News
A guide to replacing the front shocks & springs on a Lancia Dedra
Lancia installed a slightly different shock type of car fitted with an AC. Those "AC shocks" are not available any more.
BHPian Jeroen recently shared this with other enthusiasts.
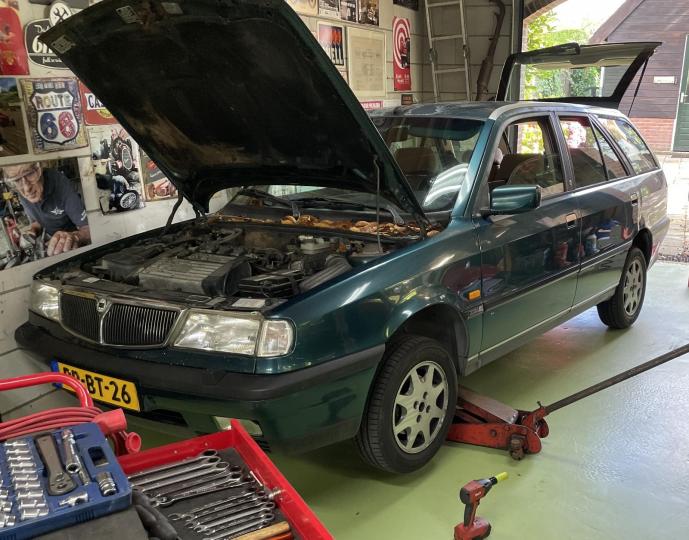
Last week Peter brought his Lancia Dedra round to install new shocks and springs.
Shocks and springs will at some point in time need replacing. Eventually, they wear out, it is inevitable of course. But on the whole, they last many years/kilometres. This also means that they tend to get pretty stuck over time, bolts, nuts get corroded, and so on.
Although Peter's Lancia is an old car, its suspension set-up is about identical to what you will find in many modern cars today as well. So we thought we would spend some extra time taking some extra images of what is involved in replacing shocks and springs. The first thing is to find the correct parts. Which can be a bit of a thing.
Peter had encountered quite some challenges finding the correct parts.Initially, he could not find the correct shocks for this particular model.
Finally, he managed to find a guy who really knew his Lancia parts! Lancia installed a slightly different shock type of car fitted with an AC. Those "AC shocks" are not available anymore, but the standard shocks should fit as well the guy told Peter. So Peter ordered a pair of shocks, springs, and shock bearings. As you will see they did fit, sort of!
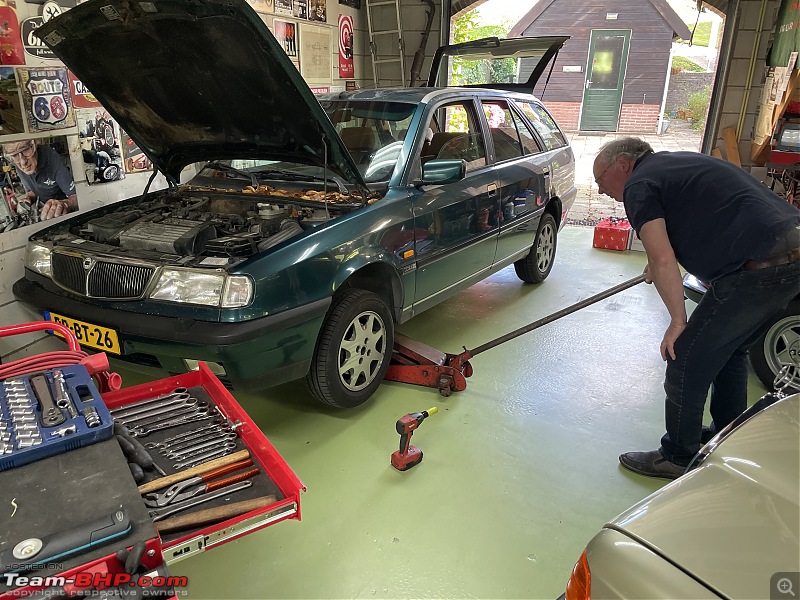
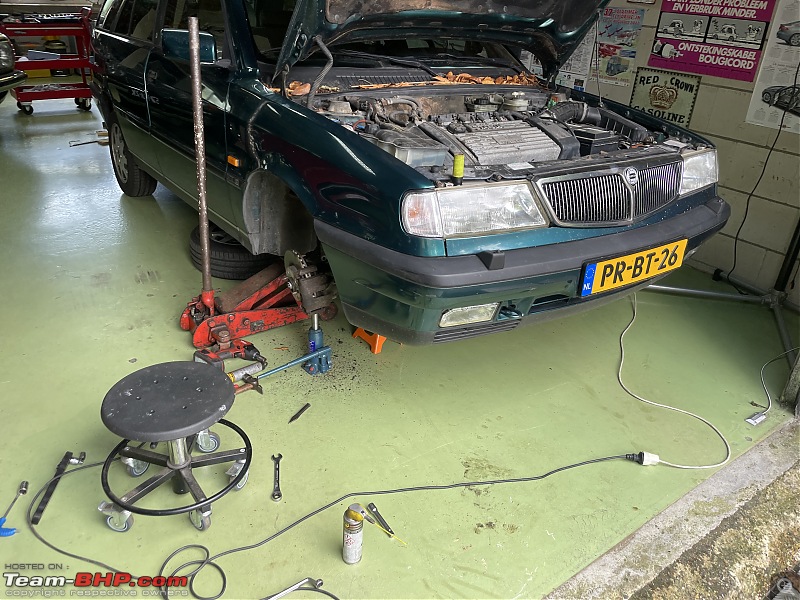
Lancia in my garage. When working on shocks and suspension components, it is usually a good idea to lift both sides of the car. With only one side up, the sway bar will try to pull it down. So we had the Lancia up on two jacks and two axle stands.
Parts at the ready!

We do not have any technical documentation on this car. It has proven to be extremely difficult to find (English) technical documents. But, hey, changing out a couple of shocks and springs only. How difficult could it be?
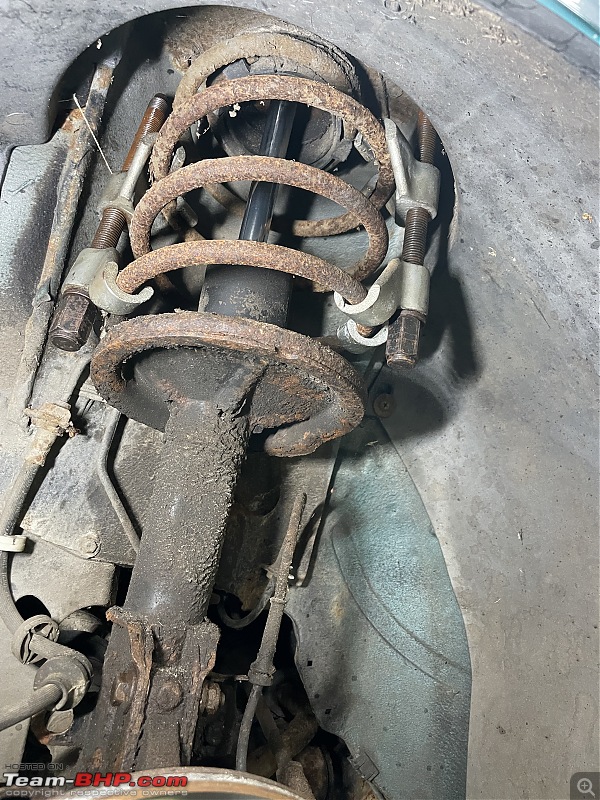
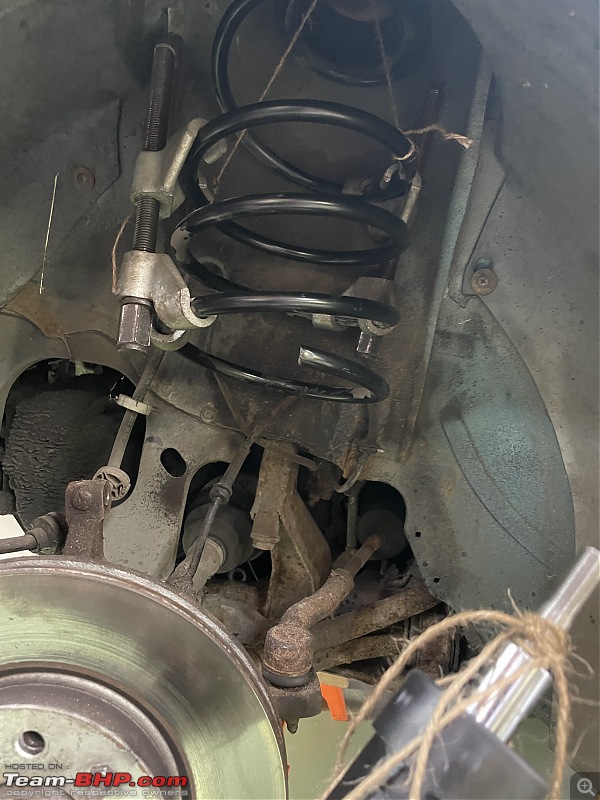
This is what we are up against. Looks pretty simple! Just undo the two large bolts and the top nut on the shock, attach the spring compressor, and remove the lot! Bob's your uncle.


Peter had borrowed a really good professional set of spring compressors. Whenever you work on springs, never ever use cheap or made-it-yourself compressors. With springs, cheapo spring compressors can be lethal. I kid you not!!
I have seen people buying a piece of threaded rod, some nuts, and some washer and use it as a spring compressor. DO NOT use ordinary threaded rods. The thread is likely to shear off under the load!!
Here we go, spring compressor on!
Undo the nut on the top. We would also use my fancy electric torque wrench to tighten/loosen the two spring compressors. Works a treat. Without it, it would have taken hours working with regular spanners.
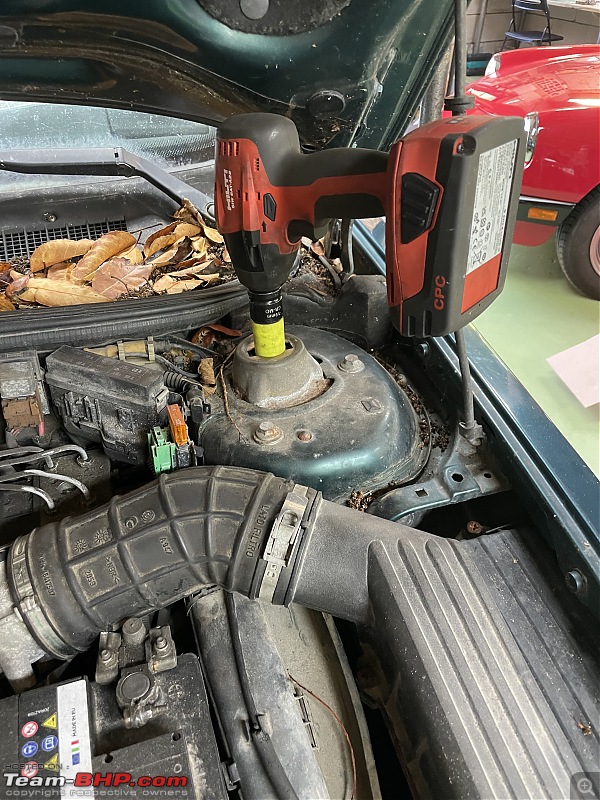
A bit of jiggling, pushing, pulling, and out it all comes! One McPerhsson strut.
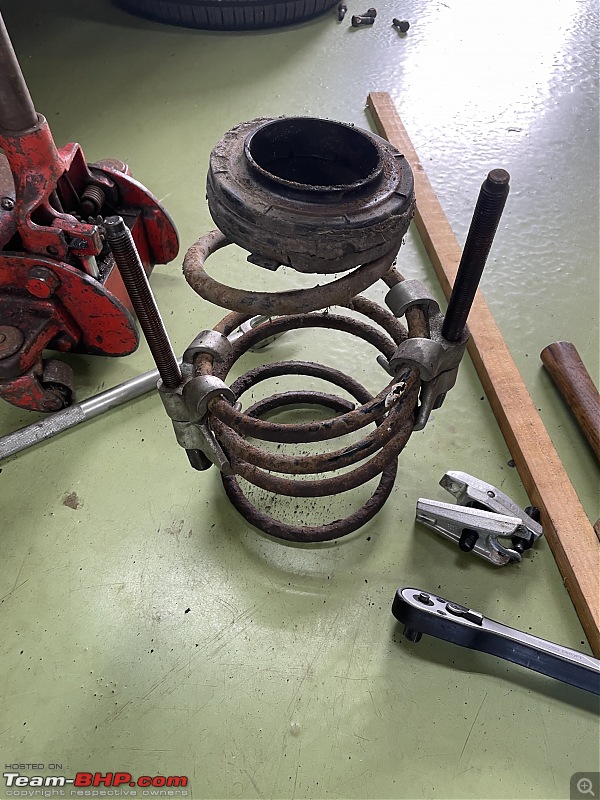
Here you see the spring with the spring compressor still attached. At the top of the spring, you can see a special rubber mounting plate and the spring bearing. I must admit I have not come across many of these spring bearings yet. They allow the springs to rotate freely when compressing. I guess it is also so the complete McPherson Shock assembly can rotate freely for steering.

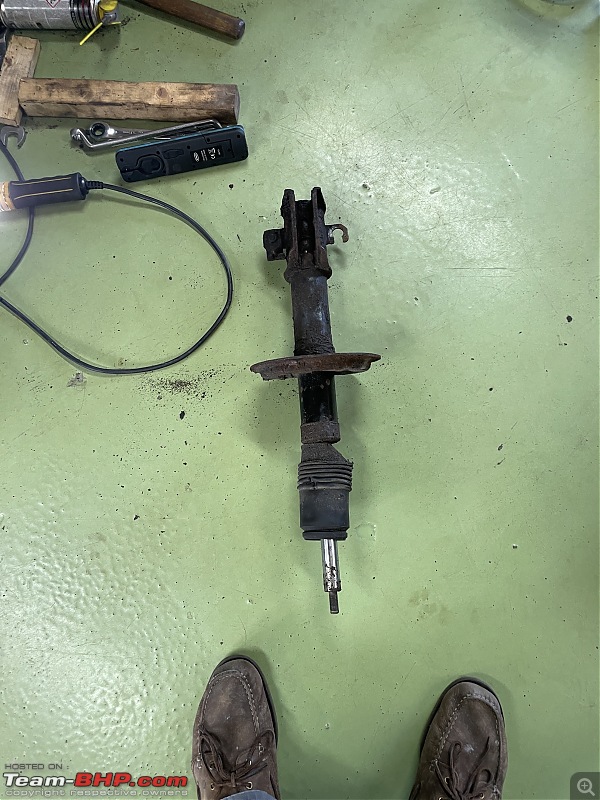
The shock itself in the vice. We had to take off one little bracket that holds the ABS sensor wire in place.

New and old next to each other. As always we check old and new parts. A couple of comments/thoughts here. The new shocks as you can clearly see are fully extended. It extends all by itself, as most gas-based shocks do. The little wire attached is our very special tool to keep it compressed when installing!
But look at the old shock. The actual rod sits deep in the shock body. We could move it up and down freely. No resistance at all. So this shock was really gone.
Also, what we did not notice, is that the top of the rod of the new shock is longer than the old one. Look at the thread on each. The new shock has a sort of boss underneath it. We did not notice, more about it later!

This car recently passed its APK (Dutch MOT equivalent). The report showed the "shocks had minor oil weeping". It has to be pretty minor, as anything above is an automatic fail. Our guess was the APK guy saw the very last few drops of oil coming out of this shock!
Here we are getting the new shock ready for installation. Compress it by hand and use a piece of simple string to keep it in place.

Peter fiddling with the new spring and the spring compressor. Luckily we had taken several images of how we had attached the spring compressor on the old spring. In theory, you could fit it anywhere, but in practice, it needs a very specific orientation or you won't be able to get the whole shock/spring assembly back under the car. Only in one specific position, it will go on.

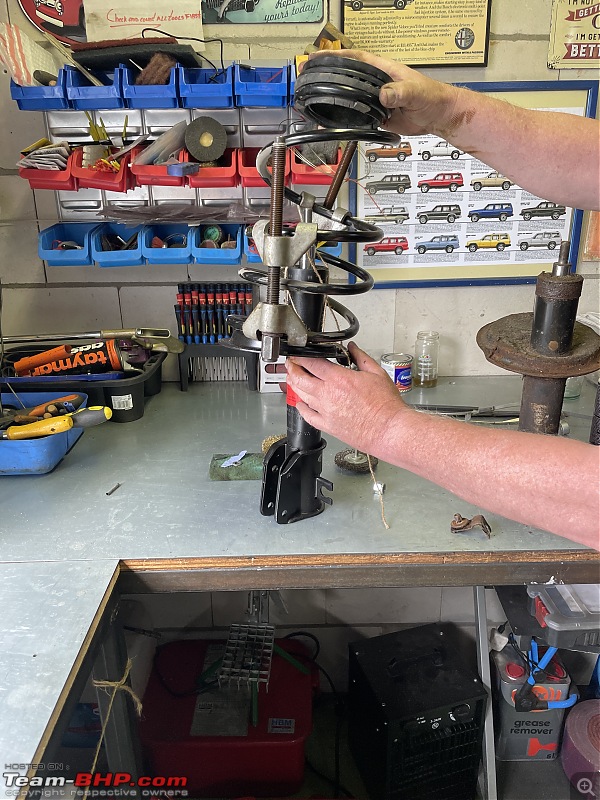
The whole assembly went in pretty effortlessly. We also attached a piece of string to the springs, just so we could hold everything in place prior to final installation.
Just bolted everything back again and one side was done. In just under two and a half hours. We felt pretty pleased with ourselves. Usually, the second one will go a bit faster. Putting all learnings from the first one into practice. Boy, were we wrong!!
Moved the car around so we had easier access to the passenger side.

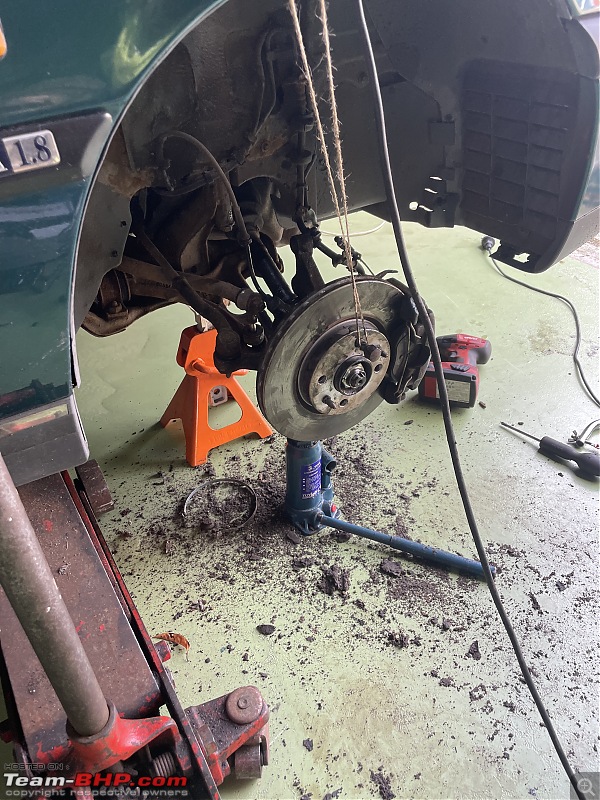
Same story, old shocks completely shot!!
But now we had run into some trouble. When we pulled the shock/spring assembly from underneath the car, the drive shaft popped out of the CV joint on the wheel side and would not go back in!
And we also had another problem. We could not get one of the two bolts out holding the shock in place. It got stuck behind the ABS sensor. If you look closely you can see that the retaining bolt of the ABS sensor is snapped off. That would be due to me, trying to loosen it!

We tried to get the ABS sensor out. But it would not budge. Truth be told, the only reason an ABS sensor should come out is when it's faulty. Over the years I have found that on many cars these ABS sensors are extremely difficult to remove. They get stuck solid. If a sensor is already broken, you can simply use a lot of force to get it out. But this ABS sensor was fine and we did not want to damage it. So we opted for sawing off the bolt with a hack saw and got a new bolt from our local DIY centre.
The disconnected CV joint was a bigger problem. In the end, Peter called a mechanic who had worked on this very joint before. He told us to remove the grease boot, straighten everything out and pop everything back in place. So I took off the boot, to find some sort of retainer ring had come off the drive shaft. We could not get that retainer ring back on. So we popped the drive shaft back in without the retainer ring. We were not a hundred percent sure. But once everything is back on, that retainer ring does not serve any purpose. Its purpose seems to be to keep the complete drive train together when you undo the shock.
So we used, yet again, another piece of string to keep it in place.
So we thought we were almost done, just pop the new shock/spring back in. Just like the first one. We were wrong. For some reason, we could not get it back in. Every time the large bolts of the spring compressor got in the way. After we had taken the spring compressors off and re-set them five or six times we felt pooped and were about to call it a day. The Lancia could just stay here and Peter would use my Jaguar to drive home.
But we had a problem. The Lancia is blocking the Mercedes and the Spider. And both cars will need to be moved in the next few days. The Mercedes will feature in a video shoot for a documentary
Peter has commissioned. And the Spider will need to go to Marc to get its carburettors fitted!
So we had no other option than to continue. After one more try it all went back in!!
You will have seen me move my Mercedes out in order to make room for a car I need to work on for a longer time. It is another important lesson, whenever you do a job on a car, that might mean it can't be moved if the job goes sour, put it in the back of the garage so it won't block my other cars.
Here you see Peter putting the last few wheel nuts back on.

Remember the new shock being slightly different than the old one as I mentioned earlier. It meant that the shocks could not be tightened properly in the chassis! Because of that boss on the top of the strut, the nut won't go deep enough. For now, we stuck some large nuts in between. I will be making some proper spacers for Peter in the next week or so.
All in all, as so often, a relatively simple job took a long time. Our spannering abilities were properly tested.
The spring compressor really took a beating too. So it needs to be replaced too. Better safe than sorry with it!
Peter found this sticker that came with the shocks. So now are reminded when to replace them next.

As always, quite the aftermath!!
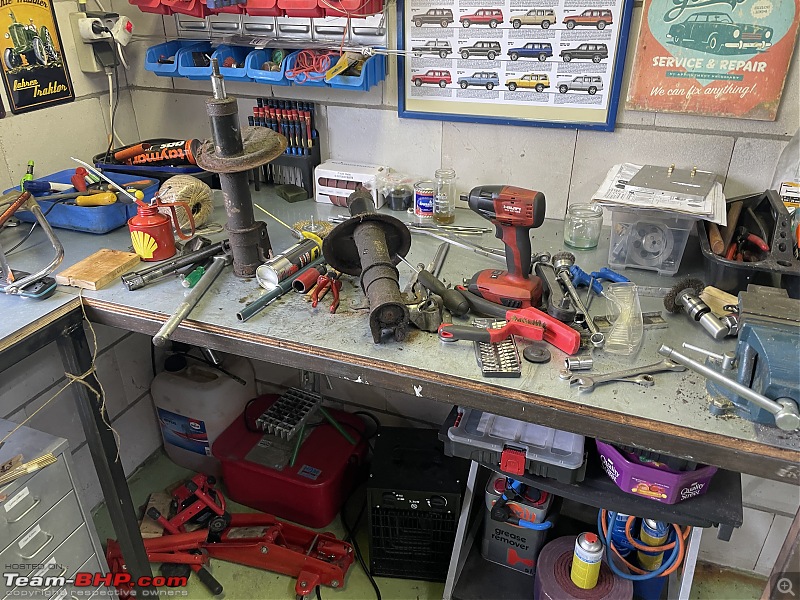
We cleaned up the tools and mopped the floor. Mrs D. went out to get a proper Dutch meal for us; French Fries and Kroketten.

Tomorrow I am taking the Spider to Marc to get the carburettor modification done. In about an hour, I am setting off in my W123 to drive up to Peter to help out on this video shoot. Looking forward to it
Jeroen
Check out BHPian comments for more insights and information.
- Tags:
- Indian
- Member Content
- Lancia
- DIY
- Maintenance
Find Car News
Just News


About Us

Buy & Sell
USED CARS