News
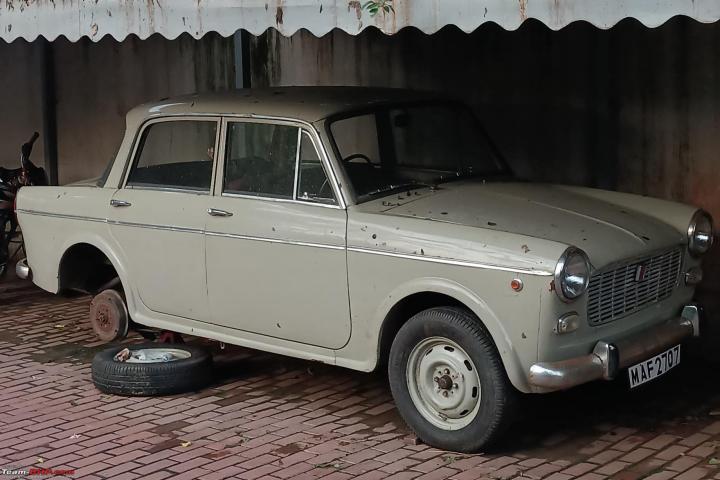
How I overhauled the brake master cylinder of my 1972 Premier President
You cannot remove the master cylinder alone as is from the car.
BHPian vishy76 recently shared this with other enthusiasts:
Background:
I was running the following brake setup as of June, 2024.
- API Master cylinder
- API piping for the complete system
- Front wheel cylinders were TVS Girling type (Sainik) with the appropriate Banjo bolts
- Rear wheel cylinders were stock API
- Front and rear liners were stock
To those who don't know, the Padmini/President/1100D saw 3 types of braking systems throughout its life in India. The two suppliers were API (from around 1964 to the late 70s) and subsequently TVS Girling. Both systems use different piping, master cylinder and wheel cylinder designs, though the rest of the hardware including the brake shoes and drums remains the exact same. During the S1 era, Premier finally introduced a double circuit Girling system which had a reservoir with two chambers and a twin piston master cylinder with two outlets, one for the front brakes and the other for the rear.
API shut shop long back, though TVS Girling continues producing wheel cylinders, wheel cylinder repair kits and even master cylinder minor kits to date. It is impossible to fit TVS parts onto an API system due to the fact that both use different threading for all brake fittings apart from the other differences I mentioned above. The Girling setup uses finer threading for all brake pipes, unions and even the reservoir bottle.
I had simply changed the banjo fitting on the front pipes to accomodate Girling type cylinders in June 2023, though this was more of a temporary solution.
Come June, 2024 and brake system related issues reared their head again. The fluid level in the reservoir would always drop ever ever so slightly. I opened both the front drums and noticed that the front passenger side wheel cylinder had developed a minor weep. I also noticed that there was considerable amounts of scouring on the piston and the cylinder wall, more than usual for a 1 year & 3,000 km old part.
I changed the seal kit for the cylinder but the system wouldn't bleed no matter how hard I tried. I handed it over to my mechanic who did manage to bleed it, but the pedal feel still remained inconsistent. The fluid levels started dropping even faster. I checked the master cylinder one morning and found a lot of fluid inside the dust cover. I also noticed a leak from a union above the differential. At this point, I realised I was only prolonging my misery. Changing to a full Girling setup was the only option.
I ordered the following parts immediately:
- Set of metal pipes ( I believe these were 5 in number)
- Set of rubber hoses ( 3 in number. 2 for the front wheels and one which snakes above the differential)
- A local master cylinder (original TVS Girling is extremely rare & pricey)
- TVS Girling wheel cylinders (4 in number)
- Brake pipe splitter (for the master cylinder outlet)
- Brake pipe unions (2 in number. One for the front and the other for the rear lines)
- Brake pedal pushrod (Girling uses a different design)
- Rubber pedal stoppers for the clutch & brake
- Original PAL brake fluid reservoir
After spending a bomb on the parts, I also found a more capable mechanic for the car. He did a fair job overhauling the entire system but wasn't happy with the brake bite. He was of the opinion that the brake liners had reached EOL and it was better to change them too since I had anyway put so much time and money into this overhaul. I procured pasted liners (first oversize) for the front from a local shop and the results were mind blowing. Brake bite was strong and the car stopped on a dime. I also wanted to do the rears, but had to leave for Bombay in a day or two and they weren't available readily.
Unfortunately, my happiness was shortlived. I noticed the bite point would keep moving downwards as I drove on. Even my mechanic couldn't figure this out since the entire setup was new and there was no drop in fluid levels. Bleeding also showed no signs of air in the system. I took the front wheel off and ran my finger under the dust boot on the MC. And there it was, drops of brake fluid. The local master cylinder had given up, only 2 days into service. The leak wasn't too bad & the car was anyways not used during monsoons, so I left it as is. Around August though, I noticed the leakage had increased. Weirdly, fluid levels would hold if the car was driven but drop like a rock if she stood still. I sourced a minor kit & asked my mechanic to change it.
Around the same time however, floods battered Baroda mercilessly. Thousands of people were displaced, crores worth of property damaged and mechanics (atleast the ones who didn't have flooded garages) were swamped with cars. My mechanic asked me not to expect any progress for atleast a month if I were to drop the car off at his place.
Destiny had again made sure I would face my worst nightmare. The Fiat's braking system had defeated me back in 2023, then in June of 2024 again. This time, I had two choices. I waste another month and wait for a mechanic to attend to the President, or man up and become the project car owner I always wanted myself to be. Common sense & public opinion were in full support of the former, but I am a stereotypical idiot. Something told me I should attempt this myself, even if it meant virtually no support from anyone. The President had gained a notorious reputation within my friends circle. No one saw it as the cool Fiat anymore. People who would willingly offer to help with it in exchange of driving it were nowhere to be seen. It was quite literally me and the car against the world now.
Anatomy of a Brake master cylinder:
The brake master cylinder is a part that has more or less remained the same over the years in most cars. The basic job of an MC is to translate pedal force into hydraulic pressure which then actuates the pistons inside the wheel cylinders or callipers. A booster was added later which uses vaccum from the intake manifold or a pump to amplify this force and reduce pedal effort.
The President uses a simple master cylinder with a single piston and a single outlet for all 4 wheels. It has a gravity feed inlet from a reservoir located in the engine bay. It sits directly under the brake pedal, behind the front driver side wheel. The major parts of the MC are the piston itself, a return spring and a couple of seals to retain pressure & fluid.
The MC used in the Padmini can also be repaired. There are two different types of kits available for the same:
- A Major kit: Contains the piston itself, a sealing cup, piston seal, rubber stopper, check valve
- A Minor kit: Contains all the above parts barring the piston itself
I procured one minor kit and two major kits from a reliable source and got to work.
List of tools needed for the job:
- A 1/4 inch ratchet set
- Spanner set (open ended)
- A circlip removal tool
- A cycle spoke or a very long plastic pick
- A pair of nose pliers
- Jack stands
Do note that the procedure mentioned below is indicative & specific to my car. There are other (possibly easier) ways of doing it.
Jack the car up and remove the front driver side wheel. Support it on jack stands. The master cylinder will be in plain sight now. You cannot remove the master cylinder alone as is from the car. Its bolted to a pedal platform which also houses the clutch pedal.
In order to remove the platform, go underneath the car and disconnect the clutch linkage. Its held by a simple cotter pin and washer setup. Also disconnect the gear selector rod the same way. This will help during assembly.
At the MC end, disconnect the brake light switch by simply pulling the wires away. There are two pipe fittings to undo. One for the feed from the reservoir & the other for the outlet. Both are 14mm IIRC. The outlet has a banjo bolt which connects the master cylinder and a splitter (housing the brake light switch and two outlet connections). Just remove the banjo bolt. Don't undo any connections on the splitter itself. There is a return spring which runs from the brake pedal extension to the chassis. Depress the pedal to relieve tension off the spring and remove it.
Go inside the car and pull up all the matting around the pedals. There's a two piece kick panel held in place by 3 flathead screws. Remove this panel & also move the brake light switch wire out of the way. This will give you more wiggle room once you try to remove the pedal platform itself.
The pedal platform is now held only by 3 bolts to the subframe/chassis. One is bang in front when you face the MC from the wheel side, the other is behind the brake pedal (depress the pedal and use a socket to get it out) and the third is diametrically opposite to the first one. Go underneath the car and undo that bolt.
The platform is now free, but I found that it still wouldn't come off. There simply wasn't enough room to yank it out in one piece. In this case, the brake pedal needs to come off.
To do so, first unbolt the grease nipple from the brake/clutch pin. Then use a circlip removal tool to release the circlip that locks the brake pedal onto the pedal platform. Additionally, the pushrod from the brake pedal to the MC needs to be released. Its held by a pin. Pull the pin and slide the pushrod off the brake pedal.
The brake pedal is now free. Tilt the platform and move it around while pulling the pedal towards you and it should slide off. Once that is done, the entire platform with the clutch pedal is also free to come off the car.
A work in progress shot. The inlet pipe, outlet banjo bolt, brake light switch connector & circlip retaining the brake pedal rod have been removed here. You can also see the return spring at the bottom of the image:
The kick panel in the footwell. Also note how the brake light switch wire is held in place on the kick panel:
The entire pedal platform off the car & dismantled. At the very bottom is the MC. The clutch pedal is towards the right on top and the brake pedal towards the left. The brake pedal pushrod (circled in red) is in between:
4 13mm bolts hold the MC onto the pedal platform. Undoing them gives better access when overhauling:
This is the sight that will greet you once you remove the dust boot from the master cylinder. A clips locks a washer (golden) which in turn holds the piston (black) in place inside the MC:
The entire MC dismantled. Barring the return spring and the washer, all parts are included in the master cylinder major kit:
This damper or washer sits at the bottoms of the master cylinder. It prevents the spring & cylinder body from metal to metal contact. This also comes included in the major kit. A cycle spoke or thin metal wire might be needed to extract it in case its stuck:
Perhaps the only factor which determines whether an MC is scrap or good for use. The bore on my master cylinder was nearly spotless as expected. You can also see the damper washer below. Ignore the old fluid stuck to the walls:
The new and old pistons side by side. Apart from some minor corrosion on the old piston, I didn't really find anything wrong with it. I still changed it since I had 2 major kits with me:
What I did find wrong was the piston seal itself. The old seal had swollen considerably, while the new one was a lot tighter:

The MC major kit which is as rare as hen's teeth apparently. These go for anywhere between 1300-1500 rupees these days. Logic is seldom to be applied when buying classic car parts:
Taking the master cylinder apart isn't too difficult. Push the piston down using a flathead screw driver & release the circlip. Once this is done, the entire cylinder comes apart. The damper washer I mentioned might get stuck so keep a long plastic pick or a cycle spoke handy to hook it out.
Assembly is the exact opposite. The TVS Girling instruction manual mentions not to use any grease or mineral oil as lubricant and to use IPA as cleaning agent. Only brake fluid is to be used here. Before starting, simply smother the bore with brake fluid. Also apply it to the piston, the cup & the two seals.
Here's a video indicating what goes where. The rubber cup (seen at the end of the video) sits atop the spring and the piston sits on top of it. Then comes the washer & the circlip to lock it all into place.
I elected to use DOT3 brake fluid simply because it is less hygroscopic than DOT4 which is a good thing for these older braking systems. The car was on DOT4 but it didn't matter since the system would anyways need extensive bleeding after MC replacement.
With the master cylinder assembled, I proceeded to assemble the entire pedal set off the car, which was a huge mistake.


In hindsight, I should have assembled the entire thing exactly like I took it off. The complete pedal set simply wouldn't go into place. There was no room.
I had to take the brake pedal off and manoeuvre the platform with the clutch attached into place. Then, I tilted the platform slightly and attached the brake pedal with the pushrod. Post this, the usual drill of securing it to the chassis, attaching the brake piping and putting the kick panel in the footwell back.
I also suggest renewing the copper washers which seal the banjo bolt to the MC. I didn't do this but it's something I would definitely suggest one does.
With the master cylinder back in, I topped up the brake fluid and proceeded to first bleed using a method BHPian Vigsom suggested. This is simply because I found the MC plunger travel to be too high. Pumping the pedal multiple times in this scenario could unnecesarily strain seals inside the master cylinder. This is the ingenious method I used with a Colin bottle plunger (containing a non return valve built in) and a wiper washer fluid pipe:
Post this, I found the plunger travel to have reduced significantly. I thus proceeded with the usual two man method for brake bleeding.

The brake pedal feel was now perfect. The sponginess had been eliminated completely. I also checked for leaks and found none. The fluid level in the reservoir was holding perfectly. However, the pedal travel was high. I realised the front liners hadn't been adjusted correctly. This is something I have planned for the coming weekend. I will report back once this is done & also again check for leaks now that the car would have been standing still for 4-6 days.
Check out BHPian comments for more insights and information.
Find Car News
Just News


_4.jpg)
.jpg)
About Us