News
Converting my Bajaj Discover 125 to an electric bike
The bike can be charged in 4 to 5 hours with a 10A charger. With 20A charger it can be charged in less than 3 hours.
BHPian efuture recently shared this with other enthusiasts.
Phase-1: Electric Scooter
I had some lithium ion cells, tools and accessories to build battery packs at home. With some cells in hand, there isn’t any application that comes to my mind other than a two wheeler. Started looking for used electric scooters with reasonable top speed and acceleration. I wanted a vehicle without battery because I didn't want to pay extra for old lead acid batteries. After some long search, finally bought a BSA Roamer scooter with 800W motor and controller. The outlook of the scooter was terrible with rusted metal parts and faded plastics. It started immediately with some temporary batteries and drove well. Ride quality was horrible, it felt like a cycle chassis. Pickup was fine but bike is not stable at 35 kmph and most important thing is its brakes, nothing at all, even cycle brakes are better. Reluctantly bought it as there isn’t any other options available at that time.

BSA Electric Scooter with 800W Hub Motor
I bought the bike without battery, so I couldn’t take it home. Fortunately seller’s shop was within couple of km from my office, so I told him to keep the bike with him for two more weeks after the sale. Measured space available in bike for battery pack where the original lead acid batteries were kept. Started working on battery pack build. But I was not 100% convinced with the BSA Roamer scooter.
Phase-2: Electric Bike with 40 kmph speed and 50 km Range
Reluctantly initiated battery pack build for BSA Roamer scooter. Planned to build a 1.2kWh 50.8V 23.4Ah small light weight battery pack with 126 cells in 14S9P configuration. The whole pack will weigh less than one of 4 lead acid batteries that came with the bike. BSA roamer scooter with 800W motor will do 40 kmph top speed which is equal to an efficiency of 20Wh/km without including any losses. With a 1.2kWh battery pack I can easily do approximately 50 km range every charge with 15% to 20% buffer.

1.2 kWh 50.8V 23.4Ah Pack
Couple of days later, seller called and told me that he wanted to buy the bike back from me and I agreed immediately without any second thought. Started searching in OLX again, this time I increased the search range all over Tamil Nadu. I found a 750W motor and controller with inbuilt reduction gear. Till then I did not considered a retro-fit project since its time consuming, labour intensive and requires a garage or good place to execute the same. I reached out to my friend who has a shop near welding and fabrication shops. With everything in place, finally bought the motor and controller.
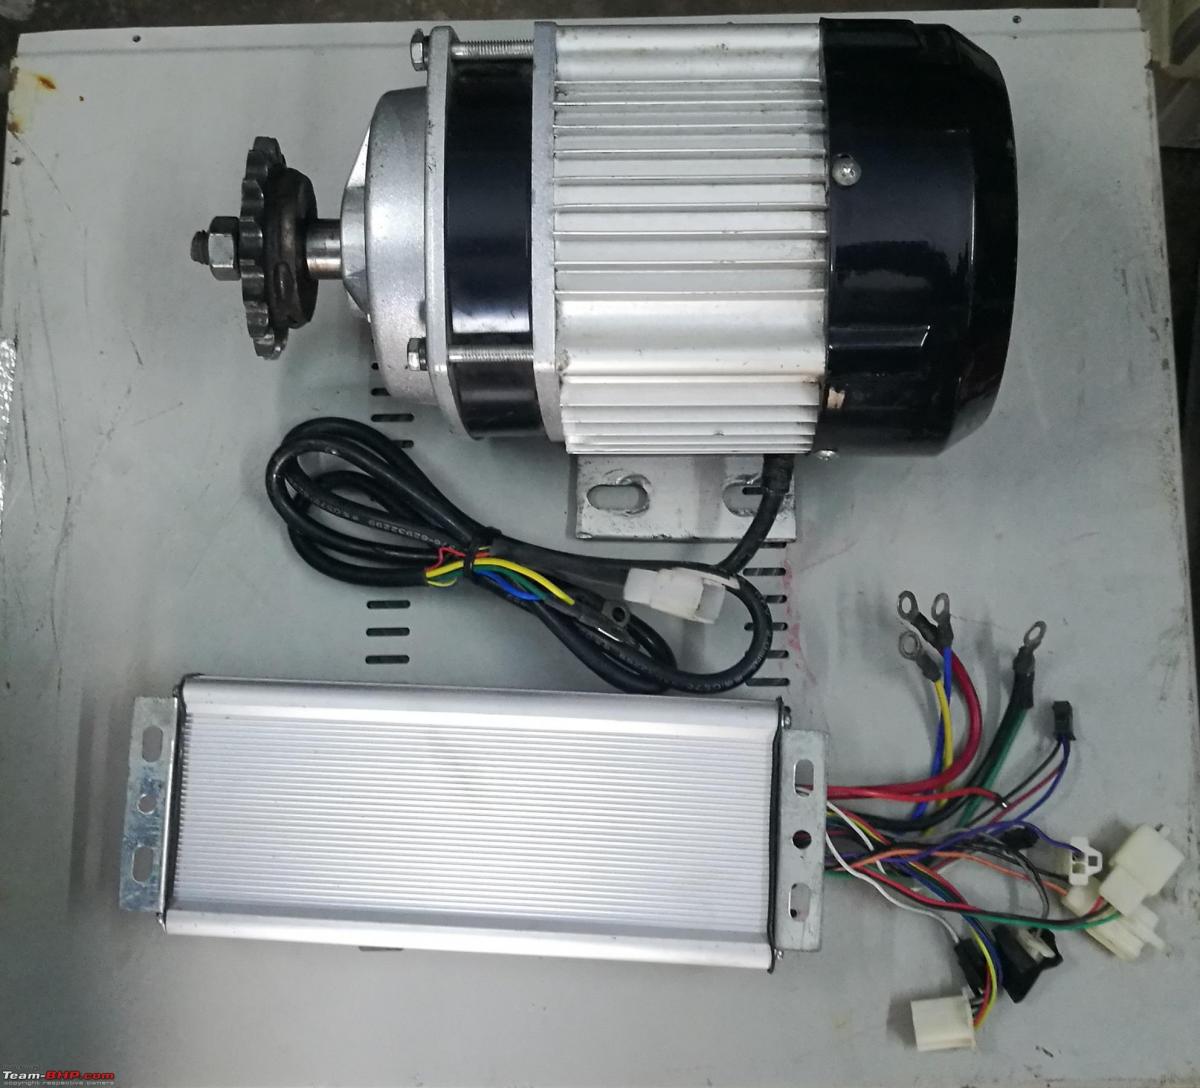
750W Motor & Controller
When I purchased the 750W motor and controller, I wanted a decent bike with 40 kmph top speed and 50 km range with the lithium ion cells I had, strictly no additional purchases. I wanted a light weight small commuter bike suitable for city application. Now comes the most important part, base donor vehicle for this project.
Started to plan the build and prepared the list of tasks starting with the search for a suitable donor vehicle which will decide the design and process. The donor vehicle should be light weight and easy to work around. Not many two wheeler conversion threads available on forums with Indian commuter bikes. Only few Youtube conversion videos were there which is of no use. Then started downloading bike frame pictures form internet and shortlisted Splendor, Super Splendor, Passion, Discover (OLD <2010 125CC/135) and Pulsar 150. After some detailed study, eliminated Pulsar 150 due to its weight and Super Splendor due to its limited availability in Chennai. Also not many SS were available on sale for less than 20k rupees in Chennai, so dropped it from the list. Now it between Splendor, Passion and Old Discover.

1st Generation Bajaj Discover 125cc
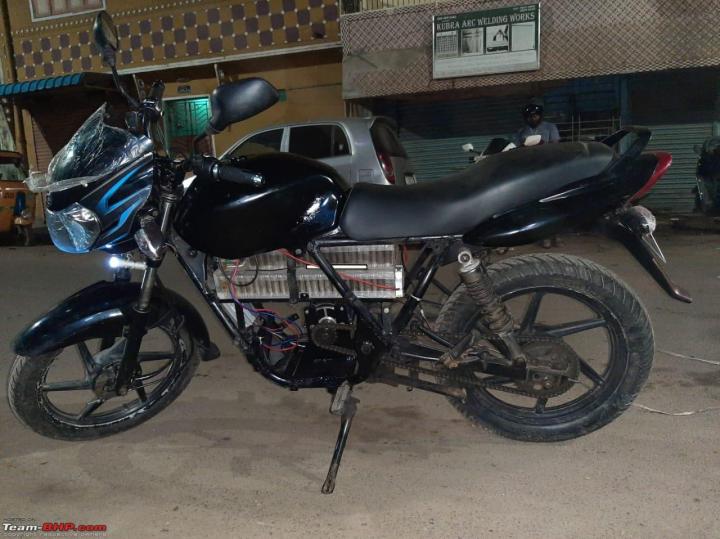
Found this picture online, it looked like Bajaj has designed this vehicle with an electric variant in mind back in 2005 itself. Finally it struck, Bajaj Discover 125 is going to be the base vehicle for this project. Searched used Discover in OLX, unfortunately not many available within my budget. In the end, purchased the bike from a local used vehicle dealer. It was not in great shape, just another 12 year old vehicle. I specifically wanted that particular variant so went ahead with the purchase. Took it to my friends shop and that was its last few kms with its original heart.
Phase-3: Electric Bike 40 kmph, 125km Range
Once again there is a change in specification. This time I got a weird idea to use all the cells I had for this single pack. I had close to 3.5 kWh cells from different makes which I bought for different applications. It is not recommend to mix and match cells with different capacity which will create imbalance in the pack and reduce pack capacity and performance. Technically the lowest capacity cell will dictate the total usable capacity of the pack. Its risky because it is difficult to manufacture two identical cells from same batch of production. Still it is not an impossible task, if cells are matched and grouped together, properly then it is achievable. Building a battery pack is a one-time process, there is no second chance. Once it is welded to the busbar, it is impossible to remove and rearrange again.
Keeping the risk in mind, started the process to finalize the number of cells for the project. Target is to use as many cells as possible which will give longer range. Since motor and controller were already purchased, voltage is fixed but the number of cells in series is yet to be decided. I had both 13s and 14s options open because I do not know how the cell grouping is going to turn out.
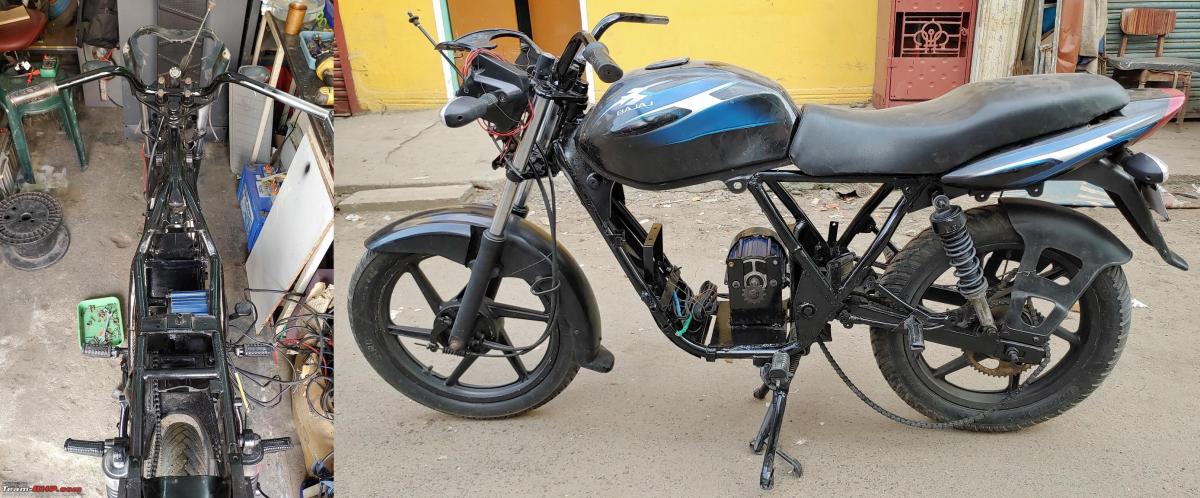
The main reason to go with Discover 125 is it has long flat seat and offers lot of space under the seat. Instead of going with regular box type battery and motor assembly like revolt and other bikes, I decided to put the battery pack under the seat. The pack is going to be a long and narrow one which will sit under the petrol tank and seat. Motor, controller and DCDC will be installed below the battery pack in the front. Measured the space availability and started battery pack drawing. Ordered Battery Management System, additional sensors for pack level voltage, current and motor temperature with wireless display, 12V 240W DCDC converter and some more accessories required for the project from China. Surprisingly everything reached within 2 weeks.
Removed silencer, engine, rectifier, air filter, LV wiring harness, petrol tank and everything that is not required on the vehicle including saree guard. Chassis is widened a bit on top to accommodate two deck pack. Due to this, I was forced to cut out the bottom part of the petrol tank. Anyhow the fuel tank is not functional anymore and it is there for aesthetics only.
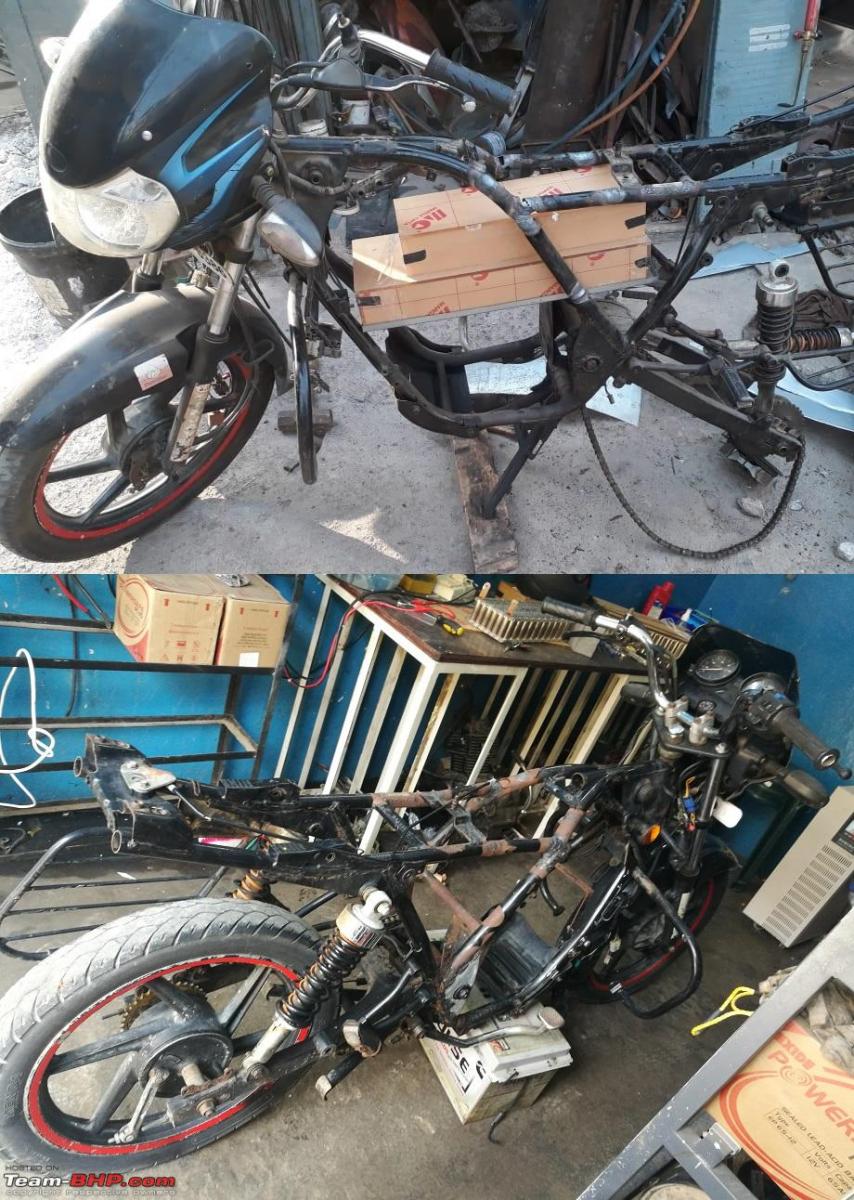
Modifications in Chassis

Petrol tank cut-out
Welded the mounting plate for motor and installed the same after aligning it with the rear sprocket. Its a low RPM motor with inbuilt reduction gear for high torque. Hence we chose M80 sprocket (36/17) and chain which does not affect our top speed much. Once motor is installed in its place, started working on the sides fairing to protect the packs and motor from stone, dust, etc. This is the most important part of the fabrication after chassis modification. It protects battery pack, motor, controller and DCDC from dirt, stone and water splash while on road. Also this would avoid unwanted attention towards vehicle while on road or in parking. I asked for a simple functional cover on both sides and in front with a cutout for motor cooling on the right hand side cover. But fabricator included some pattern near the hole and prepared similar circle on the left side panel for symmetry.

Metal Fairing
Battery Pack
When it come to electric vehicle, Tesla is the inspiration for everyone and I am no different. I wanted to build a battery pack like Tesla modules and decided to fabricate an enclosure and cell holder with clear view acrylic. Only clear view acrylic is used for complete construction with adhesives, no bolt or screws in pack construction. I even tried to incorporate single cell fuse but couldn't able to do it with spot welder and I don't want to solder on cells. Hence settled with nickel strip and spot welding. Atleast it has couple of similarities to Tesla battery pack - 18650 cylindrical cells and raw look of the cells and busbar from outside.
Battery Pack Specifications
- Pack Nominal Voltage - 50.8V
- Pack Capacity - 54.6Ah
- Pack Energy - 2.8kWh
- Pack Weight - 18.6kg
- Gravimetric E. Density - 149.2 Wh/kg
- Volumetric E. Density - 214.3 Wh/L
- Cell - 18650 Cylindrical

Battery pack is split into two modules. Small module (6S21P configuration) is kept on top of big (8S24/26P configuration). Top module weight is equally distributed on the bottom module. Cylindrical cells are structurally strong and since weight is shared equally across all cells, there is no stress on cells in the lower deck pack. Instead of regular ABS cell holder, multiple clear view acrylic sheets are used as cell holders. Acrylic shop guy suggested a special adhesive which is super strong and transparent. The low viscos adhesive is dielectric and will react only acrylic and some plastics.
While spot welding, accidentally pressed the pedal twice and it punctured the cell. Luckily it was on the positive side, if it had happened on the negative side it would have been an early Diwali. Just a reminder how dangerous the lithium ion batteries and pack building process is. Extra care must be taken for safety to avoid any accident or blast.

Spot Welding Mistake
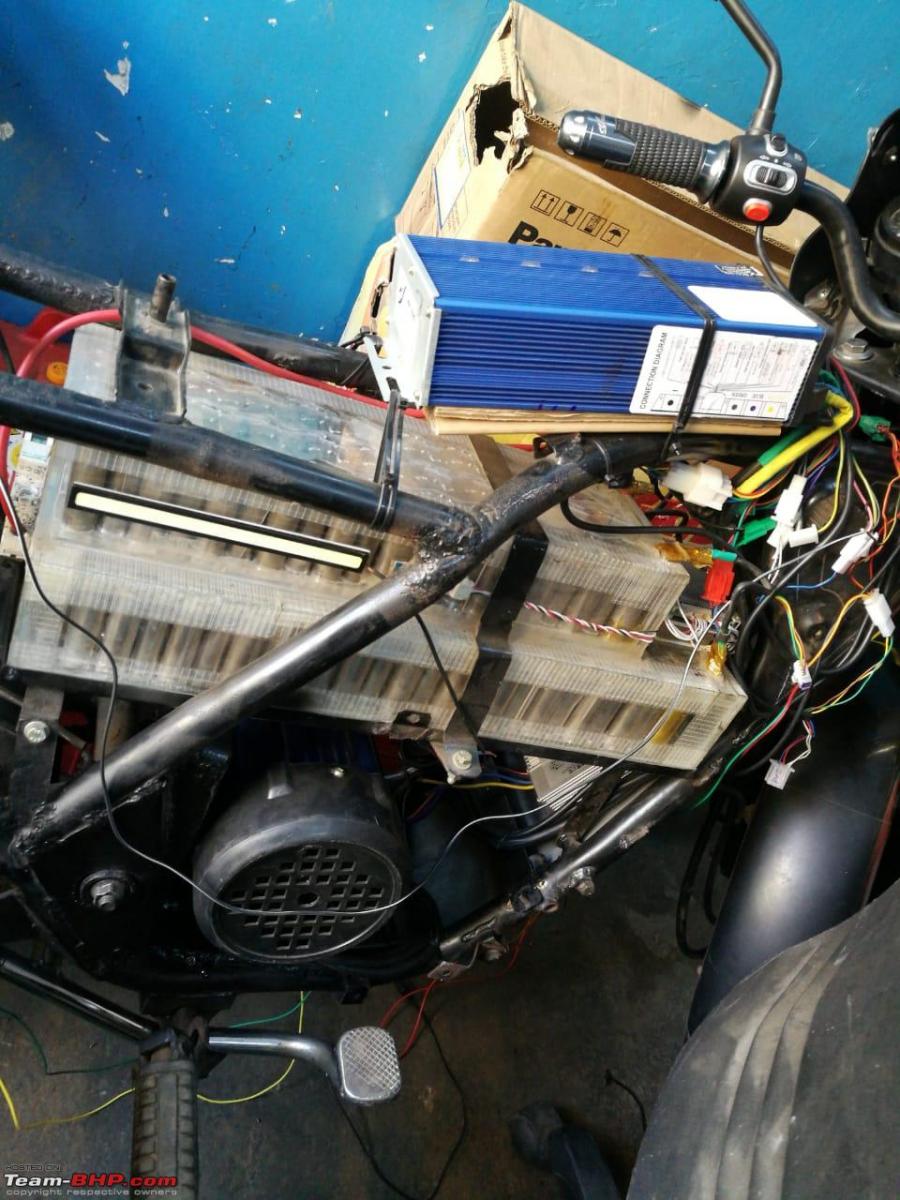
14s 60A BMS with bluetooth and PC connectivity option. Never used PC software as mobile application is more than enough to configure and read parameters. Mobile APP has electronic lock feature to turn ON/OFF battery pack. It has cell balancing feature with multiple strategy, user can configure using mobile app based on their requirement.

14S 60A Battery Management System
Vehicle Assembly
Washed the chassis and painted the whole chassis with spray can and installed battery tray. Installing the pack in vehicle was the trickiest part in the project. Initially I thought the fully built pack can be installed by sliding the pack from the rear of the vehicle. Unfortunately the pack was heavy and clearance was too tight to execute the plan. Fortunately I figured our the problem while trying out with outer enclosure without cells. Only limitation to split the pack into two is the BMS LV connector (voltage monitoring and balancing lead) in BMS which is a single 15-pin connector. After sorting the connector, prepared two independent modules and installed them in the vehicle. Two temperature sensors one in each module was also connected to BMS. Acrylic adhesive is used to secure the second module to first module. For secondary protection, a thin metal clamp was installed on top of the pack to firmly secure it to the battery tray.


Fully Assembled Electric Discover
Took the vehicle out for a ride, pickup was on par with petrol vehicle even with a pillion rider. Its top speed was only 35 kmph due to RPM limitation which was 5 kmph less than the expected speed. After driving it for 150 more km within the city, I felt the top speed of 35 kmph is not enough for a vehicle like Discover.
Phase-4: Electric Bike 80 kmph, 125km Range
Finally convinced that this battery pack and vehicle deserves a powerful motor and decided to double power with a 1.5kW Motor and controller. Space was not an issue as it can easily fit a larger motor and the measurement confirmed the same. I purchased a 1.5kW motor and controller set with low voltage switch gear set including multiple power mode, forward and reverse switch.
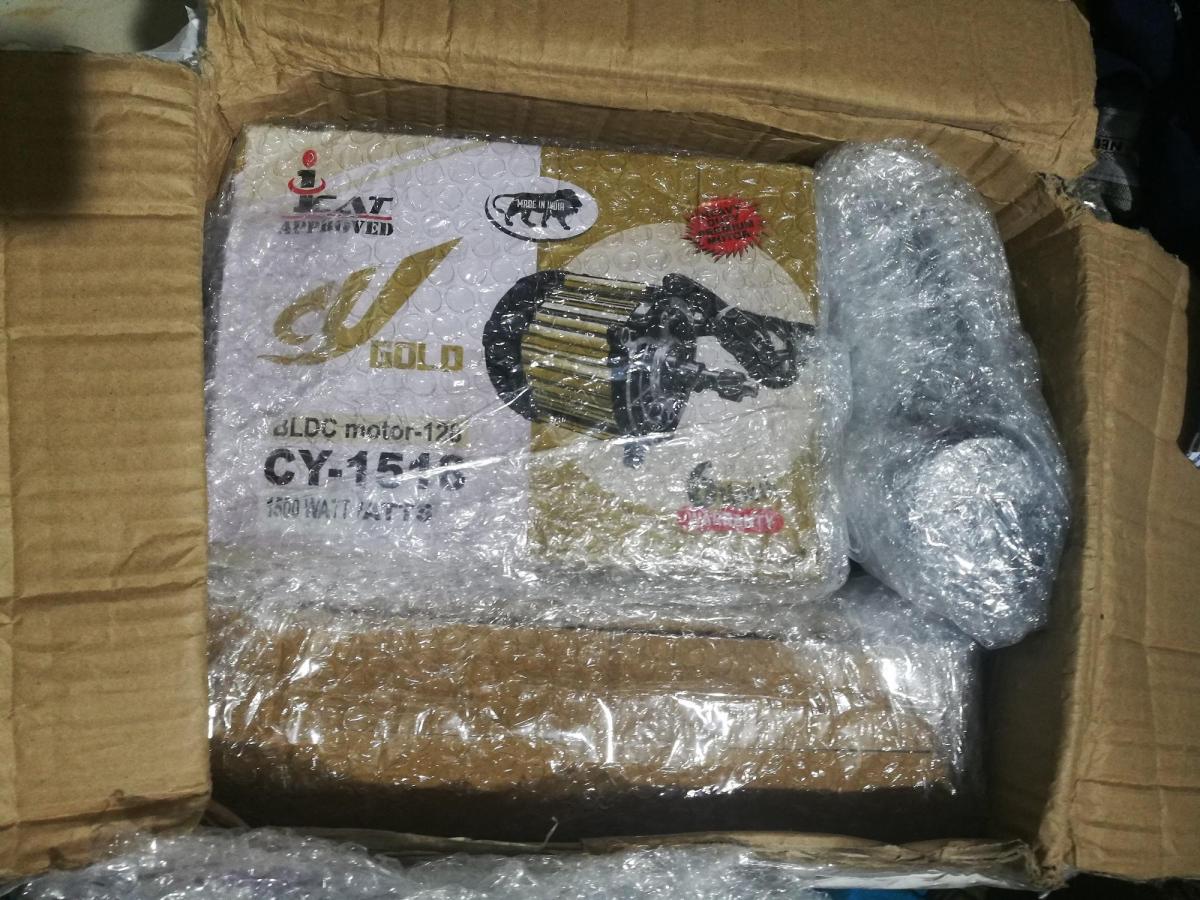
1.5W Motor and controller
Removed the existing motor and controller. This 1.5kW motor does not have reduction gear and can do a maximum of 3000 RPM. Used original discover 14T sprocket on motor side and TVS XL super chain 50T sprocket in the rear. It worked perfectly and reached a top speed of ~90 km/h on speedometer and 77 km/h in GPS. Pickup is on par with 125cc petrol bike. Overall the second version with updated motor and controlled felt more like a 125cc petrol bike in city and average speed is almost similar to ZMR average speed in most of the city routes.

14T Sprocket on Motor Side
Also replaced some old faded plastic parts, completely new 12V wiring, replaced both front and rear tires. Painted the alloy wheels and petrol tank for fresh look.
New 1.5kW Motor
The new controller was longer than the 750W controller, hence installed it below the petrol tank. Also moved MCB on top of controller for easy of access.
Motor Controller
In the updated version, installed wireless display unit in the console to monitor pack voltage, motor temperature, pack charge and discharge current. This reduced the dependency on mobile phone. Also included a second throttle without release spring on the left hand side to maintain throttle input for highway rides. It is a simple cruise control method to maintain constant throttle input and proved very effective in highway trips. The bike can be charged in 4 to 5 hours with a 10A charger. With 20A charger it can be charged in less than 3 hours.


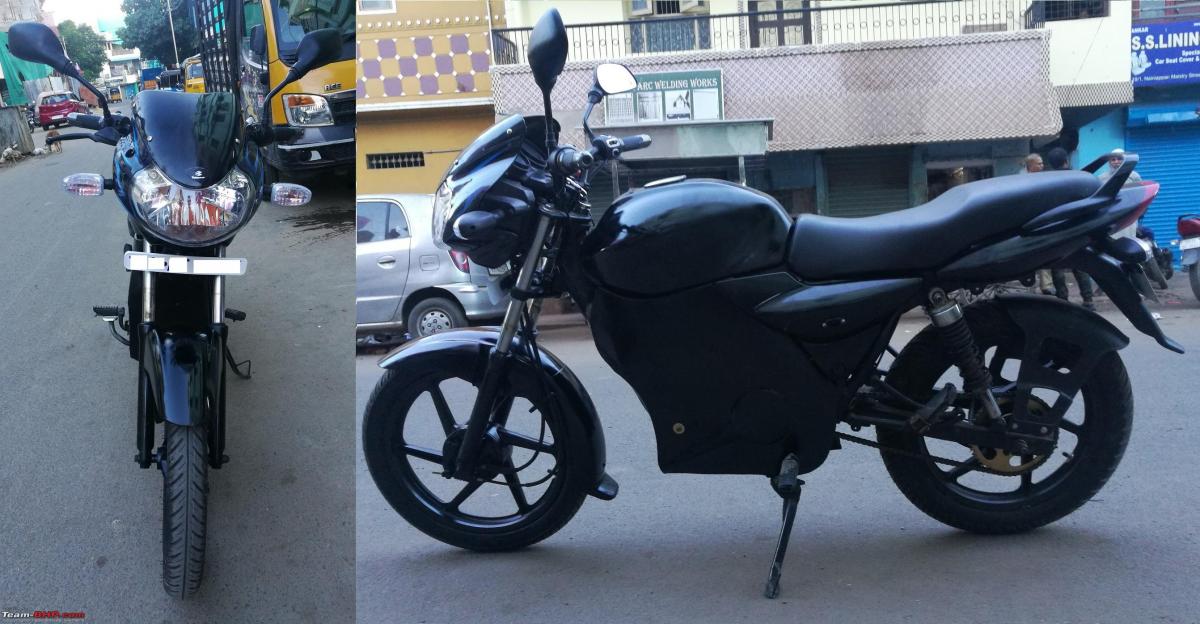
Updated eDiscover
Range Test-1
After successfully completion, took the vehicle around the city al lower speeds around 40 kmph to build confidence. After some 400 km, decided to do a proper range test. Selected route with 50% city and 50% highway. Charged the pack to 100% upto 4.1V/cell (~92 to 95% of total pack capacity). Maintained 40 kmph speed throughout the trip. At the end of the trip, pack reached 48V with 20% SoC available for further use.
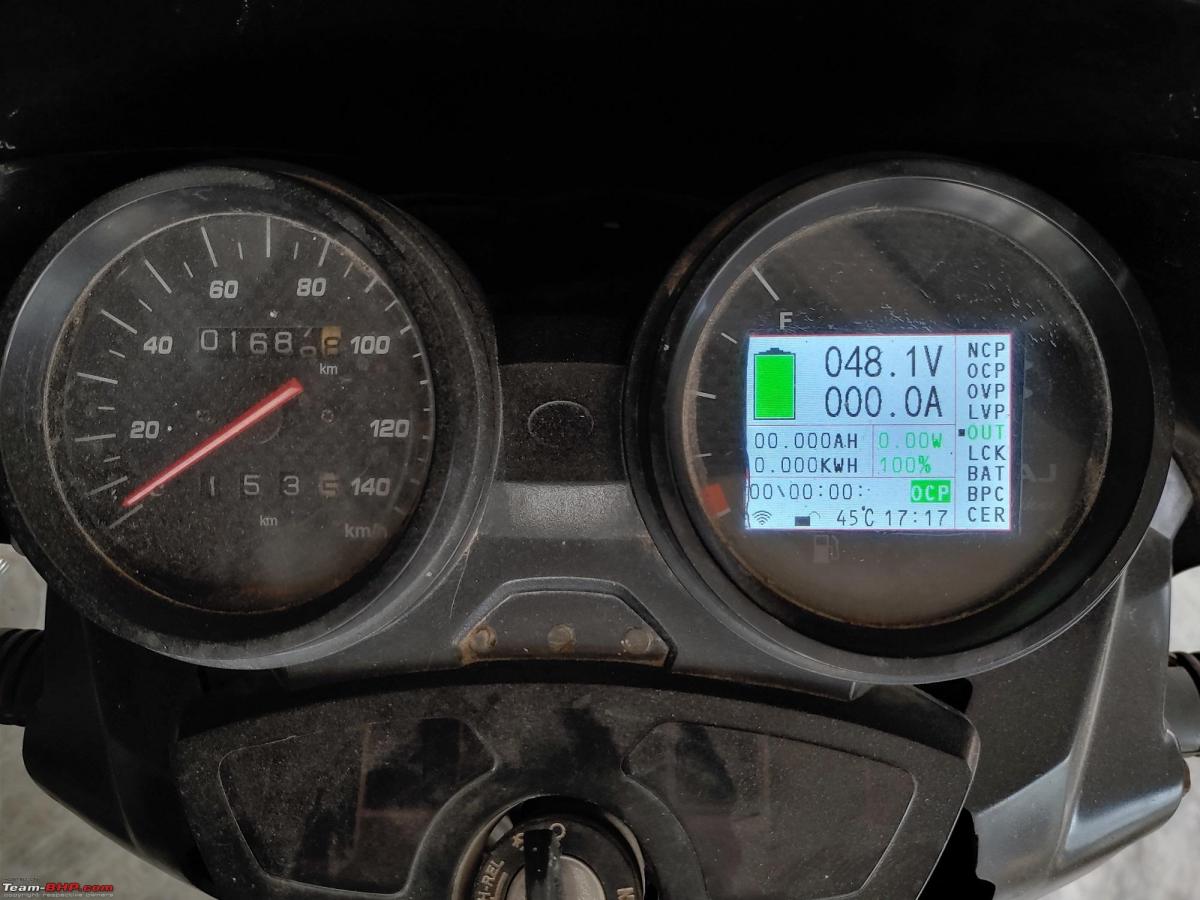

150km Range Test
Average Speed Test - 2
There is some perception that electric bikes are not suitable for weekend trips due to range and speed limitation. So I did back to back ride in identical route with eDiscover and ZMR. Agenda is to maintain maximum possible speed in ZMR and maintain 65 kmph speed (speedometer) in eDiscover. Surprisingly the average speed difference is only 14 kmph even tough I reached upto 110kmph top speed in ZMR. I was able to complete this trip with 35% remaining SoC left in the pack.
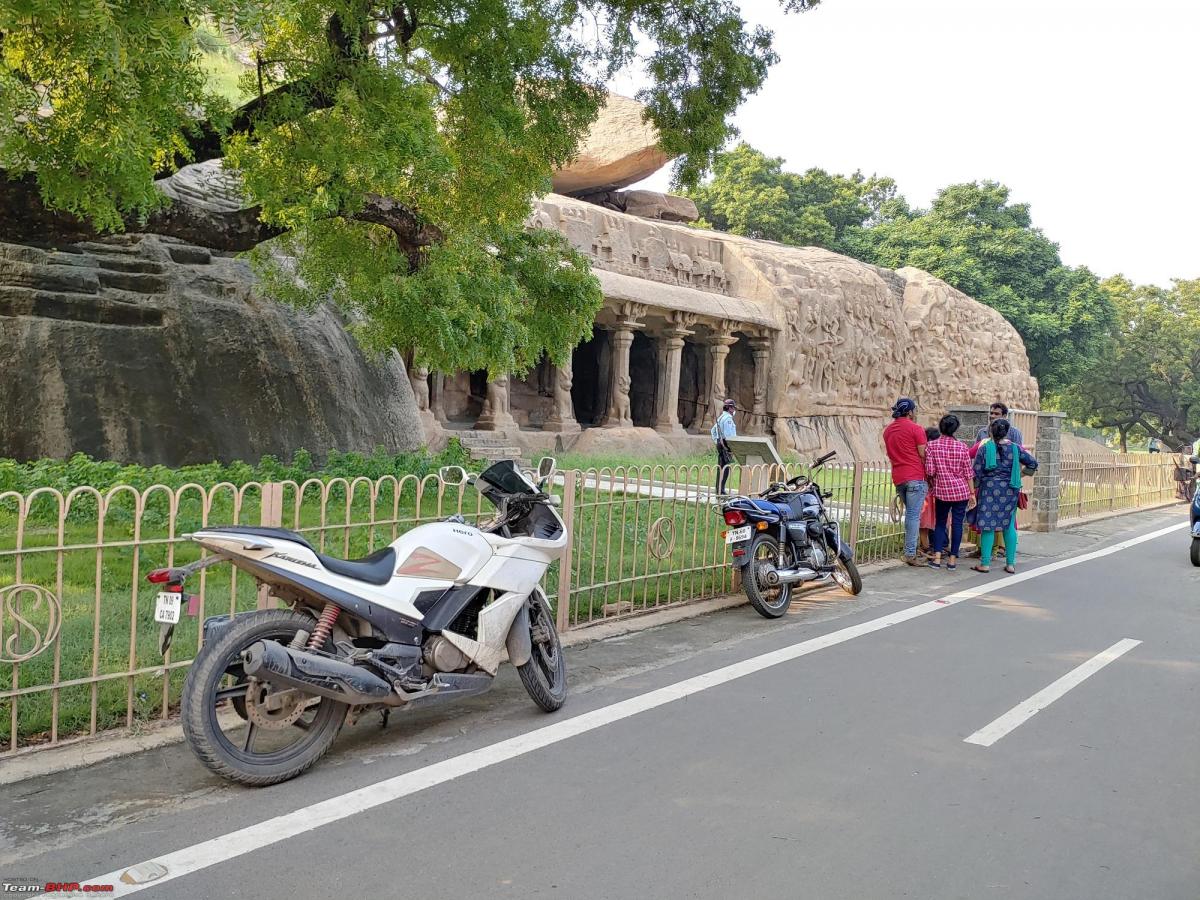

Average Speed Comparison
Range at high Average Speed
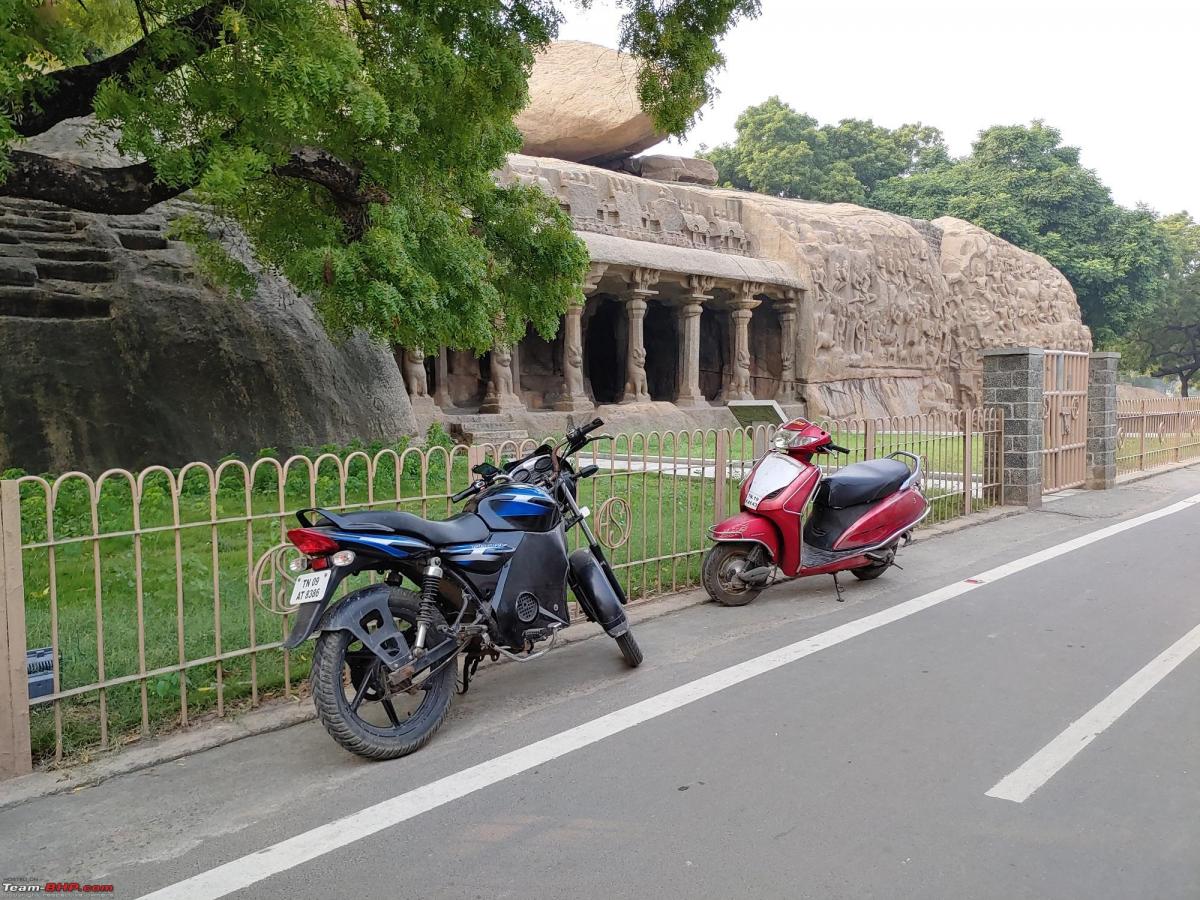
Read some articles regarding 110+km range at 24 kmph average speed in Ather forum (Link here). I was curious to check if I can achieve 100 km range at 40 kmph average speed in my eDiscover. With some confidence from previous 65kph cruise speed trip, I decided to do this trip at 55kmph cruise speed for 100+ range. Once again, its in the same tried and tested ECR route. And the trip ended exactly at 99.9km in GPS data-log and 103km in ODO meter.

100 km Range at 40 kmph average speed
Since Aliexpress site is banned in India, most of my update plans were stopped including 20A fast charger and new BMS.
Check out BHPian comments for more insights and information.
Find Car News
Just News


.jpg)


About Us
Buy & Sell
USED CARS