News
DIY Seat modification of my Triumph Scrambler 400X: Improved ergonomics
I am very happy with the overall initial impression. The feeling of sliding forward is greatly reduced and seating feels much more planted.
BHPian nasirkaka recently shared this with other enthusiasts.
SEAT SLOPE CORRECTION DIY FOR SCRAMBLER 400X
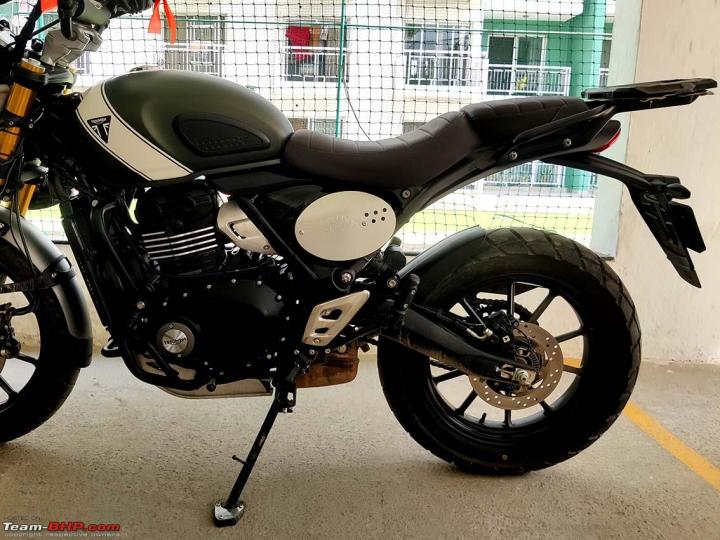
Since the day of test ride, i was not very convinved with the seat profile of the Scrambler 400X. I had difficulty finding a sweet spot. The seat has a prominent forward slope which slowly and gradually pushed the rider forward, creating stretch points on the contact patch. Its not just me, many other riders have voiced similar complain as per various youtube video reviews. There is an OEM accessory "quilted" seat avaible from Triumph but at over 8K, its very expensive for trail. Also when i sat on one at the showroom, it did not feel much different from the stock.
A single seat design can not fit everyone as riders come in various shapes, sizes and weight. Infact, most of the bikes i have owned, there has been some form of seat modification gone into it to personalise it to my riding. Only exception being the BMW310GS on which i did not find any reason to complain or make any changes.
I have been to many seat modification shops including the famous (or infamous?) Raos of Bangalore. Its difficult to get the ideal seat at one sitting as the modification needs to be validated over a period of time. Most of the seat modification shops do not have a lot of time to spend on customers requirement and try and push what they think may work. Also, many a times, the rider does not clearly know how to define what he wants and all this leads to the final result which is not satisfactory. Hence whenever feasible, i try and attempt some simple seat modifications myself. its not very difficult, does not require special tools or skill set. With some basic practise amd time at hand, anyone should be able to attempt it. Worst scenario, we can always carry the seat to a shop and get it fixed. Sharing a pictorial representation of the seat slope correction on the scrambler which i attempted last saturday.
TOOLS REQUIRED:
- Screwdriver and plier to remove the stapler
- Hacksaw blade to rough cut the foam
- File/rasp (handmade using a bottle cap) to finish the foam
- Stapler gun (manual) and hard staples (prefebly stainless steel ones)
- Foam sheet of 1/2 inch and some rubber solution (incase required)
- TIME: 4 hours

Remove the seat from the bike. Its a fairly simple operation but requires removal of pillion seat first using the key. This exposes the two allen bolts which secures the rider seat.

Carefully pry open the staples using a screwdriver and pull them out using a plier.

Make sure to collect all the staple pins and dispose them carefully. They are hard and can easily prick the skin.

Pull out the seat cover to explose the foam underneath it.

The foam is wrapped in a thin plastic sheet, just like how a masala dosa comes packed. This would surely help protect the foam from water when exposed to rain/bike wash, etc.

But the seat cover also has a thin layer of foam which is used to create the horizontal band pattern. This foam gets totally wet as the water ingresses from the stitch points all around. My bike was exposed to rain couple of days back, but the water ingress was still present and the seat cover was wet from inside.

We can see the wetness seeped around the seat plate as well. This is an issue that should be looked at and rectified by the manufacturer.


Marking on the foam and trying to identify the areas to remove material to reduce the slope.

Rough cutting of the foam material. The intent was to remove material from the rear side of rider seat and match the transition towards the front.


Finishing the foam and the contours.

Trial on the bike. This is a critical feedback step which helps identify whether the intended thoughts are working as desired or not.

Identifying the areas which requires additional material removal.


Reworking on the form and trying on the bike again to make sure the results are positive and satisfactory.


Cutting and pasting another thin later of foam all over helps with additional padding. It is important to have an idea of the foam thickness available to play with, as removing excess material means the seat pan can be felt at places.
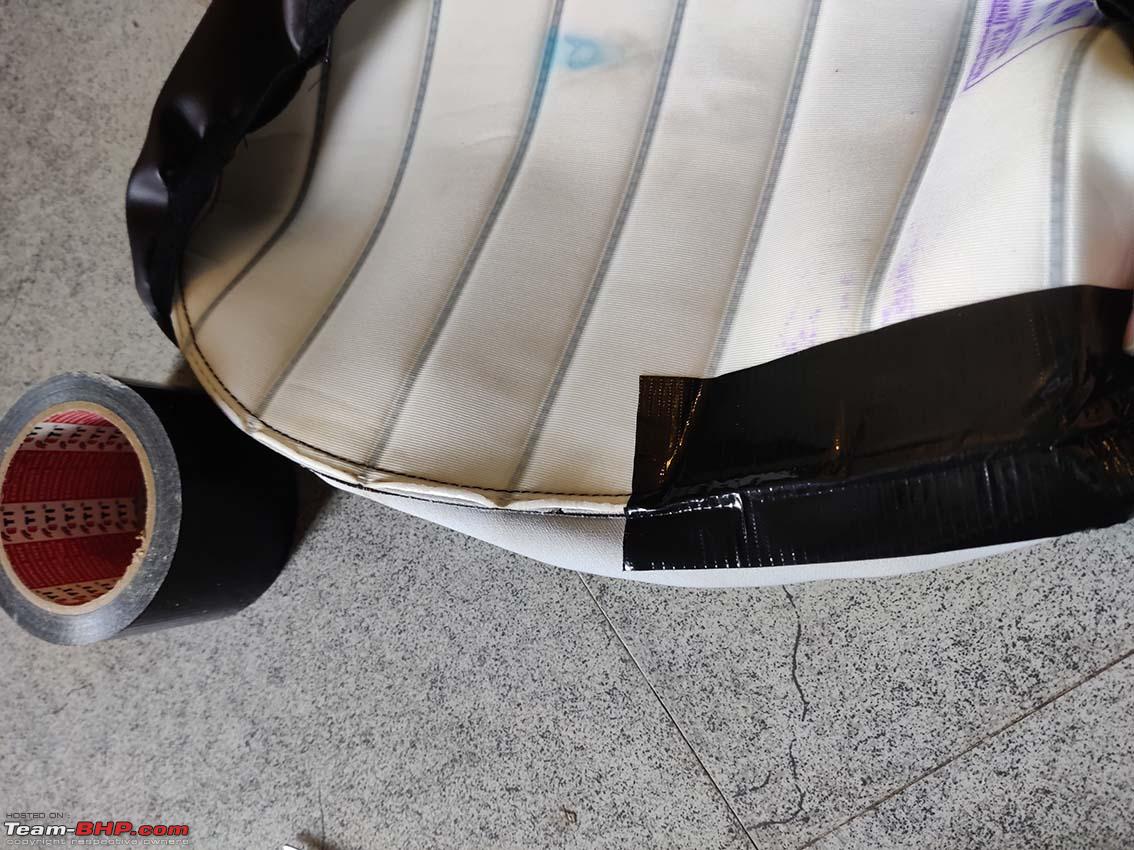
Taping insde of the stitching seam in hope to reduce the water ingress. For some reason, the tape does not stick very well to the seat cover material. I tried duct tape, clear tape and also the brown packing tape.

Fitting back the seat cover and stapling it in place.

And the modified seat is ready to be installed on the bike.

That is the end result. Time well spent.

Comparison of the old seat profile with the new one. The camera angles are not identical so may not given true picture but in actual, there is good amount of difference.
CONCLUSION:
I am very happy with the overall initial impression. The feeling of sliding forward is greatly reduced and seating feels much more planted. Will have to try it over longer ride and see how it fares.
Check out BHPian comments for more insights and information.
Find Car News
Just News


_2.jpg)


About Us


Buy & Sell
USED CARS