News
DIY: How to install original Hyundai Creta horn on Tata Nexon


The entire process is easy & anyone can do it at home without spending a lot of money. Also, there's no need to cut any wire.
BHPian KarDIY recently shared this with other enthusiasts.
DIY: Install Original Creta Horn in Tata Nexon
Recently, I bought a Tata Nexon XM(S) for my day to day commute. Though the car gives you a somewhat SUV-like feeling, the stock horn doesn’t really compliment the SUV look of the car. So I decided to switch from the original stock horn, K-90 twin tone Uno Minda horn, to Creta’s original stock horn, Hyundai Original Creta 2015 HITGT Horns.
After doing thorough research, most of the guides told me I would need to cut the wires because Tata is notorious for using their proprietary connectors, i.e., 2 pin fuel injector connector, instead of using universal horn adapters in their cars. They do this so people will not use aftermarket horns and just use Tata original horns. Cutting a wire in your brand new car is like setting fire to your warranty card, if any wire is cut, your warranty on the whole car is suspended.
So, I went to several workshops and came up with a way to change the horn without cutting a single wire. The whole process is easy and anyone can do it at home without spending a lot of money.
Now, we know we can’t cut the wire but installing the new horn is a must. To save us from this crisis, adapters come to the rescue.
If you are someone who understands better from video, you can watch the videos below:
- Installing Original Creta Horns In Our Tata Nexon | Part-1 How To Remove Tata Nexon Front Bumper
- India's First Tata Nexon with Original Hyundai Creta Horns | Part-2 How To Install Horns with Wiring
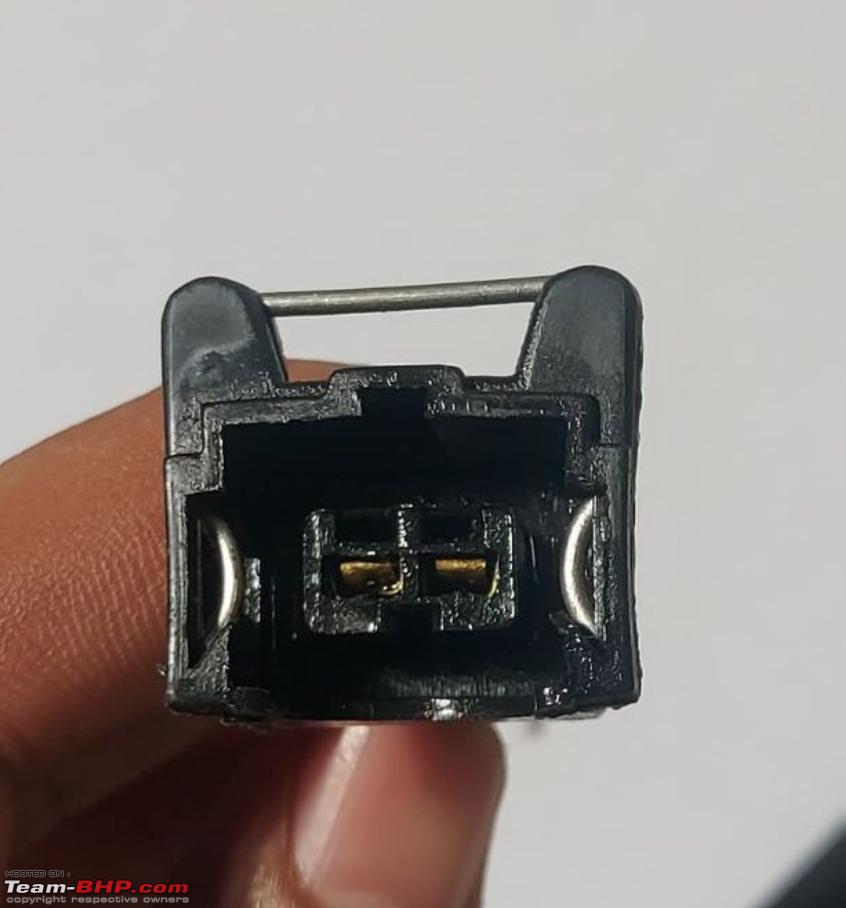
Both of the cars have one high tone horn and one low tone horn. This is why I had to buy both adapters, 2 male Tata Nexon adapters (2 pin fuel injector) and 2 female adapters for the Hyundai Creta horn. Also, as per BHPian Reinhard, Nexon's connector is known as 282762-1 connector worldwide.
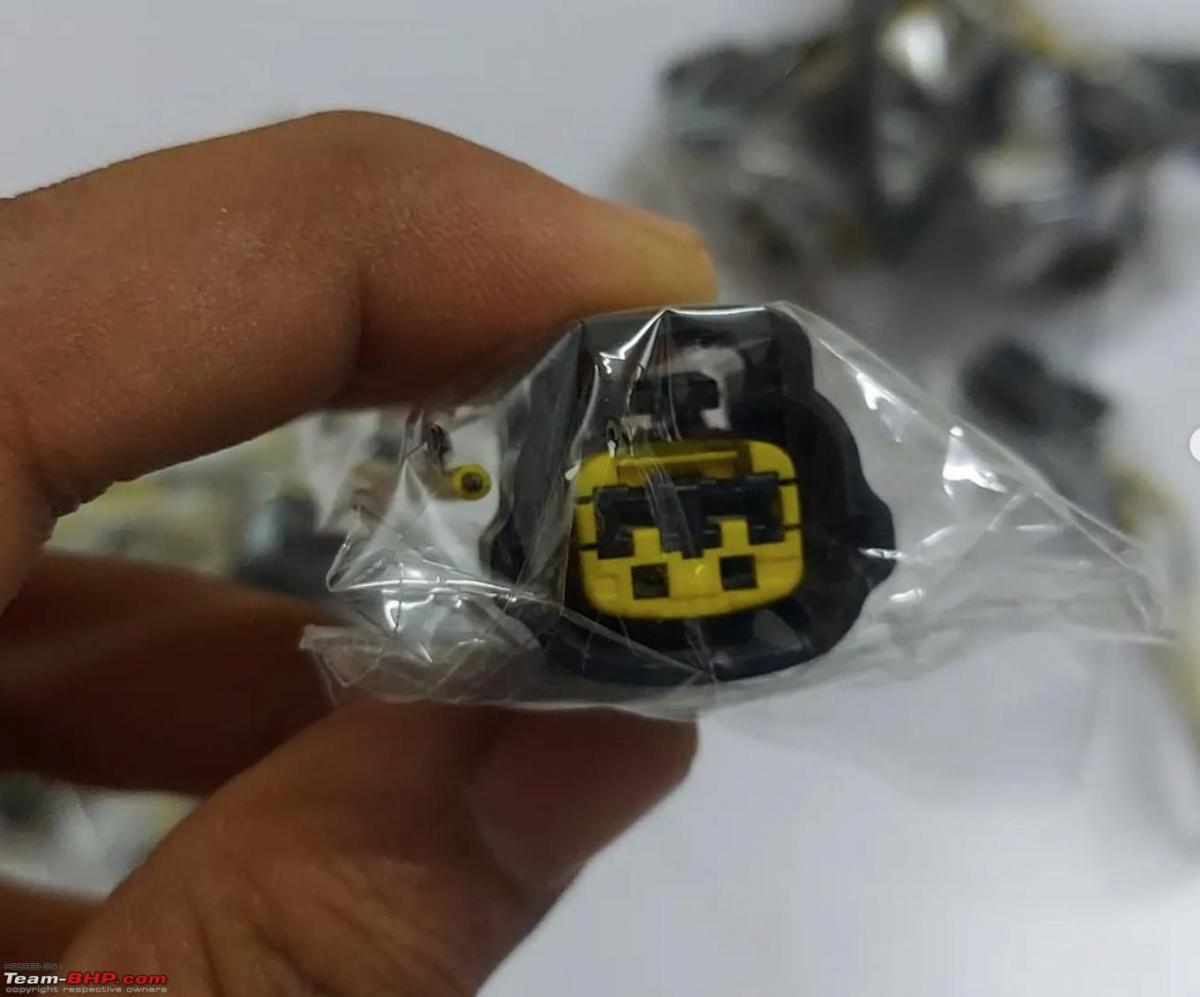
We will use each adapter, connect them together and then connect the horns using them. I got a pair of male-female Tata connectors from a CNG service workshop for INR 200 and to get Hyundai connectors I had to go to Kashmiri Gate, Delhi. Each connector costs INR 120.
Tools required
- Screwdriver set
- Spanner/ratchet set
- Wire cutter
- Tape
- Horns (of course)
- Hand safety Gloves
- 2 Male Tata connectors
- 2 Female Hyundai connectors
Now that we have all the tools and equipment ready. Let’s start with replacing the horn.
Procedure
- Step 1: To replace the horn, we will need to remove the front bumper first. There are a total of 15 nuts and screws which you need to open in order to remove the front bumper.
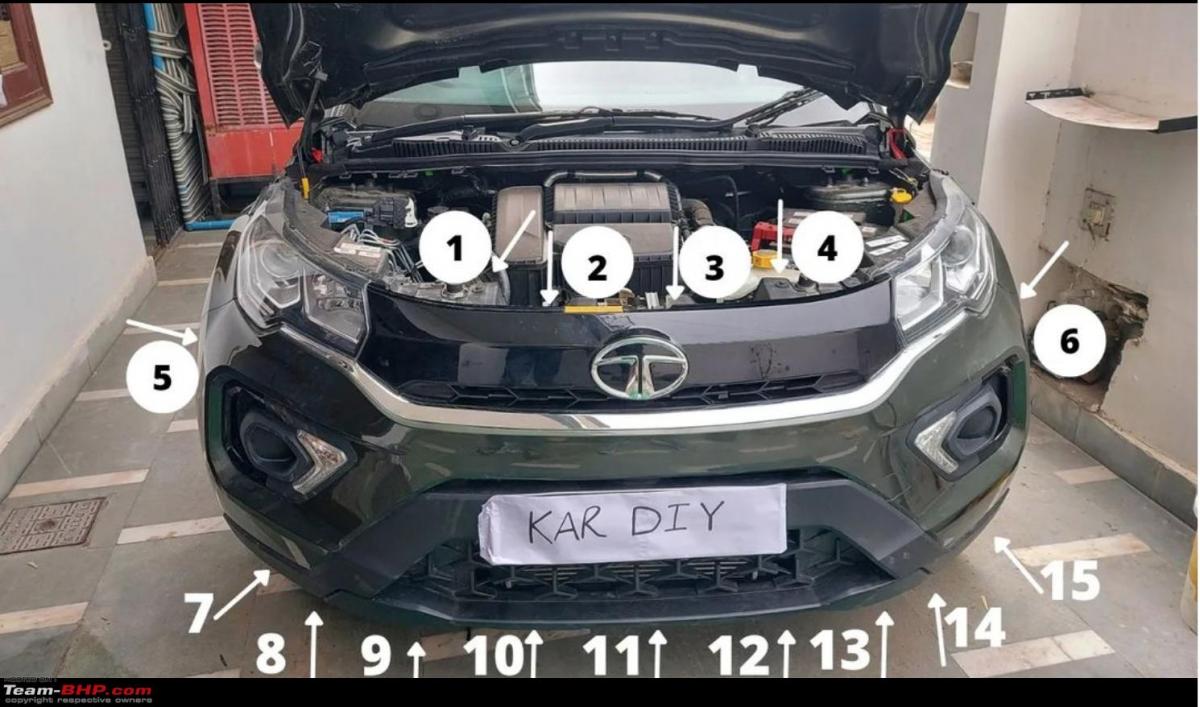
Specification for all the nuts, bolts and screws:
- 1,4 - Bolt (10 no.)
- 2,3 - Star head plastic screw
- 5,6 - Philips head screw
- 7,15 - Nut (10 no.)
- 9,13 - Bolt (10 no.)
- 8,10,11,12,14 - Philips head screw
Important Tip: Arrange the nuts and screws properly after taking them out so you can easily put them back from where they came from.
- Step 2: To remove the first four nuts and bolts, open the bonnet. Here, you will find 2 nuts and 2 screws. You will need 10 no. socket to open the nut and a star head to unscrew the screws.
- Step 3: Remove screws number 5 and 6 using a Phillips head screwdriver. Tip: Turning your tyre in the opposite direction will help you in accessing the screws a little more easily.
- Step 4: There are 5 screws, 2 nuts and 2 bolts under the front bumper.
- Step 5: Remove the bumper from the screw in the bottom. Note: The bumper will not fall even after removing all of the screws, nuts and bolts, as it is locked in the positions using locks.
- Step 6: Remove the bumper from the fenders by disengaging the locks. To disengage, slowly and firmly pull the bumper out. Do this on both sides. Tip: You will need a person to assist you while removing the bumper, otherwise you might end up damaging it.
- Step 7: Before removing the bumper completely, remove the indicator lights by rotating them counterclockwise and pulling them out.
- Step 8: Remove the bracket by unscrewing the nut.
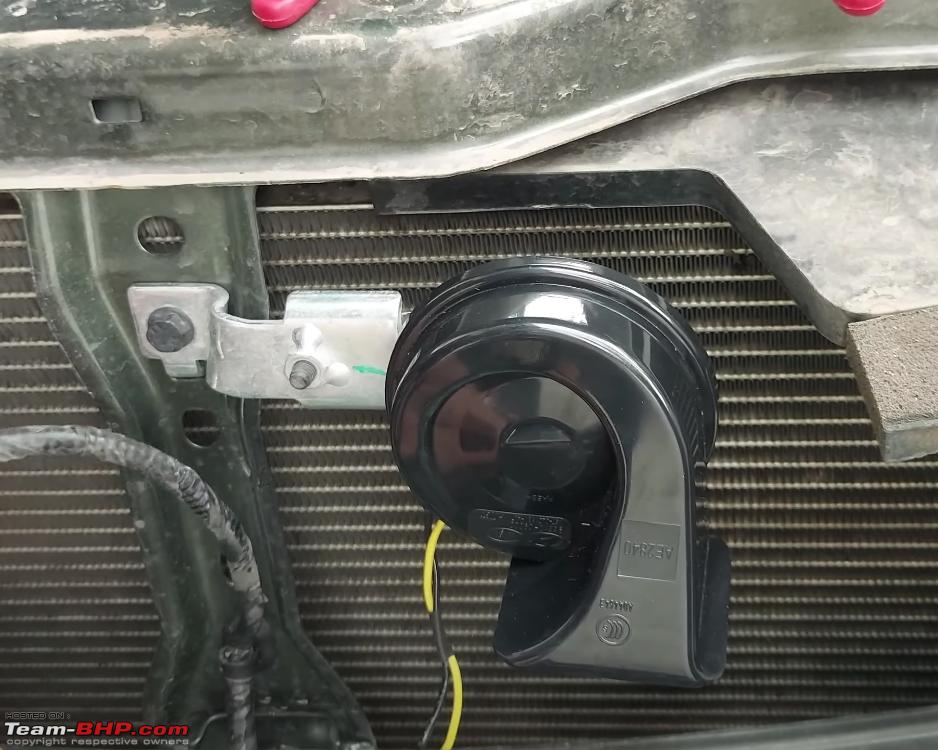
- Step 9: Replace the horn on the bracket.
- Step 10: Plug in the male Nexon adapter in the car’s female connector.
- Step 11: Connect the male Nexon adapter to the female Hyundai adapter. Note: when connecting connectors, check if the horns are working or not. If they are not working, don’t panic and switch the cables and then it should work.
- Step 12: Plug in the female Hyundai connectors in the Creta horn.
- Step 13: Screw back the brackets on the chassis. It is important that your horn should face downwards because we don't want any water to go in the horn and stuck there.
- Step 14: Put back the bumper and engage all the locks. Note: Don't forget to put back the indicator while putting back the bumper.
- Step 15: Screw all the screws, nuts and bolts back.
And with that, your new horn and car are good to go.
Check out BHPian comments for more insights and information.
Find Car News
Just News


About Us


Buy & Sell
USED CARS