News
Changing the spark plugs on my 2012 Superb: A comprehensive DIY guide
Too tight can lead to spark plug breakage and too loose can lead to compression loss or even the spark plug blowing out of the cylinder block.
BHPian dkaile recently shared this with other enthusiasts.
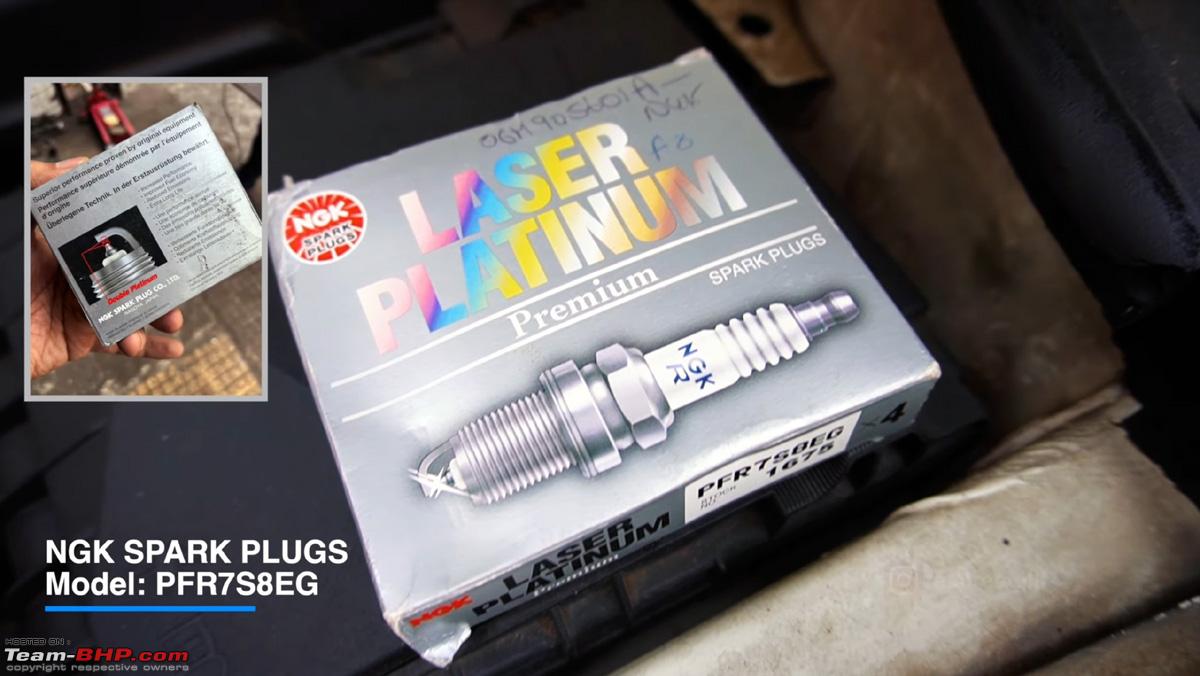
I had the Superb's original Spark Plugs lying with me for nearly 10 years now. They were the superior NGK Iridium Platinum variety, Made in Japan, part# PFR6Q which had a service change interval of 90k kms, just like the originals. So even though the originals were working just fine and still had more than half of it's life left in them according to their service schedule, I decided why to take any risk and get these changed anyways, as the car was 12 years old now.
So out came the NGK spark plugs. The main tool required to open up the spark plugs is the 16mm spark plug long socket with rubber grommet to catch the spark plug and 3/4" (or 1/2") ratchet and an extension piece

This is the alternative Spark Plug part# if the above one is not available nowadays - PFR7S8EG for the 1.8TSI engine
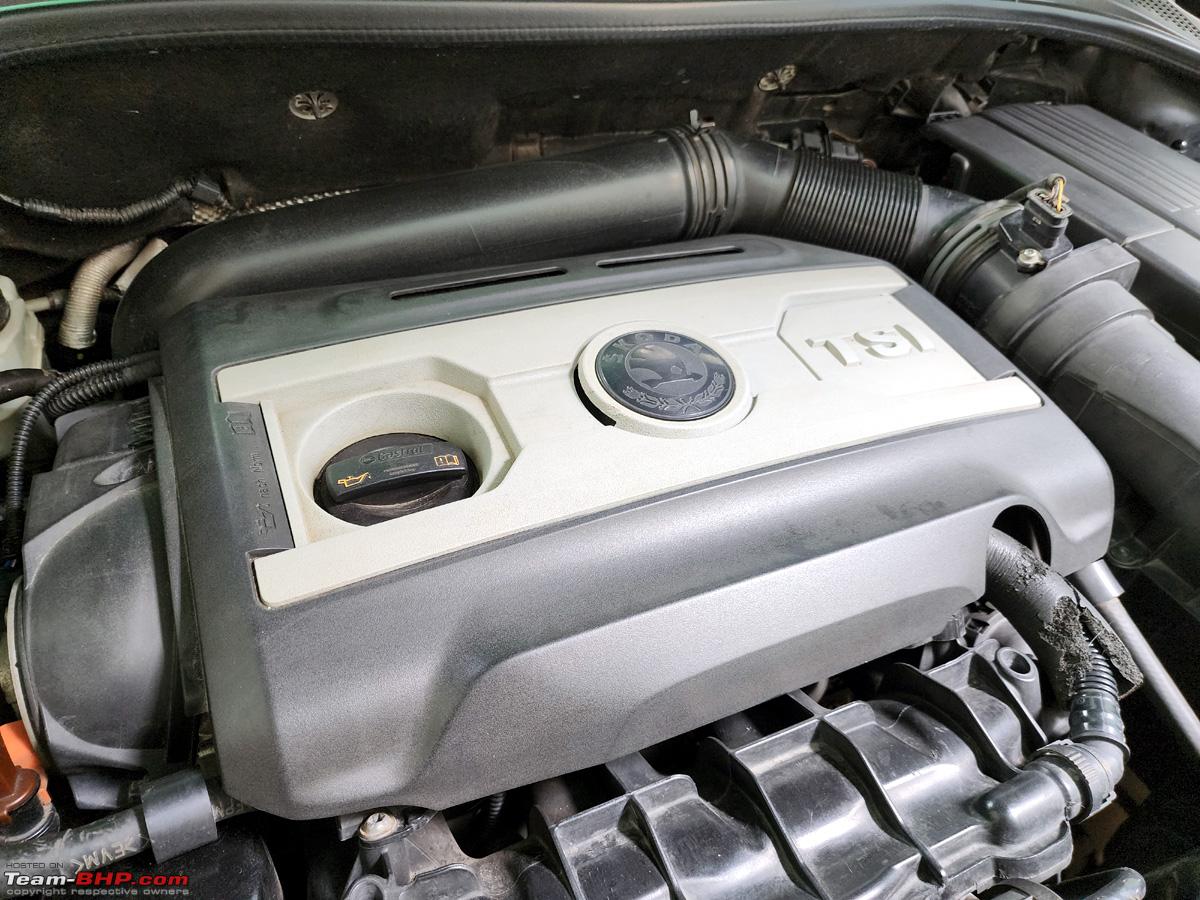
First job was to remove the engine cover which is held by just 4 rubber grommets. You just pop them up to release

Next disconnect the connectors at the back of each coil pack. Their locks are released by gently pressing the lock tabs as shown in the picture. I did it by hand

After releasing the tabs you just gently slide them back as shown in the picture
Now you are ready to take the coil packs out. Be careful not to bend them and exert equal pressure on the front and the back and very gently raise them to prevent damaging their insulation. Take the help (very gently) of a long screw driver IF necessary
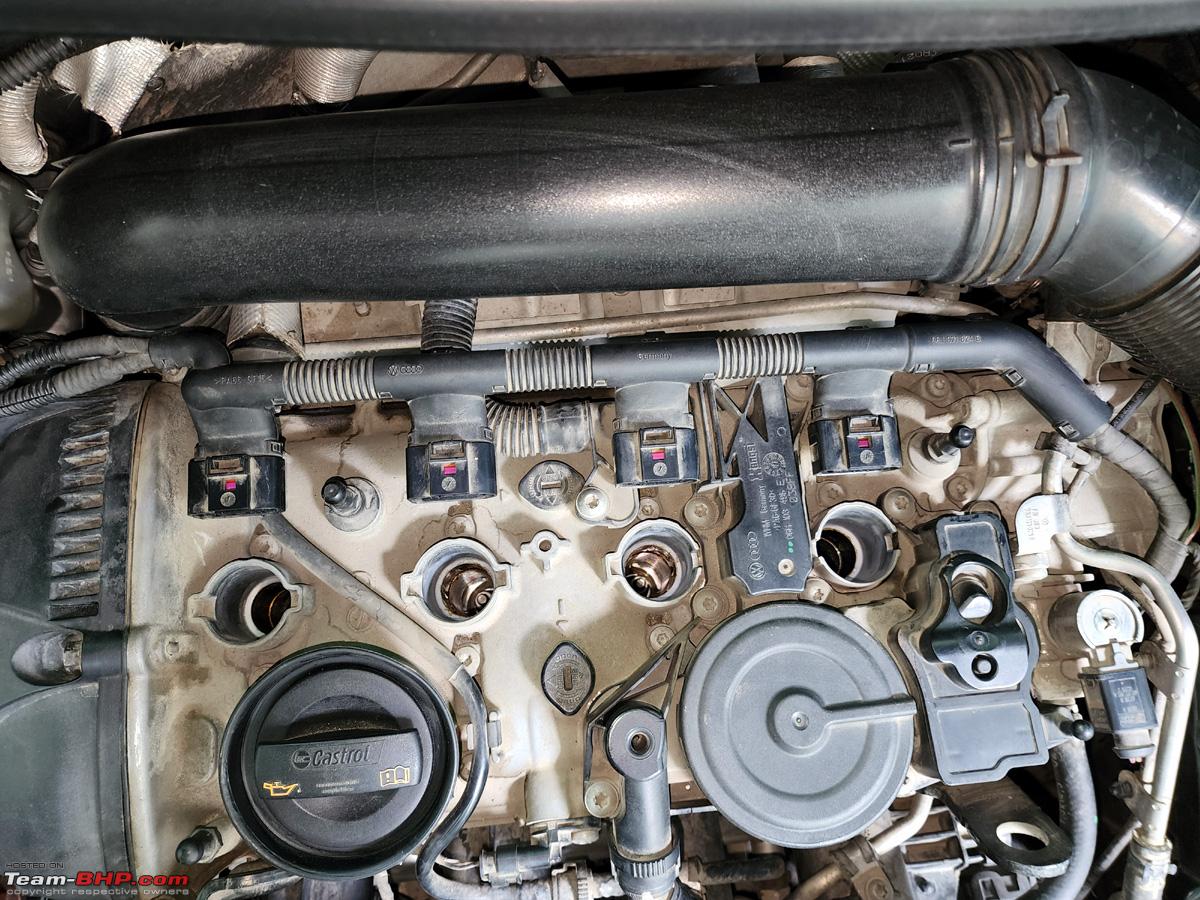
All 4 ignition coils are popped out as shown in the picture

A view from the top after the coil packs are removed. The spark plugs are visible inside
Now gently put in the Taparia ratchet wrench and the 16mm socket with extension and open anticlockwise to loosen the spark plugs fully. They clipped on to the rubber seal in my spark plug socket and I was easily able to pull them out.
Tip - You can also use one of the ignition coils to lift them out if you do not have a rubber seal in your spark plug socket.
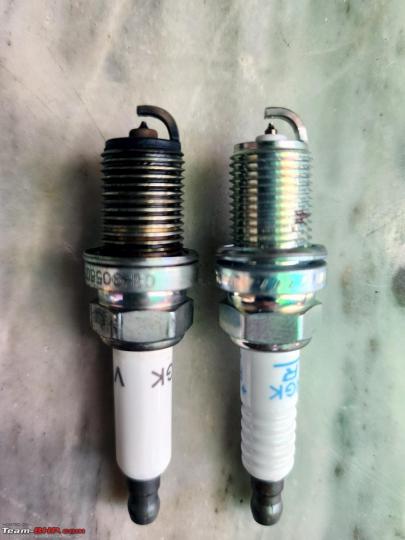
All the 4 old spark plugs are out. Notice no yellowing or burn out of the white insulator part

The old and the new together.

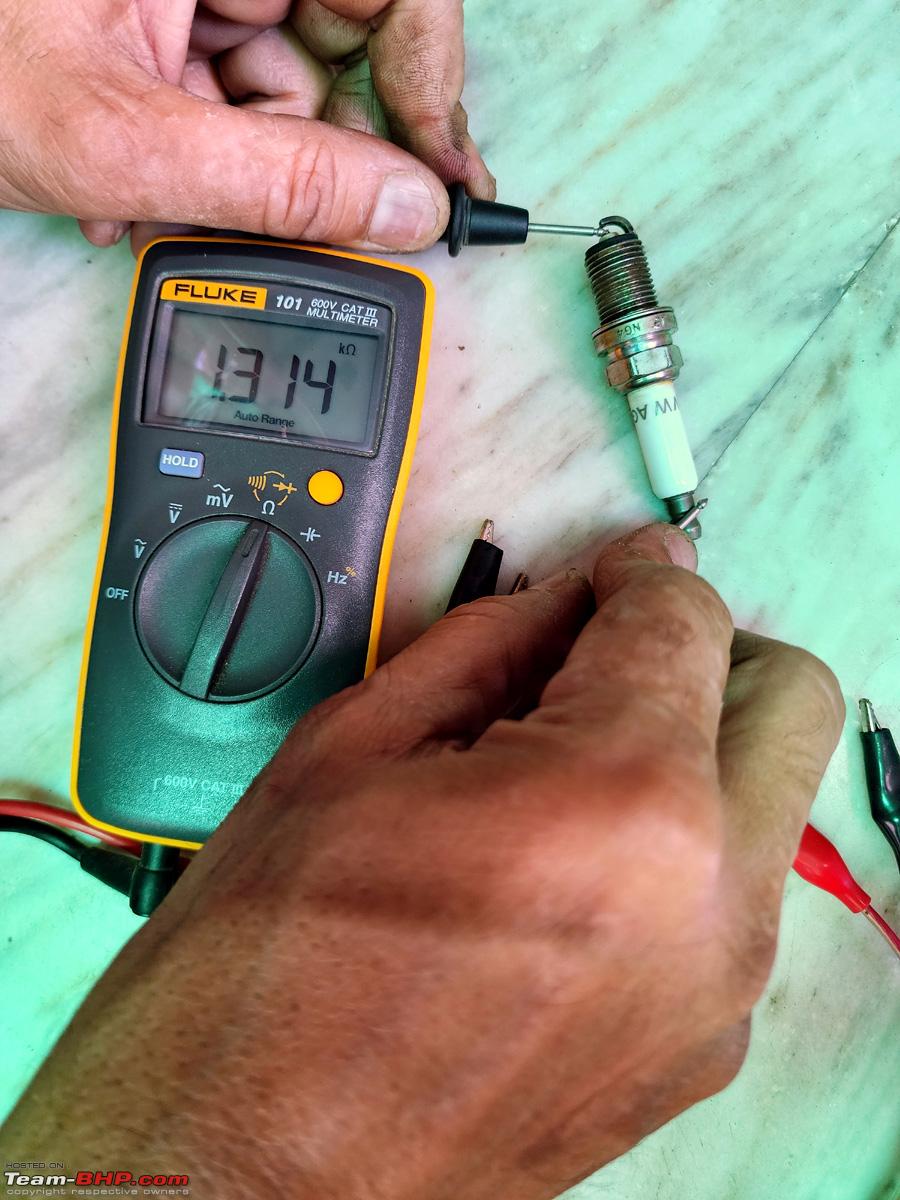
Now I checked the resistance of both the old and new spark plugs, which is the best parameter to check the health of your spark plugs (as these are resistance based spark plugs). Here's the resistance of the 12 year old one, which is around 1.3Kohm, which is where it should be as per OE specs.
Note the difference between the uncleaned one on the left and the cleaned old spark plug on the right
Now the 4 NEW ones were ready to be fitted in the car
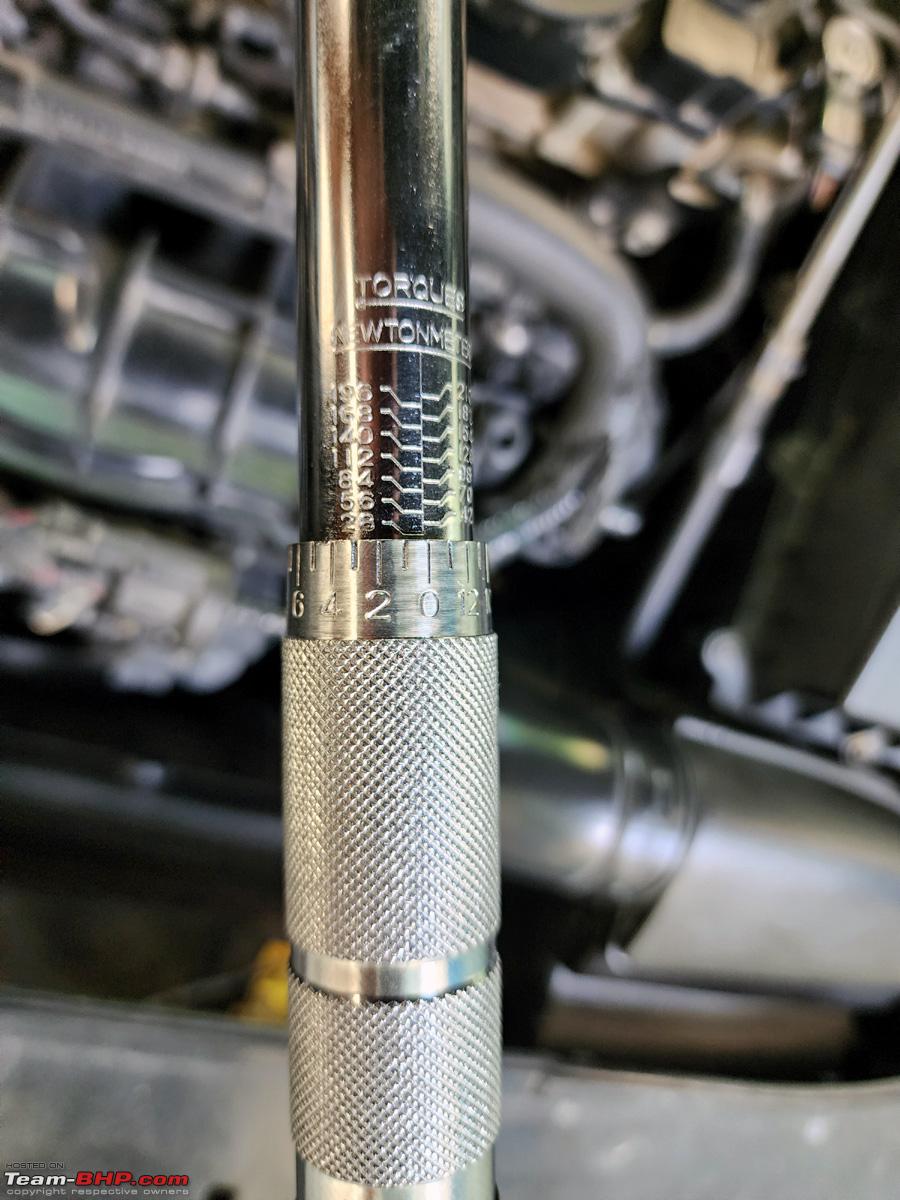
Now torque wrench may seem to not be needed but is a very good idea. The perfect torque provides optimal heat transfer between the spark plugs and the cylinder heads. Too tight can lead to spark plug breakage and too loose can lead to compression loss and in some rare cases, the spark plug even blowing out of the cylinder block. The torque spec required here is 25Nm, just enough to the crunch the crush washer and I set my torque wrench to the minimum to achieve that

Final check was to crank the engine, which it did in half a crank (as earlier)

Hope this helps fellow Skoda/VW/Audi/VAG car owners.
Check out BHPian comments for more insights and information.
- Tags:
- Indian
- Member Content
- DIY
- Skoda Superb
Find Car News
Just News


.jpg)

.jpg)


.jpg)

About Us