News
Toyota Land Cruiser Prado spotted in India for the first time


The Land Cruiser Prado is positioned below the Land Cruiser LC300 and competes with the Land Rover Defender.
The 2024 Land Cruiser Prado has been spotted in India. Videos circulating on the internet show the SUV being transported on a flatbed.
The latest iteration of the Land Cruiser Prado made its global debut in August 2023. It was initially introduced in the US market. It is positioned below the Land Cruiser LC300 in Toyota’s SUV lineup.
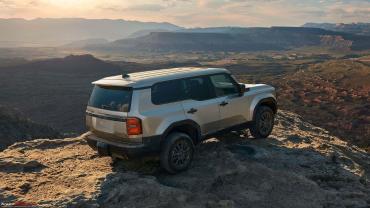
The new Prado adopts a new design philosophy featuring a more rugged and boxy styling. It has a large grille in the front with vertical slats, which suggests that this is the Prado VX variant. The grille is flanked by rectangular LED headlamps and there’s a chunky front bumper with integrated fog lamps. The rear end has a more conventional look, though.
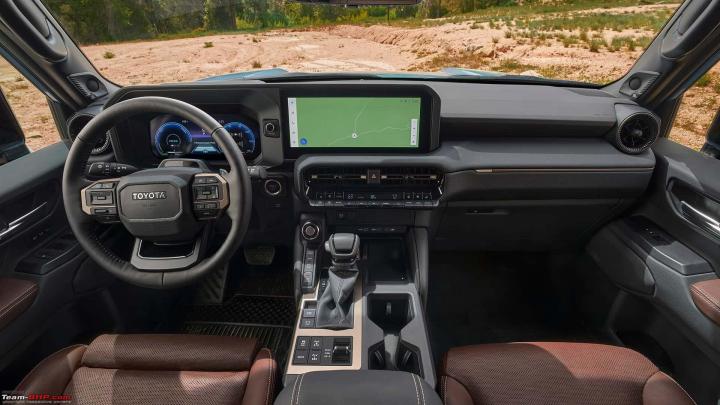
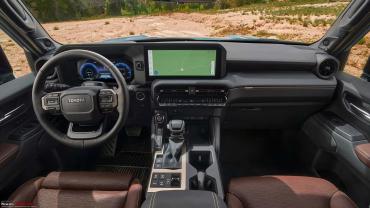
The interior of the Land Cruiser Prado has a rugged and durable look. It has a large touchscreen in the centre and a chunky 3-spoke steering wheel. There are three rows of seats with AC vents for each of them.
The Land Cruiser Prado is powered by a 2.8-litre diesel mild-hybrid engine in select markets. This unit produces 201 BHP and 500 Nm and is paired with an 8-speed automatic transmission. Toyota also offers a 2.4-litre petrol hybrid powertrain on the Prado.
Source: Pandit help
- Tags:
- Indian
- Land Cruiser Prado
News
Driving my Toyota Land Cruiser to Death Valley to explore some trails


Car companies bring their new vehicles here for testing. The idea is that if a car can survive the intense summer heat of Death Valley, it can withstand any other hot place in the world.
BHPian arunrajk81 recently shared this with other enthusiasts:
I’ve wanted to explore Death Valley National Park for the past few years, but it never happened because my family wasn’t interested. So, this December, I decided to do a solo drive to Death Valley and explore some trails.
What motivated me now is that I recently made some minor modifications to my SUV. I changed the 20-inch OEM wheels to 18-inch OEM and upgraded the skid plates and underbody protection to thicker metal ones. I would like to add rock rails but decided to keep the side steps since they are very useful for my family during daily use. I’d like to take it to moderately challenging off-road trails to test the changes. There is an off-road park near my house, but I’d prefer to take it to Death Valley so that I can also complete my long-pending trip.
A few days before the trip, when I mentioned that I would be doing some trail/off-pavement driving, my third grader changed his mind and decided to join me. He even brought his own RC Jeep on the trip so he could play with it. So now, it’s officially a boys' trip. We also planned to do some stargazing since there are places with very little man-made lighting inside the park so there wouldn’t be any light pollution.

The Death Valley Entrance from the Bay area side

The never-ending Road

Varied Landscape
Fun Facts: Death Valley is the place where the hottest temperature ever recorded on Earth (134°F/56.67°C) occurred, and some parts of it are 282 feet below sea level. It is the largest national park in the mainland United States by area (Alaska has the largest national park overall, but it is not part of the mainland). This was news to me, as I had thought Yellowstone was the biggest. The majority of the park is in California, with a small part extending into Nevada.
There were around 4,000 burros (donkeys) in and around Death Valley, which are not native to the area. They are descendants of the animals brought during the Gold Rush when Death Valley was a hot spot for mining (Not only gold, but for other minerals as well) but was later abandoned. The government recently spent several million dollars to remove them from the park boundaries, but they can still be seen just outside the park.

Few distant Barros
You can also find remnants of several mines and ghost towns scattered throughout Death Valley. There are miles of backcountry roads in Death Valley, making it a paradise for off-roaders and overlanders. Some off-road trails are even as long as 77 miles. There are many abandoned mines and ghost towns in Death Valley from the Gold Rush and mining era, and these trails were created when they were active 80 to 100 years ago.
If you’re interested in diverse landscapes and vibrant earth colors, Death Valley is the place to visit. During spring, around April, Death Valley is known for its wildflower blooms, which attract many visitors and during 2016 there was a super bloom. If you think peak summer would be the off-season due to the extreme heat, you’d be wrong. Many visitors, including people from Europe, come during the hottest days just to experience the intense heat.
Unfortunately, accidents occasionally occur. Last year, a biker tragically died of heat stroke during the peak summer day. Other incidents involve people becoming stranded on backcountry roads and wandering off in an attempt to escape, which is nearly impossible due to the vastness and extreme heat. In such situations, it is recommended to stay in your car, preferably in the shade with the hood open, so that someone else traveling the trail can spot you.
Roughly 500 miles from my house, Death Valley is about an 8-hour drive. Our plan was to stay for one night and two days. We brought plenty of water, some bottles of electrolyte drinks, snacks, power banks, and an electric kettle. Additionally, we packed some basic car essentials for off-pavement driving like traction pads, a tire deflator/inflator, a shovel, and other basic tools.
There is no cellphone reception in most parts of Death Valley. If you have a phone or device that can share your location via satellite in case of an emergency, it can be a huge advantage if you plan to explore backcountry roads. Because of this, carrying a printed backcountry map is highly recommended. These maps are available at visitor centers or can be printed online.
We started around 2 AM from home because I didn’t want to arrive at the park by noon and risk spoiling the day if it was too sunny or hot.
We entered the park around 11 AM, and since it was winter, the temperature was between 10°C and 17°C. However, the sun's rays were still strong, giving a unique feeling—warm but pleasant compared to the scorching heat Death Valley is known for.
Our first stop was Stovepipe Wells Village, an old mining village and one of the only two places inside Death Valley where you can find a fuel station and restaurants. The village also has a general store, a gift shop, and a few rooms available for lodging. After exploring the area, we had lunch at the restaurant there. The restaurant's theme resembles an old countryside bar, featuring several posters of classic movies that were filmed in the area.

Stove-Pipe Weels Village

The General Store

The Bar and Restaurant

An Old Fire International Truck

An Old Tractor
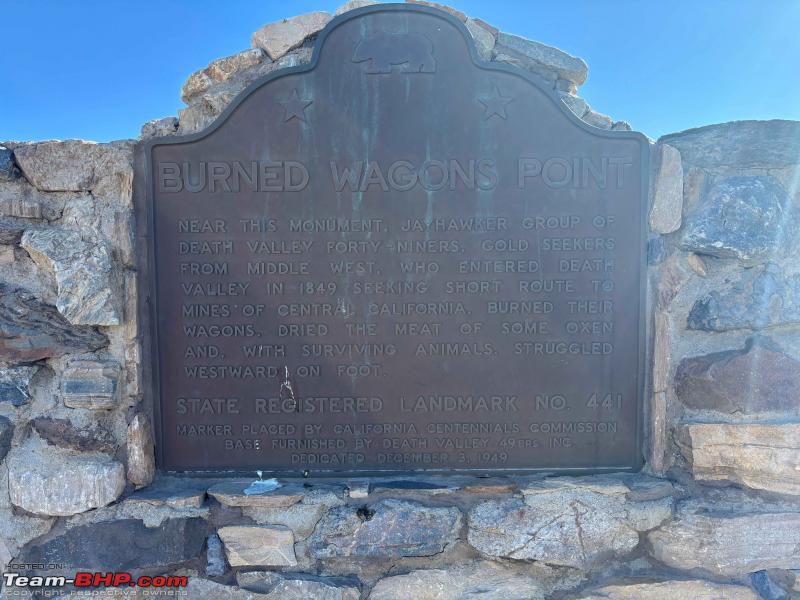
Some History
Death Valley is one of the places where manufacturers bring their new vehicles for testing. The idea is that if a car can survive the intense summer heat of Death Valley, it can withstand any other hot place in the world. During our visit, we saw three camouflaged test mules: one that looked like the new Kia Sorento, another that I couldn’t identify, and a third that seemed to be the next-generation RAV4. In some areas, you can see roadside signs advising drivers to switch off their air conditioning to prevent their cars from overheating.
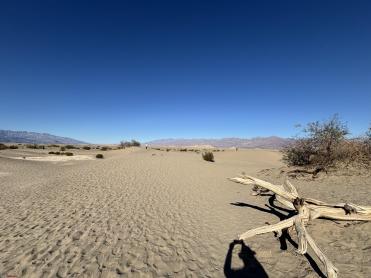
The next stop was Mesquite Flat Sand Dunes, which is only a 10-minute drive away. The dunes got their name from the mesquite trees that survive in such harsh conditions. Death Valley is the location for several famous movies, including Jurassic Park and Star Wars. One of the scenes from Star Wars was filmed here at these sand dunes. We spent around 30 minutes there, walking through the dunes for a while before continuing our drive.

Mesquite Flat Sand Dunes

Mesquite Flat Sand Dunes
Our next stop was the Furnace Creek Visitor Center, the main visitor center located in the middle of Death Valley. This is the second place where you can find a fuel station, Tesla Supercharger, food, and lodging, though everything is quite expensive. You can pay for the entry pass here, which costs around $35, or if you have an annual pass, you’ll receive a pass to display on your dashboard.
We spent some time here, but we preferred the souvenirs and goodies we had already purchased from Stovepipe Wells. There is a thermometer in the front that displays the temperature and it’s a favorite selfie spot.
The Artist’s Palette is a short scenic drive of 8.5 miles with viewpoints offering views of rainbow-colored soil across tiny peaks. The coloration comes from the chemical composition of the volcanic soil, which contains iron oxide, chlorite, and other minerals. We went for a short hike and climbed a few of the colorful hills there. I saw some geology enthusiasts walking around, searching for small stones of interest.

Earth Colours from Artist’s Palette

A washed trail from Artist’s Palette

Another view
VIDEO: Dashcam footage from Artist's Palette - There is a wide body Dodge Challenger Demon ahead us.
Our next stop was the Devil's Golf Course, a flat area between mountains that was once a lake called Lake Manly, which dried up around 2,000 years ago. The dissolved minerals and salts from the surrounding mountains accumulated over the centuries, forming a scaly salt pan with depths ranging from 1,000 to 9,000 feet below. The area is very photogenic, but being there feels different. The scaly nature of the salt deposits can tear your skin if you're not careful.

The Devil's Golf Course

The Devil's Golf Course - At the end of the Trail
I read about a naturally formed bridge in the park and decided it was a must-visit. To reach the Natural Bridge Trail, you need to take a short drive along an unpaved road. The terrain is such that you either have to drive very fast or very slow, at a normal speed, it shakes the car to an uncomfortable level, I know that airing down the tires to 20-25 PSI would solve this, but it’s a short trail. From the parking lot, there’s a walking trail that leads to the natural bridge, which was carved by flowing water over centuries. Yes, flash floods do occur in certain areas of Death Valley. It was only 30 minutes before sunset, so we turned back without completing the trail as soon as we reached the bridge.

At the Natural Bridge Trail - One peak is well-lit, while the other is in the shadow.

At the Natural Bridge Trail

The Natural Bridge or Arch

Trail Parking

The Trail
Our next point, The Badwater Basin is the lowest point in North America, at 282 feet (86 meters) below sea level, covering around 200 square miles of sodium chloride, along with calcite, gypsum, and borax. There is water in this area, which is an extension of the Devil's Golf Course and part of the same Lake Manly. The story goes that when early prospectors arrived and saw the water, their mules refused to drink from it because it wasn’t drinkable, and they named it Badwater Basin. From the parking lot, you can see the sea level marker, which you need to look up at the mountain to spot. We waited for the sunset here, and my son did some off-roading with the RC Jeep he brought along. This was our last stop for the day.

The Badwater Basin

The sea level is marked above the mountain.
Since the accommodation inside the park is much more expensive compared to nearby towns, we booked our stay in Beatty, a small town on the Nevada side. It’s on the opposite side of Death Valley from where we entered, so we literally drove across the park. Beatty is one of the closest towns to Death Valley and offers all the amenities of a small town. Since it was already dark when we arrived, we couldn’t explore the town as planned. We picked up dinner from a Subway and went to the hotel.
Continue reading about arunrajk81's adventure drive for BHPian comments, insights and more information.
News
Toyota Land Cruiser Prado India launch in H2 2025


The Land Cruiser Prado will be imported as a completely built unit (CBU) and positioned below the LC300.
According to a media report, Toyota plans to launch the new Land Cruiser Prado in India in the second half of 2025. It will be imported as a completely built unit (CBU) and positioned below the LC300.
The all-new Land Cruiser Prado made its global debut in August last year. The SUV is based on the TNGA-F ladder-frame chassis and measures 4,920 mm in length, 2,139 mm in width and 1,859 mm in width. It has a wheelbase of 2,850 mm and a 221 mm ground clearance.
The latest iteration of the Land Cruiser Prado sports a retro look. It has a boxy exterior with black bumpers, giving it a rugged look. Inside, the SUV gets a 12.3-inch touchscreen infotainment system, moonroof, heated & ventilated seats, a head-up display, wireless charging and more.
In some markets, the Land Cruiser Prado is offered with a 2.8-litre diesel engine paired with a 48V mild-hybrid system. In the US, Toyota offers a 2.4-litre petrol hybrid powertrain paired with an 8-speed automatic transmission and 4WD.
In terms of off-road tech, the new model comes with a Multi-Terrain Select System, Downhill Assist, Electronic Locking Rear Differential, Crawl Control, Front Stabilizer Bar Disconnect System, Multi-link Rear Suspension System and more.
Source: Autocar India
- Tags:
- Indian
- Land Cruiser Prado
News
Fulfilling my 35-year old dream: Got a 2024 Toyota Land Cruiser Prado
An off-road capable SUV for my photography and road trips. While I may not get into serious off-roading, it provides a reassuring sense of capability when I see an unpaved road ahead.
BHPian arunrajk81 recently shared this with other enthusiasts.

2024 Land Cruiser/Prado in Heritage Blue

Another angle
This is my journey towards my dream car, the Toyota 4Runner, which took an unexpected but lovely turn. While looking for an SUV in the USA in 2015, the design and capability of the 5th generation Toyota 4Runner caught my attention, but its engine and gearbox were primitive, going against my like. So, I brought a Toyota Highlander AWD, 3.5V6 as a gap filler for the next 6 years and then moving to 4runner once gen6 is available.
It’s now 2022, and there is no sign of Toyota updating the 4Runner. The Gen 5 sales are still going strong, especially with the pandemic hit and the ladder-frame SUV craze exploding with the introduction of the Bronco. The Gen 5 4Runner saw its highest sales numbers in its life during 2022, and I started losing hope of updated 4runner since it’s selling like hotcakes. My Highlander is now around 7 years old, with 55K miles, which is very low by US standards. However, I can confidently say it has faced more extreme scenarios than a typical Highlander or monocoque SUV but has encountered zero problems to date, other than periodic maintenance.
I have done several mud/slushes off pavement trips, lakebed runs, and it has served me well for my photographic trips over these years, which is typical for a Highlander. We also did lots of camping trips where the third row was folded down and filled with tents and supplies. What is not normal is that this car also served the purpose of a pickup truck. I used it to haul 8 ft 4x4 timber, several bags of soil, bags of stones for my DIY backyard garden, unassembled furniture, a few 24inch clay plant pots, and the list goes on. Recently, I completed an 11-day road trip from the Bay Area to Yellowstone, and the car performed like a charm.
Even with all these activities, the car has no squeaking, zero body rattle whatsoever, and is in perfect condition. So, why replace it? It’s a long-pending desire for an off-road, a rear-wheel-biased SUV with low range. Ultimately, it's a battle between the heart and the brain.
After losing patience, I almost decided on a Defender 110. Then, rumors started popping up about the Toyota Land Cruiser (200 series at that time), which had left the US market in 2021, possibly coming back in the form of the Toyota Prado. I started following this news, especially on the TFL – The Fast Lane YouTube channel.
By the first half of 2023, Lexus announced the GX550, the Lexus cousin of the Prado. The updated model with a twin-turbo V6 showed significant performance improvements over the GX460, but the efficiency remained almost the same which is thirsty, leaving me in a dilemma, because what I needed was a daily driver car.
Then, by October 2023, the official announcement came from Toyota about the Land Cruiser. Even though it’s called a Land Cruiser in North America, it’s the Prado elsewhere, which I like more than the LC200/300. The design of both the new Land Cruiser Prado and the GX550 gives a feeling that they are more off-road focused compared to the curvier design of the current generation. The wheel arches have enough space to upgrade to bigger tires if needed. Especially for the Land Cruiser, the bumper design is modular, allowing for the installation of a steel bumper without cutting any body panels. Simple description is It’s a boxy design.

Its called as Land Cruiser in North America, No Prado Badge anywhere.
The main differences between the GX550 and the Land Cruiser (Prado) are:
- Engine and Transmission: GX550 has a 3.4L twin-turbo V6 with a 10-speed TC, whereas the Land Cruiser (Prado) has an inline 2.4L Turbo hybrid with 8-speed TC.
- Third Row Seating: The GX550 offers an optional third row, while the Land Cruiser (Prado) has only two rows due to the placement of the hybrid battery.
- Fuel Efficiency: The GX550 has a maximum of 17 MPG, compared to the Land Cruiser, which has a maximum of 25 MPG.
The price difference between the corresponding Lexus and Toyota was approximately 7k to 8k USD, which was expected. However, the major decision-maker for me was the taillight design of the GX550, which might sound silly. I can’t tolerate the full-length taillight of the GX550, a new trend in all new Lexus models. What I must live with is renting a van if relatives visit from India or if I need to carry more than five people, which I find acceptable compared to what I’m getting into. Spec-wise, there is only a minor difference in power and torque figures between these models, but there is a huge difference in efficiency. The LC hybrid is significantly more efficient, which is also a major factor in the decision process.
Within one week after the announcement, I went and placed my deposit at a showroom known for selling vehicles at MSRP in the Bay area. I chose a middle “Land Cruiser Trim” in Heritage Blue with a dual-tone color scheme. I was 37th in the queue, and now it’s a waiting game. Deliveries started around April 2024, with the first batches of vehicles being the costly First Edition or entry level 1958 trims. People who were willing to pay the markup started receiving their cars. I also received offers with markups ranging from $5,000 to $20,000 USD, which I rejected. I even went to the extent of calling dealers in Boston to see if they had a car available without a markup. If I could buy one, I would be willing to make a cross-country trip, as I felt the money spent would be worthwhile compared to paying a markup.
There was still some confusion about what would happen if a Gen 6 4Runner were announced during my wait for the Land Cruiser, what if it is a better car? Toyota announced the Gen 6 4Runner around May 2024. Until Gen 5, the 4Runner had a unique styling compared to the rest of the Toyota lineup, which I liked. However, the Gen 6’s from front end till the rear door bodyline looks exactly like a Tacoma pickup. The interior also resembles that of the Tacoma, which made my decision easy. I’m sticking with the Land Cruiser.
As time passed and production increased after the initial glitches, markups began to narrow down (though not at all showrooms). I then realized that my color combination is causing further delays, as the dual-tone colors with the option I wanted (or rather didn’t want) were not initially produced in large numbers.
By that time, I had developed a good rapport with the sales guy who helped me with the deposit. Around mid-July, I received a call from another sales guy from the same dealer asking if I was interested in a Trail Dust dual-tone color. It took me 30 minutes to decide and respond, and by the time I got back, another customer had taken it. Another week passed by and then I received a message from my sales guy with the exact color that I requested, and I jumped on it. I got the VIN for my allocation, and at this point, the car is still in the vessel on its way from Japan to USA.
After two weeks, I received a call from my sales agent informing me that my car is ready for pickup. I had been expecting further delays at the port, as I had heard from others that there had been delays due to quality checks on some models. Additionally, I did not have an approved loan at that time. Fortunately, I was able to arrange the loan within the same day and was able to get a good deal for the insurance as well. The next day, I arrived at the showroom and could see my car in the delivery section from a distance. After the PDI, took a test drive, and after a minor delay with the documentation, the Land Cruiser reached home.

The first Look when I reached the showroom for pickup

At Canyon road near my House

Another view at Canyon Road
The car allocated to me came with a few options I hadn’t requested, such as 20-inch wheels and a Premium Package, which increased the price by another 10-12%. Unlike American or European brands, Japanese cars cannot be factory-ordered with the exact options you want. Instead, factories build cars with options based on their own studies, and users can only choose from the available inventory based on what you are looking for. On my car, the Premium Package was added at the factory, but the 20-inch wheels, door edge guards, and paint protection film below the door handle were added by the distributor once the car reached the port (PIO – Port installed Options) to make a quick profit, which I normally can’t reject at the dealer when the car is at high demand.

PIO 20 Inch wheels that defeat the purpose of this vehicle - atleast for me
I attempted to revert to the original 18-inch wheels at an additional cost, but the dealer did not have them available. By that time, my child had fallen in love with the 20-inch wheel design, so I decided to keep them until my first tire change.
Mine is a middle trim, which had minimal PIOs. However, for the base 1958 trim, the PIOs significantly increased their price, bringing it dangerously close to the middle trim price. As a result, the 1958 trim remained available at dealerships for some time, when the middle and first editions were tough to get. The good thing about my dealership was that they didn’t add any unwanted accessories, which would have required me to negotiate their removal. Considering the waiting period I had already had, I decided to accept the car as it is.
Two features that I particularly appreciate in the Premium Package, which I would have otherwise had to order separately, are the sunroof and side steps. The car sits much higher compared to my Highlander, making it more difficult for my kids and wife to get in and out. The side steps the grab handle near each door to make entry easier.
The Premium Package also includes a 14-speaker JBL sound system, which doesn’t matter much to me, as I only need a basic music system. The console cooler is another feature I have mixed feelings about. While it can also function as a console box when the cooler is turned off, it only has space for four half-liter bottles. I prefer the original console box without a cooler, as it is deep enough to hold a 14-inch laptop.

Normal shaped Toyota keyfob with Landcruiser written

No default default Sunroof, its an additional Option
Other features in premium package are Digital Key capability, digital rearview mirror, wireless charging, leather-trimmed memory/power driver's seat, Head-Up Display, Lane Change Assist, Front Cross-Traffic Alert and Traffic Jam Assist, Semi-automatic parking, remote start and goes on.

View from Inside, Dashboard view

It’s good that they kept a lot of physical controls in the LC compared to the GX550.

The driver and front passenger get power-adjustable seats.
The car features full-time four-wheel drive with a torsion differential in the center, low range, central and rear differential locks, a front stabilizer bar disconnect, CRAWL control, and multi-terrain select. This full-time 4WD setup is very useful in snowy or slushy conditions, as it eliminates the need to manually engage the 4WD mode when needed if the driver is inexperienced.

Diff locks and Multi-Terrain Select are available on all trims, while the sway bar disconnect and CRAWL Control are only available on higher trims.
Let me start by noting some of my observations in comparison to my existing vehicles, the Highlander and the Duster 110 VGT. This is the first ladder-frame SUV I’ve owned, and I was expecting a somewhat floaty driving experience, which it indeed has, but is comparable to my Duster. It offers a more planted and smoother drive than the Gen 5 4Runner and absorbs most uneven patches with ease.
The vehicle features stadium-style seating and offers good visibility around. The steering switched from Power steering to EPS in this generation to incorporate safety and auto parking features. There are two sensors above the steering column that monitor your attention, beeping if you look away from the road or if your eyes appear sleepy. This feature can be disabled if needed. The trailer brake controller comes standard with a tow hitch receiver and connector. The hitch is useful for me to carry bikes during trips. The vertical design of the dashboard matches the vehicle's exterior character. Chunky gear selector with offroad functionality buttons and drive mode selector nearby. Customizable meter console which is expected at this era. Soft touch vanity lights. The car features a surround camera with a dedicated button. When you engage reverse, the car adjusts the rearview mirrors to provide better visibility and then returns them to their original position afterward. It also moves the seat backwards and adjust steering column once you park an open the driver side road which I find it annoying and disabled it from the infotainment screen. The front seats are power-adjustable, while the rear seats are not.

Second row Seating

Rear climate control

Boot Space: The hybrid battery stays 3 inches above the normal floor height.
Mine is equipped with black leather seats and a 12-inch touchscreen with the new Toyota infotainment system that began appearing on some models from 2022. This system includes wireless Apple CarPlay and Android Auto. Additionally, the back seat has roof-mounted AC vents, that were not very common in earlier Toyota ladder-frame SUVs.

Roof Mounted AC vents
The U.S. spec has only two rows of seating due to the hybrid battery located in the rear floor. Still the non-existent third-row passengers also get cupholders, separate AC vents, and USB chargers. One very useful feature, especially for me, is the 2,400-watt inverter that comes standard, which can power appliances like a microwave, a freezer or electric kettle. This is particularly helpful for camping and road trips. The second row is fixed and cannot be adjusted forward or backward, but the seating angle is adjustable. There is a slight hump in the floor that might affect the comfort of the middle passenger, which is expected in an SUV like this. Rigid LED DLR is color changeable between white and amber.
The second row doesn’t fold flat to provide comfortable sleeping space for overlanding. The seat is 4 inches higher than the rear when folded, but you can easily adjust it with an air mattress.

Boot space

2400W Electric Outlet that can power 120v equipments.

A tiny storage behind the Hybrid battery

Another storage behind Second Row

Windshield Angle

Rear Glass Opening

Full Size Spare Tire and Tow hitch (Covered)
The Drivetrain: - i-force Max 2.4T
The engine is a 2.4L inline four-cylinder turbo with a hybrid motor sandwiched between the engine and the transmission. The 8-speed torque converter shifts moderately fast, much quicker than the 6-speed torque converter in the 2015 Highlander. The transition between the electric motor and the internal combustion engine is not noticeable during normal driving conditions. However, in stop-and-go traffic at single-digit speeds, you can feel it. It's not as bad as a mild hybrid or engine start/stop system seen in some other cars. This is because the engine shuts off more frequently during heavy traffic crawling and restarts with the throttle more often than the i-CVT system in other Toyotas. I-CVT hybrids can drive on electric power alone up to around 20 MPH, but this i-Force Max could only drive up to single-digit speeds and rest in assisted mode.
Even though it’s not as fast as its 3.4T in its Lexus cousin, GX550, the turbo lag is compensated with the thrust from the electric motor. As a result, it pulls almost like a diesel from a standstill, with peak torque of 630 Nm (465 lb-ft) available at 1,700 RPM. It requires only a slight throttle to reach 80 mph highway speeds. The engine feels like a more powerful version of the Duster 110 VGT, with no turbo lag, and the sound inside the cabin is also similar. Although the new Highlander and Grand Highlander also use this engine, it sounds more truck-like in the LC. Managing at city speed 30-45 MPH initially felt a bit tricky for me as the car accelerates with a slight throttle input. I was used to heavy foot needed for Highlander in similar situation. Because of the Hybrid, it gives almost similar MPG on city and highway use.
This car is equipped with Toyota Safety Sense 3 (TSS3), which includes Lane Keep Assist. Compared to TSS2, TSS3 more actively steers you back into your lane if you attempt to switch lanes without a turn signal.

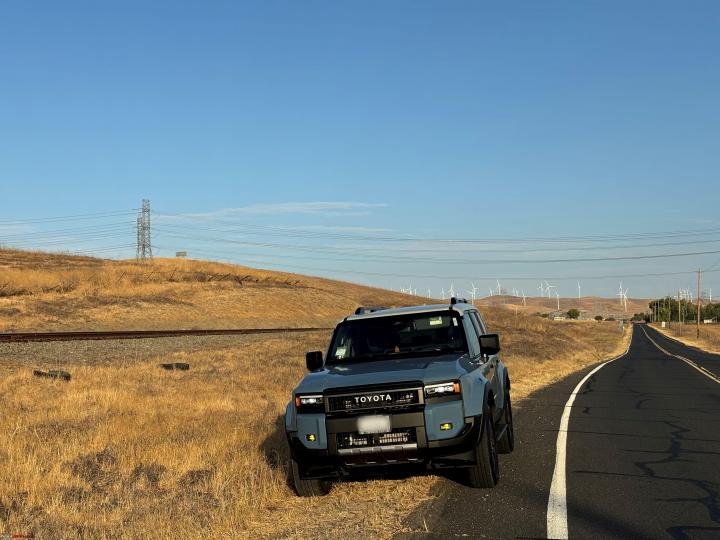
LC near a Wind Farm

Front View
The day after I brought it home, I drove to Santa Cruz with a full load of passengers, navigating curvy, hilly highways. It has slightly more wind noise than my Highlander, which is expected for this boxy shape. Toyota recommends premium fuel for this car, but I have seen on some forums that people are using regular fuel. The fuel tank is only 17Gallon which is smaller by any standards that gives around 300 miles range approximately.
I am still exploring its features, especially the tech features. I am planning to swap the 20-inch wheels with the 18-inch OEM ones, and I saw that some people are doing it on the LC forums. This is the only modification in my mind right now.
The Highlander was in such good condition even after 9 years that I wasn’t initially inclined to sell it. I tried to convince my wife to keep it for her use, but she doesn’t want to drive a big car and decided to let it go. The day before the sale, it reached its scheduled service mileage, and I didn’t want to skip the service even if I am selling it. So, I did the service, placed the ad, and the first person who came to see it ended up buying it.

Cup holders, USB charging ports, and AC vents for the non-existent third-row passengers.

Driver and Front passenger get Power controls
Here is my feeling after replacing the Highlander with an LC:-
What I miss:
- The third row for occasional use and the huge legroom in the second row.
- The smooth, quiet 3.5L V6 engine and its resonant sound at high throttle.
What I don’t miss:
- The lazy, slow-shifting 6-speed automatic transmission.
- The gas guzzling in the city and in traffic, with fuel economy dropping as low as 12 MPG.
What I gain with the LC:
- The fulfillment of my 35-year-old desire to own a ladder-frame SUV, inspired after seeing a Pajero SFX for the first time as a kid sometime during late 90’s
- An off-road capable SUV for my photography and road trips. While I may not get into serious off-roading, it provides a reassuring sense of capability when I see an unpaved road ahead. (Yes, I need better tires and wheels).


Check out BHPian comments for more insights and information.
News
Living with a 2008 LC Prado V6: Upgrades & restoration processes
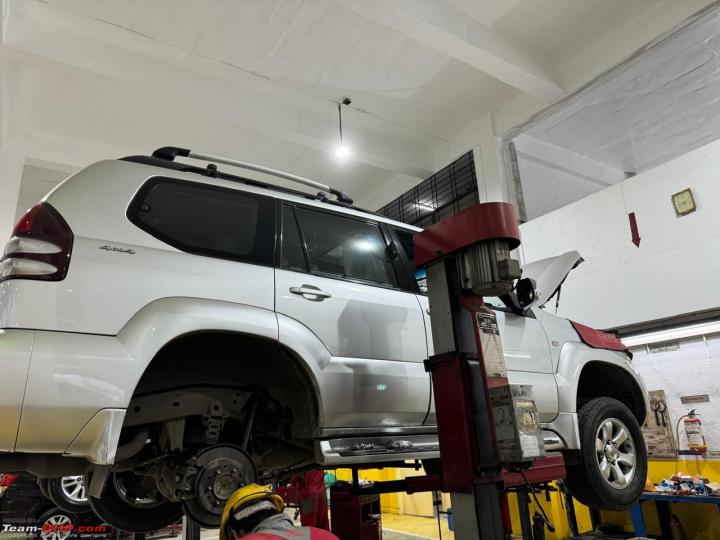
I have clocked ~ 10K kms in the last 1.5 Years which includes a few road trips
BHPian raj_1787 recently shared this with other enthusiasts.
As promised, I am back with an update on my journey with the Silver Rhino so far. The last post covered my experience of finding, evaluating, transferring, and restoring the Rhino. After all of this was completed, I was finally able to enjoy the Rhino from ~ Feb 2023. In this post, I will try to walk you through my journey of living with the Rhino, various projects that I executed on the Rhino, and the learnings that came associated with all of this.
This is going to be another long one and hopefully with tons of learning!
Sunroof Servicing: I noticed minor rusting on the frame of the sunroof glass. Upon investigating further, I found that the frame is indeed rusting and is in initial stages. The sunroof of Prado 120 has a design limitation and is prone to honeycomb-style rusting. The areas most prone to rusting are where the rubber, frame and glass are all glued together. I checked with Madhuban Toyota and researched on web, and found that all 3 parts (glass, frame and rubber) are sold as 1 SKU (~ INR 60K) and child parts are not serviceable. The design is such that it is prone to rusting upon ageing. There are numerous stories posted by Prado 120 and GX 470 owners worldwide on this topic. I discussed with Jatin at Wagenwerkz and he picked up the job. The rusted portions were cleaned by sanding, and the holes in the frame were repaired with filler. This wasn’t easy as the rubber cannot be separated from the frame and the entire job had to be performed very carefully, such that the rubber seal is not damaged. After cleaning and repairing the affected areas were painted with anti rust black paint. Thought the finish was compromised because of the anti-rust paint used, but it gave a few more years of life to the sunroof. The channels were serviced, and drains were cleaned. Spend ~ 4K
Brake Rotor, Pads and Check-up Service (Mid-Year): During the initial assessment it was reported that the front brake pads were non-OEM and the brake rotors were also just 25mm which is the recommended thickness for replacement as per schedule. I planned this with Madhuban Toyota and ordered for the Front – Brake pads and Rotors. Along with the brake rotor and pads replacement, also got the spark plugs replaced, (fuel system) throttle body cleaning done as a part of the check-up service. The engine was a lot more silent and smooth post plug replacement and fuel system cleaning.
The front wheels developed a brake squeal in a couple of days after replacement and the rotors had developed minor scratches. The rotors were resurfaced by Madhuban Toyota and the issue did not reoccur since then. Spend ~ INR 50K
Rear Suspension Air Balloon: The rear left suspension balloon started losing air and I observed this for a few days before taking the car at Madhuban Toyota. While there wasn’t any issue while driving, I am sure this was putting extra pressure on the air compressor. I checked service history and the balloon on RHS was replaced by the previous owner in 2021. There was no history of balloon replacement prior to that in the lifecycle. As days progressed, the leakage started worsening. On 15th Aug 2023, I took a solo road trip to Nanded through Samrudhi Mahamarg, and upon reaching Nanded when I parked the car, within 30 minutes, the balloon lost air. The very next day, I asked Madhuban Toyota to order for the replacement balloon. It was replaced within a week as the part arrived quickly. No issues thus far. Spend ~ INR 30K
Wheel Hub Caps: When I acquired the car, one of the wheel cap was missing, which I ordered for ~INR 3.5K at Madhuban Toyota itself. The other wheel hub caps also had some broken clips and were bound to fall off some day. I lost two of them during the trip to Nanded. Replacement hub caps were available on Amazon US/Ubuy for ~ 30$. I placed order on Ubuy, however the landed cost including shipping and duty was ~ INR 8K for a set of 4. Still cheaper than INR 3.5K a pc from Toyota.
Suspension Overhaul and 160 K Service (Annual): This was the most interesting project and took quite a bit of research and time. The whole episode started when I had given the car at Madhuban for Rear LHS suspension balloon replacement. From the history I had while acquiring the car, there were some remarks of weak suspension components (mostly rear suspension components). Hence, I requested Madhuban folks to do a compressive suspension assessment and provide me with the report. While the assessment carried out was more on visual basis, as some of the parts like Struts, ball joints can be assessed properly only upon dismantling the suspension. The report indicated that the struts are weak, bushes are worn out and the steering rack reported a leakage. There was a history of front struts replacement in 2017, and front UCA and LCA bushing replacement.
I decided to go for a complete suspension overhaul, as it would mean a more confident and comfortable highways cruises. I started my research by making a list of all the parts needed for the overhaul. The approx. cost if I had to go for all OEM Toyota parts was upwards of ~ 7 lakhs. Just to give an idea – Steering rack assembly ~ 1.5 Lakhs, all 4 struts ~ 2 Lakhs, front LCA ~ 50 K each, front UCA ~ 35 K each and so on.
I decided to dig deeper and connected with a few wonderful individuals for guidance and support. I connected with Viraat_13 (an enthusiast and a teambhp member) on his insta page – Viraat’s Automotive Garage, who also runs a garage in Delhi. Viraat was super helpful in guiding and arranging some parts for me. He was also kind enough and offered to send over his team to Mumbai to carry out the overhaul. I also connected with Mr. Virender from Automarc (Okhla, Delhi) to also seek guidance on the projects. These folks have immense experience on LC’s and were able to share their experience and recommendations on using the most suitable OEM/OEM supplier parts. These discussions really inspired me and instilled confidence in me to proceed with this project.
During my research I also came across a lot of examples (mostly in Australia and US), where suspension had been upgraded with non-OEM specs parts, and these were mostly performance oriented for better off-roading capabilities. I concluded that sourcing these performance parts will be challenging, expensive and finding someone with experience to carry out this upgrade and maintaining it will be a big task. I did meet Mineel at Mkraft who does Ironman, but for Ironman I had to convert air balloons to spring-based suspension in the rear. I wasn’t ready to let go of the comfort the ballons add to the ride and was keen to stick to OEM specs.
The consensus was that suspension overhaul can be done using OEM supplier parts as most of these parts are available from brands who are suppliers to Toyota. The only challenge would be to source these parts and source them accurately. Struts – KYB (OEM Supplier), Bushings and strut mountings – RBI (OEM supplier), there was an option of CTR also, but the feedback on web was not so great on CTR. Ball joints, linkage rods – the clear winner was 555. The steering rack assembly parts like rack end and tie and were also available in 555 at a much lower cost, but then Steering rack assembly had to be repaired with a steering gasket kit sold by Toyota only. Furthermore, I pushed Madhuban Toyota folks to repair the rack with the OEM kit, so they agreed to do so only on the condition that I put in the rack end and tie ends from them.
After almost three months of research, discussions and part sourcing, I finally gave in the car to Madhuban Toyota (with non OEM parts as well that were sourced by me through various channels) to carry out the overhaul. Here is the final list of parts that went into the Rhino after months of research to ensure that the right parts are being sourced. Thanks to Viraat, Virender ji, boodmo.com, amayama.com, partsouq.com and toyota-general.epc-data.com and size.name/en/catalog who were of enormous help during this research.
The who exercise took ~ 5 days as the whole suspension had to be dismantled, parts were sent for bush and ball joint replacement at hydraulic press, Steering Rack was sent for repair, all this managed by Madhuban Toyota. Thankfully, all the parts that were ordered were an absolute fit with zero deviation from OEM fitment. Huge shout out to Madhuban Toyota team – Ravi Parmar (not at Madhuban now but helped a lot), Swapnil, Aakash, Jafer Bhai and Pahadi Bhai (the technician who worked only the Rhino for 5 straight days, he has an experience of working on LC’s in middle east and hence I was super confident on execution)
As a part of the annual service, I also got ATF fluid/ATF strainer, differential oil, Coolant replaced.
Total spend including, parts (plus duty on parts sourced form partsouq), labour, annual service ~ 2.9 L. Out of this spend, suspension overhaul was ~ 2.3 L and rest was spent on the annual service, change of fluids, filters etc.
I had a road trip planned a week after the work was completed, hence I decided to drive the car a bit around the city, sent the car again to Madhuban for suspension retorquing. Once the car was back, I was off for my planned road trip to Nanded and Tadoba via Samruddhi Mahamarg. Oh boy, what a drive it was, planted and steady, even on the poor surface of the concrete expressway, my family was quite comfortable.
I am sure many of you would be aware of this, but I still want to share this learning that I had during this whole project – handling courier and customs during import. By default, in such cases, courier companies like Fed-ex, DHL will calculate the duty @~70% of the invoice value submitted by the shipper. Now in the fine print, if you read carefully, if you are importing these parts for personal use, and you can prove that you are an individual who has made the payment for these goods through your own account/card the applicable duty is @~40%. It added 3-4 days of delay as DHL was not very efficient, but I was able to save almost 30% duty on INR 85K (parts shipped by Partsouq.com). DHL did try to pull a fast one by adding demurrage for the period of delay, but I knew how to bring them on track, and they refunded the demurrage.
Audio Upgrade: This was another long project, which involved a lot of research, tons of learnings. The most important learning that doing an audio setup for an SUV especially a 7 seater is not easy. I had few basic expectations from this set up – 1) it should have a good sound stage for the driver and the front passenger, 2) occasionally the car is driven with all seats occupied, hence the audio experience for last row passengers should not be compromised when played at low volume, 3) and lastly when required the set up should be able to deliver the needed punch to make some noise.
I met various installers during the process and one key learning is that if you are procuring the products from the installer, then he will be biased towards his own interests/commissions/sales targets/inventory. Further, I also learnt that car audio set up is a bespoke set up and it is very hard to audition the products beforehand, especially in Mumbai.
One more important thing I learnt is that when it comes to car audio, there is nothing like a minor upgrade, either you upgrade properly, or you don’t do it at all. Anything in between will leave you demanding for more.
In my previous post I had already shared my experience with Motosounds (Ravi), Mulund and hence I avoided him this time.
I met Ramie from Sound Factors pro to discuss the setup, one major challenge was his availability – the guys is eternally busy, does high-end car audio and high-end home audio setups as well and really know his stuff. I met him twice and he had a contradicting PoV both times I met him on the approach and the products to be used. Few reasons I did not proceed with him was:
- No Consistency in the proposed approach both times I met him
- If your budget is ~ 1L, this guy may not be able to give you a value-for-money set-up, you really need to have deep pockets to be able to get best of this guy
- The setups he proposed had DSP as a must, and hence it limited the number of channels, and by this meant I will not be able to give the experience to last-row passengers if I do not go with a high-end DSP with 10+ channels.
Next, I spoke to Motorouge Dipesh and Manish, the guys sounded reasonable and had good reviews on the web. After much deliberation, I decided to execute step 1 –> 4 channel morel MPD 4.100 – 100 RMS per channel, and JBL GTO Stadium 930 (6X9) in the boot in a box. An amplifier was used to power the GTO’s in the boot and Helix L 62C in front doors. Nakamichi speaker wires and Scoche wiring kit for the amp was used. The idea of installing GTO’s in the boot was to bring the fullness in the sound as I was avoiding a subwoofer and to give the experience to last-row passengers as well. During installation I checked the GTO’s and the manufacturing date was of 2017 and the pair that was pulled out for installation had a manufacturing defect which I noticed. This was quickly replaced as they claimed they had enough inventory. I was worried about installing a 7-year-old inventory, but I was reassured by Manish that if there is any issue they are there to support.
The installation experience itself was below average – the installer, a contract worker and not a permanent, was inexperienced and damaged the dashboard trims while opening the trims. The line and length of the dashboard trims was damaged and after putting things back the OEM fit and finish was lost. The guy was in a tearing hurry as he had to do another installation, that he had booked with someone else. He claimed that Toyota had an issue with the dashboard trims and the OEM fit and finish cannot be achieved once opened. Manish was helpless and expressed his helplessness about the installer attitude.
Coming to the upgrade experience, while the GTO’s in the boot were booming well, the overall balance was still disturbed and I could not get a good sound stage in the front. Even the clarity was missing.
With this experience, I quickly started working on the evaluation of stage 2. I discussed with Manish and he proposed that we should change the HU as the poor source (Blaupunkt costa messa 900) is the culprit. He proposed Pioneer 5290 and I was ok with the suggestion as based on multiple reviews on this forum, it was by far a good choice. Another issue to be addressed was weak front staging and Manish proposed to install a better set of components in the front. I was in no mood of a cocktail and hence stuck to JBL’s. The components from the same series were JBL GTO Stadium 600C, however, they were not in stock and the new series was available – JBL Stadium 62CF. The advantage with this was the possibility of adding a plug-and-play mid-range for a much better front staging if it was needed in future.
I researched a bit and also took a quote from Winkel.com (another distributor in Mumbai). I got a better quote from Winkel and I told Manish upfront about it, Manish bettered his quote immediately and I went ahead with stage 2. I was clear that I needed a better installation experience, and Manish was in agreement. Manish proposed that I get the installation done from Fixwell. I was hesitant, hence I took feedback on Fixwell from Ramie. I was all green and an appointment with Surinder at Fixwell was set up. Manish sent the products over to Fixwell in Marol directly and the installation was completed in about half a day seamlessly. The line and length of the dashboard was also restored. Surinder and his boys did an amazingly neat job with this installation.
This looked like a major upgrade from what I had earlier, not to mention the Apple carplay that came in the pioneer unit as an added benefit. It took me a few days to get used to the new HU and fine-tuning. Front staging was still lacking, probably the rear JBL GTO Stadium 930 was overpowering the rest of the components of the set-up.
While I was quite happy with the install, there was an itch to move to stage 3, and then started the search for procuring the mid-range (JBL Stadium 32S was the only compatible plug-and-play upgrade, and I was ok with this. The question was the installation position as there were two options. Upon some digging I found that some GX470 came with a factory front 3way set up and it had the midrange in the door (sample image attached). I wasn’t too impressed with the OEM position of the tweeter or the proposed midrange, as the OEM positions would give me a compromised front sound stage. I decided to proceed with installation on A-pillar for midrange and tweeters after a lot of deliberations. Procured the pods for midrange and JBL Stadium 32s from Manish (Motorogue) and proceeded with installation at Fixwell. This time Pravin picked up the installation, and he spent a good 3-4 hours the result was an extremely satisfying installation. The front soundstage improved drastically.
The next few days, while I was enjoying the setup, a strange low-frequency rattle developed in one of the JBL GTO Stadium 930’s in the boot and was quite prominent at lower volumes. I contacted Manish and he asked me to drop the speaker at his shop at Lamington Road. Dipesh inspected the speaker and confirmed the rattle at lower frequencies. While Manish was trying to push back by saying that this is nominal and can be ignored. I was in no mood to compromise after spending so much of effort and money. Manish agreed to have the speaker sent at JBL service center. I wasn’t aware that I was in for an ordeal with this Moto`rogue’ duo.
After about 15 days of follow up, Manish told me that JBL is saying that the speaker has gone bad and cant be repaired and they will have to replace it. However they do not have a replacement set available right now. Every time I followed up a new excuse was cooked and handed over to me very sweetly by Manish. After a few weeks I was quite sure that since this is a discontinued model there is no point in waiting for the replacement. I asked Manish for the ticket number of the case logged with the service center so that I could directly deal with the service center and I was told that there is no ticket as they deal with the distributor and distributor deals with the service centre. I gave up and gave an offer to Manish to give me JBL Stadium 62CF in replacement of the GTO Stadium 930’s. He tested my patience for another two weeks. Finally agreed to give me the JBL Stadium 62CF’s at Rs 18K while the earlier pair was sold to me at Rs 16.5K. I told him that this is not a fair practice, but I had lost my patience by this time and paid him the difference to get the JBL Stadium 62CF’s delivered.
This was the start of stage 4 and probably the final one. I decided to put a sub in the boot and put the Helix L 62C in the boot and use JBL stadium 62CF in the rear doors for a better sound consistency in the front and middle row. Now I had to power 7 channels – 2 in front door, 2 in rear door, 2 in boot and 1 for sub so I needed 1 more amp that could run two components and 1 sub in bridge mode.
I evaluated a few amplifiers and zeroed on the Pioneer 8704 for the following reasons:
- It offered enough power
- Has a subwoofer bass control knob
- And was compact in size for an underseat installation.
Took quotes from Manish, Winker and Fixwell for the amplifier. Fixwell and Winkel offered comparable prices, so I asked Surinder at Fixwell to order for the amp. The amp arrived and installation was decided to be carried out the following Sunday. Surinder asked Pravin to dedicatedly work on Prado and the install was completed by around evening.
The final set-up was an absolute bliss and I drove away a happy man:
Here is the summary of all stages of the installation.
- Stage 0: Blaupunkt Costa Messa 900 HU, Helix L 62C in front doors, stock speakers in rear doors
- Stage 1: Morel MPD 4.100 powering JBL GTO Stadium 930 in the boot and Helix L 62C in front door. HU and stock speakers in rear door remain unchanged Done at Motorogue, cost ~ 40K
- Stage 2: Replaced Blaupunkt HU replaced with Pioneer 5290 and Helix L 62C components in front door replaced with JBL Stadium 62CF. (Helix L 62C goes in store for now) Done at Fixwell, Cost ~ 37K
- Stage 3: Added JBL Stadium 32S midrange added on the front pillars with metal pods. Done at Fixwell, Cost ~ 18K
- Stage 4 and Final: Added Pioneer 8704 amp, Kenwood KFC-W3009 Sub in boot and replaced rear door stock speakers with JBL Stadium 62CF. Removed JBL GTO Stadium 930 (gone bad) in the boot with Helix L 62C Done at Fixwell, Cost ~ 34K
- End State set up: Morel MPD 4.100 powering the front 3-way components (JBL Stadium 62CF + JBL Stadium 32S) and JBL Stadium 62CF on the rear doors. Pioneer 8704 powering Kenwood KFC-W3009 (had this sub with me in my Nissan Sunny for last 12 years, but wasn’t functional any more as the amplifier in sunny had stopped working, hence decided to reuse in Prado) sub in bridge mode and Helix L 62C in the boot.
Amp wiring – Scoche
Speaker Wiring – Motorouge used Nakamichi, Fixwell used Blaupunkt. Damping used (partial damping) – Vibrofilter, Silicon speaker baffles were also used for the door speaker along with egg crate foam behind the baffles
Roof LED bar install and Roof Carrier mounts replacement:
I always wanted a roof-mounted LED bar, and decided to go for it as I already had a 32 inch Lightbar which was procured from Aliexpress in 2017 and it is bright as hell.
I ordered a KC wiring hider for taking the wire from engine bay till the roof alongside the A pillar. I also ordered the mounting brackets to mount the bar on the roof rail. These were ordered on Amazon US and they were brought to India soon by someone travelling back.
The mounts looked great and I was also tempted to get these mounts for my roof rack as well, as the existing ones were cheap and had started rusting. I got these fabricated out of stainless steel by giving one of the mounts as a sample to a fabricator. He made an exact replica of the mounts and were very similar in weight, strength and thickness of the sheet.
I painted them Matt black over a weekend and subsequently mounted the bar and replaced all the mounts of the roof rack. I am now at peace that I don’t have to bother about rusted bolts as the mounting hardware is of a very high quality.
Had planned to get the wiring done by Jatin (Wagenwerkz)
Cost ~ 10k (not considering the cost of the LED bar as I had it spare)
Mounts ordered on Amazon
KC wire hider
Mounts fabricated for roof rack (Random Fabricator in Kurla)
wireless remote for Led bar
Interior Cleaning and Glass Polishing:
A thorough interior cleaning was long pending, especially with multiple projects and workshop visits, the interior was taking a toll. I decided to send the Rhino to Maxshine, Thane. Discussed the requirement with Mangesh and booked the appointment. Along with interior cleaning, I also asked them to polish all the 4 door glasses and the rear quarter glasses as it had minor swirl marks which were giving an ageing look to the car. While the interior cleaning was done (not the usual Maxshine stuff, it was a lower-than-average outcome), the window panes were not polished properly, and infact were damaged further. It could be due to a bad buffer pad, incorrect compound or poor workmanship, but the glasses became cloudy. I was told by Pritish that the cloudiness would settle in a few days. I waited for a few days, but it was the same and I decided to speak with Mangesh. Mangesh accepted that there could be an issue, but he claimed that glass polish is not successful. I disagreed with him as I had an experience with 3M and as per my experience glass polishing does remove minor swirls and scratches, it may not remove deep scratches but it will never make the glass cloudy unless done incorrectly.
I told Mangesh, that I will take the car to 3M and will get the glass polished again, Mangesh refunded the money, but was still not willing to accept that he could have done a substandard job.
I booked an appointment with 3M Mulund, and explained the issue to them. They tested on one glass. While the results were not 100%, but still the glass was better than before. The job was performed by 3M Mulund, and the glasses were looking much better than before. Since the weather had already become hot in Mumbai, it was decided that we will perform one more round of polishing in monsoon, as cooler weather is favourable for good results in glass polishing.
Cost – 2.5K paid at Maxshine (excluding the refund of glass polish)
4.5k paid at 3M Mulund
Battery replacement: The battery, though just about 3 years old gave up when the car was left unattended for about two weeks. Upon inspection it was found that the battery was also throwing out the acid. I decided to get the battery replaced immediately, as a precaution the battery tray was sanded properly and anti rust paint was applied on the tray as the acid from battery had damaged the pain on the tray, and the tray could have easily corroded in a few months.
Done at Wagenwerkz by Jatin.
Summary:
I have clocked ~ 10K kms in the last 1.5 Years which includes a few road trips - Mahabaleshwar (2 trips), Nasik (1 trip), Tadoba (1 trip) and Nanded (2 trips).
The car has grown on me in the last 1.5 years and I understand the machine much better. I can't say more, but Rhino is an absolute pleasure to drive.
To date, my TCO on my Rhino is estimated to be ~ 21L (everything included). While there is a part of me which says that is it worth to keep investing in such an old car, when I drive the car, I get my answers immediately.
I do keep looking out for tips to keep the Rhino young and in pristine condition and next on the line for preventive/proactive maintenance are the following:
- Inspection of Universal Joints
- Fuel Tank cleaning, replace filter in fuel tank
- Replacement of hoses as per maintenance schedule


Check out BHPian comments for more insights and information.
News
How to import a Land Cruiser Prado from Japan without involving Toyota?
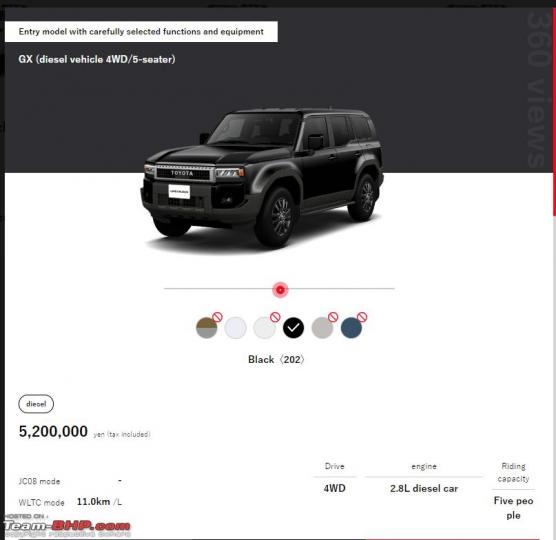
A top-spec Prado in Japan is 42 lakh, but in India, it costs 2.6 crores.
BHPian TorqueIndia recently shared this with other enthusiasts.
I was quite surprised by the pricing of the Toyota Land Cruiser 250 aka PRADO in Japan.
The SUV is priced at just 28L with 2.8L diesel+8 AT+full time 4WD+ADAS in the 5s variant.

The top variant costs around 42L in Japan, further while looking at the website reveals more interesting products with a wide variety of body styles and great value compared to Toyota India pricing (LC 300 is priced at about 2.6 CR in India)

The question is how can we import these products from Japan as they are available in RHD too, SIAM shows the tax structure for various imports including used cars.

Is there any option to import these Toyota cars without involving Toyota India?
Toyota India has a very thin portfolio with exorbitant prices compared to their global lineup, be it a local product, CKD or CBU product
Here's what BHPian Haze had to say on the matter:
28 L (Prado) + 110% import Duty (30.8L) + Shipping fees (3-ish Lakhs) + Customs clearance and permissions agent fee (1 Lakh) = 62.8 Lakhs
+ 15% Road tax (Approx) = 72.2 Lakhs
- Jeep Wrangler On-road price Delhi (Source Carwale) = 72.2 Lakhs
- Discovery Sport price On road Delhi = 78 Lakhs
- And these are before negotiations.
- And these have a manufacturer warranty.
- And parts availability.
Here's what BHPian Bhodrolok had to say on the matter:
If Toyota launches an LC 250 at 70 odd lakhs in India, they will not have room for the Fortuner to grow, so expect it at around 1Cr.
Here's what BHPian Asoon had to say on the matter:
Given Toyota's track record, this will not come below 1.1 Cr in India, So, 72L with all the hassle is worth this car. The day is not far when fortuner will be priced 75L and the buyers will wait in line for overpriced, feature, deficit, less comfortable SUV
Prado / LC brand is way stronger than the Discovery Sport / Wrangler. if priced at 72/ 75L this product will own the segment
Here's what BHPian TorqueIndia had to say on the matter:
There is an update from an importer in Mumbai,
It will cost around 215% taxes including 100% customs duty as claimed, members can verify this and give a clearer picture.
So LC 300 base petrol will cost around: 28Lx 3.15 = 88L
LC 300 diesel top end : 43Lx 3.15 = 1.35 CR

Check out BHPian comments for more insights and information.
- Tags:
- Indian
- Land Cruiser Prado
- Import
News
Toyota unveils 48-volt mild hybrid system for its turbo-diesel engines

Toyota states that the mild-hybrid system can handle water-wading depths of up to 700 mm.
According to a media report, Toyota has recently unveiled its latest 48-volt mild-hybrid system for its turbo-diesel engines. The new tech is expected to initially be offered on the Hilux and Land Cruiser Prado offerings, while the Fortuner could also get it at a slightly later stage.
Reports state that the new mild-hybrid system comes with two motor generators and a power split device. This helps make it compact and lightweight, allowing for easy integration with existing powertrains. The new mild-hybrid system also features a belt-driven electric motor, enabling quiet engine restart, smoother response and minimal vibrations. The electric motor also provides torque assistance, comes with regenerative braking to recharge the battery and is also capable of powering auxiliary systems like the steering, pumps & fans.
Toyota states that the mild-hybrid system can also handle water-wading depths of up to 700 mm, making it particularly suitable for models like the Hilux, Fortuner & LC Prado.
Toyota has announced that their 1GD-FTV 2.8-litre inline 4-cylinder turbo diesel engine on the Land Cruiser Prado will get the 48-volt mild-hybrid system in select European markets & Australia. The same engine also powers the Hilux & Fortuner.
Source: Car&Bike
News
2024 Toyota Land Cruiser Prado globally unveiled
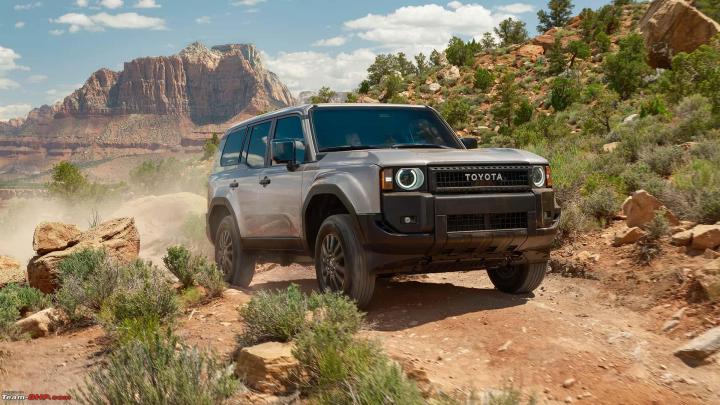

The new J250 Land Cruiser will also be priced more affordably than the full-blown LC300.
Toyota has taken the wraps off the all-new Land Cruiser J250, which will get the 'Prado' suffix in certain international markets.
The new Land Cruiser J250 comes with a completely new design, offering a retro look with boxy & upright proportions. The new SUV also marks the return of the Land Cruiser nameplate to the United States market, where it will rival the likes of the Ford Bronco and Jeep Wrangler. The new J250 Land Cruiser will also be priced more affordably than the full-blown LC300.
The new Toyota Land Cruiser Prado will come in different trims, with prices starting from $55,000. These trims include the base LC 1958, mid-spec Land Cruiser & the top-spec LC First Edition. Each variant comes with its own visual appeal to help differentiate each one. Further, the LC First Edition will be limited to just 5000 units and offer a more rugged off-road-ready appeal.
The new Land Cruiser Prado measures 4,920 mm in length, 2,139 mm in width and 1,859 mm in width. It has a wheelbase of 2,850 mm and a 221 mm ground clearance. The Prado is underpinned by Toyota's TNGA-F ladder-frame chassis.
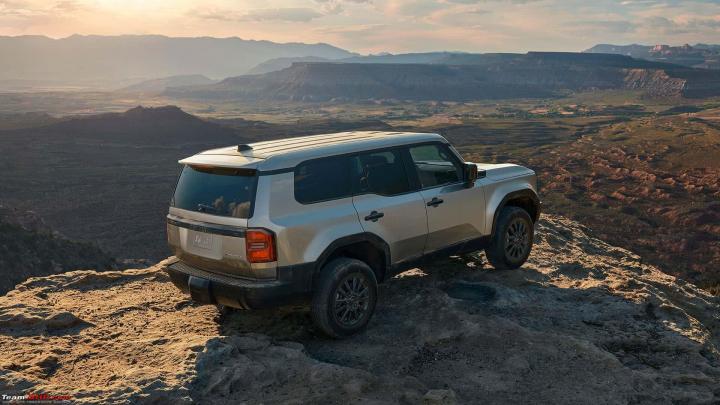
The 2024 Toyota Land Cruiser comes with a host of features and tech, both inside and out. This includes Toyota's Safety Sense 3.0, a 12.3-inch touchscreen infotainment system, moonroof, heated & ventilated seats, HUD & wireless charging; among others. In terms of off-road tech, the new LC comes with Multi-Terrain Select System, Downhill Assist, Electronic Locking Rear Differential, Crawl Control, Front Stabilizer Bar Disconnect System, Multi-link Rear Suspension System and more.
Powering the 2024 Land Cruiser Prado is a 2.4-litre 4-cylinder turbo unit paired with a 1.87 kWh battery pack. The powertrain produces a combined output of 326 BHP and 630 Nm and is mated to an 8-speed automatic transmission, sending power to a full-time 4WD setup offered as standard.
News
2008 Land Cruiser Prado: My purchase, restoration & ownership story


The landed cost so far including all of the above is ~ 15 Lakhs and my bond with the silver Rhino is growing stronger with each passing day!
BHPian raj_1787 recently shared this with other enthusiasts.
I start writing this saga as I sit on a plane from Mumbai to Delhi. I will try to make you live through the journey of rebirth of my “SILVER RHINO” as I have experienced over the course of the last few months. Please bear with me as this is going to be a long story.
This was somewhere around mid-June 2022 and I had been driving a 2016 XUV500 W10 AT for almost 3 years now. We had just completed a Mumbai – Uttarakhand – Mumbai drive with a group which had 4 cars – Land Cruiser Prado 120, Range Rover Evoque, a rental XUV500, and my XUV 500. While I was quite satisfied with my XUV 500 after returning from this trip, I felt that I should start looking for an upgrade if I had to plan for such long road trips so that these trips could be more comfortable for the family.
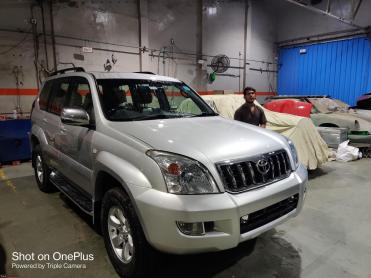
On a Sunday evening, while I was casually window shopping on the classified page of team bhp, I saw this very special post about a Land Cruiser Prado 2008 VX (2nd owner, 137000 on ODO, 4L V6 Petrol) which caught my attention and I sent a mail enquiring about the vehicle and shared my number in the mail, and I had almost forgotten about it. The next morning, while I was driving to the office, I got a call from the owner of the vehicle.
We spoke for a few minutes and exchanged notes on the details of the vehicle. Based on initial inputs collected over call and looking at the pics of the car, this seemed to be a genuine deal and the current owner was selling due to the 15 Yr NGT rule in NCR. I was, fortunately, travelling to Delhi in the same week, and we decided to fix up a meeting to have a quick look at the car and discuss further.
The First Encounter:
Based on a quick drive and initial evaluation my observations were the following:
The bodyline seemed neat, with a few scratches here and there but no major structural damage or rusting. Multiple panels were painted but that was expected given the age of the car and NCR traffic. Paint jobs were not that great though. The front glass had been replaced at Toyota ASS.
Though the drive felt nice (had to be – it is a Land Cruiser with 4L V6 petrol under the hood), the following were a bit worrying:
- Power Steering pump needed replacement – This was a known issue and the current owner decided to skip this as he had to sell the vehicle anyhow and was not keen to invest further.
- The steering Rack had a very minor play, possibly linked to the steering pump.
- Slight vibration in the brake pedal while applying the brake at triple-digit speed. This was possibly due to a non-OEM brake pad replacement which was done recently or a bad disk skimming job.
The interiors had aged well, but not maintained very well. The leather seats had cracks and the leather had faded at some places. Fortunately, none of the patches was torn. The head unit was aftermarket and OEM HU was preserved and available, trims around the AC vents on the dashboard were broken.
The right Rear Bumper fog light was broken, one wheel hub cap was missing, and one roof rail cover was missing.
Tyres were almost new, but were All Terrain and hence a bit of road noise.
The car was originally owned by the MD of Apollo Tyres, and the current owner was a CEO at an IT company in Gurgaon who himself is an enthusiast.
Documents were complete, including the original invoice and tax receipt which are required at the time of reregistering the vehicle in Maharashtra. The current owner agreed to get the NoC issued through his agent at his cost.
Overall, I got a feeling that the deal is genuine, and I decided to proceed further. Since I had to fly back to Mumbai the same day, I did not have much time for further evaluation. Hence, we both agreed that a friend of mine who is also an enthusiast will have a quick look at the car and we will decide on the next steps.
In a few days, my friend planned to meet the owner and further evaluate the car. My friend upon a quick inspection was impressed with the car, and we decided to close the deal. While we agreed on the commercial terms and handed over a token amount, we wanted to take a professional opinion before taking the plunge.
We did the following as the next steps:
- My friend helped me in getting access to the vehicle history from Toyota. We were able to get a complete history of the vehicle since the car came on the road to date. One thing was sure the car had been maintained at Toyota ASS, and while the regular maintenance schedule was done with a few minor repairs, nothing was seriously off in the car. There was a list of observations in the remarks section of the history which were primarily related to the steering, suspension, and brake work (which was performed outside ASS)
- Another friend (who also owns a 2007 LC 120) recommended getting the car evaluated at AutoMarc in Okhla as they are a Land Cruiser specialist in the NCR region. The car was checked by Mr. Virender at AutoMarc and as per him the only immediate thing that needed attention was the steering pump, rest all the observations from Toyota ASS could be ignored as the car was driving quite well. As per him even if we did replace the OEM steering pump and did regular maintenance, the car will be mechanically fit in under a lakh rupees. As a worst case, If we were to address every observation mentioned by Toyota ASS, the estimated cost could be ~ 3-4 lakh rupees. As per him, parts can be arranged either at Toyota ASS or from suppliers from Dubai/Thailand
The above two gave me a lot of clarity on what I am getting into with this project. Next was to evaluate TCO and the following were the components:
- Cost of car ~ Deal was closed at 10.25 Lakhs
- Cost of shipping/driving the car to Mumbai from Gurgaon. This was coming to around ~ 30K – 35K whether I was to drive the car to Mumbai (considering fuel, toll, hotels etc) or ship it through a car carrier
- Cost of reregistering the car in Mumbai and Insurance. I had gone through this process for my Nissan Sunny XLD 2012 just a few months ago and reasonably confident that this will not be challenging to execute. As per my agent, the cost of transfer was estimated at ~3.25 lakhs including tax of reregistration in MH, Green tax as the car was completing 15 years soon, agent fees etc.
- Mechanical Repairs ~ 1 lakh as per feedback from AutoMarc. While I had reasonable clarity on the cost of repairs, some parts of my brain still had a “what if” doubt. I budgeted another lakh for this "what if" element
- Cosmetic repairs, paint job and upgrades ~ while this had no limit, I was ready to spend around ~2 lakhs to make it look near perfect.
This was totalling ~ 15 – 16 Lakhs with a reasonable degree of confidence on the landed cost with a 10-15 % variability max.
All of this took about 6 week’s time and it was around July end when I decided to proceed with this project. By this time, we also had a new member in our family – our newborn son. We took it as a sign and there was a lot of excitement in the air. We decided to proceed ahead with this project.
The NoC Story:
After a discussion with the current owner, I made a partial payment to him and he agreed to apply for the NoC. Balance payment was to be made once NoC would come, and we could conclude the transaction. The process started around 1st week of September and was a roller coaster ride, with all that could go wrong, with the original RTO (HR 55) being shut down, Agent losing the original RC in the process, Agent Tantrums and whatnot. I had plans of getting the car before Diwali as it was also my birthday around that time and who would not want a Land Cruiser as a birthday gift, but god was testing my patience and there was still no sign of this getting concluded. I was losing patience and started following up a bit more aggressively with the current owner to put pressure on the agent and get the documents straight. While the NOC came in, the agent lost the original RC in the process. To get the duplicate RC issued, the NoC had to be cancelled and this was about to get into an infinite loop. I discussed this with my RTO agent, and he suggested a way out where we could get B Extract from the RTO instead of getting the duplicate RC. The existing owner discussed with his agent and after some to and fro he finally had the B extract in hand. We finalised a date to meet up in Delhi and conclude the transaction.
The Transaction and Shipment story:
While the date to meet and conclude the deal was final, a big question was how to ship the car. My heart wanted to drive down to Mumbai, but my brain suggested holding on and getting the car in the best of shape before taking such a long trip, especially with the current state of steering – it was quite hard due to the pump issue and the brakes juddering at high speed. I finally decided to ship the car through Agarwal Packers. We met in Gurgaon and concluded the transaction, thereafter I parked the car at the hotel where I was staying in Gurgaon. While my schedule was quite busy due to work, I decided to meet my friend who had helped me during the evaluation of the car. We drove the car a bit around in the DLF complex itself and called it a day post-dinner. Two days later the car was to be picked up by the movers, and that morning I decided to make a quick early morning trip to Gurdwara Rakab Ganj Sahib in Delhi before the packers pick it up. It was a pleasant winter morning in the first week of Dec and I could even enjoy the heated seats. It was a breeze to drive the “Silver Rhino” on the smooth tarmac of NH48 from Gurgaon to Delhi. The car was finally picked up by the movers and I flew back to Mumbai. It took the movers roughly 6 days before they could deliver the car to me in Mumbai.
The Assessment and Refurbishment:
This was the real test, where the actual assessment had to be done, quotations had to be taken and some more decisions had to be taken. I had established a connection with the service manager at Madhuban Toyota, Mumbai through the service manager at Randhawa Motors, Mumbai who used to maintain my XUV500. I got the car assessed at Madhuban Toyota and established a good equation with the service advisor and the service manager. The Advisor had worked in the middle east in the past and was very well-versed with Land Cruiser and this was a huge relief. A thorough assessment of the car was carried out and the feedback on the car was positive.
Following was recommended:
- Power Steering pump replacement – This was required, and I had known this from day 1. I asked them to check if there was a possibility to repair it, but the replacement was the only choice offered. Repairing was not recommended. The cost was ~ 70K
- Steering rack assembly replacement – There was a very minor play in the rack and no leakage yet. As per recommendation, this could be done a few months down the line and wasn’t the need of the hour. The cost was ~ 1.5 Lakhs. Repairing the rack could also be explored but that had to be at a FNG
- The upper arm ball joint boot was wearing out. The ball joint was healthy, and only boot replacement was required. Though a pair of upper arms was ~ 70K, replacing the ball joint boots was ~ 3K
- Front Brakes – The previous owner had recently changed the brake pads (non-OEM) and had also skimmed the disks, but this was done at an FNG and there was a bit of judder while applying brakes at triple-digit speeds. It was recommended to go for OEM brake pads as the brakes were underperforming due to the quality of brake pads (also blame it on the size and weight of this Rhino. The discs had no further room for skimming to eliminate the judder and were suggested a replacement. While there was no risk at city speeds, this had to be done before I decide to take this for a long road trip. I decided to postpone this expense till the next service. Estimated cost ~ 35K including front disks and pads.
- Scheduled Maintenance – A service schedule for 140K ODO mark was proposed and the following was to be replaced – Oil, Oil Filter, AC Filter, Fuel Filter
- Ornamental elements – A few ornamental elements were missing which the previous owner had ignored as he anyways parting with the car. The wheel hub cap on one of the wheels, and one of the Roof rail cover was missing, Both put together ~ 7K
The parts were not readily available and had to be ordered for which I had to deposit an advance. I deposited the advance, and the parts order was placed by Madhuban Toyota.
It took ~ 10 days for the parts to arrive and an appointment was fixed with Madhuban Toyota. The car was left at Madhuban Toyota and it took them 2 days to complete all the jobs that were agreed upon. Post repairs the car felt great, the steering was smooth, no whining sound from the steering pump and no unusual revving while turning the steering. The minor play in the steering rack also vanished, maybe because the new pump was providing adequate pressure in the rack.
Now was the time to address the cosmetics, although it wasn’t very bad, both the right doors which were repainted were showing up air bubbles in the paint, and there were a few scratches here and there on the body claddings. Before I planned further on the cosmetics, there was something that needed immediate attention. There was something wrong with the audio and the driver door speaker was jarring badly. I fixed up an appointment at Megasounds, Malad and met Ravi. I was very clear that I wanted to upgrade the audio in a staged fashion.
Currently, it was running on all 4 stock speakers and a Blaupunkt HU, which was a basic Android touchscreen unit – no Android Auto/Apple CarPlay. The previous owner had replaced it as the OEM HU did not have a Bluetooth/Aux jack and was a Pioneer unit with a cassette player and a 6 CD changer. The owner did hand over the original HU to me in case I wanted to switch back to the OEM unit. Ravi suggested that we replace the front two speakers with components, and then go for an amp and a sub later as required. His recommendation was Helix and I went ahead with the pair that he recommended.
The OEM speakers were Oval 6X9 inch units with a special frame, and the components were 6.5 inch round, hence a custom frame was created out of plywood to carry out the installation. The installation was done neatly, now was the time to test the output. The output was quite disappointing as the sound was muffled. And the rear OEM pair was sounding much better. Ravi tried tuning the setup using the equalizer but couldn’t do much about the output. The Helix pair will probably need a suitable amp to fire them up nicely, but this was not happening immediately. The good thing was that at least I was getting clean sound now and there was no jarring.
Now was the time to focus on how cosmetics can be improved. I took it straight to Jatin at Wagenwerkz, Marol. Though I wasn’t too happy with the quality of work that was done by his team on my XUV500, I was a little unsure if I will go ahead with him with this project. Having seen him deliver some excellent projects in the past and knowing that he does have an eye for detail and owns up to the outcome and does the job again if need be, I decided to take a leap of faith and trust him with this project.
I was not planning to do anything major on cosmetics and had initially thought of repainting the right side/front bumper and left side body claddings. When I Met Jatin, he proposed that for a much better outcome and a fresh look, we should consider an overcoat, but I wasn’t sure. Anyways, I had some time at hand to decide as Jatin was finishing the Alpha Romeo and Impala which were due to participate in a show in Baroda. He had asked me to give him the car in the first week of Jan as he will be done with the current projects by then. It was perfect as I was to go on a vacation with family around the same time.
After some more discussion with Jatin, we decided that we will go ahead with a full overcoat including alloy wheels repaint and Ceramic Coating. Jatin indicated that the car should be ready by 14th Jan. I was happy and started imagining a quick trip around Mumbai in Prado as my wedding anniversary was approaching in Jan third week. Things usually don’t go the way when you desperately want them to go your way – it was already the third week of Jan and the car was still being prepared to be painted. I was in no mood to put pressure on Jatin and wanted him to do things right. Jatin asked if I wanted some variation in the silver shade and gave a few ideas from the Mercs that he had finished in various shades of silver. I also discussed with him if we should explore a dual-tone option, where we choose a darker shade for the bumper and claddings and a lighter shade for the body panels. I started exploring if I could see any reference images of LC120s painted in dual tone but could get only one reference pic which wasn’t looking very appealing. We sampled a few shades and decided to proceed with Skoda Brilliant Silver. I also suggested that we paint the alloys in black, but then Jatin suggested we keep them silver as silver will make it look more sophisticated. Finally, the car was painted around 20th Jan and I received some initial pics. The shade had come out nicely, and I was glad that I could not see any waviness in the panels which was my biggest worry as they look ugly and give the car a very aged look.
It was then time to paint the alloys, bumpers and other external trims, which was also carried out in the next few days. The paint job was over in the next 4-5 days and now was the time to put the car together and start the finishing work. The process had slowed down a bit but I was glad that with every incremental update, the Silver Rhino had started looking better. The most challenging part of putting the trims back was the cladding around the car. Toyota has a very complex variety of clips which holds these claddings together. Every cladding has at least 5-6 types of different clips which are different shaper and colour depending on the placement. I was able to finally crack the code and ordered the required set of clips from a marketplace in Dubai. In the meanwhile, Jatin proposed that he fabricate the clips with screws and metal sheets and proceed with finishing the car and he would replace them with OEM clips once the shipment arrives from Dubai.
An additional light bar, dash cam and led projector fogs were also retrofitted while the car was being finished. The broken AC trims which I had sourced from Amazon US were also replaced.
Finally, after about 40 days of hard work, the car was ready to be delivered back home. I was travelling for work while the car was getting ready, but Jatin’s team kept sharing updates with me and I was glad the outcome was shining more than I had expected.
Waited for about a week for the ceramic coating to curate, and subsequently went to a 3M outlet in Mulund for a foam wash and rear windshield polishing as it had some wiper marks and scratches.
Now was the time for some more tender love and care for the interiors and I decided to go with the following:
- Steering wheel leather wrap by Orchis, Powai – A very well-executed and neat job done by Orchis. It took 3-4 hours to remove the steering wheel, and then fabricate the leather wrap and hand stitch the entire thing.
- Seats cleaning and refurbishment – While the interiors had aged well and looked graceful, I wanted to just give it a basic cleaning and try to polish the faded-out areas to make it look neat. After a bit of research, I zeroed in on a product by Furniture Clinic – Leather recolouring Balm which was available on Amazon US. In a few days, while a friend was visiting Seattle, I could manage to get this product delivered to his hotel and he was glad to bring it from me. Along with it I also ordered a rubber seal refurbishment oil by 303 which was much needed for a 15 yr old vehicle. Once the product came in, I decided to spend a weekend cleaning and polishing the seat and the results were quite good I must say. The faded white patch disappeared, the cracks were less visible and overall the interiors were looking fresh and beautiful.
The transfer story:
This part was rather smooth, though a two-stepped process as the car first had to be transferred and re-registered in Mumbai, and then I had to wait for the RC to be delivered to me so that we could submit the application for part 2 which was to submit green tax for lifeline extension. As I am writing this story the car has been transferred to Mumbai with a new identity and has also been given a lifeline extension till 2028.
The landed cost so far including all of the above is ~ 15 Lakhs and my bond with the silver Rhino is growing stronger with each passing day!
Stay tuned for some more stories about the Silver Rhino which I will share soon.
Meanwhile, sharing some pics in chronological order: Receiving the car from the previous owner, Work performed at Wagenwerkz, and the final outcome.


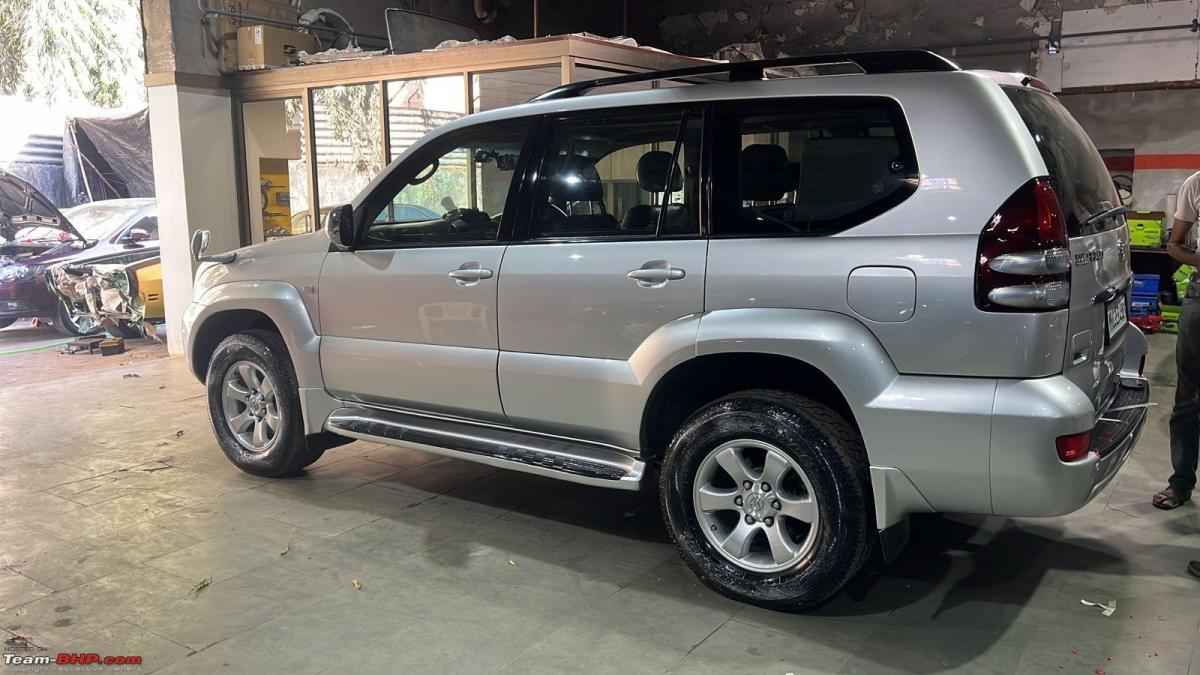


Check out BHPian comments for more insights and information.
News
In a Prado, V-Cross & Thar: From Padum to Leh via Singge La
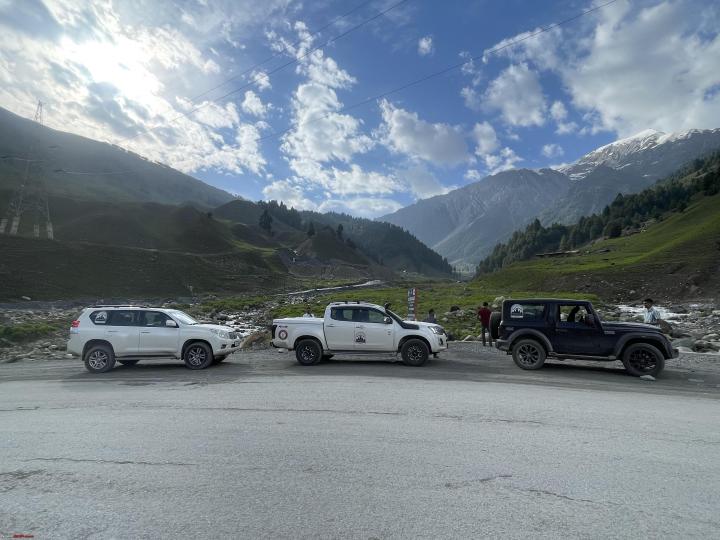
Total distance covered in 10 days was 2695 km.
BHPian raider9990 recently shared this with other enthusiasts
“Life begins at the end of your comfort zone” this quote stands true when you are in Ladakh. The voyage to the Zanskar was in my bucket list from a very long time. We had been to leh in 2021 and 2022 but this did not quench our thirst for adventure. It was decided to do Leh via Zanskar in the second week of June, 2023.
The vehicles that took us on this journey-
1.Isuzu Vcross
2.Mahindra Thar
3.Landcruiser Prado
4.Maruti Brezza (the last minute addition)

The itinerary-
Day1- Mohali to Banihal (462 km)
Day2- Banihal to Srinagar and then Stay at Sonamarg(171 km)
Day3- Sonamarg to Rangdum(247 km)
Day4- Rangdum to Padum (104 km)
Day5- Padum to Leh via Singge La and Sirsir La (240 km)
Day6- Leh city
Day7- Leh city to Thang village via Khardung La pass and then stay at Diskit(228km)
Day8- Diskit to Pangong Tso and then stay at Karu via Chang La pass (422 km)
Day9- Karu to Manali (393 km)
Day10- Manali to Mohali (258 km)
Things we carried along-
1. Tents
2. Sleeping bags rated at -20 C
3. Portable gas stove
4. Thermal sheets
5. Walkie talkie
6. Car inverter
7. Water cans
8. Eatables that would be sufficient for 10 days
9. Beverages
10. Medicine and first aid kit
11. Two recovery straps and 4 shackles
12. Air compressors
13. Shovel
14. Biodegradable utensils
15. Garbage bags
16. Cooking utensils
17. Tool kit and hydraulic jack
18. Postpaid Sims
All the cars were checked thoroughly as precautionary measure. Vcross was running BMC air filter, we swapped the air filter with stock air filter as from our previous experience it is easy to clean paper air filter than a oil based air filter.
Date of departure: 7th June 2023
Day 1 (07.06.2023) Everyone was instructed to meet at Starbucks, Kharar at 7:00 am sharp but as the saying goes ‘Good things take time’ some of my companions took this seriously. We finally left at 8:00 am from Kharar with Banihal as destination. Everything thing was going smooth, cars were cruising effortlessly and making up for time lost. Meanwhile it started drizzling and we had our breakfast near Pathankot, the hot coffee and rain made it perfect. We crossed into Jammu and Kashmir UT and soon after we crossed Lakhanpur border our prepaid sims stopped working. The traffic was increasing as we were approaching Jammu city and traffic problem stayed with us till we crossed the Jammu city. The road towards Udhampur was pretty good and we decided to have our lunch at Udhampur. Everything was going good till now. As we just finished our lunch we saw trucks had started their journey, the road which was empty just few minutes ago was filled with slow moving trucks. Prado and Thar somehow managed to reach Chenani Nashri tunnel while Brezza and Vcross was stuck in traffic. Brezza was in middle of traffic jam but Vcross managed to get out of traffic jam but there was still a very long queue to enter into tunnel. In the meantime Thar and Prado crossed the tunnel. After talking with some locals we( vcross) decided to go towards Patnitop as the road was good and there was no traffic but it was extra 30 km of travelling. We crossed Patnitop around 7:30 pm and again got connected to main highway. The problem of traffic jam was still there but traffic was moving though at crawling pace. Around 10:00 pm Thar and Prado reached Banihal , Vcross was around 50 km away from Banihal and Brezza had just crossed the tunnel. The road after tunnel was in very bad state. Around 11:00 pm, just 25 km from Banihal, front right tyre of Vcross bursted. The spare tyre was stock tyre ( 255/65/r18 ) while the car was running on 265/65/r17. The culprit was a piece of iron rod lying on the middle of road. We changed the tyre quickly and continued our journey towards Banihal. Vcross reached Banihal at 11:55 pm and Brezza reached Banihal at 1:00 am. We had dinner and straight away went to bed.
Day2 (08.06.2023)-Everyone woke up early, around 6:00 am. We wanted to leave early to avoid trucks. Last night, Vcross had one of its tyre ruptured and I did not wanted to continue journey on a different sized tyre. So we decided to change two tyres as the other two tyres were in good condition( I was running Falken Wildpeak 265/65/r17 on Vcross with mileage of 35,000km on them).After doing a little bit of research we contacted Prince tyres in Srinagar and they were ready to open their shop early for us. We left Banihal around 7:00 am and reached Srinagar around 9:30 am. The road from Banihal to Srinagar is beautiful and well paved. The Thar and Brezza left for sightseeing as it was their first time in Srinagar, meanwhile me and Prado went to Prince tyres. Earlier we decided to change two tyres but eventually we changed all the four tyres. We shortlisted three tyres- Yokohama Geolander G015(265/65/r17), Maxxis 980 AT( 275/65/r17) and Continental Cross contact Ax6(265/65/r17). We went forward with continentals on the Vcross. After installing new tyres we went to Dal lake area to meet our companions and had a hearty brunch at Bollywood curry, the food was good and service was great. After strolling around dal lake area for an hour , we picked up our mandatory coffee from barista and started journey towards Sonamarg. It usually take 2-2.5 hours to reach Sonamarg.The Sonamarg is the most beautiful place on the Srinagar-Leh highway. We reached Sonamarg around 5:00 pm.

We always wanted to camp at Sonamarg and also we had booked one hotel room at Barzman ( the owner is a dear friend and an auto enthusiast,owns a lovely Hilux) near our campsite. While half of our members went to hotel to freshen up , half of us decided to pitch our tents near the river. It was a lovely evening, while most of us knew each other there were some new members so the stories were being shared meanwhile we made some maggi and ready to eat butter chicken for evening snacks. The dinner was sourced from a local dhaba. After dinner we collected all the waste and put it in garbage bag we bought along. Everyone decided to take bath the same night as we had to leave early and running hot water is going to be a luxury in coming days. We called it a day around 10:00 pm and went straight into our tents.

Day3 (09.06.2023)- I woke up early to witness the sunrise. To my surprise some of our members were already awake. We boiled some water to make coffee. After witnessing the sunrise, some of us went to hotel to get ready. We were talking with owner of the hotel and he suggested we must cross Zojila before 8:00 am as he had received information that they will close Zojila today for some maintenance purpose. We left Sonamarg around 7:15 am and managed to cross Zojila before 8:00 am. The road to Zojila is in okay condition. There are few patches that are in rough condition but overall the condition is okay. At zero point of Zojila the temperature dropped to -1 C and was covered with snow.

We had some hot Kahwah to beat the cold. As per plan we had Padum in mind as our destination but destiny had other some other plan. As we were reaching Drass, the Landcruiser went to limp mode and then refused to crank. The car displayed low transmission fluid pressure. A army truck was crossing, he suggested that there was a mechanic just few kilometres away. We towed the Landcruiser to the mechanic. The mechanic had no idea about the problem or the car itself. Luckily the owner of Prado knew the car inside out and called his service guy at authorised service centre. He suggested to change the transmission fluid and see if the problem persists. We took matters in our hand. Fortunately, the mechanic at drass had atf fluid. We hijacked his workshop and tools and drained all the transmission fluid. Then we pumped new transmission fluid and all this took us 4 hours.

Prado finally cranked after few tries and we drove for 10-15 km around Drass. We were confident that the Prado can go further. We were back on road and the time was around 3:00 pm, so we changed our destination from Padum to Rangdum. The Prado drove just like before without any issue. We were stopped at a checkpoint, they entered our details and destination and allowed us to go further. The sun was coming down already and we were tired due to Prado ordeal. Slowly the road condition also changed. From paved road to off road, we were climbing steep climbs with full of mud and the sun had set already. We started to look for shelter at Purtikche and Panikhar but no avail and continued our jounrey towards Rangdum. We reached Rangdum around 9:40 pm and found a place named La Himalaya that offered luxury tents. We had our dinner and called it a day. I was about to get into my bed, when few of our members started feeling symptoms of acute mountain sickness.

Day4(10.06.2023)- It was around 5:00am when I received a message that one of the member who had symptoms of AMS had been throwing up all night. We gave him medicine that I had bought along after consulting a doctor on phone. After waiting for 3-4 hours when his condition remained same, it was decided that Prado will take him back to the Kargil where he can get required medical attention and we would meet in Leh after 2 days. Brezza also joined the Prado. Around 9:00 am Prado and Brezza left for Kargil while Vcross and Thar left for Padum.
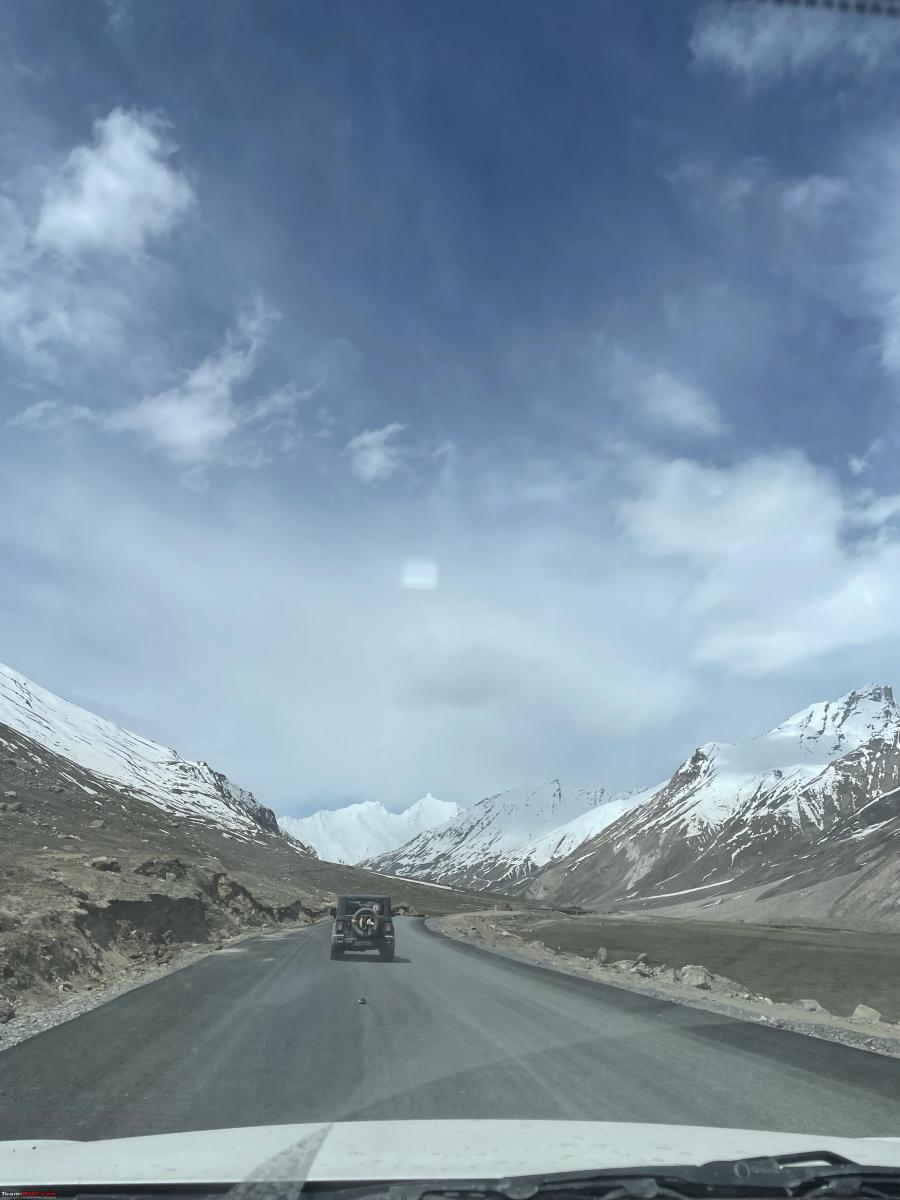

The journey from Rangdum to Padum ideally takes about 5-6 hours. On this stretch we crossed ‘The gateway to Zanskar- Pensi La pass’, this pass connects the Suru Valley to Zanskar Valley and around the same time we witnessed the magnificent Drang-Drung Glacier.

I don’t know whether it was a boon or bane, there were hardly any private vehicles on this route. The sun was shining bright and surrounded by snow cladded mountains we made some coffee and maggi near a small lake.

After the much needed coffee, we continued our journey, the road that passes through villages are narrow and in rough shape. We reached Padum around 4:30pm. There are plenty of options to stay at Padum but in Rangdum as well as Padum there is problem of electricity and running hot water is a luxury. We had early dinner and after sharing our experiences and stories we called it a day.
Day5(11.06.2023)- I am a morning person, empty streets and sunrises are my thing. I went on a brisk walk on the streets of Padum and this little town felt like straight out of a story book. After my walk, I went to check on the cars. Cleaned the air filters and did some vacuuming in the cars. As I just finished vacuuming got to know that breakfast was ready, after having breakfast we loaded our cars with baggage and were ready to hit the roads again. The road from Padum to Leh is not available on google maps so we had a physical map along with us.
The road was well paved and empty till Zangla. Near Zangla, we were stopped at a check post and they wrote down our details and destination.

After Zangla paved road turns to off road.

Then there is a stretch of road similar to Killar Kishtwar road aka The cliffhanger road.
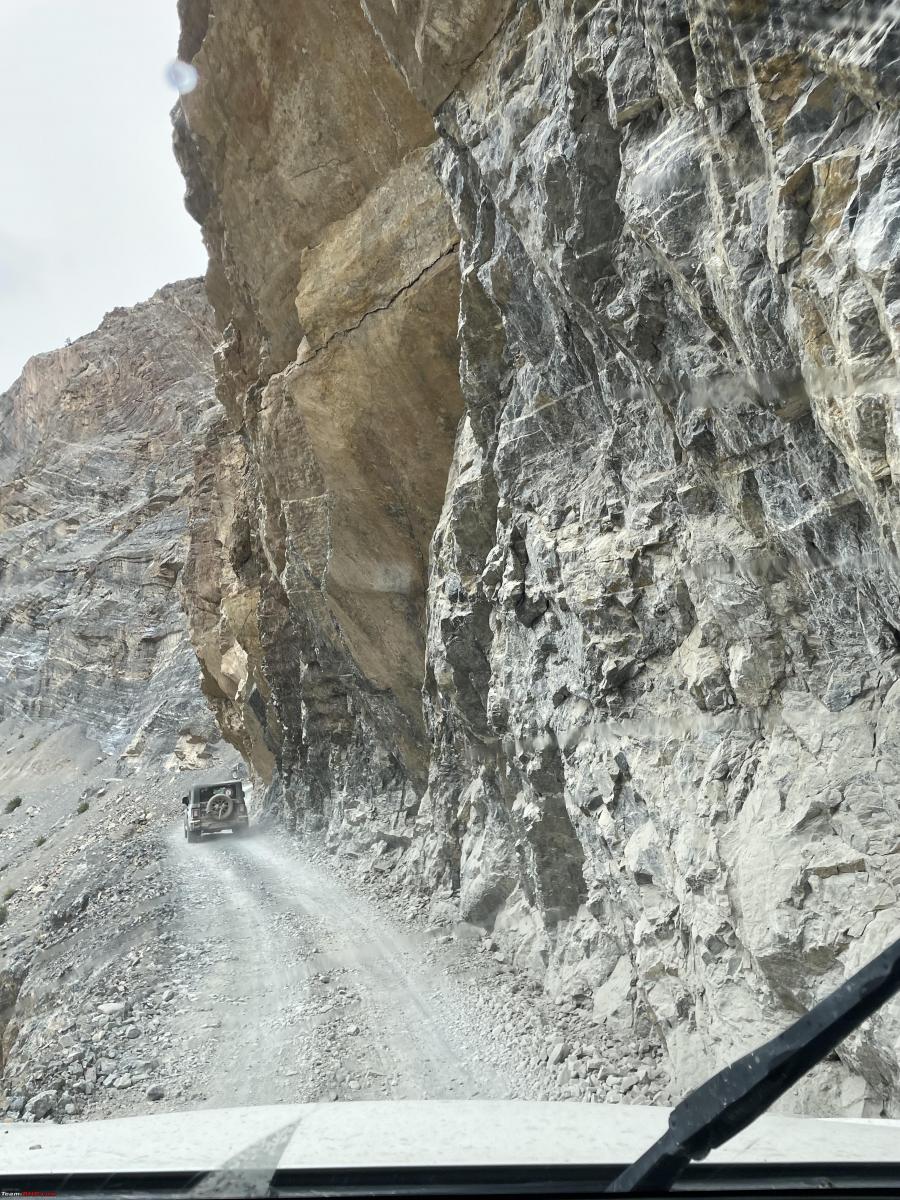
Two cars cannot pass each other simultaneously , so we had to be very cautious and careful. There were hardly any cars on this road, barring one army gypsy and 2-3 trucks we encountered. Around 11:00 am we reached the starting point of Singge La pass. The climb was pretty steep and unpaved road was not much helping either. This pass was very different from any other pass I have encountered during this trip or during my previous trips. It feels like you are climbing and climbing and there is no top. In the meantime it started raining, this meant snowfall at the high altitude. As we continued our journey further the conditions worsened,unpaved road had turned to offroad and the rain turned to snowfall and surrounded by dense fog. There were no cars on this route, just few bikers and JCBs for road work. There are no petrol pumps, mechanics, or medical assistance available anywhere on this route. Jio has good phone connectivity in the region but only works near the villages. There is no network reception at the top of Singe La Pass.


Continue reading BHPian raider9990's travelogue for more insights and information.
Pages
About Us