News
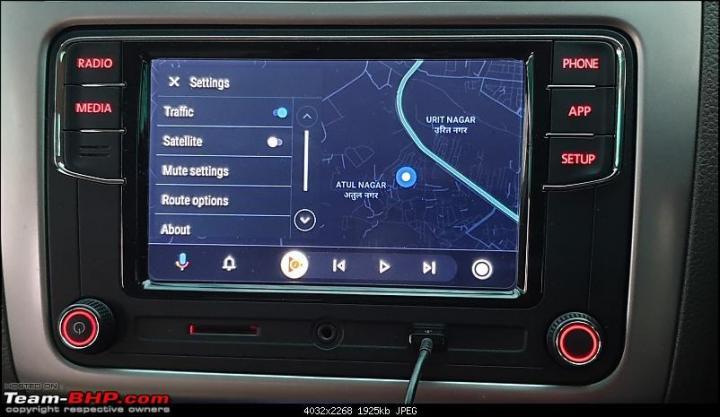
Android Auto disconnects on a particular 100m stretch of road: Cause?
This strange phenomenon baffles me completely.
BHPian RashmiRathi recently shared this with other enthusiasts.
Dear All,
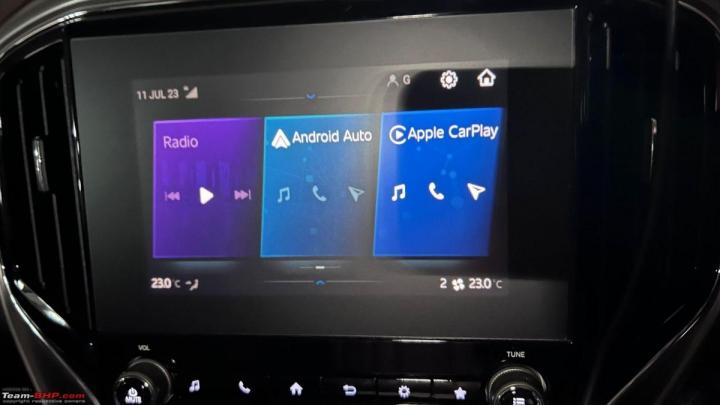
I stay in Thane. I have discovered that whenever I drive through this particular 100m stretch of road, my Android Auto connected to my Tata Safari through bluetooth gets disconnected for a moment. After passing this stretch it gets connected automatically. This has happened multiple times during various parts of the day.
Otherwise, Android Auto is working very good and there is no disconnection problem.
This strange phenomenon baffles me completely.
Can any auto experts or electronic experts in this forum throw light on this .
Here's what BHPian Kosfactor had to say on the matter:
Android Auto relies on WIFI once the connection is established through bluetooth from what I have seen the phone does. So if your phone finds a known WIFI network in that area it may disconnect from your car and connect to that one - that is one possibility. Other than that it could be some sort of radio freq interference in that area like some places where your keyless entry systems stop working etc.
Here's what BHPian tilt had to say on the matter:
This reminds me of the following complaint to Pontiac:
“This is the second time I have written you, and I don’t blame you for not answering me, because I kind of sounded crazy, but it is a fact that we have a tradition in our family of ice cream for dessert after dinner each night. But the kind of ice cream varies so, every night, after we’ve eaten, the whole family votes on which kind of ice cream we should have and I drive down to the store to get it. It’s also a fact that I recently purchased a new Pontiac and since then my trips to the store have created a problem.
You see, every time I buy vanilla ice-cream when I start back from the store my car won’t start. If I get any other kind of ice cream, the car starts just fine. I want you to know I’m serious about this question, no matter how silly it sounds: ‘What is there about a Pontiac that makes it not start when I get vanilla ice cream, and easy to start whenever I get any other kind?”
BTW, the "problem" was solved
Here's what BHPian hrman had to say on the matter:
Probably some form of radio frequency interference. I face this in my KIA Sonet, whenever I pass through a particular stretch near South India mall on BG road, Bangalore. I incidentally changed my phone (not due to this and the new phone also disconnects from wireless android auto at the same stretch.
To circumvent this, I now connect it through wired AA, since this happens in my daily office commute. Losing the music or calls while driving is a bit irritating.
Not a solution to your issue but you are not alone.
Here's what BHPian speedmeister had to say on the matter:
This is due to interference in the 5GHZ spectrum, happens in almost all wireless android auto systems. Try connecting to 2.4GHZ spectrum if you have that option.
Check out BHPian comments for more insights and information.
- Tags:
- Indian
- Android Auto
- Tata Safari
News
My experience using a Carlinkit T-Box Android Lite Box in my MG Hector
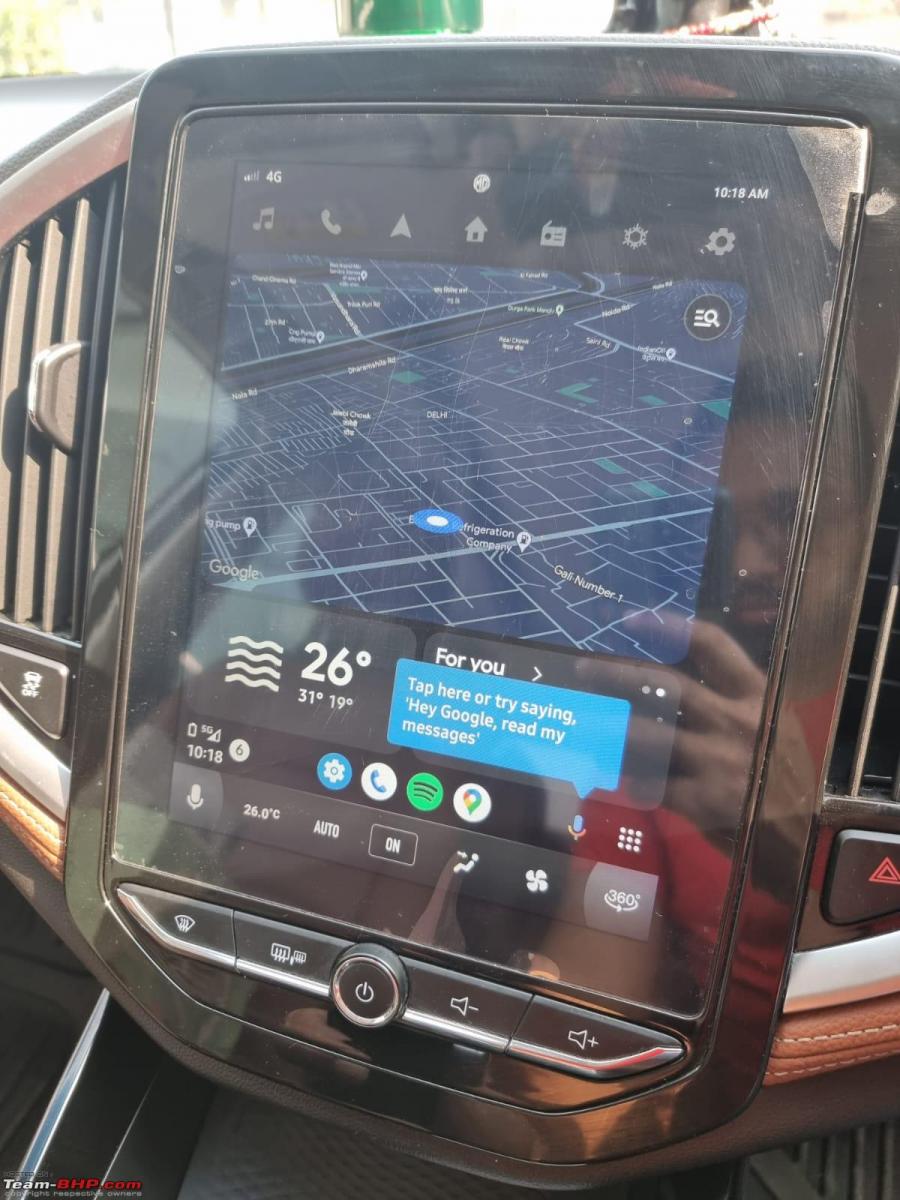
It integrates very nicely with the existing infotainment functions. Retains the AC control bar at the bottom and 360 camera functions launch as expected.
BHPian Nonstop-driver recently shared this with other enthusiasts.
I went to the service centre last week to get the D to N jerk checked. At first, the advisor tried to brush it off as normal but when we compared it against other Hectors, it appeared that the jerk was present in all but was amplified in my vehicle.
Then they spent almost the entire day checking the CVT, transmission oil, mounts, spark plugs, error codes and whatnot. But nothing came out of it. Ultimately I was advised to keep driving and report back if there were any issues.
Considering the complex vehicle that it is, I decided to close the chapter fearing they would break something else trying to fix this. Got headlights re-focused and they changed a brake pad (didn't even ask to). Bill was 0 as the elite maintenance package covered it. Got the ceramic coating touch-up done (last service of the 3-year package).
In a separate update, purchased a Carlinkit T-box Lite Android dongle and was surprised to see that it runs full-screen Android OS, Android Auto and Apple Carplay by default without any scaling or resolution issues. The dongle has 3 functions:
- Runs an Android OS on the headunit. In the basic model, you need to give it a hotspot, advanced models get a SIM slot. This means with just a hotspot, the headunit can run Google Maps, Spotify, etc.
- Wireless Android Auto. Same thing as above but now your phone heats up more and the battery drains faster.
- Wireless Apple carplay. Didn't try this yet but the reviews say this is integrated even better.
Integrates very nicely with the existing infotainment functions. Retains the AC control bar at the bottom and 360 camera functions launch as expected.
Other than the pros, 2 cons:
- Takes about 30-60 seconds to boot up after the MG boot-up
- Uses the USB port under the screen so the phone can't fit the wireless charger unless I remove the phone cover.
I have a trip planned to Chandigarh and then to Kangra later this week. This will be the first long trip in Hector. Planning to write a full purchase and ownership experience post that and click some nice pics as well.
Check out BHPian comments for more insights and information.
- Tags:
- Indian
- MG Hector
- MG Motor
- Android Auto
News
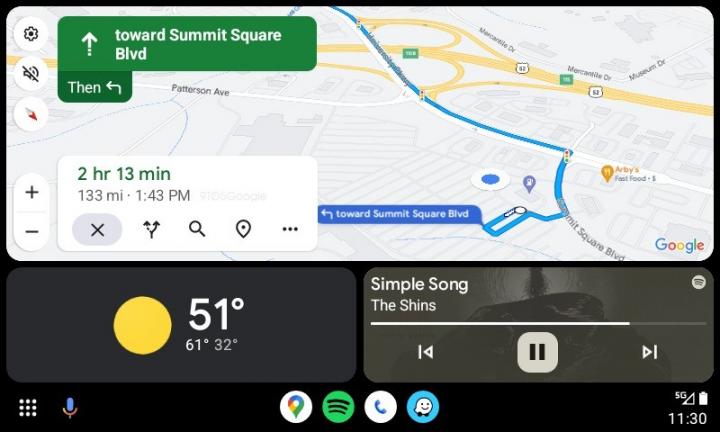
Google Maps starts rolling out improved UI on Android Auto
Android Auto users should slowly start receiving the update as the company completes the testing phase.
Tech giant, Google, has reportedly started rolling out an improved UI for its 'Google Maps' app, when running on Android Auto.
As per reports, the updated Google Maps comes with a significant UI update, giving it an almost fresh look. The app is said to have plenty of visual refinements which give it a cleaner and more modern look when running on Android Auto. Some of these new updates include new iconology on the floating bottom panel, better highlighting of essential information such as time to destination, easy access to settings & alerts and a newly designed zoom-in and out button on the lower left corner.
Apart from the visual refinements, Google has slowly been adding a number of new features recently. These include "eco-friendly routes" which now consider more factors when calculating the best route for a destination. This includes increased focus on fuel consumption, road incline and traffic conditions. Google claims that this feature helped reduce emissions by the equivalent of taking half a million cars off the road.
Google Maps also recently introduced "Immersive view" for a number of locations. This feature provides a multi-dimensional view of locations to help drivers get familiar with the areas before they even begin driving.
While Google has remained mostly tight-lipped about the redesign of the Maps on Android Auto, users should slowly start receiving the update as the company completes the testing phase.
Source: AutoEvolution
News
Study: 50% car buyers won't buy a vehicle without connected tech
The McKinsey study analyses the preference of both ICE & EV owners, which is said to differ significantly.
Connected technology is increasingly becoming an essential part of modern vehicles. New car buyers now expect access to online streaming services, over-the-air updates and real-time navigation in their vehicles. Having said that, most car owners prefer using smartphone-integrated features such as Apple CarPlay and Android Auto, instead of factory-installed apps & services.
The importance of Apple CarPlay and Android Auto has increased so much that a new study by McKinsey states that 50% of new car buyers won't even consider a vehicle without these connected features. However, carmakers are slowly moving away from offering Android Auto & Apple CarPlay support, which reports suggest doesn't look like a smart move.
As per the study, customers are used to having these smartphone-integrated interfaces, and an overwhelming 85% of them prefer it over the built-in OEM system. This could become a problem for carmakers who insist that customers use their built-in connectivity features.
Tesla started the trend of not offering Android Auto or Apple CarPlay in their EVs. However, owners unanimously state that the brand's navigation and apps are at least as good as the smartphone features, hence, most don't consider either Android Auto or Apple CarPlay a priority.
The same though can't be said about other carmakers. Rivian is refusing to offer Android Auto and AppleCarPLay despite desperate requests from owners. The EV maker's current interface is said to be patchy, but the company believes its software will improve, and in the near future its customers won't feel the need to have smartphone-projected apps.
The McKinsey study analyses the preference of both ICE & EV owners, which is said to differ significantly when it comes to software & connectivity issues.
Source: AutoEvolution
News
Added Wireless Apple Carplay to my decade old BMW: Here's how
There is nothing fast you can do here. This Road Top upgrade needs time and patience. No way you are going to do this in 30 minutes as shown on You Tube.
BHPian sandeepmohan recently shared this with other enthusiasts.
This post is about a Apple Car Play/Android Auto box install. The product is made by the ever popular and known brand called Road Top. I think there are a few Audi users here who’ve done the install.
Road Top decoder box for CIC HI enabled Head Units
My car is a Japanese Import of a 2013 328i sedan. The idrive is practically useless in this day and age. The only thing working or doing its job being the radio and Bluetooth audio streaming. While the inbuilt navigation was updated by the dealer to New Zealand maps, it is a pain to use and outdated in terms of knowledge of roads.
For BMW’s and maybe even most other cars, the compatibility of Road Top products depends on the generation of your car stereo. The stock BMW head unit I have is the older generation one known as CIC HI. Make sure you order the right one. The plus side is that the chaps at Road Top are proactive online and you get a response to a query fast.
I went with the usual box unit where the stock head unit plugs into it and you link the car’s stock center console display to the Road Top box. They have another version where the entire screen is replaced to a touch screen unit and the hardware is also housed in that new screen (No external decoder box). I did think about. The cost was quite a bit higher which is why I didn’t buy one.
I attempted this as a two part DIY. Thanks to several users on the tube who’ve shared their install process. This helped immensely. The hardest part of the job is unmounting/refitting the glovebox, followed by all the cable routing required more for CIC HI head units. Units after this such as the NBT and Evo series are a little less complicated to install.
Challenges faced:
- Routing of the Aux audio cable from the Road Top unit to the center armrest console, where you have a USB and Aux input. This needs to be plugged in else there won’t be any audio.
- Tapping the stock mic from the roof liner with the Road Top supplied mic jumper cable and routing it through the dashboard.
- Tidying up all the wiring can be time consuming.
- This part is specific to my car only. Being a Japanese import, the previous owner had fitted what looked like another Apple Car Play/Android Auto box, which ended up being a TV Tuner sort of thing as I later discovered. Removal of this unit took time as I had to trace all the wiring and not cut off, remove anything by accident.
- Dropping and refitting the glovebox
Tools:
- A trim Removal Tool
- A T20 and T25 Torx screwdriver
- A small reversible ratchet wrench which can handle T20 and T25 screw heads and sockets
- A motor driven screw driver, if you can manage. Makes the job a whole lot easier, as I later discovered.
- A lot of patience
- Fine work Gloves or Band aid. Brace yourself for a few small cuts and bruises
DIY Part 1 : Started and Abandoned
I started with pulling off some of the dash trim, which came off as expected based on all the footage I had watched. Disconnecting some of the cables, especially the center console screen can be hard as the cable length from the head unit isn’t much. Plus, the cable is a tight fit behind the screen.
You go in this order for all the trim removal:
- Ambient lighting plastic trim unit below the Climate Control
- Removal of center console AC vents. This starts from the passenger side to the middle. It is one long piece. Does pop of easily. You have two cables to release in this step. The Hot/Cold air mix and the Hazard Light/Central Lock switch.
- Unscrewing of climate control unit and removal of the control cable
- Unscrewing the head unit
- Removal of the lower tray unit, below the glovebox.
- If you’re car has a knee air bag, then you need to remove this.
- Dropping the glovebox
In all of the above, I’d say dropping the glovebox was the hardest. 9 screws secure the glovebox and they are not easily accessible, which is where a motor driven tool comes handy. Mounting back the glovebox can be a challenge.
Fortunately (or unfortunately) my car did not come with a knee air bag unit so I had one less thing to worry about. Removal or unmounting of the air bag unit is required to gain access to 2 of the 9 glove box screws. If you do have an airbag unit and need to lower it, I’d recommend disconnecting the battery. All you need to do is lower the air bag unit. Don’t disconnect the cable that goes to it. In general, I’d say disconnect the battery before you start this DIY.
After removal of all the trim, I found what looked like an Android unit already installed plus another unit that looked similar to it, right above the glovebox. It had the same LVDS video cable connection and a dummy cable sitting behind the air vents. I tried to look into the routing of all the wiring and could not figure it out. It was frustrating. I wasn’t sure if the unit was active. It had a label on the unit that said Parking Assist feature. I wasn’t sure if the car’s reverse camera was connected to this unit. Not all versions of the 3 series had a factory reverse camera. Some were aftermarket installed. Without knowledge of what wires I could remove or even remove this unit, I decided to put a hold on this DIY. This unit was hidden in the section towards the left of the cars stock head unit. I took some pictures of the unit, did a bit of googling for a whole week, looking at wiring diagrams, etc. Figured out the box was linked to a Pioneer TV Tuner unit. These were popular in Japan back when this car was new. The previous owner must have installed this. Once the car was imported in to New Zealand, they disabled the unit. However, I could see a power lead running to the Pioneer TV Tuner box.
DIY Part 2 : Started and Completed. Between 5 and 6 hours of time.
Getting started was easy. I had removed all the dash trim as before. This time around, I had a Bosch Go electric screw driver. Made a world of a difference.I traced all the wiring for the Parking Assist box to the Pioneer unit and removed whatever I could, including the decoder boxes. As expected, nothing was connected to the cars main head unit. However, rogue cables were running everywhere. There’s still some excess cable which I decided to leave in the car such as 4 TV Antennas as the routing was going all the way from under the dashboard and towards the lower trim, besides the passenger front seat. They were also zip tied to some of the cars original wiring harness. I was nervous touch anything that could disturb this setting. One error with cutting or removing any of the cars stock wiring on these complex Euro cars and you’re done with the car.
First step was connecting the Road top power cable harness with the stock harness behind the head unit. This is pretty much THE main cable where everything plugs in and works. The process can be a little hard as stock cable play is minimum and the head unit is rather heavy. The stock head unit harness can have a optical fiber cable on it (some of them don’t). You need to transfer that green optical cable onto the power harness cable that Road Top provides. This is relatively easy. The next part requires plugging in one end of Road Top’s power cable harness to the stock harness and the other end to the stock head unit. There is one more end of this cable which plugs in the Road Top decoder box. Sufficient length is provided.
Next step is taking the LVDS cable from the head unit (Was connected to the stock car screen) and routing that to the Road Top decoder box. Another LVDS video cable goes from the decoder box to the screen. This cable is provided by Road Top.
Next is taking the Aux Audio cable from the main Road Top power cable harness, routing in through the center console which has the gear shifter and plugging this into the Aux input below the arm rest. Some cars have this, some cars don’t. If you have a USB, Aux input below the center armrest, you need the aux cable connected, else there won’t be any sound. Videos show removal of parts of the center console to route the cable below the unit. I took the easy path and just routed it via gaps on the side of the center console, where it meets the cloth trim of the car. I used a little stiff copper wire to pull the cable into armrest area. Its not perfect but does the job and there are no cables visible externally.
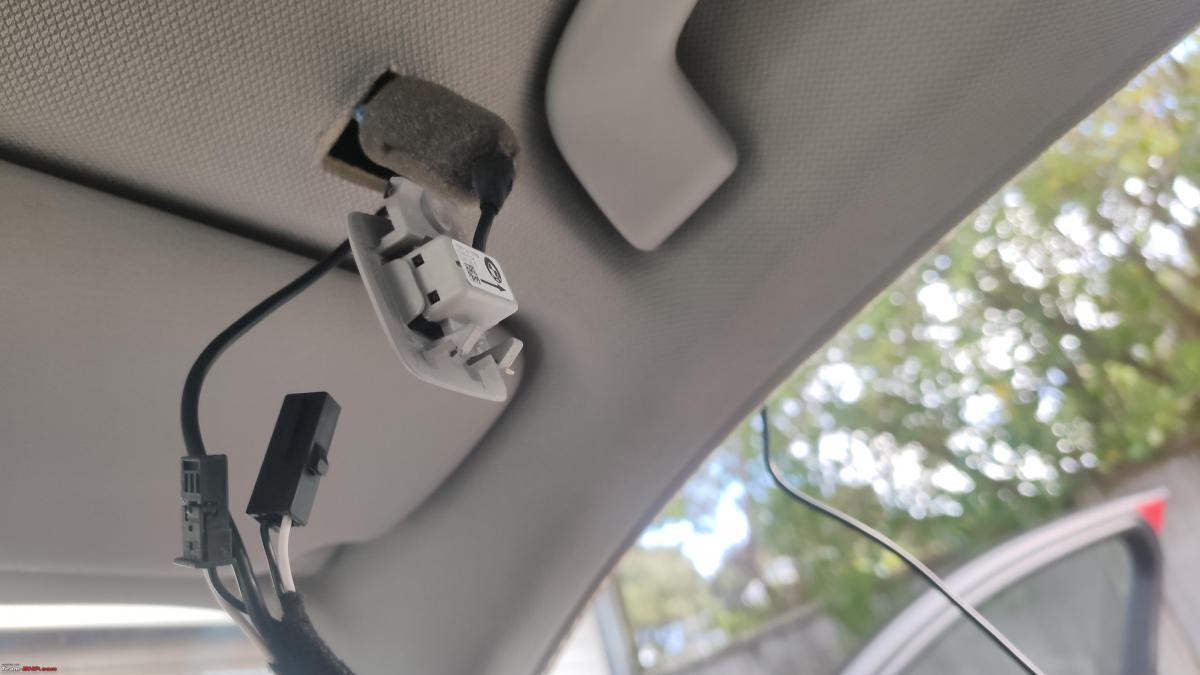
The next bit is taking the Road Top supplied mic jumper cable and plugging that into the mic on the roof liner. I did this on the drivers side. I don’t know if you can do it via the passenger side instead. It will make routing the cable a little easier as you’ve dropped the glovebox. Once again, this is a requirement for the CIC HI stock head unit equipped cars. NBT and later probably don’t need this step. You need to pull out a little plastic trim on the side of the dashboard and pull away some of the door rubber trim leading up to where the mic is located. The mic pops off easily with a trim tool. Disconnect the mic from the stock wiring harness. Using the Road Top supplied mic tap, you need to plug one end into the mic and the other end into the stock wiring harness. This ensures you can continue to use the mic via the stock iDrive system and Apple Car Play/Android Auto. Routing the mic cable via the roof liner and A pillar needs some care. I used a little copper wire to get over the A pillar air bag and pull the mic cable over this and down the A pillar. This mic cable needs to plug into the Road Top wiring harness. I used the same copper wire to pull the cable behind the dashboard and through to the other side of the glovebox. Tuck the cables and push the mic unit back into the roof liner, run the mic cable along the A pillar trim, put back the rubber door seal trim and put back the side dashboard cover we removed earlier. This whole process is relatively easy. Take care around the air bag unit is all.
Next up is the USB cable and WIFI Antenna. While you don’t need the USB cable for wireless car play or android auto operation, you do need this for future system updates Road Top may send out. I needed the USB cable as my phone is running Android 10 and wireless Android Auto is available only on versions 11 and higher. I tucked the usb cable on the side of the center console, on the passenger side. The Wifi Antenna is stuck to the center console.
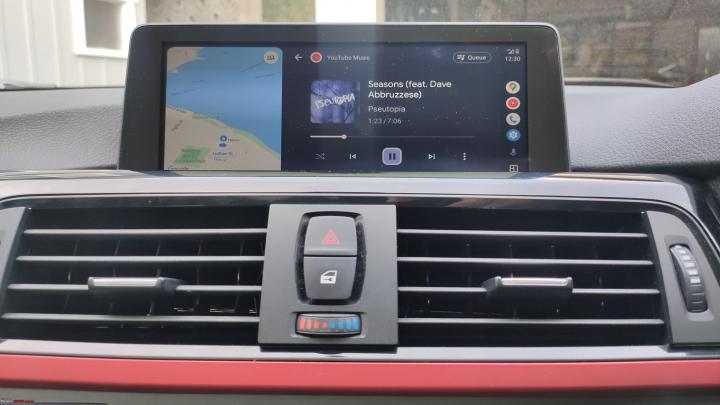
With all the cable work done, I decided to test the system out before doing any cable tidying, routing and putting everything back. Started the car and the usual iDrive screen popped up. A good sign. Next was to hold down the menu button on the iDrive controller for a couple of seconds. This takes you into the Road Top decoder unit settings where you initialize Car Play/Android Auto. As my method of connection was wired, it worked at the first go. I was quite thrilled to see Google maps load up full screen. The resolution, color rendering and quality of maps is surprisingly good for such an old idrive display unit. You use the idrive controller to navigate around the screen. Super easy to use and there is zero lag. The one thing odd I found with Android Auto is that you don’t have all the Apps on your phone available on the screen. I found only a handful of them. The essentials are there so I am not worried. I got YouTube Music App which is all I care about. Maybe there is a way to get all apps visible. Steering wheel controls work. You can navigate the display using the scroll wheel, adjust volume, trigger Siri/Hey Google, Take/Reject calls. Everything works as advertised by Road Top.
You need to disable or unpair your phone Bluetooth to the cars iDrive system and enable Aux input. Turn the Aux input volume up to 90%. If you don’t, there will be a imbalance in the sound for music while being played via Airplay and the various stock car chimes. This takes some trial and error to get all the volume levels balanced. Audio reproduction quality isn’t the best straight out of the Aux input. Fortunately, the Road Top decoder has a few Audio Presets, a customizable Equalizer and Loudness setting which allow you to compensate for some lost audio quality. Does the job. Don’t expect perfection to a stock and modern iDrive Harman Kardon unit. The one catch with adjusting audio parameters or the Equalizer is that you need to quit your Car Play session. You cannot make changes on the fly or hear changes as you make them.
With the test now successful, the next part was tidying up all the cables and mounting the Decoder box against a steel dashboard support brace. This is right between the glove box and head unit. There is a space there to place the decoder box. I used some 3M double sided tape for this. Only time will tell if this will hold up and hopefully no rattles surface. Its definitely a lot of of cables leading to the Road Top decoder box and there’s not much you can do about. I did the best I could of tidying them up while not causing too much stress to the cable bends.
Putting things back also takes some time. Pushing the stock head unit back into its slot needs some effort as the cables right behind it are more now. It can be done. A little patience and observation is all.
Refitting the glovebox is about the hardest part of this process. It goes in the same way you took it out. There are 4 support mounts under the glovebox that need to align. You need to do some acrobatics of looking below the glovebox area as you mount it back so you get this perfectly aligned. Not to forget, put back all the cables you removed that were attached to the glovebox such as the light, stock idrive usb cable and glover box lamp switch. 9 screws secure the glovebox.
Next you have air bag unit, if you removed it. Followed by the glove box under tray which has a cabin light connector you need to put back.
Put the screws back for the screen. Note that while the screws are the same T20’s for pretty much everything, the display screen screws are slightly shorter and thicker. I had made this mistake during DIY attempt 1 by putting in the wrong screws. The head unit will take another 4 screws to secure, followed by 4 more screws to mount the Climate Control unit. The final screwless bit is the AC duct and dashboard trim. This requires refitting the Hazard lamp and Hot/Cold wires and gently pushing the trim unit into the dashboard. Go easy while doing this.
As you would have understood by now, not the easiest or fastest of DIY jobs. There is nothing fast you can do here. This Road Top upgrade needs time and patience. No way you are going to do this in 30 minutes as shown on You Tube. Thats edited footage. I ran into complications primarily due to a third party decoder box already installed which took a whole week to figure out. Even without this, the process takes time. In the end, I am not regretting this upgrade. The screen is not a lot more useable than displaying the outdated idrive interface. You modernize the inside of the car a little bit. If you have the cash, I’d say go for Road Top Touch Screen unit. Will make things even better and more up to date.
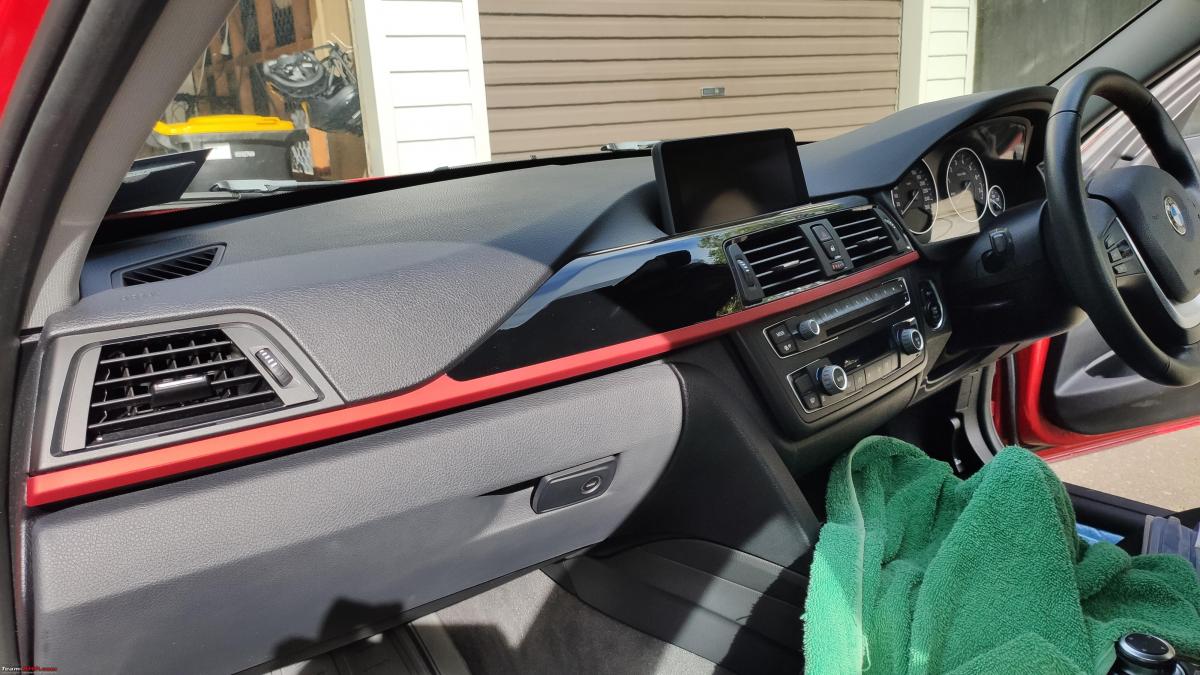
The dashboard, before ripping everything apart. The green towel on the center console is there to rest the head unit after taking it out. Its a heavy unit with a lot of sharp edges. Can damage the dashboard and console surface easily.
Lower trim removed. Some cars have a ambient light placed here. Some cars do not. You can see the disconnected wire for that here.
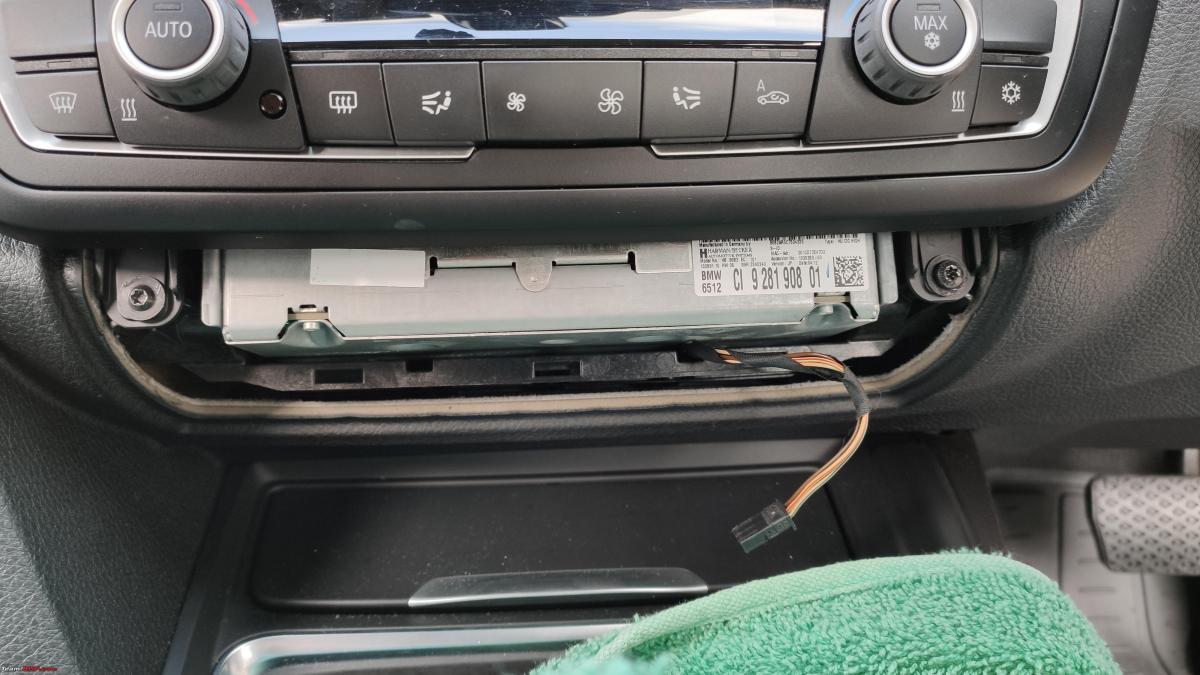
Taking out the AC duct trim piece. This is a long unit and requires a trim removal tool. Take care when removing this as the red strip at the bottom is delicate.

The two circled yellow connectors need to be removed. One is for the hazard/central locking switch and the other for the Hot/Cold air mix control.

Next, take out the Climate Control unit secured by 4 screws. This revels the head unit. Cars with inbuilt navigation have this large 2 din sort of head unit. Cars that don't have navigation have a 1din size unit. Makes it easier to place the Road Top decoder box below the head unit for the ones without inbuilt navigation.
Its a bit hard to see. Above and behind the internal AC ducts are two screw that you need to remove to take out the screen. Note that these screws are slightly different to the screws used to hold the head unit and climate control unit. Don't mix them up.
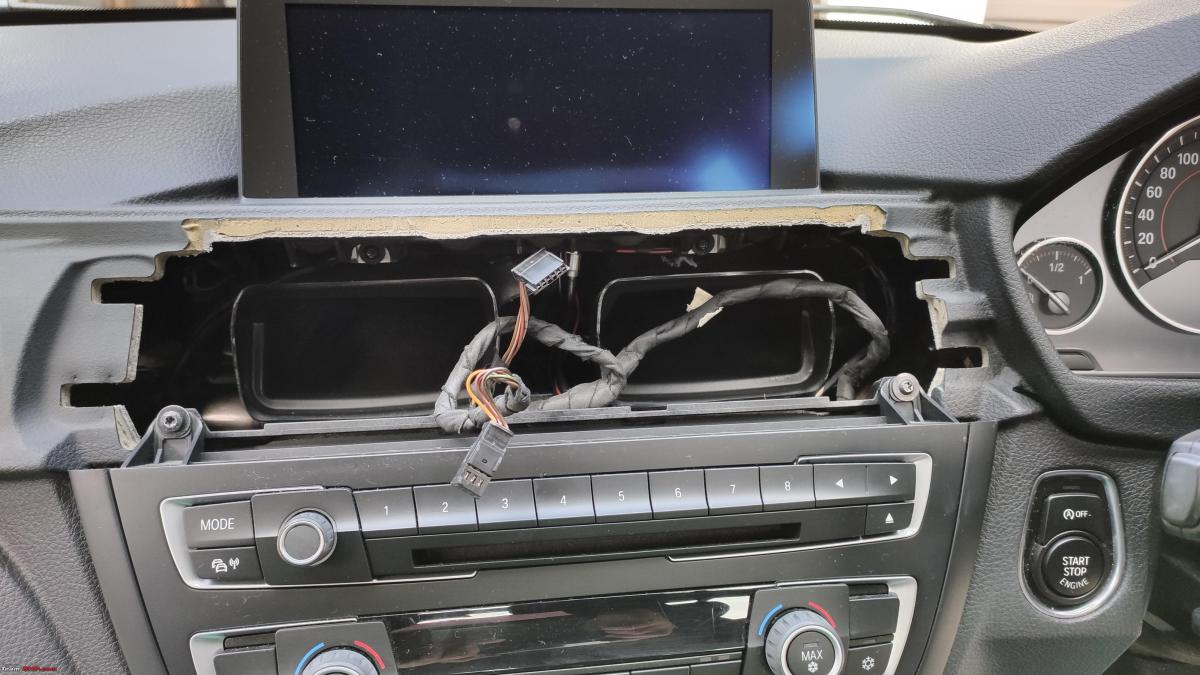
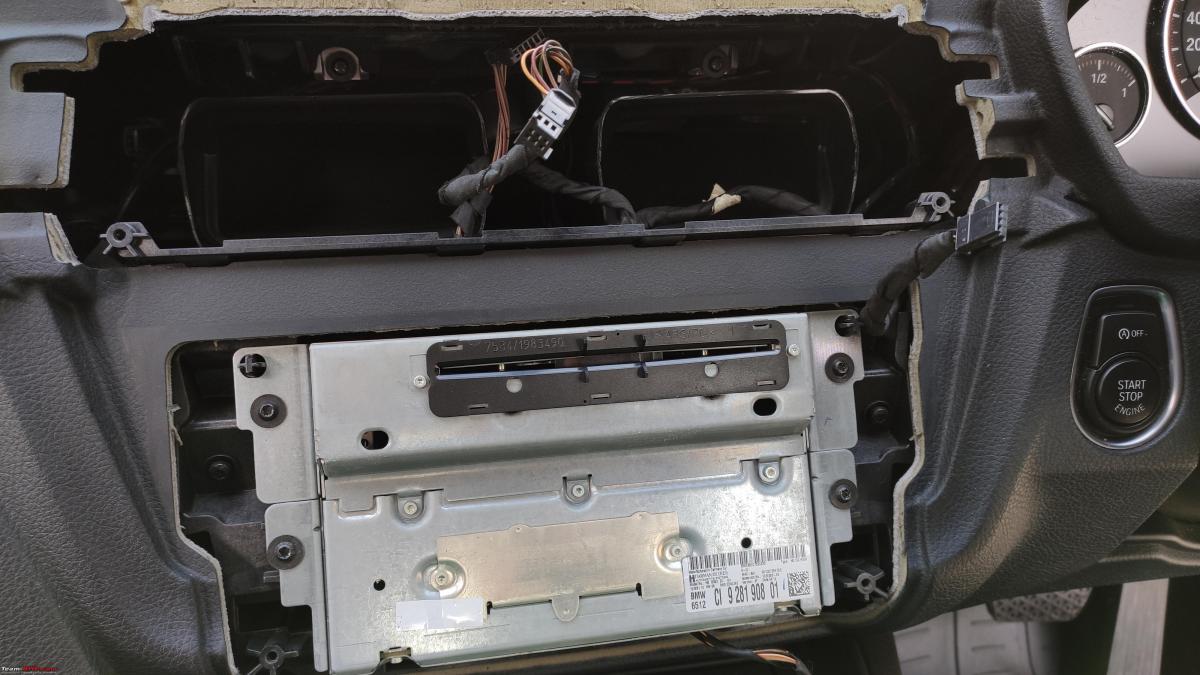
Yellow box marking the type of head unit. In this case CIC HI. Later generations are NBT and EVO.

There are some steps to the process where I missed taking pictures. Was too involved that I forgot.
The next stage requires dropping the glovebox thats secured by 9 screws. Not easily accessible and some will require odd angles. This is where a motorized tool comes handy. Before you can drop the glovebox, you'll need to take out a glovebox under tray that hides all the screws. This under tray unit is secured by two bolts and has a cabin light fixture that needs removal. You'll find in one of the pictures of a screw hole with no screw in it. Thats for the knee air bag mount. My car does not have a knee air bag unit so that slot was free.
Black box on the floor mat is the Road Top decoder box. Everything plugs into this unit.
Yellow U and Yellow box drawing are markers to align the glovebox when you refit. If you don't get this right, you'll be pulling your hair out. There is a similar thing to be observed on the other side of the glovebox too. Best is to take pictures before removal.


Yellow dot seen deep inside the glovebox (right edge) cavity is the location of a steel dashboard brace. This is where I secured the decoder box. This was the same point where the Japanese Parking Assist box was placed.

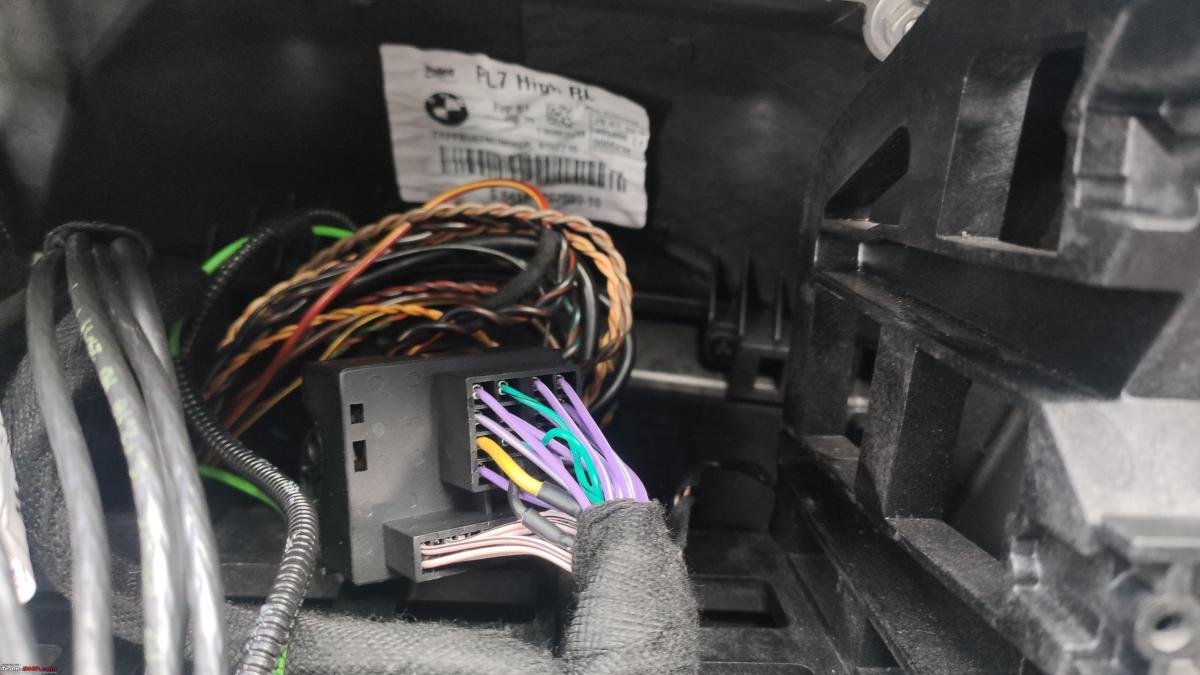
The quad lock connector. You're looking at the Road Top connector that is connected to the cars Quad Lock connector unit. Its a big block connector that secures a green optic fiber cable on some cars. For cars with this cable, you need to take it off the cars quad lock connector and move it over the connector supplied by Road Top. The thick cables, limited stretch to the stock car quad lock cable make it hard to push all the cables back. Not easy work.
Next up was the mic tap. You need to do this for CIC HI equipped cars, else the mic won't work. Road Top supplies this mic tap cable. You need to take out the stock mic and disconnect from the stock wiring harness. Take the Road Top mic tap wire and connect one end to the stock mic wiring you just disconnected and the other end to the mic unit. Run the cable via the roof liner, down the A pillar and through the dashboard. I used a stiff copper wire to pull it across the dashboard. This is not a hard process. Take care around the curtain air bag unit and run the mic tap wire over the air bag. In the event the air bags has to deploy, the wire won't come in the way.

Securing the WIFI Antenna and USB connector. The WIFI antenna should not be stuck onto anything metal. Its possible to stick it on the glove box under tray. I stuck it to the center console. I can always move it later.

The all important Audio Aux cable you need to connect on CIC HI enabled BMW Head units. This cable runs from the Road Top main wiring harness, through the center console and into the armrest. I pulled the cable via gaps on the side of the console. Some folks have removed parts of the gear console for routing. I chose not to do that.

Test run and taking Android Auto for a spin. Works flawlessly. Stock iDrive based Reverse camera is triggered automatically and the display switches and goes back. The only thing I've noticed is that when I am done reversing, my car camera tends to stay on for a little longer. Unless I pop the gear shifter into D, it won't go back to Android Auto. Some fine tuning needed in the Decoder box settings.
You can prioritize which app to populate the larger part of the screen or make Google maps populate the entire real estate of the screen if you like.


Read BHPian comments for more insights and information.
News
How to install & view YouTube on Android Auto without rooting or a PC
If you are a Youtube Premium user, you can view Youtube ad-free on your car as well. There are options for full-screen viewing, voice search and other ease-of-use features designed for vehicle-usage.
BHPian krsansgr recently shared this with other enthusiasts.
Disclaimer
Before we begin, I would like to highlight that I'm not the developer or affiliated with this app and this guide is merely for educational purposes. I myself or Team-BHP as a whole, does not condone unsafe driving or being distracted while driving. Use this knowledge responsibly.
Introduction
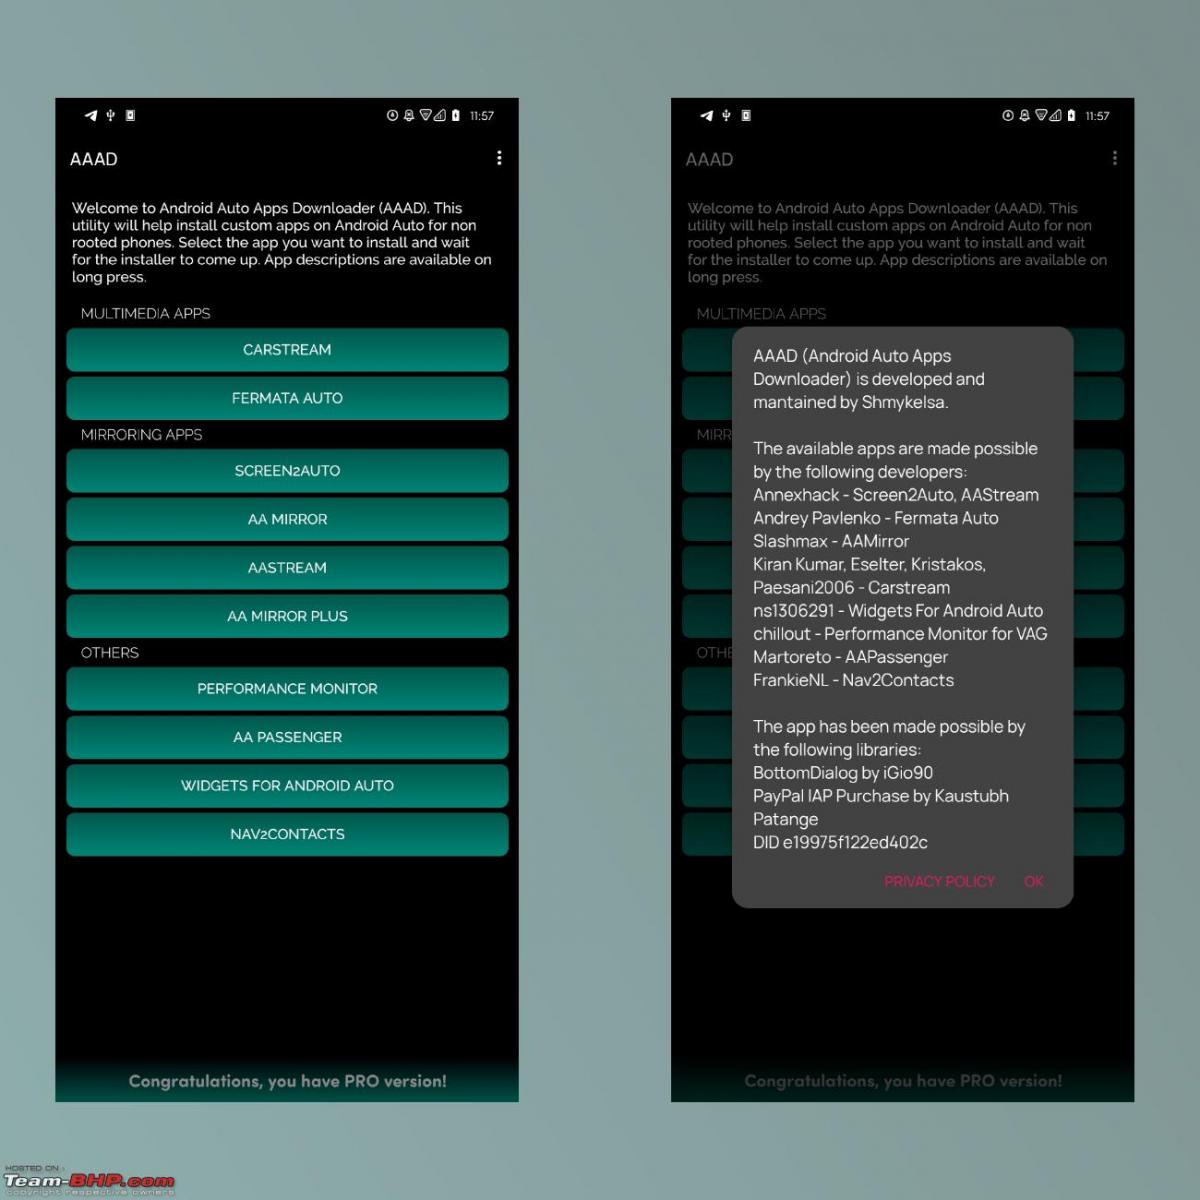
The following guide will let you install Youtube in your Android Auto compatible vehicle. Once installed, you can login to your account and access a desktop version of youtube as you normally would.
If you are a Youtube Premium user, you can view Youtube ad-free on your car as well. There are options for full-screen viewing, voice search and other ease-of-use features designed for a vehicle-usage.
The app I'm about to show will also let you view your local videos/downloaded videos you have on your Phone as well.
Pre-requisites
- Android 6.0+ Phone
- Android Auto Compatible Vehicle
Guide
- Download the latest version of the AAAD APK file from github
- Install the APK file of the app on your Android device
- Open the AAAD app on your mobile
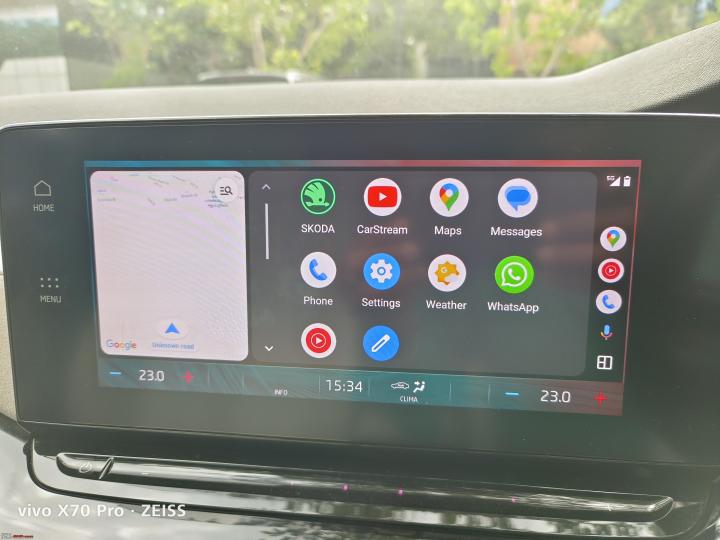
- Choose CARSTREAM app from the list and download it.
- When the download is finished install the app.
- Open the newly installed CarStream app on your phone.
- Tap on the top right Menu Icon (3 dots) and select settings.
- Enable Desktop Mode in the settings.
- Now go back & login to your Youtube Account. (This only needs to be done once.)
Now you'll be able to see a CarStream app on Android Auto when you connect your device next time.
Thats it!
Sources/references
Video of it working on my 2023 MG Hector
Disclaimer regarding safety of the app
Installing a random app from the internet is scary and I understand that. I'm personally using this app for the past couple days. It works well and as intended. Not to mention, the app is open-source and available on Github since 2021 with regular updates. I've also attached the original XDA developers link to this post and none of the users since 2021 has reported any sort of safety issue with this app. If you're facing any issues or difficulties, both links have extensive documentation & FAQ regarding anything you might need.
Other notes
The AAAD app has other apps like CarStream within it. Each app adds a different functionality to your Android Auto. You can long-press on the app name in the list or google the names of the app to see what each does. The app also allows only 1 FREE download per month. For unlimited downloads, you will need to get their PRO version for $3.50. But once you get the app you need, there is nothing more to be done so the 1 FREE install is all you need.
Read BHPian comments for more insights and information.
News
Using Android Auto heating up my phone: What could be the cause
I’ve seen that when my phone is using AA wirelessly, all connections are switched on and that starts draining my battery.
BHPian Drdriver recently shared this with other enthusiasts.
Hey fellow BhPians.
I have recently gotten an Android headunit installed in my car which is running Android Auto via headunit reloaded app.
It connects fine both ways, wirelessly and wired. But I’ve seen that when my phone is using AA wirelessly, all connections (wifi, bluetooth, location and data) are switched on and that starts draining my battery. I plug it in the 12v socket and soon it gets so hot that i can literally make an omelette over it.
If i go the wired way, the HU doesn’t put out enough current to charge the phone and it shows 7h+ charging time on 35%. Plus, it doesn’t even charge and rather the battery drains here too. It still gets warm, but not so much. I’ve been using an AC vent mobile holder to keep my phone cool but it means that I have to consistently blast my AC on road trips even when the weather is good outside and it just ruins my mileage.
Has anyone experienced the same? And are there any solutions to this issue?
Here's what BHPian Mr.Boss had to say on the matter:
2 key information missing - Which HU, which Phone?
Try with a different phone and observe the same for easy conclusion.
My observations so far with Pioneer 5290 & JVC 740 models (both with wired AA & ACP)
No heating issues in below models:
- Moto One fusion plus
- iPhone SE2020
Moderate heat (a little above warm)
- Vivo T2
- Honor (forgot the model)
Fry pan:
- Samsung M13
Here's what BHPian shancz had to say on the matter:
While your phone is unknown, Exynos chipsets are notorious for heating especially on mobile data. Do check and confirm. Charging a heating phone will make matters worse.
Is your phone set to 5G by default? I have noticed high battery drain and heating when on 5G network and data. That device was the Moto Edge 20 Fusion running Dimensity 800U.
Assuming that your battery backup is okay otherwise, check if your phone is overheating under normal map navigation on mobile data which could indicate an issue with the SoC.
BHPian Drdriver replied:
My phone is a Samsung Galaxy m14 5G. Bought it 2 days ago. But I was facing the same issue on my Galaxy A12. Could be the Exynos chipset issue you mention.
Here's what BHPian Kosfactor had to say on the matter:
When a phone is playing music and navigating at the same time, its not a problem however when the battery is a bit low and the fast charging is trying to quickly top up the battery, this can be a problem, especially if it has wireless fast charging, the inefficient nature of wireless charging combined with fast charging releases quite a bit of heat as it is, there is no place for all that heat to go.
Some things you can experiment with.
Connect to a non-fast charging port.
Charge the phone completely before entering the vehicle.
Keep only the music and navigation on in the phone apps.
Remove the phone cover when using wireless fast charging.
To put this in perspective:
A super cheap Vivo something phone happily runs Android Auto, it does not have a very fast charging speed or wireless charging at all.
Here's what BHPian Shreyans_Jain had to say on the matter:
This isn’t acar issue; this is a phone issue and a basic thermodynamics issue. The specific chipset is prone to overheating, especially when multiple things are used simultaneously, and fast charging generates a lot of heat. Net net, the phone will get hot.
The OP’s phone is new. I have this same issue in my ageing iPhone XR. Wired CarPlay with navigation running, summer heat and especially on a battery charge under 20%, the phone heats up so much that charging stops. Sometimes, it shuts down altogether. My solution is to set it up and then put the phone into the cooled glovebox. That keeps it working and charges well too.
Here'swhat BHPian abhisekbit had to say on the matter:
I managed to test a host of phones with Wireless Android Auto and Android based Chinese Headunits. And the observation is practically the same. Use it for long drives and the phone is practically unusable. Battery gets depleted very fast and phone heats up like hell.
So mostly I use a secondary phone for wireless android auto connected to power will the primary phone is used for other stuffs.
The primary phone is connected to the headunit only via Bluetooth so as to receive calls outside of Android Auto.
Check out BHPian comments for more insights and information.
News
Carluex Pro+ converts wired Apple CarPlay into an Android device
The Carluex Pro+ takes 6 seconds to boot up and comes with Wi-Fi 6 for faster wireless connections and a USB-C port.
According to a media report, CARLUEX PRO+ is the latest device which offers car owners a wireless connectivity experience. However, what's interesting about Carluex Pro+ is that it converts wired CarPlay (Apple) into a full Android computer. The small device offers Apple users a full Android experience, even giving them access to all the perks of Google's mobile operating system.
The Carluex Pro+ doesn't come with a stand-alone screen but uses the car's display. The device connects to the CarPlay port and then offers full Android access on the same display. The device is said to be more responsive, has shorter loading times, and promises improved performance compared to its previous iterations and some other Android head units in the market.
The company also states that the Carluex Pro+ device comes with a Qualcomm chip. It connects to the CarPlay port and then uses a wireless connection to run either Android Auto or CarPlay. The device comes pre-loaded with Android 13 OS, and users can get the full Android experience on any device. So essentially, owners can choose whether to run wireless Android Auto, wireless Apple CarPlay or an embedded system powered by Android 13.
The embedded Android experience allows all customers access to all apps on Google's Play Store. This includes apps like YouTube and Netflix to run on the car's screen. The Carluex Pro+ takes 6 seconds to boot up and comes with Wi-Fi 6 for faster wireless connections and a USB-C port.
At $359, the price of Carluex Pro+ is on the expensive side. For that, you get the device itself, a USB-A to USB-C adaptor, a cable to connect to the car and the manual.
Source: AutoEvolution
- Tags:
- Indian
- Android Auto
- Apple CarPlay
News
Wireless Android Auto & Apple CarPlay experience on my XUV700 AX7L
When all of the above stuff does work, it is beautiful indeed.
BHPian kedar_GT recently shared this with other enthusiasts.
Apple CarPlay
- Google Maps sometimes appears 'stuck' - Spotify continues to play fine and the turn-by-turn navigation voice prompts also continue - but the display shows something that looks like the start location and does not update.
- It fixes itself, after a while.
- I am not sure if this has got to do with the patchy reception of the Vodaphone sim in my iPhone SE. (my hunch is that this is the issue)
Android Auto with Coolwalk UI
- At times, the screen refuses to split and shows just the Google Map in full-screen. The touch fails to respond as well. A fix is to toggle aeroplane mode on and off which 'may' resolve this problem.
- Spotify does not respond - says it is unavailable - but if you control it from the phone, you can hear the music via BT. The volume and track controls from the steering wheel will not work.
- No volume control for AA - For some reason, everything goes out of whack and for a short while the song plays at a very high volume level. This has happened twice to me once when my son's phone was connected via just BT and another time when AA was on but unresponsive. This can give someone a big start and has the potential to cause an accident. At this time, pressing the mute button does not help. (it will mute only the infotainment and navigation sounds - but the song continues to blare out)
The infotainment system has the unenviable task of handling multiple input sources and am sure some of these corner cases were not caught during Mahindra's SW testing. For eg, I have Alexa enabled, 2 phones with AA, 1 with CP and 1 with just BT, all vying for the infotainment system's attention :-)
But yes, I expected better results with just AA running on an OnePlus6 with an Airtel sim. I notice disconnections when (I think) the phone heats up.
A solution is to keep the phone on the cooled armrest.
Another quirk was that I had to toggle some settings on my OnePlus6 to get OkGoogle to respond when the phone was connected via AA. Else I had manually unlock the phone for okGoogle to 'listen' to my command.
When all of the above stuff does work, it is beautiful indeed. Just get in the car and AA or CP resume playing the song where you left off.
Does anyone have any thoughts or inputs to fix any of the above?
Cheers
Check out BHPian comments for more insights and information.
News
Android auto keeps calling random numbers? Here's the solution
Tried searching for settings in Google app and android auto but couldn't find anything that could stop this.
BHPian AutoNoob recently shared this with other enthusiasts.
I am facing a concern while using Google Voice Asst on AA for making calls. The concern happens in the scenario it is unable to correctly recognize the called name in the contact list. The Assistant searches the called name on the internet and auto-dials the number for the similar sounding web-search (usually a business listing).
What to stop this behaviour by restricting the search in contact list only. If the search fails, it should simply indicate the same and not auto-dial some random number.
Tried searching for settings in Google app, AA but couldn't find anything that could stop this. 'Device & Call Settings' turn up blank. So, request guidance here.
Here's what BHPian Rehaan had to say on the matter:
Great timing!! Experienced this yesterday and it's an absolutely ridiculous & senseless behaviour on Android Auto's part.
One possible solution:
(I am yet to try this)
Here's what BHPian gururajrv had to say on the matter:
So bloody apt scenarios ive faced nd ridiculous of this nonsense Android Auto to call randoms as against the command provided. Carplay / Siri is extremely accurate and refined.
AA called a random salon when I asked to call a friend! It was so idiotic for a smartphone or the feature It has to behave erratically!
BHPian Rehaan had the following update to share:
Solved!
So as per my earlier post, the proposed solution was to:
- Set up voice match
- Turn on Personal results
So...
- I set up voice match
- Personal results was already turned on in my case - so no changes there
Read BHPian comments for more insights and information.
Pages


