News
My Swift: Periodic maintenance including EGR & throttle body cleaning

Usually the tappets need no adjustment unless there is a evident clicking noise, My known SA suggested checking the tappet clearances during the service.
BHPian Ashtoncastelino recently shsred this with other enthusiasts.
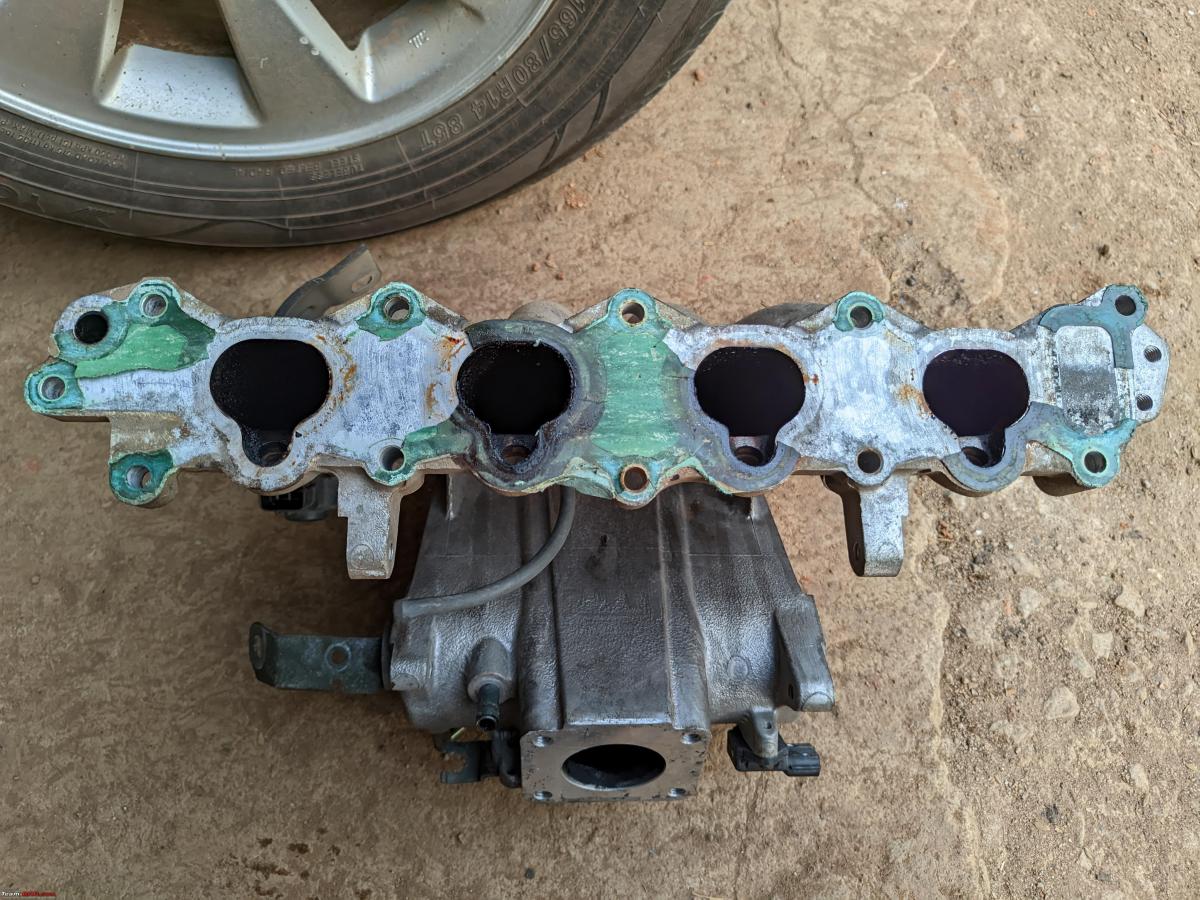
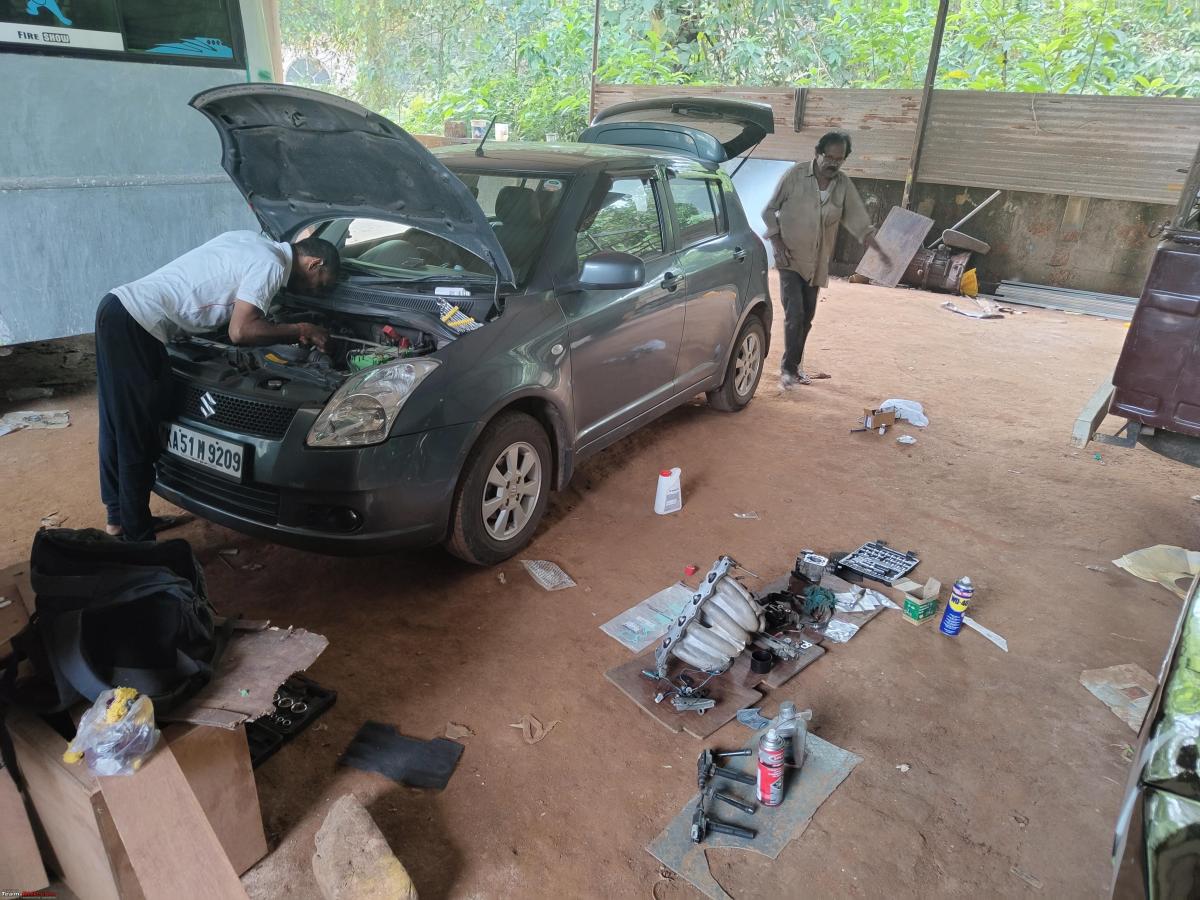
When cleaning the air filter, I opened the butterfly valve of the Throttle Body and saw found a lot of sticky carbon deposits , upon closer inspection I also noticed the inside of intake manifold looked rather oily and dark with carbon. Decided I will dismantle the entire intake manifold to clean it. Scared that I would break one or the other bolt , I rang up Vishu and decided on a Saturday to get this job done.
Parts collected for the work:
- Throttle body cleaner. Sourced from Amazon
- New Throttle body gasket. Part Number: 13421M83B10
- New intake manifold gasket. Part Number: 13119M83F00
- New ISC Valve gasket. Part Number: 14139M70G30
- New EGR Gasket. Part Number: 18529M77E01
- New Fuel injector O-Rings and Rubber kit. Part number: 09320M09022 and 99000M24120-857
Started disconnecting the sensors, unplugging the harness clips, removed the throttle body, injectors and loosening the bolts of the manifold. The bolts gave not much struggle to loosen since I had sprayed them with MGP Rust smash generously. Out came the manifold and it was time to remove the EGR.

EGR assembly is mounted by two bolts. Even after spraying Rust Smash and letting them soak, One of the bolts while loosening started to squeak and Vishu hesitated to loosen it further fearing the worst “BROKEN BOLT” !! I told him since the manifold is out of the car, It’s easier to get it fixed now rather than later. So as expected the bolt broke off. You’re always one bolt away from making a 5 minute job into a day’s ordeal.

We welded a nut to the broken bolt which was stuck on the manifold for about 8-9 times, each time the nut would rotate a turn and then break off again. Vishu got frustrated and decided to drill through the bolt and create threads of the same size. So we did the same and it turned out pretty good, I got a sigh of relief ! By all of this saga it became 7pm and really dark so we had to end the day. Requested Vishu if he could come the next day (Sunday) to complete this work, fortunately he agreed.
I took the manifold, Injectors, throttle body, EGR home to clean them myself. I made my own circuit to clean the Fuel Injectors.
I used:
Limit switch
Fuel injector connector from scrapyard
Wires
Small syringe

Fuel injector before cleaning.

Inserted the fuel injector in reverse to the syringe and made sure there are no leaks. The fuel injector O-rings created the perfect seal. While I started spraying the throttle body cleaner into the syringe, it built up pressure with the cleaner and dad pressed the limit switch which gave power to the fuel injector solenoid to open and release pressure. The same was done for all 4 injectors thoroughly. The spray pattern of the injector improved with every spray.
The intake manifold was cleaned using diesel till it was spic and span. EGR and throttle body was sprayed with throttle body cleaner till it was shiny silver. The ISC valve was clogged with carbon deposits which was also cleaned. I soaked and kept all the studs and bolts in diesel overnight to remove any rust.

Dirty throttle body:
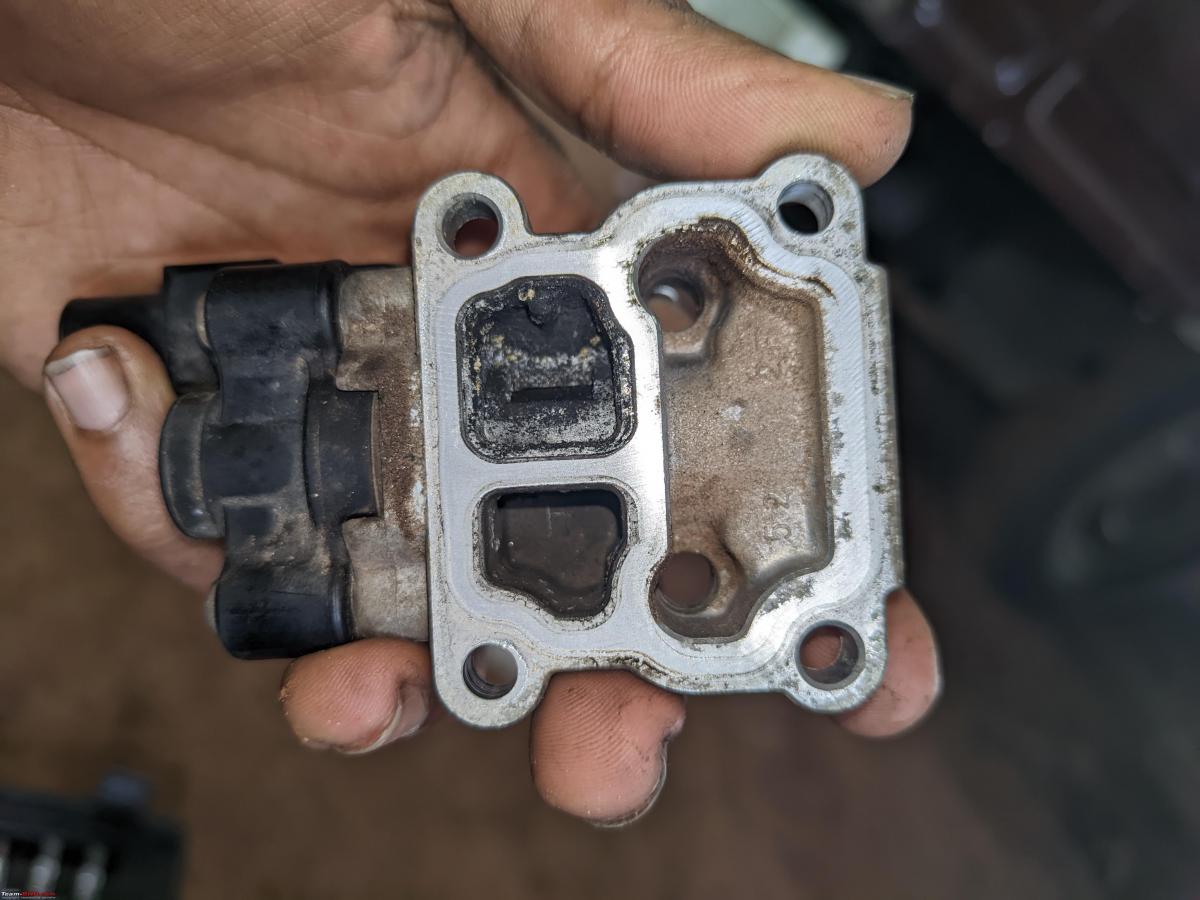
Clogged IAC valve.

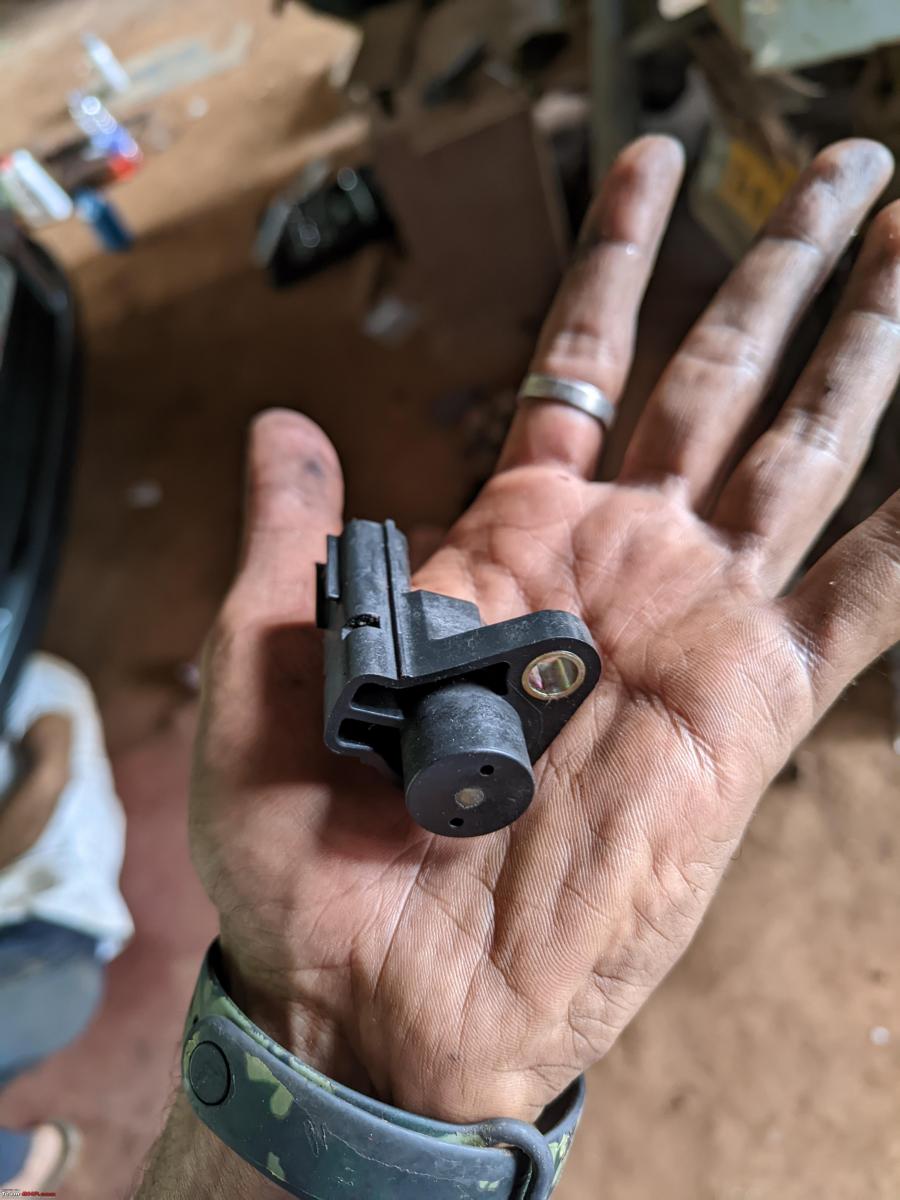
Leakage near crank sensor.
Cleaned.
The crank sensor was also cleaned and fit back. All this took about 1.5 hours to fit back and it was time for the tappet adjustment.
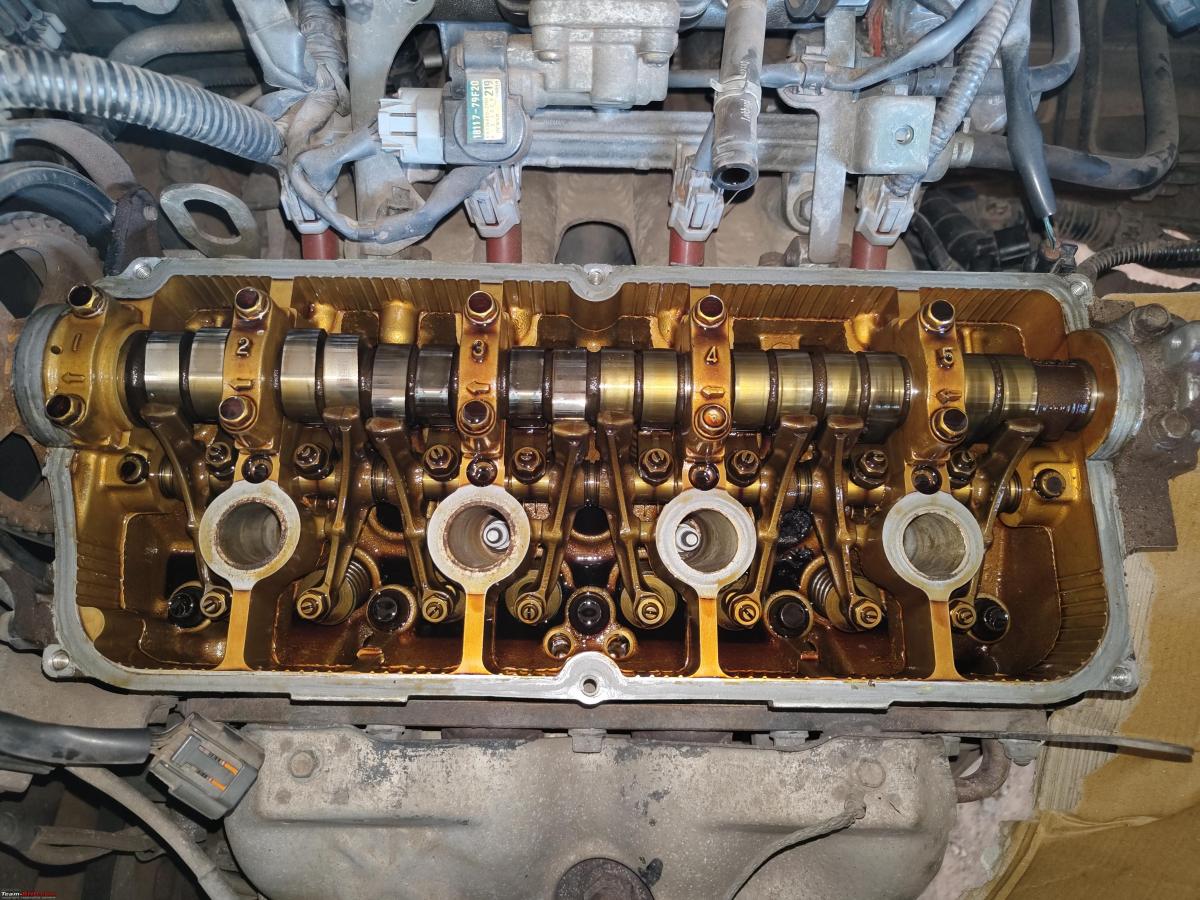
Tappet Adjustment / Valve Lash clearance:
Usually the tappets need no adjustment unless there is a evident clicking noise, My known SA suggested checking the tappet clearances during the service. Now, my tappet cover gasket had given away and also started the infamous tappet cover leaking of the G Series Engine. The Camshaft Sensor Cover Gasket , Tappet cover gasket and Spark Plug O-Rings were ordered from Boodmo. The Camshaft Sensor cover gasket was SGP make, the MGP one is slightly thinner and larger in size.
My mechanic Vishu started checking and adjusting the tappets. I had printed the values and made sure they were adjusted within the limits specified in the service manual. The clearances were off slightly than the specifications from the Service Manual.
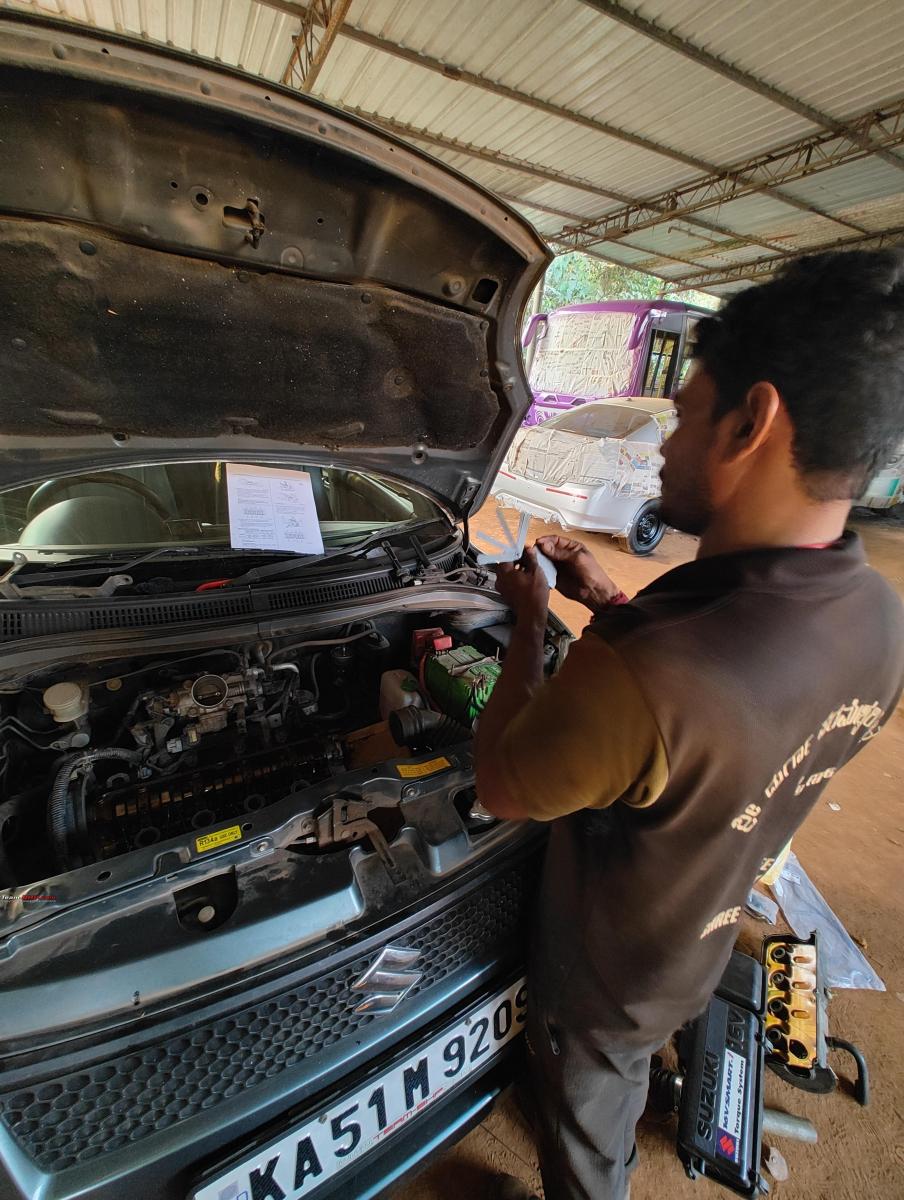
Once the adjustment was done, I started assembling it back with new gaskets and made sure nothing was overlooked. Started the car and it sounded much better than before, Water sputtering out of the exhaust was a pleasant sight to see. Kept a close eye on the Fuel Efficiency and it had increased by about 1-1.5Km/L. The new Spark Plugs could also be playing a role for the increase in FE.
My mechanic Vishu was extremely happy with the car after a test run and I was even more because of the work done to my satisfaction and perfection. Vishu didn't charge me for the work but since he came on a Sunday, I made sure he didnt go empty handed. He is also searching for G13B Swift to replace his 2003 M800.
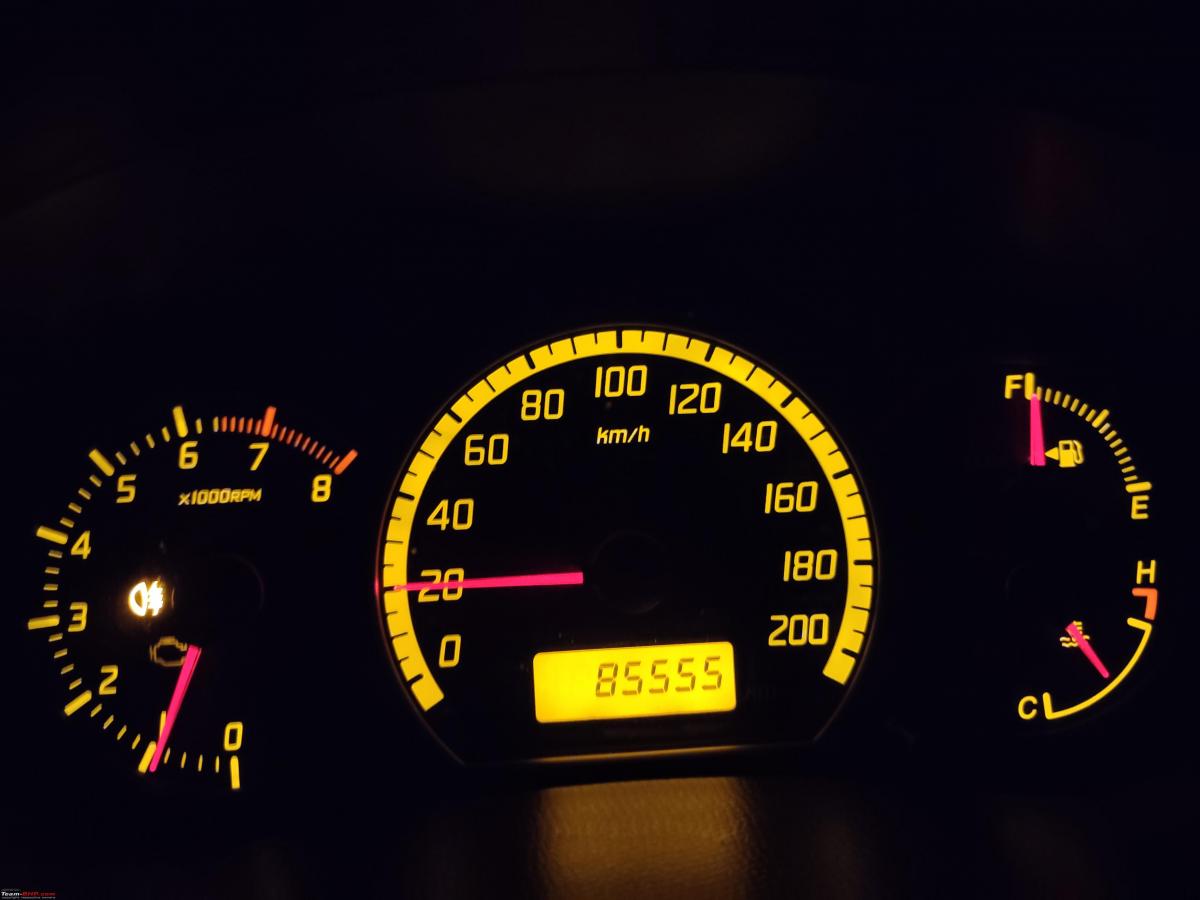
Odometer.
Regards,
Ashton Castelino.
Check out BHPian comments for more insights and information.
Find Car News
Just News
.jpg)


About Us
Buy & Sell
USED CARS