News
My 2006 Maruti Swift: Doing some mods & maintenance work
We fitted a Maruti SX4 ZXi's steering wheel with mounted controls. We also got the brakes of the car overhauled.
BHPian chiranjitp recently shared this with other enthusiasts.
Few mods, some maintenance and a heartbreak
Adding steering mounted controls
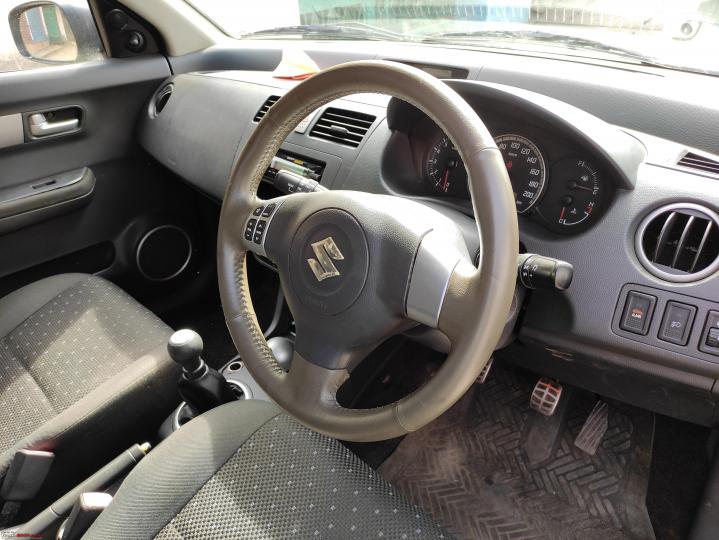
The Swift, when launched in 2005, didn't get steering mounted controls even in ZXi. Heck, it didn't even get an OE stereo back then. In 2008, Swift was refreshed, ZXi also got more equipment, which included steering mounted controls & a factory-fitted stereo.
It was always a dream project for me, to have steering mounted controls in my Swift as well. Though never thought about it seriously, as I simply didn't have the technical know-how to do it. The main inspiration for this project came from Dbhpian paragsachania's thread. Then last year, I met Ashton, a fellow bhpian & a very close buddy. He's my current go-to guy when it comes to DIY. He had fitted the T2 Swift steering wheel in his 2006 Swift VXi. Ever since then he was always pursuing me to do this mod in my car as well.
My car being a ZXi had an airbag, so it would have to be a bit different from his mod (non-airbag model). Also, I am a sucker for OE things, so I wasn't looking to change over to the T2 steering wheel. This meant we had to look at the 2008 (& beyond) Swift ZXi steering wheel. Ashton told me that we will be needing a new steering wheel (controls come as one), a new airbag, new clock-spring. All of these seemed too much for me, I wasn't till then looking to fiddle with the airbag system. Then Ashton carefully explained to me the whole process, & that nothing would go wrong. He also confirmed that my current HU, a single DIN Sony HU, can take steering control inputs.
Next up, the cost. The total cost was coming to around 10k if we were to get all things new. Steering wheel some 2.7k, Airbag (aka horn pad) 6.4k, clock-spring 1.3k. I didn't have the required fund then, so I told Ashton that we will do the project a bit later. Then a few weeks later, Ashton calls me & tells me that he has got a steering wheel for me & the project is a go.
He had found a steering wheel in the scrapyard, it was from an SX4. Upon closer inspection, it was the steering wheel from an SX4 ZXi/ZDi leather variant. Basically, this variant got slightly different steering, it was leather-wrapped from the factory & got thumb contours. Only slight issue was the mismatch in colour, SX4 got brown steering, whereas Swift gets a grey steering wheel. Next up was getting the steering wheel remote cable - the cable that will take the steering control signal from the clockspring to the stereo. I left all of that to Ashton. I told him to order everything that is needed for the project and then ship it to me.
The SX4 ZXi leather steering wheel:

Closeup of the connectors at the back:


What's a clock spring? Before this DIY, clock-spring seemed like some super complicated part of car equipment that one shouldn't touch or fiddle with. Let me try to explain what a clock-spring is in my way. The steering as we know is constantly rotating, but a wire (or wires) can't be rotating continuously. They would get tangled/damaged in no time if connected directly to a steering wheel. In cars equipped with airbags we need to have a constant power supply to the airbag, & horn as well (other steering-mounted buttons as well if & when available). This is where clock-springs comes into play.
Clock-spring is basically a 2-part thing, where one part is fixed with the steering column, the other part is fixed with the steering (i.e. it rotates with the steering as one piece). They are basically circular disc devices that contain rolled up electrical connections in the form of a conductor ribbon. As the steering wheel rotates to the left and right, the ribbon roll-ups and unrolls on the disc. The wiring on the column side of the clock-spring takes the signal to and from the airbag module, horn, stereo, etc. The wiring on the steering side of the clock spring takes the signal to and from the steering mounted controls, horn, airbag, etc. Each set of wiring is fixed & doesn't need to rotate (relative to where it's fixed), the 2 sides of the clock spring do the signal transfer between them.
My OE clockspring:

The new clockspring:

I did need a new clock-spring despite my car being equipped with one (airbag-equipped model), my OE clock-spring had two 2 wires, one for the horn & one for the airbag. I had to get a new clock-spring from the post-2008 Swift which got steering mounted controls as OE.
Next confusion I had was as my stock clock spring had only 2 wires, how will the new clock-spring with 6 wires/pins be compatible with my OE wiring. It turns out that the airbag cable is always separate & that coupler is the same between different clock springs (from MSIL stable), so that one was sorted. The next (& only) OE wire in my car was for the horn. I had to remove that wire from the OE coupler, solder it with the wire coming out of the new coupler & heat shrink it properly.
Heat-shrinked the horn wire:

I must add that we had to procure a 6 Pin 2.54mm JST connector, to plug in the clock spring (my OE was a single Pin connector). Here's the link. The rest of the 5 wires went like these, 3 wires went to the stereo via an AUX cable, two went for illumination (one +ve, one -ve). In short, except for the horn & airbag, we didn't have to use the stock wiring for the rest of the wires.
6 pin JST connector:

6 pin JST connector slid in place:

Clock-spring diagram:


Connector fitted to the clock spring:

Now one might also get this confusion (I certainly did) that in old cars (cars without airbags), there's no clock spring, yet the horn works. Here, since only the horn needs to work, a simple cancel Cam system is in place. The horn switch completes the ground of the circuit when pressed, & the horn honks. There's a metal ring that's always in contact with the steering wheel.
Next up, the theory behind how steering mounted controls work. I had initially thought that for each functionality there are individual wires, but that's not the case. There are basically 3 (2 in mine) wires in the steering wheel remote cable, out of which one is for the earth. So, only 2 wires in modern MSIL cars (with separate BT switch) & 1 wire in older Marutis (like my Swift with only switch in steering) does all the talking.
Every button will have a different resistance, that's how the HU knows which button we have pressed. In a stock HU, the HU is already programmed to behave to each different resistance value. In an aftermarket HU (like mine), one has to make it learn the functions. From the steering side, there are 6 (or 5 like in my case) wires, one is for horn, two for illumination, three (or two like in case) steering mounted controls. In new-gen Marutis, the extra wire is for the BT controls. The BT controls get a separate module placed at the bottom of the steering in new-gen Marutis. In my gen of Marutis, steering control was one module only, hence only wire is used here.
Soldering and heat shrinking wires to the aux cord:


Cut the aux cord in half:

Testing of which wire is done using the continuity mode in the multimeter. Audio R can be either of the SWC (steering wheel control) BT or even SWC AC ( audio controls) and vice versa for the Audio L:

These are the different types of 3.5mm Jacks. For SWC (steering wheel control) we use stereo audio because we need to connect 3 wires only:

Sony remote control accessory RC-SR1 (does the same thing, but expensive):

Steering wheel remote cable fixed to the stereo:


Continue reading about chiranjitp's mods and maintenance work for BHPian comments, insights and more information.


