News
DIY: Door damping on my Kia Seltos for improved sound quality


From the factory, the door pad has sound-absorbent padding all over. But the metal parts do not have any kind of damping whatsoever.
BHPian dipdawiz recently shared this with other enthusiasts.
The usual itch for better sound never ends. And as you would see Seltos' Bose sound system is nothing to write about and it's just adequate. After delivery, for a month or two, I fiddled with different sound settings in my car and then accepted that this would be the same no matter how much I play with the different settings.
My main complaint was the voice clarity was not up to my liking and high is nowhere present inside this Bose system. And if the bass improves (clear bass) a bit, it is enough for me. So with the promise of one day would upgrade the audio, I left it as it is. And after 2 years that day came.
I wanted to upgrade as gradually as possible. So as a wise person would do, I wanted to do door damping as stage 1, then move to upgrading the speaker and then the introduction of DSP and whatnot. But I would like to stop as early as possible.
Hunt for an installer started in August this year, but after a couple of usual shops in Koramangala and central Bangalore, I was super confused, some sounded snob, some too casual, some did not care and some were too "expert" to my capacity to accept the jargons. So, the only installer left was me. I gave it a go.
Did some online research, and saw a couple of youtube videos and I was already confident that there is no installer better than me in Bangalore.
Finalized on these two items
- i-copper from motorogue.in for vibration reduction
- Nitrile tape - a fire-resistant, heatproof 6mm sound absorbent roll
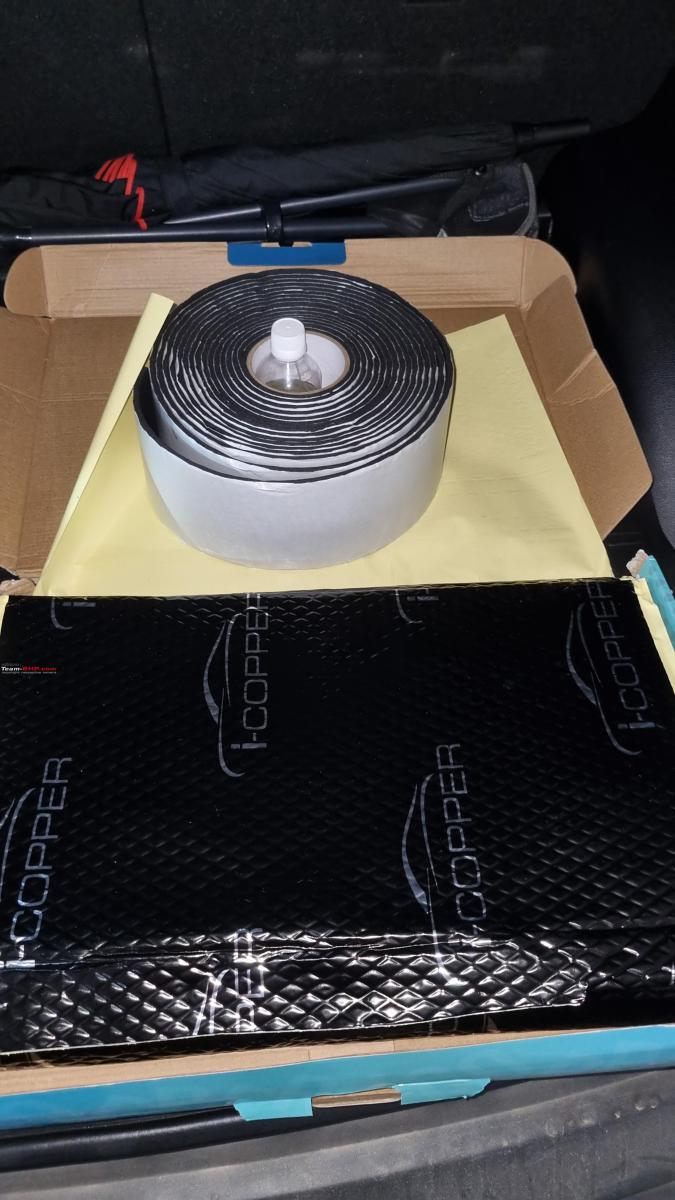
Accessories
- Paper cutter to cut the mat and tape
- 2-inch roller to roll on the mat after installation
- PH2 screwdriver
- Pry tool
- Cleaning alcohol
Action
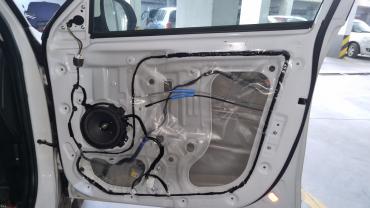
So first thing is to remove the door pad. I started from the driver's door. To remove it, first pry open the small panel above the tweeter. Then remove two screws - one in the bottle area, 2nd behind a small flap (pry open) in the door unlock lever.

Door is locked in place with multiple clips around the periphery. Pry open slowly from the tweeter side to the bottom to the other side. Now, do not pull the door pad as for the driver door has 4 connectors and 2 string connectors. Better take help from someone to hold the door pad when you press the clips of those connectors and pull them open. For string connectors, you just have to rotate the connecting bit and pull out of the groove. Disconnect and open the speaker too (held with 4 screws). Tweeter is fixed with the door pad itself.
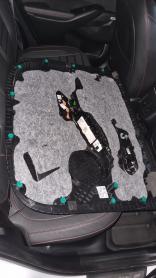
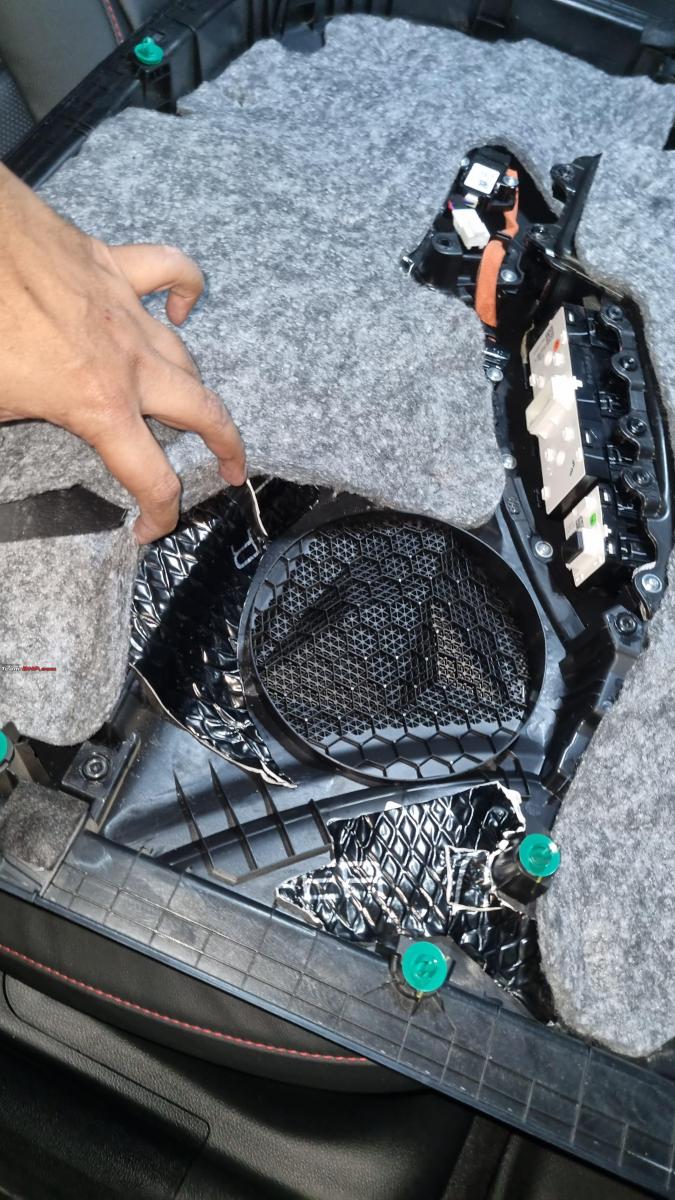
Door pad has sound-absorbent padding all over. But the metal parts do not have any damping whatsoever.
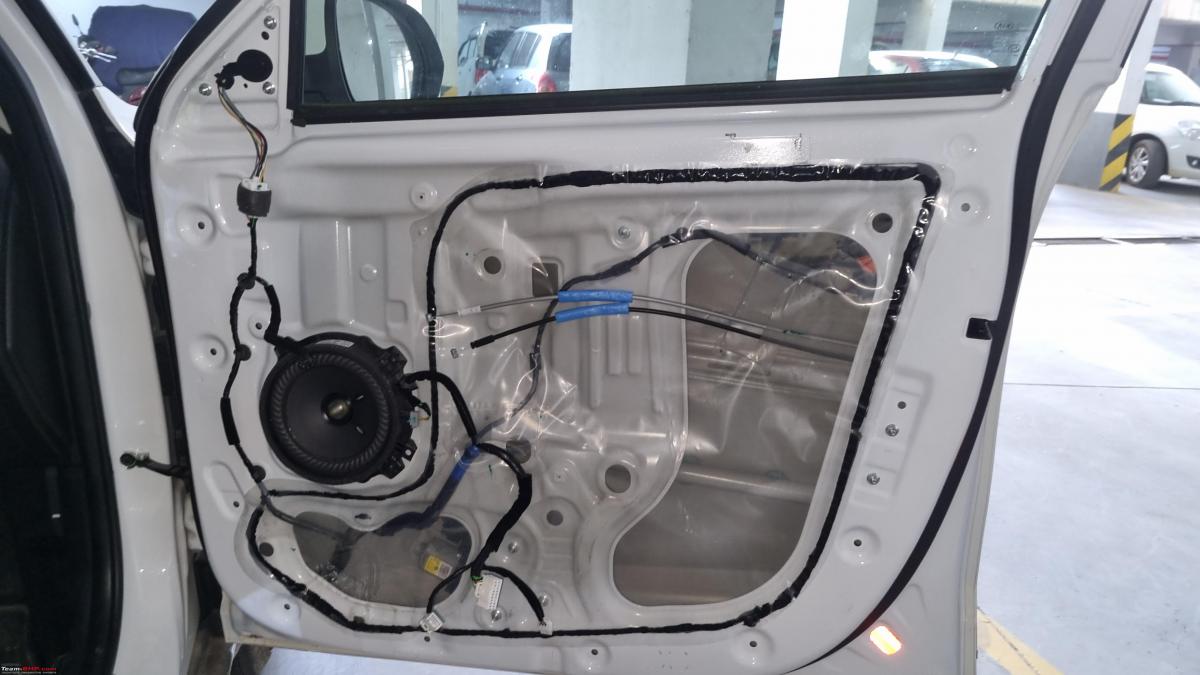
Now I took the approach to damp only the flat surfaces. So three slim strips of mat filled the outer metal. An A4 size (may be a bit large) mat for the middle metal large hole, and a smaller one for an opening below the speaker. Did not try to fill anything in the smaller holes. Also just behind the speaker, on the outer metal, added sound absorbent tape on top of the damping mat.


I made sure the plastic cover it came with was intact and preserved the silicon glue so that I could reapply it back. Also for connectors, I kept the appropriate cutouts.
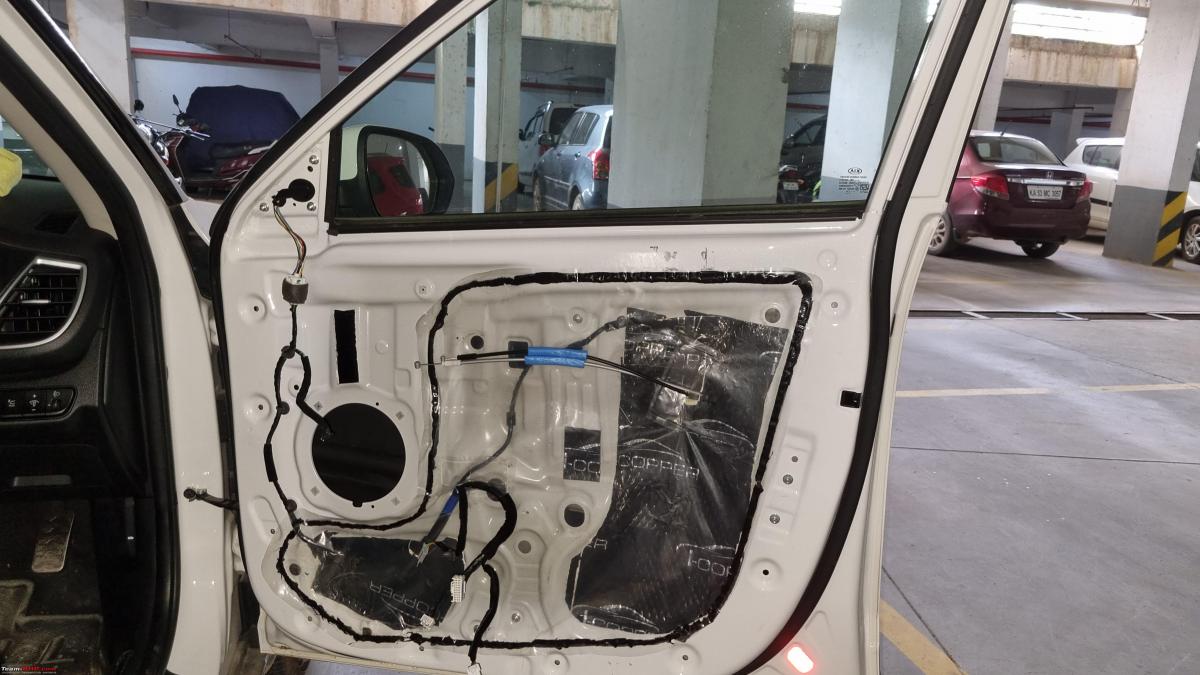
I cleaned the metal surfaces with cleaning alcohol before applying the mat and made sure after applying the mat, used the roller to make the mat stick to the metal.
On the plastic door pad, it has enough sound absorbent, so I just added damping around the speaker on the flat surfaces only.
Once done, fix the plastic cover, and roll over the silicon glue, it seemed fixed. Reconnect the speaker, connect all electronic connectors, then those two string connectors and align the door pad press the clips to fix it in place. Test all the functionalities of the door button, door lock unlock, speaker etc. Once satisfied, fix those two screws and close the panel you opened at the beginning.
All other doors are similar. I did one door at a time, so opened, applied, tested, closed - then moved to the next door.
I needed 1 and 1/3 of mat on each door and two feet of sound absorbent tape on each door.
After the damping, the following improvement is observed:
- Mid (vocal) is clear like I changed the speaker. It's no doubt more than 50% improvement in clarity.
- Bass became tighter, clearer.
- No apparent change in high though. This may need a speaker upgrade (Morel may be or JL audio?)
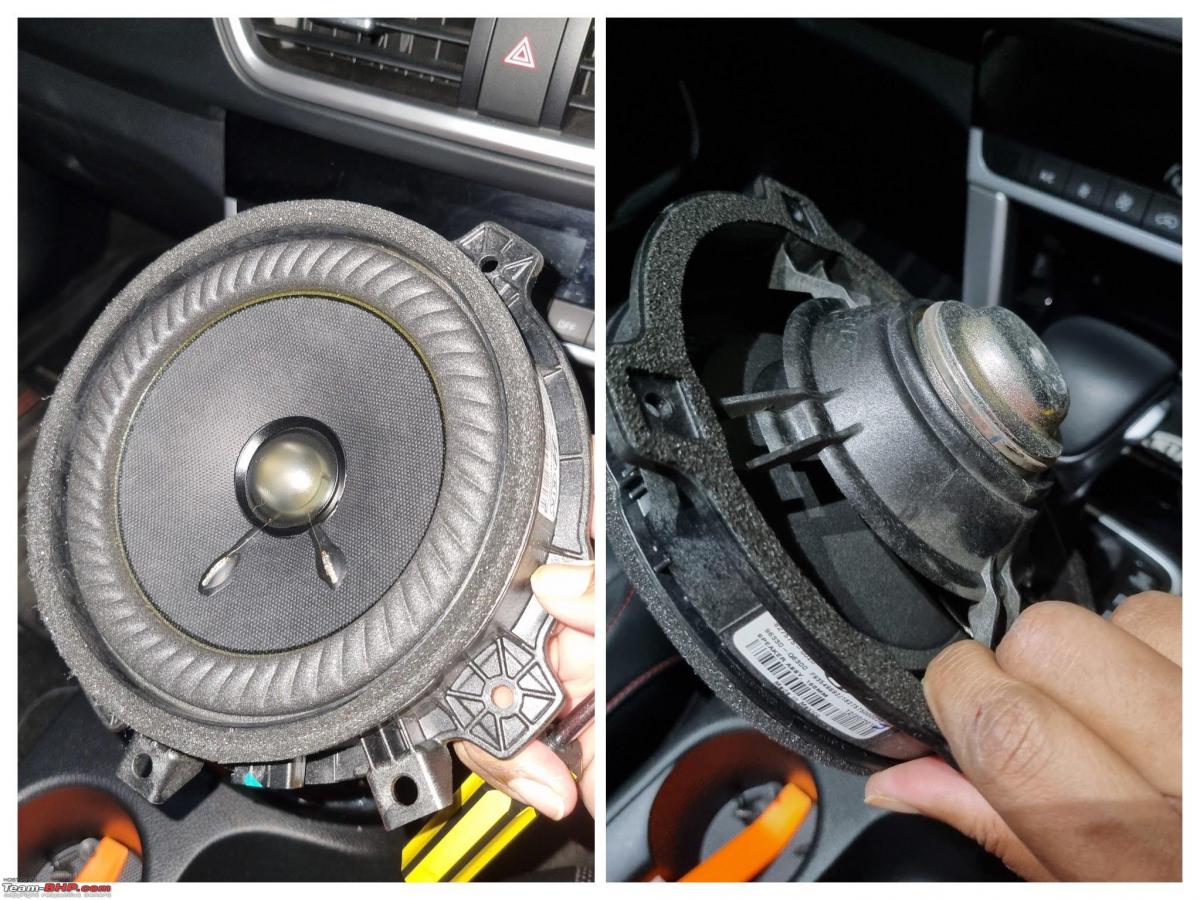
Just to show how the so famous Bose speakers given in OEM, here are the front and magnet.
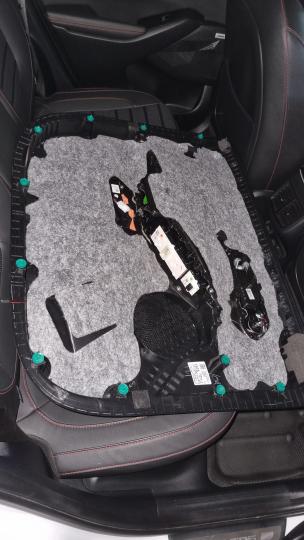
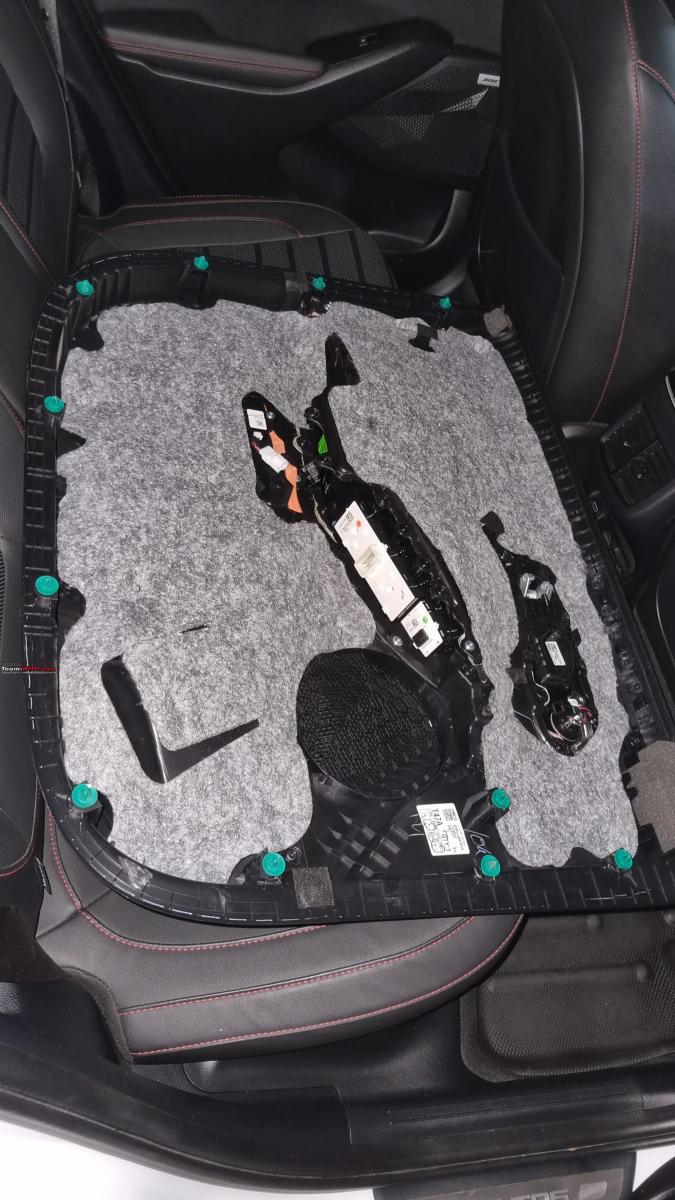
Tried to check if I can do some damping near the subwoofer area at the back. Figured out that, it needs a little more DIY stamina - the rear seats need to come out to open that panel; which I did not have. However, from the back, I could pull to some extent to see what's inside. It's a 6-inch subwoofer, I am sure with an equally small magnet/voice coil. But with a ported plastic enclosure, it does the job - ok for me.
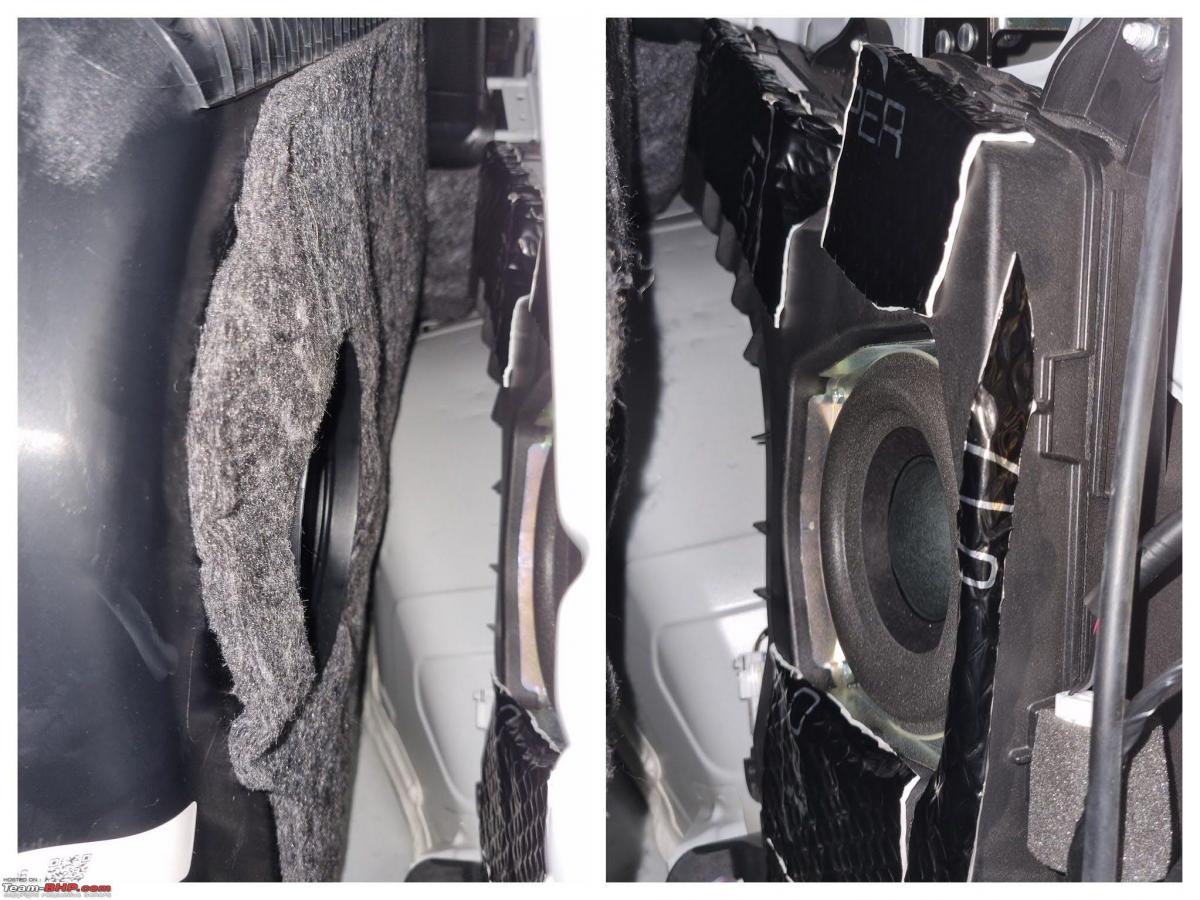
Hence just added bits and pieces to it, though it was not required and it had enough sound damping from the factory (the cotton type). As I have a couple of sheets left, added one sheet in dicky - then closed it and called it done. So next, could be just a front component upgrade.
Super happy with the damping performance. I may just update the front component with a bright one with decent bass.
A couple of pointers
- Use gloves. They save you from nicks and cuts (or from something serious too). I was too excited and did this without giving much thought to safety. Luckily got away with a couple of small cuts.
- Take it easy with the clips while prying. They fly off, break or you can lose some, then you have to visit the service center to fix the rattle. I sort of half broke one clip on the rear left door. I fixed it though, still, if I get some rattle in future, I know where to look.
Check out BHPian comments for more insights and information.
- Tags:
- Indian
- Member Content
- Kia Seltos
- Doors
Find Car News
Just News
_4.jpg)
.jpg)


About Us


Buy & Sell
USED CARS