News
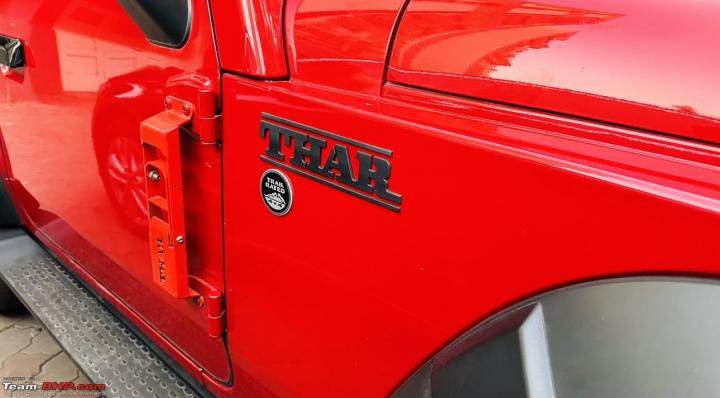
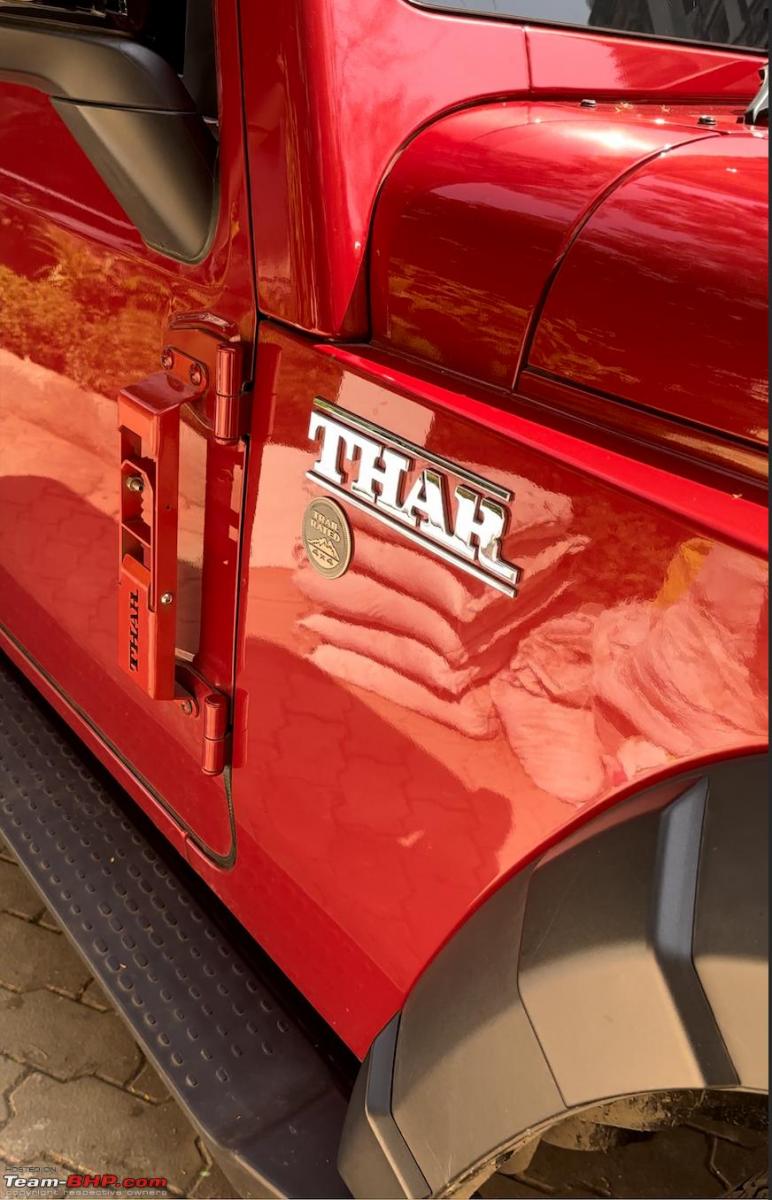
DIY: Dechromed badges of my new Mahindra Thar using black rubber paint
I gave each emblem a total of 5 coats each, with each coat getting progressively heavier.
BHPian SA-G13B recently shared this with other enthusiasts.
Hello BHPians!
I’ve recently (read = Jan’23) picked up a 2023 Mahindra Thar, in the 2.2 Diesel AT configuration, and have just started toying around with this.
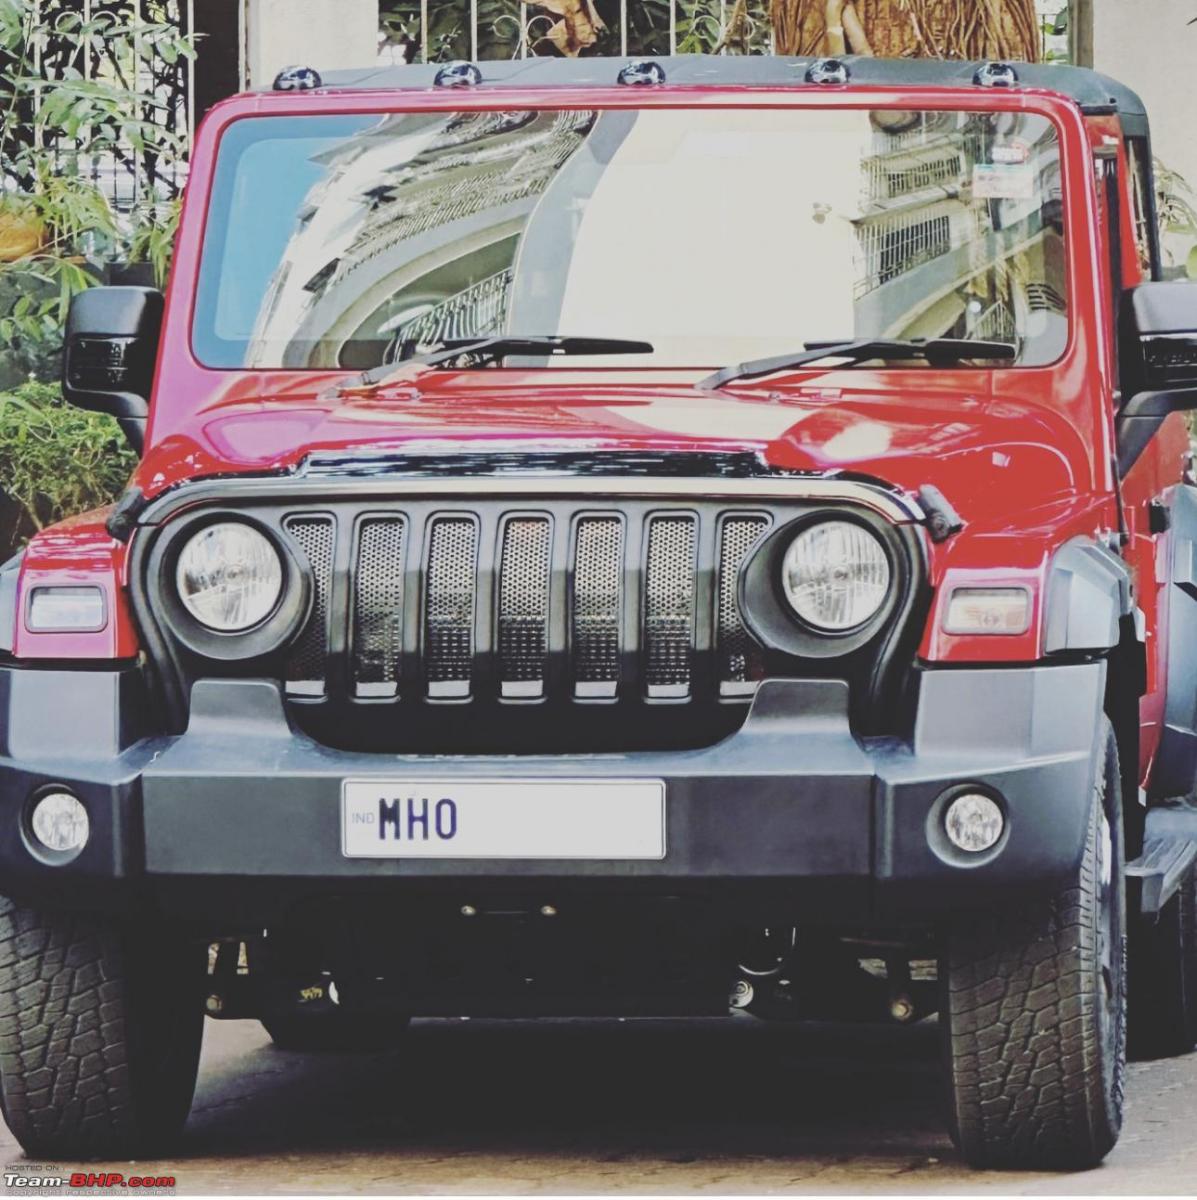
The car has the usual list of mods that almost every Thar owner does:
- Wrangler Grill
- Monkeybar Handles
- Bug Deflector
- Side Step
- Gloss Black trims
- Front/Rear Armrests
- SS Metal Skid Plate Radiator Guard
- Marker Lights
I really wanted to get the chrome (EYESORE) delete done as soon as possible, but all workshops near me gave outlandish quotes in the Rs.4000 range.
I decided to go the DIY route, and picked up a can of Rust-Oleum Automotive Peel Coat Spray Paint from Amazon for Rs. 650.
Sunday morning 11am I readied my DIY basket to dechrome the car myself, and got to it! DIY Basket contents:
- 3M Glass Cleaner (Used to clean the emblems, since it has IPA)
- Tooth Brush
- Cotton Swabs
- Microfiber Cloth
- Masking tape
- Cello Tape
- Paper (For masking)
- Rust-Oleum Automotive Peel Coat Spray Paint (Matte Black)
- Toothpick to aid in peeling.
Step 1: Clean the emblem:
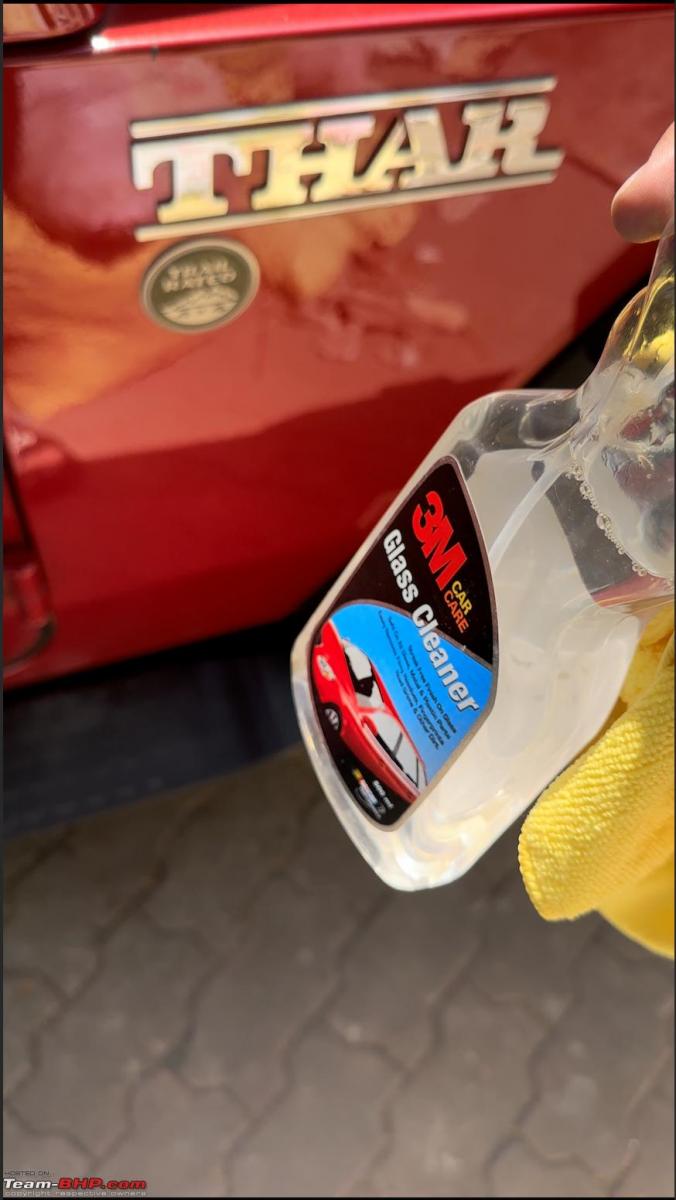
Liberally sprayed the cleaner on the emblems, and gave it a nice rinse and wipe with the microfiber towel. Then proceeded to get into the nook & crannies using a damp cotton swap. Trust me, your car emblems are much dirtier than they look!
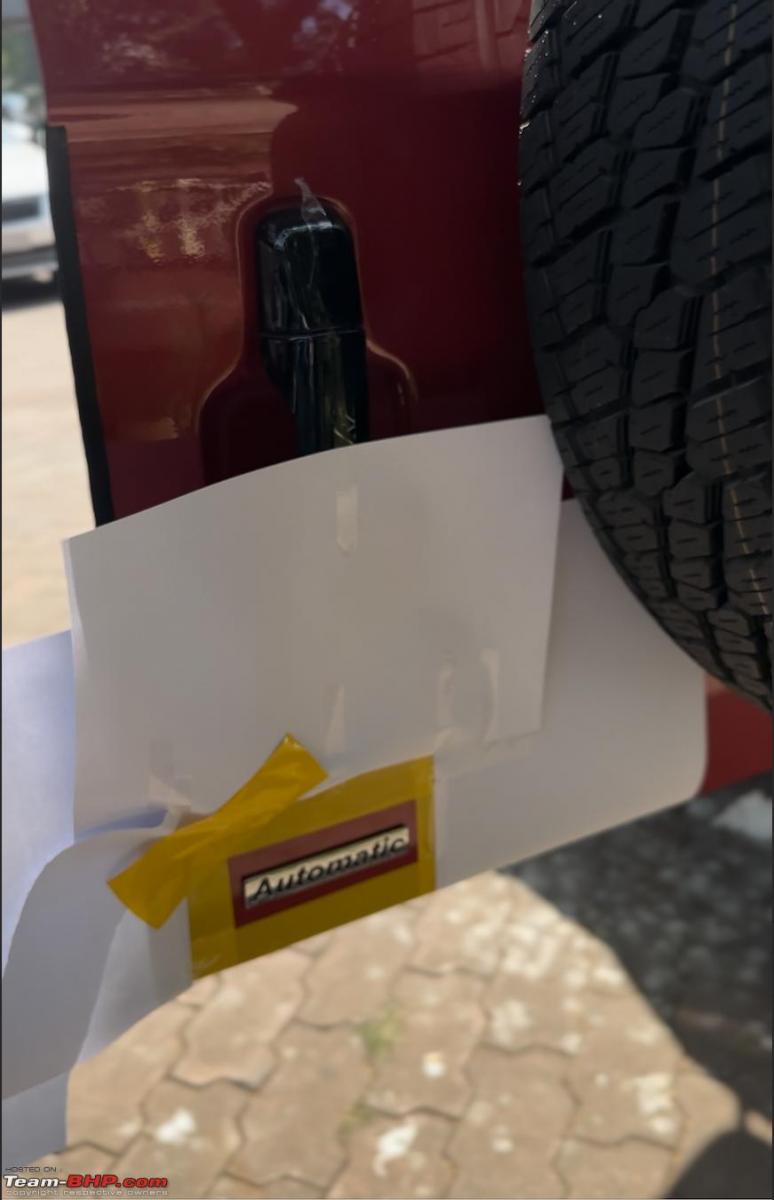
Step 2: Masking (Most important step):

I wasn’t too worried about overspray here, since this is rubberised paint, overspray just peels off the car. Nonetheless, I wanted to make sure I keep it to a minimum, to please the inner OCD.
First I masked off the emblem with just tape on all 4 sides, leaving 1-2 inches of space. Leaving this space is crucial to ensure a clean peal of the paint, or else you’ll be struggling to get small pieces of rubber out from between the emblem gaps:


Step 3: Spray Spray Spray!
I gave each emblem a total of 5 coats each, with each coat getting progressively heavier.
The first coat was extremely light, mostly for giving me a sense of how rubber paint sprays out (and trust me, it’s different from your regular spray paint). Each progressive coat was sprayed only after the previous coat was completely dry.
Also made sure to spray for all angles, since the emblems are 3D & quite thick on the Thar, to ensure no chrome spots were left uncovered.

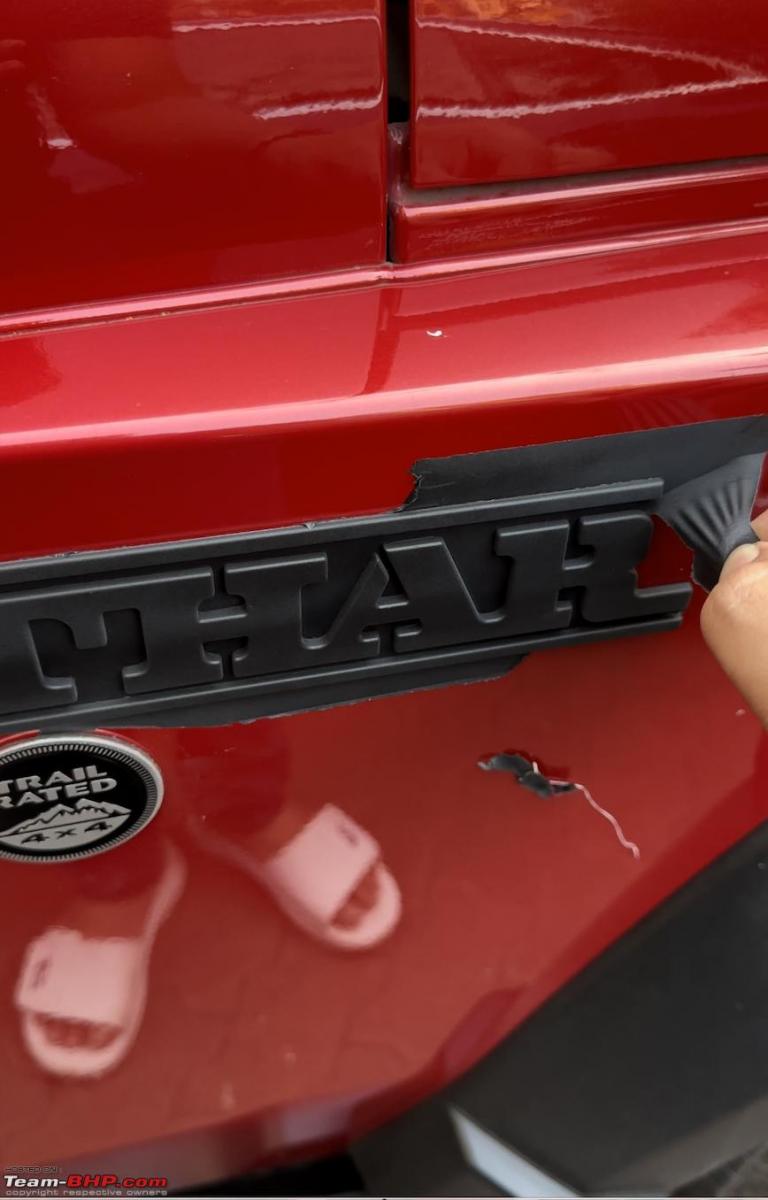
Step 4: Peel Peel Peel!
Here it comes, the most satisfying part of this DIY, peeling off the rubber paint, and oh boy was it a lot of fun! My wife joined in for this part too!
Got to be careful while peeling, ensuring you don’t peel off the rubber on the emblem too! The mighty toothpick was my best friend here, making a fast job out of the nook and cranny peel:
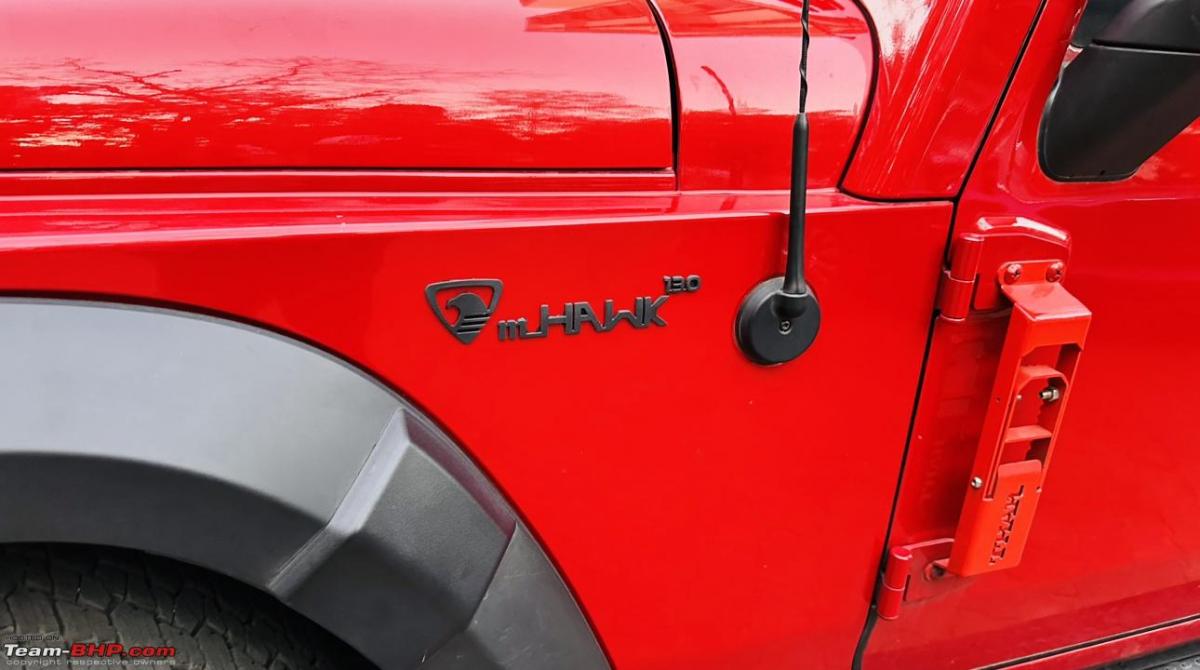
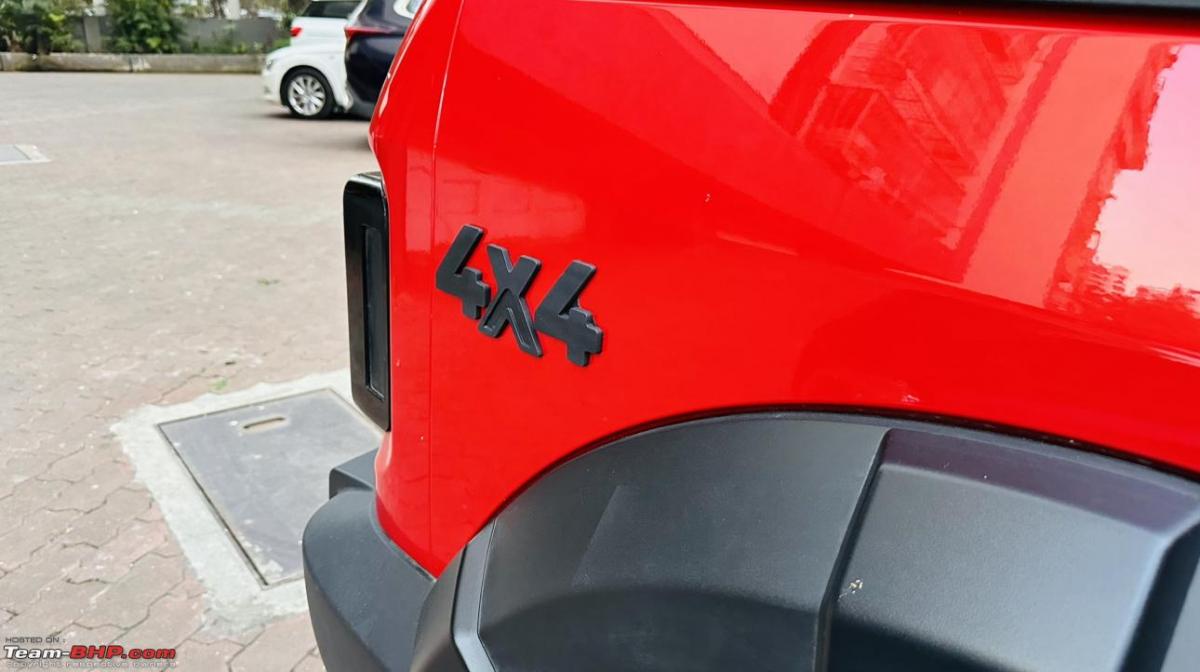
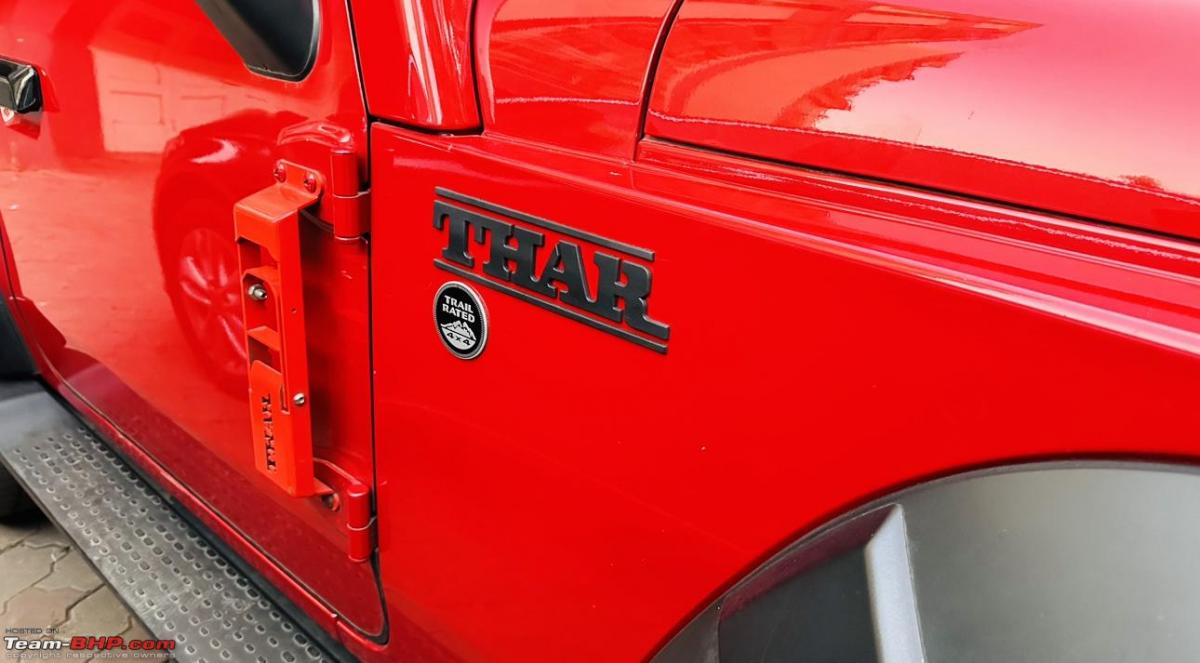
Gave the emblems a good wipe after the peel, took a few steps back, and enjoyed the fruit of my effort!
And now, it’s time for you to enjoy the fruit, for reading through this post! Enjoy:
Hope you guys liked this DIY.
Check out BHPian comments for more insights and information.
Find Car News
Just News


About Us