News
Installed a 3D printed spark plug tray on my Alfa Romeo Spider

I also picked up some new front shocks for the Spider from my friendly Alfa parts supplier Goos.
BHPian Jeroen recently shared this with other enthusiasts.
Well, I knew it would happen at some point, but I have done it!
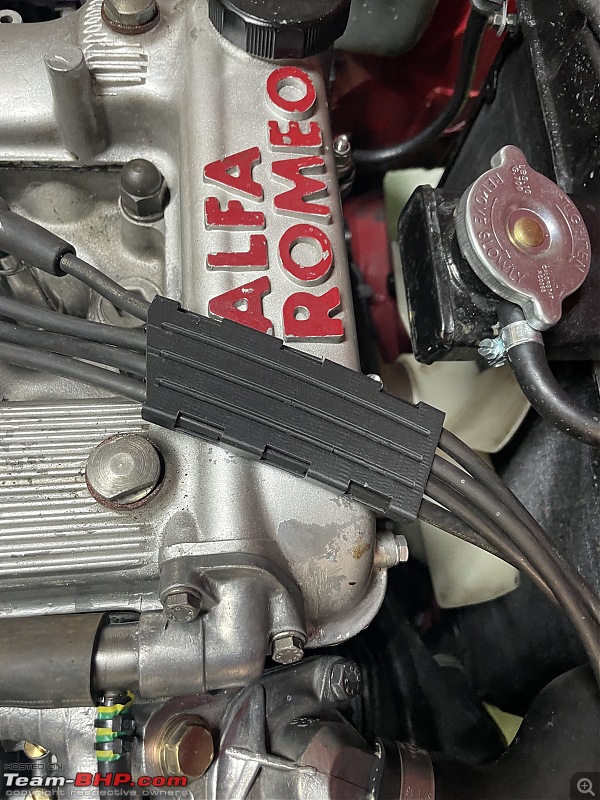
The first 3D printed part fitted to one of my classic cars. In this case a spark plug tray/top on the Alfa Spider.
On the Spider the spark plug leads are secured on top of the cylinder head/valve cover. Somehow this cover got lost over the last 18 months of doing multiple jobs on the engine.

You can't source it new anymore and also second hand impossible to get hold of.
By chance I got a suggestion from somebody on AlfaBB (https://www.alfabb.com/threads/calib...5#post-8910435) He noticed that some photographs I shared it was missing and directed me to another AlfaBB member who had made 3D CAD design.


So I downloaded these files. The tray was still attached to the valve cover. So I send the CAD file of the top to a 3D print shop. The next day and Euro 13 later I received two 3D printed tops! I ordered only one, but they made me two for some reason. Euro 13 to put is some perspective is the price of two coffees at Starbucks here!

Fits perfectly!!
I am very pleased with it. I have owned a 3D printer myself many years ago. It was not a huge success at the time. It was easy enough to get the shapes and dimensions correctly. But in those days the final product would be quite brittle and would quickly snap.
This part feels a little flexible, so I don't think it will break easily. The one thing I might/should have checked perhaps was the heat resistance of the material used. I just did not think of it. But it gets 90oC easily on top of that valve cover. So we will see how this lasts!
I also picked up some new front shocks for the Spider from my friendly Alfa parts supplier Goos. (Actually, I picked them up by boat!! different story different thread)
You can read earlier on in this thread on how I replaced the rear ones and that made a huge difference. I also adjusted the front ones at the time. (They were Koni Adjustable shocks).
Marc suggested I should replace the front ones with the same Bilstein Gas shocks.
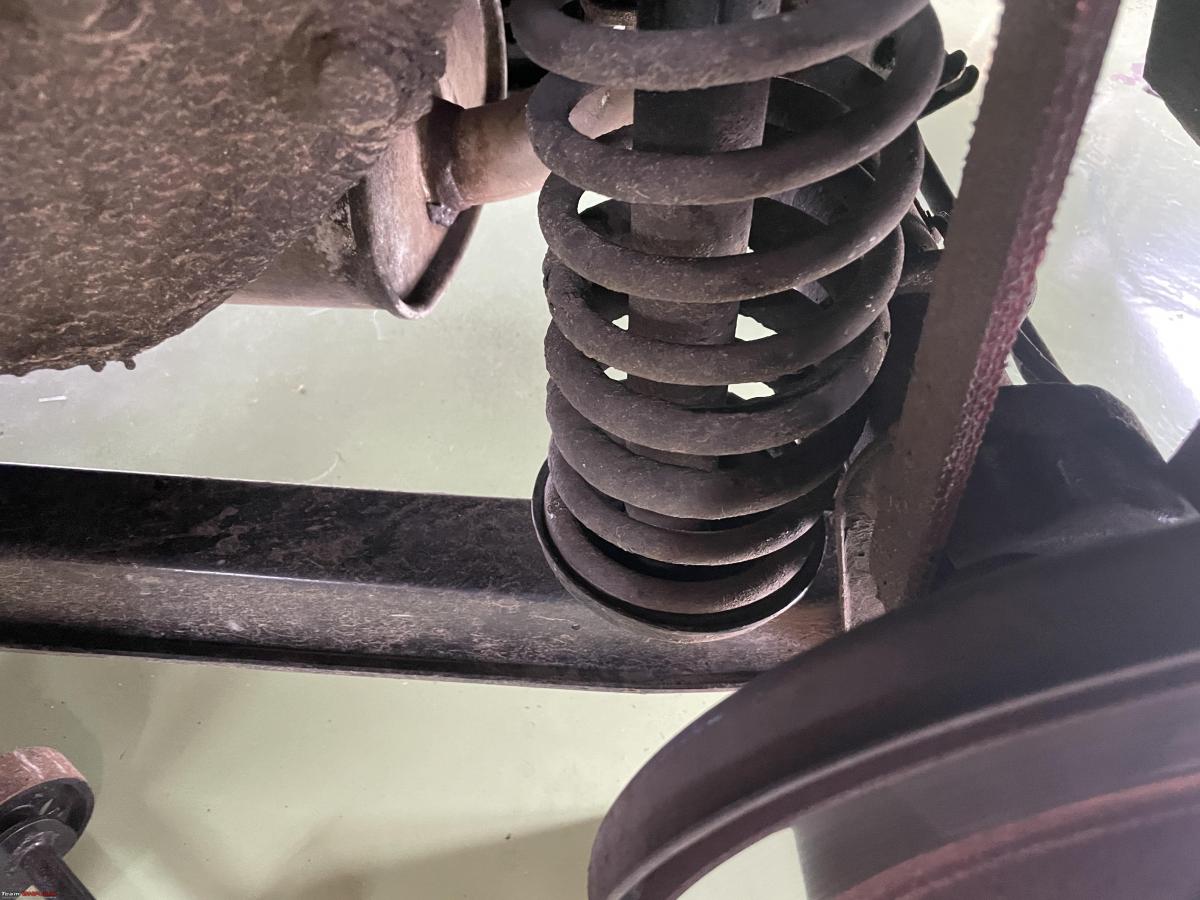
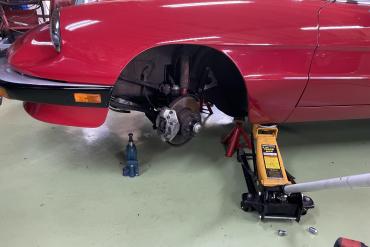
Replacing front shocks on a Spider is one of the easiest jobs you can do!

Of course, you need a jack, and axle stand and the respective wheels need to come off.

Original Koni as fitted for the last 20 years and some 120000km!

Take off the nuts at the top and the bottom and pull them out. That's all.
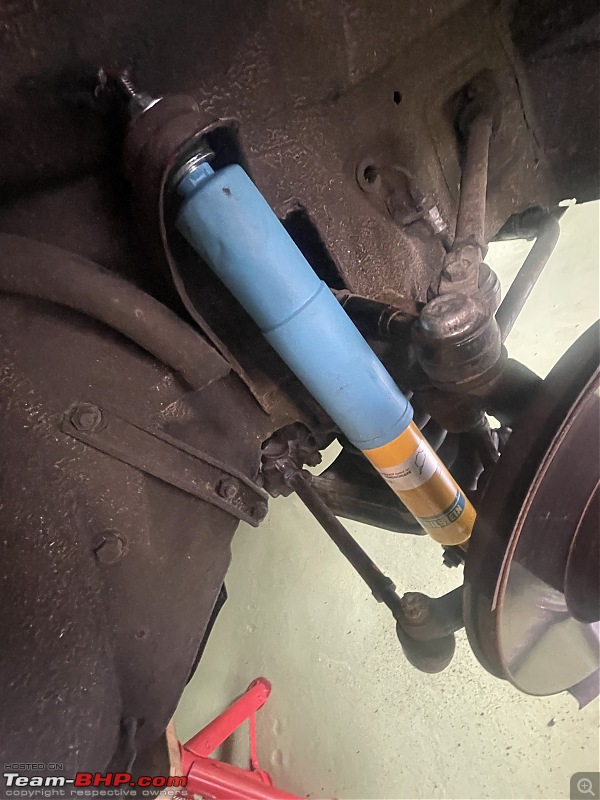
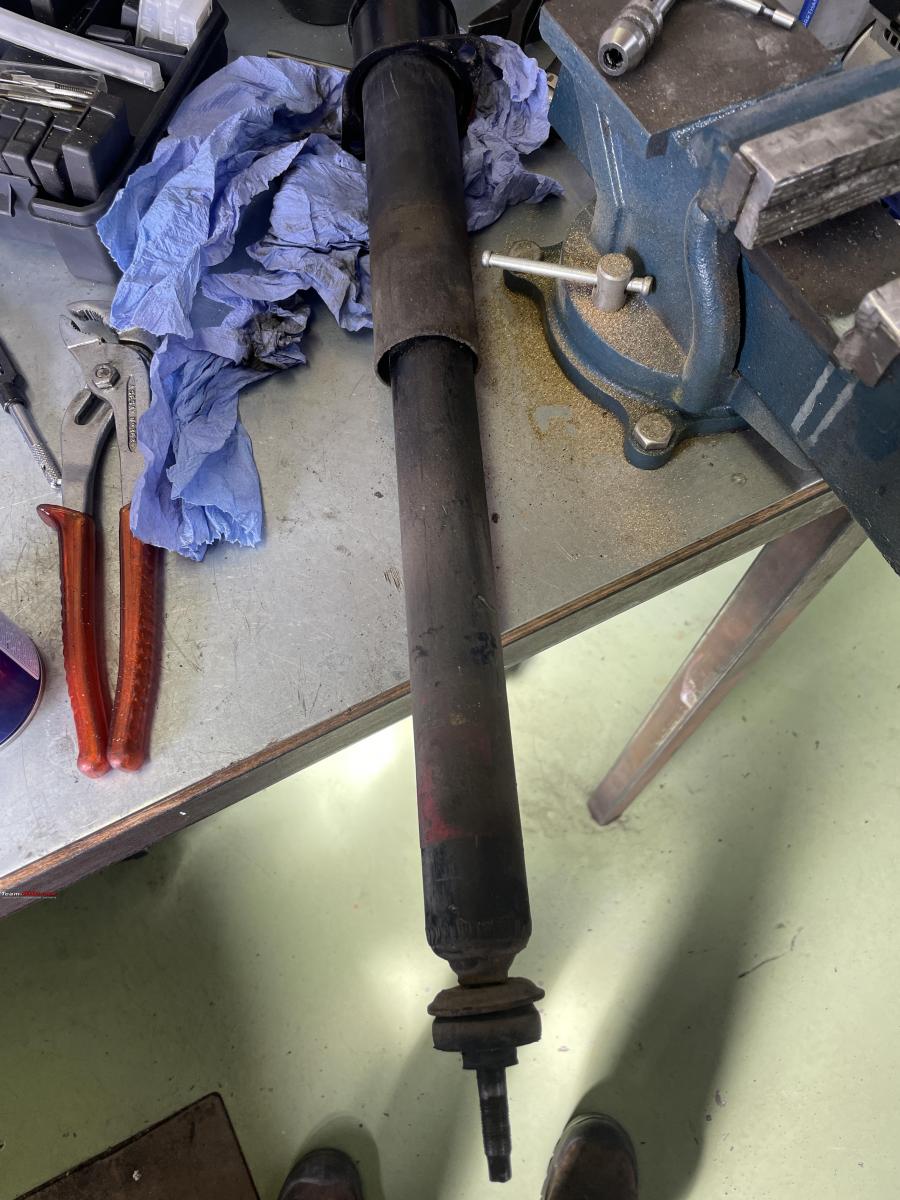
As is customary comparing the old and the new one. I paid special attention to the top mount, based on our earlier (unfortunate) experiences with replacing the shocks on Peter's Lancia. These were identical, new rubber mounts and nuts were supplied with the new shock.

One shock fitted!
Replace on the other side and make sure to torque all wheel lug nuts correctly!

I have done a test drive with them. Again, makes a difference in the feel and handling. Also, the ride height is slightly better. These shocks are (gas) preloaded. So they actually do push the car up a bit compared to non-gas shocks. On a very low-slung car, fitted a sump guard of 1 or 2 centimetres extra clearance makes a huge difference when encountering speed bumps and so on.
I am very pleased with how the Spider feels and drives. Still need to check the oil consumption. I have done about 700 km. Fuel consumption with the carbs compared to the injection is up by about 20%. But I was expecting that.
In just over a week Peter and I will be taking our Spiders to the South of Germany for our annual Spider trip. The first stop is Technik Museum in Sinnsheim.
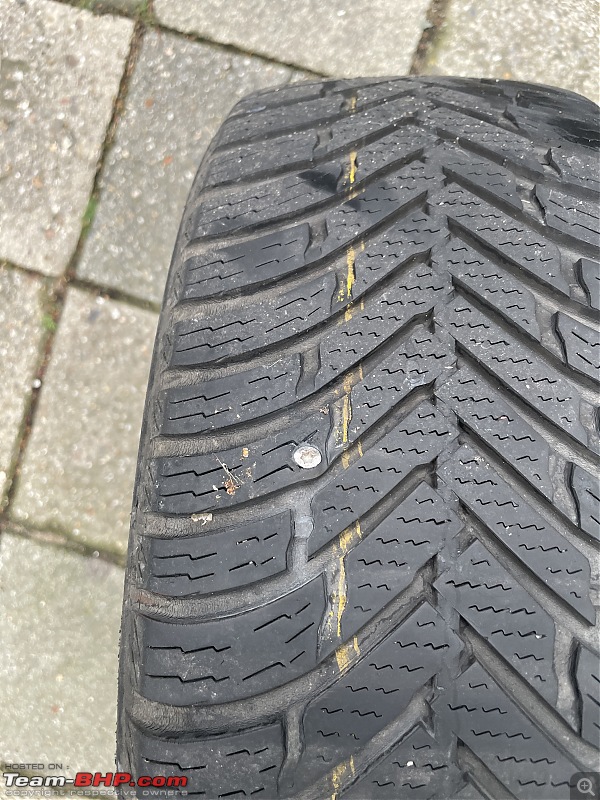
Mrs. D's little Fiesta suffered a flat! I wanted to move it around our yard and as soon as I started it, I got a TPMS alarm. I checked and I could see the right rear tire being a little low on air.
Mrs D was supposed to go over to our daughter and look after our two granddaughters for the day. So I quickly jacked up the Fiesta, shoved an axle stand underneath, and took the wheel off.

Look at this, no mistake, that will leak!!
Threw the wheel in the back of my Jeep and drove over to our local tyre fitter (Euromaster Gorinchem). I know these guys, I have bought multiple tyres from them over the years. I rocked up at exactly 08.00 AM. By 08.15 I was on my way back home with a fixed tire.
By 08.30 the Fiesta was back on the road!
Of course, always use a torque wrench for the wheel nuts. (Funnily enough, the Fiesta has the highest lug nut torque in our fleet! 130Nm

Checked all four tyres for correct pressure

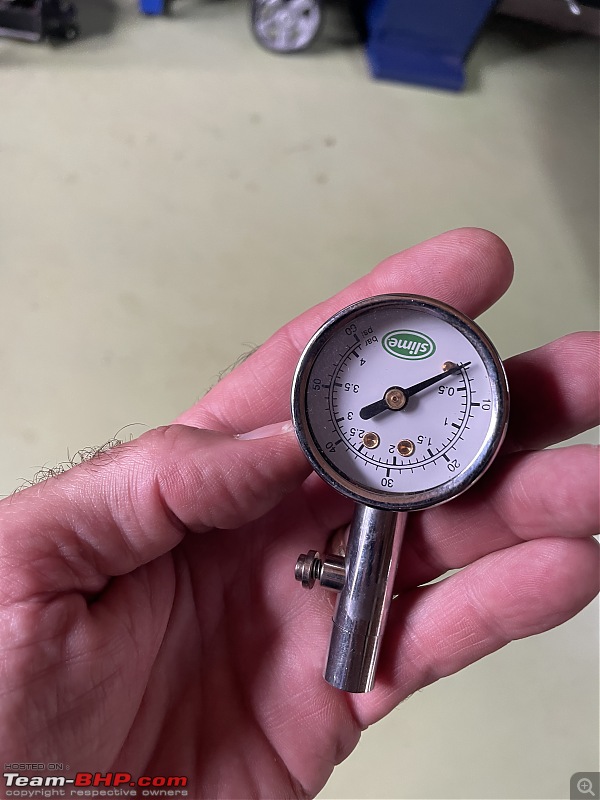
Whenever I use my compressor with its fancy Haxet tyre inflator manometer I always take one reading with this small handheld manometer. These tyre inflators are notorious for wandering off their original calibration over time. So I check them regularly against a different instrument. As long as they indicate similar values we are good to go!
Check out BHPian comments for more insights and information.
News
Taking care of some old cars including my Alfa Romeo Spider & Mini One


I wanted to change the transmission oil which is a very simple and straightforward job, but a pain without a lift.
BHPian Jeroen recently shared this with other enthusiasts.
I came home from our 5 Spider trip to the Eiffel a couple of days ago.
First order of business is to wash and dry out the Spider as it got incredibly wet!
Luckily it was very nice weather in the Netherlands!

The Spider did really well in Germany. It used about 300 ml in about 1000km. So it looks as if the oil usage is still coming down. As it should on an overhauled engine. Even so, I am still not completely convinced about my Bosch L-Jetronic system working properly. So I have made an appointment in two weeks time with a real classic electronics specialist. See what they can find.
I cleaned the clamps on the battery with my special little nifty tool.

And also all the ECU ground connections on the engine. Just for good measure.
I spend a lot of time drying out the floor plan underneath the carpet. It has noise dampening material and it got soaked. Used my wife's hair blower!


The problem is the hood leaks badly when it rains heavily. I am going to buy a special little cover that fits just over the hood to keep the water out of the cockpit.
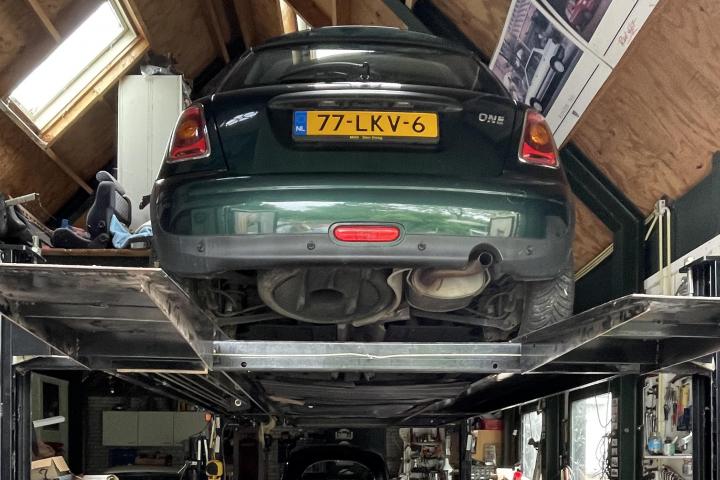
Yesterday I went to see Berndt. I had one job on my Mini and Berndt had three jobs on three of his cars. First, my Mini went up on Berndt's lift as I wanted to change the transmission oil. A very simple and very straightforward job, but a pain without a lift.

When changing out oil, before draining said oil, make sure you can open up the filler. Both the drain and the filler plug have an 8mm Allen connection.
This is the drain plug:

And this is the filler plug. As you can see, it was badly damaged.

Some idiot must have over-torqued it! These plugs don't have (copper) washers or o-rings. they seal just on the thread and need to be tightened to precisely 43 Nm. Looks like somebody overdid it.
So I decided not to proceed and get two new plugs first before making an attempt.
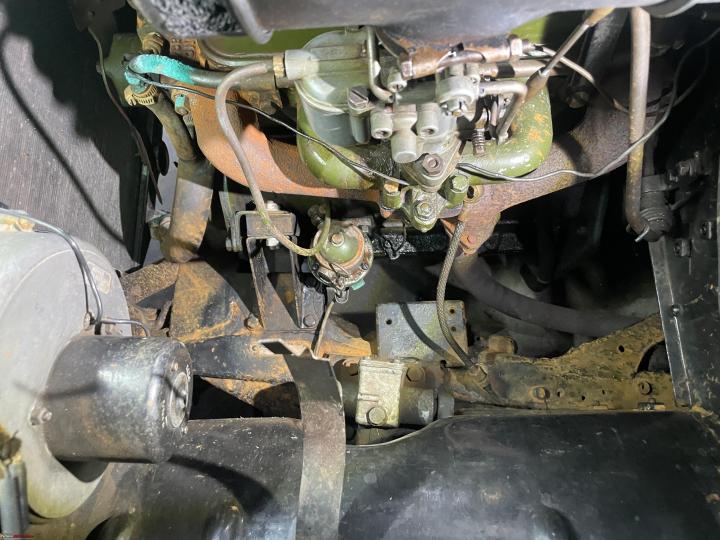
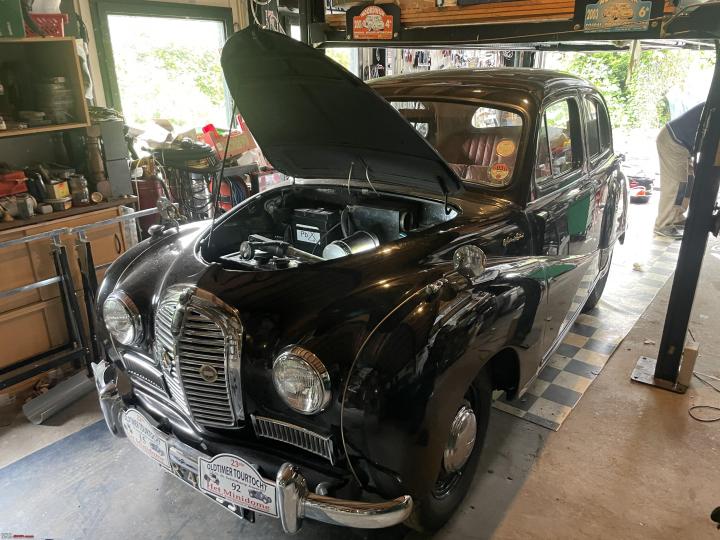
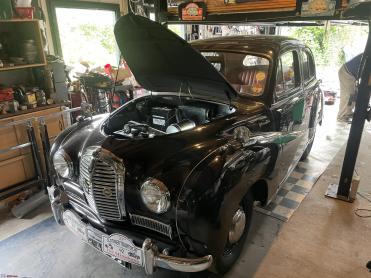
The next job was on Berndt's Ollie, his Austin Somerset. Last year we spent quite some time on this little car. We overhauled the fuel pump. But now and then the engine seems to stall when it is warm. We have a feeling we did not reassemble the pump correctly. This means that the fuel lines are very close to the engine block. Here you can see it, I have already removed the fuel supply line.

We took the pump of the engine and re-positioned the top half so the inlet and outlet would be rotated about 120 degrees.

Much better!

Next job was on Berndt's 1985 classic Mini. It had failed its MOT due to a frayed parking brake cable. Quite the job to replace it, but made it a lot easier having the Mini on the lift. Sorry, I did not take any photographs other than this disassembled handbrake.

It took us almost three hours to replace the handbrake cable. Which meant we did not have enough time left for the fourth job, fixing the gear lever play on Berndts Landrover.
We will redo the Mini and the Landrover in a couple of weeks time, second attempt.
Check out BHPian comments for more insights and information.
News
Update on my Alfa Romeo Spider: Driven 1600 km after engine overhaul
I am still not 100% convinced the problem with the over-fueling is completely solved, but it appears a lot better than last year.
BHPian Jeroen recently shared this with other enthusiasts.
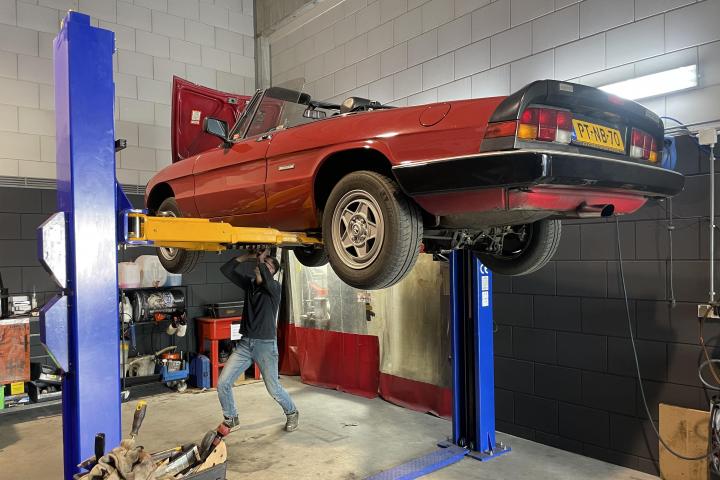
Yesterday, I took the Spider back to Marc. Since the last engine overhaul, I have driven almost 1600 km. So, it's time to get the oil and filter changed. And a few other small things.
As always, there is plenty to see in and around Marc's shop!

We put the Spider on the lift. Drained the oil, and replaced the oil filter.
The engine has used about 0.75l of engine oil, which is not too bad for a newly overhauled engine. I am still not 100% convinced the problem with the over-fueling is completely solved, but it appears a lot better than last year.

When we started the engine, within minutes I noticed a huge black spot of soot and crap underneath behind the exhaust on the shop floor. Marc confirmed it is most likely unburned fuel. This means the cold start and warming up system is not working properly. I will look into it when I get back home.
We also investigated the small coolant leak. Most likely it is not the coolant pump seal. With the Spider on the lift, we could have a good long look. Impossible with the Spider just on jackstands in my garage.
We concluded that there was most likely a tiny bit of coolant coming from the bleed screw and perhaps also underneath one of the hose clamps. So that was soon fixed. I also felt the Spider steering was a bit on the heavy side. We discussed the option, which is adjusting the front wheel alignment (Toe in/out) or the steering box. As the Spider drives extremely well straight out at high speeds (130-140 km/h) we opted for adjusting the steering box. I have done this once myself a few years ago. It is somewhere in this thread. It is done by placing additional shims on the top of the steering box. And I must say, it made a remarkable improvement.
I have already spoken to Peter. Most likely he will come over to help me with checking the cold start system. It is not that difficult, but it is a two-man job most likely. We will need to remove the cold start injector and hold it above a container whilst the other one cranks the engine.
I took a nice drive back home, avoiding all motorways.

In a few weeks time, we had planned our annual Spider trip to France. Unfortunately, Cees and Annelies, our friends and owners of the B&B Le Paradis had to cancel our booking due to personal circumstances. During that time they need to be in the Netherlands. With the other Spider friends we quickly made different arrangements, so we are going to Daun, Germany instead of Buxurelles France. Cees and Annelies will be staying in our home, so that works out for everybody.
Check out BHPian comments for more insights and information.
News
Preparing my old Alfa Romeo for a bi-annual roadworthiness certificate

I always check a few things, just to make sure the basics are working. Which means checking all the lights. For the MOT/APK every outside light that has been installed, has to work.
BHPian Jeroen recently shared this with other enthusiasts.
I have made an appointment for the bi-annual APK (MOT) of the Spider with Goos.
I always check a few things, just to make sure the basics are working. Which means checking all the lights. For the MOT/APK every outside light that has been installed, has to work. So that means all headlights, in all settings, rear lights, fog lights, indicators, reverse lights, registration plate lights, and brake lights including 3rd centre brake light.
I had actually checked all the lights before I took the rear unit off to be fixed. I had a spare half hour so I thought I would quickly put the fixed rear light unit back in.
Here you see the studs and how I fixed them with JB Weld. Let's hope it holds!

Before putting the unit back in I also applied a liquid gasket to the rubber gasket. This will hopefully help a little by keeping the unit fixed in place, but also if it does become loose prevent water ingress.

With the unit back in, all wires cleaned and attached I tested all the lights again. And it was a mess!!! The fog lights would only come on, with the headlights on full beam. With the headlights on, the indicators would not work. And the right front dipped beam light was not working at all.
This is the problem with the car's electrical system. One small problem can offset a whole host of seemingly unrelated issues.
I checked the fuses. I know they get dirty and I twiddle them a bit inside the fuse holder.

Nothing, so I took the headlight unit apart to check the bulb.

The bulb was fine, I checked I got 12VDC on the connector, for both the dipped and the main beam.
So I decided to check the fuses a bit better by removing them. You can see that the fuse is not popped, whilst still in the fuse holder.
But with the fuse out of the fuse holder, it became immediately apparent what the problem was. Terrible corrosion of the fuse, on both ends! Cleaned it and all problems were gone!!

The next day I drove over to spanner mate Peter. He had a few little jobs, nothing he could not have done by himself. But we enjoy doing these things together.
Lots of Spiders on the drive! When I first met Peter more than 20 years ago, he only had the white S3 Spider. It is very similar to mine but has a different dashboard. Otherwise identical (well apart from the colour obviously)

First job, was an engine oil change. So we drove Peter's Coda Tronca for about 15 minutes to warm up the engine. Next drained the oil and put a new oil filter on.

We also replaced the air inlet filter. The weather was not cooperating and we had to work in between various showers.
The final job was to replace the lock on the boot. There are some earlier posts in this thread on this one. The lock was stiff, which means you had to pull very very hard on the plastic handle inside the door frame to open it. These cables and the plastic handle will snap at the best of times after 40 years. We tried to make it all a bit more smoothly but were only partly successful. The main problem was you couldn't get these locks anymore.
By sheer chance, Peter had managed to pick one up the other day.
We pushed the Spider in the shed, so the rain would not bother us.

Very simple such a lock and it did the trick. We had to adjust it a bit to get it to open up smoothly, but all is working well now!
Later today I am picking up my Mini!! About time too, it has been away for quite some time. But it should be fine or so I am told. I have several trips lined up over the next few days to rake up sufficient kilometers to check out everything.
Jeroen

Check out BHPian comments for more insights and information.
News
Working on my Alfa Romeo: Removing rear shocks & driver door trim panel


These might well be original or at least have been on the Spider for longer than I have had the car, which means well in access of 30 years!
BHPian Jeroen recently shared this with other enthusiasts.
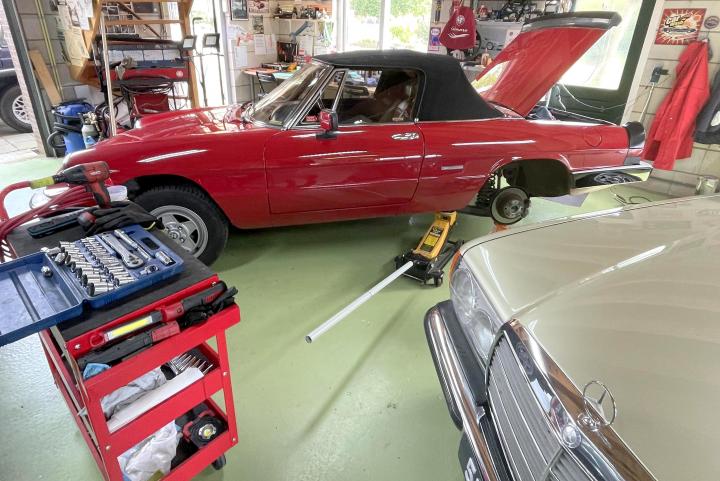
I decided to remove the aft shocks on my Spider and see if I could adjust them.
The aft shocks are a little bit more complex to remove than the front ones.
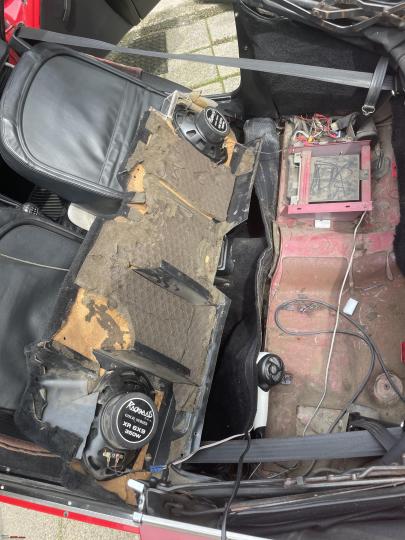
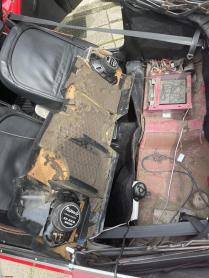
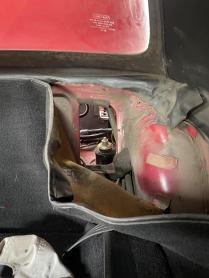
Here you see the top of the shock, inside the boot.
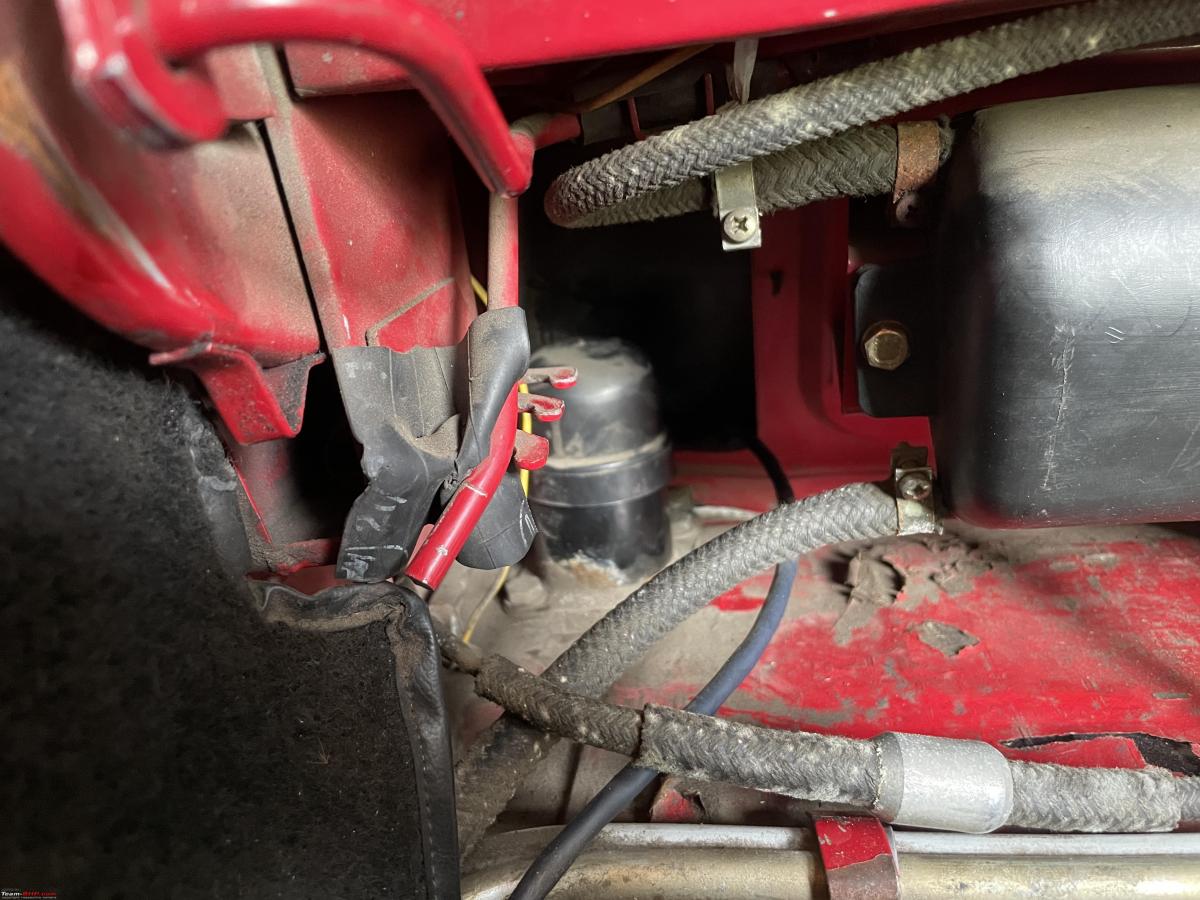
Obviously, the bottom part is attached to the trailing arm using a double nut.
To get better access I also removed this little black canister in the boot. It is part of the emission system. It's also fragile after all these years. Best to handle it very carefully.
Took the rubber top cap off, to get clearance to get at the two bolts holding it in place.

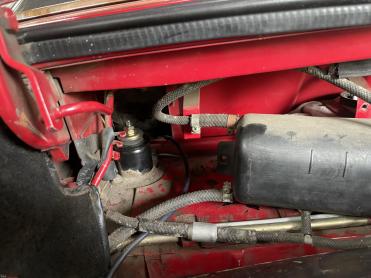
In order to be able to extract the shock, you need to peel back the trim inside the back of the cockpit as well to reveal this little panel, held in place with two screws.

Remove the screws and voila, you can pull out the shock from inside the cockpit!

Here you have it. Much to my surprise, it was not an adjustable Koni shock, but a plain Sachs gas shock. So I checked all my maintenance files. Sure enough, I did find the invoice for the two adjustable Koni's at the front. But I could not find anything about the rear shocks. So these might well be original, or at least have been on the Spider for longer than I have had it. Which means well in access of 30 years!
One of the two shocks did show some signs of wear, so I have decided to replace them.
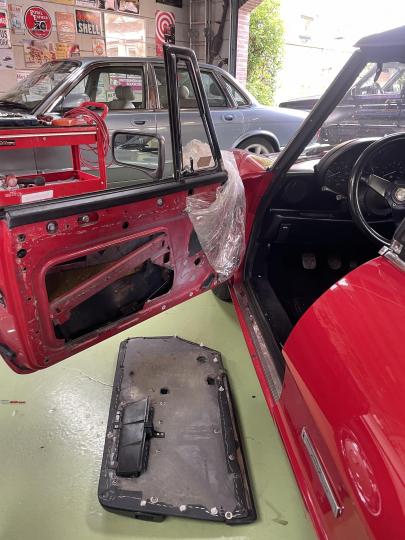
I also decided to remove the driver door trim panel once again. You have seen me remove this panel many times. The window is rattling in the guidance rail and I wanted to see how I could fix it.

Getting the rail out was a bit of a fiddly job, as you can't really see what you are doing. All by feeling and cursing!

The belt/rubber guidance in the rail has come apart. I need to find myself some new stuff.

The first thing Monday morning is to call my friendly Alfa Spider specialist and parts supplier Goos. I am pretty sure he has the shocks, not so sure about the rubber felt window guide. I also need to book an appointment with Goos for the Spider annual APK (MOT).
Check out BHPian comments for more insights and information.
News
Installing new Bilstein shock absorbers on my 1986 Alfa Romeo Spider


It is not that difficult to mount these new shocks but the thing is, you need to depress them fully before inserting them in.
BHPian Jeroen recently shared this with other enthusiasts.
Very wet, rainy and windy weather here. Perfect day for playing in my garage. I spend most of the morning working on my Scuderi Model Engine. Almost all parts are finished and I am now working on fine-tuning everything.
Around noon a big box arrived!

New shocks and a new rubber for the window guide!

Developed on the Nurburgring, can you imagine what that will do for the performance of the Spider!


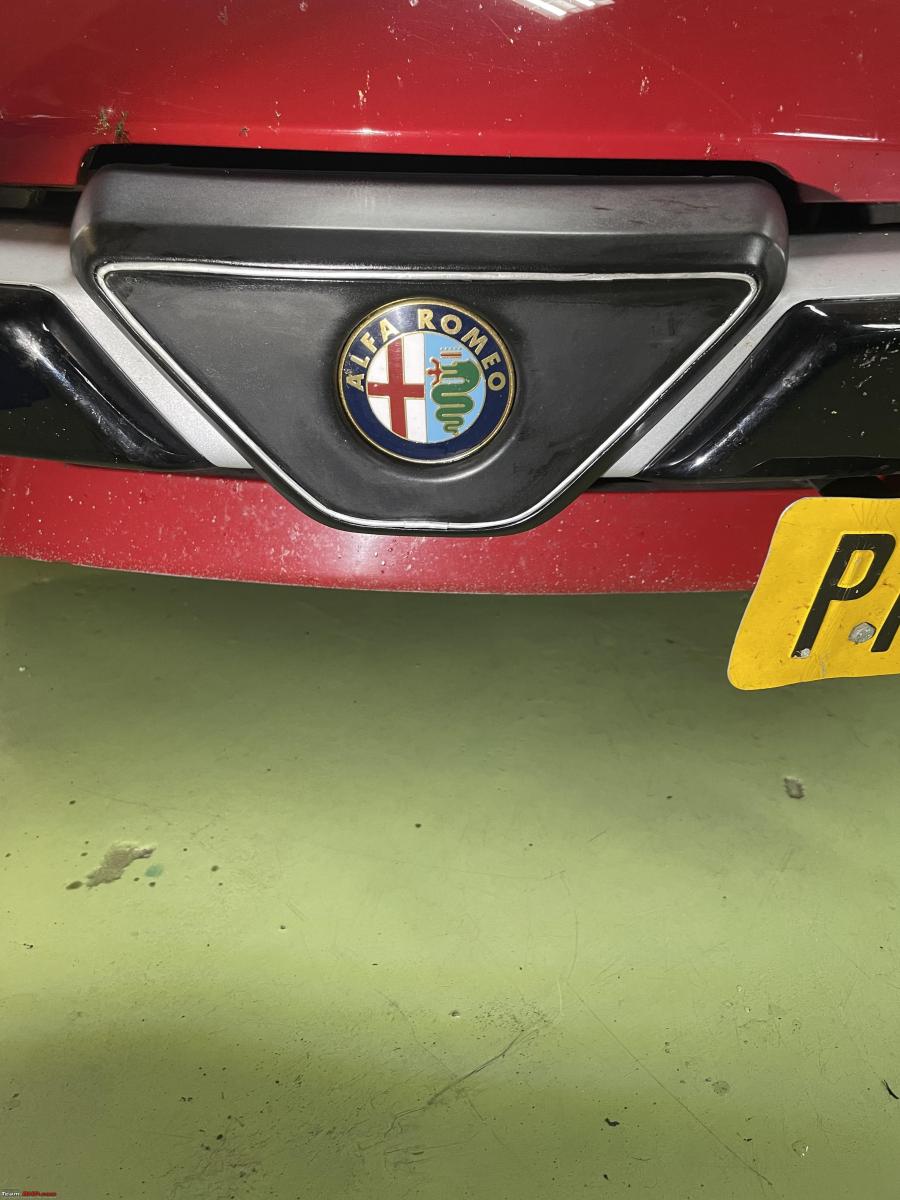
I decided to do one small job first. The front of the Spider has a very special Alfa emblem, set in black with a nice piece of metal trim around it. When I bought the Spider some 30 years ago, that metal trim was missing. One of the first jobs I did, was to make my own. You can't get this piece of trim anymore. So I went to a model-hobby shop and bought some aluminium tubing. Next I bent it in the exact shape and glued it in place. After thirty years it had become loose.
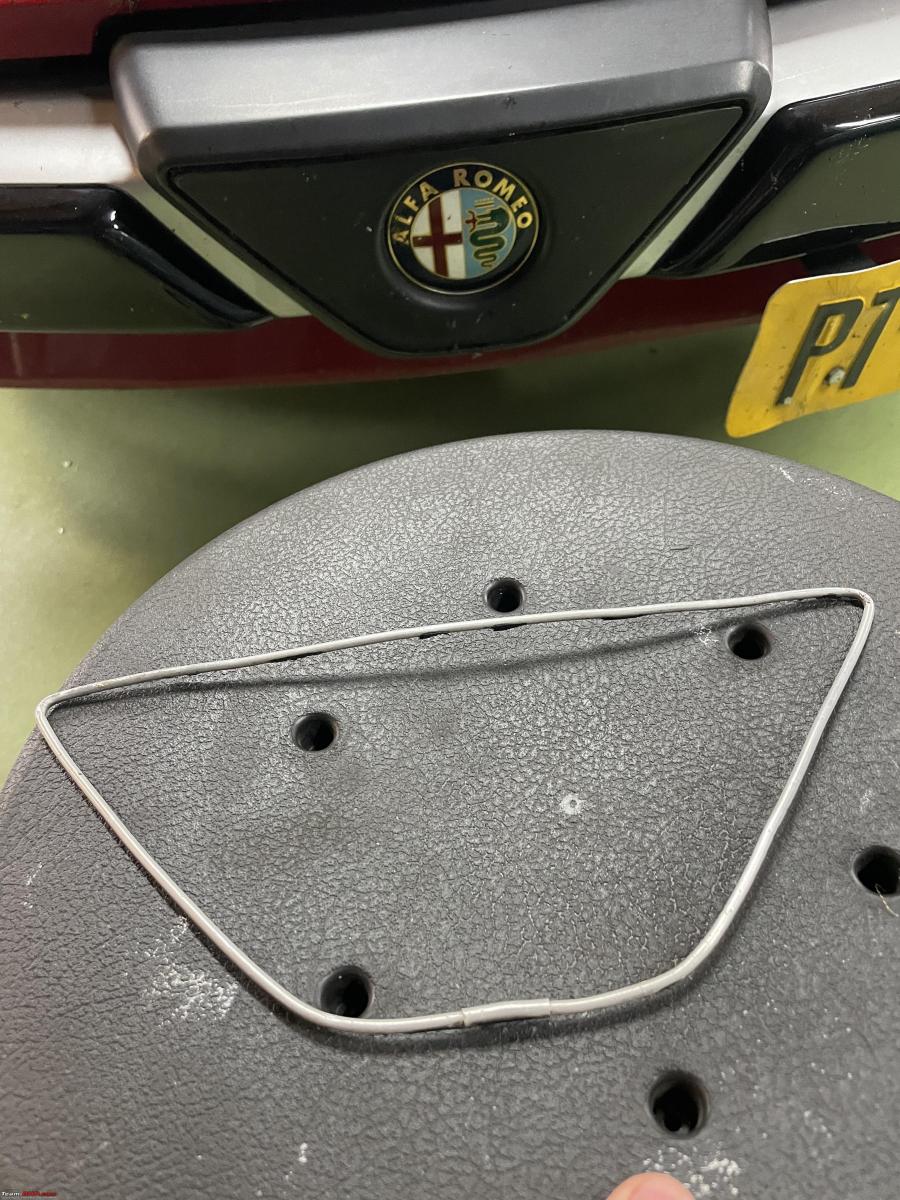
First thing is to clean everything very very thoroughly. And bent it back into shape.


All fixed looks great once again. I hope it holds for yet another thirty years!
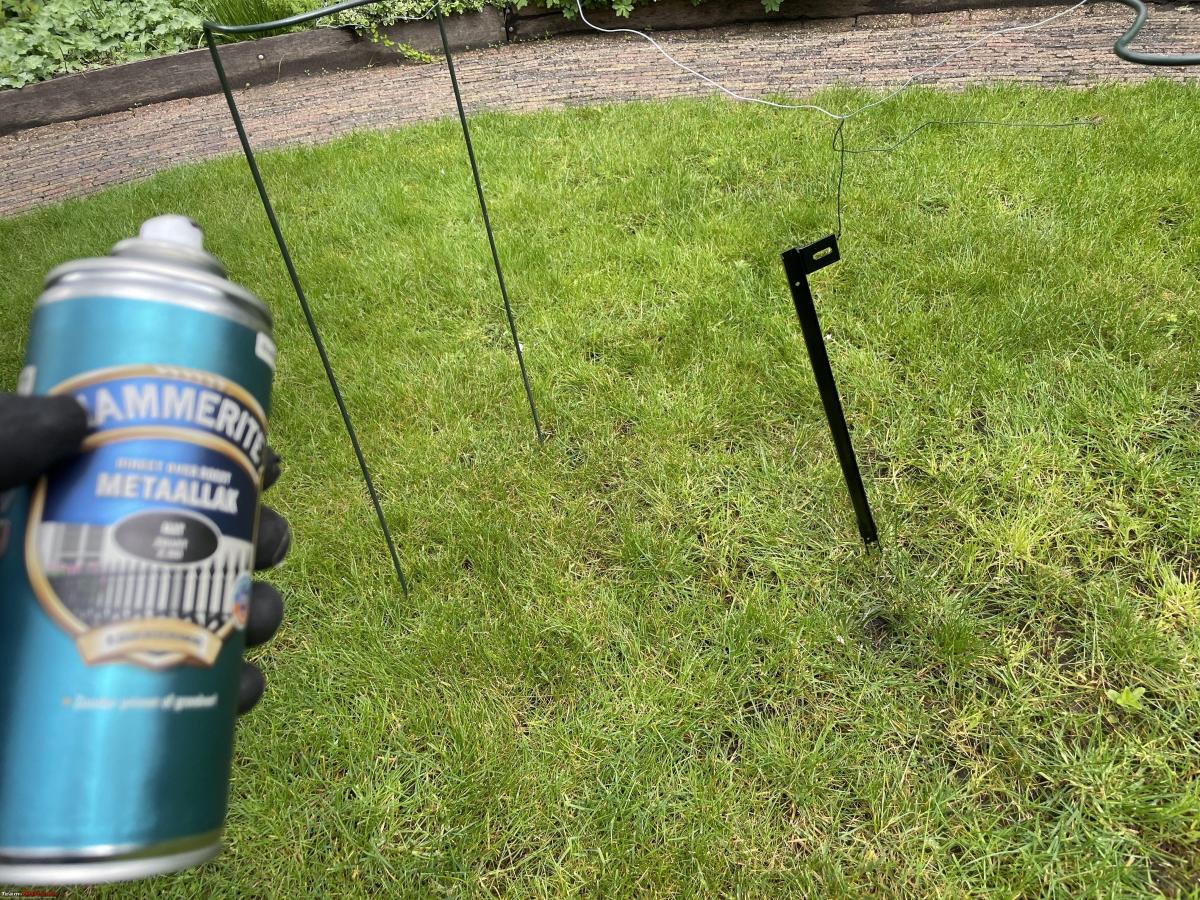
Next, I went to work on the window guide rail. In order to mount the new seal I wanted to clean it first. But a good inspection showed it needed a bit more than just cleaning. I spent about an hour and a half with various pneumatic tools and wire brushes, cleaning this small part. Lots of work.

With these wire brushed in the pneumatic tools it is safety first!

There is a saying in the classic car restoration work: The difference between good restorers and swindlers is the difference in the amount of time they spend on parts you will never ever see!
After I had cleaned the guide rail I degreased it. Also drilled out some rivets that held the seal in place. Next, I put three layers of my special super Black Spray paint on.
Now for the shocks!
My usual comparison of old and new parts. Checking that they will fit, same dimension, checking the various new bushes, rings, nuts etc.
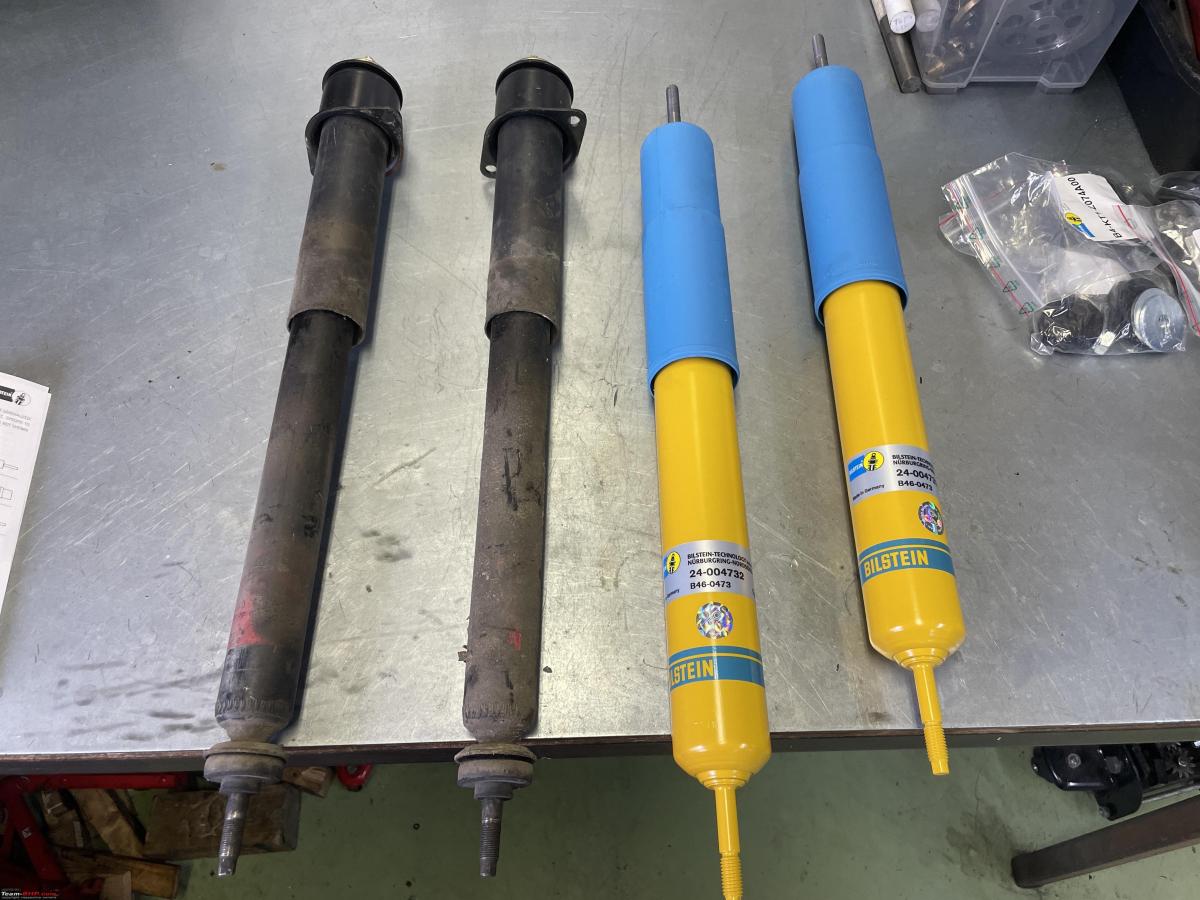
I took the mounting flanges of the old ones and put them on the new shocks.

Everything looked fine, so I decided to fit them right away.
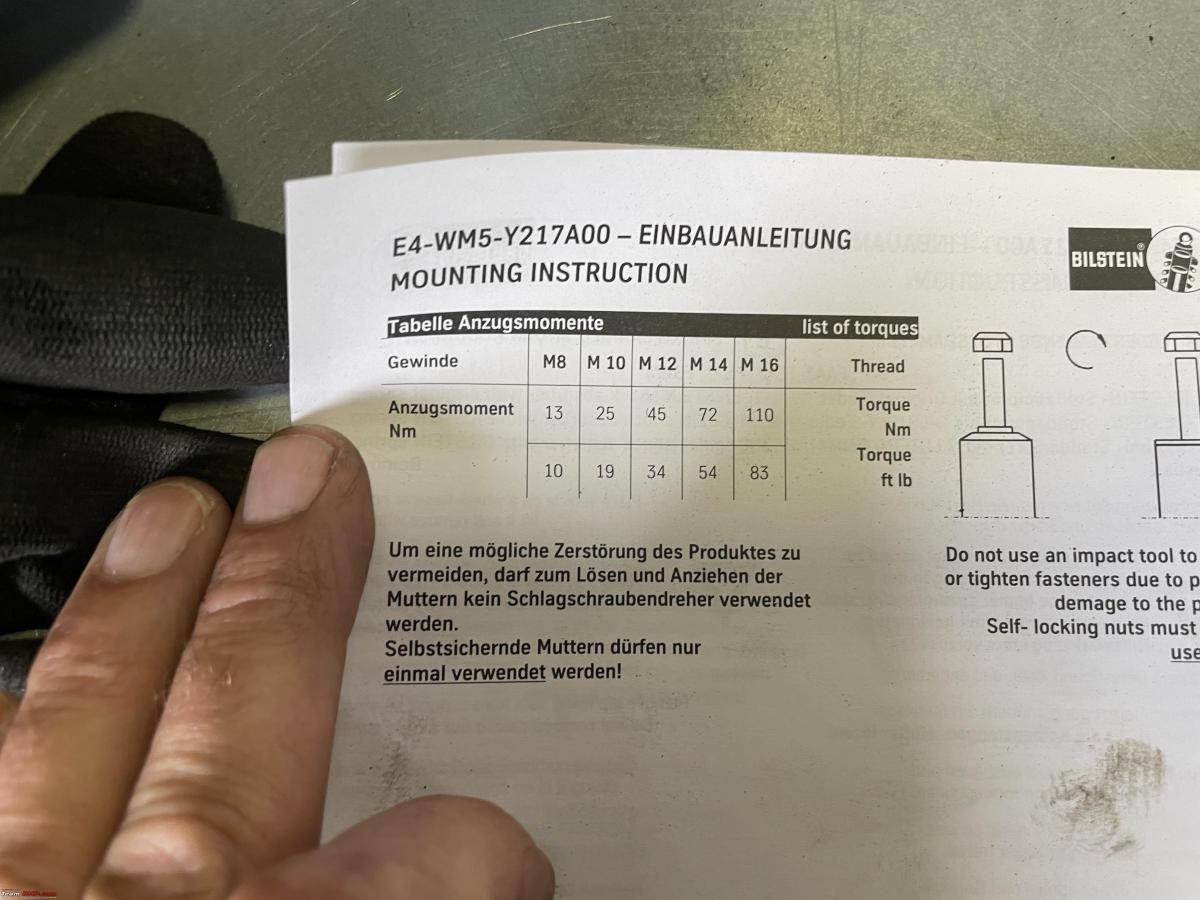
These shocks come with detailed instructions, including how to torque them.
Started on the right rear one, so jacked up the Spider, axle stands underneath, and front wheels choked as per my SOP

It is not that difficult to mount these new shocks. Apart from one thing. You need to depress them fully before inserting them, through the little panel at the back of the cockpit. These shocks always expand. It takes quite a bit of force to push them in. As soon as you let go they start expanding again, slowly but surely. The problem is when you insert the shock whilst it is expanding it will get stuck and it will be very difficult to remove it again.
So I have a little trick; I put the shock in my vice, compress them and put a clamp on it. Next I tie some thin metal wire around it to hold it in place whilst compressed.

Works really well, you just need to remember to extract all bits of metal wire afterwards. But as long as you haven't tied the nuts and bolts down on the shock fairly easy.
My BIG plier came in handy too. When tightening the nut underneath the trailing arm the shocks start to turn. I could easily clamp it with my pliers. Make sure you don't damage the shock's outer casing, you must clamp on the weld on the outer case!

Shock-mounted as seen through the little panel.

The final touch, re-positioned the rubber protective boot!
All done. I still need to fit the interior trim a bit better. I will do that tomorrow. The fresh paint on the window guide will be hardened tomorrow as well. So I can glue the new seal in and let it dry for another day.

Check out BHPian comments for more insights and information.
News
Alfa Romeo's EV can't be named Milano, says Italy

he Milano will be the first Alfa Romeo to be built entirely outside of Italy.
Alfa Romeo recently unveiled its first mass-market electric SUV, the Milano - named after the famous city of Milan, Italy.
However, the Italian government has now announced that the name is illegal. The country's government has stated that since the car will be built in Poland, it can't sound Italian. Alfa Romeo is an iconic Italian brand but is now owned by Stellantis. The conglomerate has been at odds with the government for months, stating its displeasure towards the lack of support for EV adoption and also not supporting home-grown brands like Alfa Romeo and Fiat.
However, the Italian government retaliated saying that moving the production out of the country was a step too far. Adolfo Urso, Italy's Industry Minister, even slammed Stellantis' decision to build the EV in Poland. The Milano will be the first Alfa Romeo to be built entirely outside of Italy, and if the vehicle isn't built in Italy, it can't have an Italian-sounding name.
Urso, stated, "A car called Milano cannot be produced in Poland. This is forbidden by Italian law." She added, "This law stipulates that you cannot give indications that mislead consumers. So a car called Milano must be produced in Italy. Otherwise, it gives a misleading indication which is not allowed under Italian law." Urso is referring to the law set in 2003 that prohibits any product not built in Italy from having an Italian-sounding name.
The Alfa Romeo is built on Stellantis' e-CMP platform, which also underpins the Jeep Avenger. According to Carlos Tavares, CEO of Stellantis, producing the Alfa Romeo Milano in Poland helps the brand shave off 10,000 euros from its retail price.
Source: Electrek
News
Putting my Alfa Romeo's engine back into the car after an overhaul


These cars are fitted with Bosch L-Jetronic injection and ignition system. Lots of wires, sensors and endless hoses and tubes that all need to be fitted correctly.
BHPian Jeroen recently shared this with other enthusiasts.
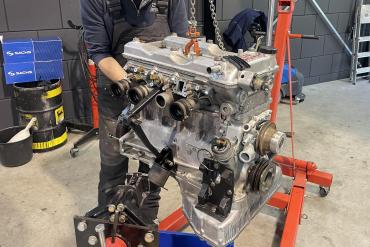
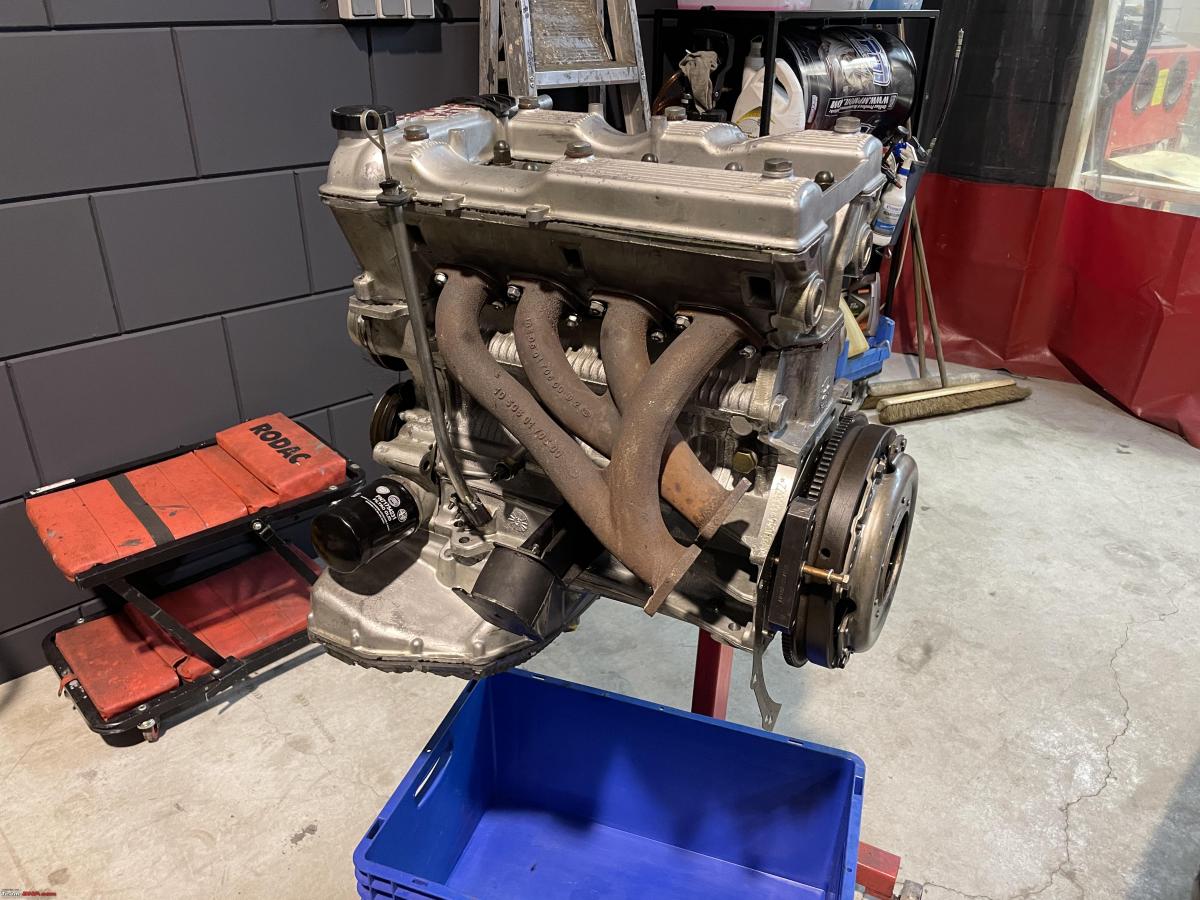
Earlier this week, I spent a day with Marc and the Spider. Marc had finished overhauling the engine and it was time to put the engine back into the Spider.
Marc must have done this hundreds if not thousands of times. But I have done it only a few times. For me, it is very interesting to work alongside a real pro.
Engine all done!

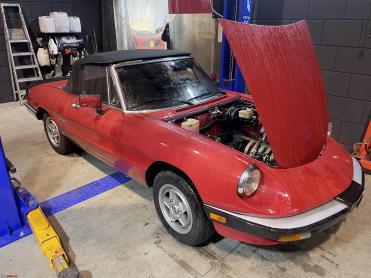
We had to shuffle some cars around to get the Spider onto the lift. Marc always has so many cars at his shop, space is always at a premium.

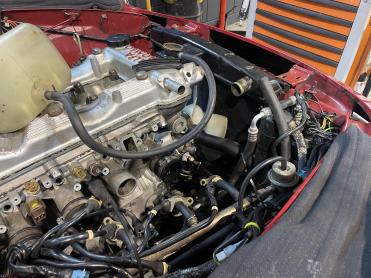
This is what the engine compartment looked like.
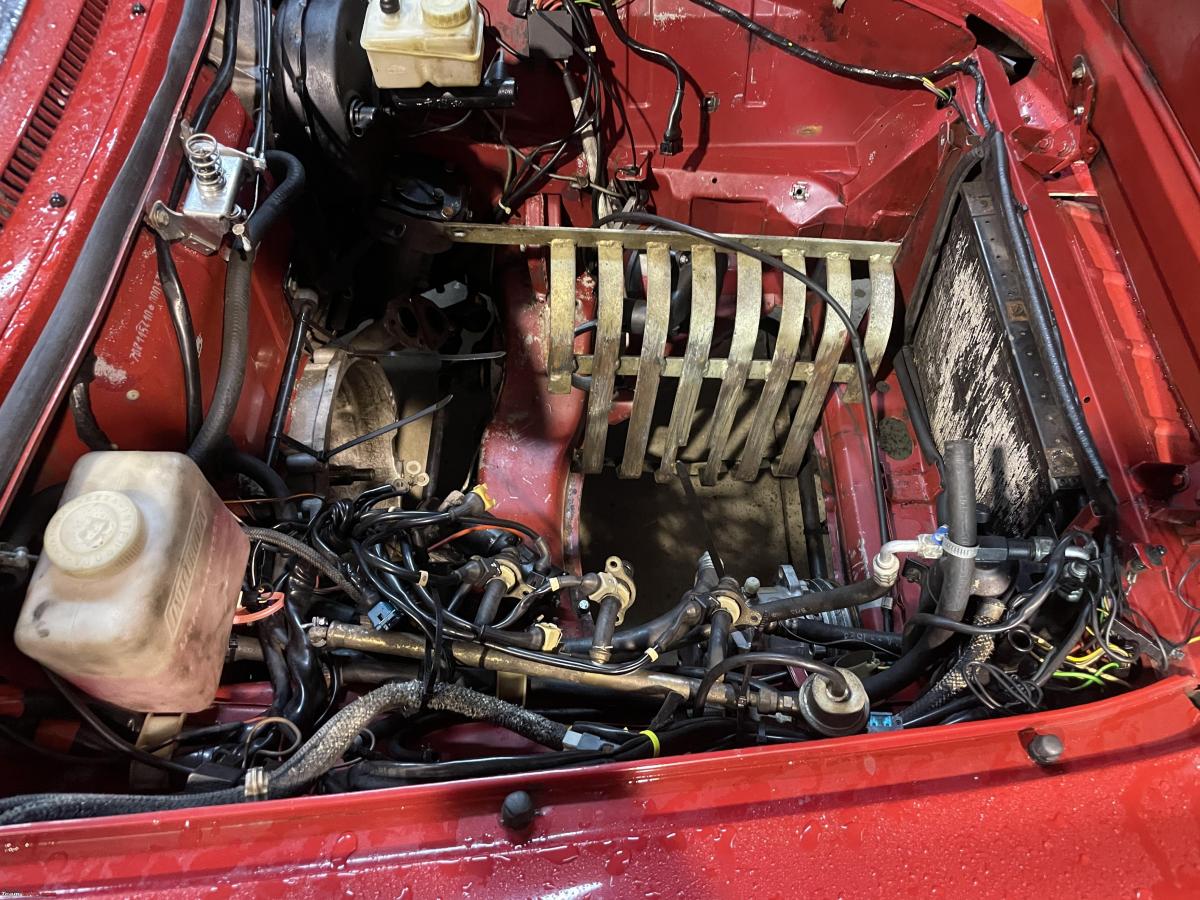
Here is an image taken from the front of the Spider. In the middle centre, you see the bell house and if you look closely, you can just see the input shaft. To the right, you see the flanges of the exhaust. We also took the hood off, which makes it a lot easier to get the engine back in again.
On the right-hand side, you see the alternator. On the left is the AC compressor and also the fuel injector rail with all the injectors. The starter motor is dangling down there as well. Actually, it might look a bit messy. But everything is tied down with tie-wraps. All other components were laid out separately and very systematically by Marc and his team.

Marc doing the final prep on the engine.
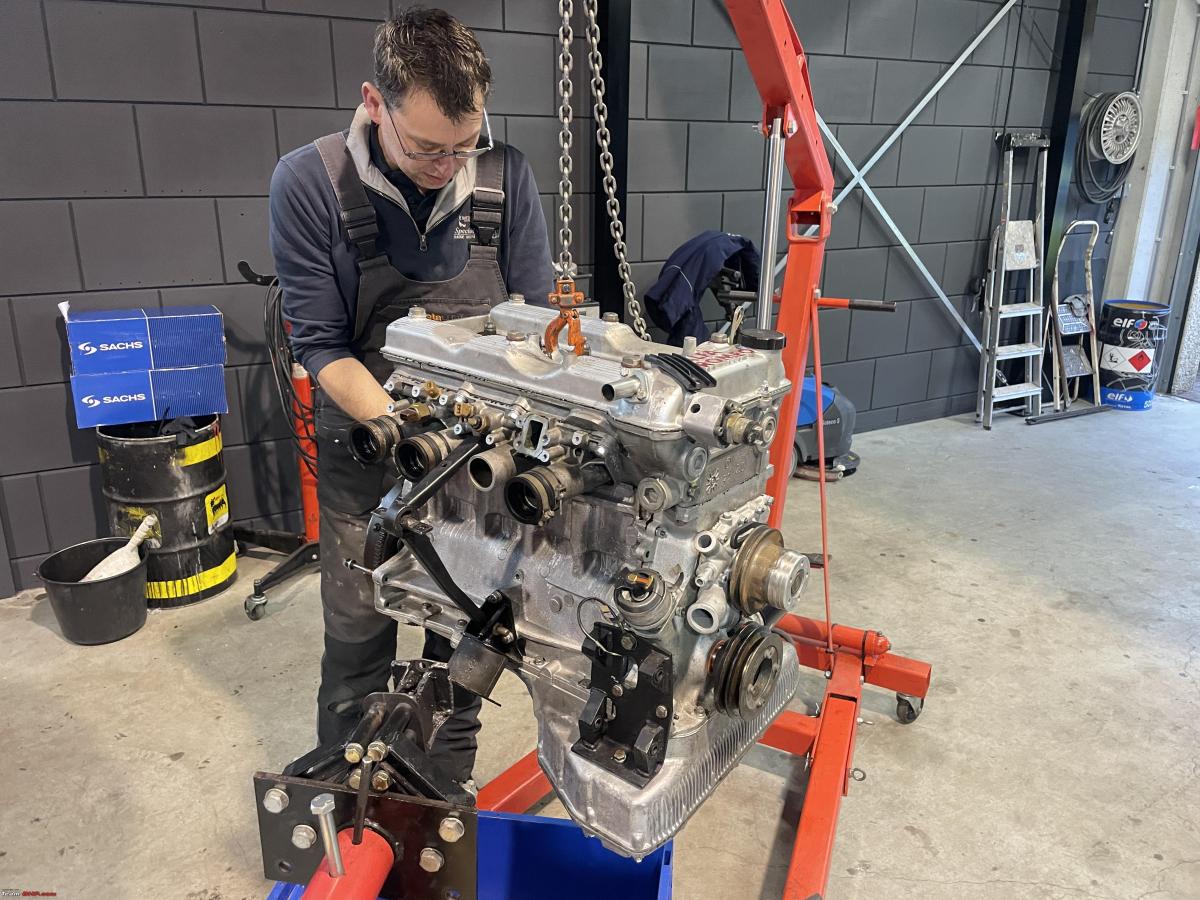
Back in again. Marc put an axle stand under the gearbox/bell house so it is angled slightly upwards. That allows for easier mounting of the engine. With the engine dangling from a little engine crane it took less than five minutes to put the engine back in its place, flush against the bell house once again. From there on it is just a matter of bolting everything back in place.

I was very impressed with Marc's knowledge and experience. We had so many bolts, nuts, washers, rings. He knew exactly which one went where!

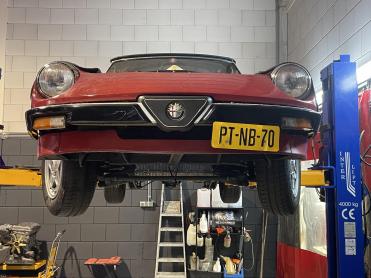
Having the Spider on the lift is so much easier. Because you need to work from underneath and from above on the various engine components.
We had taken the track rod off as well. Can't get the engine in with it in place. Makes for interesting front wheel positions!


By the end of the day, everything was bolted back into place again. So I filled the cooling system with the appropriate cooling liquid and the engine with engine oil.


With everything tightened up, we hooked up the battery as well. Moment of truth. First start after a complete engine overhaul!
Started the first time! Not bad. These cars are fitted with the Bosch L-Jetronic injection and ignition system. Lots of wires, sensors and endless hoses and tubes that all need to be fitted correctly.
One of the injectors was leaking a bit of fuel, Marc will fix that. I needed to leave, unfortunately. There are a few more little things to fix and then the Spider will be ready. The next stop will be the "rolling road" where we are going to test the Bosch system.
Check out BHPian comments for more insights and information.
News
Trying to fix a serious engine oil consumption issue on my Alfa Romeo
After diagnosing the problem, we believe that it could be a case of what is known as fuel wash.
BHPian Jeroen recently shared this with other enthusiasts.
At long last, Marc opened up my Spider engine! Just to recap. Earlier this year Marc did a complete overhaul of the Spider Engine. Ever since it has been suffering from serious oil consumption. During our trip to Scotland about 1l per 350 kilometre! So that is even more than before the overhaul. I noticed the oil consumption within a few weeks of the overhaul. We investigated and concluded that the engine was running way too rich. We replaced the fuel pressure regulator, the airflow meter and the O2 sensor.
But it only got worse. Marc suggested that keep driving it during the season and start investigating during the winter as I don't use the Spider during the winter. (I can't drive it during the winter months due to some silly classic car rule).
Although you always hope for something obvious and simple which can be fixed easily, I knew this was going to be a complex problem.
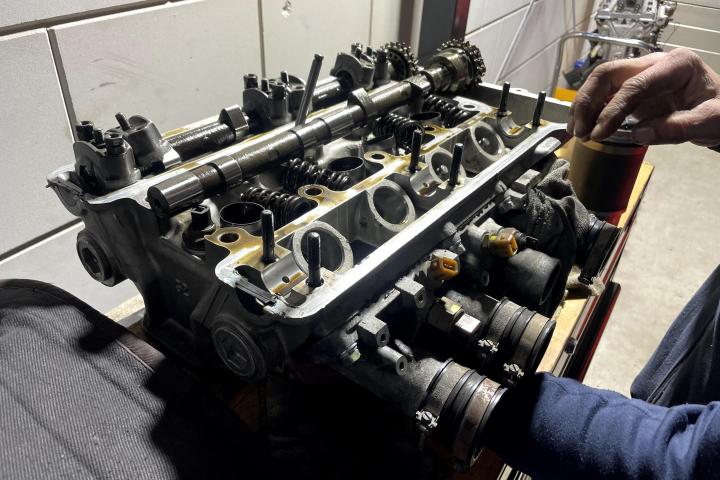
Marc had taken the engine head off again. Everything checks out fine. The valves are looking great. Valve stem glands and seals are as new (which they are).


Here is the problem, or rather the symptoms. All four brand-new liners look polished on the inside. The normal "honing" marks you would expect to see are virtually gone. On all four, in an identical way. Piston rings, compression and scrape rings were fitted correctly, oil disperse holes in all pistons are open.

This looks like a case of what is known as fuel wash. A fresh coat of oil protects the cylinder walls and bearings. If that protective layer of oil washes off, it becomes susceptible to damage. Raw fuel is one thing that can wash off the cylinder's protective coat. For this reason, any unburnt fuel in the cylinders can result in fuel wash. You're left with a wet mixture of raw fuel, which washes the oil away and can cause damage to the cylinder bores, pistons, and piston rings.
The most common causes of fuel wash or wash down as it is sometimes referred to are faulty and or leak injectors and or (vacuum) leaks. A common system is also poor starting. My Spider starts fine. Marc checked the injectors and we also checked, multiple times for (vacuum) leaks.
So based on all of this, we believe the injection computer might have a problem. Remember the Spider has a very early Bosch L-Jetronic system. Two separate computers, controlling respectively the injection and the ignition. It is also a complete analogue computer. The next Bosch Model, the Motronic series, combines both functions in one fully digital package.
The Bosch L-Jetronic computers have proven themselves to be very robust and resilient. But over time, electronics age.
We discussed three options:
- Repair the old computer
- Install a modern electronic (race box style) computer
- Convert to carburettors
To start with the carburettor conversion. It is certainly doable. But the engine compartment layout of the injection versus the carburettor version is very different. It means a look at modifications on many different parts. And then you need two new carburettors as well. So it's not going to be cheap.
I did like the idea of the new computer. But we decided to first go with the old computer. For two reasons. If we can get the computer diagnosed and it turns out it is faulty, we have found the root cause of the excessive oil consumption. If the computer can be fixed I will also retain the originality of my Spider.
However, there is a practical problem. Getting these old computers checked and repaired is becoming increasingly difficult. Marc knew somebody and he is going to check. As it so happens I have four (used) spare computers! Two injections and two ignition computers. If we find somebody that has the knowledge and the equipment to check and service these computers I will have him check my spares as well.
If we can't get the old computer checked or refurbished, we will go for the modern upgraded computer. The interesting is that inside the engine compartment, everything will remain the same. The new computer can be hooked up to all the old sensors in the Spider. All that is required is to swap the old computer for the new one, underneath the parcel shelf behind the seats! (Well, it is a bit more complex, but still)
Irrespective, with either the refurbished old computer or the new computer we will take the Spider to a facility with a Dyno, so we can do a proper engine run in combination with exhaust gas measurements. We have to make sure we are not getting raw fuel into the cylinders! The new computer needs fine-tuning on the dyno anyway.
So, we still have a way to go with this one! Should prove interesting what we find. I would love to have my Spider on the Dyno. Marc has fitted these new computers to many Alfa 105 series, with the same 2.0L as mine. He says without any further modification he can get it to crank out 150BHP easily. I am not so interested in the sheer horsepower. But a little more pulling power in the lower RPM band would be very useful.
We will see!
I had the Mini at my local garage (FNG you would say in India) for its annual MOT or APK as it is known here. They noticed the beginning of problems with one of the wheel bearings. I had them replace it because once you have a car on the lift it is dead easy. I also asked them to flush the brake fluid. My Mini was showing a "flush brake fluid" in the dash. Again, so much easier on the lift than crawling around on all fours on my concrete floor. Also, the last time I used my pressure bleeder it was leaking so I need to fix that first.
I managed to reset the "flush brake fluid" light afterwards. Only to have the "Service" light come on the day after. I knew it was coming. So I just ordered the parts. I will also replace the front discs, pads and sensors.
I also need to have another look at that pesky thermostat housing. I am still not convinced it is completely leak-free.
Check out BHPian comments for more insights and information.
News
Brazing workshop, a drive in Mercedes & a repair job on my Alfa Romeo


I had enrolled in an activity where folks from a nursing home were taken for a little tour in classic cars.
BHPian Jeroen recently shared this with other enthusiasts.
Last Saturday I participated in my third "Brazing" Workshop. I have written about brazing before. It is a very useful technique, you can use it to connect almost all types of metals and or alloys. And when done properly it will give similar, sometimes better, results compared to various welding techniques.
The last workshop was held in my garage, which proved to be an interesting background to such a workshop.
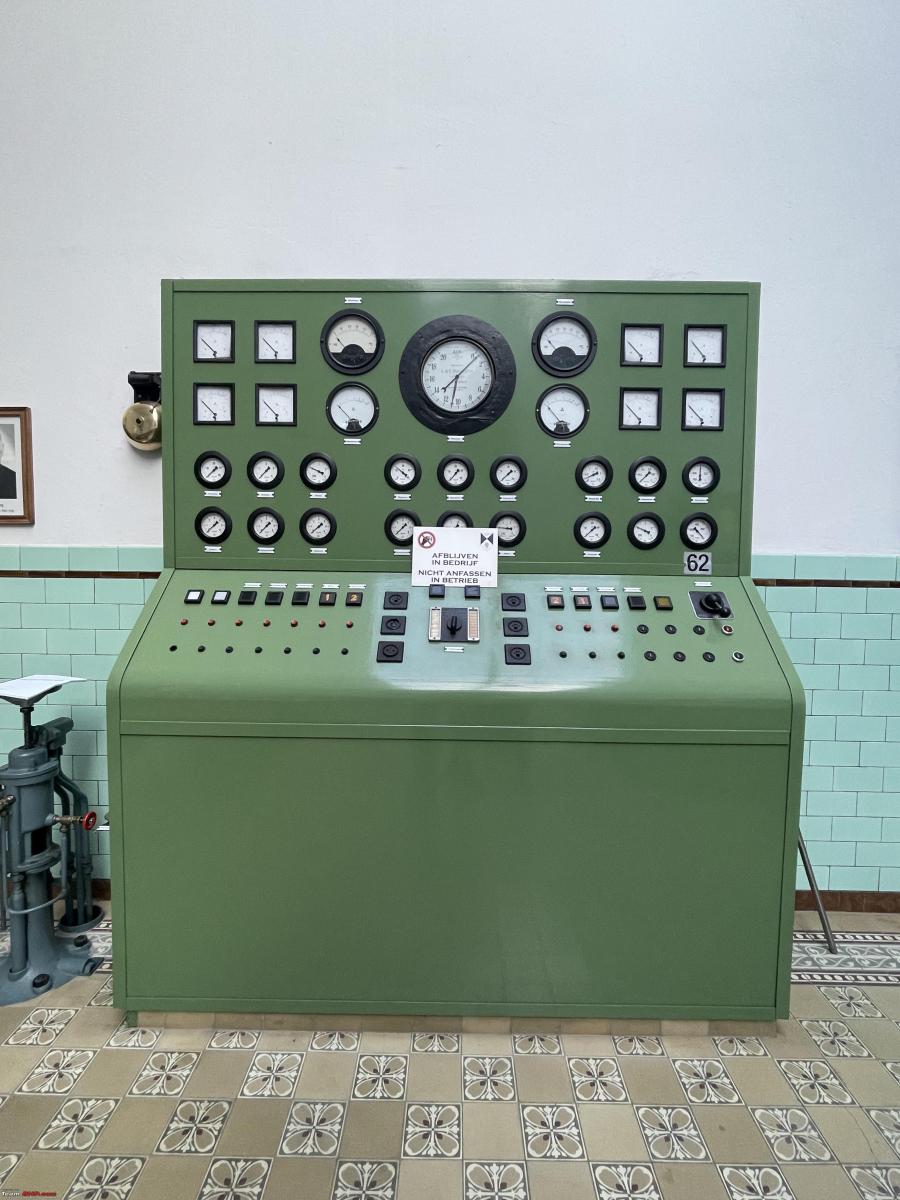
We had the same teacher, Wiel. This time the workshop was in a magnificent location. We were in an old monastery that had its own steam-generated electric power! Pretty cool those monks and priests!
A few images of our surroundings for the day:
One of two steam engines:

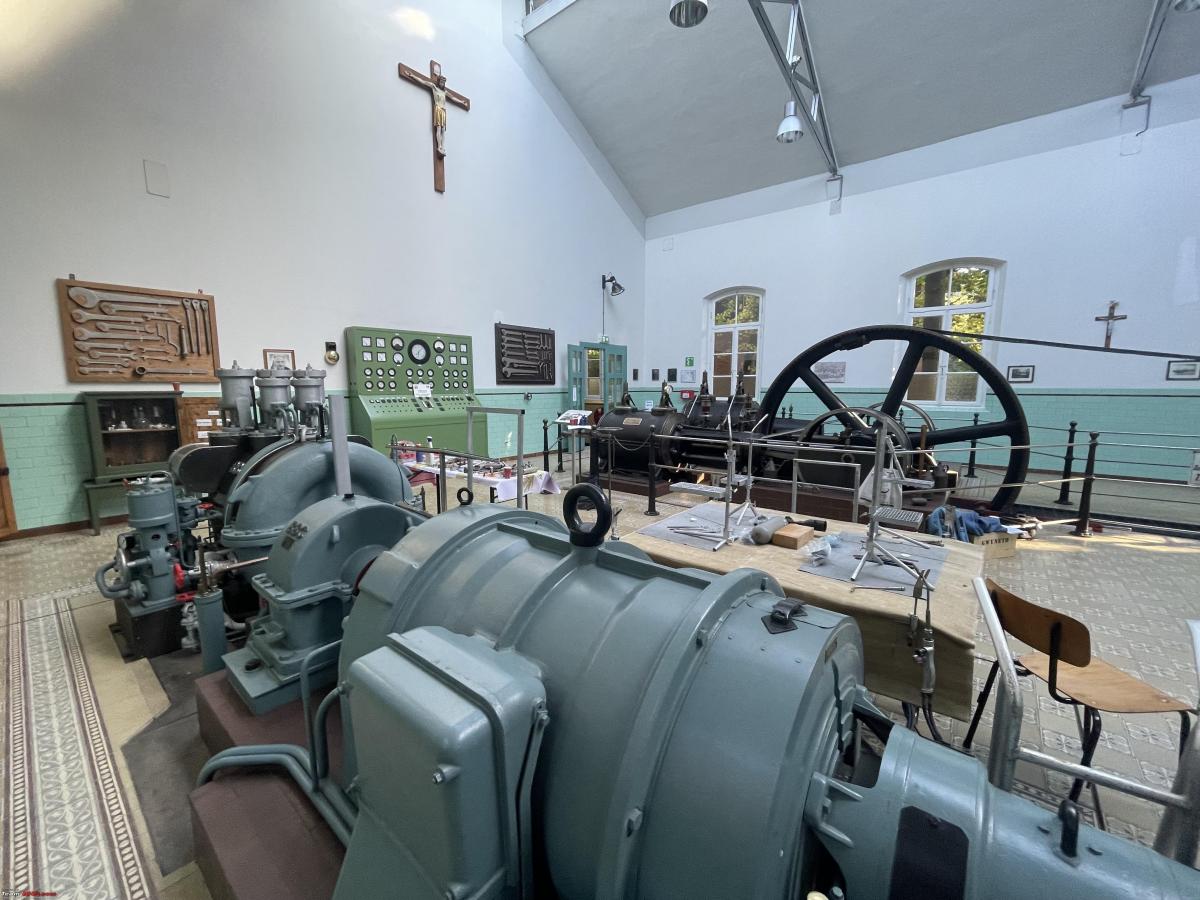

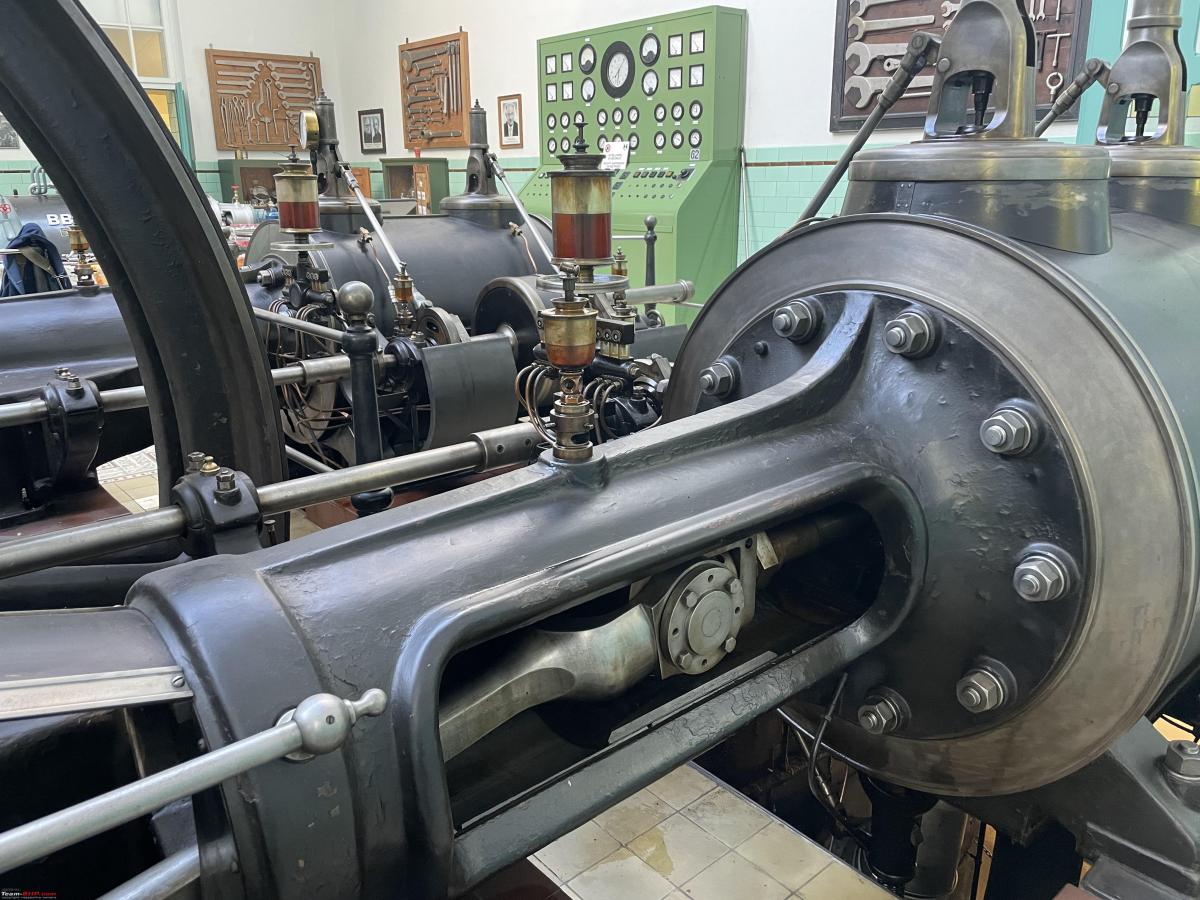
Control panel
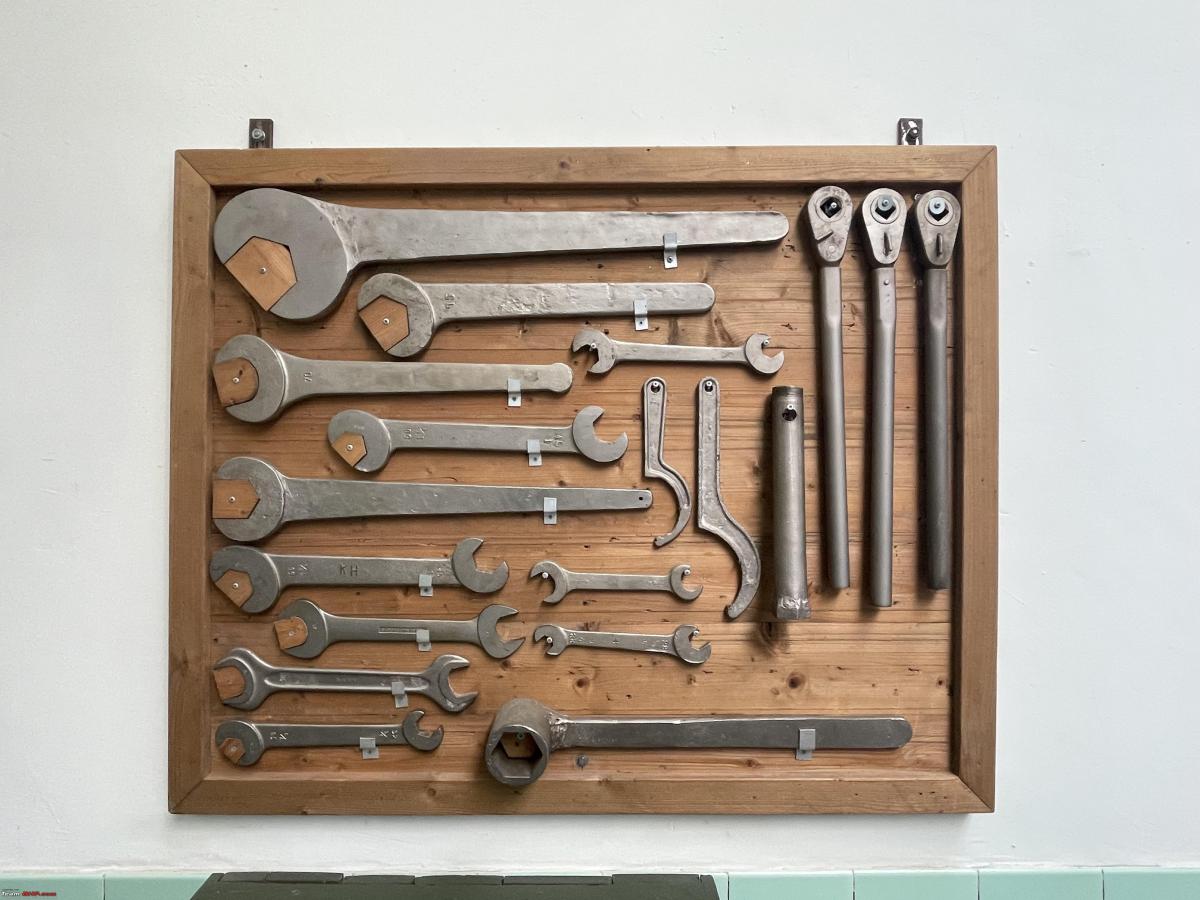
Some interesting tools, a little larger than what I have in my toolbox.
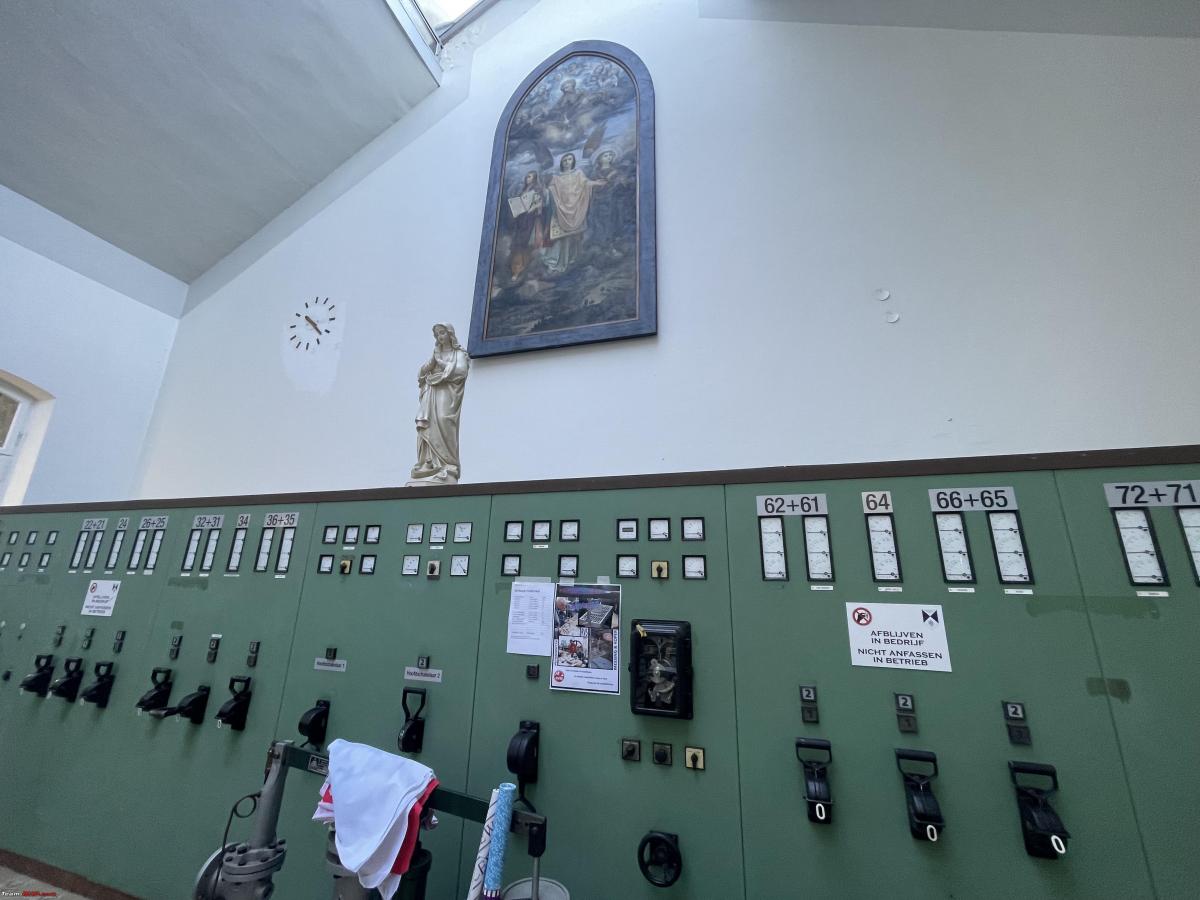
Electrical control panel
Very interesting to walk around. Wiel knew a lot of interesting details and background to this place. Very interesting.
But we were here for our workshop brazing!! So we did quite some brazing.
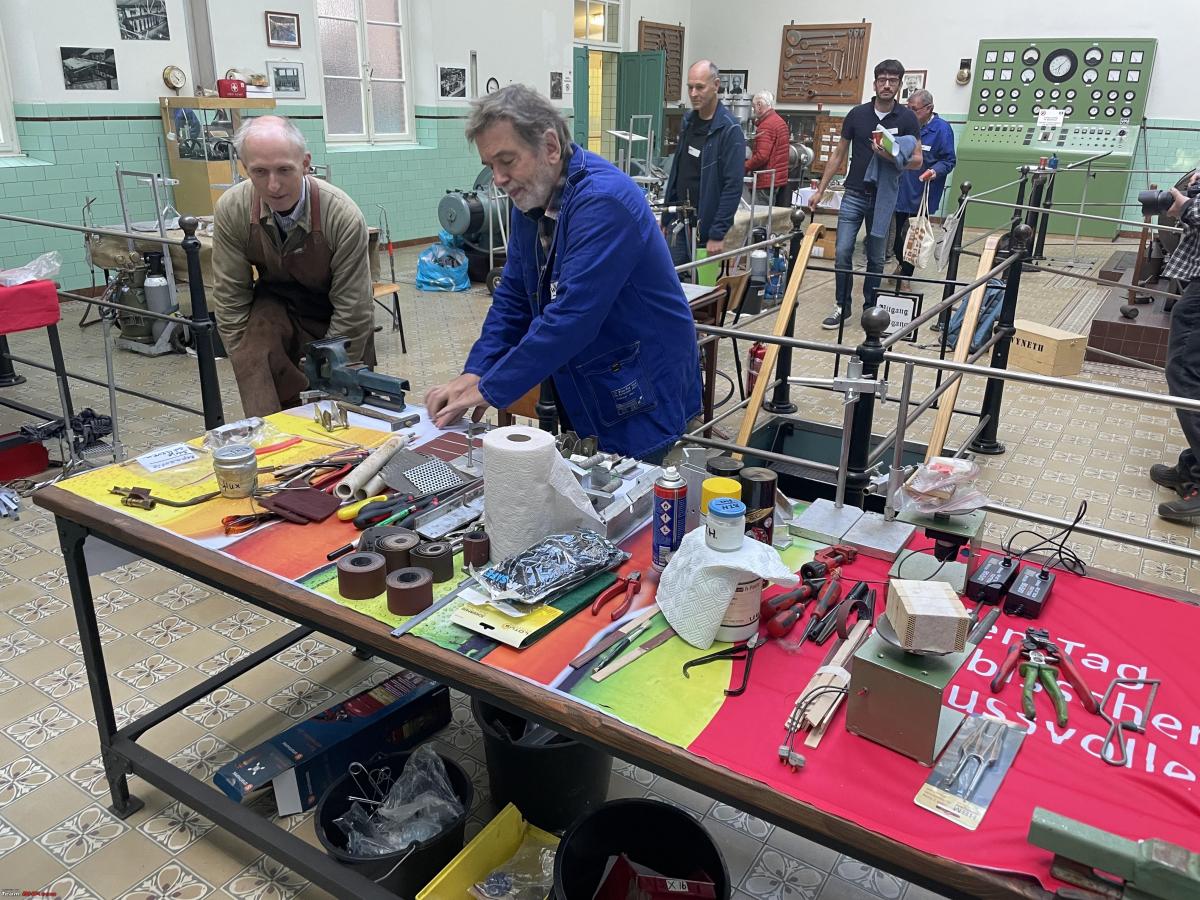
Yours truly in action, image courtesy of my friend Ruud.

I managed to learn a couple of new things. The four-stroke Scuderi Model Engine I am building is going to require some brazing of various parts in the months to come. All ready for it!
On Sunday I participated in a nice little drive with the Mercedes W123. I had enrolled in an activity where folks from a nursing home were taken for a little tour in classic cars. I have done this several times. It is always good fun and very rewarding. We only drove 60 kilometers in total with a coffee stop in the middle. Even so, it took all day. You don't want to be in a hurry with these elderly ladies and gentlemen of course.
There were about 20 classic cars and a few more regular cars to help out, bringing the wheelchairs, Zimmer frames nurses and so on. All done by volunteers.

As I have mentioned earlier, my Spider will be going back to Marc on the 1st of November to figure out the oil problem. During our tour of Scotland, I also felt the Spider pulling to the right. Marc had already tried to fix it, but it was still there. So I thought I would have another look myself.
The car has been aligned perfectly by Marc, and the tires and rims are in excellent condition and fully balanced. I replaced all four discs calipers and brake pads last year, including some new brake lines. So it is difficult to understand why it would still pull to the right. It also does it in a bit of a particularly weird way. I have had this before. Ultimately we managed to trace it back to a stuck ball joint. Because it was stuck, when you brake, the car dips at the front and the right wheel was pulled in a tiny bit due to the stuck ball joints.
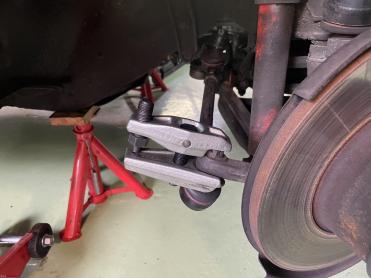
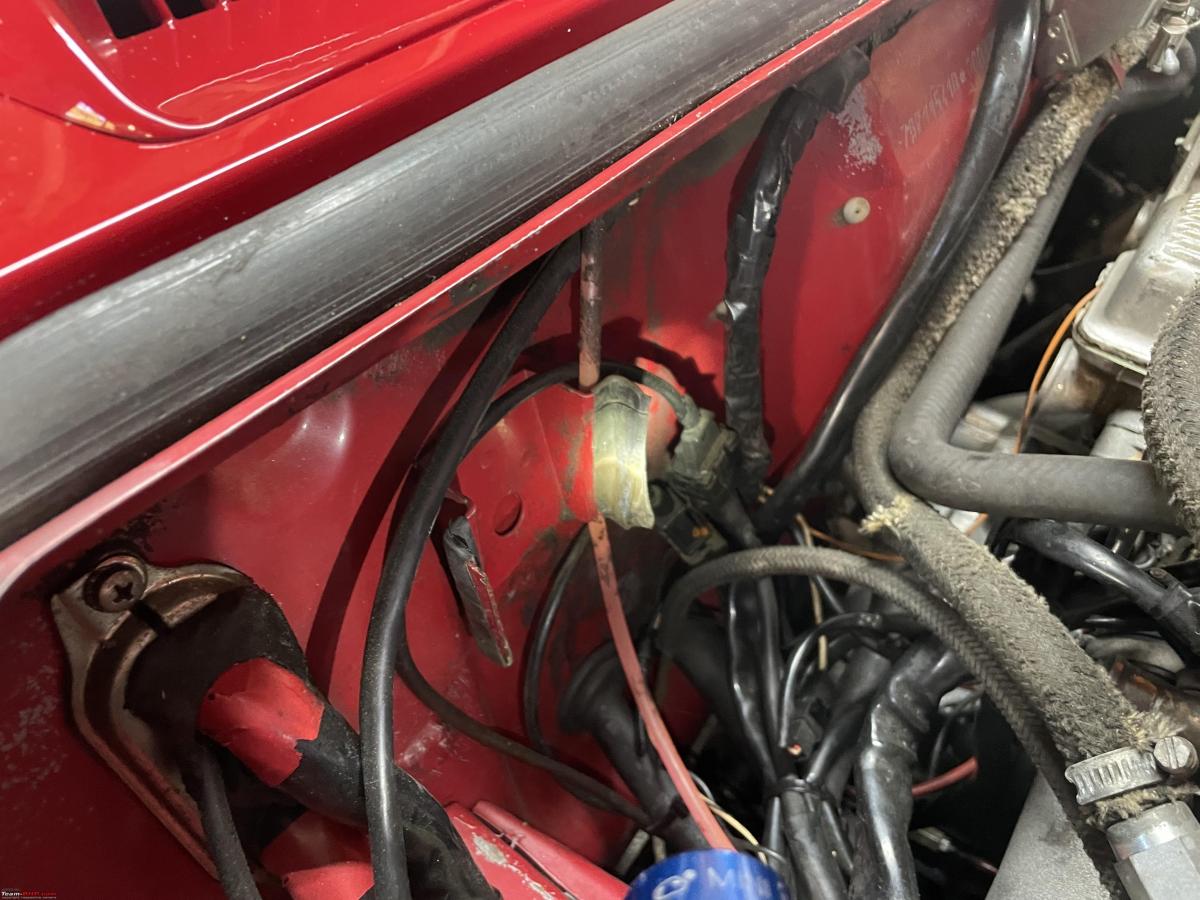
So time to put the Spider on some axle stands and check a few things:
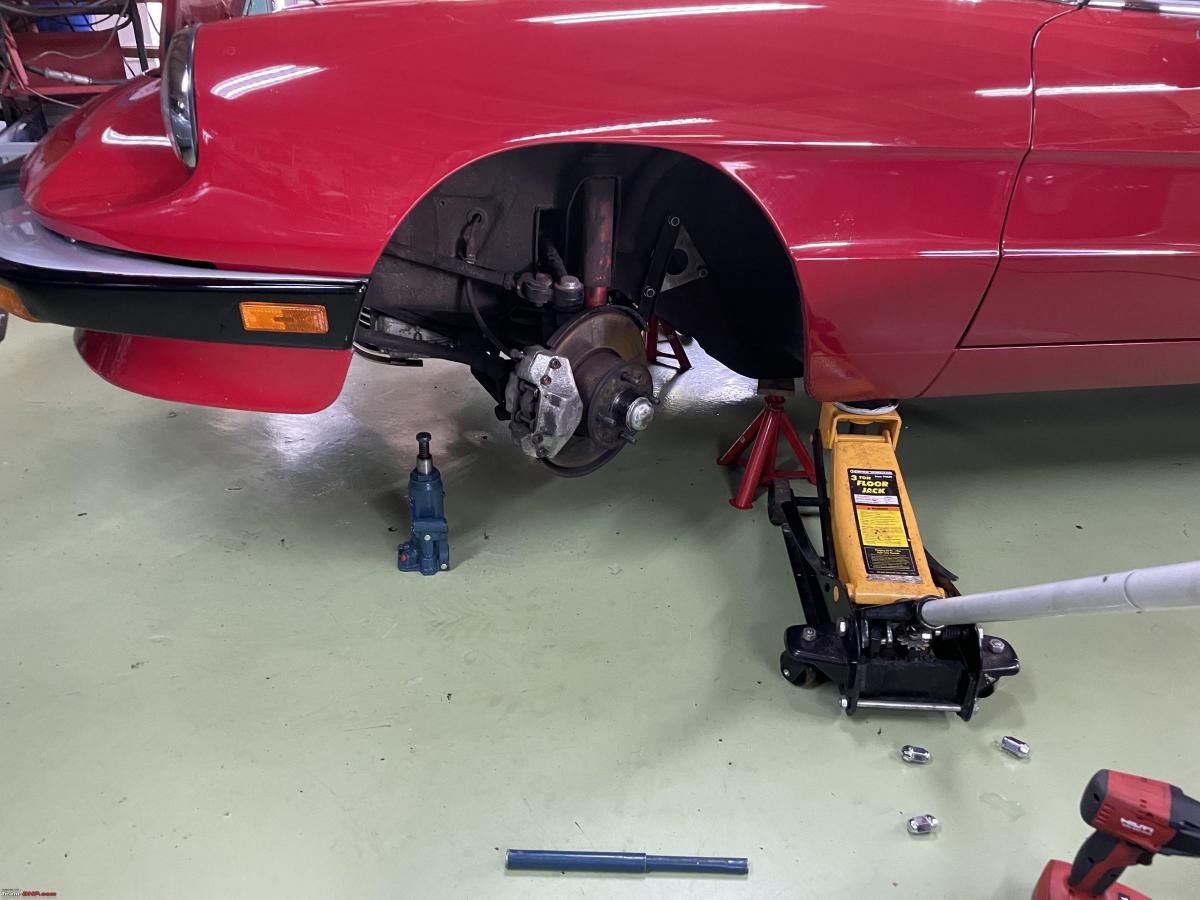
I popped the ball joints with my special little tool:
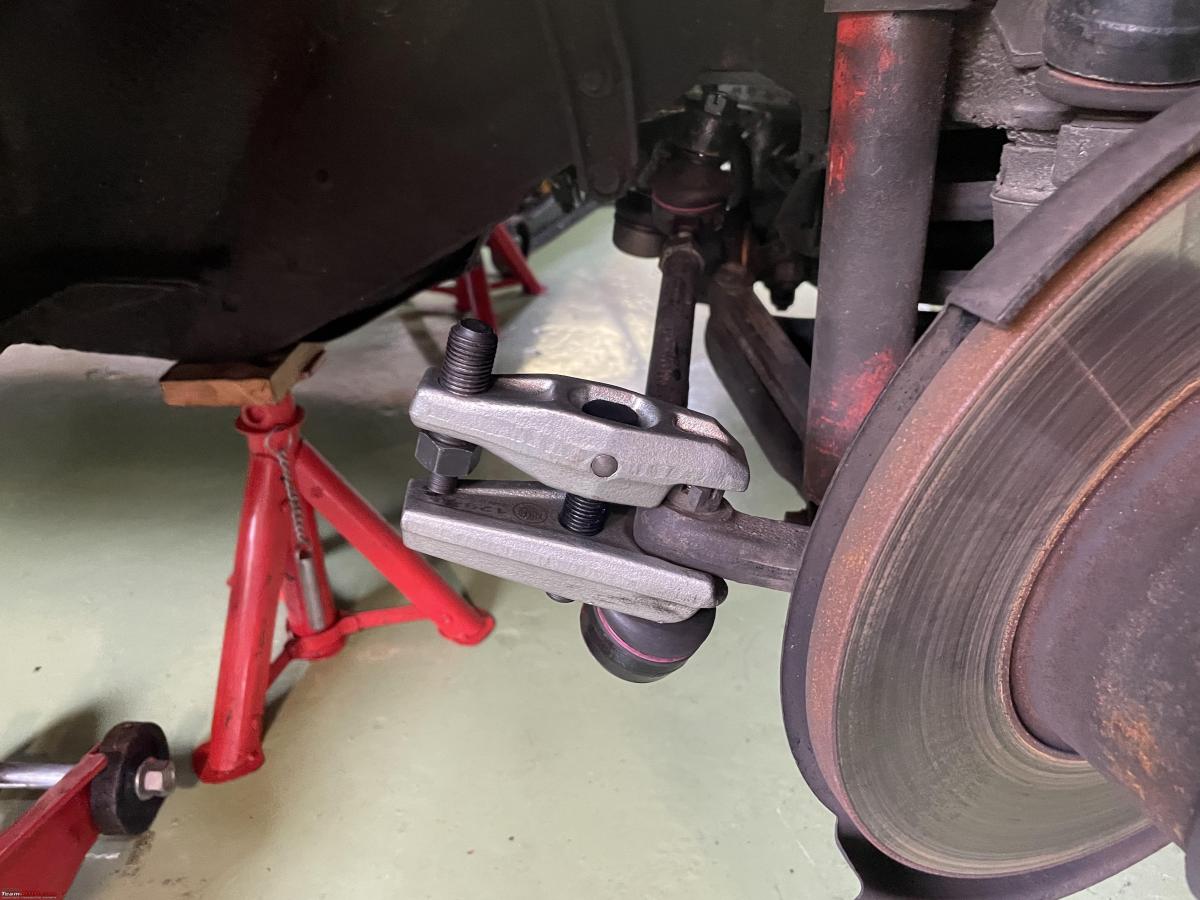
I kept the castle nut on the stud to make sure I didn't lose it:
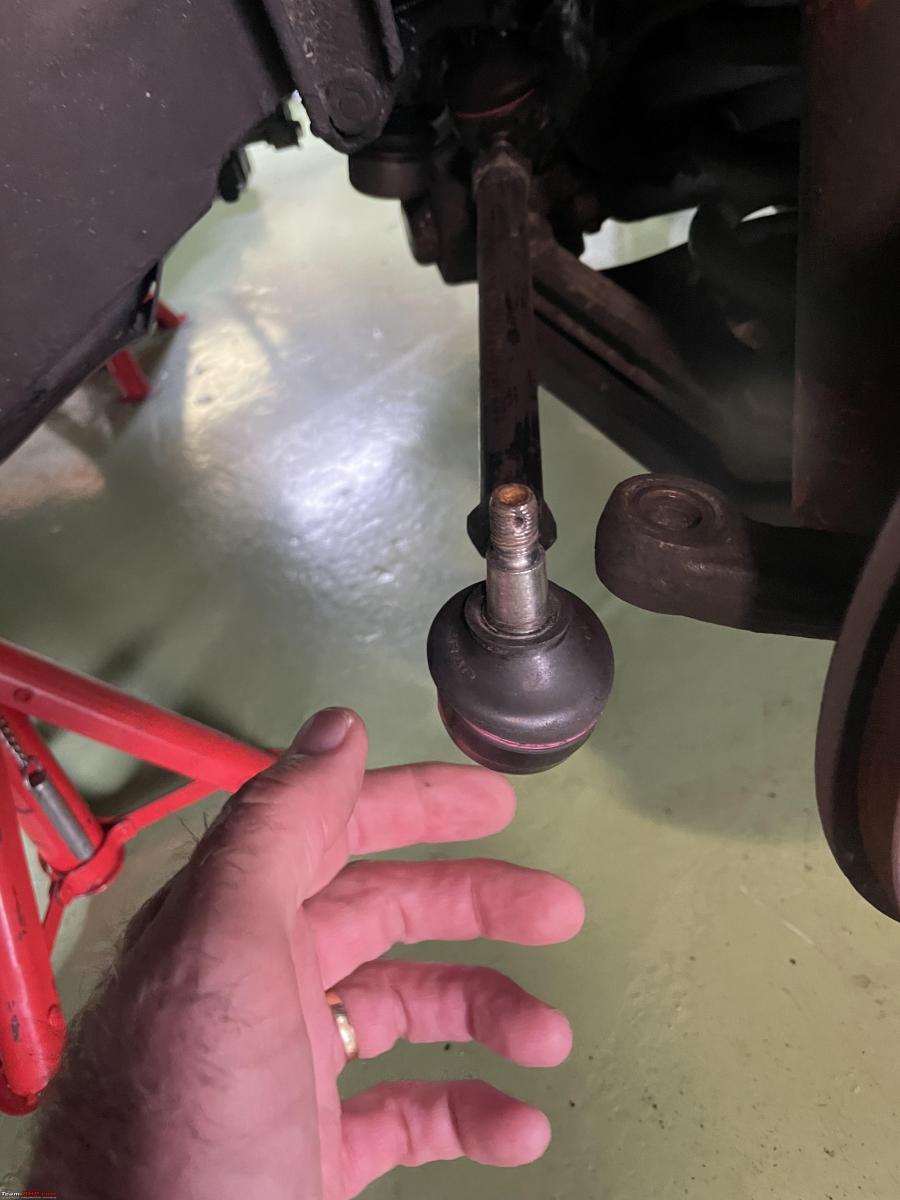
I checked everything as best I could. I could not find anything. Until I noticed this. Here you see the stud of the right ball joint in its two extreme positions.
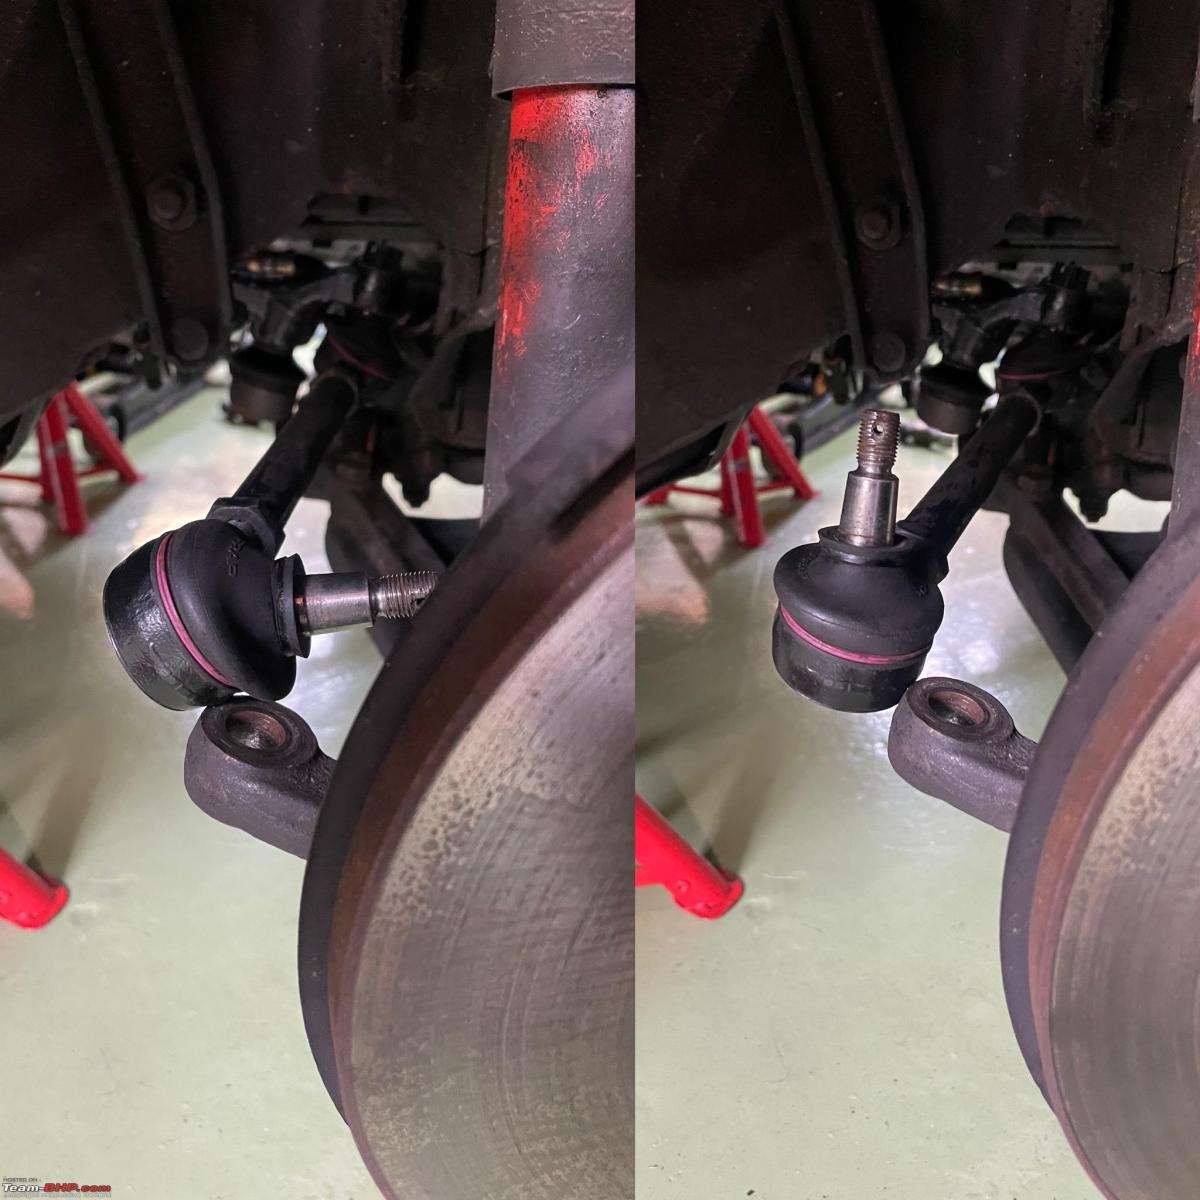
It looks like it might not be able to rotate sufficiently when fitted. However, when I put everything back together the effect was not present. It's difficult to judge these angles with the wheel removed and the suspension completely extended. We will need to recheck this when the Spider is back with Marc in a couple of weeks.
Put the front wheels back onto the Spider and tightened up my chrome lug nuts with the specified amount of torque. We have a recent thread on the forum that emphasises why you should always use a proper torque wrench and the proper torque setting when working on lug nuts!!
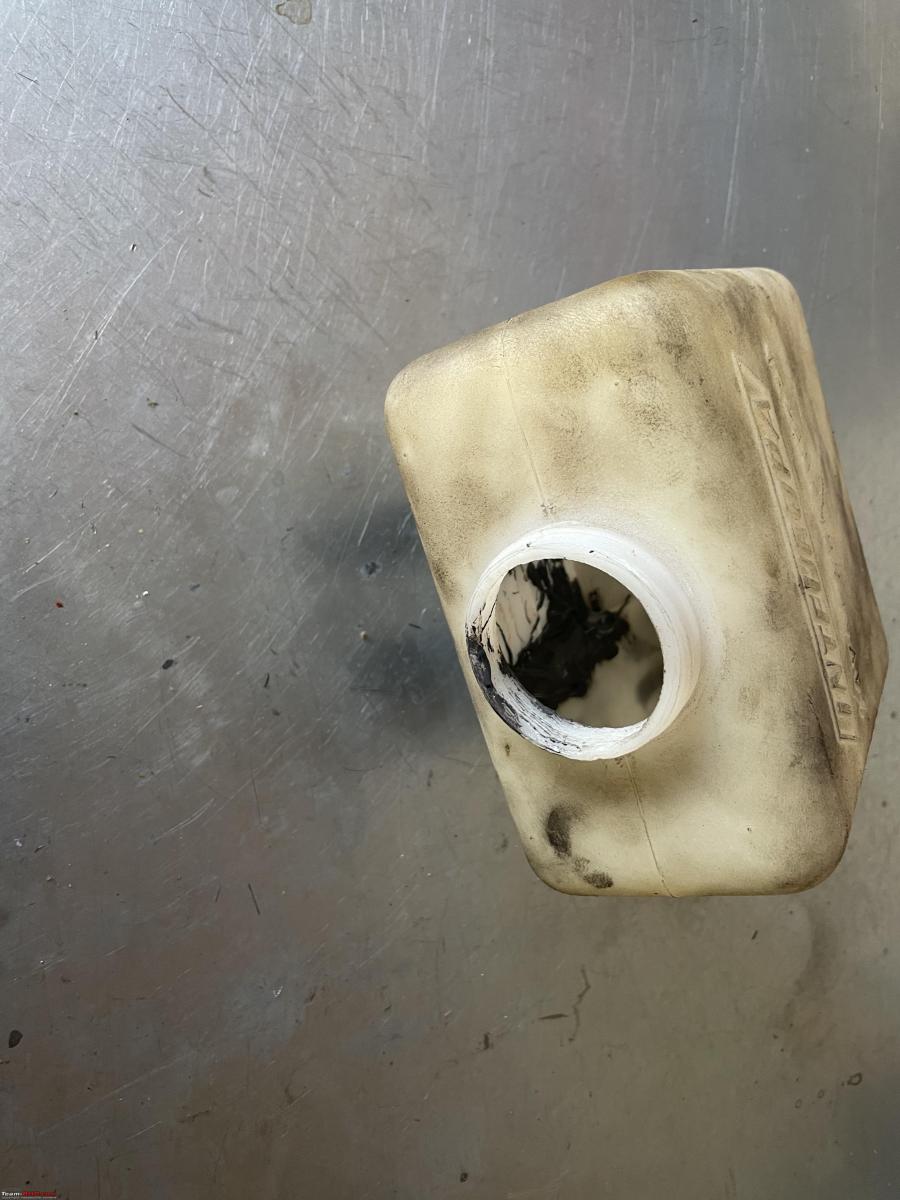
Also, the window wiper reservoir had started leaking again. You might recall I fixed this quite some years ago. Unfortunately, due to what looks like the ageing of the glue I used and mechanical wear due to stupid Italian design it developed two leaks again.
Technically, it is an MOT failure! Regardless, I wanted it fixed now. So I went to my local DIY centre and got some proper waterproof leak sealant. Applied it liberally to the out- and inside of the reservoir.
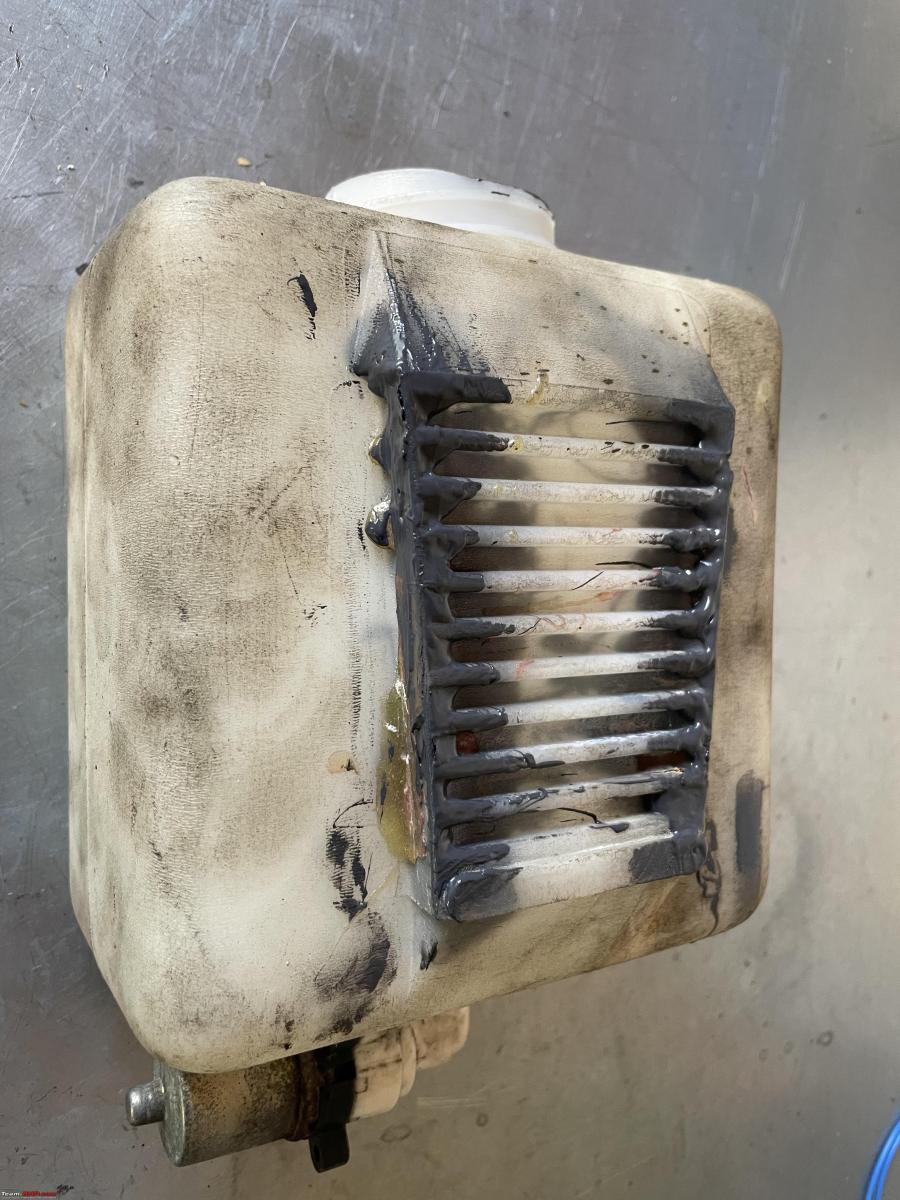
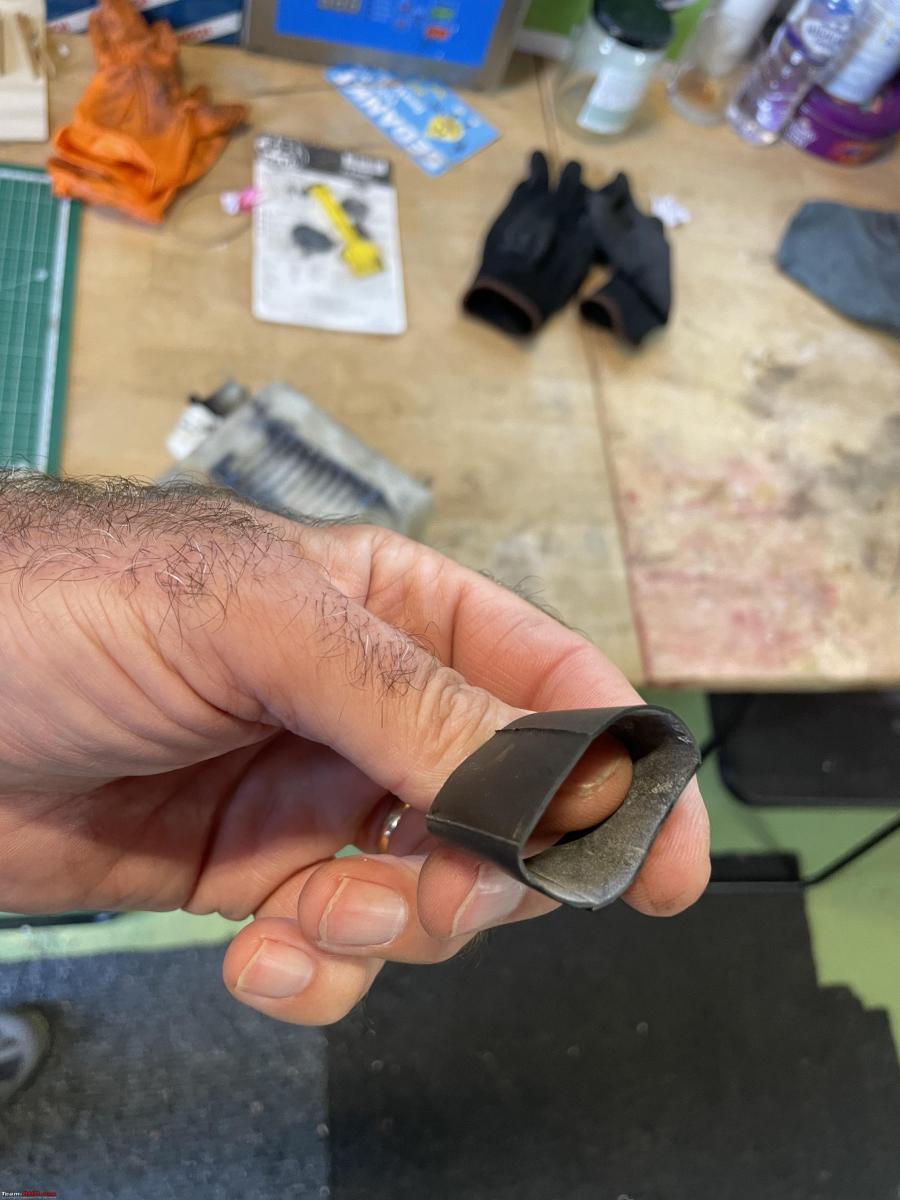
Part of the problem is the stupid V-shaped bracket that holds the reservoir. It is metal onto some pretty soft plastic, so a leak waiting to happen. I got one of my old bicycle's inner tyres cut off a few pieces and used it to wrap around the sharp metal bracket.
We will have to see how long it will last. Fingers crossed!!
This coming Sunday I am helping my good friend Berndt at the BritishCarClubDay.
Berndt has collected hundreds if not thousands of folders and brochures on English cars. He wants to get rid of them, so he has rented three market stalls for us to display and sell all of them. Fingers crossed for that as well. I am not sure how much documentation gets sold at these classic car events.
Irrespective, this is always a very enjoyable event. Mostly about British Car clubs and some commercial traders as well. Good fun, I am looking forward to it.
Check out BHPian comments for more insights and information.
- Tags:
- Indian
- Mercedes
- Alfa Romeo
- Classic cars
Pages
About Us