News
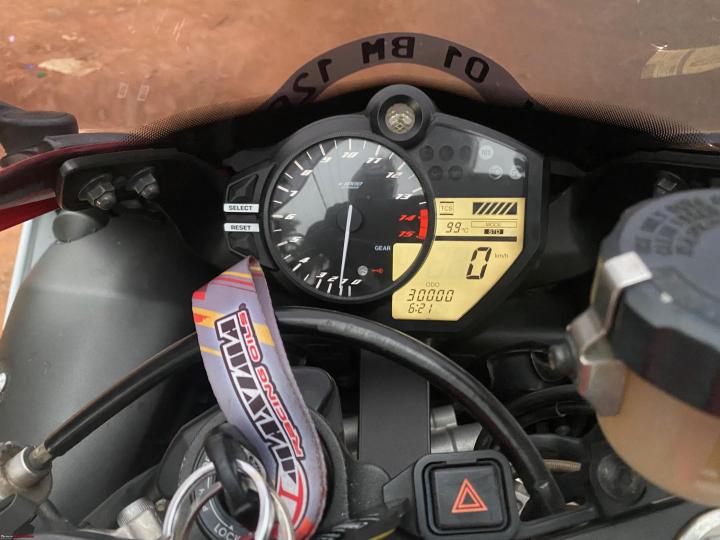
Yamaha R1 clocks 30,000 km on the odometer: Major service update!
Post the service, gave the bike a 12 km shakedown to find everything up to spec.
BHPian krishnaprasadgg recently shared this with other enthusiasts.
It's been a while. Lots to share in this post. I finally got around to fixing a few problems on the bike which I had been too lazy about for the longest time.
But first, let's get started with the ODO shot! Yup, finally the ODO hit 30k km.
 Now since that is out of the way let's get to the crux of the post. Finally decided to clear a few items from my to-do list of jobs on the R1 that have been on the backburner for way too long. I had very limited time on hand and not all tools handy, so as usual rode to cochin to work along with my friend Sanjay to tag-team it and get the work done quickly as I had to return home the same day, so the list was again shortened and took care of some of the most delayed stuff.
Job done were as follows:
- Fitting the radiator guard
- Swapping the Gear position sensor
- Changing out the frame sliders
- Airbox and under tank application of heat reflective tape
- Some general routine stuff like Airfilter clean & Chain slack adjustment
Now while getting started on my trip to cochin I noticed something, the hot idle issue that I had about 1 year back make a re-appearance. That meant only 1 thing, TB needs to be cleaned again. So added that onto the list too, the airbox was going to come off anyway so it was a no-brainer to get this also done and out of the way. So I just carried on and rode to Cochin without taking any breaks.
As soon as I reached we got started working on the bike.
Step 1: Lift the bike on the paddock
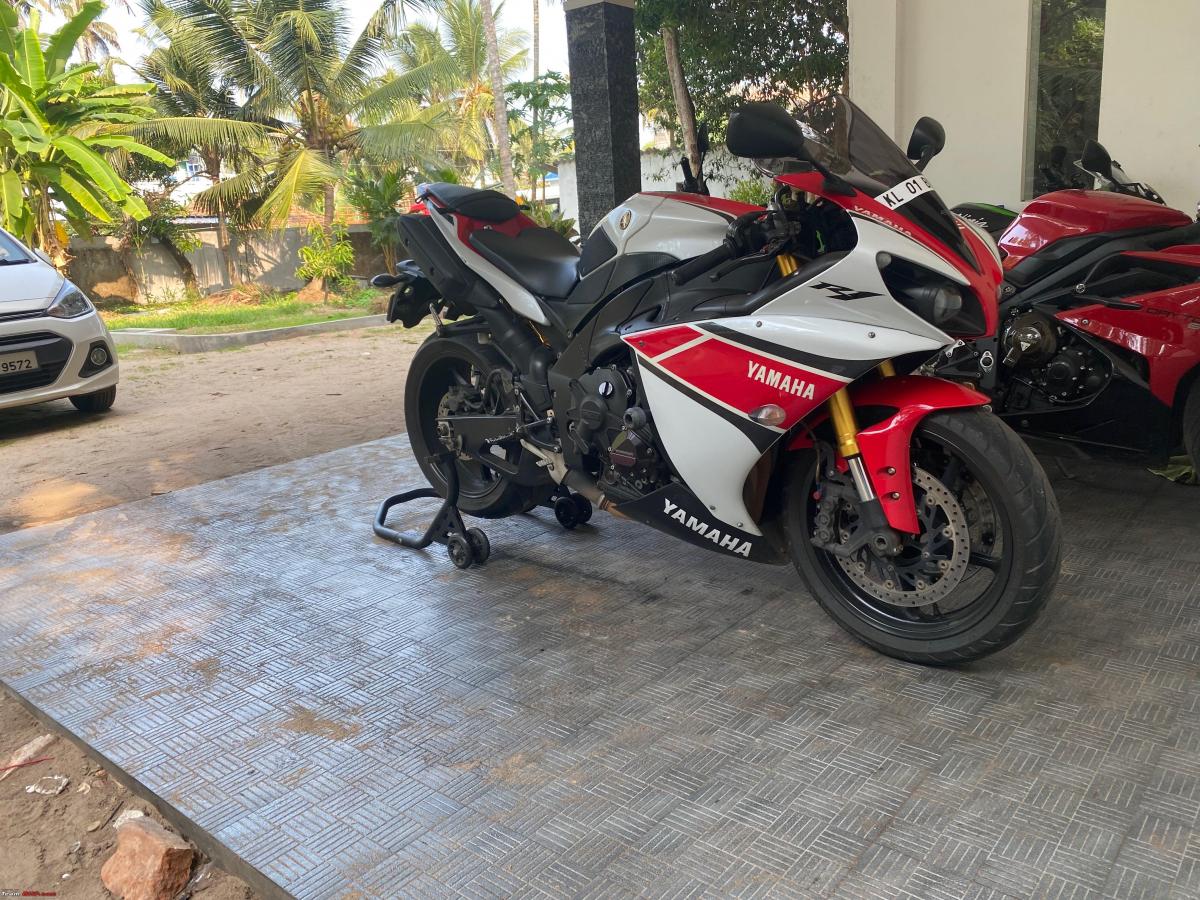
Dissembled the bike to the point where both of us could take ownership of a job and complete it fast without getting in each other's way. So the bike went onto the paddock and the tank was lifted, airbox opened, filters removed and airbox also removed, took off the fairings too and planned the work among us.

So let's get started.
1. Air filter maintenance, Airbox and under tank application of heat reflective tape
I was hoping that the air filter would be relatively clean since the filter was cleaned not too long ago. But to my horror the filter was pretty badly covered in dust, and so was the pre-filter part of the airbox. Goes to show how dusty the roads in Kerala are getting, mind you this is with minimal city riding since the last clean.
The amount of dust in the pre-filter part of the airbox
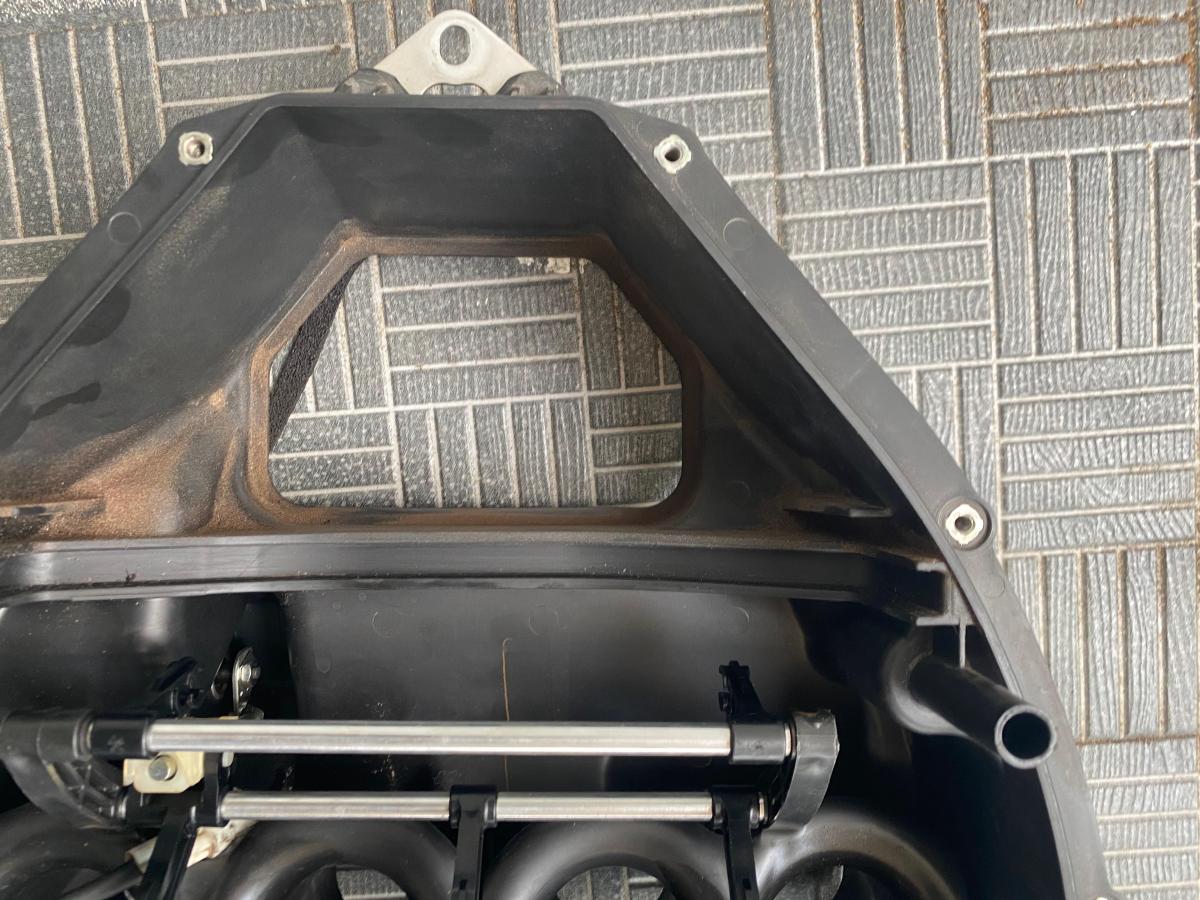
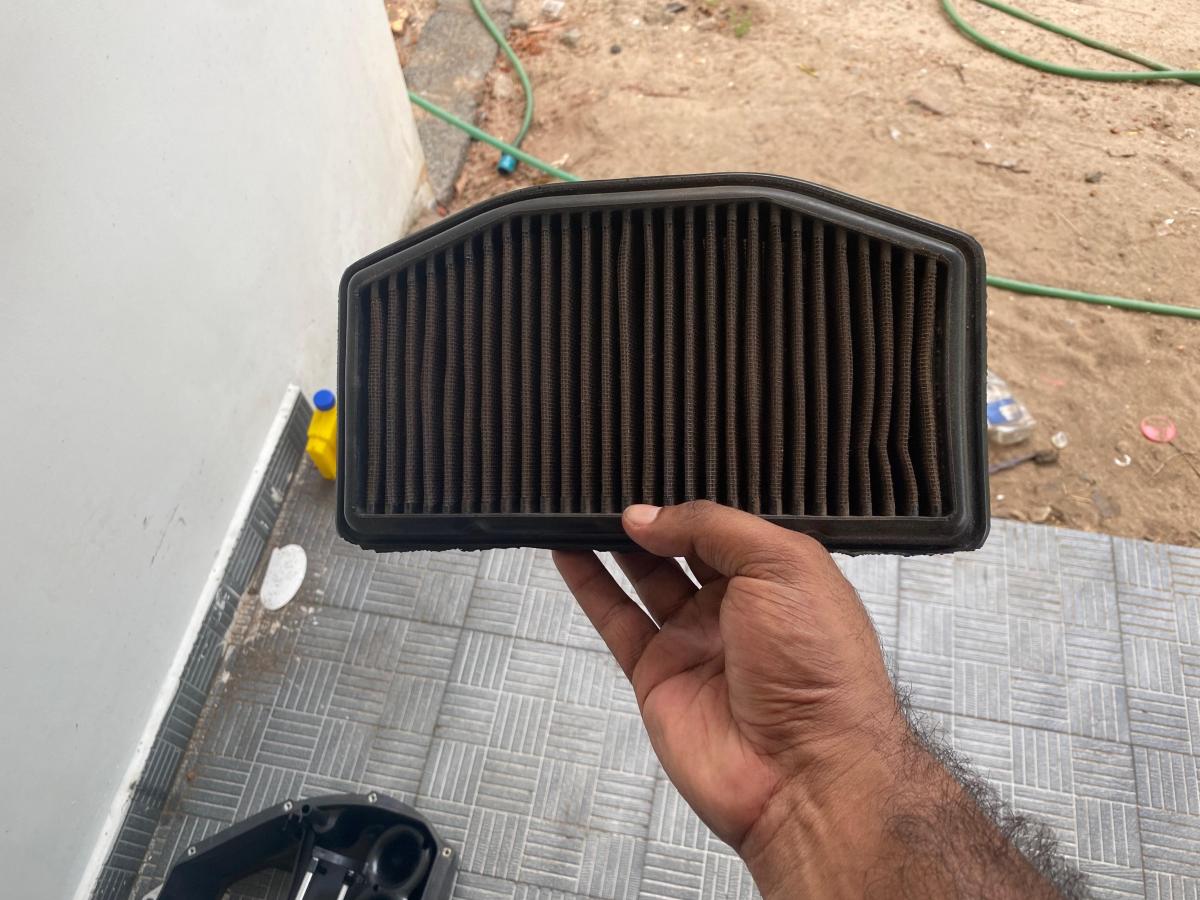

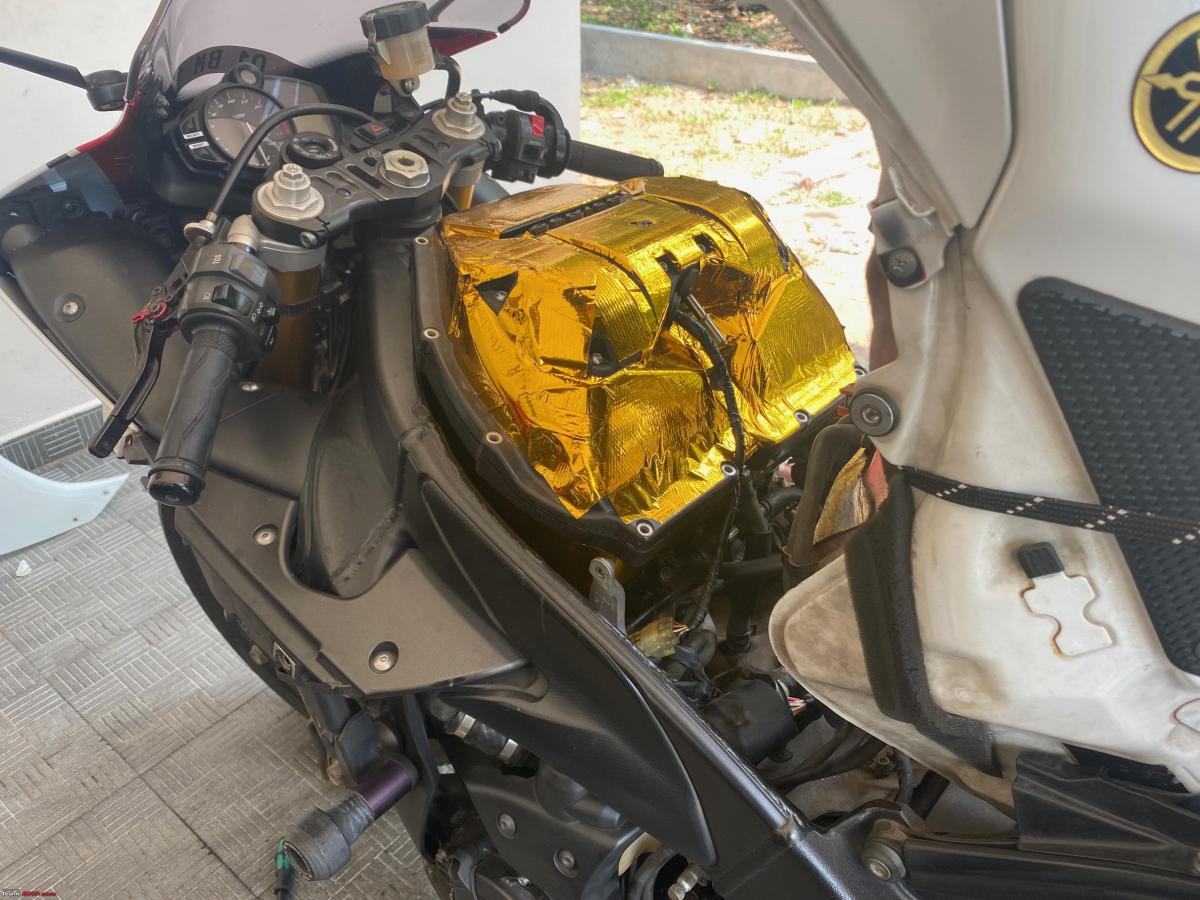
I had carried the K&N recharger kit anyways so quickly took care of cleaning the filter and put it up to dry and carried on with removing the airbox. I have already covered the steps for it in an earlier post so not going through it again. The airbox was removed and I quickly got onto covering it up with the DEI Reflect-A-Gold heat reflective sheets I had procured a few months back. DEI claims that their gold tapes can handle continuous temperatures of up to 800 degrees F, and it is used in all sorts of automotive applications for both cars and bikes.
Can you tell I wasn't great at arts and crafts at school?

My aim to use this is not for performance upgrades or to extract more power out of the bike or anything, rather this is just an attempt of mine to try and reduce the ambient air temp within the air box, as it is the bike runs super hot and with it being a bike the airbox and tank are very susceptible to heat soaking as its located right above the engine anyways.

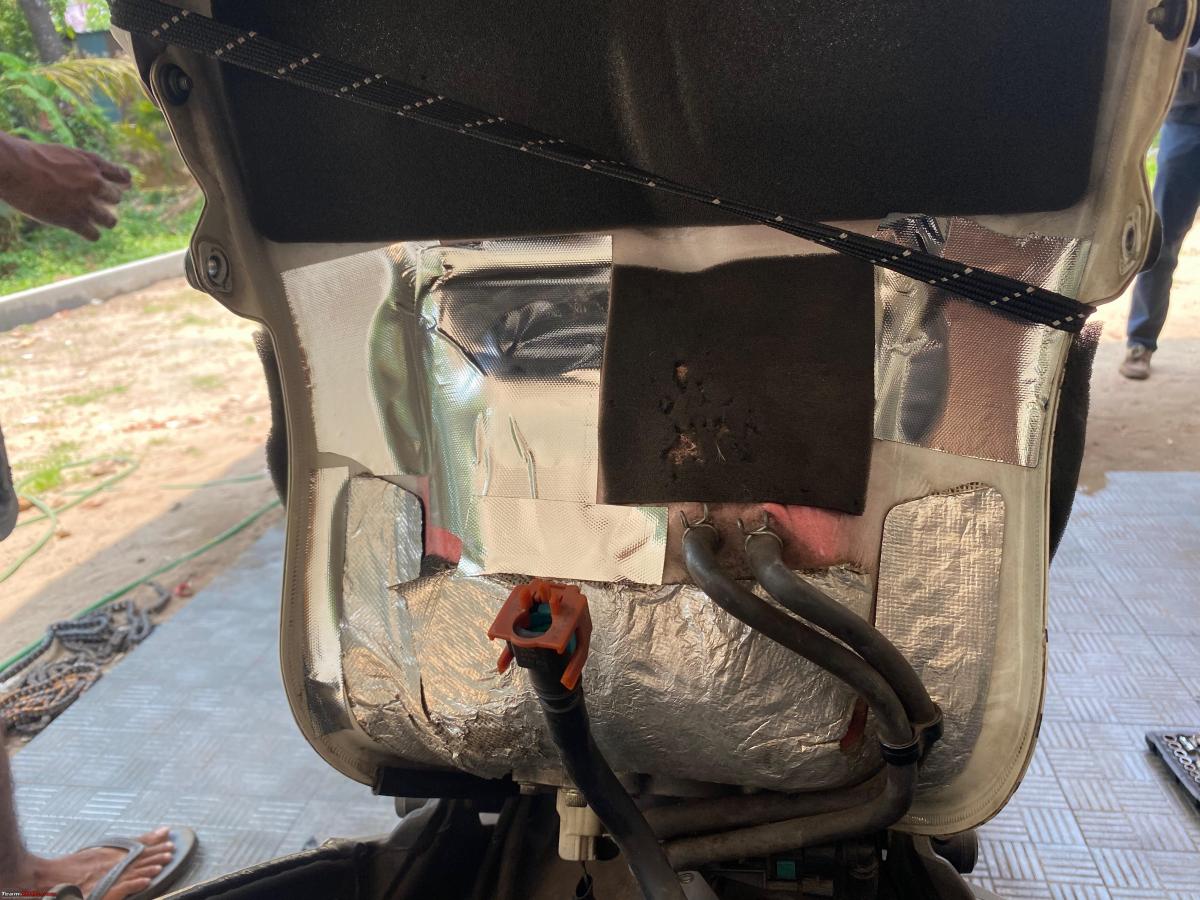
So all I am expecting to gain out of this was a bit smoother running engine as the airbox stays cooler than before and the tank also to an extent that I do not have vapour lock problems(had this happen during peak summer once before), I used the CV4 silver thermal film for the under-tank area.

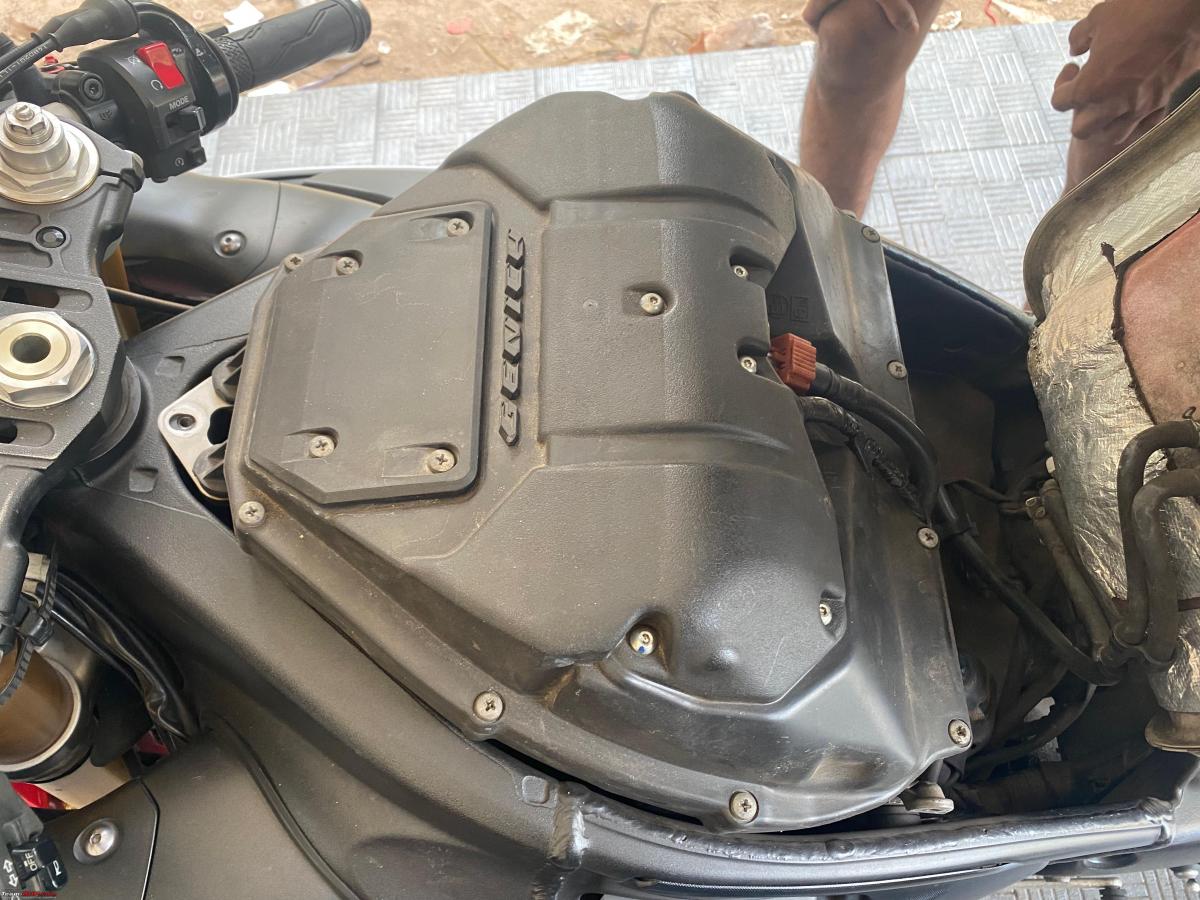
Now I have to say, the job took a good 1.5 hours as it was not easy to cover the full surface area of the airbox and I am not that great with scissors anyway, so there was a bit of overlap and some areas that were not covered the best way they could have been done. But it's a part that is not visible outside anyways so I did not pay much heed to that. But around 97-98% of the surface area was covered successfully. The sheet was pretty easy to work with and had great adhesion too. So it wasn't too bad.
Airbox before
After

The R1 undertank already comes with a bit of heat reflective patches from the factory, all I did was extend it a bit more than what was already there. Again, not a clean install by any means, but gets the job done and since it's out of sight, I'm ok with it.
While we were at this point with the Airbox out and since I had the hot idle issue again, we quickly just sprayed a decent amount of injector & TB cleaner into the TB and wiped off the butterfly valves with a clean towel.

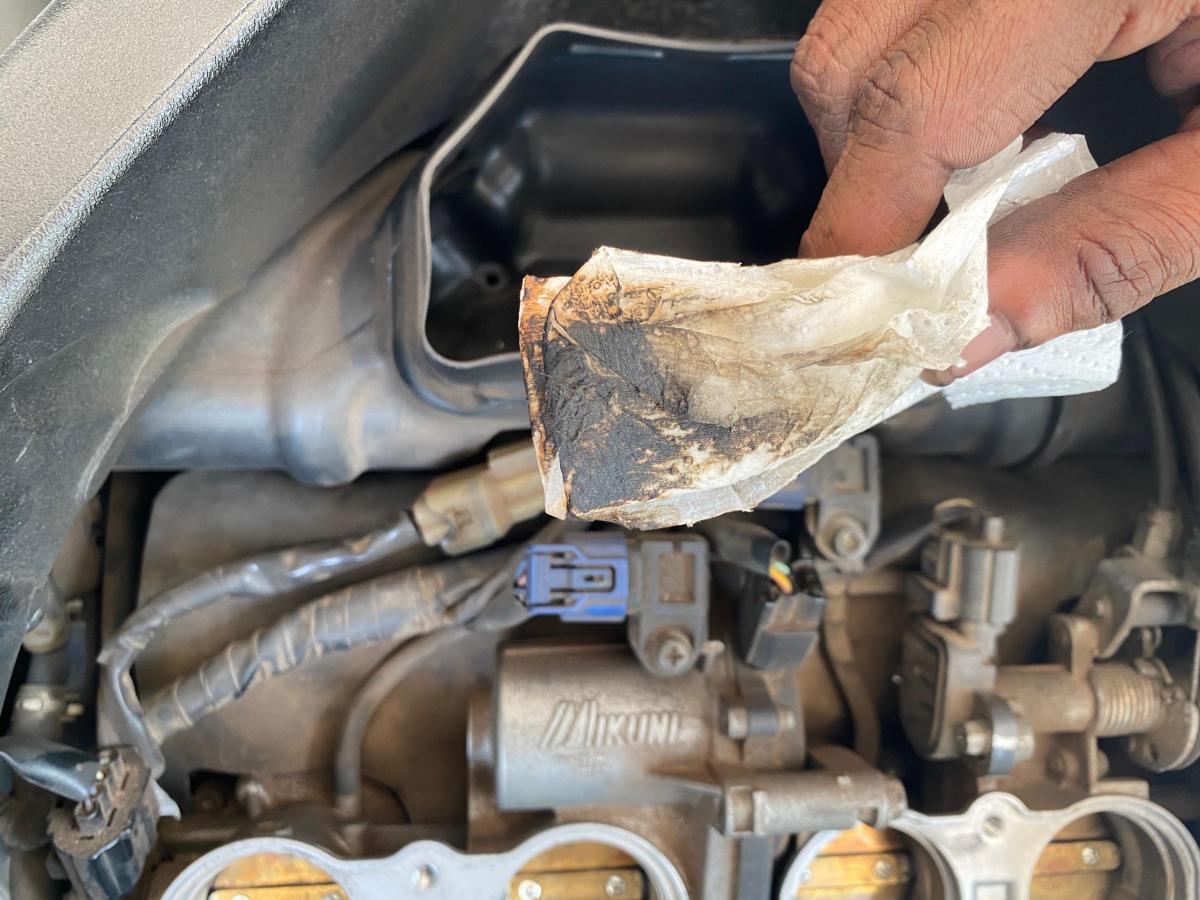
Not a thorough/detailed job by any means, but just a quick once over, enough to carry me forward for a few thousand km by when I will be doing a proper TB overhaul by deep cleaning it by removing it off the bike.
Observations: I got a bit more than what I bargained for. Oh boy, was this a relief, the bike actually felt a lot smoother as a result of this change. The R1 always felt that it complained a lot while in traffic and in the 1-5k rpm range (You stay in this range usually when puttering around town or riding in traffic) and the bike always felt like it ran rough, but post this change the bike actually ran considerably smoother, the bike now is much more tamer in these RPMs in the city limits and doesn't complain as much. Now I can't show how much the film reduces my airbox temp but have a look at this video, this might help give you a sense as to why I went ahead with this job.
Just to make sure it was not a placebo I asked my friend to also ride it as he wasn't really sold on the idea of applying the film at all. And he came back pretty surprised and felt the shame I felt about the improvements. Now before you feel that we did the TB clean(we didn't do a super detailed job of it too as we were low on time) so that might be the reason for the change, hold your horses, the last time we cleaned the TB(Super through) and injectors(Both primary and secondary) and even did the TB sync and yet the bike never felt this smooth or complain free in the lower rpm range, so no, it was not the difference of the TB clean that we did.
2. Swapping out the Gear position sensor
Now, this has been an annoying 'kabab me haddi' type issue since day 1. Whenever the bike got up to temp the Neutral indicator would not work and would start working again once the bike cools down, this in no way affects the rideability of the bike, has no bearing on how it runs but the only annoying part of this was that you cannot put the bike on the side stand without it tripping the engine kill switch because the ECU thinks that the bike is in gear and cuts off the engine immediately.
Location of the GPS
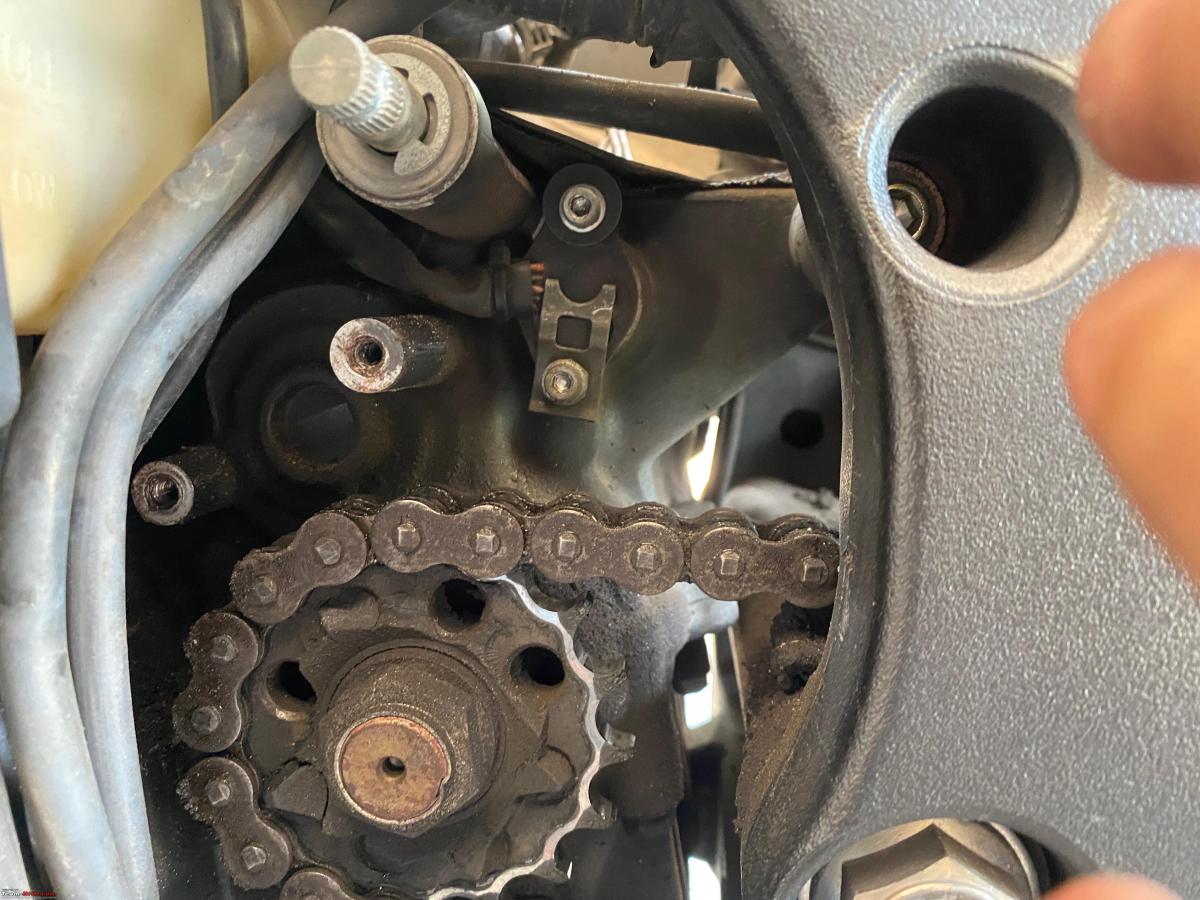
So stopping on the side of the road to quickly check your map or just to stretch your back or neck and the bike gets shut off, now this is a problem because with the R1 the temps instantly shoot up and cranking the bike immediately is very taxing on the starter motor and takes some effort, not to mention its annoying too, even to take a quick pic during a ride, it turns to be a wait of 5 mins because I let the temp falls a bit so that the starter motor is not getting overloaded.
Connectors that come from the GPS to the wiring loom

I had ordered the part from the US a long time back since Yamaha India had no intention of sourcing it for me anyways(waited on it for close to 6 months before I took matters into my own hands) and have been sitting on it for the longest time, and its literally just a 5 min job.
Out with the old

To get this job done, you need to remove the shifter rod and the front sprocket cover, takes about 2 mins and you have access to the Gear position sensor (GPS), the sensor has 2 connectors that go up and connects to the wiring loom, the location of which is right under the fuel tank, takes about 20 secs to disconnect and fish out the sensor, another 20 seconds to replace it with the new one, luckily you don't need to wrestle with the cables or anything, routing is simple and easy and no fouling against any other part of the bike or clearance issues.
In with the new

Now we couldn't test the sensor right away, we waited till all the work was done and took the bike for a test ride in traffic and got the temperature up to 110 degrees and rode like that for a good 10-15 minutes and came back and slotted the bike to neutral and voila! The neutral light comes on.
Post the shake-down run. It works!
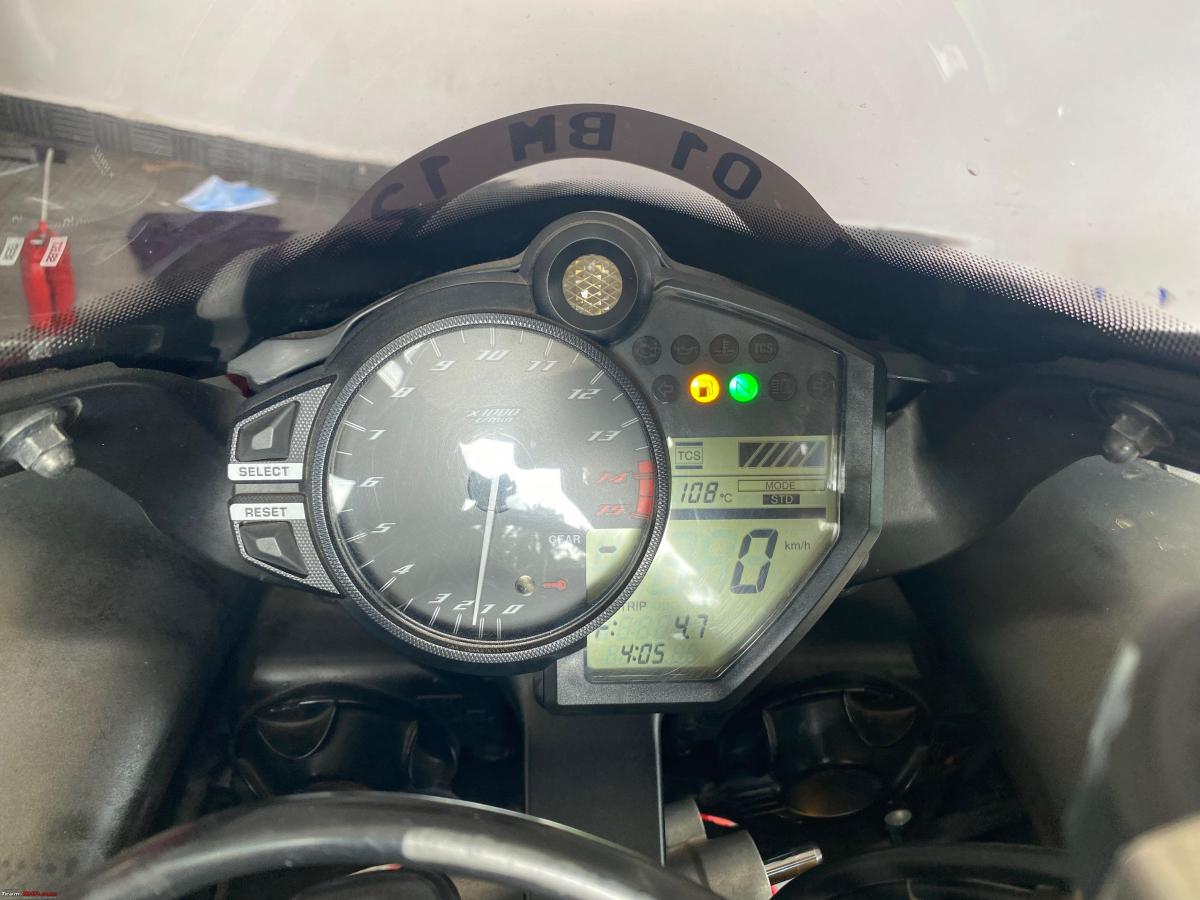
So initial tests were successful and later the same day I put it to test in a very excruciating 150kms ride back home in heavy bumper-to-bumper traffic for over 50% of the ride and the neutral light worked perfectly in all temperature ranges. So that one very long-standing irritating issue was taken care of for good.
Frame Sliders
Well, this was required as unfortunately the frame sliders on the bike were put to use already, twice actually, both instances on the right side of the bike. Once quite a few years ago when the bike was with the original owner and once by me about 2 years back, both were while the bike was standing still and was a simple seemingly harmless drop. So almost 9-10months back I had placed an order for an LSL frame slider for the R1 via moto-usher and finally decided to get it changed this time.


The process is fairly easy and straight forward and LSL does a great job with proper instructions and pictures on what goes were and how to do it too. We got started with the side that needed changing, that's the right side of the bike, we started getting the engine mount bolt loose and we noticed something, the bolt while coming off is moving in a weird way, and that's when we realized that the frame slider while it did its thing, also bent the engine mounting bolt by a fair margin.
Bent engine mount bolt
I had a small panic attack moment that what if the threads on the engine block were also damaged and did I open a can of worms by removing the slider as the slider apart from some cosmetic damage was not a risk or didn't warrant a change at all.

But anyways we were past the point of no return and decided to try our luck with the new kit from LSL, they come with new extended bolts to fit their kit precisely anyways, and breathed a sigh of relief when the bolt went it with no bent or no drama when we did the dry fit, so we took everything apart again and fit it properly in place, this time we used Loctite just to make sure it doesn't come undone.

Shiny new Frame slider for the right sideThat's the right side of the bike done and now we move to the left side, but wait, did you think the bent bolt was a scare, now comes the best part, we removed the left side slider and immediately found an issue, for the left side of the bike there is a spacer b/w the frame and the engine block. Now the slider kit that already was on the bike replaces the OEM spacer and has its own form of spacer + backing plate for it to fit flush and when we put up the LSL kit which was designed to go with the OEM spacer there was a 1-inch gap between the frame and the engine block onto which engine bolt bolts onto and I do not have the OEM spacer with me either, never knew I would need it as I didn't know the existence of such a spacer in the first place. We tried to jugaad it with using the older kits spacer and backing plate(reversed) and tried to mount the LSL sliders, it kind of worked but not really, the bolt goes in about 3/4 the way in but does not seat in fully properly. Now we were stuck, our options were to get the backing place to a lathe and cut out the protruding bits that were causing the clearance problem or find/make an OEM spacer.
Both of these options were not possible and I took the executive decision and used the "It's not a bug it's a feature" card from my IT work experience arsenal and fit back the slider kit that was already on the bike for the left side. It's not just BMW who can do asymmetry design, I can do it too. So now the bike has the LSL frame slider on the right and the older slider on the left.
In all its asymmetric glory
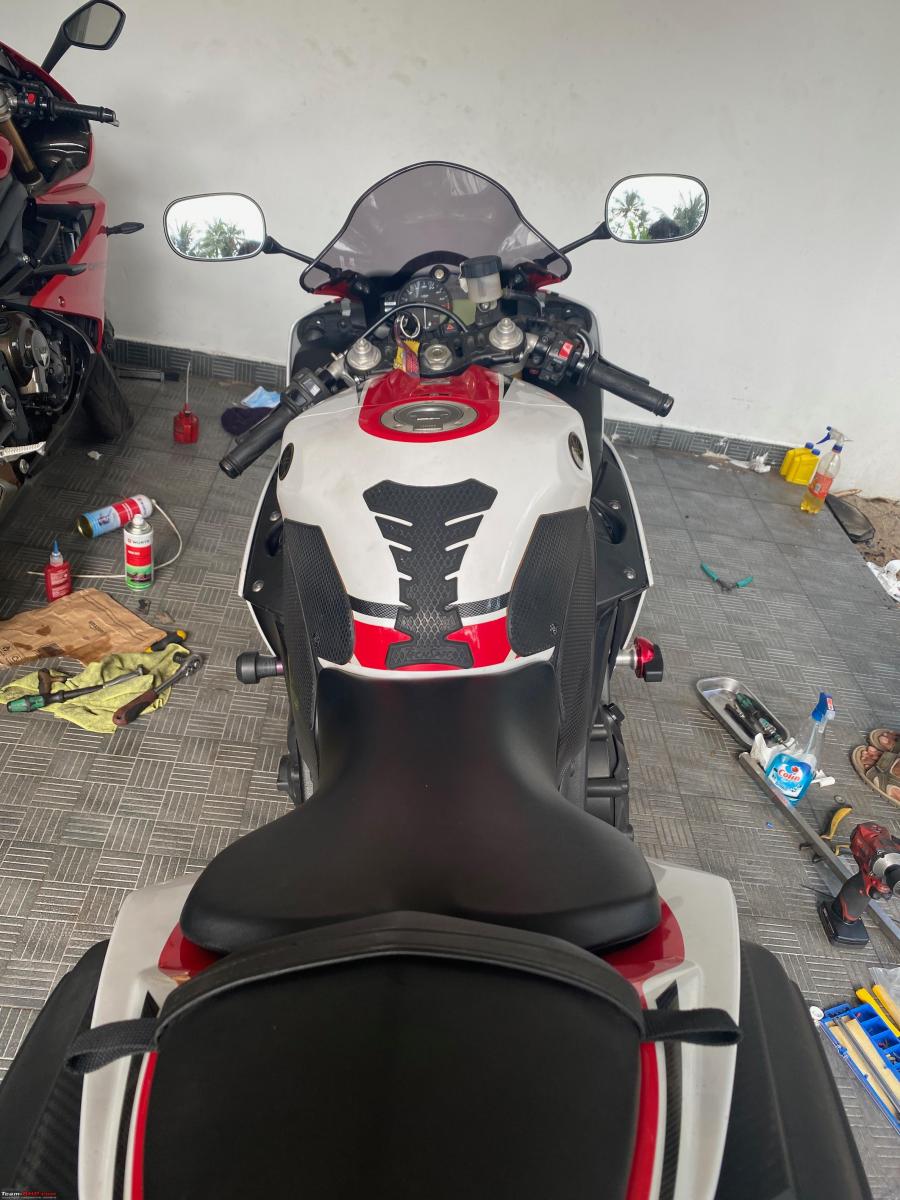
Jokes aside, I do not intend to leave it like that. I need to order an OEM spacer and once I have it I will replace the left side slider with the LSL kit. Till then I'll rock the bike like this and pretend I meant to do it like this all along. I know it should be illegal to have my level of smartness, but alas it's not so deal with it!
Lunch break and Beyond!
Once that was done took a short break for lunch and "accidentally" had too much, so was super sleepy I had to get going back home in less than 1 hour so we had to rush through the rest of the job and fit in a shakedown run before I got started. So I could not take photos or document the rest of the jobs.
But in all fairness, there was nothing worth taking pics of even, it was just fitting the R&G radiator guard install, lubing the clutch and throttle cables, and adjusting chain slack.
Got all that done as quickly as we could, buttoned the bike back up (The guy who invented the quarter lock fasteners needs to be declared a legend, take notes Honda & Ducati) and did a 10-12 km shakedown run, and everything as found to be up to spec.
Post which I started back home only to get stuck in heavy bumper-to-bumper Saturday afternoon traffic. The ride back home was hell but a more ridable lower rev range and a functional neutral light meant I could be a bit more relaxed than it would have been.
All in all, I would say it was a day well spent!

Check out BHPian comments for more insights and information.


