Treepie was out of focus with a larger aperture

Quick change of settings and there is improvement in the image

Emerald Dove image with a less than ideal head angle

Better and more pleasing head angle (a very high ISO image hence noisy)

The perch and the water bath in the Kodagu hide

The view of the hide from the perch

Inside the hide: its hot, humid, full of mosquitoes, lizards and bugs


How can we forget the cars, after all this in an automotive forum. I do not own an SUV or a high ground clearance vehicle, so all my trips were in the 3er or the Polo. I have seen that if you are slow and careful these cars can manage a lot of bad roads. The only issue is mud and slush.
The 328i served me well in a lot of dirt tracks with passengers and camera gear. Looking forward to many more trips with the M340i now.


The little GTi is my off roader, thanks to the short wheelbase


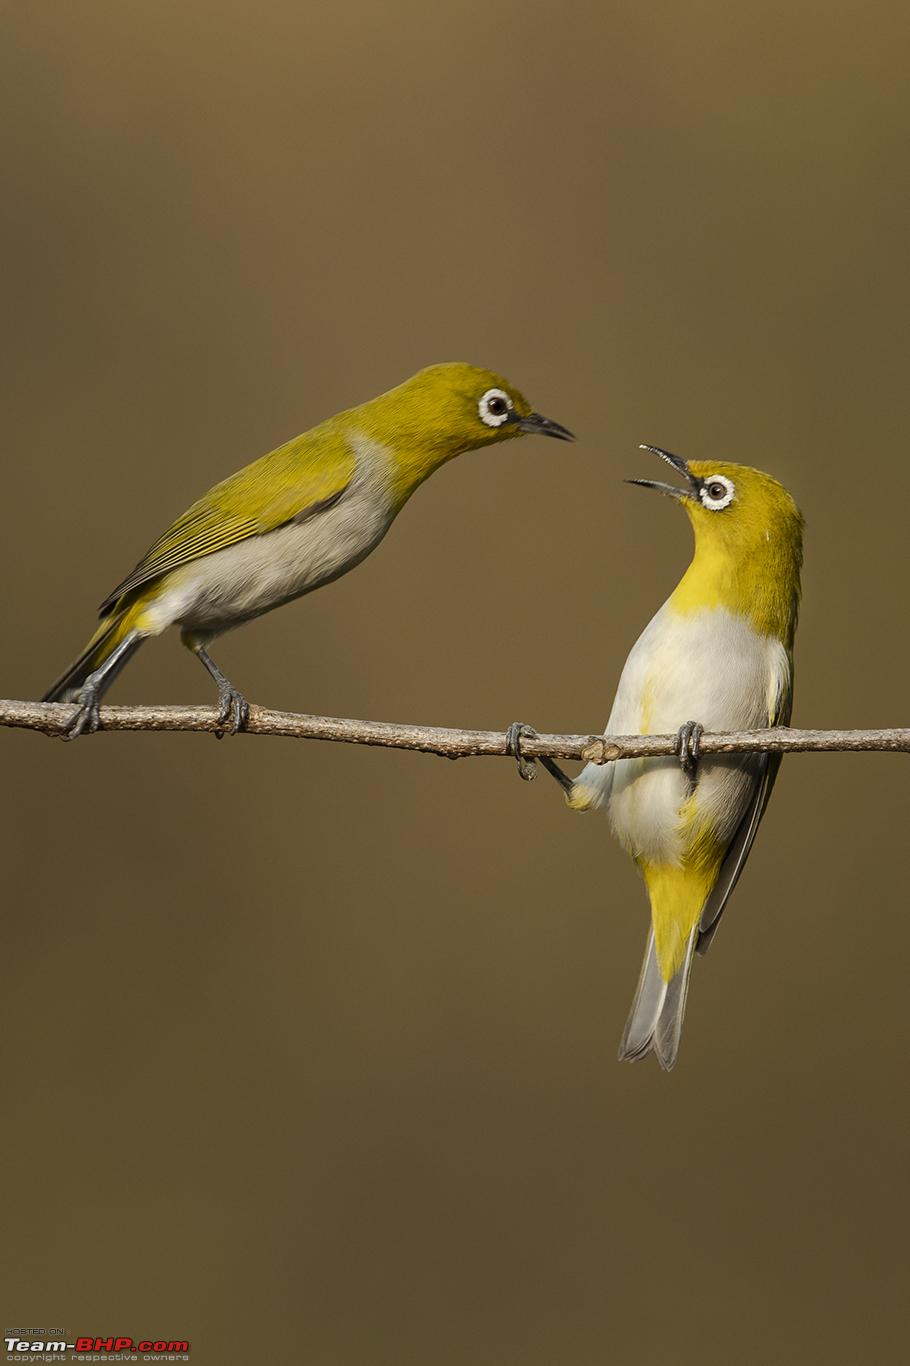
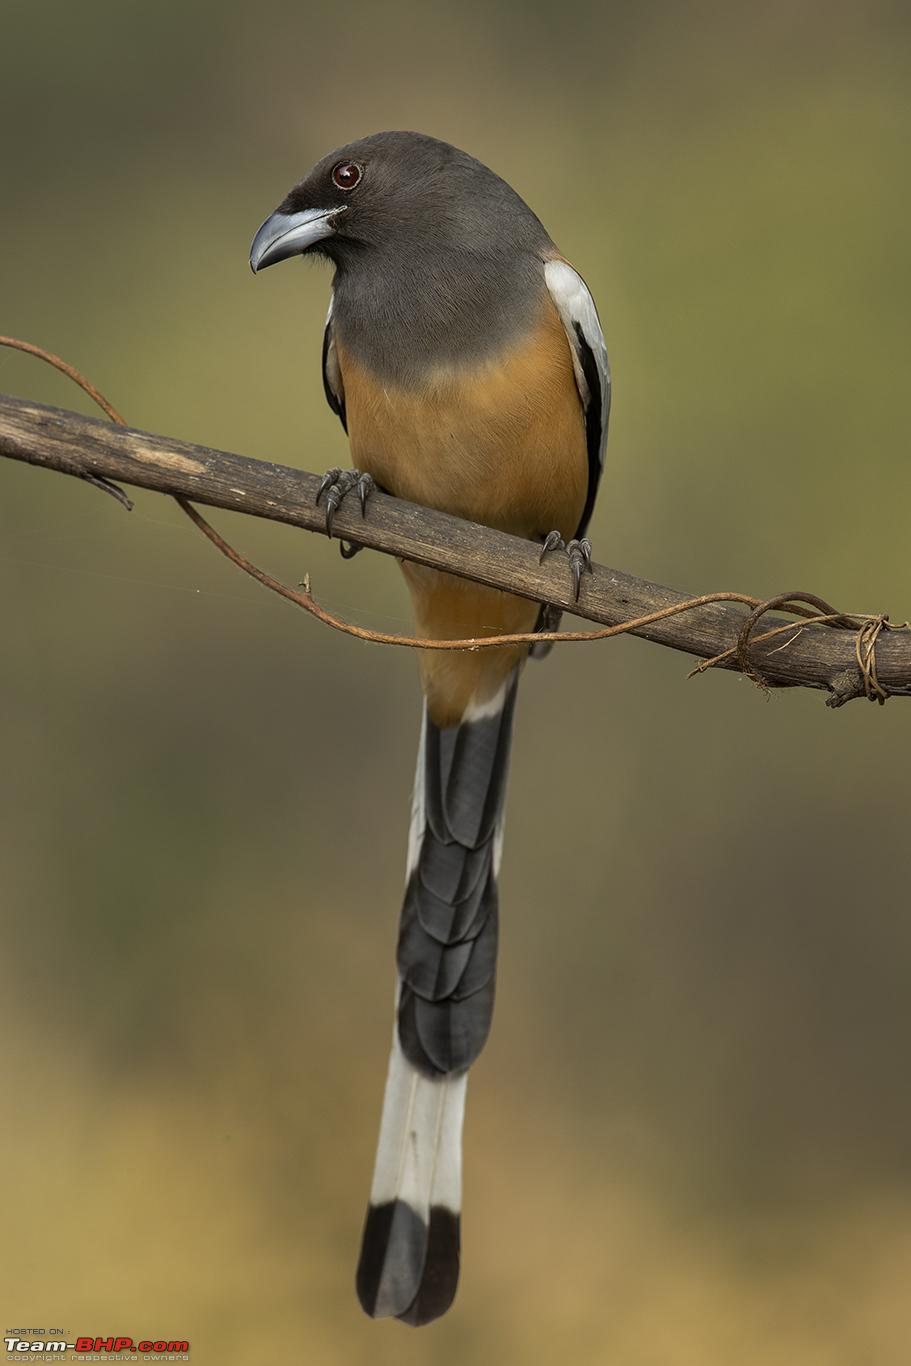
That’s all for the images.
Now the boring part..
Let’s discuss some
advantages of hide photography.
•Most hides are set up for photographers. Background, perches, light etc. are all taken in to account while the set up is made. These places are mostly set up by photographers so you can get eye level shots with a clean background (bokeh) very easily.
•It’s possible to photograph multiple species by just sitting in one place for hours.
•A lot of experimentation from a photography aspect can be carried out as the subjects are in plenty.
•A permanent hide is well camouflaged into its surroundings, which is a boon for birding.
•Hides allow birds to be photographed in their natural surroundings without being disturbed
Coming to the
disadvantages
•It may not seem ethical for some people especially if attractants like fruits, flowers etc. is used.
•It can get boring if there is no activity as you are sitting is one place for hours peeping through the view finder. The process involves a lot of patience. This is definitely not your regular family trip.
•May not be accessible to all. Most hides work on references among the local birding fraternity. Though there are a few which are open to everyone.
Some
Do’s and Don’ts
•Do not try to move around or switch seats inside the hide. Maintain as much silence as possible. Birds are very shy creatures and fast movements or noise will scare them easily. This is especially important if you are in a group.
•Do not wear bright colours and all movements should be slow and smooth. This does not mean you need to wear camouflage gear but anything plain and dull is fine. The point is not to stick out like a sore thumb in a red shirt.
•Carry water bottles along with you always along with some light snacks. Sometimes you need to sit inside for hours together. Please do not leave water bottles and snack packets inside the hide once the session over.
•Always carry a tripod, extra battery as well as memory cards.
Some
tips and tricks of bird photography which I have found to be useful.
Know your subject
It all depends on anticipation. If you know how the bird is going to behave then you will have better action images. If there is a water bath below a perch, some birds will fly down to it from the perch and then again back to the perch.
Don’t ignore the common subjects. Even a bulbul in good light can be great subject. Thing is that you need to decide whether your aim is to see more species of birds (binoculars and a checklist is better for this) or take better pictures.
Get close to your subject in a slow and calm manner (not possible in a hide).
Be aware of the season and weather too. Just because your leaves got approved in the monsoons or if you have a weekend off doesn’t mean you will get to see all the birds during that time.
High speed bursts
The moment we see a bird, we start firing in Continuous mode. With newer mirrorless cameras and silent electronic shutter with high fps, this can fill up memory cards in no time. We are always anxious to take a picture before the bird flies away. This is fine if it’s a rare bird and you need to document that you have seen it. But it becomes a pain to choose a good image later and most images just use up HDD space. A pleasing photograph has much more to it. The light, background, head angle, catch light in the eye etc. all adds to the drama of a nice image. Take your time and press the shutter button. Be a minimalist, ten good images from a trip is worth more than gigabytes of junk. Sometimes if the conditions are not ideal, then don’t shoot at all. Just keep the camera aside enjoy the scene.
Camera gear and settings
Be aware of the camera settings all the time. It is a very dynamic thing as light keeps changing all the time. Even when you move the frame a few inches, the settings may have to be changed. Apart from your usual aperture, shutter speed and ISO, the focus points and metering mode matters too. One very important setting is exposure compensation. I usually shoot in Aperture mode with an EV of negative 0.3 all the time. I shoot RAW and its relative easy to recover shadows than blown out highlights. Keep checking the settings every now and then and even while looking through the view finder. Eventually it will be muscle memory and you will be able to change settings while still looking through the view finder. This is the reason you must be very familiar with your camera body.
I have been using Canon for over twenty years and I am planning to stick to it in the future too. Often other brands come out with great cameras and a lot of people keep switching brands. The problem is that you need to learn the UI all over again. I would much rather take a slightly noisy image than take a blurry image with a stop of extra dynamic range and less noise. Gear does matter in nature photography; it is not about owning the latest and greatest but that it may help you to capture that difficult image that would be almost impossible with more basic equipment. Professional lenses hold value and can be used for a long time if well maintained. I am using the same telephoto prime since 2012 and it has helped me take numerous decent images. If you are worried about not using your gear often then renting is a great option.
Full frame cameras are great (although expensive). This is not to say crop-sensor cameras are bad for wildlife photography. Just don’t be swayed into buying expensive crop-sensor camera if you already have a full frame option. Better to invest your effort into learning bird behaviour and improving your camera technique (autofocus and exposure settings). That goes a lot further than a 1.5x or 1.4x crop – and the loss of high ISO image quality it brings – toward improving your photos.
Lastly, a lot of luck is involved in bird photography. If you get the picture of the species you seek, then great. If not, don’t get disappointed, rather enjoy what you are doing. I guess end of the day you may get a million likes for an image in social media but if you are not enjoying the process of capturing an image then it’s a futile exercise.
I have put forward most of the things which has helped me over the years to take better bird photographs. I may have missed a few things and have purposefully left out the lens and camera choices as there are already endless debates about those topics if you wish to partake.
Thanks to Viddy and Dr.AD for all the help and encouragement. Its been ages since I compiled photos for a TBHP thread. Hopefully can post more travel/photo stuff as the world opens up. Do let me know if there are any mistakes or suggestions in the comments. This photologue may seem little haphazard and hopefully I will improve over time in my descriptions.
Happy birding!
RoBi


 5th July 2021, 23:31


 (62)
Thanks
(62)
Thanks