Team-BHP > Technical Stuff
Register New Topics New Posts Top Thanked Team-BHP FAQ


Reply
  Search this Thread
18,078 views
Old 27th June 2021, 18:18   #1
Distinguished - BHPian
 
vigsom's Avatar
 
Join Date: Feb 2006
Location: NSEW
Posts: 3,853
Thanked: 27,233 Times
Aircons! Demystifying the car air-conditioning system, Part 2

Introduction

I’d introduced the subject of car aircons to all of you via this (Aircons! Demystifying the car air-conditioning system).

Please consider the next few posts as a sequel to the above thread. The objective here is to illustrate how to inspect and service a car’s A/C system, dwelling in detail on the procedure adopted on a 2007 Suzuki Grand Vitara automatic. Dashboard assemblies/ evaporator cores (cooling coils) of a few other cars will also be featured to help readers appreciate how failed evaporator cores look like, and some care that could prolong their life.

This is probably the first illustrated procedure on the net on how to inspect the HVAC on a Suzuki Grand Vitara. The guidelines mentioned here will also be useful when performing a similar job on any simple car/SUV.

Aircons! Demystifying the car air-conditioning system, Part 2-gv_hvacunitdismantling.jpg

Last edited by vigsom : 27th June 2021 at 21:52.
vigsom is offline   (27) Thanks
Old 27th June 2021, 18:48   #2
Distinguished - BHPian
 
vigsom's Avatar
 
Join Date: Feb 2006
Location: NSEW
Posts: 3,853
Thanked: 27,233 Times
re: Aircons! Demystifying the car air-conditioning system, Part 2

Background

I’ve been holding this 2007 Suzuki Grand Vitara since 2014, and the aircon was functioning perfectly until end-2019. In end-2019, I observed that although the unit was cooling, it would take a few minutes for the blower to throw cold air, and this was certainly a departure from normal. I’d associated this shift in behaviour to the usage of the car dropping to 1/3 of its earlier usage. Nevertheless, I carried on. The definite change was that earlier, the low side (Compressor suction) piping would show dew on its outer surface, while later it felt just cool, but not chilled.

Covid-19 induced shutdown – 2020 until early 2021

The country was shut down in Mar-2020 and that meant virtually zero use of the car. Post Unlock 1.0 in May-2020, the car remained practically idle, but I used to keep the car roused by driving around for, say, 20kms once or twice a week. The aircon remained functional, but the behaviour remained as described above.

Why was inspection of the HVAC Unit required?

Sometime in Apr-2021, I decided to get the aircon inspected. I could have easily evacuated the refrigerant, done a pressure test at 200-250 psig followed by a vacuum hold test at -76cmHg, and charged fresh refrigerant. However, better sense prevailed. Since it was over 6.5 years since I’d got the car pre-owned, I decided to have the HVAC Unit opened, so that the evaporator core could be inspected and, if required, cleaned.

Project Grand Vitara Aircon

Removal of the dashboard assembly

Benefits of removing the dashboard assembly have been enumerated here (Aircons! Demystifying the car air-conditioning system).

We moved on to remove the dashboard assembly. Here are the steps that were followed :

1. Disconnect the battery negative terminal, and wait for a few minutes.

2. Evacuate the unit to recover the refrigerant.

3. Remove the two silver painted ornament strips on either side of the center console. Use a tool to pry the ornament strip first at the bottom, and then move up.

4. Remove the glove box.

5. Decouple and remove the blower assembly.
Aircons! Demystifying the car air-conditioning system, Part 2-gv_acblower1.jpg

Aircons! Demystifying the car air-conditioning system, Part 2-gv_acblower2.jpg

6. Remove the chrome ring and the garnish assembly around the gear lever.
Aircons! Demystifying the car air-conditioning system, Part 2-gv_atlever.jpg

7. Remove the necessary screws and remove the floor console as one unit.
Aircons! Demystifying the car air-conditioning system, Part 2-gv_centerconsoleremoval.jpg

Airbag module
Aircons! Demystifying the car air-conditioning system, Part 2-gv_airbagmodule.jpg

8. Press the shift lock button and push the AT gear lever all the way back to L. This is to create room for removing the convenience box just below the AC control panel, and also to remove the dashboard assembly.
Aircons! Demystifying the car air-conditioning system, Part 2-gv_atlever_l.jpg

9. Remove the bolts fastening the gear lever assembly to the floor- this is just to move it around to access and decouple the airbag module couplers, and also to be able to pull the dashboard assembly out of position.

10. Decouple all couplers to the fuse panel – cum – body control module located above the accelerator pedal.
Aircons! Demystifying the car air-conditioning system, Part 2-gv_bcm.jpg

11. Remove the dashboard lower panel as shown
Aircons! Demystifying the car air-conditioning system, Part 2-gv_dashboardlowerpanel1.jpg

Aircons! Demystifying the car air-conditioning system, Part 2-gv_dashboardlowerpanel_removed.jpg

12. Remove the driver air bag assembly. Place this upright on the rear seat. Do not place it with the horn pad facing the bottom, as, in the rare case of the air bag deploying, the unit will become a missile.

13. Remove the steering wheel assembly. Before doing so, please mark the centerline of the steering wheel so that the wheel can be perfectly in line during re-assembly.

14. Remove the steering column cover assembly. This is in two parts - one top and one bottom adjoining the steering control stalks

15. Remove the couplers, and then the clock spring, taking care to ensure that the orientation of the unit isn't disturbed. Wind some tape around to prevent it from moving around.

16. Remove the bolts holding the steering column to the metal frame.

17. Open the bolts on the A-pillar holding the dashboard assembly frame to the car's frame
Aircons! Demystifying the car air-conditioning system, Part 2-gvdashboard_bolts_apillar.jpg

18. Remove the dashboard assembly as one unit. The unit is heavy and will need two people to pull it out of position, and out of the car.

The following video elaborates how the steering wheel and the clock spring are removed.


Dashboard assembly removed
Aircons! Demystifying the car air-conditioning system, Part 2-gv_dashboardassembly_removed.jpg

Last edited by vigsom : 27th June 2021 at 22:05.
vigsom is offline   (18) Thanks
Old 27th June 2021, 19:34   #3
Distinguished - BHPian
 
vigsom's Avatar
 
Join Date: Feb 2006
Location: NSEW
Posts: 3,853
Thanked: 27,233 Times
re: Aircons! Demystifying the car air-conditioning system, Part 2

Removal of the HVAC Unit

1. Loosen the bolt on the expansion valve at the engine firewall side.

2. Disconnect the aircon low side and high side piping connections at the expansion valve.

3. Disconnect the hoses to the heater core at the firewall side.

4. Disconnect the rectangular cross section AC ducts at the floor of the HVAC Unit. These ducts feed air to the rear of the car under the driver and co-driver seats.

Aircons! Demystifying the car air-conditioning system, Part 2-gv_ducts_rearside.jpg

5 Remove the HVAC Unit by opening all the nuts fastening the unit to the frame.
Aircons! Demystifying the car air-conditioning system, Part 2-gv_hvacunit_beforeremoval.jpg

Inside the car after removing the HVAC Unit- note the steering column lowered
Aircons! Demystifying the car air-conditioning system, Part 2-gv_withhvacunit_removed.jpg

Transmission Control Module above the left kick panel
Aircons! Demystifying the car air-conditioning system, Part 2-gv_transmissioncontrolmodule.jpg

Last edited by vigsom : 27th June 2021 at 22:07.
vigsom is offline   (12) Thanks
Old 27th June 2021, 20:03   #4
Distinguished - BHPian
 
vigsom's Avatar
 
Join Date: Feb 2006
Location: NSEW
Posts: 3,853
Thanked: 27,233 Times
re: Aircons! Demystifying the car air-conditioning system, Part 2

Inspection of the HVAC Unit - Evaporator Core

The top half of the HVAC Unit was opened to access the evaporator core. The evaporator core was observed to be reasonably clean and in great shape for a 14 year old car. Whatever little leaves are seen must have crept in in the period before my ownership. I've taken great care to ensure that the cabin air filter was in place, and the fresh air flap was never open when I'd taken the filter out for cleaning.

HVAC Unit being dismantled to remove the Evaporator Core
Aircons! Demystifying the car air-conditioning system, Part 2-gv_hvacunitdismantling.jpg

Evaporator Core before cleaning
Aircons! Demystifying the car air-conditioning system, Part 2-gv_evapcoil_beforecleaning.jpg

Evaporator Core after cleaning
Aircons! Demystifying the car air-conditioning system, Part 2-gv_evapcoil_clean.jpg

After cleaning, the Evaporator core was installed back, the HVAC Unit re-assembled, and fitted back in the car. Installation of the HVAC Unit, the dashboard assembly, and normalising the connections was done in the reverse order of removal. Proper installation of the dashboard assembly is confirmed if a)the dashboard is locked in the front frame and, b) the holes for the bolts are aligned on the A pillar.

Dashboard assembly being reinstalled
Aircons! Demystifying the car air-conditioning system, Part 2-gv_dashboardbeinginstalled.jpg

Last edited by vigsom : 27th June 2021 at 22:31.
vigsom is offline   (15) Thanks
Old 27th June 2021, 20:28   #5
Distinguished - BHPian
 
vigsom's Avatar
 
Join Date: Feb 2006
Location: NSEW
Posts: 3,853
Thanked: 27,233 Times
re: Aircons! Demystifying the car air-conditioning system, Part 2

Commissioning the unit

These were the steps followed to commission the unit

1.Fix the hoses to the heater core.

2. Reconnect the low and high side piping to the expansion valve, and install the expansion valve bolt.

3. Leak test the refrigerant circuit at 250 psig. Keep the pressure on hold for at least one hour.

Aircons! Demystifying the car air-conditioning system, Part 2-leaktestpressure.jpg

4. If no pressure drop is observed, evacuate the system (pull vacuum) for at least 30 minutes after full vacuum (-76cmHg) is reached.

5. Hold this vacuum for 30 minutes to confirm that the system is leak proof (the vacuum hold test is a better indicator than the pressure hold test).

6. Introduce approx. 20cc of refrigerant oil into the system via the low side(blue) hose.

7. Connect a can of refrigerant to the low side hose. With the valve on the system side closed, purge the blue line with some refrigerant to displace all air in the hose.

8. Switch on the aircon and keep the engine rpm at approx 1500rpm.

9. Open the system side valve. Break the vacuum using refrigerant and gradually add the required quantity of refrigerant.

A can of refrigerant is 450g and the specification for the Grand Vitara is 570 plus or minus 30g. So approx 600g was added in total, and that corresponded to a low side pressure of 40psig, dew on the surface of the low pressure line, and a grille temperature of approx 8.5 deg.C. The cabin turned cold in no time.

Aircons! Demystifying the car air-conditioning system, Part 2-lowsidepressure.jpg

Last edited by vigsom : 27th June 2021 at 22:16.
vigsom is offline   (12) Thanks
Old 27th June 2021, 20:42   #6
Distinguished - BHPian
 
vigsom's Avatar
 
Join Date: Feb 2006
Location: NSEW
Posts: 3,853
Thanked: 27,233 Times
re: Aircons! Demystifying the car air-conditioning system, Part 2

Dashboard removal on some other cars

The Grand Vitara, the Toyota Corolla, and many other cars come with the dashboard assembly separate from the HVAC Unit.

However, the i10, i20, XUV500 are some sample cars where the dashboard assembly and HVAC Unit are removed as one. As an example, when removing the i20 dashboard assembly, there are bolts below the wiper cowl that also need to be removed. When fitting such dashboard assemblies back, all the mounting holes have to perfectly align with the respective points, and the heater and evaporator core connections have to perfectly align with the points on the firewall

Here are some pictures of failed evaporator cores from a few other cars. In all the cases illustrated below, the evaporator cores had failed and the indication was the presence of oily gunk at some portion on the unit.

2012 Hyundai i10

Evaporator failure after 9 years of service

Car sans dashboard
Aircons! Demystifying the car air-conditioning system, Part 2-hyundai_i10_dashboard_removed.jpg

Dashboard assembly
Aircons! Demystifying the car air-conditioning system, Part 2-hyundai_i10_dashboard.jpg

Leaking evaporator core
Aircons! Demystifying the car air-conditioning system, Part 2-hyundai_i10_evapcore_leaking.jpg

New vs Old evaporator core
Aircons! Demystifying the car air-conditioning system, Part 2-hyundai_i10_evapcore_new_old.jpg

New evaporator core
Aircons! Demystifying the car air-conditioning system, Part 2-hyundai_i10_evapcore_new.jpg


2015 Nissan Terrano

Evaporator failure after 6 years of service

Failed evaporator
Aircons! Demystifying the car air-conditioning system, Part 2-terrano_evaporator.jpg

Note the amount of dog hair that has gotten in
Aircons! Demystifying the car air-conditioning system, Part 2-terrano_evaporator2.jpg


2011 Hyundai i20

Evaporator failure after 10 years of service

Dashboard assembly
Aircons! Demystifying the car air-conditioning system, Part 2-i20_dashboardassembly_removed.jpg

Failed evaporator core
Aircons! Demystifying the car air-conditioning system, Part 2-i20_evaporatorcoil_fouledleaking.jpg

New evaporator core
Aircons! Demystifying the car air-conditioning system, Part 2-i20_newevaporatorcoil.jpg


2013 XUV500

Second evaporator failure in 8 years

Dashboard- note the intelligent use of mesh on the fresh air path to prevent inadvertent entry of rodents
Aircons! Demystifying the car air-conditioning system, Part 2-xuv500_dashboard1.jpg

Aircons! Demystifying the car air-conditioning system, Part 2-xuv500_dashboard2.jpg

Failed evaporator
Aircons! Demystifying the car air-conditioning system, Part 2-xuv500_evapcore_leaking1.jpg

Aircons! Demystifying the car air-conditioning system, Part 2-xuv500_evapcore_leaking2.jpg


2010 WagonR

This evaporator failed after 11 years of service
Aircons! Demystifying the car air-conditioning system, Part 2-wagonr_evapcore_leaking.jpg

Key learnings

1. A clean interior goes a long way in prolonging the life of the evaporator core

2. When an AC service is performed, especially after many years, and one isn't sure of past history, it is a good idea to get the compressor oil replaced. I didn't touch the compressor oil in the Vitara since I knew it was super clean

3. Use the aircon only just enough to keep fatigue at bay. Do not over-run the aircon and get addicted. It isn't healthy

4. Please get out of the habit of running the aircon with the car at standstill and folks sitting inside and eating away. Move out, get some fresh air, sweat !

Last edited by vigsom : 27th June 2021 at 22:44.
vigsom is offline   (28) Thanks
Old 28th June 2021, 05:12   #7
Team-BHP Support
 
Join Date: Feb 2004
Location: Mumbai
Posts: 18,629
Thanked: 80,586 Times
re: Aircons! Demystifying the car air-conditioning system, Part 2

Thread moved out from the Assembly Line. Thanks for sharing!
Aditya is online now   (3) Thanks
Old 30th June 2021, 09:45   #8
BHPian
 
viXit's Avatar
 
Join Date: Apr 2020
Location: Hyd
Posts: 809
Thanked: 2,888 Times
Re: Aircons! Demystifying the car air-conditioning system, Part 2

Two of my cars don't have cabin air filters, one of them, a 2013 Honda Amaze Petrol just wouldn't cool. And it had negligible airflow even at max fan speed.

I opened up the blower assembly and there was a black ball of lint and possibly pollen and other dust particles. The ball had filled the blower assembly and wasn't allowing any air to go through. There was some airflow and cooling on removing it and cleaning. But I was dead sure that the evaporator would be caked with mud.

The service centre overhauled the entire AC system, refilled gas and now it cools like a dream.

The second car is a Safari Storme 2013 2wd VX. This variant came with an overhead AC unit from factory that works even when the front ac is completely OFF.
This car also doesn't have an AC filter. How can I prevent any failure/dirt from entering? Do you have any pics/tips please. The car is 7 years old and is used extensively in dusty farms. We felt the cooling went down and took it to TASC. They evacuated the system, held vacuum and then refilled it. Over 7 years, 20gms of gas was lost. Which they refilled, and now the car cools well even in the summer in hot slow traffic. Which was a struggle earlier.

There is always a worry in the back of my mind about having a gunked up evaporator surface due to this. How can manufacturers provide a car without a cabin air filter, The SA mentioned something about a piece of sponge that traps dirt, but I don't buy it. Even if it's true, how much dust will it trap! What can I do about this.

Thank you for this very informative thread.

Last edited by viXit : 30th June 2021 at 09:47.
viXit is offline   (3) Thanks
Old 30th June 2021, 09:56   #9
BHPian
 
Researcher's Avatar
 
Join Date: Oct 2019
Location: MH01/OD02
Posts: 242
Thanked: 1,243 Times
Re: Aircons! Demystifying the car air-conditioning system, Part 2

Thank you for this very informative thread. A joy to read like all of your articles.

The condition of the evaporator core from your Grand Vitara (one of my all time favourites
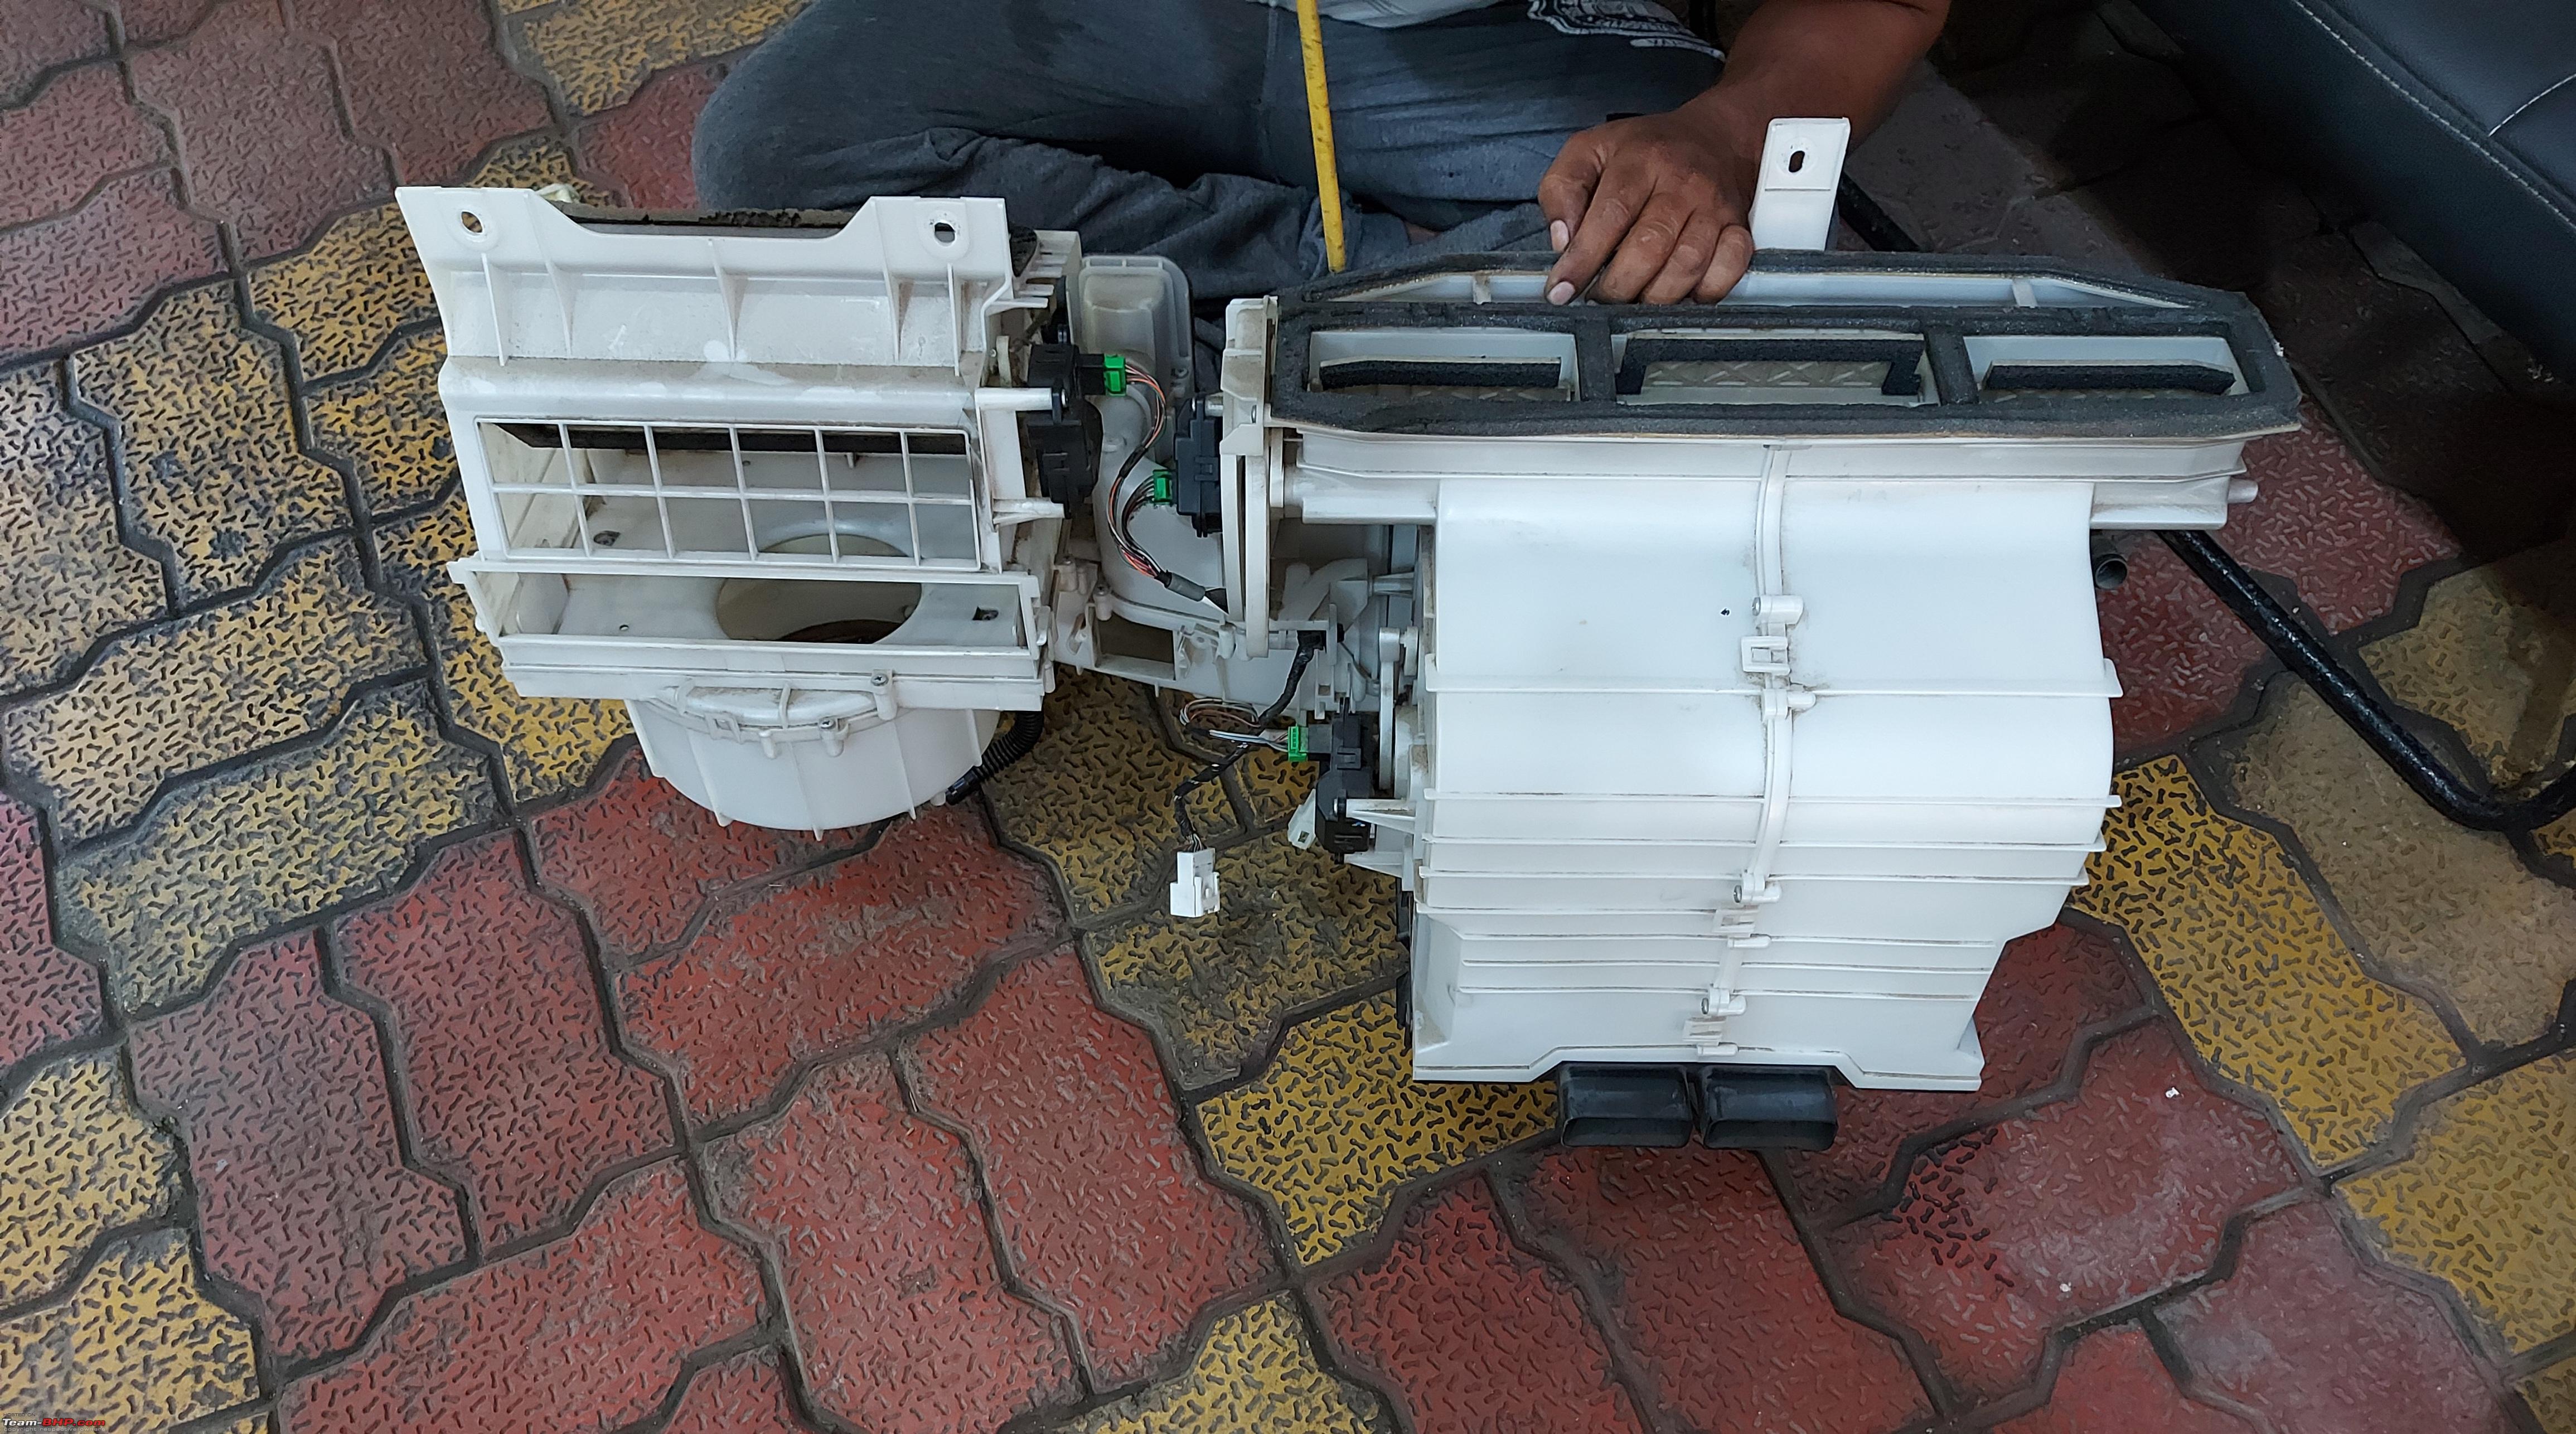
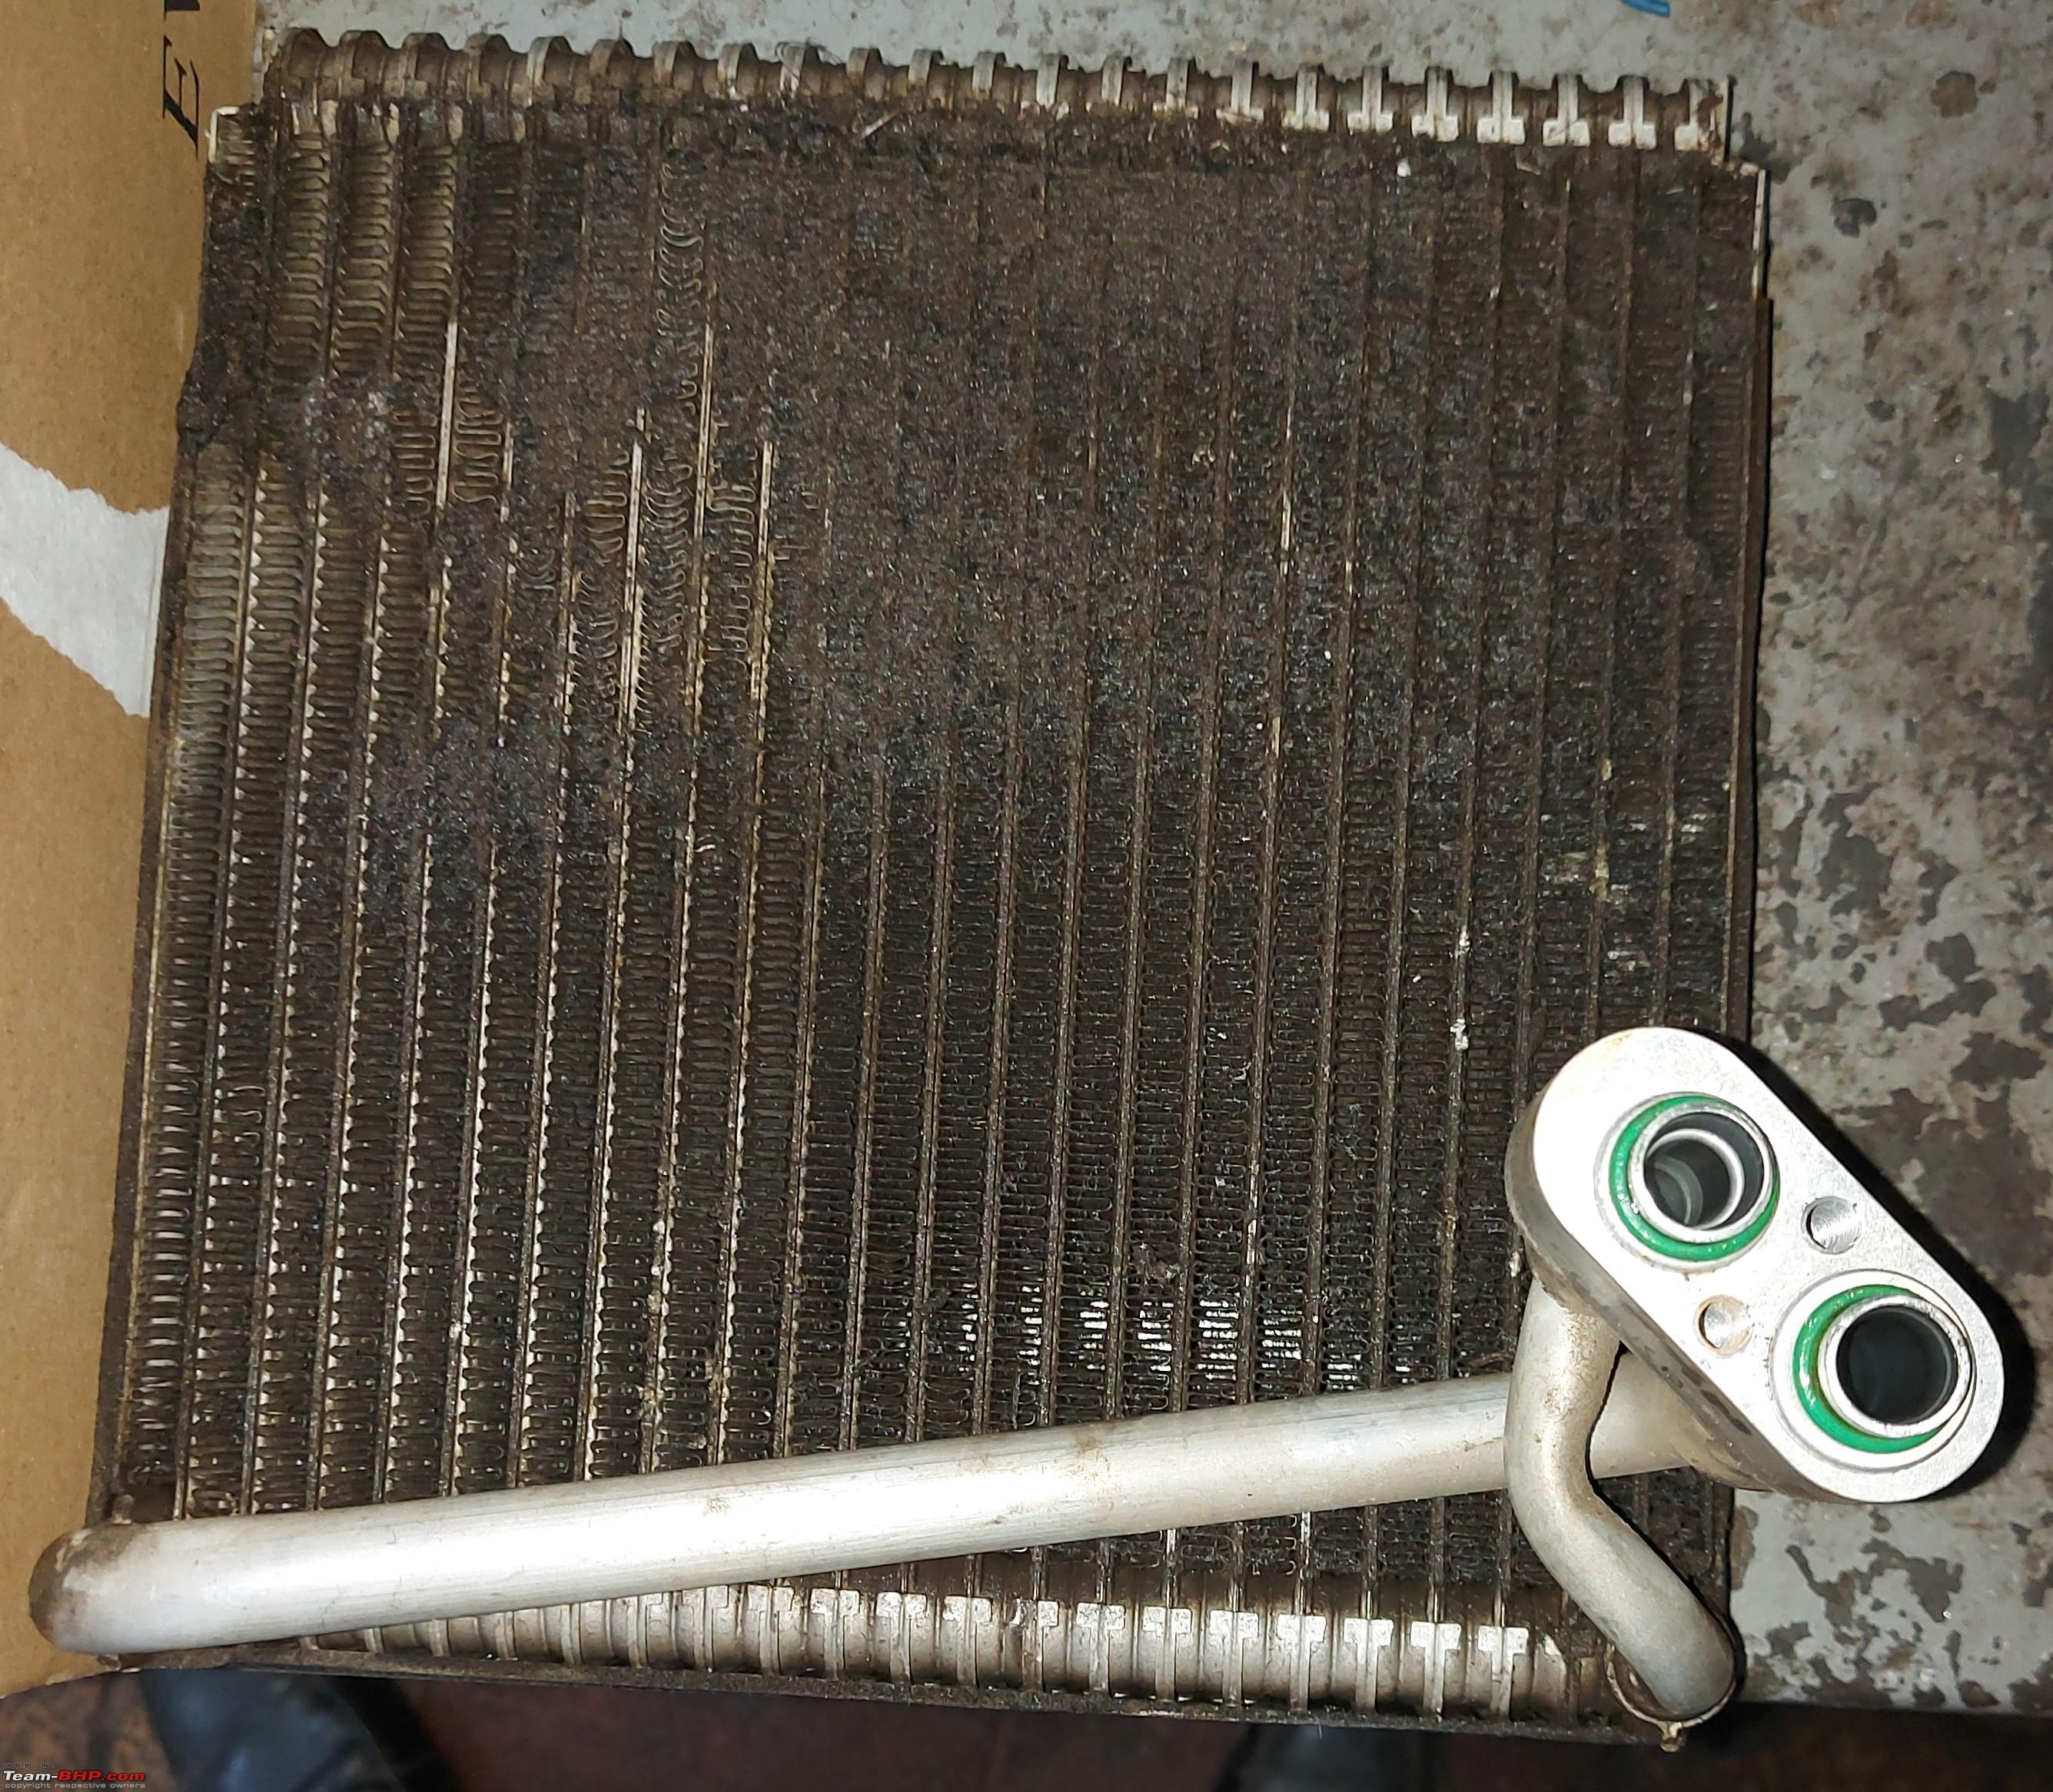
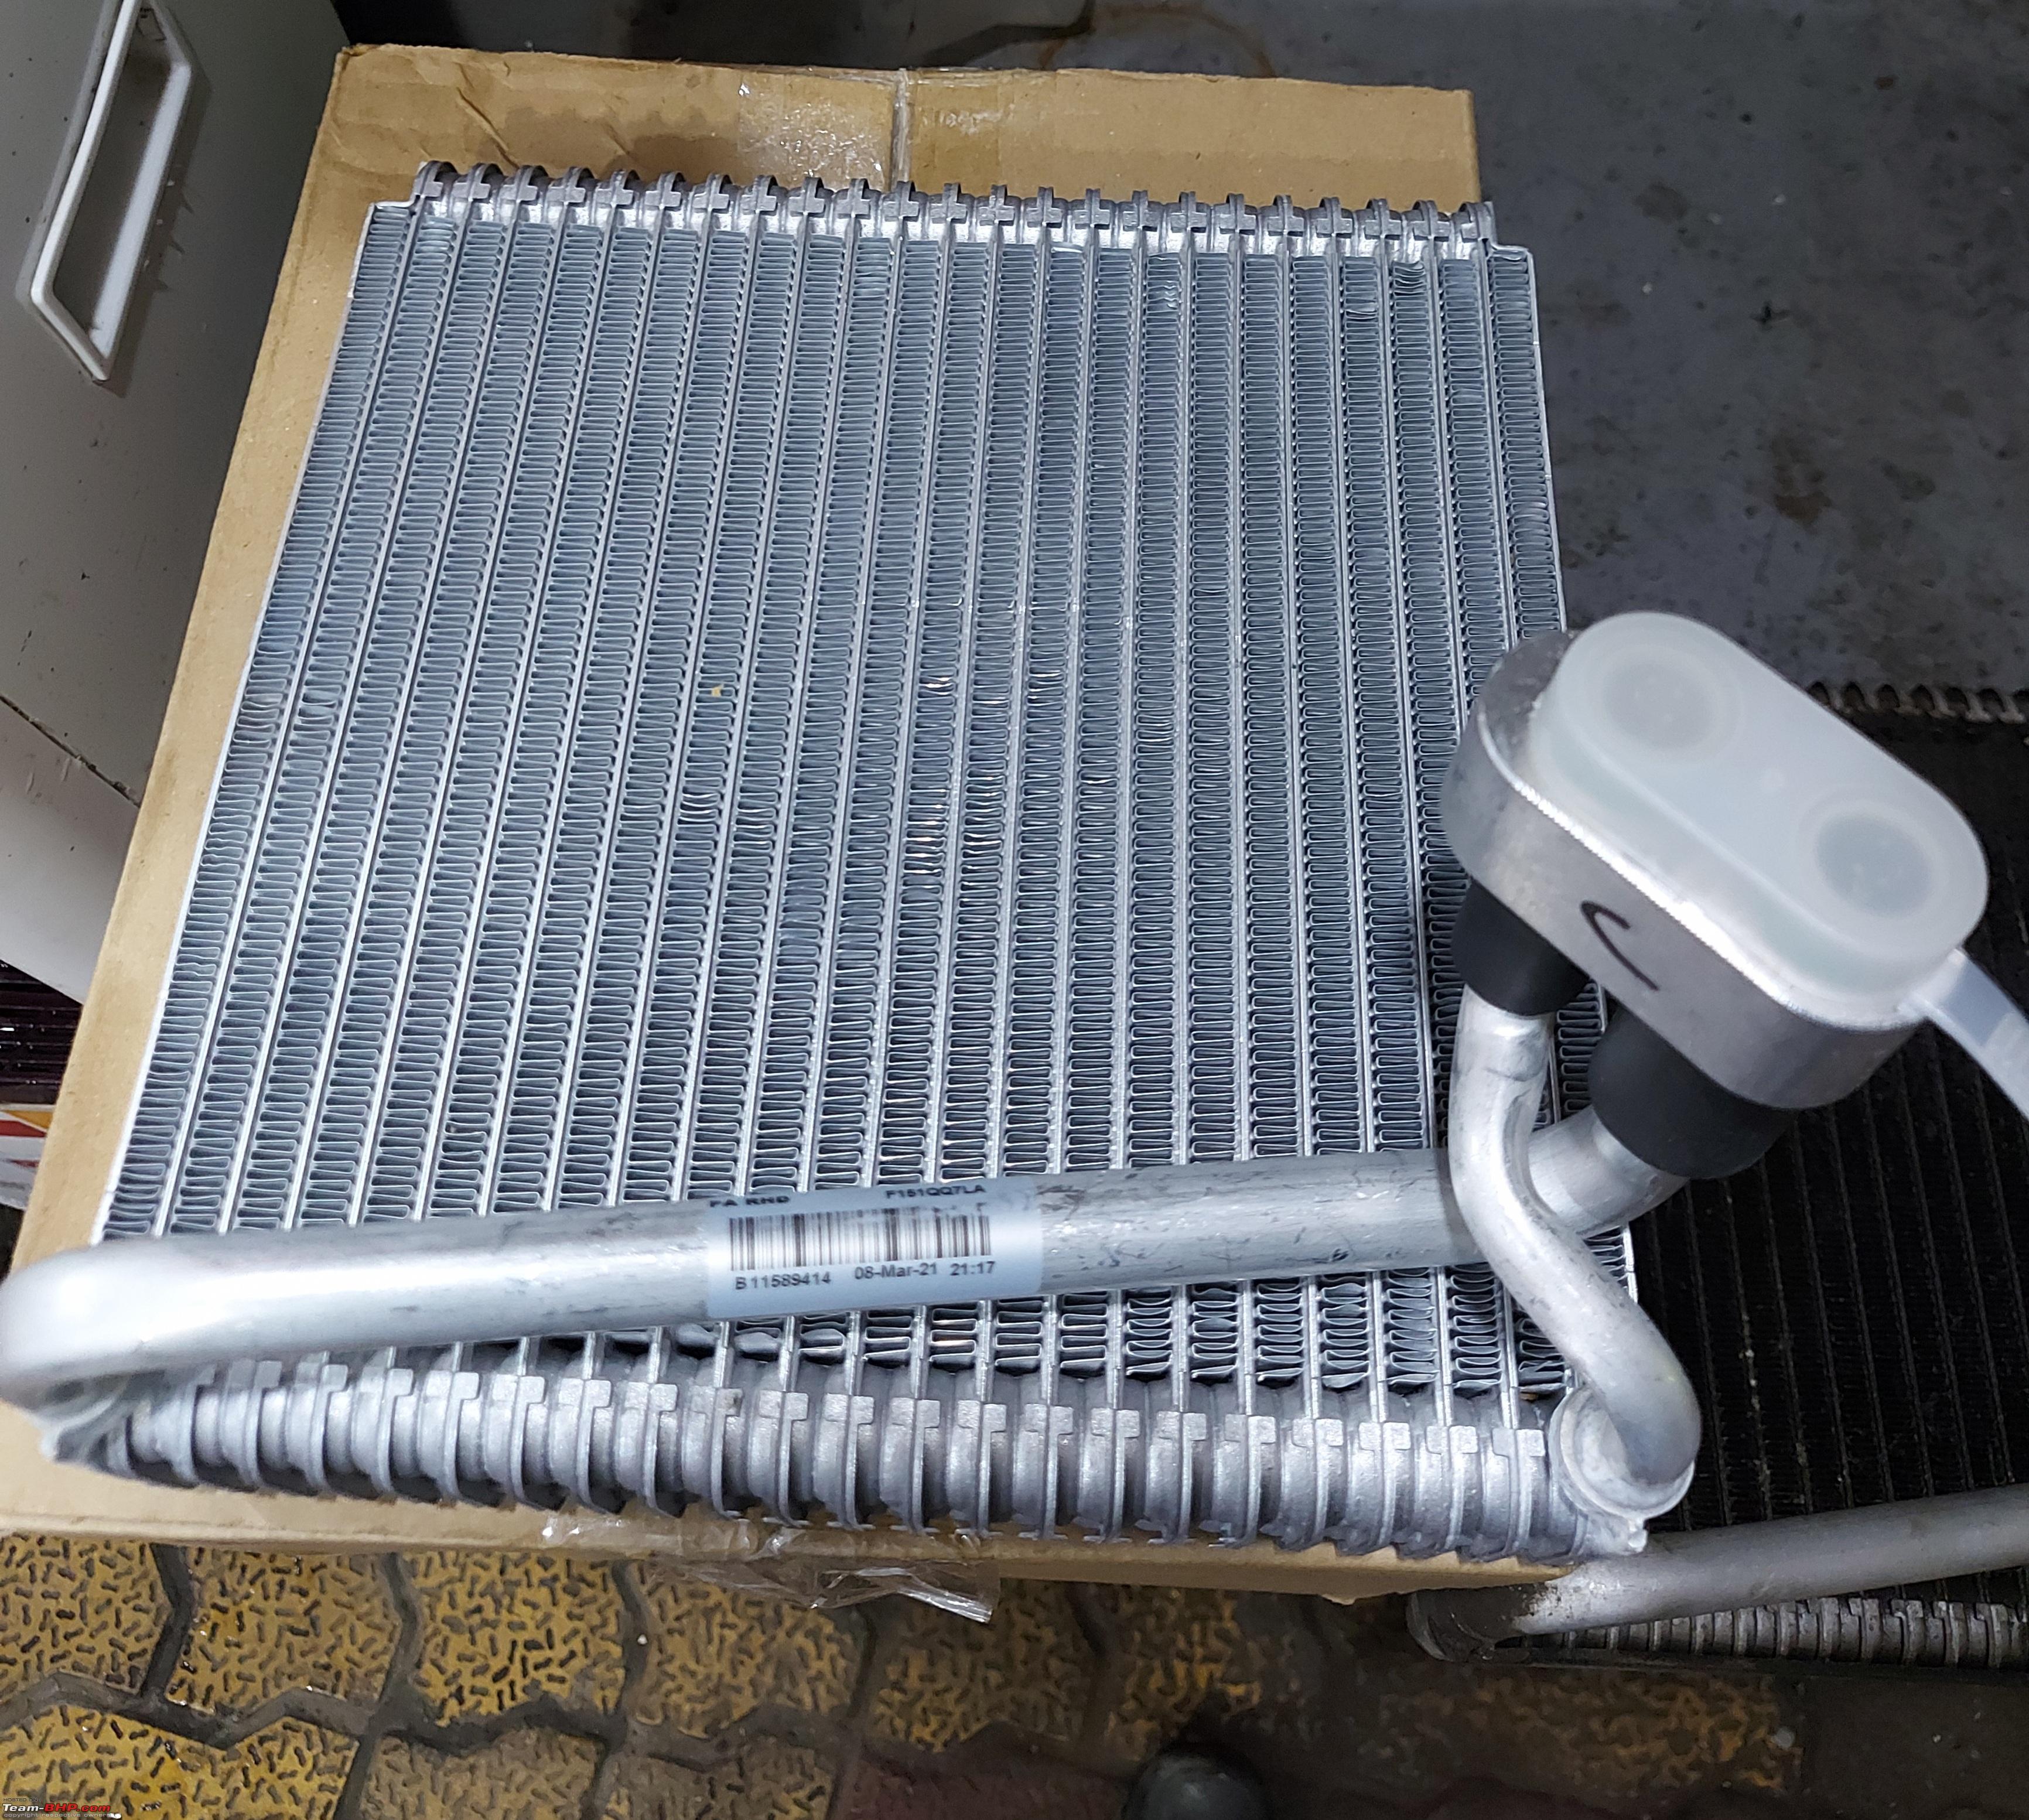
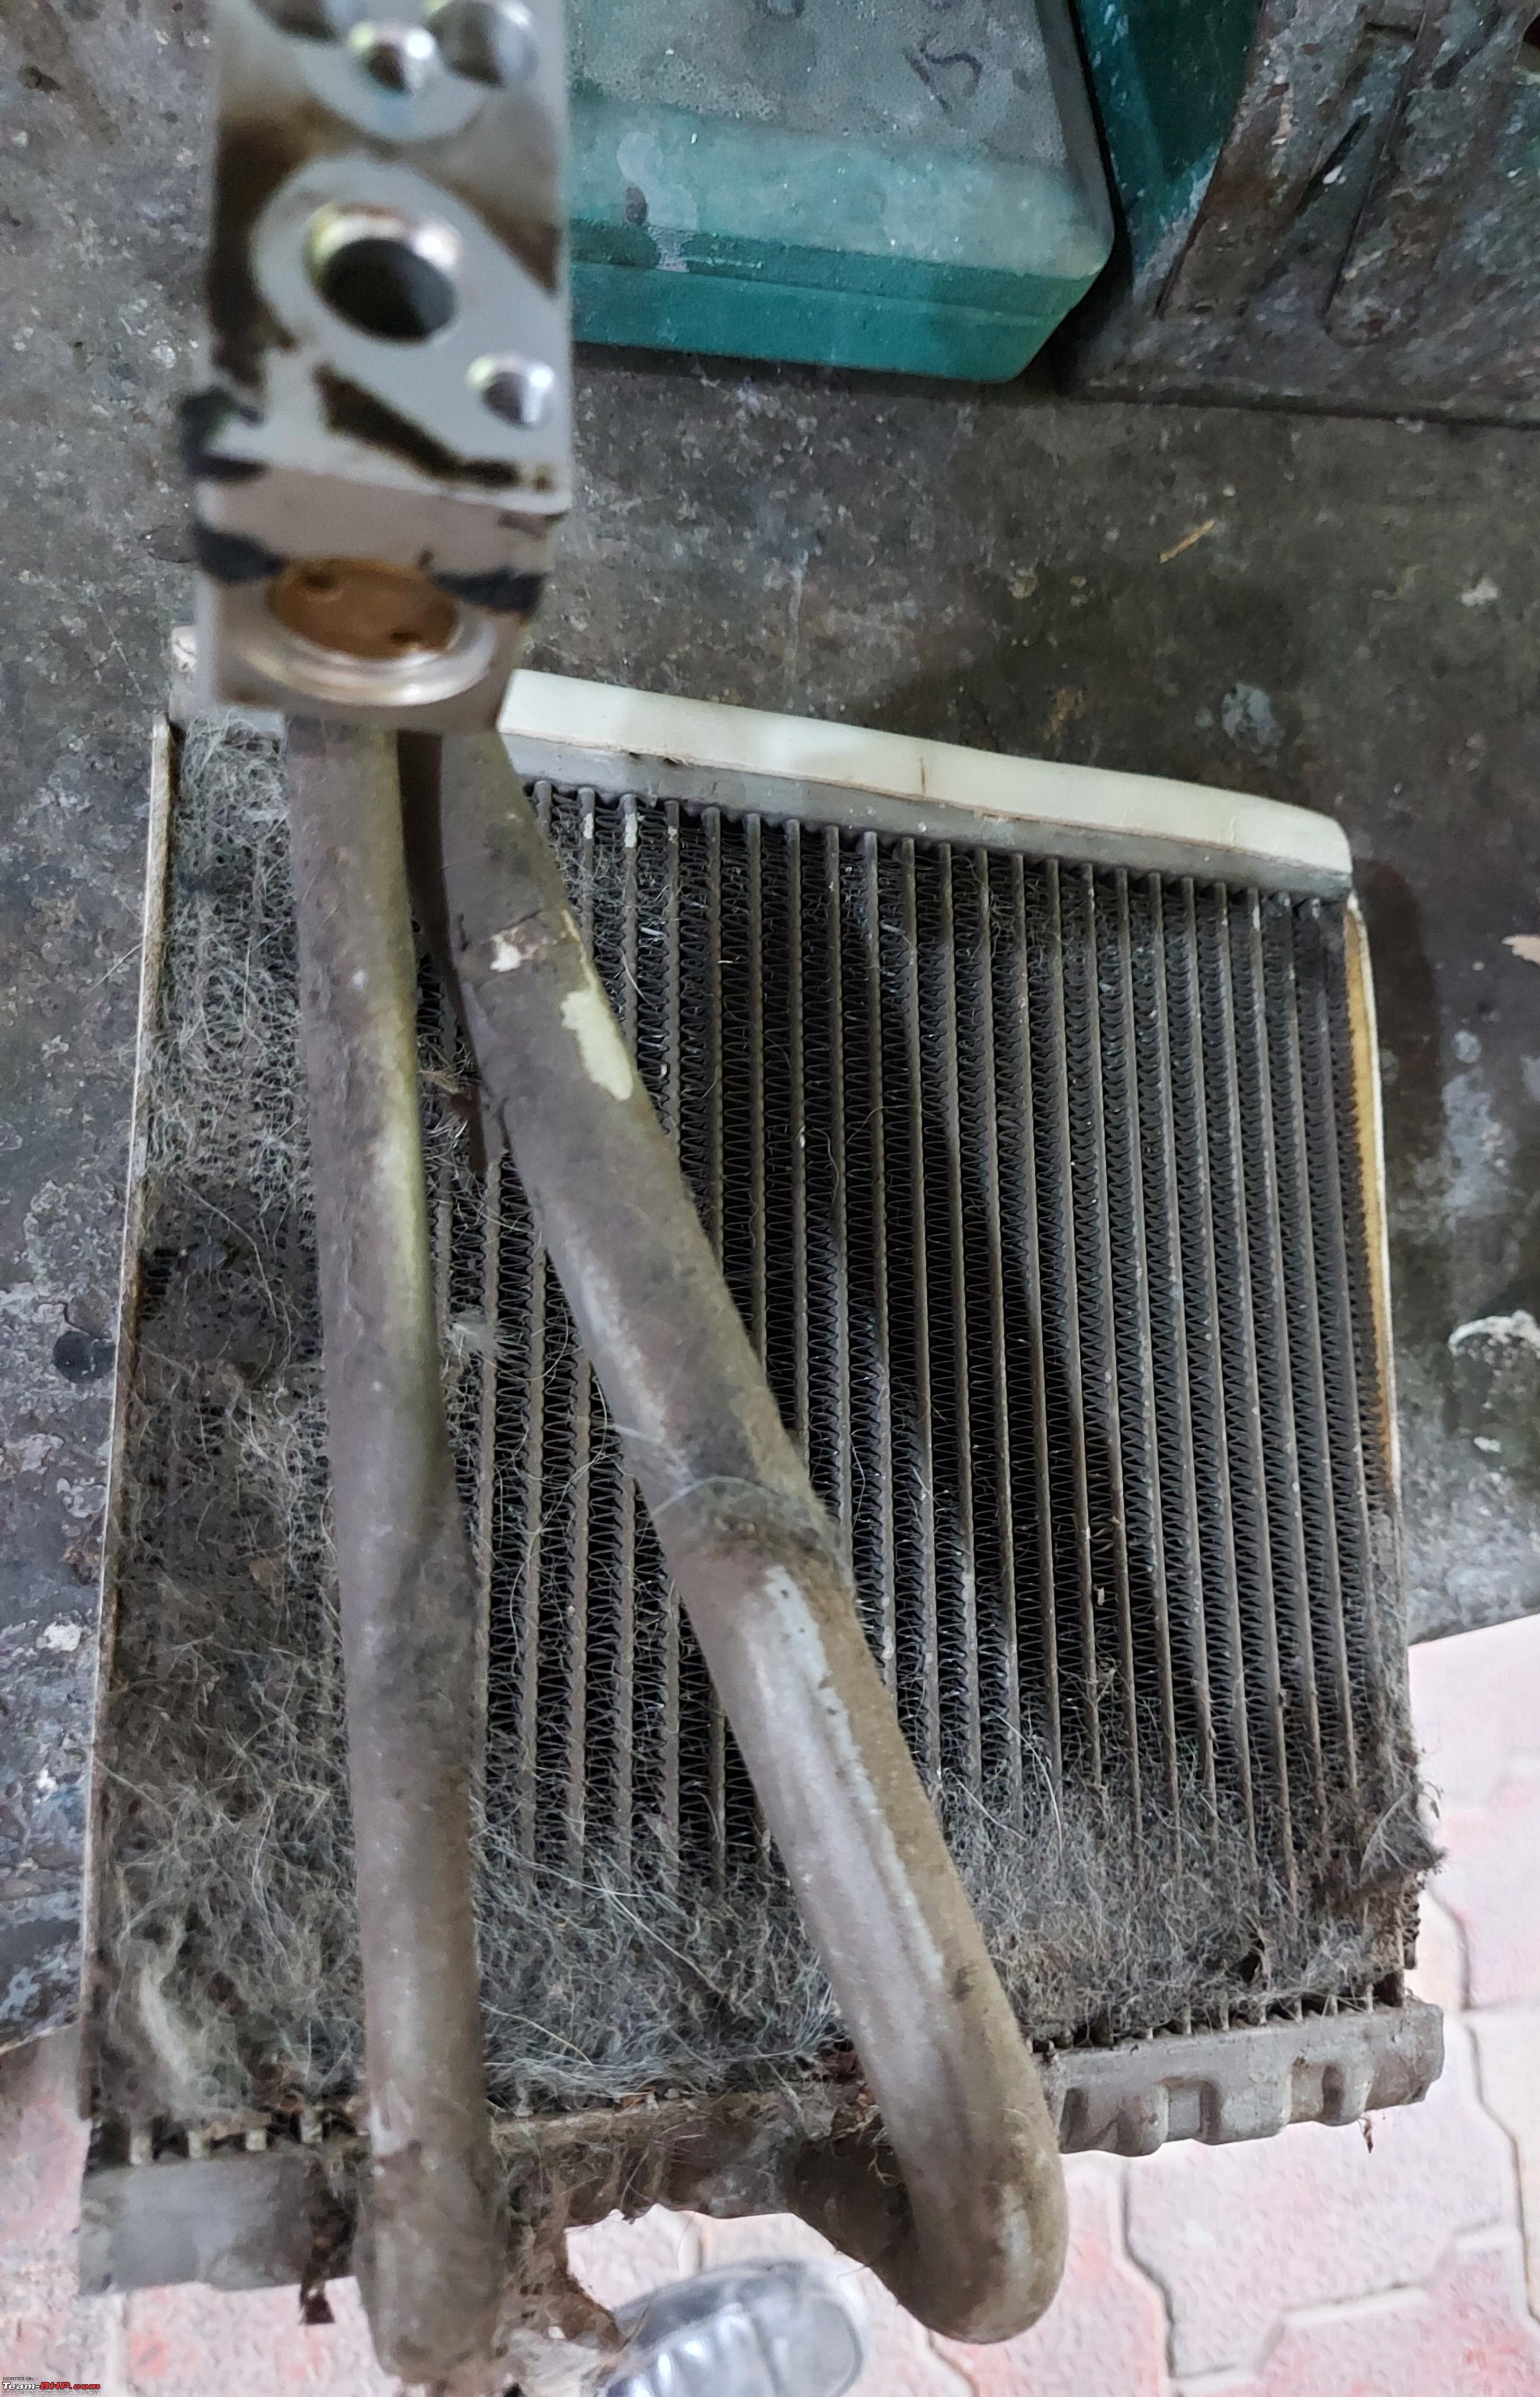
) almost looks the same as the new from the 2012 i20. This speaks a lot about the quality of the Japanese imports that many swear by. 2 failures in 8 years for the Mahindra is shocking, but then again, you had definitely warned me the same sometime back. The built-to-last cars from the 2000s have certainly become built-to-cost these days, sadly.
Researcher is offline   (3) Thanks
Old 30th June 2021, 15:03   #10
BHPian
 
ramnaresh_2000's Avatar
 
Join Date: May 2017
Location: Hyderabad
Posts: 805
Thanked: 2,915 Times
Re: Aircons! Demystifying the car air-conditioning system, Part 2

Thank you for the informative thread. This thread brought back memories of my old first generation Verna AC repairing. I was totally shocked with the amount of work went in changing the compressor and condenser.

I was also naive at that time (this was back in 2016) and was under the impression that car AC components are clean and neat. To my shock the amount of debris stuck in the AC units and dashboard was shocking.
Attached Thumbnails
Aircons! Demystifying the car air-conditioning system, Part 2-20160530_153633.jpg  

Aircons! Demystifying the car air-conditioning system, Part 2-20160530_153019.jpg  

ramnaresh_2000 is offline   (4) Thanks
Old 30th June 2021, 15:29   #11
BHPian
 
Join Date: Jan 2010
Location: Hyderabad
Posts: 42
Thanked: 17 Times
Re: Aircons! Demystifying the car air-conditioning system, Part 2

Sir

Extremely elaborate and informative article .. no number of congratulations and thanks are enough for such a detailed education.

I have two doubts.

Most cars I have seen don't provide any air filter in the cabin air return / evaporator intake line, leading to the evaporator choke up.

Many a times the compressor loses its efficiency / pumping over a period of time, necessitating its replacement. I don't find any step for checking this in your precise

Deep regards
refaircargo is offline   (1) Thanks
Old 30th June 2021, 15:49   #12
BHPian
 
ash22's Avatar
 
Join Date: Jul 2019
Location: Chennai
Posts: 210
Thanked: 489 Times
Re: Aircons! Demystifying the car air-conditioning system, Part 2

Thanks much for the detailed information. AC Service is one of the tedious jobs since it requires a lot of manpower. I had my car AC Serviced last year and oh boy, I was shocked to see the amount of dust.

Before

Aircons! Demystifying the car air-conditioning system, Part 2-whatsapp-image-20191220-5.23.30-pm.jpeg

After

Aircons! Demystifying the car air-conditioning system, Part 2-whatsapp-image-20191220-5.23.29-pm.jpeg
ash22 is offline   (4) Thanks
Old 30th June 2021, 17:38   #13
BHPian
 
Join Date: Jun 2011
Location: Delhi
Posts: 117
Thanked: 242 Times
Re: Aircons! Demystifying the car air-conditioning system, Part 2

Thanks Vigsom. I have been troubled by the AC in my I20 ever since it needed a replacement of the cooling coil and compressor after a gas leak prompted a visit to Hyundai's service station and the service advisor insisted on replacing these components too due to trace amounts of some black substance being discovered by them in the system. They did remove the dashboard for performing the entire job. The job was done two years ago. Sharing my problem to pick your brain if you have any ideas here.

While the AC has been cooling well ever since, the problem I have been facing is-

A) the cooling starts with a lag. Initially it used to throw cold air almost instantly after I switched on the AC. Even my Creta throws cool air immediately. The I20 now takes almost 4-5minutes before cool air comes out. Further, the cool air starts coming out of the passenger side much before the driver side. Am not sure what is causing this behavior

B) The heater has stopped throwing hot air like it used to before this job. I get mildly warm air from the passenger side but normal temperature air from the driver side. The heater was very impressive earlier.
interest is offline   (3) Thanks
Old 30th June 2021, 19:22   #14
Distinguished - BHPian
 
vigsom's Avatar
 
Join Date: Feb 2006
Location: NSEW
Posts: 3,853
Thanked: 27,233 Times
Re: Aircons! Demystifying the car air-conditioning system, Part 2

Quote:
Originally Posted by viXit View Post
The SA mentioned something about a piece of sponge that traps dirt, but I don't buy it. What can I do about this.
Thank You @viXit. The rear AC in all 7 or 8 seaters come with no air filter for the evaporator since the service is considered less fouling. Sponge does nothing much; the air filter must have good surface area to pass sufficient air. That's why most cabin air filters are corrugated. The flat ones (like in the Nano) are more porous.

Quote:
Originally Posted by Researcher View Post
The condition of the evaporator core from your Grand Vitara almost looks the same as the new from the 2012 i20
Thank You @Researcher. Yes, even I was blown away by the fit and finish of that core. The car is still on an original activated carbon based cabin air filter since 2014


Quote:
Originally Posted by ramnaresh_2000 View Post
I was totally shocked with the amount of work went in changing the compressor and condenser
Quote:
Originally Posted by ash22 View Post
AC Service is one of the tedious jobs since it requires a lot of manpower
Thank You @ramnaresh_2000 and @ash22. You're absolutely right in stating that the AC evap core service is a laborious job, and required a lot of account taking for various screws, bolts, nuts, and cables. That's why removing the dashboard assembly as one unit is a better option than removing every single part on the dashboard.

Quote:
Originally Posted by refaircargo View Post
Most cars I have seen don't provide any air filter in the cabin air return / evaporator intake line, leading to the evaporator choke up.

Many a times the compressor loses its efficiency / pumping over a period of time, necessitating its replacement
Thank You, @refaircargo. I think most cars today come with the cabin air filter, or at least there is a provision to install one. The cabin air filter is a very important part in ensuring longevity of the evaporator core.

The compressor does get a tad weak with age, but continues to perform as long as it has lubricant (Compressor oil) inside.

Quote:
Originally Posted by interest View Post
The I20 now takes almost 4-5minutes before cool air comes out. Further, the cool air starts coming out of the passenger side much before the driver side
I have never experienced low heating in a car, but have seen heater cores leak in older Zens and Esteems.

In your case, it is either a low refrigerant charge or some flap is stuck part open. Low refrigerant charge will result in one half of the vents throwing cold air and the other half, comparatively warm air. Easiest thing is to get the low side and high side pressures checked.

Last edited by vigsom : 30th June 2021 at 19:40.
vigsom is offline   (3) Thanks
Old 30th June 2021, 21:04   #15
Newbie
 
darknight's Avatar
 
Join Date: Jan 2021
Location: Canada/Gurgaon
Posts: 15
Thanked: 7 Times
Re: Aircons! Demystifying the car air-conditioning system, Part 2

Is there any other way of getting the evaporator cleaned except taking out the whole dashboard apart?
darknight is offline  
Reply

Most Viewed


Copyright ©2000 - 2024, Team-BHP.com
Proudly powered by E2E Networks