Team-BHP > Motorbikes > Superbikes & Imports
Register New Topics New Posts Top Thanked Team-BHP FAQ


Reply
  Search this Thread
23,100 views
Old 18th April 2018, 18:08   #1
Senior - BHPian
 
dkaile's Avatar
 
Join Date: May 2011
Location: Meerut, India
Posts: 3,525
Thanked: 9,071 Times
Dummies guide: Superbike puncture repair & wheel balancing

DUMMIES GUIDE FOR "HOW TO PERMANENTLY REPAIR A SUPERBIKE's PUNCTURE & BALANCE YOUR WHEELS MANUALLY"

(Mods may copy these subsequent posts into a separate Topic also, if necessary, as I feel it can help many Superbike Owners as well as Motorcycle owners in general)

As I had mentioned in my previous posts, that I had found a very minor puncture in the front tyre. And Today I found this embedded in the rear tyre as well... yikes!

Dummies guide: Superbike puncture repair & wheel balancing-puncture-repair-16042018_1.jpg

Now I could have gone in for the temporary tyre puncture fix, which I presume 99% of bike owners as well as superbike owner's do. But I was not convinced about it's potential safety aspect at high speeds, especially in bikes capable of doing 250+ kmph speeds. Also this is what is specifically mentioned in the Service Manual of the bike by Kawasaki about tyre repair -

Dummies guide: Superbike puncture repair & wheel balancing-kawasaki-tire-repair-information.jpg

So, a permanent fix it was. And the best permanent fix is to do a mushroom or plug type tyre patch which is now being offered by all MRF Exclusive Stores in the country. Here is how it is properly supposed to be done -


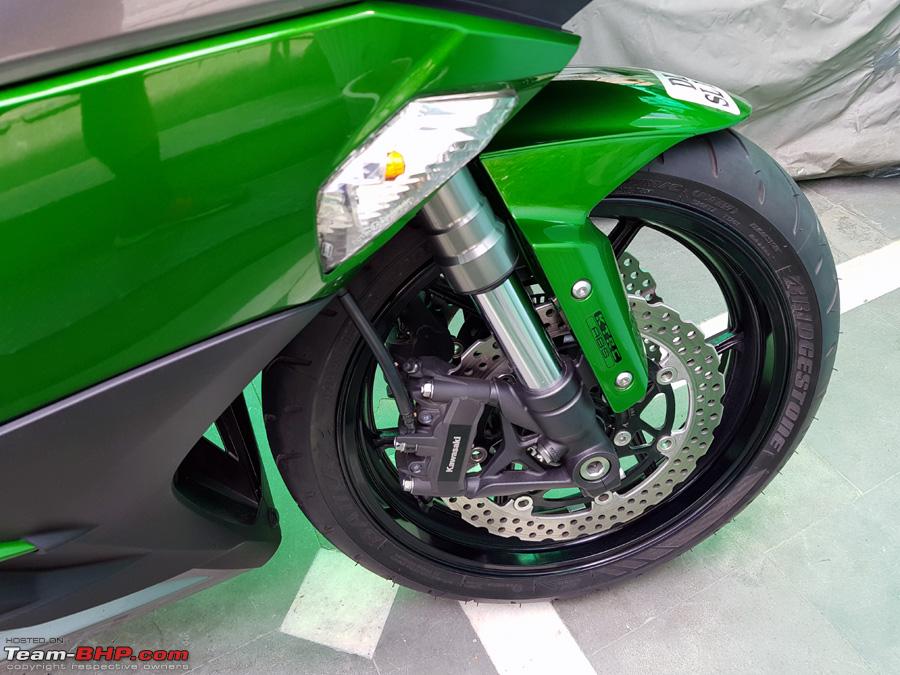
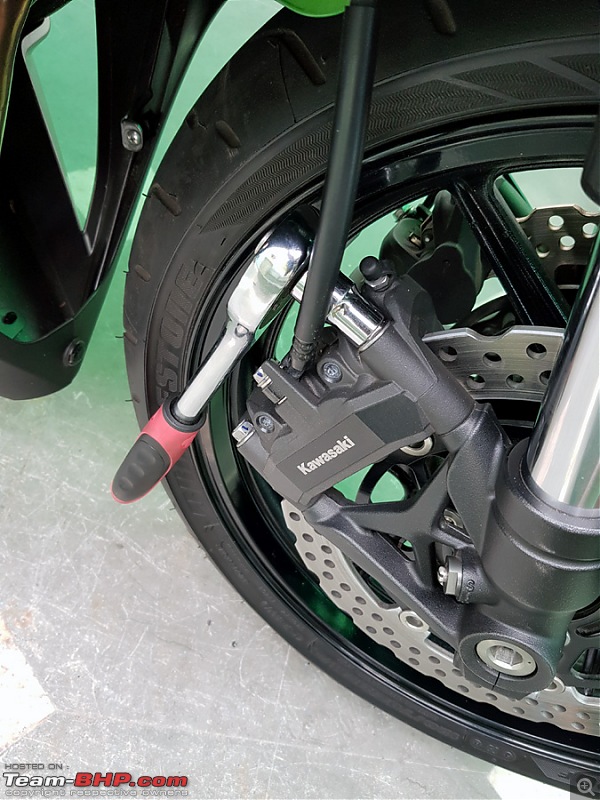
So first step first, taking the wheels off the bike. The steps I detail now are going to be common in most superbikes. But still, kindly refer to the service manual of your bike for exact repairs. Starting from the front, first step is to remove the 4 Front Brake Caliper Mounting bolts (2 on each side) -

Dummies guide: Superbike puncture repair & wheel balancing-puncture-repair-16042018_2.jpg

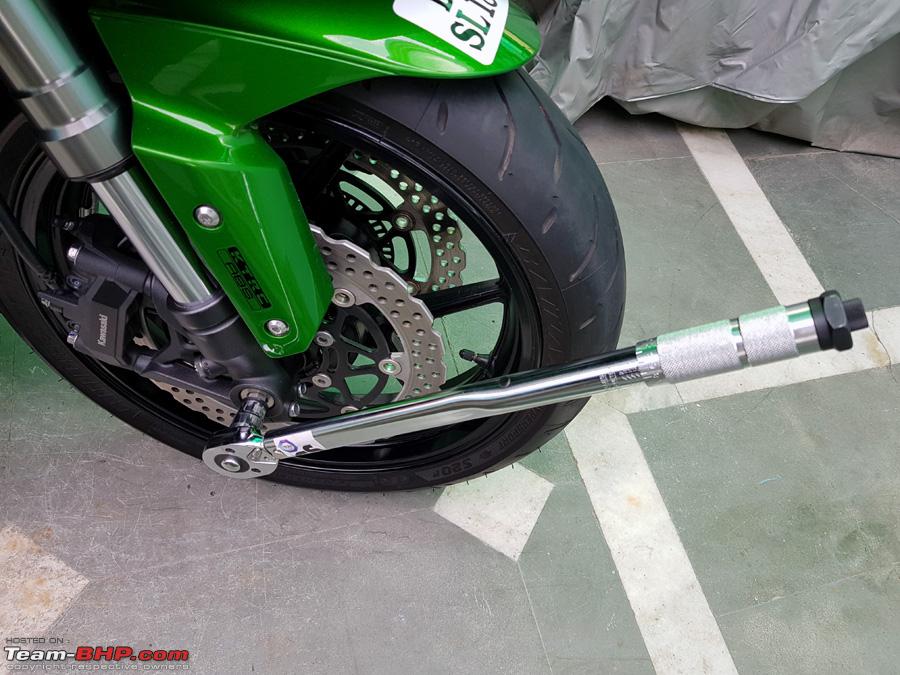
Then loosen the Front Axle Clamp Bolts on the right side of the bike

Dummies guide: Superbike puncture repair & wheel balancing-puncture-repair-16042018_3.jpg

Then loosen the Front Axle from the right side of the bike This requires a 14mm Hex key tool.

Dummies guide: Superbike puncture repair & wheel balancing-puncture-repair-16042018_4.jpg

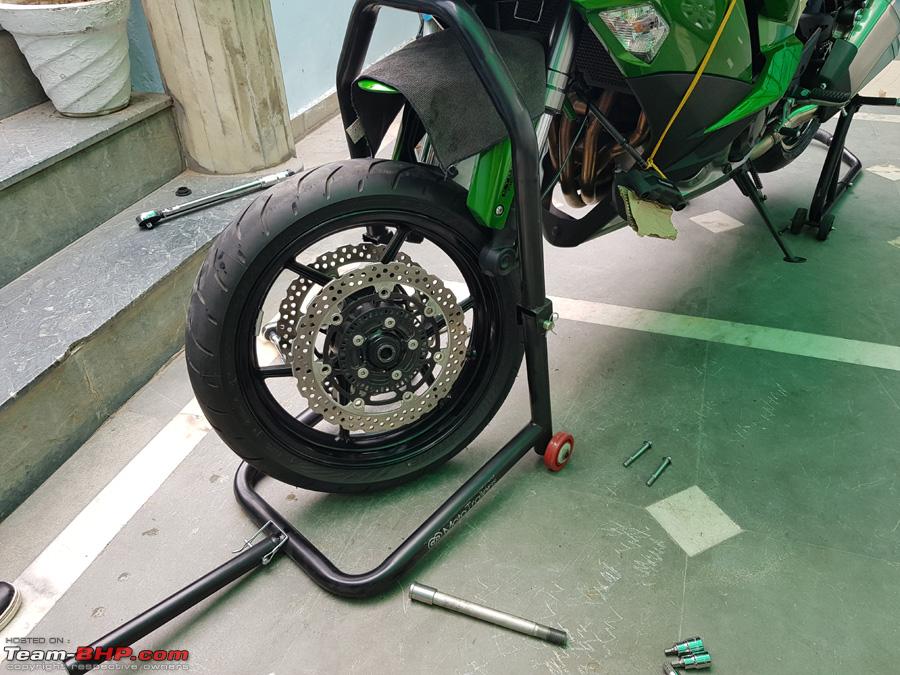
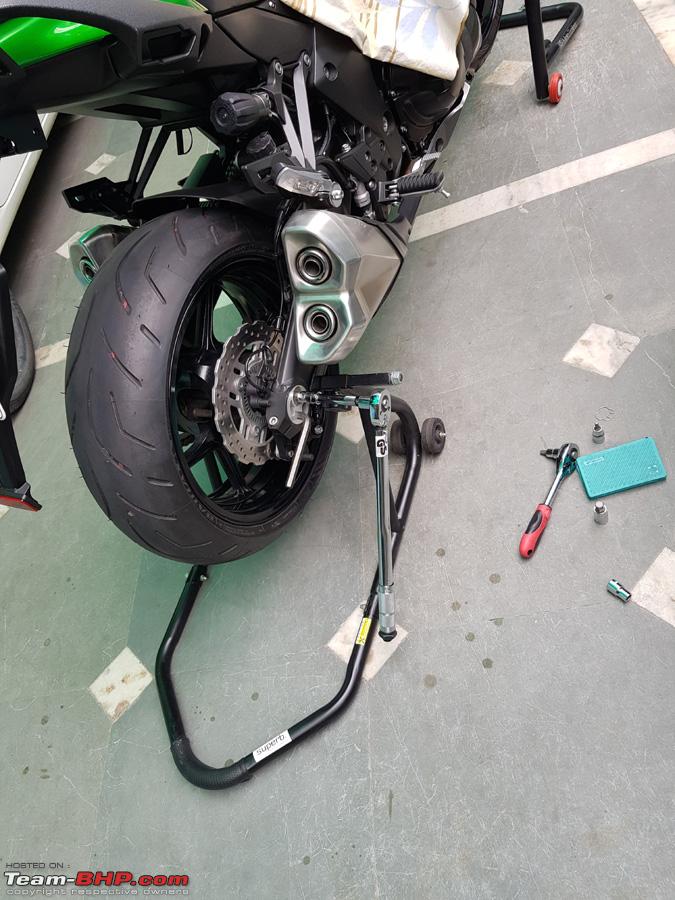
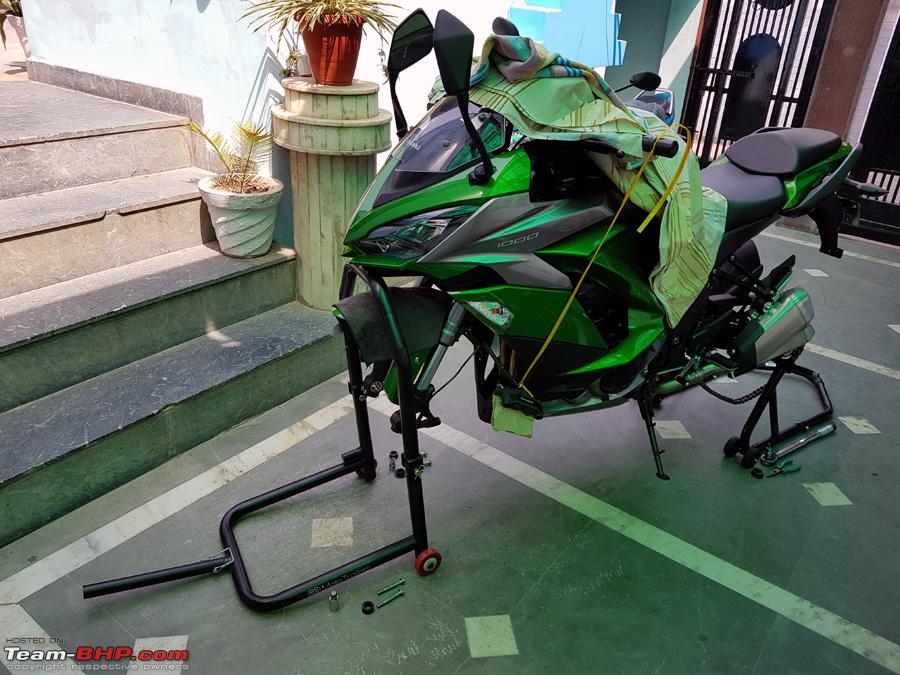
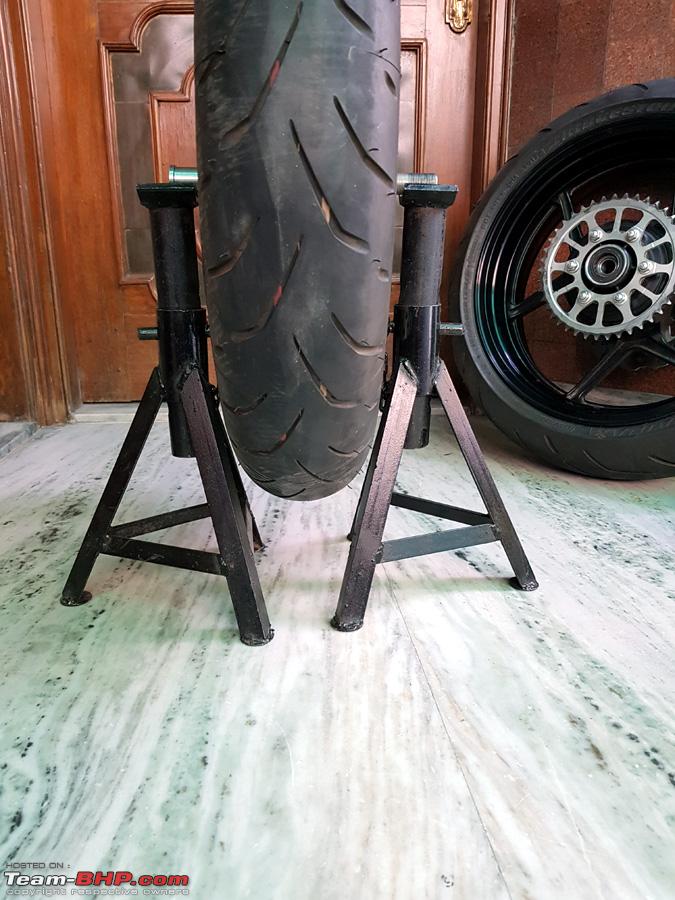
Then put the bike up on a proper jack. I first used the Rear Paddock Stand and then I used the Triple T Front Stand which I had discussed in my previous posts, so that both wheels were now off the ground. Remove both the Front Brake Calipers (inspect for brake pad wear too)

Dummies guide: Superbike puncture repair & wheel balancing-puncture-repair-16042018_5.jpg

Insert clean piece of cardboard to help prevent them from sliding closed or falling out.

Dummies guide: Superbike puncture repair & wheel balancing-puncture-repair-16042018_6.jpg

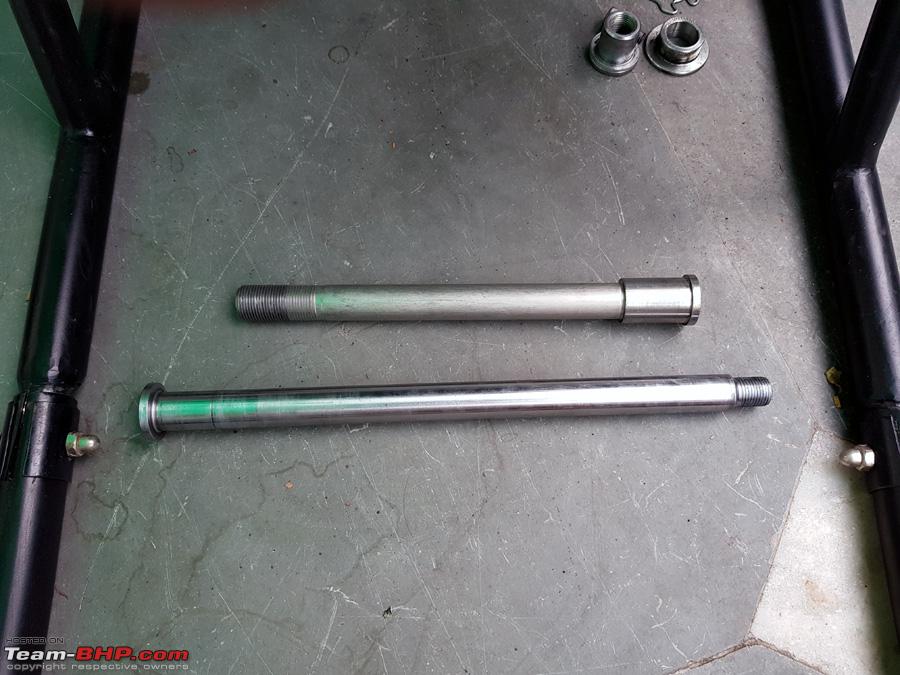
Remove the front axle completely after being fully assured that the bike is securely supported by the Triple Tree Stand. Also secure the Brake calipers with some plastic rope as I have done, so as to avoid any undue pressure on the brake lines

Dummies guide: Superbike puncture repair & wheel balancing-puncture-repair-16042018_7.jpg

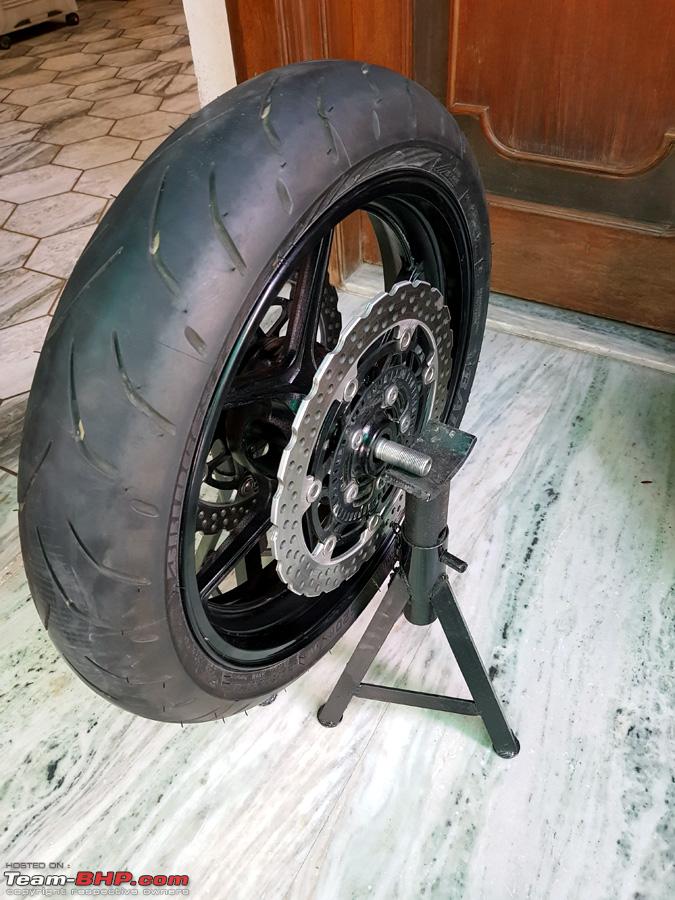
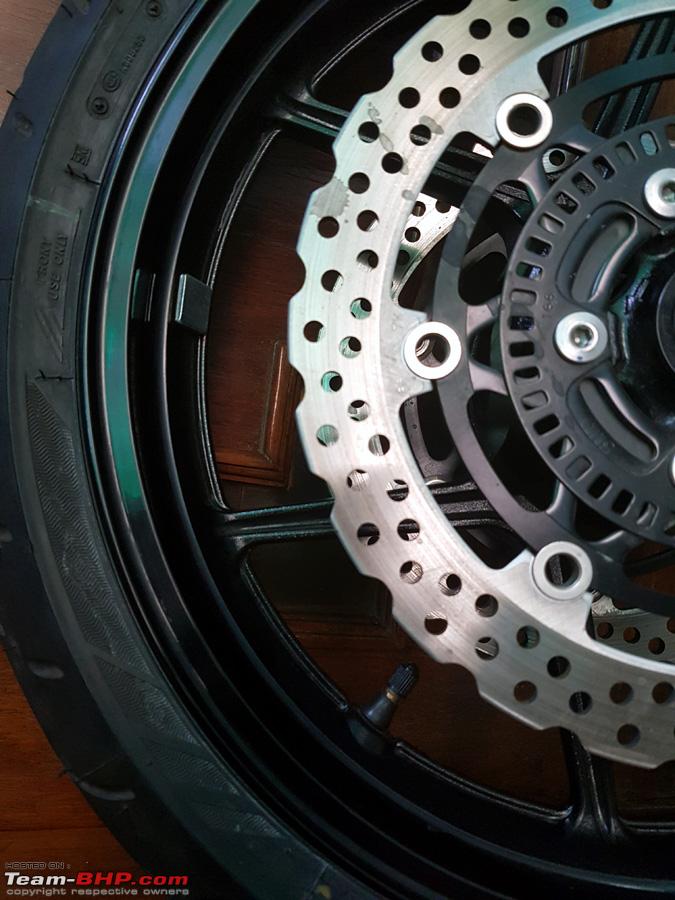
Remove the front wheel completely

Dummies guide: Superbike puncture repair & wheel balancing-puncture-repair-16042018_8.jpg

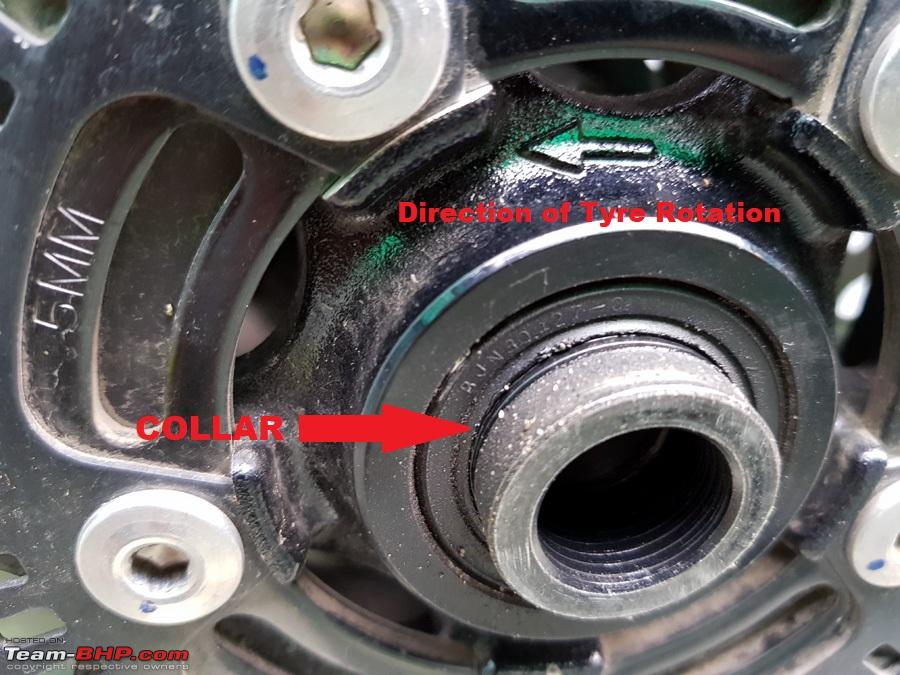
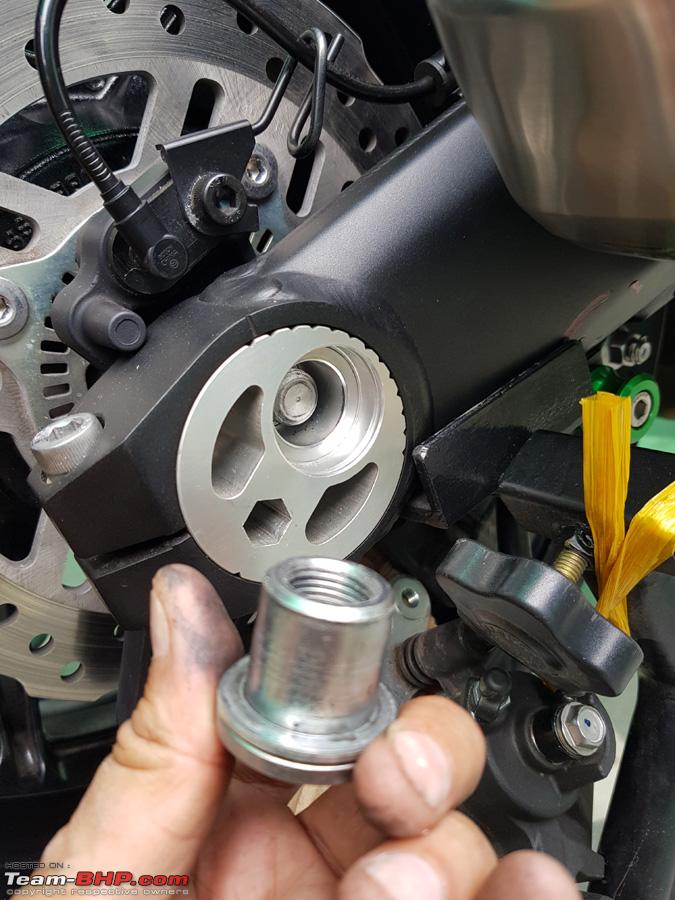
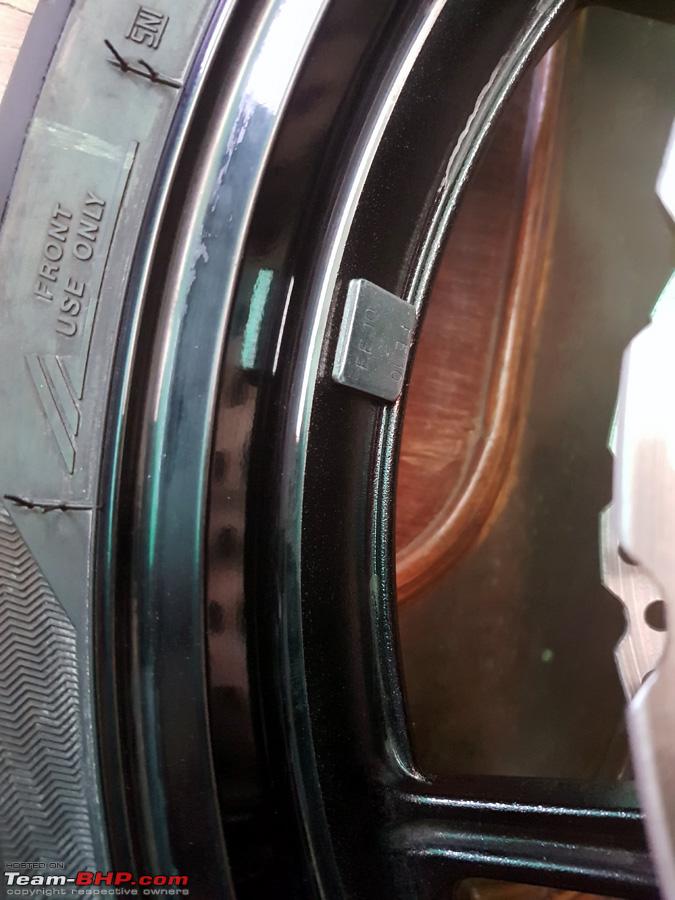
Remove the collars on both side of the front wheel and also note the tyre rotation arrow. This will be useful for refitting the tyre back on the front wheel in the same direction matching the markings on the tyre as well as the rim. The collars are same on both the left and right side of the front wheel (but different on the rear wheel) and need to be properly cleaned and greased with high quality high temperature grease while refitting the wheel.

Dummies guide: Superbike puncture repair & wheel balancing-puncture-repair-16042018_9.jpg

FRONT WHEEL REMOVAL COMPLETE.

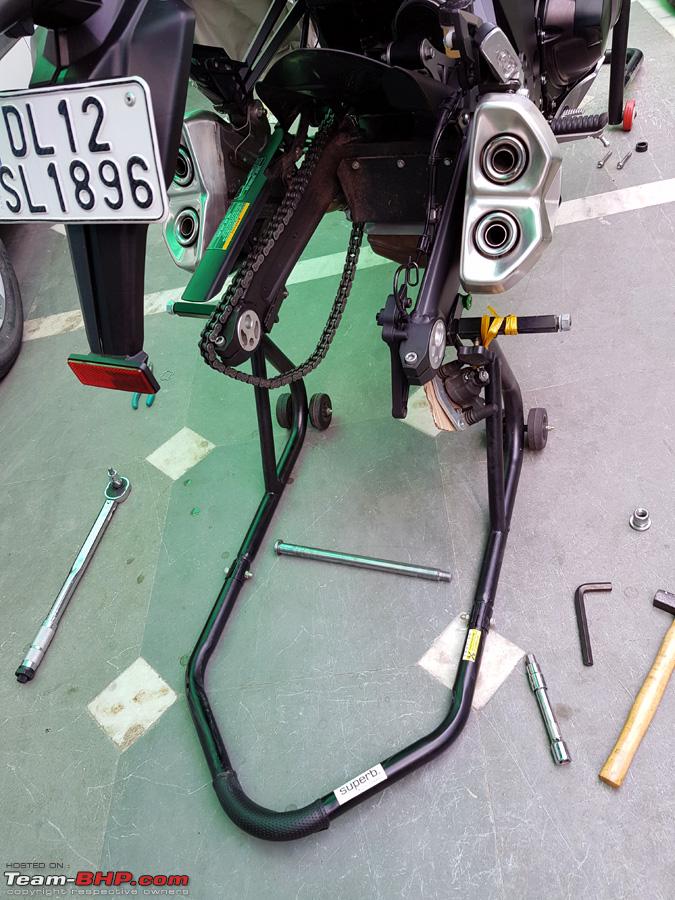
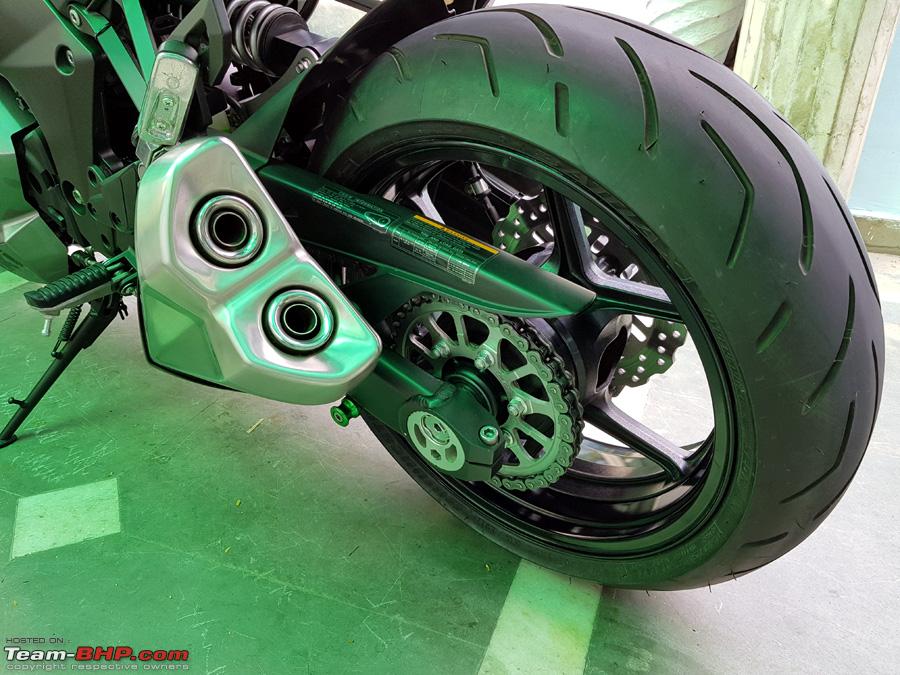
After raising the Rear Wheel on a Paddock Stand, Loosen the Chain Adjuster Clamp Bolts on both the sides of the wheel (as detailed in my previous Chain adjustment post) and loosen the chain adjuster to make Chain Slack. Remove the retaining rings on both side of the rear axle and loosen the Rear Axle Nut

Dummies guide: Superbike puncture repair & wheel balancing-puncture-repair-16042018_10.jpg

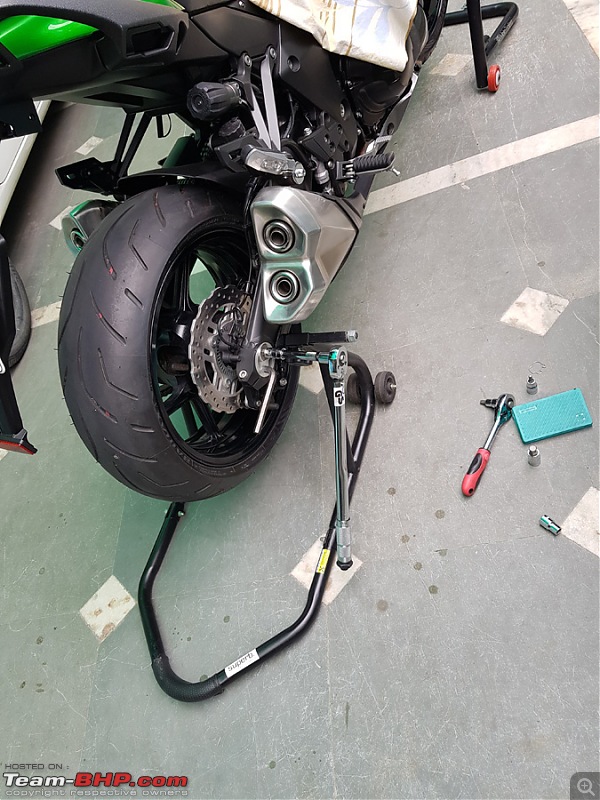
Remove the 2 Rear Brake Caliper Mounting Bolts and remove the rear brake caliper. Once again attach some clean cardboard in between the brake pads for reasons stated above.

Dummies guide: Superbike puncture repair & wheel balancing-puncture-repair-16042018_11.jpg

Remove the Rear Axle Nut and it's washer from the right side of the rear axle

Dummies guide: Superbike puncture repair & wheel balancing-puncture-repair-16042018_12.jpg

Remove the chain from the sprocket on the left side, as it has already been loosened previously

Dummies guide: Superbike puncture repair & wheel balancing-puncture-repair-16042018_13.jpg

Remove the Rear Axle from the left side. Slight gentle hammering might be needed to slide it out.The just slide the rear wheel out.

Dummies guide: Superbike puncture repair & wheel balancing-puncture-repair-16042018_14.jpg

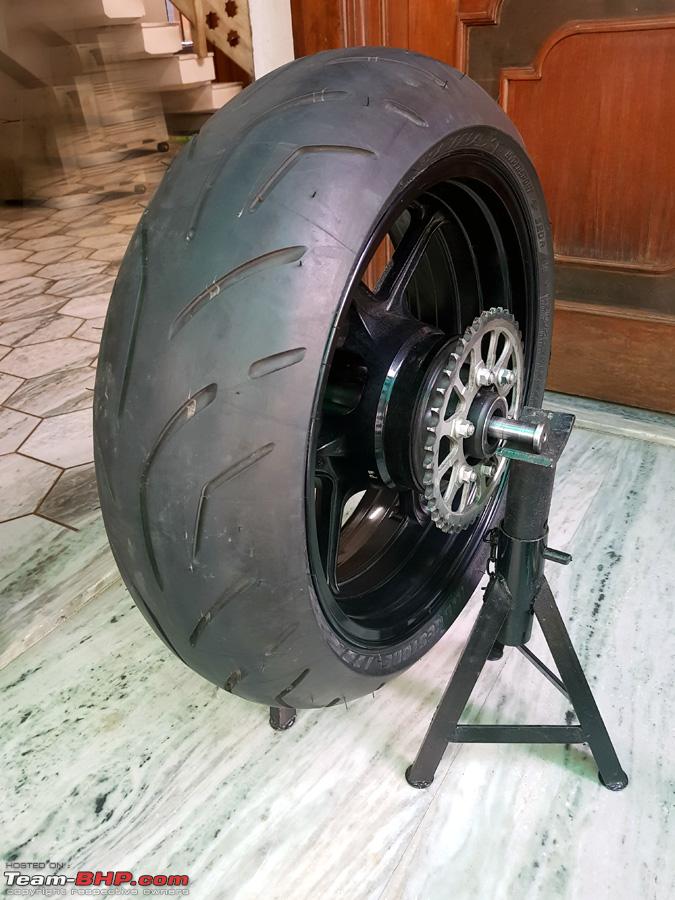
REAR WHEEL REMOVAL COMPLETE.

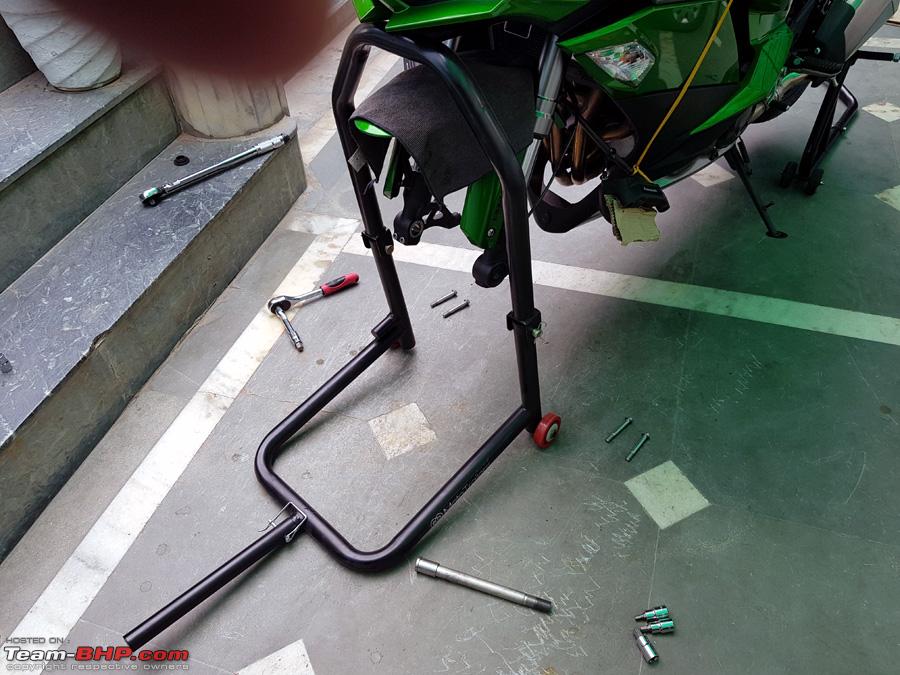
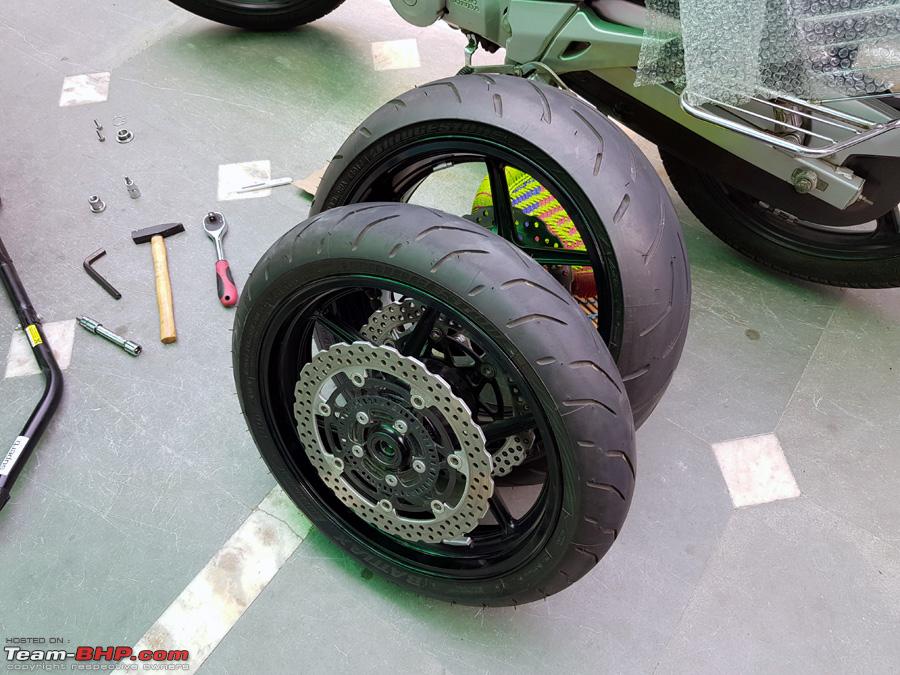
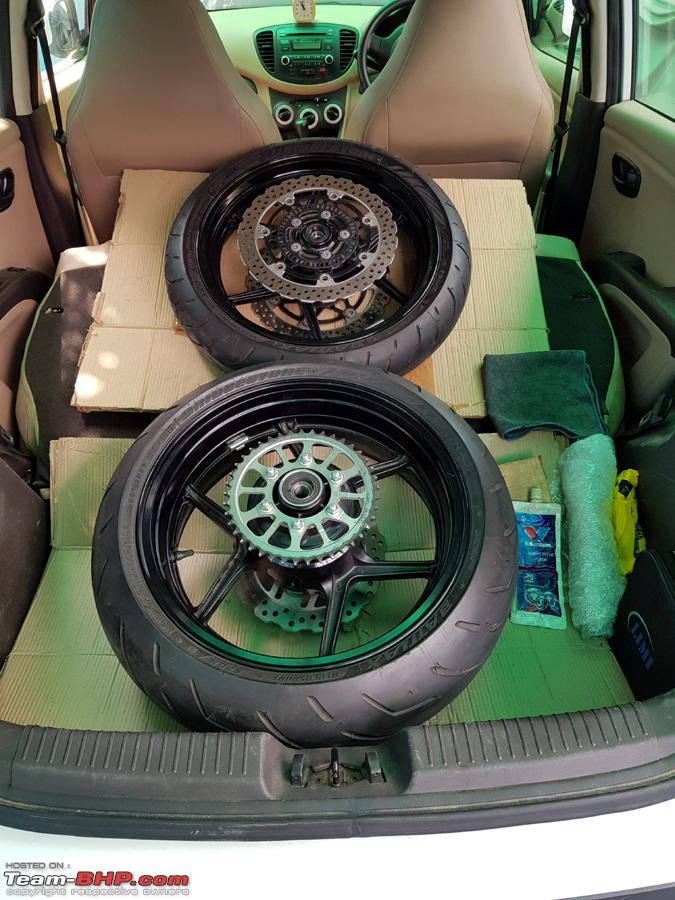
Both the front and rear wheels removed. Took me not more than 5 minutes each for each wheel with the proper tools and jack stands even though the process above may seem daunting.

Dummies guide: Superbike puncture repair & wheel balancing-puncture-repair-16042018_15.jpg

The Bike now bare-wheel supported on the two stands

Dummies guide: Superbike puncture repair & wheel balancing-puncture-repair-16042018_16.jpg

Pack up both wheels on some clean cardboard in some proper vehicle to take away to the MRF Exclusive Store, in my case this i10...lolz

Dummies guide: Superbike puncture repair & wheel balancing-puncture-repair-16042018_17.jpg

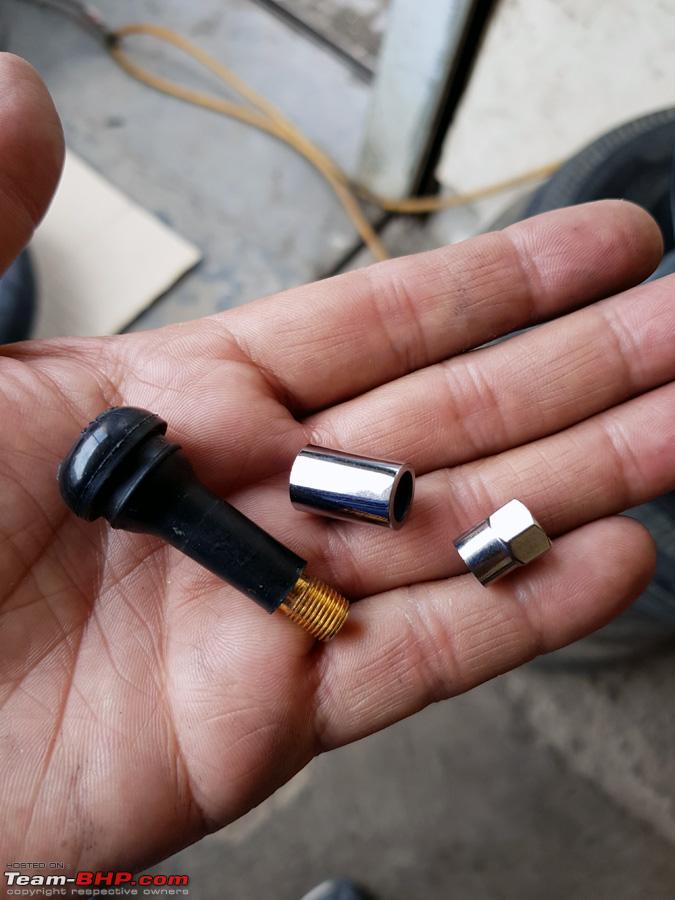
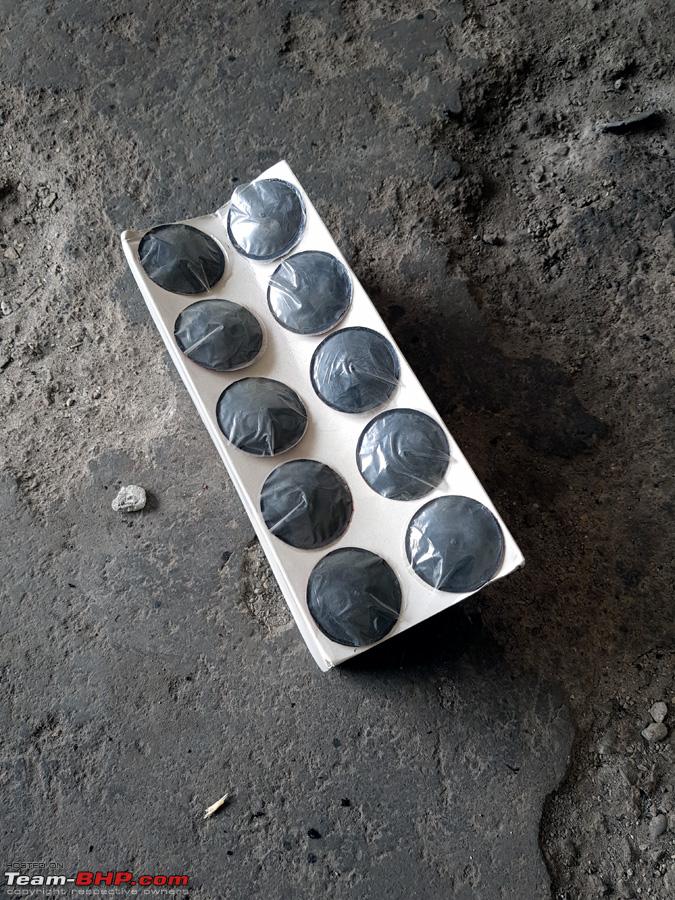
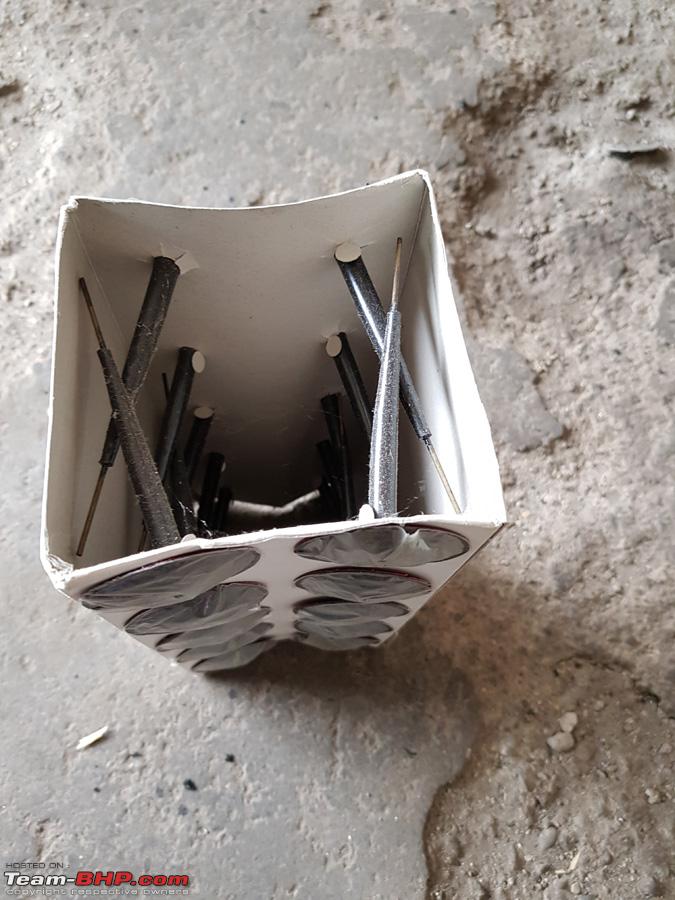
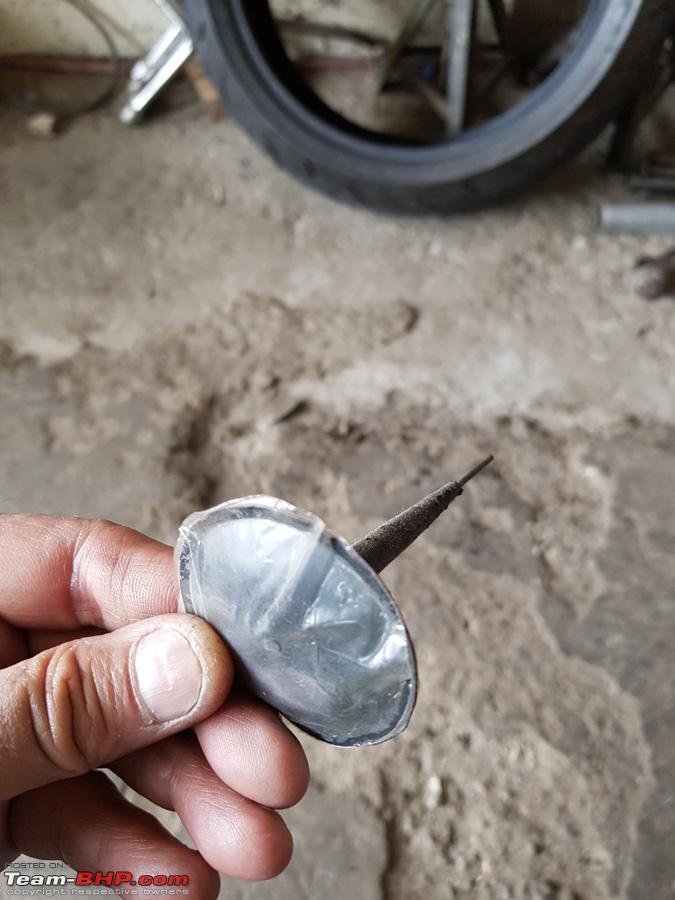
Also received these tyre valve stems. TR 412 is the shorter one and is the OE size and TR 413 is the longer one. I got 4 of each for about 90 bucks for 4 from AliExpress - https://www.aliexpress.com/item/4pcs...311.0.0.zF7Mmb . Kawasaki had charged me 1100/- bucks for ONE!!! while replacing my wheel rims under warranty.

Dummies guide: Superbike puncture repair & wheel balancing-puncture-repair-16042018_18.jpg

Also received these plastic rubber wheel rim protector to prevent the rim edges from getting scratched while removing the tyre from the wheels. 300 Bucks from AliExpress - https://www.aliexpress.com/item/2PCS...311.0.0.79hIuY

Dummies guide: Superbike puncture repair & wheel balancing-puncture-repair-16042018_19.jpg

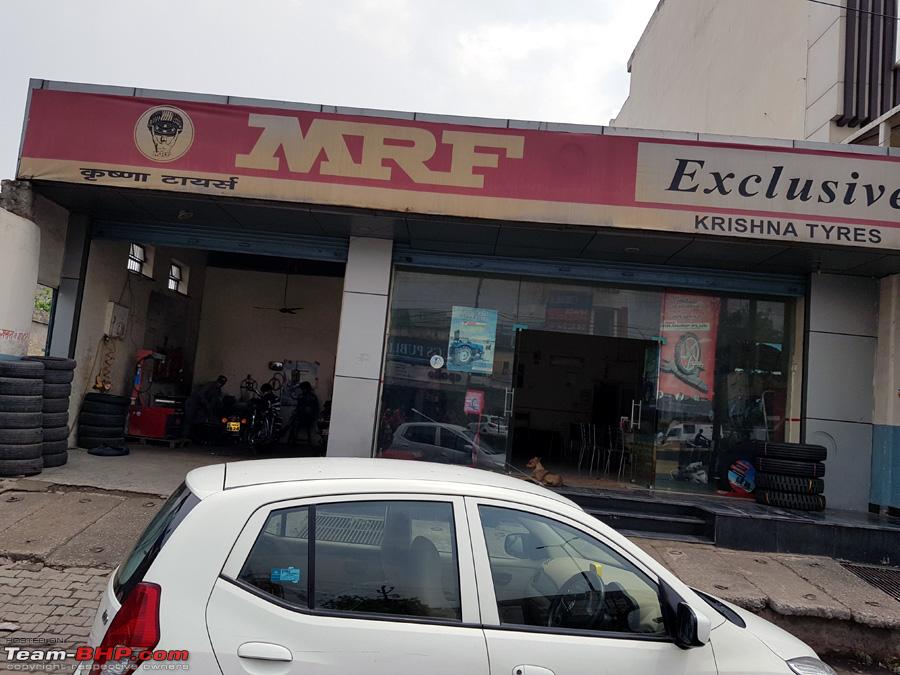
Reached the MRF Exclusive Store. This was not in such a great condition and I later found a different ultra modern MRF Store with latest german machines. However this one had a competent mechanic and all necessary tools and patches to do my job to my 100% satisfaction.

Dummies guide: Superbike puncture repair & wheel balancing-puncture-repair-16042018_20.jpg

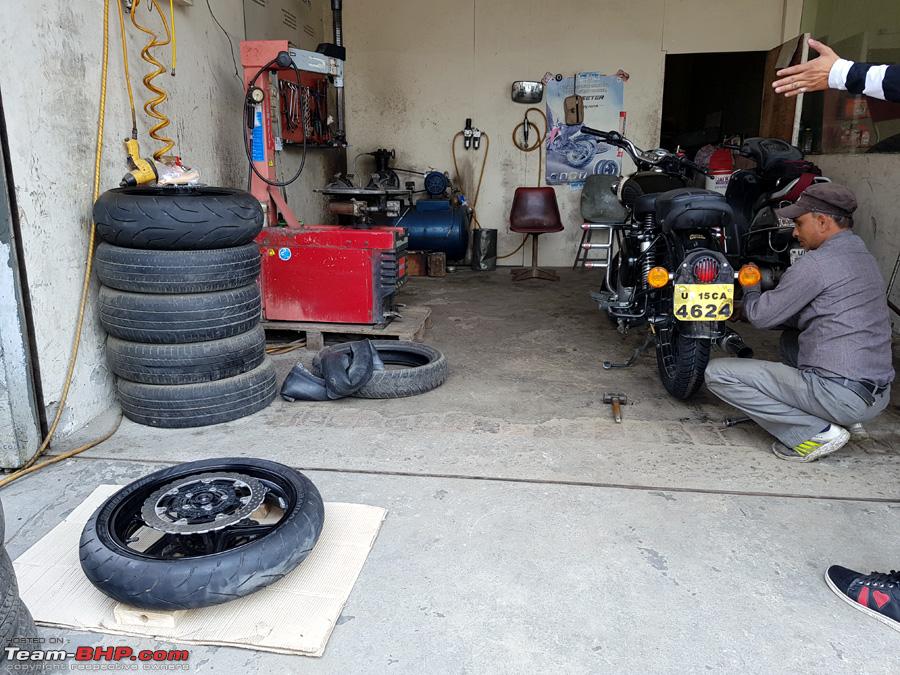
The Puncture repair workshop

Dummies guide: Superbike puncture repair & wheel balancing-puncture-repair-16042018_21.jpg

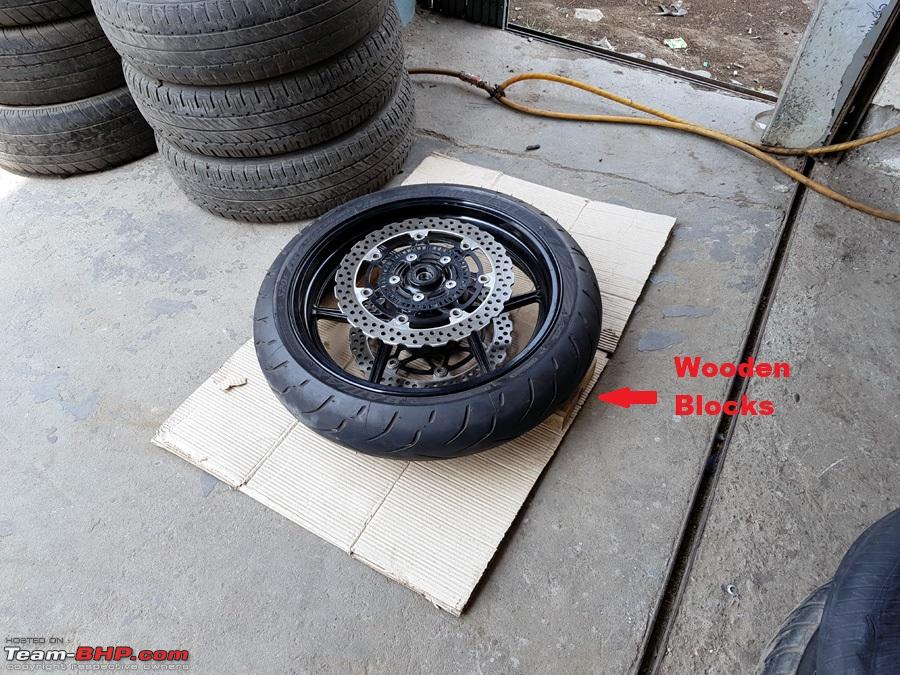
Keep the wheels on the ground on the clean cardboard carried from home on two clean wooden blocks (as shown in red) so that the brake discs do not touch the ground and get damaged

Dummies guide: Superbike puncture repair & wheel balancing-puncture-repair-16042018_22.jpg

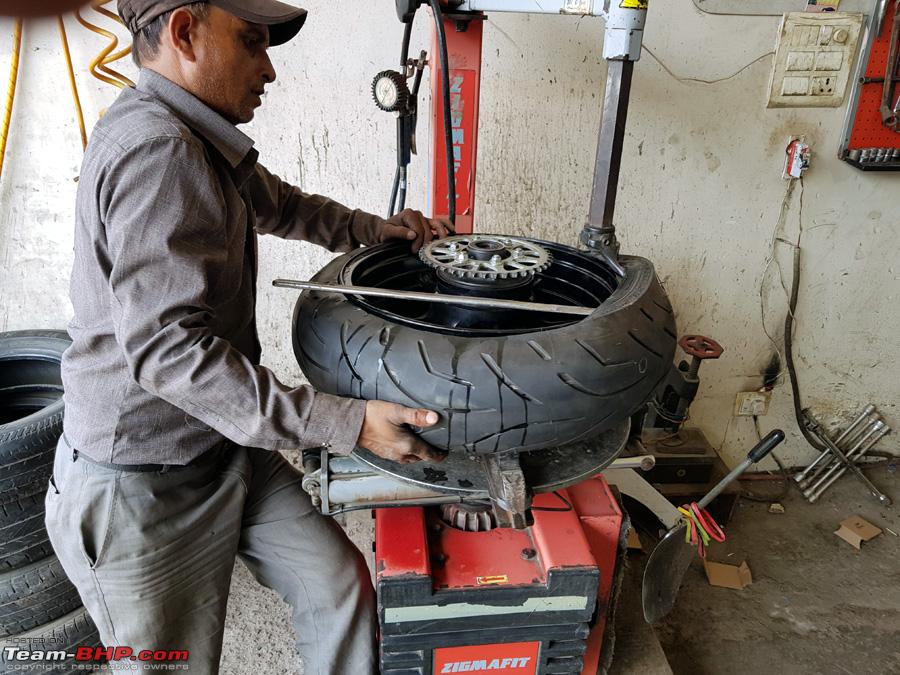
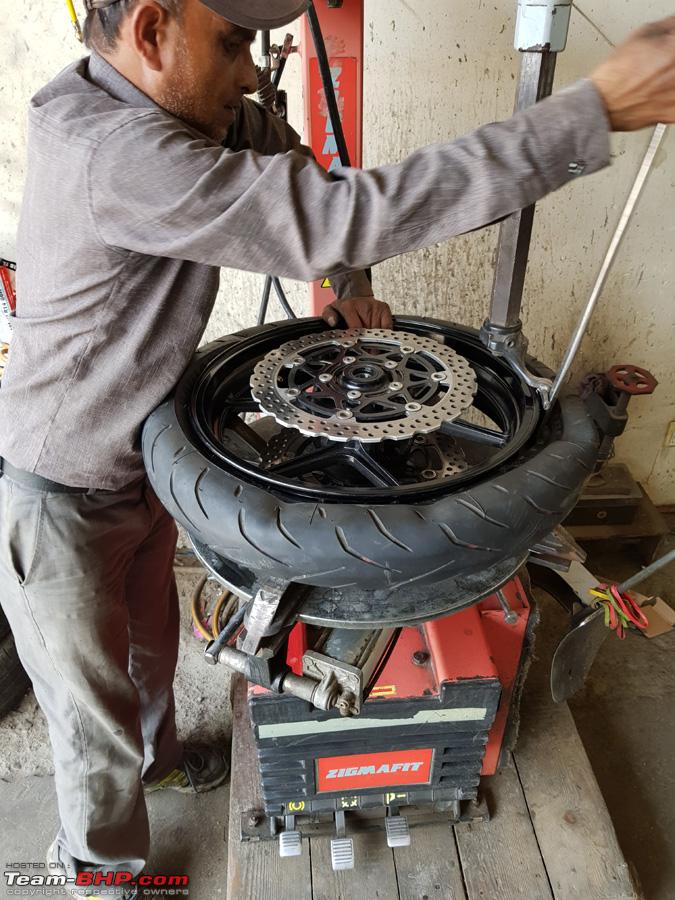
The Rear wheel being tackled first and the bead being broken by the semi-automated machine

Dummies guide: Superbike puncture repair & wheel balancing-puncture-repair-16042018_23.jpg

The tyre being carefully removed from the rim so as to not scratch anywhere

Dummies guide: Superbike puncture repair & wheel balancing-puncture-repair-16042018_24.jpg

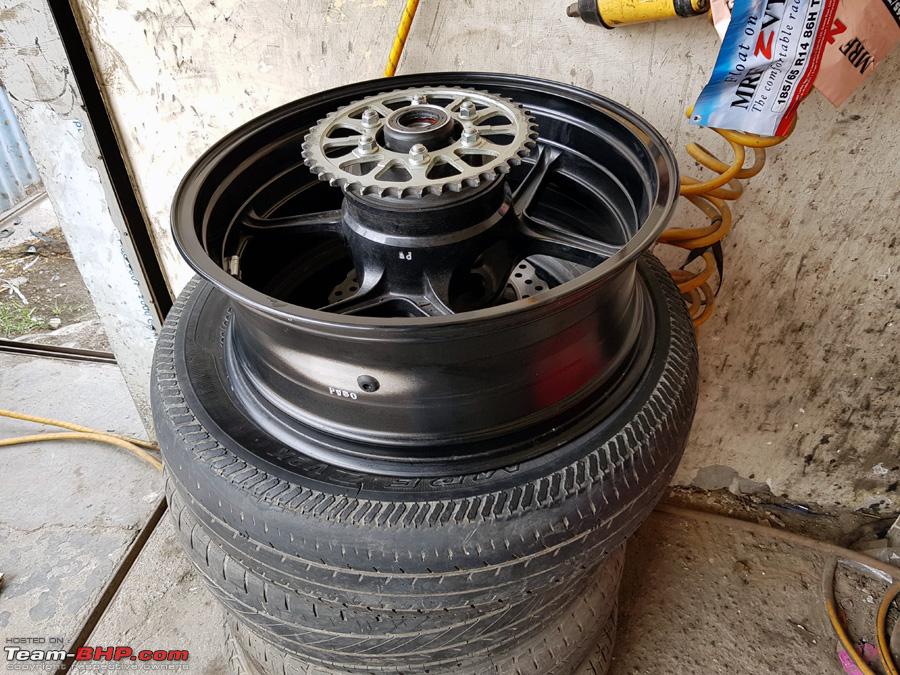
The wheel rim removed from the tyre and being properly supported so as to not scratch anything

Dummies guide: Superbike puncture repair & wheel balancing-puncture-repair-16042018_25.jpg

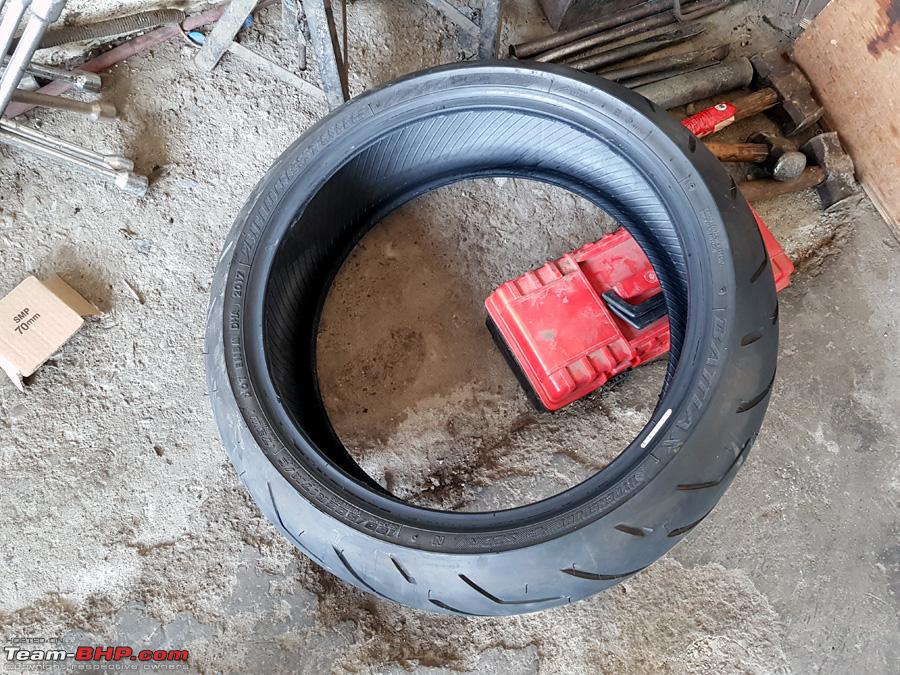
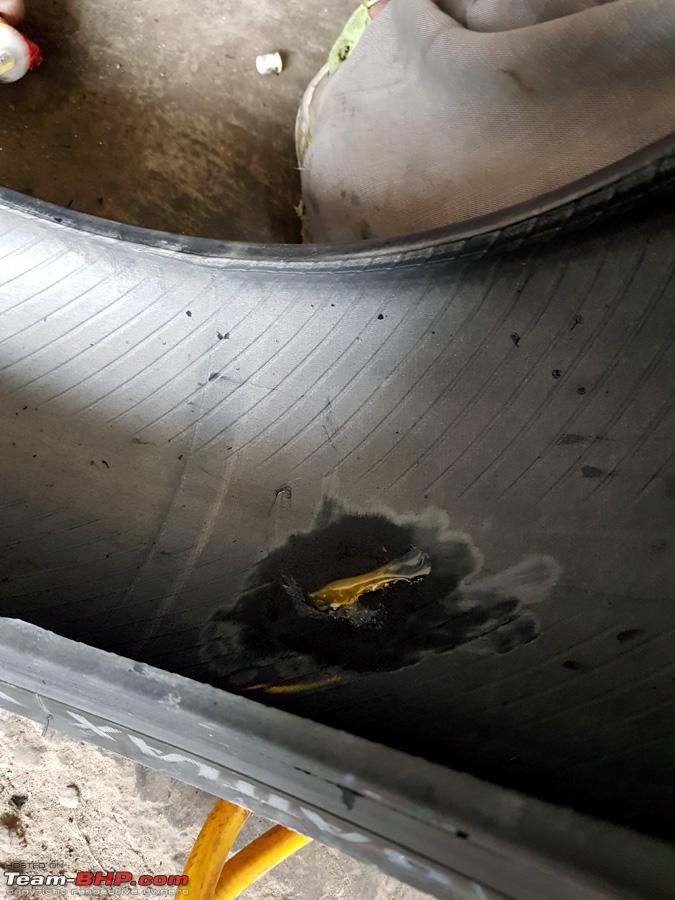
The Rear Tyre, which is a Bridgestone Battalax Hypersport S20R 190/50 ZR17 M/C, Made in Japan (73W), opened up

Dummies guide: Superbike puncture repair & wheel balancing-puncture-repair-16042018_26.jpg

This is the original MRF Tyre valve stem (TR 413) offered by MRF for 50 bucks

Dummies guide: Superbike puncture repair & wheel balancing-puncture-repair-16042018_27.jpg

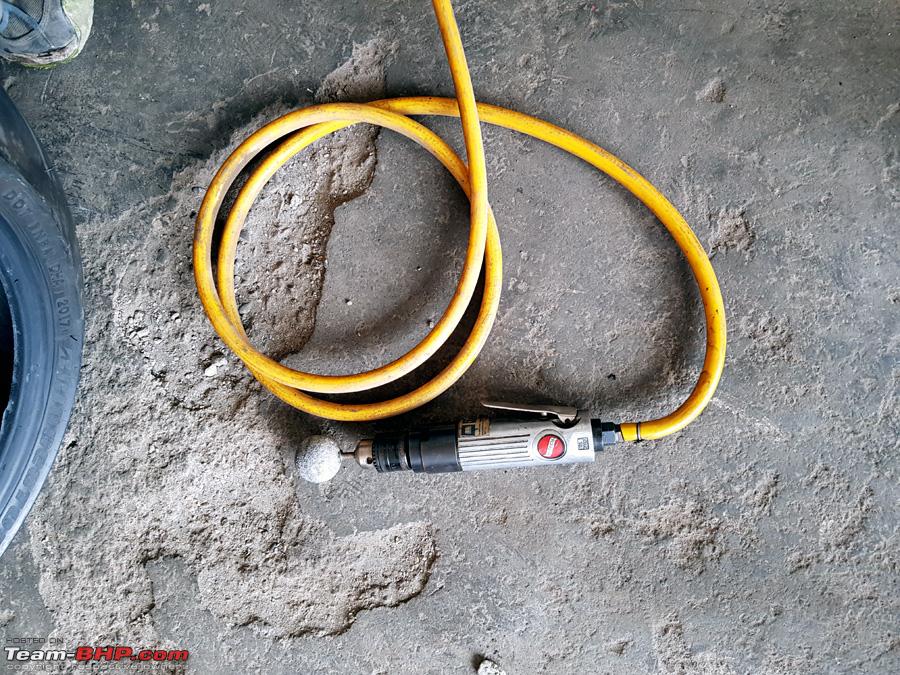
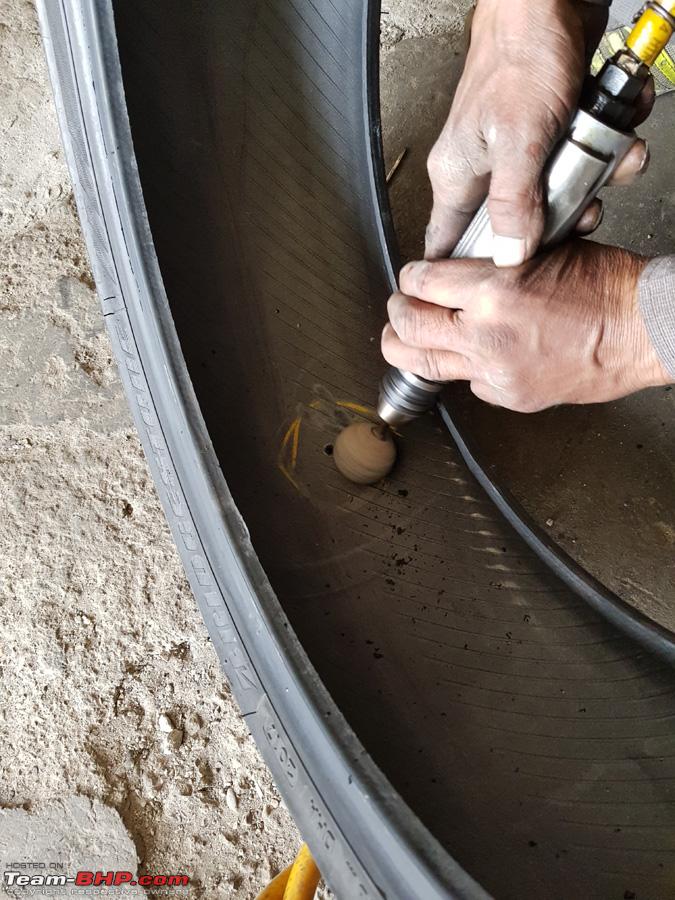
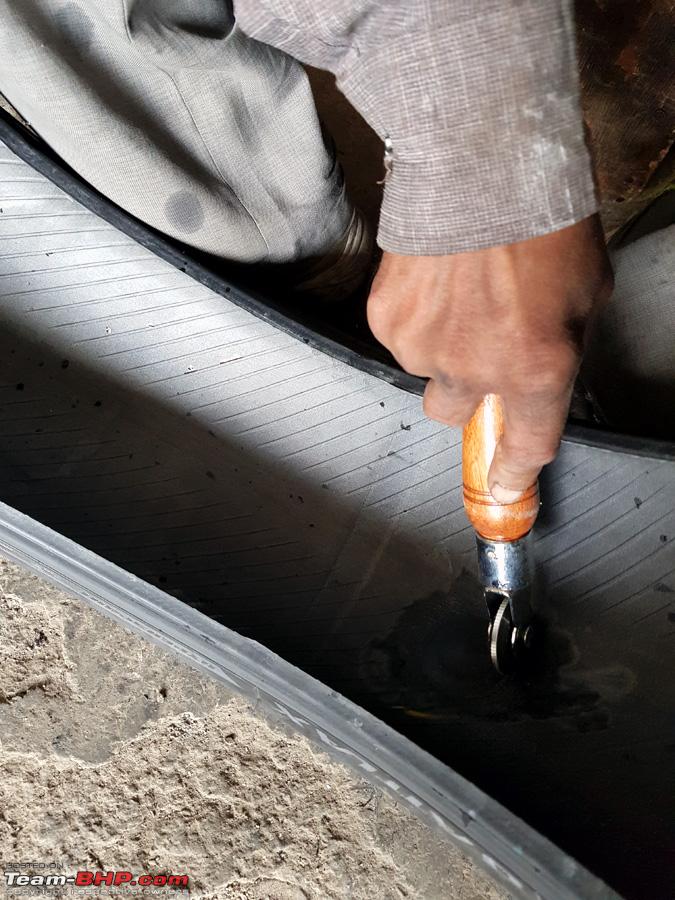
Proper pneumatic buffing tool to scrub the puncture site from inside

Dummies guide: Superbike puncture repair & wheel balancing-puncture-repair-16042018_28.jpg

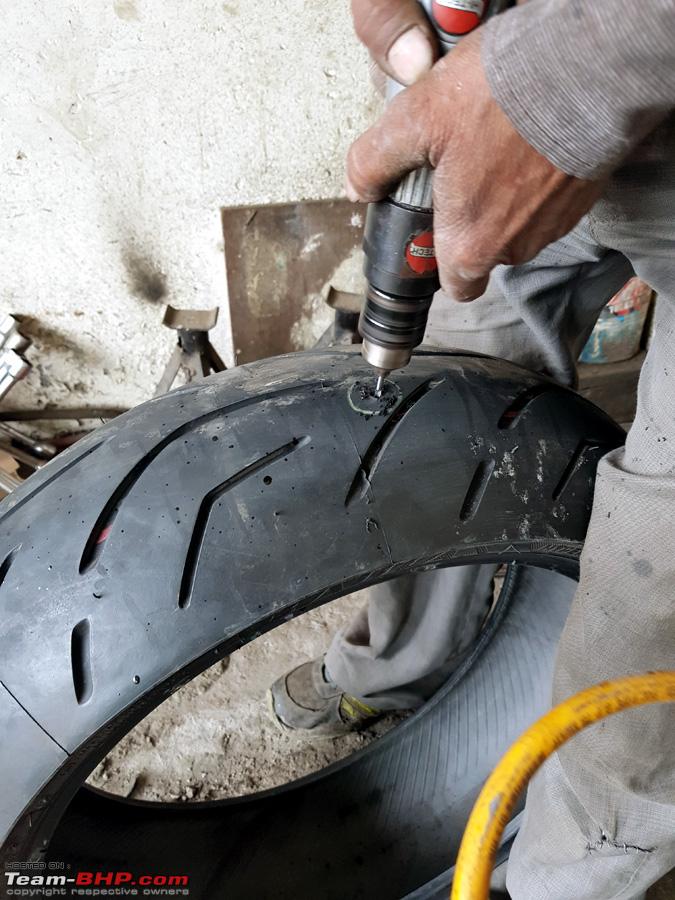
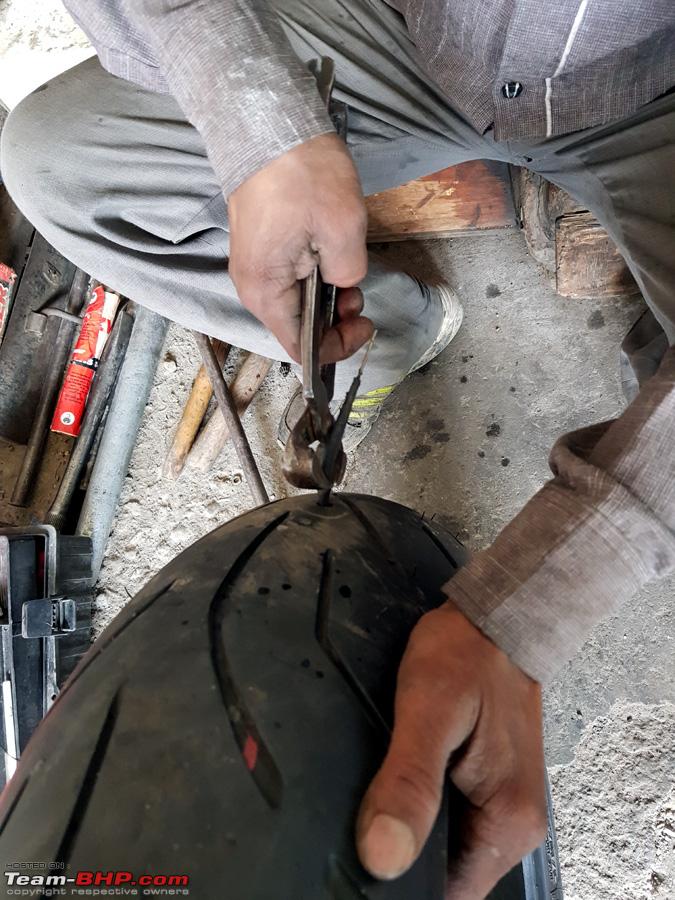
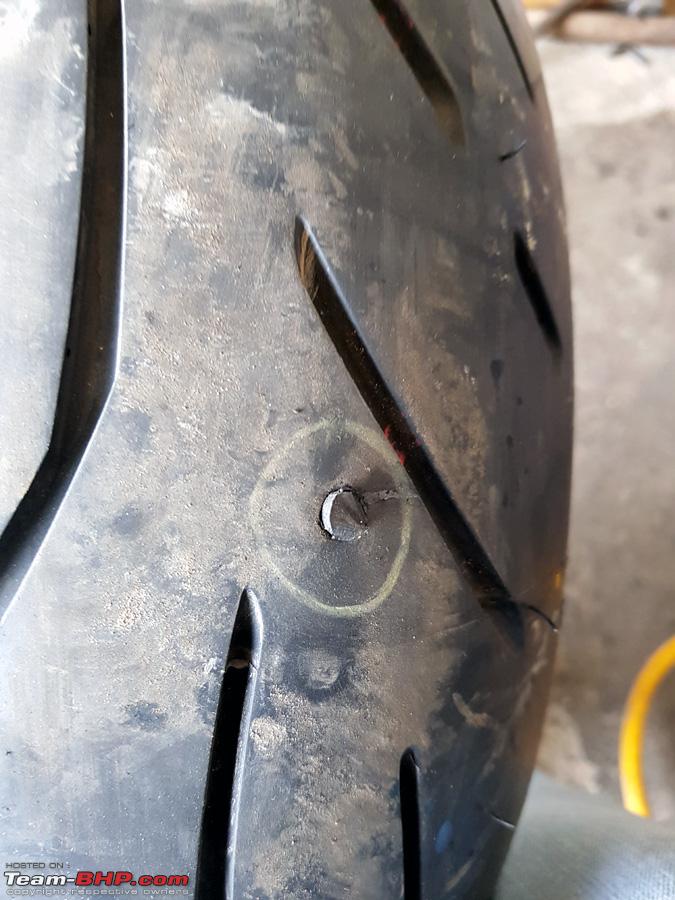
The culprit screw was removed and the tyre hole was properly drilled and prepared for the mushroom tyre patch

Dummies guide: Superbike puncture repair & wheel balancing-puncture-repair-16042018_29.jpg

Max 30 photos reached per post. To be continued in the next post...

Last edited by dkaile : 18th April 2018 at 18:13.
dkaile is online now   (31) Thanks
Old 18th April 2018, 18:34   #2
Senior - BHPian
 
dkaile's Avatar
 
Join Date: May 2011
Location: Meerut, India
Posts: 3,525
Thanked: 9,071 Times
Re: 2018 Kawasaki Ninja 1000 - The Comprehensive Review

Cont. from previous post..

DUMMIES GUIDE FOR "HOW TO PERMANENTLY REPAIR A SUPERBIKE's PUNCTURE & BALANCE YOUR WHEELS MANUALLY"
cont...

The tyre is also drilled and prepared from the inside

Dummies guide: Superbike puncture repair & wheel balancing-puncture-repair-16042018_30.jpg

Then it is buffed from the inside only to the point of removing the rubber lines on the rubber on the inside. Take care not to buff extra to reveal any steel belts inside the tyre.

Dummies guide: Superbike puncture repair & wheel balancing-puncture-repair-16042018_31.jpg

Vulcanising (Rubber) solution is applied to the buffed area at the patch adhere point

Dummies guide: Superbike puncture repair & wheel balancing-puncture-repair-16042018_32.jpg

These are some of he views of the original MRF Mushroom Patches which come in several sizes. This was the most common size and comes in a pack of 20 (MRP around 600 bucks for 20) and afaik is provided free of cost to their exclusive stores by MRF.

Dummies guide: Superbike puncture repair & wheel balancing-puncture-repair-16042018_33.jpg

Has a long rubber tail and a removal metal pin for pulling the patch from the outside of the tyre to secure it into place

Dummies guide: Superbike puncture repair & wheel balancing-puncture-repair-16042018_34.jpg

A single patch and it's rubber tail and metal pin revealed. This is the ONLY manufacturer certified permanent puncture solution for tubeless tyres.

Dummies guide: Superbike puncture repair & wheel balancing-puncture-repair-16042018_35.jpg

A view of the top of the patch that remains inside the tyre

Dummies guide: Superbike puncture repair & wheel balancing-puncture-repair-16042018_36.jpg

The patch is applied from the inside and the rubber tail is pulled out with the help of the pin from the outside. The metal pin is discarded.

Dummies guide: Superbike puncture repair & wheel balancing-puncture-repair-16042018_37.jpg

And the patch is again properly flattened out with the proper tool from the inside so that the vulcanising solution and the adhesive on the patch adhere permanently

Dummies guide: Superbike puncture repair & wheel balancing-puncture-repair-16042018_38.jpg

The excess rubber tail is pulled and cut off with just 2mm of the tail being left out which eventually flattens out and meshes with the tyre surface as the tyre is used on the road

Dummies guide: Superbike puncture repair & wheel balancing-puncture-repair-16042018_39.jpg

Here's how the completed patch work looks from the inside of the tyre

Dummies guide: Superbike puncture repair & wheel balancing-puncture-repair-16042018_40.jpg

The same process is repeated on the front tyre

Dummies guide: Superbike puncture repair & wheel balancing-puncture-repair-16042018_41.jpg

And the tyre is patched from the inside permanently. However as the front puncture was very very minute, the technician decided against drilling any holes in the front tyre and simple buffed from the inside and fixed a FLAT permanent patch from the inside. This is a normal tyre patch but without any rubber tail or metal pin.

Dummies guide: Superbike puncture repair & wheel balancing-puncture-repair-16042018_42.jpg

The guide for PERMANENT PUNCTURE REPAIR IS NOW COMPLETE.

Guide for MANUAL BALANCING OF THE SUPERBIKE's WHEELS follows in the next post. Cont...

Last edited by dkaile : 18th April 2018 at 18:37.
dkaile is online now   (33) Thanks
Old 18th April 2018, 19:19   #3
Senior - BHPian
 
dkaile's Avatar
 
Join Date: May 2011
Location: Meerut, India
Posts: 3,525
Thanked: 9,071 Times
Re: 2018 Kawasaki Ninja 1000 - The Comprehensive Review

Cont. from previous post..

DUMMIES GUIDE FOR "HOW TO PERMANENTLY REPAIR A SUPERBIKE's PUNCTURE & BALANCE YOUR WHEELS MANUALLY"
cont...

BALANCING OF SUPERBIKE WHEELS

Now as both the tyres were off the bike, I decided to get them balanced also. In the process I searched an searched for some automatic balancing solution as the one available for 4 wheeler wheels but to no avail. I found the latest and greatest German Balancing machines in the process but none of them had the attachment for the narrower axle hole diameter as found on our motorcycle tyres. So in the end resorted to going back to the Service Manual, which incidentally detailed a very simple balancing process with the help of a manual wheel balancer. This is what the service manual says -

Dummies guide: Superbike puncture repair & wheel balancing-kawasaki-wheel-balancing-information.jpg

And this is how a manual wheel balancing machine looks like from AliExpress

Dummies guide: Superbike puncture repair & wheel balancing-motorcycle-wheel-balancing-machine.jpg

But I also found out from YouTube that you can use your friendly "Jack Stands" to balance your wheels. Yes, you can! Here's how -


Which is similar to how you do it on that manual machine -


So first thing you need are the two front and rear axles, nicely cleaned

Dummies guide: Superbike puncture repair & wheel balancing-wheel-balancing-16042018_1.jpg

And some weight's that I got from that new MRF Store with German machines. These are stick on types (100 bucks each strip of 60g weights) and the conventional hammer weights, again 100 bucks for 100g, but eventually I didn't require the 2nd hammer type ones.

Dummies guide: Superbike puncture repair & wheel balancing-wheel-balancing-16042018_2.jpg

So following the procedure given in the Service Manual, I went ahead and supported the wheel on it's axle on 2 jack stands that I already had, so that the wheel can be spun freely and is absolutely level to the ground for gravity to do it's work properly. Here is the front wheel supported -

Dummies guide: Superbike puncture repair & wheel balancing-wheel-balancing-16042018_3.jpg

And spinning freely

Dummies guide: Superbike puncture repair & wheel balancing-wheel-balancing-16042018_4.jpg

The lightest point was marked (refer videos and service manual procedure) and appropriate weight temporarily attached with paper tape

Dummies guide: Superbike puncture repair & wheel balancing-wheel-balancing-16042018_5.jpg

Once it was clear following that procedure that the wheel was now properly balanced and no further weight was required, the weight was permanently fixed

Dummies guide: Superbike puncture repair & wheel balancing-wheel-balancing-16042018_6.jpg

And spun again to reconfirm that the balancing was perfect

Dummies guide: Superbike puncture repair & wheel balancing-wheel-balancing-16042018_7.jpg

Now when my wheel rims were changed under warranty, the technician had attached a 30g weight to the front rim from the old rim without even checking the balancing!! This I had now removed. And the work was done by just a single 10g stick on weight which was now at the correct position.

Dummies guide: Superbike puncture repair & wheel balancing-wheel-balancing-16042018_8.jpg

Also removed the similarly irrationally attached 20g weight from the rear wheel

Dummies guide: Superbike puncture repair & wheel balancing-wheel-balancing-16042018_9.jpg

Now it was the turn of the Rear Tyre

Dummies guide: Superbike puncture repair & wheel balancing-wheel-balancing-16042018_10.jpg

Which was again spinning freely on a completely horizontal surface

Dummies guide: Superbike puncture repair & wheel balancing-wheel-balancing-16042018_11.jpg

And the 20g weight was now attached to the right logical area after confirming it was the lightest area on the tyre by the above procedure

Dummies guide: Superbike puncture repair & wheel balancing-wheel-balancing-16042018_12.jpg

So BOTH WHEEL BALANCING WAS NOW COMPLETE

The tyre pressure was re-checked to confirm that no loss of air pressure had happened. It was at my preset 46 psi which I had set at the shop. The tyres were adjusted to the required air pressure of 36psi for the front and 42psi for the rear.

Dummies guide: Superbike puncture repair & wheel balancing-wheel-balancing-16042018_13.jpg

The wheels were re-attached in the reverse procedure, taking care to lubricate the axles and collars to be properly cleaned and greased as per specs given in the service manual. The front axle was torqued to 110 Nm by the torque wrench. Before tightening the front axle clamp bolts to 20 Nm, the front forks were pumped up and down 4-5 times to properly seat the right front fork leg on the front axle. The Front Brake Caliper Mounting Bolts were torqued to 35 Nm. You can use a jack as shown in the picture to raise the tyre to align to axle level in case you are working alone -

Dummies guide: Superbike puncture repair & wheel balancing-wheel-balancing-16042018_14.jpg

The same reverse procedure was followed for the rear wheel. With both the left and right side rear collars properly cleaned and greased and rear axle also lubricated. The chain was re-engaged with the rear sprocket, tightened and cleaned with WD 40. The rear axle nut was tightened to 100 Nm and the Rear Brake Caliper Mounting Bolts were tightened to 25 Nm. This completed the enire procedure.

Here is the front wheel back to original

Dummies guide: Superbike puncture repair & wheel balancing-wheel-balancing-16042018_15.jpg

And also the Rear Wheel

Dummies guide: Superbike puncture repair & wheel balancing-wheel-balancing-16042018_16.jpg

And the bike is ready to explore the unknown... lolz

Dummies guide: Superbike puncture repair & wheel balancing-wheel-balancing-16042018_17.jpg

What a beautiful cockpit!

Dummies guide: Superbike puncture repair & wheel balancing-wheel-balancing-16042018_18.jpg

I was charged 200 bucks each for the mushroom puncture patchup at the MRF store. Cheers for now...

Last edited by dkaile : 18th April 2018 at 19:36.
dkaile is online now   (46) Thanks
Old 19th April 2018, 08:28   #4
Team-BHP Support
 
Samurai's Avatar
 
Join Date: Jan 2005
Location: Bangalore/Udupi
Posts: 26,002
Thanked: 49,669 Times
re: Dummies guide: How to repair Superbike wheels & tyres

Taking out of Assembly Line. Thanks for sharing - Support Team
Samurai is offline   (3) Thanks
Old 19th April 2018, 09:36   #5
Senior - BHPian
 
Join Date: Dec 2006
Location: pune
Posts: 2,397
Thanked: 2,735 Times
Re: Dummies guide: Superbike puncture repair & wheel balancing

Excellent guide

Quote:
Originally Posted by dkaile View Post
So BOTH WHEEL BALANCING WAS NOW COMPLETE

The tyre pressure was re-checked to confirm that no loss of air pressure had happened. It was at my preset 46 psi which I had set at the shop. The tyres were adjusted to the required air pressure of 36psi for the front and 42psi for the rear.
I was given to understand that wheel balancing should be carried out at recommended tyre pressure rather than adjusting pressure while mounting the wheel.
sukiwa is offline   (1) Thanks
Old 19th April 2018, 09:36   #6
Senior - BHPian
 
dkaile's Avatar
 
Join Date: May 2011
Location: Meerut, India
Posts: 3,525
Thanked: 9,071 Times
Re: Dummies guide: Superbike puncture repair & wheel balancing

Thanks Mods for creating a separate topic out of my Ninja 1000 Ownership Thread. As I keep mentioning "my previous posts" in the above posts, the uninitiated can follow my previous posts here - http://www.team-bhp.com/forum/superb...-review-9.html

Hope that helps. Cheers...
dkaile is online now   (4) Thanks
Old 19th April 2018, 09:41   #7
Senior - BHPian
 
dkaile's Avatar
 
Join Date: May 2011
Location: Meerut, India
Posts: 3,525
Thanked: 9,071 Times
Re: Dummies guide: Superbike puncture repair & wheel balancing

Quote:
Originally Posted by sukiwa View Post
I was given to understand that wheel balancing should be carried out at recommended tyre pressure rather than adjusting pressure while mounting the wheel.
A 2-3 psi change in tyre pressure does not and should not affect the tyre balancing because that anyways can happen due to various parameters like ambient temperature, speed of the vehicle, high speed changing the temperature of the rims etc. However just for your information, I had rechecked the tyre balancing after bringing back the tyre pressure to the manual recommended ones also. Also to be noted is although this is the "Service Manual Method" for tyre balancing, you will get slightly more accurate results on a more finely calibrated German/reputed Automatic Wheel Balancing Machine made specifically for motorcycles. As I had mentioned, I had searched but could not locate one locally in Meerut. If any TeamBhp member comes across one in Delhi/NCR region or all India in general, do kindly post the details in this topic for the benefit of other Team members. I am surely inquisitive to see one.

Cheers...

Last edited by dkaile : 19th April 2018 at 09:47.
dkaile is online now   (4) Thanks
Old 19th April 2018, 09:58   #8
BHPian
 
anshumandun's Avatar
 
Join Date: Oct 2014
Location: Bangalore
Posts: 502
Thanked: 3,219 Times
Re: Dummies guide: Superbike puncture repair & wheel balancing

This is some amazing information, specially about the wheel balancing. Thanks for sharing this in such details. I really struggled to find a wheel balancer for my bike when I changed my tyres.

Here in Bangalore, we have a group for the Kawasaki Z bikes riders and we all were facing issues regarding proper servicing and maintenance of our bikes. One of our fellow riders who is also as passionate about DIYs and bike maintenance as you, has partnered with another rider who owns a car garage and some others have chipped in too to start a Z specific bike maintenance and service center called 'Bikesmith'. I am going to share this with them. Wheel balancing will be another feather in the cap that they can add to their services.
anshumandun is offline   (1) Thanks
Old 19th April 2018, 10:09   #9
BHPian
 
scorpian's Avatar
 
Join Date: Jun 2008
Location: GOA
Posts: 857
Thanked: 1,297 Times
Re: Dummies guide: Superbike puncture repair & wheel balancing

I too have been searching high and low to find a tyre shop that could balance my wheels,never found one. some promised to get the equipment but eventually that never happened. Your post surely helps in resolving a long lasting issue that has always been niggling me.
Thank you.
scorpian is online now   (1) Thanks
Old 19th April 2018, 14:30   #10
Team-BHP Support
 
CrAzY dRiVeR's Avatar
 
Join Date: Jun 2006
Location: Bangalore / TVM
Posts: 18,006
Thanked: 78,829 Times
Re: Dummies guide: Superbike puncture repair & wheel balancing

Any idea how efficient is this? Mushrooms plugs along with a spring loaded gun is provided to plug the puncture without having to remove the wheel.


Have seen this kit in a superbike garage in Bangalore.
CrAzY dRiVeR is offline   (3) Thanks
Old 19th April 2018, 14:49   #11
Senior - BHPian
 
AMG Power's Avatar
 
Join Date: Mar 2017
Location: BLR
Posts: 1,278
Thanked: 8,851 Times
Re: Dummies guide: Superbike puncture repair & wheel balancing

Quote:
Originally Posted by CrAzY dRiVeR View Post
Any idea how efficient is this? Mushrooms plugs along with a spring loaded gun is provided to plug the puncture without having to remove the wheel.
Those are not standard mushroom plugs. It's almost like the regular repair kit with a very small head and as such the effect would be like the standard plug.

Additionally, mushroom patches have additional safeguards that are built in during the fitment procedure - glue on the reverse and the buffing (although buffing is again debatable if not done properly), vulcanising etc, to help increase safety levels.
AMG Power is offline   (1) Thanks
Old 19th April 2018, 15:05   #12
BHPian
 
Join Date: Jun 2013
Location: Bangalore
Posts: 365
Thanked: 858 Times
Re: Dummies guide: Superbike puncture repair & wheel balancing

Quote:
Originally Posted by anshumandun View Post
This is some amazing information, specially about the wheel balancing. Thanks for sharing this in such details. I really struggled to find a wheel balancer for my bike when I changed my tyres.

Here in Bangalore, we have a group for the Kawasaki Z bikes riders and we all were facing issues regarding proper servicing and maintenance of our bikes.
You can take your bike to Madhu's enterprises for balancing. They have a proper computerized dynamic balancer for bike wheels.

I've seen it at their store but have not yet needed to get the wheels on any of my bikes balanced since they installed the balancer. But I have used their store a lot for car wheels and never been anything but very happy.

Got some ads they were running from FB:
Dummies guide: Superbike puncture repair & wheel balancing-0c9903844bc648acac8dd3a1f7e81d03.jpeg

Dummies guide: Superbike puncture repair & wheel balancing-f80e6381236e49ce9e440b9d15109209.jpeg
VellVector is offline   (4) Thanks
Old 19th April 2018, 15:37   #13
Senior - BHPian
 
dkaile's Avatar
 
Join Date: May 2011
Location: Meerut, India
Posts: 3,525
Thanked: 9,071 Times
Re: Dummies guide: Superbike puncture repair & wheel balancing

Quote:
Originally Posted by CrAzY dRiVeR View Post
Any idea how efficient is this? Mushrooms plugs along with a spring loaded gun is provided to plug the puncture without having to remove the wheel.
Yeah, I have bought that kit too from Grand Pitstop as you would have seen on my Ninja 1000 Ownership thread. However that too is just a TEMPORARY solution and I do NOT deem it as a permanent fix for high speed bikes. It will get you out of a jam in a stranded situation but as you will see from the video of the same that I posted below (watch at 4:10), even this puncture is prone to leakage.


So you can use the same in emergencies but do not treat this as a permanent fix by any stretch of the imagination.

Cheers...
dkaile is online now   (2) Thanks
Old 26th April 2018, 12:35   #14
BHPian
 
Join Date: Aug 2011
Location: Gurgaon
Posts: 100
Thanked: 131 Times
Re: Dummies guide: Superbike puncture repair & wheel balancing

Hey Dkaile, Many Thanks to your timely thread and an untimely puncture in the rear tyre (a 2 inch long bolt for some reason) of my month-old CBR650, I chose to go for an Umbrella patch as well. It was not that neatly done as yours but was acceptable. Let's see how it holds up.
animeshb is offline   (1) Thanks
Old 5th June 2018, 15:38   #15
Senior - BHPian
 
dkaile's Avatar
 
Join Date: May 2011
Location: Meerut, India
Posts: 3,525
Thanked: 9,071 Times
Re: Dummies guide: Superbike puncture repair & wheel balancing

A separate Dummies Guide for Replacing the Rear Tyre on a Harley Softail is posted here - http://www.team-bhp.com/forum/superb...ml#post4410266


Cheers...
dkaile is online now   (1) Thanks
Reply

Most Viewed


Copyright ©2000 - 2025, Team-BHP.com
Proudly powered by E2E Networks