| |||||||

| Search Forums |
| Advanced Search |
| Go to Page... |
 |
| Search this Thread |  46,848 views |
 1st April 2019, 12:13
| #1 |
| BHPian Join Date: Jan 2010 Location: Kolkata
Posts: 894
Thanked: 1,027 Times
| Indo-Italian PAL: 1963 Fiat 1100 Super Select "Bella" The interest started after I drove a few Fiats belonging to friends over the years. From John Milne's 1960 1100 Select with the Lusso trim to Premier Padmini's, I started getting more hooked. Here was a model that was easy to drive, critical spare parts were still available in India, and they looked cute! They were also easy cars to drive through regular traffic in Calcutta, being quite narrow & the fun factor-they are nippy, agile cars blessed with decent handling. Then of course came Karl Bhote's excellent restoration thread of his Super Select. I had shared my desire to buy an early with a few friends. March 2018: A good friend called me one day & said that there's a 1960s Fiat that belongs to a family friend, single owner car & that I should seriously consider buying it. I wasted no time, my friend promptly sent me a few photos of the car. She was garaged well since 2013 when her first owner had passed away. Thereafter his son used to start the Fiat once in a while. These are the first photos I received: 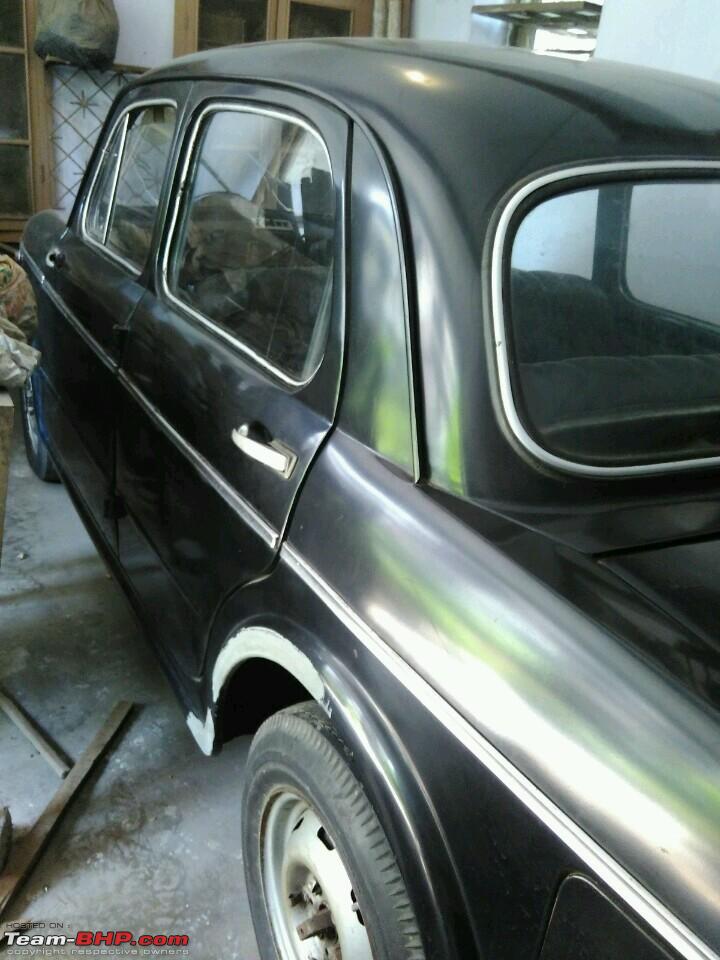  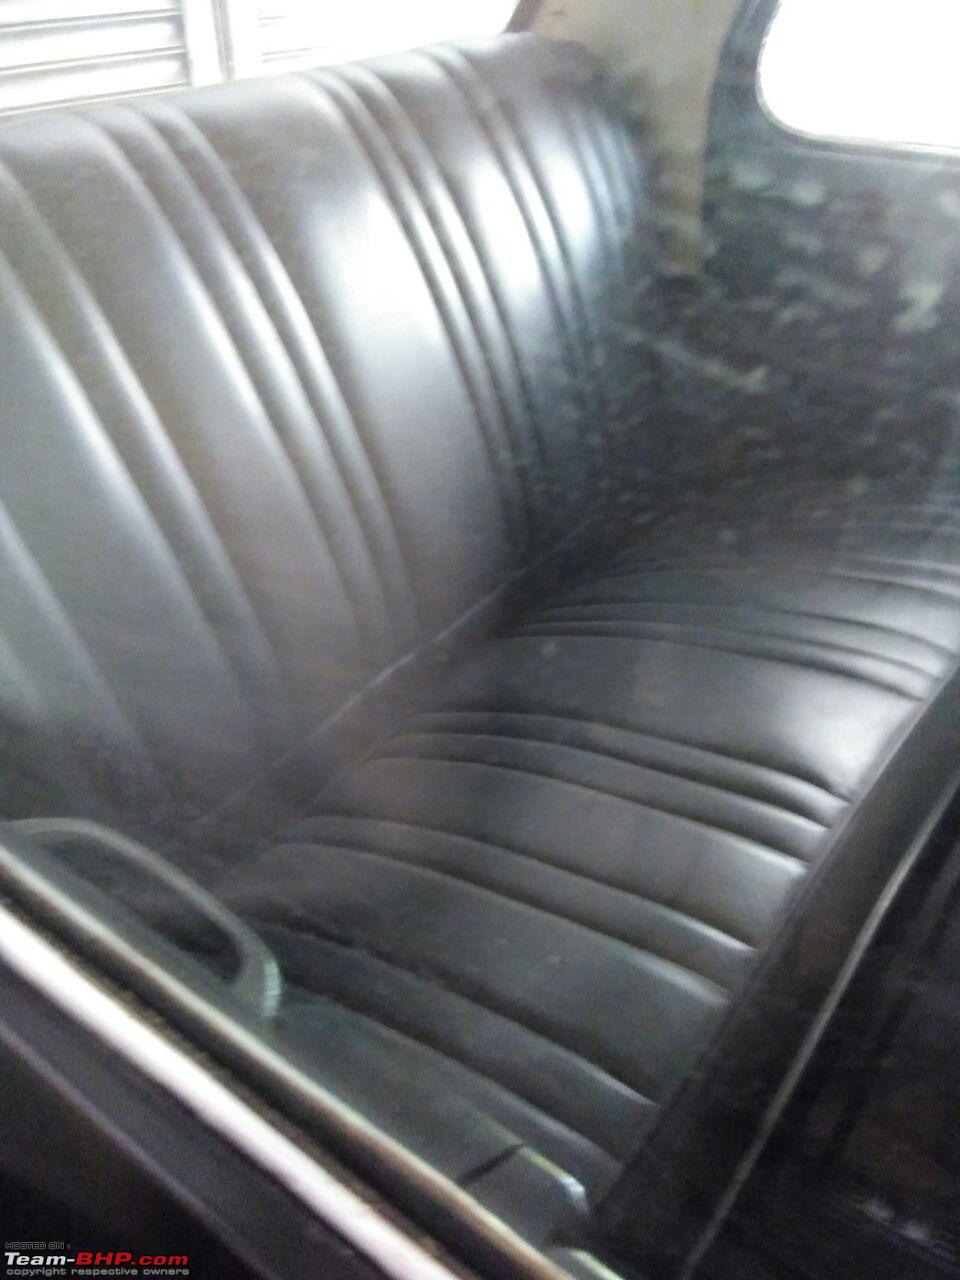     I liked what I saw in the photos but wanted to think about it a little before I took the plunge. So I asked for a few days to do some research & then take a call. The very next day I was told by my friend who gave me the lead, that the family was being approached by another person who was keen on the car. My friend also said that even if I did not buy it, I should go and buy the car for his daughter, since he was out of town. That was all the prompting I needed. I coaxed 2 of my close car buddies to come along with me and the 3 of us went to have a look at the Fiat. After exchanging pleasantries with the current owner and his sister (the son & daughter of the first owner), they opened the garage. There she was! A fairly solid looking 1963 Fiat 1100 Super Select. I was immediately smitten & both my friends thought the car looked good. In our excitement we tried to start the car, the engine did crank but she would not start. The owner, growing more apprehensive by the minute, kept telling us to let her be, she's not been on the roads for atleast 4 years, her brakes were weak, a tyre had very little air, & it was his father's car! He grew more wary when one of us suggested we should take her for a spin  Anyway, long story short, I had the money with me & we went into the house & sealed the deal. The Fiat was fondly referred to just as '202' by her first family, after her registration number. After concluding the deal, we organised a flat-bed truck to take 202 but I didn't know where to keep her. My parents may have thrown a fit so my house was out of the question. One of my friends very kindly offered his place to the park 202 for a few days till I made up my mind on how I wanted to tackle getting her reliable for driving. As soon as the flat-bed arrived, I could see the look of sadness that both the brother & sister, who had seen the car since new, had on their faces. It's hard, seeing the car that you grew up with, leaving you & going away to a stranger who you may never see again, worse, you may never see your old car again. A car you've seen for 55 years. I tried to reassure them that I would take good care of the car, & when she was again on the roads in good nick, would come back to their house & show them the Fiat they loved so much. The gentleman took great pains to explain to me what work his father had done for the general maintenance of the car, pointers on how to treat the car & handed me some odds & ends for the car that had been used in the past. 202 was pushed out of her garage of 55 years and carefully loaded onto the flat-bed. While my friends & I were thrilled with my new Fiat, the gent & his sister were genuinely sad & bid adieu to their beloved '202'. A few photos of 202 leaving her first owner's house in the light of the setting sun:    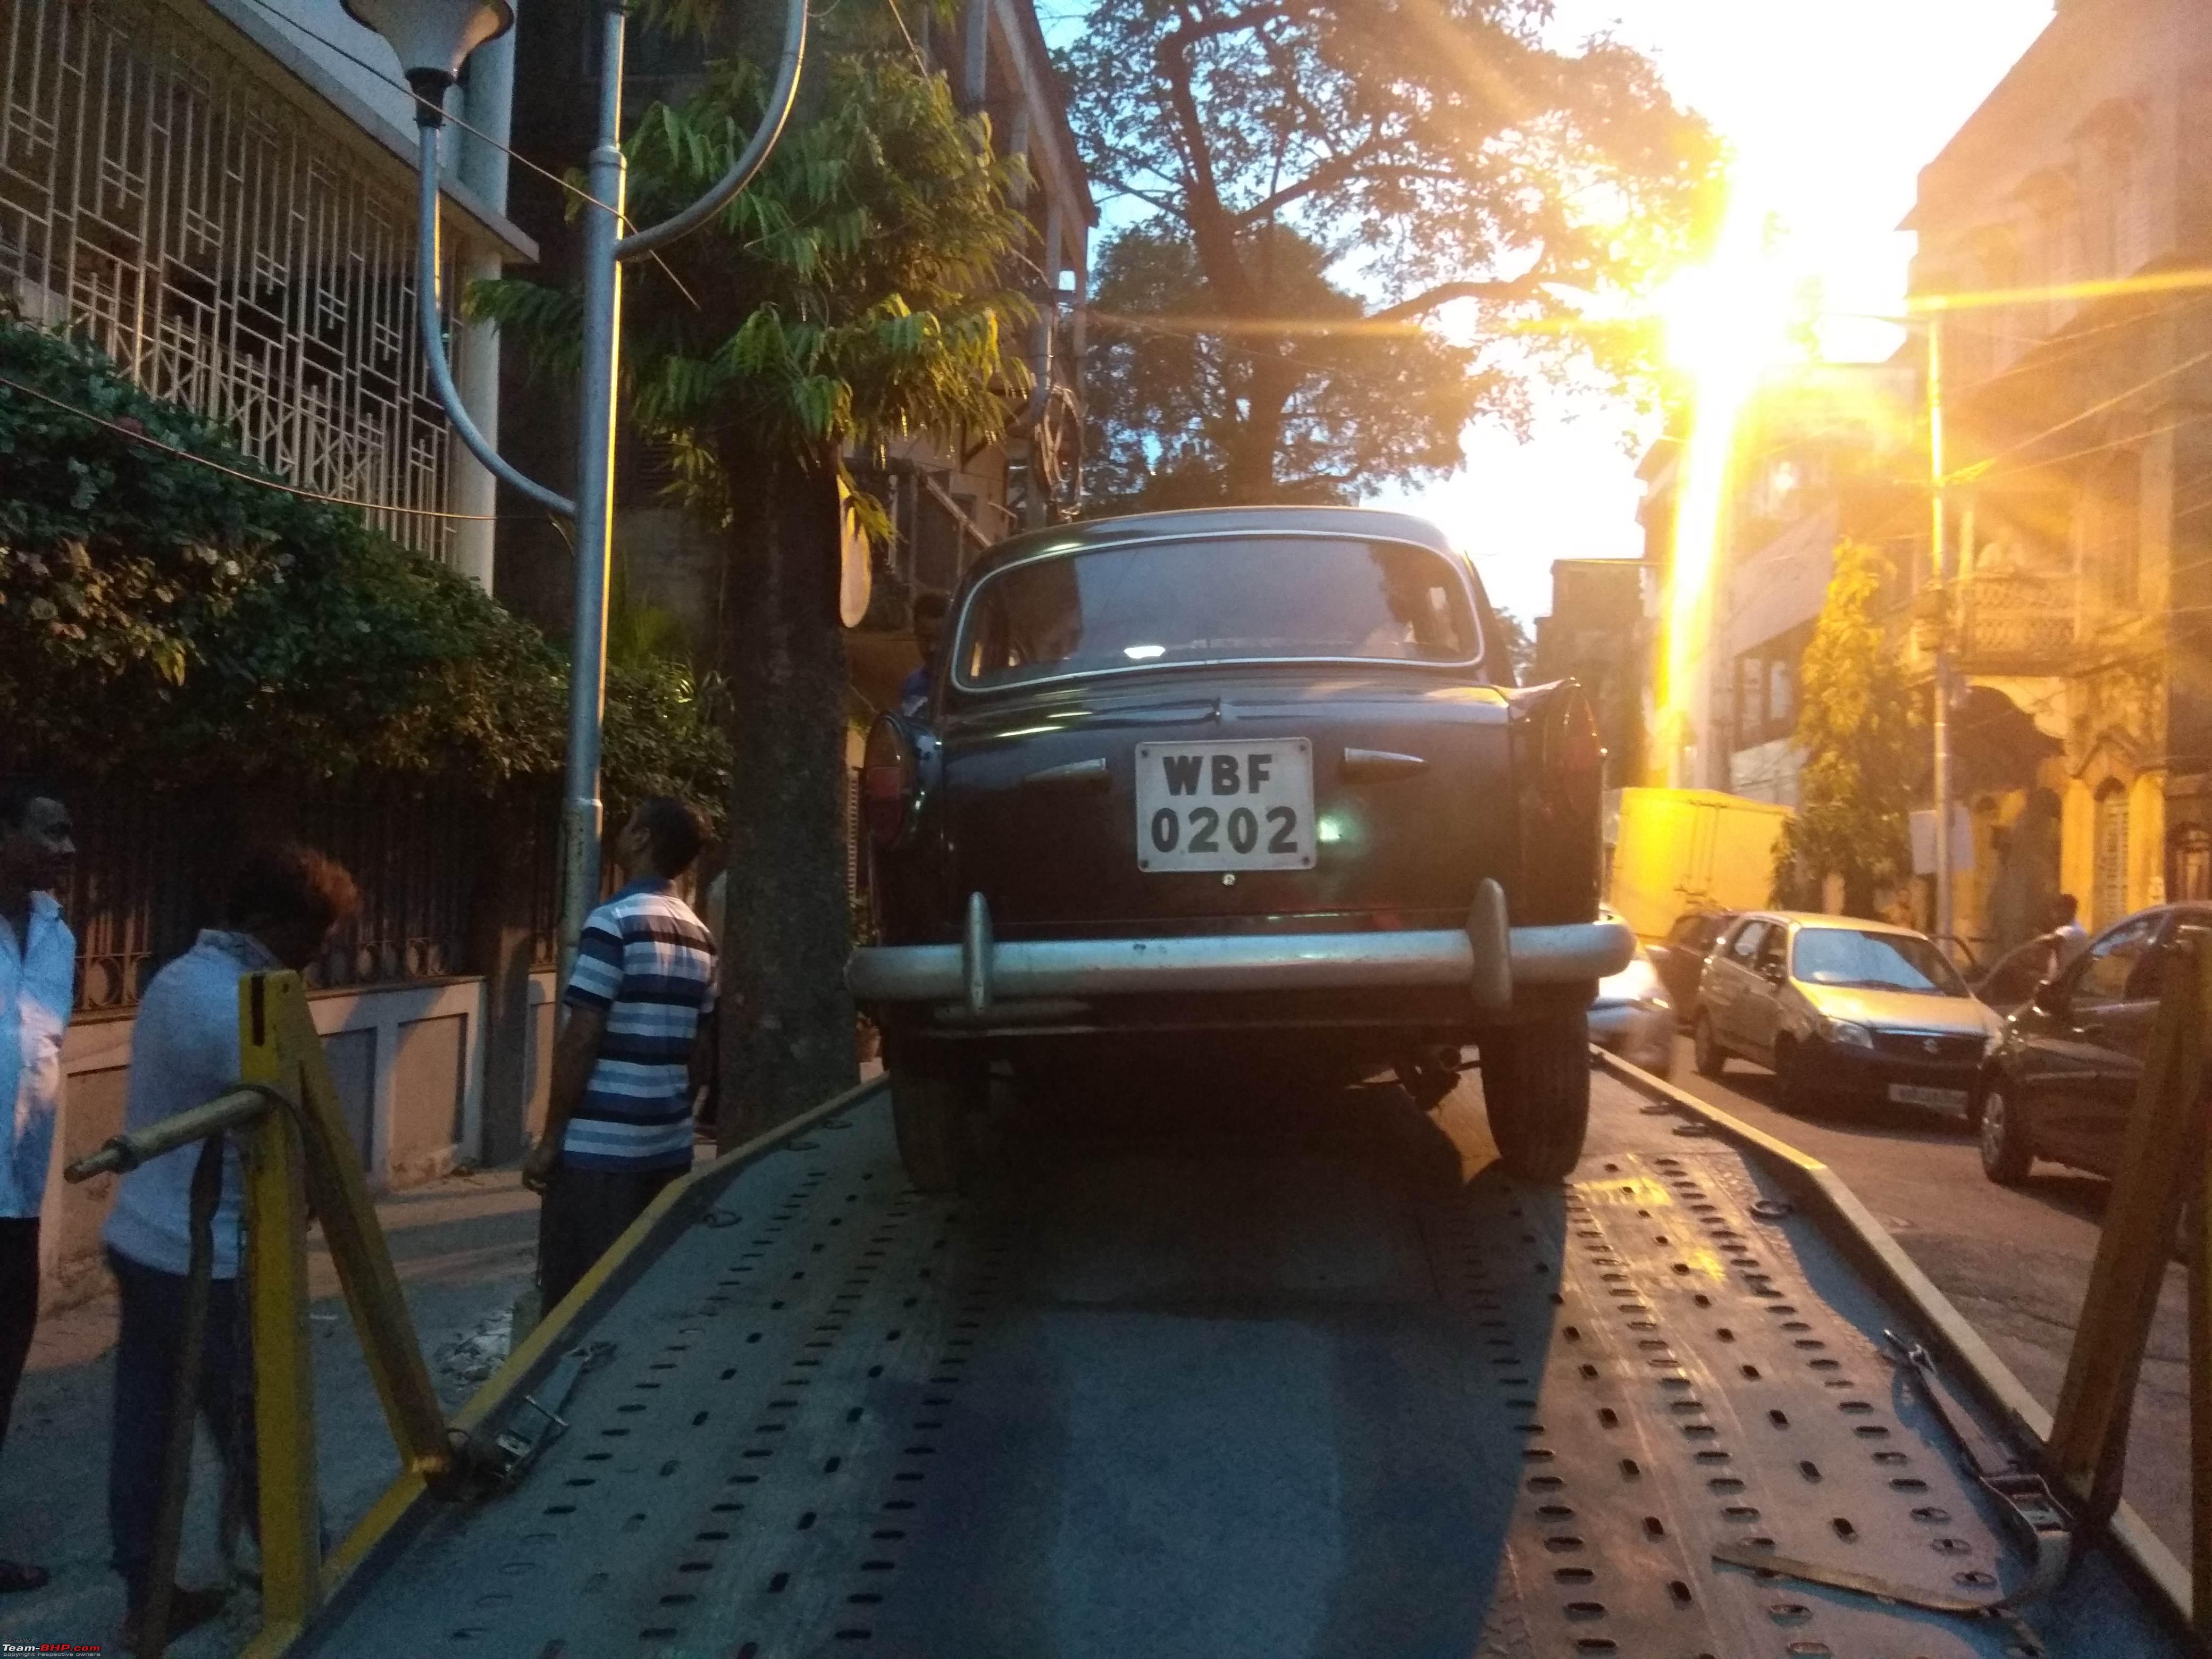 We followed the flat-bed to my friend's house & to my annoyance, it started to rain. By the time we got her of & into my friend's garage, I was wet, tired but extremely happy with 202. We're absolutely nuts about classic cars & started checking out different areas of 202 immediately: Engine bay was a mess with years of gunk & muck. I was happy to see that the steering box, inlet manifold with the pre-heating system, Magneti Marelli ignition coil, bonnet inspection lamps, original brake fluid container & factory fitted Solex carb & correct wheels were present. Not so happy about the missing jack.   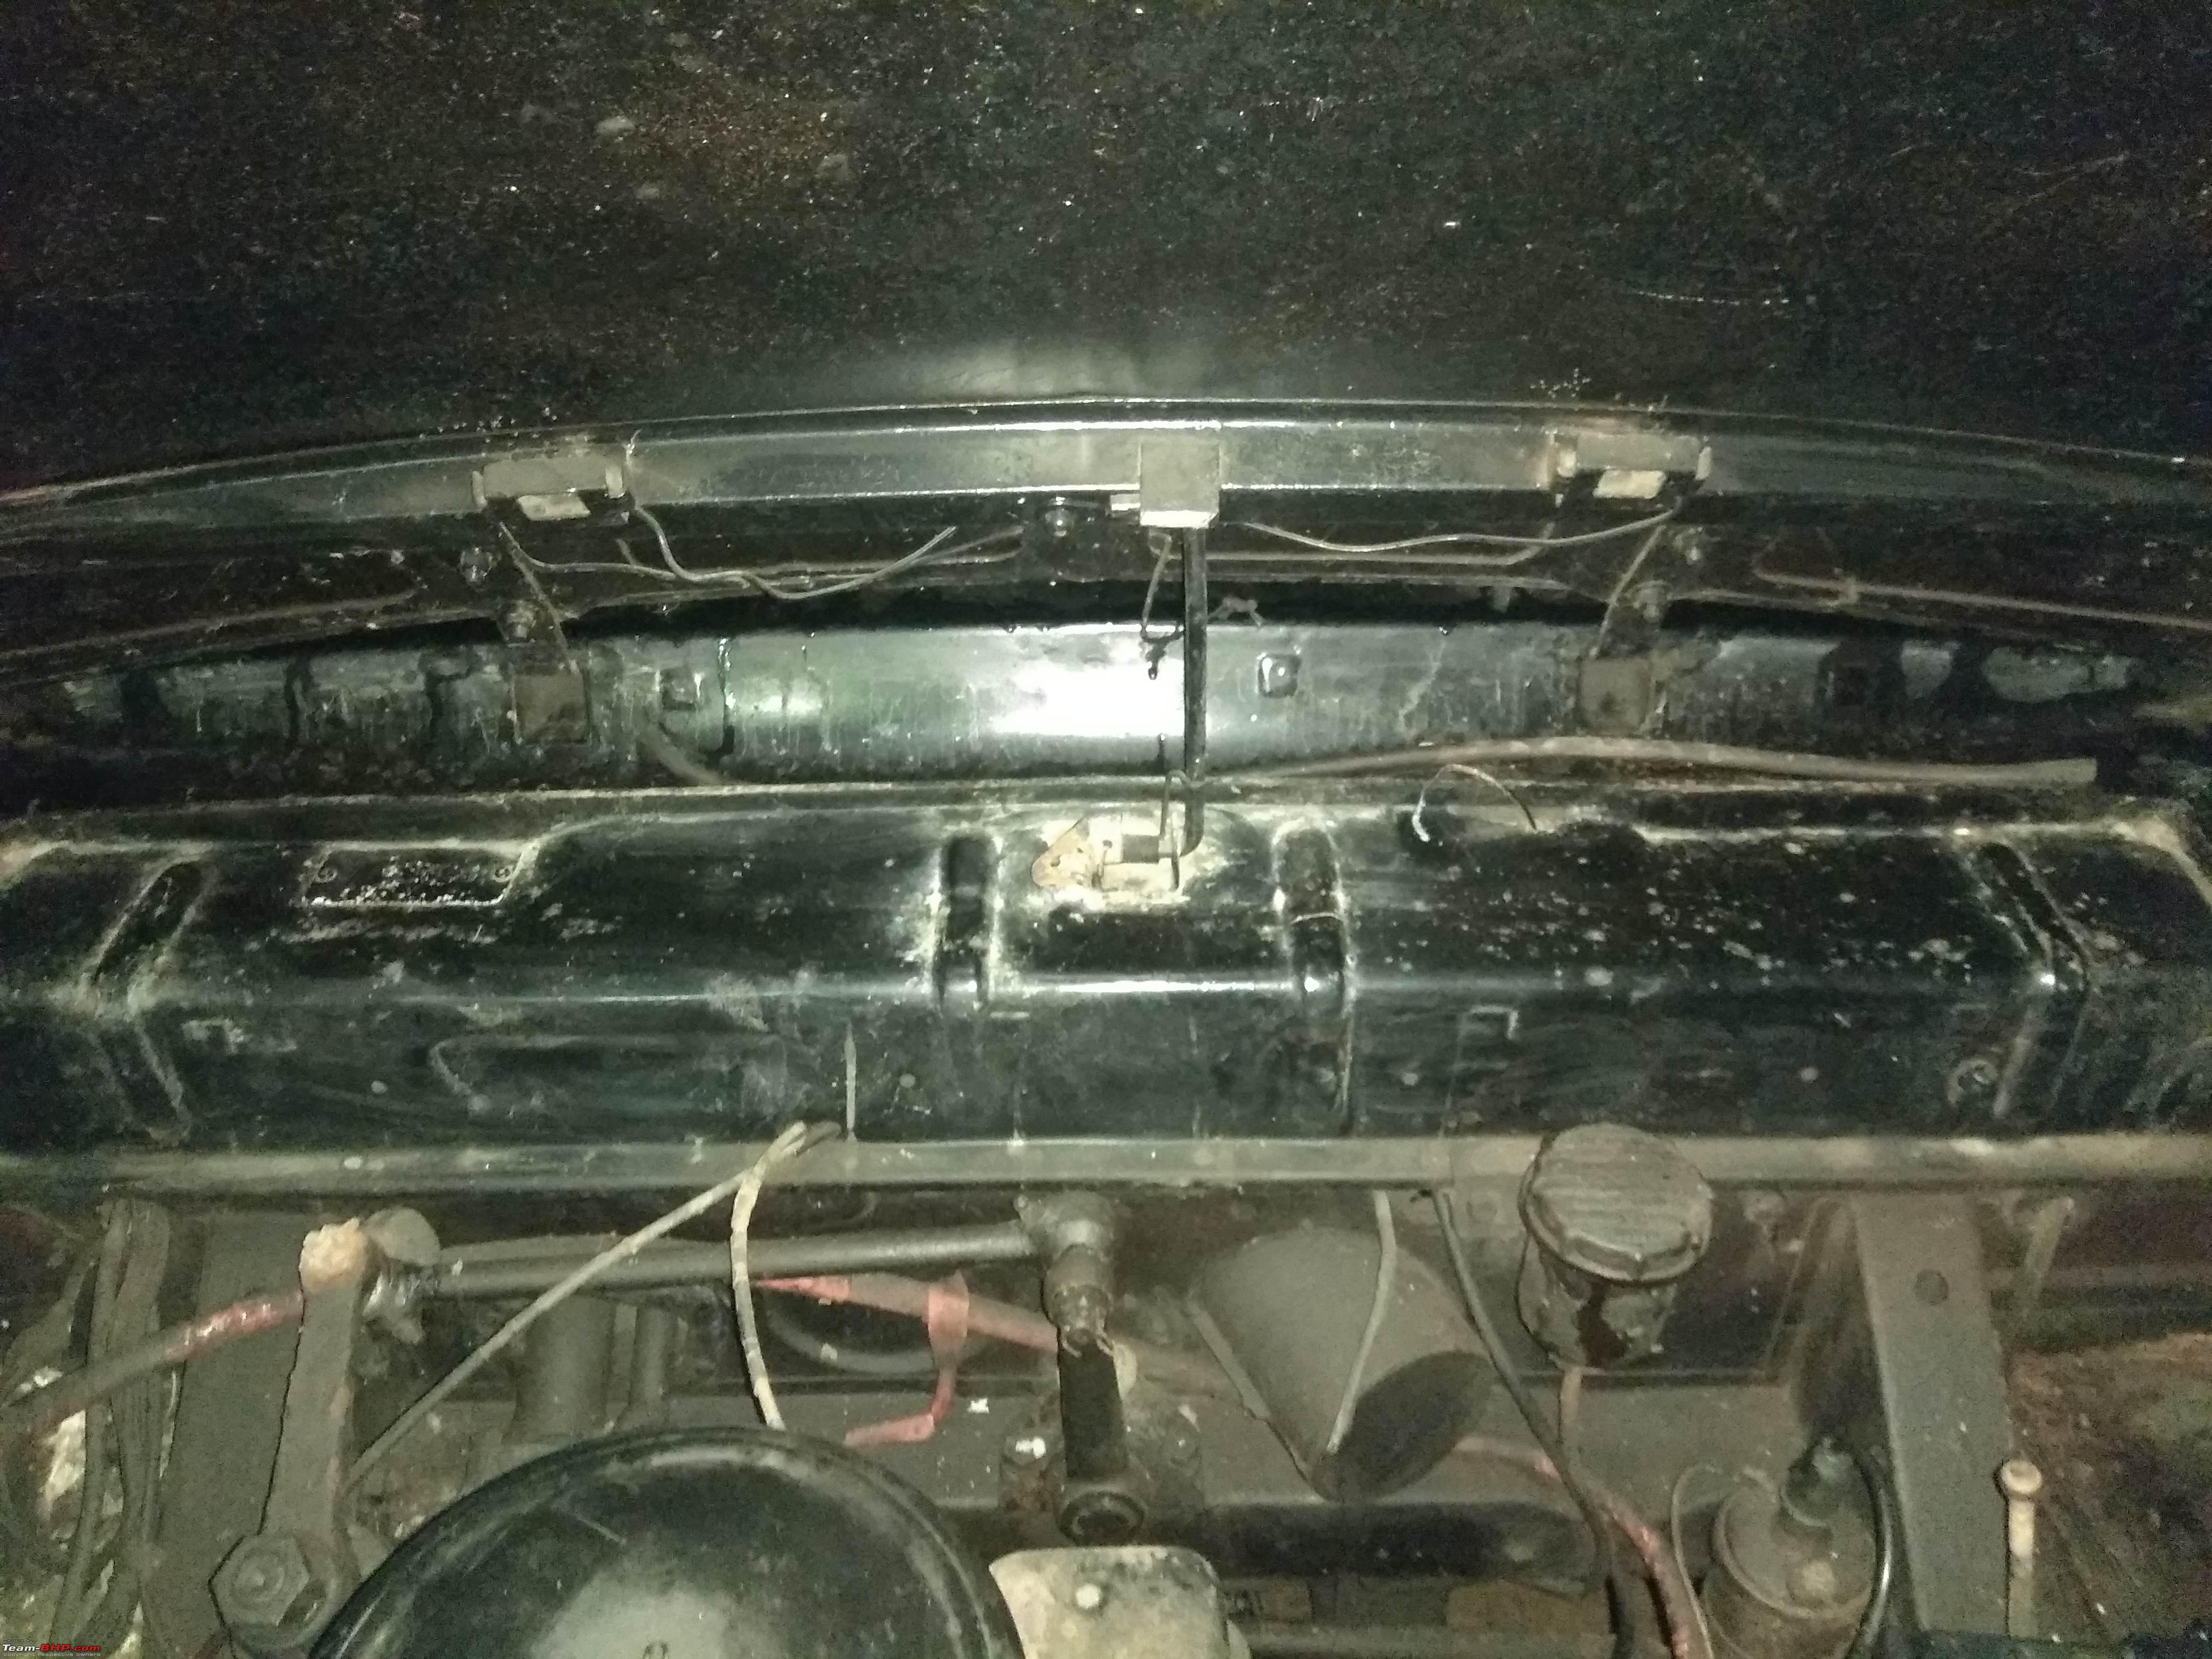 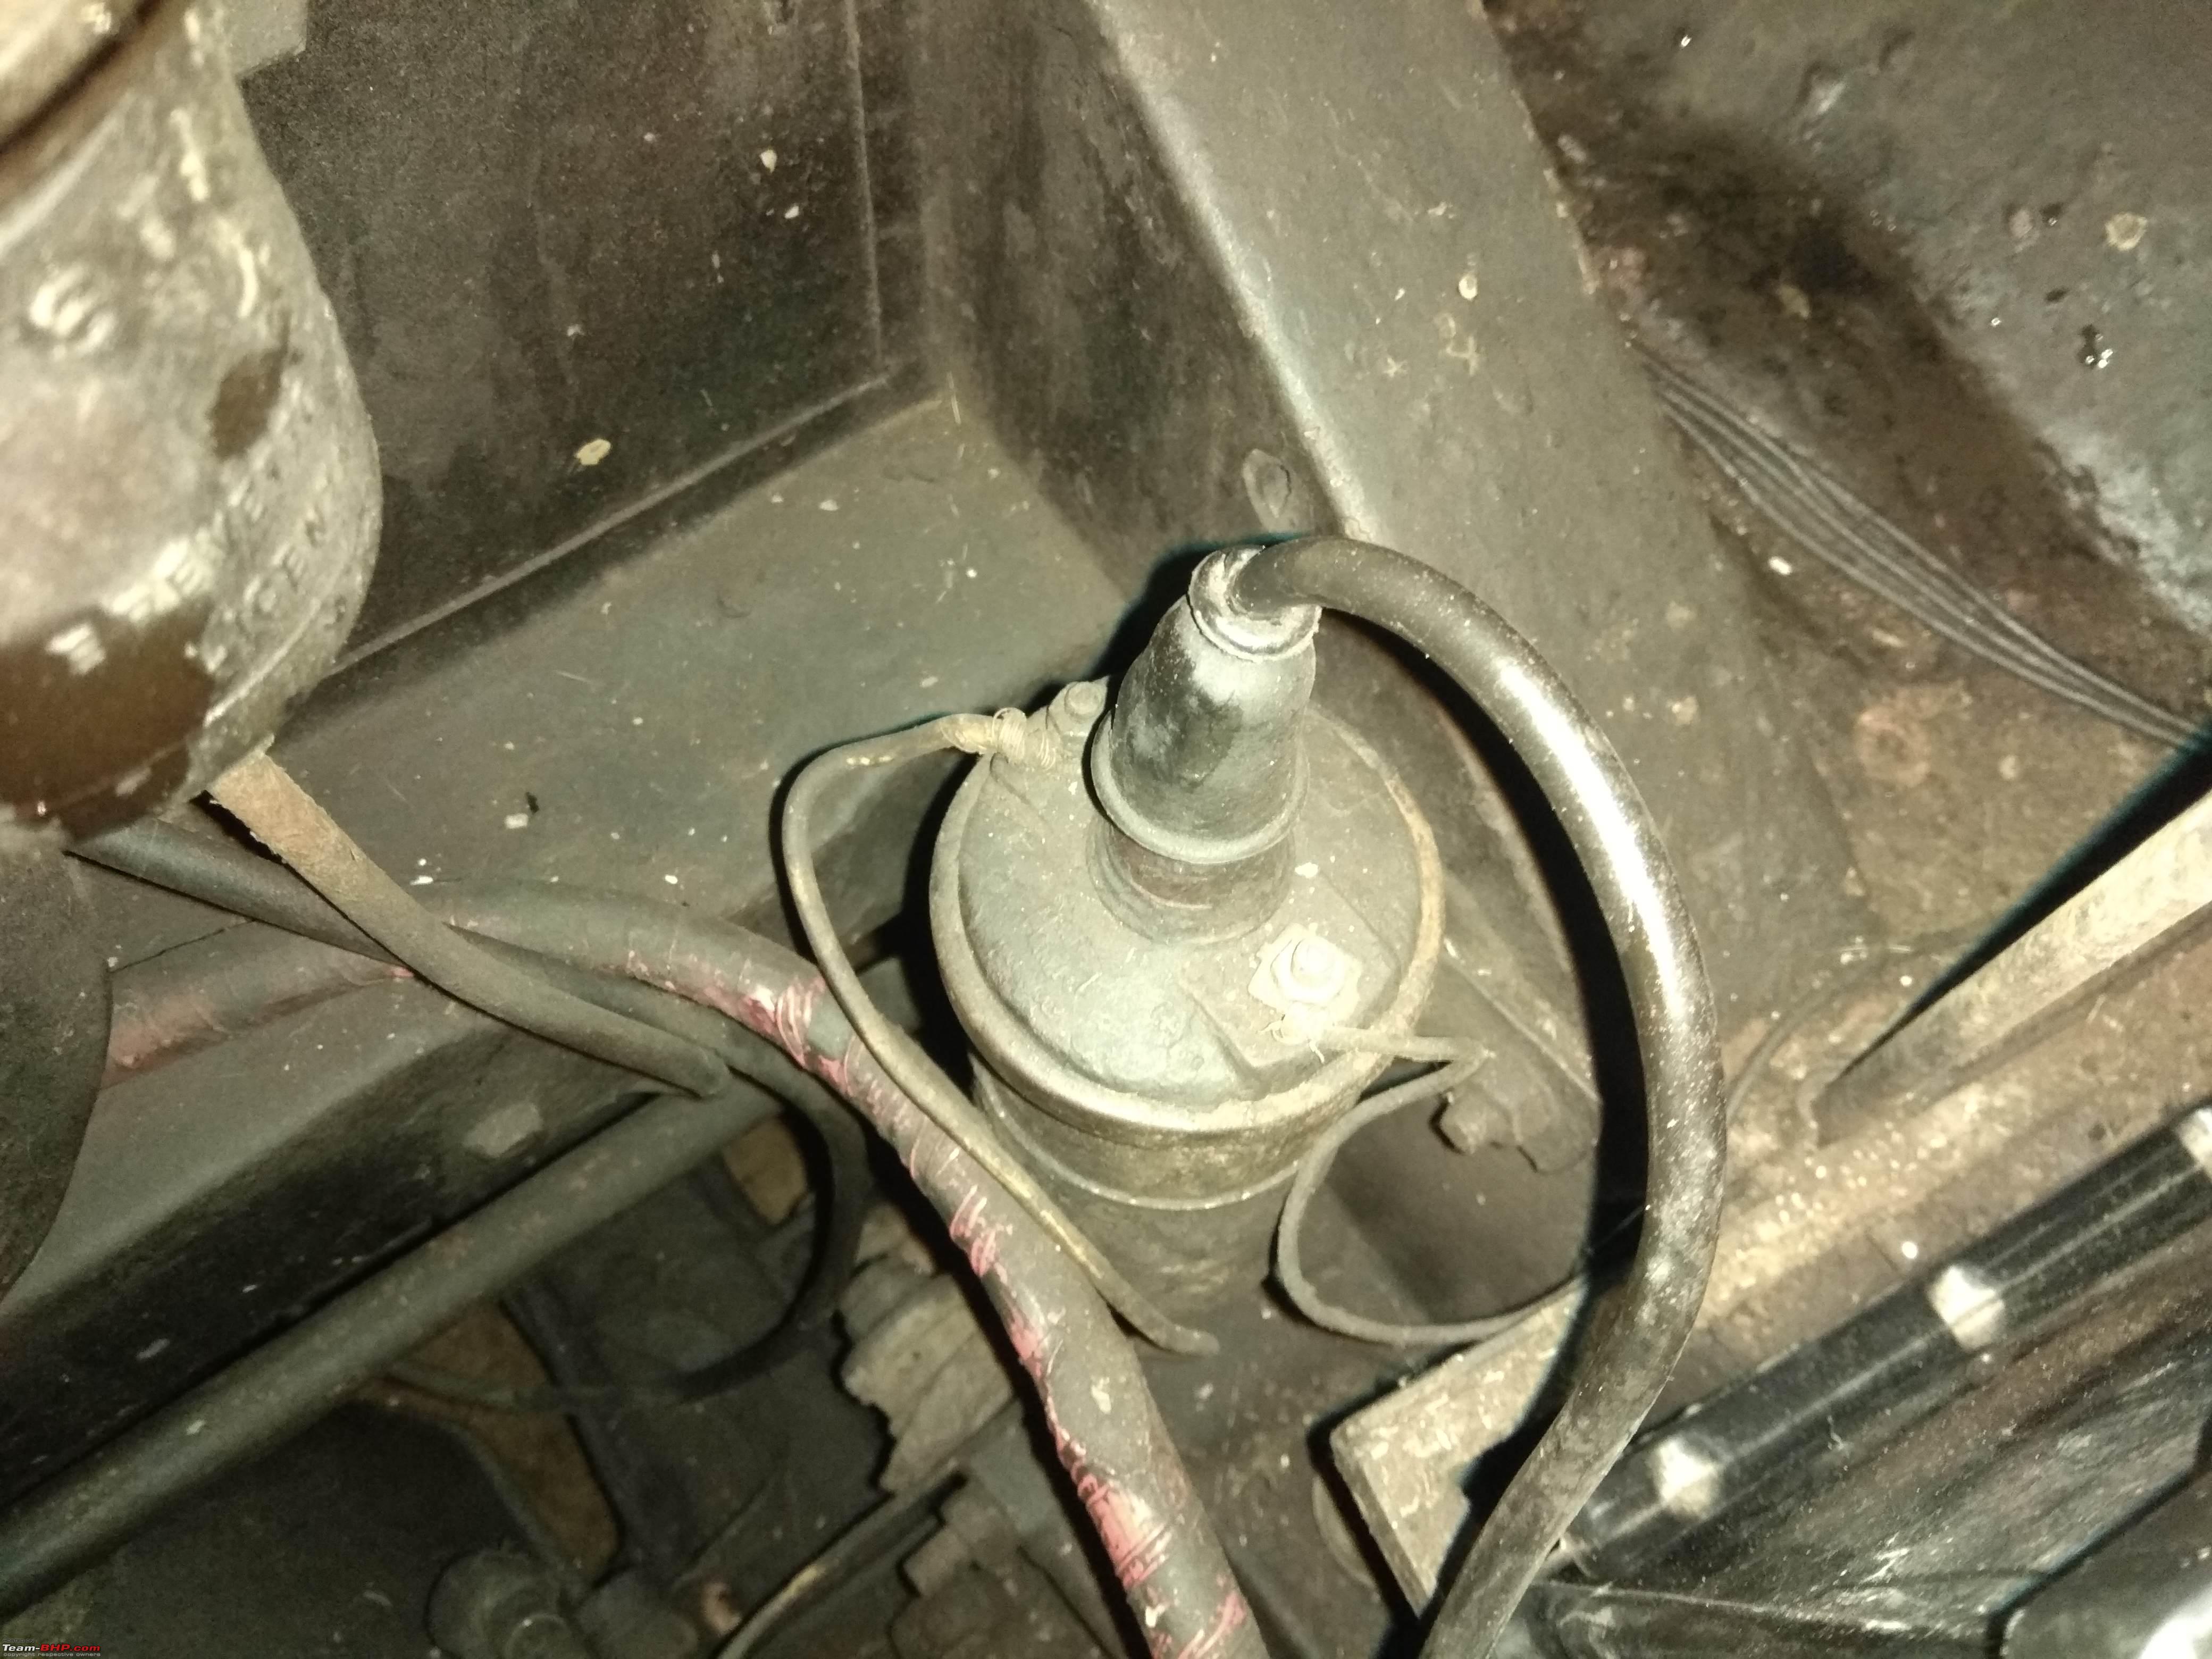 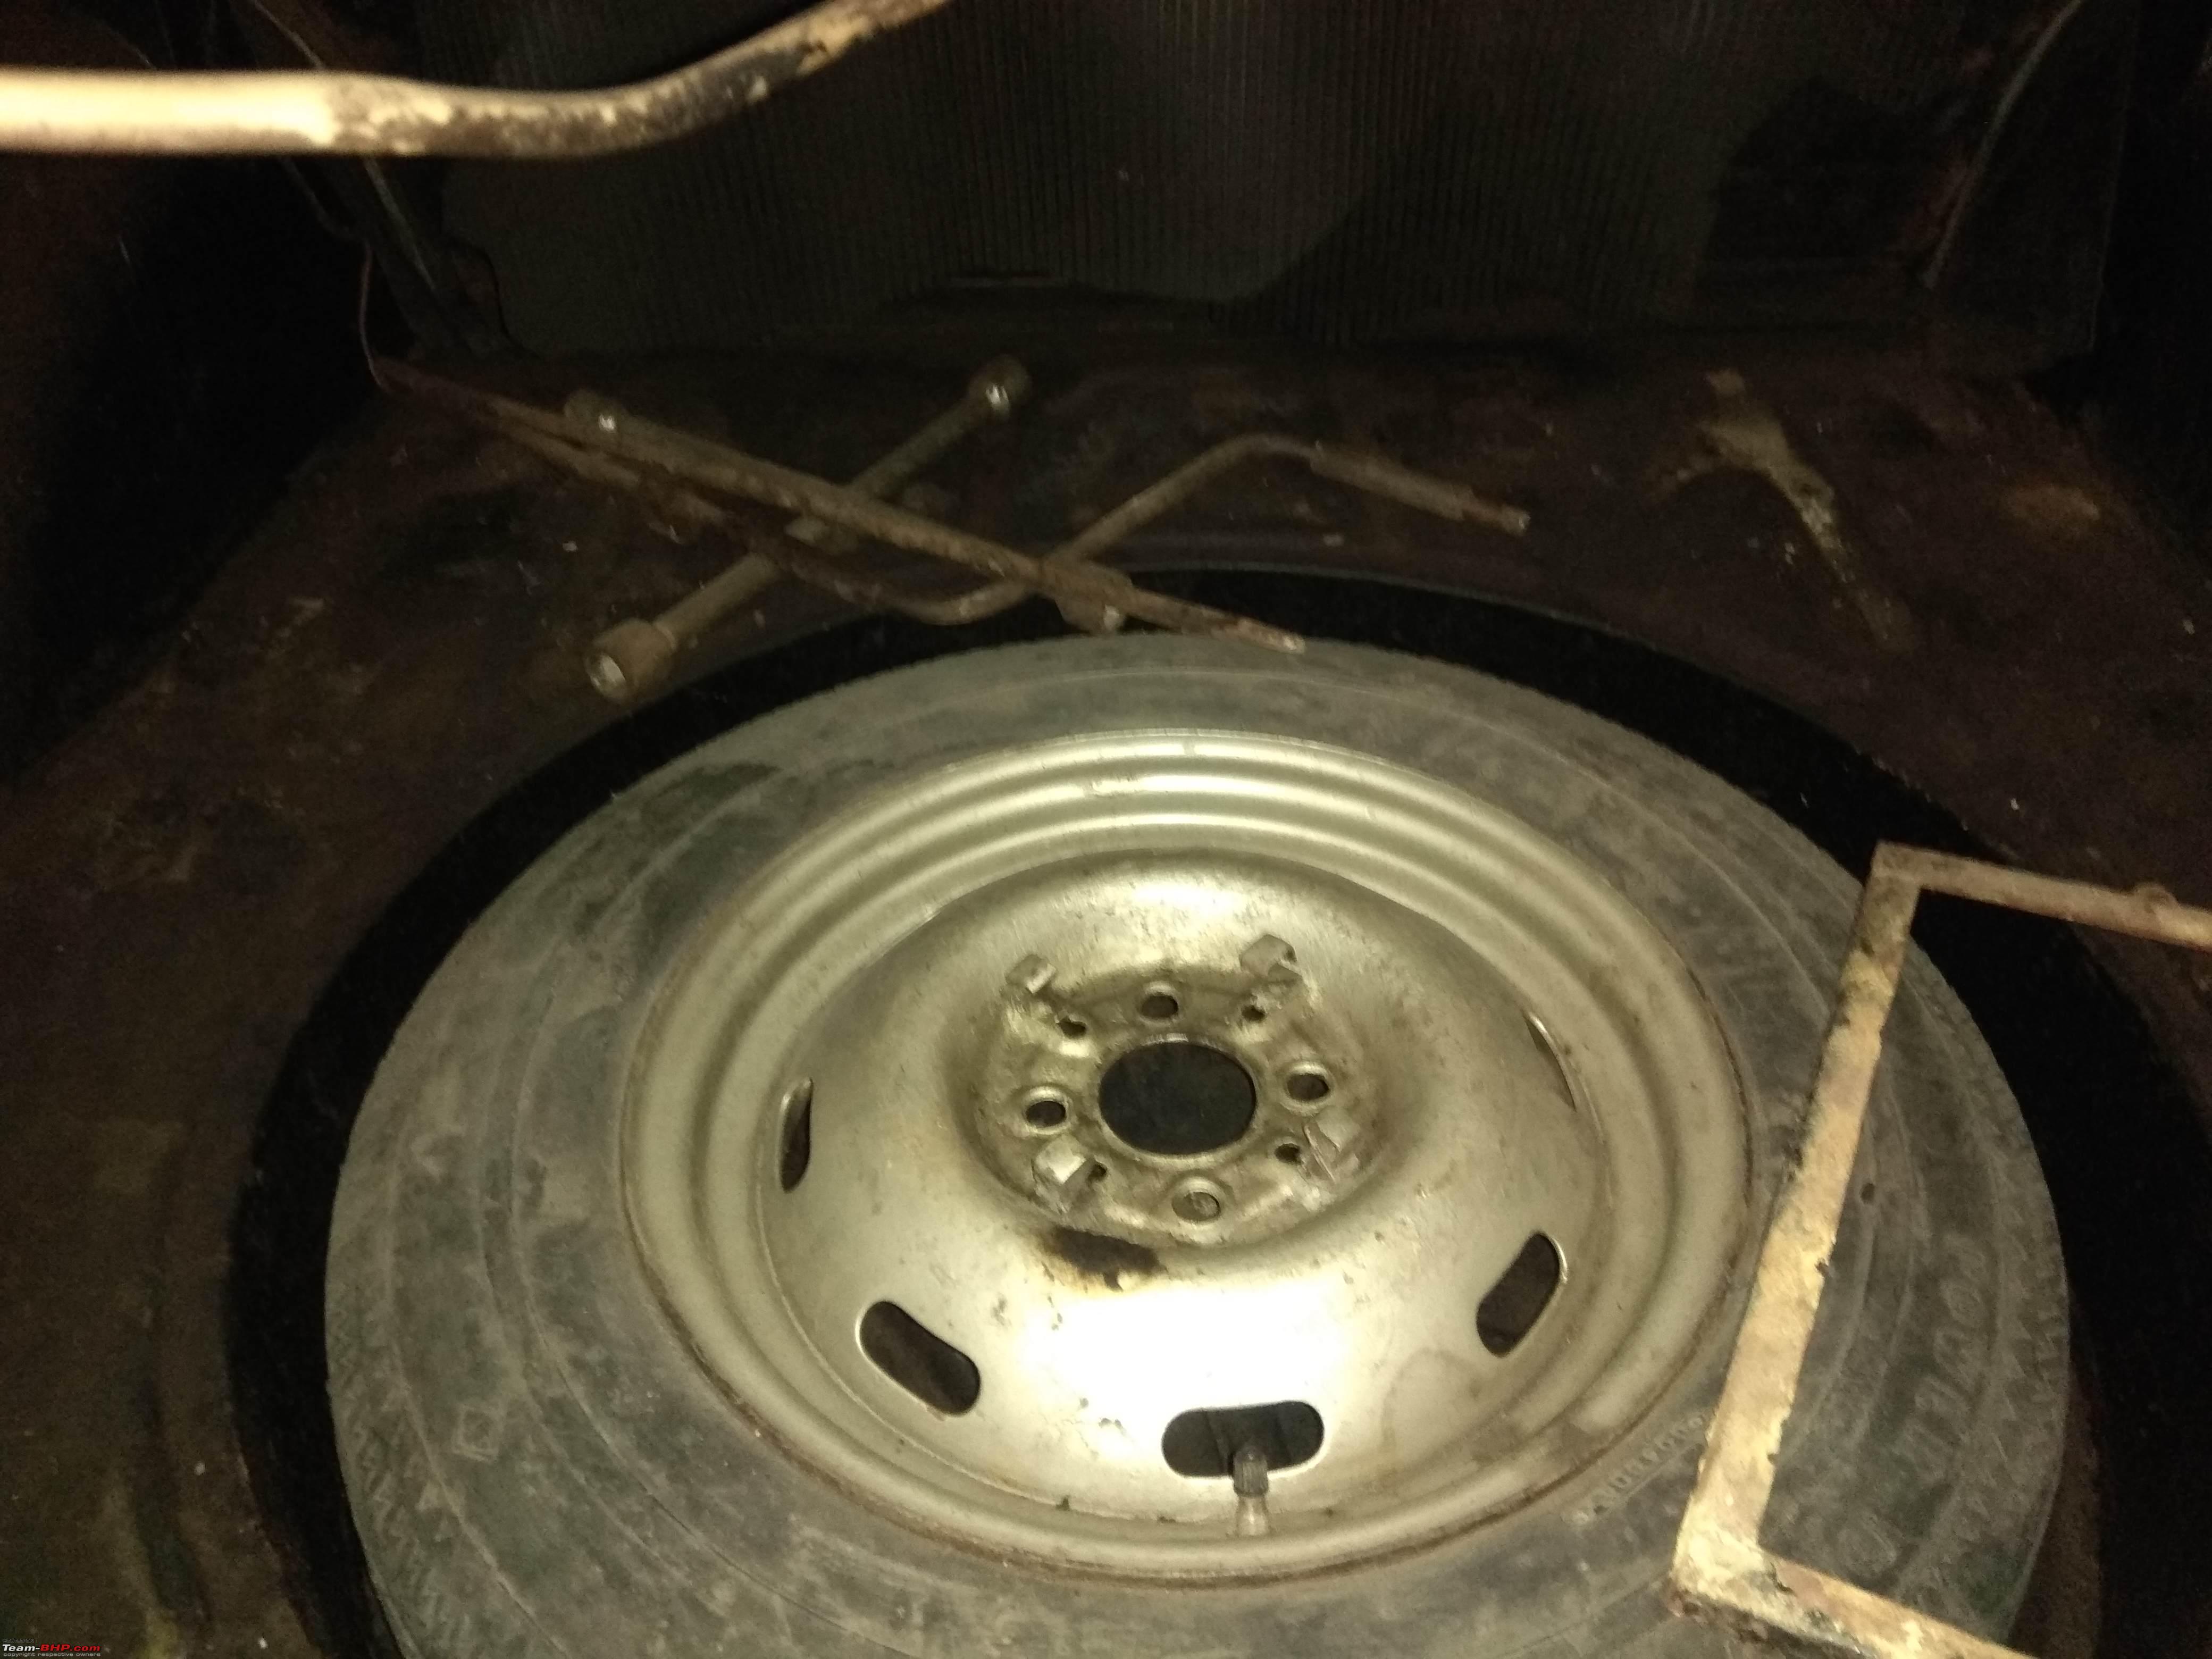 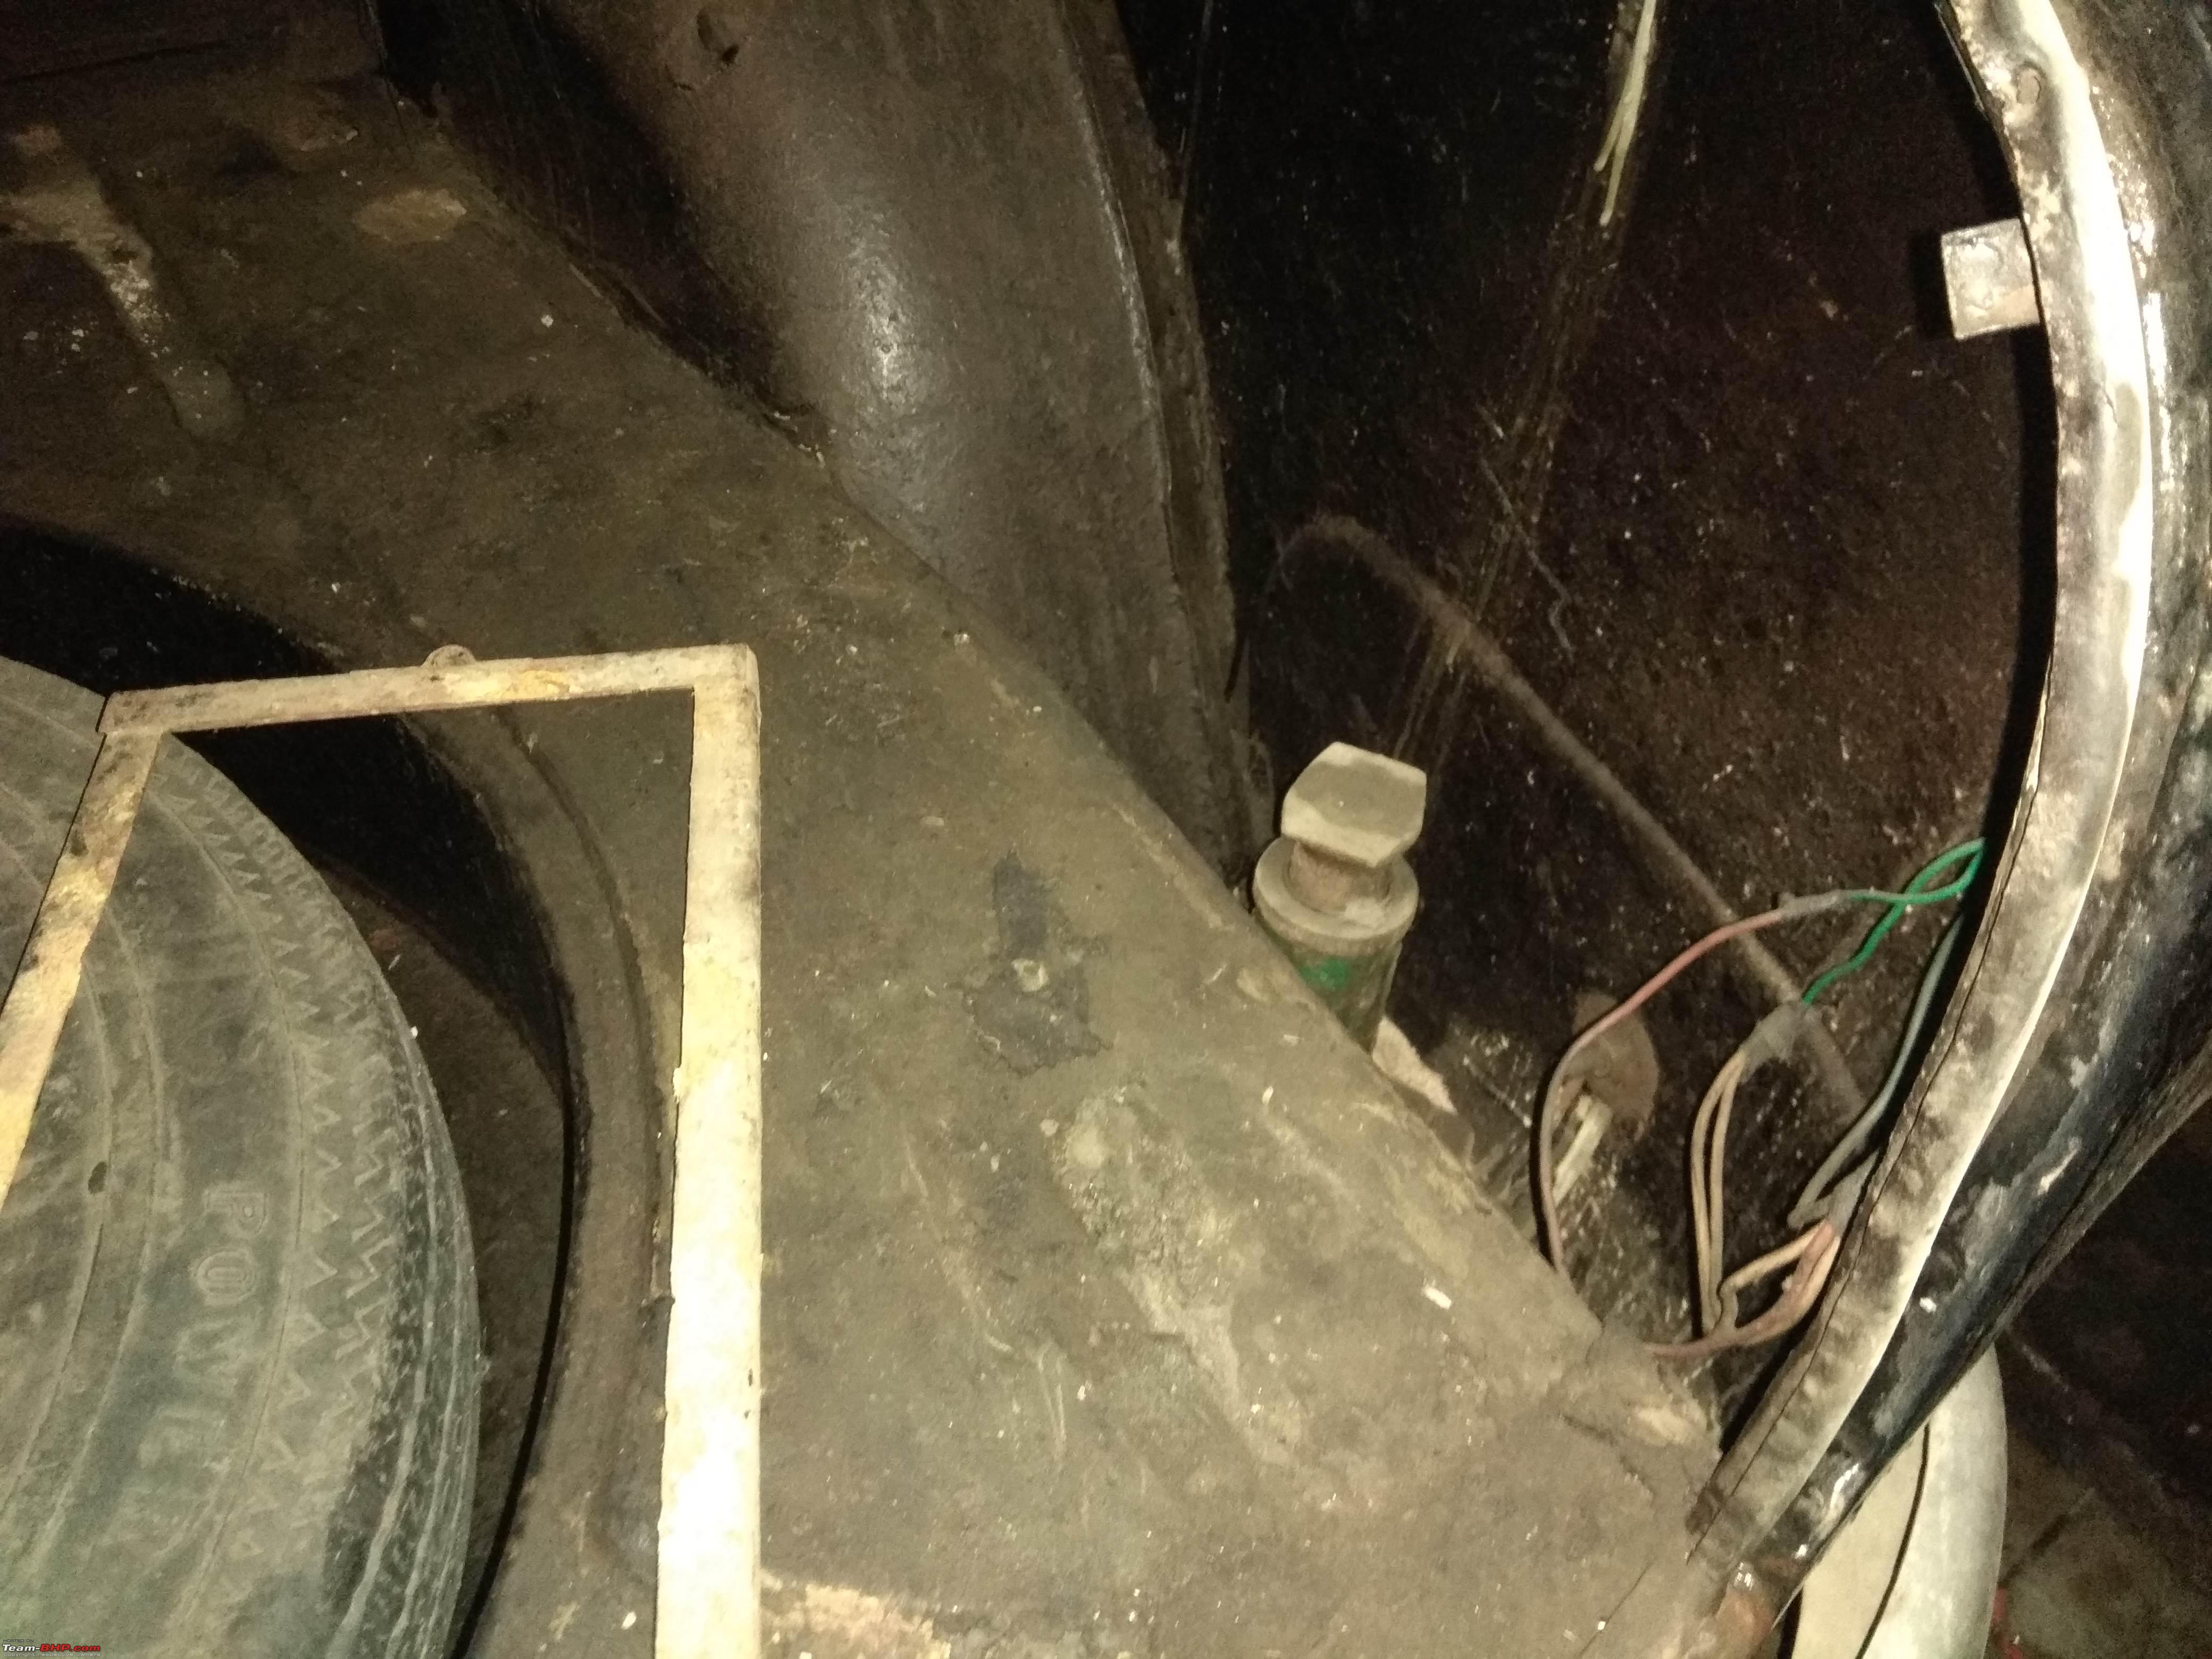 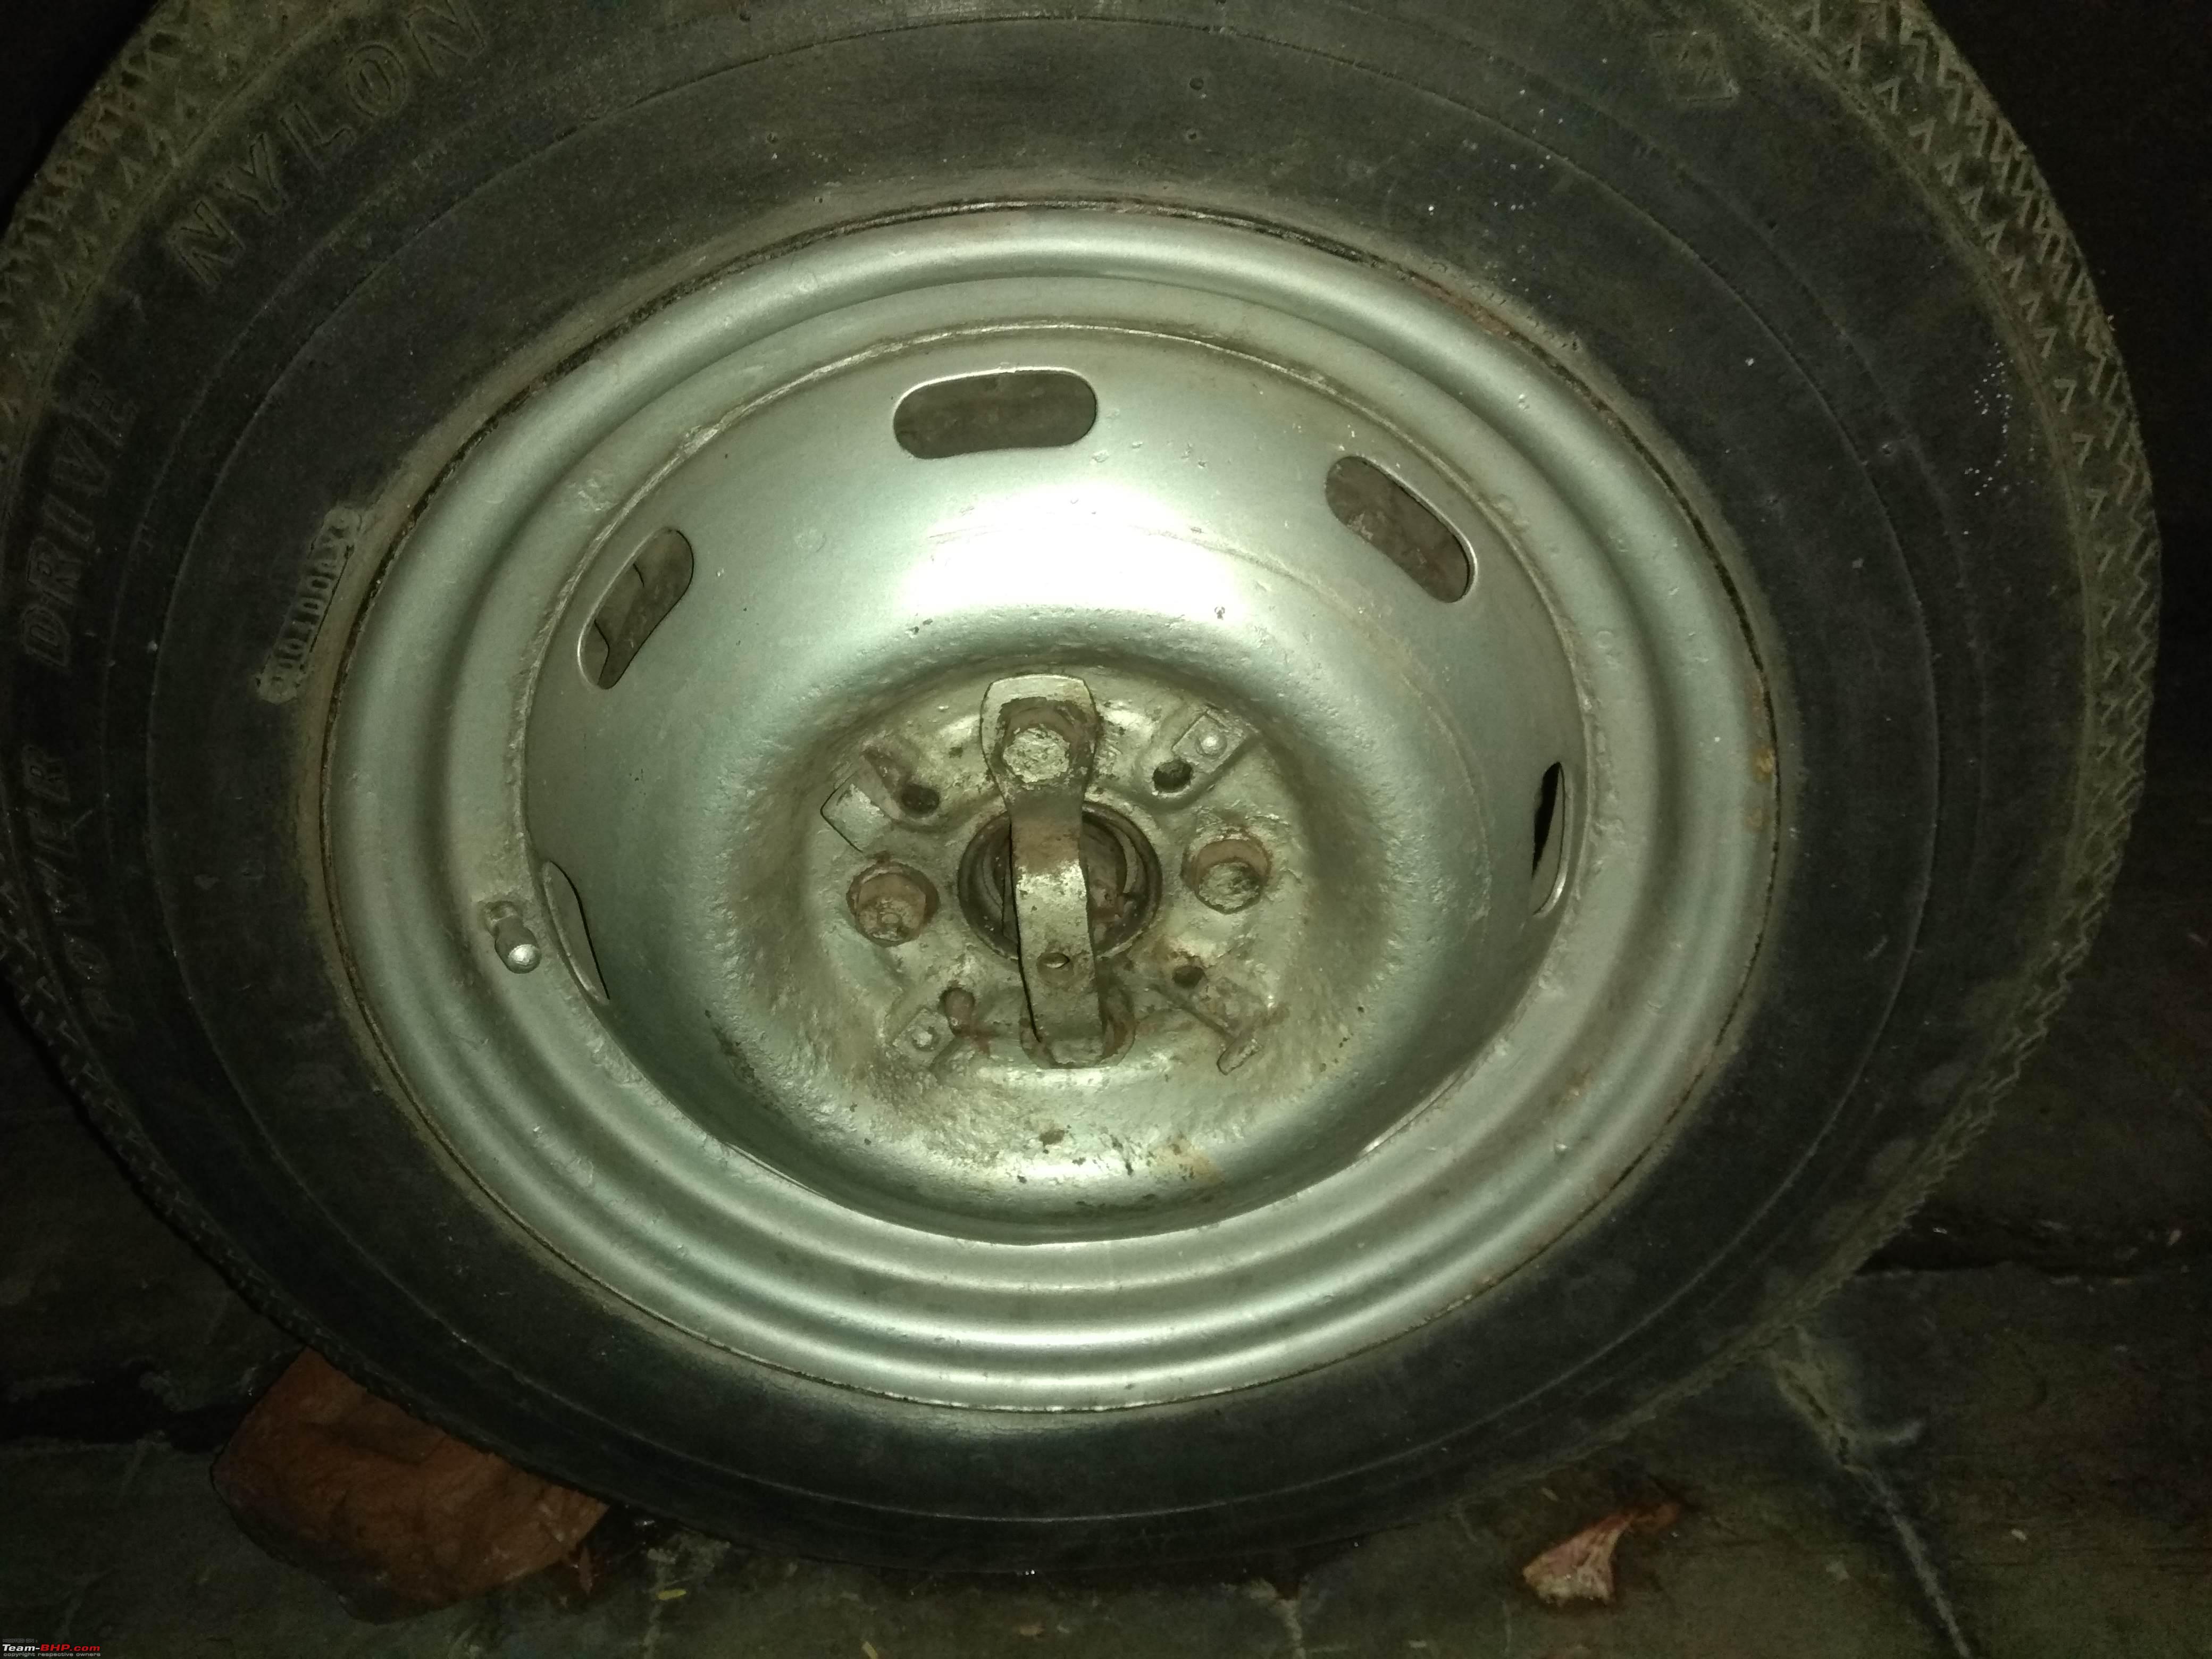 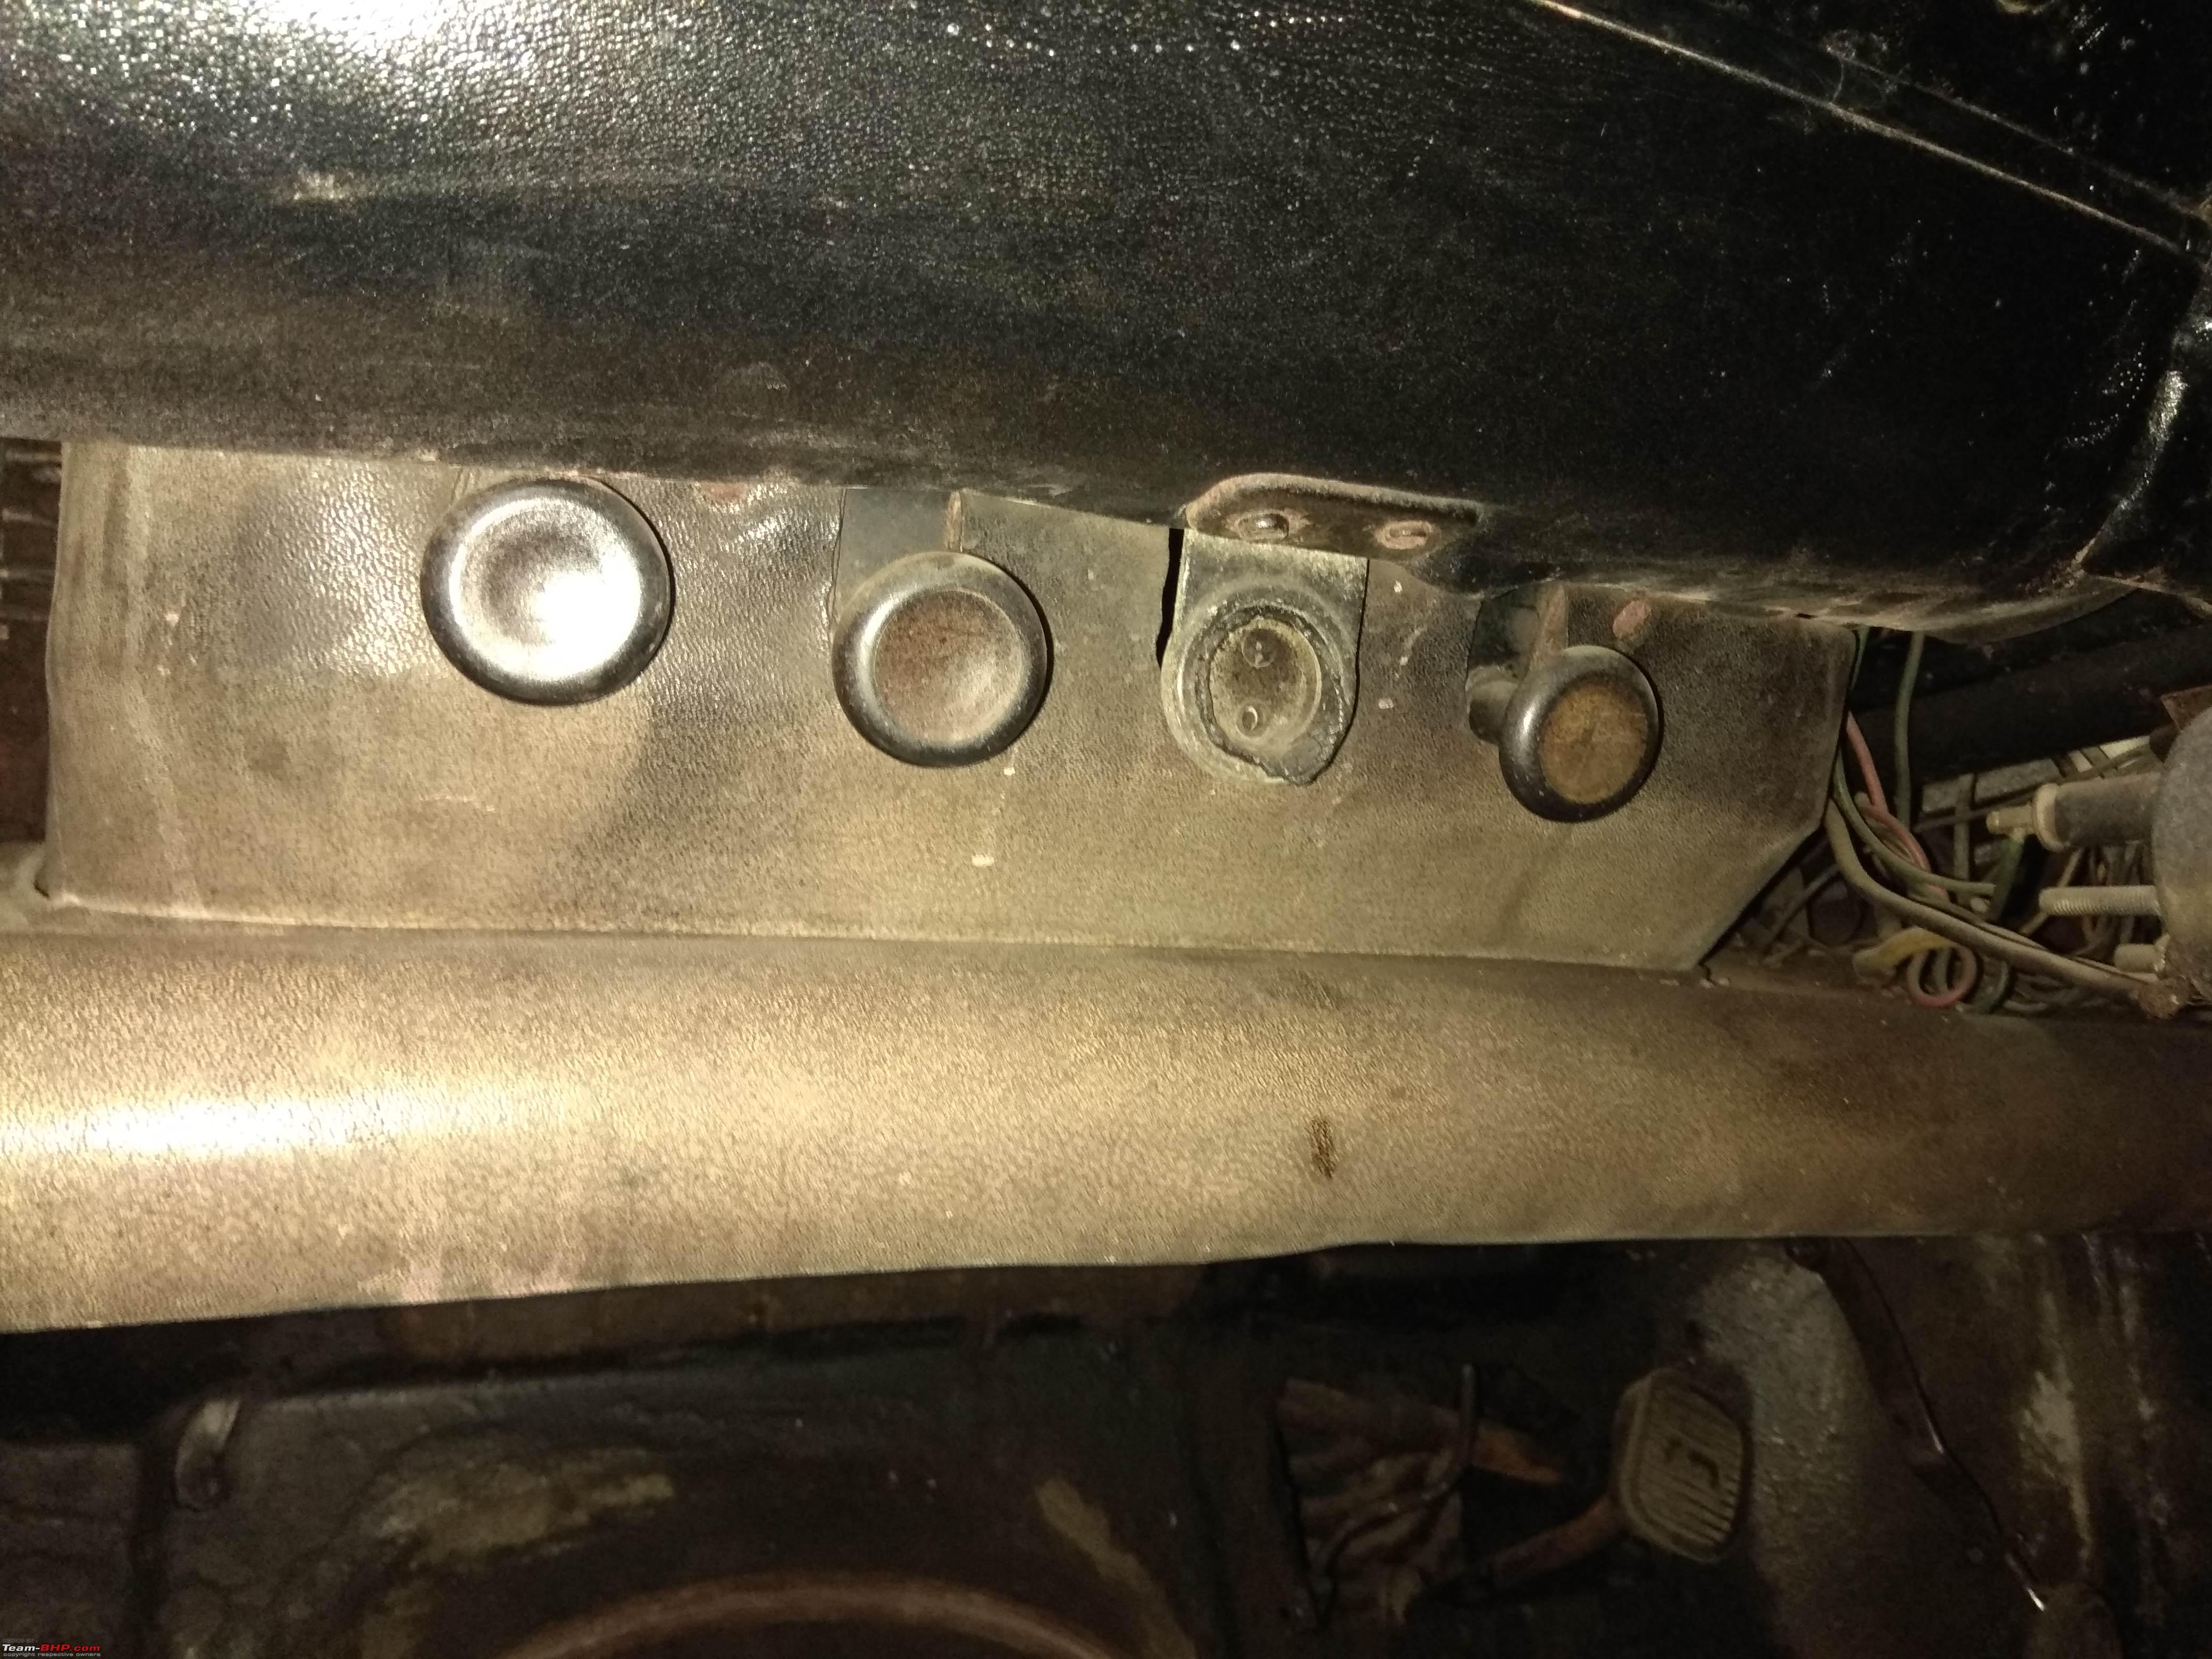 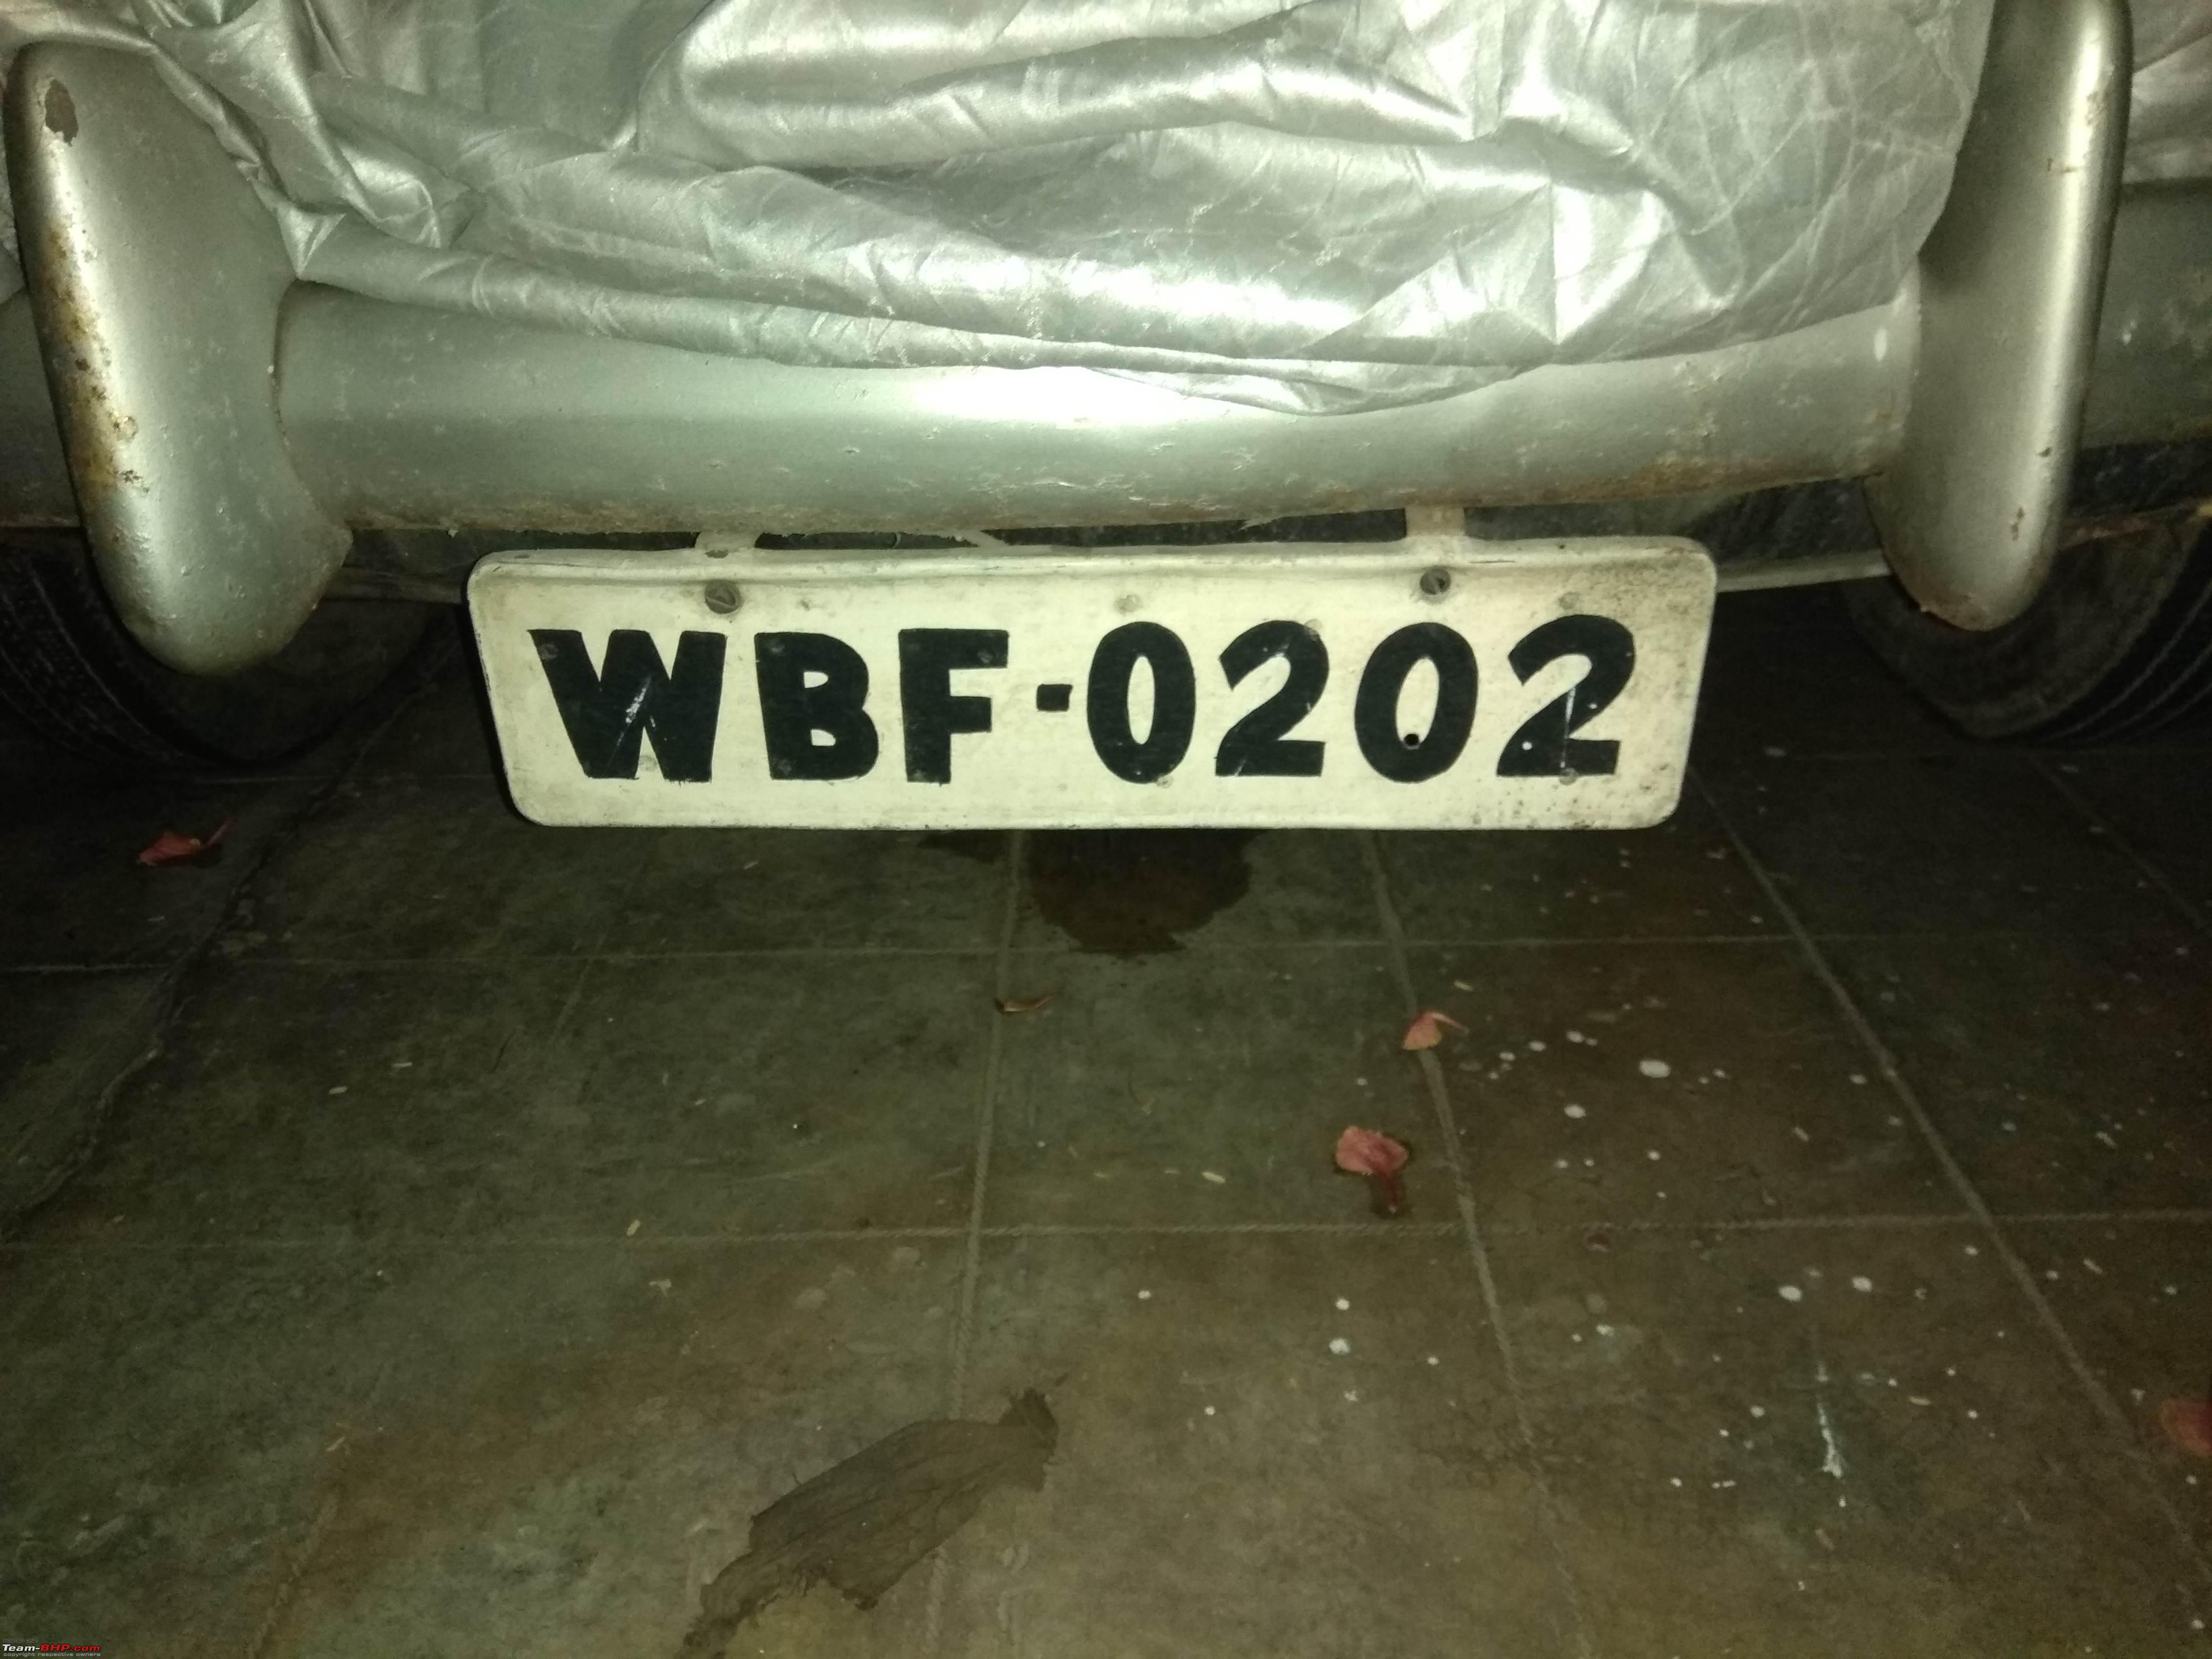 After drying 202, i covered her for the night & left my friend's place. Last edited by mbz180 : 1st April 2019 at 12:17. Reason: Spelling errors |

|  (38)
Thanks (38)
Thanks
|
| The following 38 BHPians Thank mbz180 for this useful post: | --gKrish--, Aditya, Babyhindusthan, BopsKA12, bvasista, Cyborg, dailydriver, Dani7766, darklord, funkykar, Gansan, GTO, Hirohito, InControl, johy, karlosdeville, KartikeyaL, KPS, KrisTvpm, Leoshashi, Lij, manishalive, paragsachania, Roy.S, RWD, Samba, Samfromindia, samsag12, SnS_12, Stanher, tharian, the mole, theexperthand, V.Narayan, v12, vaasu, VaibhaoT, vaish9925 |
| |
|
1st April 2019, 16:15
| #2 |
| BHPian Join Date: Jan 2010 Location: Kolkata
Posts: 894
Thanked: 1,027 Times
| re: Indo-Italian PAL: 1963 Fiat 1100 Super Select "Bella" I pondered over the next 10 days on what the next course of action for 202. She seemed to be a fairly solid car, thankfully with difficult trims like the aluminium side trims, aluminium door handles, headlamp bezels, bumper units etc. present. The body lines looked good, I couldn't see any signs of rust under the wheel arches & other usual areas. I had a few options: 1) My friends suggested I should clean her up, sort her out mechanically & use her. I could always go in for more extensive work later. 2) I could have her mechanically sorted out with an overcoat of black & a bit of interior work & use her. 3) I could go for a full blown restoration. What concerned me was the floor boards. While not too bad, I could see there were tiny holes in it, not good. Anyway, I chose option 2, mechanicals, overcoat & freshen up the interiors. A few days later 202 was again on a flatbed, on her way to Mr. Rahul Sircar's workshop. Over the next few days, the fuel pump, carb, etc. were taken apart, serviced & fitted back. The brakes were checked, the old Fiat API system was in place. I was told that it will be changed to a Girling system; API parts were now of doubtful quality & the shape of the wheel cylinder buckets were notorious for leaking braking fluid. The tyres were just about okay to do a few short runs to check the fitness of the drive-train. On my routine Saturday visit to the workshop, I was surprised to hear the familiar sound of a Fiat engine, my Fiat's engine idling smoothly! By then the bonnet hood had been taken of to do a trial overcoat & we decided to drive 202 for the first time. Mr. Sircar himself initially drove the car, quite happy with the lack of whine from the transmission & differential & the steering feel but the brakes & gearshift were pretty poor. Another friend & I took 202 for a short spin later, encountering no problems. 202 on the road sans bonnet. 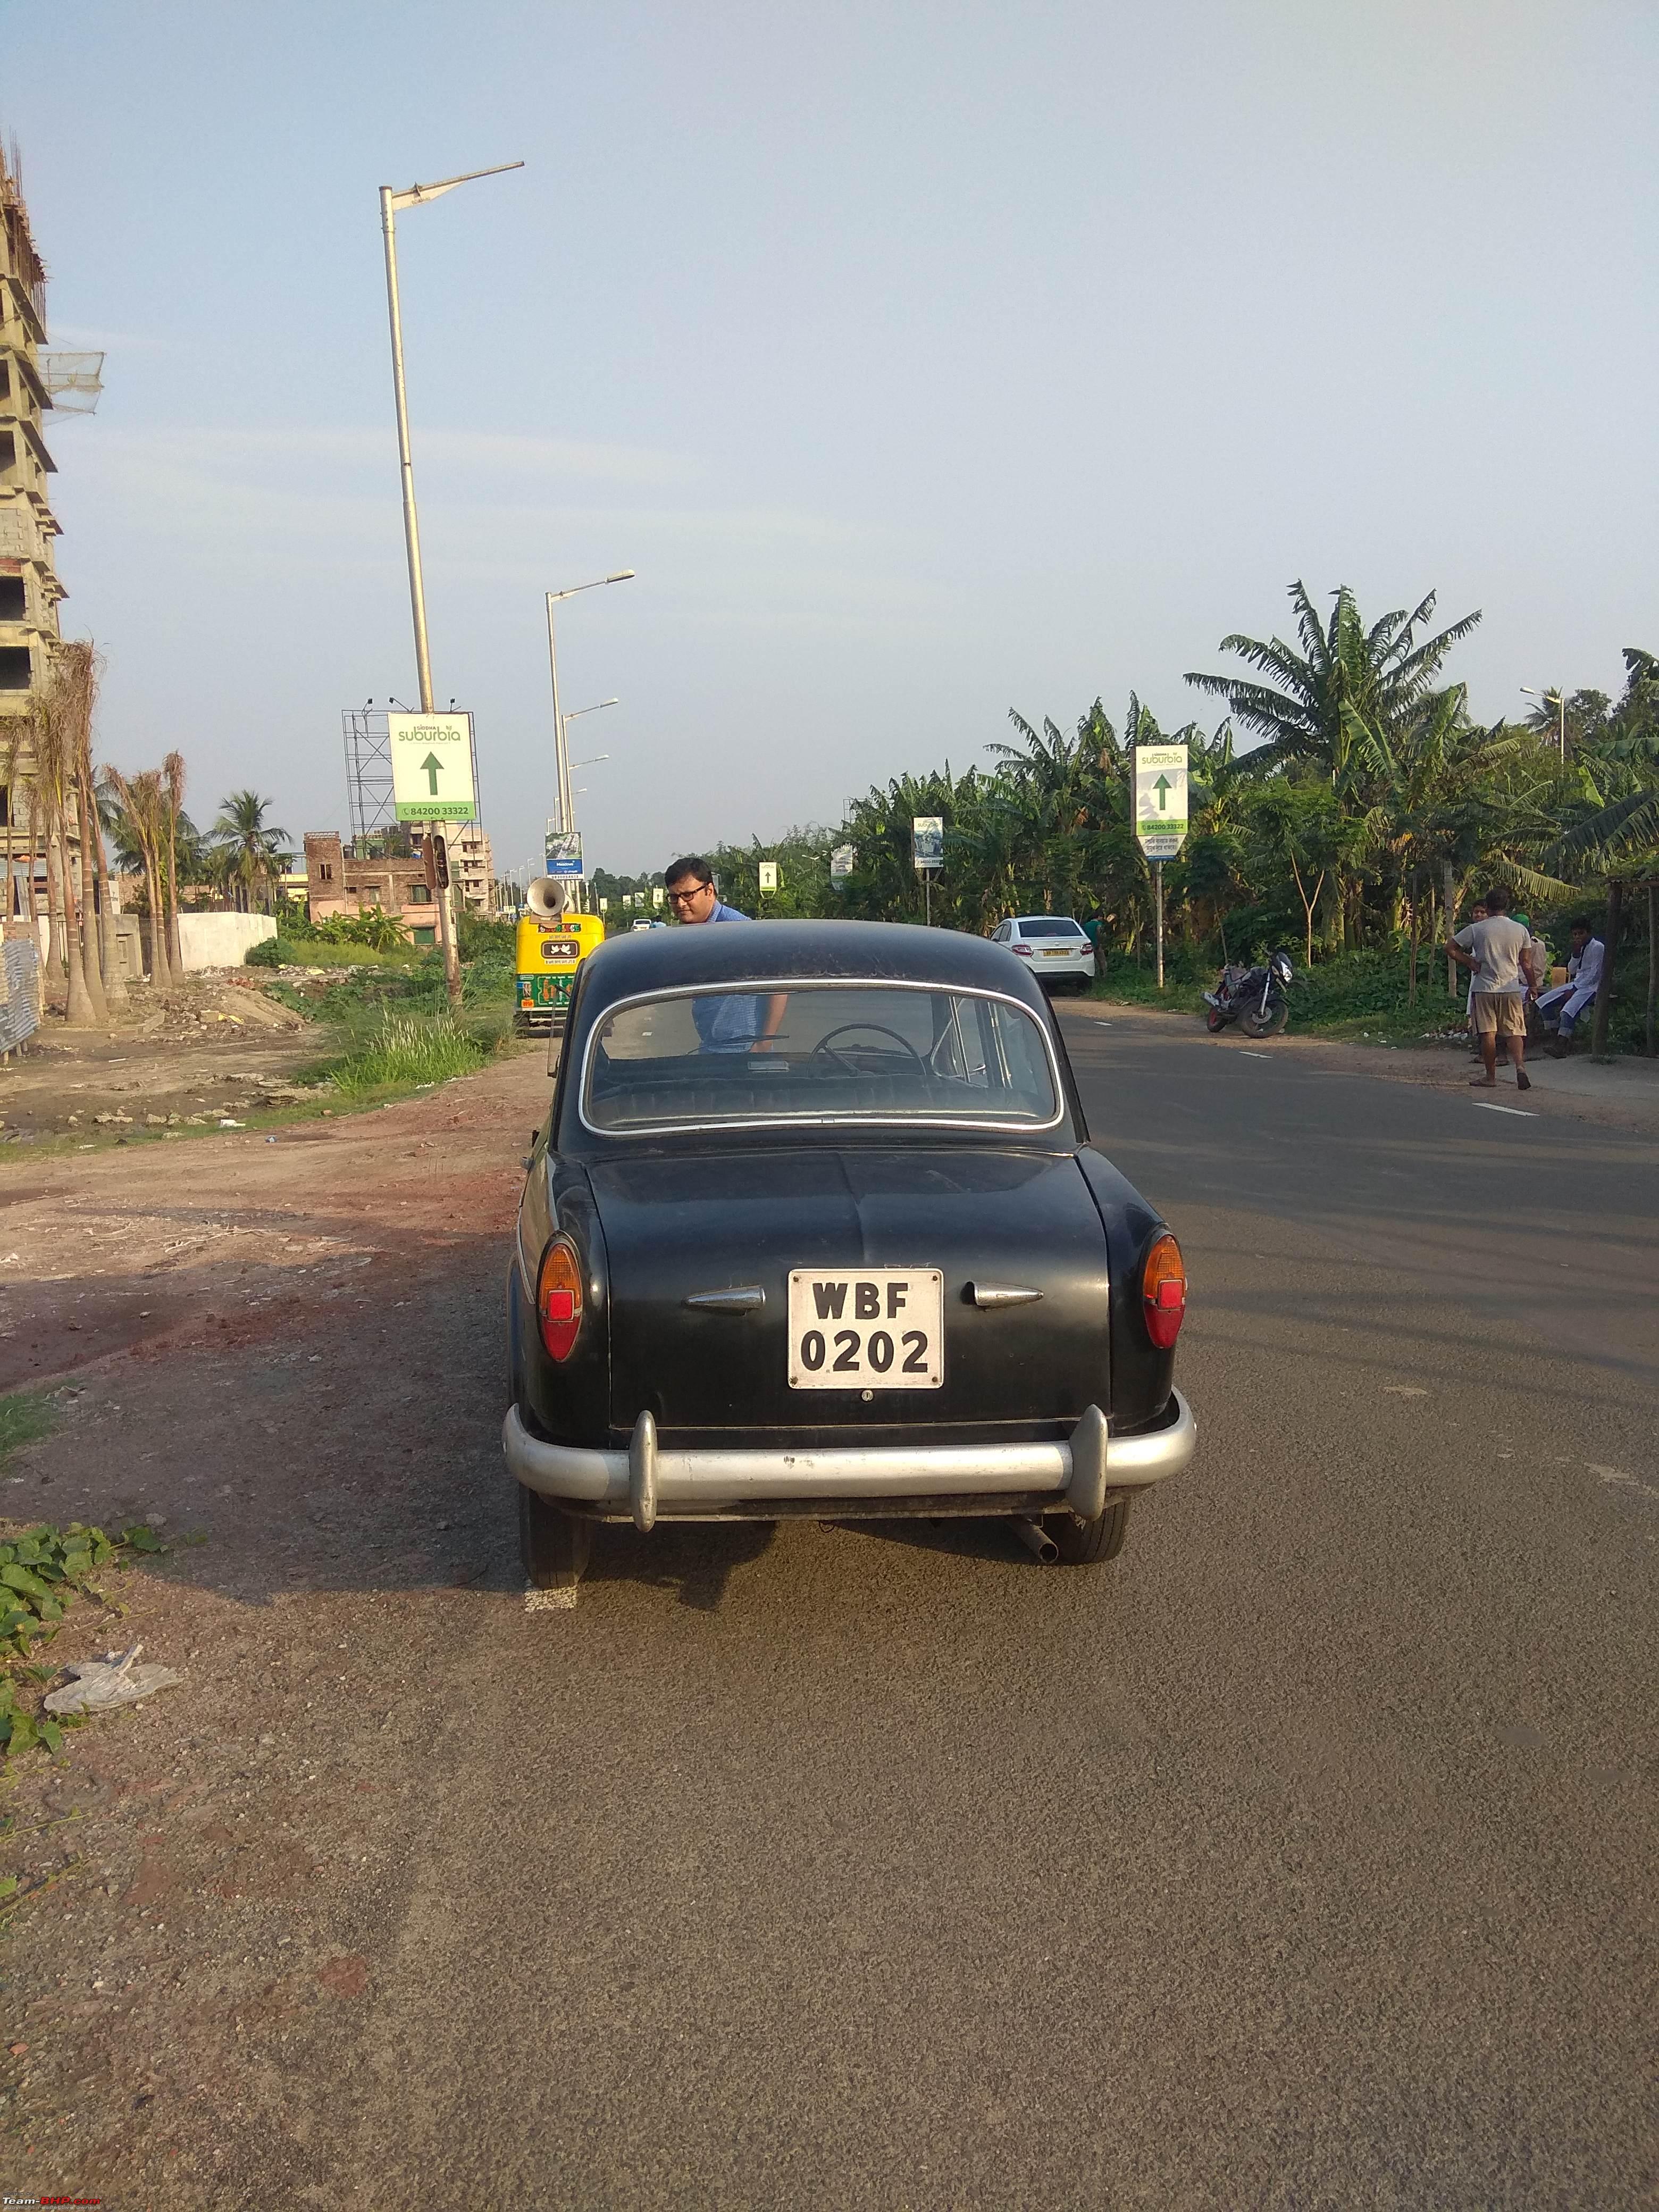 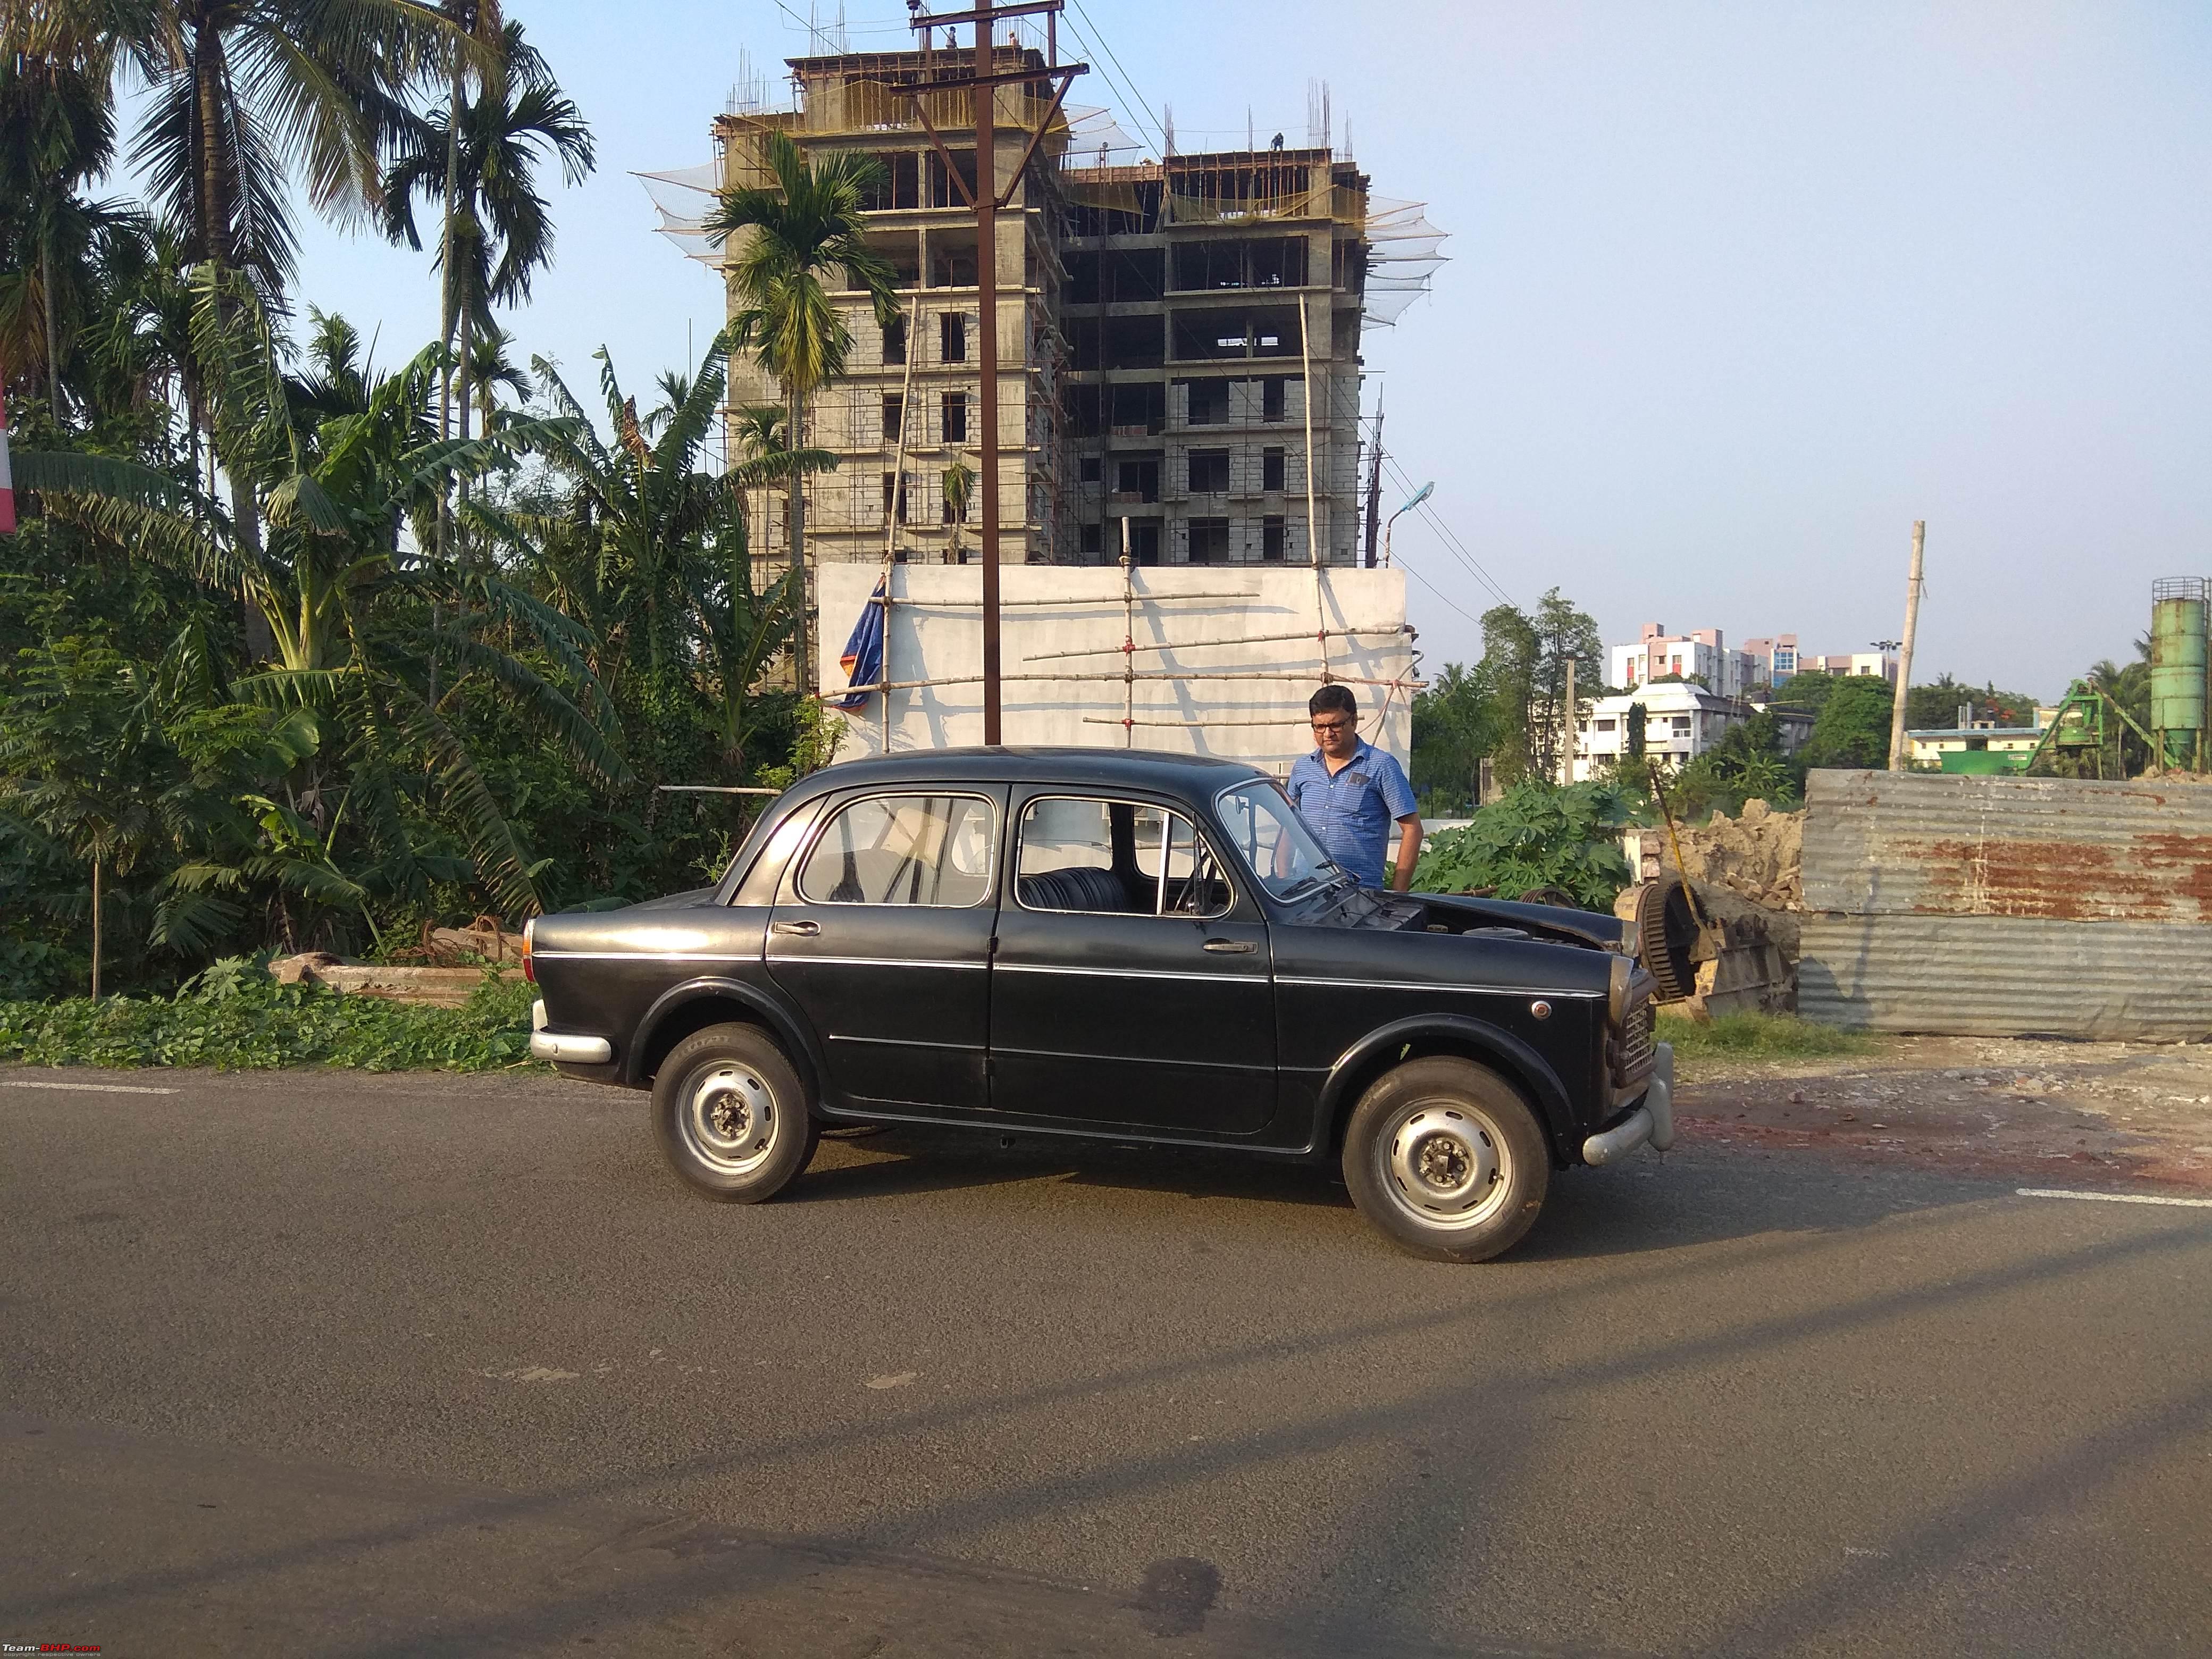 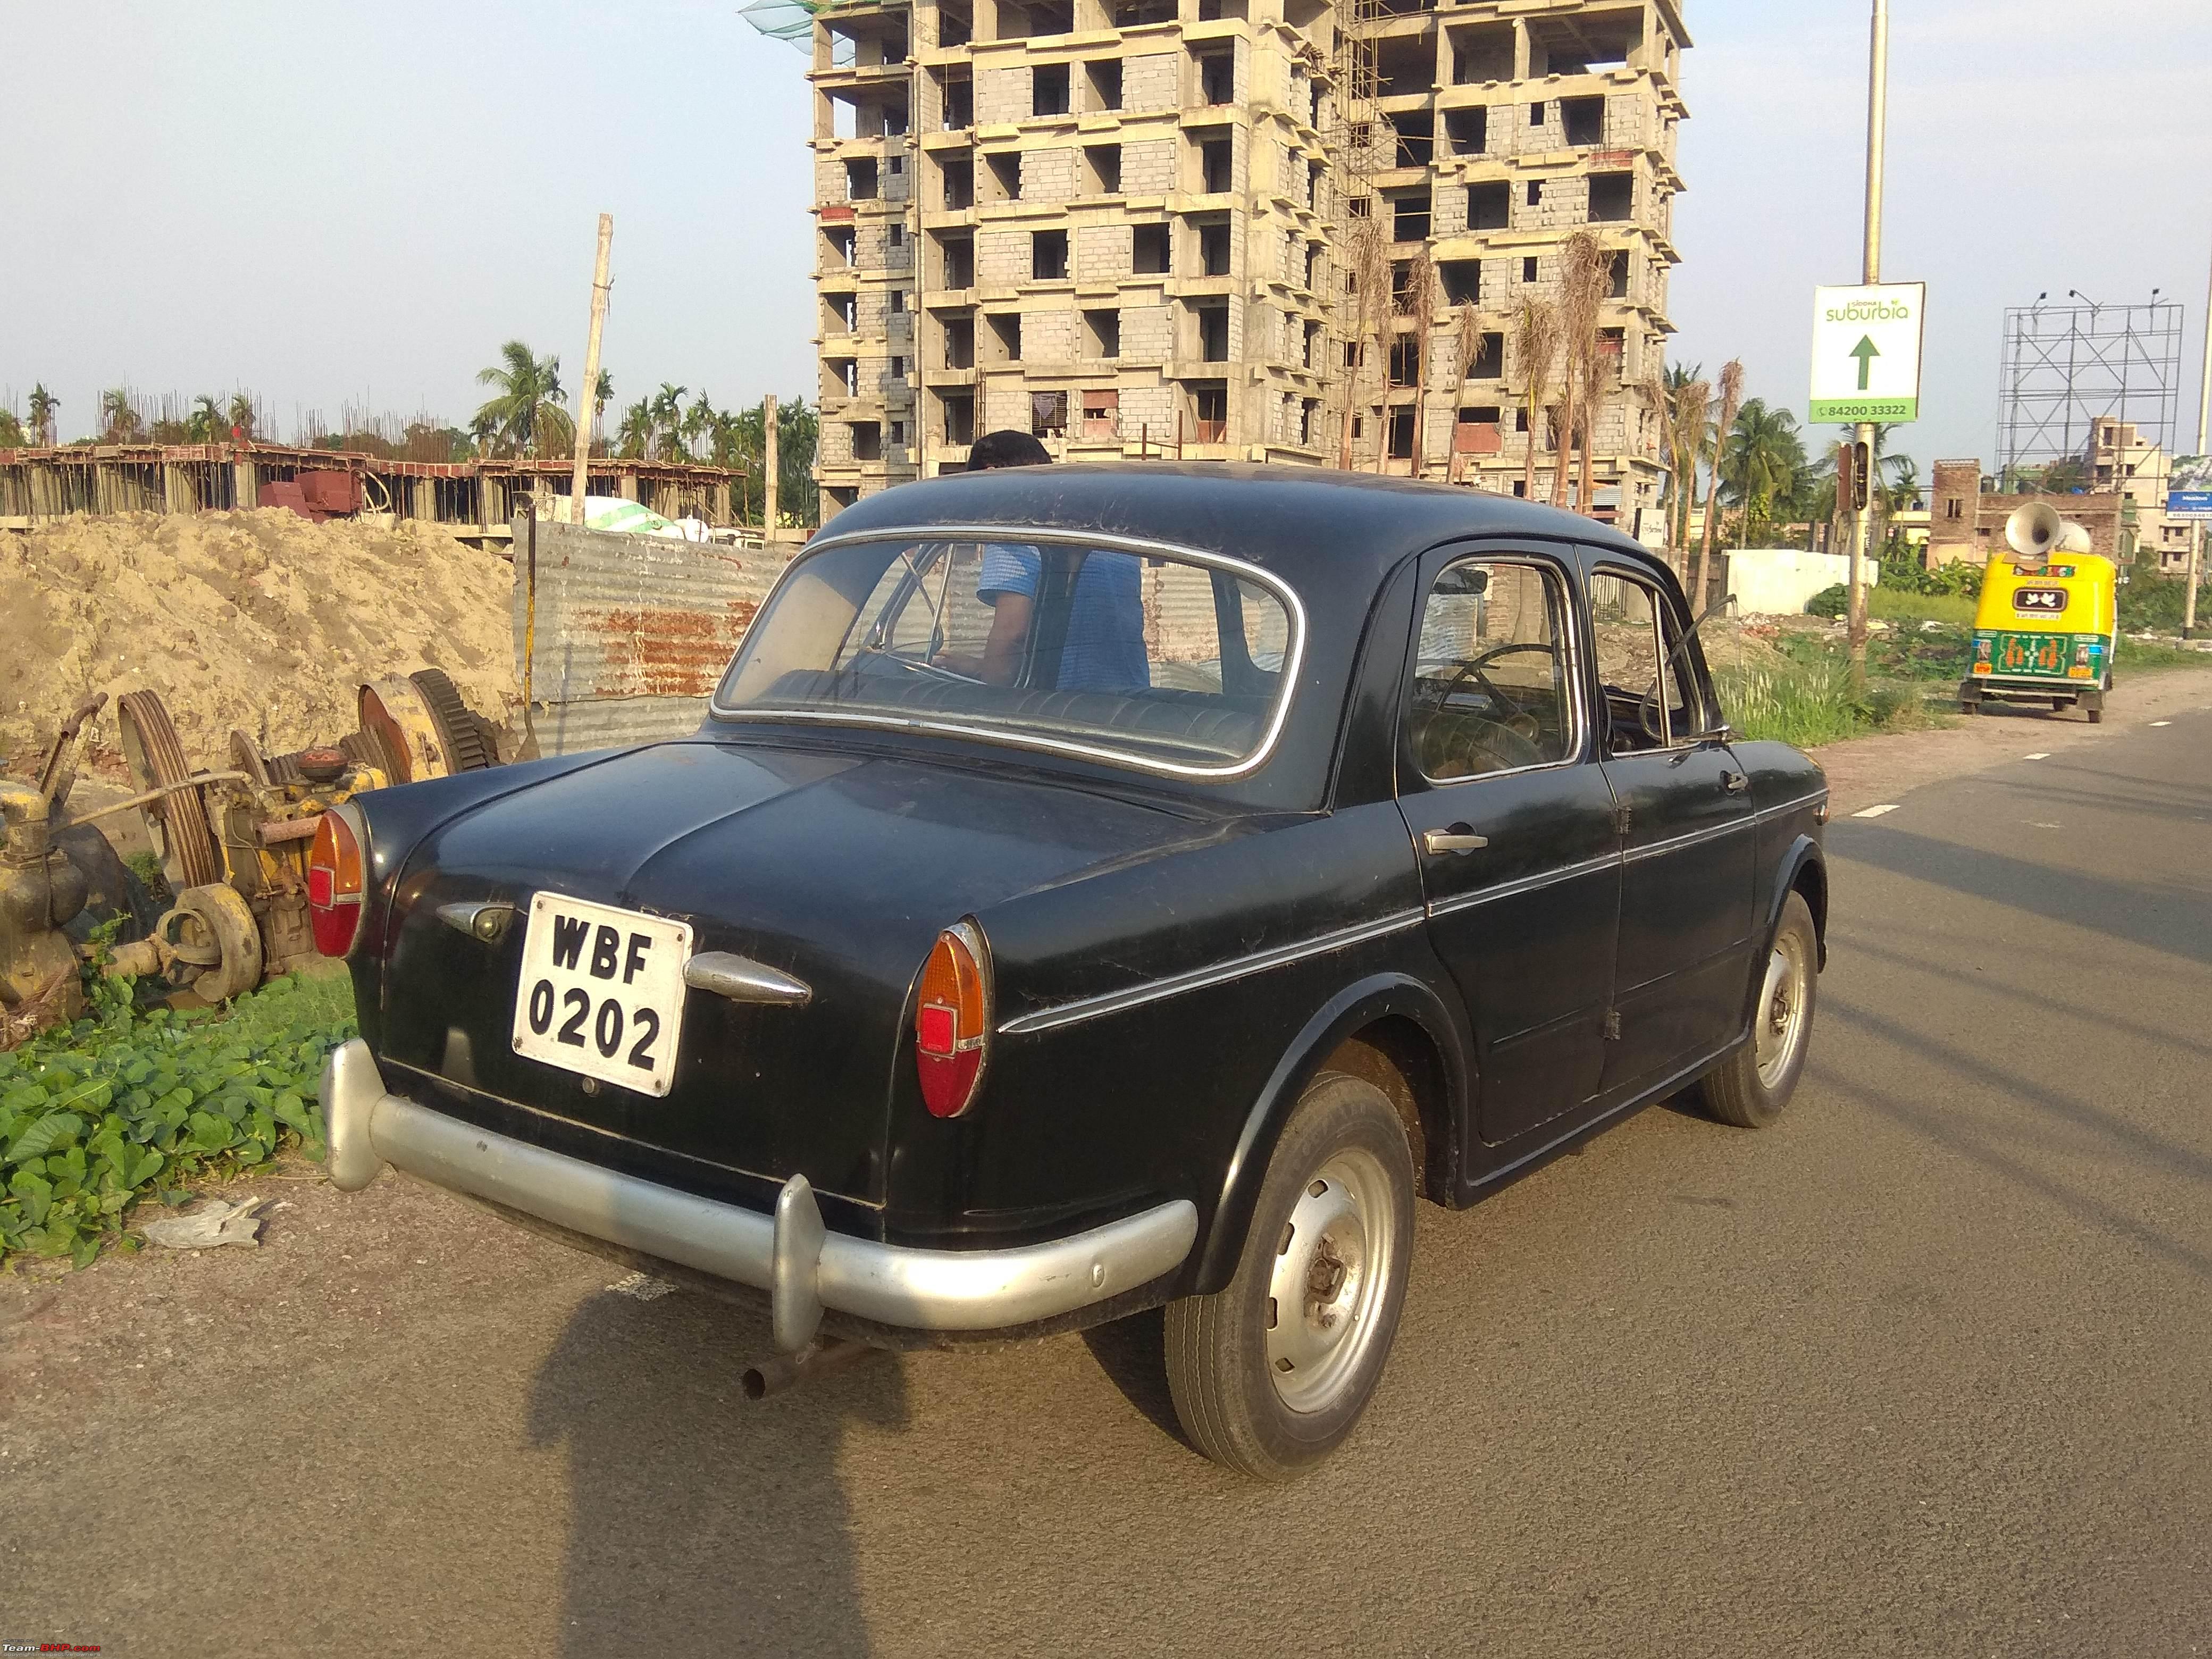 In the meantime, the bonnet was painted as a test panel.   The previous owner gave me 3 of the hubcaps which the car had since new, the 4th was lost in the 1980s on the way to Howrah Station; weak spring clips (which I later learnt were notorious for losing tension) lead to the cap flying off. Sadly for me, the 3 remaining caps had been drilled with a hole in the centre to bolt on so that they didn't fly off in the future  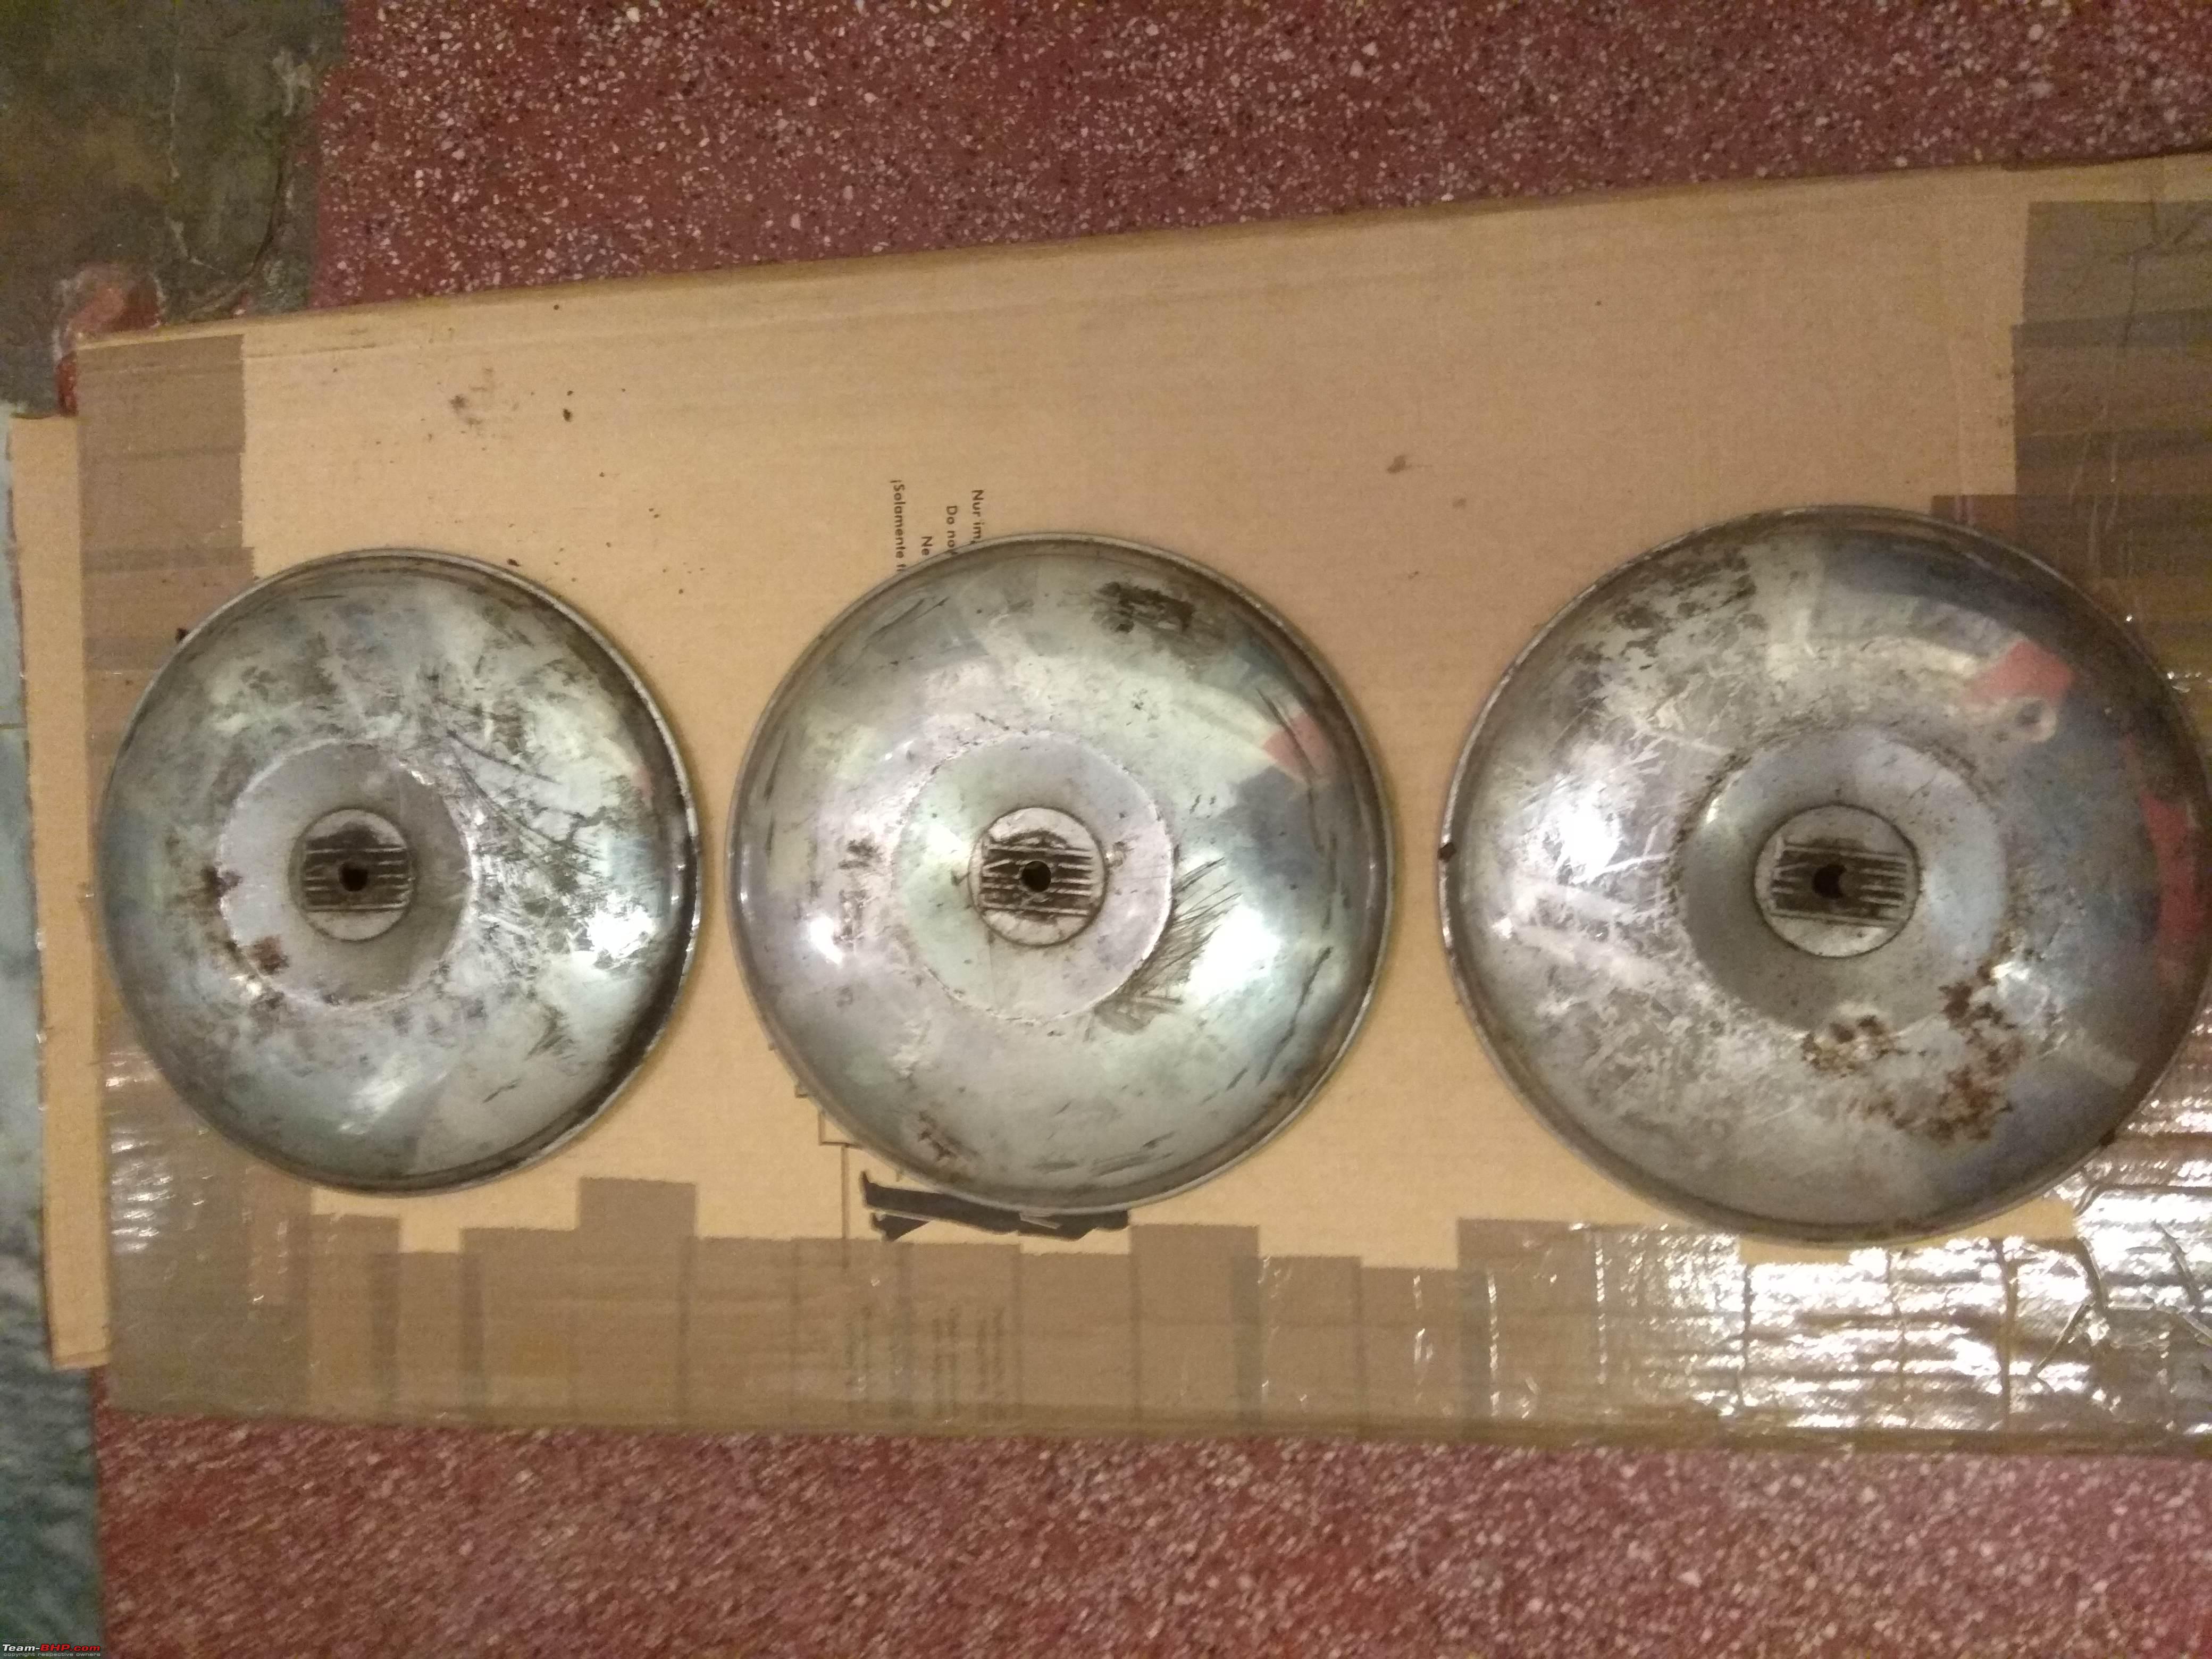 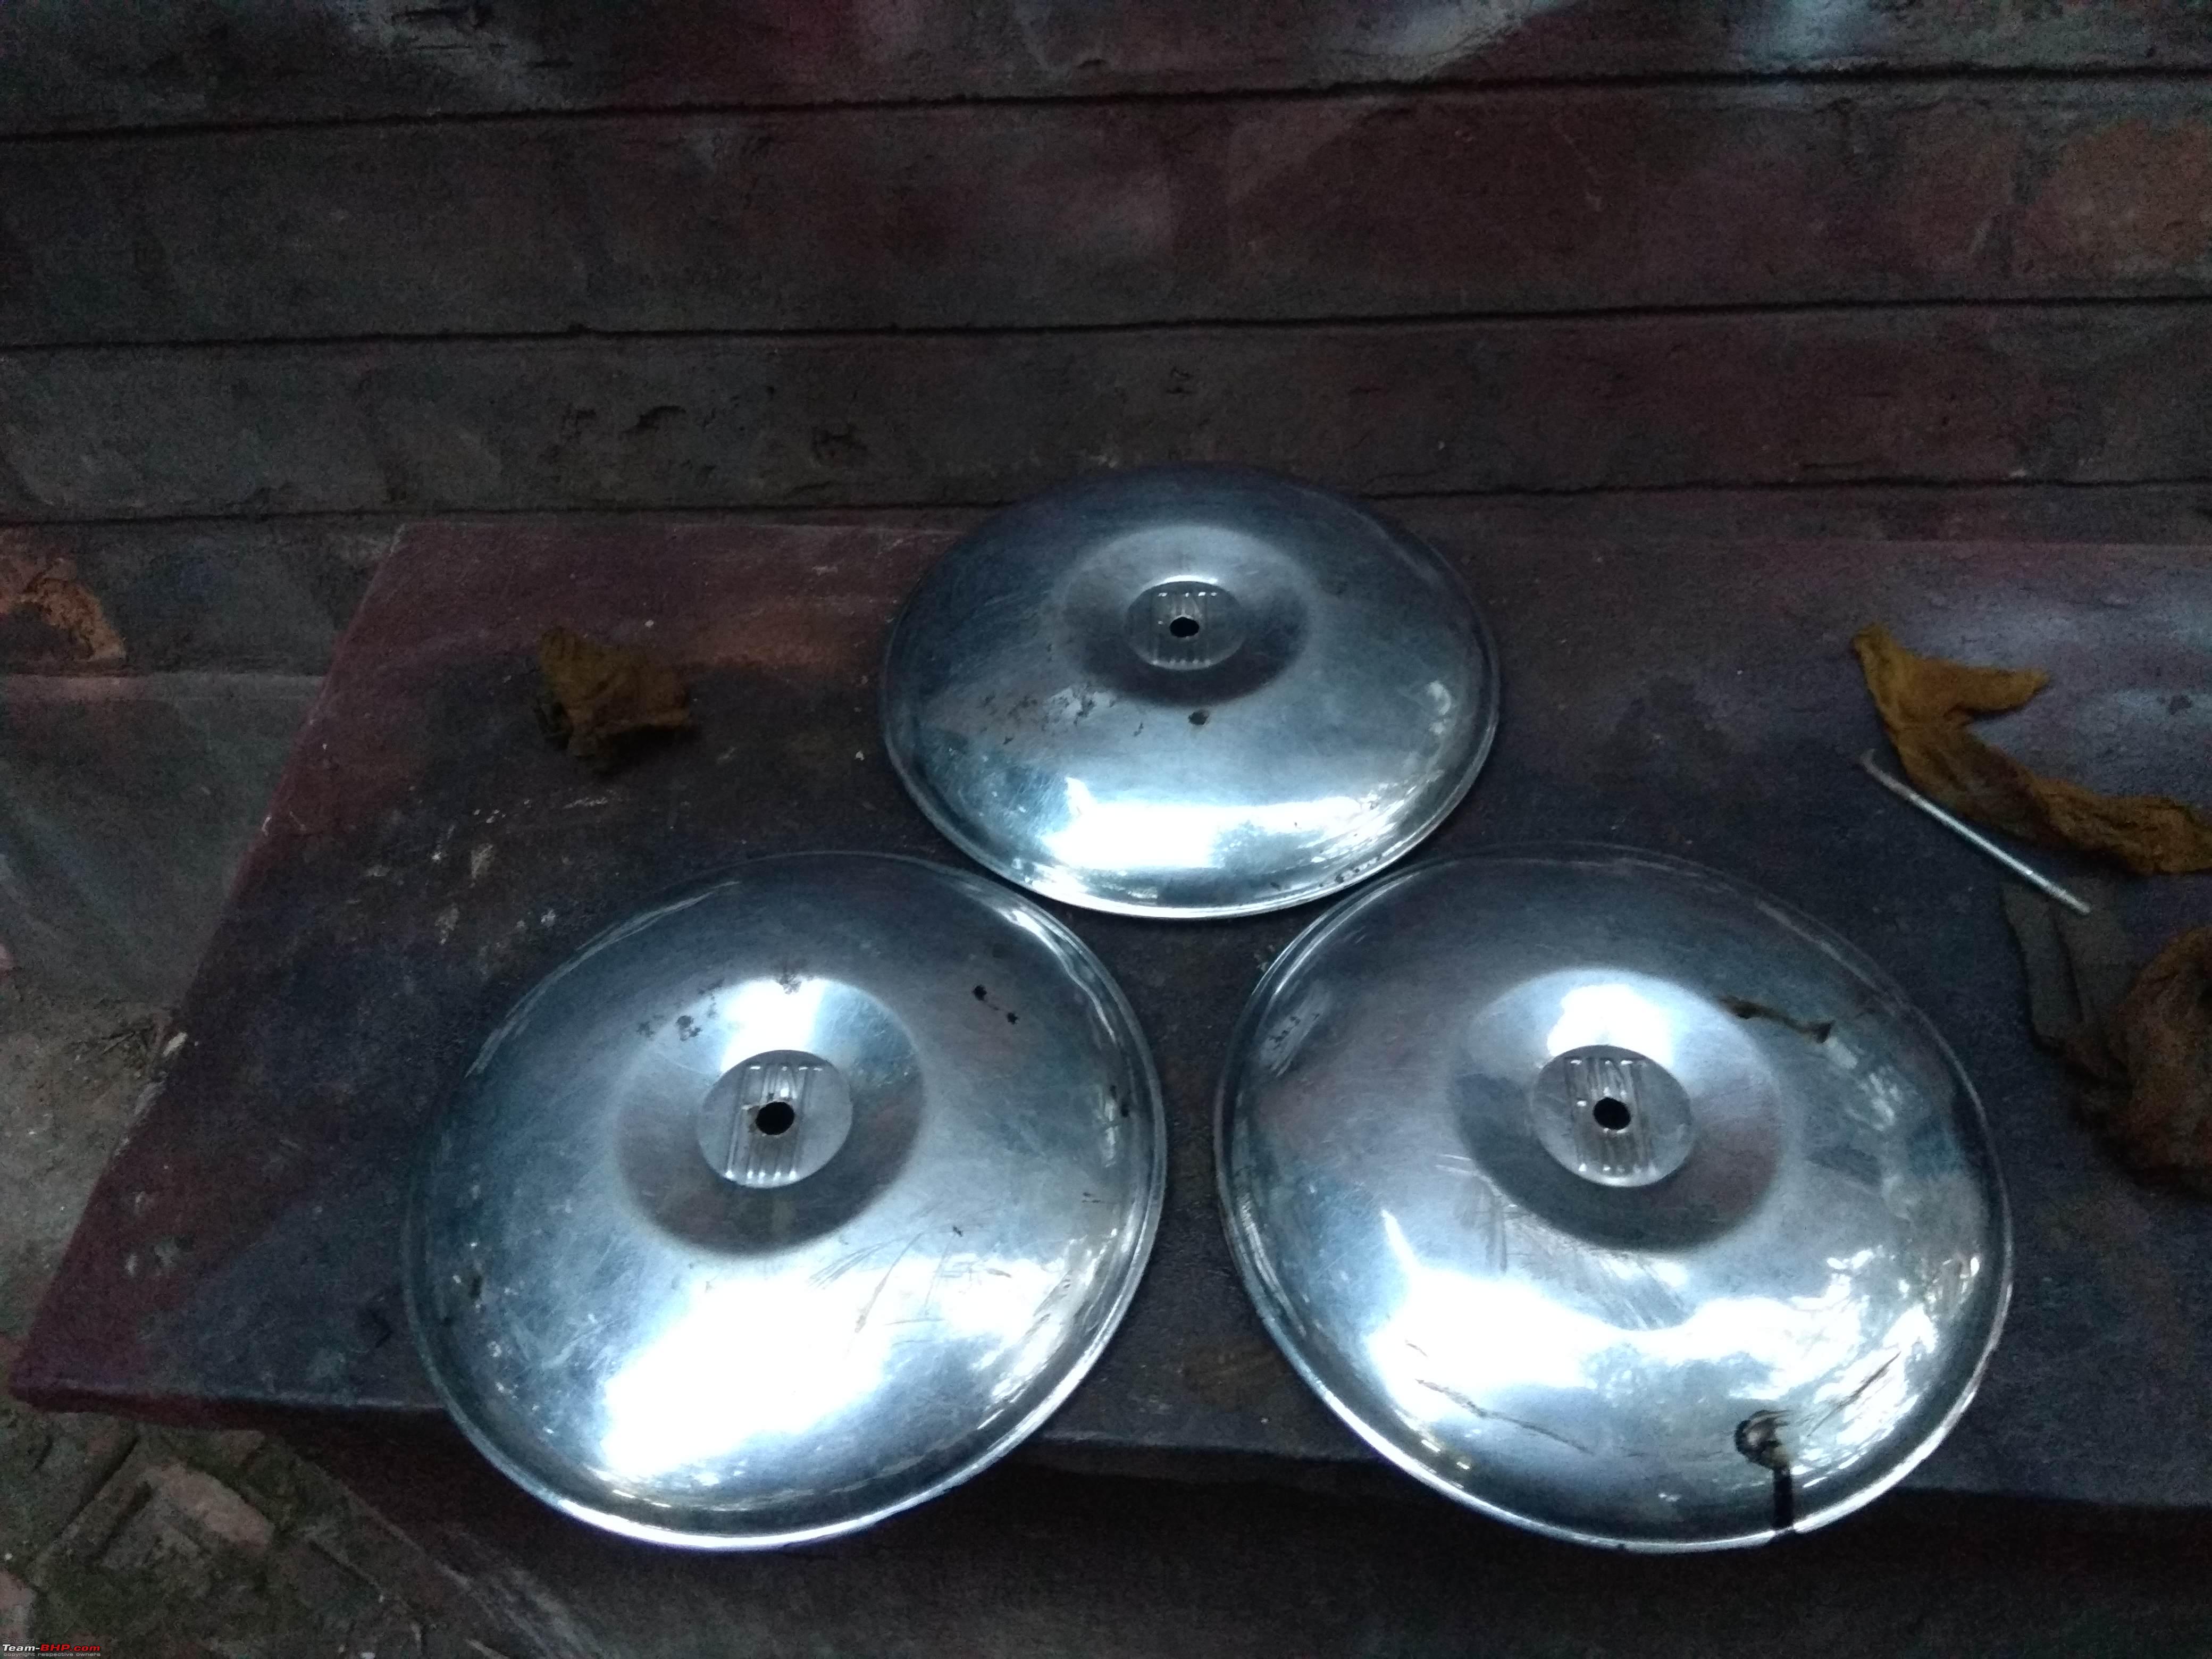 I found a headlamp lying on the rear seat with a cracked lense with no script; just an anchor logo. I was told that that was the Carello logo.  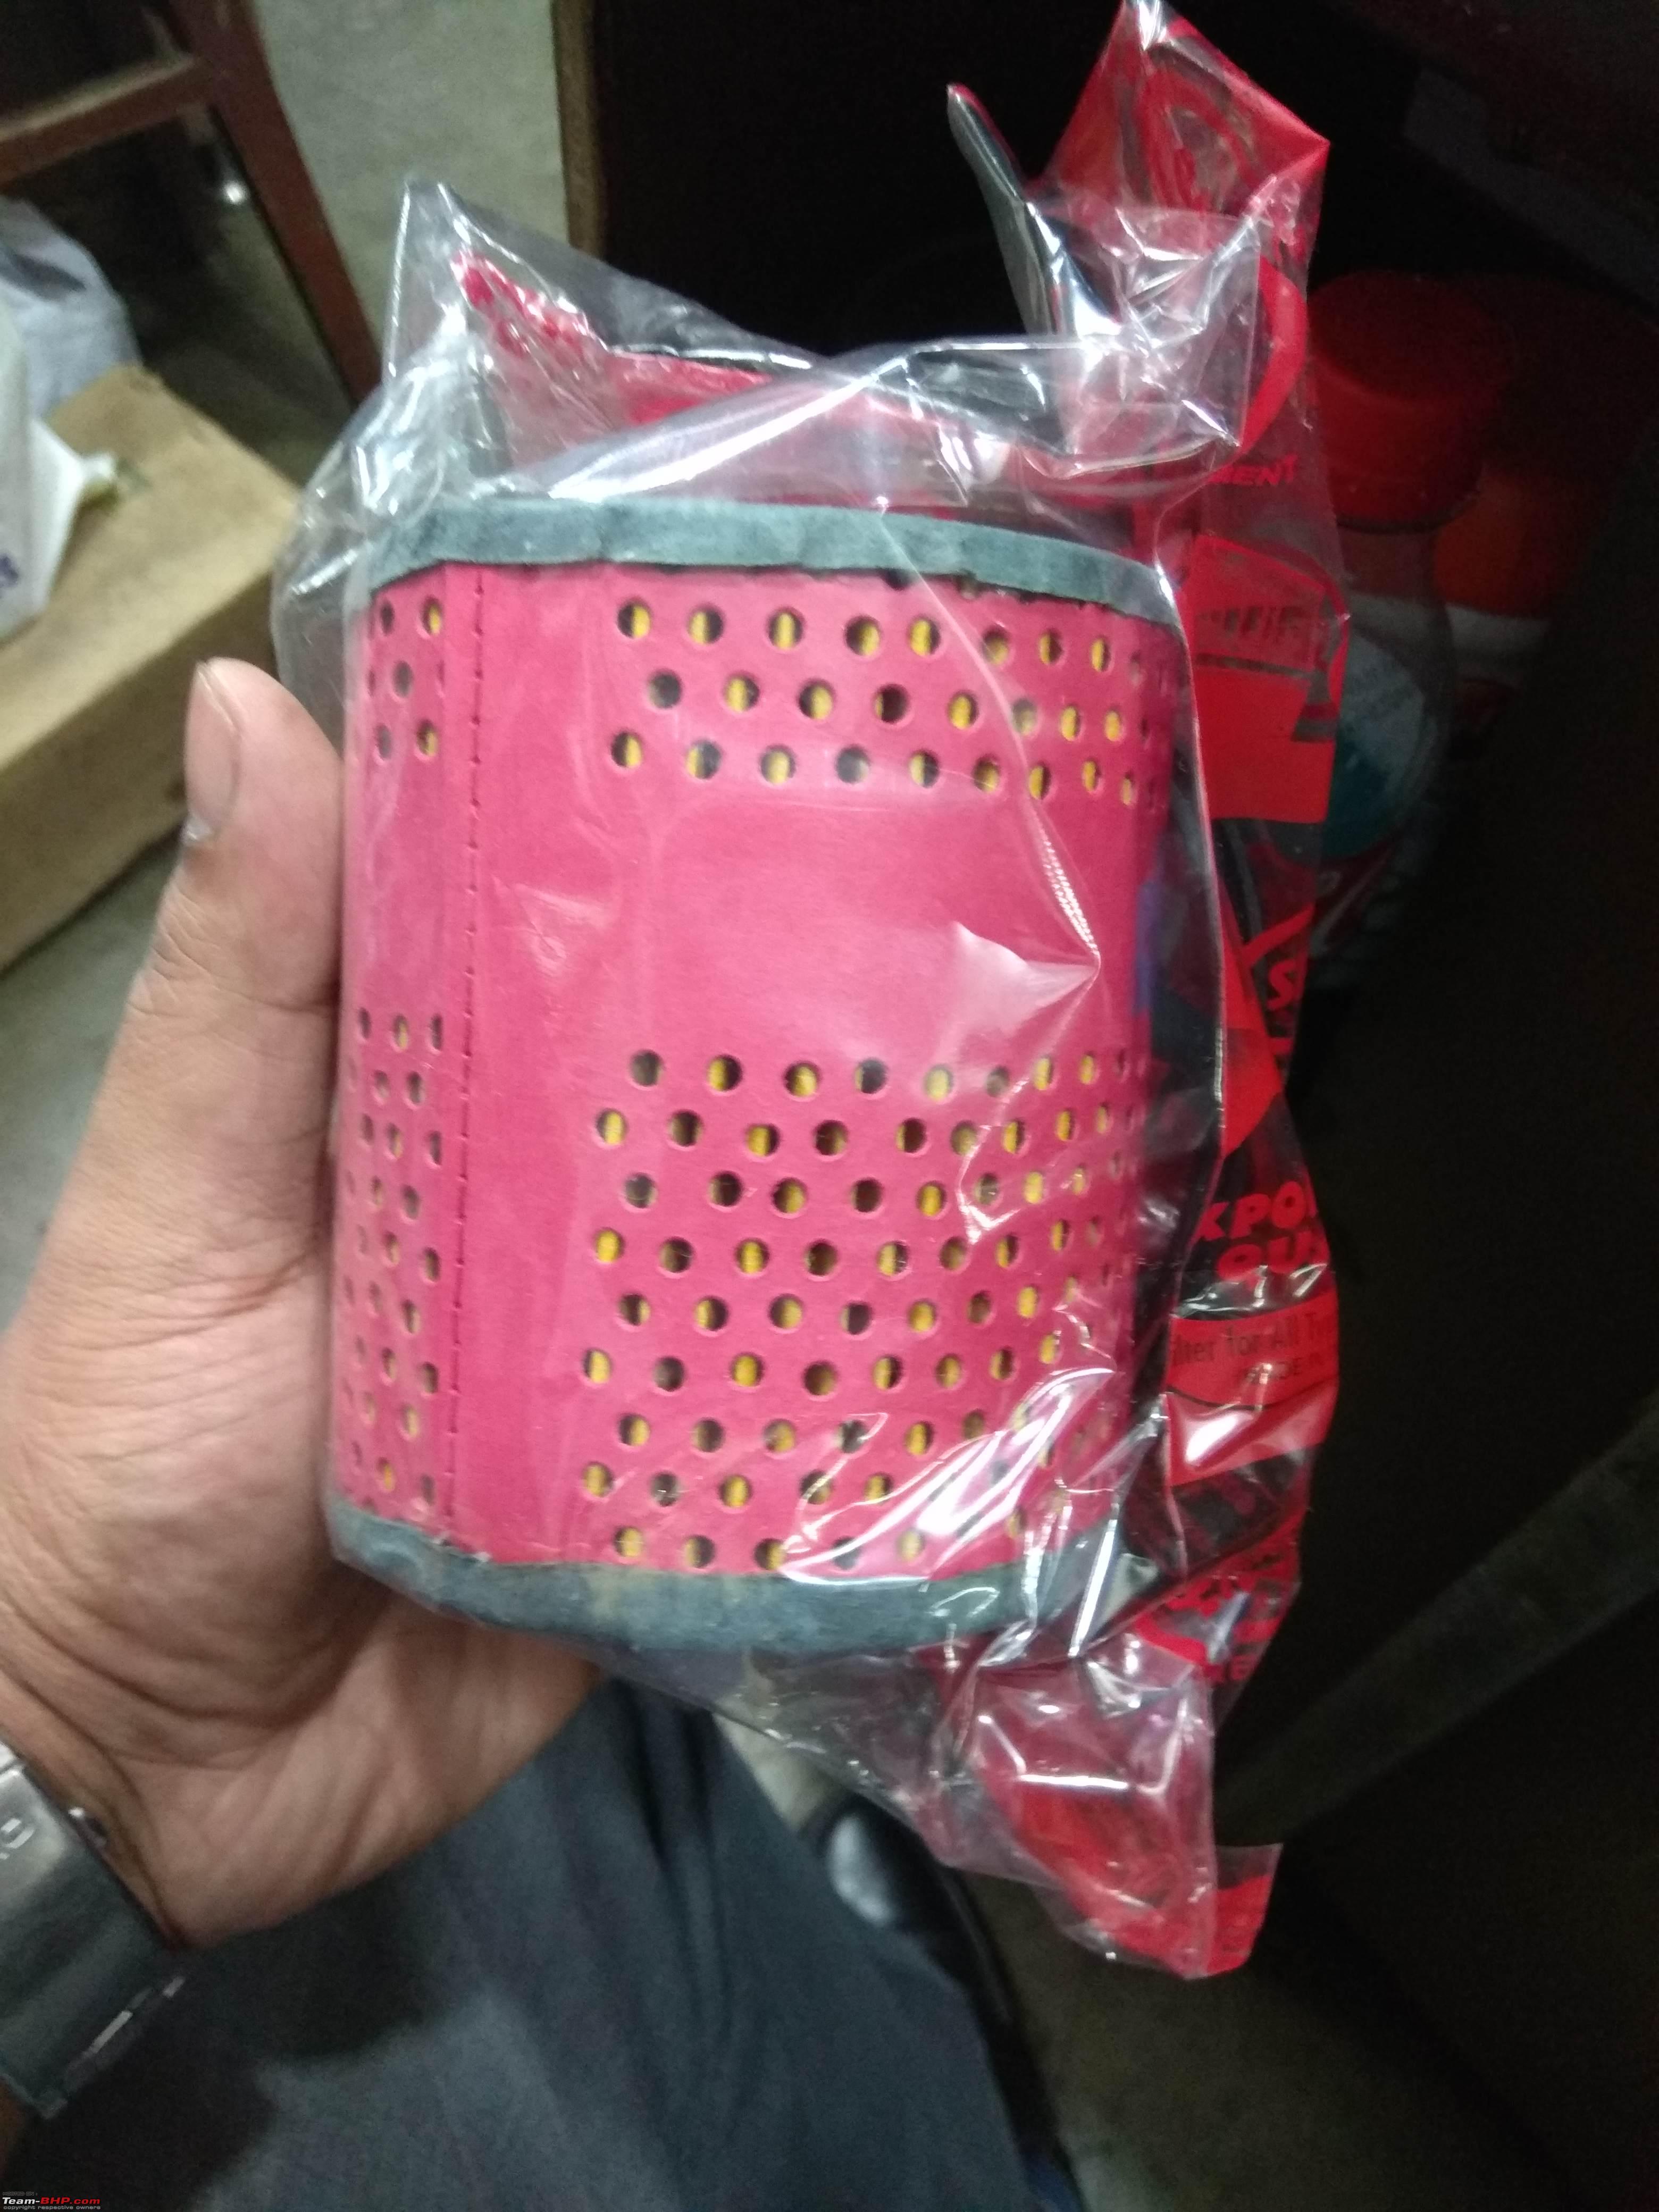 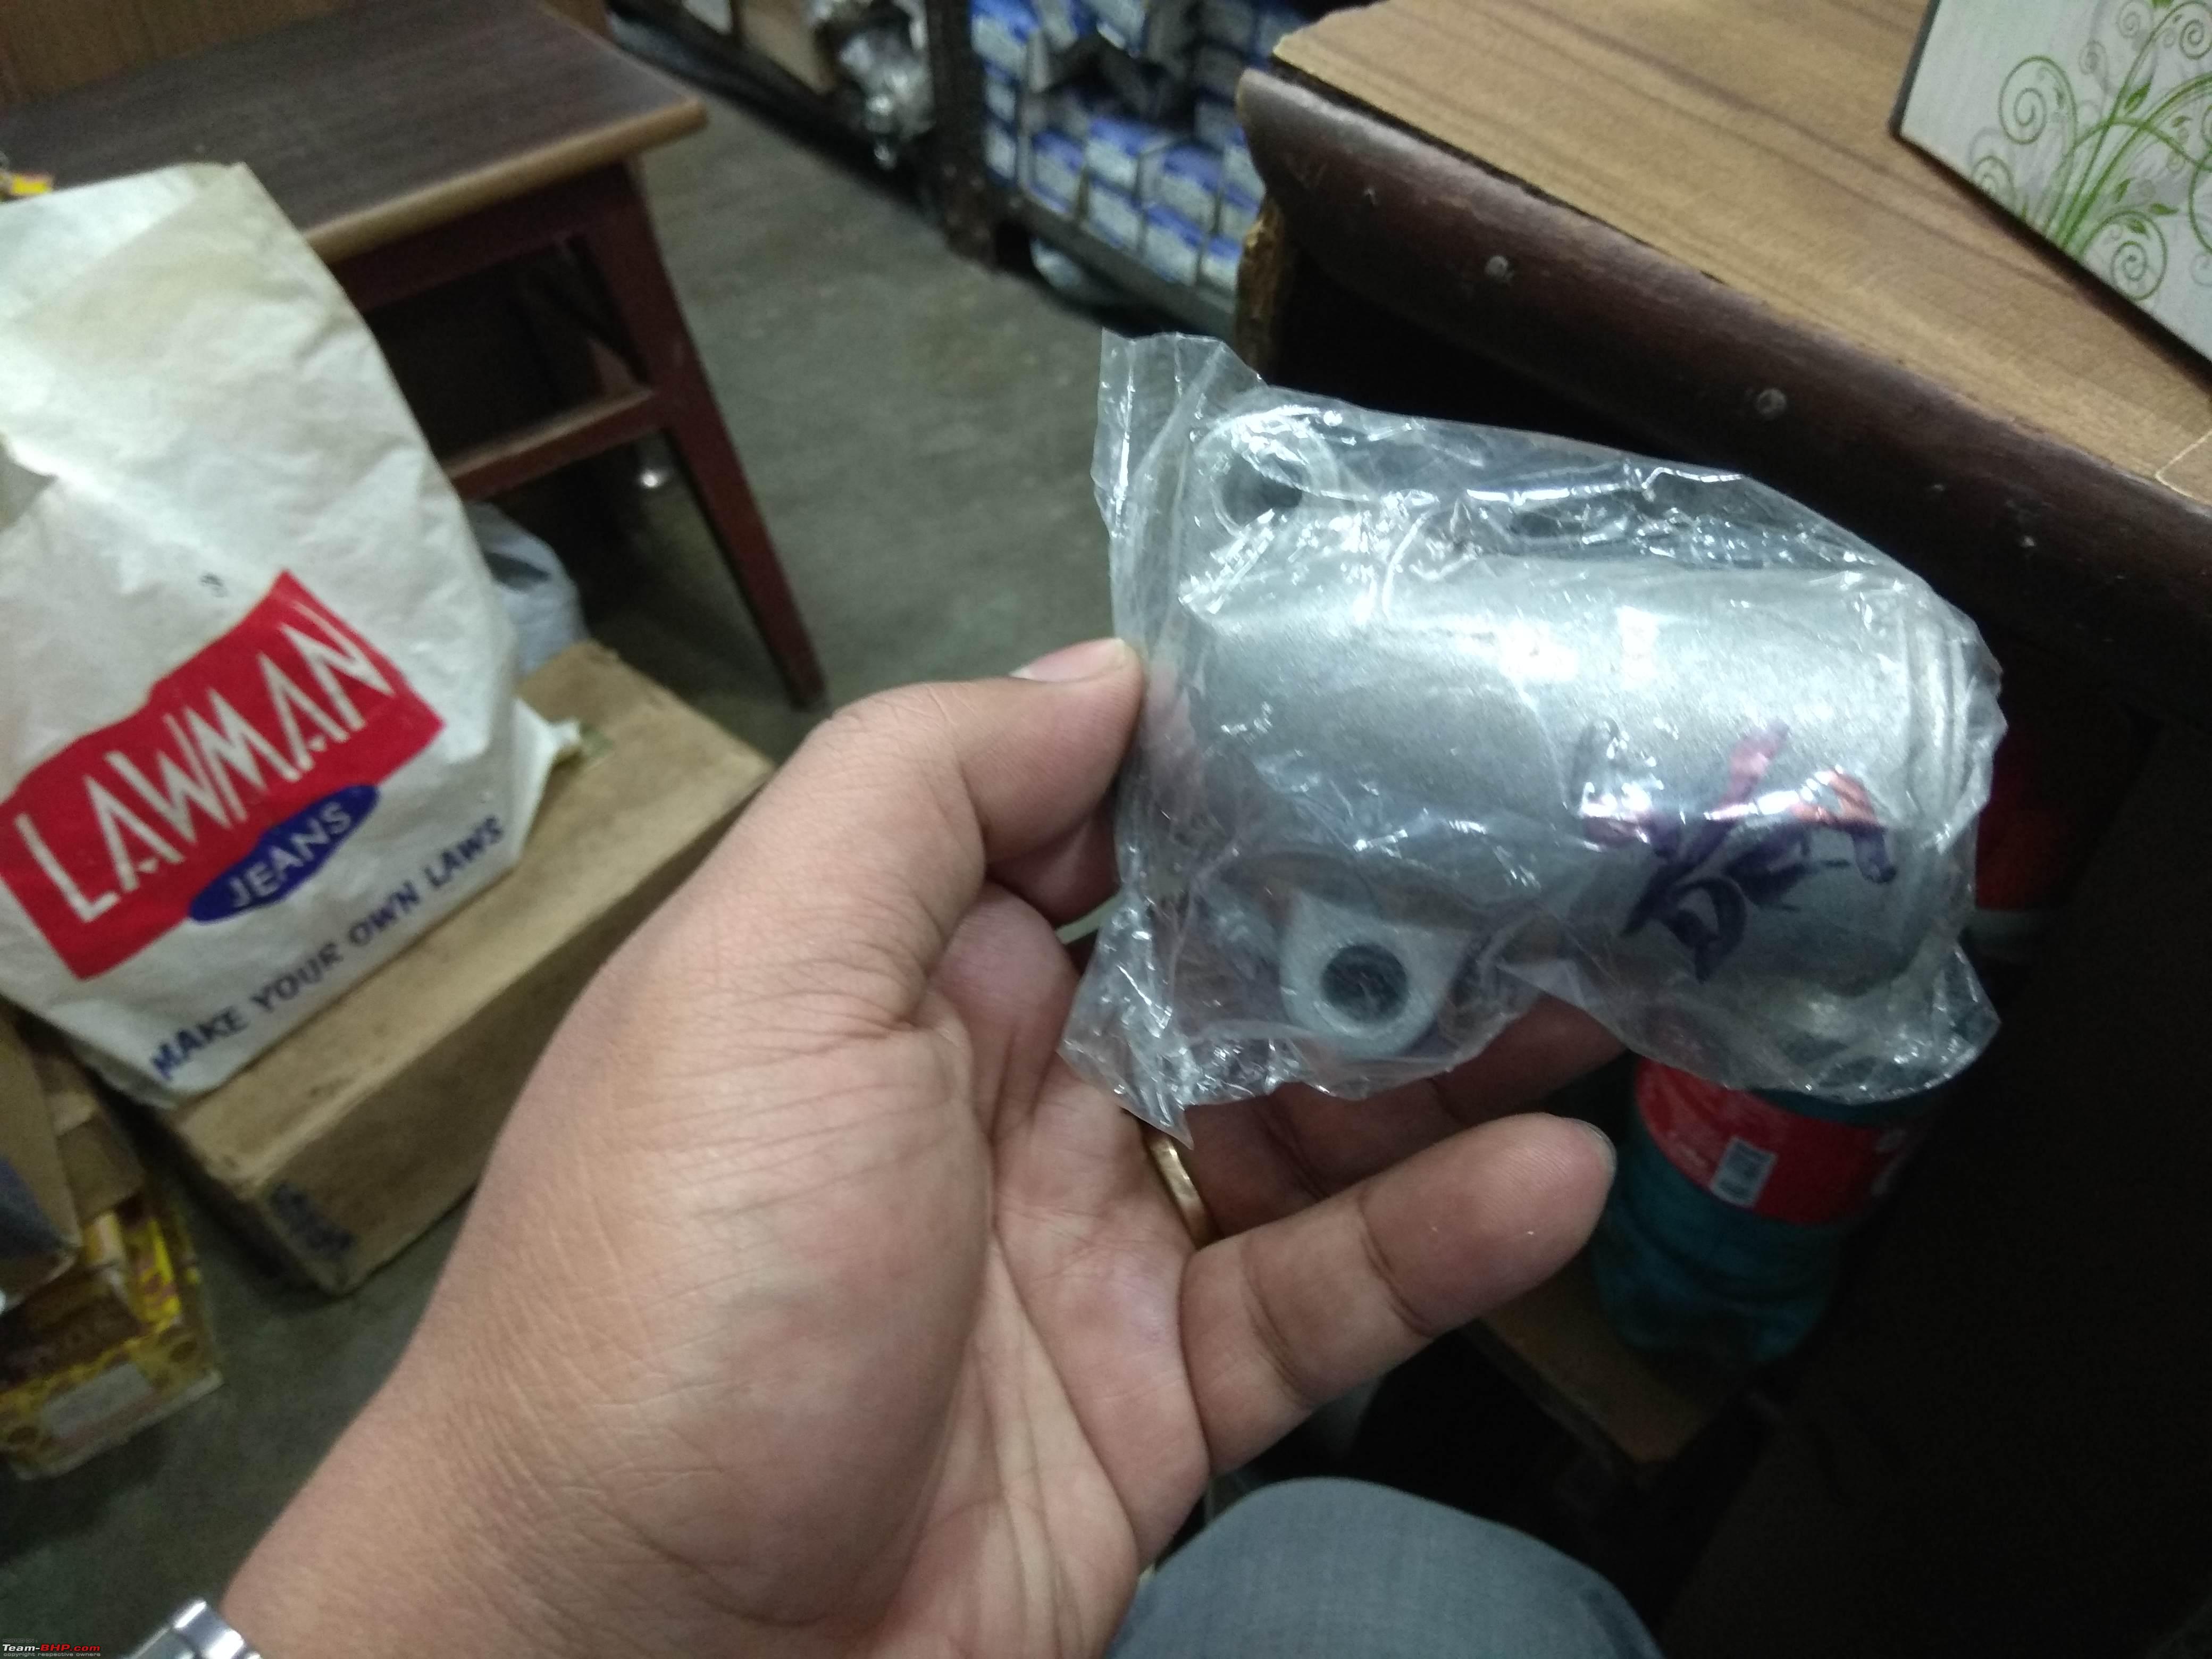 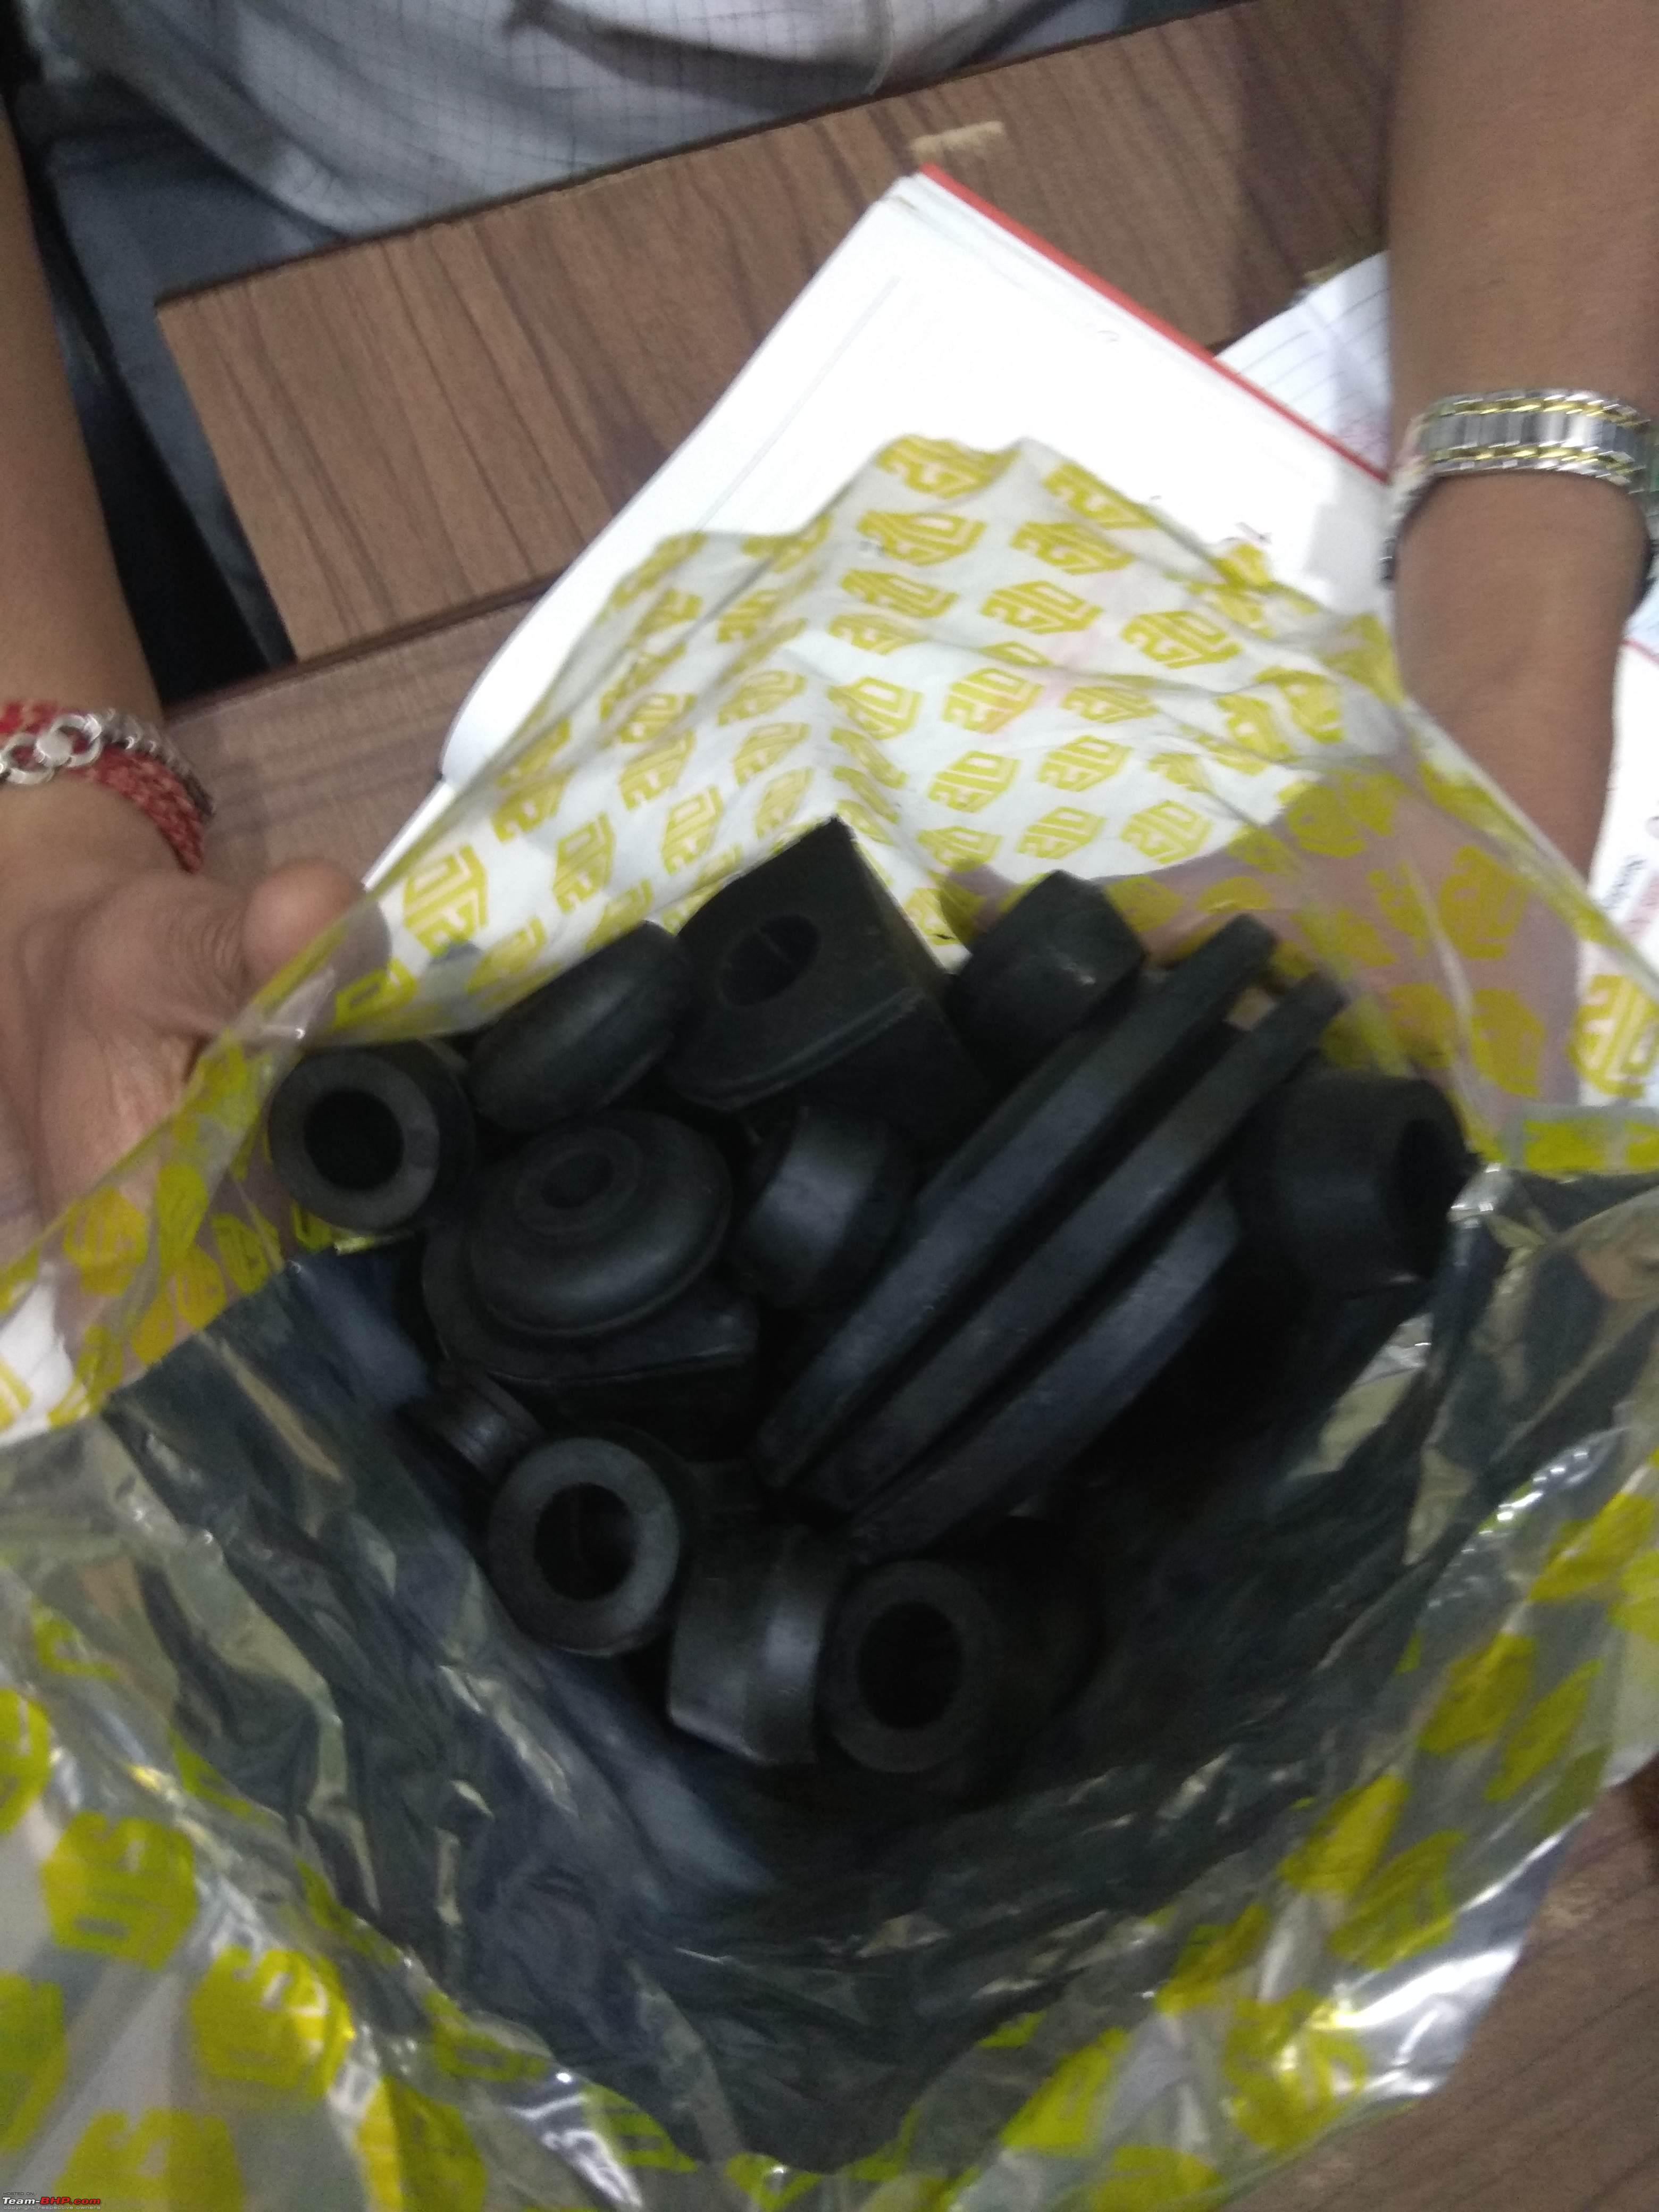  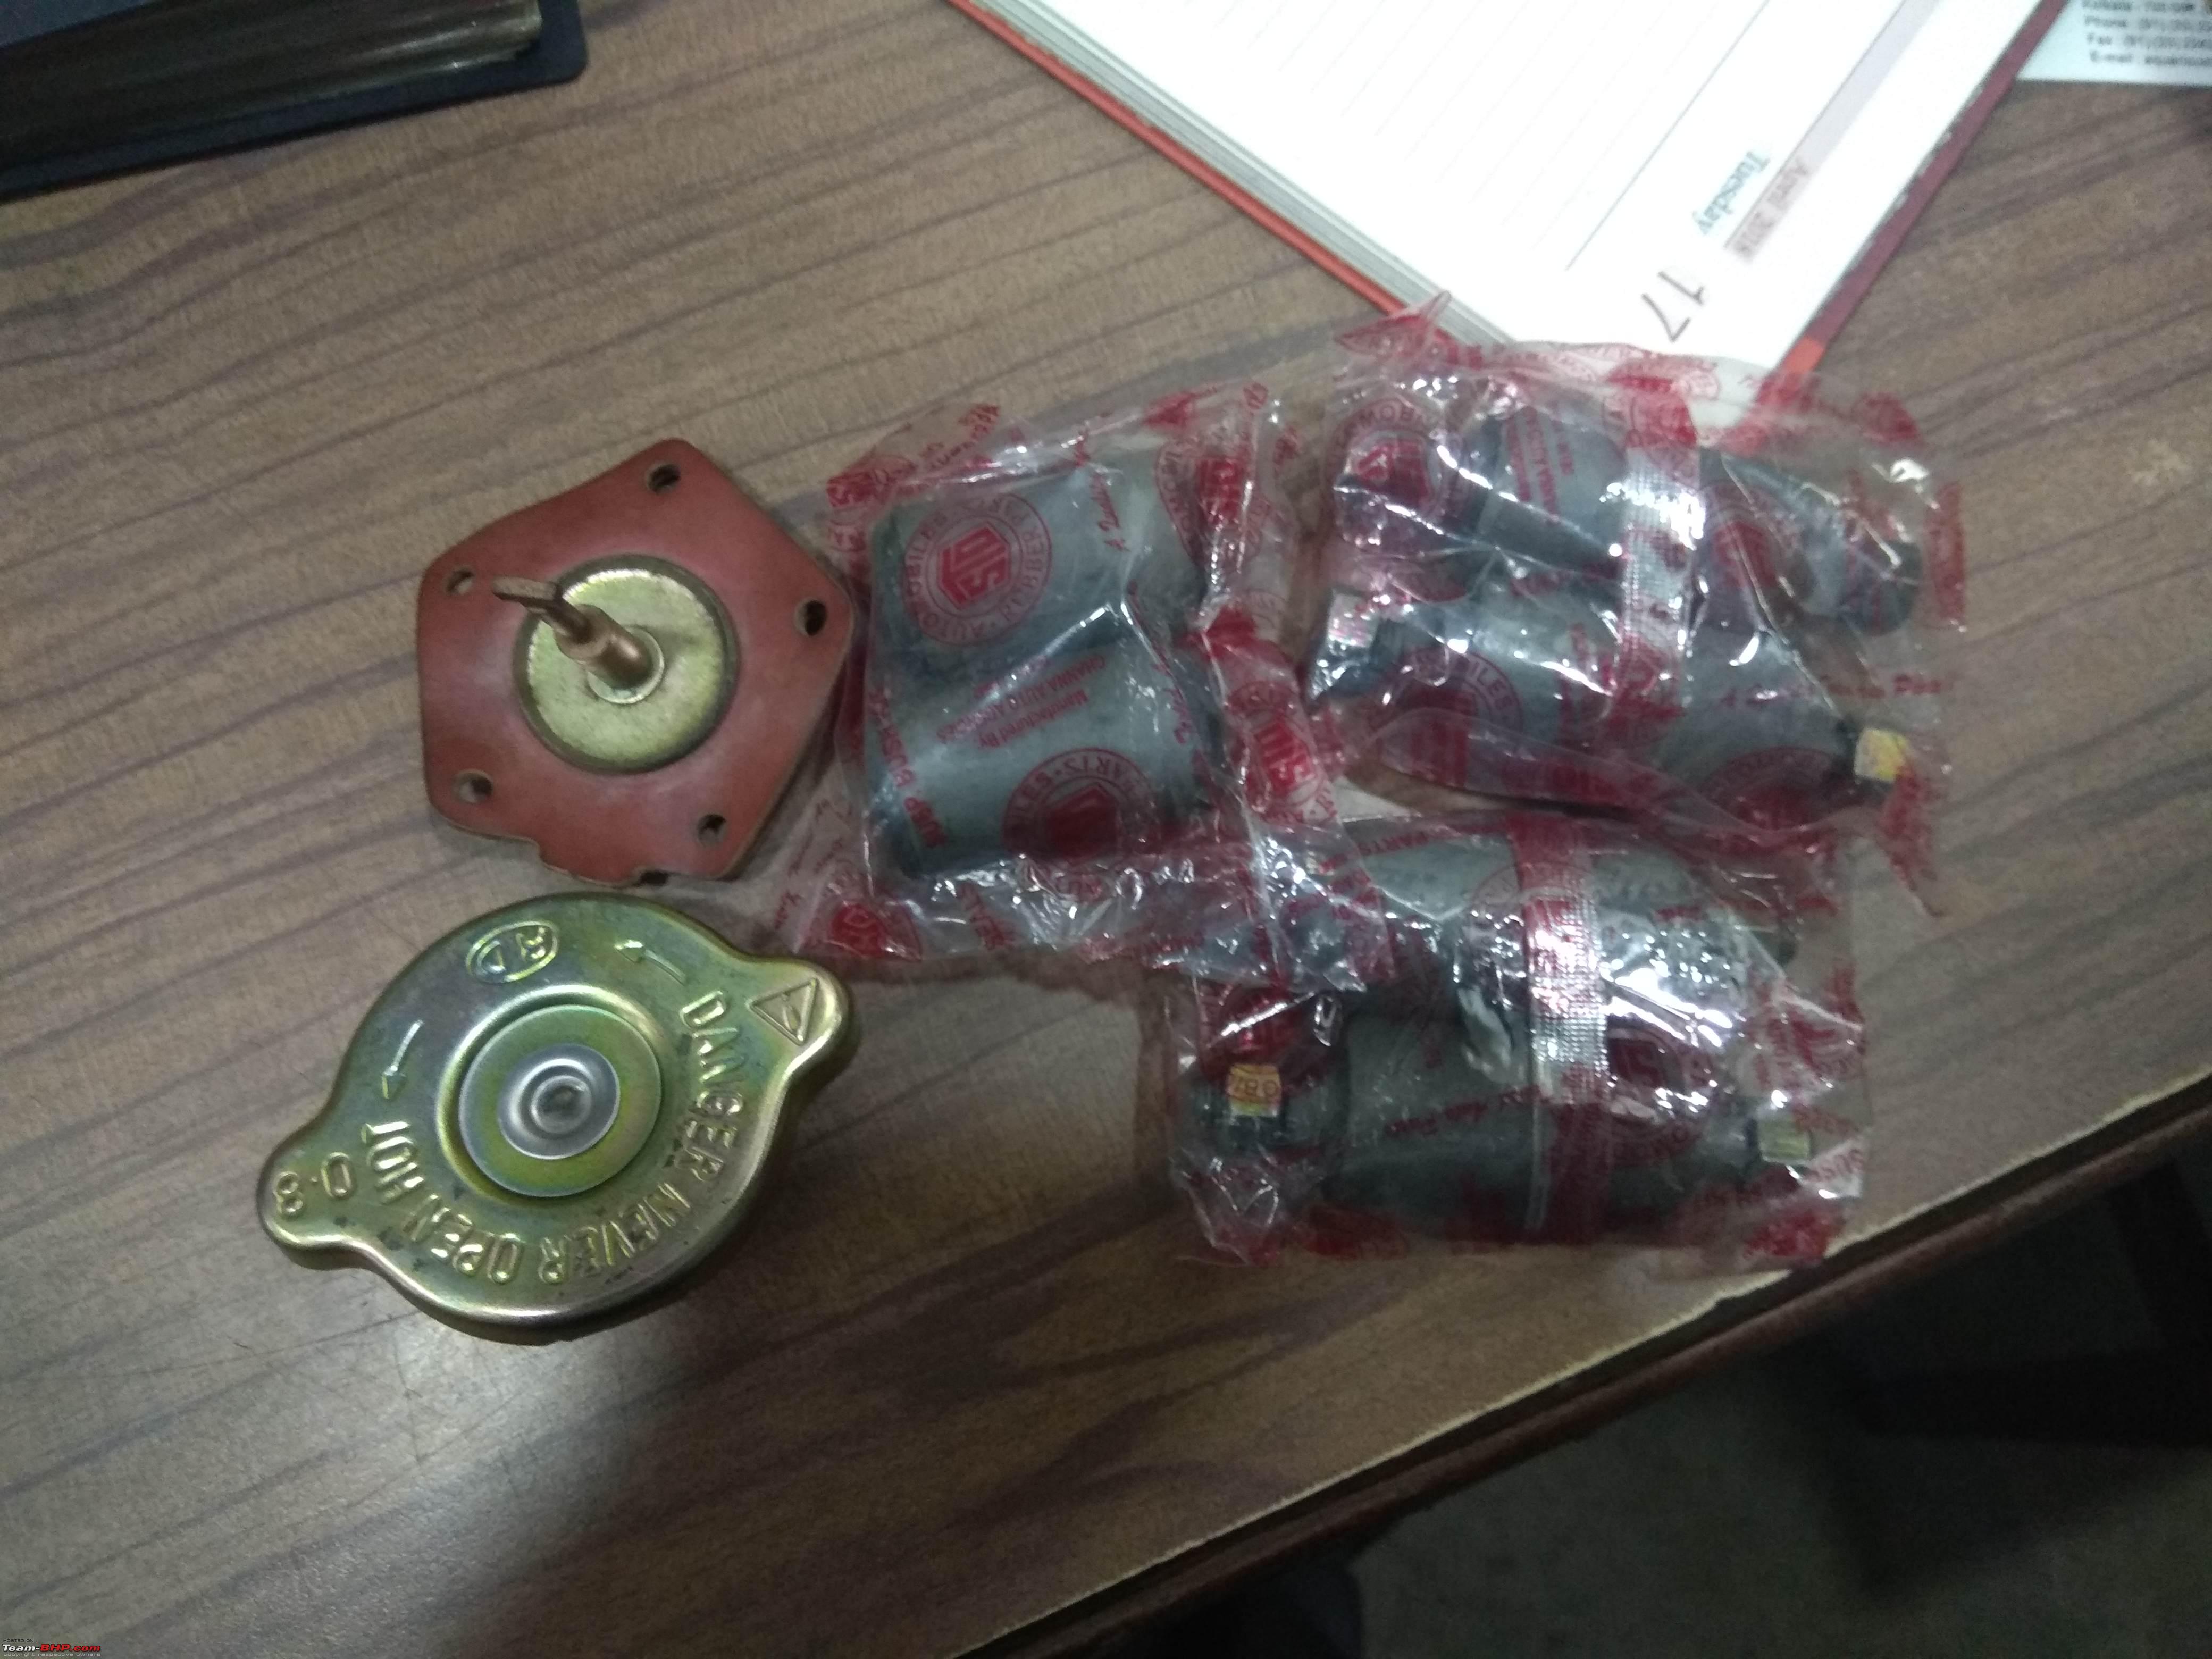 Then things changed course very quickly. When other areas of the car were being prepped for the over coat, rusty areas started appearing. We didn't know when the engine had last been rebuilt but it was silent. It took one fast & extremely thrilling drive in my friend's hands (well he is a former INRC driver) to reveal the engine's weaknesses. Her plugs were getting fouled by engine oil while rattles also appeared. Rust spots & weak piston rings didn't make sense to me. I wanted a car that not only looked good but also drove good. It was at this point that I decided that there's no joy in getting stuck on the road while driving & we might as well go in for a full blown restoration! |
|
| (42)
Thanks
|
| The following 42 BHPians Thank mbz180 for this useful post: | Aditya, Ahmed, Alfa_Romeo1, AnkitAnimesh, arun1100, arvindmanju, BopsKA12, bvasista, Cyborg, dailydriver, Dani7766, darklord, Gansan, grkonweb, GTO, harit, Hirohito, InControl, johy, justin.das, karlosdeville, KartikeyaL, KPS, Lij, manishalive, paragsachania, Samba, Samfromindia, samsag12, SnS_12, Somu2009, Stanher, the mole, theexperthand, Thermodynamics, Torino, V.Narayan, Varun_HexaGuy, vsrivatsa, Wildy, xsrahul, zavegur |
|
1st April 2019, 20:19
| #3 | |
| BHPian | re: Indo-Italian PAL: 1963 Fiat 1100 Super Select "Bella" Quote:
| |
|
| (1)
Thanks
|

| The following BHPian Thanks justin.das for this useful post: | mbz180 |
|
2nd April 2019, 11:16
| #4 |
| Team-BHP Support  | Re: Indo-Italian PAL: 1963 Fiat 1100 Super Select "Bella" Great acquisition. I had a 1962 Super Select and loved driving it. Sadly, I didn't have the time required to look after it and eventually passed her on to another BHPian. It's good you went for option 2 to start with. Later on, I suggest you go in for a full restoration. It will take time and cause a lot of pain. But, the car looks in a fairly good shape and the final result will make the effort worthwhile. Nothing like seeing one of these in its original shape. From what I recall, most of the cars I have seen have had their wheel caps with central bolts. Flying wheel caps were a problem in the Fiat / Ambassador days. We lost quite a few on highway drives. Try to source whitewall tyres. They just make the car look complete. |

| (6)
Thanks
|
| The following 6 BHPians Thank Aditya for this useful post: | arun1100, KPS, mbz180, Samba, SnS_12, v12 |
|
3rd April 2019, 13:16
| #5 | |
| BHPian Join Date: Jan 2010 Location: Kolkata
Posts: 894
Thanked: 1,027 Times
| Re: Indo-Italian PAL: 1963 Fiat 1100 Super Select "Bella" Quote:
 The Restoration Mechanicals: The last coil on the front right coil was broken, it was simply resting because of the weight of the car. Both springs were replaced. Rubber bushes were mostly all shot. All the suspensions rubber components were replaced with VIR brand pieces. The left side lower wishbone was longer than the right side wishbone. Both lower wishbones were replaced. Rear leaf springs were opened & re-cambered. The shocks were in good order & were cleaned & painted. Propshaft: The front flex coupling was changed. While scraping the panel above the transmission hump, evidence of a rip in the sheet metal was found. At some point in the past, the propshaft coupling must've come loose at high speed & ripped through the panel! Differential: Though the gears etc. inside were in good shape, the flange connecting to the propshaft has worn out. This was attended to. Transmission: The gearbox itself was sound so it was cleaned & all the seals/gaskets were replaced. Wheel bearings were in bad shape & were all changed. Steering assembly: 202 retained her original Italian steering box. It was just cleaned & buffed. But I do no that some shaft was changed (I forget the exact name). Brakes: The old API-Lockheed system was discarded. New TVS Girling wheel cylinders on all 4 wheels were installed. We went in for a dual circuit braking system on the advise of the restorer to make the front & rear circuit independent of each other. This necessitated a second brake fluid can along with a dual piston TVS Girling master cylinder. The aluminium drums were cleaned & buffed & all the flex hoses, shoes etc etc were replaced. The brake pipes through were of course all replaced. Clutch: The clutch assembly had to be replaced along with the throw out bearing & fork. All the heavy metal components were stripped, cleaned, & coated in epoxy based primers & paints. Some photos of the above components before & after being rebuilt/cleaned/replaced: Engine area before cleaning. The amount of muck was unbelievable  Brake drum when taken out. The locally made bracket for the hubcap bolt can be seen. 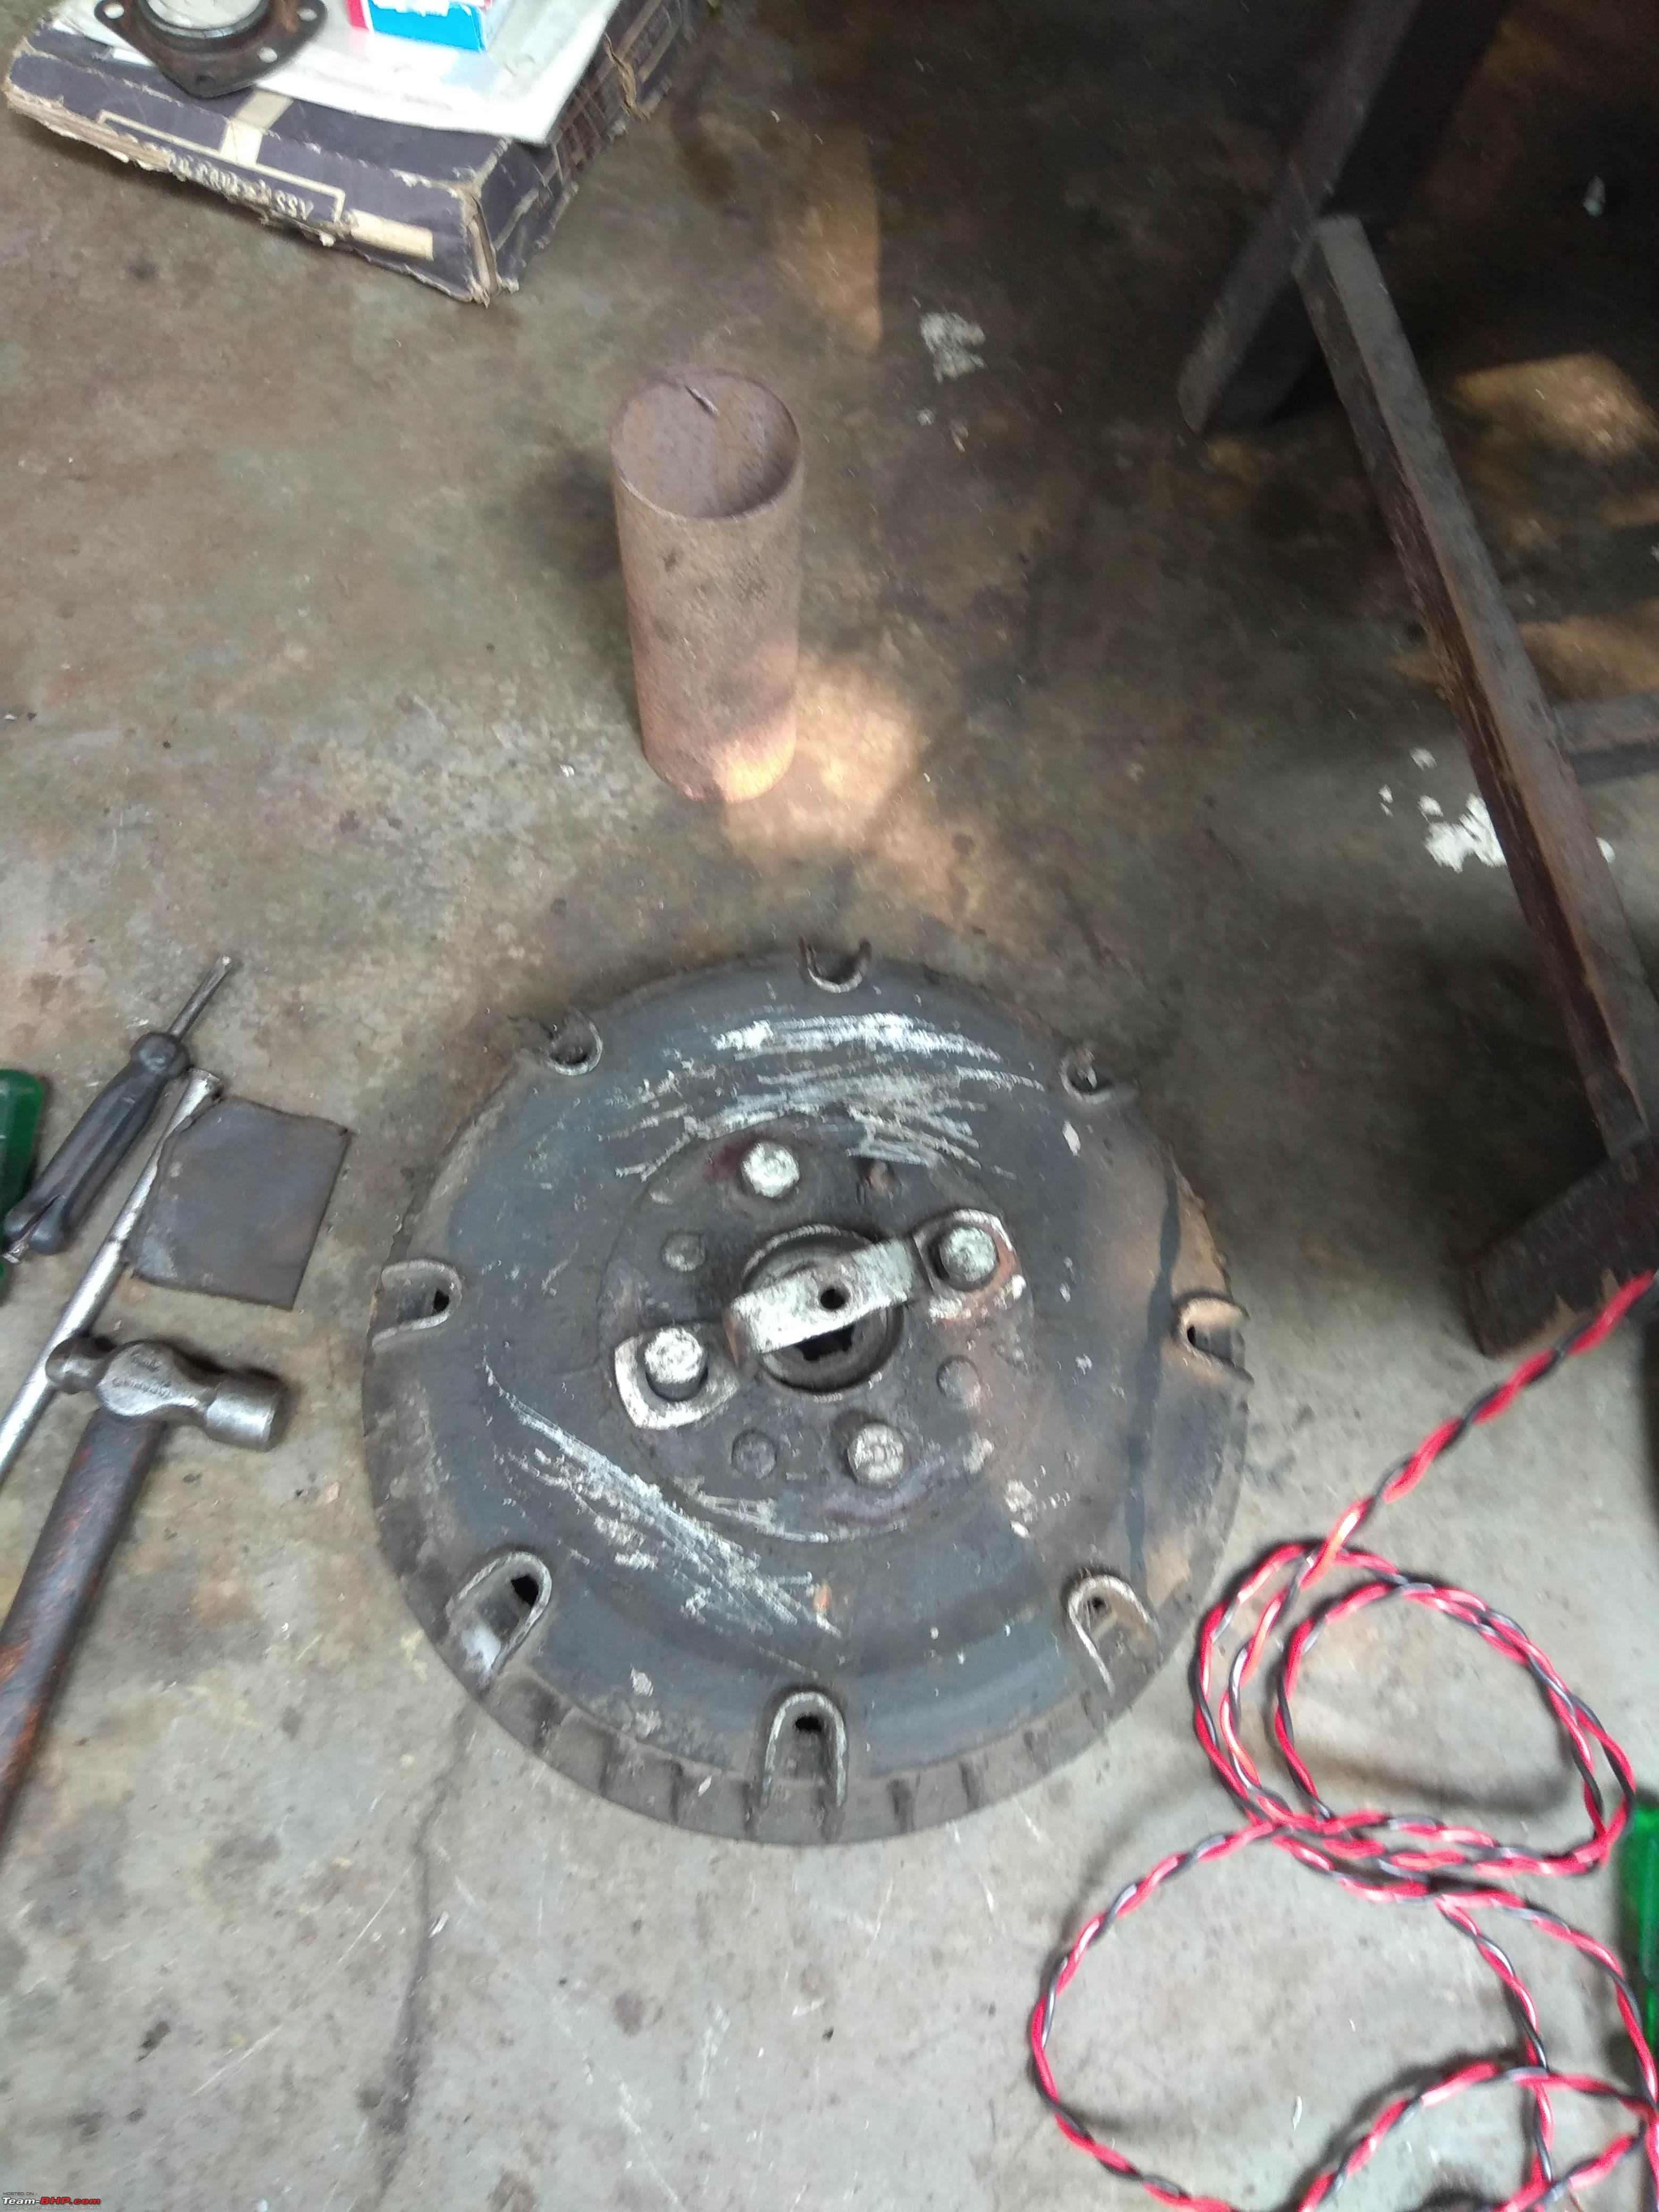 Brake drum after cleaning & buffing  Brake anchor plates finished with new hoses. Was happy to see Fiat bolts all round. 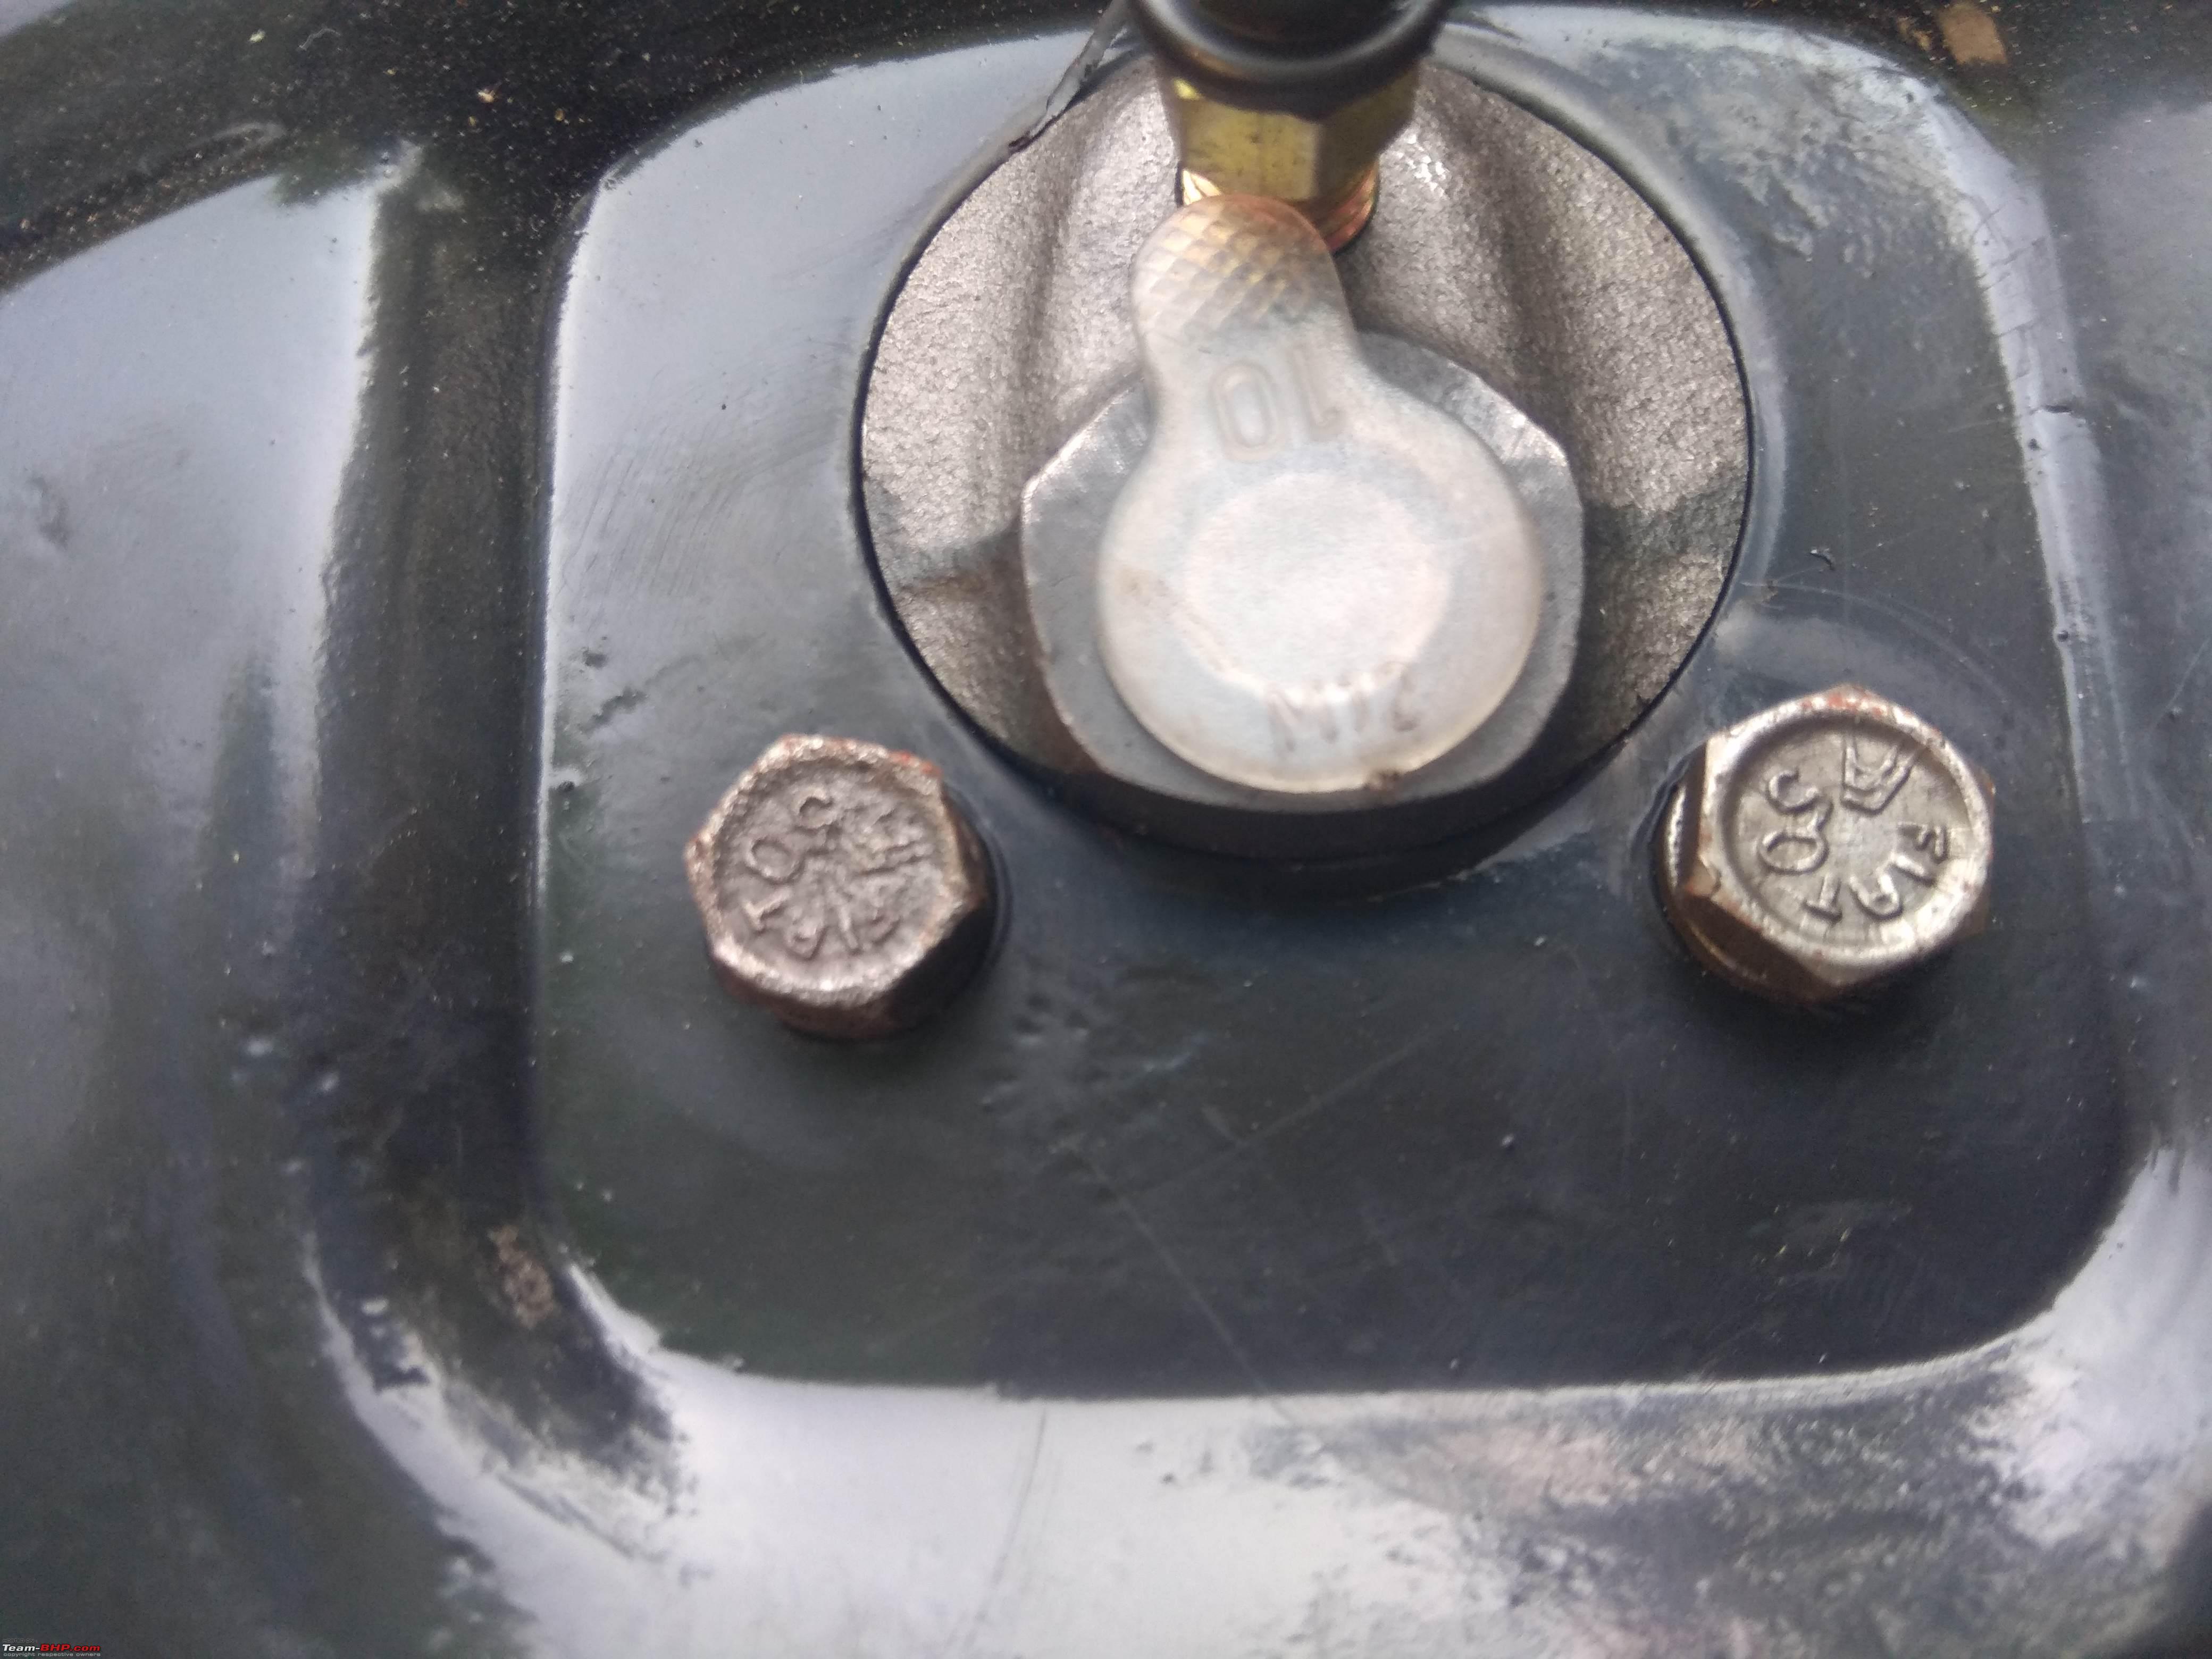 New TVS Girling wheel brake cylinders go on  TVS Girling double piston master cylinder for dual circuit brake set-up 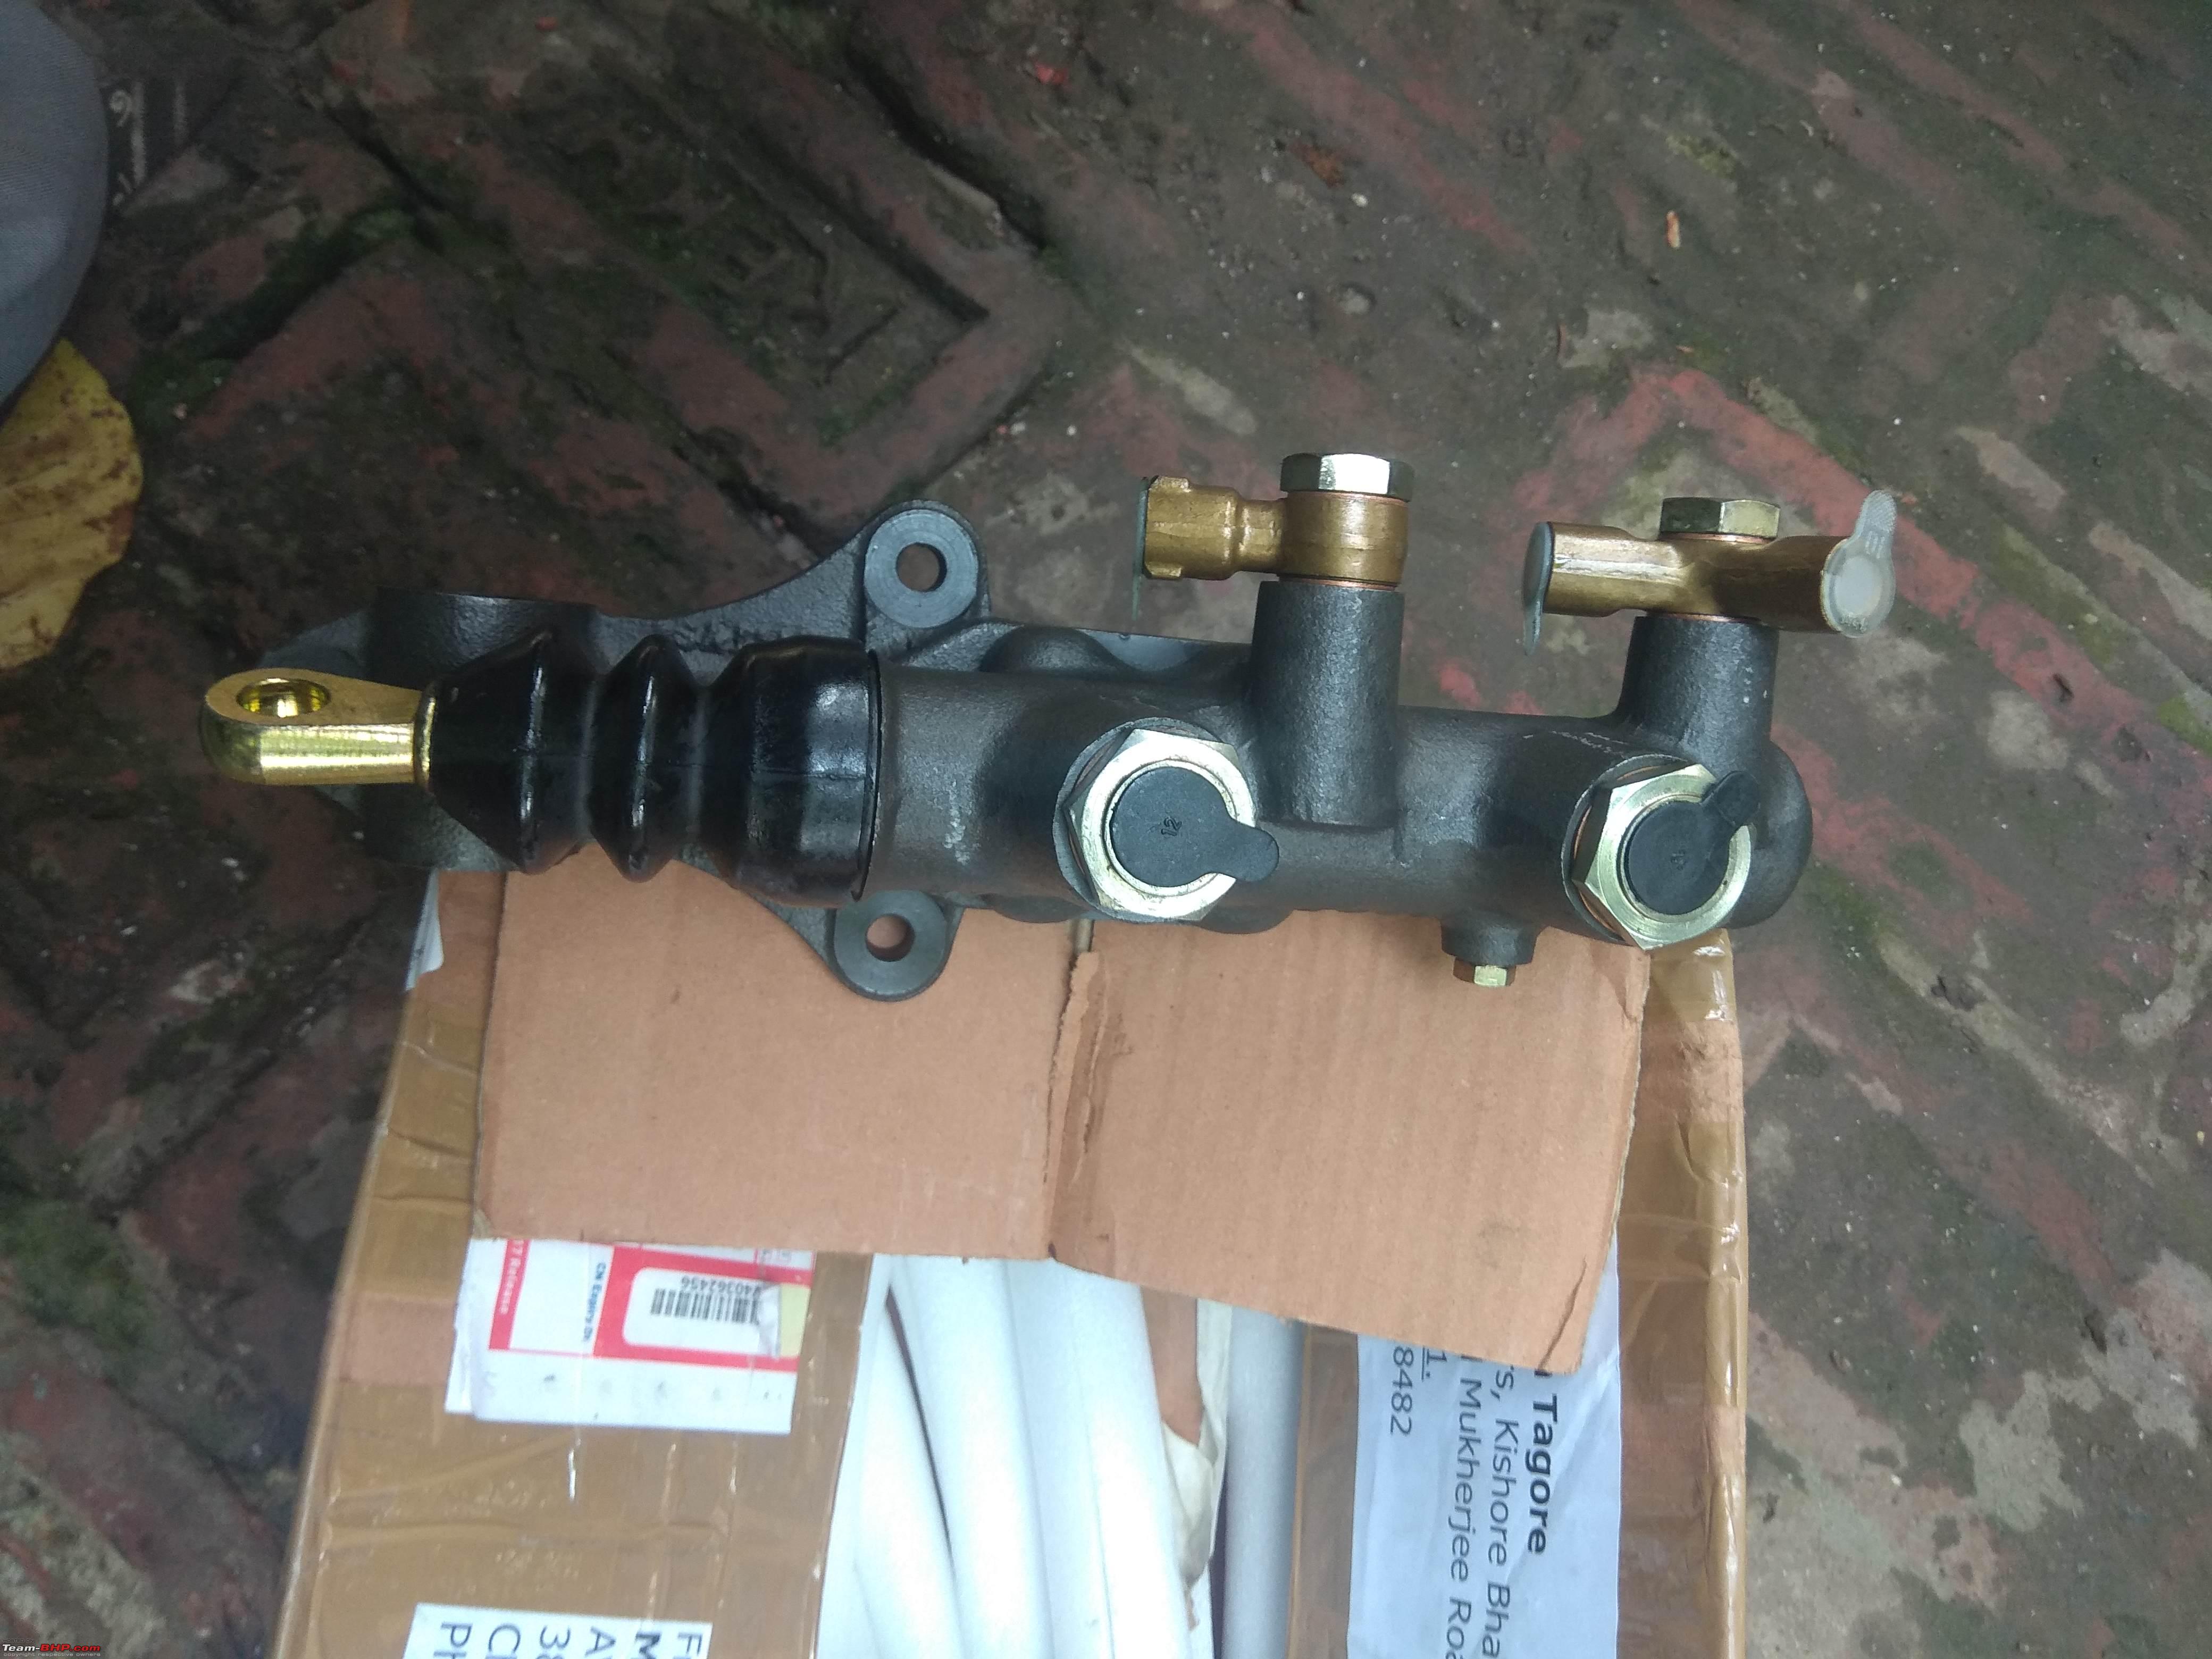 Miscellaneous new oil seals 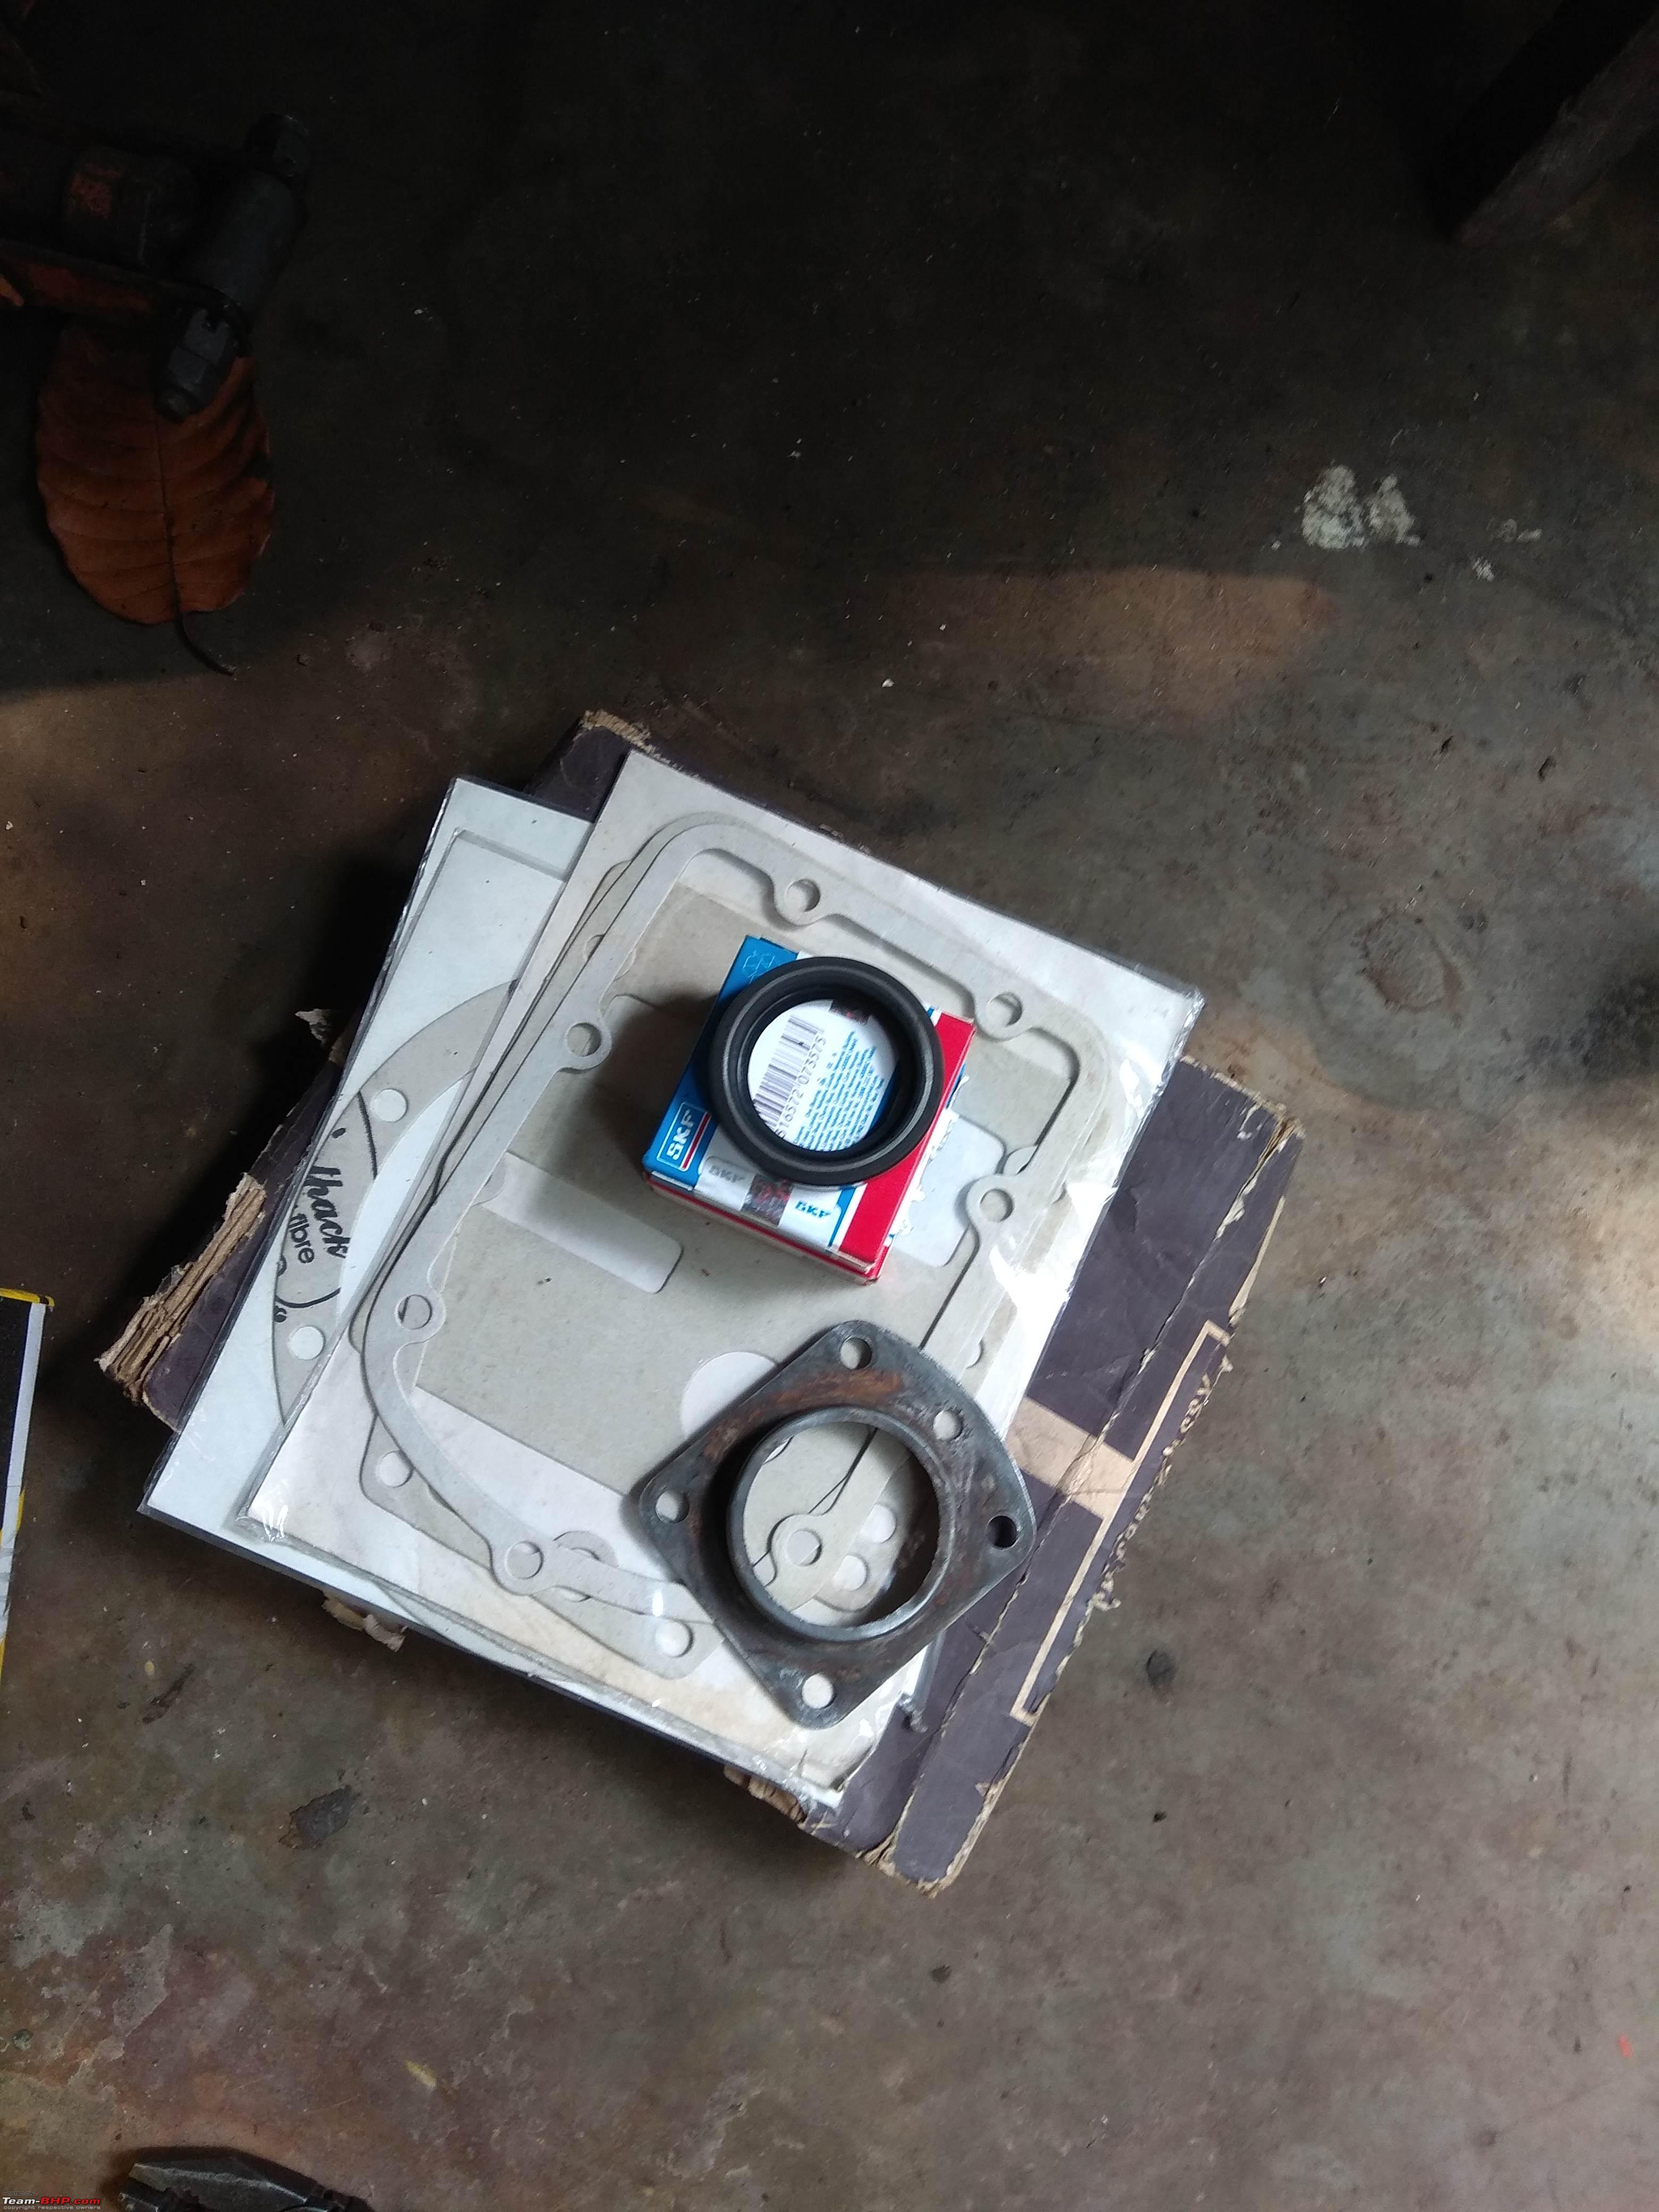 Re-assembled rear axle 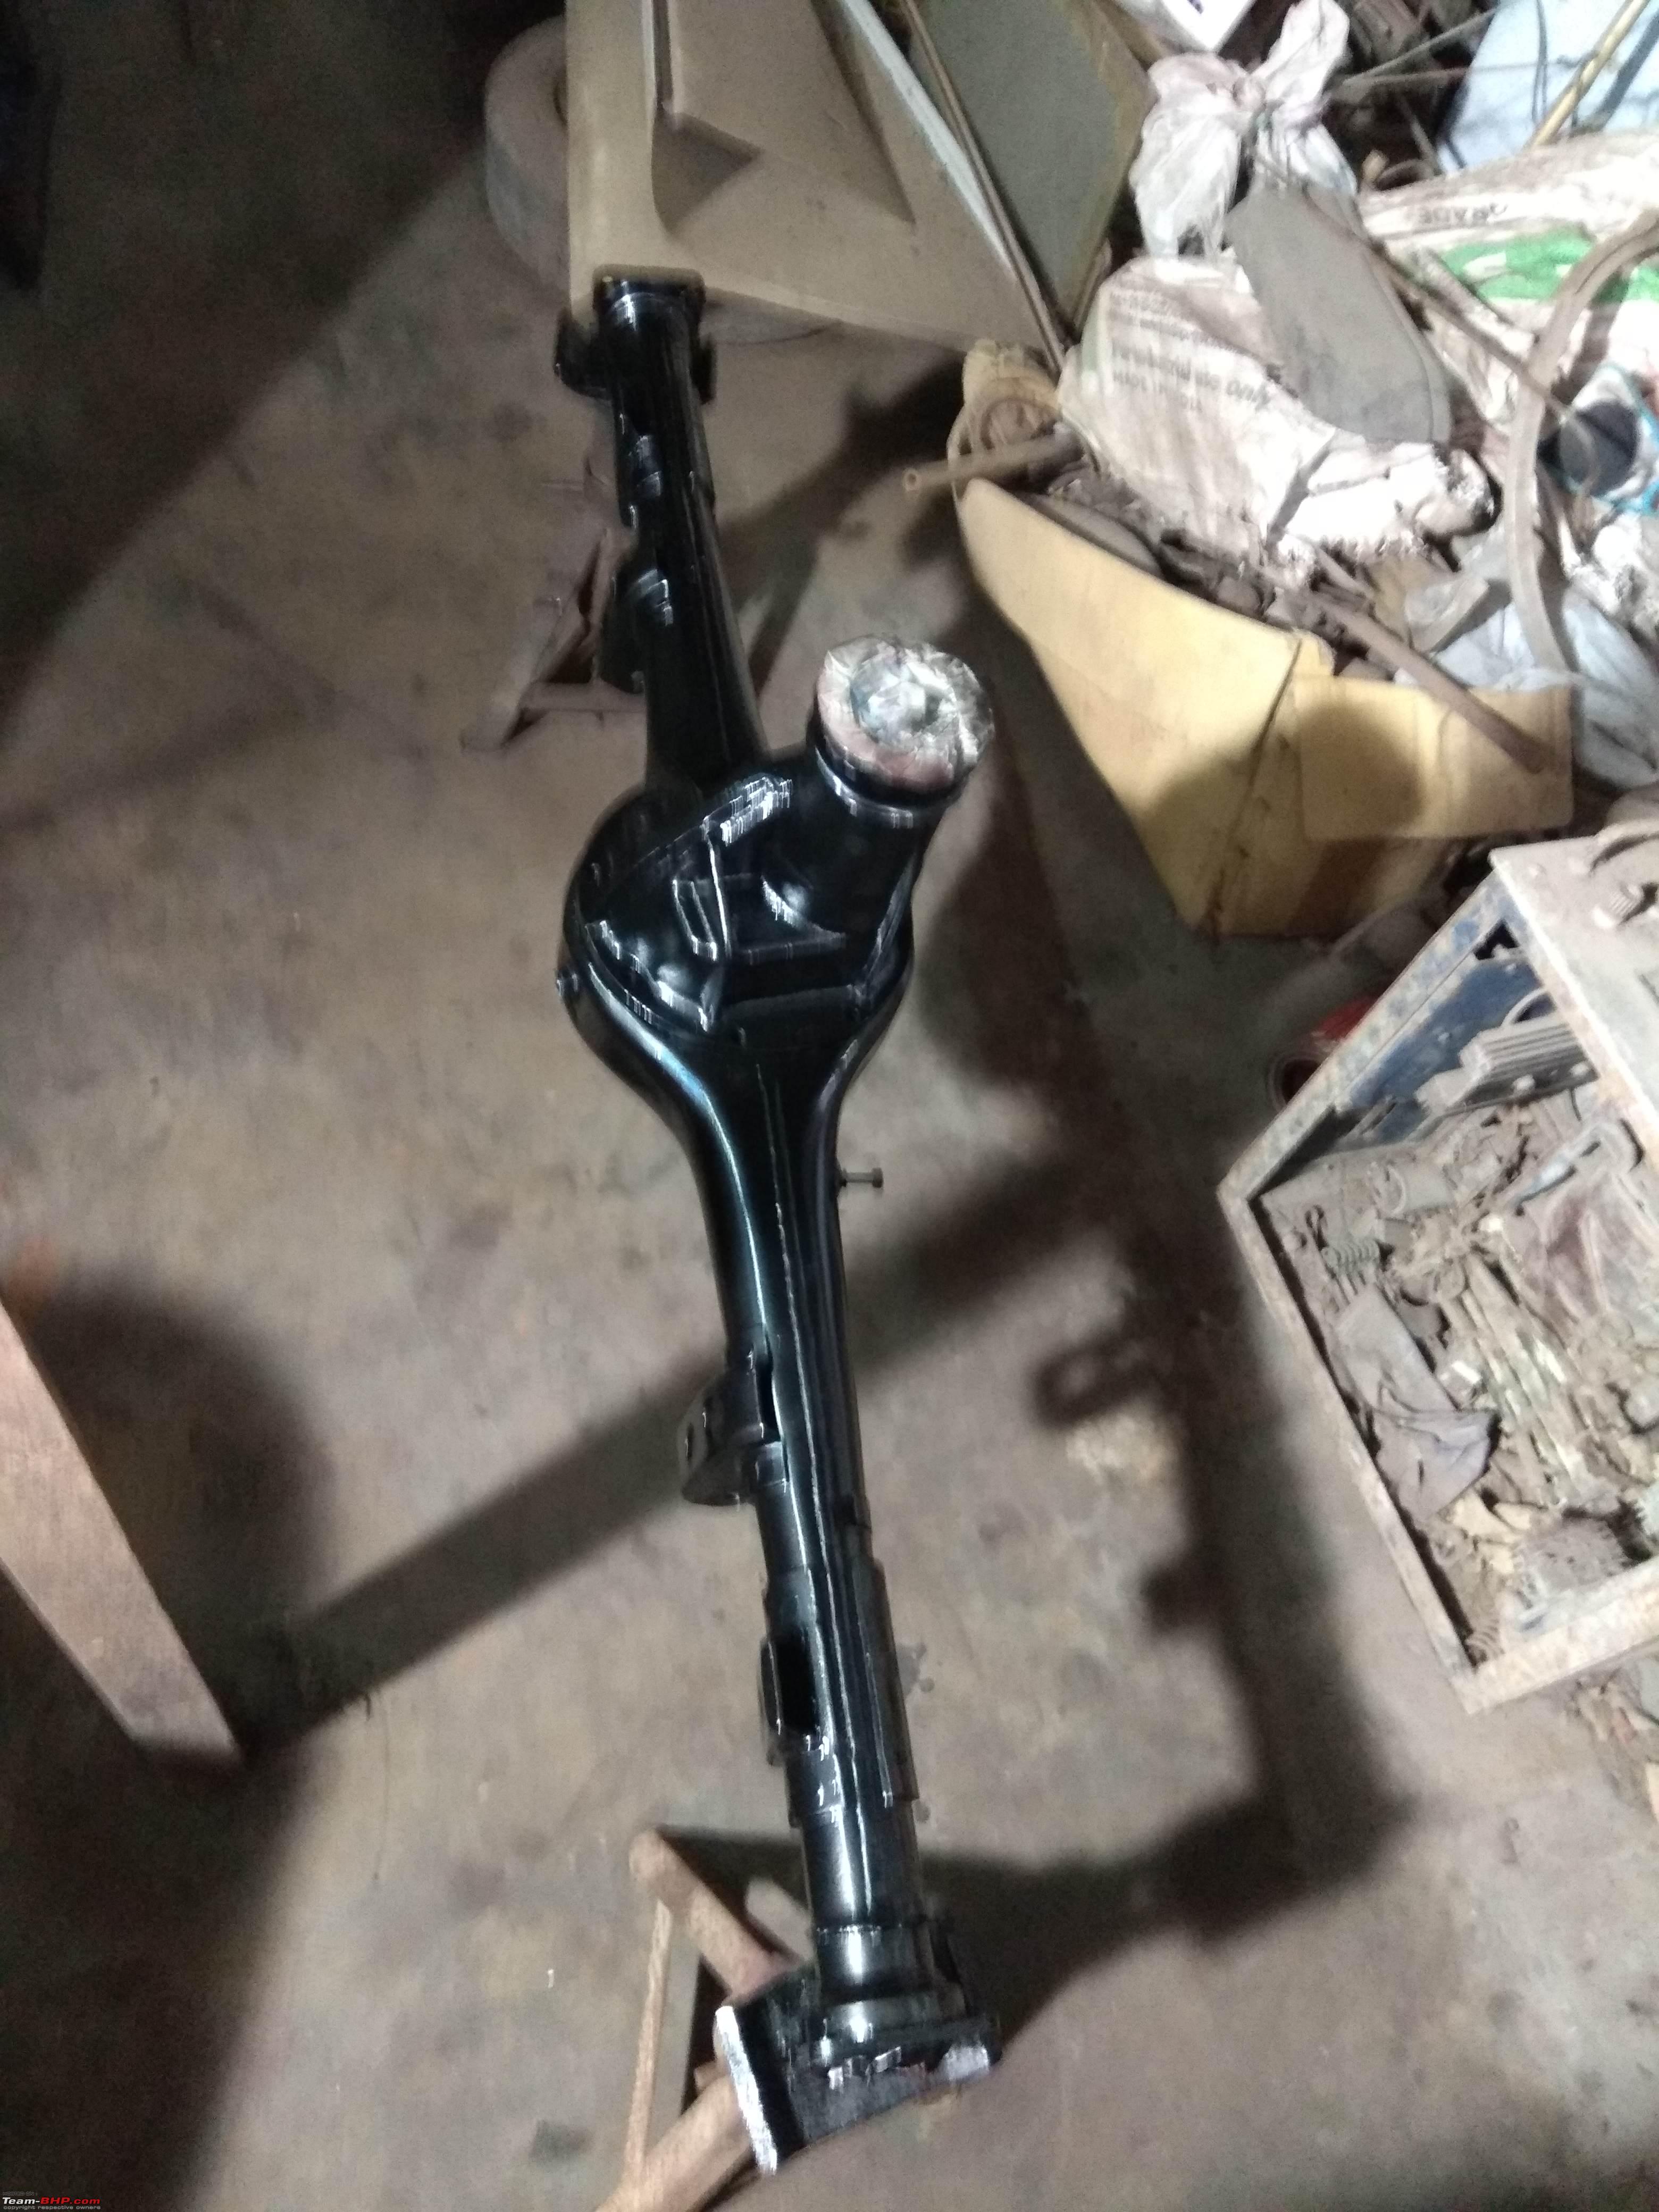 Leaf spring shackles & other parts taken of for cleaning 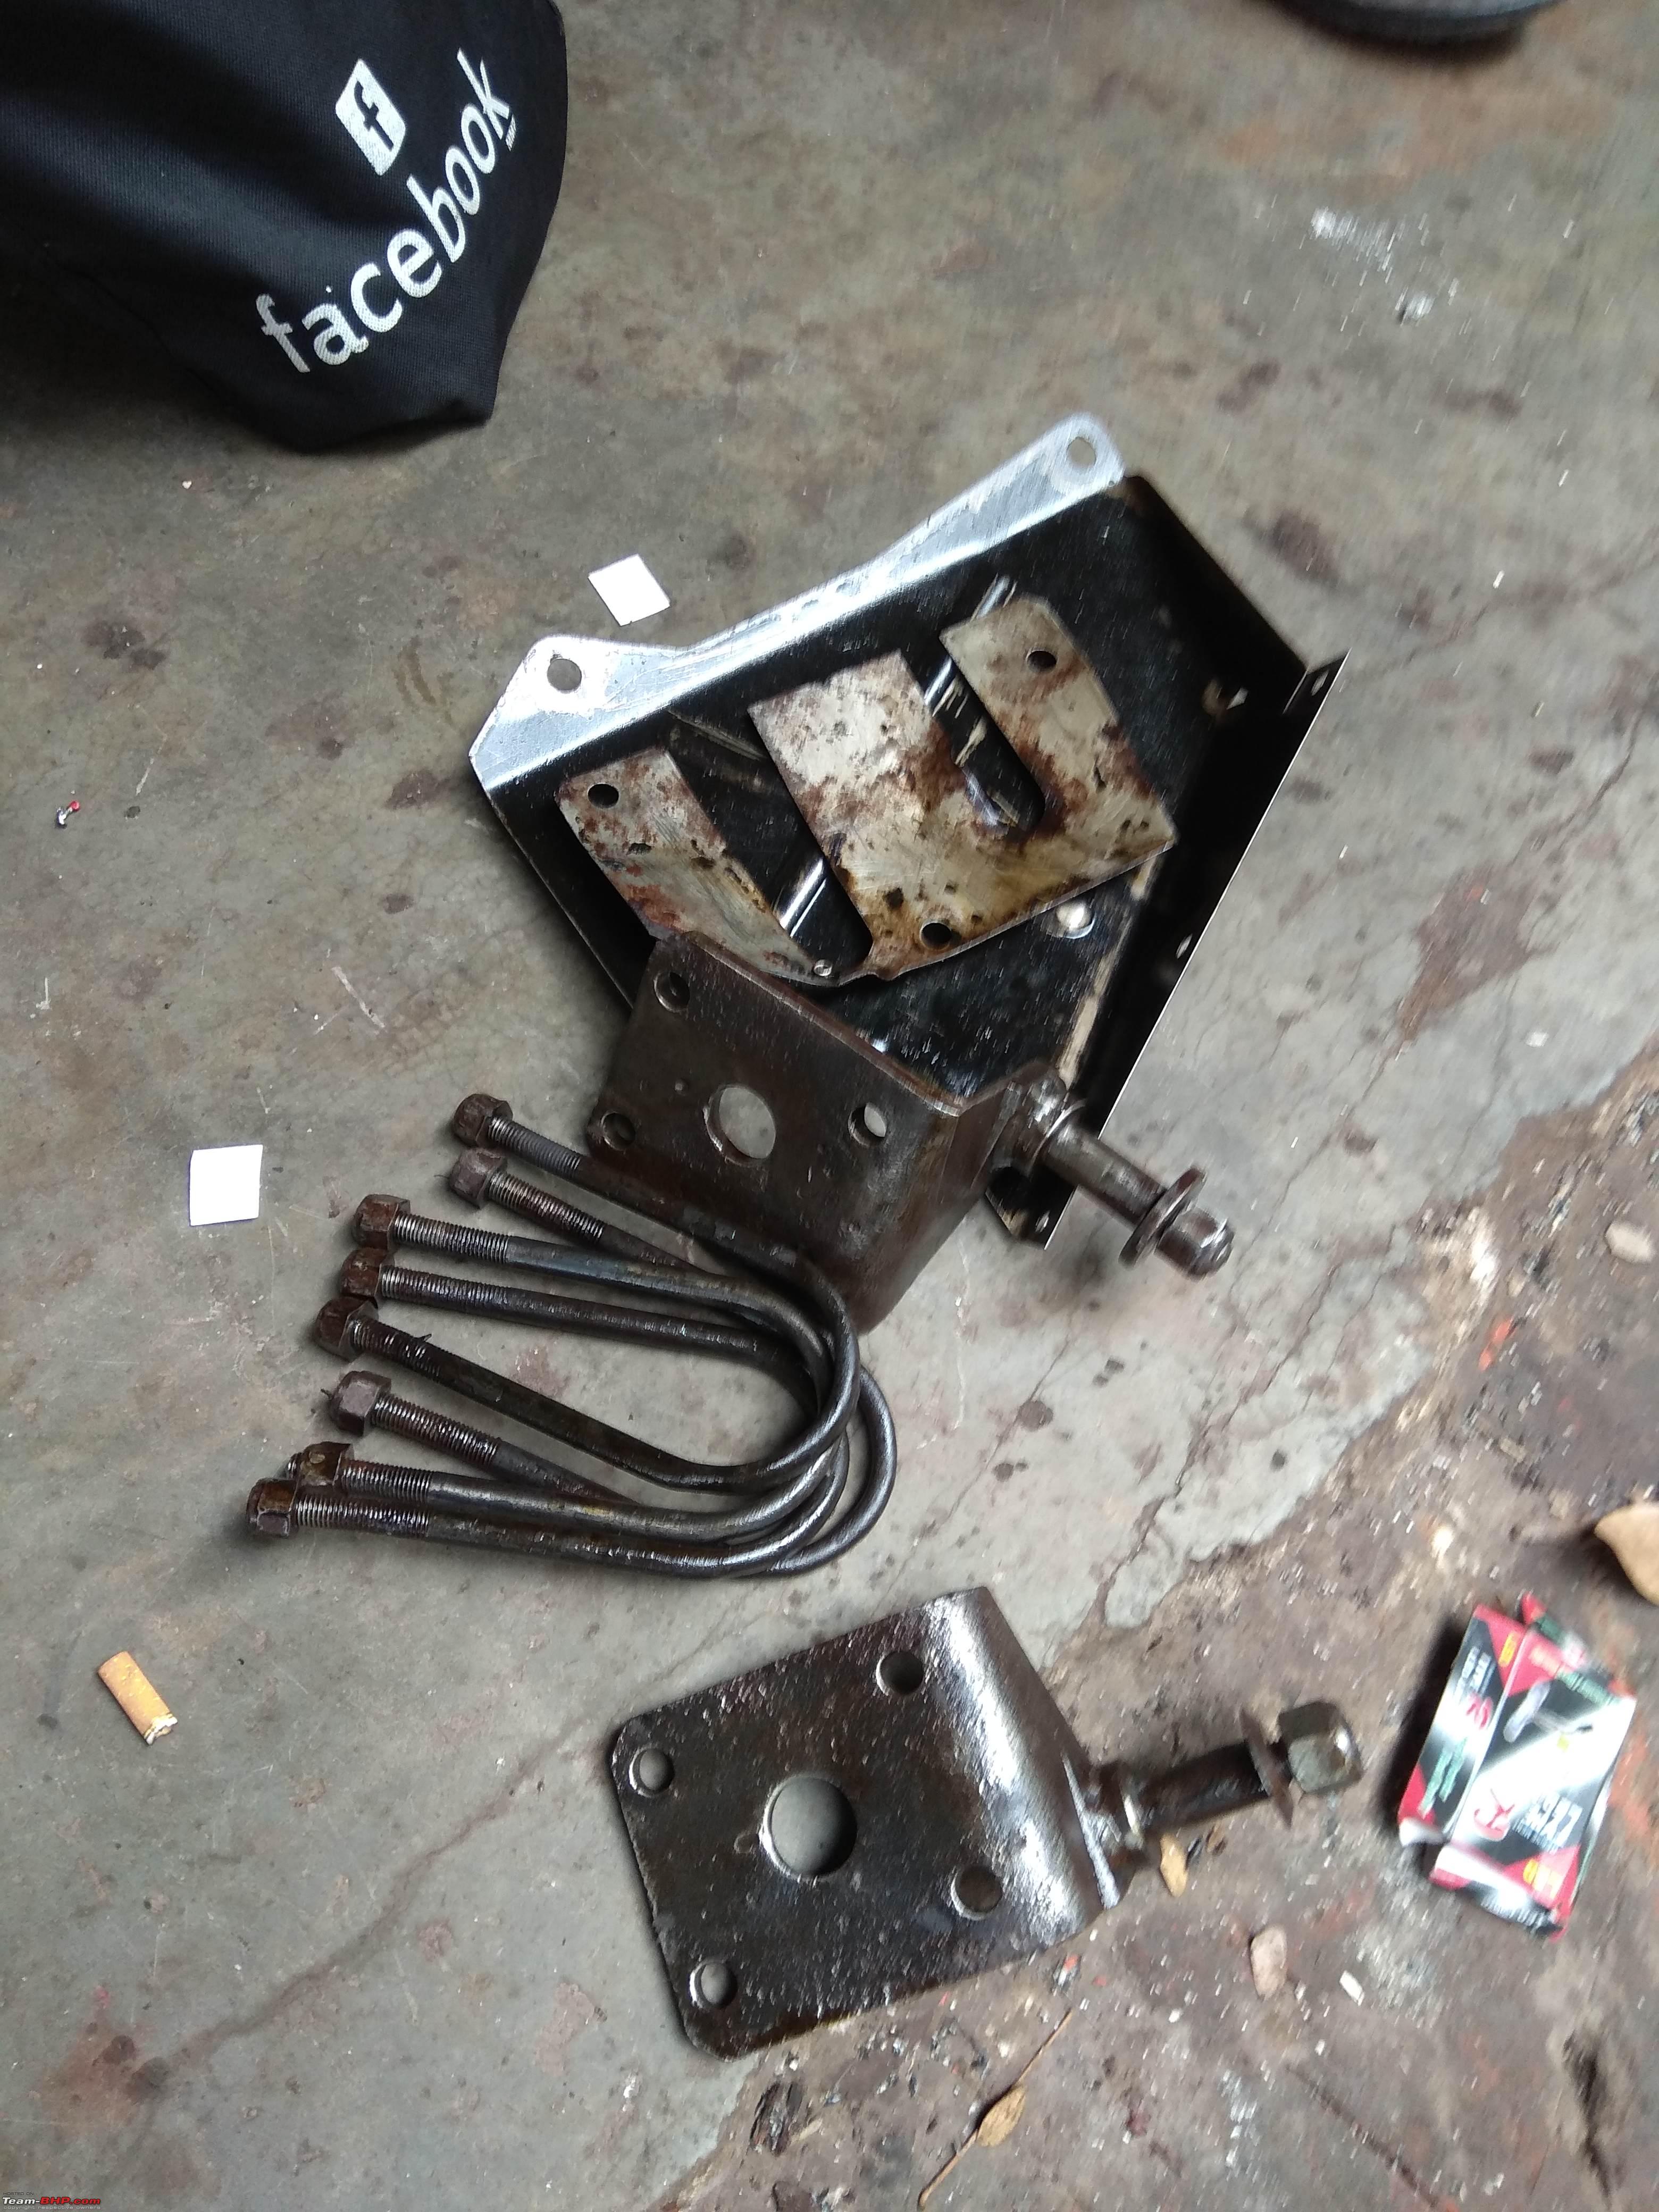 New clutch unit 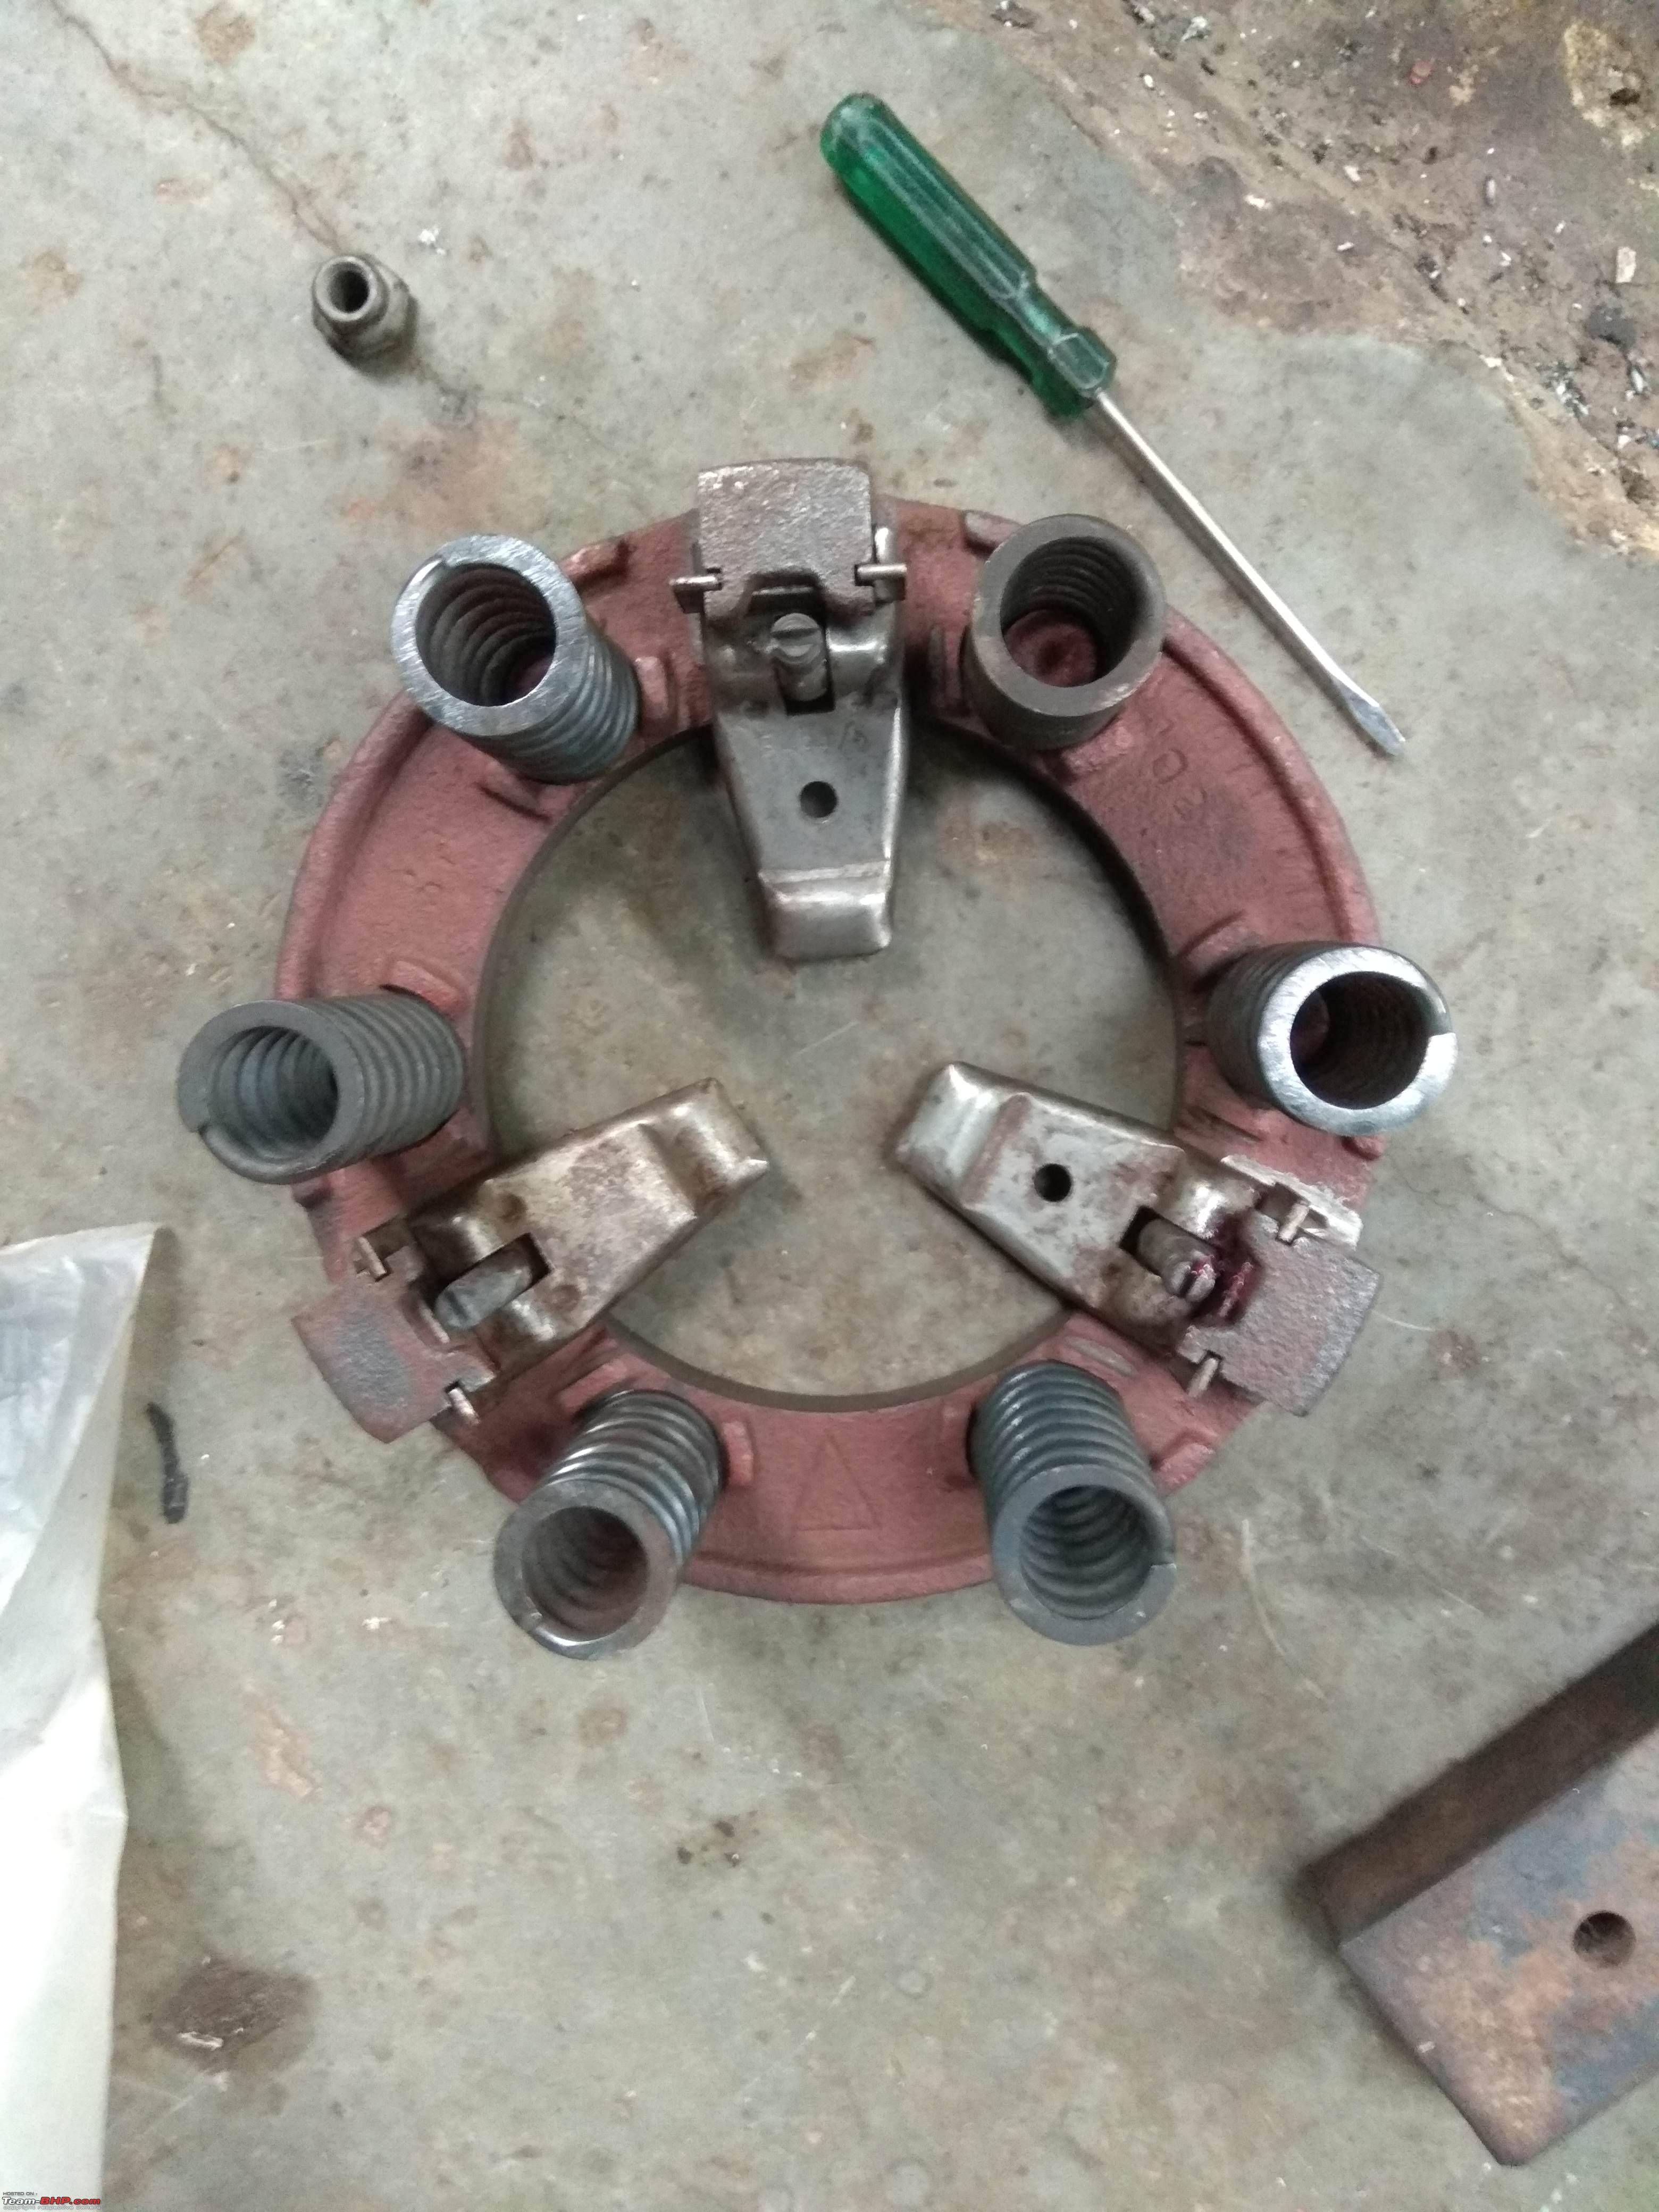 Clutch assembly being assembled/adjusted  Differential rebuilt 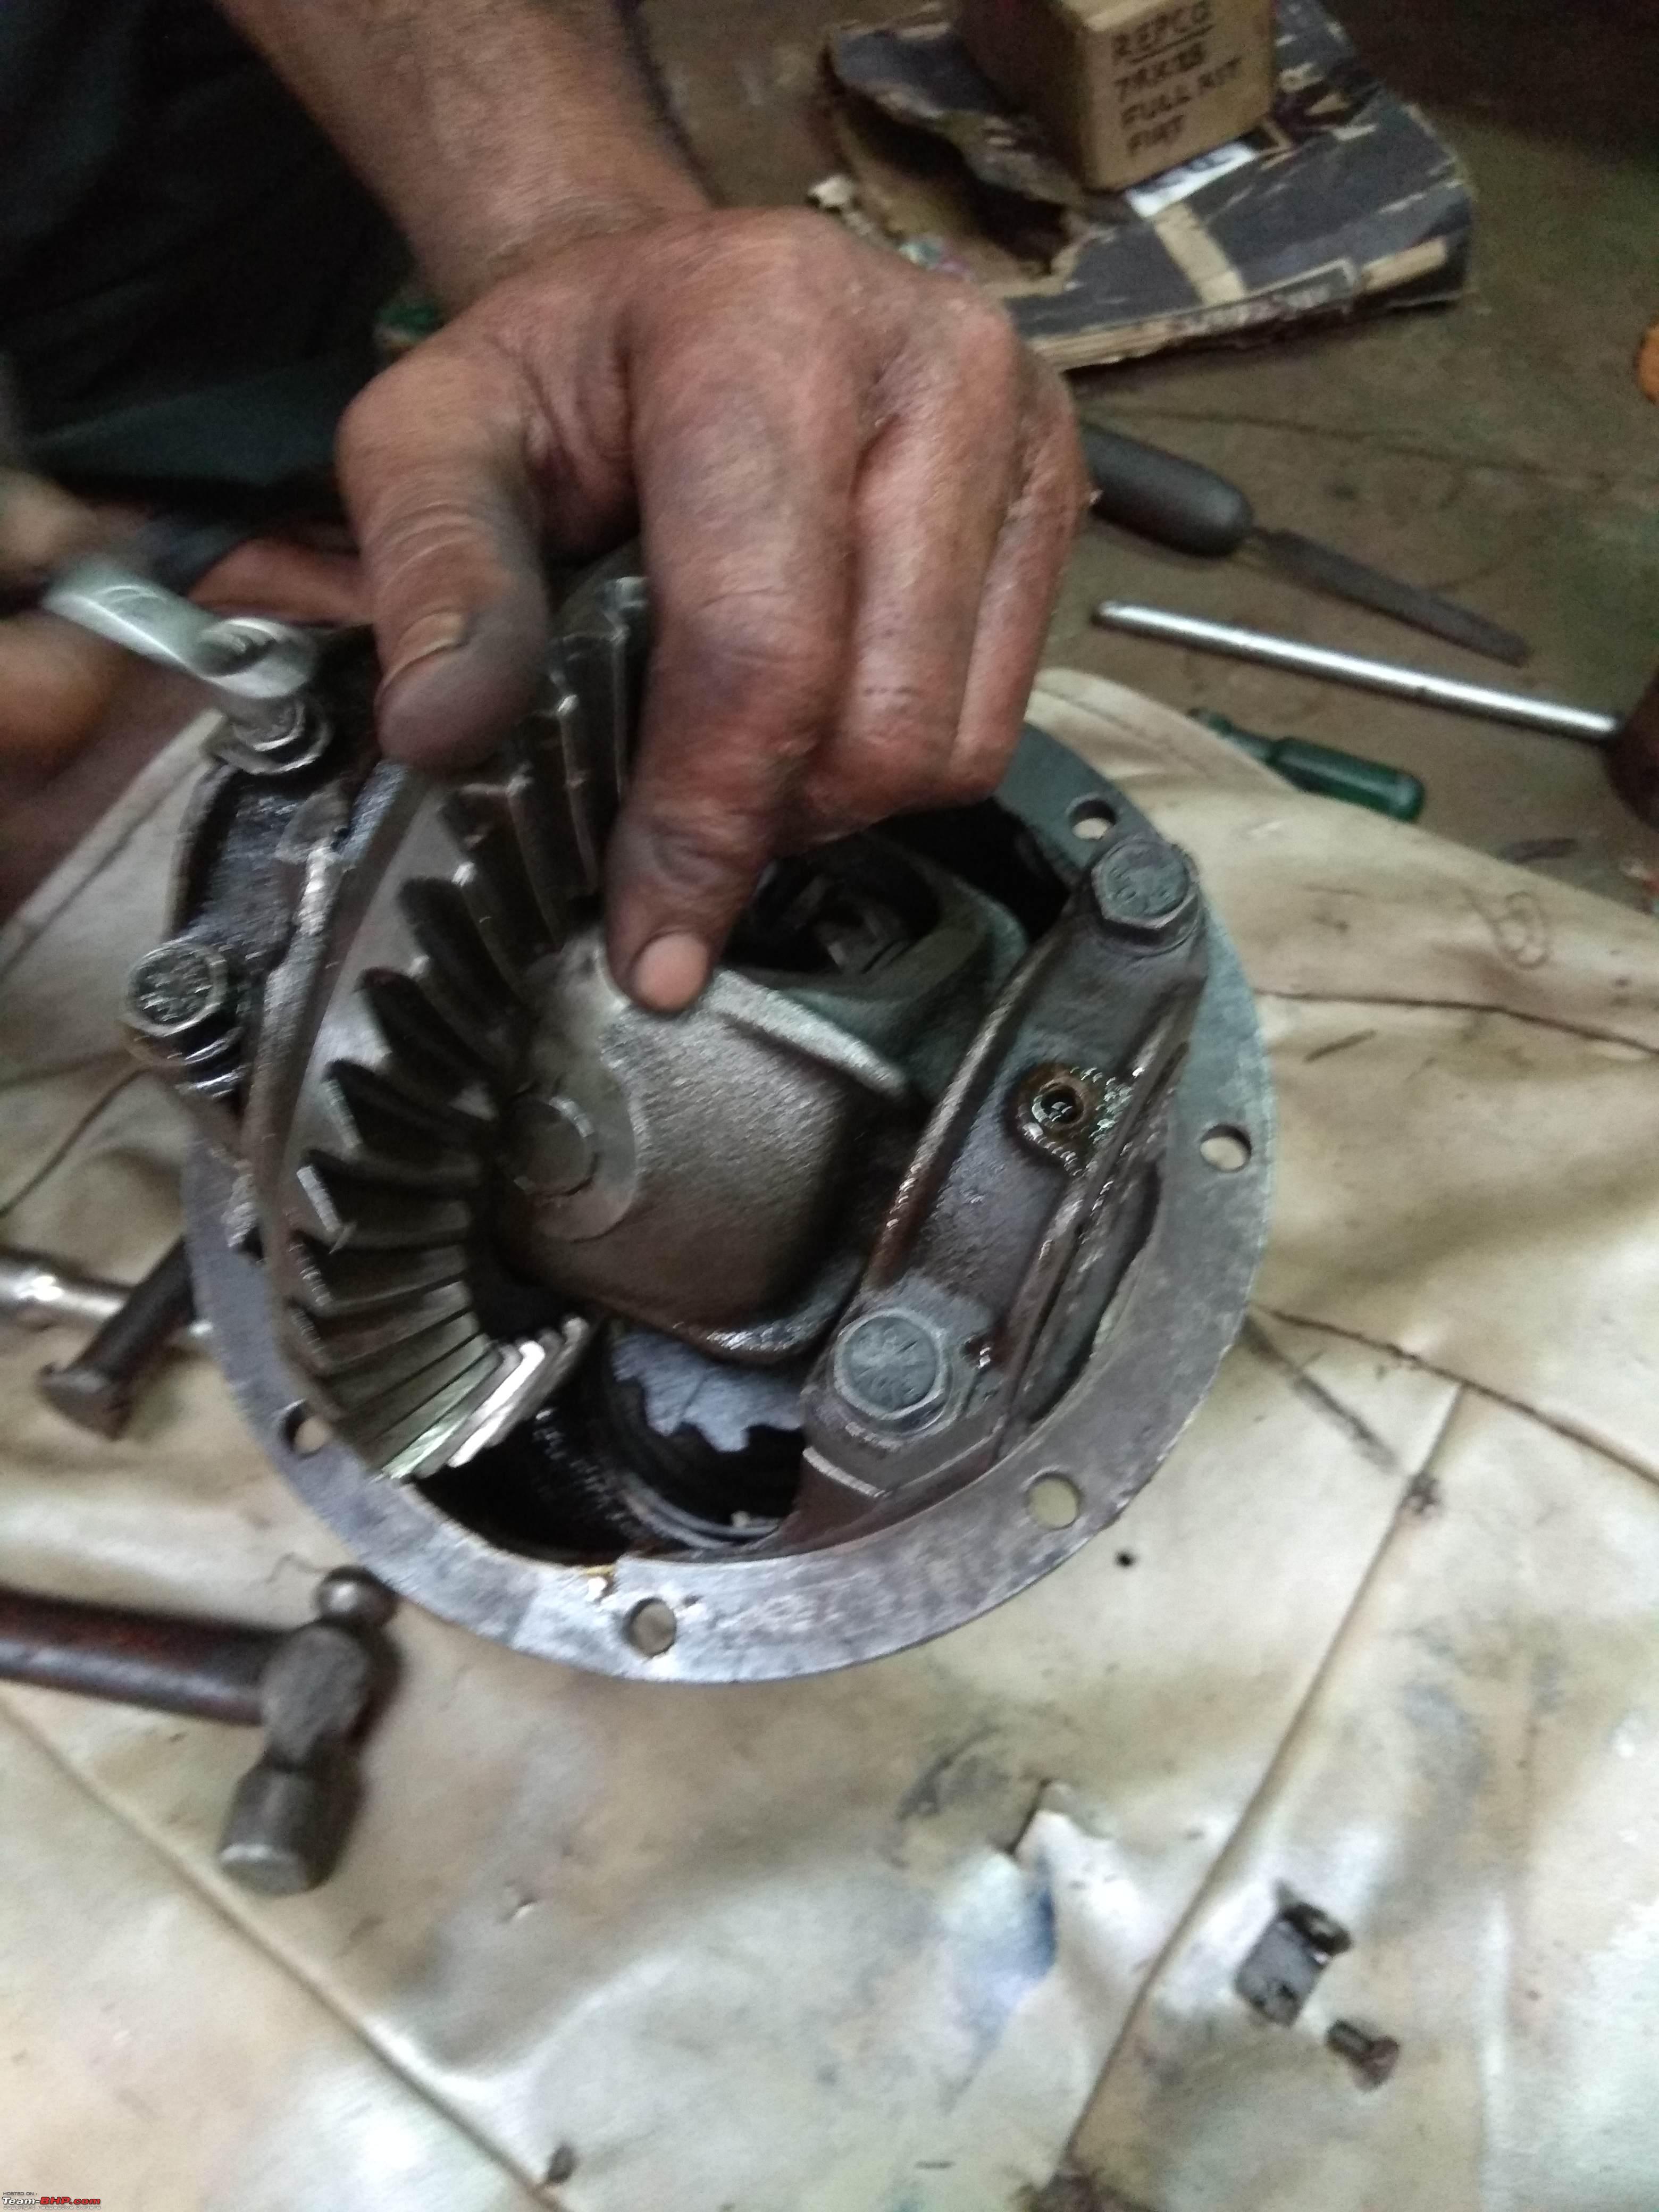 Diff completed  Transmission unit only required a good clean-up & change of seals  Steering assembly was cleaned  Lower wishbones on right & left were unequal lengths!  Although you can't make out in this photo, the last coil on this spring is actually broken 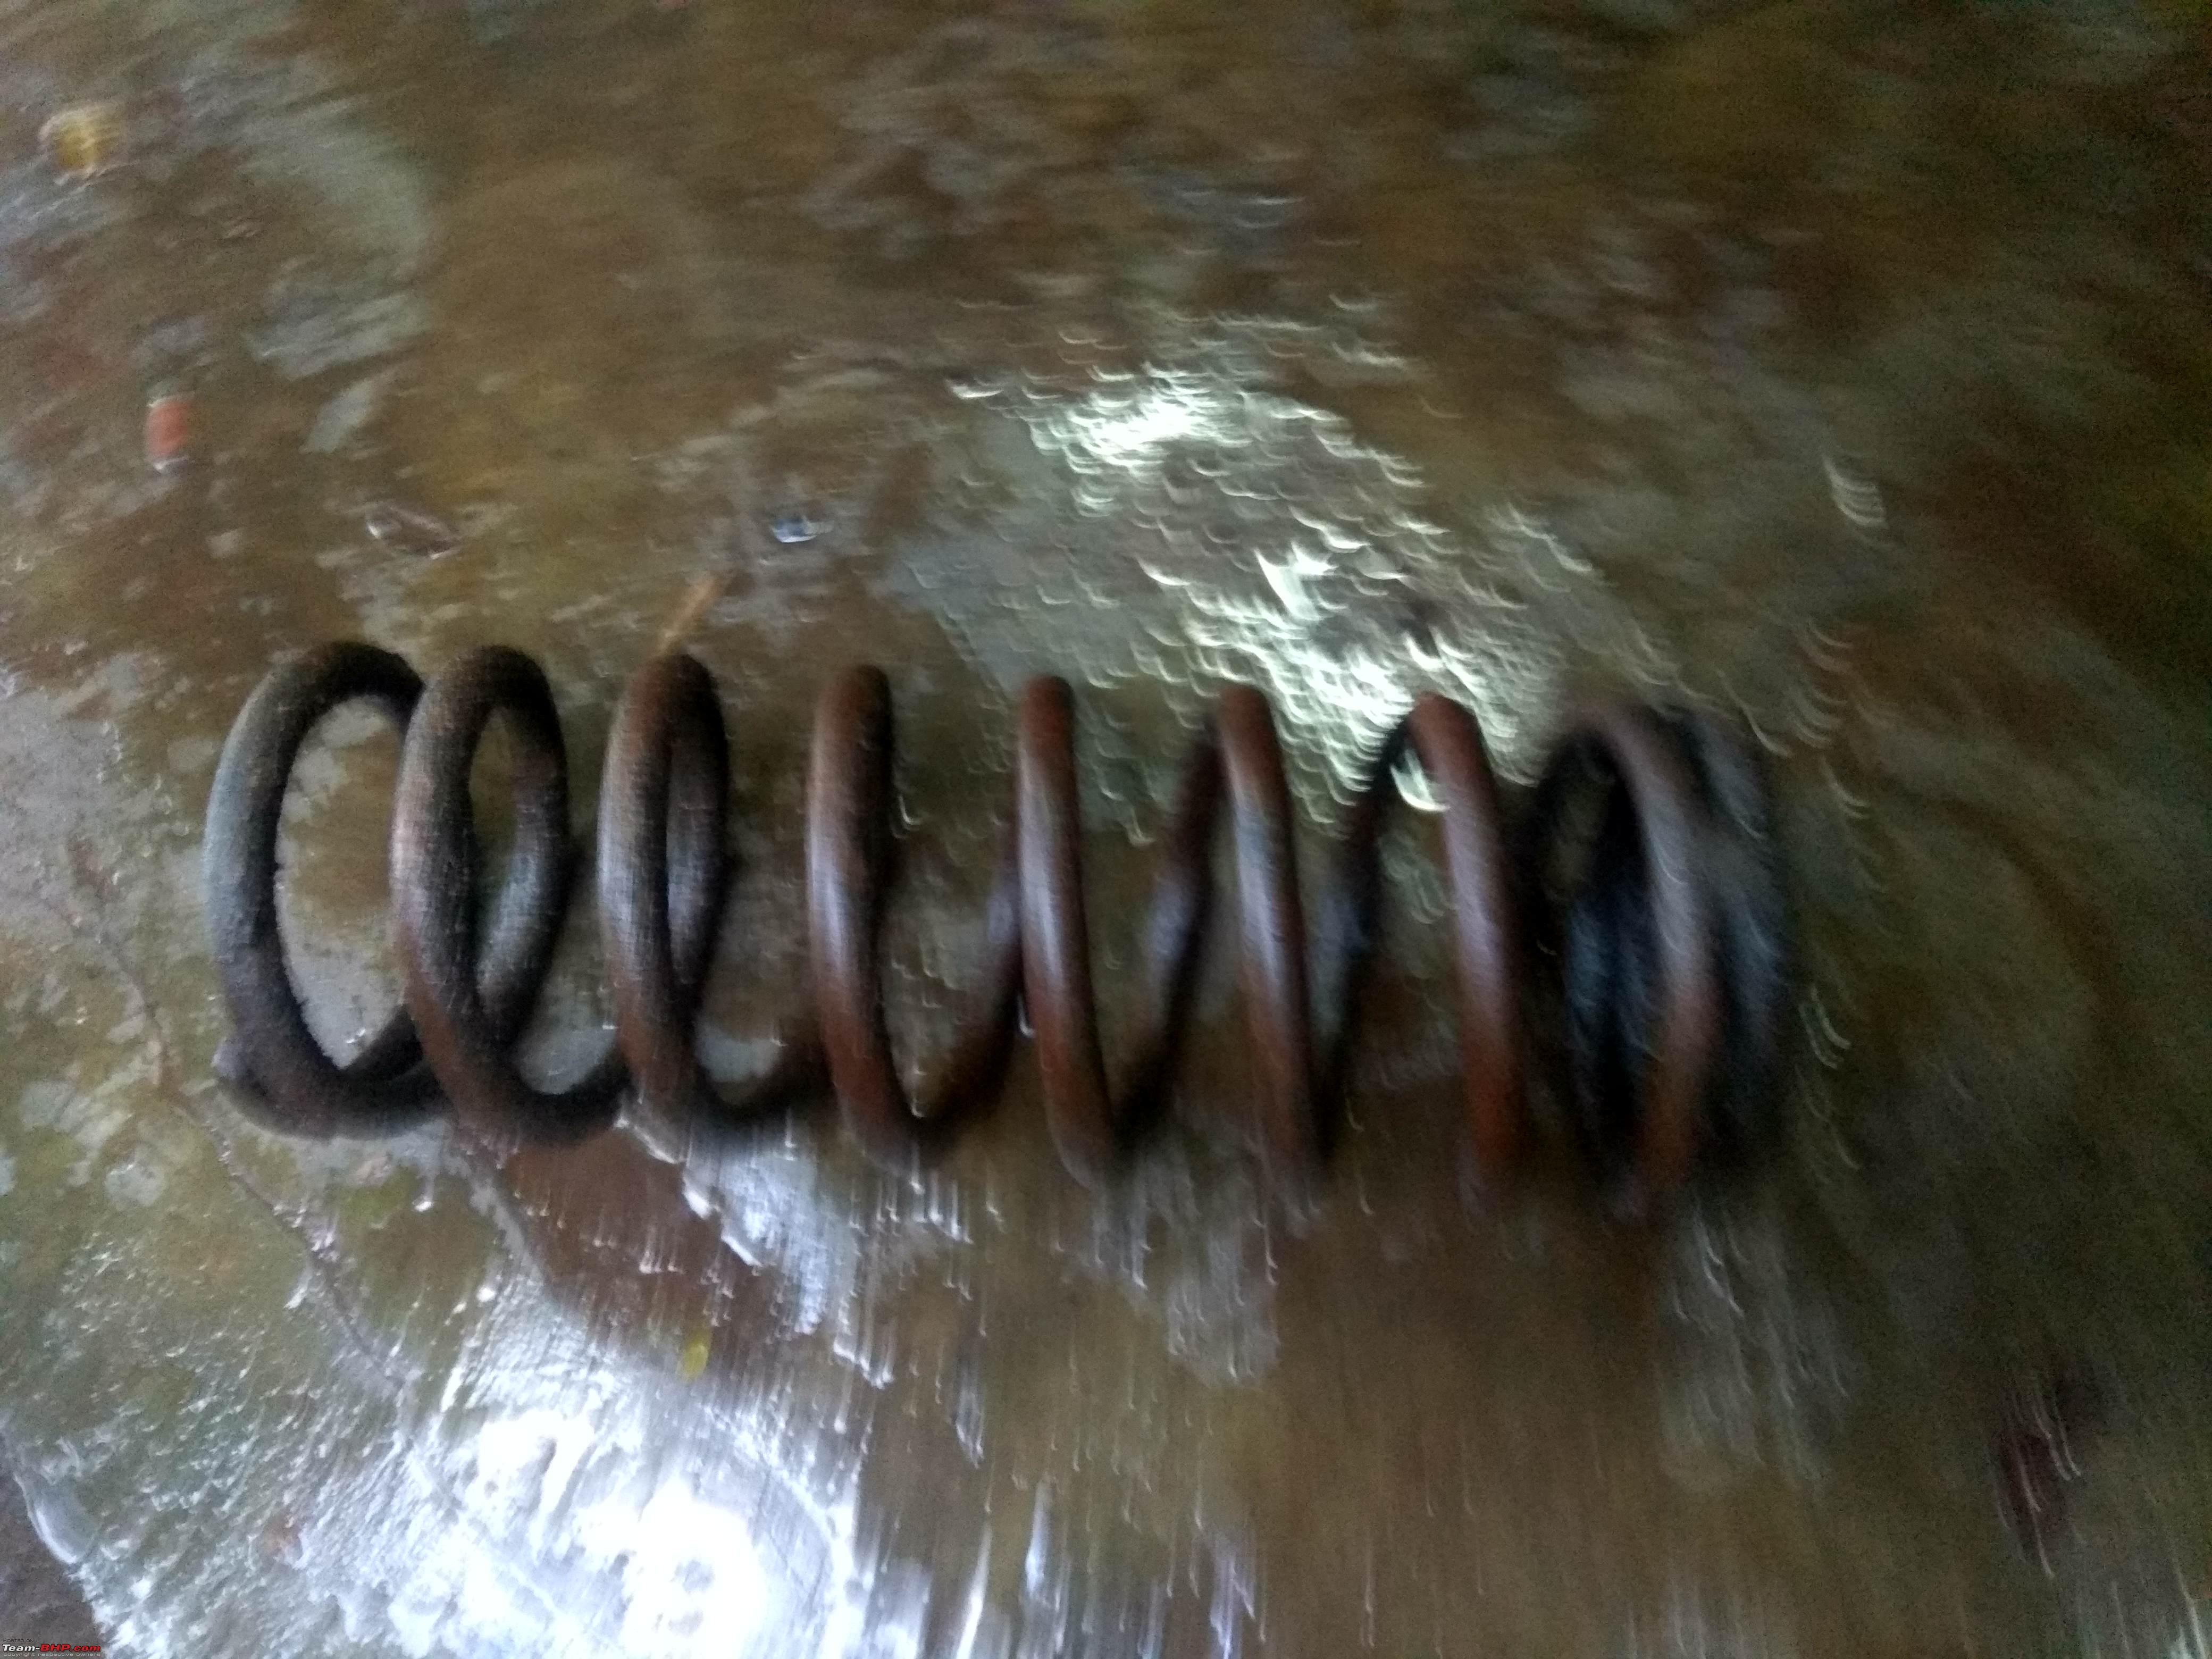 VIR make components, which I am told are OEM quality (bushes mostly) were used throughout 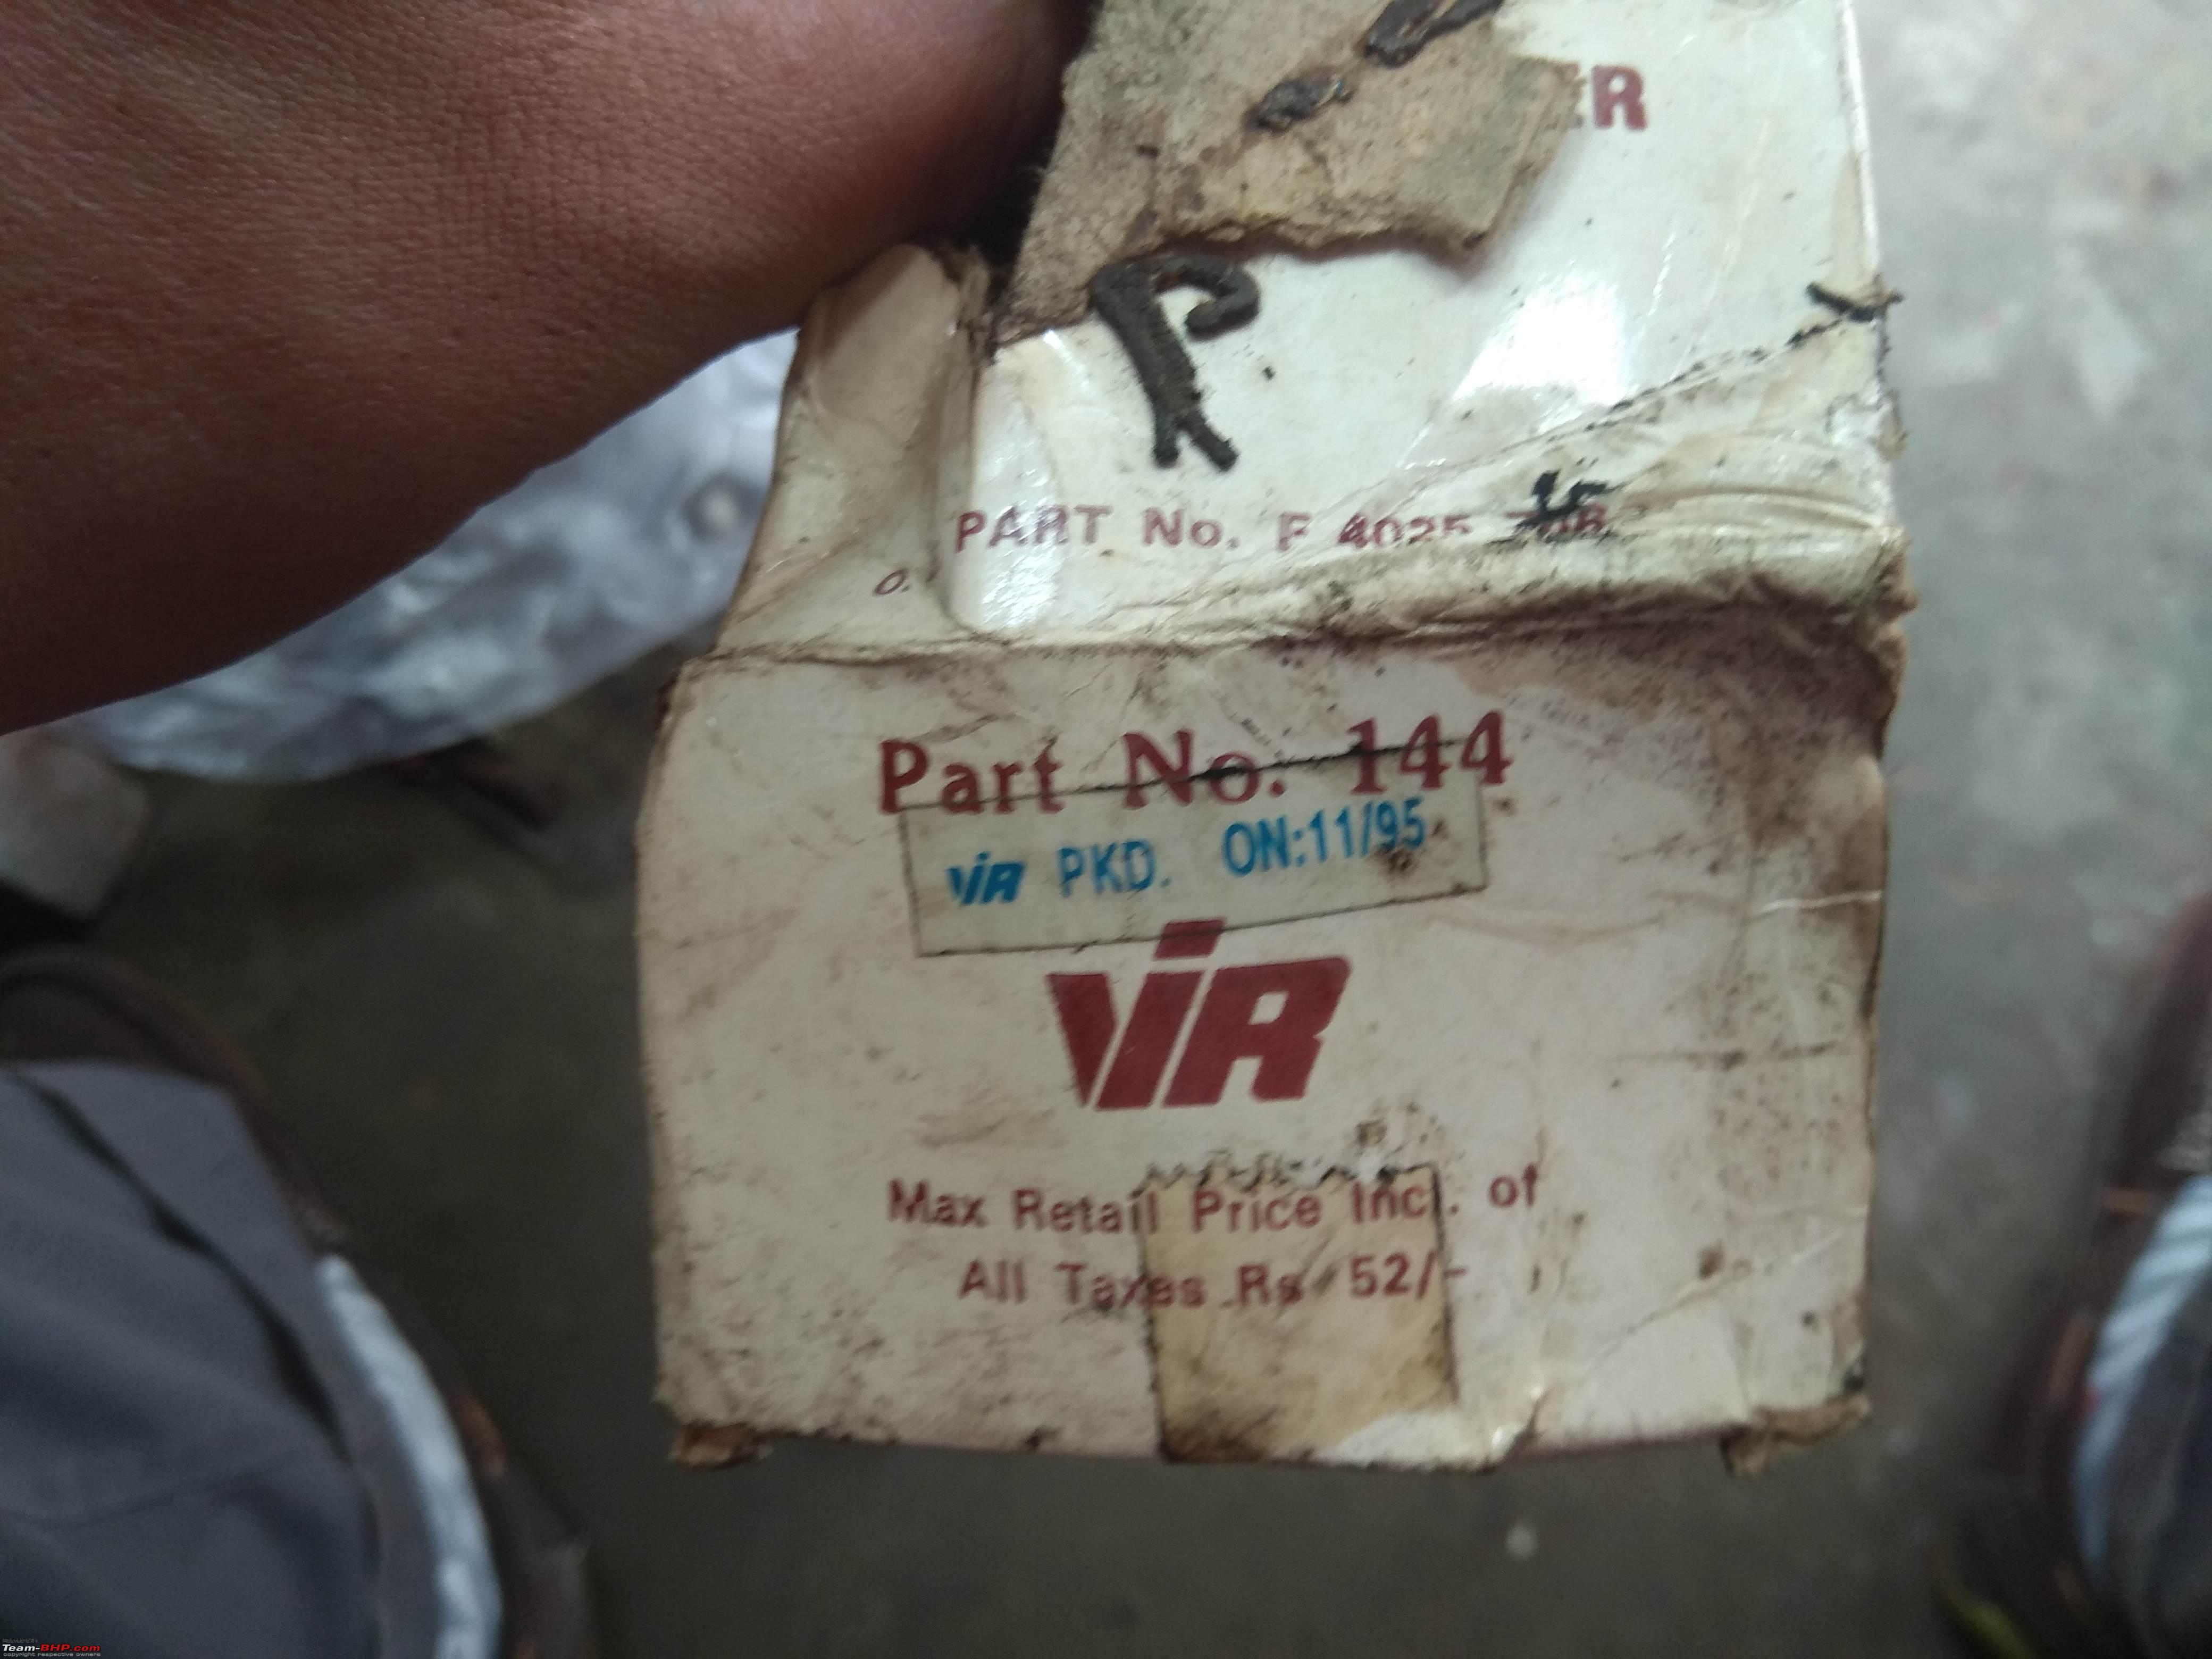 Rear axle & suspension re-assembled & fitted 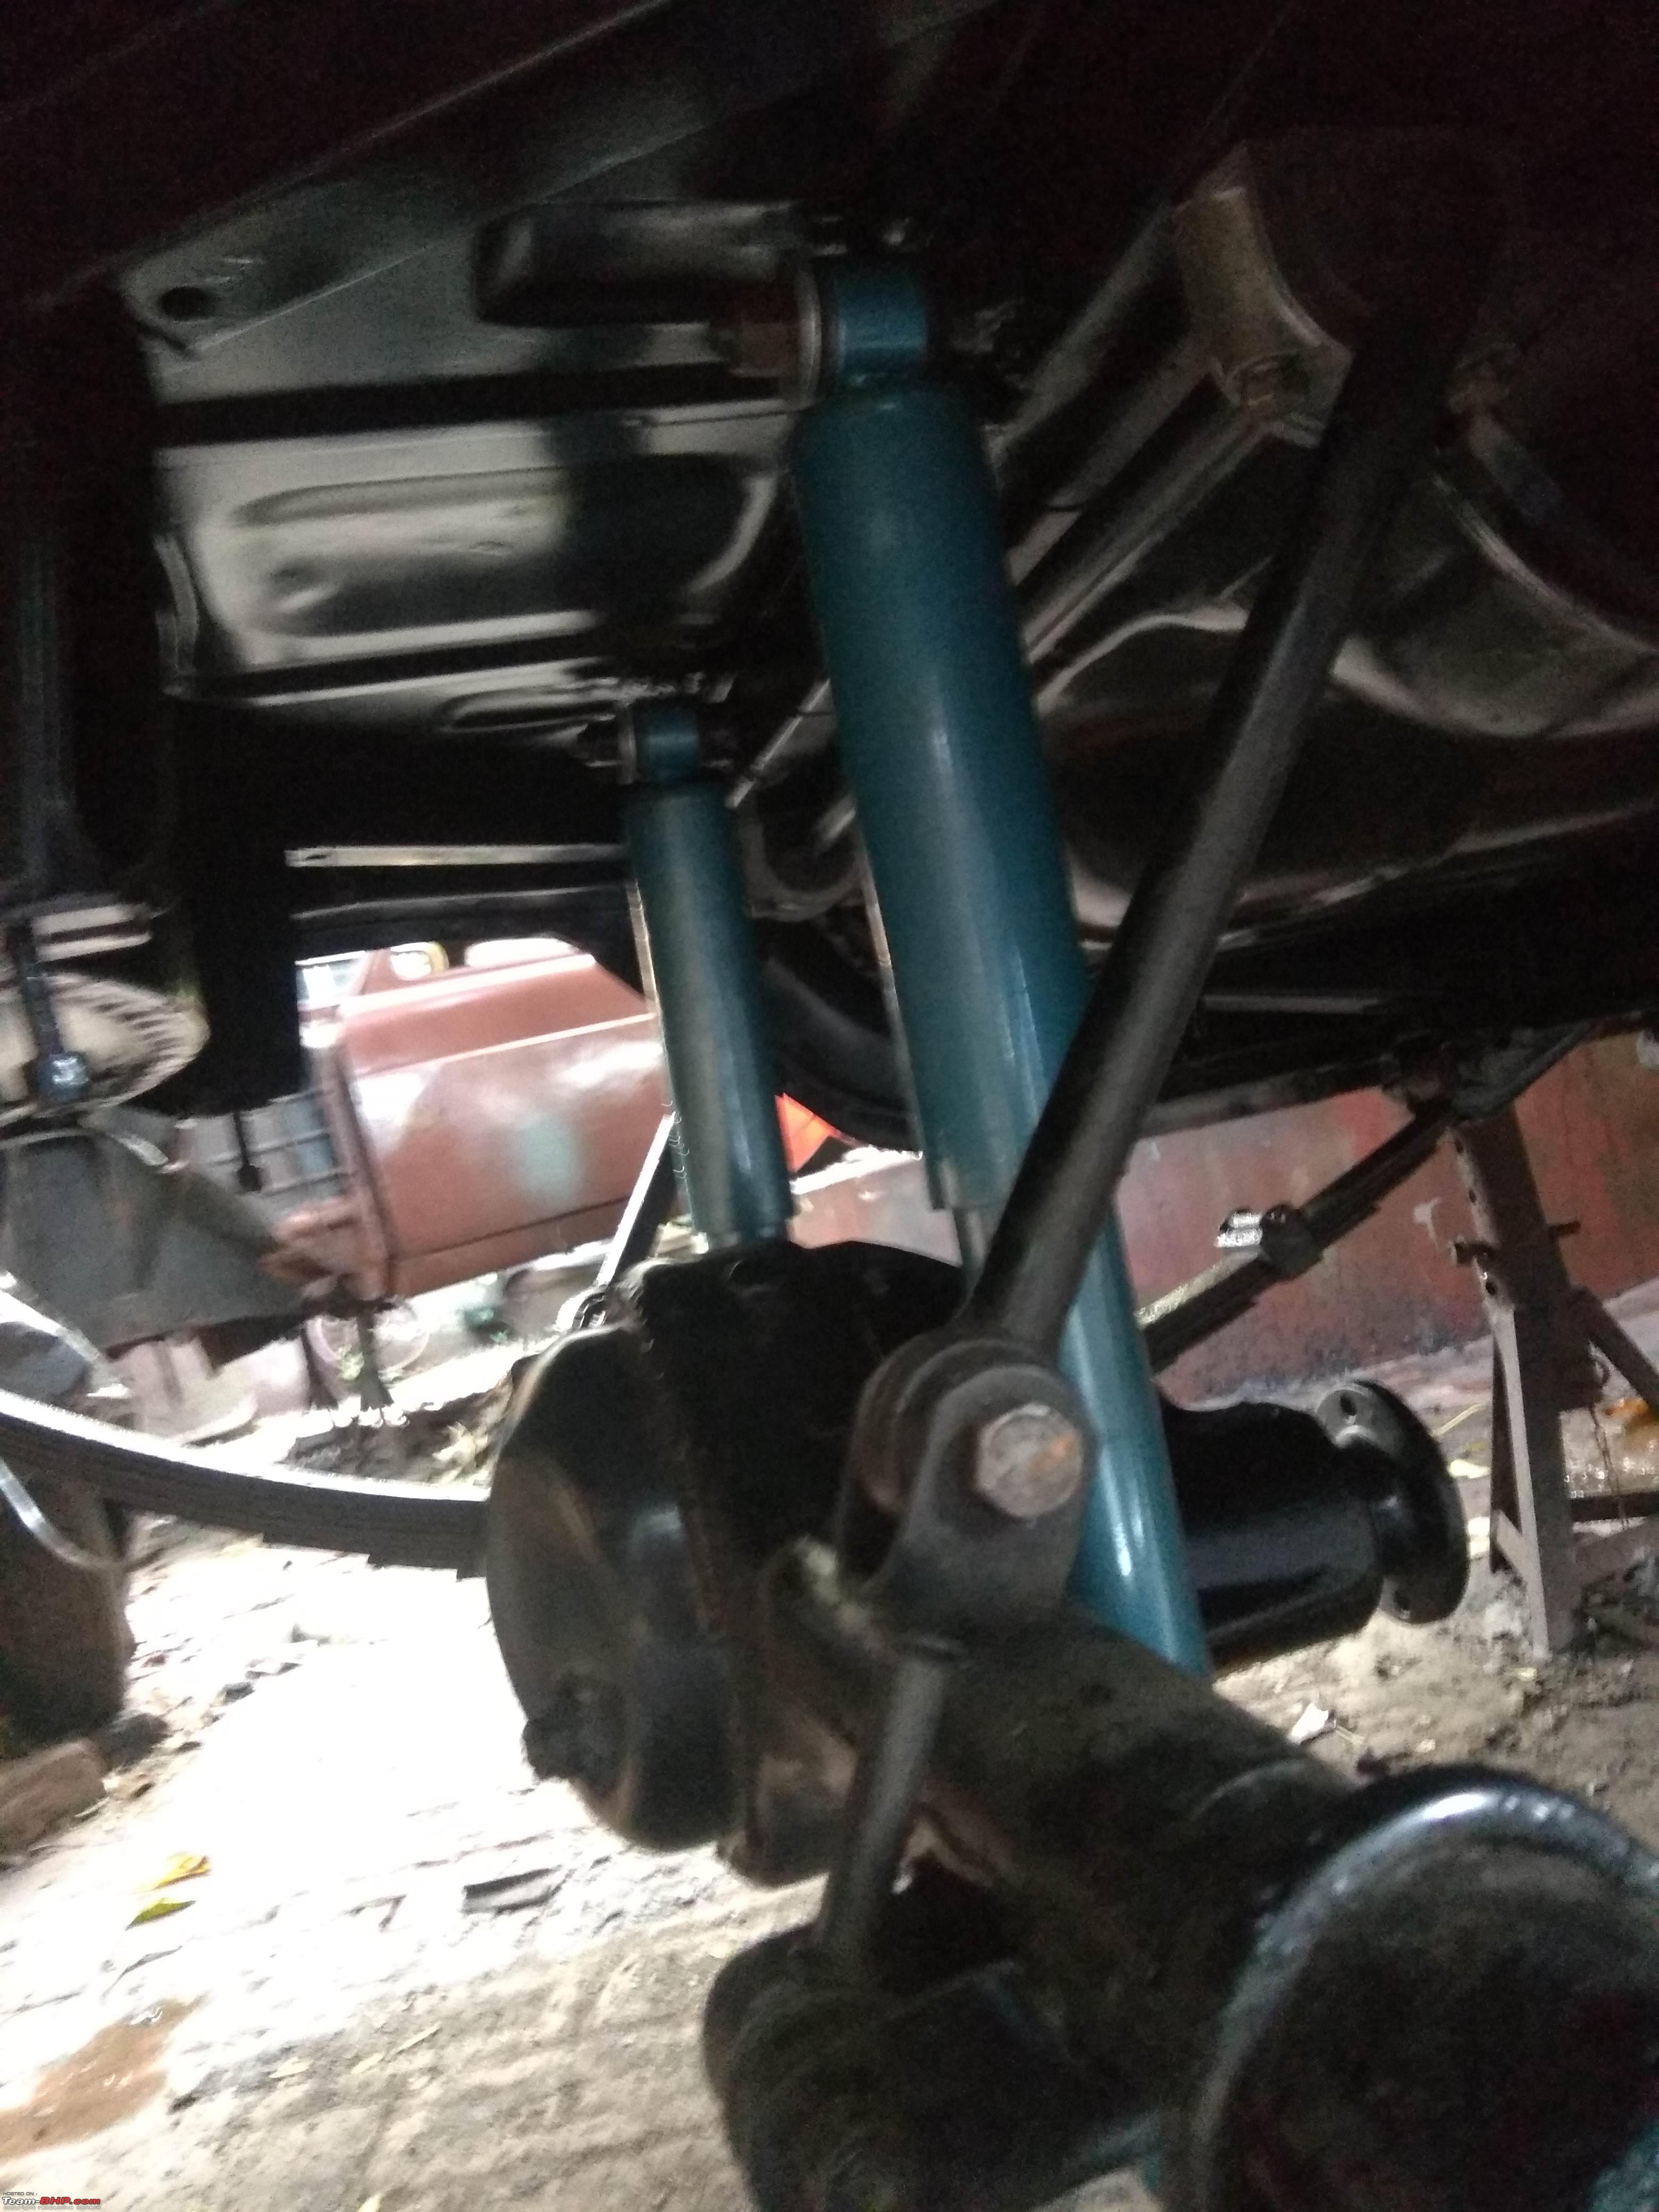 THE BIG CLEAN We don't know how 202 came to be covered in oil caked grime on her under-sides, engine area etc. Maybe it was decades of servicing with diesel for protection against rust coupled with road dust & dirt & more layers of oil. While the grime did protect several areas of 202 from rust, it was one hell of an arduous & long task to take all the much of as the pics will show: The filth in the wheel well areas 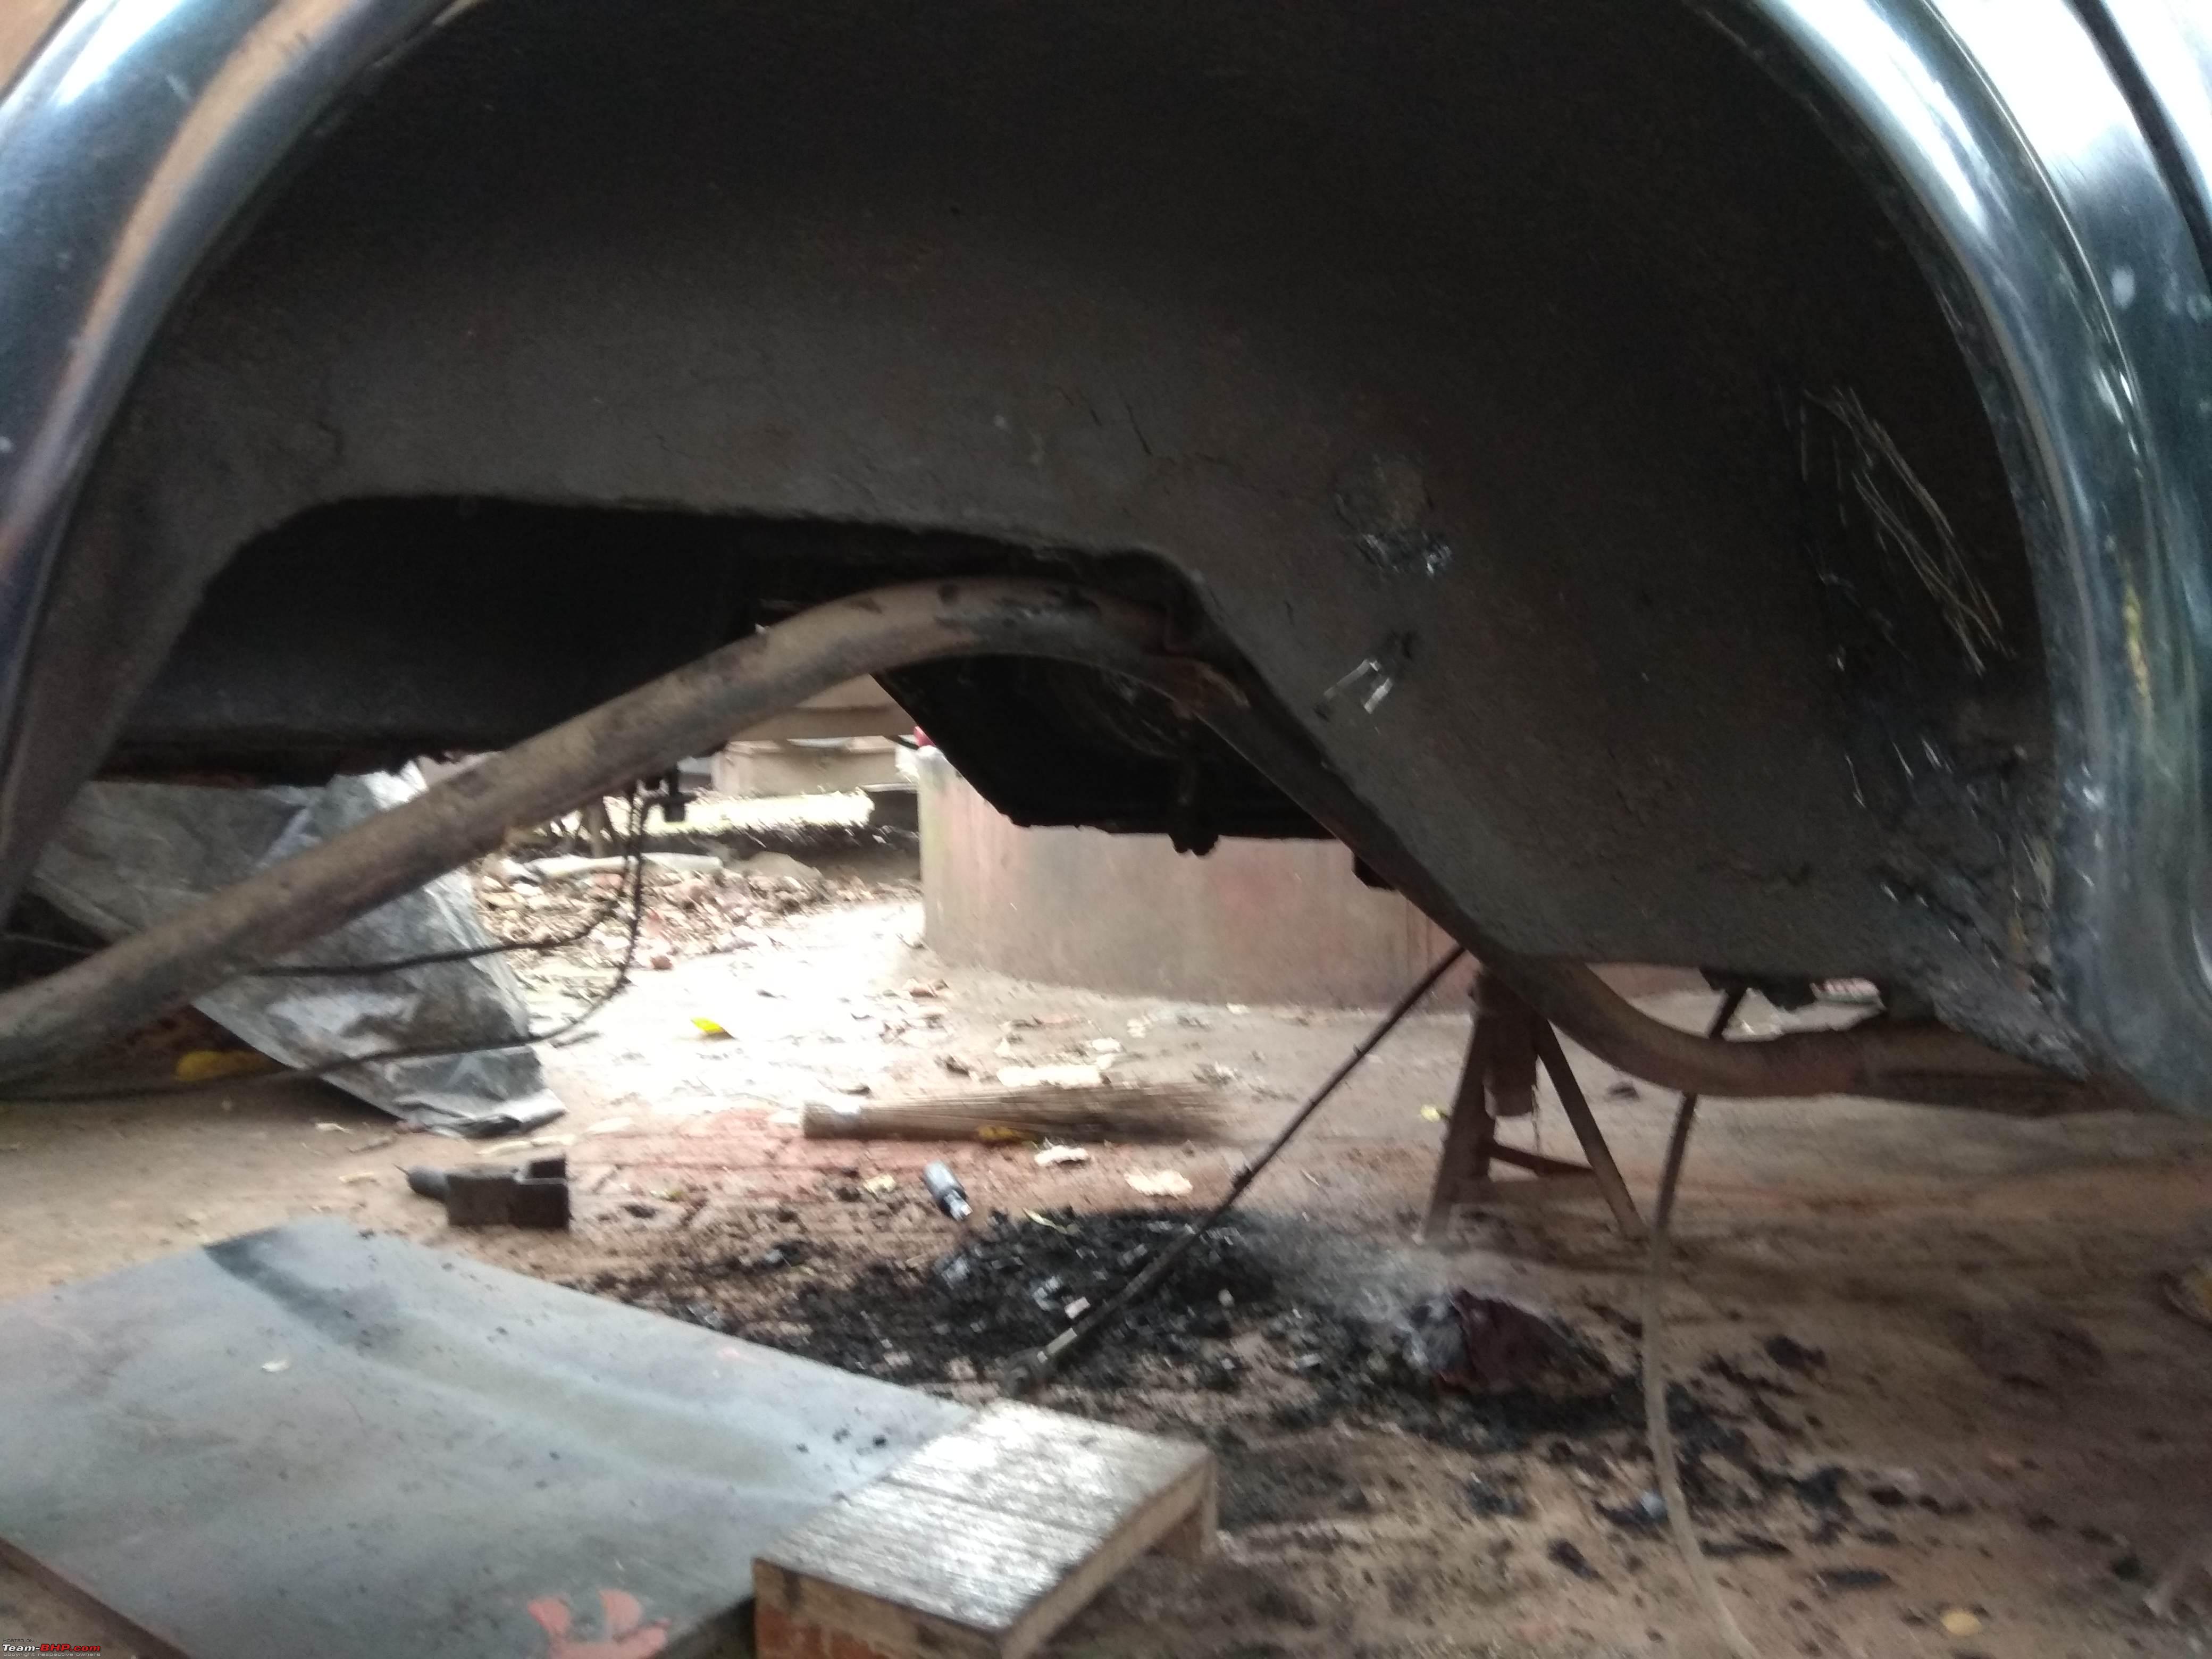 The black stuff on the ground is only a part of the muck that has been scraped of. I estimate that the half inch thick layer all throughout the underside of the car would have weighted around 5 to 7 kilos!  This pic gives a good idea of the extent of the grime. The underside of the trunk & rear axle area have been scraped clean while the rest of the underside if yet to be cleaned  Original paint shade seems to have been a light yellow or cream  Cleaning of the engine bay in progress  I was curious to know the chassis number & what it looked like  Even the grille panel had a lot of grime 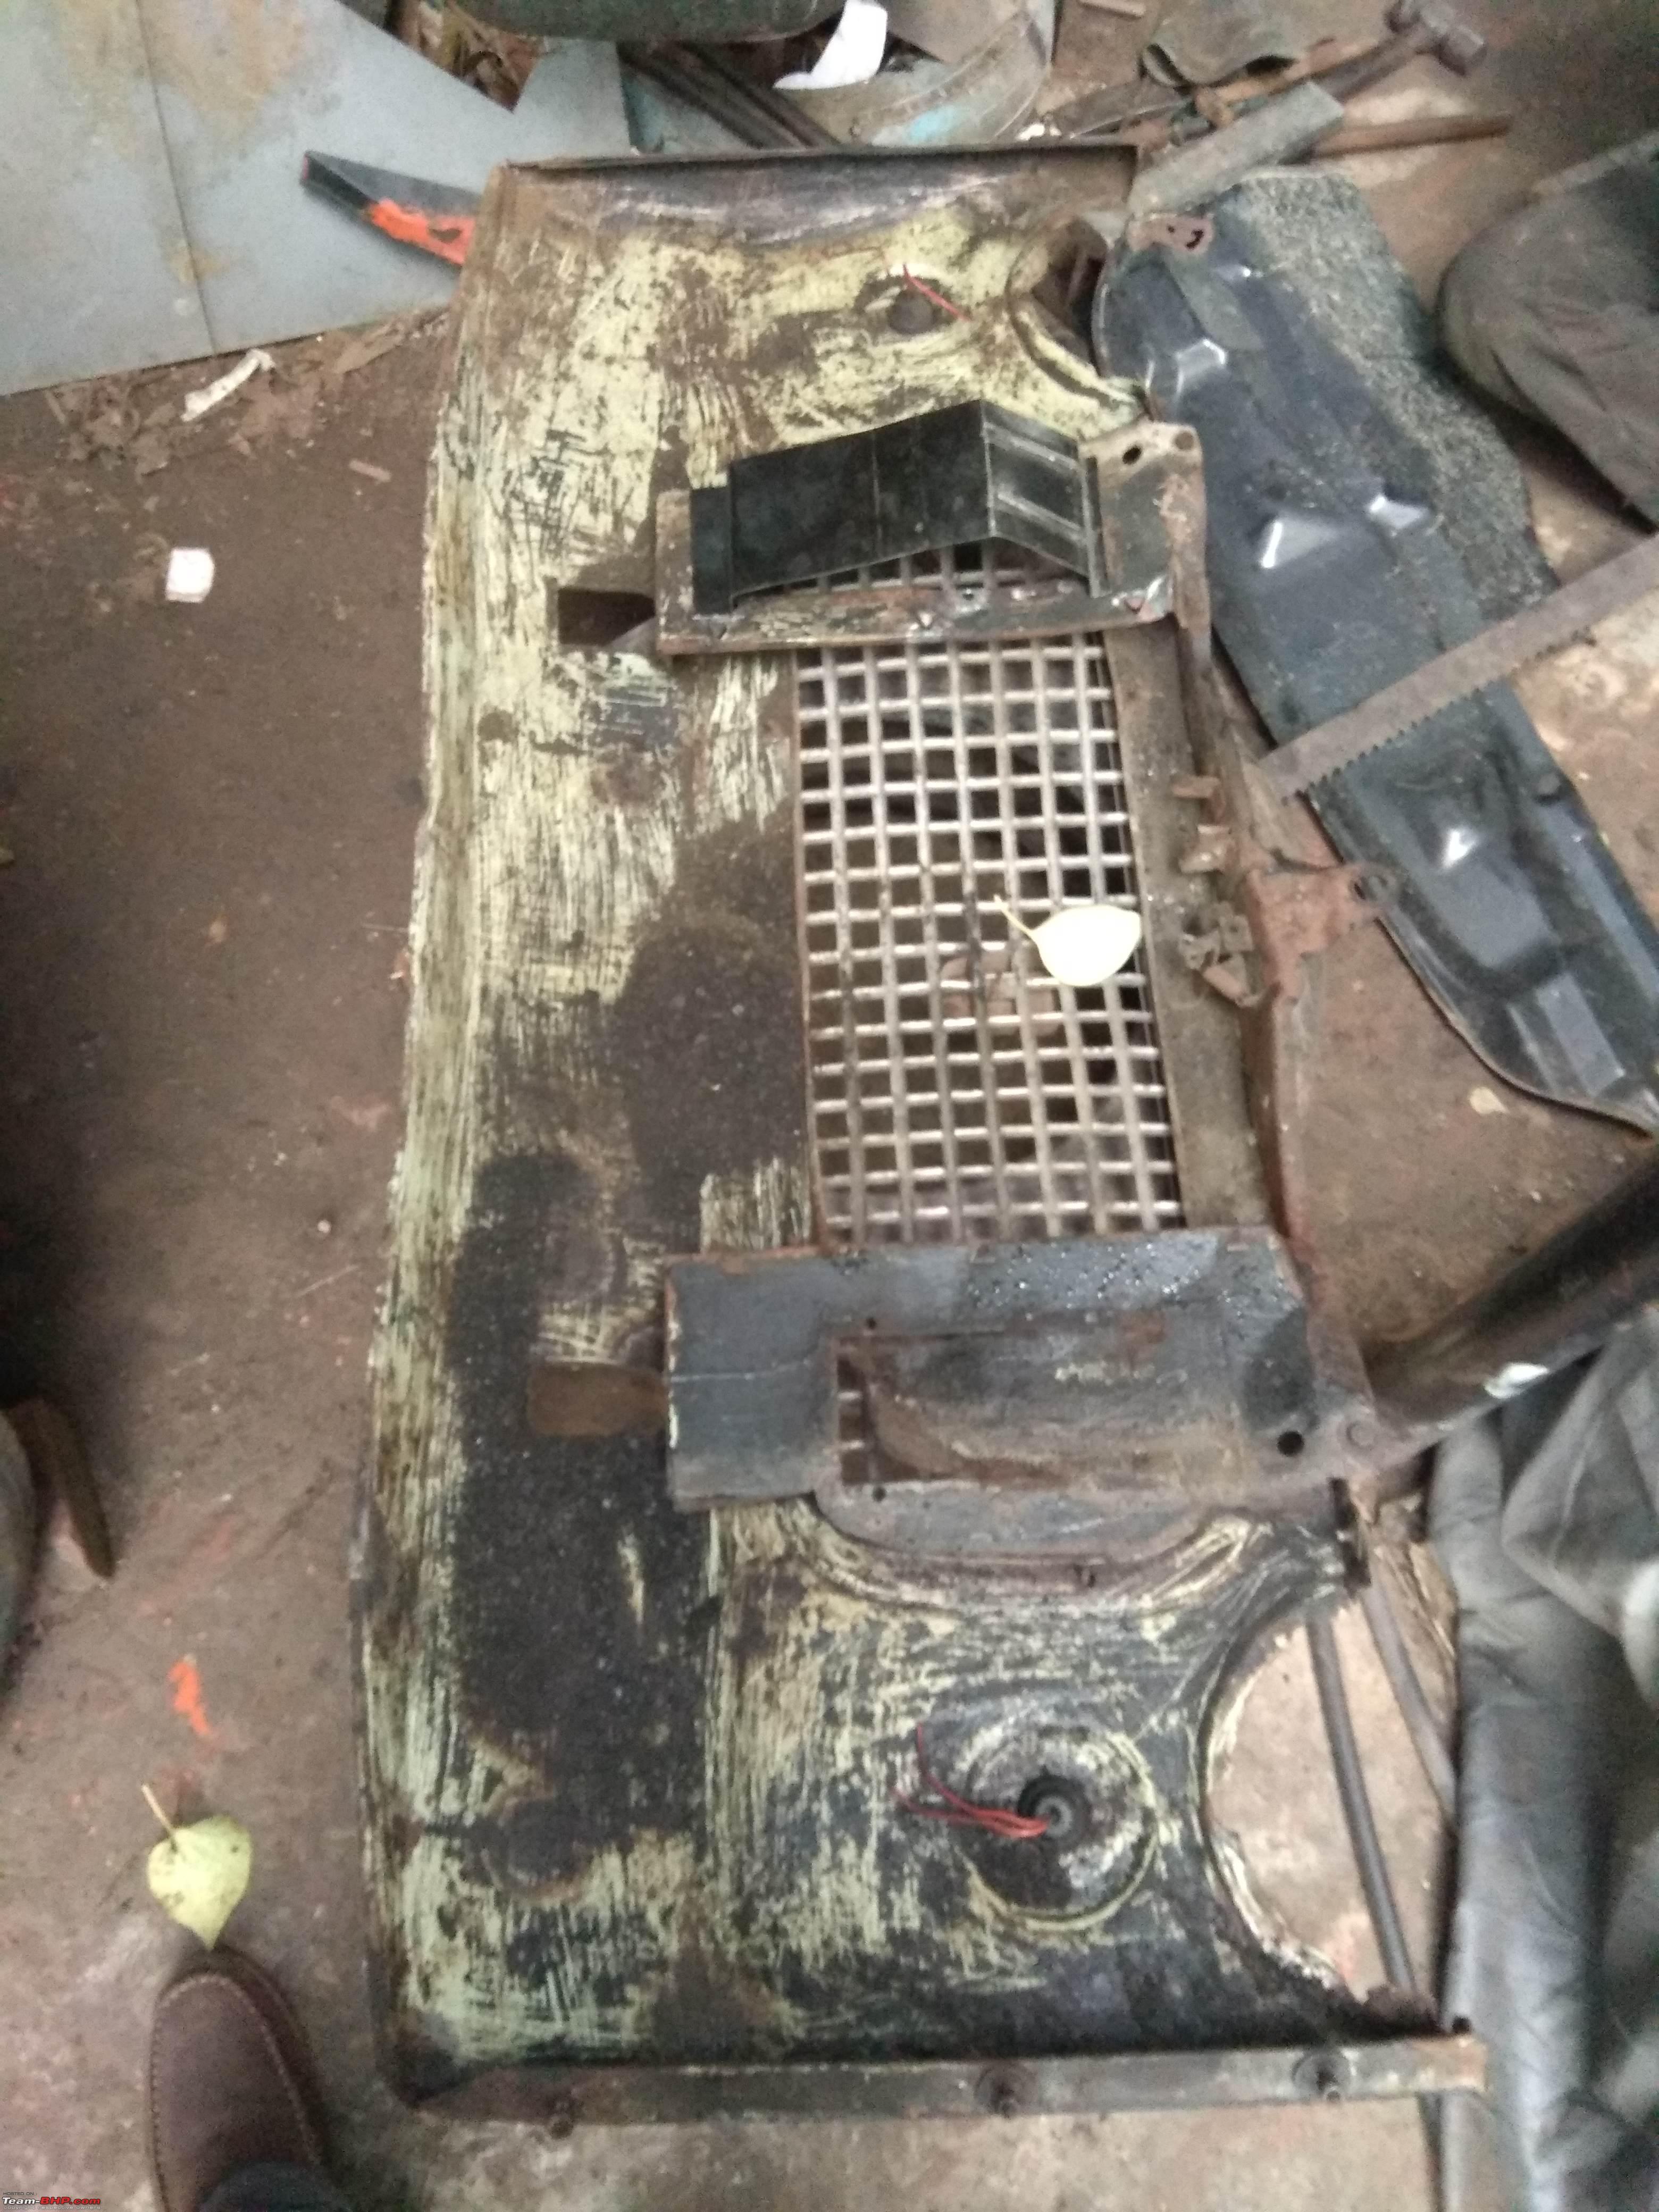 Under-carriage near the rear axle area-this seemed to be the original factory paint as it appeared everywhere when the car was scraped 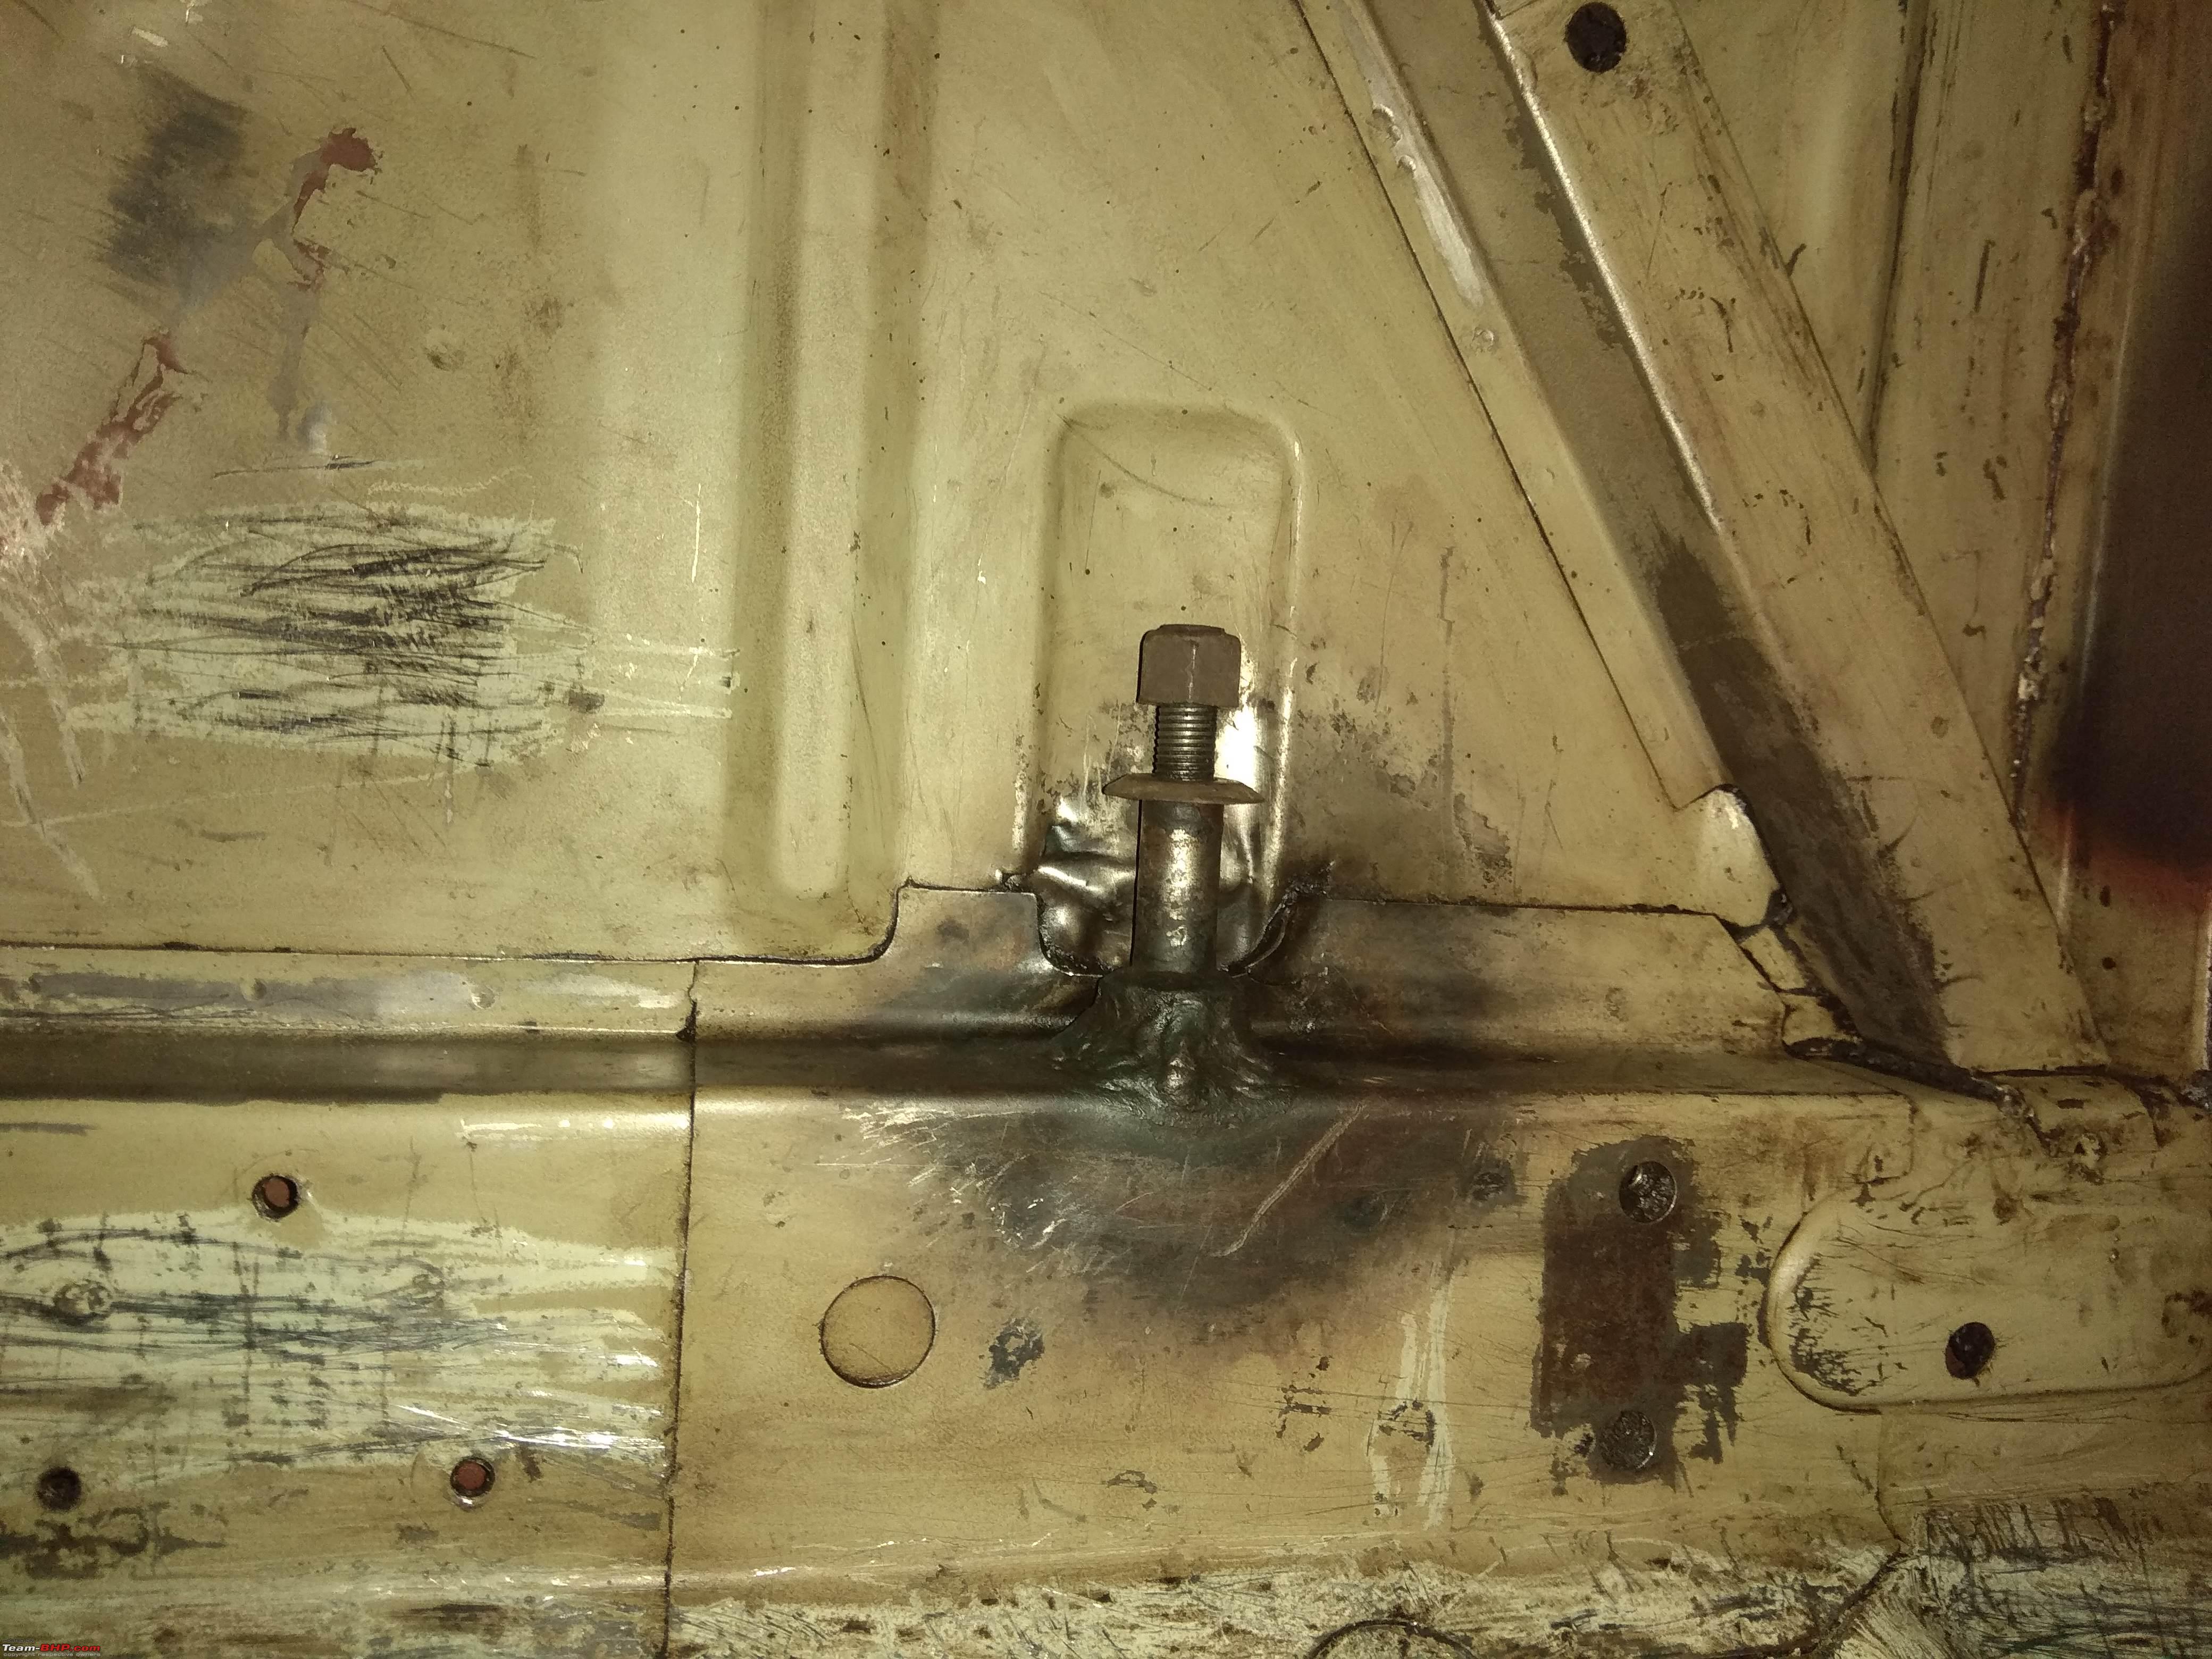 Insides too had substantial grime  | |
|
| (28)
Thanks
|
| The following 28 BHPians Thank mbz180 for this useful post: | ACFT, Aditya, Ahmed, arun1100, cp171185, Cyborg, dailydriver, Dani7766, darklord, deutscheafrikar, Hirohito, iron, jaunthead, karlosdeville, KartikeyaL, KPS, Lij, manishalive, ramgkulkarni, Samba, samsag12, siddarthab, Slick, Stanher, theexperthand, Torino, V.Narayan, v12 |
|
3rd April 2019, 20:10
| #6 |
| Distinguished - BHPian  | Re: Indo-Italian PAL: 1963 Fiat 1100 Super Select "Bella" This thread is pure nostalgia for me! Wish you all the best for restoring this beauty.  I guess you are from Kolkata and once the restoration is done, i will love to see this car physically.  A 1960 Fiat 1100 super select was our family's first car. The car was sold in 1993. The day our car was sold, i was eight years old and i was in tears. A spanking white Padmini replaced this car but still the 1100 super select was special to me. A pic of my dad in our 1100 super select from 1983. This pic was clicked by my mom a couple of years before i was born! 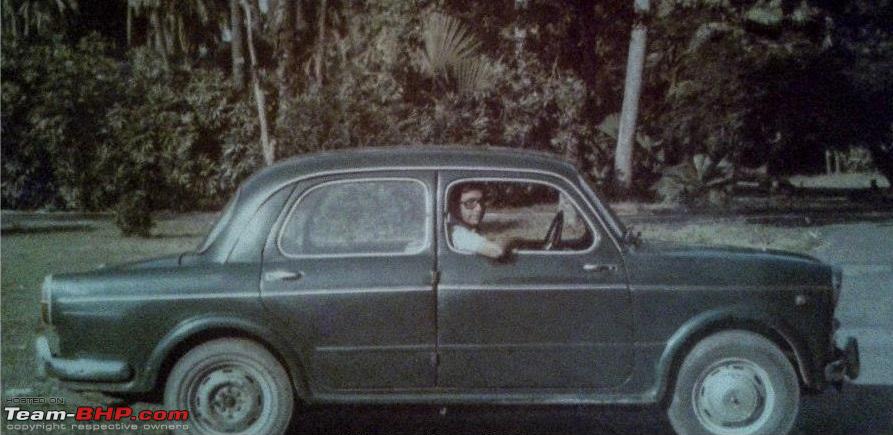 Last edited by Samba : 3rd April 2019 at 20:14. |
|
| (19)
Thanks
|
| The following 19 BHPians Thank Samba for this useful post: | Aditya, arun1100, arvindmanju, cp171185, Cyborg, dailydriver, Dani7766, jaunthead, karlosdeville, KartikeyaL, KPS, manishalive, mbz180, Samfromindia, Stanher, theexperthand, V.Narayan, VTec_KickedInYo, YoungSaint |
|
4th April 2019, 11:26
| #7 |
| BHPian Join Date: Sep 2009 Location: bangalore
Posts: 208
Thanked: 177 Times
| Re: Indo-Italian PAL: 1963 Fiat 1100 Super Select "Bella" Very interesting thread and I am totally gripped on to your updates. Really happy to see a five decades old car being under one hand, awesome buy that is. We had Fiat 1983 for a couple of years and that was our first car, it had a modified silencer too and it was such a pleasure to listen to it move. Awaiting eagerly for your restoration. All the best. |
|
| (1)
Thanks
|
| The following BHPian Thanks majumon for this useful post: | mbz180 |
|
4th April 2019, 16:05
| #8 | ||
| Distinguished - BHPian | Re: Indo-Italian PAL: 1963 Fiat 1100 Super Select "Bella" Quote:
Karl, has explained on Super Selects as below Quote:
KPS Last edited by KPS : 4th April 2019 at 16:06. | ||
|
| (4)
Thanks
|
| The following 4 BHPians Thank KPS for this useful post: | KartikeyaL, mbz180, Samba, theexperthand |
|
5th April 2019, 18:50
| #9 | |
| BHPian Join Date: Jan 2010 Location: Kolkata
Posts: 894
Thanked: 1,027 Times
| Re: Indo-Italian PAL: 1963 Fiat 1100 Super Select "Bella" Quote:
Lovely pic, as KPS has already said, the car is a Select. The smaller tail lamps again a Select feature. BODY WORK So 202 turned out to be a 20 or 10 footer at best. From that distance, the body looked pretty decent. But once stripping to bare metal started, we truly saw the extent of work required. The engine bay required only the battery tray to be re-made since the earlier one was anyway fabricated & was over-sized. Front fenders, rear fenders, corner sections of some wheel arches, inner wheel well areas & the entire floor board had to replaced. We couldn't find good replacement panels in Calcutta for the floor so they were made out of one sheet of steel. The lower portion of the trunk lid was rusty & weak, and replaced. Lower sections of the front doors were replaced. One of the rear passenger foot rests was in bad shaped and was made & replaced. We decided to relocate the handbrake assembly from the left of the transmission tunnel to the right, making it practical to use. Apart from all this, an immense amount of tinkering went into the doors, fenders, bonnet & trunk lid. We then realised that the lines between the door sill (rocker) panel & door bottom edges were not as straight as they should be. Patchwork done in earlier years had messed up these lines. While a right side rocker panel was available locally, its quality wasn't very good. In stepped in one of our Fiat friends from the South who took the trouble of arranging & shipping a set of door panels! Some photos of the works in progress: 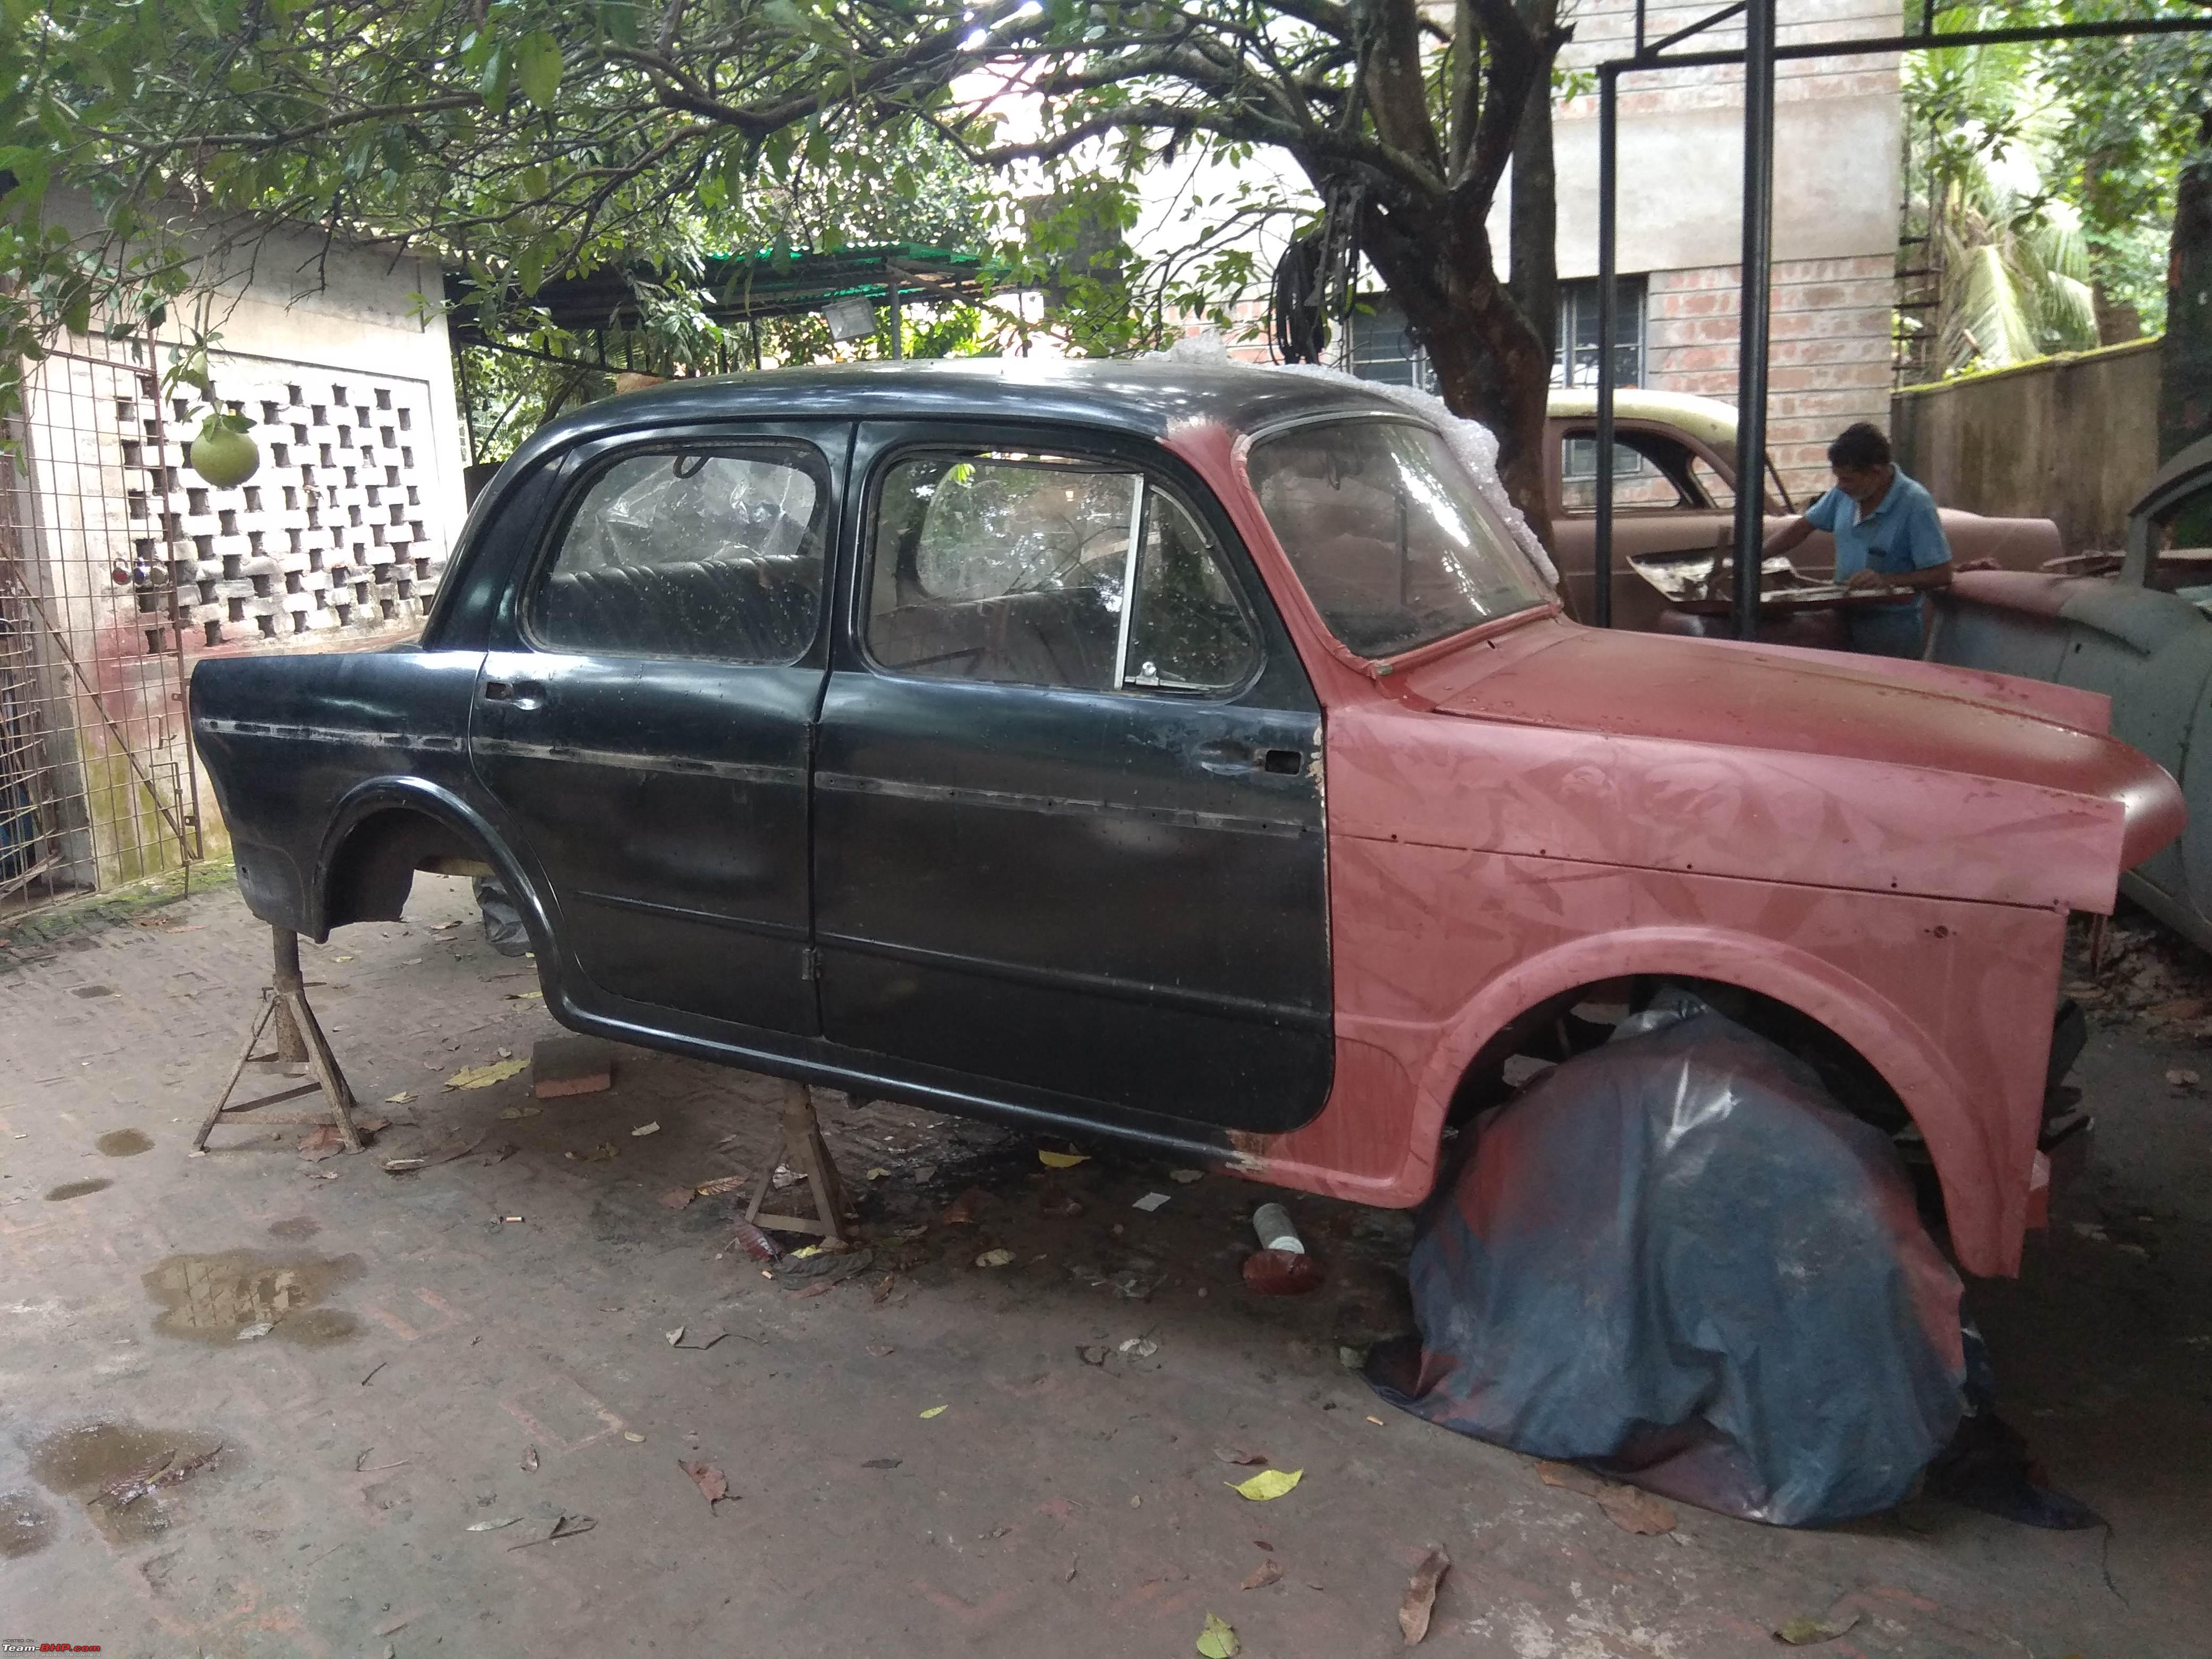 Bare metal scraping starts  Some views of 202 during the scraping phase 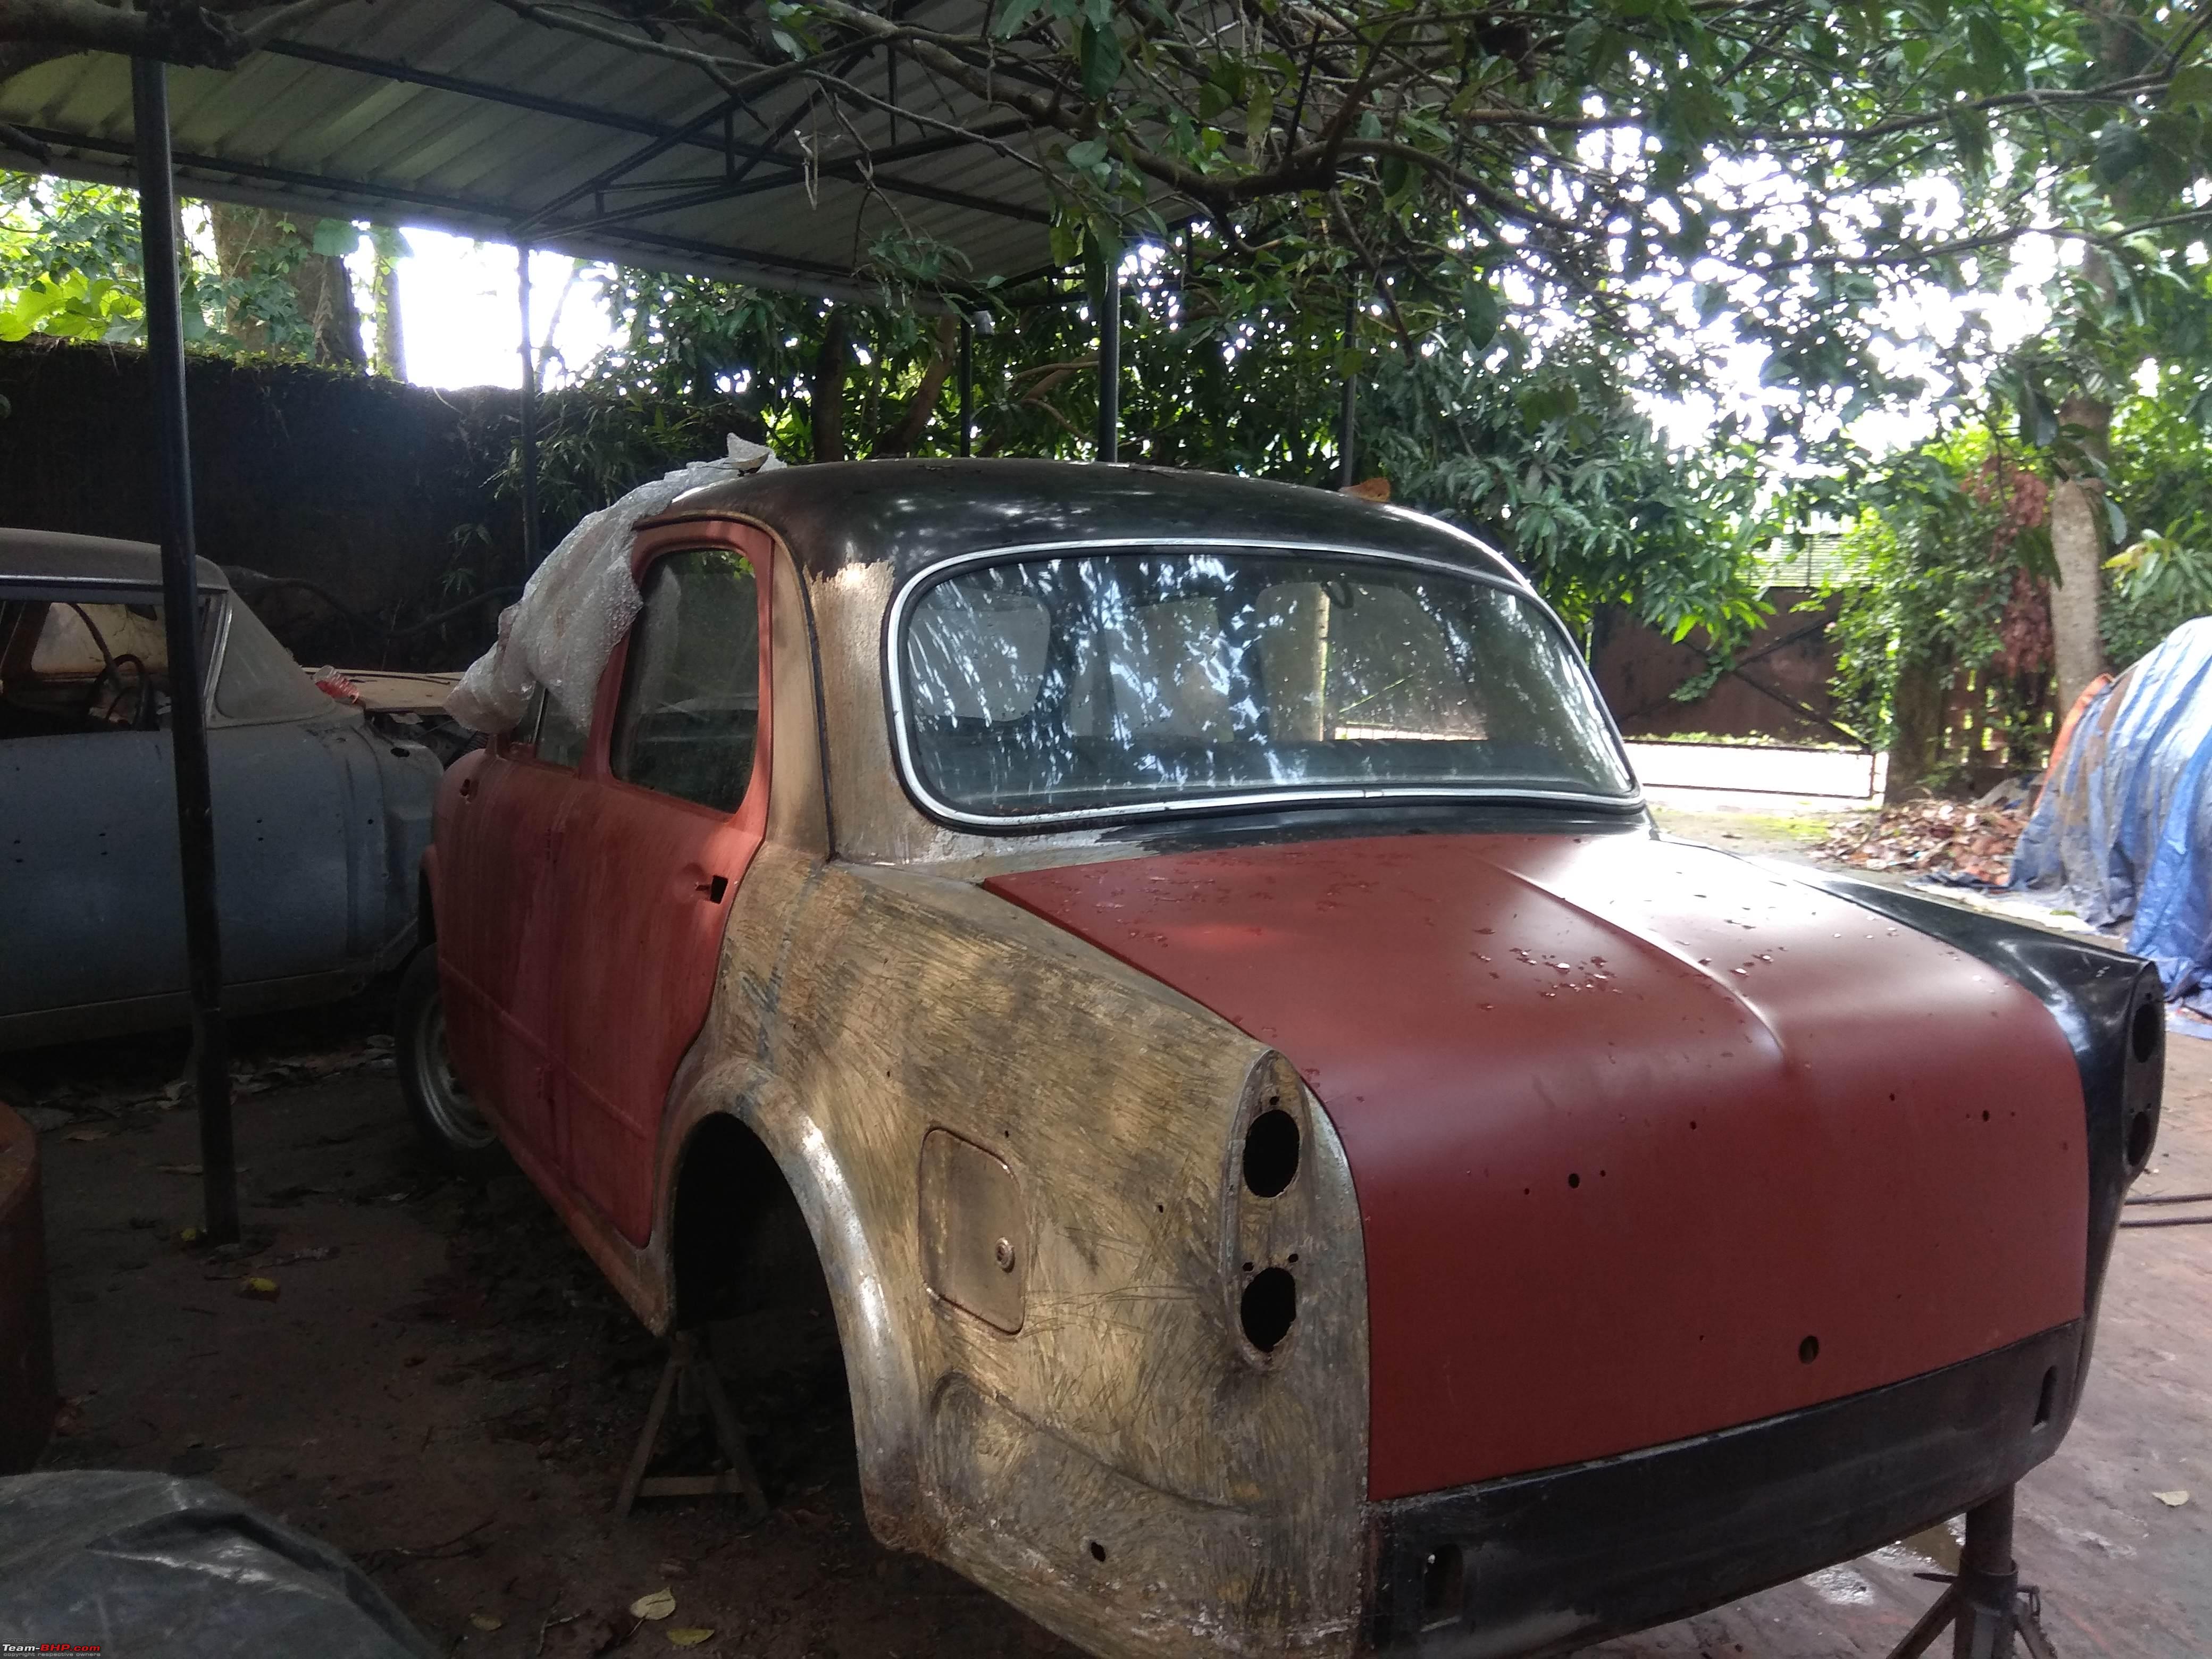 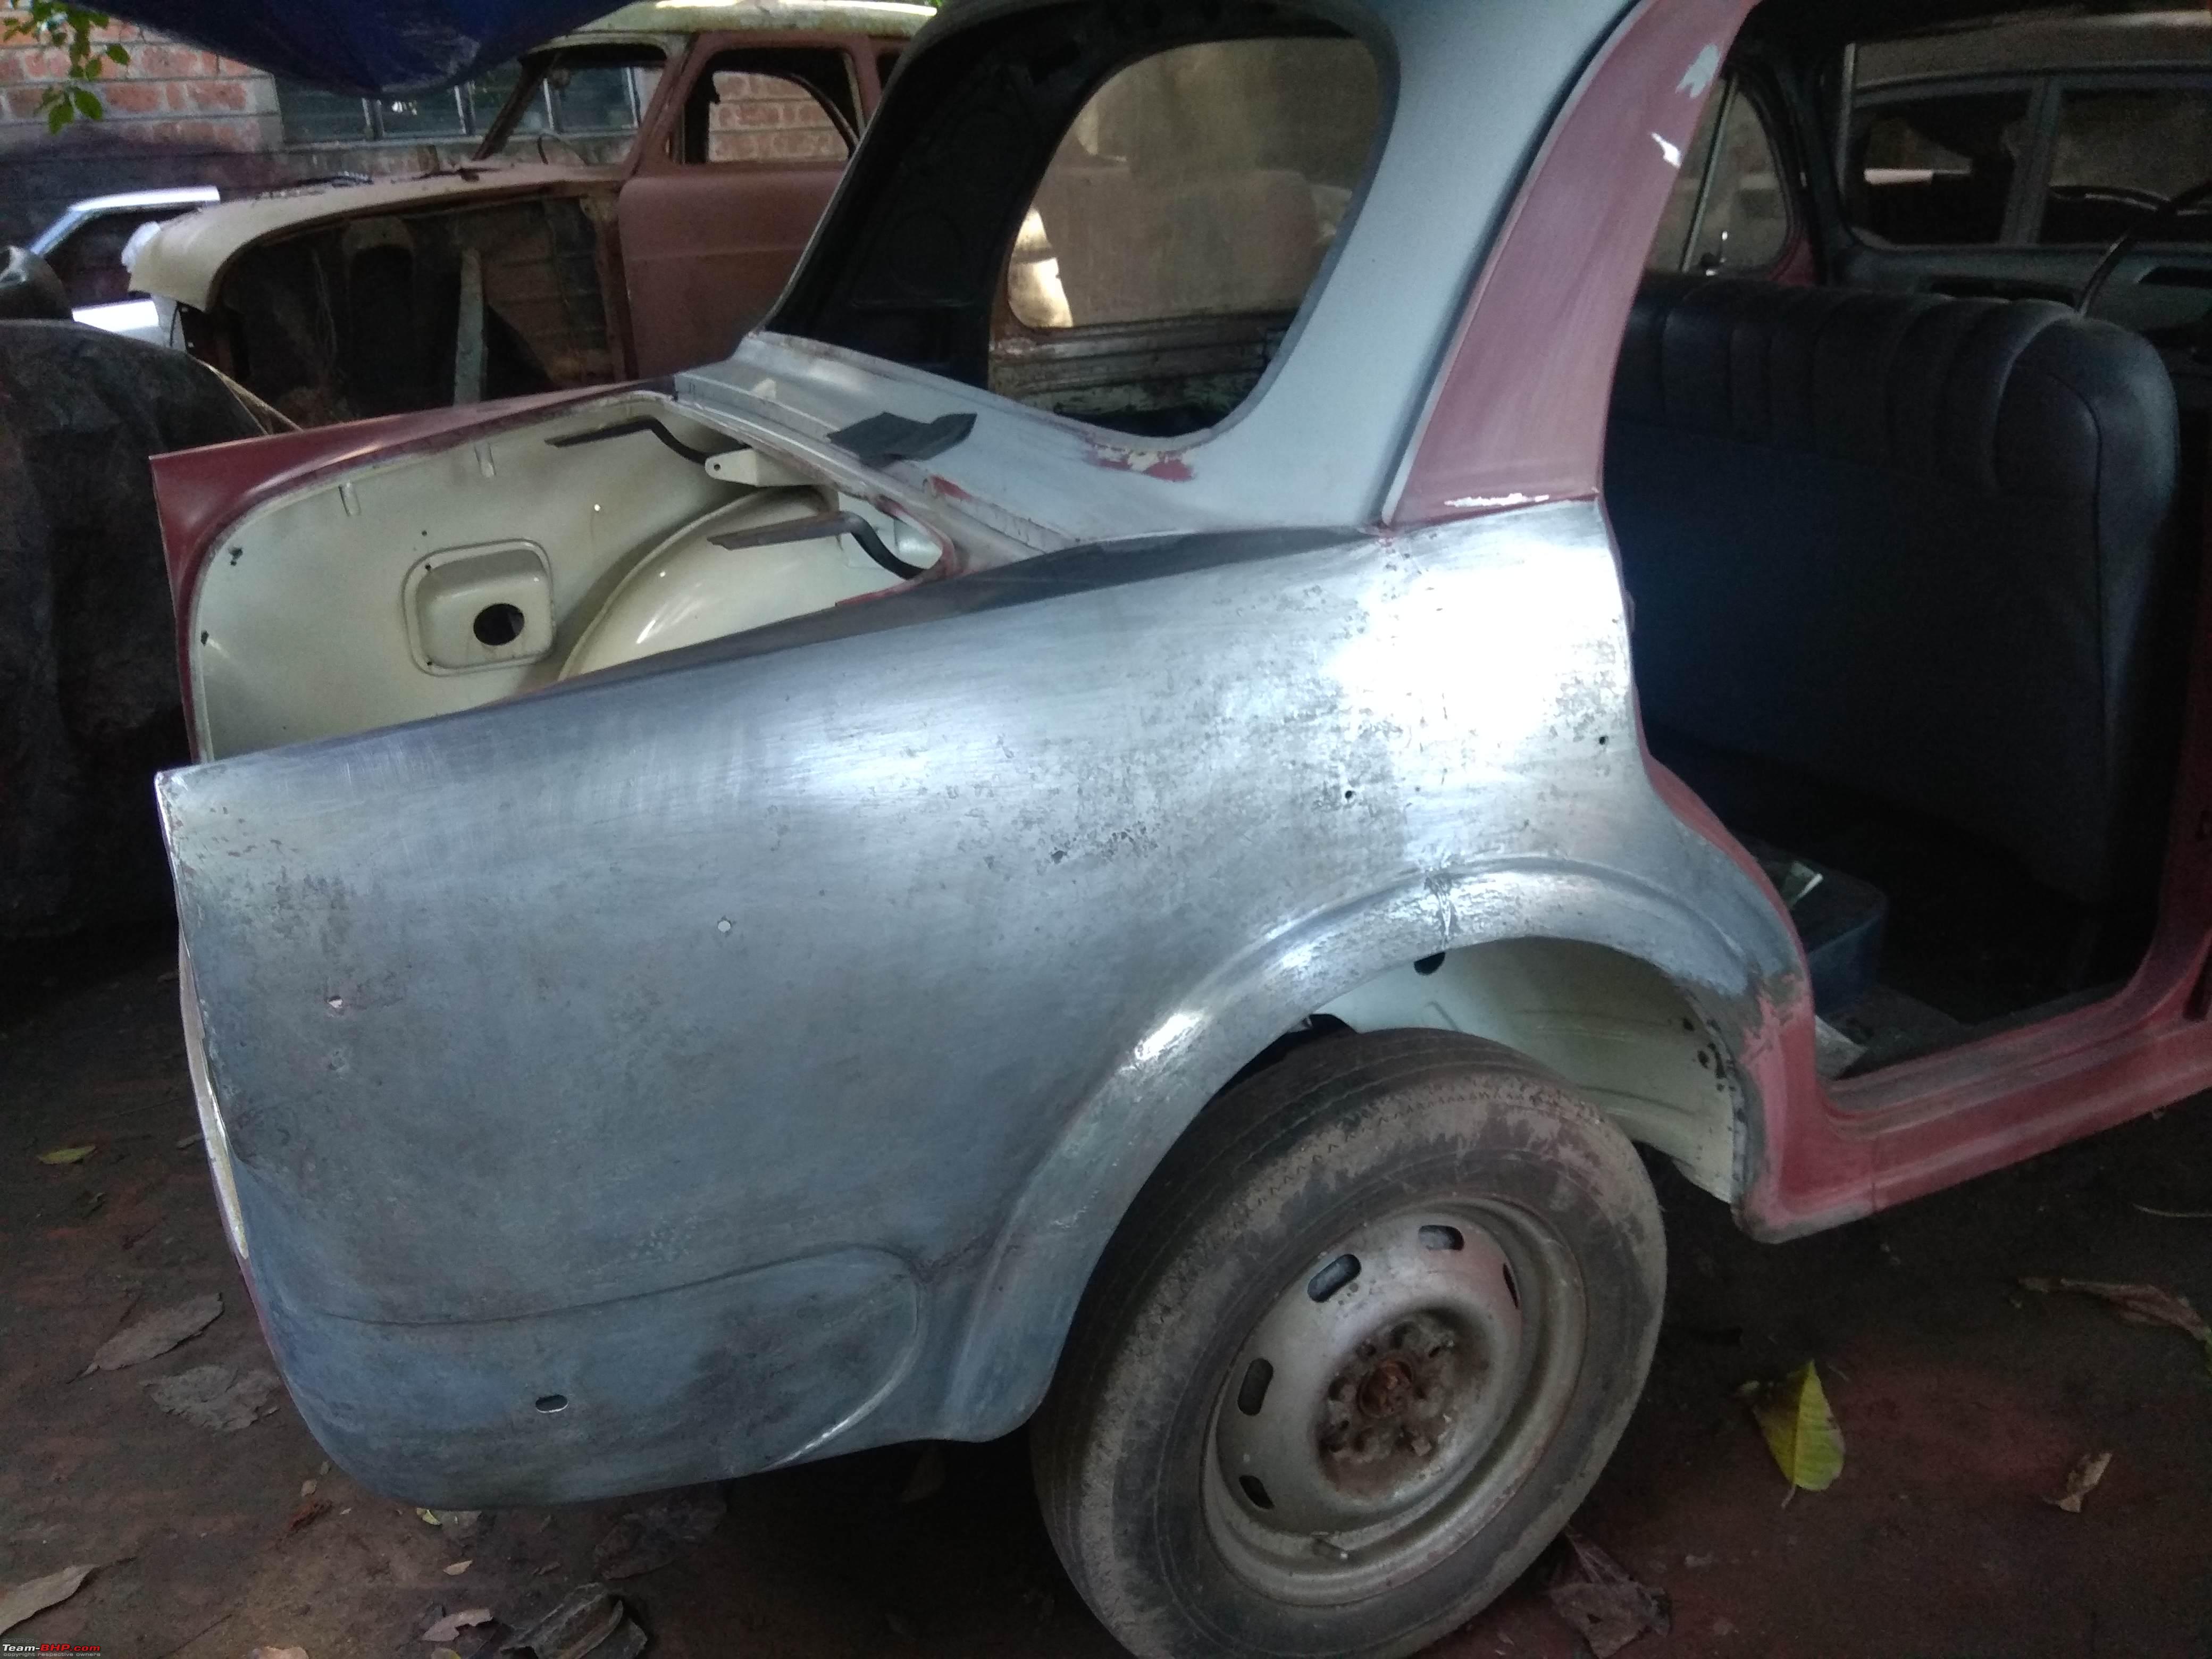   I found this number stamped on the top of the grille panel before it was stripped  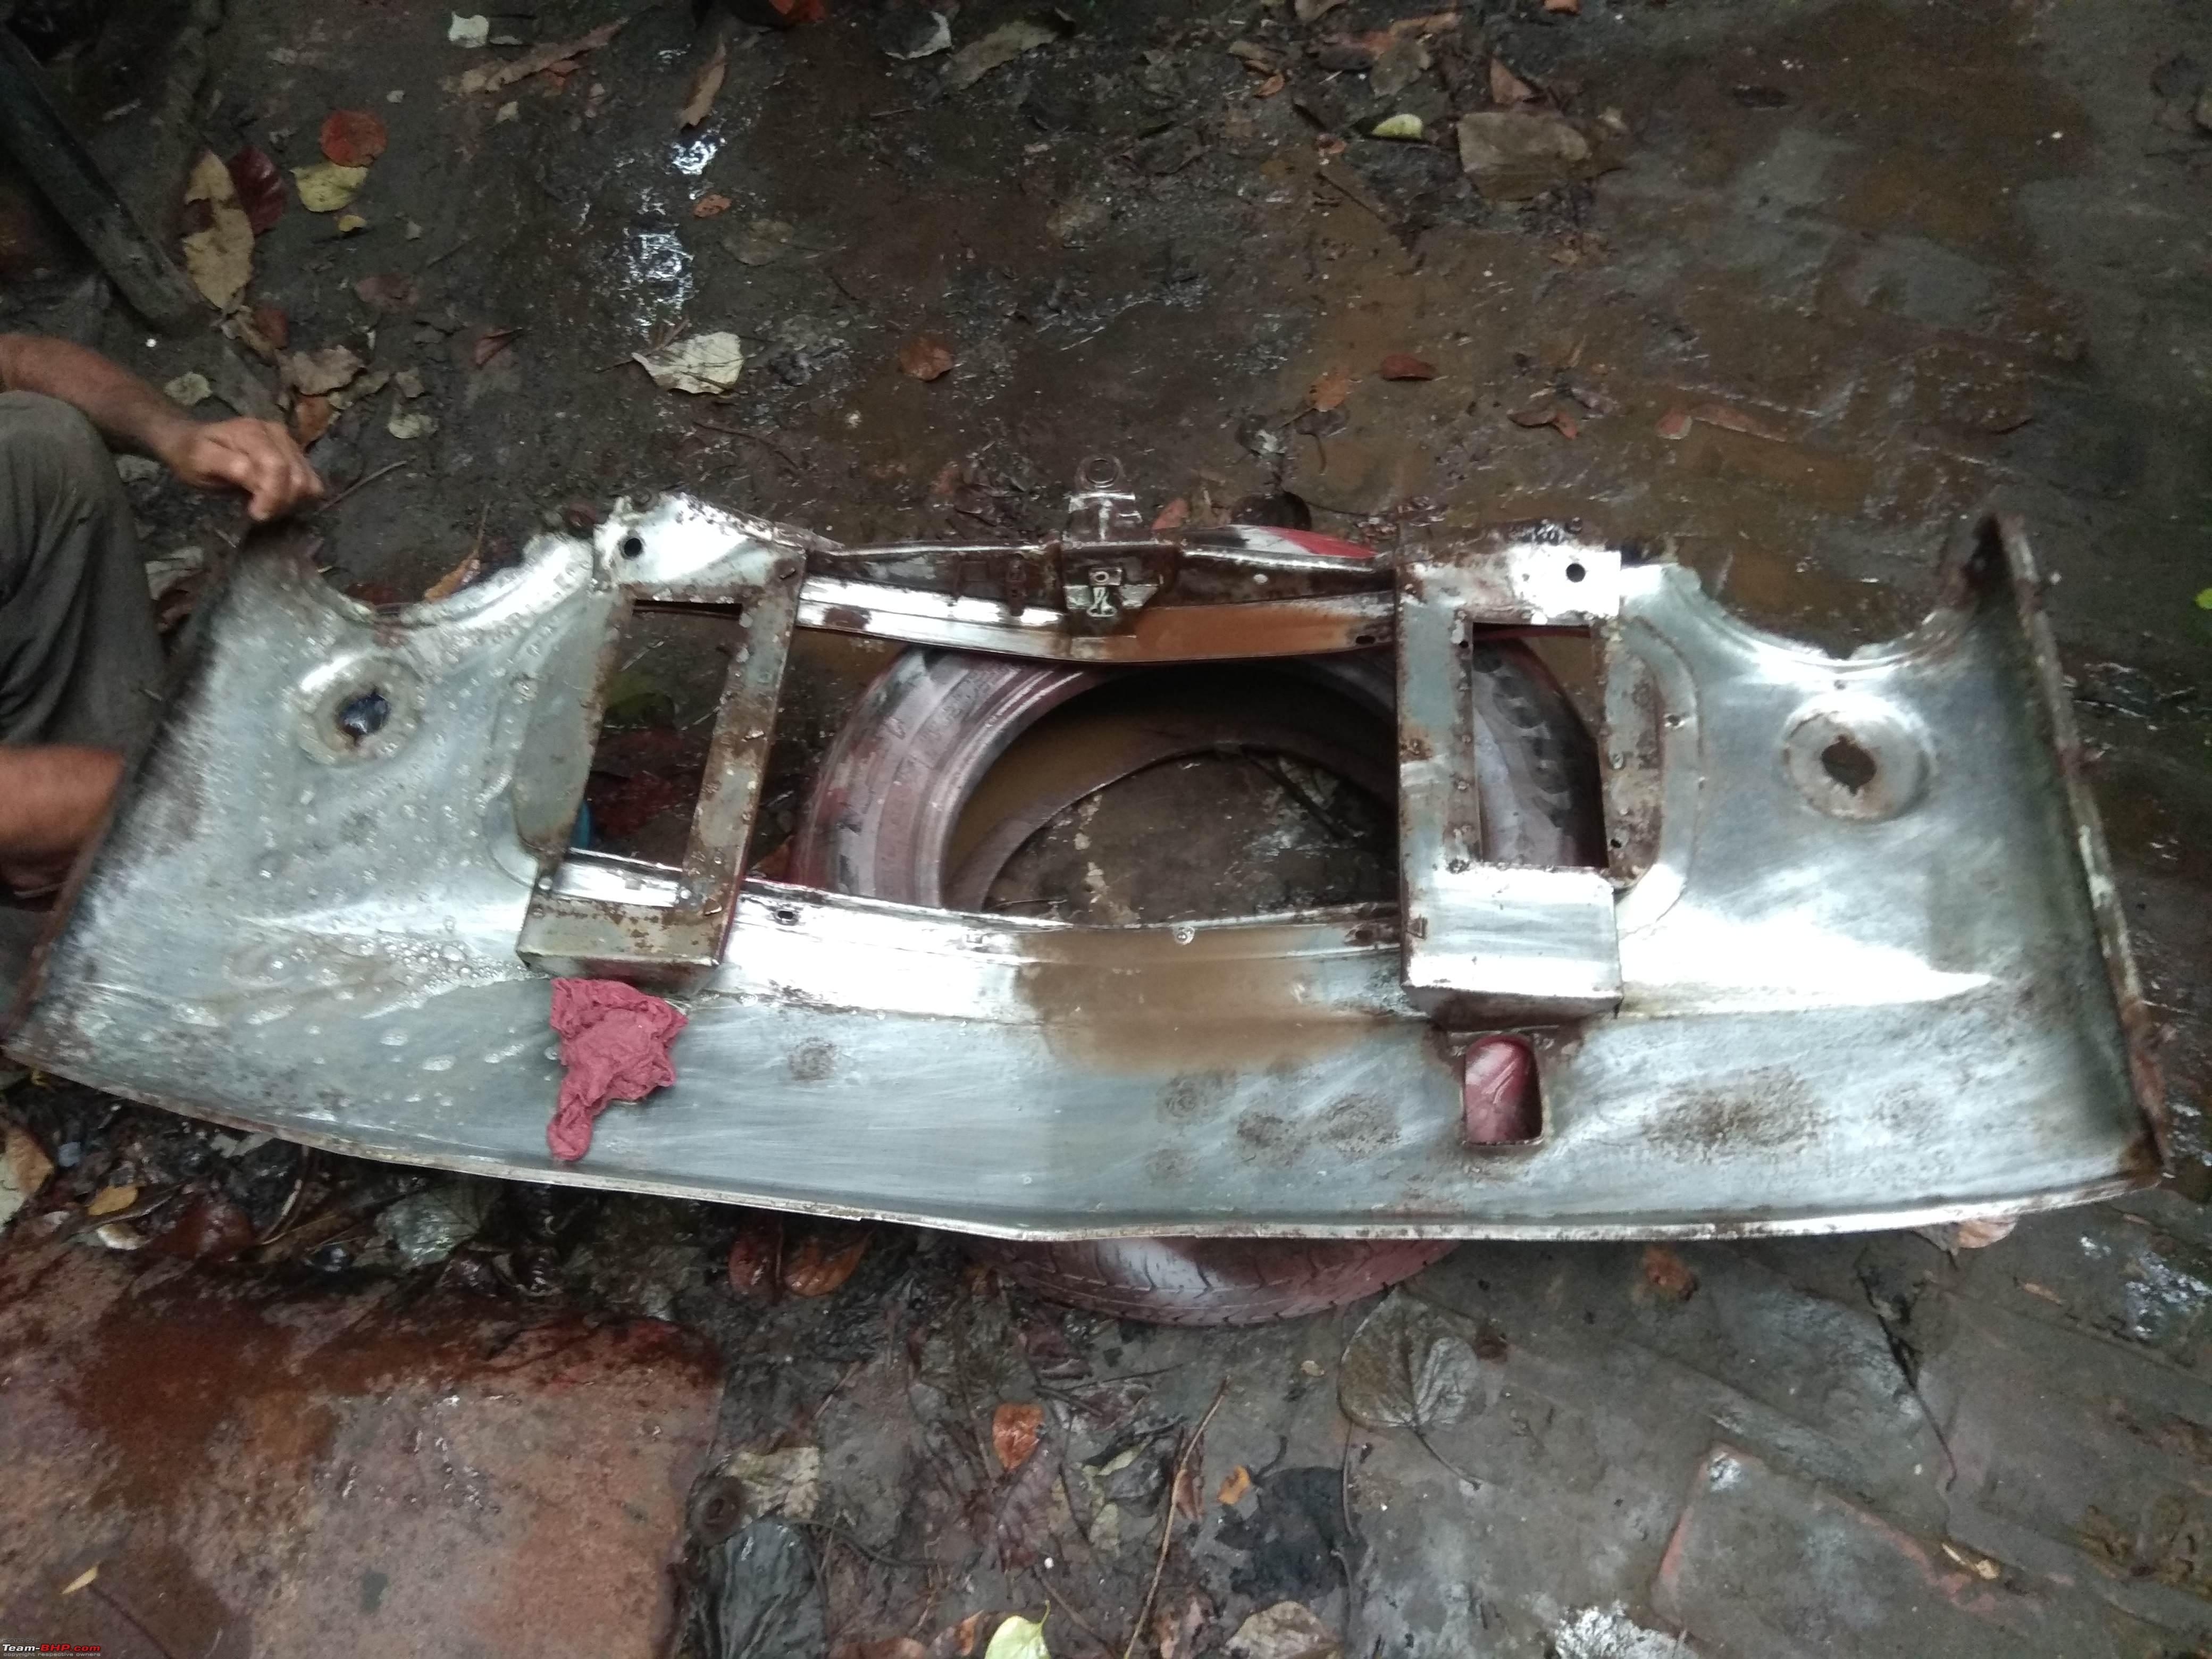 Engine area in primer  A bad patch of the floorboard 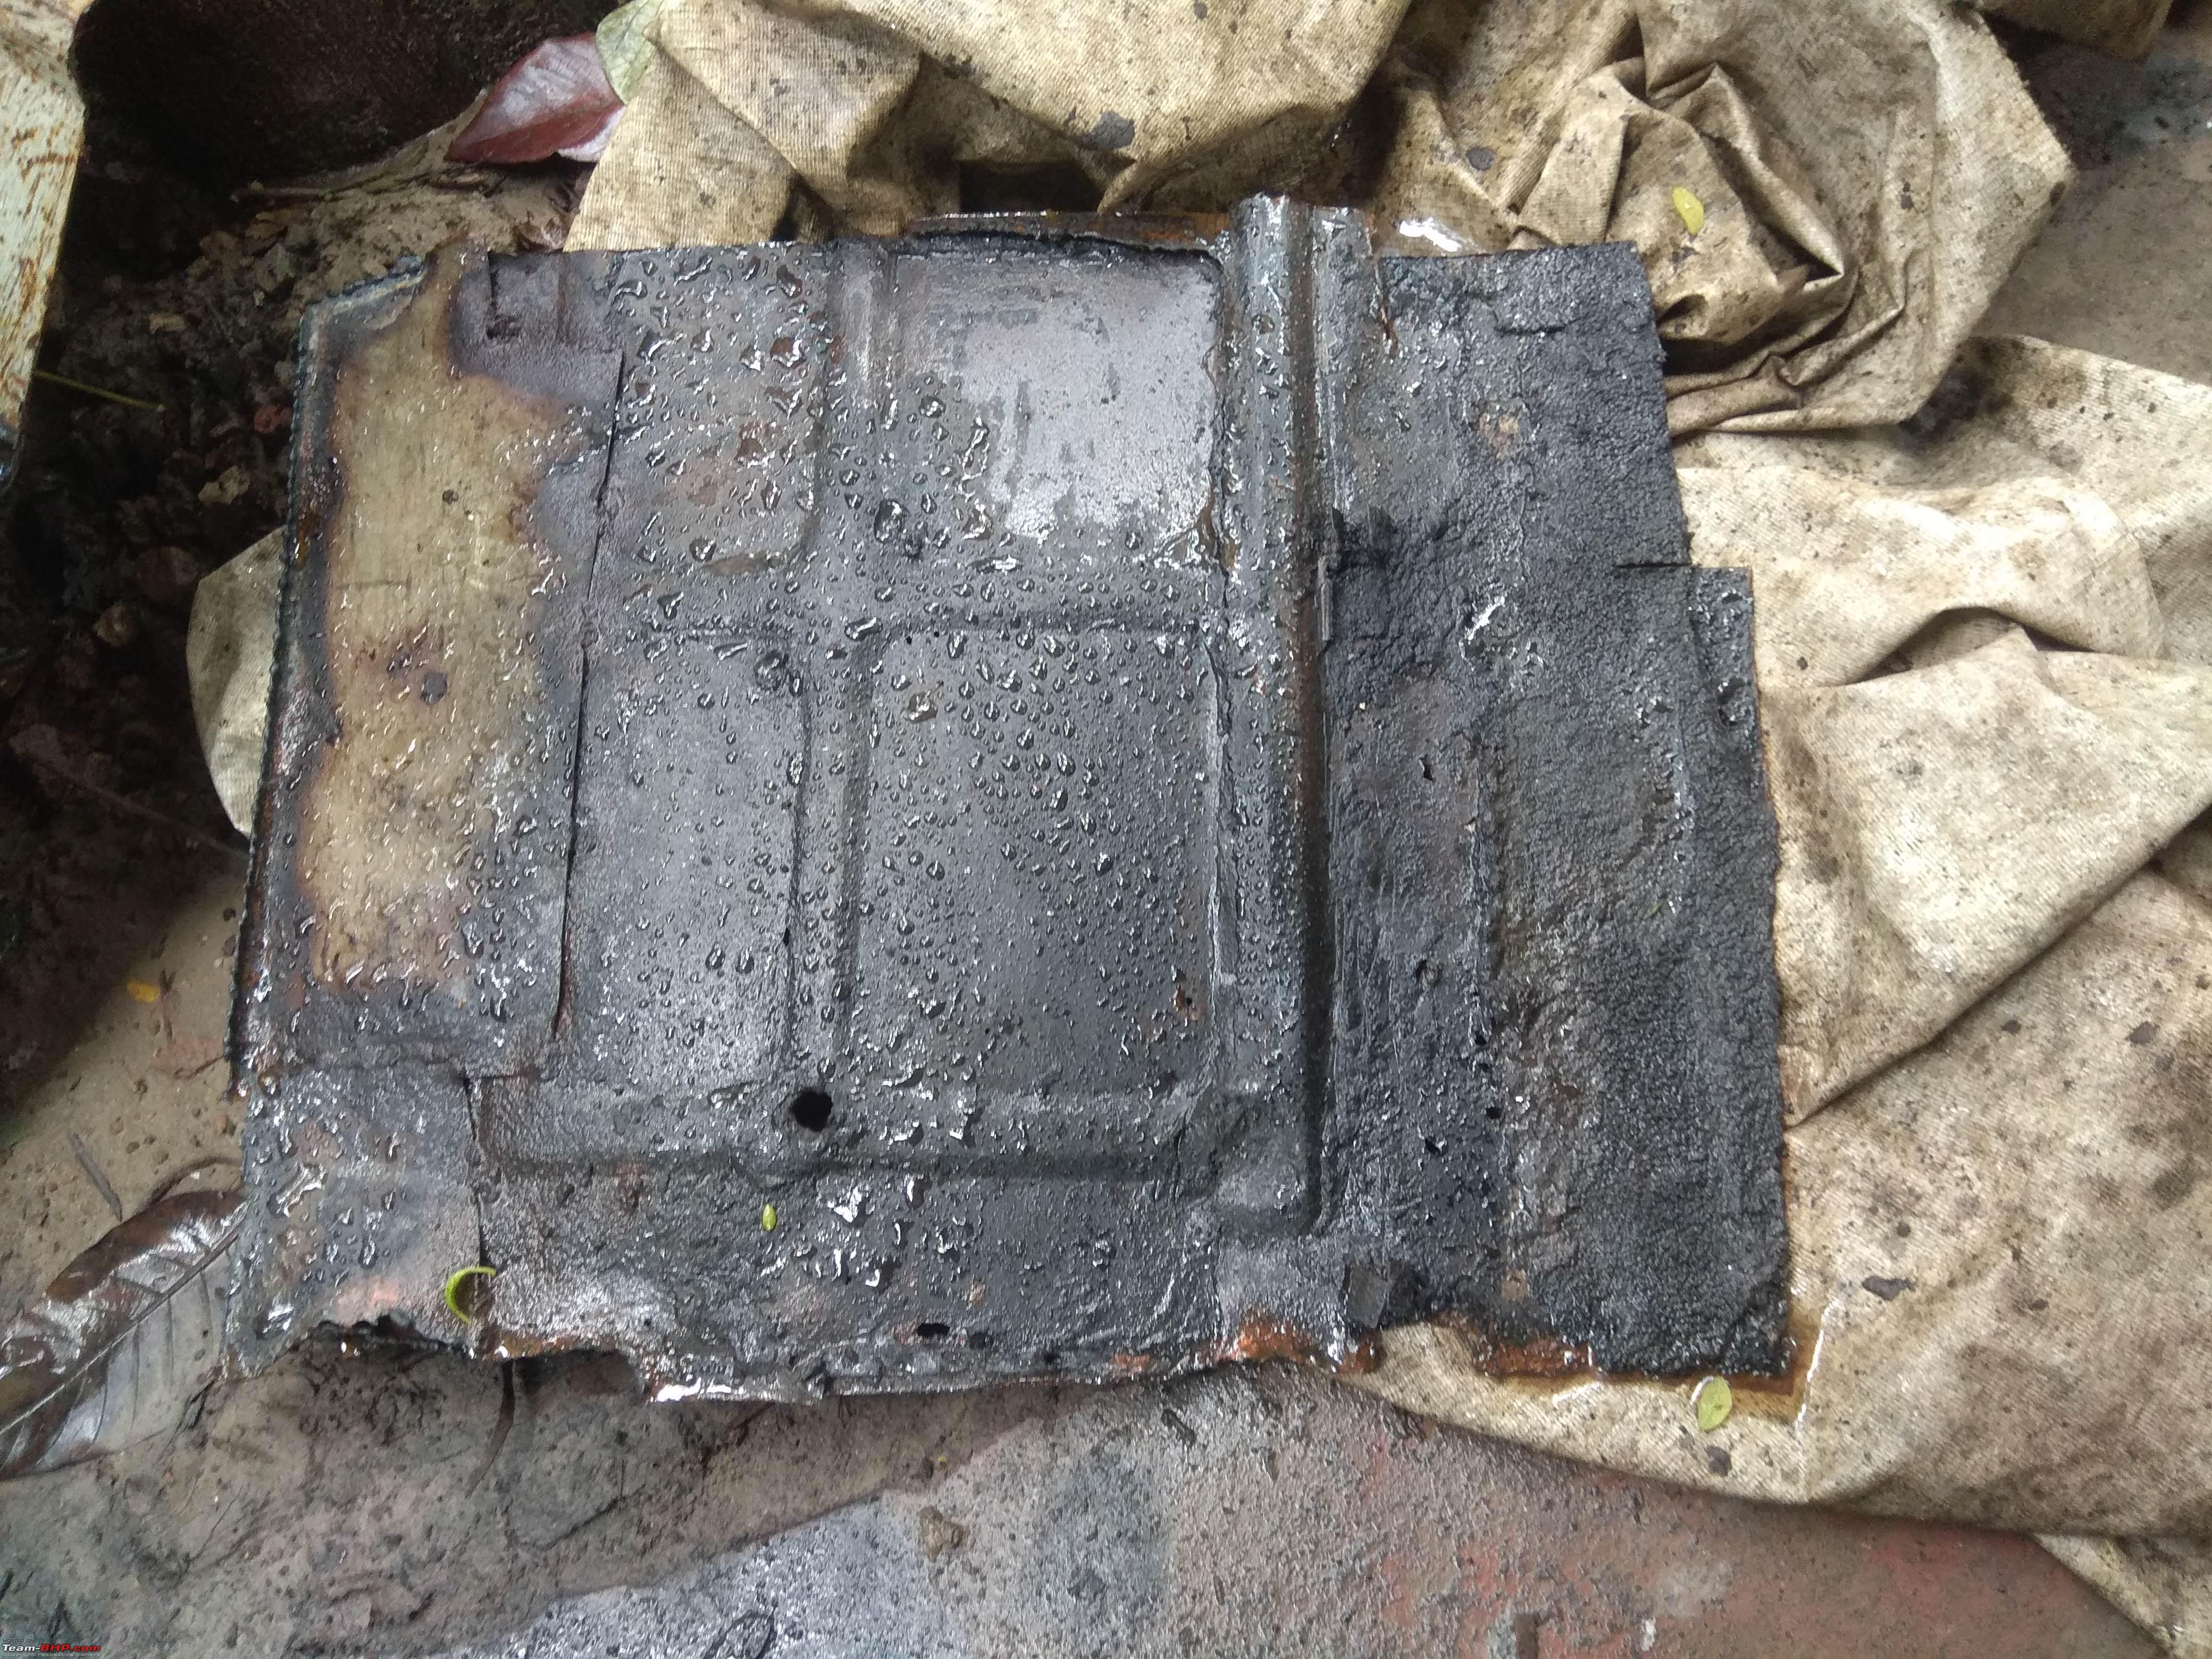 Rusty lower section of the trunk lid 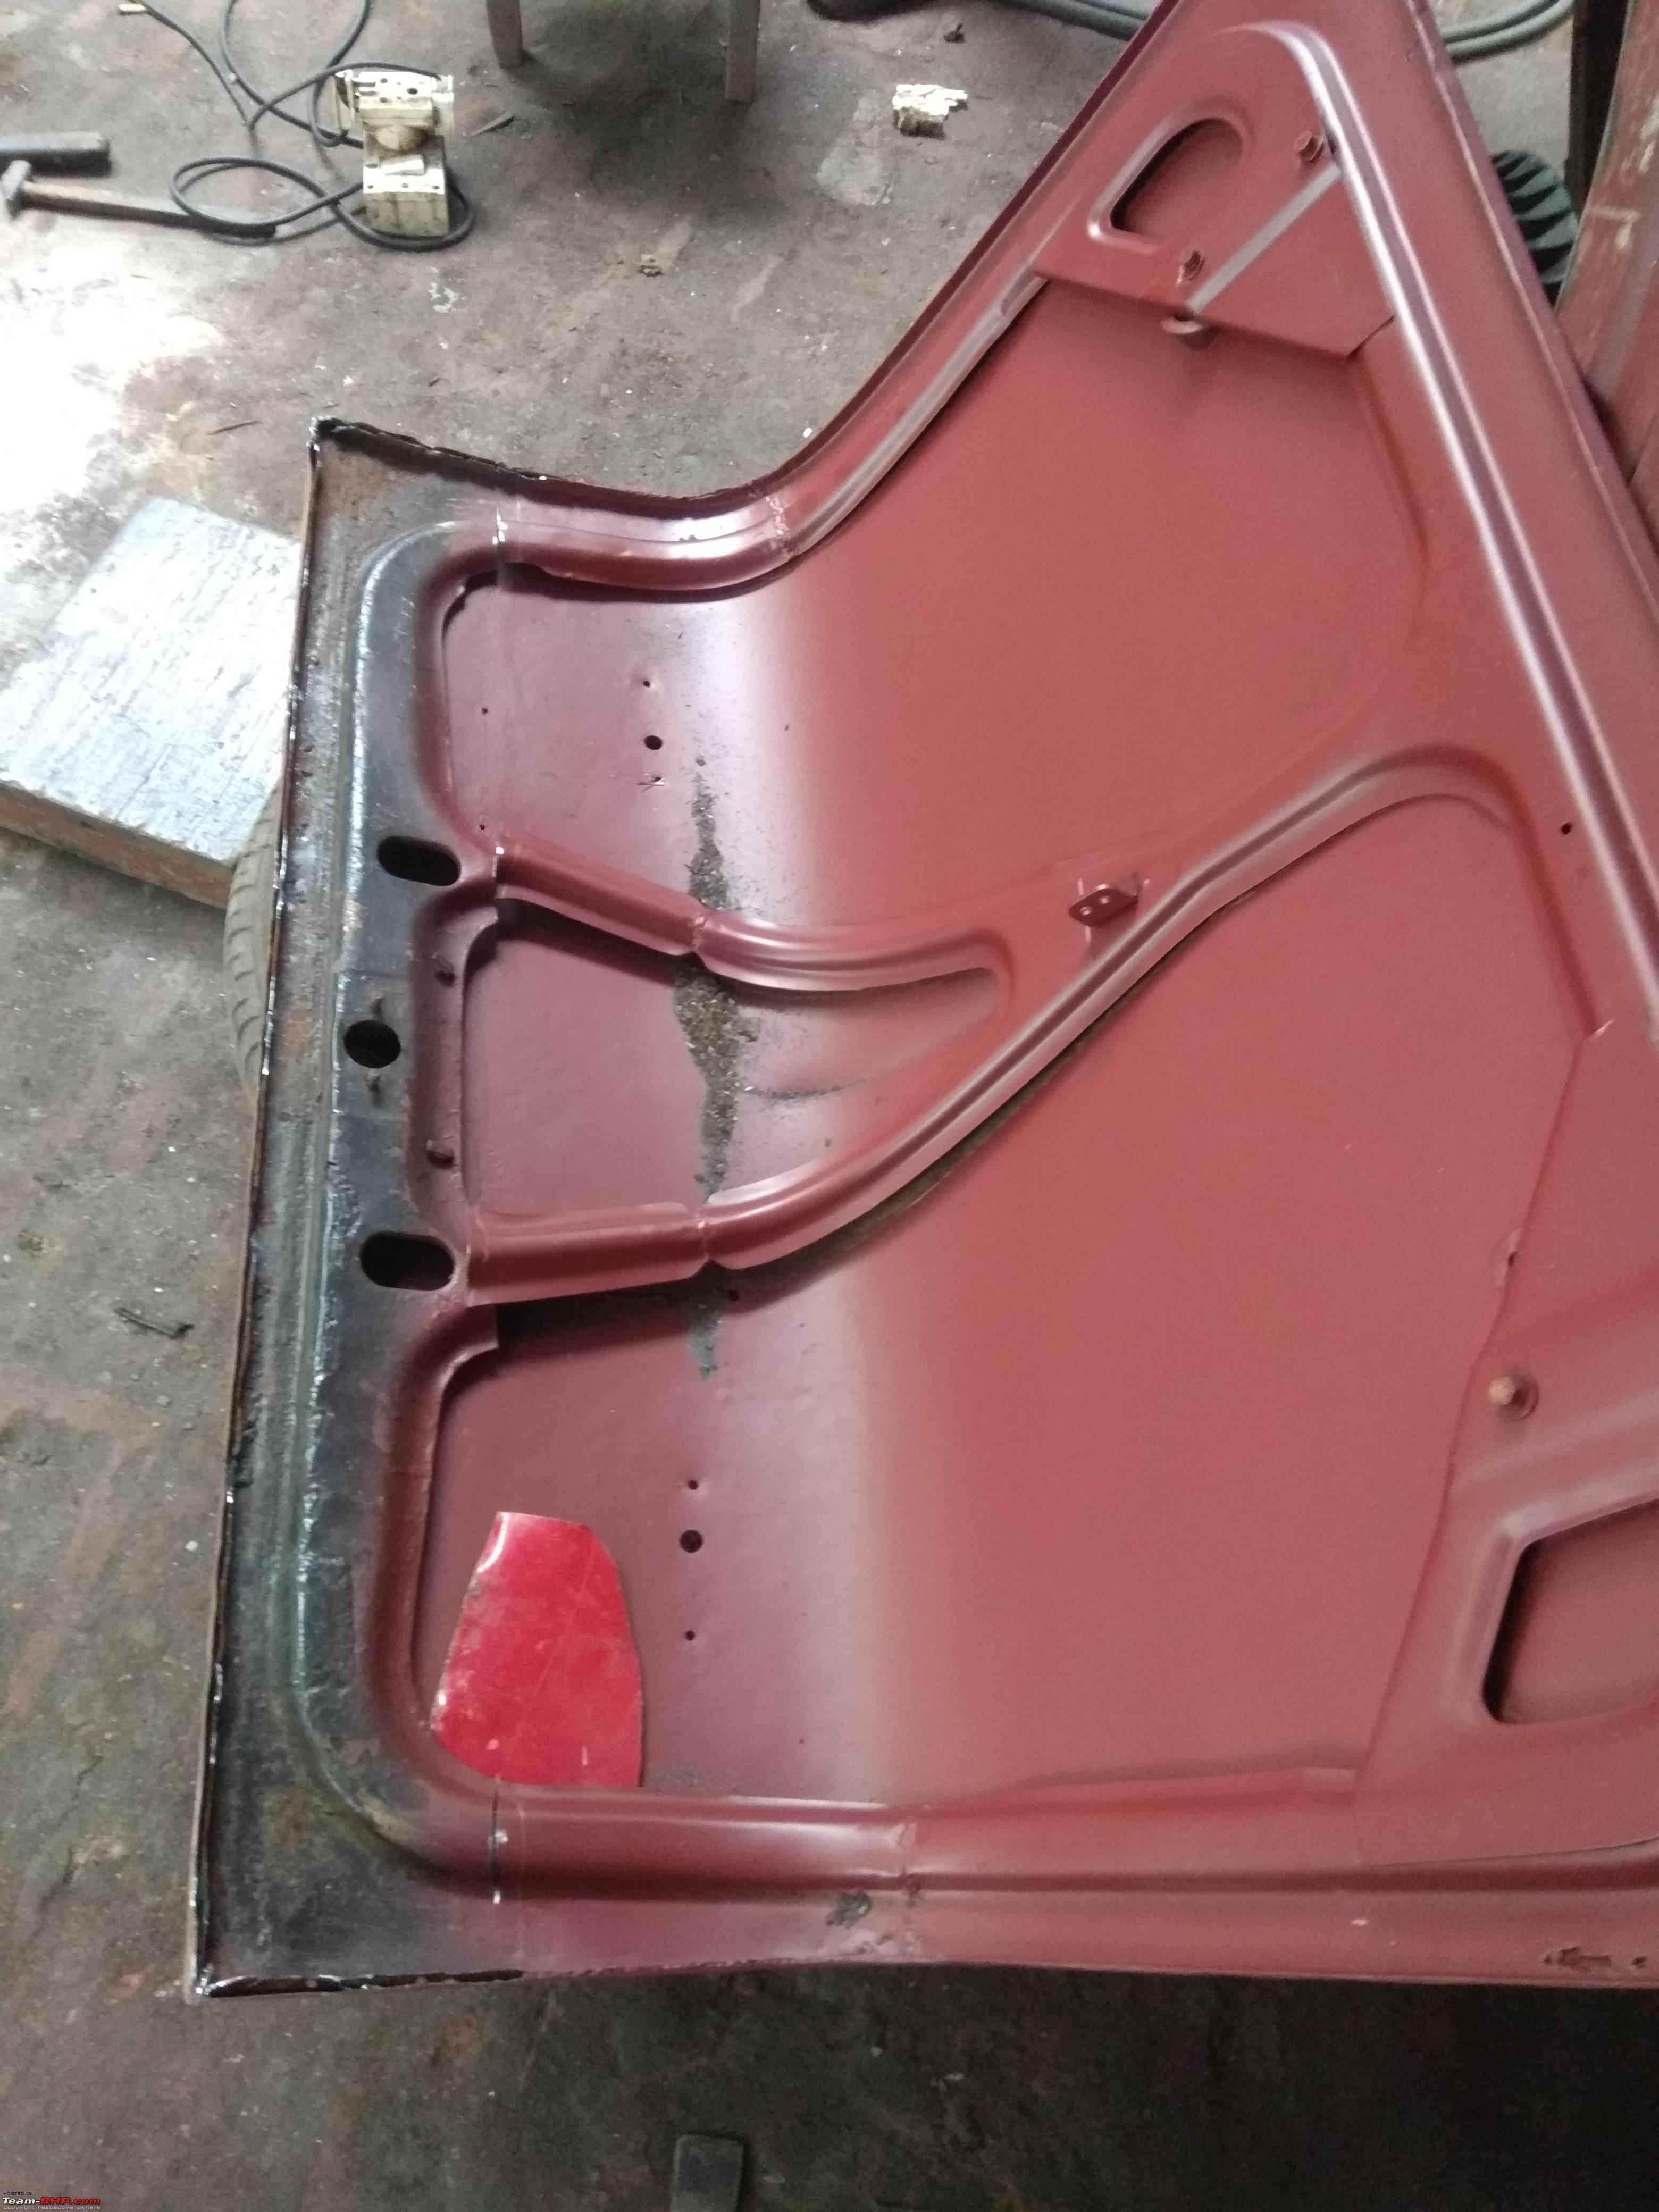 Lower door sections being attended to 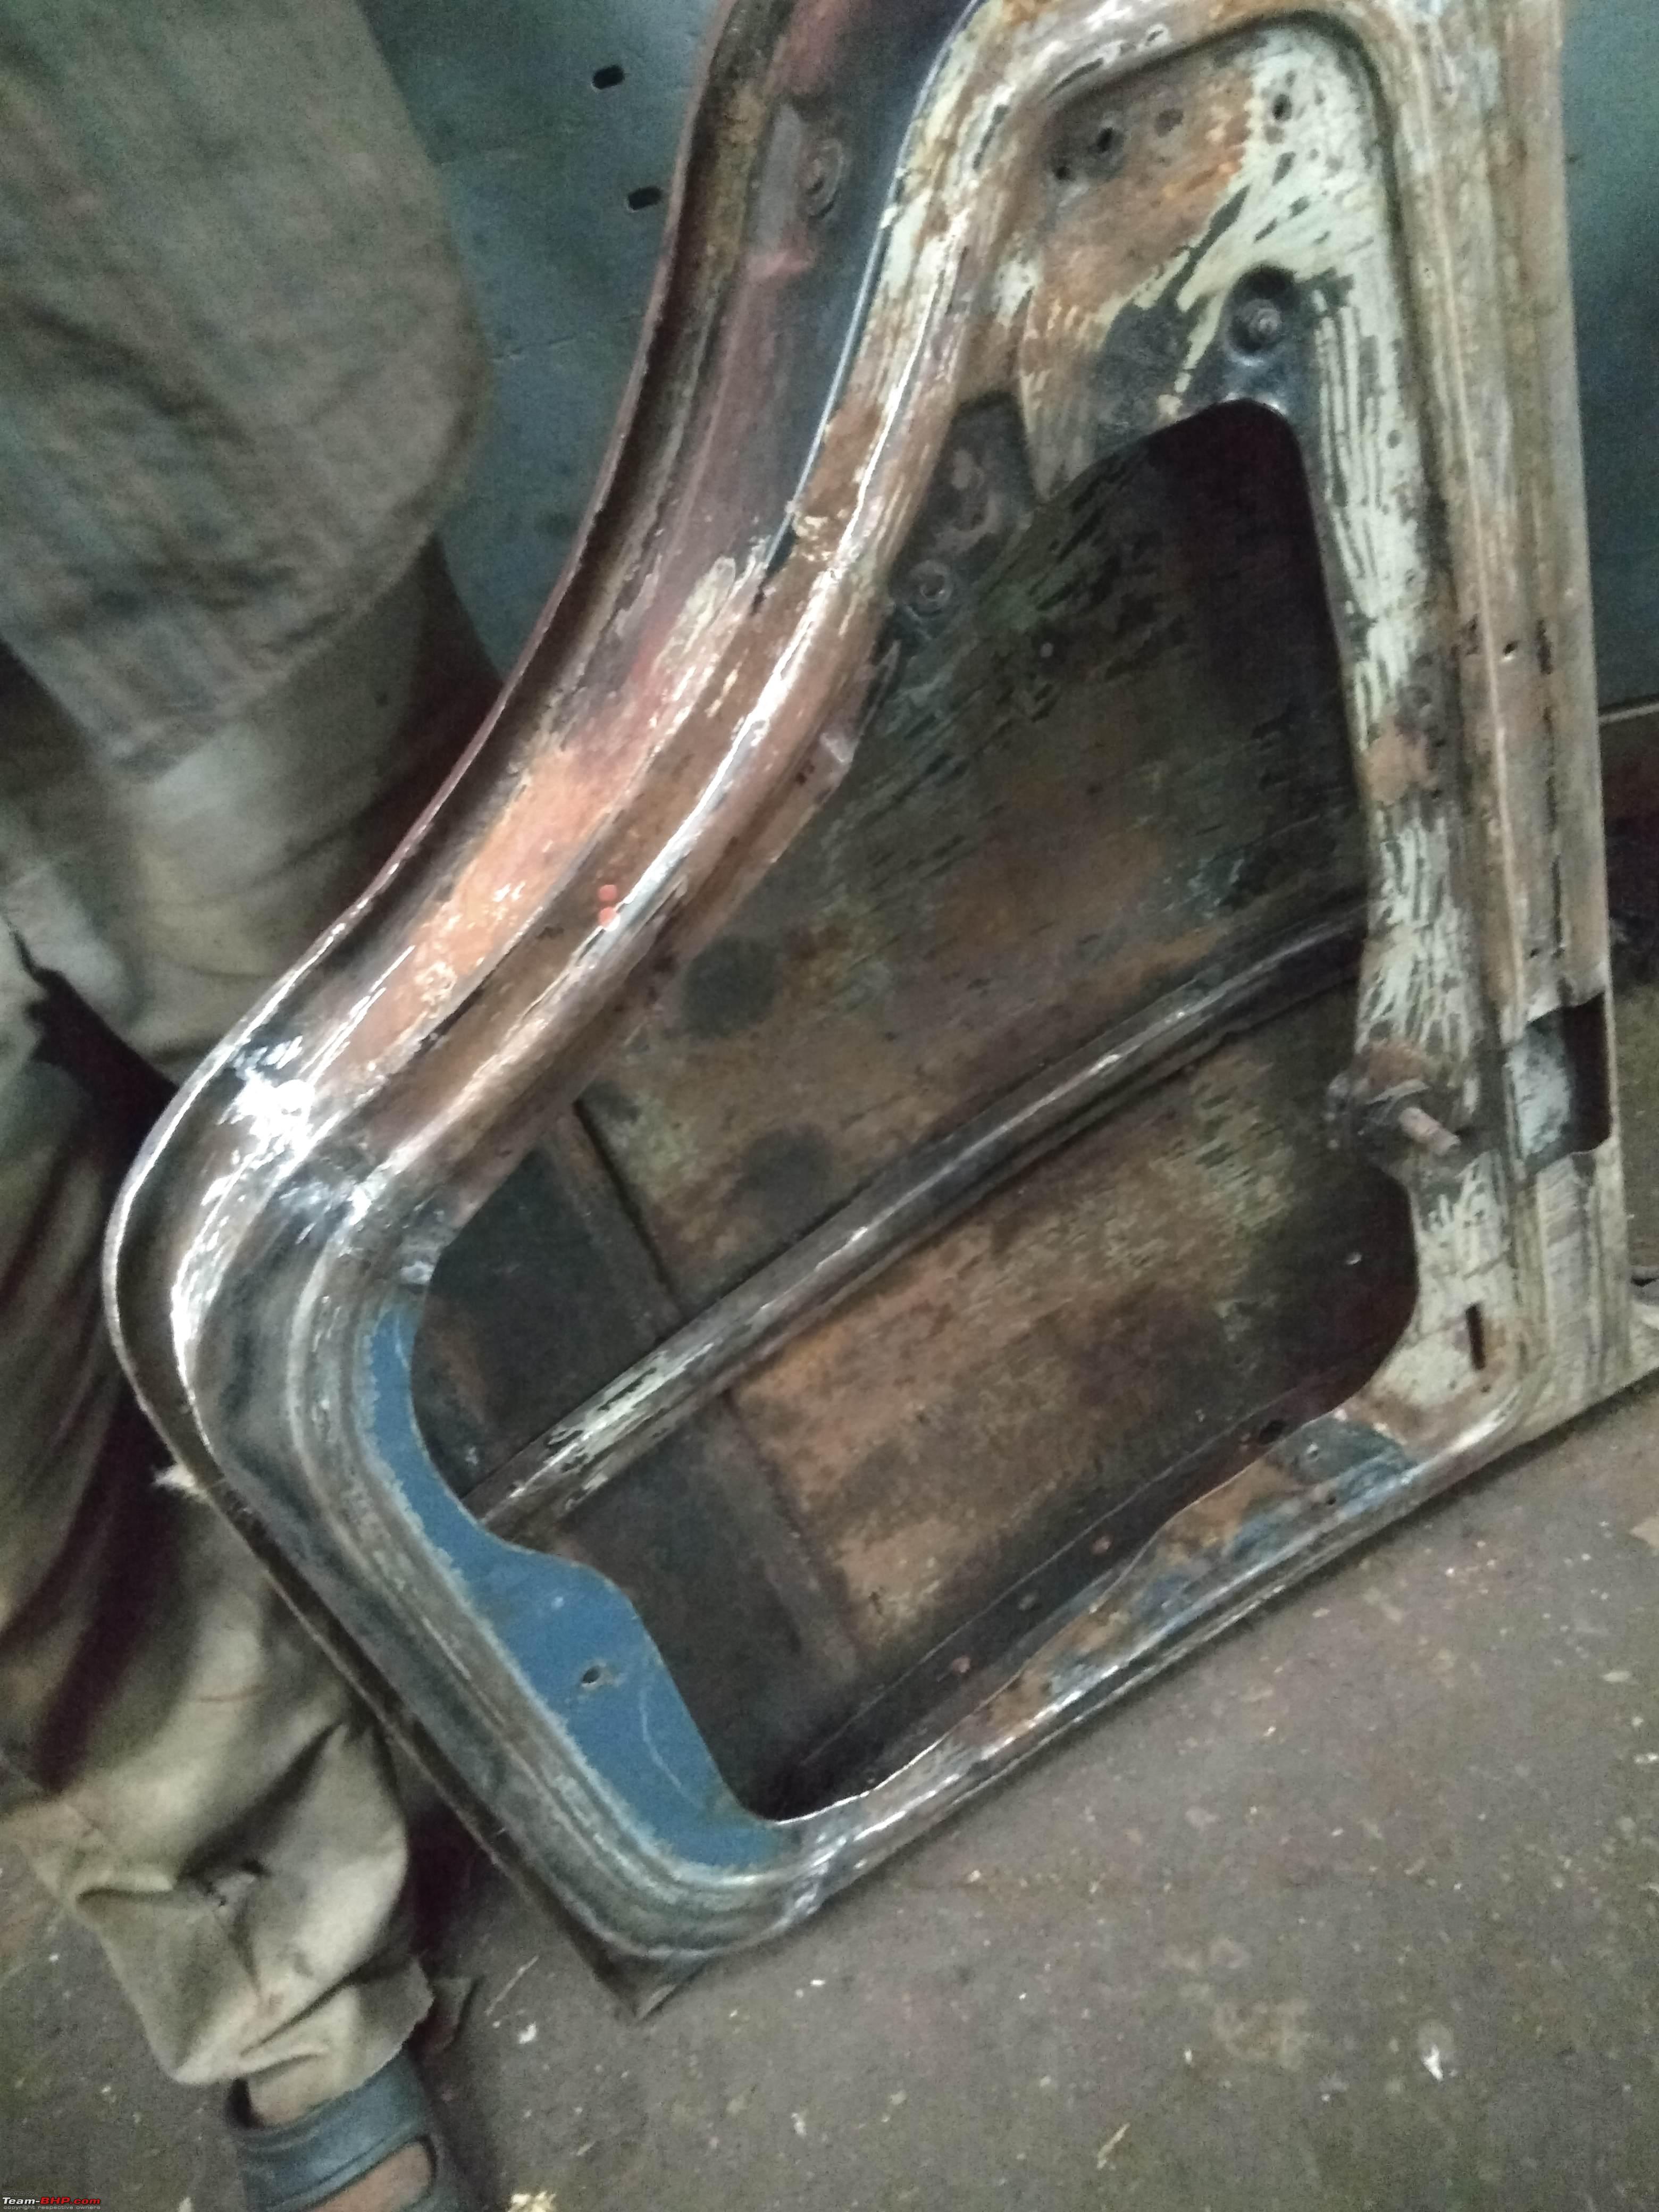 We ensured that the drain holes at the bottom of the doors remained open 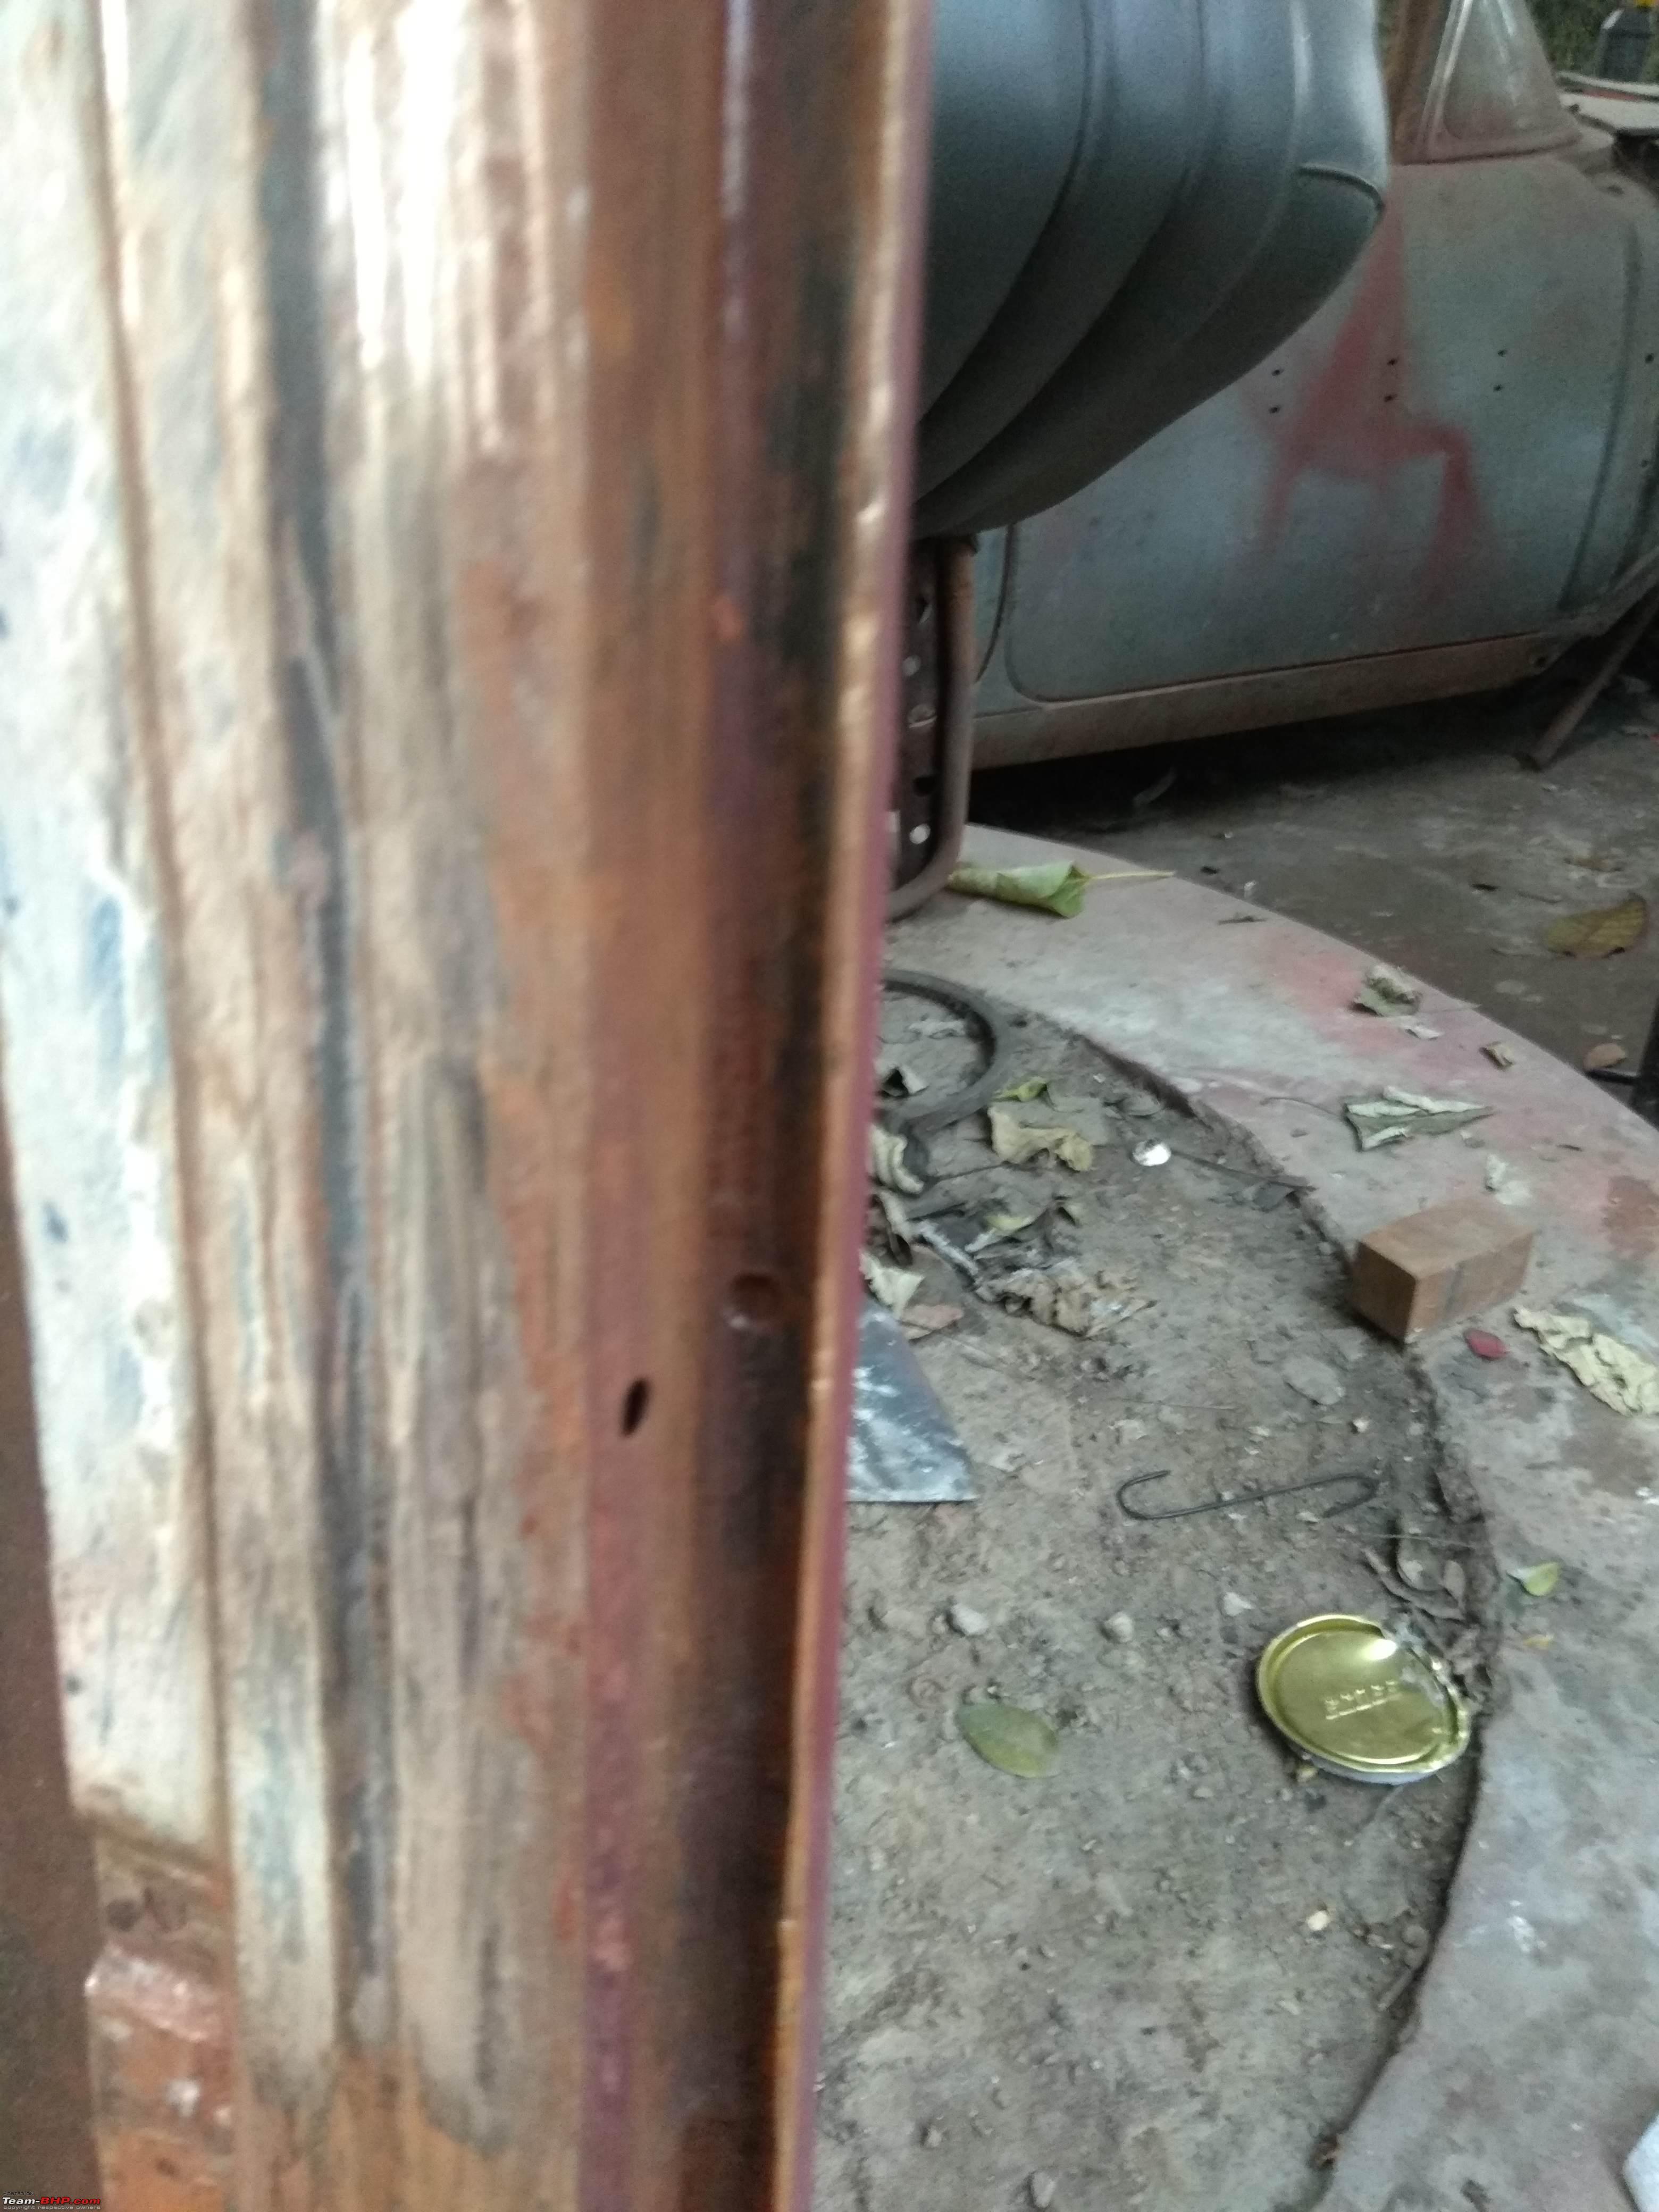 The cabin being scraped 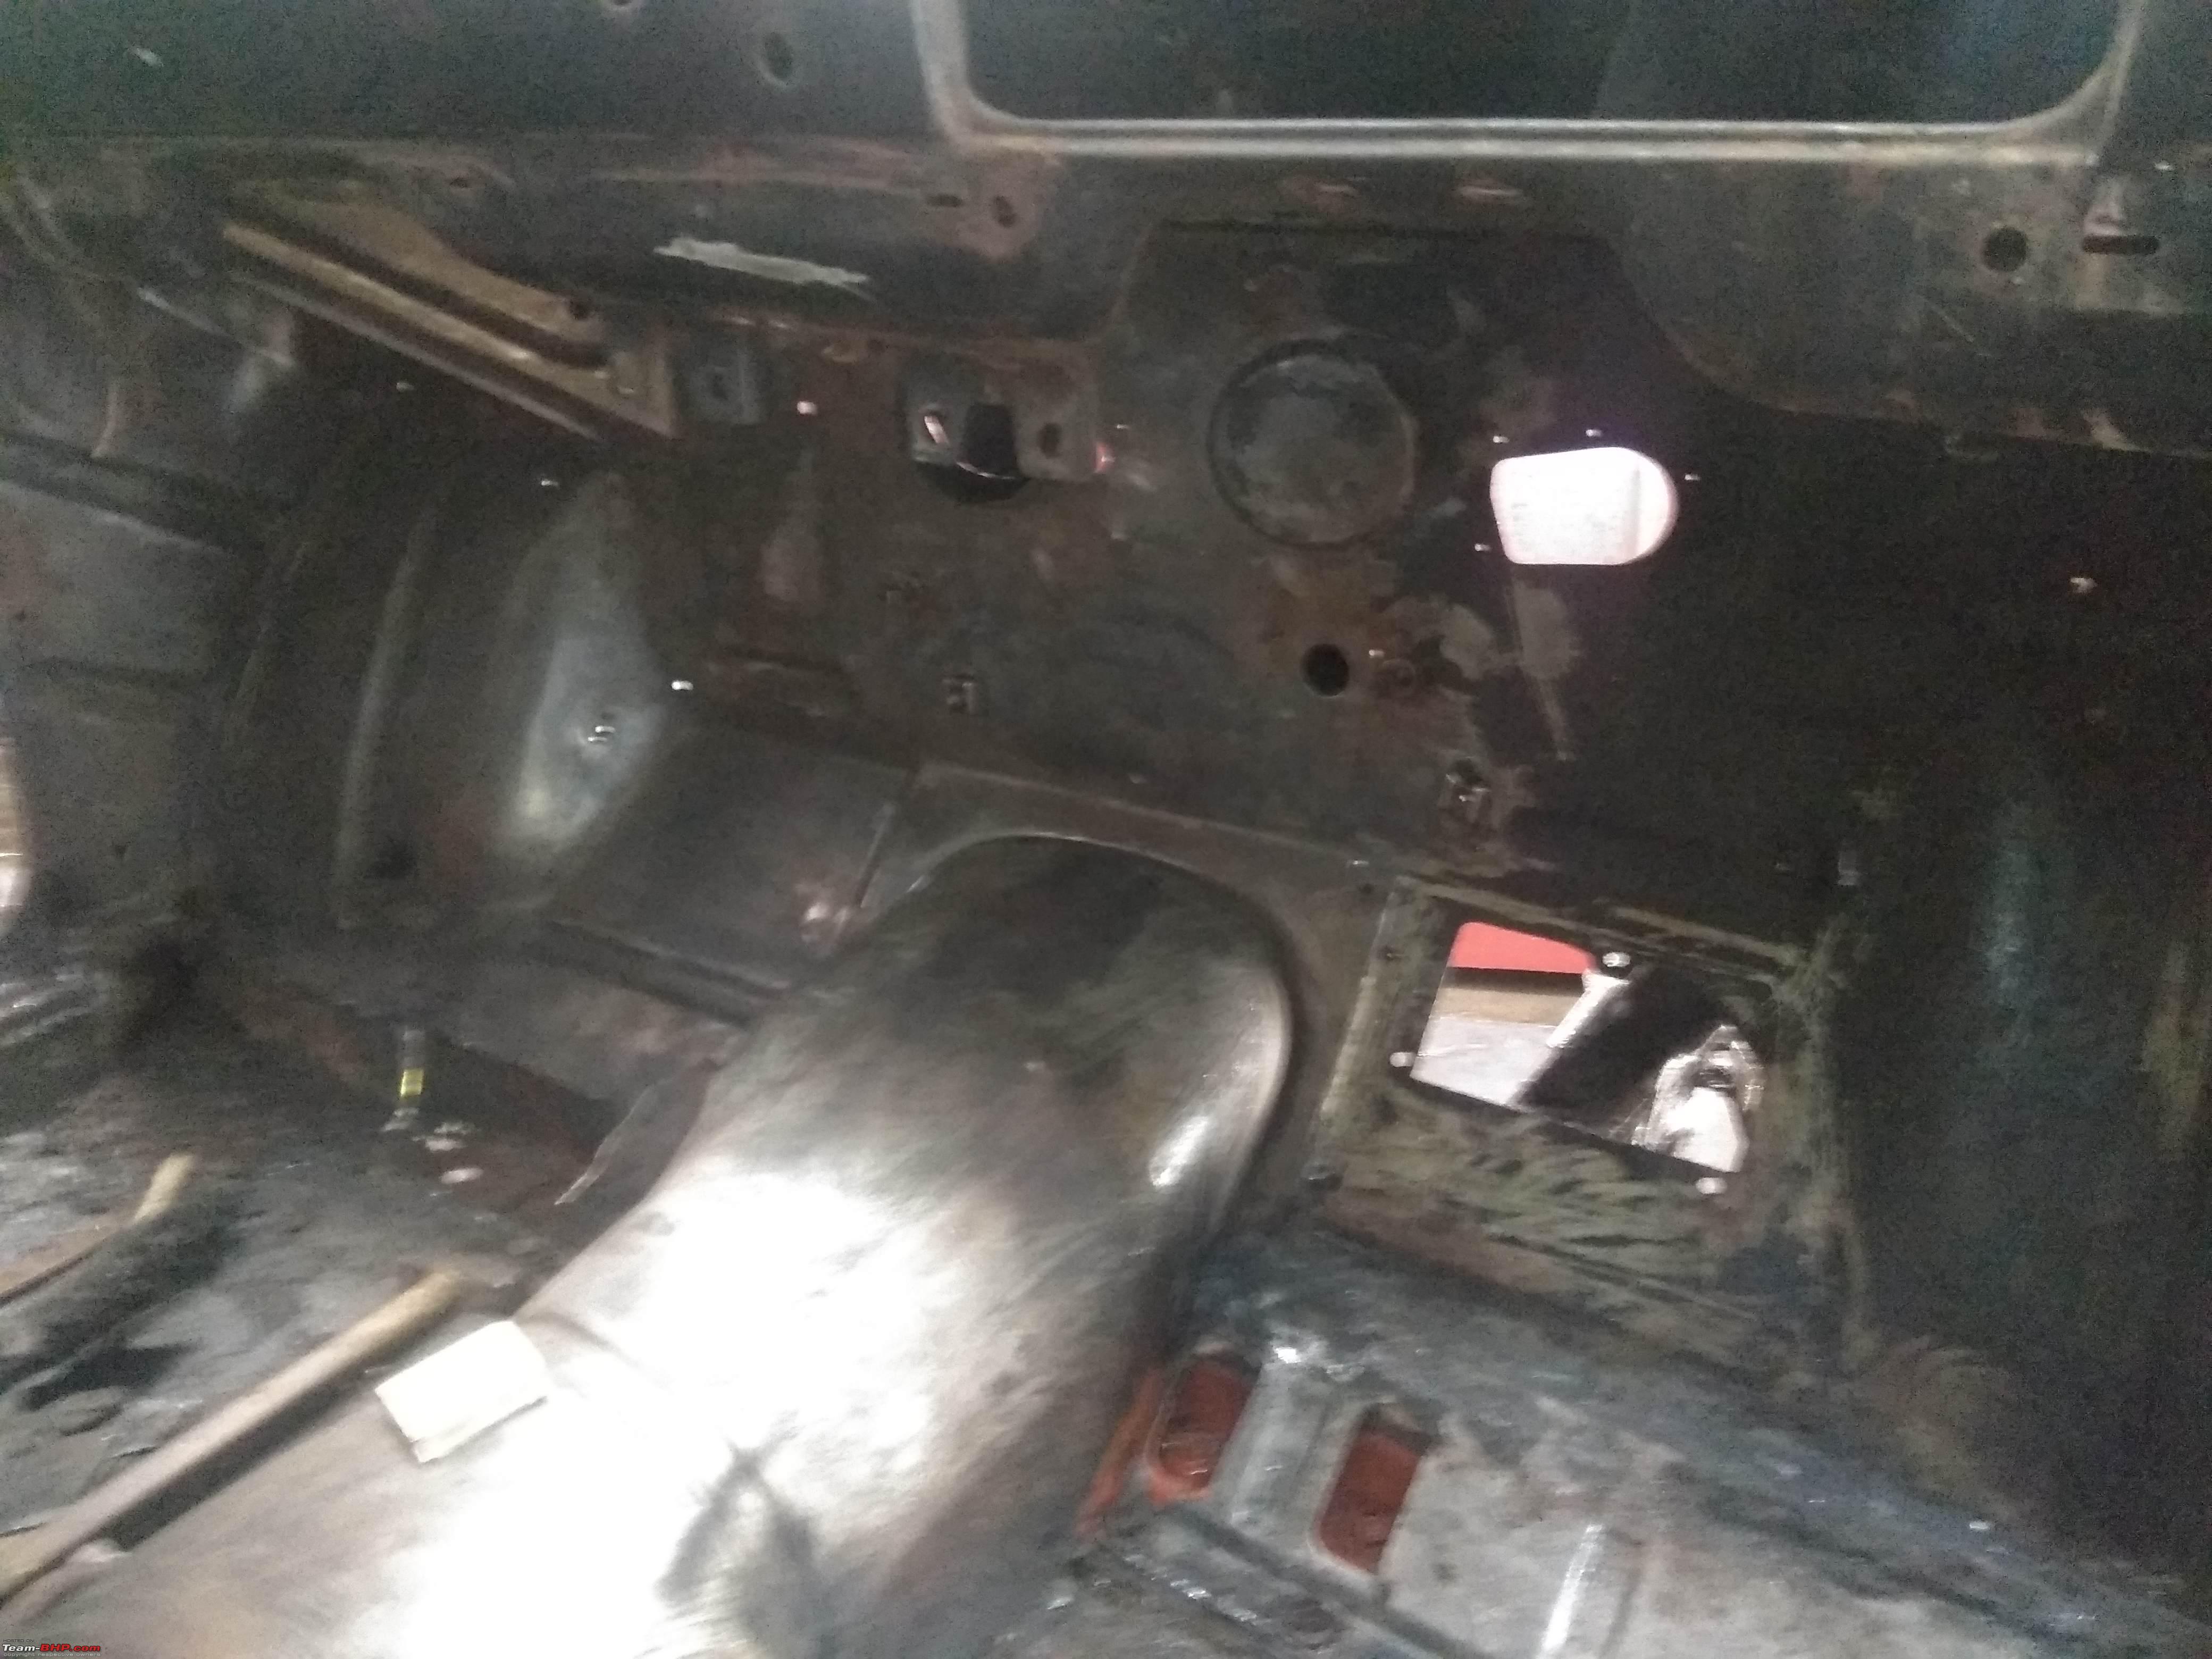 One side of the floor board replaced. The window glasses are on since the monsoons had started & we didn't want water to get into the cabin. 202 had so much muck that the cleaning & stripping had to be done outdoors.  The other side replaced  Lower bulkhead 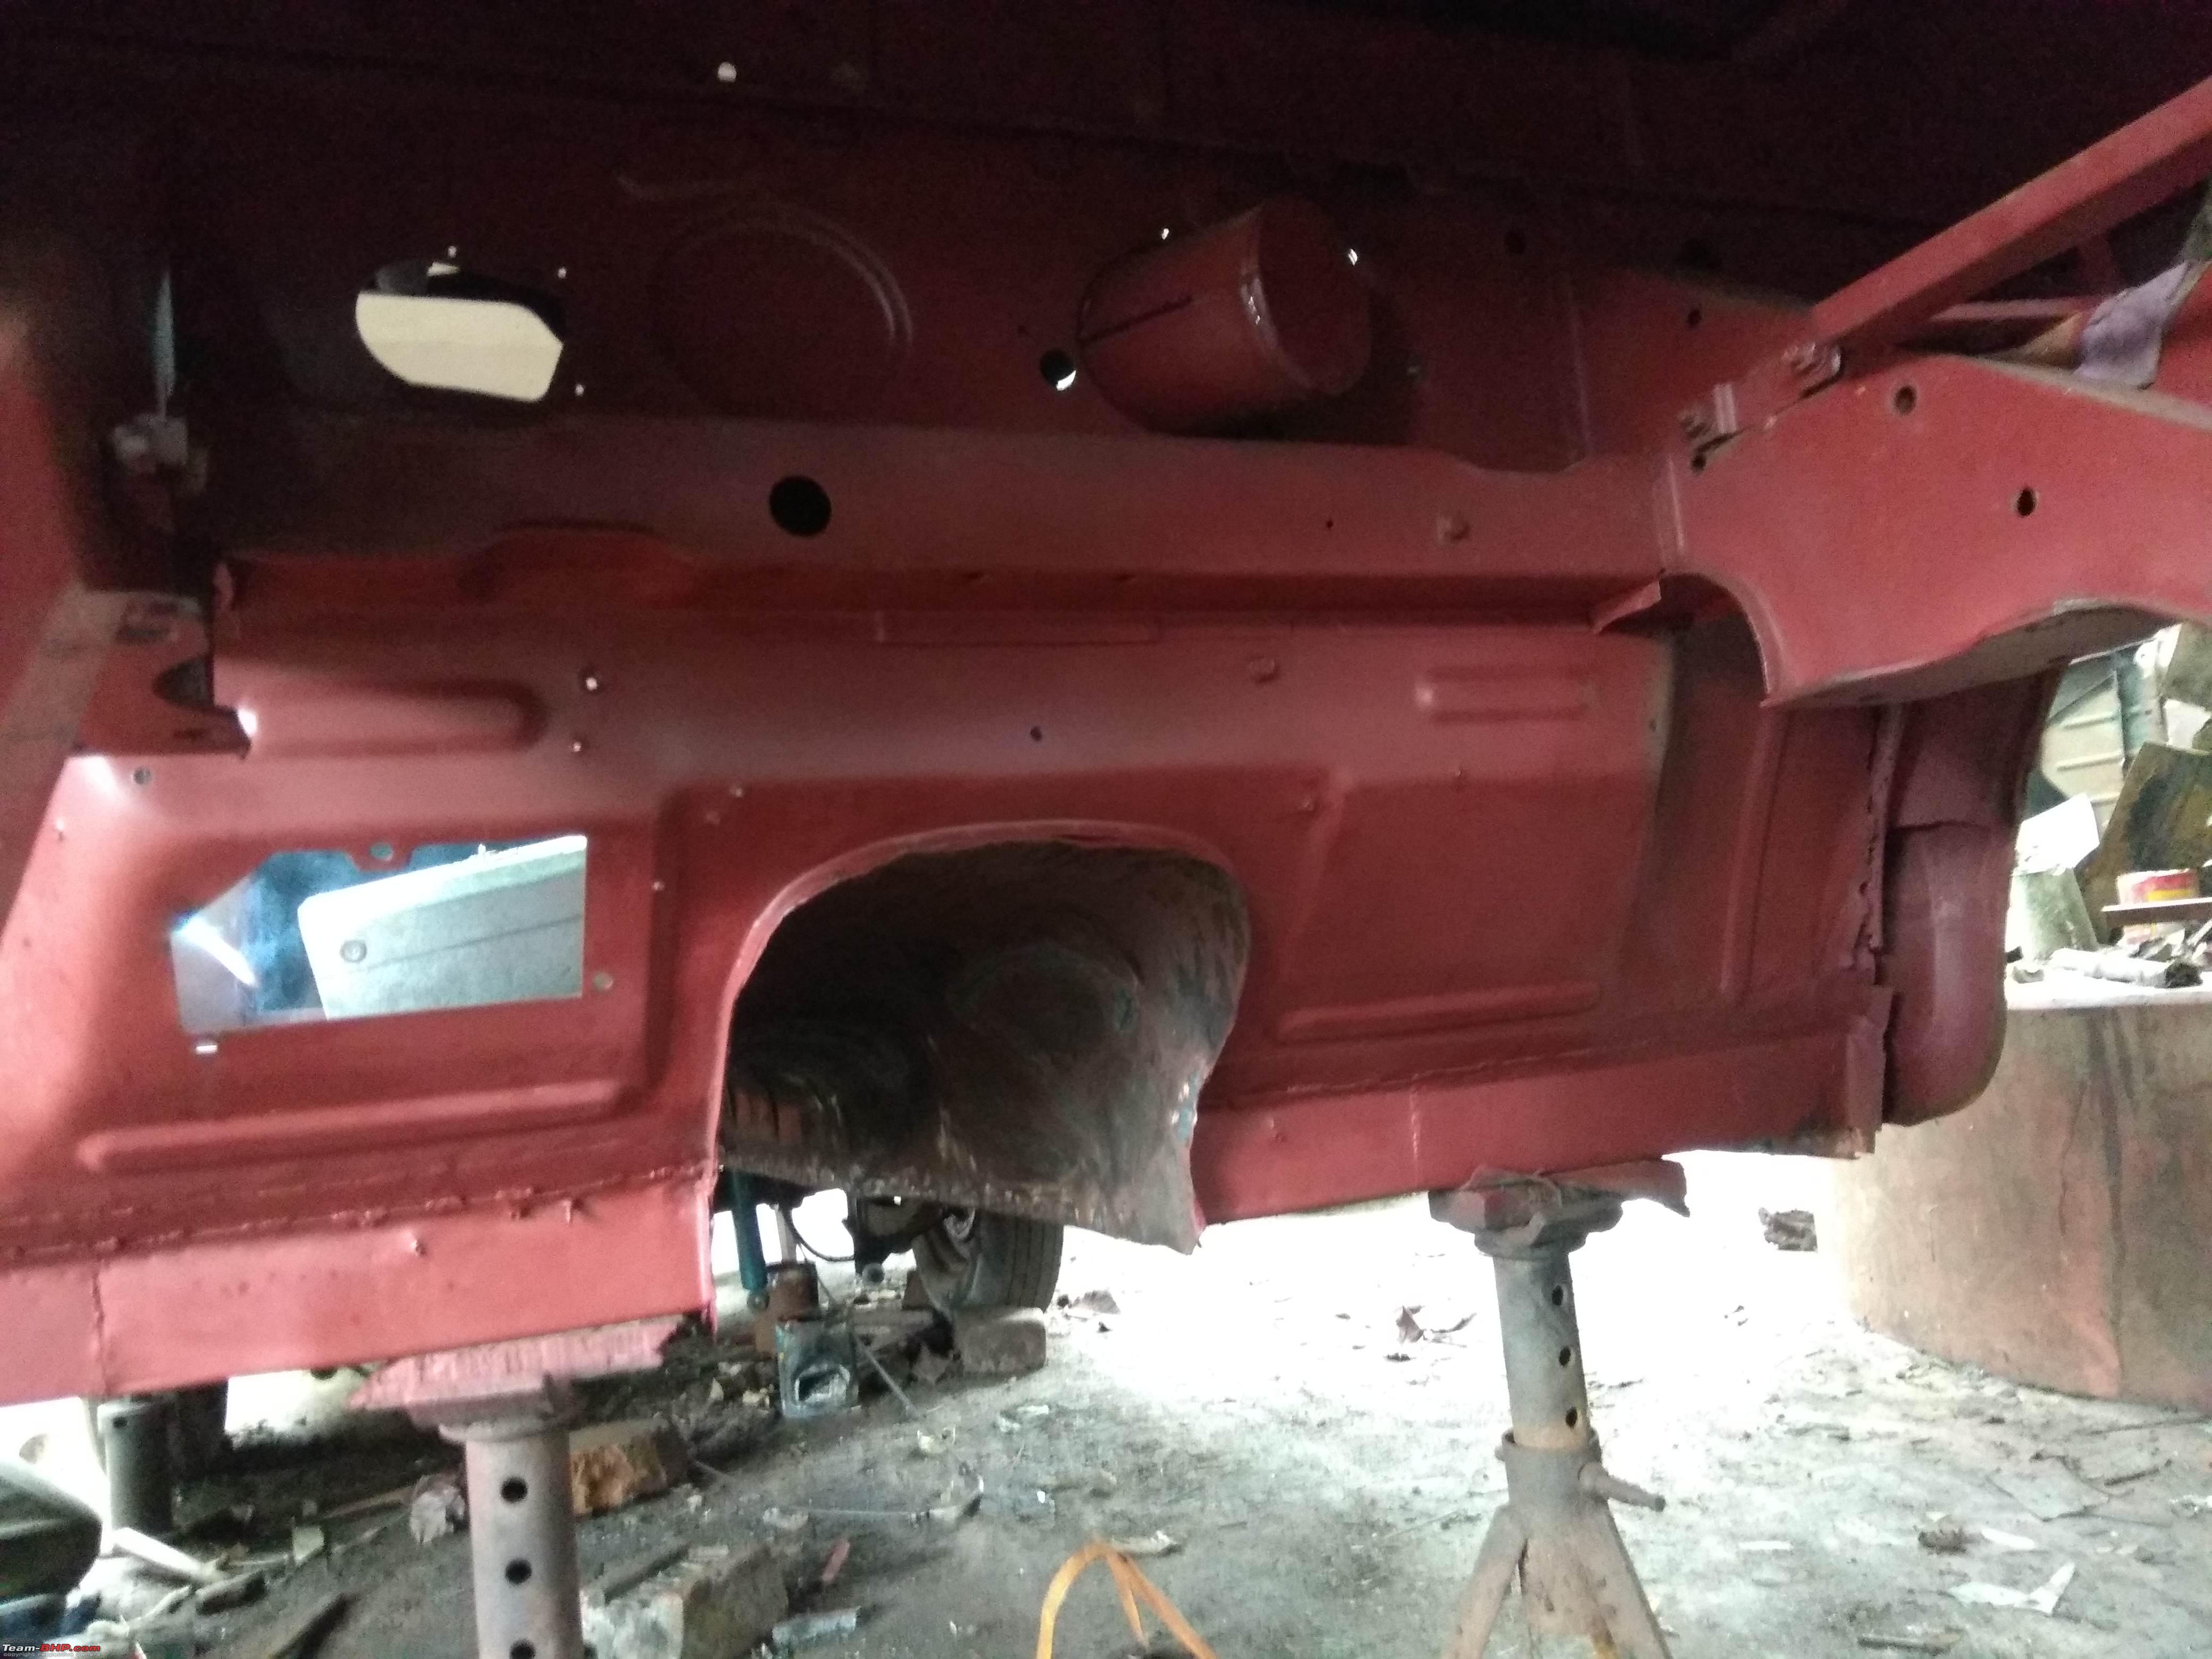 Undercarriage finished in epoxy primers/paints 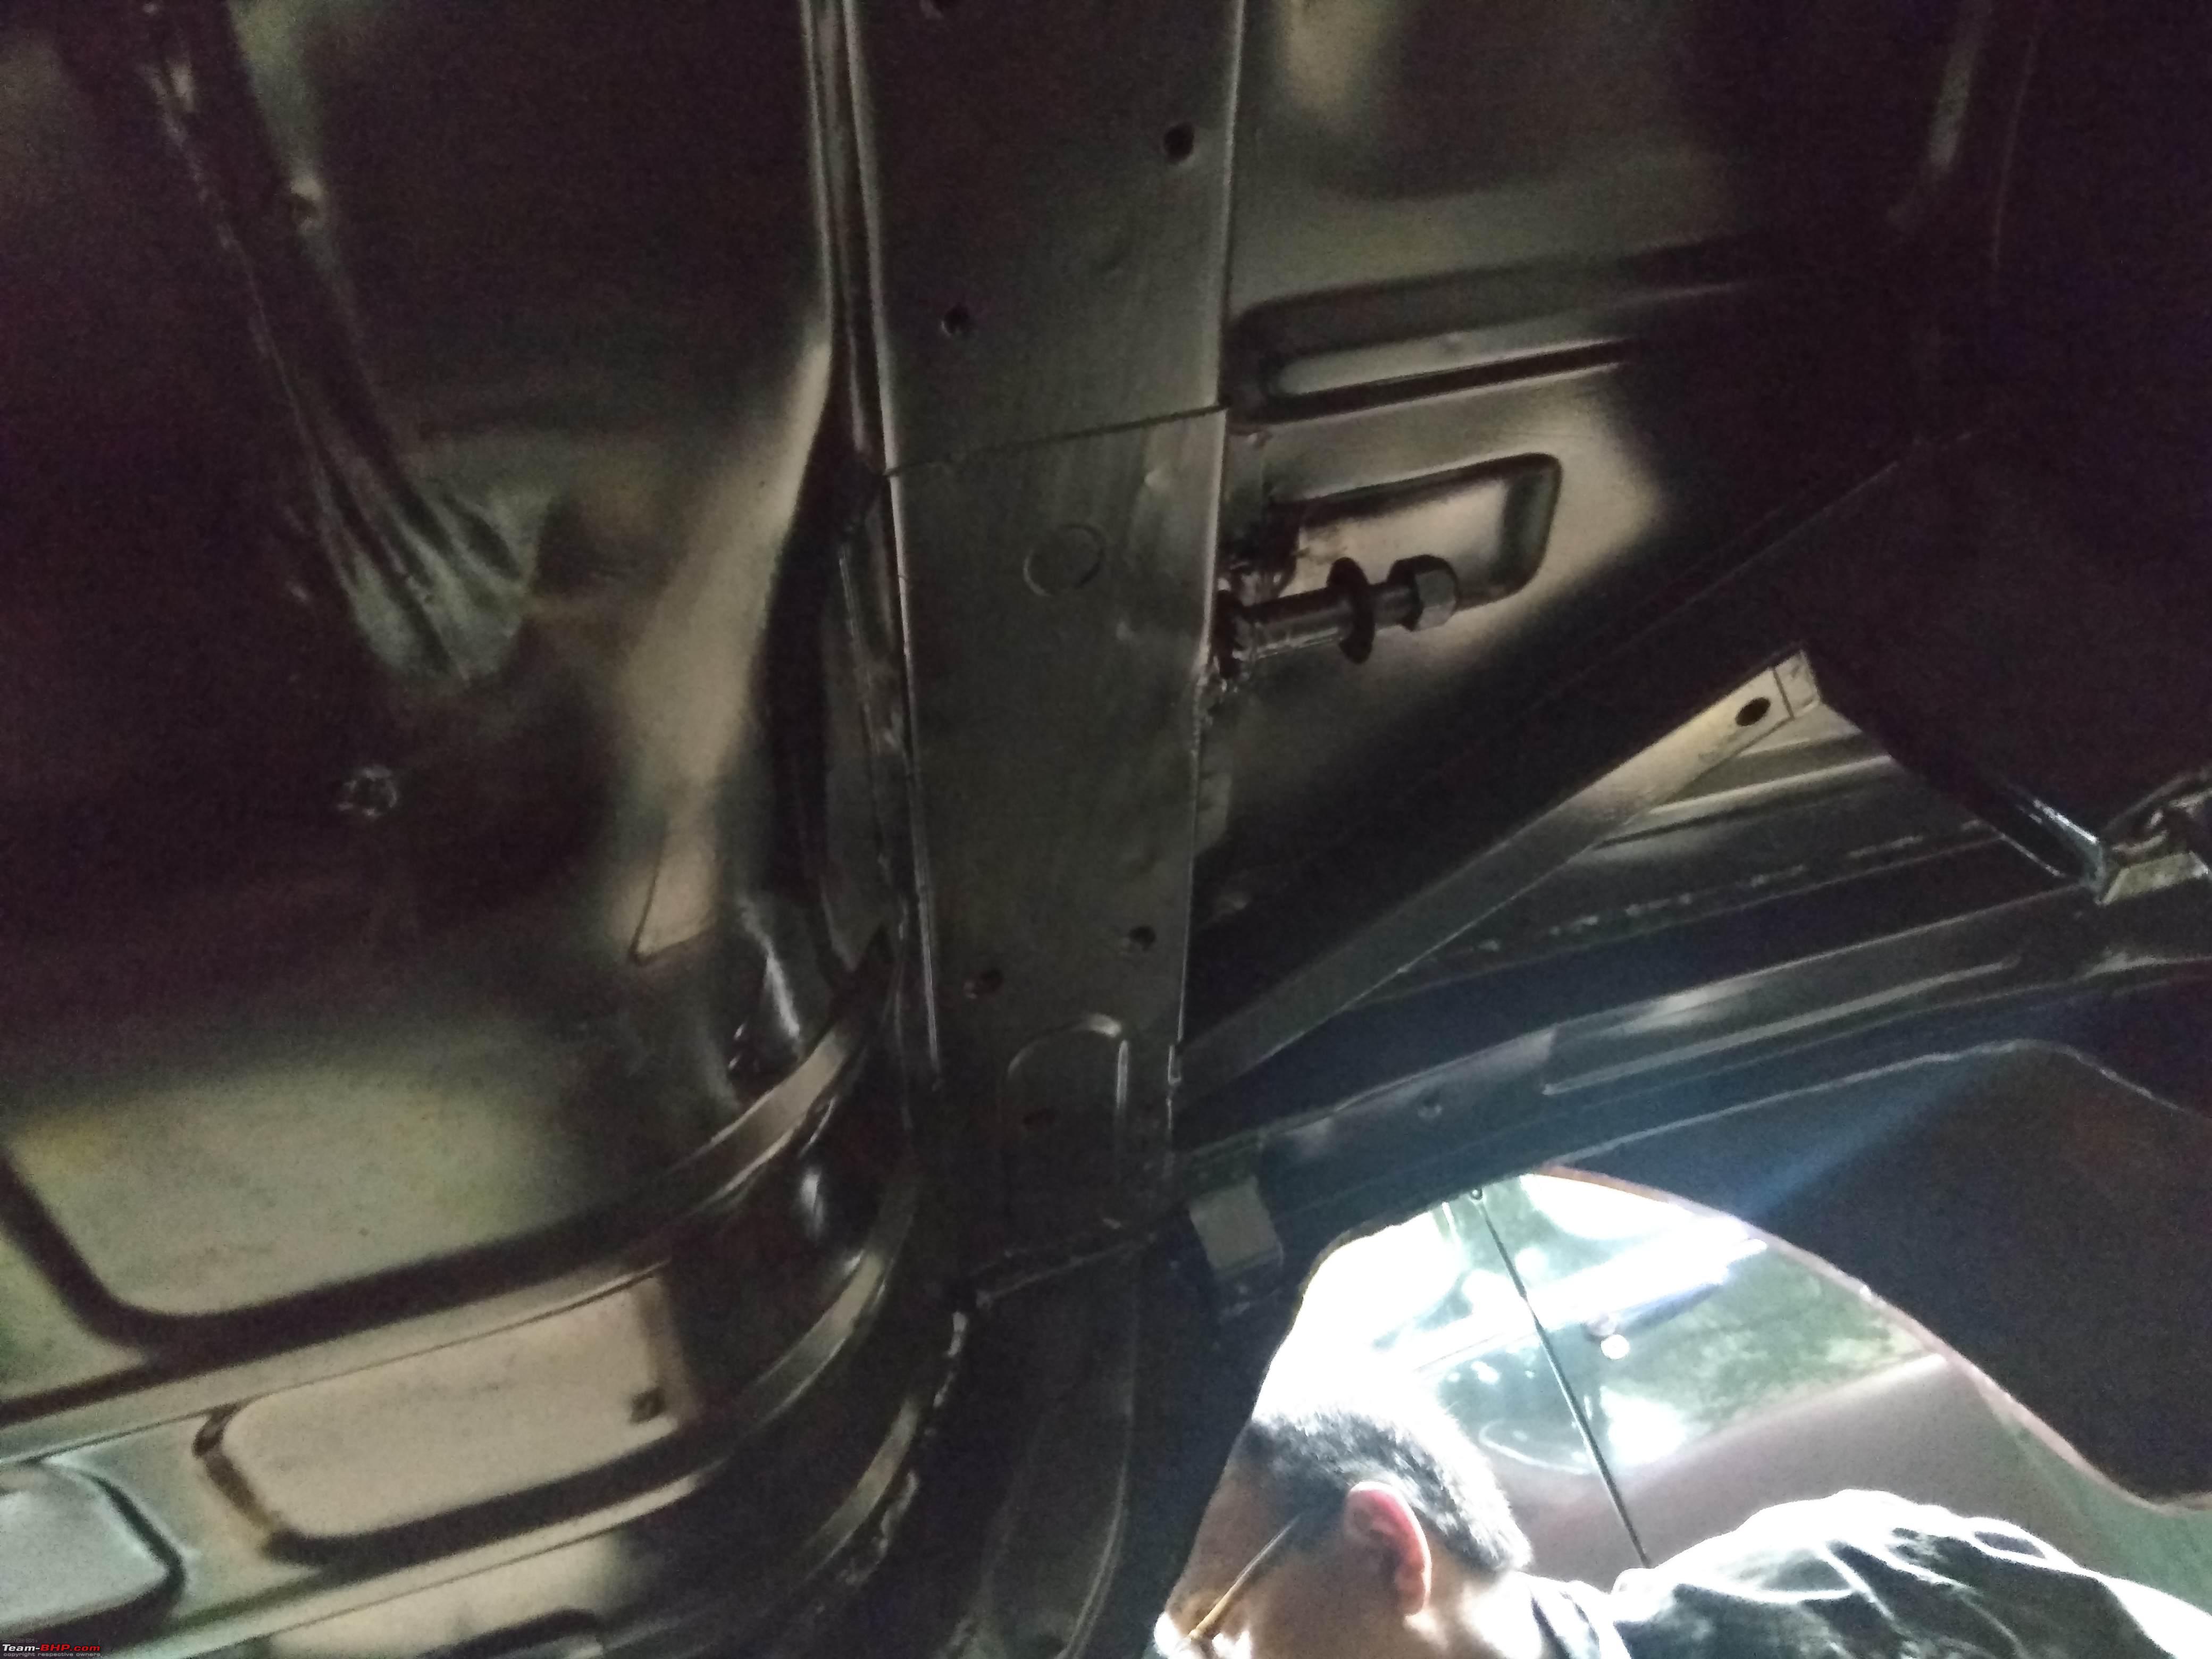 Cabin areas completed   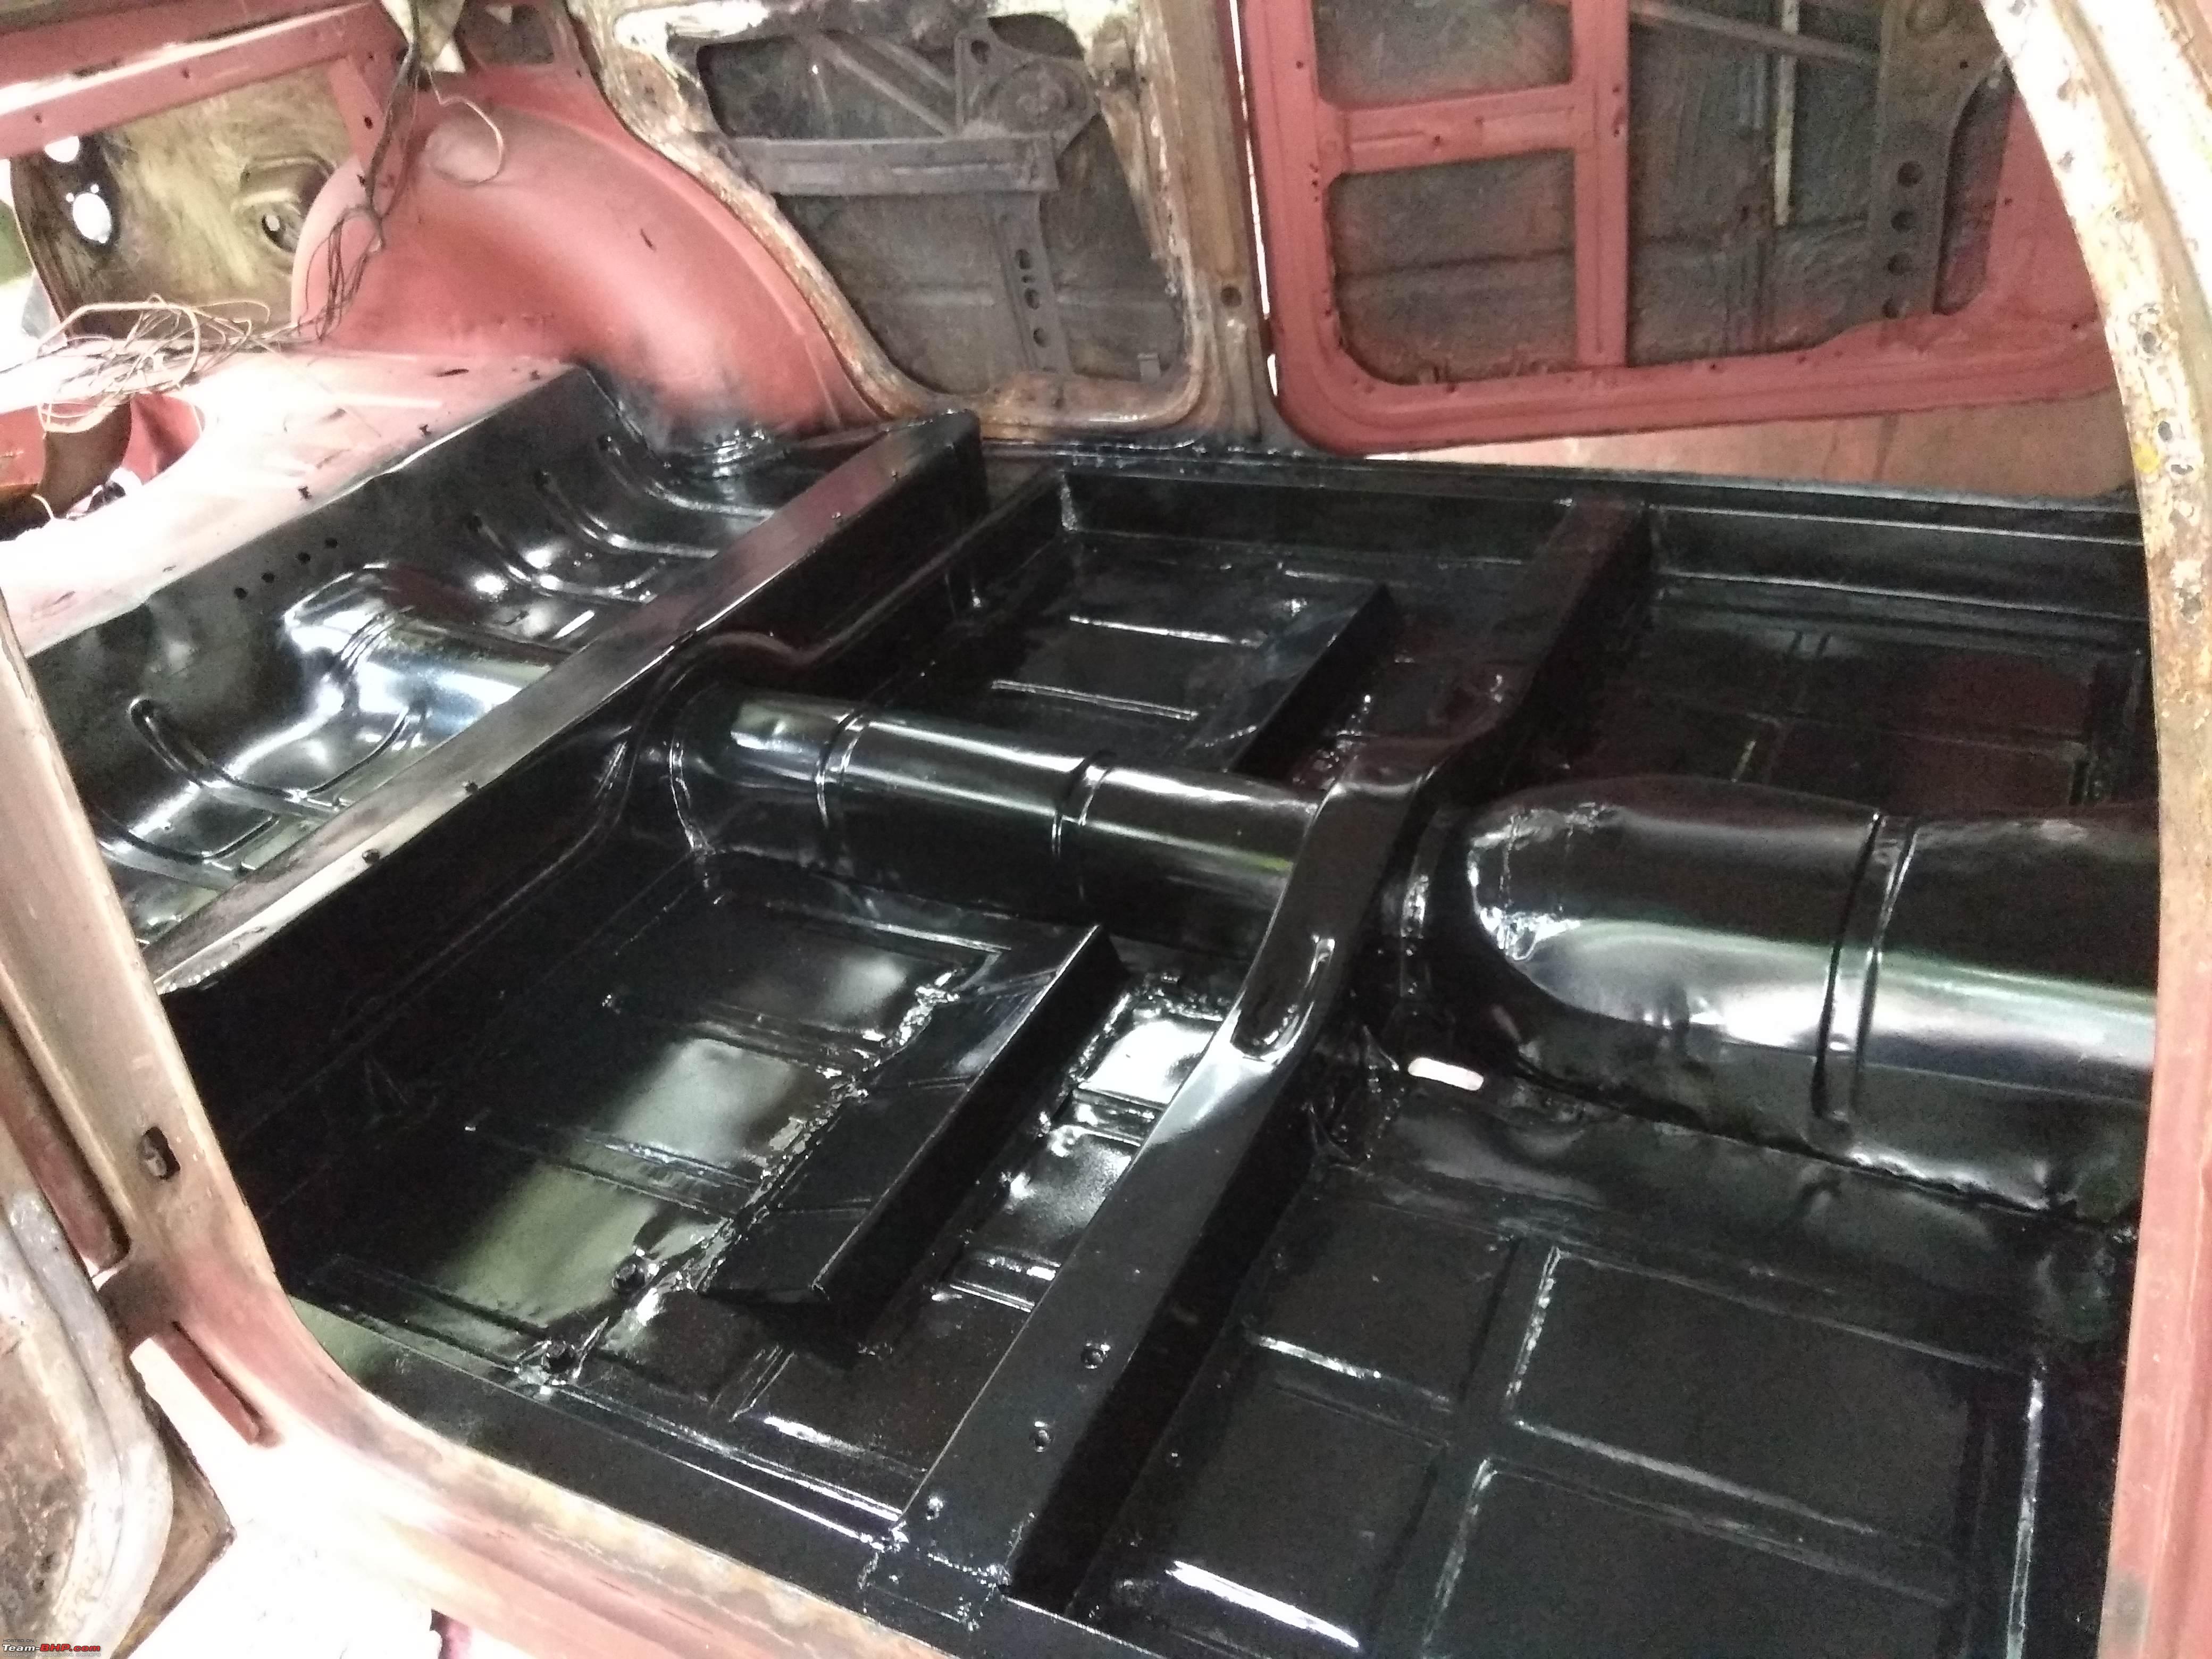 When the sub-frame was taken of, I was told that in all likelihood it was the original unit (Italian).  The front cross however had been replaced in the past & was rotten. It was replaced with a fresh piece. 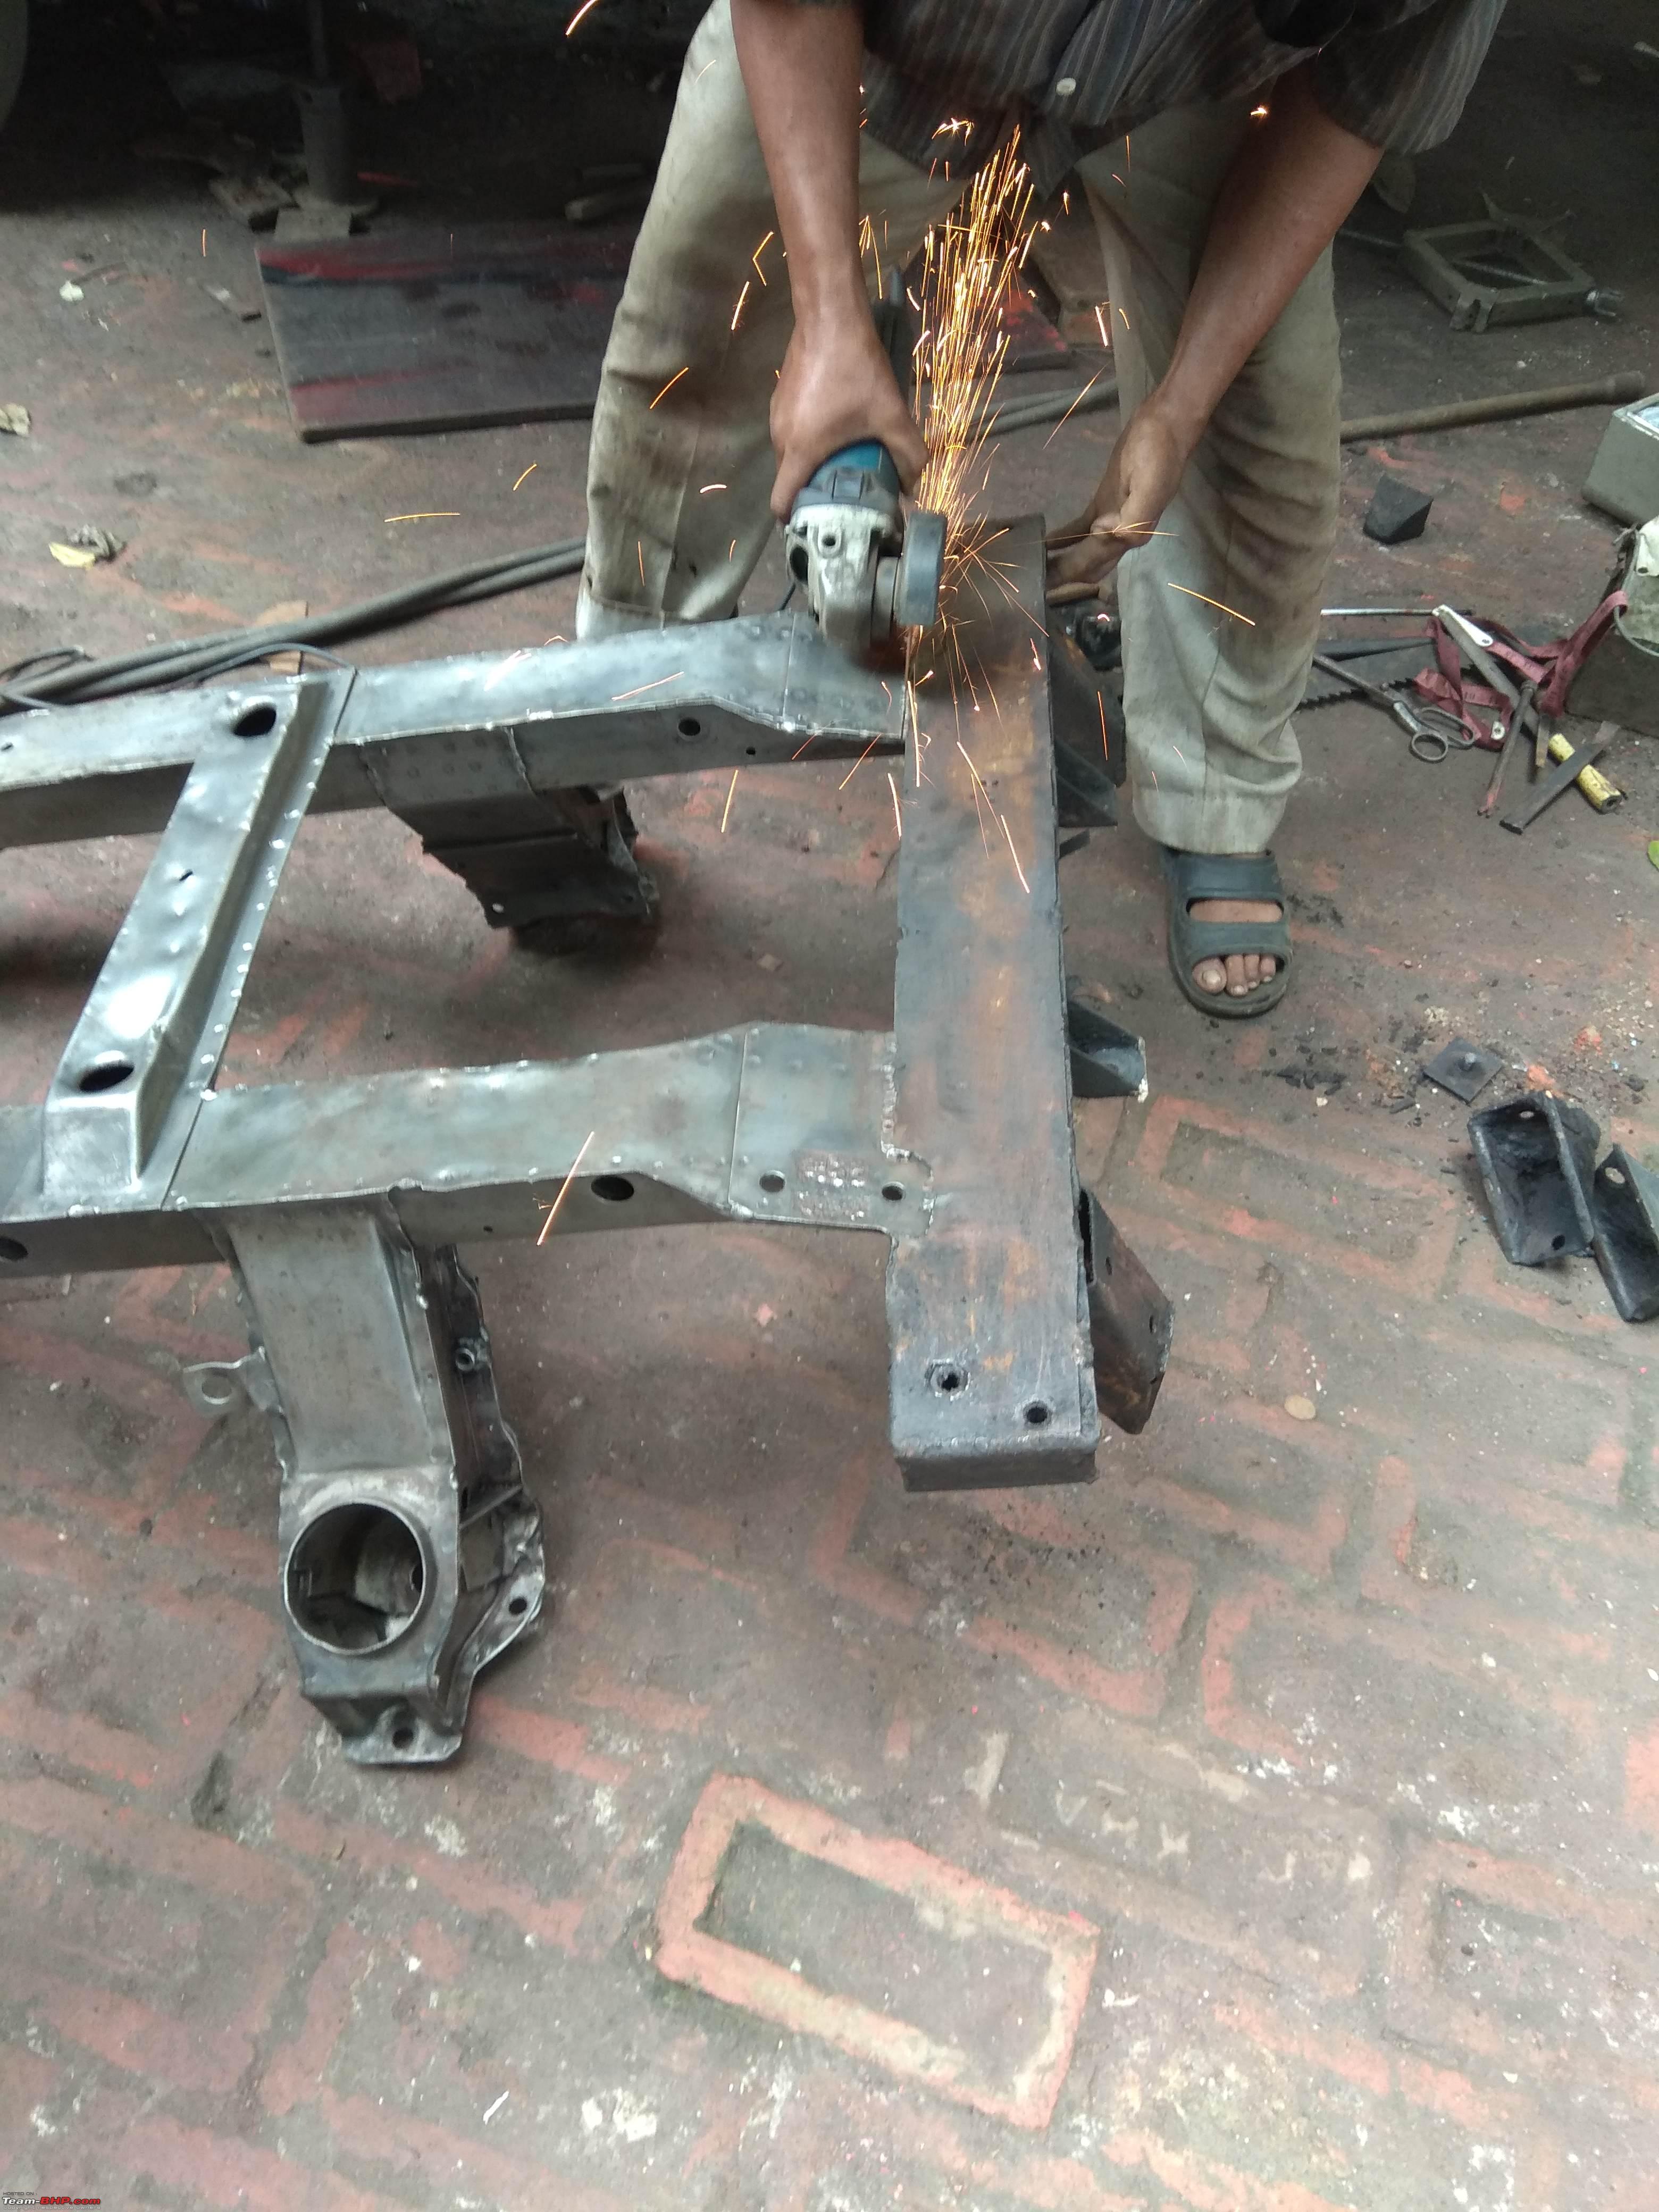 Once the sub-frame was cleaned thoroughly, I was happy to see the factory spot welds! 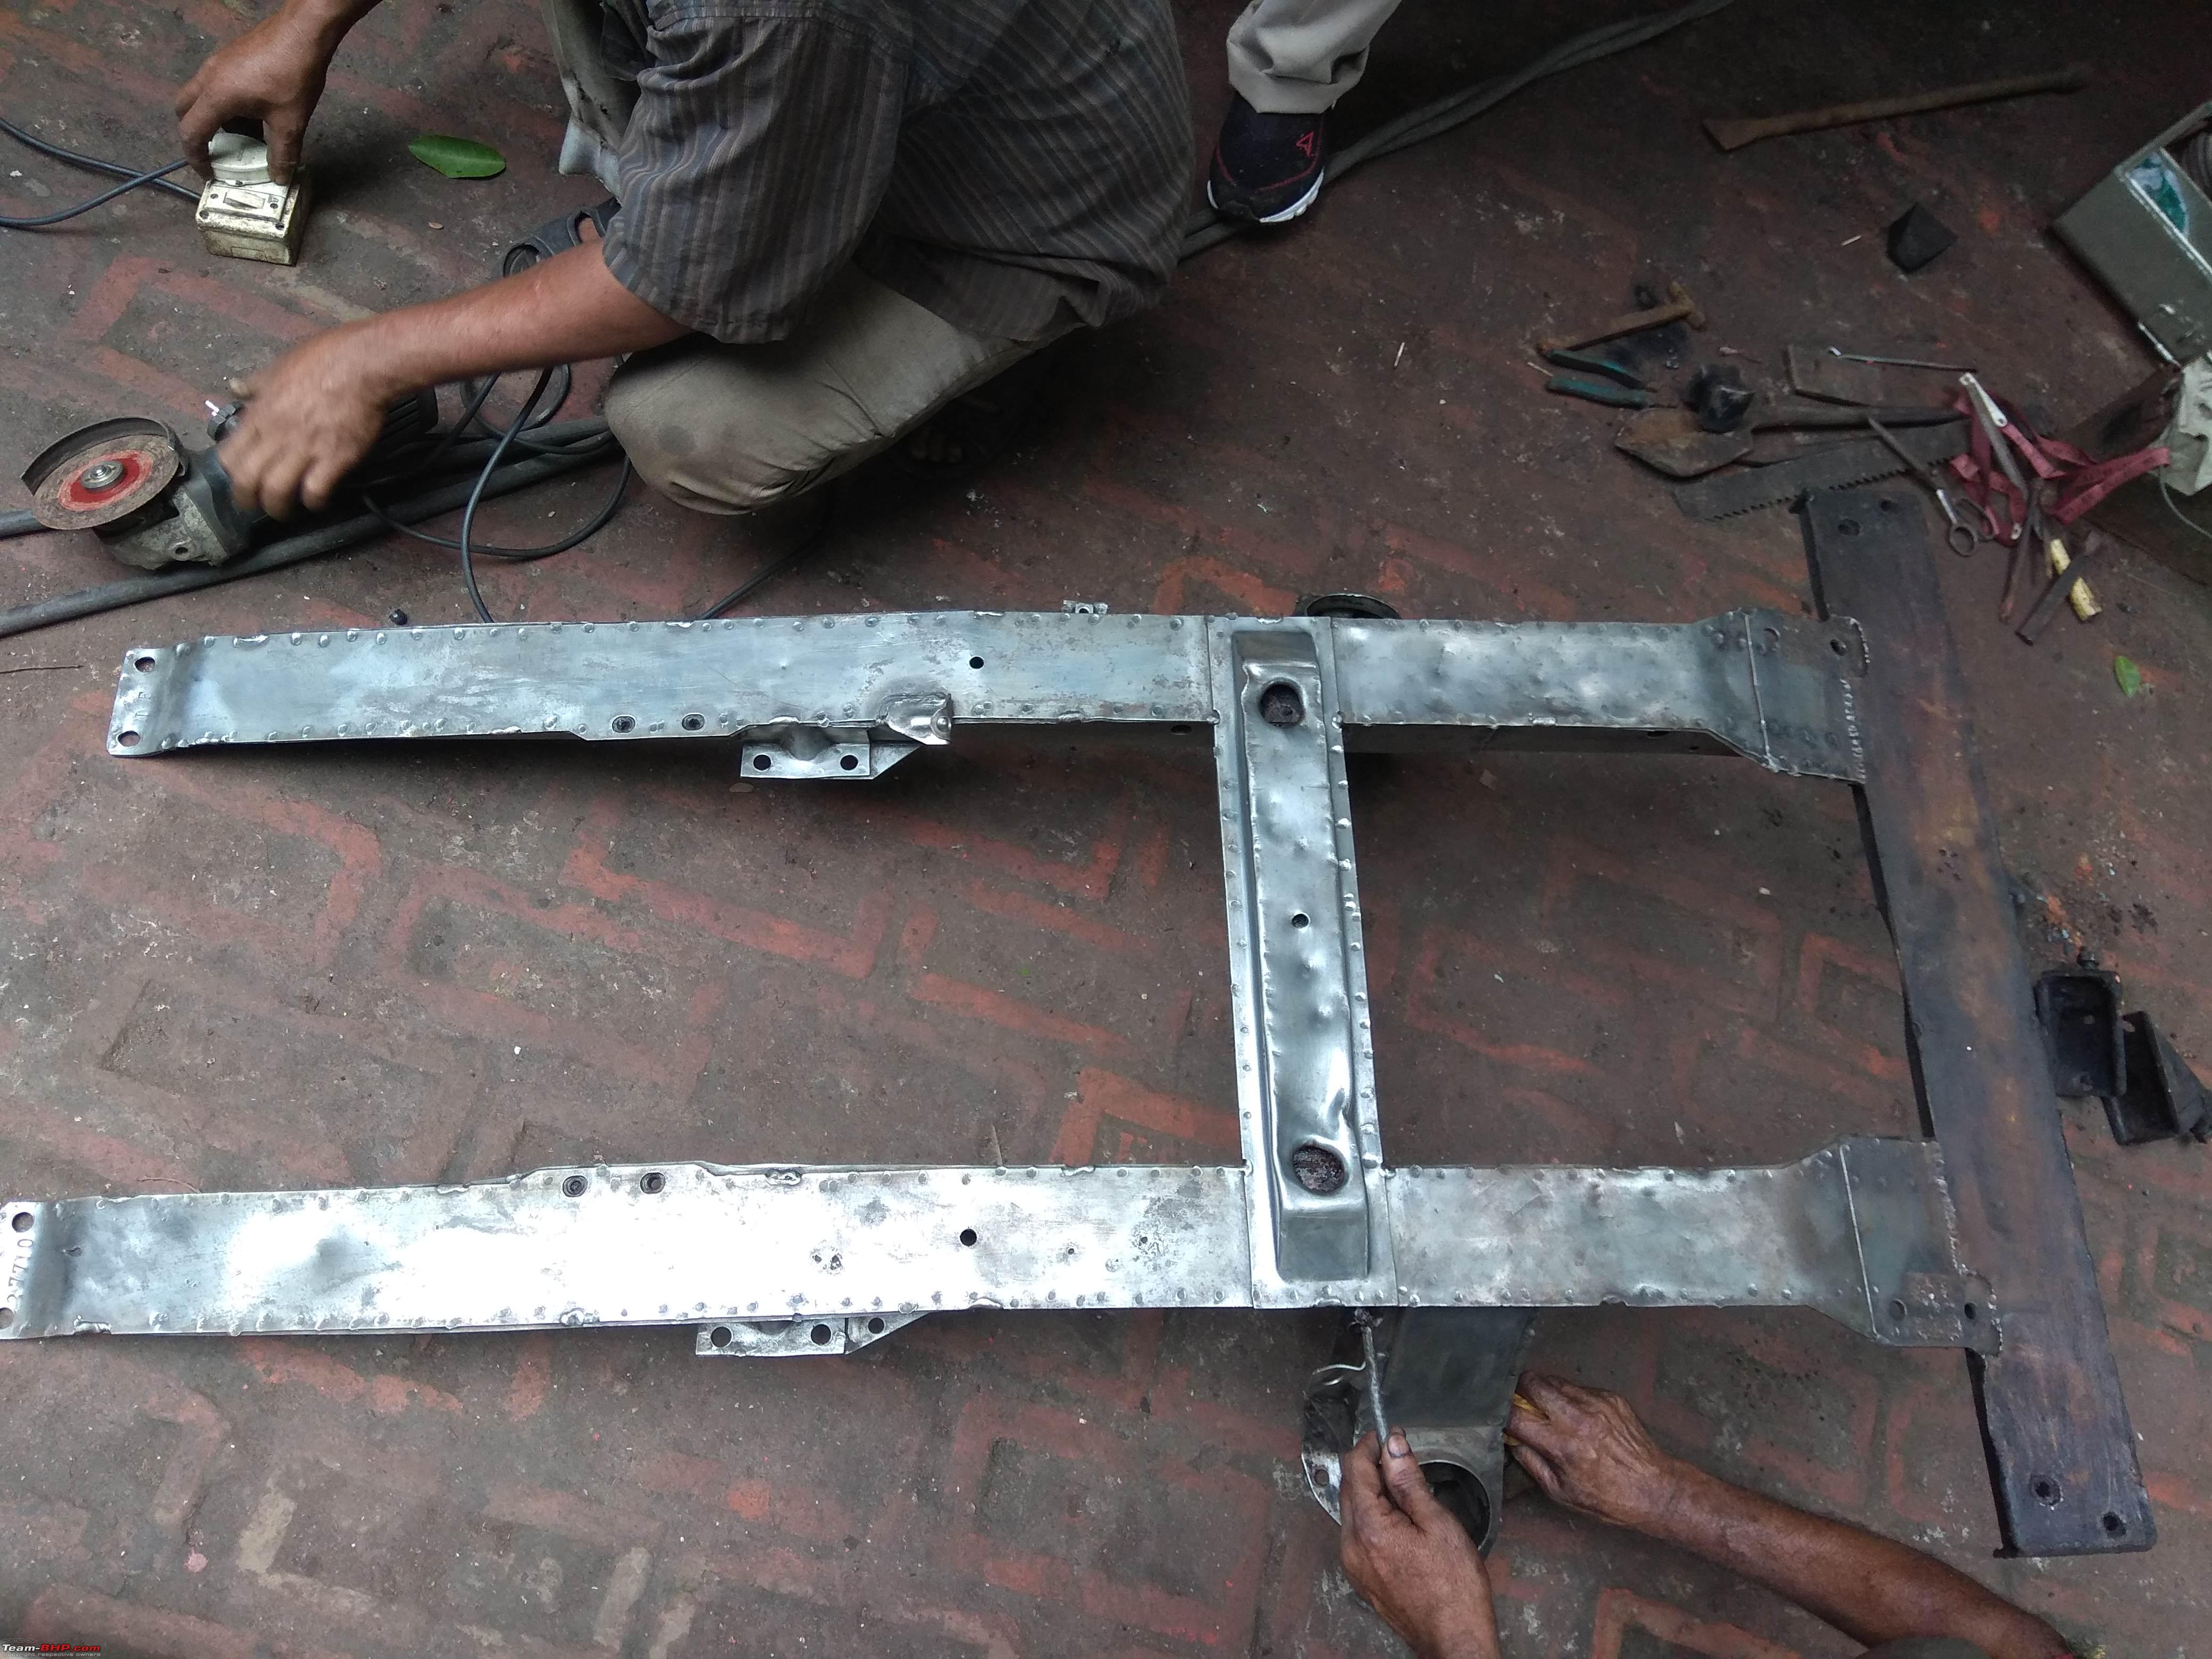 Also found this number stamped on the frame along with the letters 'NF' 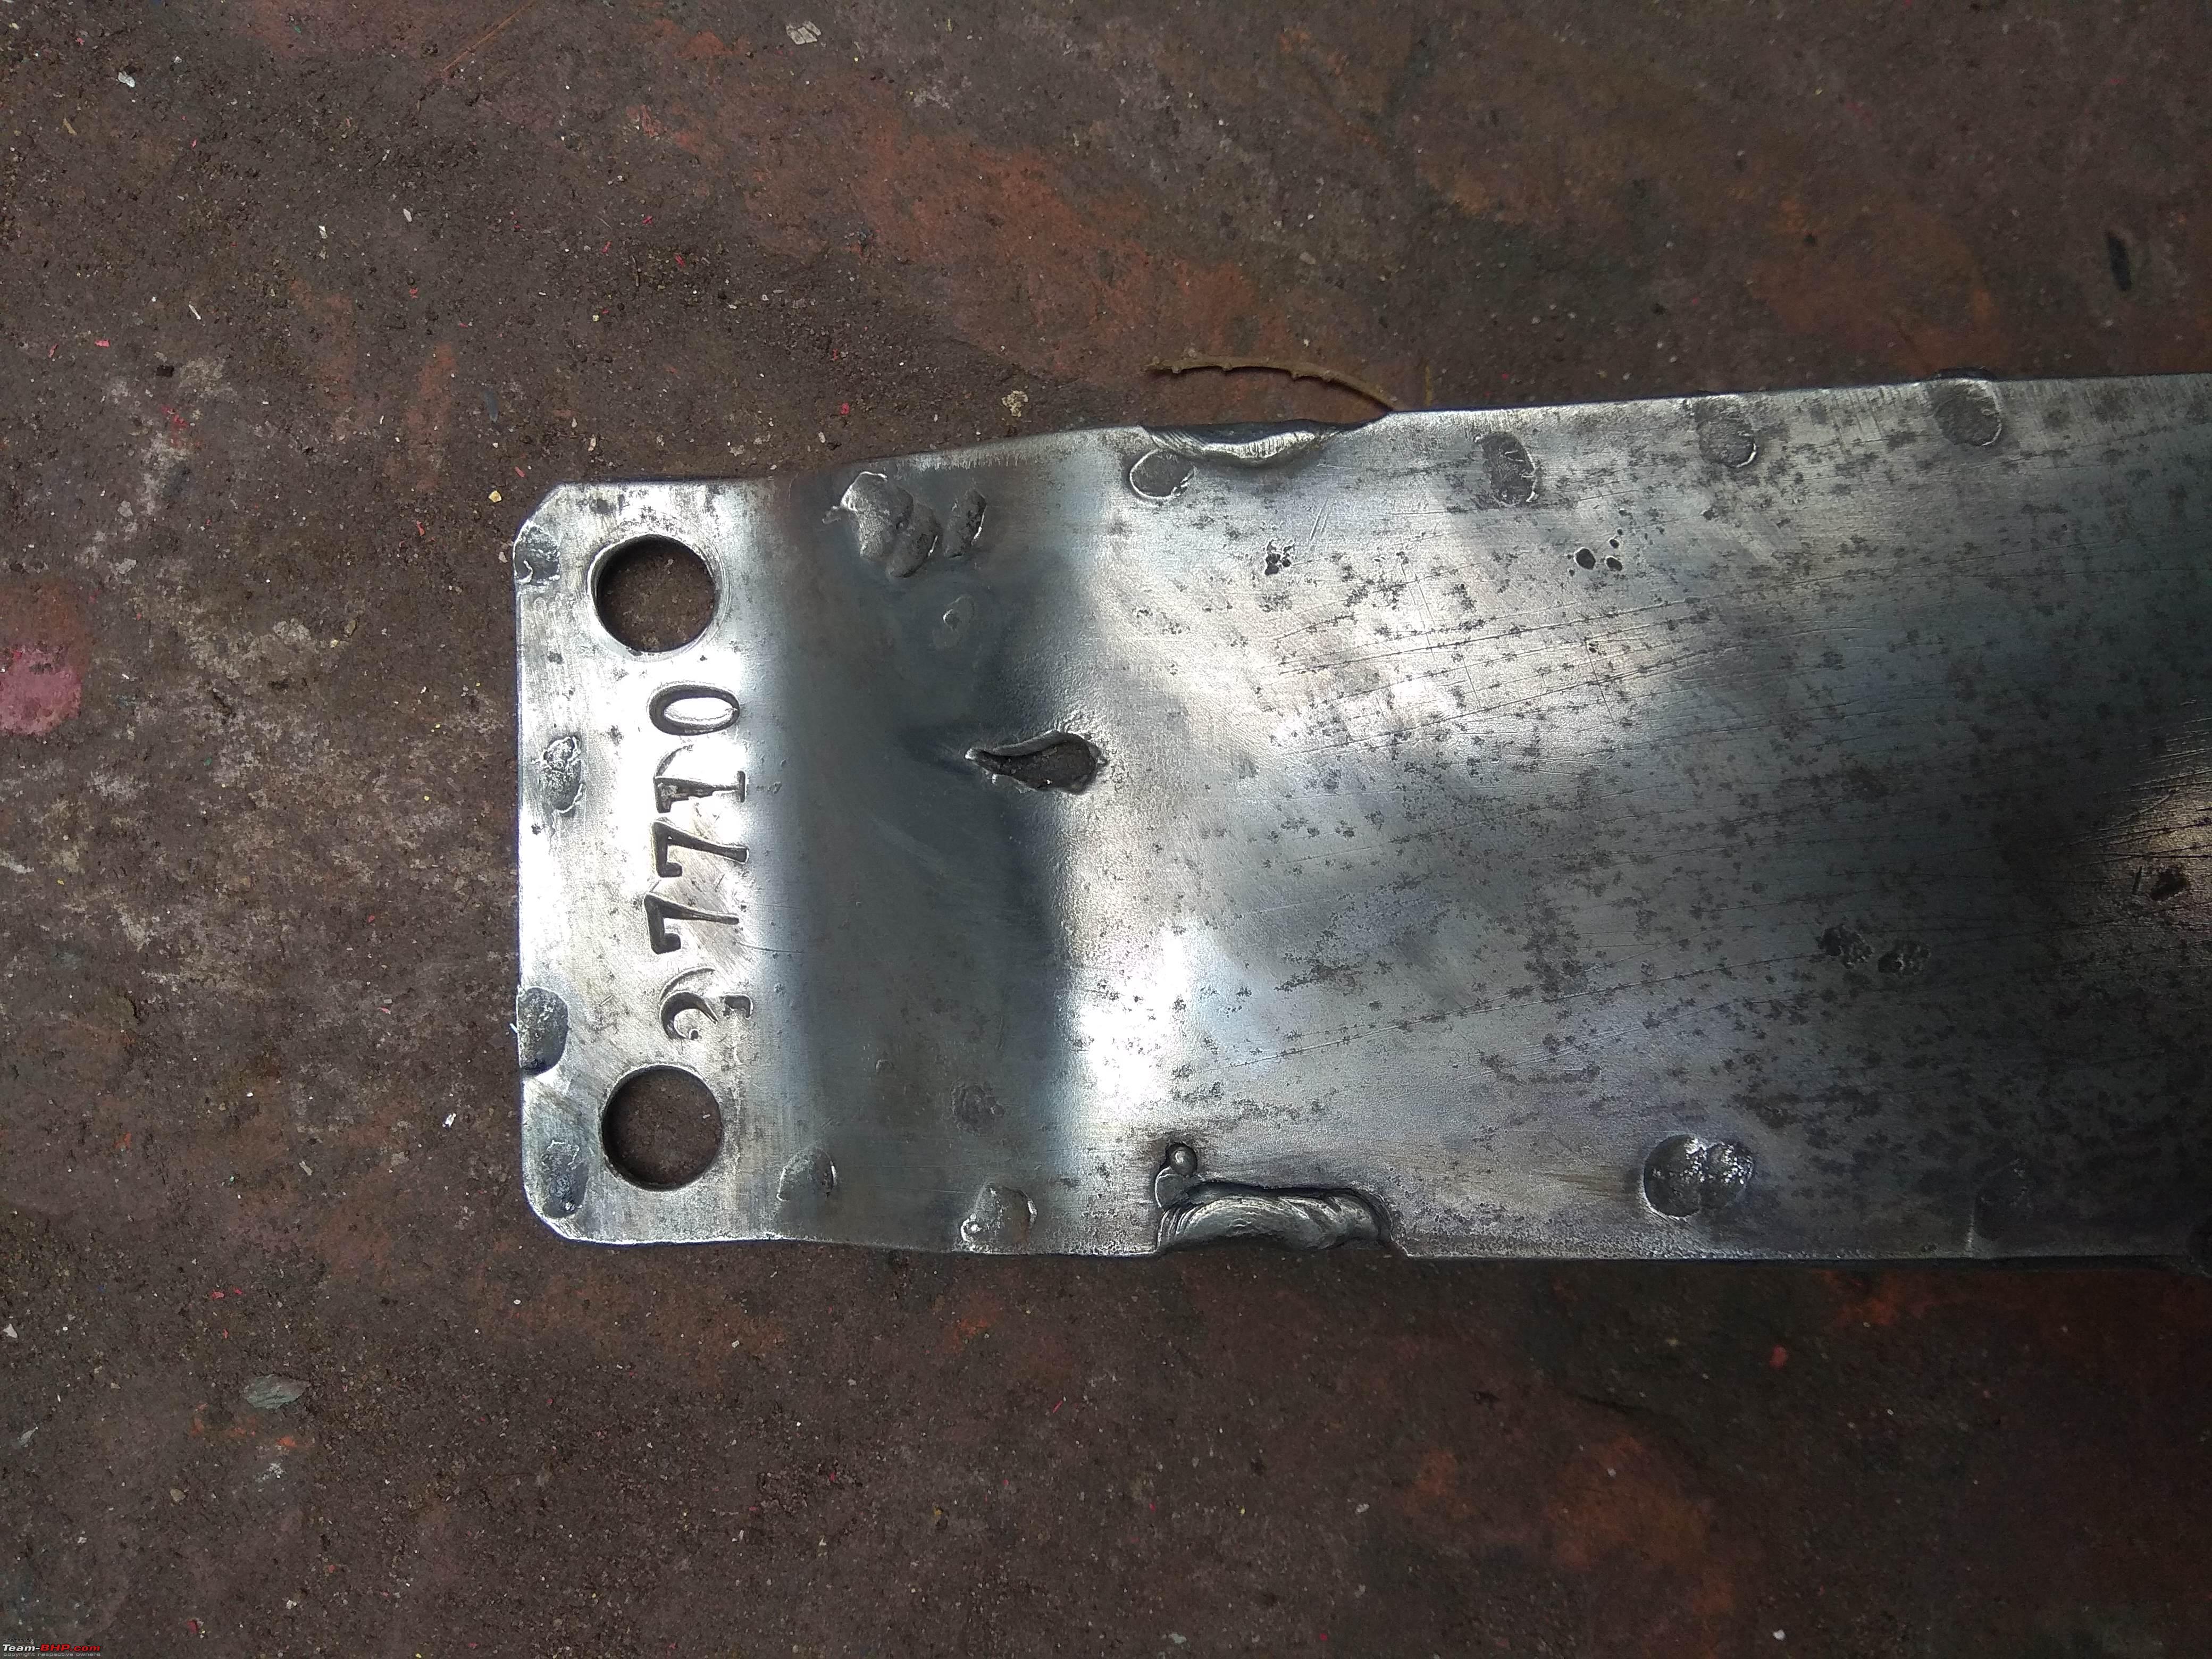 In primer before paint 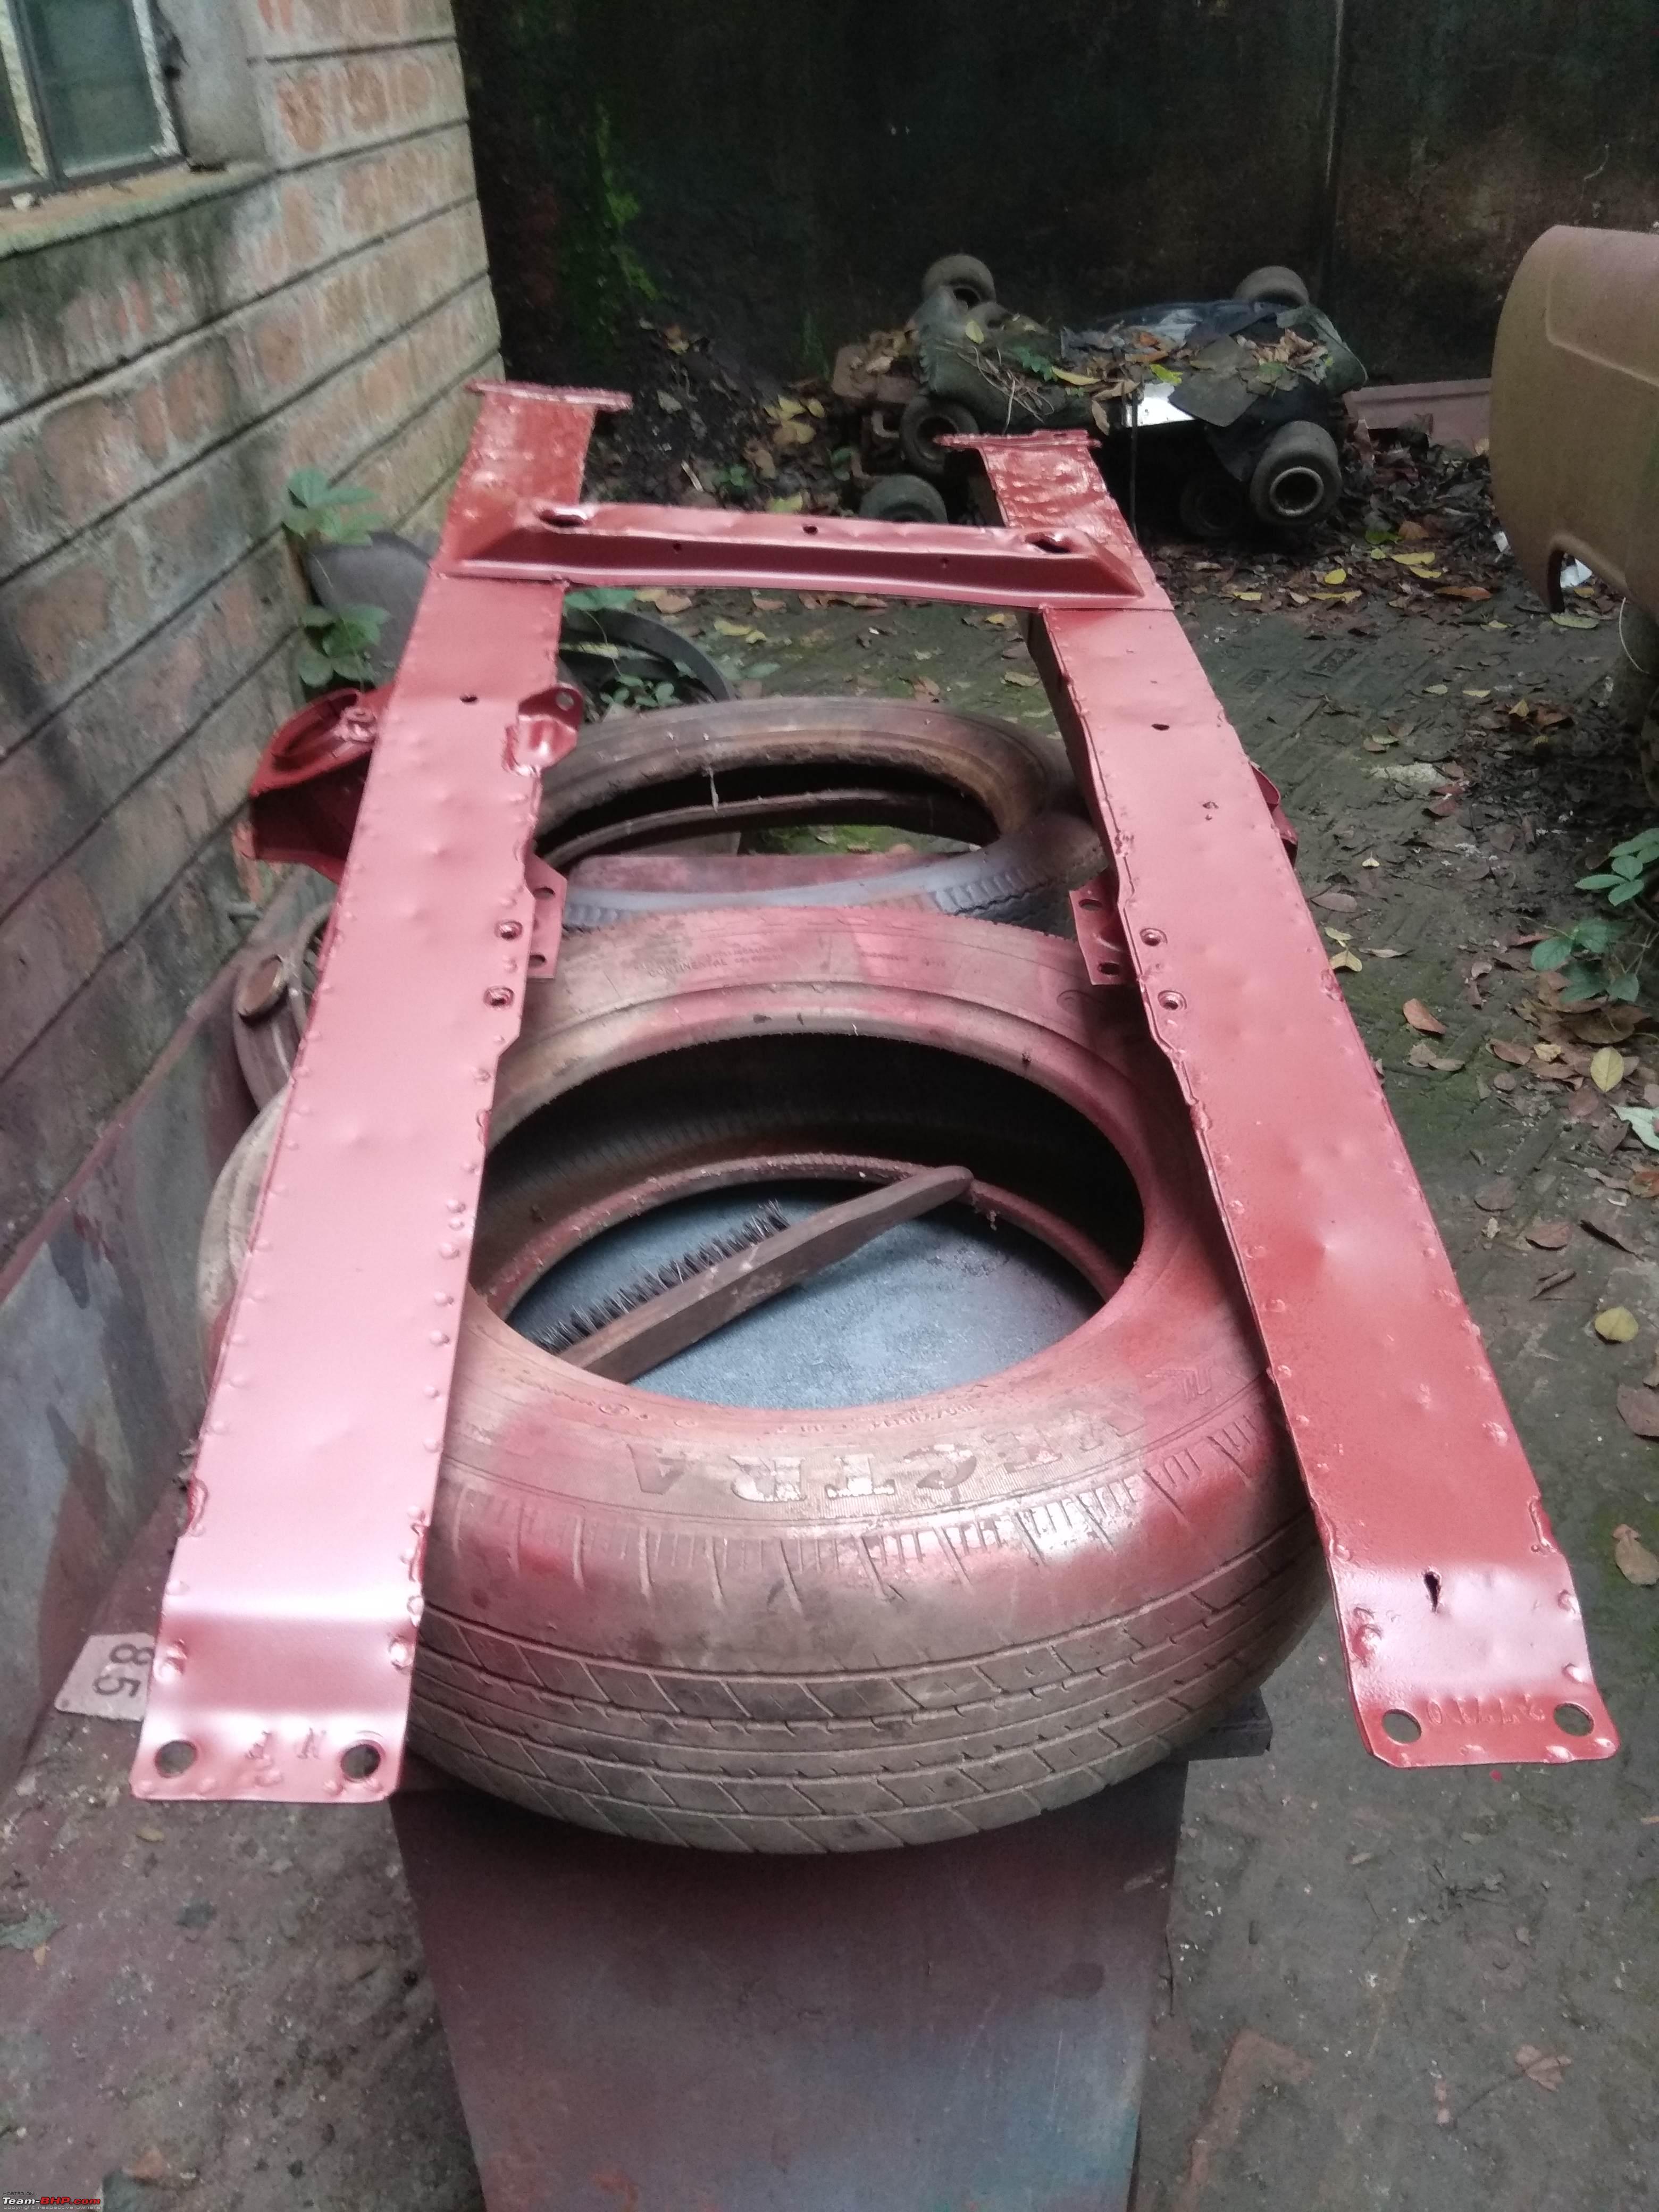 The arrows point to the old rocker panels which were not even with the door bottoms 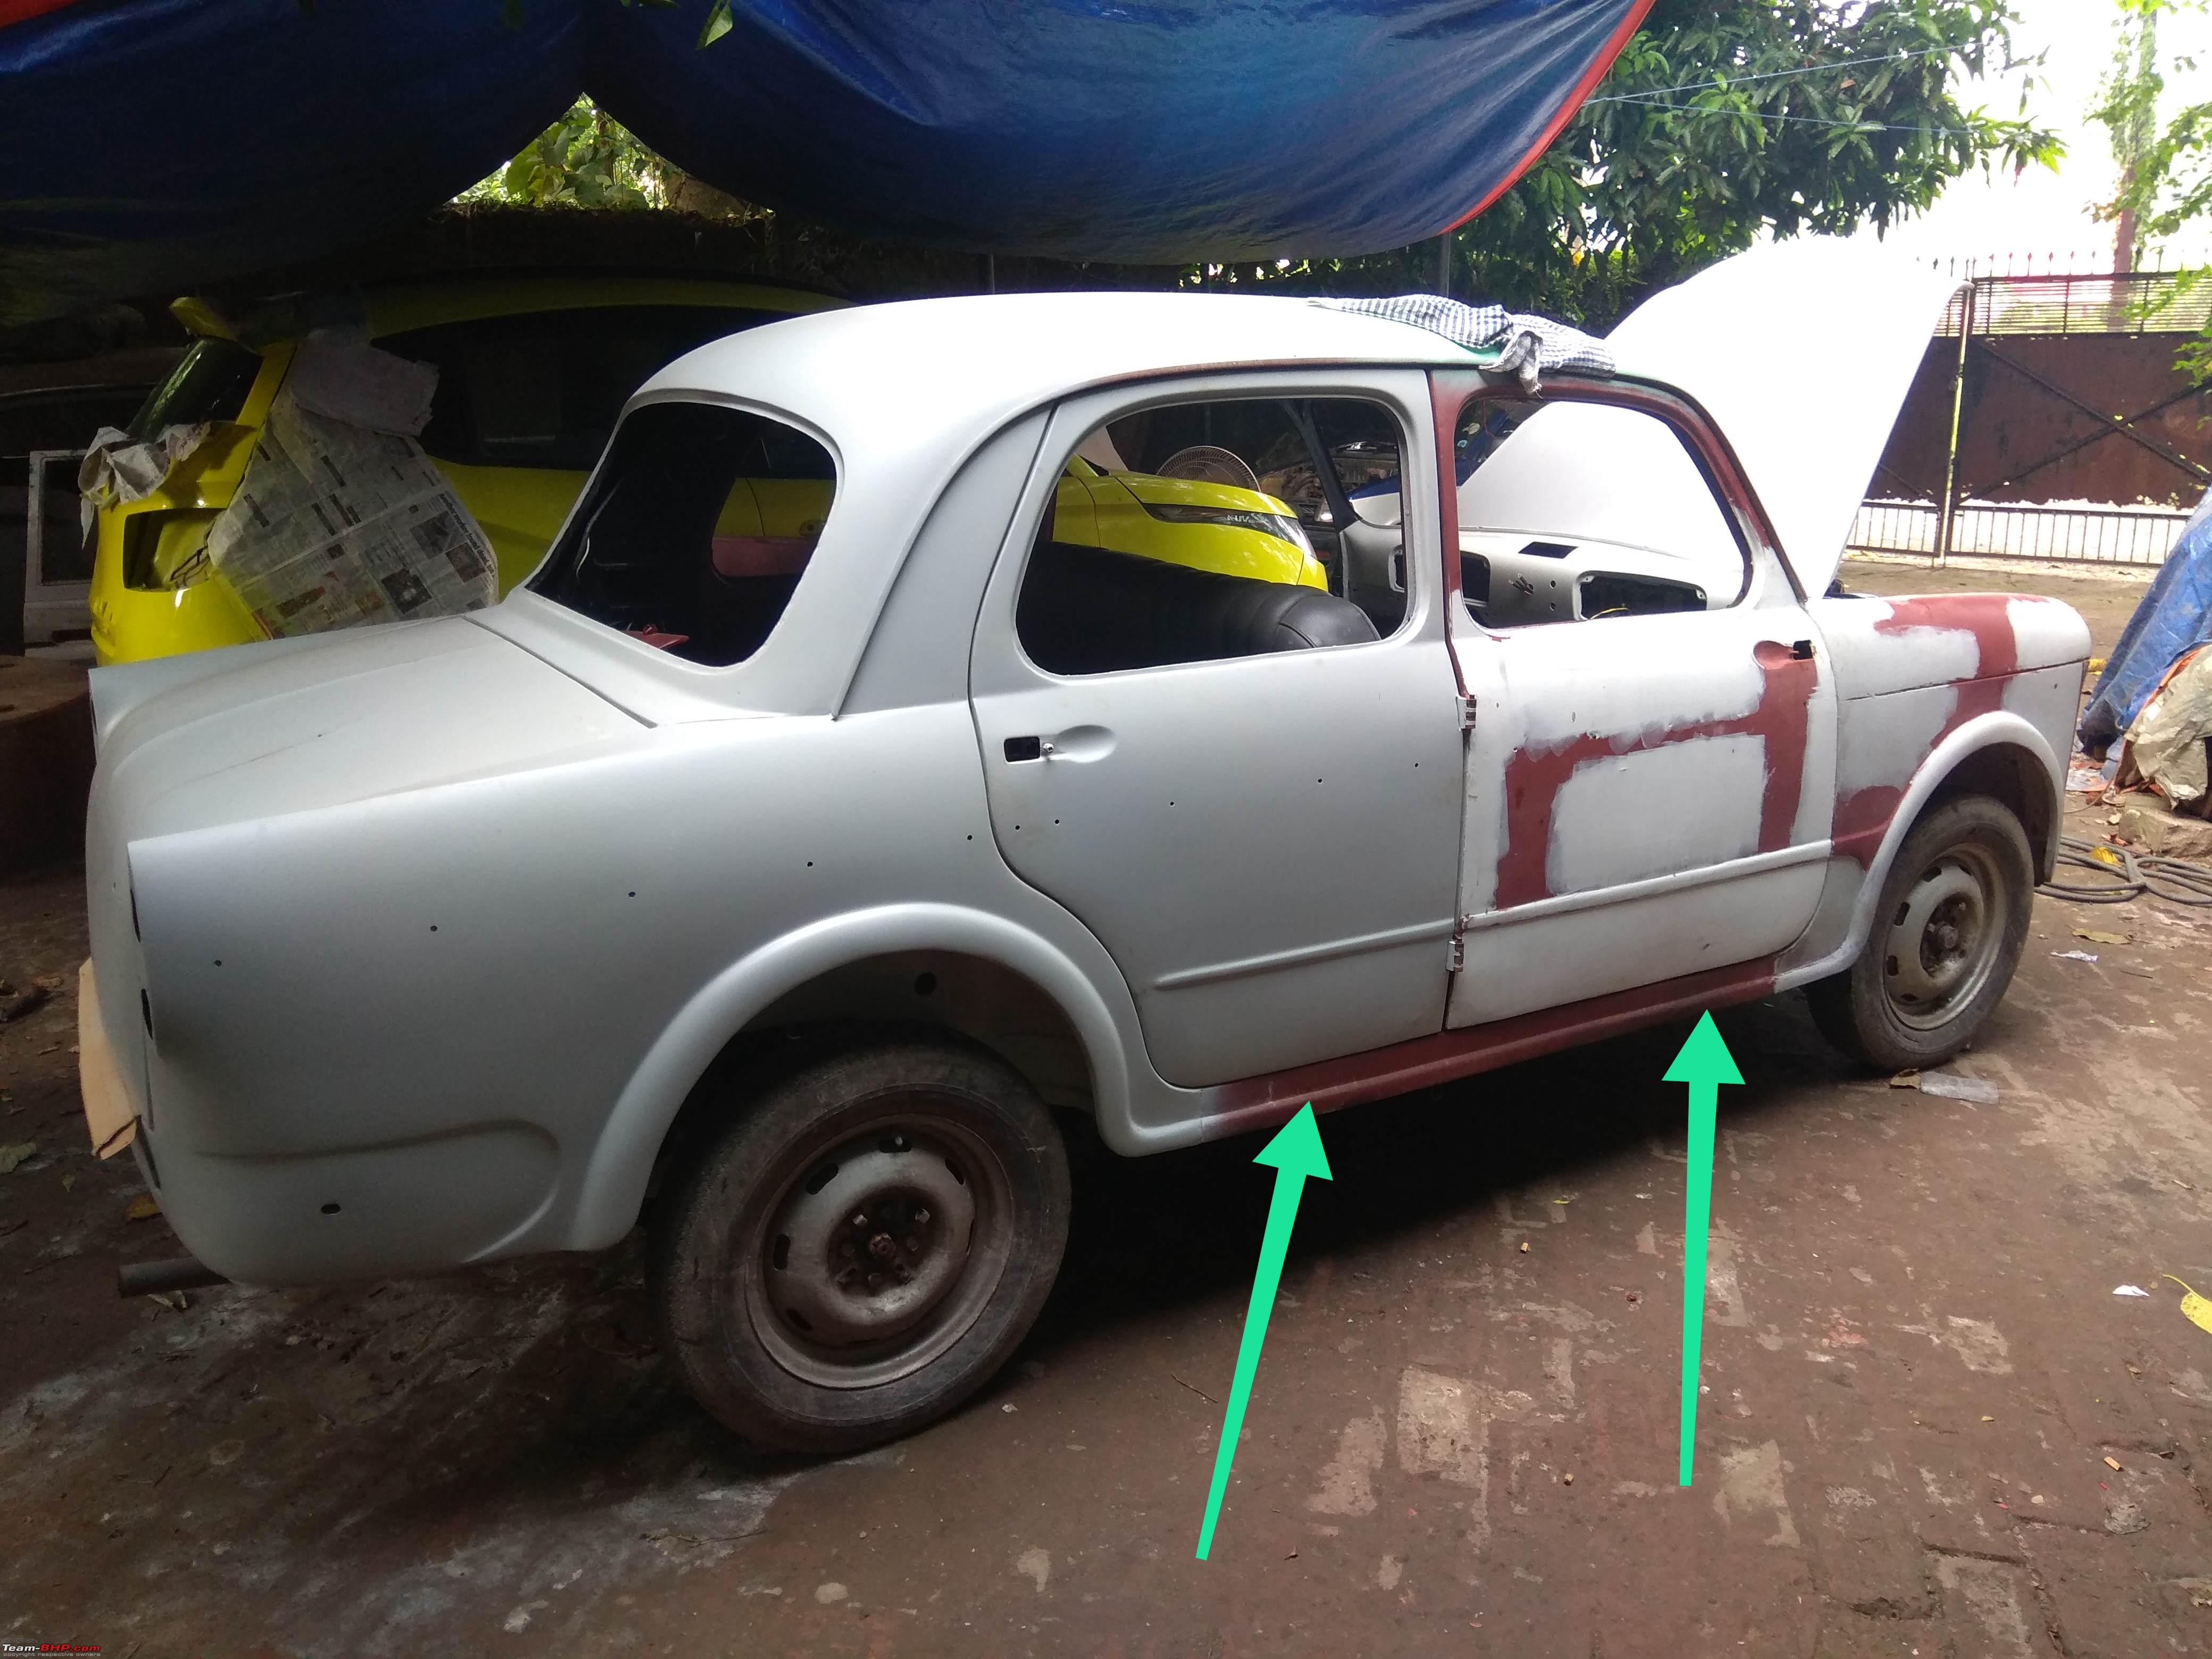 A set of fresh rocker panels arrive courtesy a Fiatian from the South! 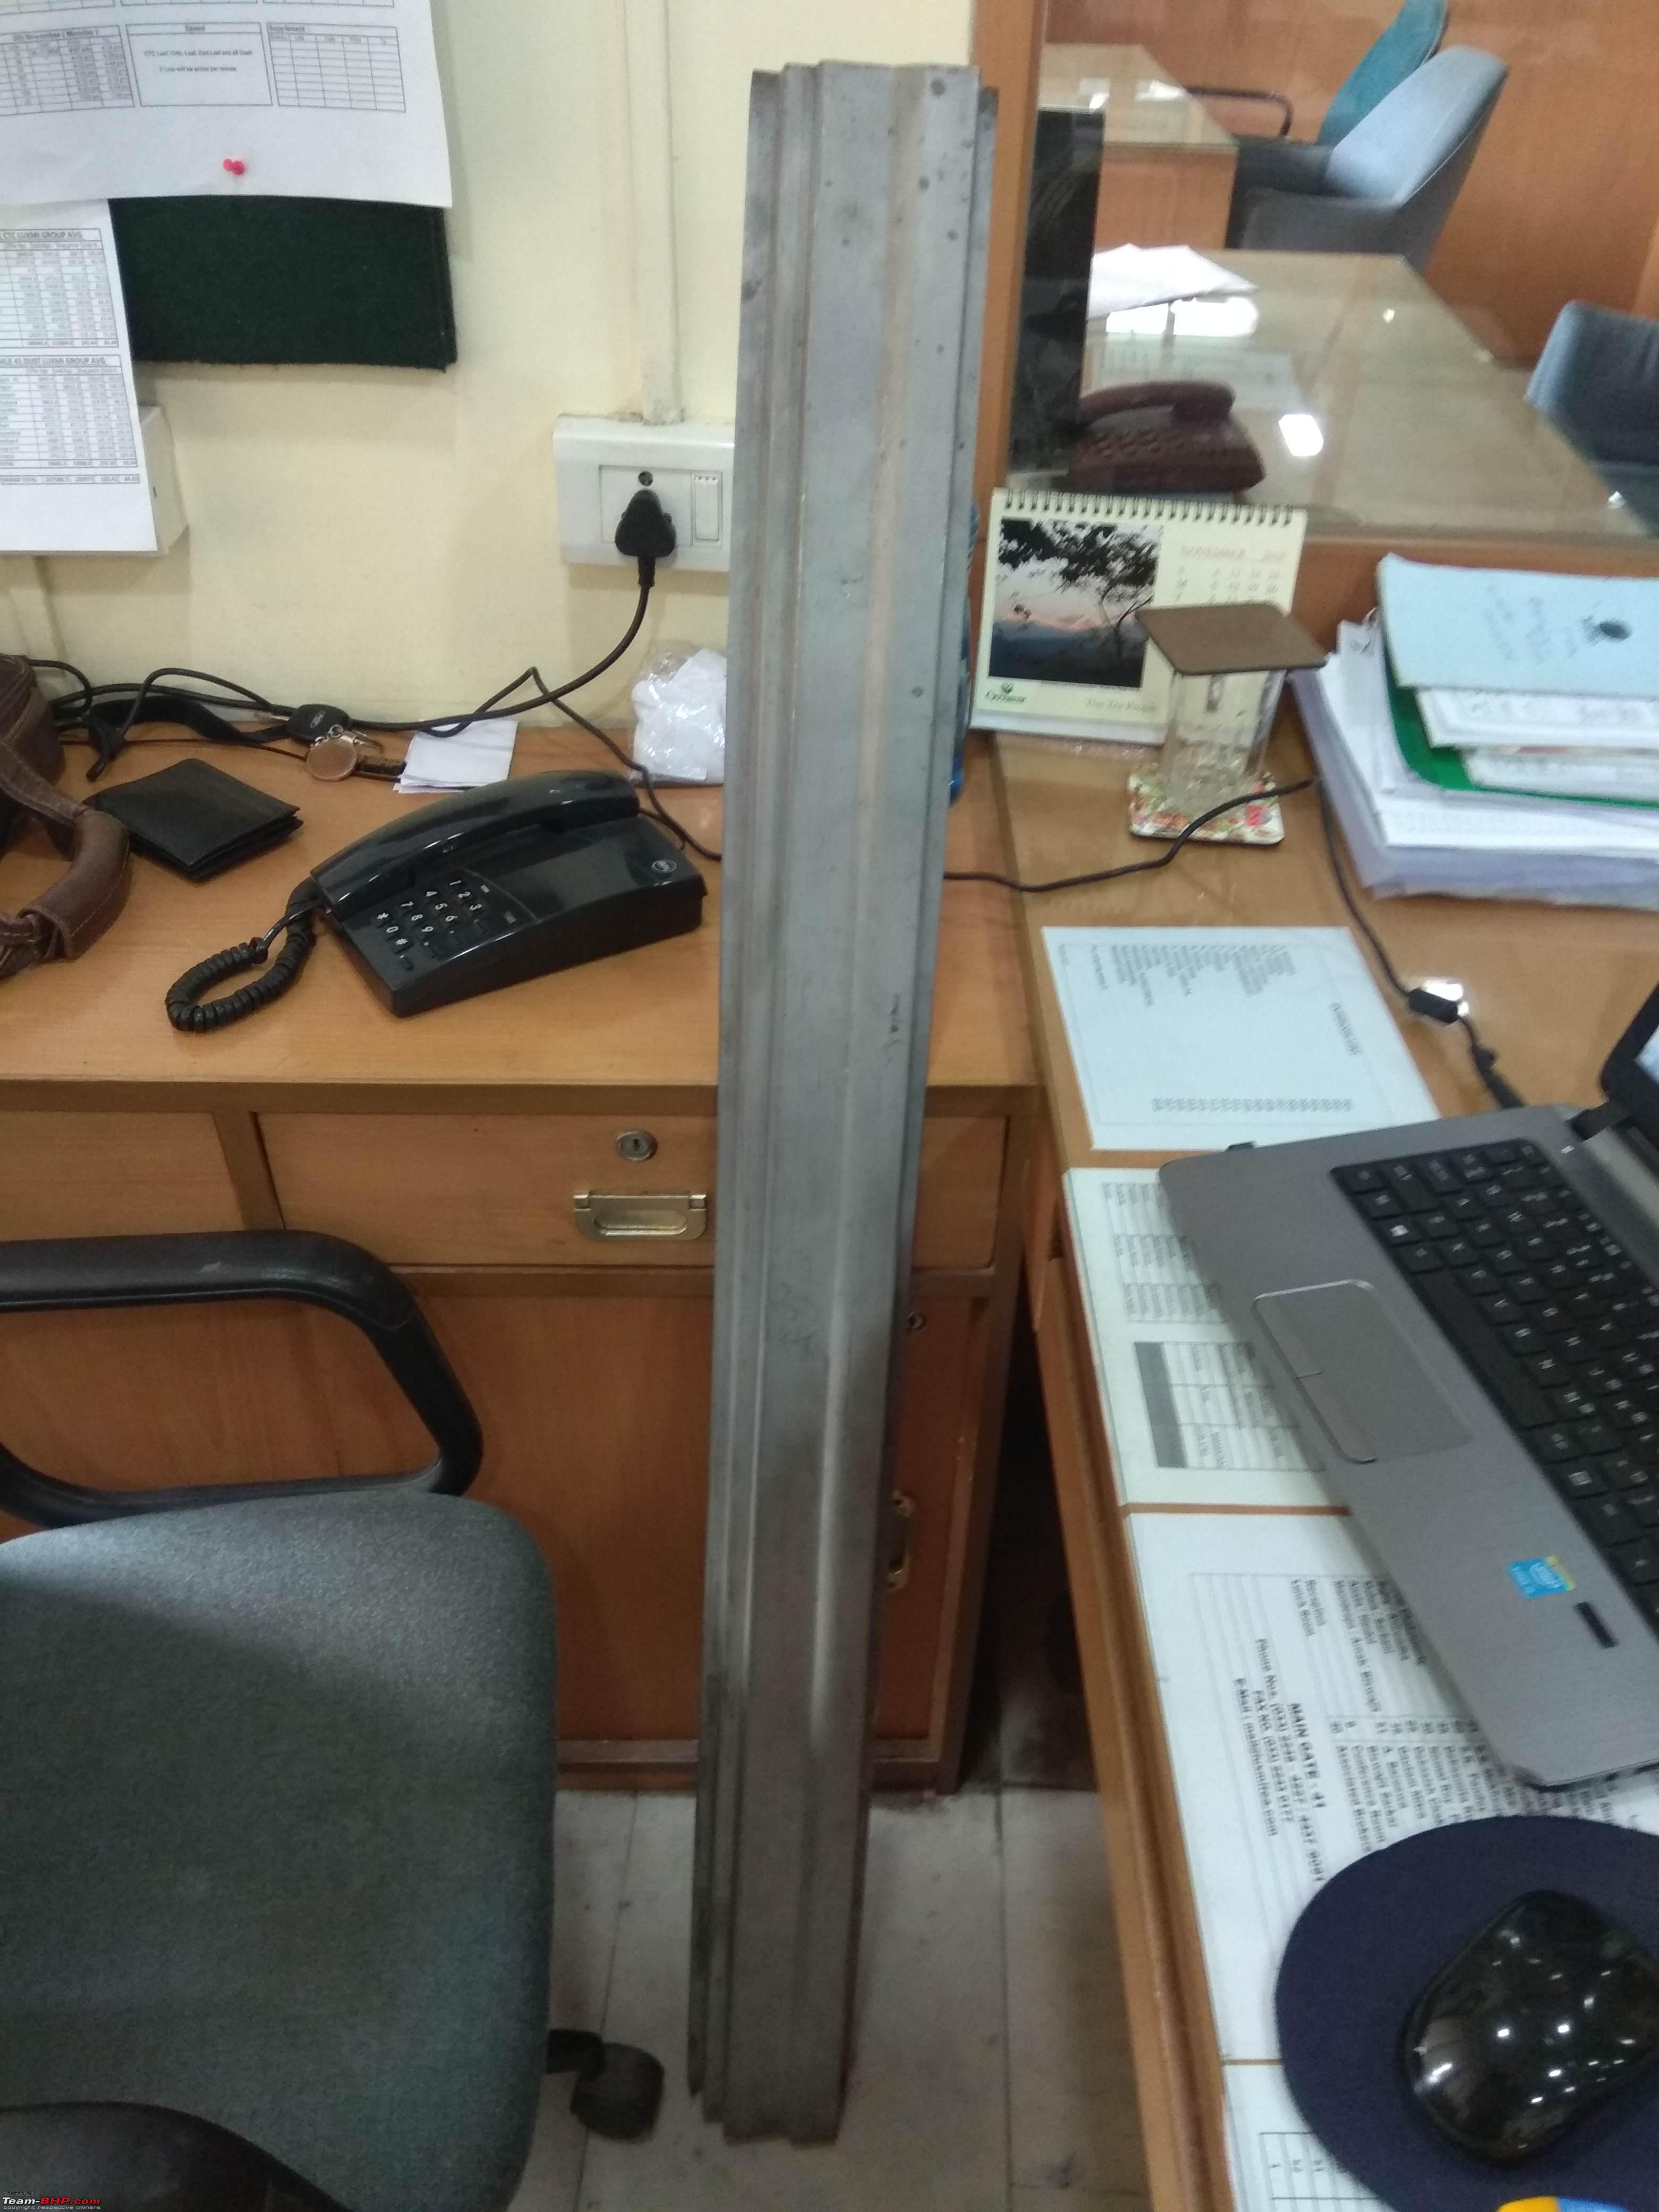 | |
|
| (16)
Thanks
|
| The following 16 BHPians Thank mbz180 for this useful post: | ike, joethomasv, karlosdeville, KartikeyaL, KPS, Leoshashi, noelnelly, Samba, samsag12, Slick, Stanher, V.Narayan, v12, Viju, Vmax1200, zavegur |
|
8th April 2019, 17:05
| #10 |
| BHPian Join Date: Jan 2010 Location: Kolkata
Posts: 894
Thanked: 1,027 Times
| Re: Indo-Italian PAL: 1963 Fiat 1100 Super Select "Bella" Engine works Once we had decided on rebuilding the Fiat's engine, we began to gather parts quickly. New pistons, rings, cam bushes, crank bearings, gudgeon pins, new valves, timing chain, gaskets etc etc. were all obtained. The old oil pump however was not in good nick & had to be replaced with a good, used unit. The aluminium cylinder head was decked slightly. The main oil filter, which sits inside the oil sump has a brass net filter screen which had disintegrated over the years. We found similar fine brash mesh & rebuilt the old filter. During this time, the bypass oil filter unit, air cleaner (from a later Padmini) , was refinished. A friend in Calcutta arranged for an NOS Italian fuel pump & a single choke Weber carburetor to replace the original Solex. While the carb was NOS, it came sans jets. It took a little while & help from a bhpian to figure out what the correct missing jet sizes were. I must commend Weber of UK, they provided very helpful illustrated exploded views of the carburetor & guided me on which jets would be required specific to the carb. So a new set of jets arrived from the UK to complete the carb. The engine bloc, oil chamber etc was cleaned, primered & painted while the valve cover, which was sightly wavy, was repaired & refinished. Engine mounts needed to be replaced-they were not available in Cal. In steps in another bhpian who was a huge help throughout the car's resto. He took the time off to measure the height of the mounts & only then had them shipped to us. The cooling water hoses included the carb pre-heating unit hoses were bought from Italy as they are high quality EPDM. Whatever is available in Cal is old stock & poor quality. Once the engine was re-assembled, a small wooden cradle was made for the engine to sit so as to not damage the oil chamber & the new paint. Once the engine area was completed and the new clutch assembly fitted, the engine was gently guided into the engine bay & fitted. A few pics showing various stages of engine related works Engine out - as expected a lot of grime all round 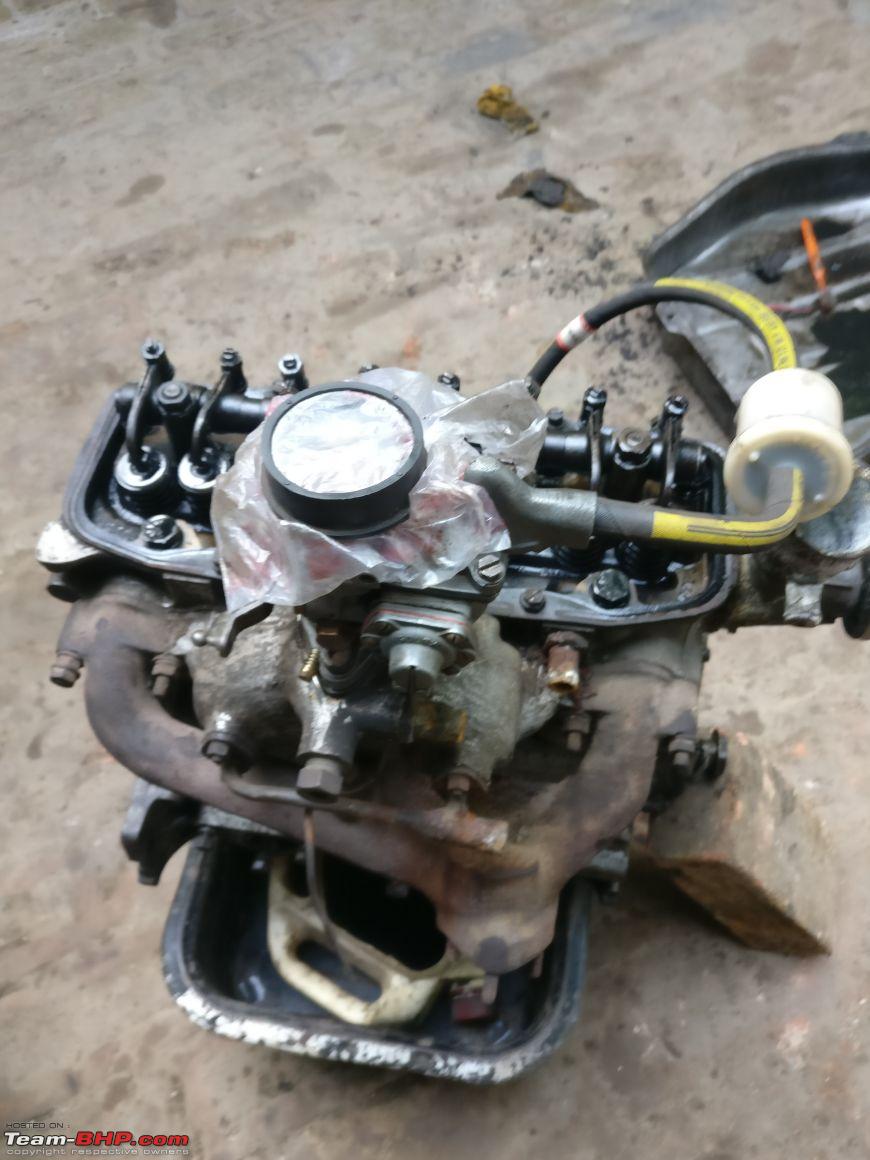  Pistons were standard size & were replaced with second over-size pistons 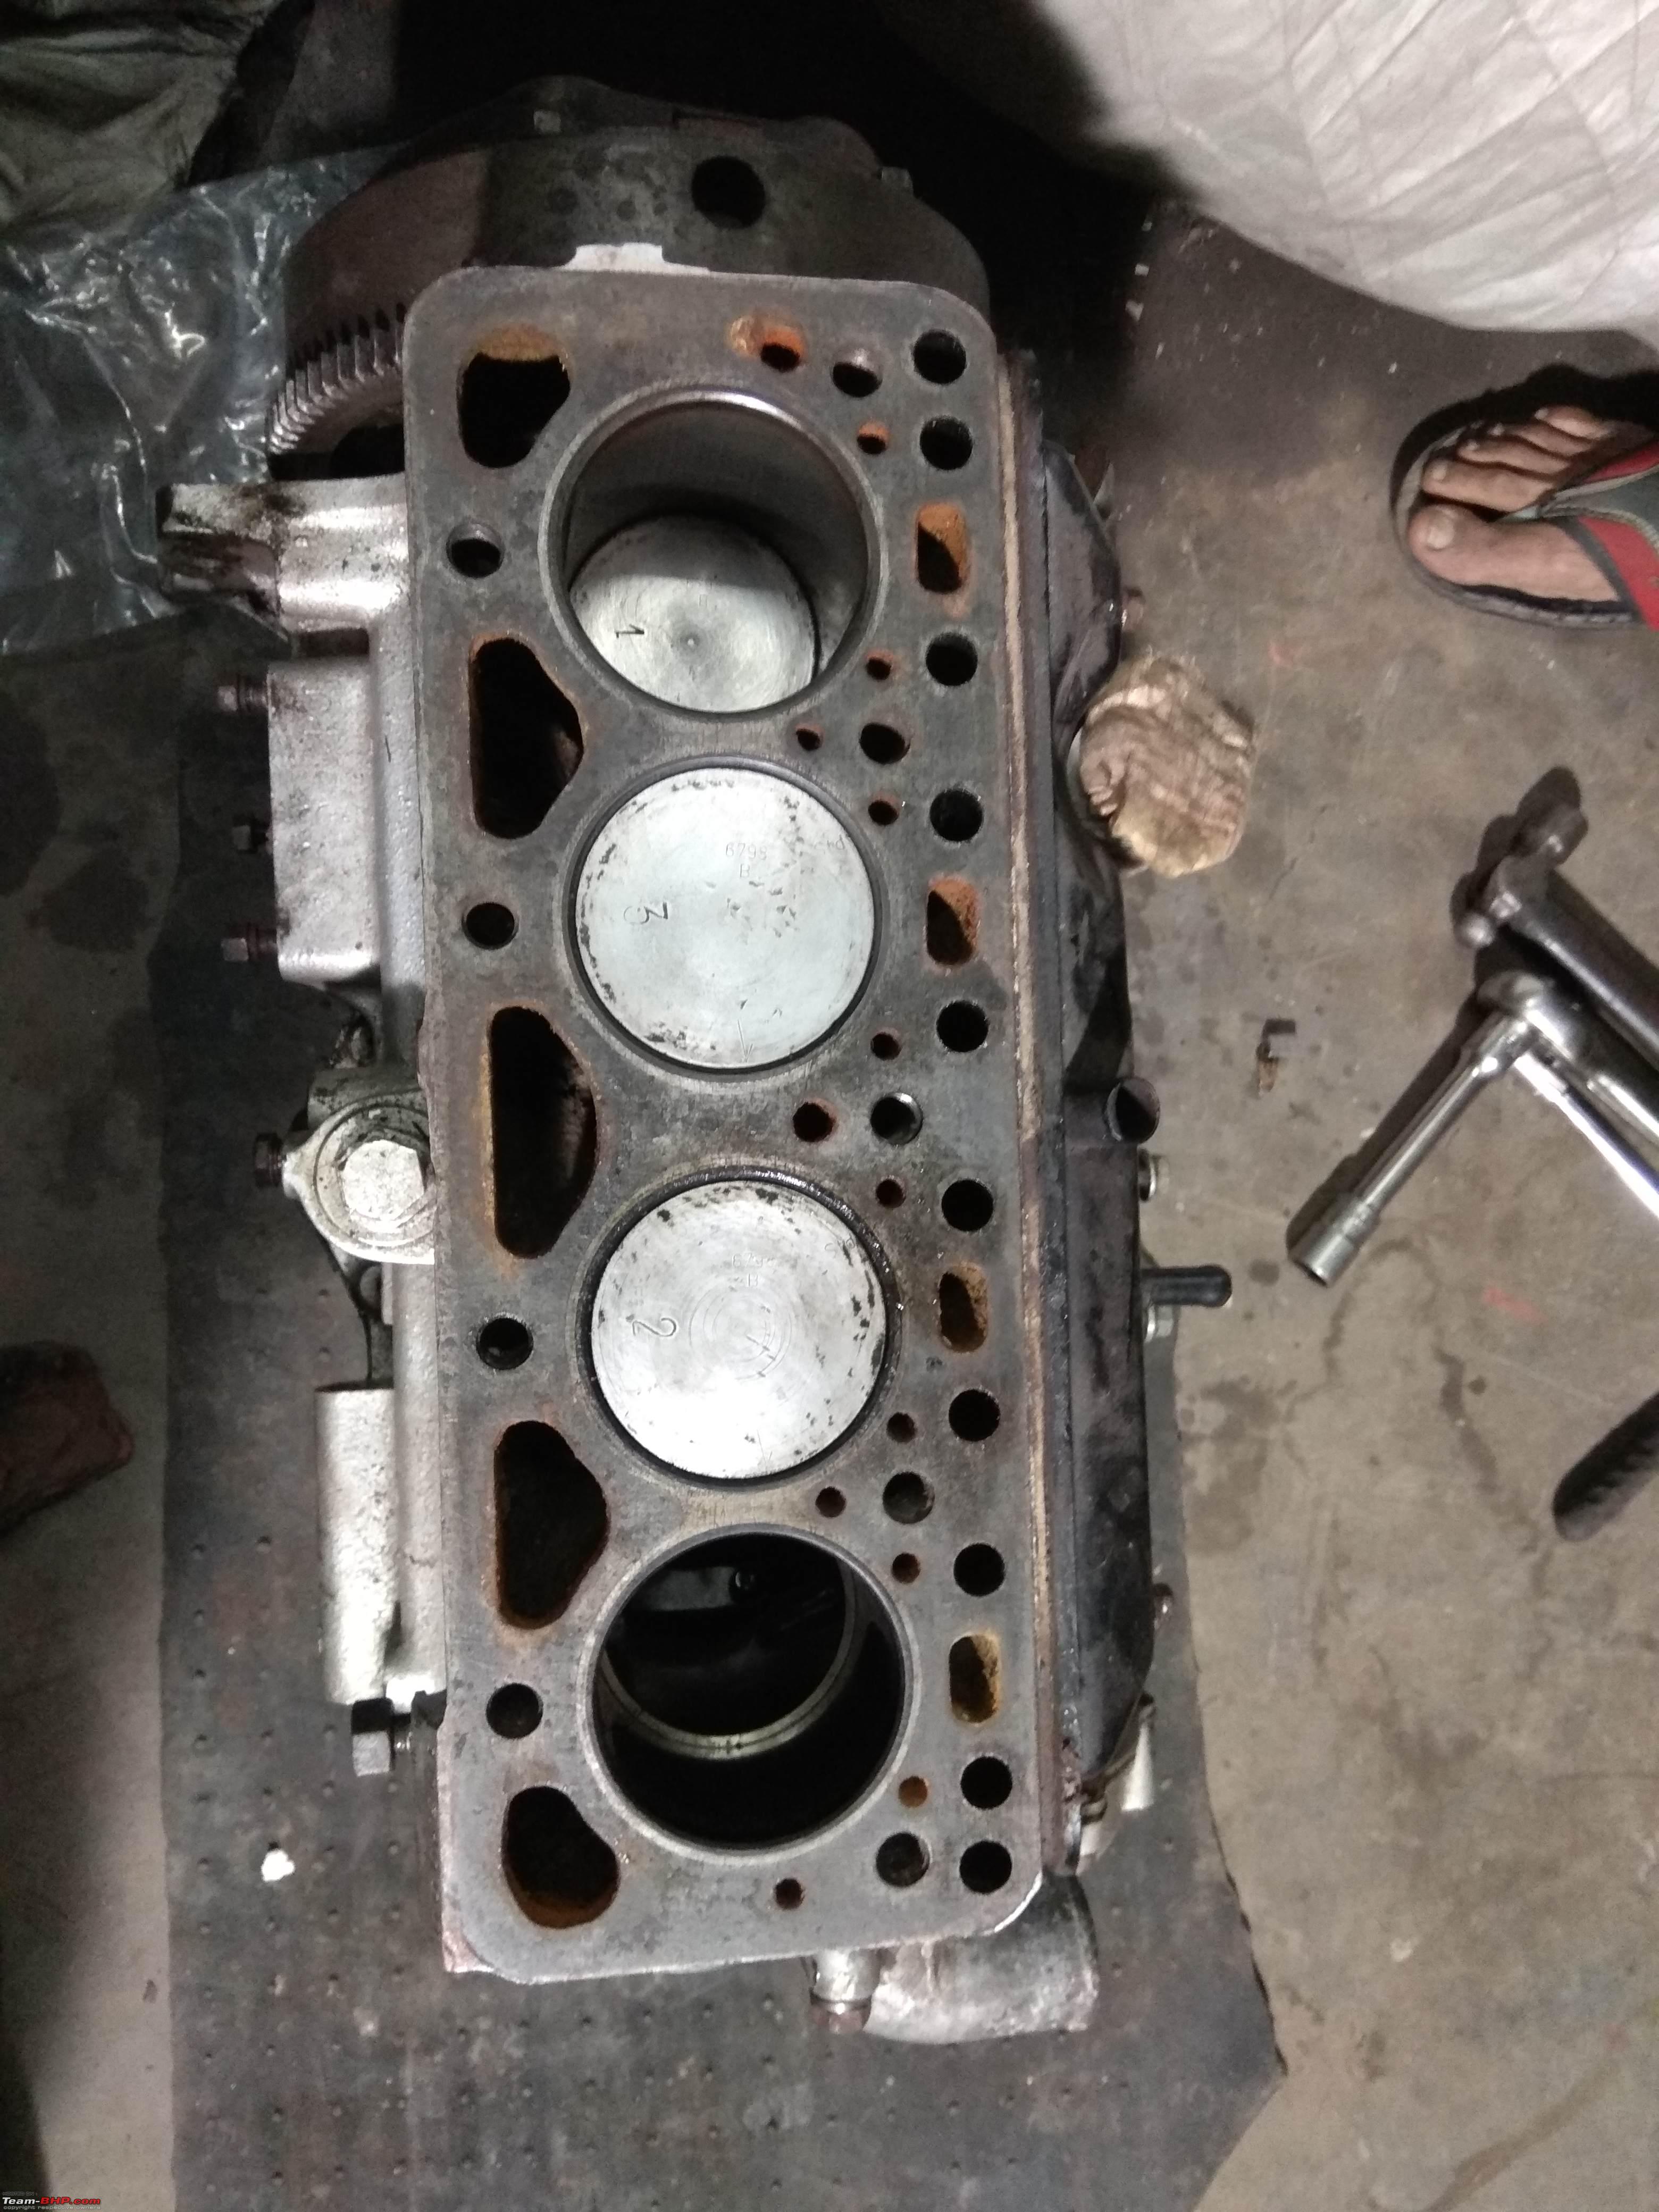 The old rings had scored the cylinder walls through which oil was travelling up  Crank bearings had been over-tightened in the past when fitted - the scoring on the bearings are visible 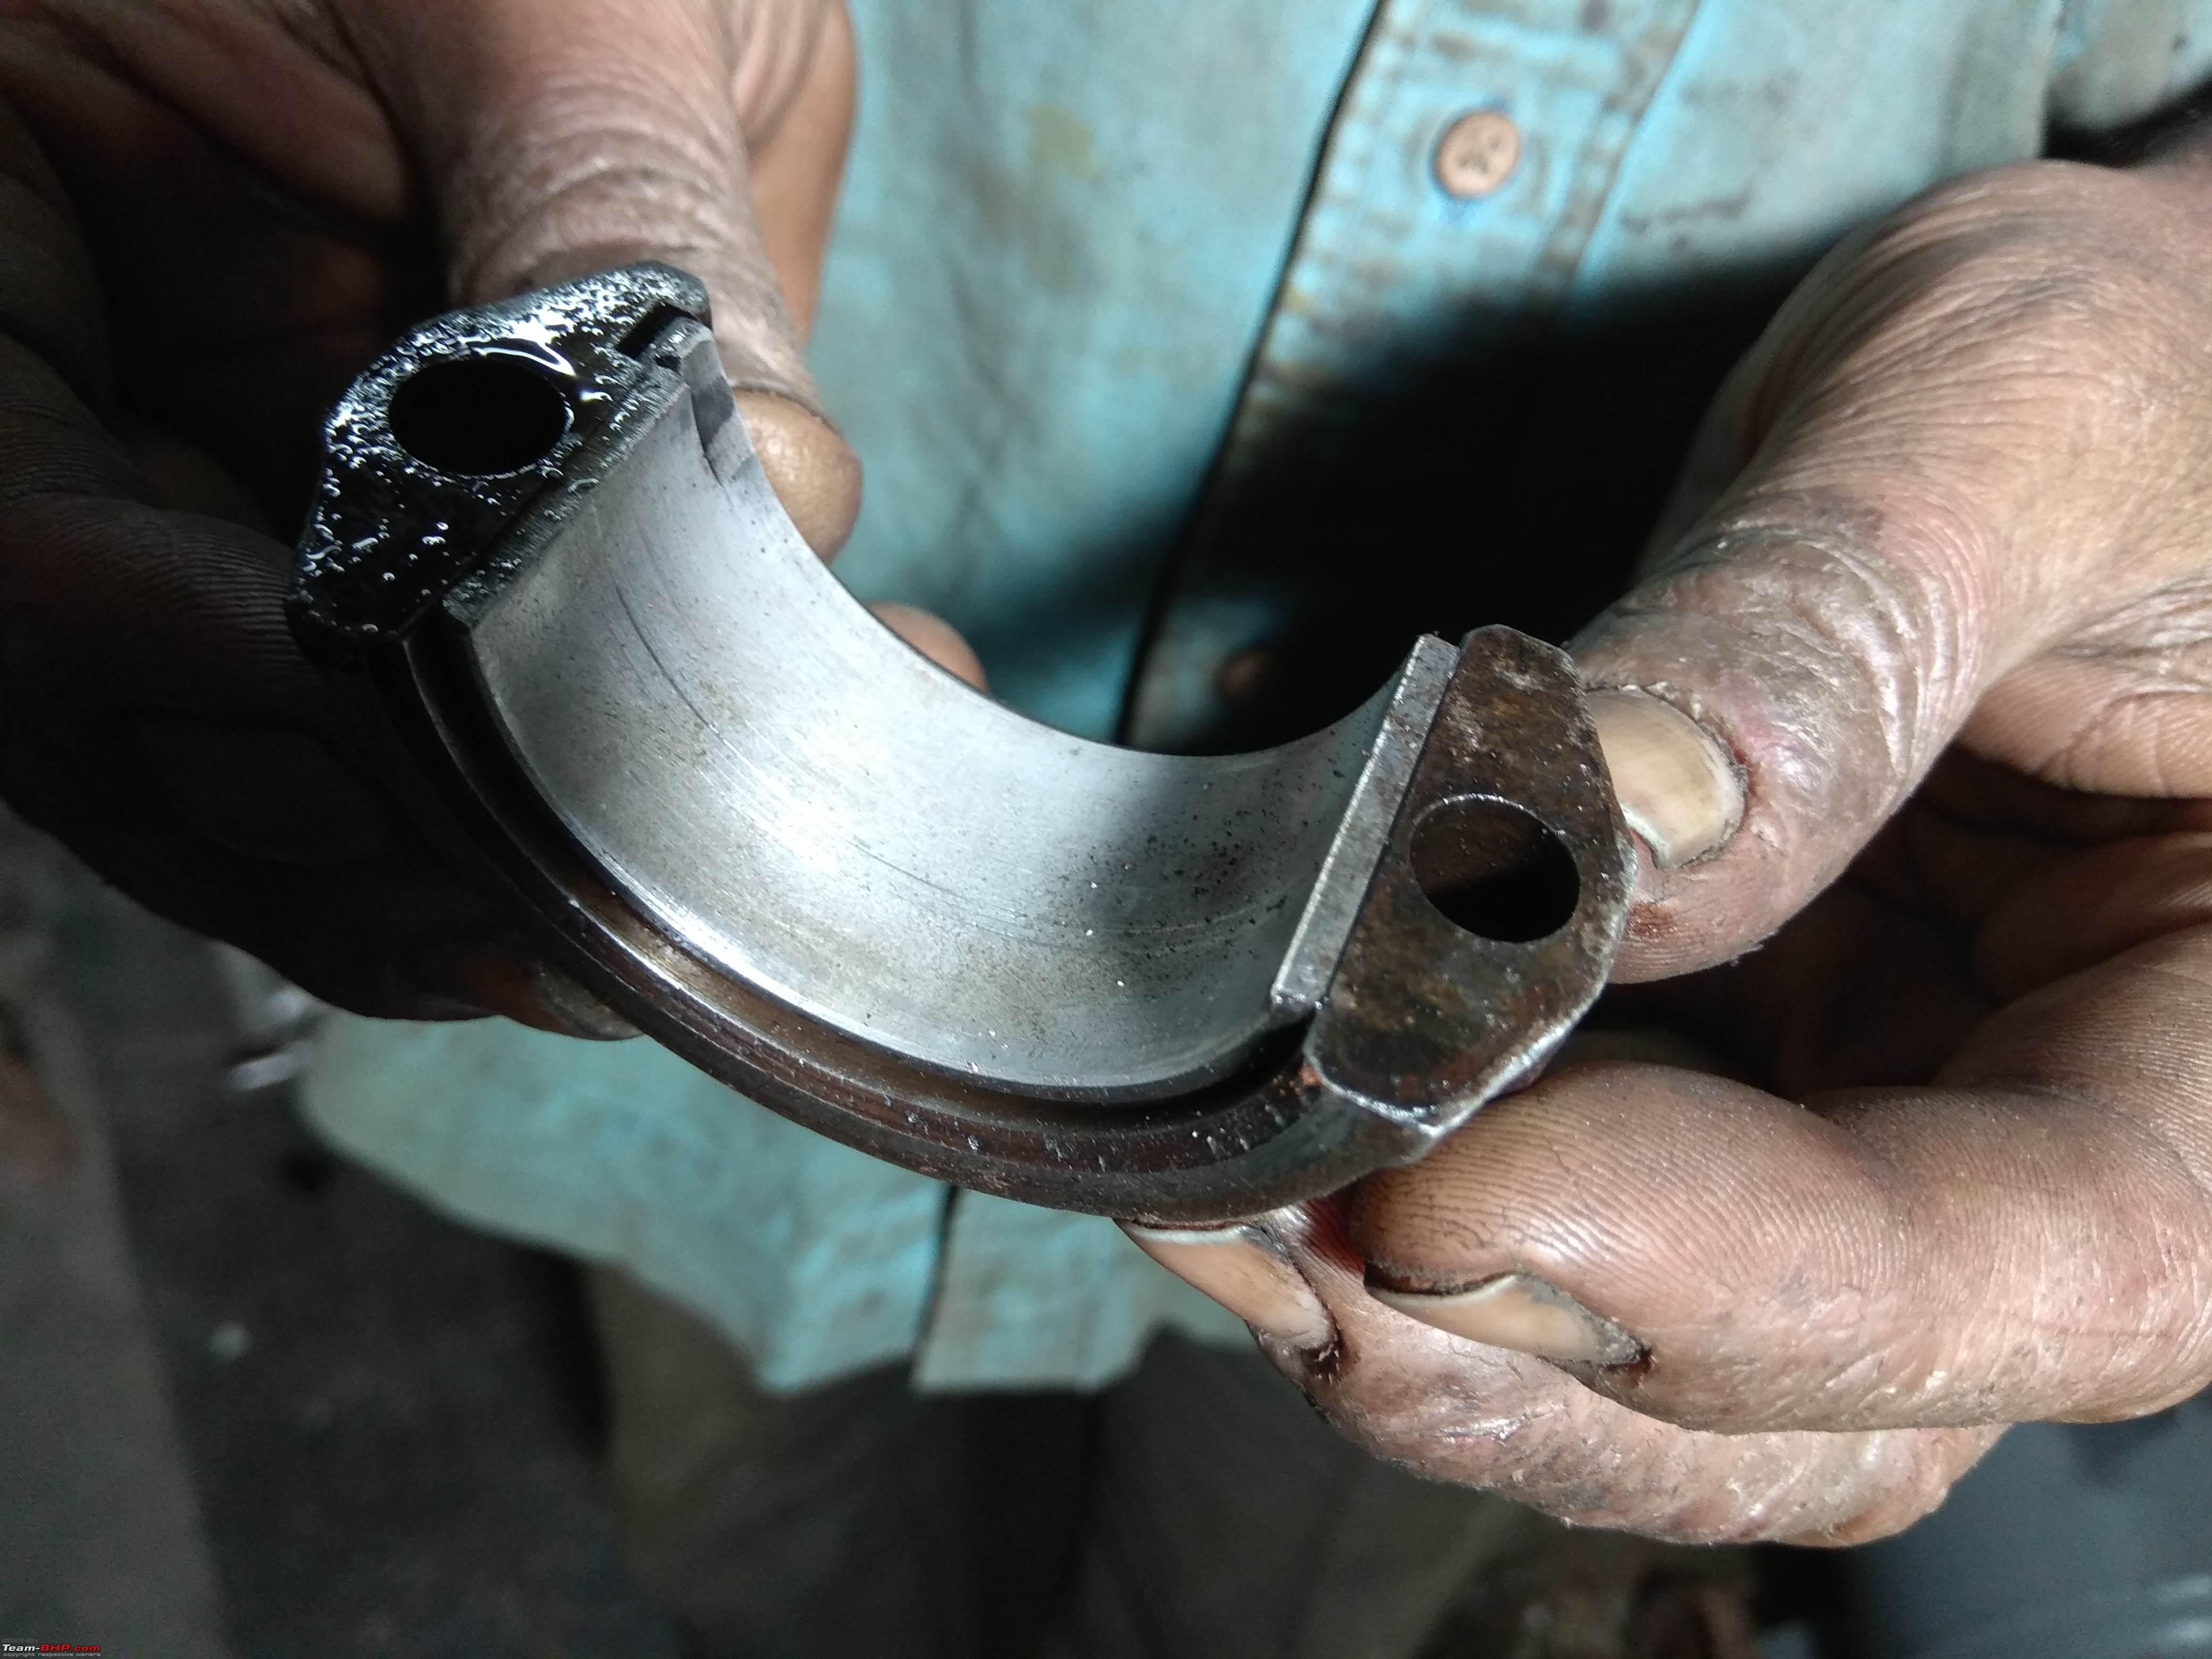 The old oil pump came up short with very little pressure being developed 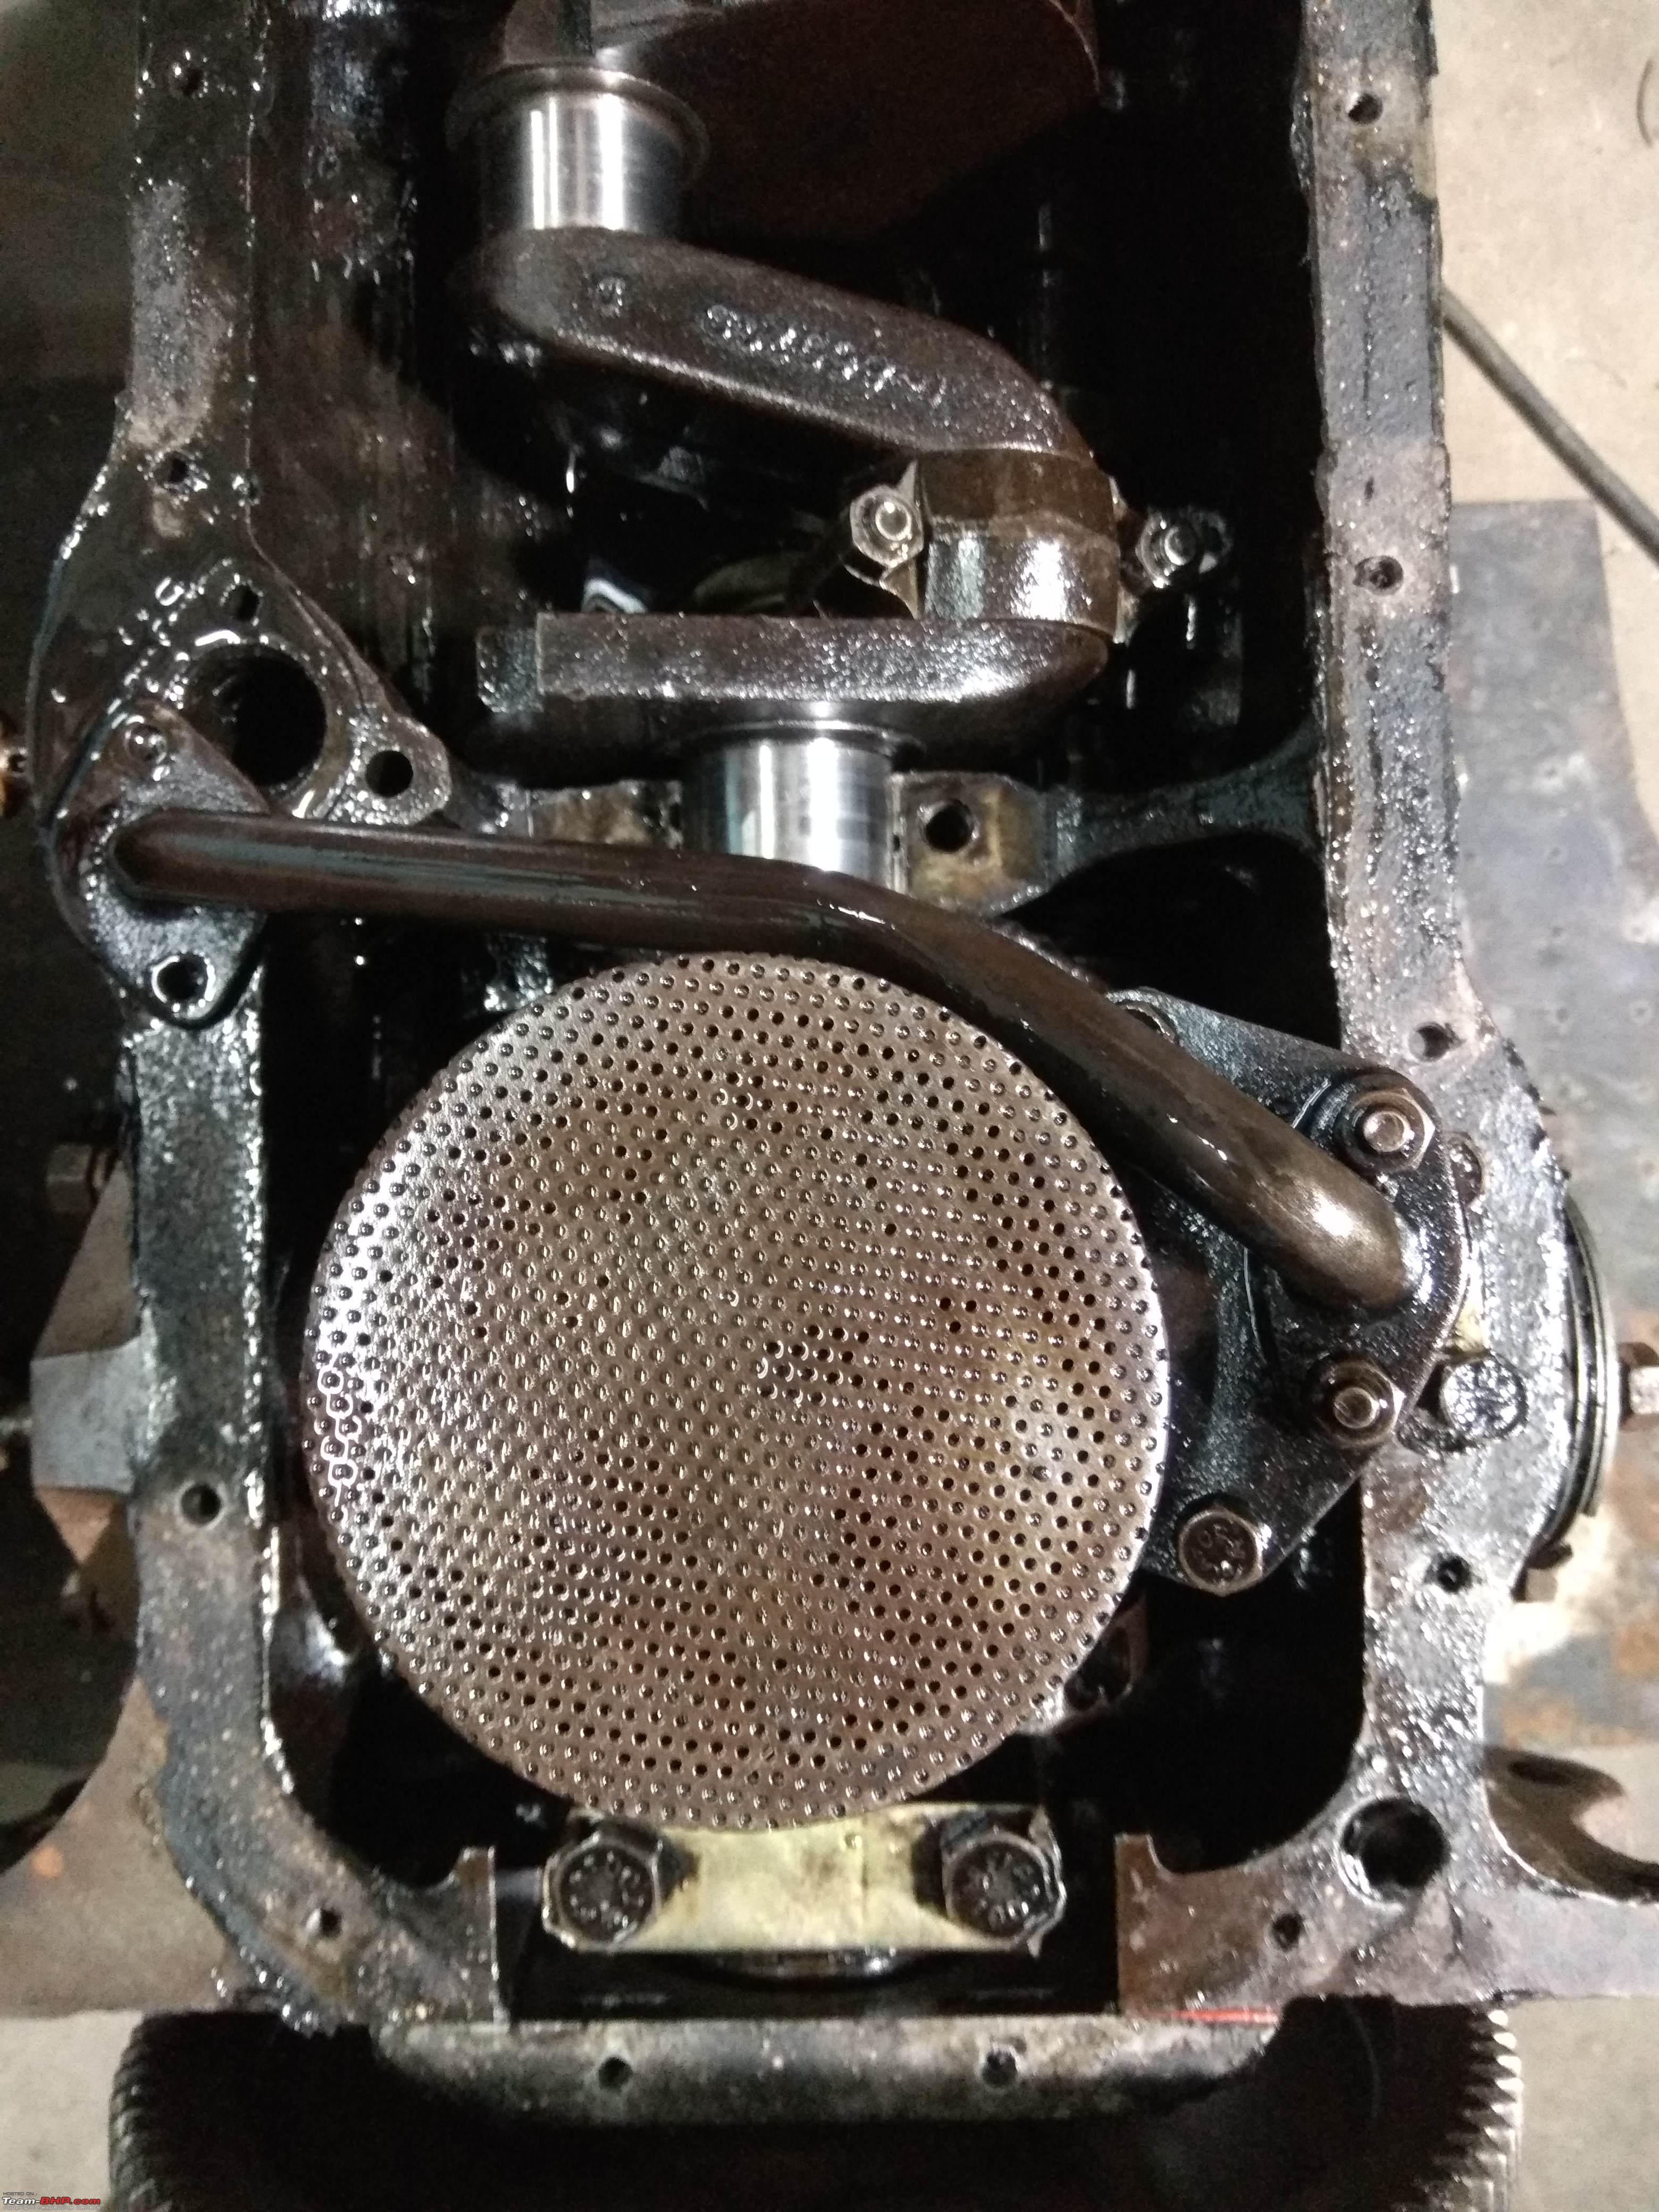 We went in for a good, used oil pump to replace the old one  The cylinder head after decking 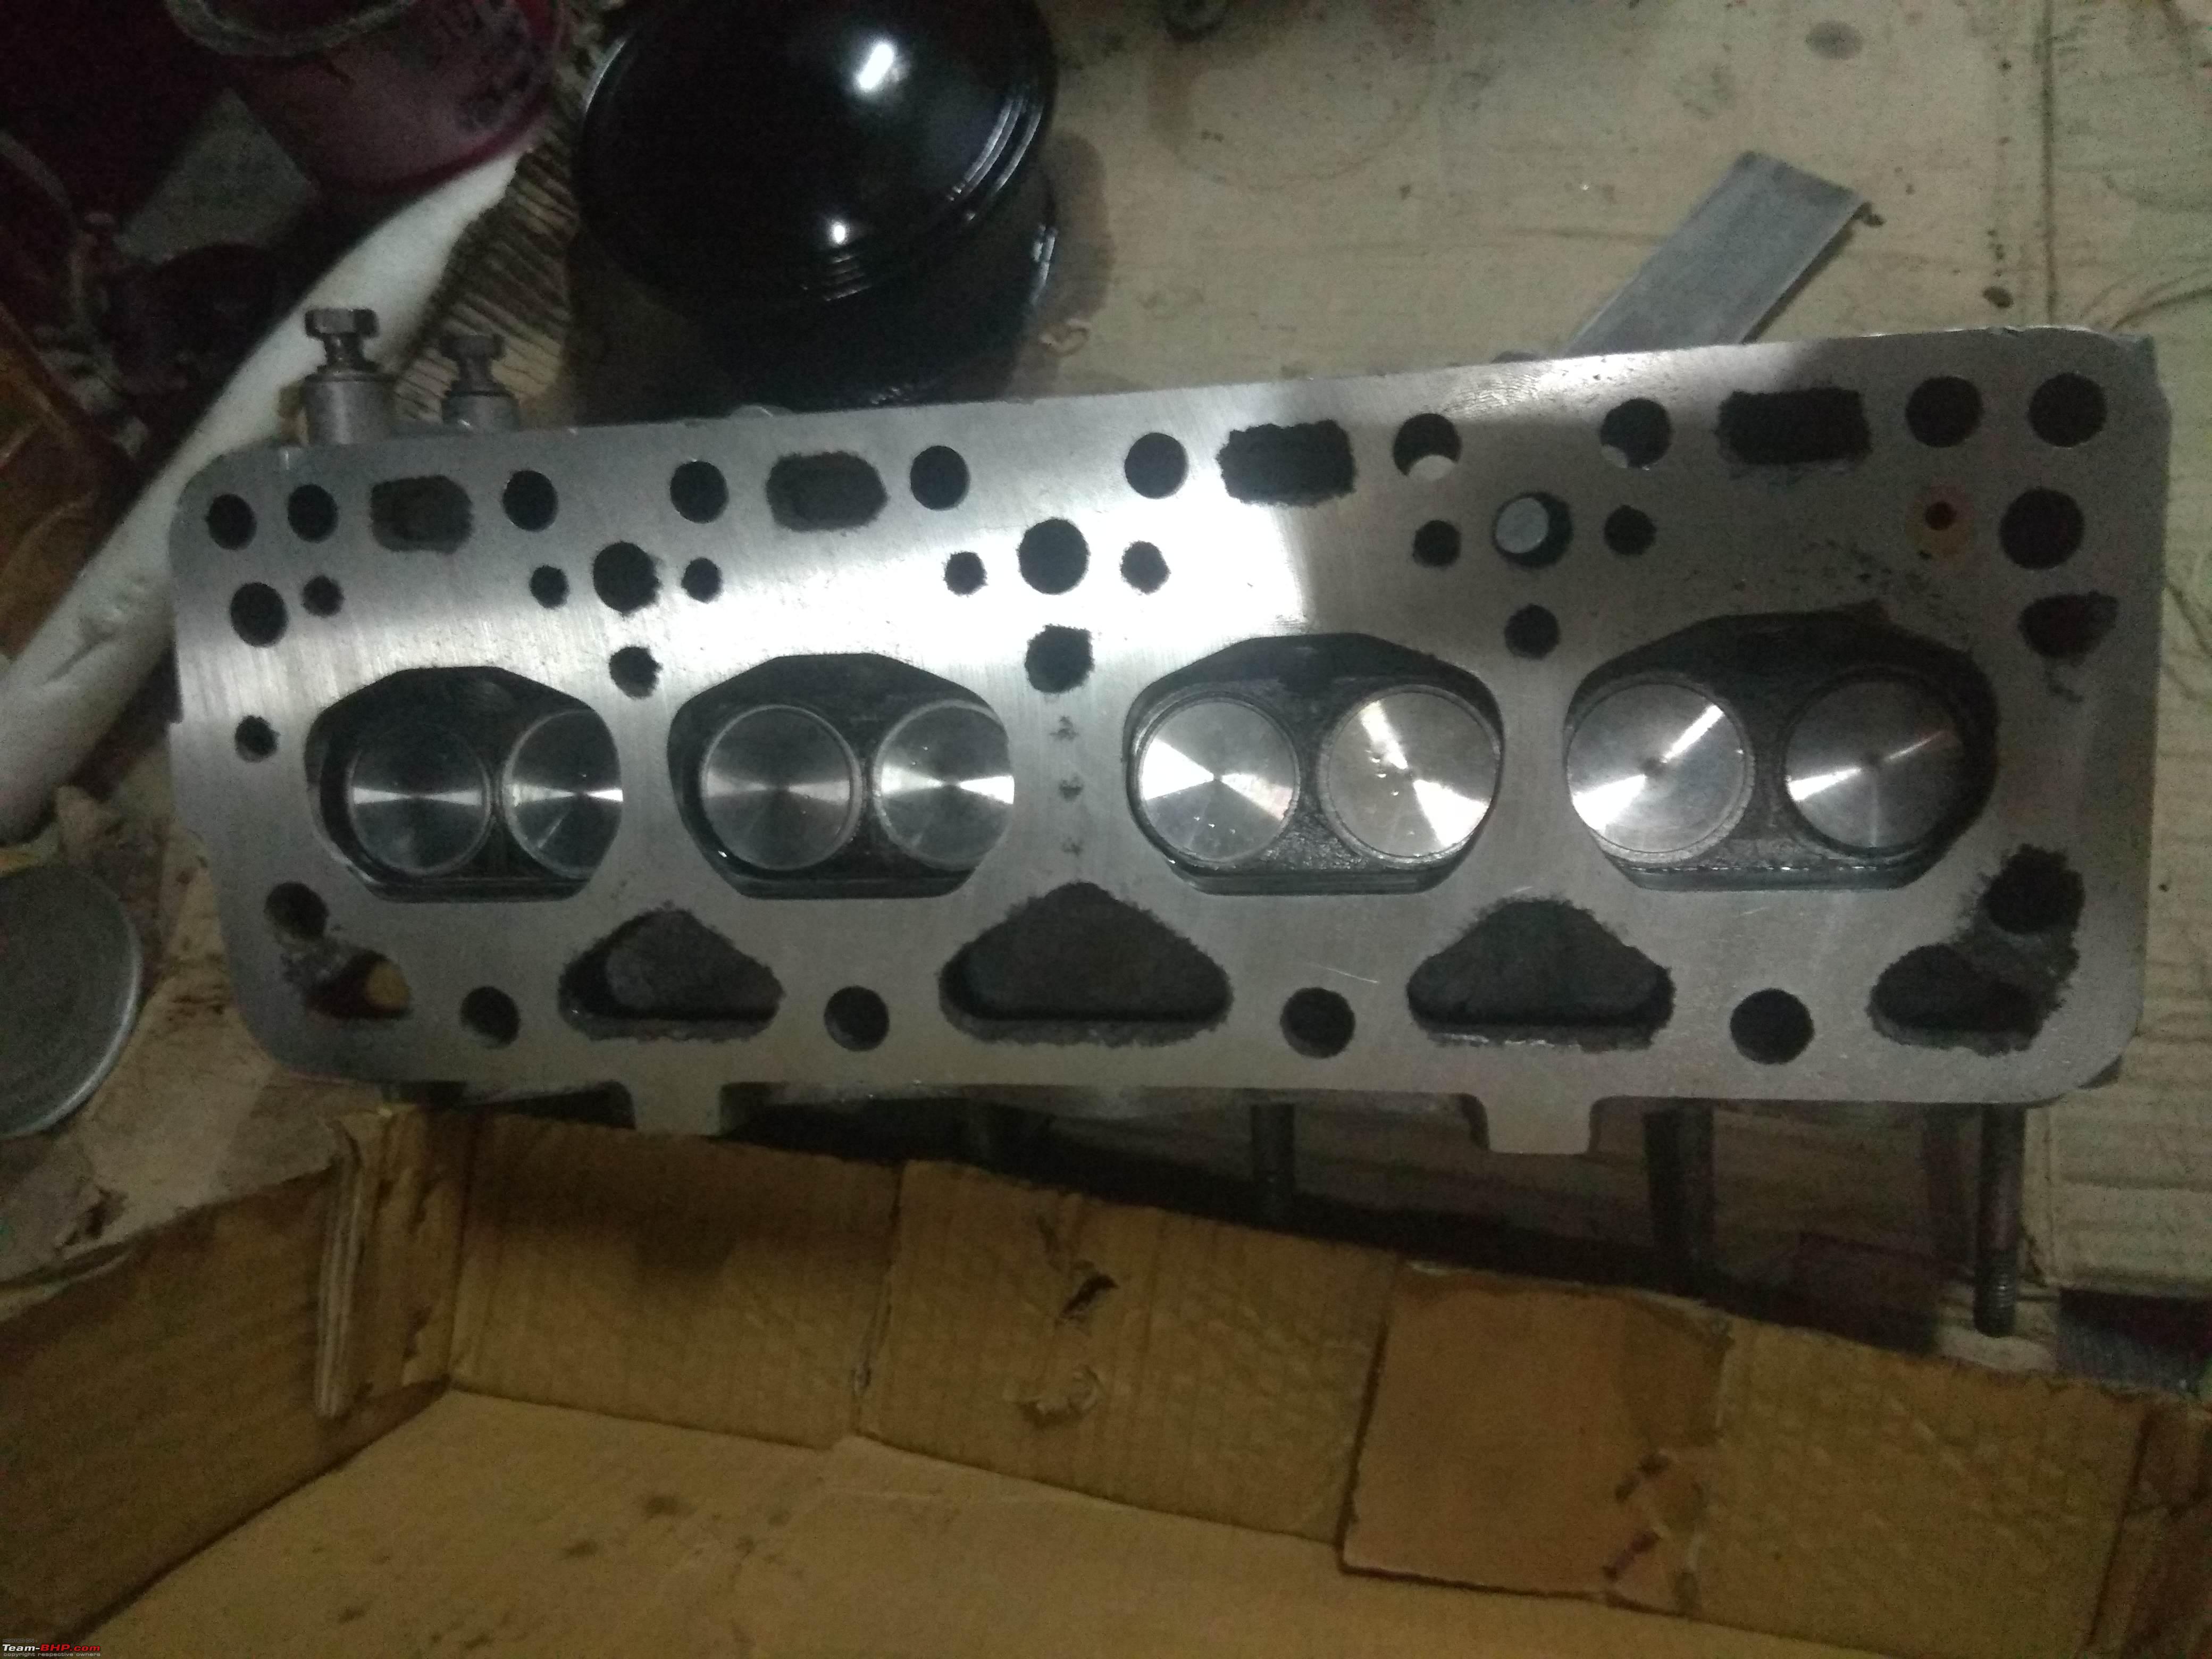 The main oil filter's fine brass screen was found to have been disintegrated when it was opened - it was rebuilt with similar, fine brass mesh  Engine unit in primer after re-building 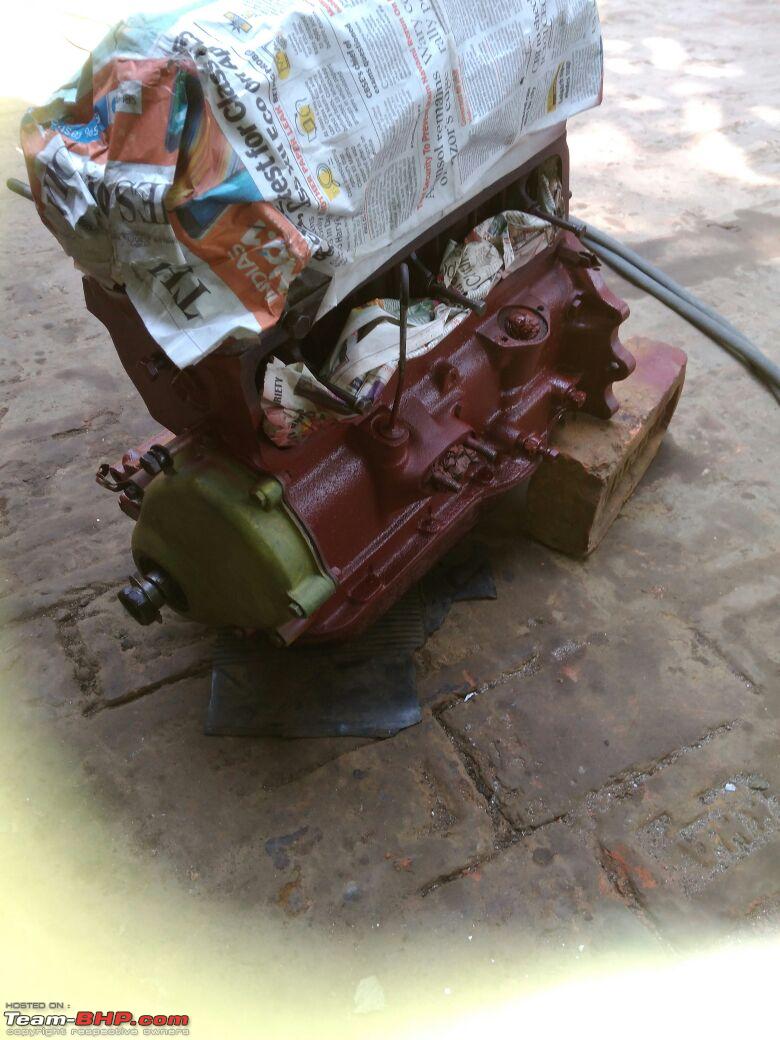 A close-up of the engine number stamped on the block  Side-covers were thoroughly cleaned 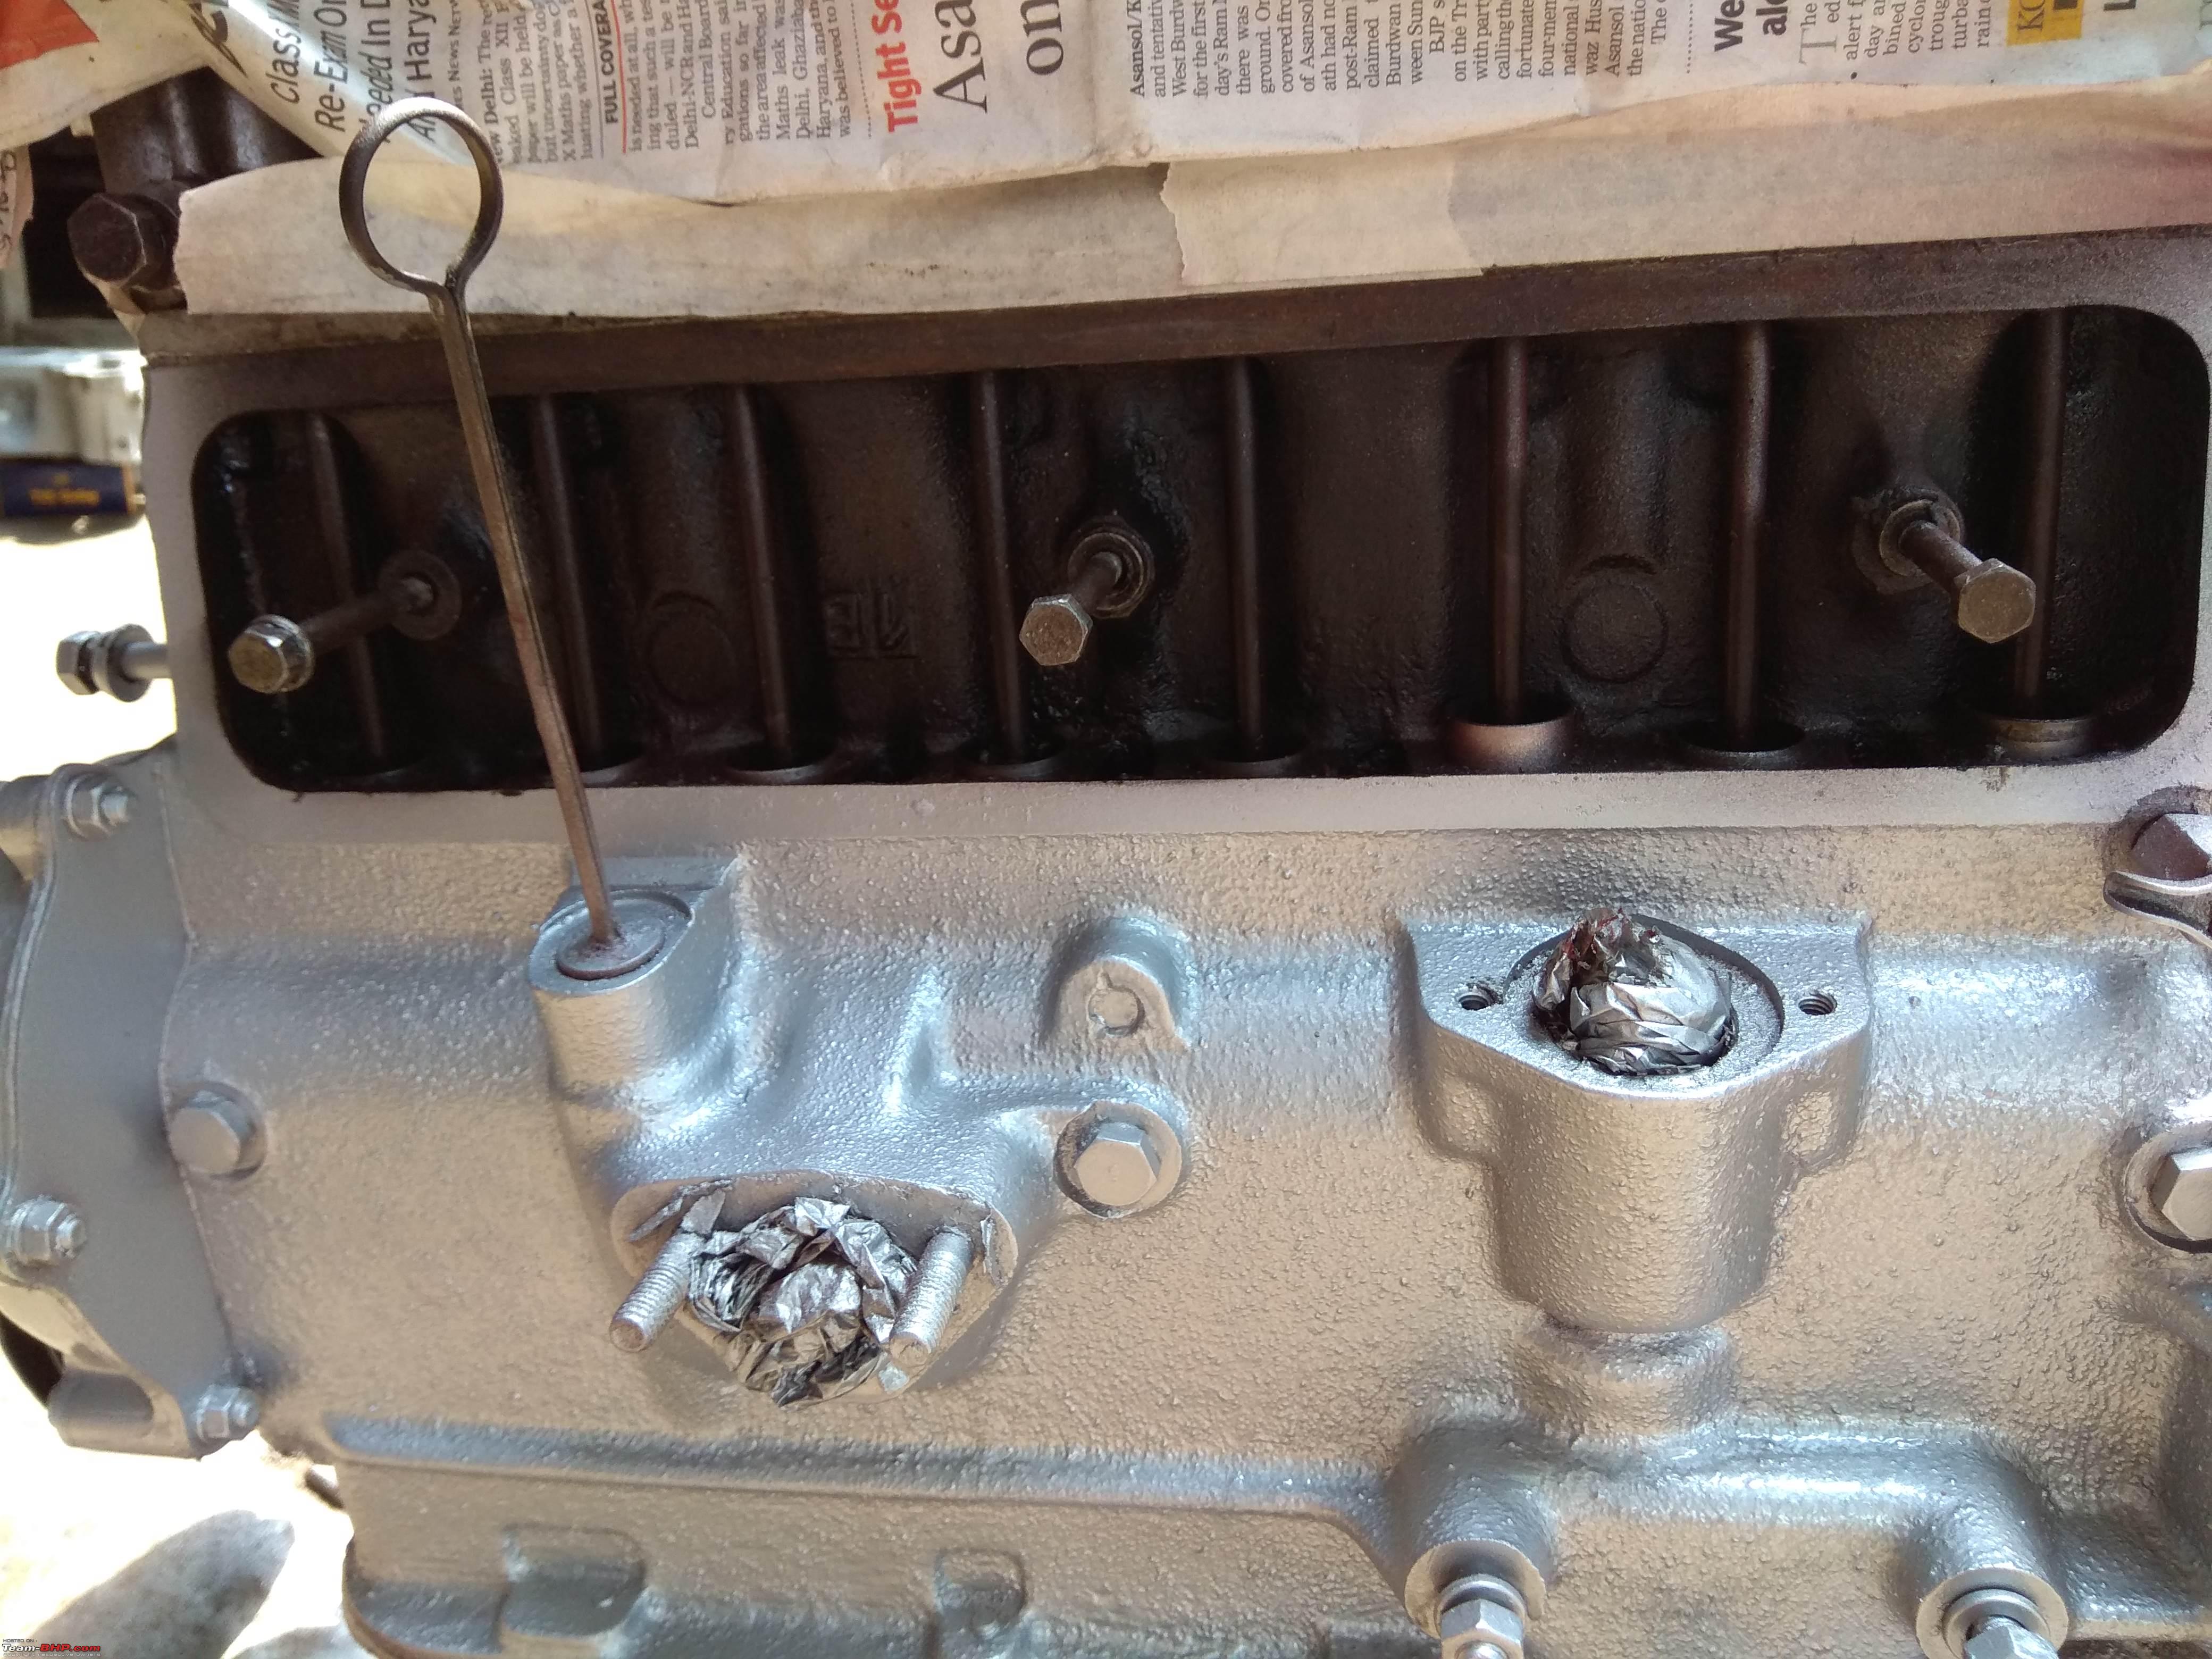 Valve cover had dings & dents which were smoothed out  Prepping the valve cover 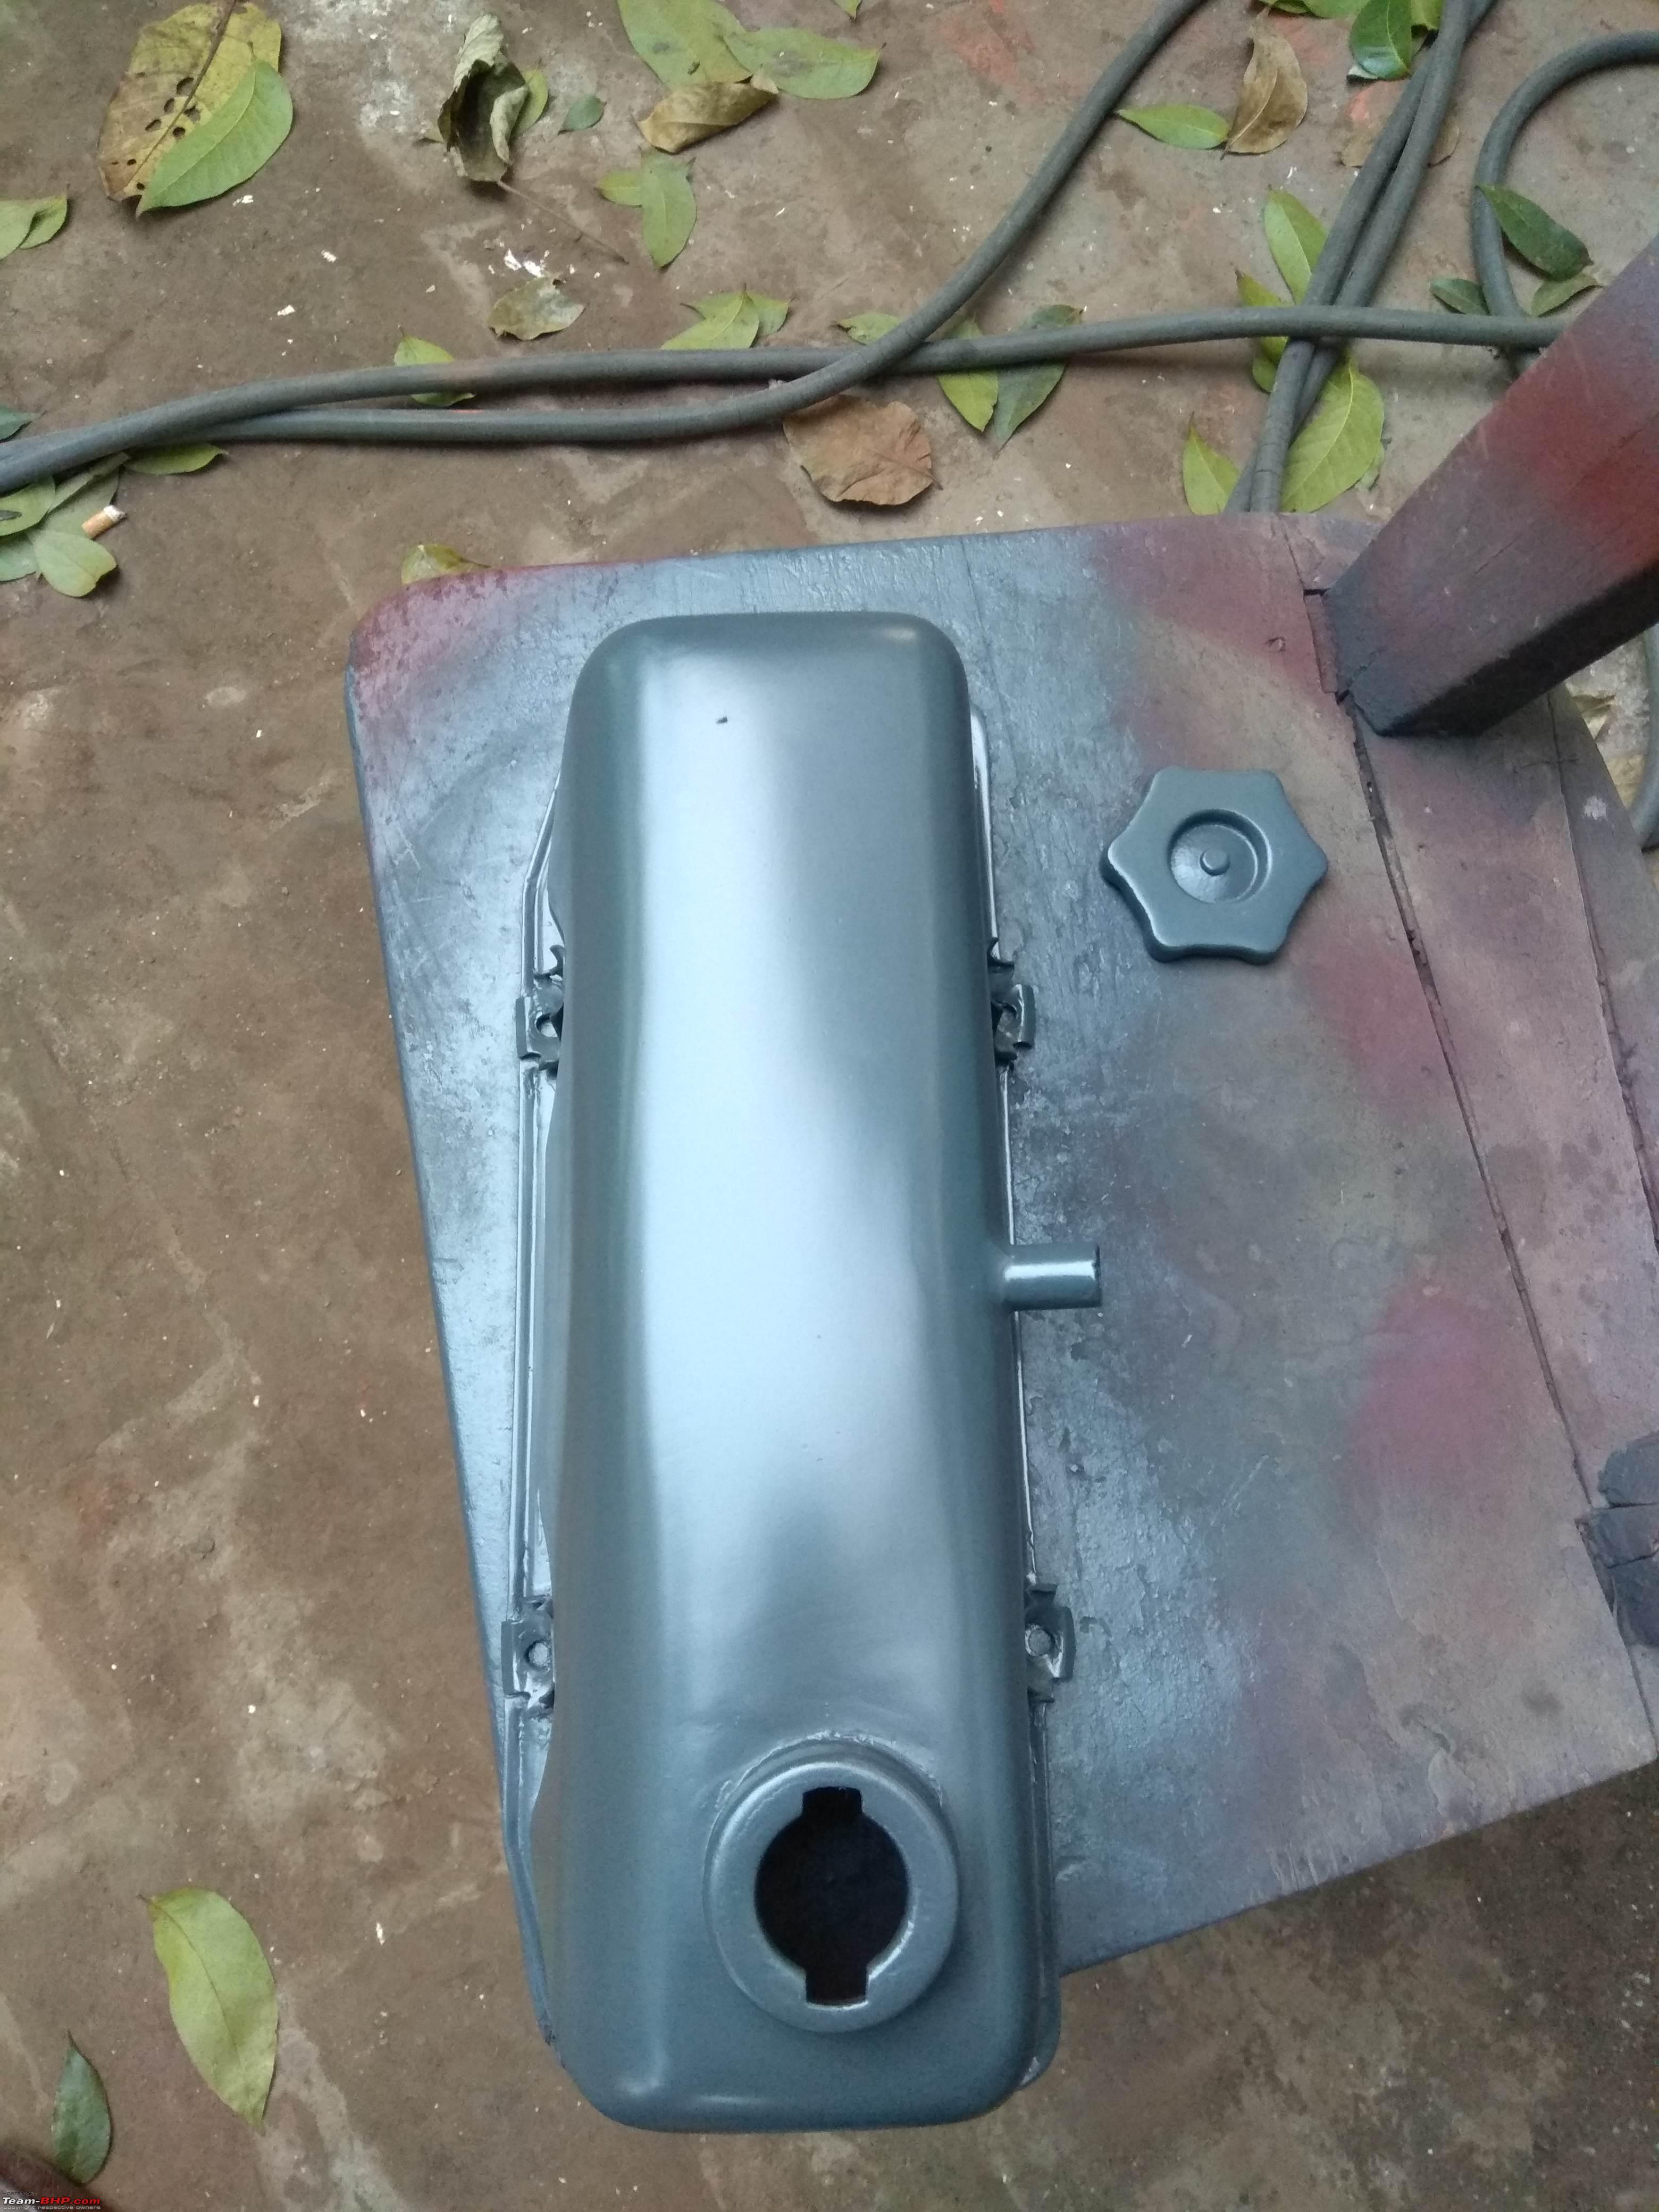 Engine cosmetically completed 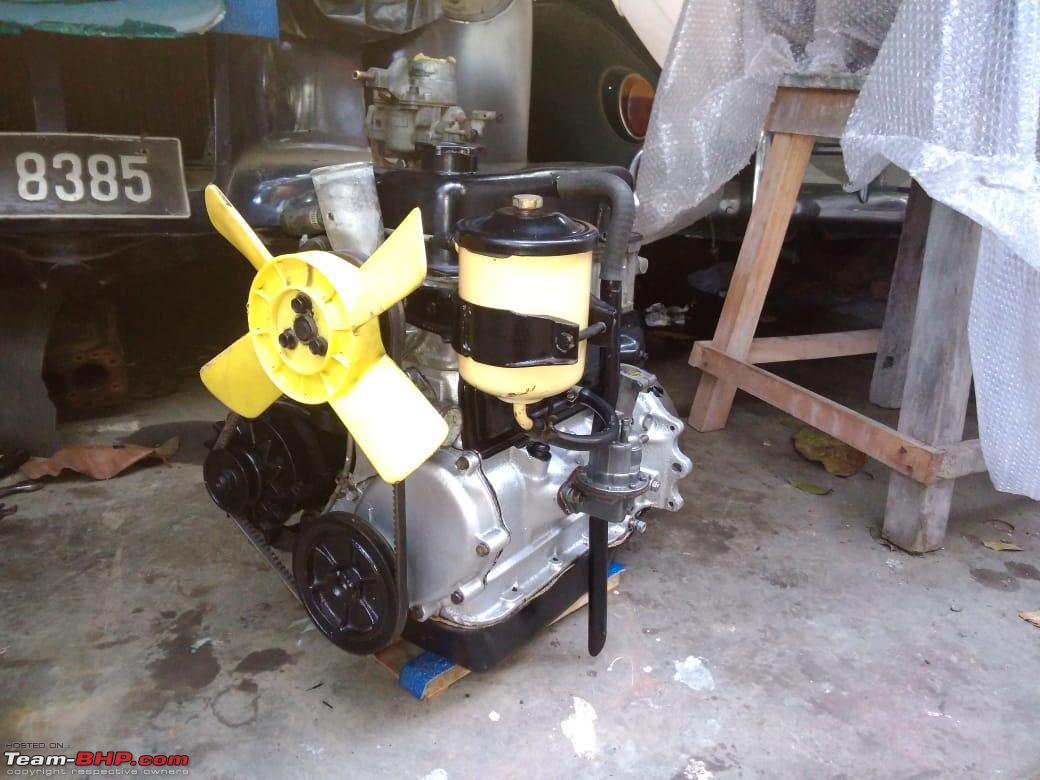 Engine mounts were sent from a Bhpian in Bangalore & measured before sending to get the correct units 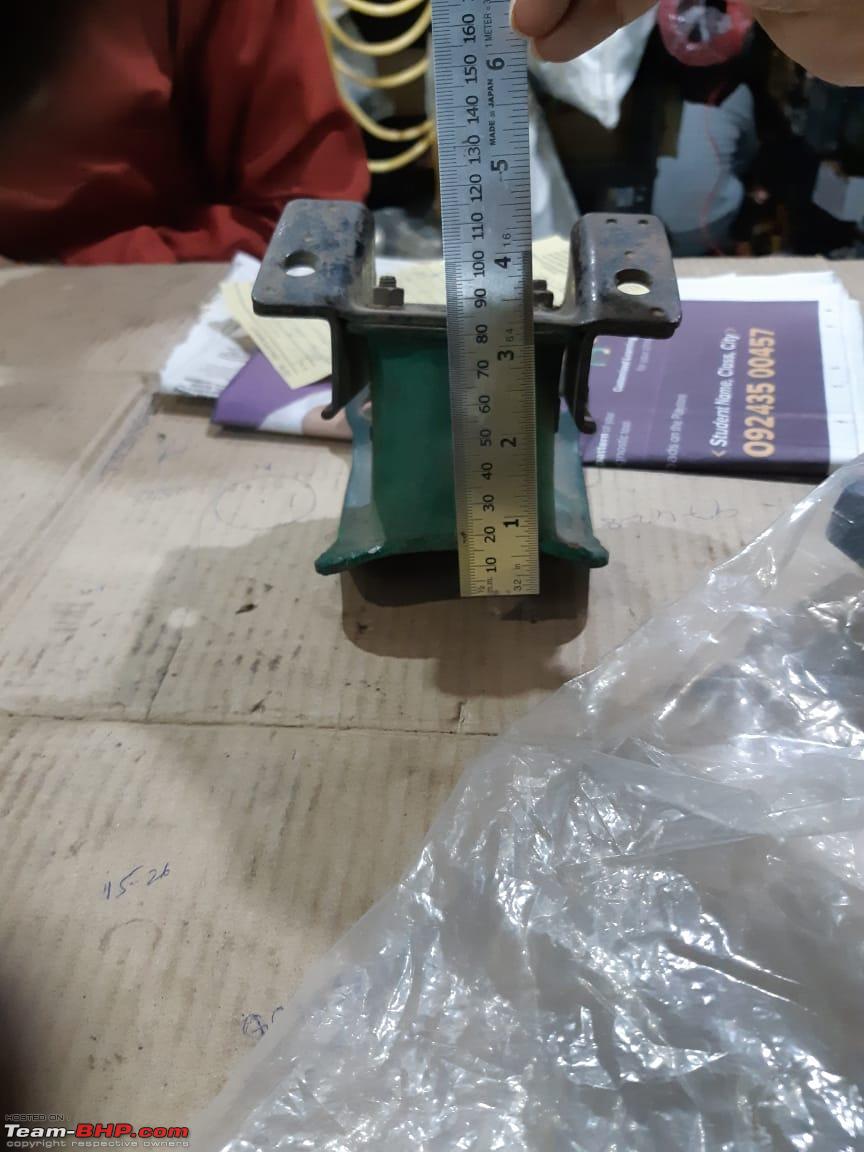 A small wooden cradle was made for the engine to sit on before it was re-installed 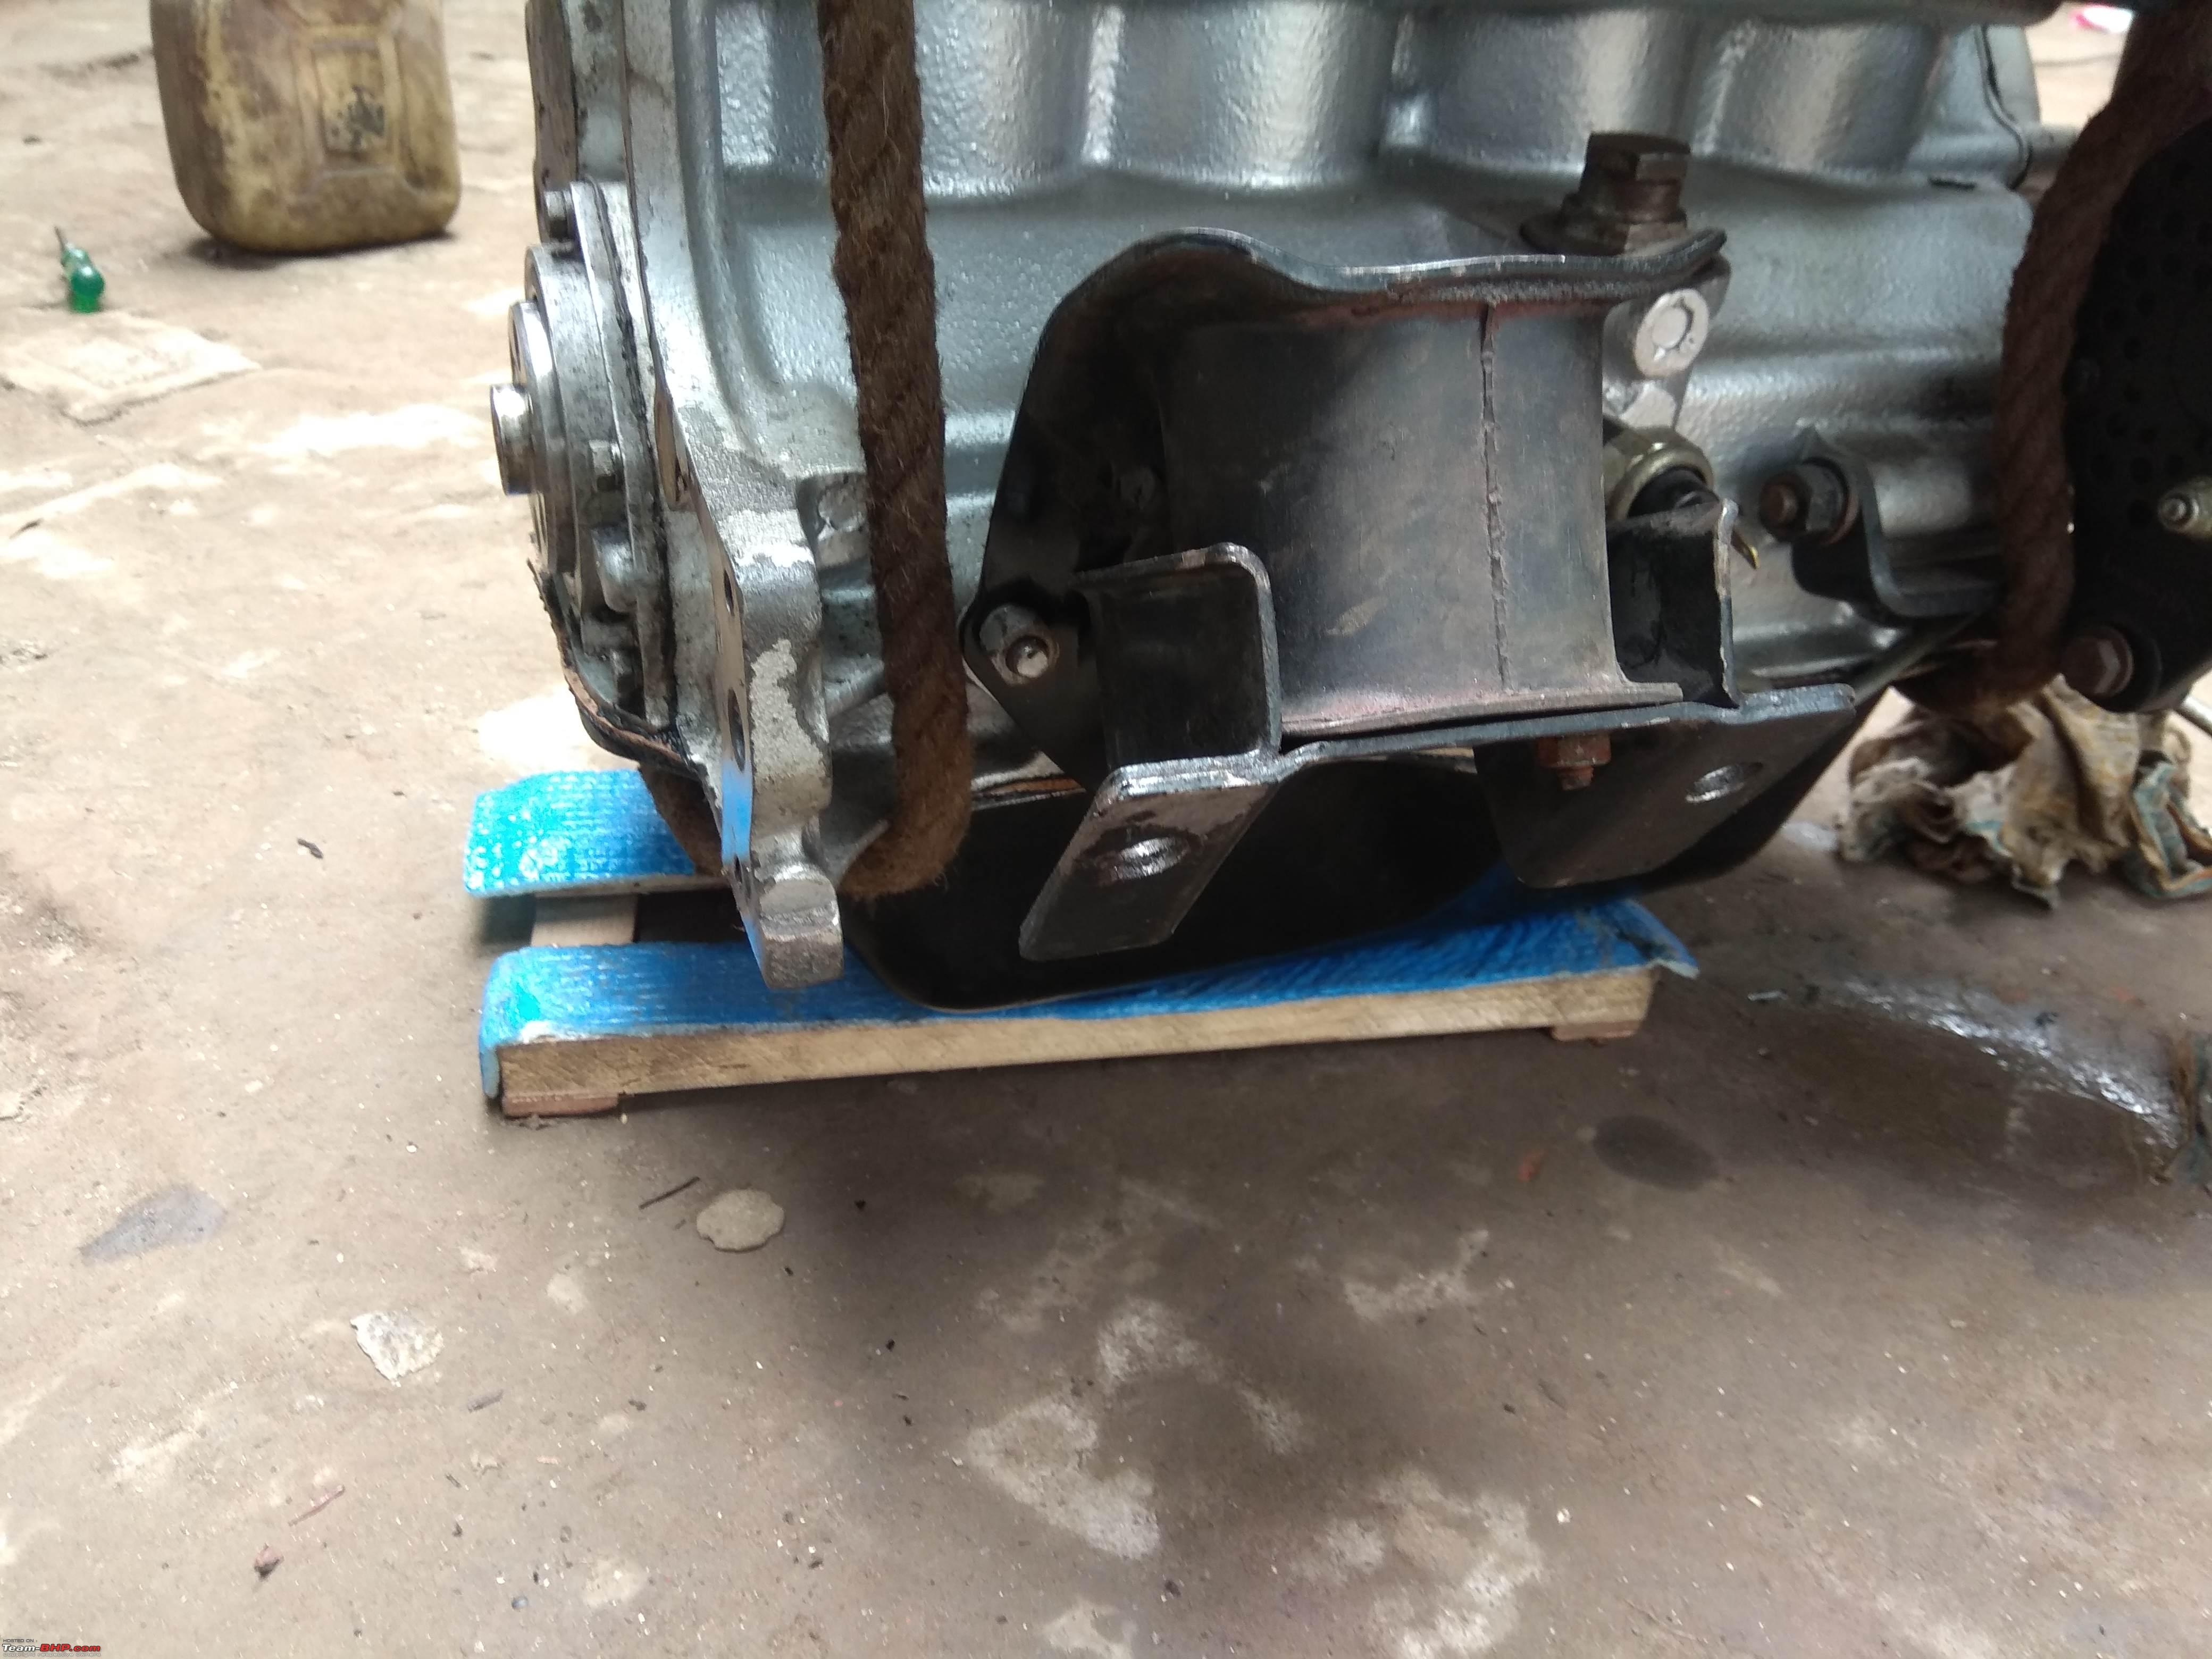 In the meantime, the engine bay was completed to receive the engine  A later air filter unit with a top similar to the original's was sourced & painted in the correct colours 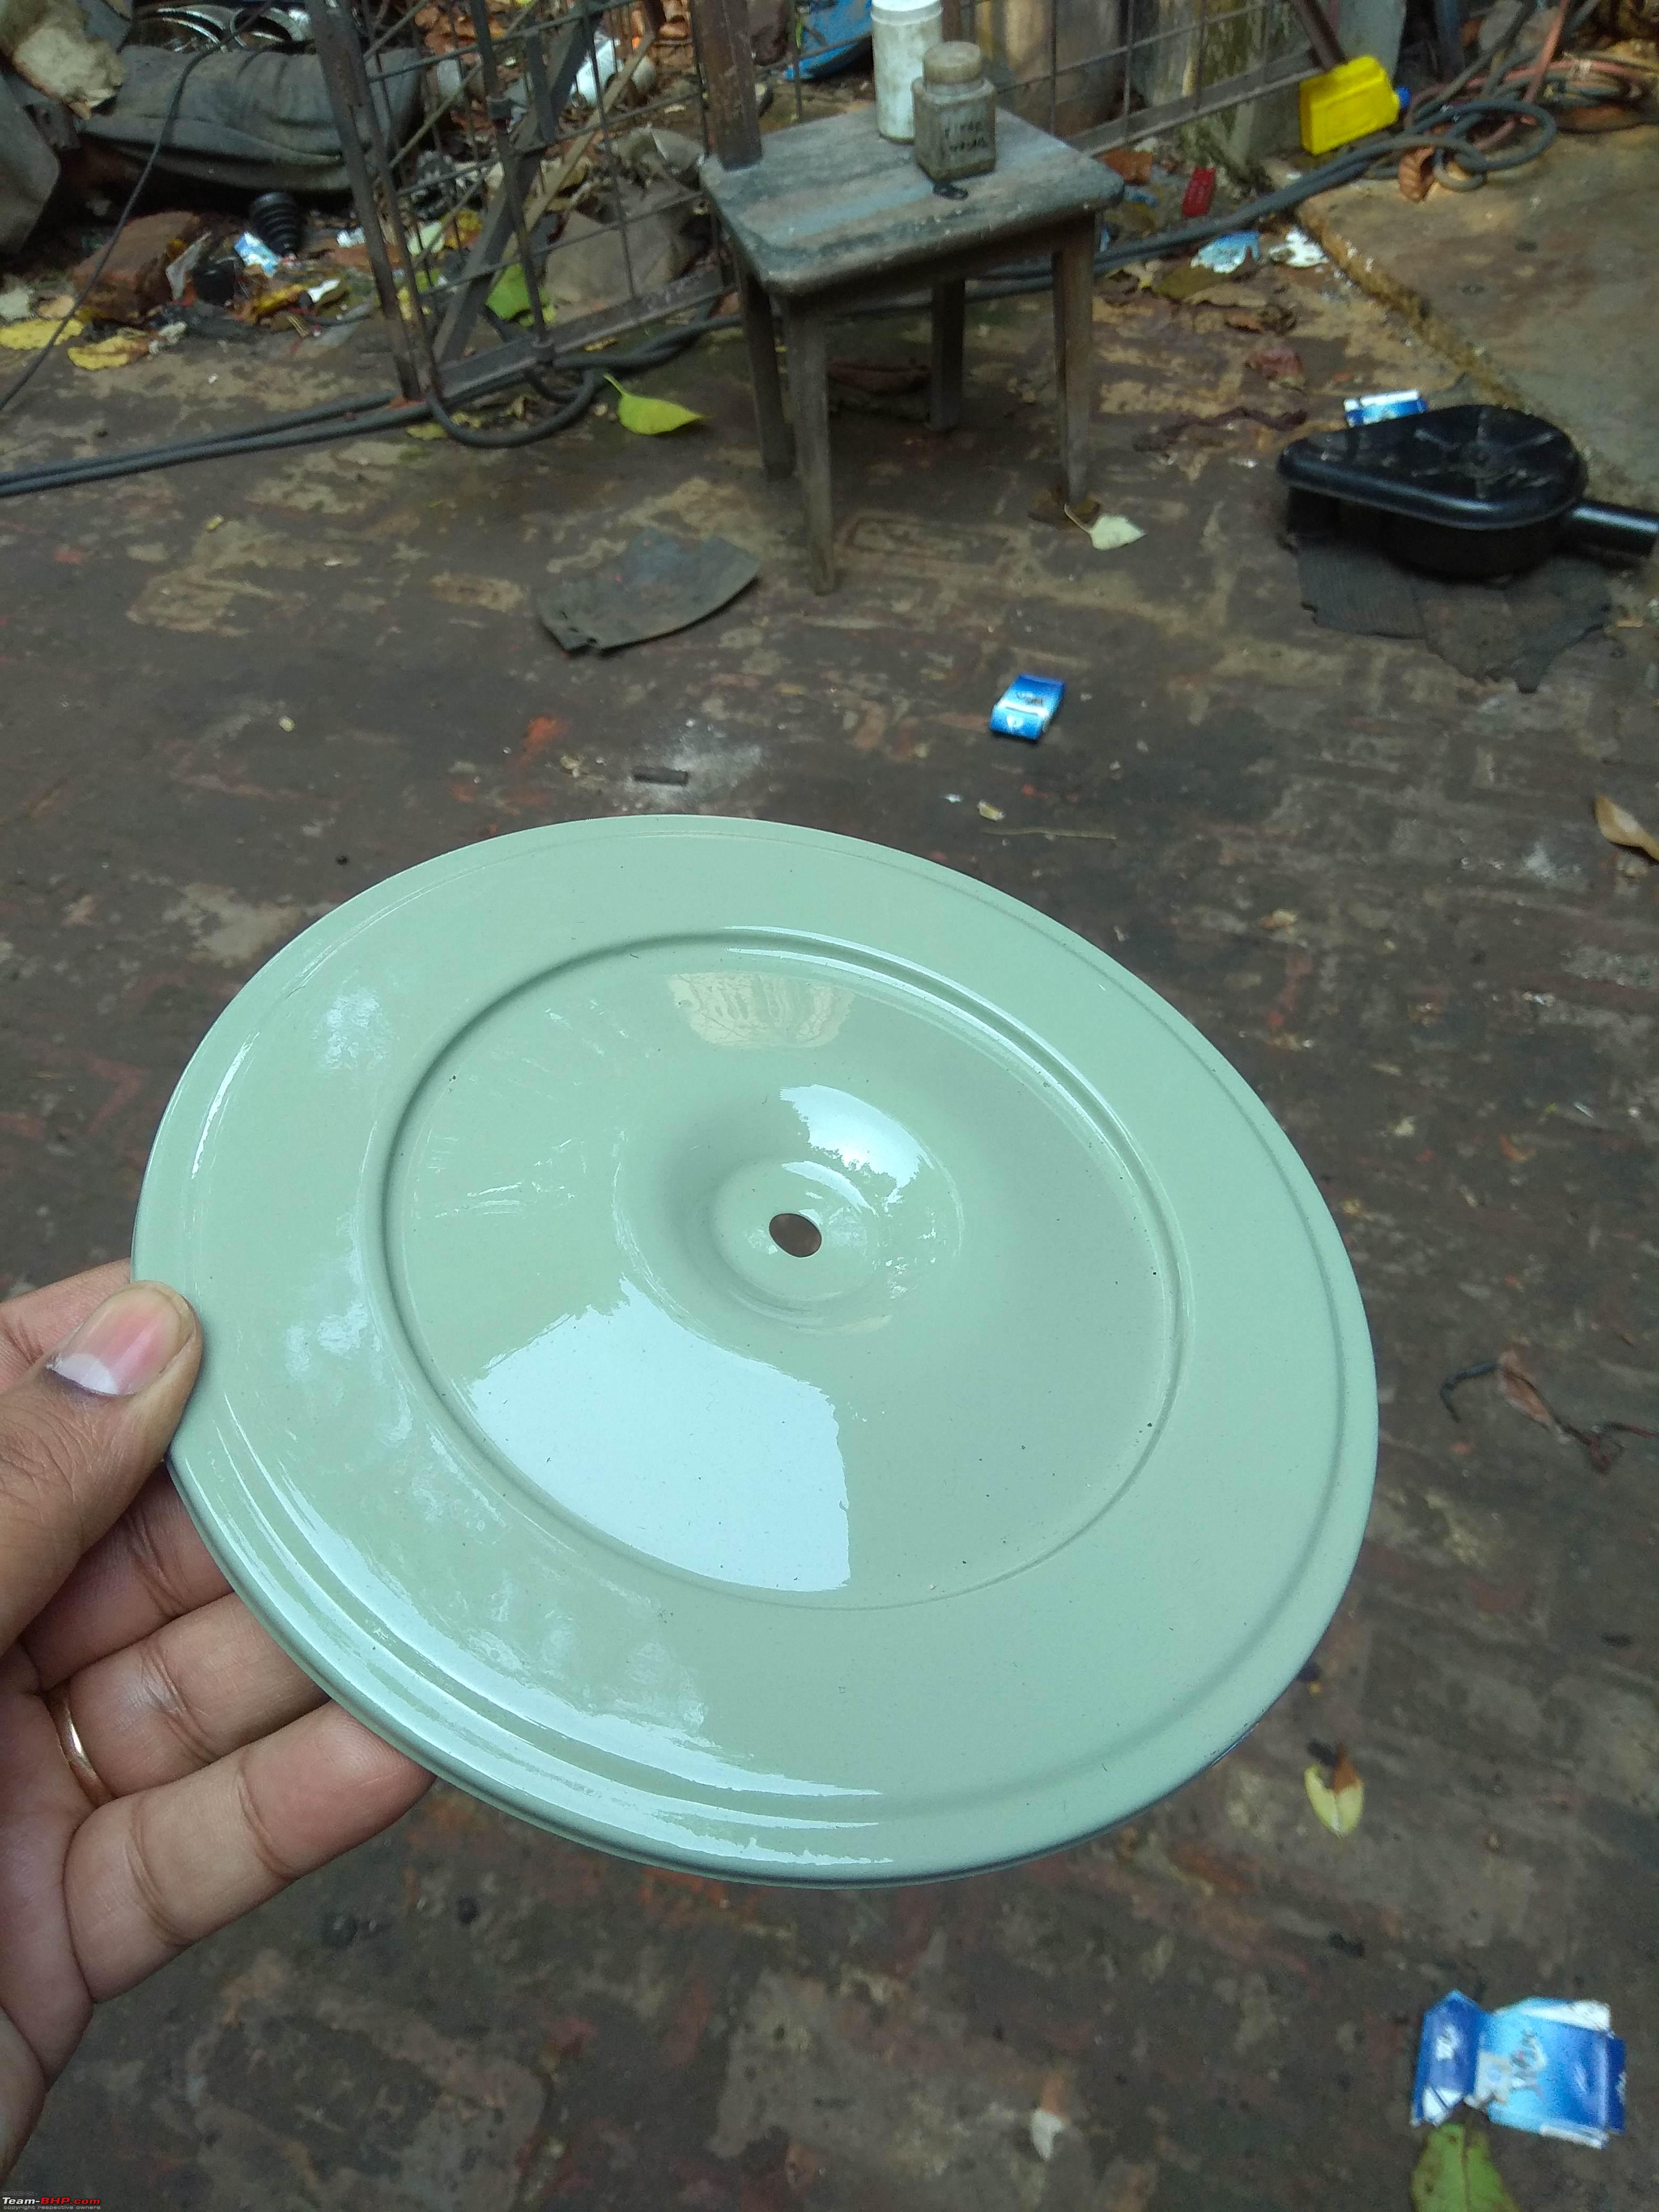 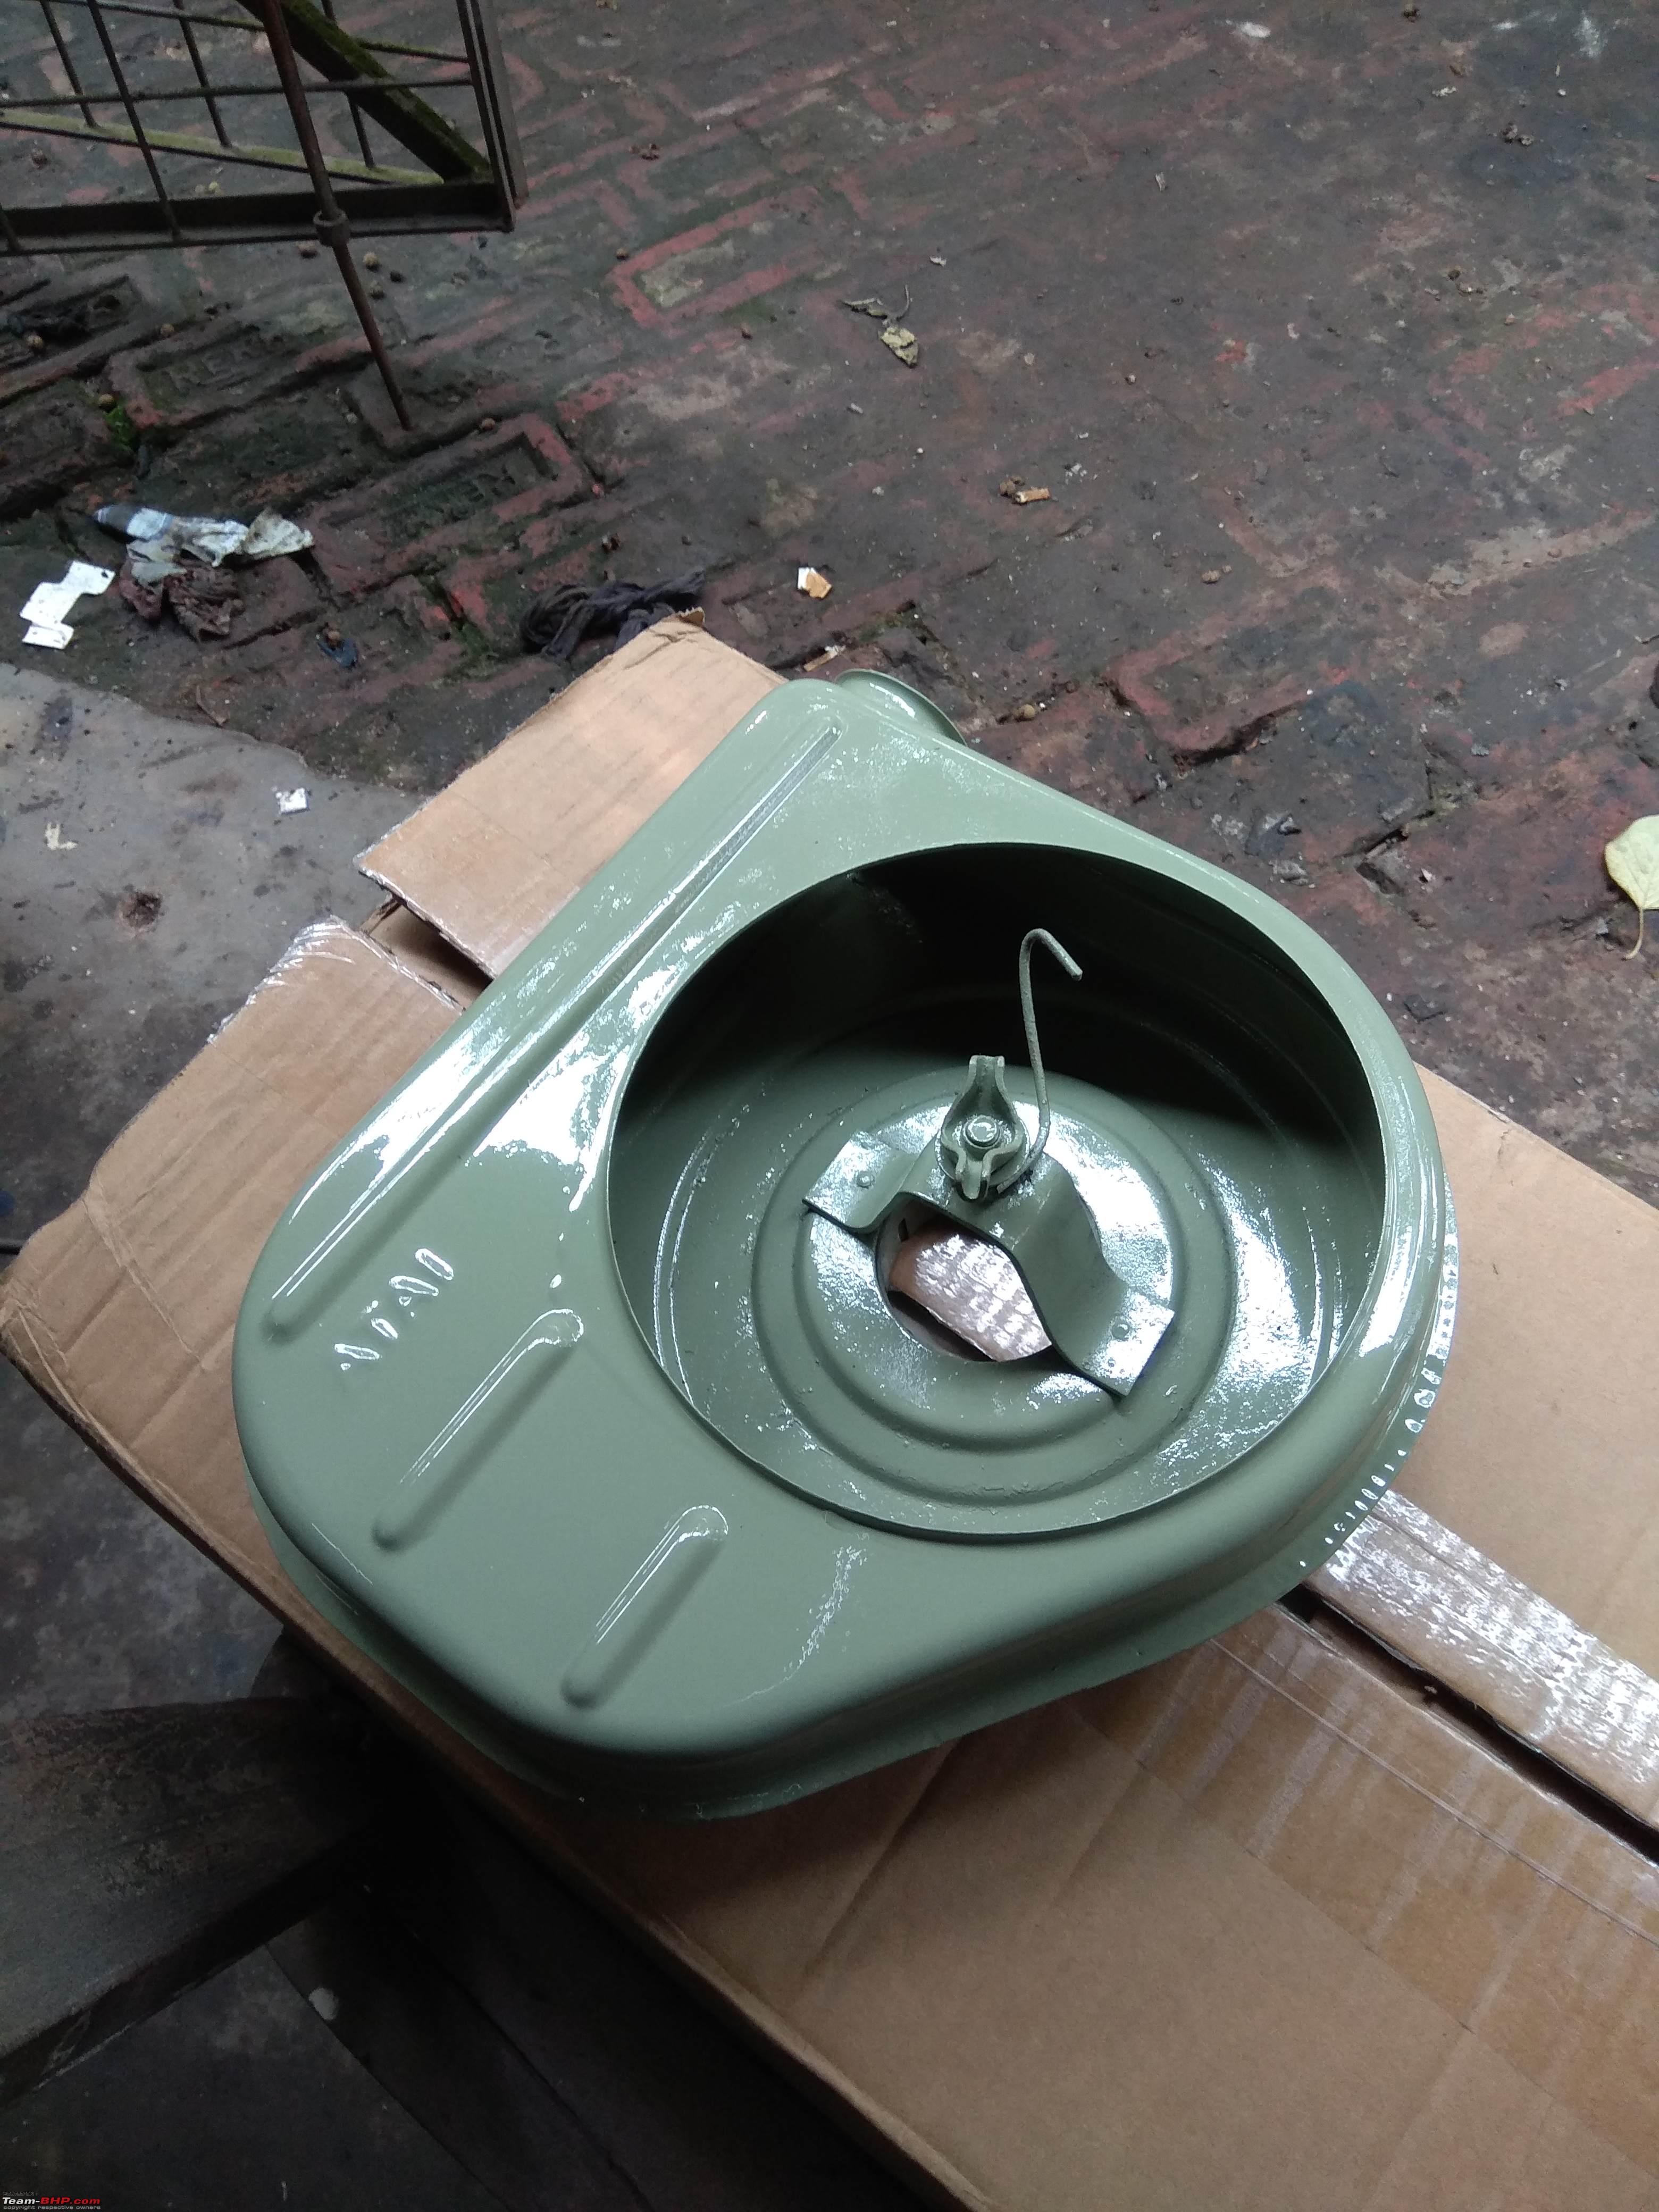 By pass oil filter painted. I know the Super Select had the cover in red but I chose black since I was going to use a decal on it! 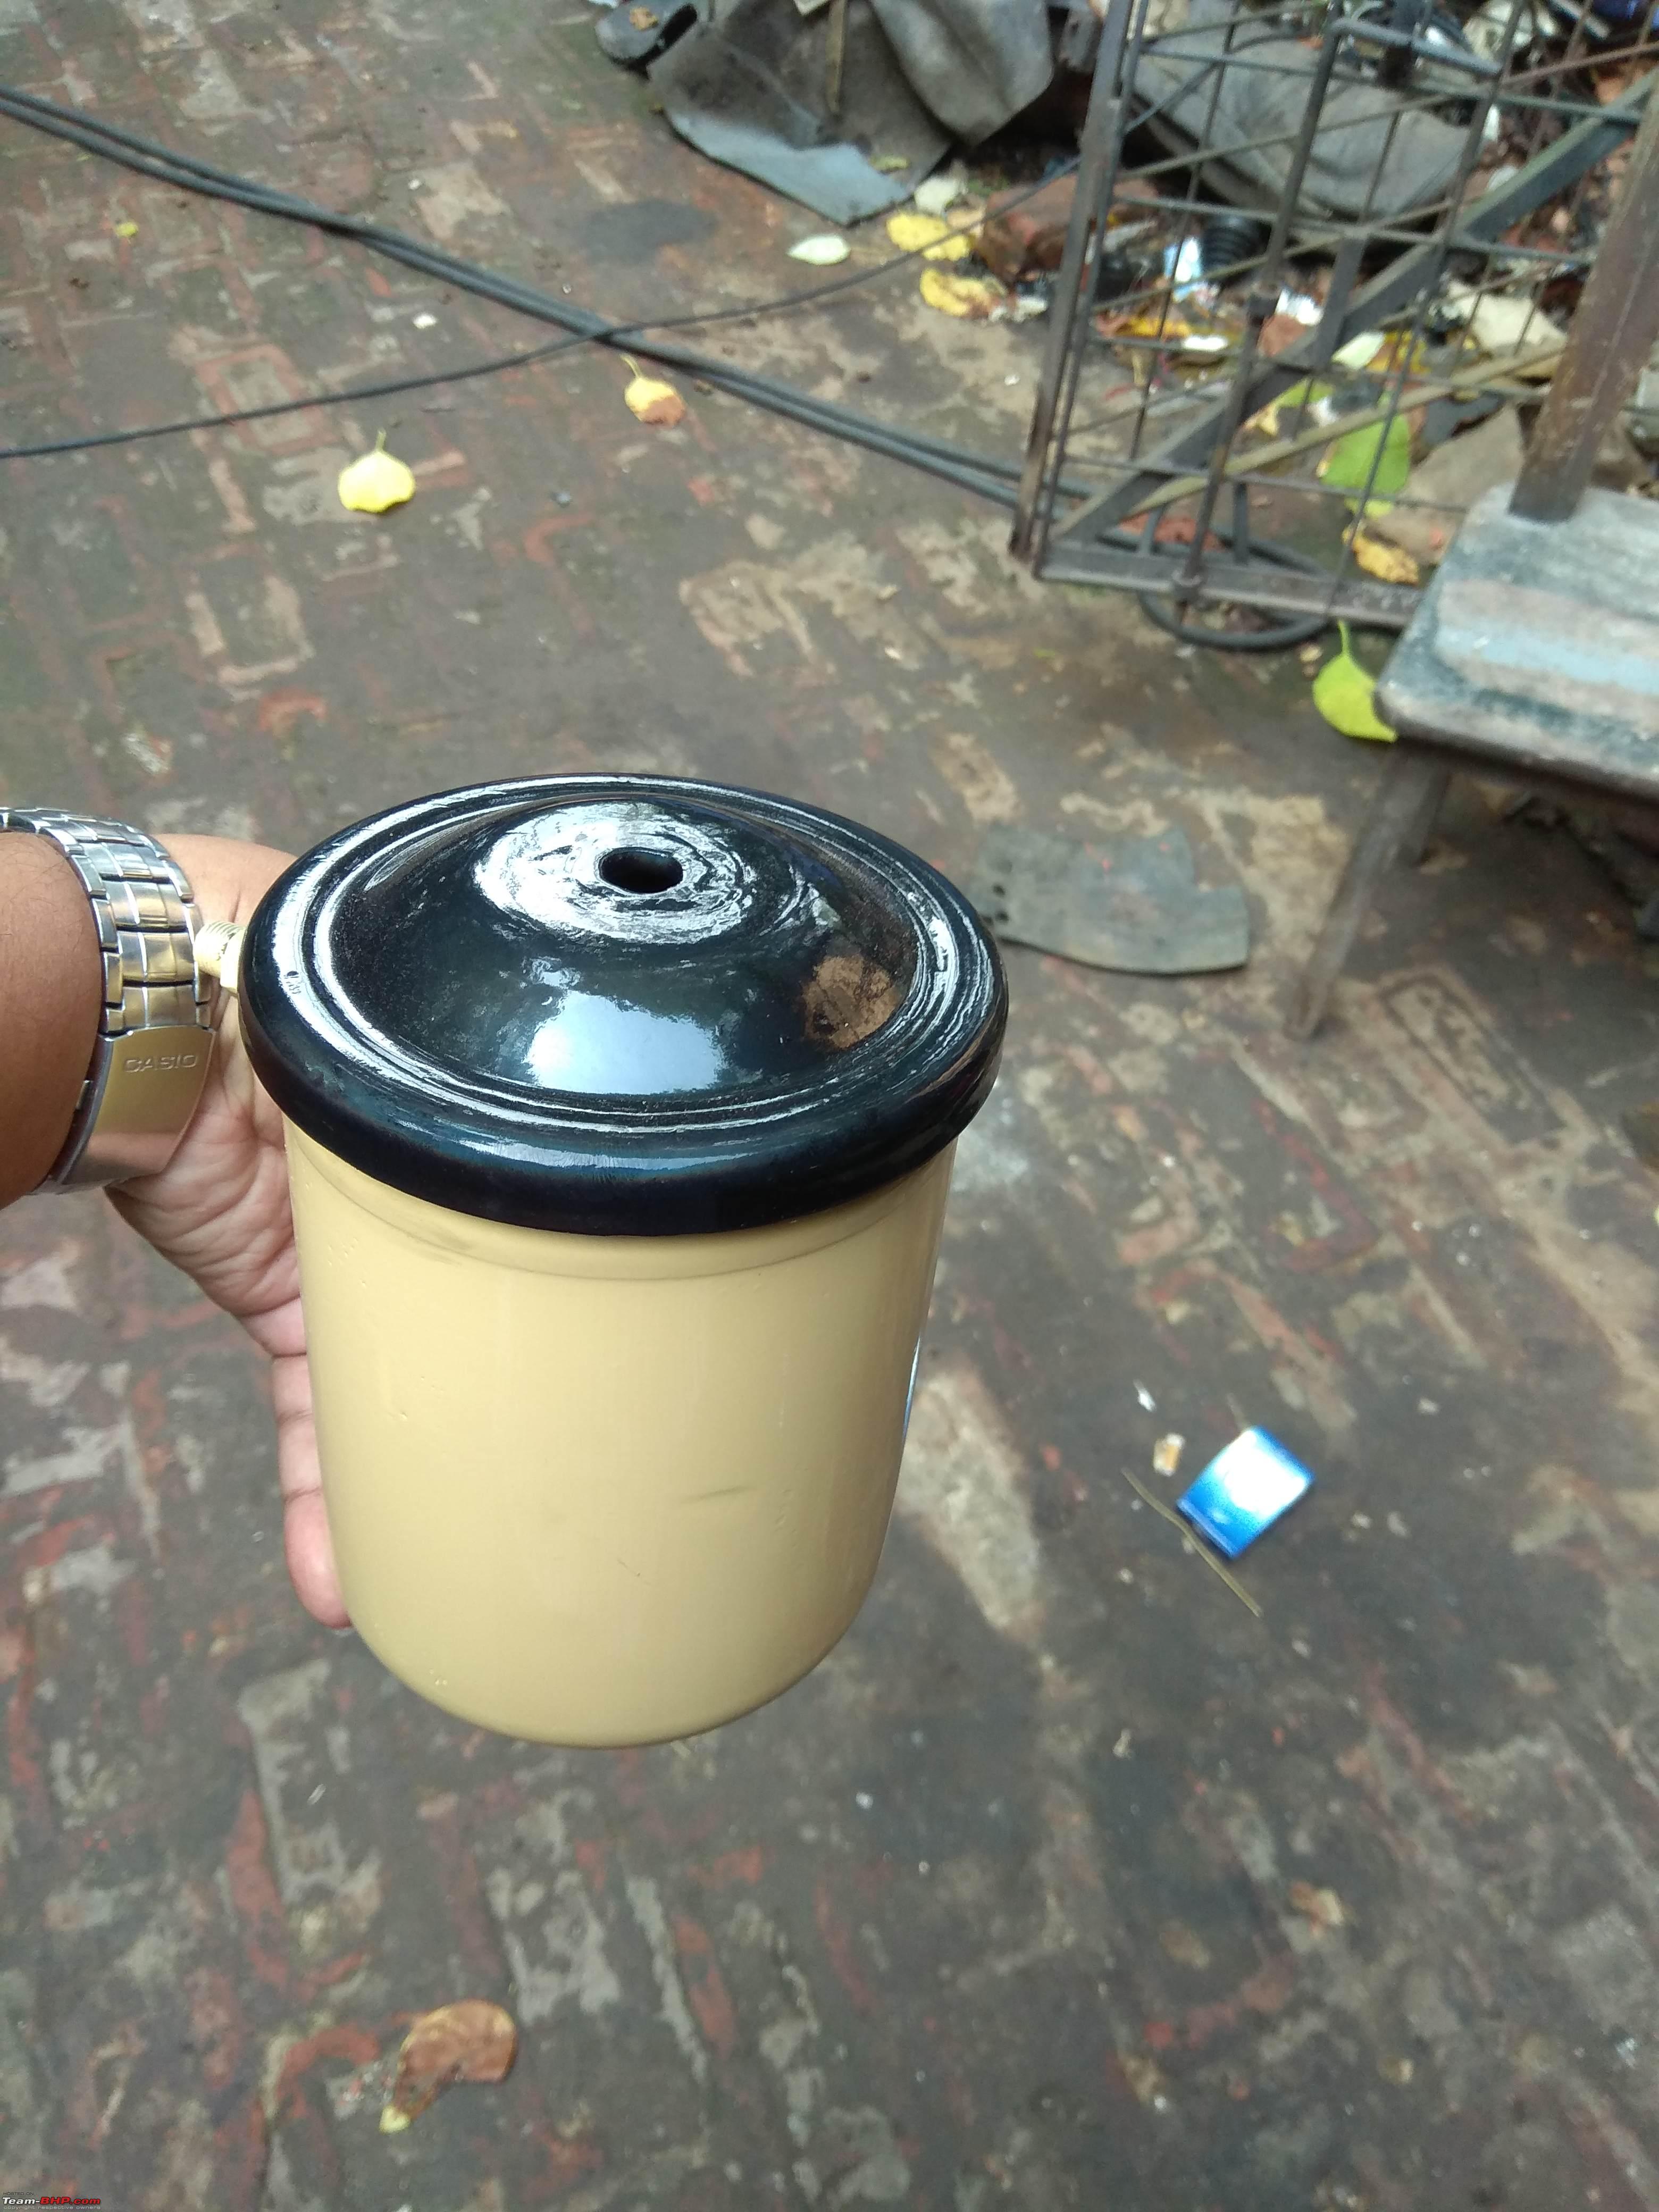 The engine on a hoist being guided & dropped inside the engine bay 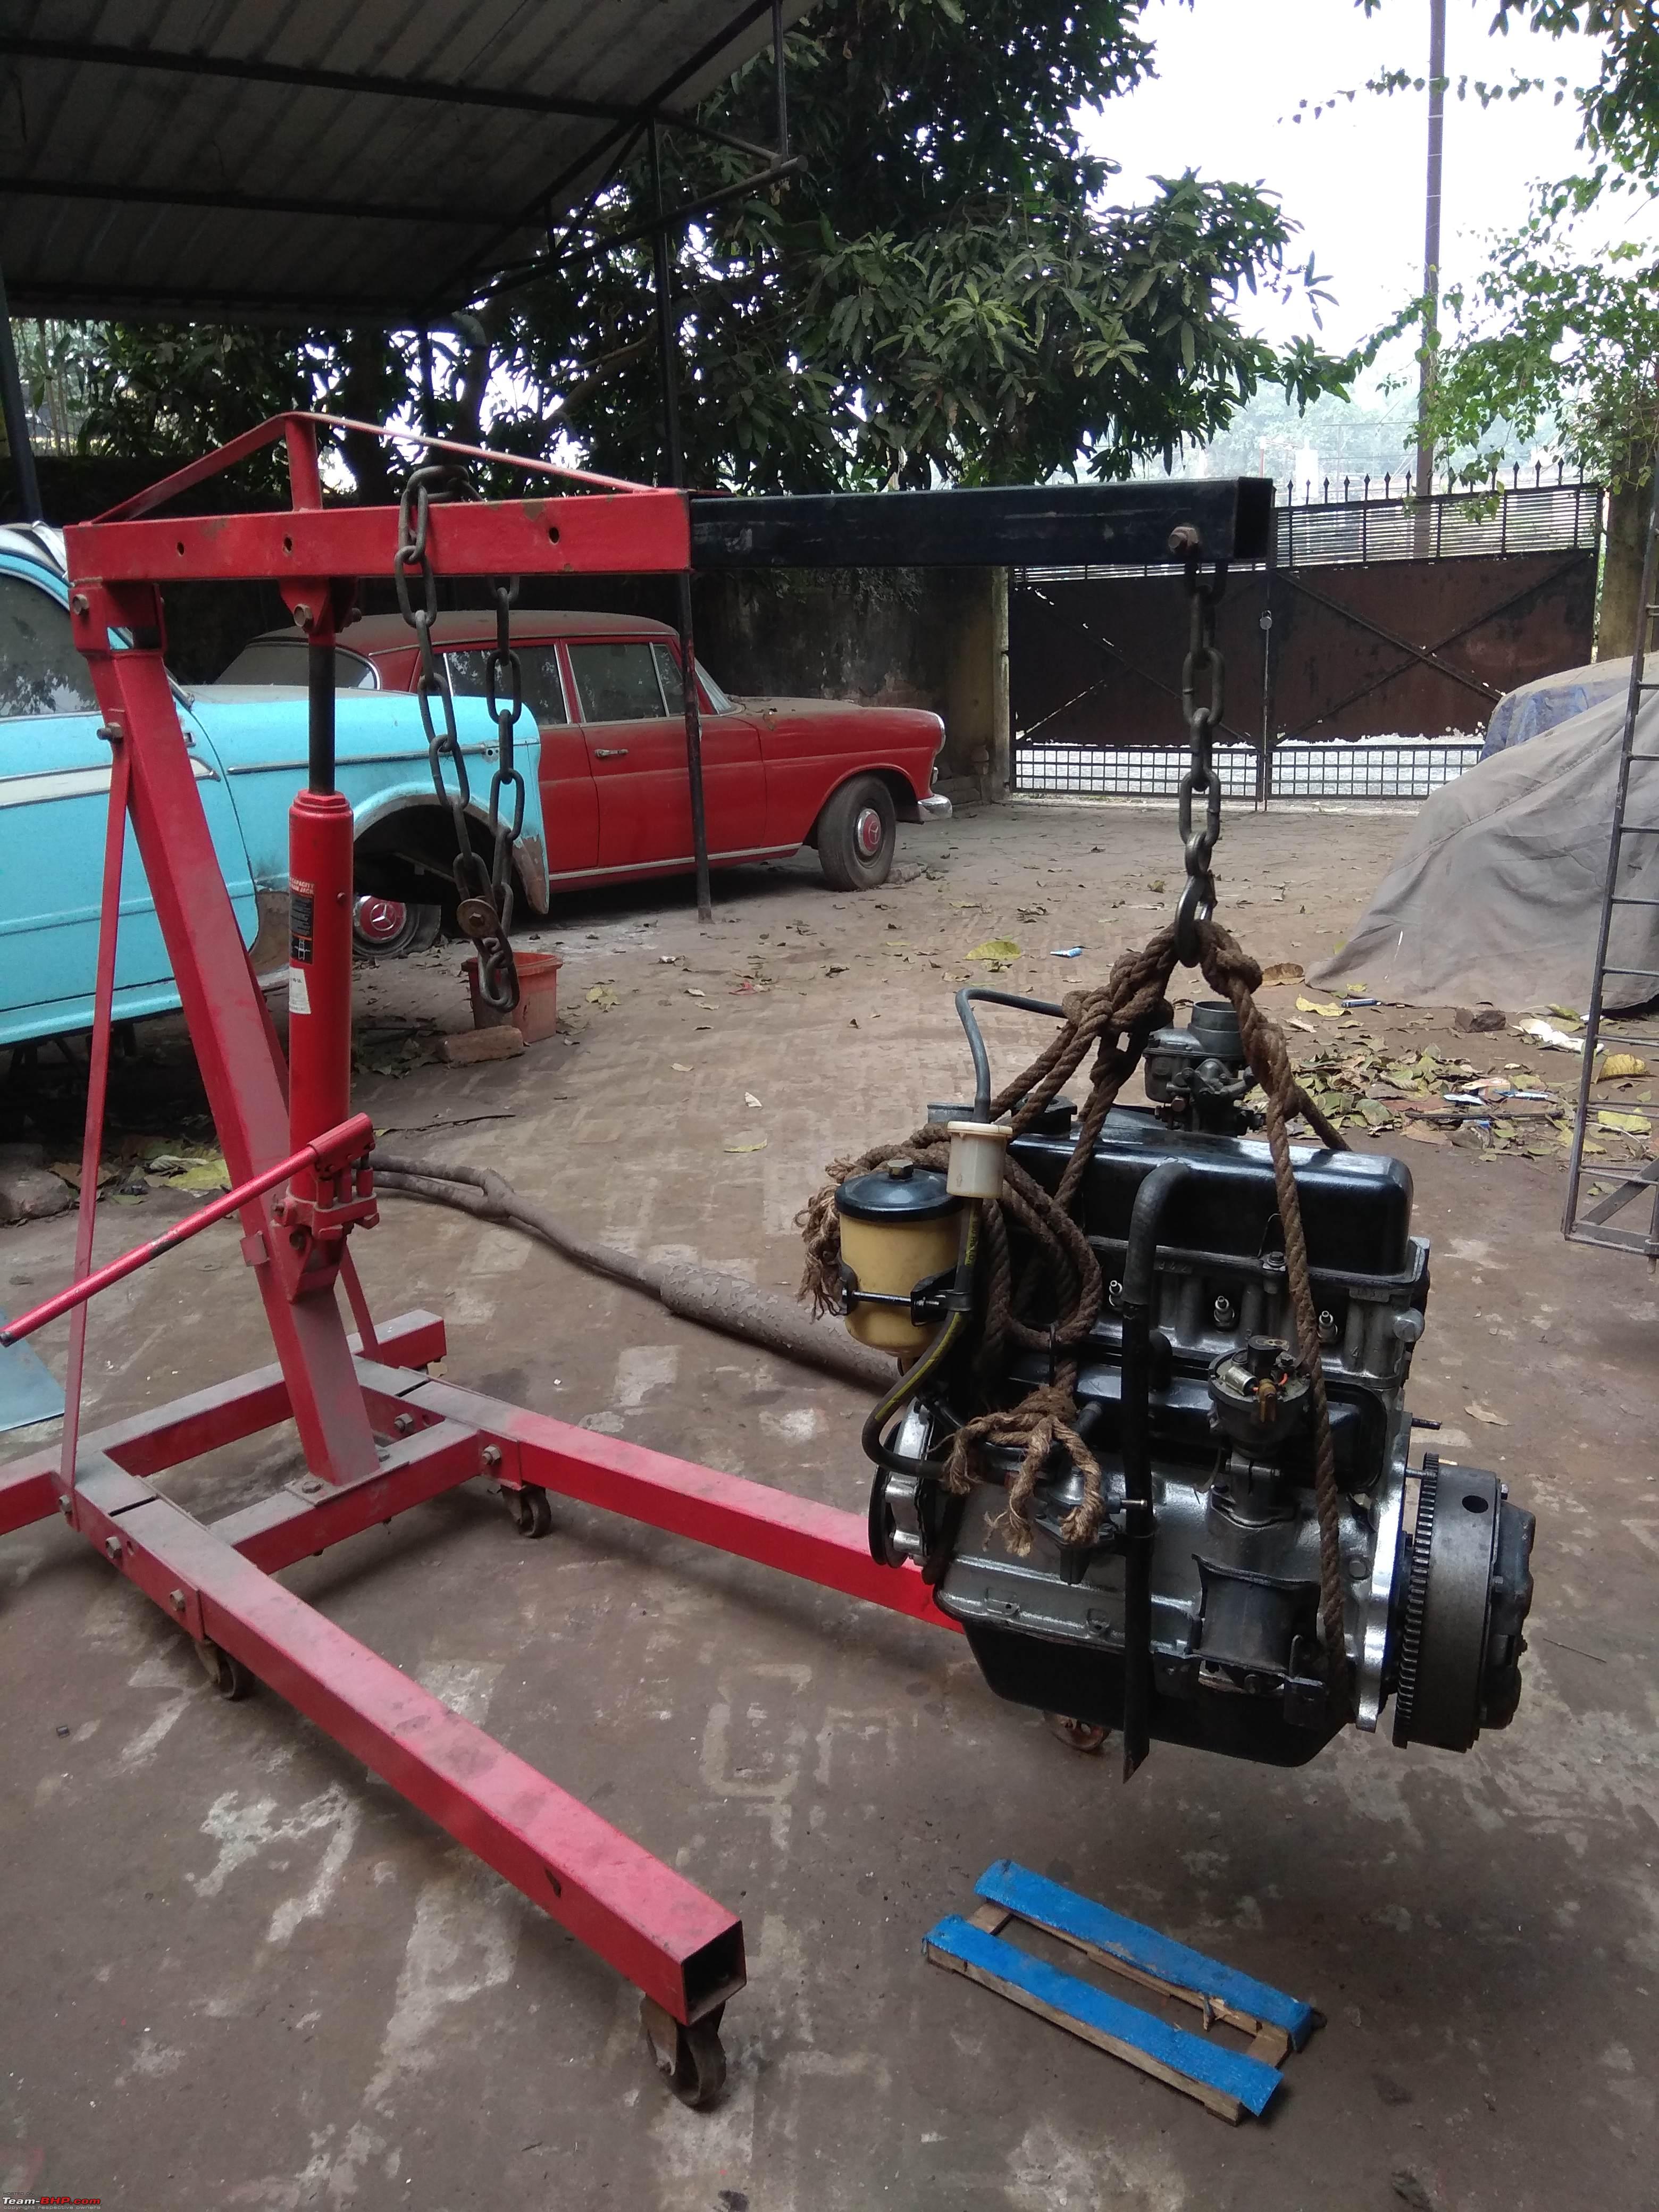   Engine's finally in!  I forgot to mentioned earlier, when the sub-frame was taken out, a pair of Magneti Marelli keys made in India under license by Globe Auto was found lying on the gearbox cradle The previous owners had wondered where the keys had disappeared. One possibility is that the speedo to gearbox area cover was open for repairs & someone leaned down with the keys in their shirt pocket when it fell & remained safely till we found it! The unused Weber carb with missing jets 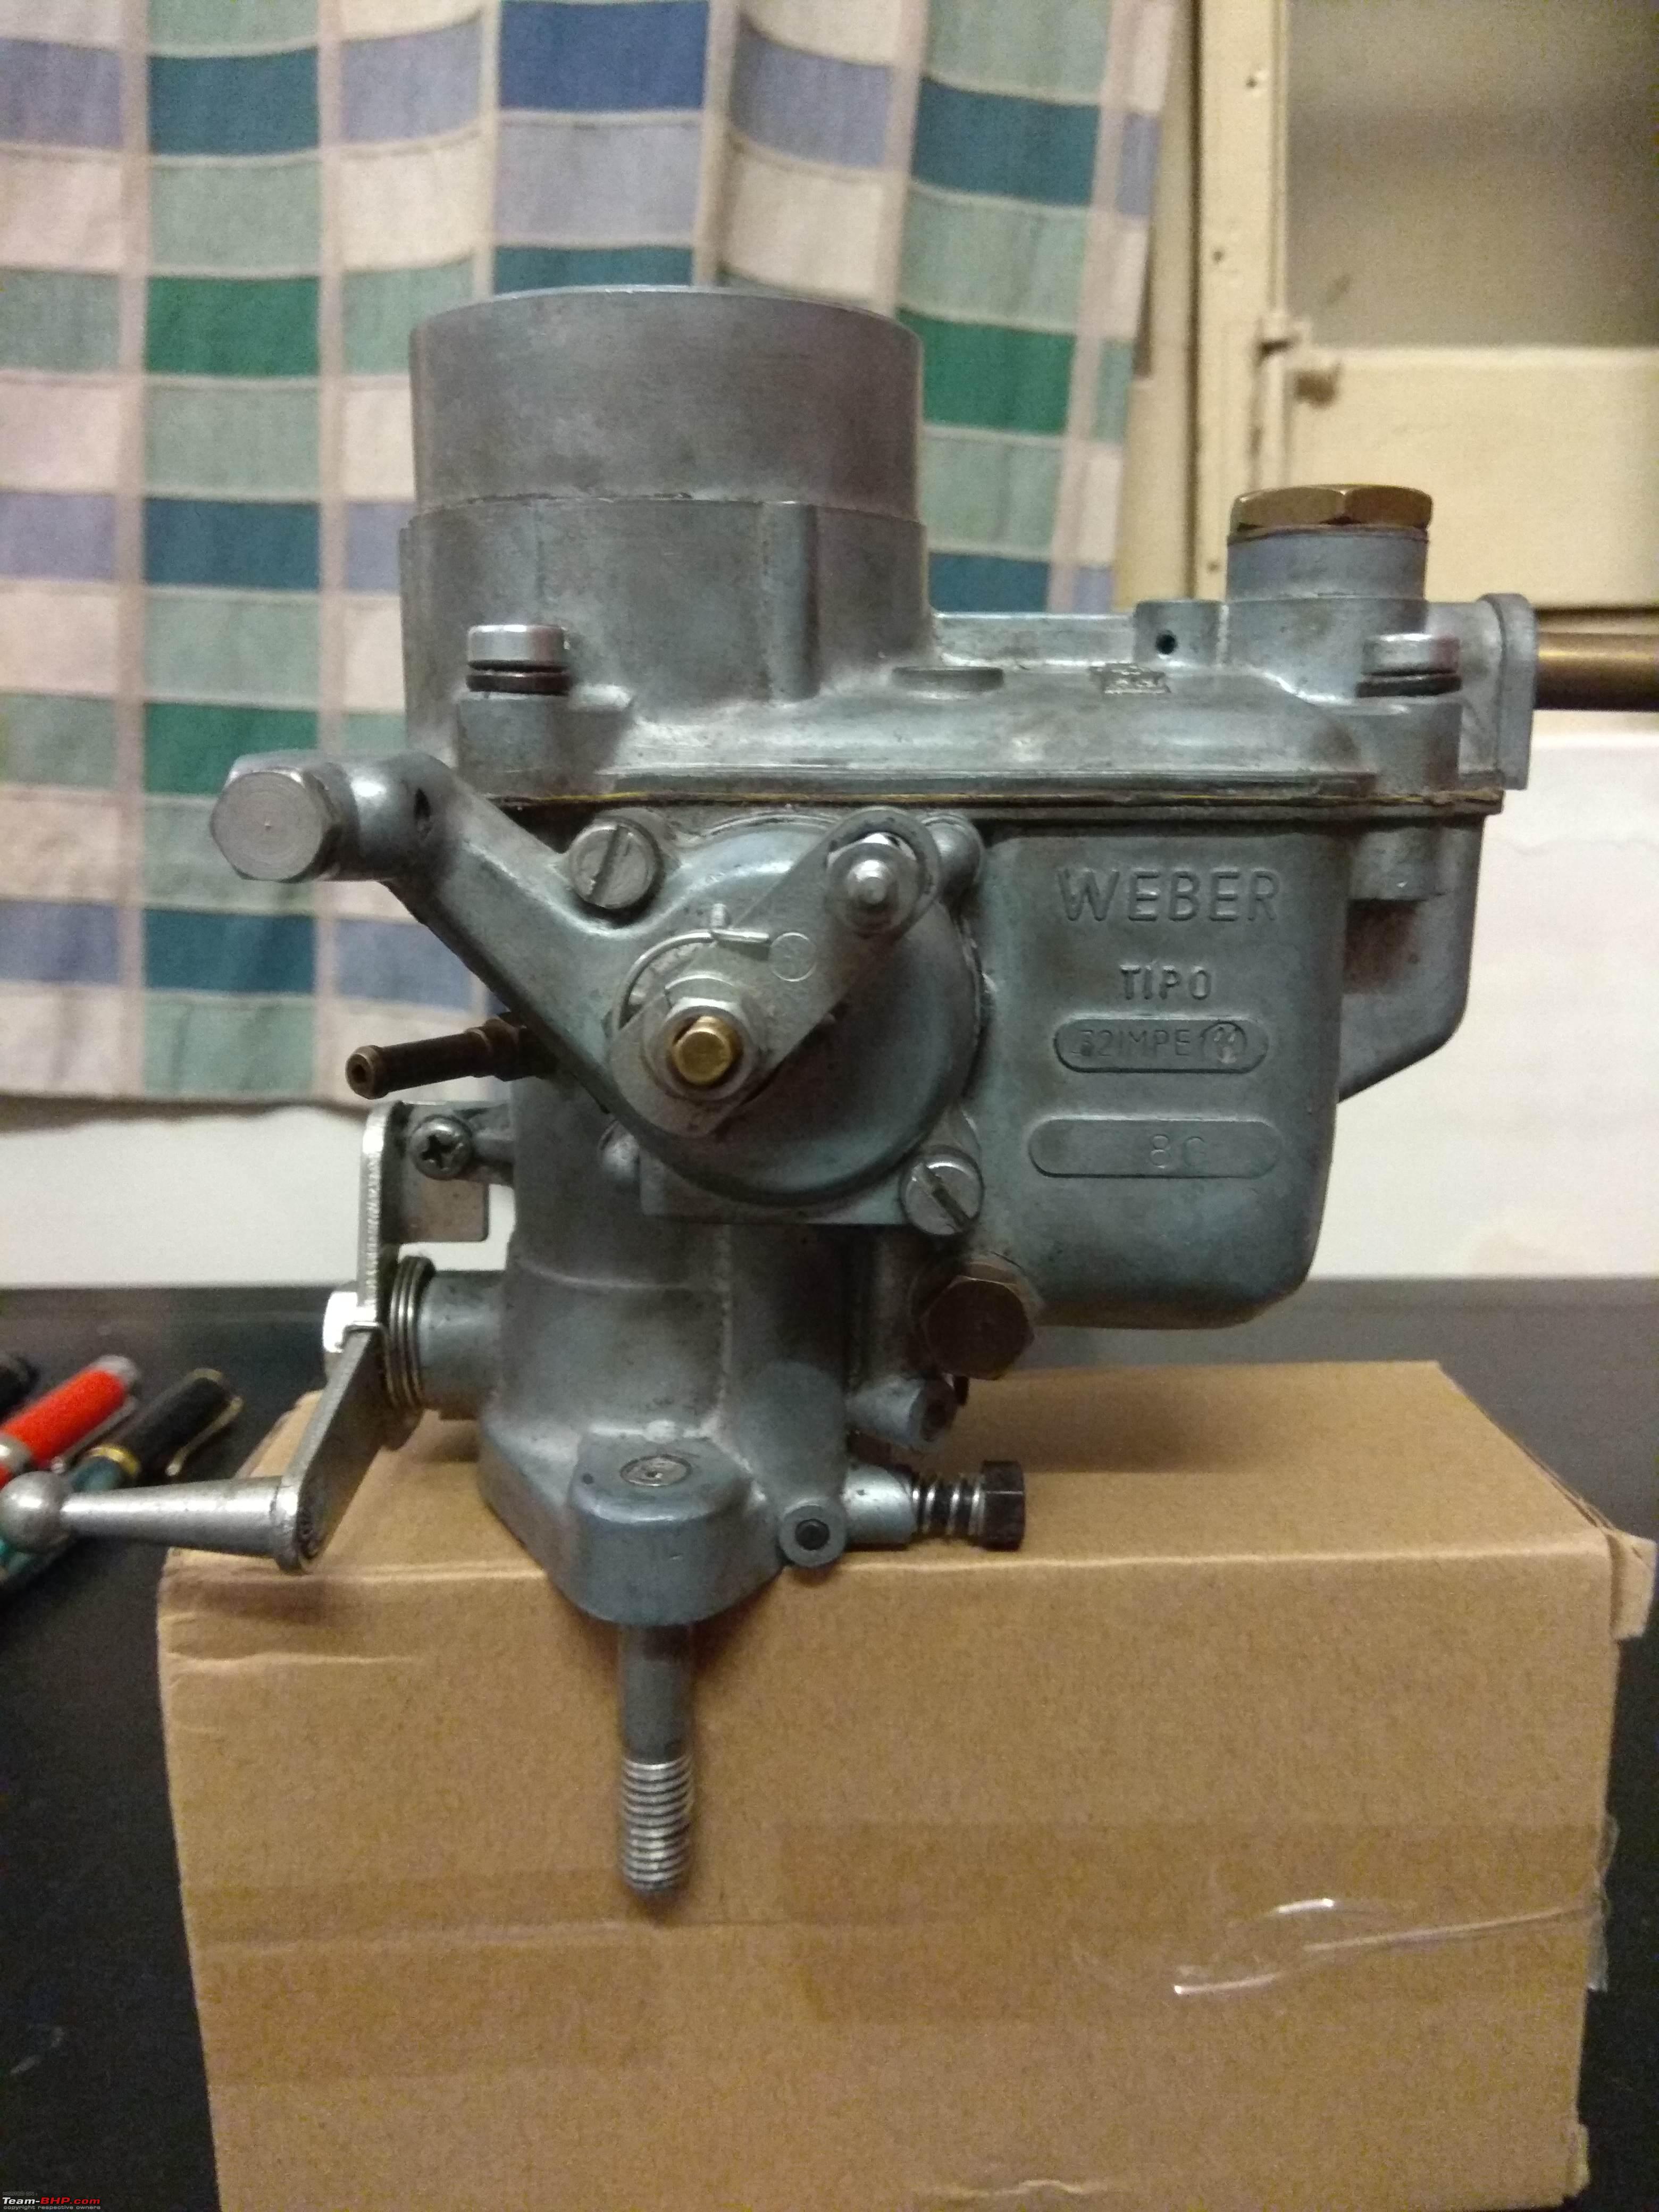 Top view showing the 7 jets that were required  New jets from Weber UK! The Weber went on to replace the factory fitted Solex 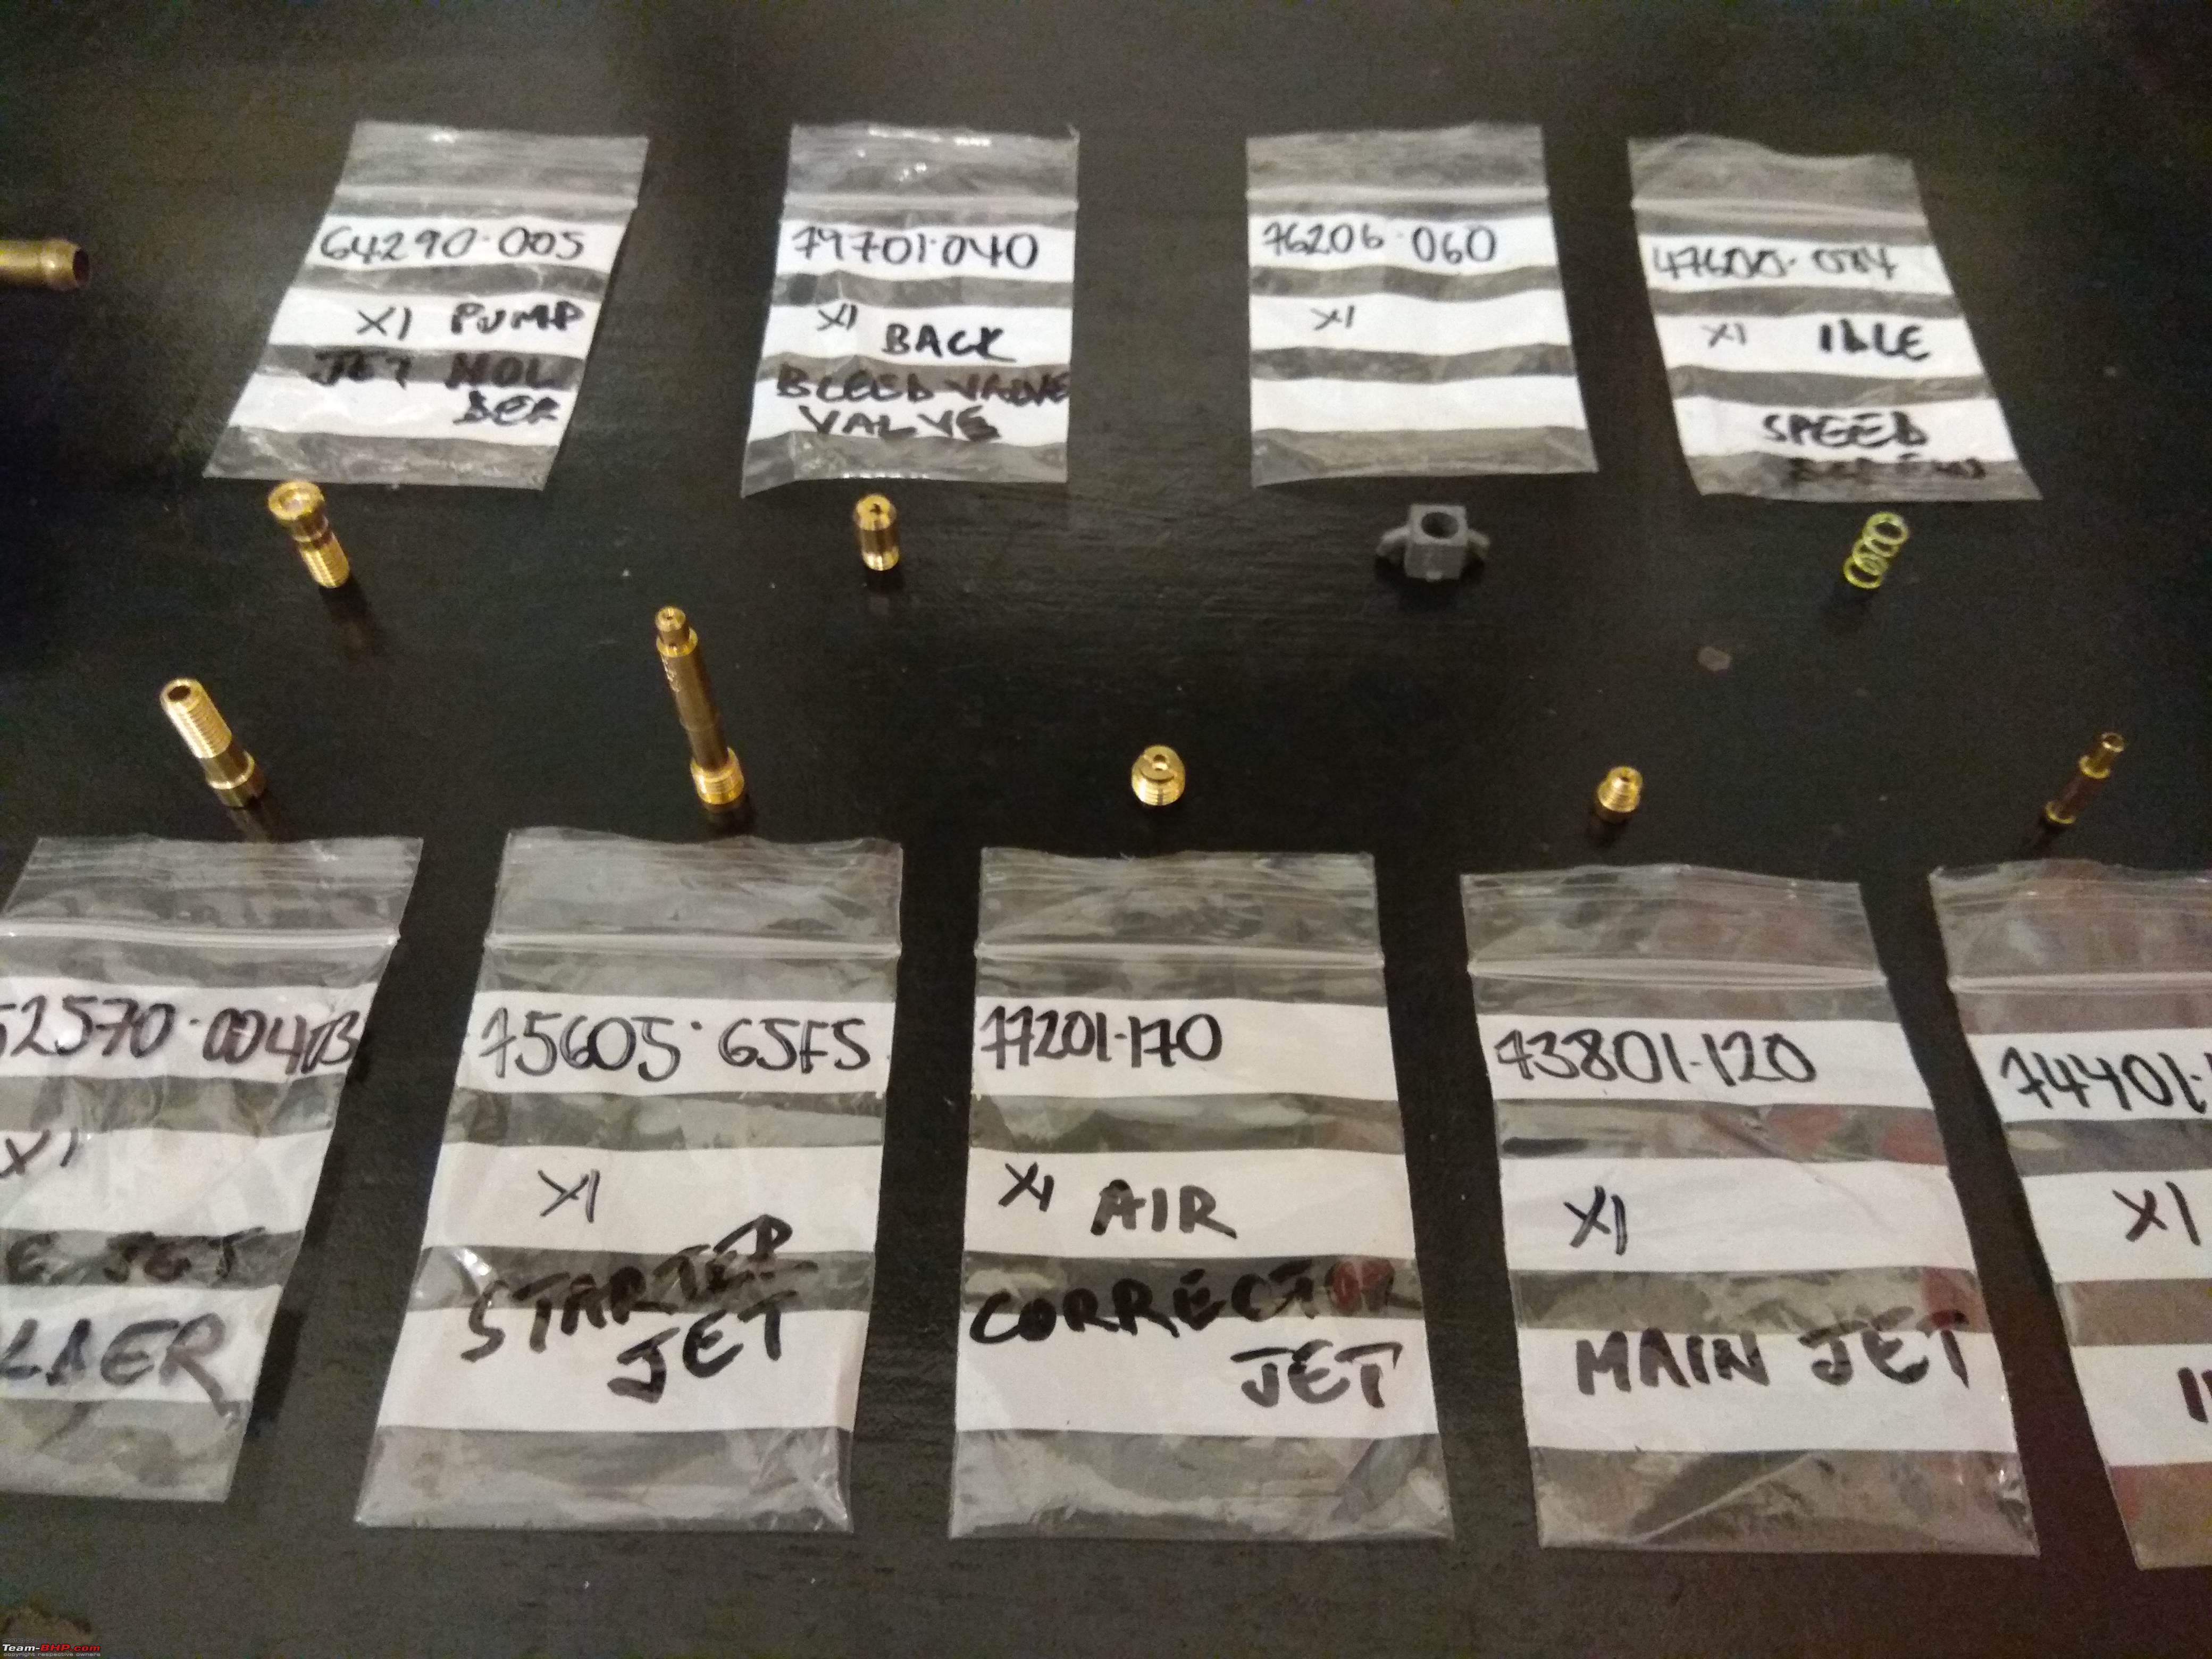 A correct NOS Italian fuel pump was arranged by the same friend who sourced the carb  |
|
| (18)
Thanks
|
| The following 18 BHPians Thank mbz180 for this useful post: | --gKrish--, arun1100, deehunk, harit, ilangop, karlosdeville, KartikeyaL, KPS, Leoshashi, manishalive, moralfibre, RWD, samsag12, sandeepmohan, V.Narayan, v12, vaasu, whitewing |
|
8th April 2019, 22:26
| #11 |
| Senior - BHPian Join Date: May 2006 Location: Bangalore
Posts: 1,147
Thanked: 1,971 Times
| This is simply amazing. It brings back memories of our own Premier Padmini 1963 model. I had worked on a similar restoration for it back in the day. Not as extensive as yours but I do seem to connect to every single component. I even recalled the fuel pump and we had the same and it used to overheat and stop pumping. In those days a wet cloth used to be placed in the fuel pump to make it work again  . It used to be a real adventure those days and you had to be mechanically inclined to truly be a good driver. . It used to be a real adventure those days and you had to be mechanically inclined to truly be a good driver. Your restoration efforts are par excellence. Waiting to see the finished product eagerly. All the best. |
|
| (2)
Thanks
|
| The following 2 BHPians Thank Traveler for this useful post: | arun1100, mbz180 |
| |
|
10th April 2019, 08:23
| #12 | |
| BHPian Join Date: Jul 2008 Location: bangalore
Posts: 53
Thanked: 85 Times
| Re: Indo-Italian PAL: 1963 Fiat 1100 Super Select "Bella" Quote:
After Super Select , it was Delight , President and then Padmini. | |
|
| (3)
Thanks
|
| The following 3 BHPians Thank ARUN.V for this useful post: | arun1100, mbz180, Stanher |
|
17th April 2019, 21:37
| #13 |
| BHPian Join Date: Jan 2010 Location: Kolkata
Posts: 894
Thanked: 1,027 Times
| Re: Indo-Italian PAL: 1963 Fiat 1100 Super Select "Bella" Electrical items, trims & other goodies Thankfully 202 had her original and now uber rare pull knobs for the fresh air duct, hand throttle & choke functions. She also had all 4 aluminium outer door handles. However several other parts were replaced with later, Indian made fittings like: Interior lamps Parking lamps Tail lamps Toggle switches for the main lights & instrument cluster License plate lamps Wiper arms & blades Ignition switch Headlamp units Rear view mirror Instrument cluster Some of the inside door lock handles & window winders were local steel items Many other items small items too had been replaced over the course of 50 years. So while the workshop was concentrating on the car itself, I decided to do what I am best at, research & import parts My web searches resulted in buying things from mainland Italy, Sicily, France, Germany, Latvia, UK, USA & Australia! Some pics of the parts I collected & some other before after pics of individual items: At one point of time, one room in my house had an entire side filled with parts boxes!  Assorted parts: Trunk seals (Indian seals were useless I found), add-on brake & reverse lamps, a pull strap, air filter element, spare tail lamp lense, rubber stops, license plate SS frame, a parking lamp, an NOS unit for the lamp & turn signal combi switch etc. 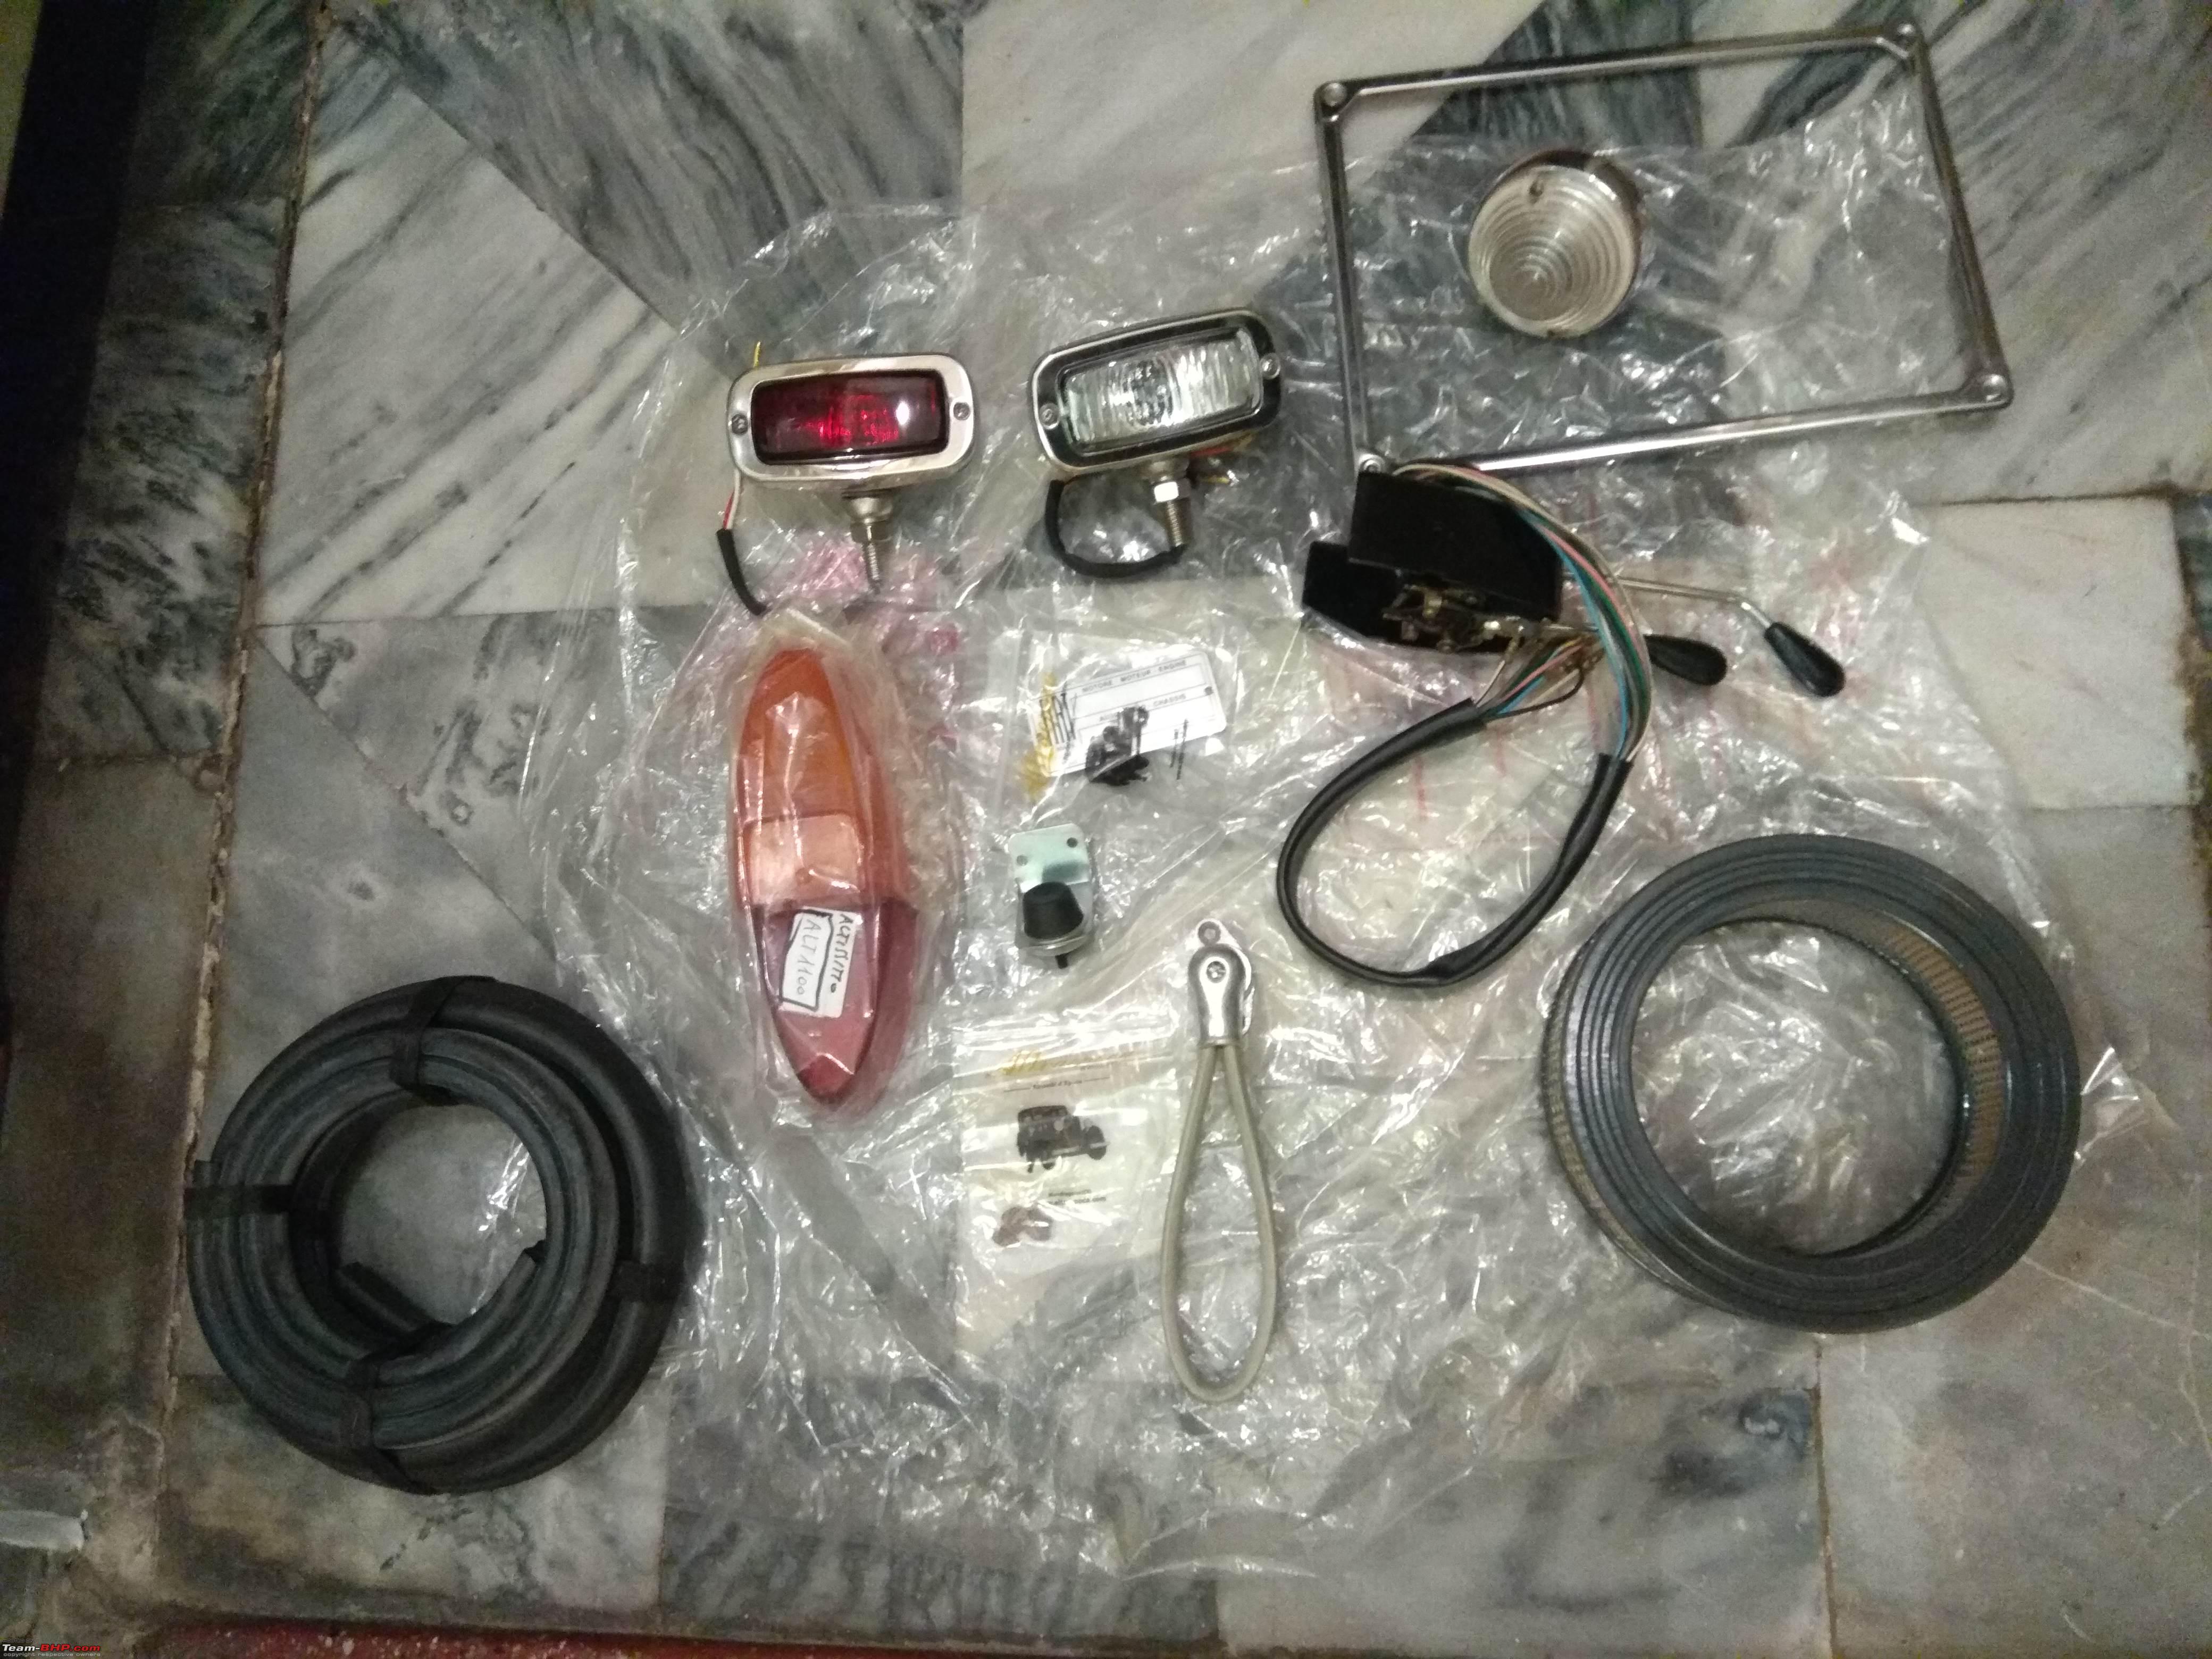 EPDM hoses, a new Magneti Marelli ignition coil, green colour coded ignition leads, new parking lamp seals, windscreen washer nozzles, toggle switches & escutcheons, etc.  Grille emblem (check out the cool detailing), warning lamp (jewel lamp), trunk lock unit, interior lamps 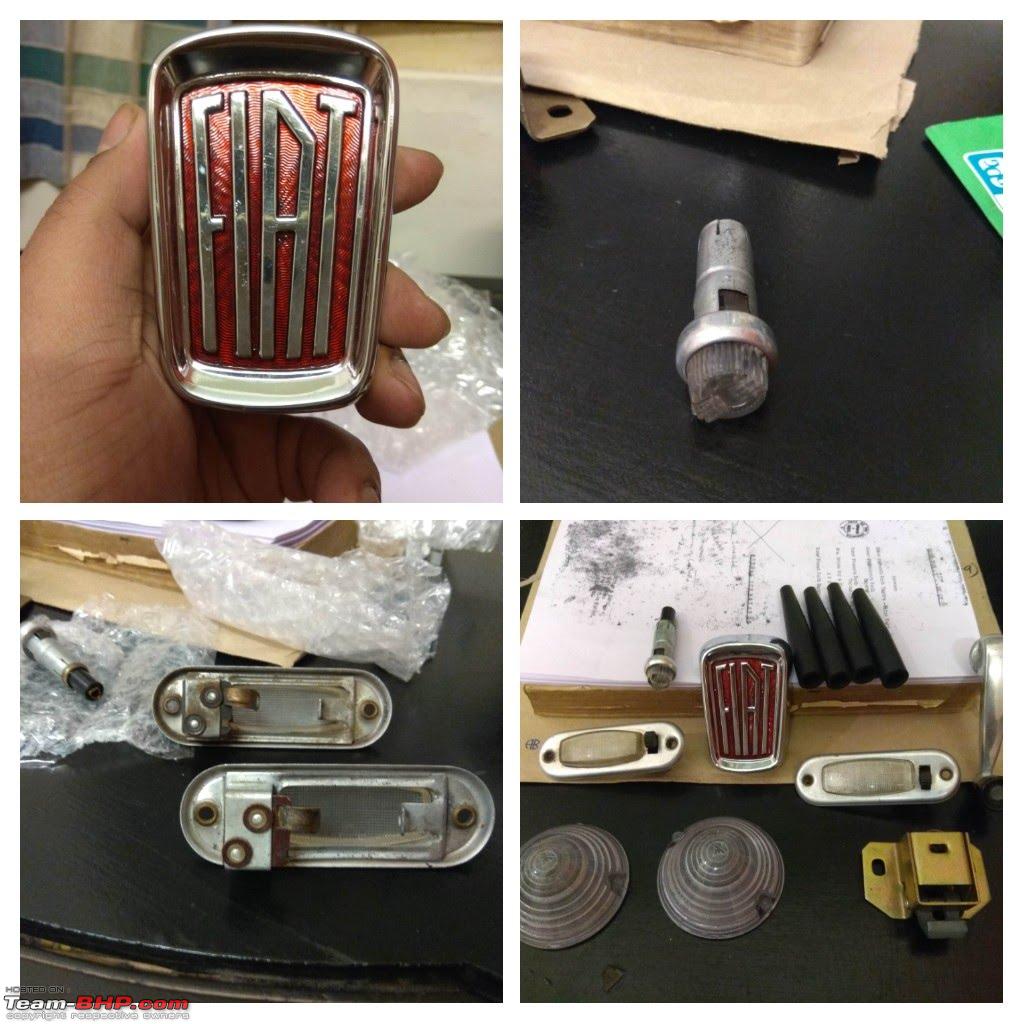 202 was missing her washer bag. After a lot of hunting I found this correct CAVIS washer bag in decent used condition. 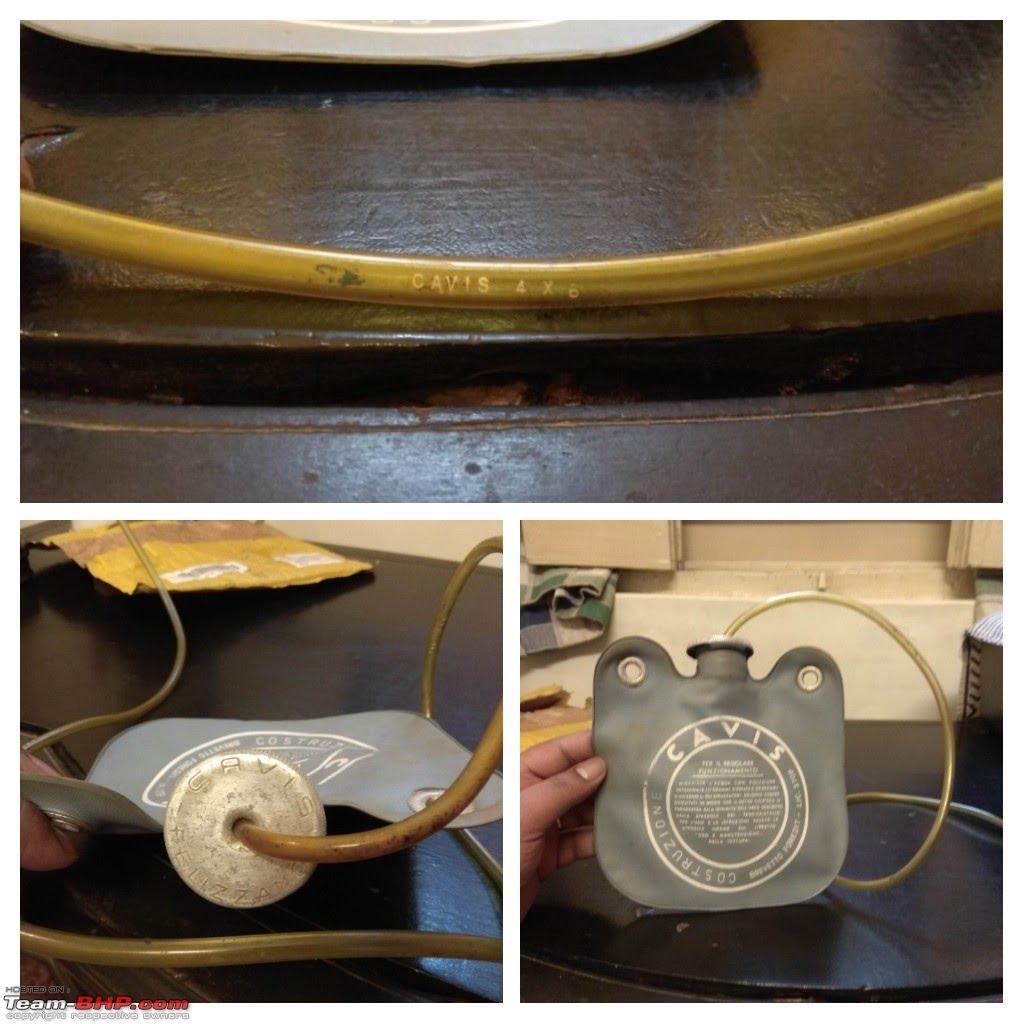 The ignition switch when I bought the car & an NOS Sipea unit to replace it with the key. I also bought 2 key blanks.  Top: how the pull knobs under the dash looked when I bought the car. Bottom: How they turned out after some careful & patient cleaning. 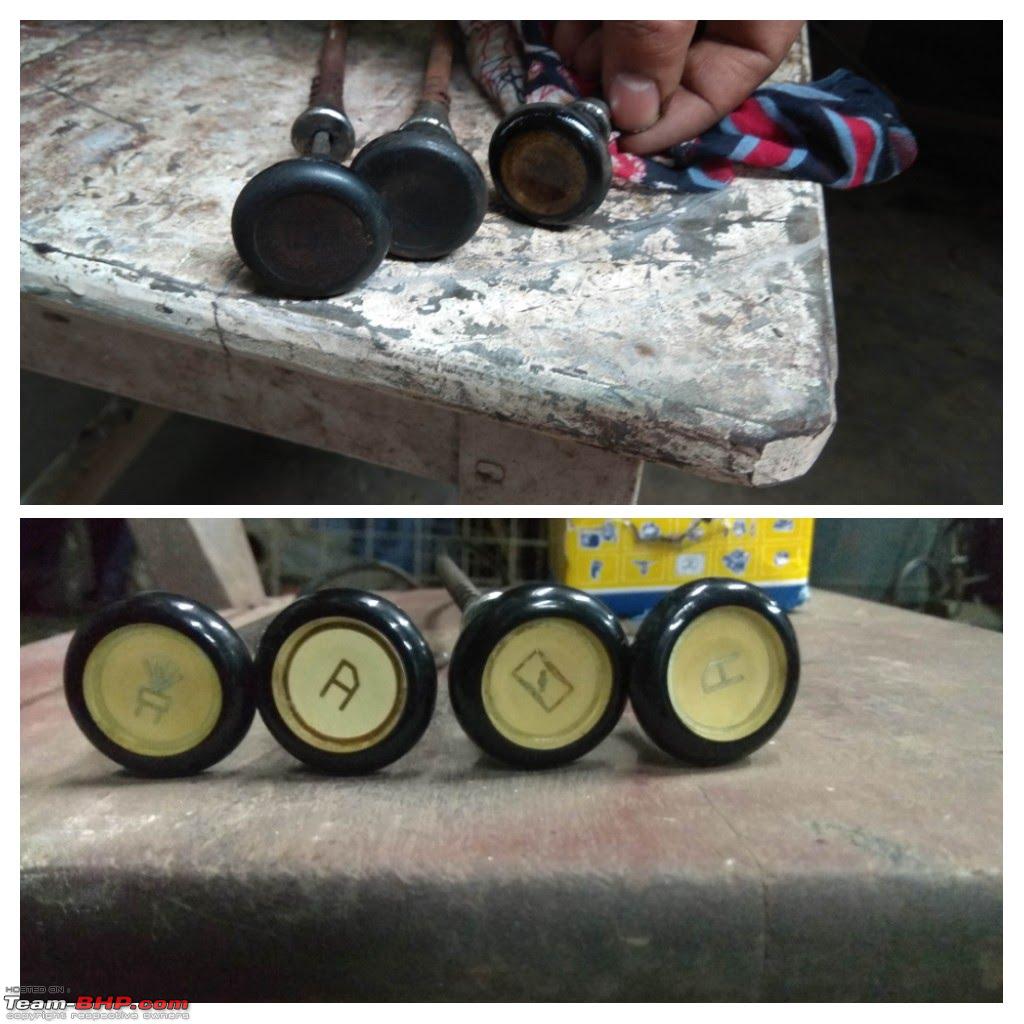 NOS horn button unit - I like to take things apart, clean & study them (and put them back together!) 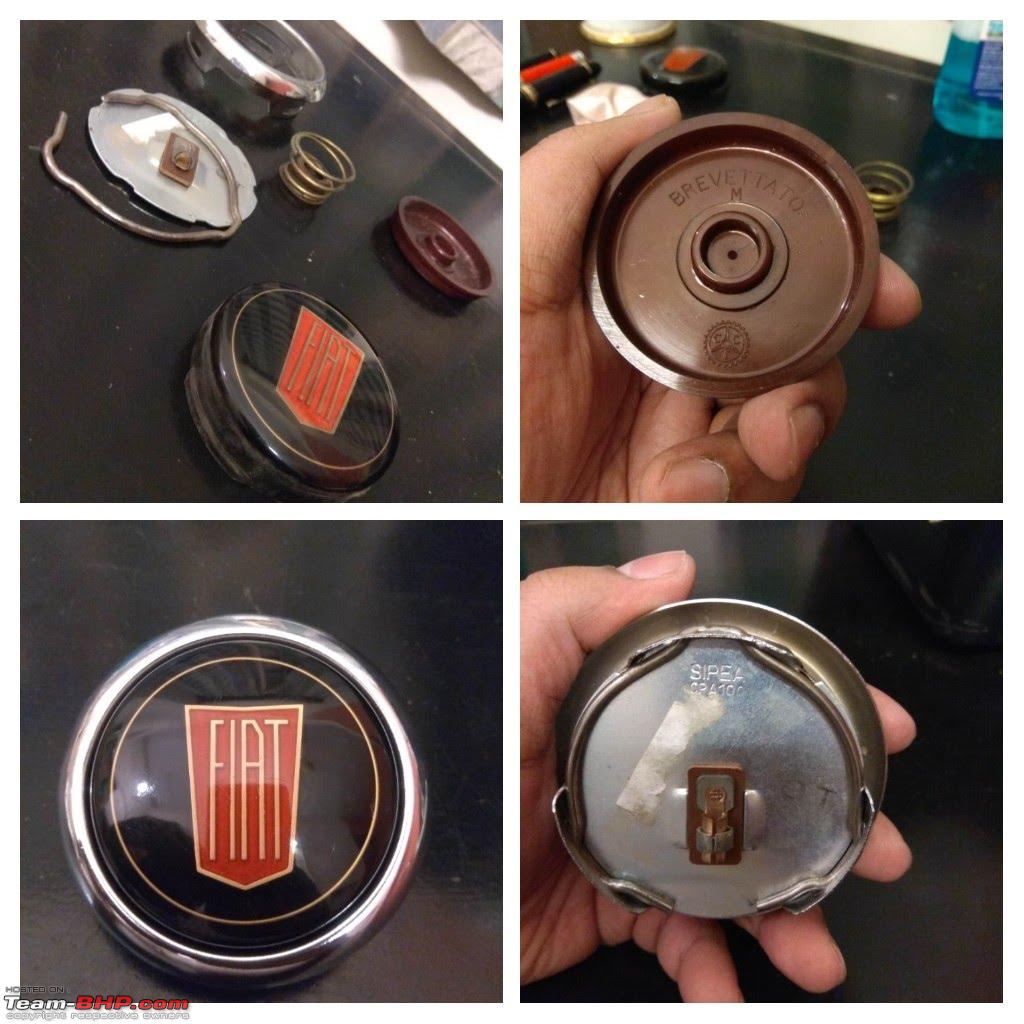 Old & new push button trunk opener  A prized purchase, an NOS in box Magneti Marelli horn. Boy is she loud! 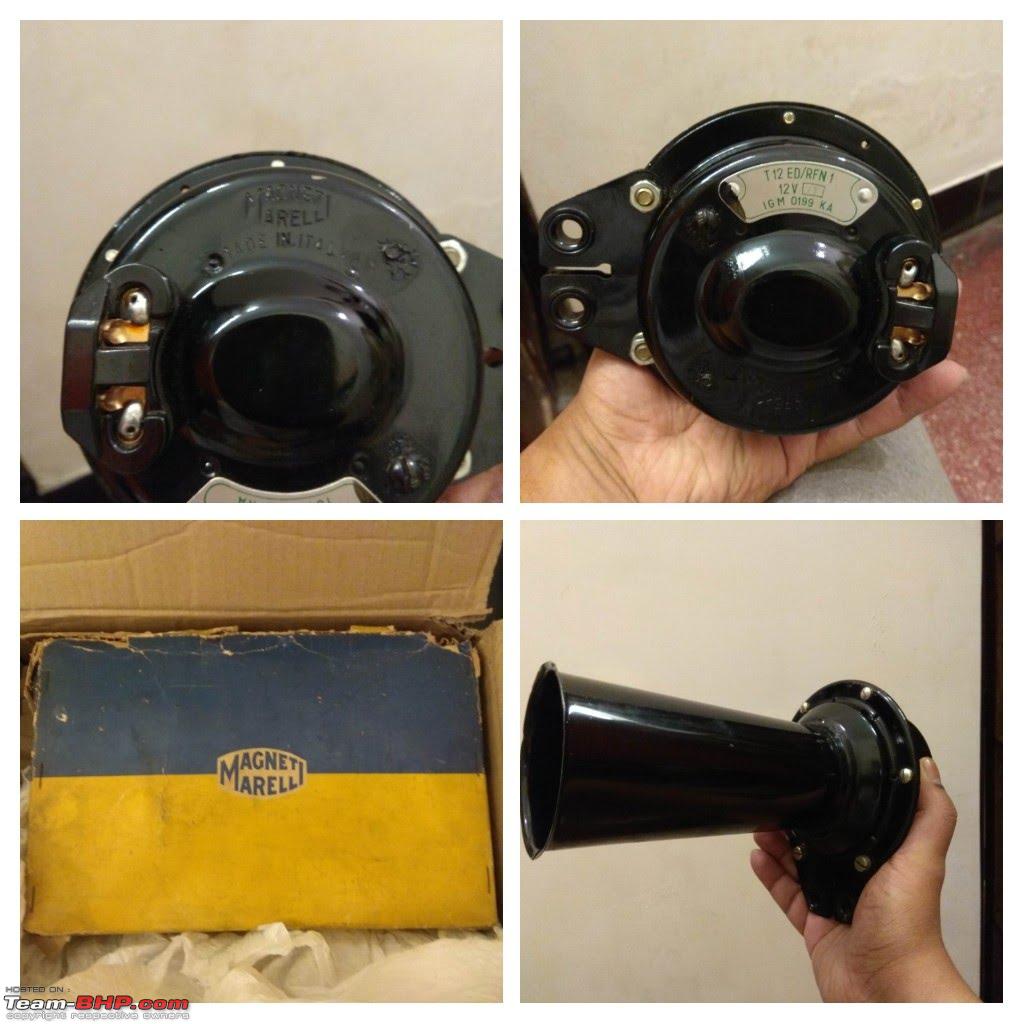 I purchased a new set of spring clamps for the hub caps from Bangalore. They were useless. Thankfully I found an Italian vendor selling spring clamps for our cars. I am using them & have yet to lose a hubcap in over 1600 kms of driving. 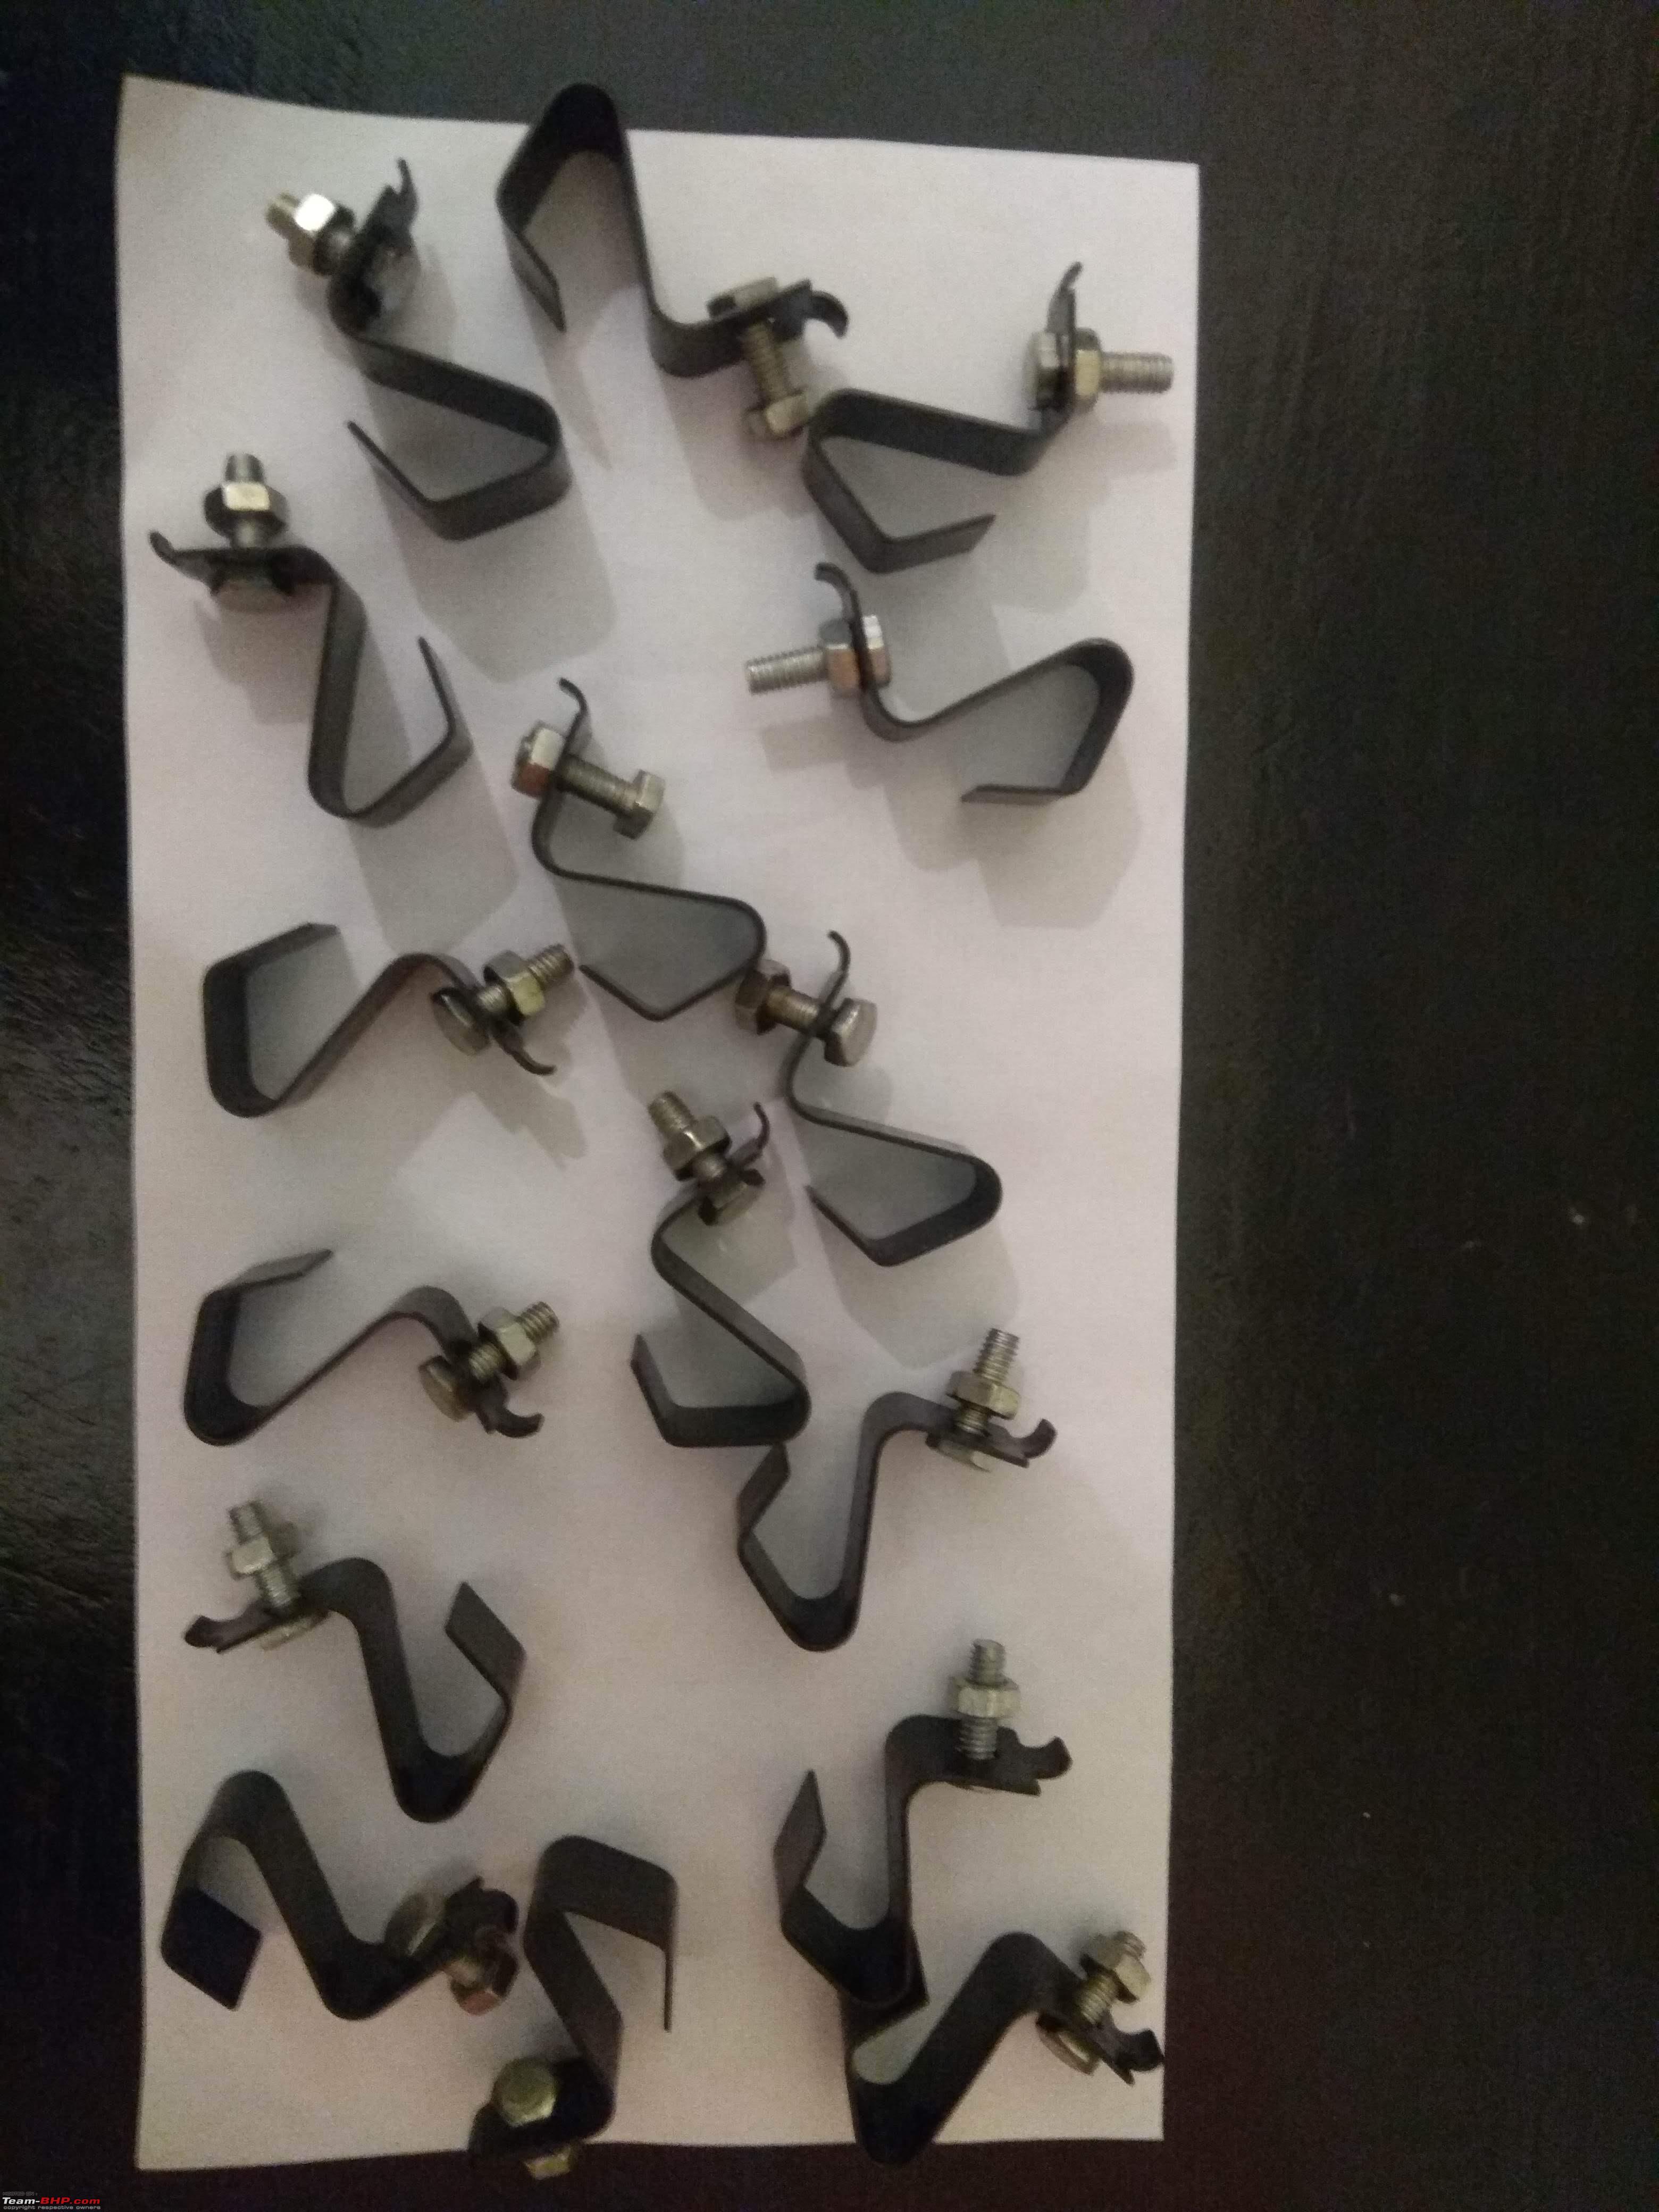 Carello headlamp bulb holders. Note that all the electrical connections were redone in the original style with brass 'bullet' connectors soldered to the wires; a very time consuming process. 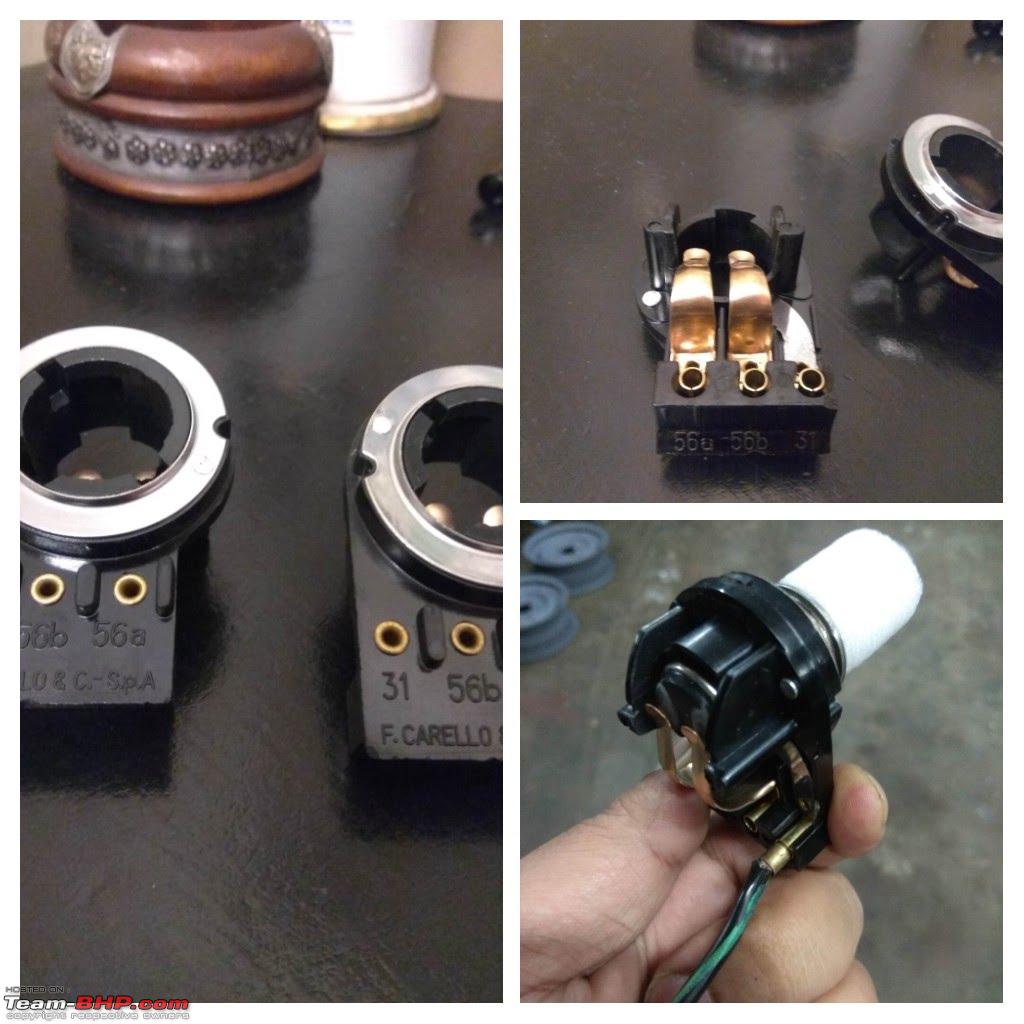 And NOS Carello headlamp units to go with the bulb holders! I was dreading opening the box in case they had broken; it was such a relief to see them intact. On the side an NOS pair of Giuntini turn signal units.  One of the NOS pull straps. You can only pull down the strap towards you so the units are side specific. However, we found after disassembling the spring mechanism inside, it's possible to re-orient the spring so that a left side unit can work on the right & vice versa  Although the outside door handles were original & aluminium (with the drivers door lock functional but with worn out tumblers), I had to separately collected missing aluminium lock & window handles for the inside. I was surprised to see how well they brightened up after buffing! Also bought the trunk lid catch & a wrong set of wiper arms - for a Fiat 500!   A new radiator cap  And a period NOS cap for special occasions  Fuel filler cap  Engine oil filler cap 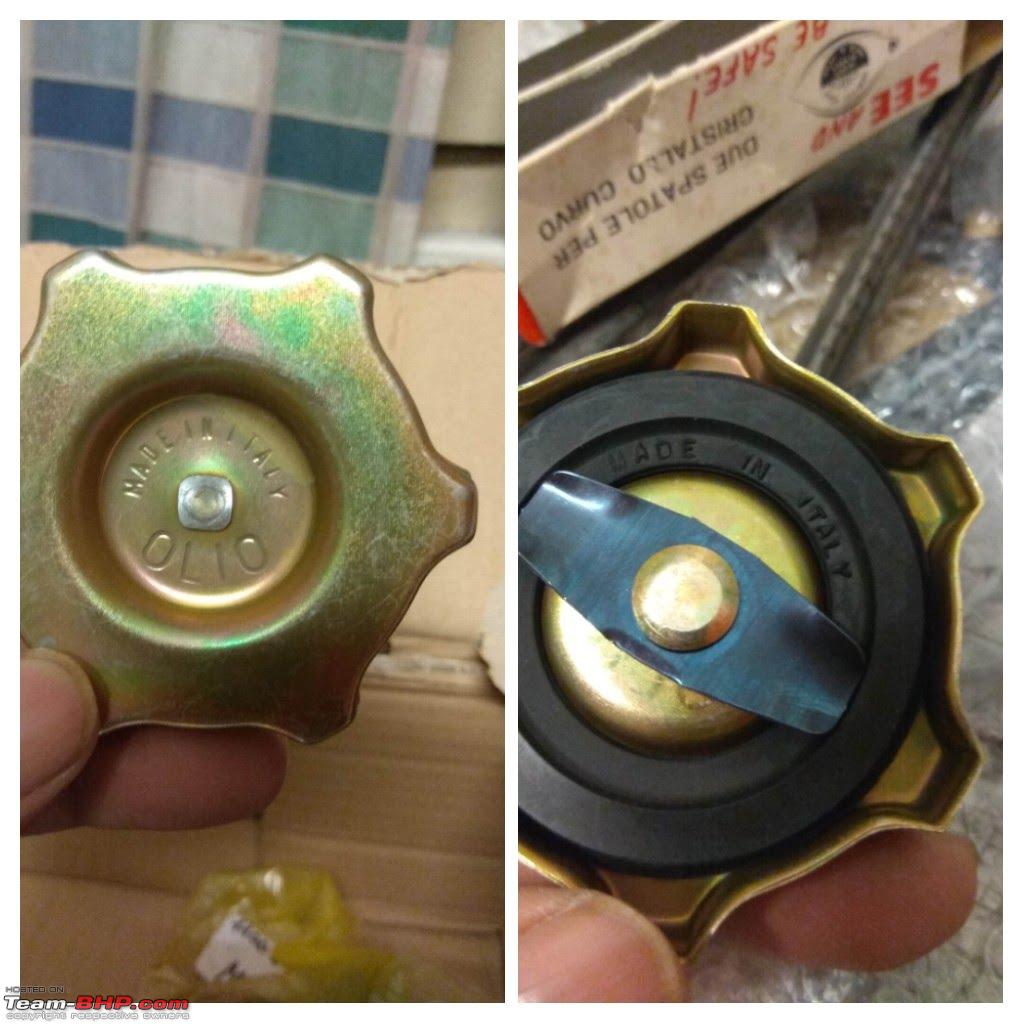 Italian parking lamp units. 1 was unused the other in good used condition. Again, I took them apart, cleaned them & replaced the old seals with the new ones. They had Fiat marked bulbs.  Tail lamps were carried by hand by a friend who lives in France. The reflectors, lenses & bulbs were dusty but after a bit of TLC, they cleaned up real good. Check out the 'Fiat' marked bulb! 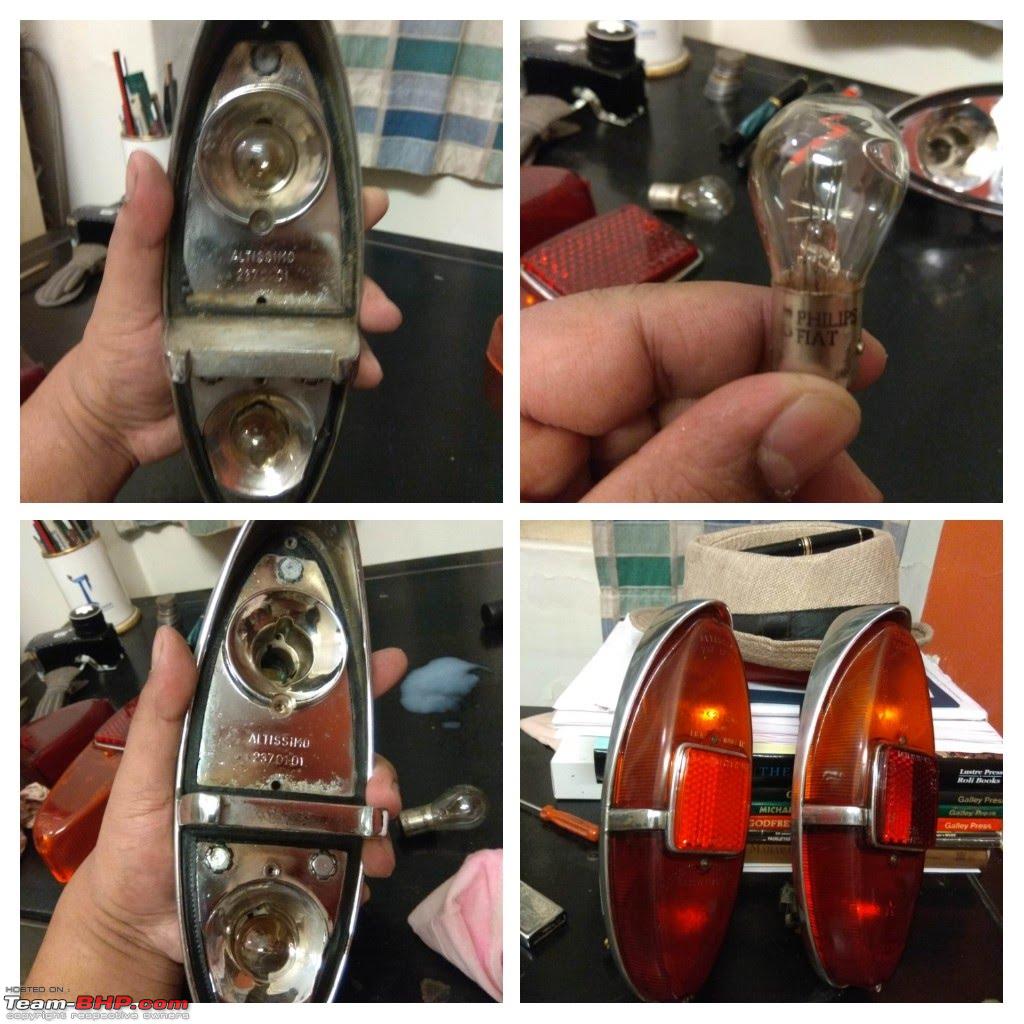 License plate bulb units 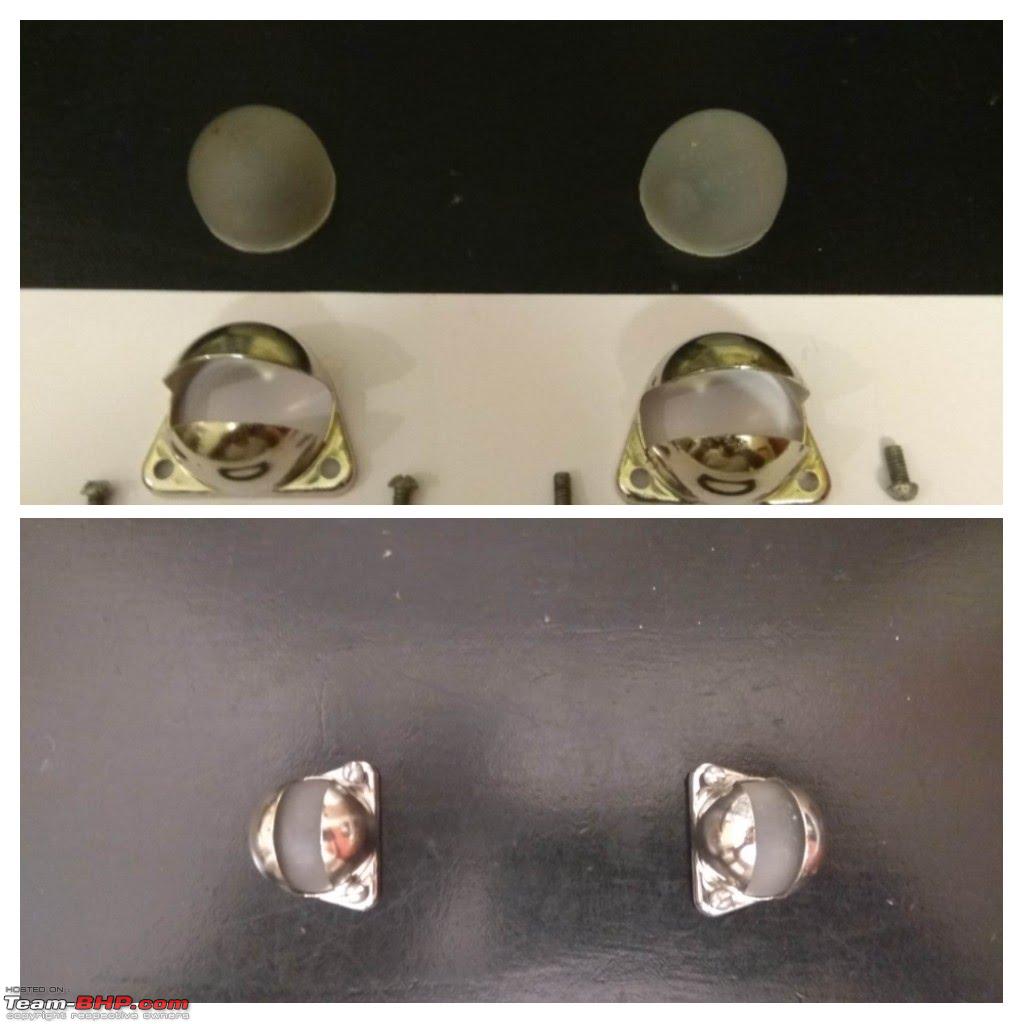 A friend who's been a huge help (& fellow bhpian) sent me his spare under dash plate with the ultra rare SS strips. Mine were totally gone, both strip & panel. They really completed the dash area when fitted. [center] 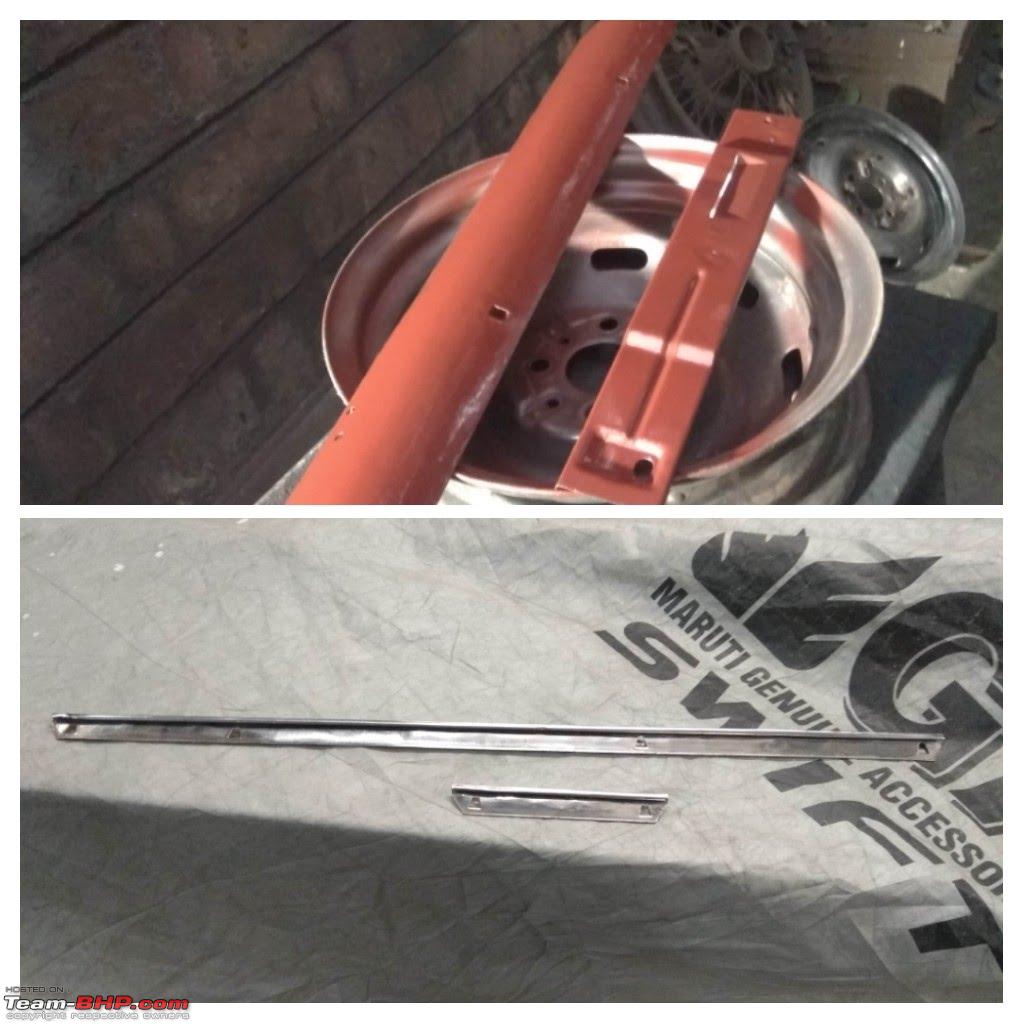 Had to have these '103' (signifying the model 1100/103) pedal covers!  I was told in advance that the original vent window lock would be unusable since we were replacing all the window glasses. So I brought in a pair of NOS units (these are the ones prior to the push button style)  202 did not have her original rear view mirror. I couldn't find a good piece in India at a decent price. I was surprised to see that the Italian units are made of Bakelite & are overall of better quality, especially the frosted glass where the lamp is. Note the sticker from 1956; I wanted to retain it after refurbishing & to my delight, the workshop did retain it! 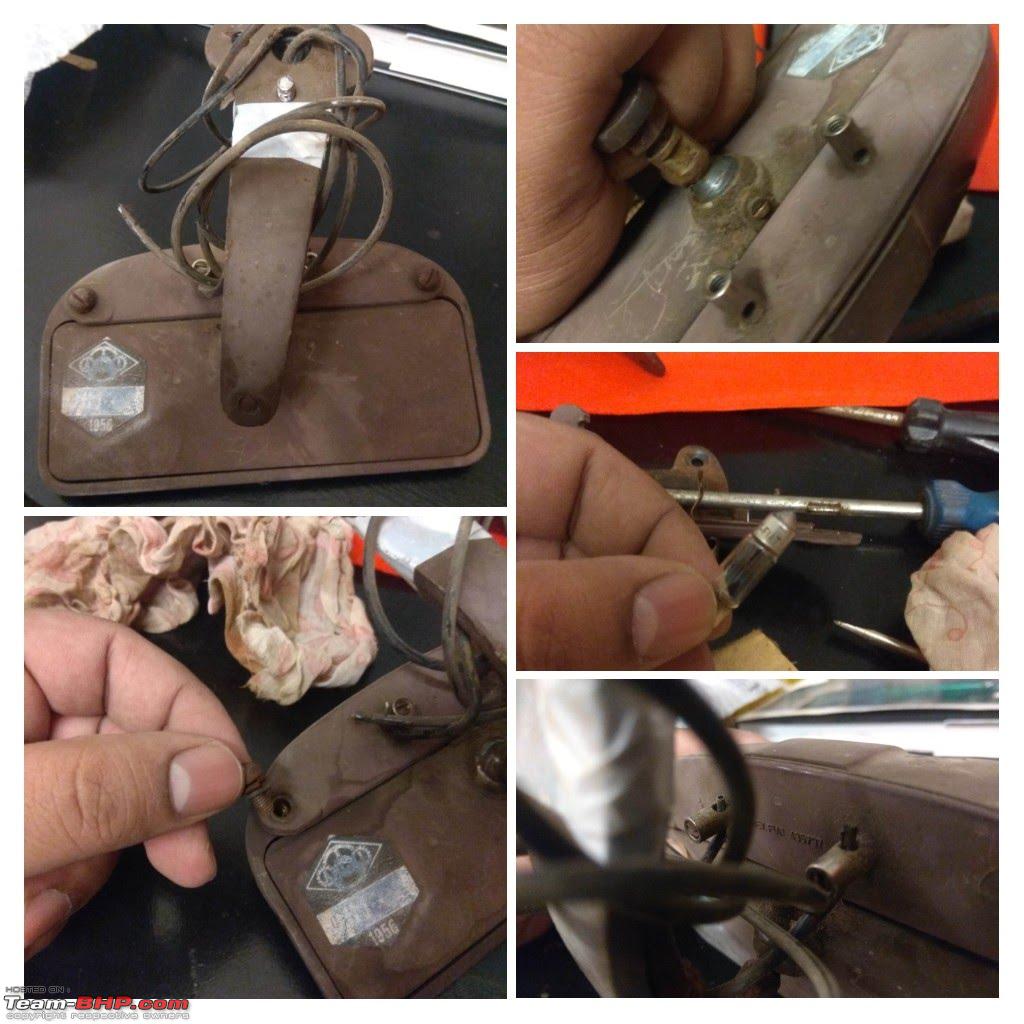 Another prized buy, a used leather & enamel key fob with great patina from the 1960s for Fiat's. It came with a very nice letter. 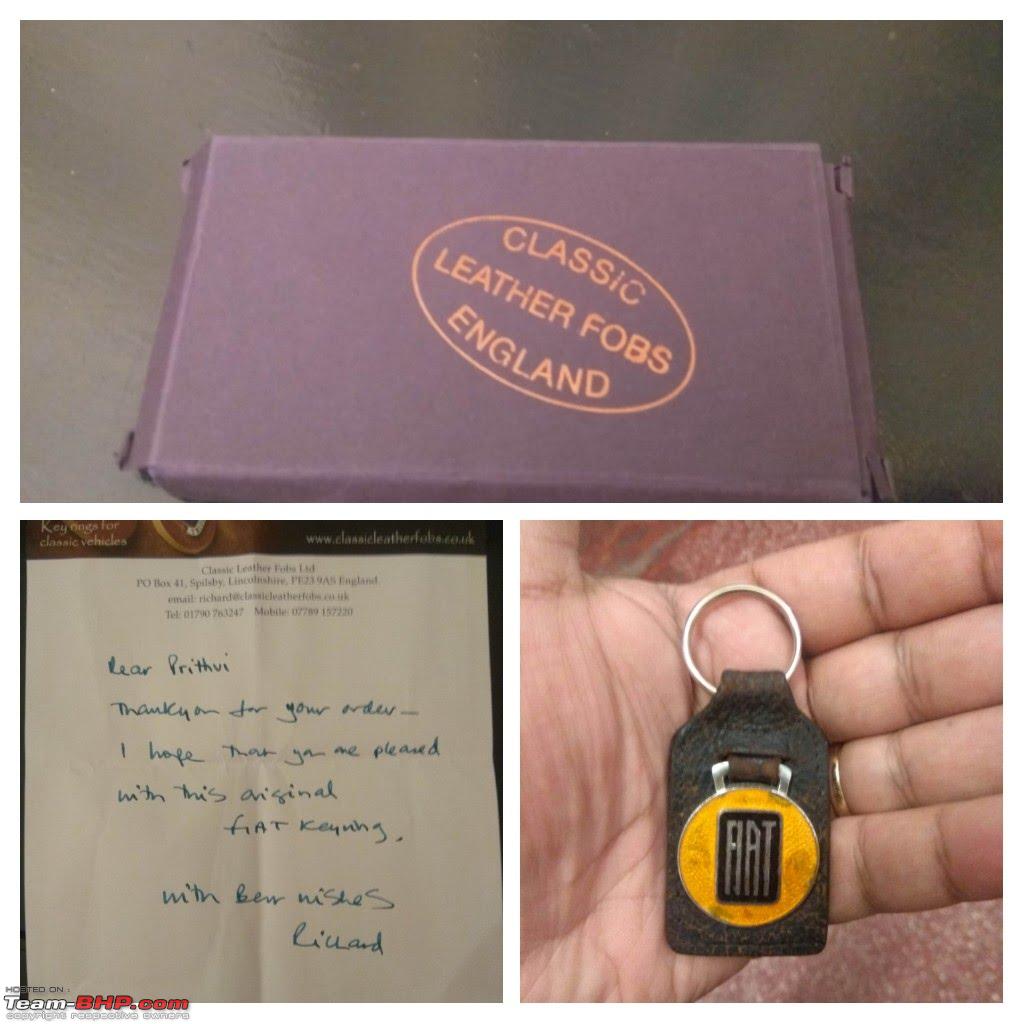 NOS Carello Trico wiper arms & blades  Will post more later...! |
|
| (10)
Thanks
|
| The following 10 BHPians Thank mbz180 for this useful post: | 1100D, AnkitAnimesh, arvindmanju, harit, ilangop, karlosdeville, KartikeyaL, V.Narayan, vaasu, Viju |
|
17th April 2019, 22:37
| #14 |
| Senior - BHPian | Re: Indo-Italian PAL: 1963 Fiat 1100 Super Select "Bella" Great thread and love the detailed description, the amount of work you have put in this car is commendable and inspirational.  Can totally connect with you regarding research and buying parts from abroad, though its hard on the pocket but joy of opening a package of goodies is just amazing. Look forward to your posts. Cheers Kartik |
|
| (1)
Thanks
|
| The following BHPian Thanks KartikeyaL for this useful post: | mbz180 |
|
18th April 2019, 14:05
| #15 | |
| Senior - BHPian | Re: Indo-Italian PAL: 1963 Fiat 1100 Super Select "Bella" What a wonderful thread, am glued on. Rated 5 stars!! Quote:
| |
|
| (1)
Thanks
|
| The following BHPian Thanks 1100D for this useful post: | mbz180 |
|