| |||||||
| Search Forums |
| Advanced Search |
| Go to Page... |
 |
| Search this Thread |  16,039 views |
| | #1 |
| BHPian Join Date: Jan 2010 Location: Kolkata
Posts: 894
Thanked: 1,027 Times
| A mini restoration of a 1949 Citroen Slough (UK) built Traction Avant 15-6 A few days back, Indrojit suggested that I start a thread on the restoration of adkol's Citroen. Thanks for giving me the idea Indrojit. However the work done was not a restoration, it was a mini restoration which addressed some areas of the car that needed urgent work. So here's how things developed: 17th December, 2011. 2 of my main mechanics came up to me in the morning and were lamenting that we didnít have any car to participate in the Statesman Rally. They obviously had something in mind and then with great excitement they exclaimed that we should fix up adkolís 1949 Citroen Slough (UK) built15-6 since they had fixed the clutch around 2 months back. They were very enthusiastic, I wasnít. Finally I gave in to their repeated pleas and visible enthusiasm and I agreed to speak with adkol. My mechanics just wanted to have some fun by taking the car to the rally. It was a Saturday and we didnít know when the rally would take place; I was hoping that it would be on the 2nd or 3rd week of Jan, 2012 but I was told that that the newspaper said 8th Jan! So I told my mechs that if we are to enter with the car made roadworthy, we would need to bring the car to my garage ASAP. They didnít have any problem with going over to adkolís place early morning the next day (Sunday) and drive the car back. I too agreed but I told them that I would need to get the green signal from the owner for all this. The same evening I spoke to adkol and he said that if we were confident of finishing the required work then we were most welcome to bring the car to my garage and do the work. I was excited, my mechs even more so! So on Sunday morning we went with necessary tools in my M800 (I like calling my 20 year trusty steed that) and arrived at adkolís place. Adkol being an early riser was next to the car waiting and was a little apprehensive about driving the car to my place around 15 km away. Now I know that 15 km doesnít sound much, but in Calcutta, with our roads and traffic, 15 km is more like 40 kms. Plus we didnít really know how reliable the car would be as it wasnít driven by the previous owner in Bangalore for 5 years I believe. Adkol suggested trucking it down. But I wanted to drive the car and see how the mechanicals were besides it would also save time, so he agreed. Weíve been having the coldest winter here in a decade, and the cold morning was not good for the battery. After a few cranks the batteryís charge just wasnít enough. We jump started the car (never do that in a 4 cylinder Traction, they had weaker aluminum gearboxes which are prone to cracking under such stress after usage of 50-60 years. The 6 cyls have sturdier steel boxes) and the Traction immediately fired up. Kept it on high idle, dynamo working so I was relieved. Though we fixed the clutch earlier, it obviously wasnít adjusted properly as I found considerable judder taking off from stand still on 1st gear. Anyway, so off we were and first I checked the brakes and I realized that I had to use them about 30 feet from the car in front to avoid bumping into it. So that needed work. It was then that I realized that these 6 cyl cars have tall gearing on 2nd & 3rd and run best at higher speeds. Itís got only 3 fwd speeds but loads of torque and is happiest when driven over 20mph. At very slow speeds the steering is pretty heavy but thereafter it lightens up progressively and becomes really easy and quite accurate too. The gear lever on the dash didnít require much time to get used to; itís fantastic, shifting is smooth when used right with not much effort needed. Lots of rattles, loud squeaks and the shock absorbers felt like they were in bad shape. Otherwise no problems on the way, water temp was also fine. Once home, we started work immediately, first by taking off the original carpeting which looked decent but the moment it was taken off (slowly) a lot of it started to fall apart. The thick rubber matting under it was still in fairly good shape and we used it later. Under that the entire front floor section was rotten. The driverís floor had large holes; I was lucky that I didnít fall through on the drive home! We saw that a later layer of sheet on the front half of the floor over the original had been welded and the gap was obviously one of the reasons why the original floor was in bad shape. Out of the 3 long supports which run under the floor, 2 were in need of replacement. Rear floor and under seat where in good shape. Once we took off the carpets on the tall door sills, there was severe rot on the monocoque frames on both sides all the way upto the engine bay. We started the work in the following order: 1) Cut out the front half of the floor and finished remaking the sills on both sides. This was not easy as they are one of the major supports of the car. There are 3 box sections, 1 over the other and took 4 days to complete upto the engine bay. Like I said before, the car hadnít been used in 5 years so luckily the alignment of the carís structure and panels were not affected; itís still got good lines. 2) Next we repaired the box on the front floor on which the seats sit and replaced the front floor as well as the lower parts of the pedal, centre under dash box area and passenger foot well area. 3) Since we didnít have time, we did denting only in a couple of places that were absolutely necessary. B]Some pics of the work done on the passenger cabin floors and some other areas[/b] 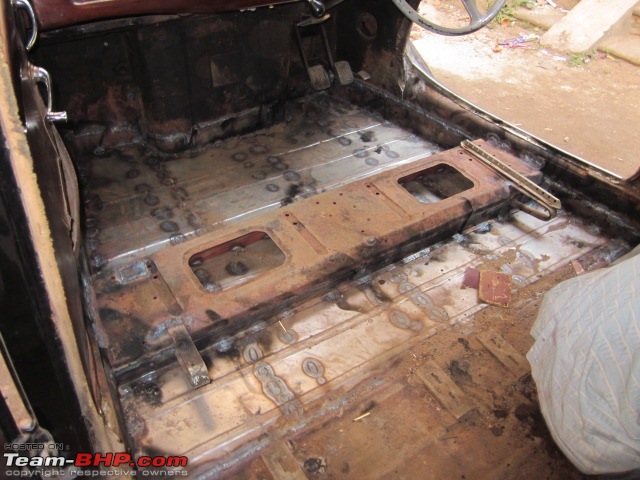  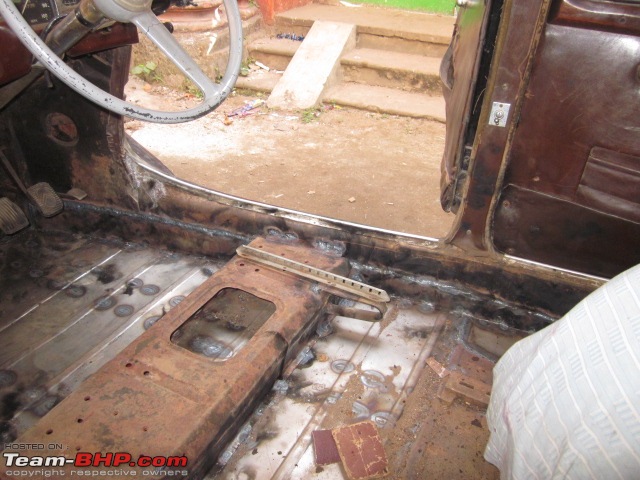 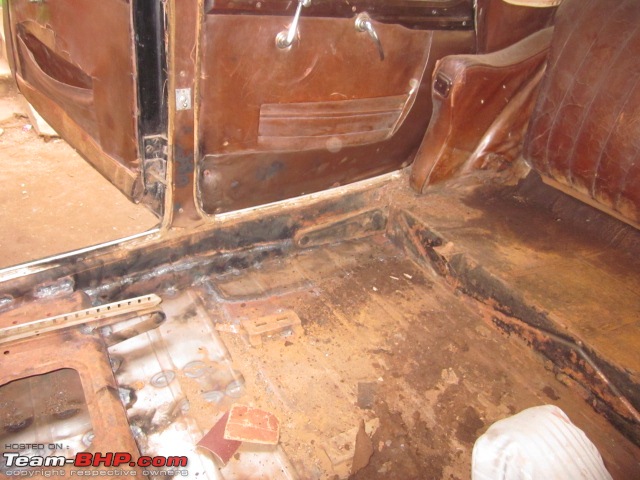   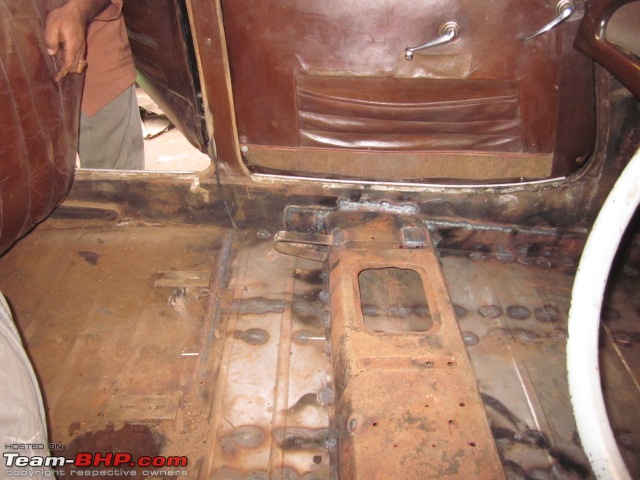 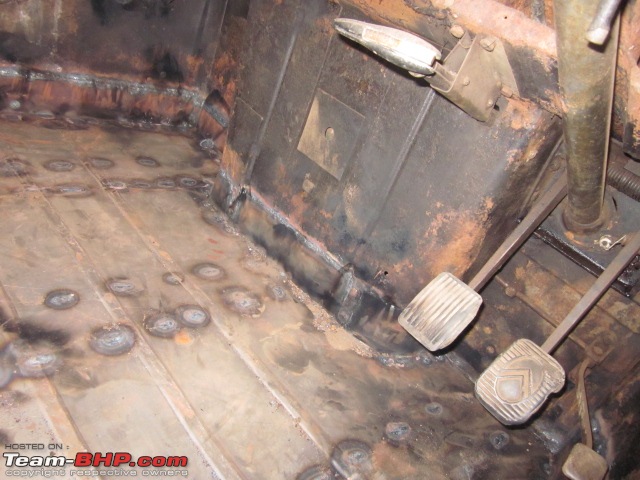  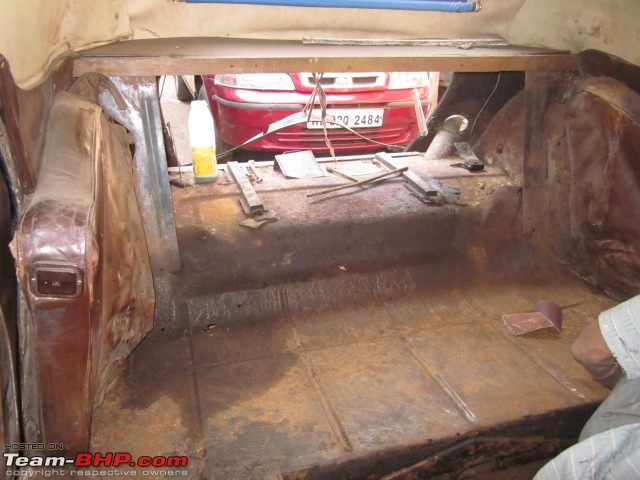  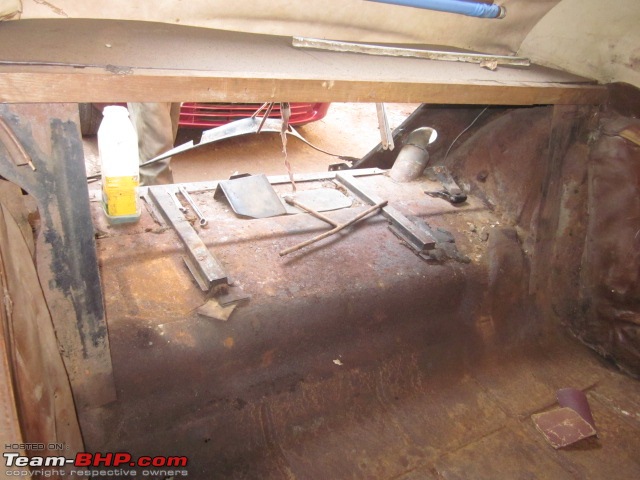   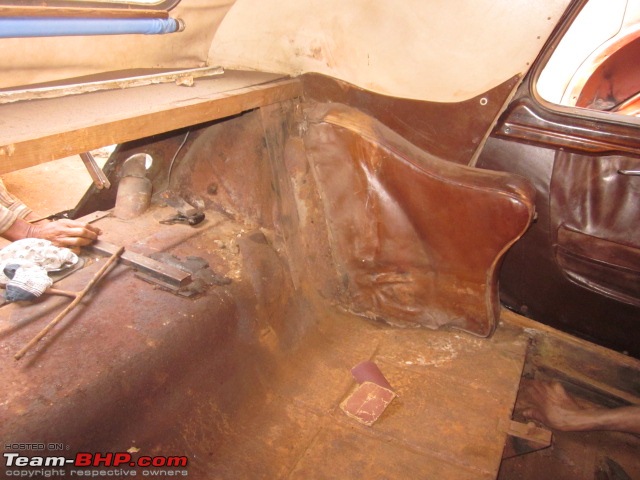    4) Took off the non original and poorly done rexine ceiling material. 5) Other suspension components were in good order; we only replaced all 4 shockers. The old ones had died a while back. The shocks are of and odd size on the car but we did get new ones in the correct size. 6) The brakes were checked; 3 wheel cyls were seized one was barely working. It had the original type Lockheed rubber buckets. My mech went to look for new replacements for all 4 wheels and when I came back from office he told me with delight that he got a set of NOS Lockheed buckets of the same size! This mech has always had a nack for finding hard to get parts (he got the odd size shocks as well). He goes out hunting the entire day, sometimes more than a day and mostly returns with the required. Never tells me or the other mechs which shop he got it from though. The master cyl was ok so the brakes were serviced and buckets replaced and closed. 7) Once the floor and sills were finished, we made 2 new under floor supports and put them in place with the 3 rd original piece. We then started work on the trunk area. The inner main frame of the trunk was again rotten as were the trunk floor and outer under lid panel. The gas tank (itís huge) had to be taken out for the trunk work as did the fuel filter and the box itís concealed in which is fitted inside the trunk panel. 8) The original rear floor was scraped clean and out came metal that actually shined more than the new panel! My team was of the opinion that though itís common knowledge that back in the day the quality of metals was so much superior to what is used on cars now, they were still amazed at the quality of the sheet that this car had. The passenger cabin was then applied with rust converter chemical which was wiped clean thoroughly and then coated with epoxy primer. Panel joints were sealed with 3M Autobody Sealant and then the finish Epoxy Metalcoat Matt black paint was sprayed to complete the cabin area. Another point, at every layer of the 3 sill sections, rust primer was used before the other section was welded into place. The under seat box was also primered and finished on the inside before it was welded back to the floor.  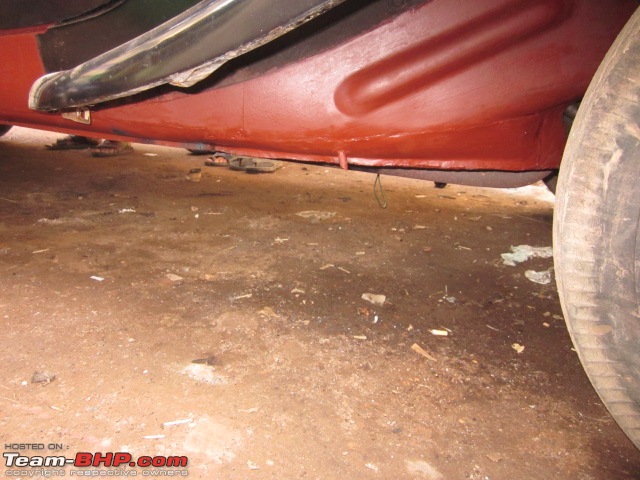 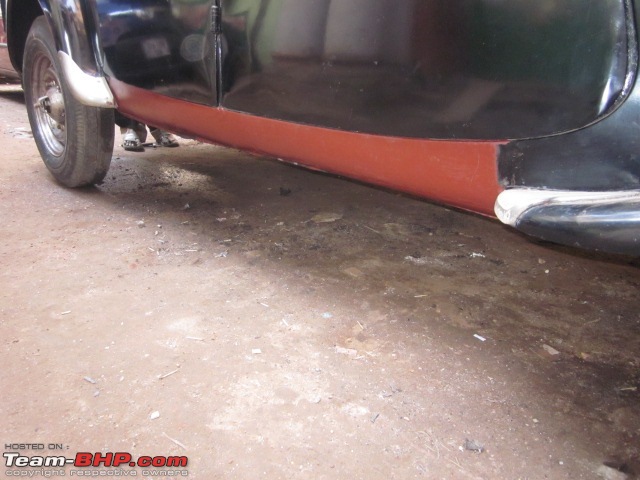  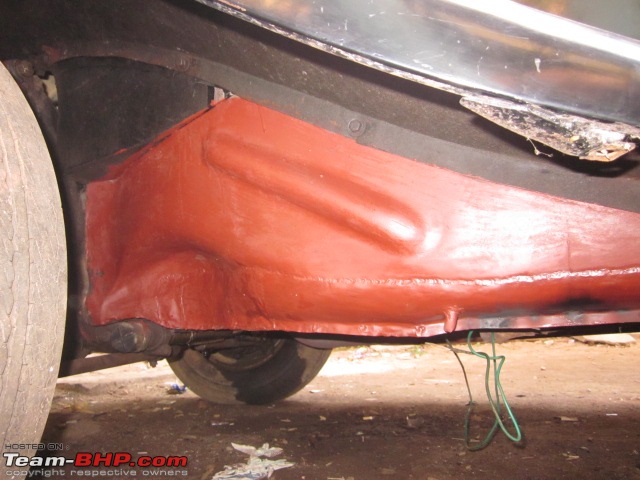      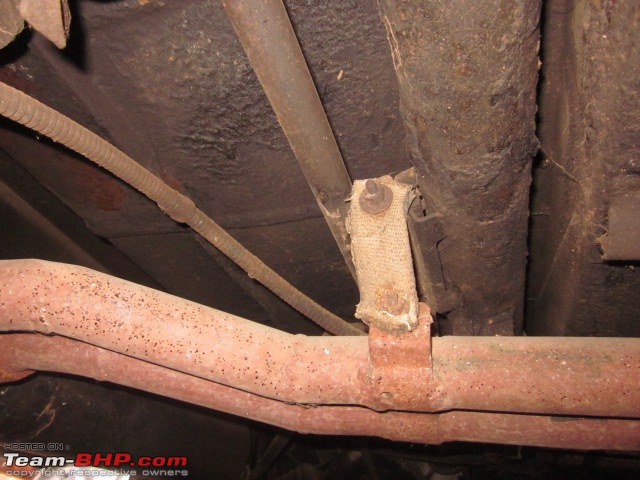  Continued in next post... Last edited by mbz180 : 11th January 2012 at 14:23. |
| |  (1)
Thanks (1)
Thanks
|
| The following BHPian Thanks mbz180 for this useful post: | GTO |
| |
| | #2 |
| BHPian Join Date: Jan 2010 Location: Kolkata
Posts: 894
Thanked: 1,027 Times
| Re: A mini restoration of a 1949 Citroen Slough (UK) built Traction Avant 15-6 Continuing.... 9) After all of the above we only had another 7 days left for our rally deadline and we took a last minute decision to respray the entire car. I saw that the car had some areas in which the paint had already started to flake off (it was sprayed in Bangalore just before leaving for Cal). So prepping was started for fresh paint. Last edited by mbz180 : 11th January 2012 at 14:35. |
| |  (1)
Thanks (1)
Thanks
|
| The following BHPian Thanks mbz180 for this useful post: | mitrajdeep |
| | #3 |
| BHPian Join Date: Jan 2010 Location: Kolkata
Posts: 894
Thanked: 1,027 Times
| Re: A mini restoration of a 1949 Citroen Slough (UK) built Traction Avant 15-6 10) The trunk area which turned out to be a big job as well was completed. One bracket of the trunk lid was so corroded that it broke off and we had to make a new one. 11) After this the trunk area was finished in the same way as the passenger cabin. Also, the entire under side was scraped clean, primered and epoxy painted. The glass fuel filter and metal screen were cleaned thoroughly and re-installed. Fuel tank was finished like the rest of the inner panels.   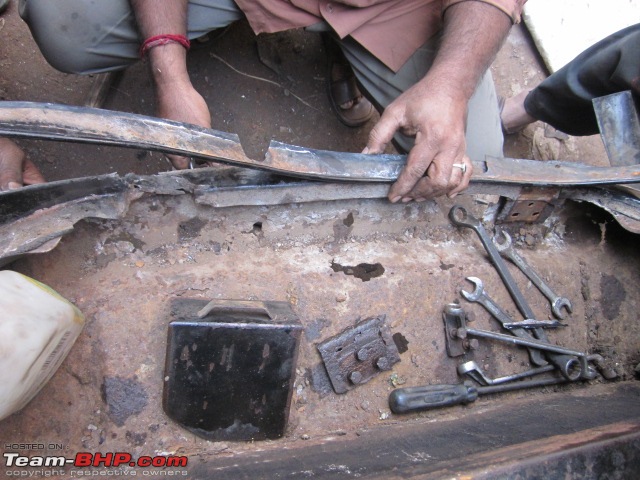  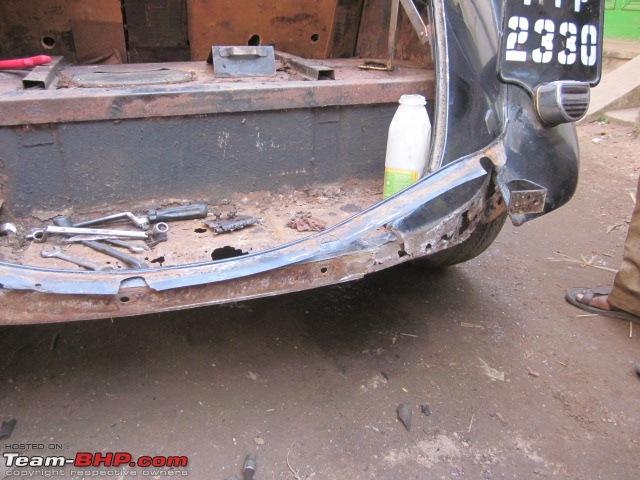 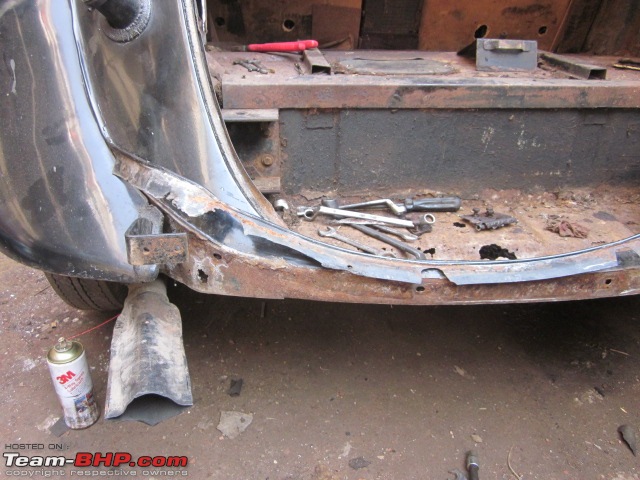  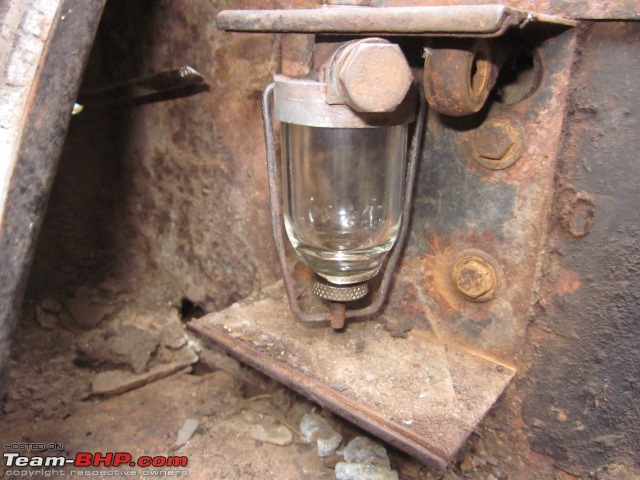 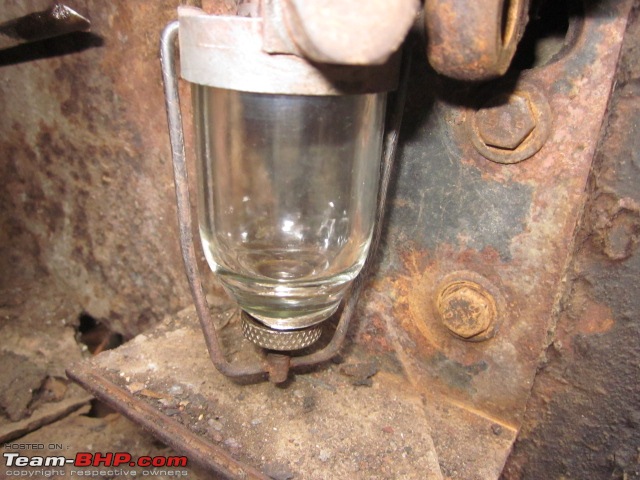 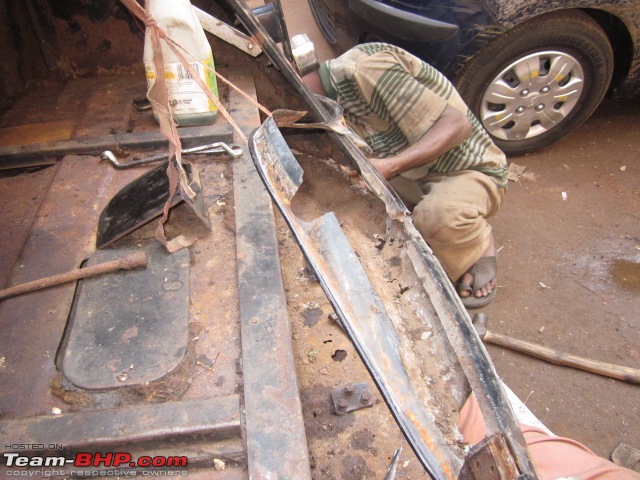 12) 5 days to go. The upholstery guy was getting really mad, how could he do the ceiling and carpets with binding, the door piping etc. unless the painting was complete? The car was then given 2 coats of paint, 3 in some parts. All this while I was taking some time off between my office work hours, going crazy looking for the ceiling material I wanted. It was available, but not in the shade I wanted. After hours of my mechanic and I searching on foot in different areas (the 2 of us could cover more shops), I finally got referred to the street on which the shade may be available. I was in another area; my mech was in the right area. I relayed the info to him and reached there later and was thrilled to get exactly what I wanted. On the same day we were searching for suitable carpet material and a nice colour to go with the dark brown seats. I thought of a dull old style green. Every shop we went to in the carpet whole sale area had bright shades of blue, maroon, red and green. I was at a loss. Finally I went to an up market home furnishing store and after seeing around 20 rolls of carpets I saw what I had in mind. It was pure wool and we required 108 sq. ft. of it. Turned out to be a ridiculous amount though adkol gave me the go ahead. I told my mech who was in another area the price and he blasted me; I was mad, he said, to go for such expensive material. I hesitated and left the shop. After getting the ceiling material we again went back to the Ďbrightí carpets area. Found a tiny shop with a colour I liked; rust. Ordered it, as the guy said it would take a day for the entire roll to come from the godown. Lastly I went to a garments/suitings store to get period looking wool cloth for the door piping. Got everything and headed home. 13) The ceiling panel was earlier scraped and finish painted along with the bows. There were 2 wooden supports in good shape as well. The ceiling stitching was completed outside the car, and was installed along with the door piping (ended at 10 at night). Window channels were already replaced. After unnecessary delay the next day (the upholstery guy was completely loosing it by this time) we got the main base carpet roll which was cut to the required size and pieces and we closed at 12 at night. The delay was because I got a call in the morning from the carpet guy telling me that the roll has come but not in the exact shade of the sample I had seen! I was about to have a heart attack so I rushed to the shop and was relieved to see that it was the right shade; the sampleís colour looked different coz it was dirty. 14) The next morning the carpets were sized properly and went for binding. The electrician was working through the day and bit by bit the things that were not working were attended to: a) Horns: 1 trumpet had broken off earlier and there was no sound due to the internals being very rusty. Fixed. b) Trafficators worked but the lights inside did not. Fixed. c) One headlamp had a fused bulb; the other was original and working. I deputed the mech talented with getting old parts for the instrument panel (screw on torch type, but they were in 6 volts) bulbs as well as the headlamp bulb. Once again he succeeded; he came back in the evening with replacement panel bulbs and an NOS replica of the fused original bulb. 1 non working side lamp also fixed. Combo tail/license plate lamp fixed. Brake lamp fixed but requires some work. It was hard to locate the brake lamp switch, not on the master cyl but near the petrol tank. d) The fuel gauge kept fluctuating when driving. Fixed. e) Interior lights were not working. Fixed 15) Friday, 1 day to go. Disaster. The master cyl bucket gave up and leaked brake fluid all over the garage floor and the driverís footwell over the finished epoxy paint. My trusty mech immediately went hunting for a replacement, found it and reassembled. He kept the cyl out of the car to test for leaks and there was still some fluid coming out. He had to replace the piston as well and it was finally fixed. Rubbing done twice; ended in the evening. I had taken half the day off from work and went hunting for separate foot and foot rest mat and binding material to go over the base wool carpet clean. Found them in rolls and came back home. At 9 pm the main carpets arrived after binding. I was not happy with one area of the binding and had them resent for correction and had the separate mats cut to size and also sent for binding. I also specified that I wanted a patch on the driverís mat in rexine as is common in classics. All the stuff came back at 11 at night to my satisfaction except for the rexine patch. The placement of the patch was the opposite of what I wanted! Re-sent it. 16) Judging day. Polishing of the body as well as the chrome (all original to the best of my knowledge) started at 7 am but that 1 foot mat arrived only at 10. I was hopping mad. Anyway, this time it was done right. We finally left my place at 12 noon, the car now gliding over even large bumps (I donít think there are many new cars under 20 lakhs which absorb bumps better) and thankfully no squeaks or rattles whatsoever. And then came the judging which is another story in itself. Some pics of what was presented by the rally day: 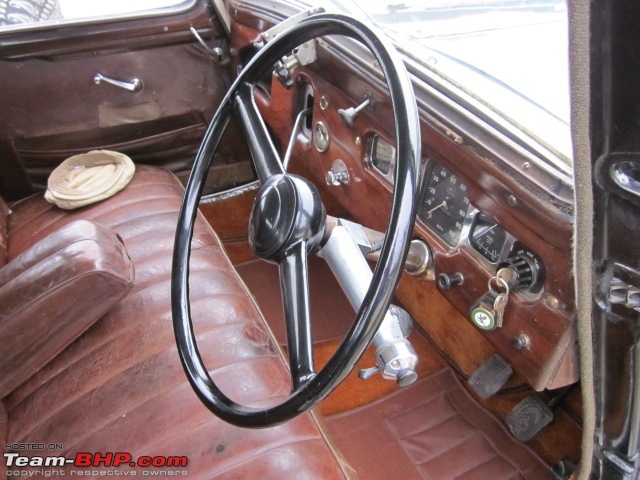  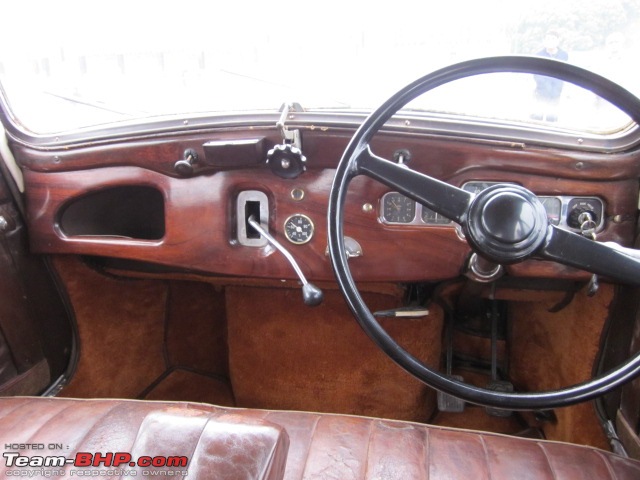  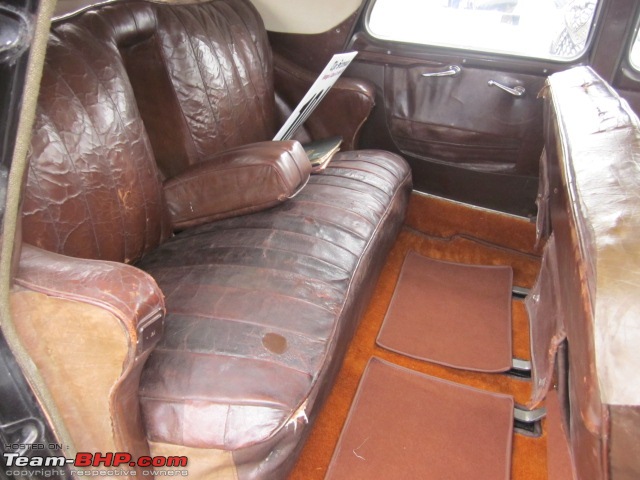  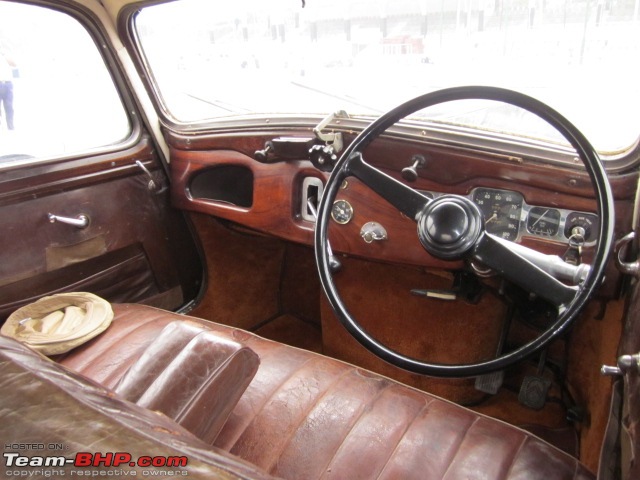 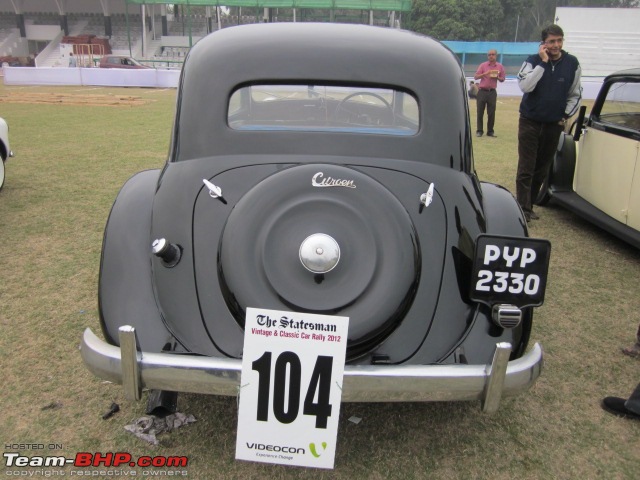      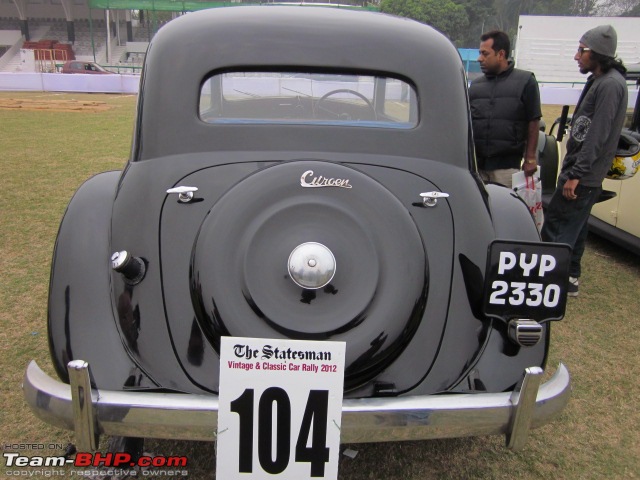       |
| |  (1)
Thanks (1)
Thanks
|
| The following BHPian Thanks mbz180 for this useful post: | mitrajdeep |
| | #4 |
| BHPian Join Date: Jan 2010 Location: Kolkata
Posts: 894
Thanked: 1,027 Times
| Re: A mini restoration of a 1949 Citroen Slough (UK) built Traction Avant 15-6 Some more pics... 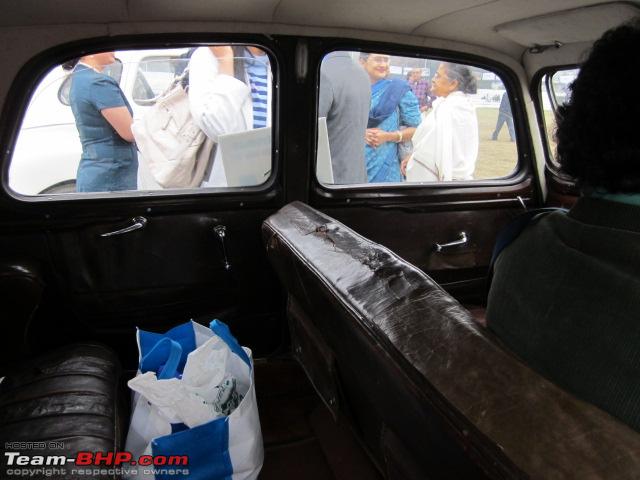  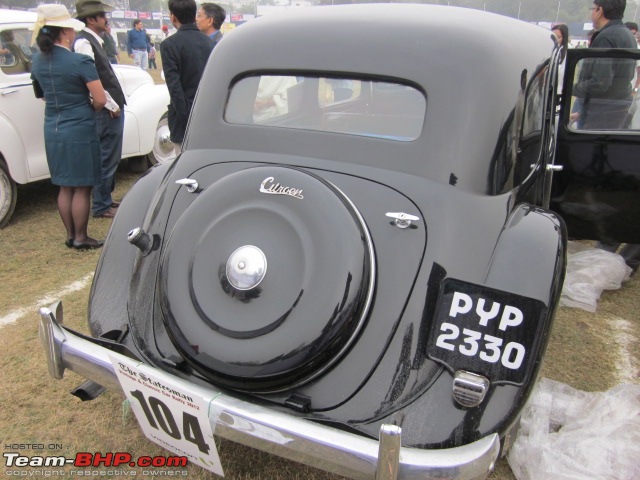 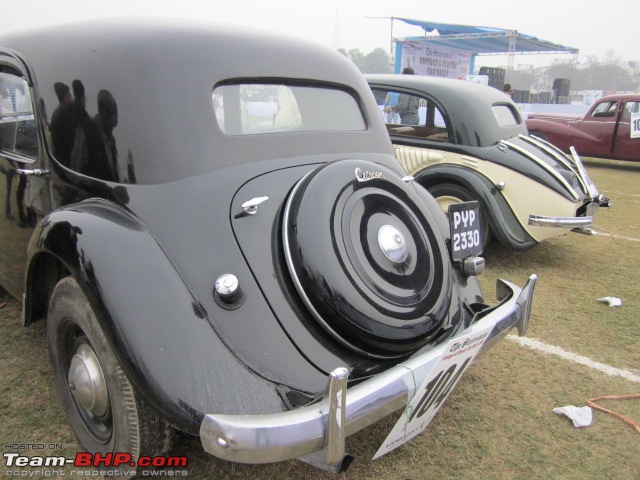 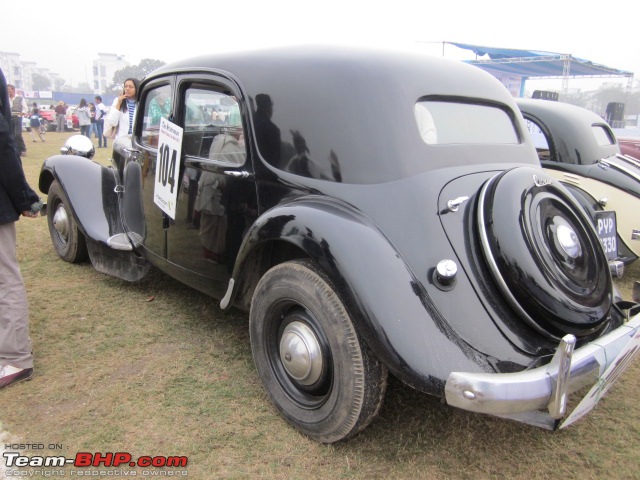   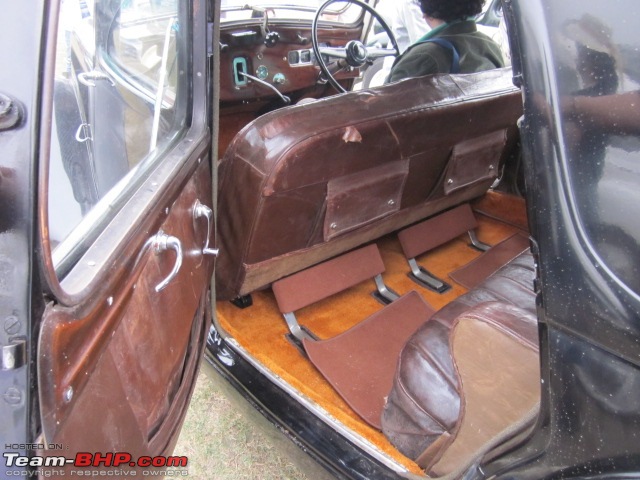 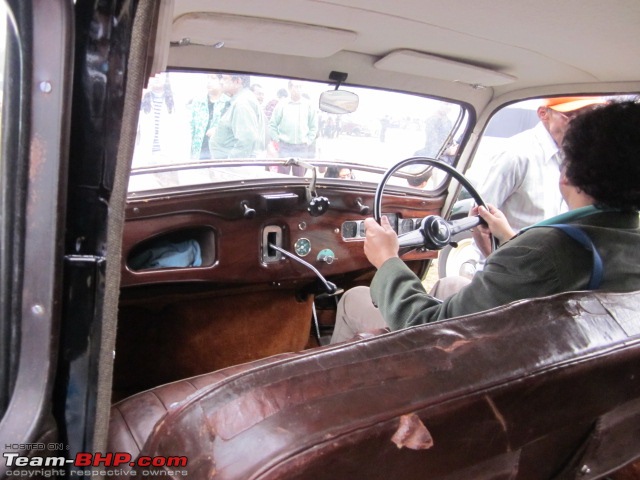    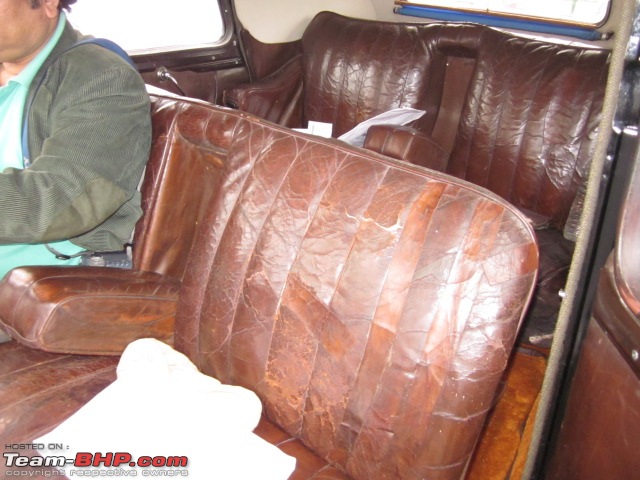       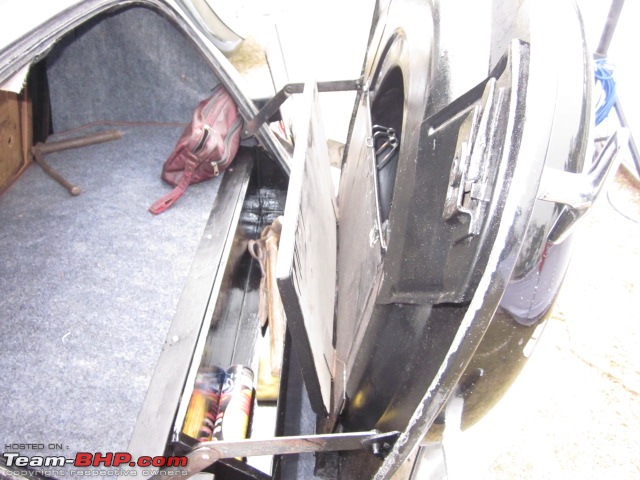  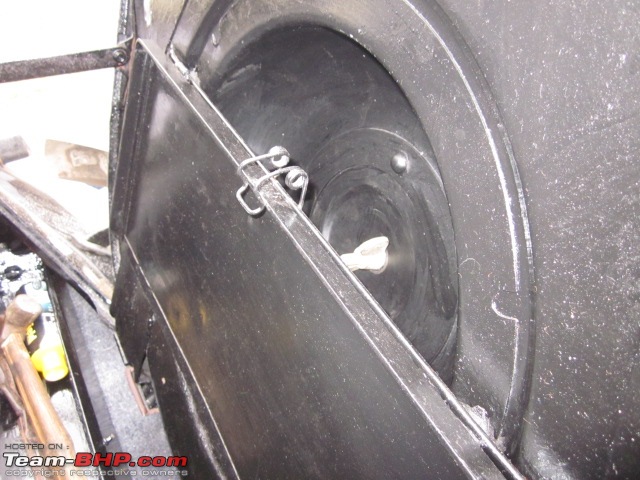     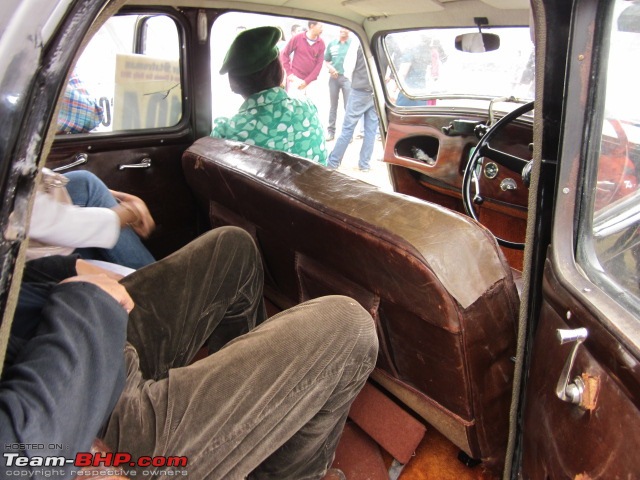 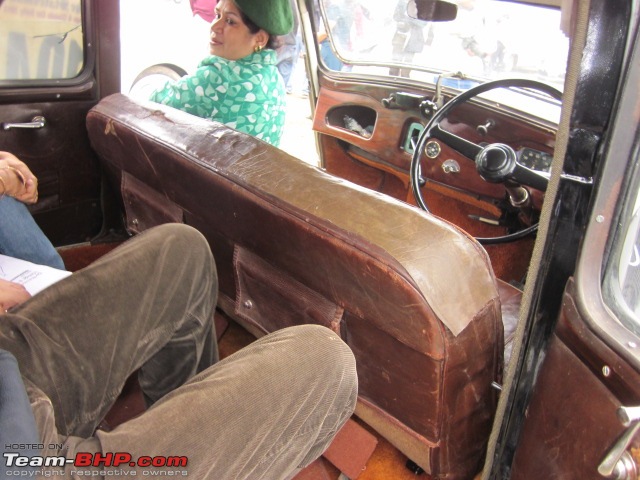  Proud owner adkol and me with the car 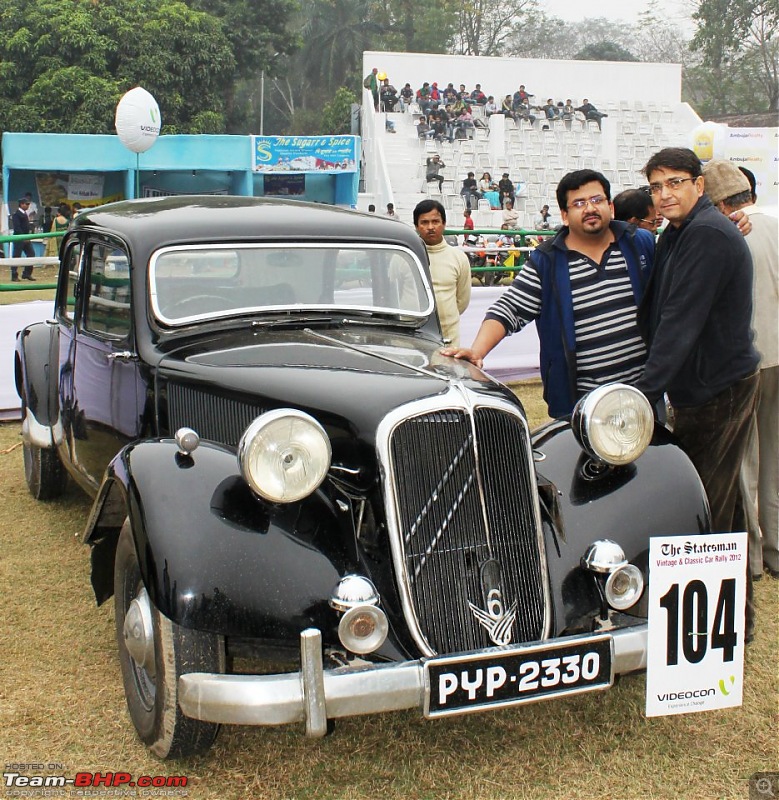 Though not a full restoration, we did cover a lot of areas in a short span of time and this was the first time that my garage had turned out a car for a client. And what a car. To get a car as rare as this as to work on was really a privilege. Restoration is not my occupation; it’s my passion and my style of operating is probably different from others. I am a working professional and it’s not possible for me to keep in touch with my team of mechs except for maybe once during work hrs. When I come back from office I go through the work they have done and spend some time with them and plan work for the next day. When I leave in the morning I give them further instructions (which come to my mind later) for the day. And also I’m 29 years old. My 2 head mechs have been working for my dad much before I was born and so I have it easy. I make them go through the manuals, translating into Bengali and that’s it. They need little further guidance; once they open up something it’s the other way around. Despite me asking them to refer to the books they tell me how it’s done. And last but definitely not the least, adkol, though a hard man to please, himself did a lot of research and gave me suggestions, valuable advice and was on the whole very involved with this mini restoration. And most importantly, he keeps the funds flowing! Many thanks to adkol and my mechs who made things possible. In the near future, we will be carrying out more work on the car and I’ll update this thread from time to time. I would greatly appreciate any comments on the car and ways to improve the work already done as a lot of members of this forum have vast knowledge about the way things are meant to be done. Cheers mbz180 Last edited by mbz180 : 11th January 2012 at 15:02. |
| |  (5)
Thanks (5)
Thanks
|
| The following 5 BHPians Thank mbz180 for this useful post: | honeybee, james, magneto, mitrajdeep, Viju |
| | #5 |
| Senior - BHPian | Re: A mini restoration of a 1949 Citroen Slough (UK) built Traction Avant 15-6 This is pure awesome, at least in the pictures its difficult to find are areas that need more work, maybe except the boot where the tools are stored. The work seems to be flawless the paint job is really really good, its got that new car shine. Somehow the rear looks much more beautiful then the front  |
| |  (1)
Thanks (1)
Thanks
|
| The following BHPian Thanks mayankjha1806 for this useful post: | mbz180 |
| | #6 |
| BHPian Join Date: Sep 2011 Location: Kolkata
Posts: 108
Thanked: 65 Times
| Re: A mini restoration of a 1949 Citroen Slough (UK) built Traction Avant 15-6 Great work. The fact that your team was able to finish the work within such a short period of time and then were able to put the car on display is a great achievement. The paint job looks good. Probably a little work on the interior would have made this car look even better, but then with the time in hand for this job it would have been difficult. |
| |  ()
Thanks ()
Thanks
|
| | #7 |
| BHPian Join Date: Feb 2011 Location: Calcutta
Posts: 135
Thanked: 95 Times
| Re: A mini restoration of a 1949 Citroen Slough (UK) built Traction Avant 15-6 Great work mbz, Just one thing I noticed, why did you not cover up the rear seat backrest as seen from the boot. Also what is the tray type thing on the boot door, what was its purpose ? |
| |  ()
Thanks ()
Thanks
|
| | #8 |
| BHPian Join Date: Jan 2010 Location: Kolkata
Posts: 894
Thanked: 1,027 Times
| Re: A mini restoration of a 1949 Citroen Slough (UK) built Traction Avant 15-6 @SwiftSD-Thanks for the kind comments. Yes the seats could have been turned out much better, but I wanted to condition them myself but just couldn't find the time. I had to rely on my man Friday for this, but I'll definitely improve on it soon. Amazingly, the leather on the seats as well as the door pads are the Connolly hides the car originally came fitted with. Connolly went out of business some years back and so it's worth trying to preserve even though some areas are in pretty poor shape. Door and windshield frames also need to be freshened up and many other things will be done to improve the interior. @Mitrajdeep-Thank you. Regarding the trunk side of the rear seat backrest, we had already installed the carpets for the trunk and the seats were the last thing to be fitted into the car. I didn't realize that the rear part of the seat looked like this. I wanted to cover it up with the same carpet material as the trunk, but it was too late and no material left over. Will be done though and thank you for pointing it out. I may otherwise have missed it. Regarding the tray on the trunk lid. I've put up 3-4 pics of it to get an answer of its use myself  Some suggested that it was a child seat. No way, downright dangerous and improbable. So far, I can only think of 2 uses for it: Some suggested that it was a child seat. No way, downright dangerous and improbable. So far, I can only think of 2 uses for it:1) The flat part of the trunk is quite small. If one were to fit in a larger piece of luggage, then maybe the trunk lid could be opened, tray folded out to create more flat space. Of course, for this to work, the luggage would have to be wedged to the seat backrest or else the trunk lid would keep swinging when driving. 2) If I were to go for an old style picnic, gin, tonic or champagne and glasses to go with them, with the car parked, the tray would serve as an ideal platform for a mini bar top  Oh forgot to load some pics of the floors in the primer stage. Regards mbz180 Last edited by mbz180 : 11th January 2012 at 19:01. |
| |  (1)
Thanks (1)
Thanks
|
| The following BHPian Thanks mbz180 for this useful post: | Catalyst_delhi |
| | #9 |
| BHPian Join Date: Jan 2010 Location: Kolkata
Posts: 894
Thanked: 1,027 Times
| Re: A mini restoration of a 1949 Citroen Slough (UK) built Traction Avant 15-6 Hi all, I stumbled upon a review carried out by Motor Magazine in November 1949, of the 1949 British built Citroen 15-6. It's quite interesting and the pics of the exterior and interior are more or less the same as found in adkol's car. Enjoy mbz180 |
| |  (1)
Thanks (1)
Thanks
|
| The following BHPian Thanks mbz180 for this useful post: | karlosdeville |
| | #10 | |
| BHPian Join Date: Aug 2011 Location: Kollam, Kerala
Posts: 233
Thanked: 108 Times
| Re: A mini restoration of a 1949 Citroen Slough (UK) built Traction Avant 15-6 Lovely job and considering your time limitation - amazing job  Quote:
 | |
| |  (1)
Thanks (1)
Thanks
|
| The following BHPian Thanks basky for this useful post: | mbz180 |
| | #11 |
| Newbie Join Date: Aug 2009 Location: FBD, CHN
Posts: 15
Thanked: 12 Times
| Re: A mini restoration of a 1949 Citroen Slough (UK) built Traction Avant 15-6 @ mbz180 Ė  Congratulations on the successful restoration of the cult classic, Sir. She looks truly alive, and all set to serve another generation. Long may it stay that way! Many more congratulations, for being the proud custodian of a priceless piece of authentic Automobile History. Congratulations on the successful restoration of the cult classic, Sir. She looks truly alive, and all set to serve another generation. Long may it stay that way! Many more congratulations, for being the proud custodian of a priceless piece of authentic Automobile History.While being one of the world's first ever, Unibody-FWD-IFS equipped mass-market car, she is notoriously known for driving Citrion bankrupt due to her high R&D & production cost. A lot of it was the ripple effect of the post 2nd-WW resulting skyrocketing inflation in input cost. |
| |  (1)
Thanks (1)
Thanks
|
| The following BHPian Thanks somjith_nair for this useful post: | mbz180 |
| |
| | #12 |
| BHPian | Re: A mini restoration of a 1949 Citroen Slough (UK) built Traction Avant 15-6 Wow, amazing. I'am an absolute novice in such vintage cars, but am really smitten by its looks, the size and the kind of comfortable ride it would provide. The rear leg space is just massive. Looks so Royal |
| |  (1)
Thanks (1)
Thanks
|
| The following BHPian Thanks rxpaul for this useful post: | mbz180 |
| | #13 |
| Newbie Join Date: Nov 2010 Location: Kolkata
Posts: 1
Thanked: 0 Times
| Re: A mini restoration of a 1949 Citroen Slough (UK) built Traction Avant 15-6 Hi it was lovely to go trough ur narrative...I am in the process of buying a Citroen traction avant . It is in a semi restored state ..it would be really helpful to know from you as to what was the approx estimate of such restoration done by you....this car that i am talking about needs a paint job..dash board reconstruction....upholstery , carpets and interiors restored... |
| |  ()
Thanks ()
Thanks
|
 |


