| Royal Enfield Bullet 350 DIY: Fixing a Retro 'Pedestrian Slicer' License Plate
'Pedestrian Slicer' License Plate
Yes, that is what it is called, I'm not kidding. I don't think I need to explain why either! These were fitted on vintage motorcycles and at some point in the 60's or 70's taken out of usage, and in fact are illegal almost everywhere.
In Japan, two wheelers do not require a front license plate which is good from an aesthetic view point. This also gave me an idea that I could fix a fake retro license plate on the Bullet. Yes, I can see all the actual vintage riders shaking your heads (and turning in your graves in some cases) when I am doing this to a 2024 Bullet 350, which in itself is considered 'fake' by most CI lovers, due to the fact that it does not come with a kick lever.
For the rest of us who couldn't be bothered, Hitchcocks sells a good quality kit they make inhouse. The plate itself I suspect is made of mild steel, but powder coated to a high standard, and the fixings are machined out of stainless steel. This was important to me as I do not want the fixings rusting after a few washes or rains, and hence stayed away from most similar stuff available on Ebay.
They also sell a selection of authentically sized and shaped decals (letters as well as numbers) that you can pick and choose as you want.
I also ordered a tax token holder, which I remember seeing on my father's Lamby 150 as a child. Again, the one from Hitchcocks is made out of stainless steel, which is always good. Purchase links: Difficulty level: Medium to Hard Time required: 60 ~ 120 minutes (purely depending on skill and experience) Caution: This is a DIY where there is a high probability of irreversibly damaging your front mudguard or tyre. Therefore, I would suggest going to a good mechanic if you don't feel comfortable. TeamBHP or I shall not be held liable if your pride and joy is messed up!  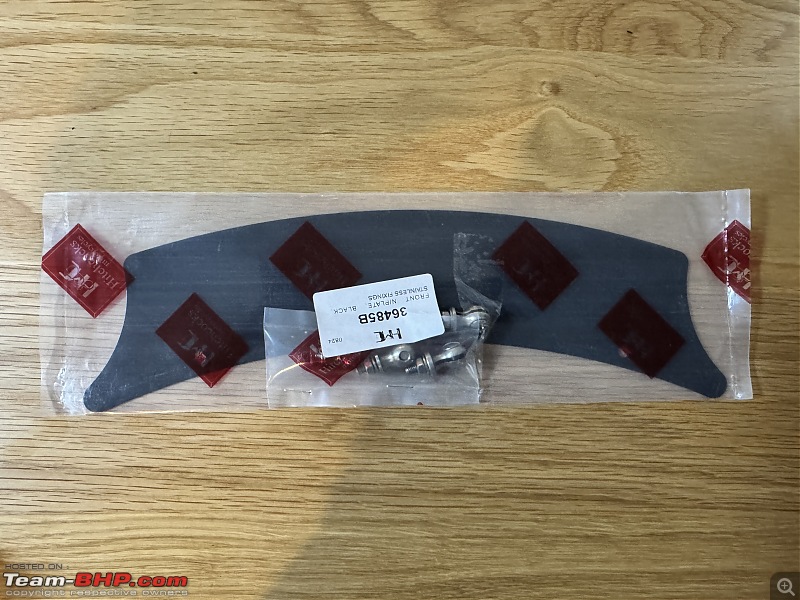
License Plate 
Tax Token Holder 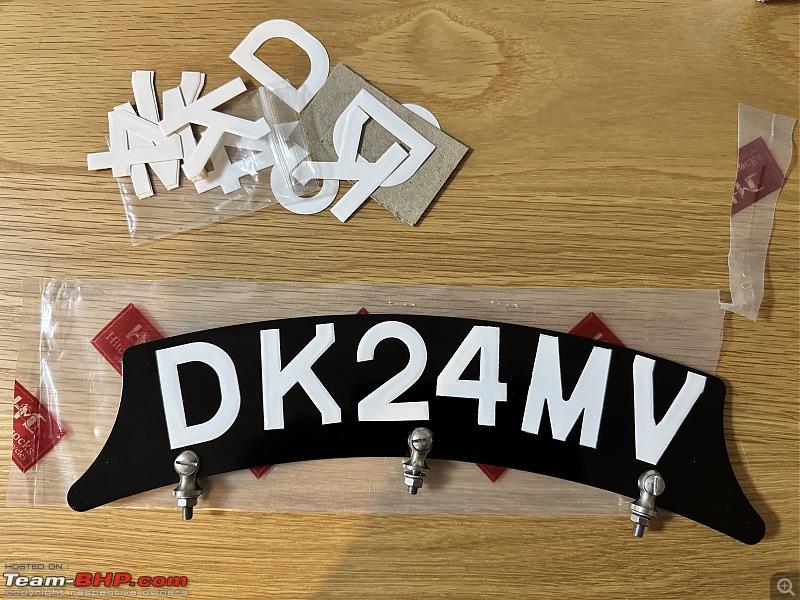
Mock-up
Last edited by Viju : 30th October 2024 at 17:21.
| 


 30th October 2024, 15:13

 (8)
Thanks
(8)
Thanks


