| |||||||

| Search Forums |
| Advanced Search |
| Go to Page... |
 |
| Search this Thread |  24,729 views |
 30th April 2021, 13:23
| #1 |
| Distinguished - BHPian  | Motorcycle Restoration | Beginner's Guide Starting this thread based on a couple of request from members outside this forum and for the benefit of our fellow members and readers. 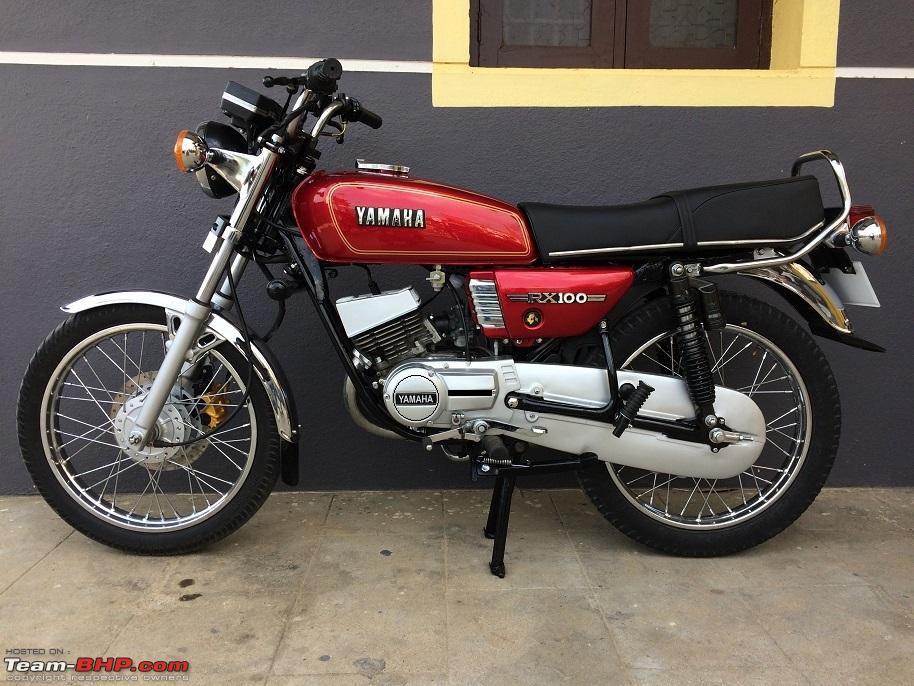 Disclaimer: - I'm not an expert in restoration, sharing this content based on my learnings from past and inputs from fellow members (inside & outside this forum) - Further inputs, suggestions, improvements, corrections, critics from anyone is always welcome - Most important disclaimer, I don't hold any responsibility if you end up spoiling your machine by following these steps  If at all anything fails, let's celebrate the failure together If at all anything fails, let's celebrate the failure togetherOther thread (How NOT to restore your old motorcycle) on similar subject which I enjoyed the way it was put Contents:
Last edited by Mr.Boss : 2nd May 2021 at 22:51. |

|  (29)
Thanks (29)
Thanks
 |
| The following 29 BHPians Thank Mr.Boss for this useful post: | 2000rpm, Akshay6988, ambarkhan, AmitRavi07, Arun.K, autocrat, Chillout, chinmaypillay, comfortablynumb, condor, drrajasaravanan, GandalfTheGrey, Gannu_1, GTO, h14, jithin23, mh09ad5578, nitinkbhaskar, RaghuVis, rxpaul, Shanksta, SnS_12, swiftnfurious, texmonster, The Great, v12, vaasu, vigsom, vredesbyrd |
| |
|
2nd May 2021, 21:50
| #2 |
| Distinguished - BHPian | re: Motorcycle Restoration | Beginner's Guide Decision Follow the simple 5W2H analysis
Starting with What? The obvious answer is Restoration but the indirect question is whether to restore or not? 2 cases here,
I myself did a couple of Pulsar restorations for close friends for some sentimental values and don't want to part with the bike. And both the bikes are immaculately maintained and used until now Details here https://www.team-bhp.com/forum/motor...ification.html (Bajaj Pulsar 150 Classic - Restoration & Modification)   Next comes Why? It depends on the need. Very few go for a mechanical restoration to keep the machine on duty and most of the restorations I come across (including my own bikes) are not daily driven machine, restored just for the passion, love and lust towards the machine and kept as garage queens (my first RX covered 12k km post restoration in 7 years) Let's touch How? portion before going for the other 2 W's The most easiest as well the toughest part is here, making the right decision - Complete restoration or partial? - One go or in steps? This question is mostly answered as an outcome of previous question. Also depends on the condition of machine and ability to spend (sometimes based on the part and labor availability) My first bike (Blue RX135 ) was done in steps, - Got the bike, used for a year - Understood the issues, areas to be addressed - Started with the tires, brakes and repaired the engine (re-bored to next oversize) - Cosmetic upgrade, full strip down restoration - Brakes upgrade (Front disc brake) - Transmission upgrade (5 speed gearbox) - Further cosmetic / functional changes (16" rear wheel, rear shocks) Details here (1998 Yamaha RX135 Restoration completed : Now, 5 speed converted!) This being my 2nd RX (1st one stayed with me for a very short duration) learnt from my mistakes and were taken care from the 2nd bike onwards. 2nd RX was not in a running condition when I purchased, so I'm left with no other option except to strip down immediately and do a full restoration Details here (Restoration - 1997 Yamaha RXG) My suggestion for how to proceed is, - Get used to the bike before stripping down, understand the issues and areas which needs a change / repair / improvement and then proceed for restoration - Prioritize : Give importance to the mechanicals than the cosmetic upgrade Next comes the other portion of How?
It depends mostly on individual's knowledge, ability to spend time and energy. I started with the 3rd option (FYI, my first RX restoration was the very first RX my mechanic worked and stripped down. Our gentlemen agreement was, he has to do whatever I say and I take the full responsibility if anything goes wrong) and once I got enough trust on the mechanic's outcome I moved to 2nd option (after 7+ years one of my RX is getting restored without my presence) How much? How much can we spend? This is the most influential and deciding factor for any repair / restoration work. It doesn't mean the quality can be compromised for a lower budget, for any budget constraints split the restoration in steps and prioritize the mechanical job than the cosmetic upgrade. Where? Find the right resource (than the expert one) who could put all his effort and passionate on the job rather than someone trying to mint money. Restoration is not like regular repair (especially when it comes to classic and vintage bikes) It needs a lot of attention & dedication otherwise we may end up with V2.0 or V infinity Incase of DIY, find a dedicated place where you can work peacefully and without disturbing others at home. Otherwise be prepared to get poisoned on the next meal This was the condition of guest bedroom, hope you can understand the reaction from my better half 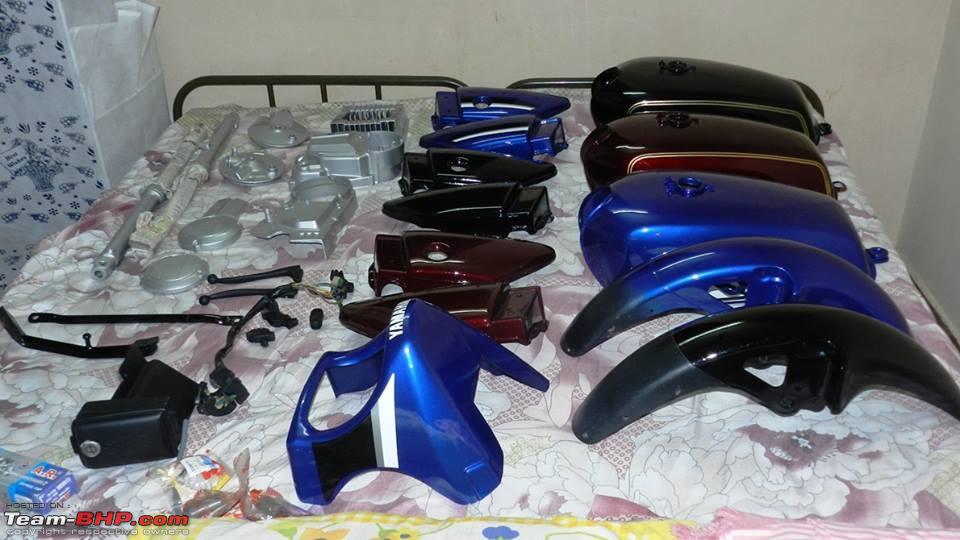 When? Right time for restoration is always "Now" or "ASAP" or "Immediately"  after all we are petrol heads and couldn't resist ourselves when it comes to cars and bikes. But depends mostly on the other preparation items, after all we are petrol heads and couldn't resist ourselves when it comes to cars and bikes. But depends mostly on the other preparation items,- Once what, why & how portion is clear - Detailed check on parts and fund availability is confirmed - Labor (mechanic, painter, etc) availability (in case of DIY, tools availability) - Avoid summer and rainy season My mechanic was kind enough to spend most of the Sundays at my home (opening the garage will have too many distractions) 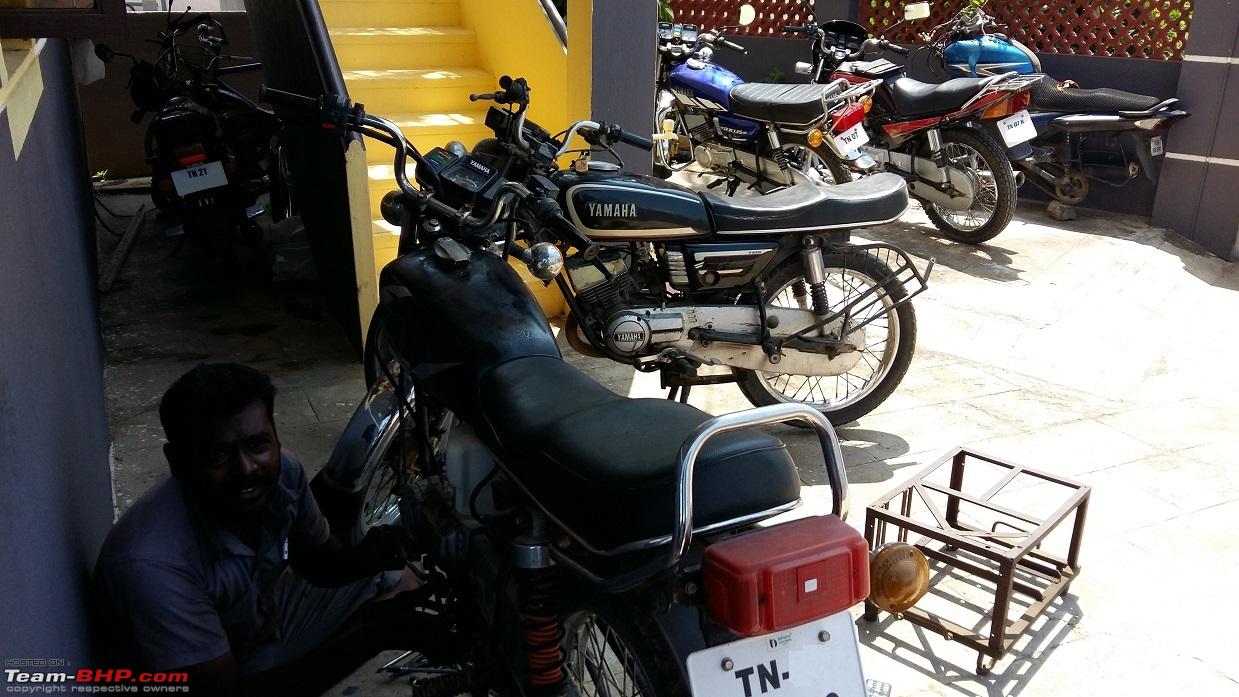 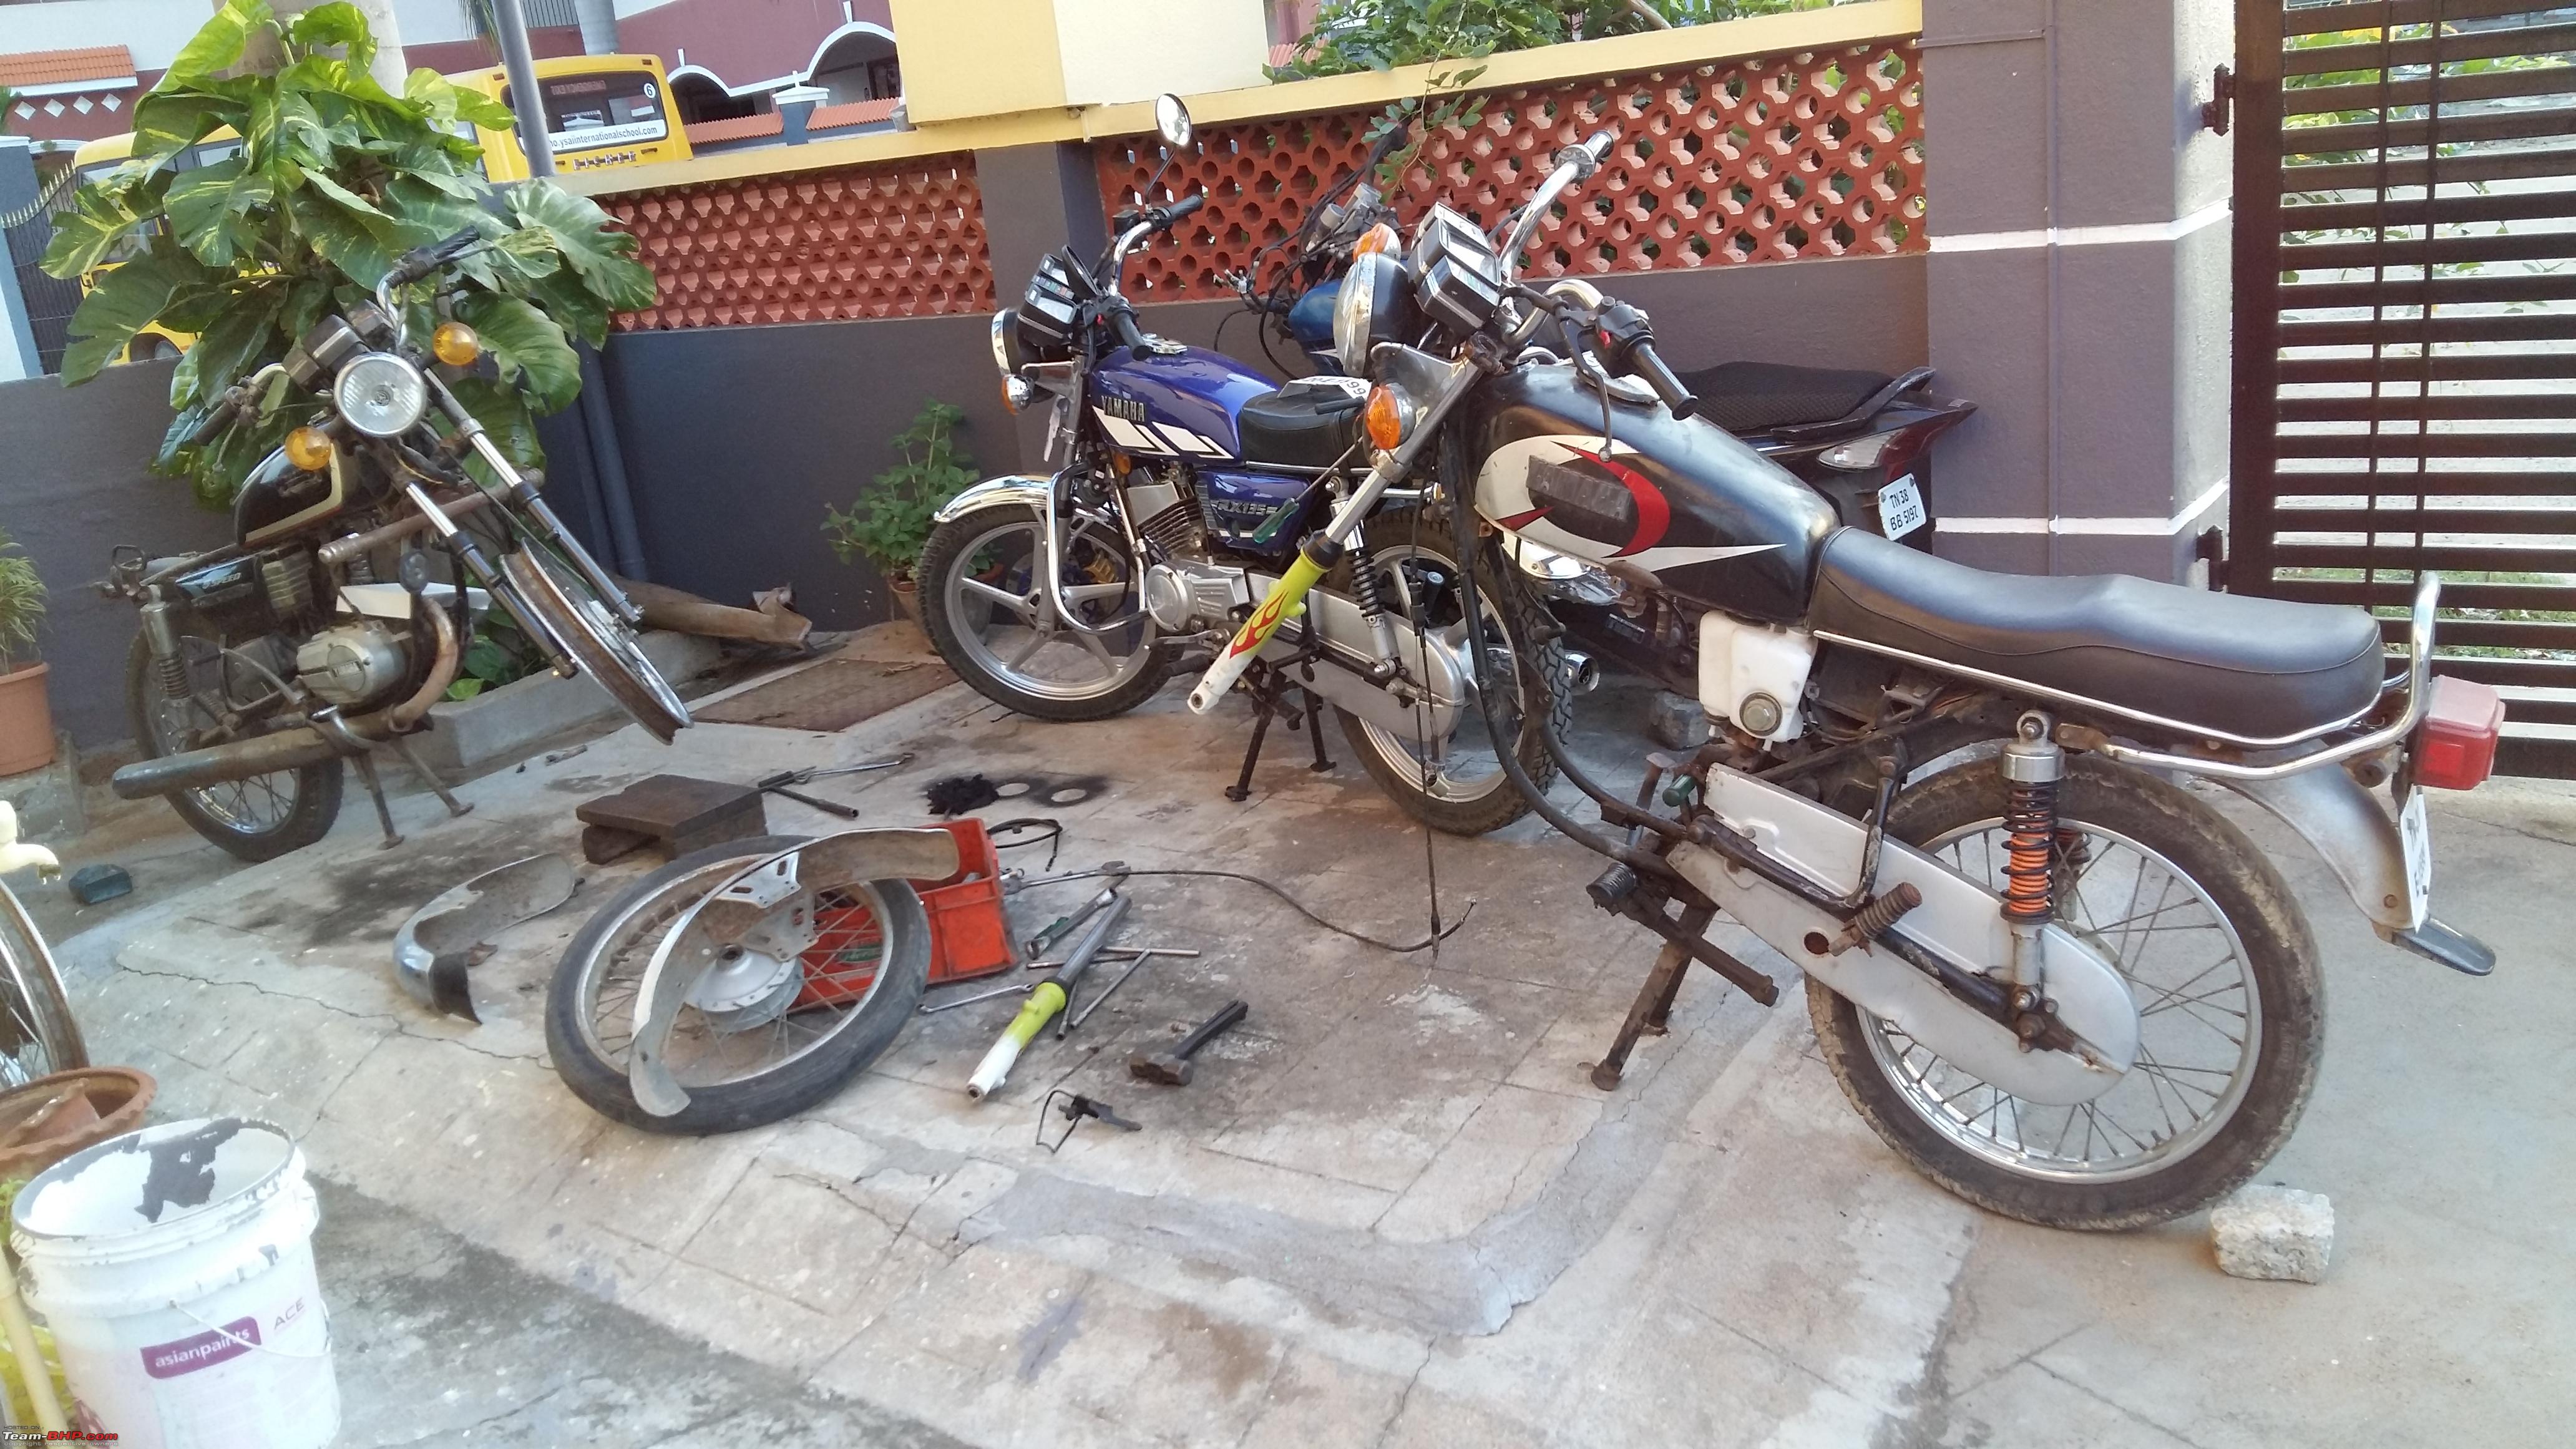 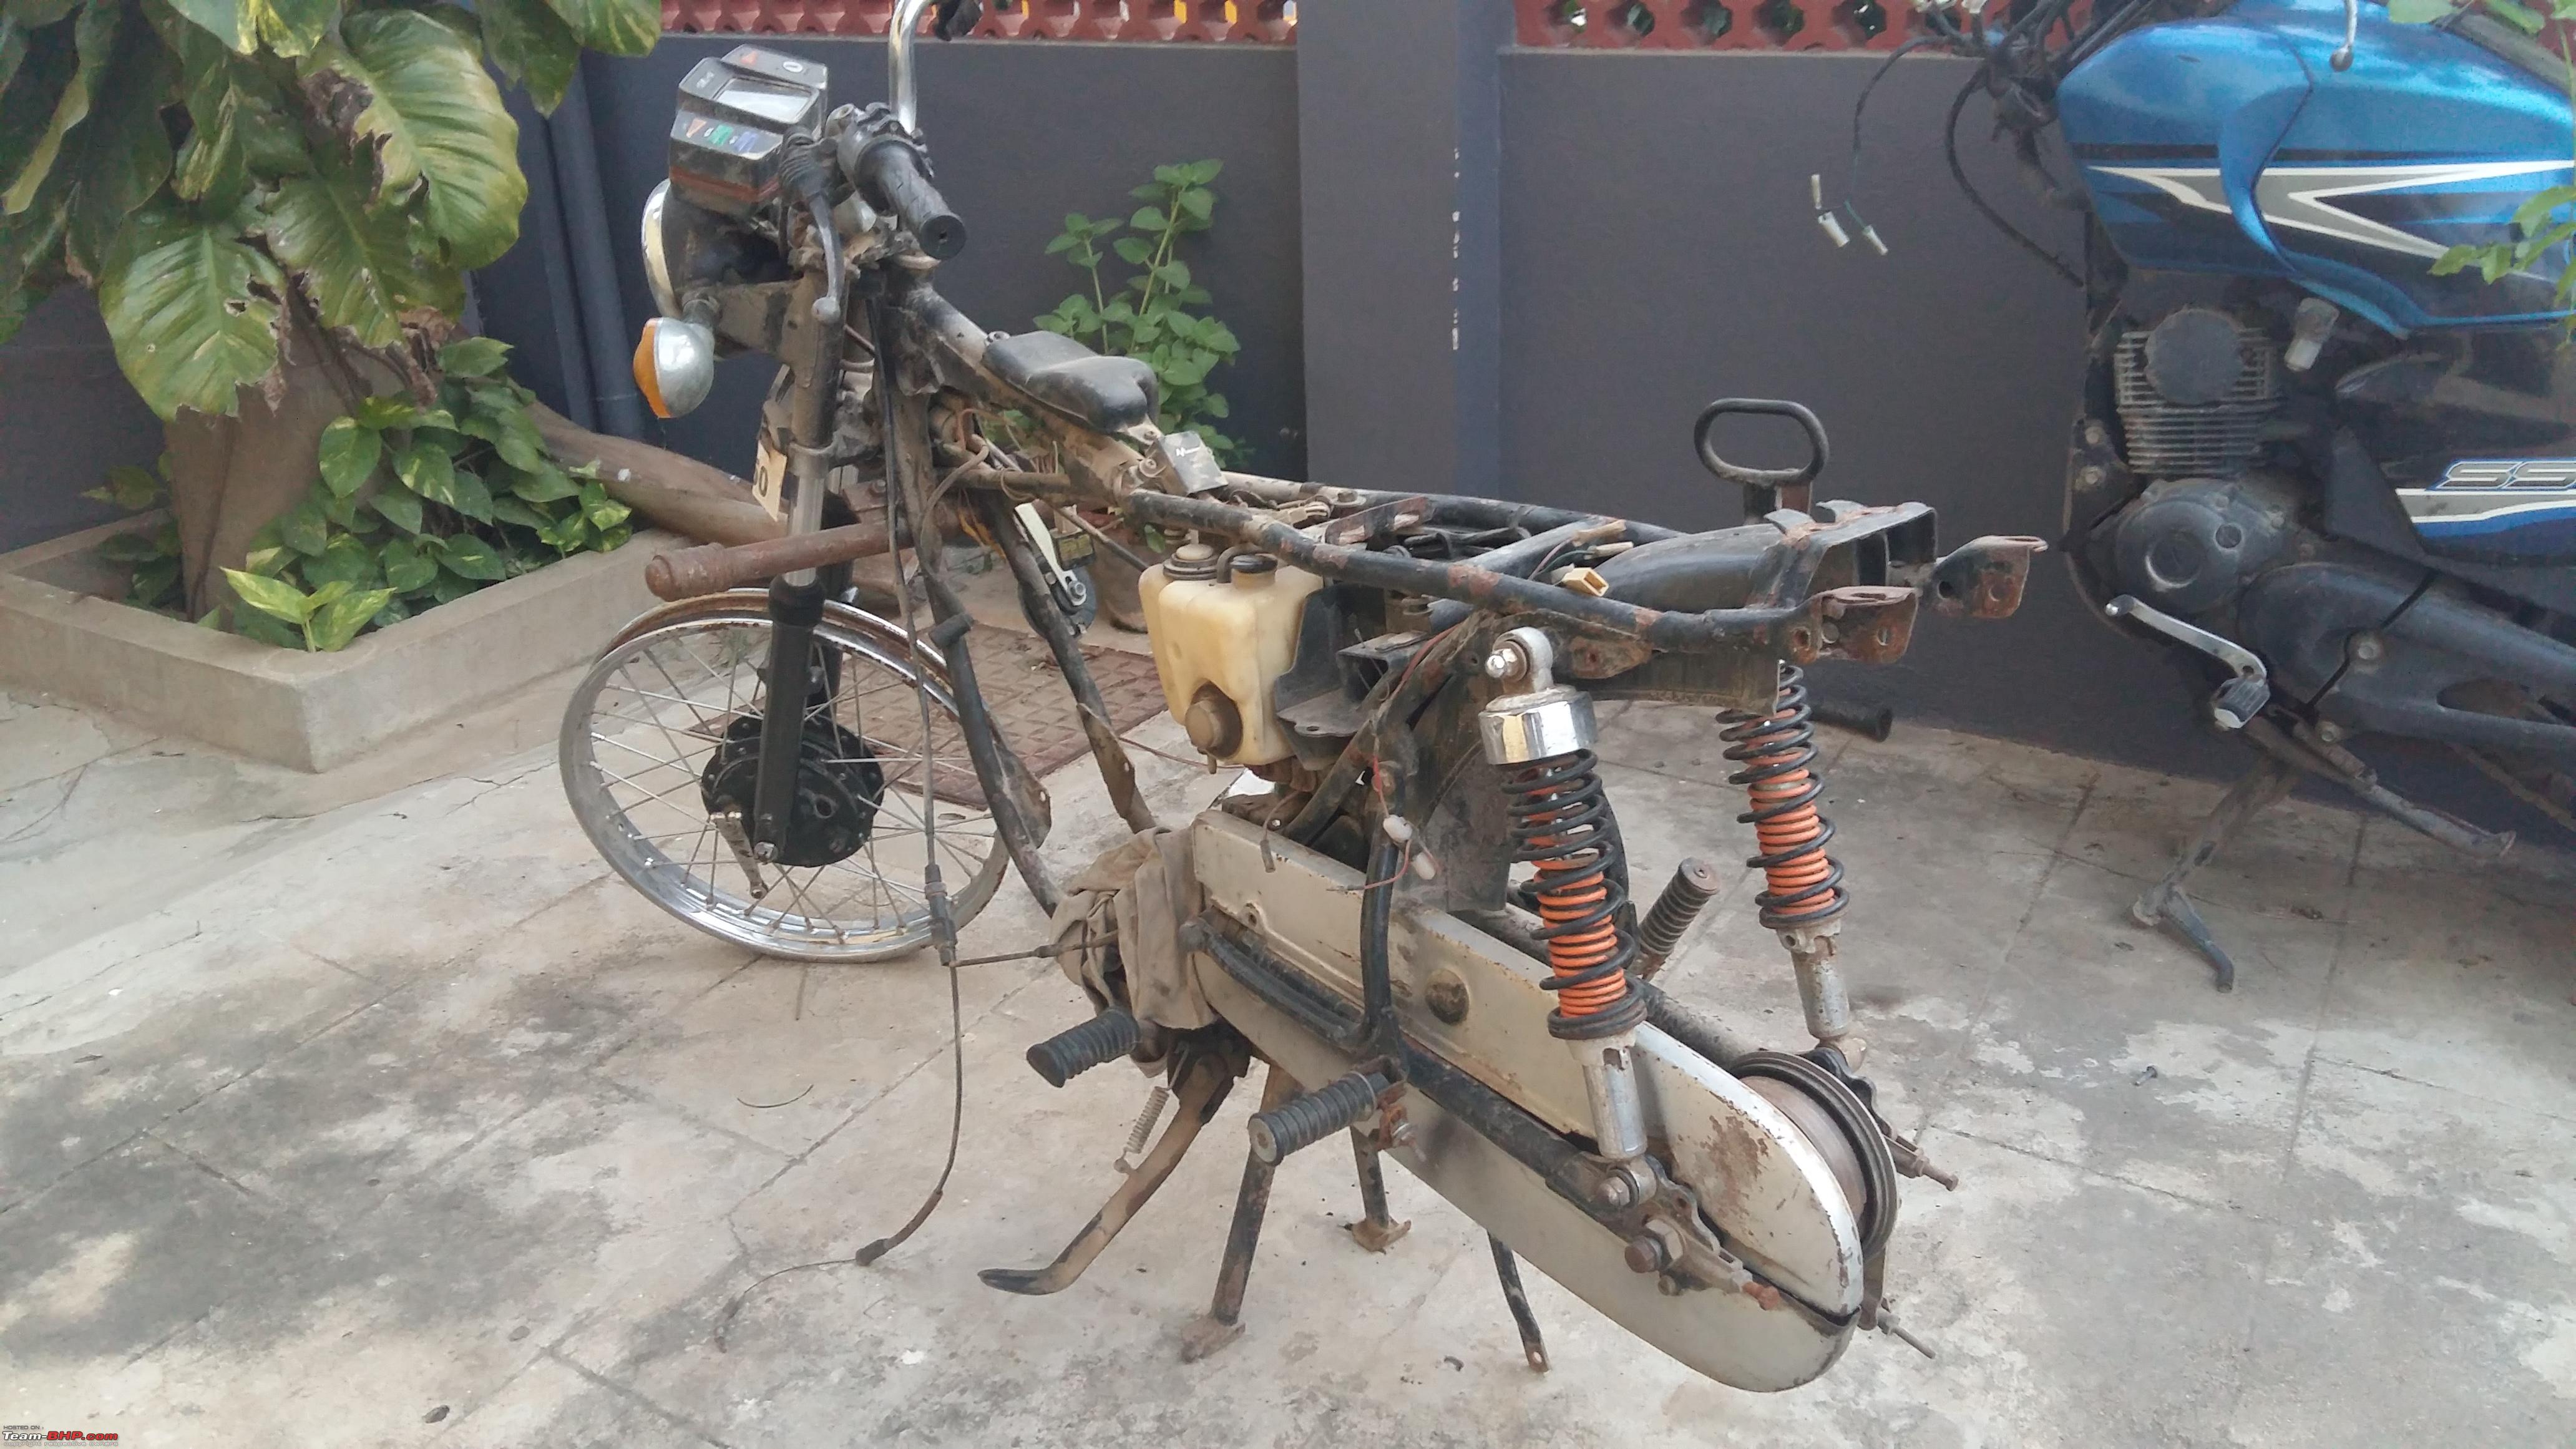 Last edited by Aditya : 4th May 2021 at 16:59. Reason: Typo |
|
| (26)
Thanks
|
| The following 26 BHPians Thank Mr.Boss for this useful post: | 2himanshu, Akshay6988, AmitRavi07, Arun.K, ashphil, autocrat, chinmaypillay, condor, deepfreak15, DrANTO, drrajasaravanan, GandalfTheGrey, Gannu_1, GTO, h14, InControl, Ithaca, Jeroen, JTM, mh09ad5578, PM - B, RaghuVis, Shanksta, SnS_12, SuhairZain, v12 |
|
2nd May 2021, 23:14
| #3 |
| Distinguished - BHPian | re: Motorcycle Restoration | Beginner's Guide Preparation Something to keep in mind  Better outcomes are guaranteed if the preparation phase is handled with care. I suggest to spend some additional time and energy during the preparation phase to avoid spending multiple folds later. Speaking from my own experience, I had started a couple of projects without proper planning and either couldn't complete on time or abandoned. one such example is here (Building a 'Pocket Bike' out of a TVS Scooty ES) For first timers it is always good to take support or KT from someone who has failed in past. Believe me, 1 failure story teaches a lot more than hundreds of success stories. I don't mean or ask to refrain from taking the advice from one who succeeded, it is more beneficial to understand Dos and Don'ts rather than following only the Dos. Preparation starts with,
Collected few manuals online and some scanned copies through fellow members of Team-BHP & other forums 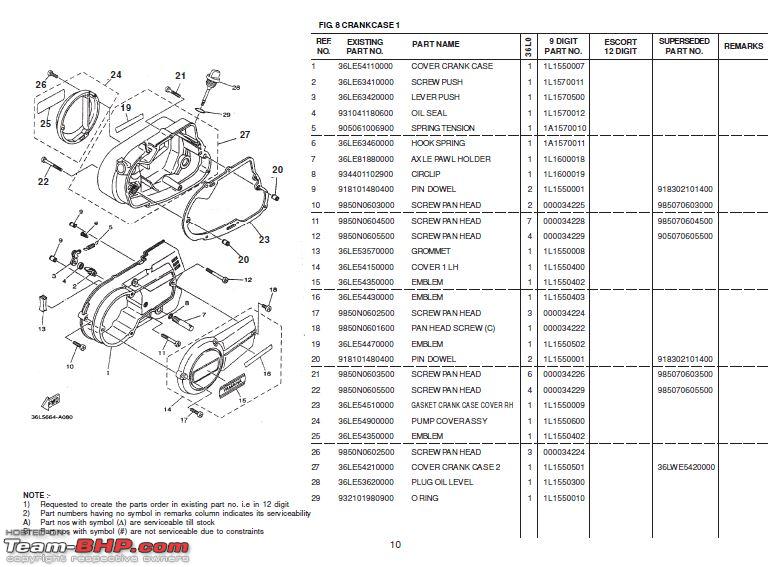  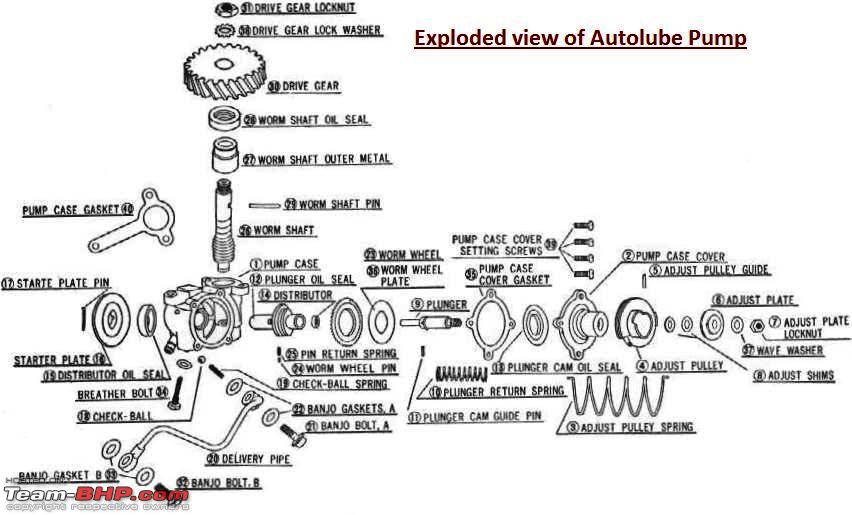 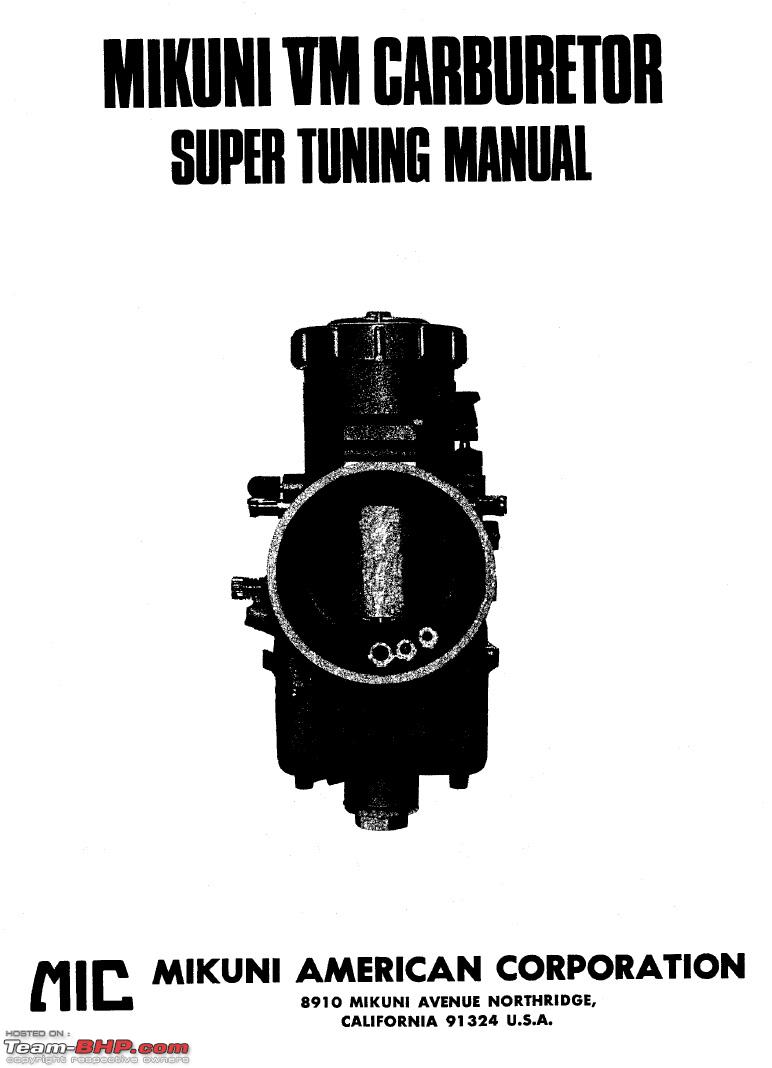 Last edited by Mr.Boss : 3rd May 2021 at 08:19. |
|
| (24)
Thanks
|
| The following 24 BHPians Thank Mr.Boss for this useful post: | Akshay6988, AmitRavi07, Arun.K, autocrat, captainkevin, chinmaypillay, condor, deepfreak15, drrajasaravanan, GandalfTheGrey, Gannu_1, Geo_Ipe, GTO, h14, InControl, Jeroen, mh09ad5578, PM - B, RaghuVis, Shanksta, SnS_12, SuhairZain, v12, vaasu |
|
3rd May 2021, 08:43
| #4 | |
| Distinguished - BHPian | re: Motorcycle Restoration | Beginner's Guide Execution 1. Wash the bike Before stripping down, wash the bike without fail. A proper pressure wash and de-greasing (Kerosene or Diesel being used by mechanics) the areas where the oil leak or grease accumulation will save you from future tragedies. Quoting from our fellow member RiderZone's post https://www.team-bhp.com/forum/motor...otorcycle.html (How NOT to restore your old motorcycle) Quote:
This was the condition after dismantling 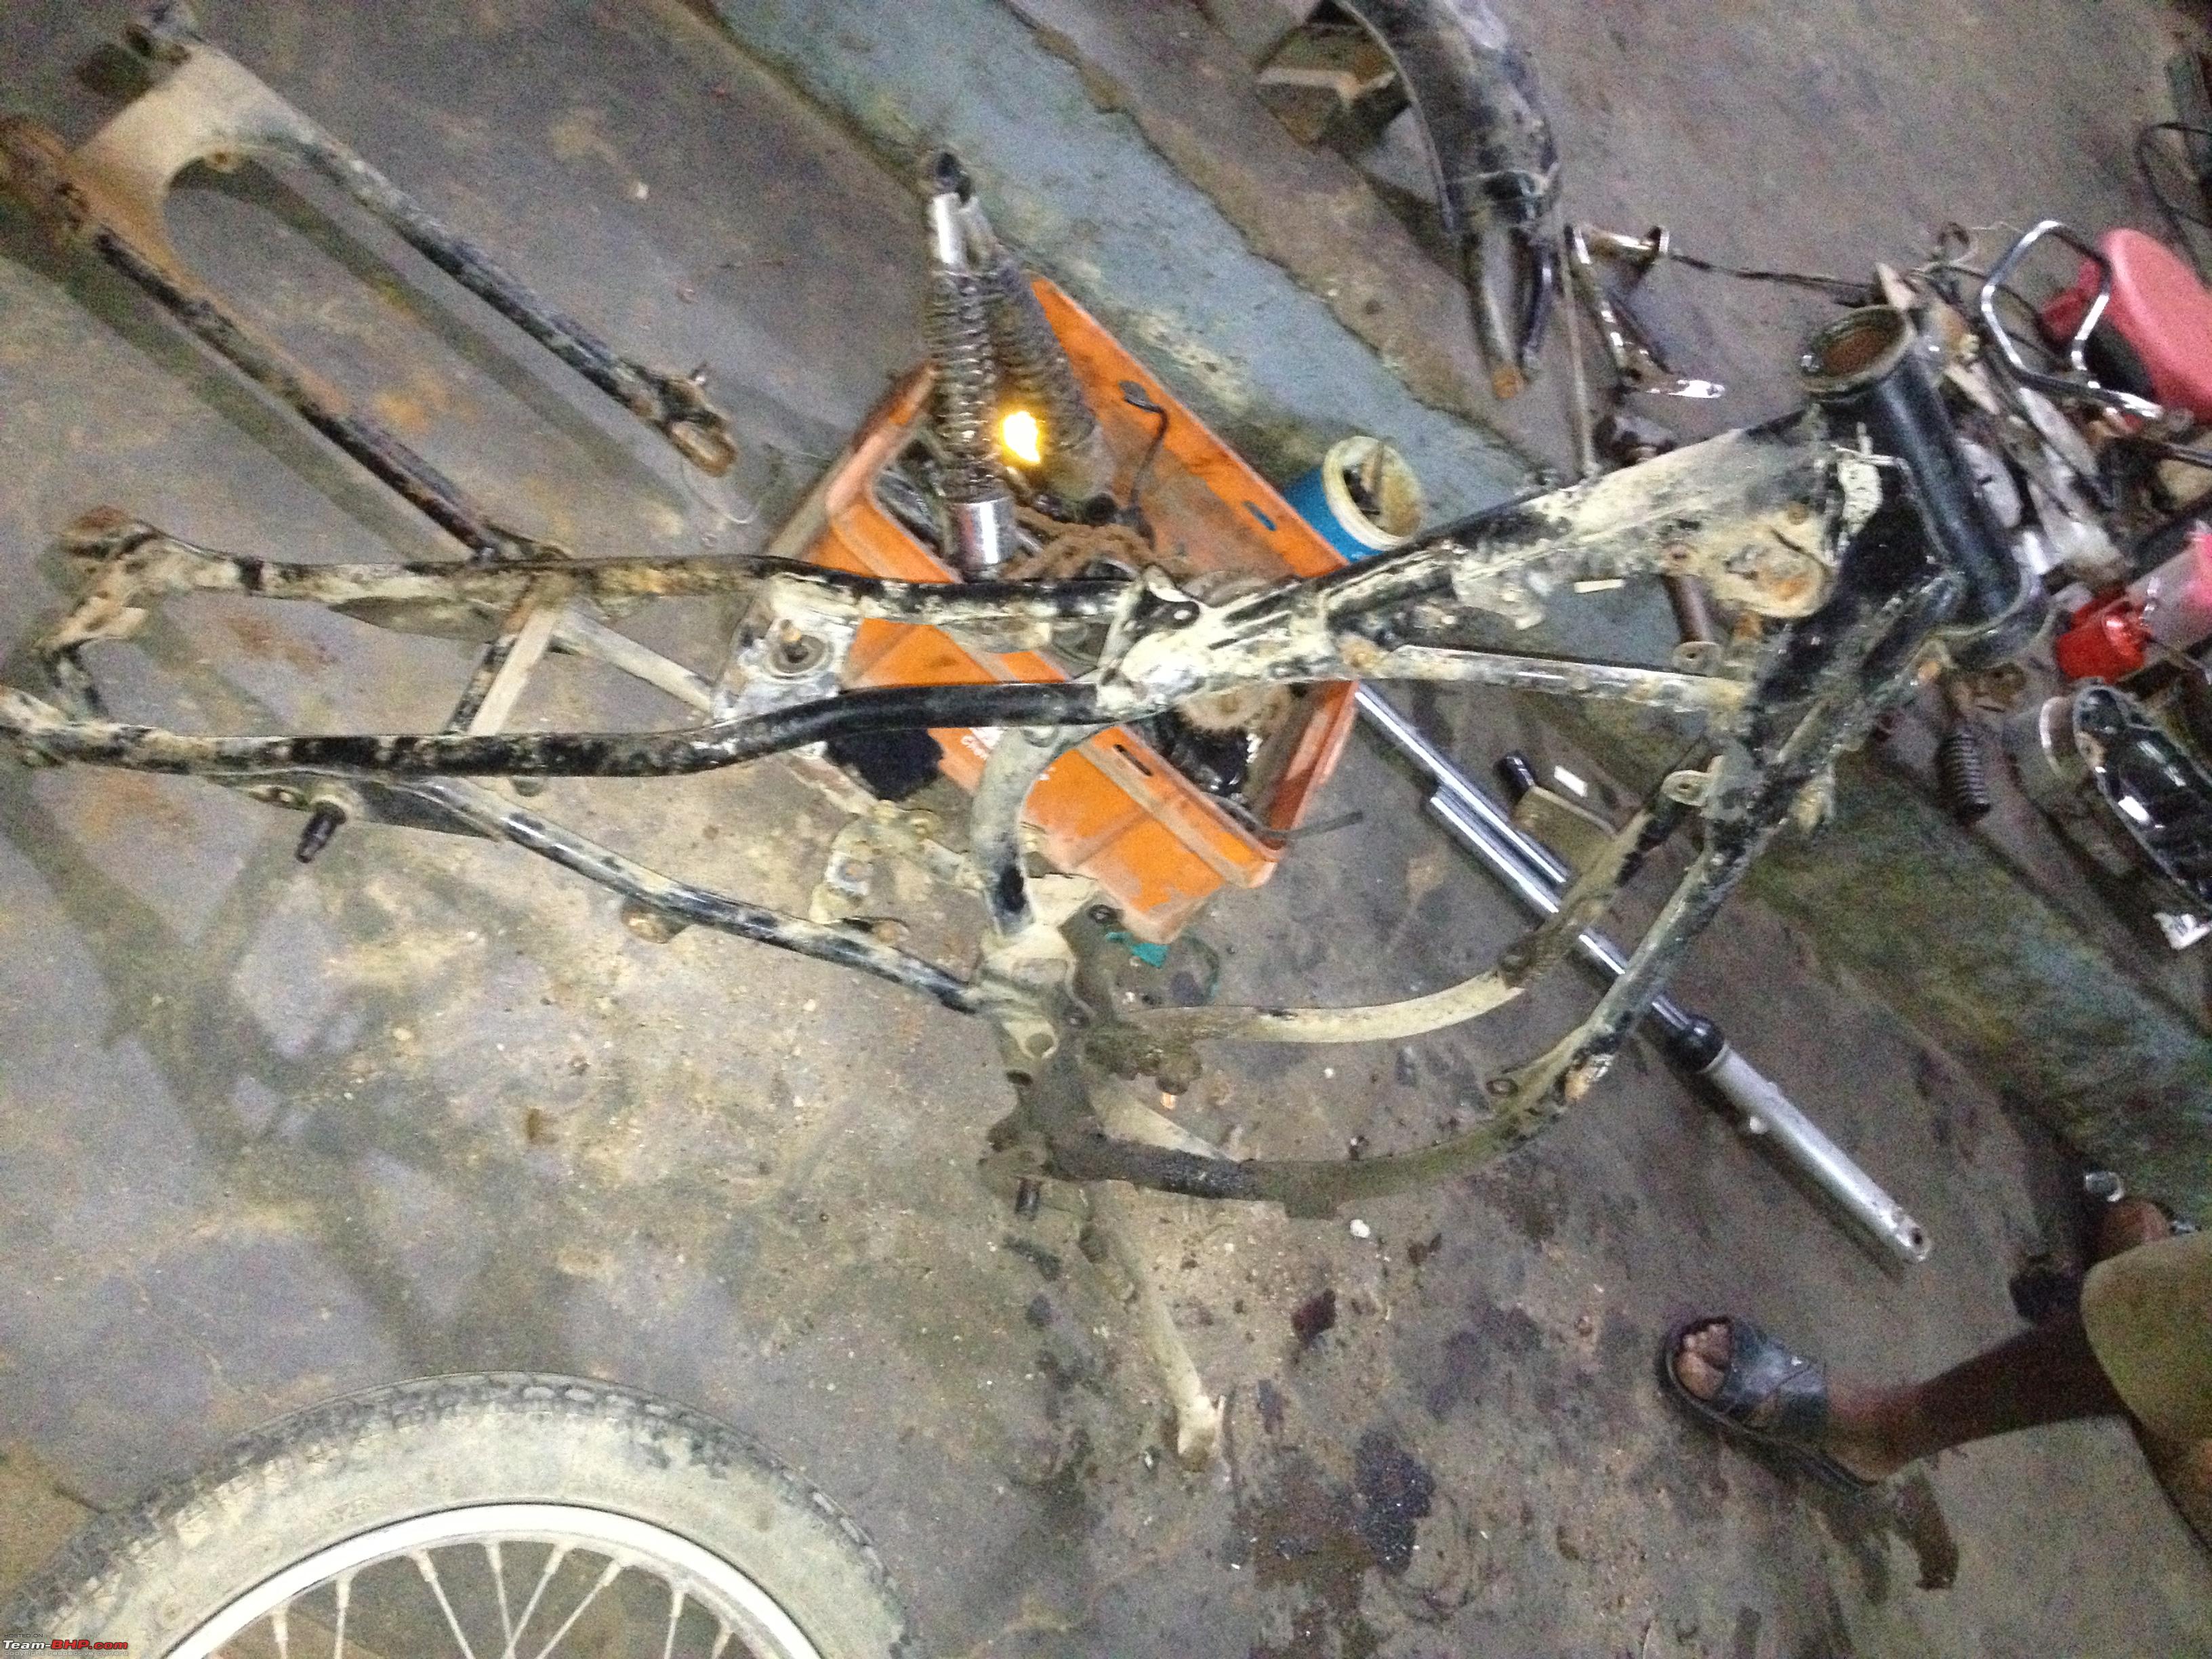 And I'm left with no other option but to take everything to nearby water wash centre and get them washed properly before I give them for sandblasting  Took this learning and for the subsequent restorations we started with washing. For reference, this is how the frame looked after dismantling from a washed bike 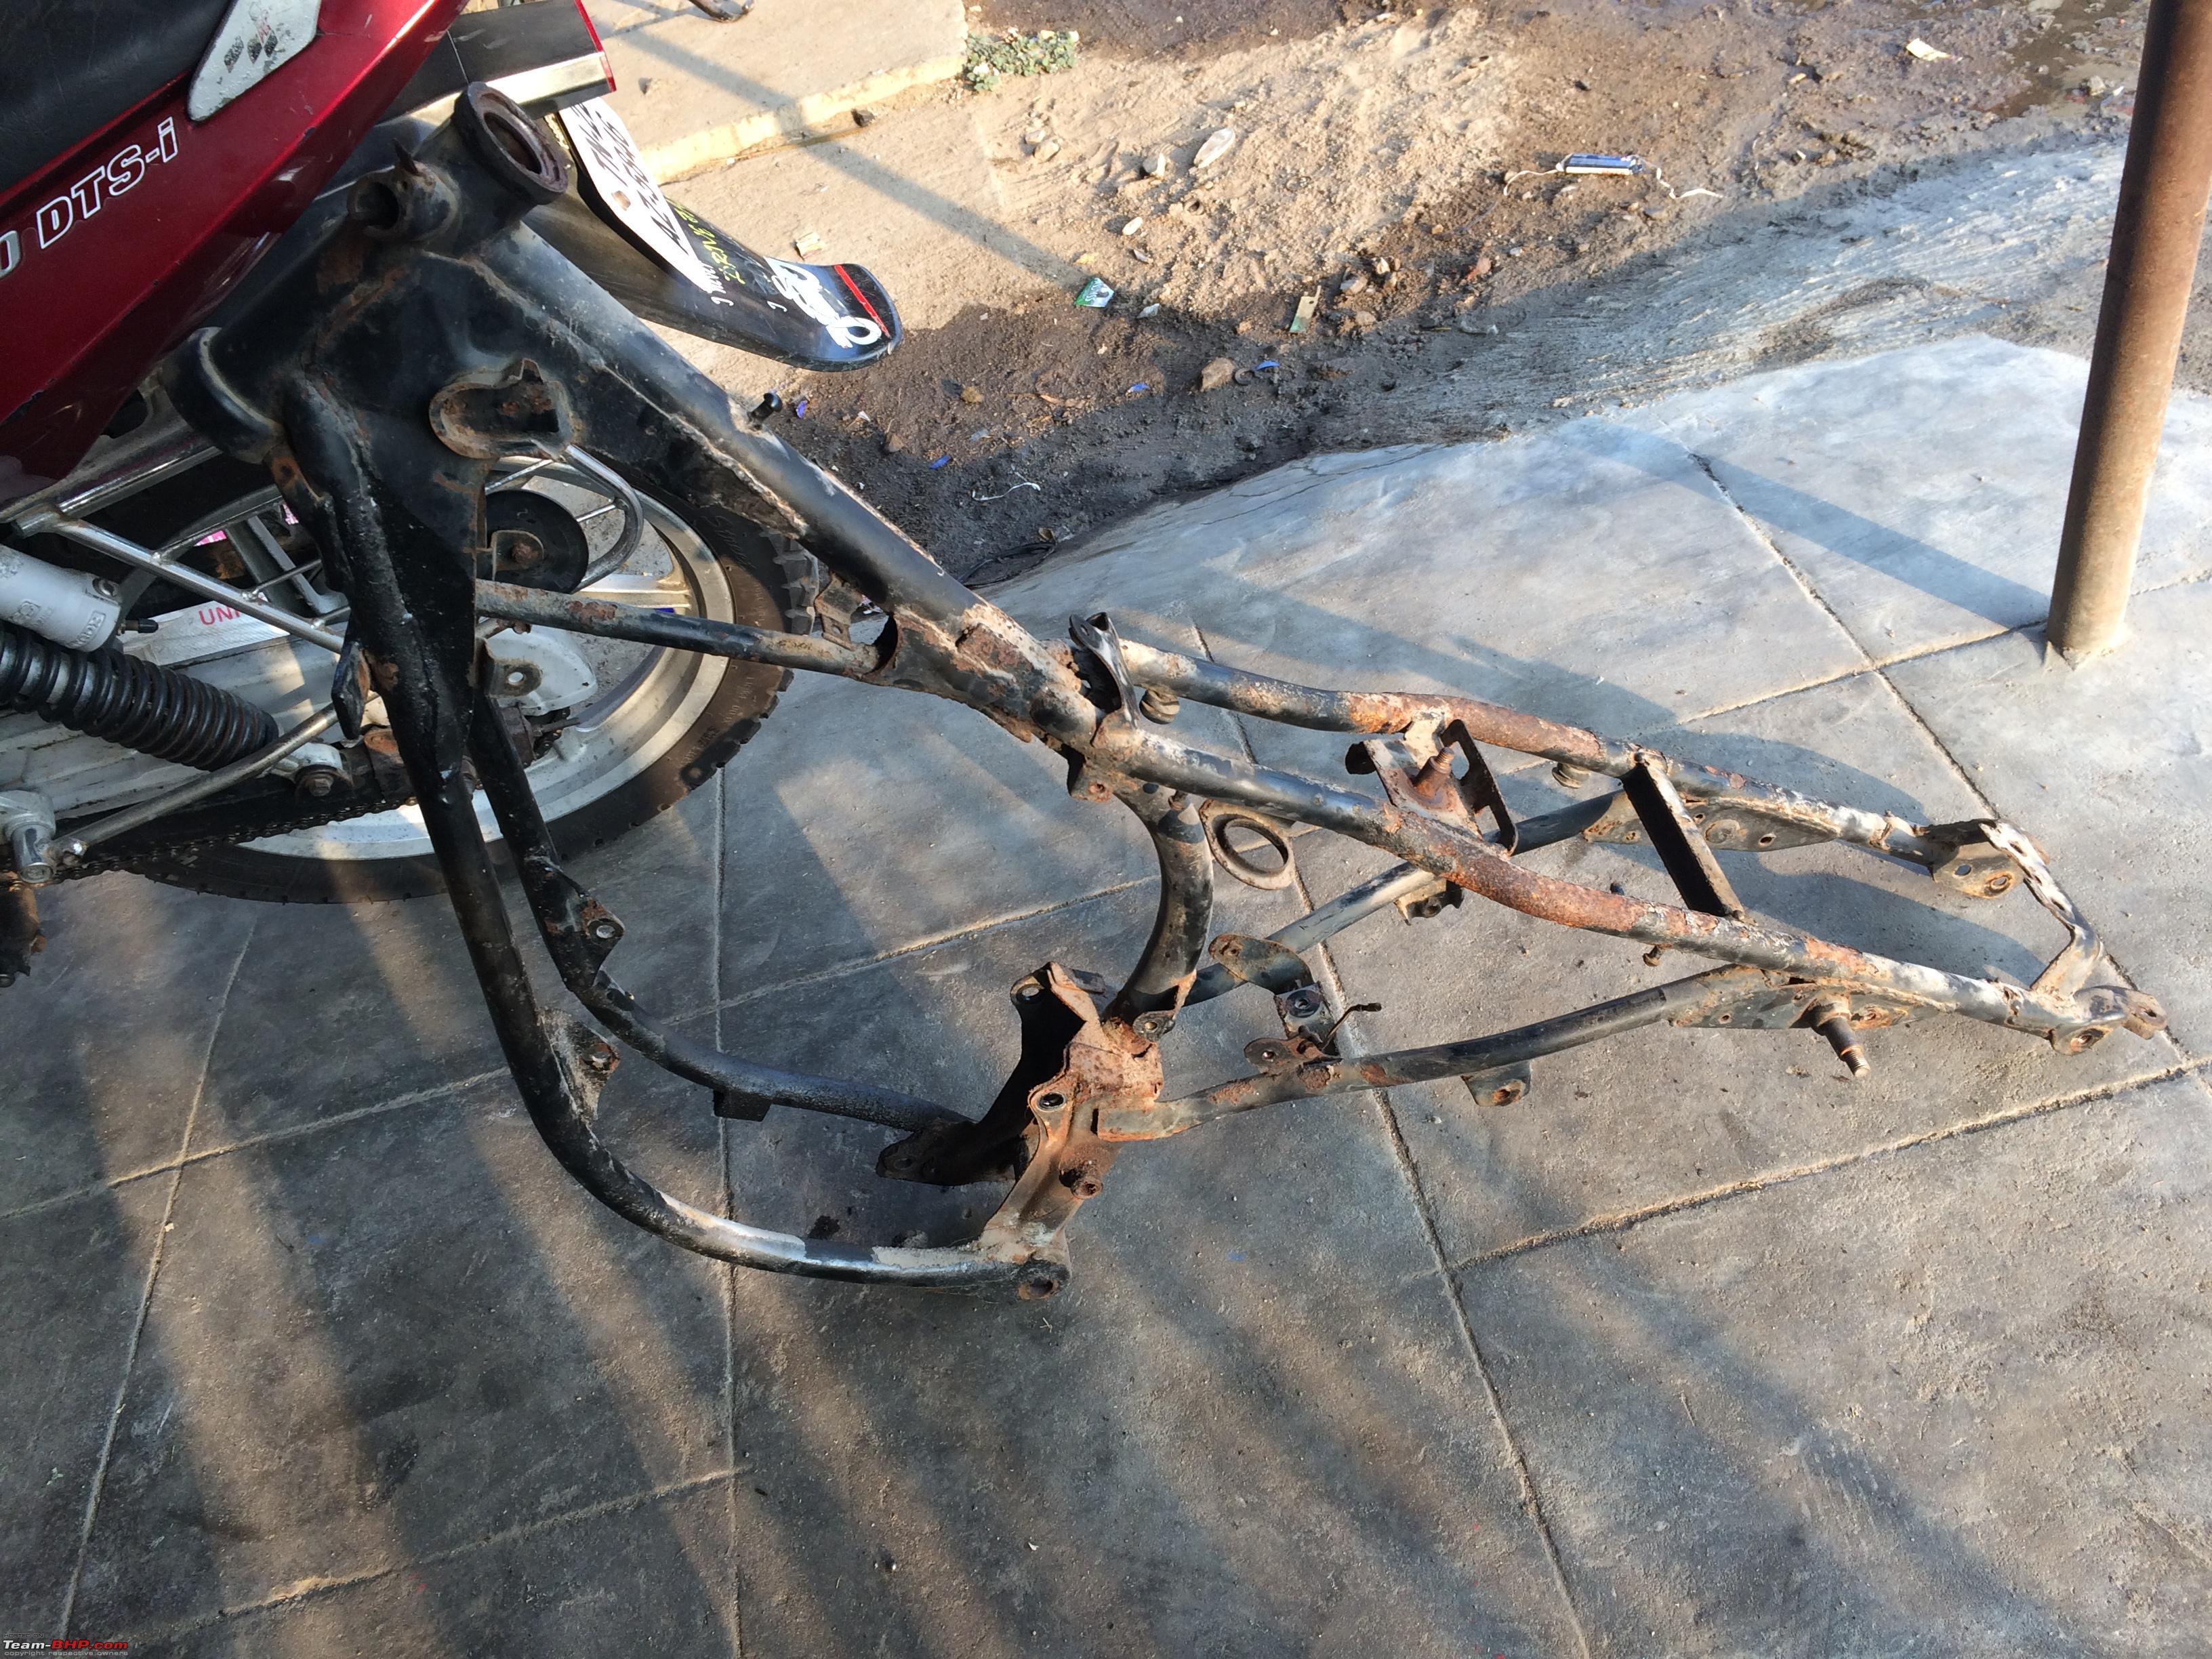 2. Collect the necessary tools Repair / service manual can save a lot of time here (especially for the special tools like pullers) It is worth investing on such special tools if the bike will be retained for ever. Sometimes making a custom tool saves space and one single tool can handle multiple vehicles (Eg: magnet pullers, with variable PCD studs) We normally do the dismantling and assembly late in the evening or sometimes during mid night. There are instances where we are left with no support for such special tools (or sometimes no replacement for a broken impact driver) in the middle of night and we had to wind-up without completing the job. So it is always better to have a back-up before starting the job. Make sure to have below items before dismantling
3. Dismantling This is the most easy & enjoyable job in restoration. Anyone who could hold a spanner or screw driver could accomplish the mission in few hours. But if the right order / sequence was not followed, we may end up with a tedious process later. Below is the sequence I follow for Yamaha RX
Helping hand is always better, but remember TOO MANY COOKS SPOIL THE BROTH 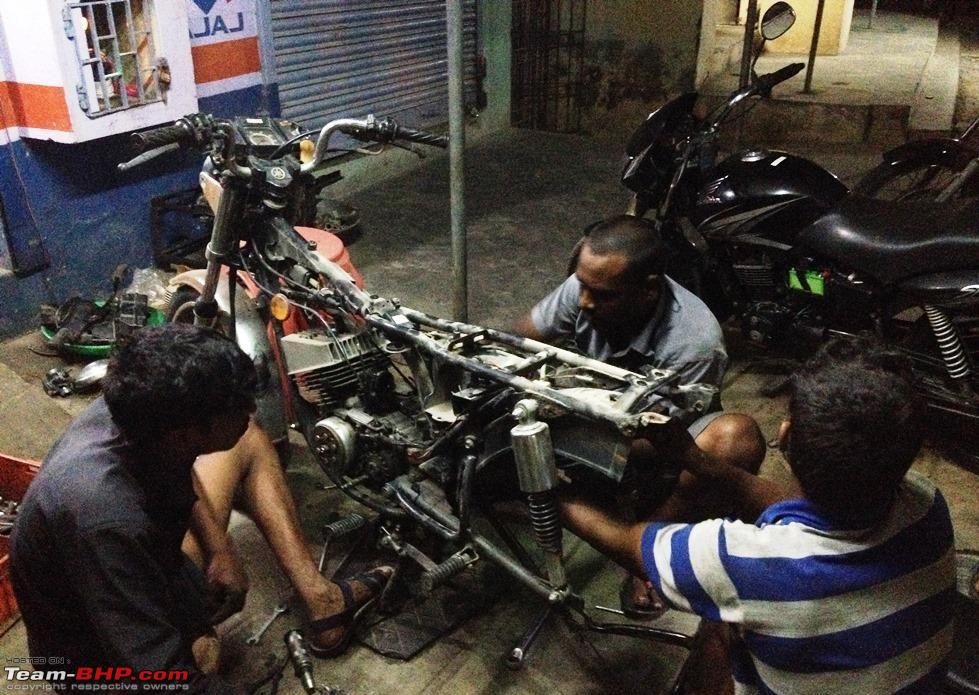 This involved 4 people - mechanic, couple of his friends and yours truly (behind the lens) and the bike was dismantled in less than 25 mins. Guess what, few small bits (magnet woodruff key, couple of other balls) went missing and none of us knew where it went. While dismantling make sure to segregate the parts accordingly
Clean the parts as much as possible while dismantling or before sending then for further processing  Make sure to have identification marks engraved on the critical parts that goes out for repair work. These days people are so greedy to swap the genuine and good parts with fake and useless goods. Remember, the 'made in japan' novelty has a huge market when it comes to RX & RD parts. Last edited by Mr.Boss : 3rd May 2021 at 14:49. | |
|
| (20)
Thanks
|
| The following 20 BHPians Thank Mr.Boss for this useful post: | Akshay6988, AmitRavi07, Arun.K, autocrat, chinmaypillay, condor, deepfreak15, DrANTO, drrajasaravanan, Gannu_1, GTO, InControl, Ithaca, mh09ad5578, RaghuVis, Shanksta, sleeperwagon, SnS_12, SuhairZain, v12 |
|
3rd May 2021, 10:47
| #5 |
| Distinguished - BHPian | re: Motorcycle Restoration | Beginner's Guide Execution - Contd... 4. Painting
In case of DIY, use proper PPE and exhaust system (base minimum as suction fan) and follow the multi-coat painting process (I'm not an expert on this subject) with enough curing time between each coat. 5. Platting
6. Repair <<Need basis>> Especially for the re-bore job, find a competent garage who keeps the maximum precision. Most of the garages I came across recently were running with (ab)used machines and out of precision. My last restoration (Red candy - RX100) was done with one such example and the engine seized already, where as the very first restoration (Blue RX135) done with my regular guy is running fine after 7+ years (touch wood) Same applies for the crank calibration & clutch basket reset with new rubber kit. Quality of workmanship is most important here. Cover the painted, platted and repaired parts safely until the bike is assembled back 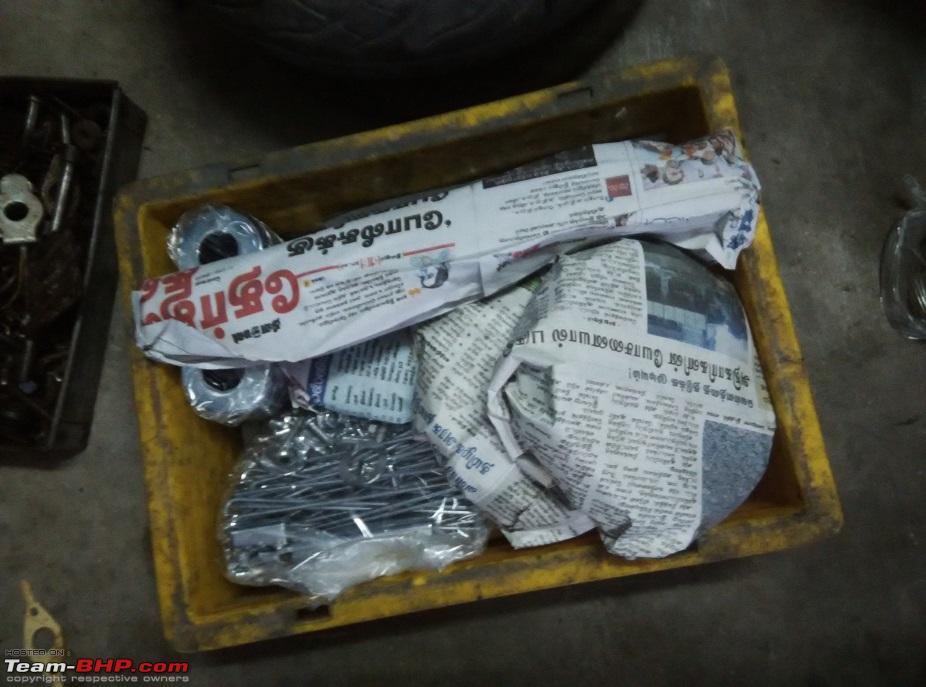 Last edited by Mr.Boss : 3rd May 2021 at 12:38. |
|
| (20)
Thanks
|
| The following 20 BHPians Thank Mr.Boss for this useful post: | Akshay6988, AmitRavi07, Arun.K, autocrat, chinmaypillay, condor, deepfreak15, drrajasaravanan, Gannu_1, Geo_Ipe, GTO, InControl, Ithaca, mh09ad5578, PM - B, RaghuVis, Shanksta, SnS_12, SuhairZain, v12 |
|
3rd May 2021, 12:17
| #6 |
| Distinguished - BHPian | re: Motorcycle Restoration | Beginner's Guide Execution - Contd... 7. Procuring the parts Comes next the most tedious job these days. Market is flooded with greedy sellers quoting a hand and leg for classic / vintage bike parts and equally flooded with cheap and fake parts (especially in OE packing) It needs some eagle eyes or trustworthy source to buy genuine stuffs. For Yamaha parts I'm really missing Indiaspares.in who used to supply genuine parts at MRP (Boodmo of Yamaha spares those day) 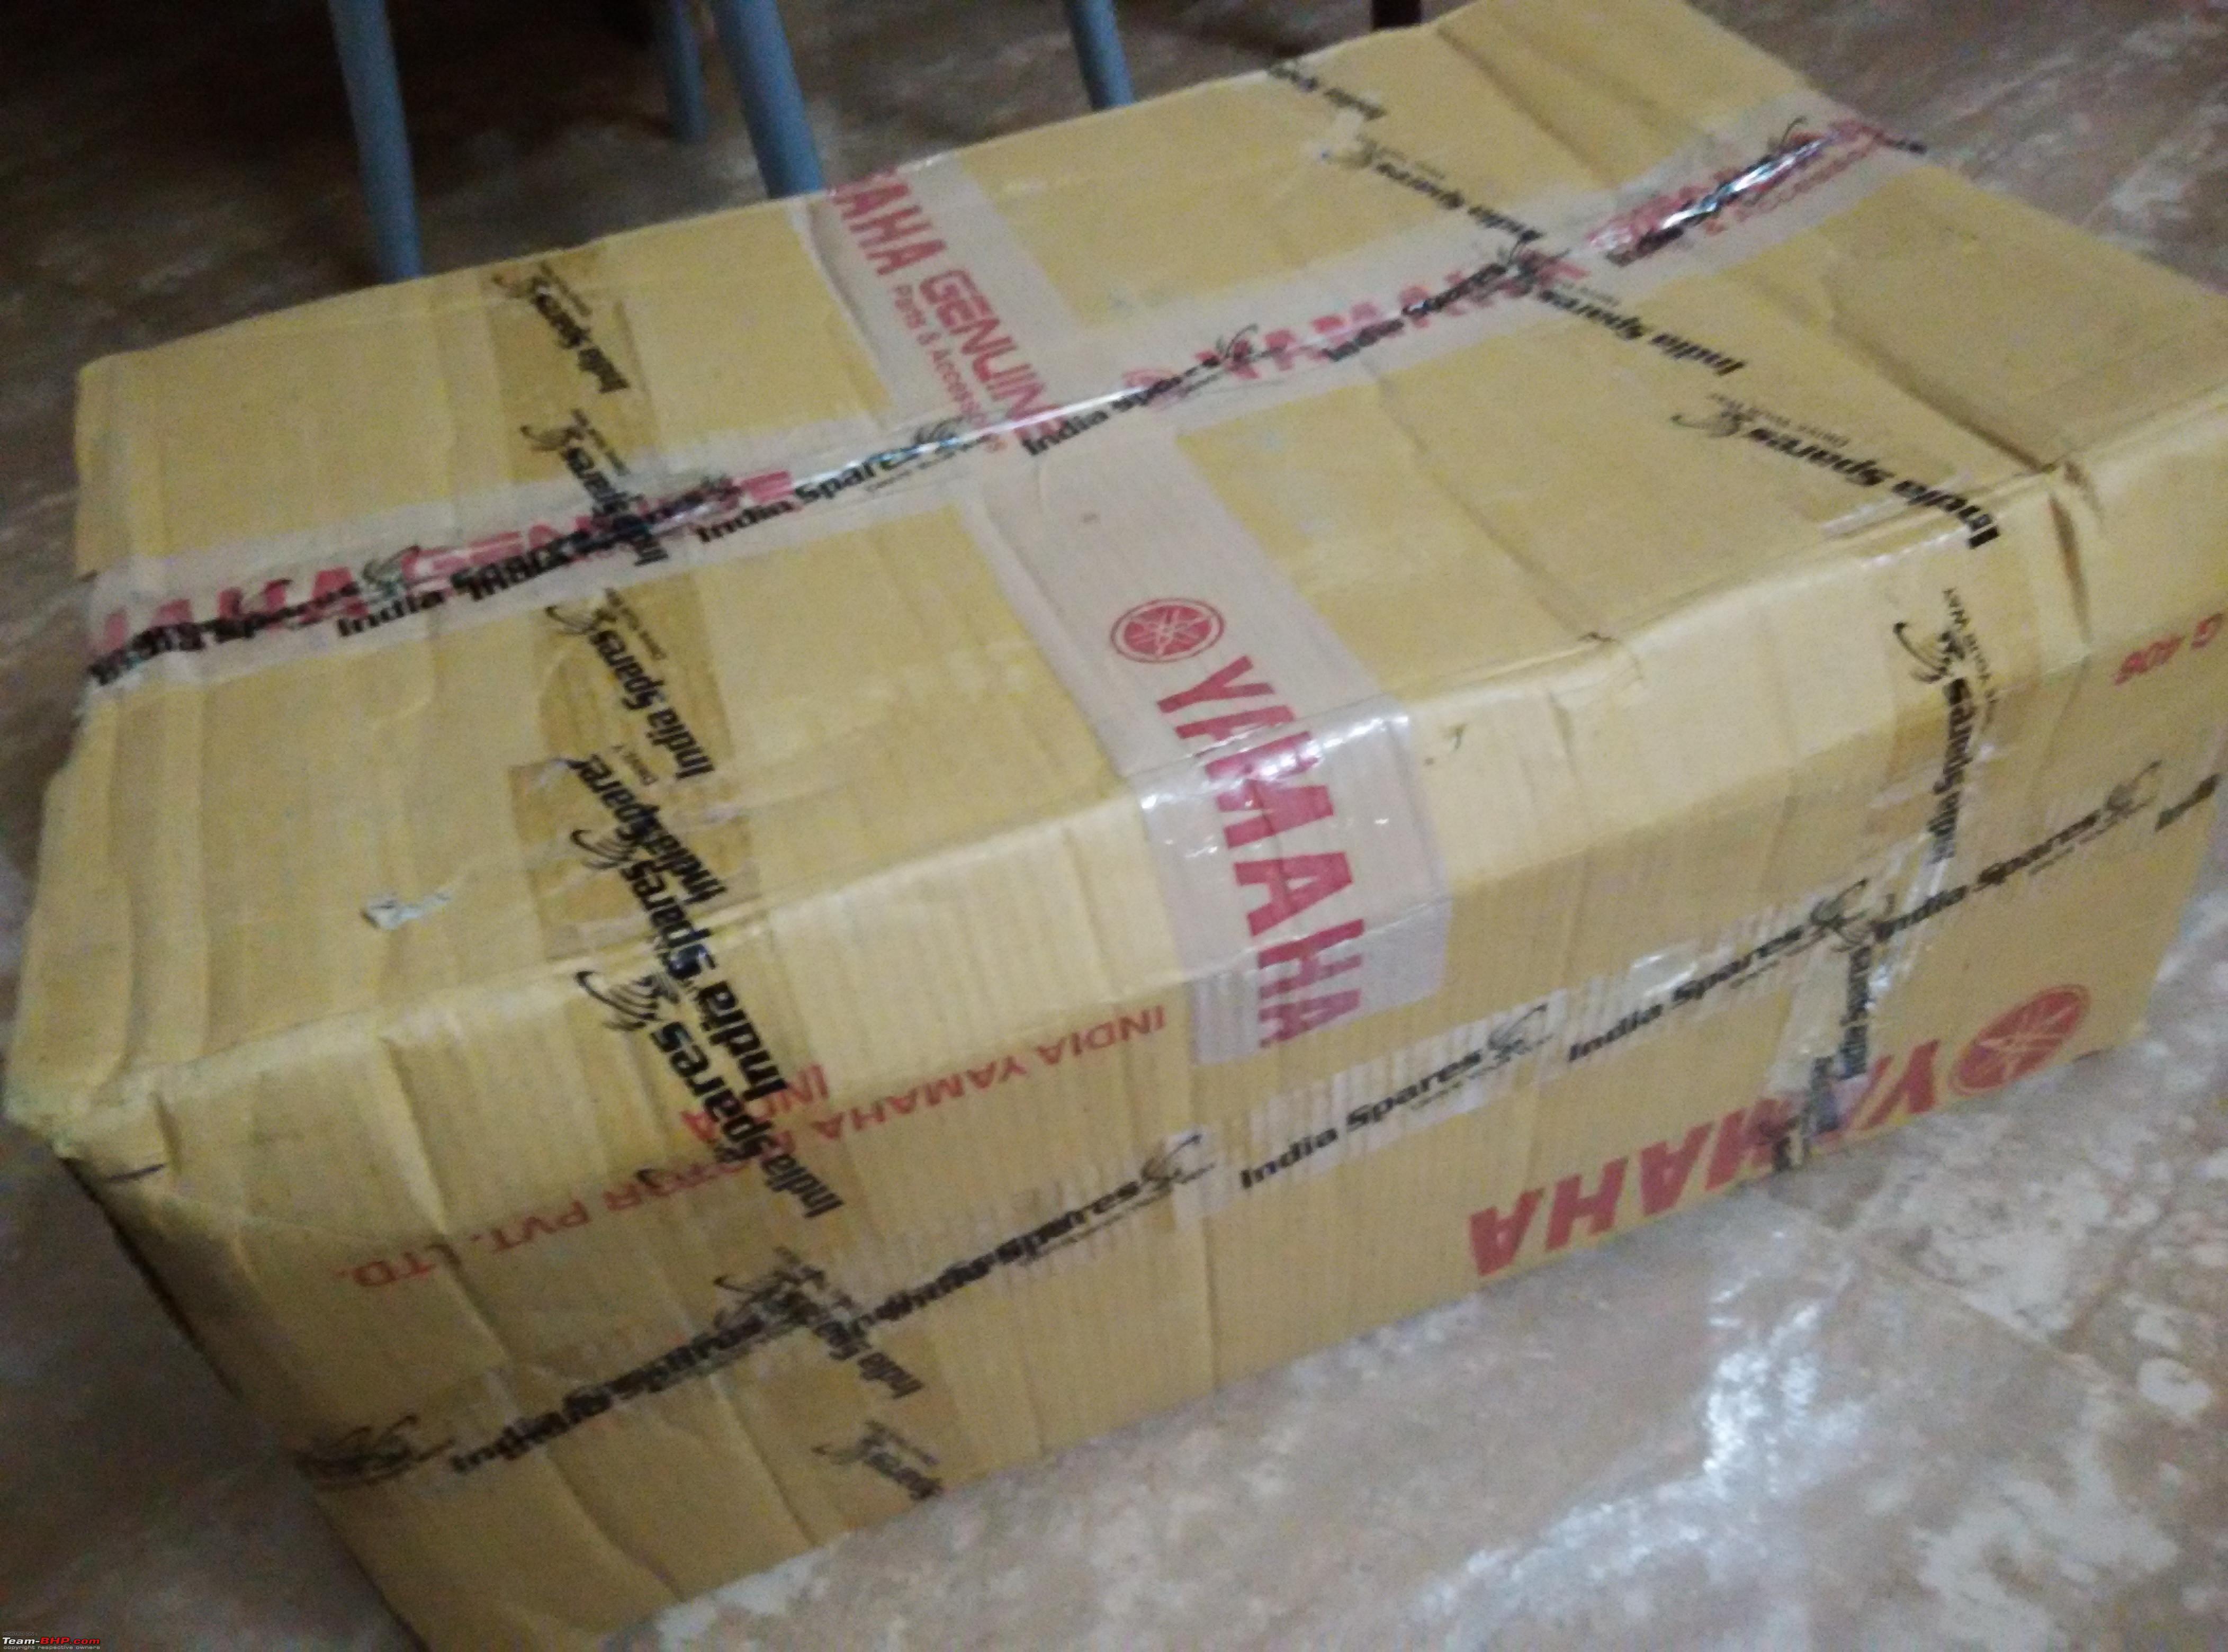 Few care points,
This part was removed from my bike since the clutch milling worn out and couldn't function well.  Swapped with a brand new case & kept aside this one thinking for getting it repaired later. Someone I knew (dealing in used spares) was looking for this made in japan case and I sold him for a mere scrap rate (to recover the logistics cost) and guess what, the same part was posted in FB groups for 5x the MRP. Some parts (including consumables) are hard to source these days. So if you could find such parts, get them in bulk (or at least a few more spare) and secure for future Sometimes back Motul 2T oil (not even the synthetic one) was not available and managed to get an entire case and stored. I'm left with 2 or 3 cans now 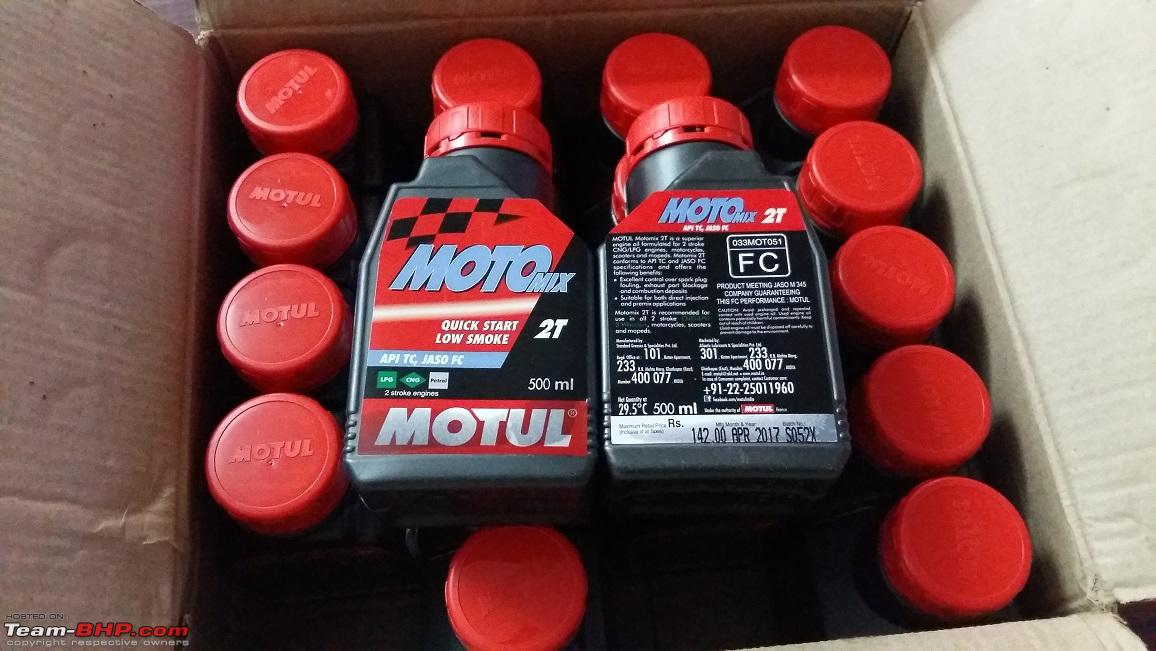 Sometimes we may end up buying a donor bike for the spares. Gladiator in background was a proper running bike purchased for the alloy wheels and Front disc brake. 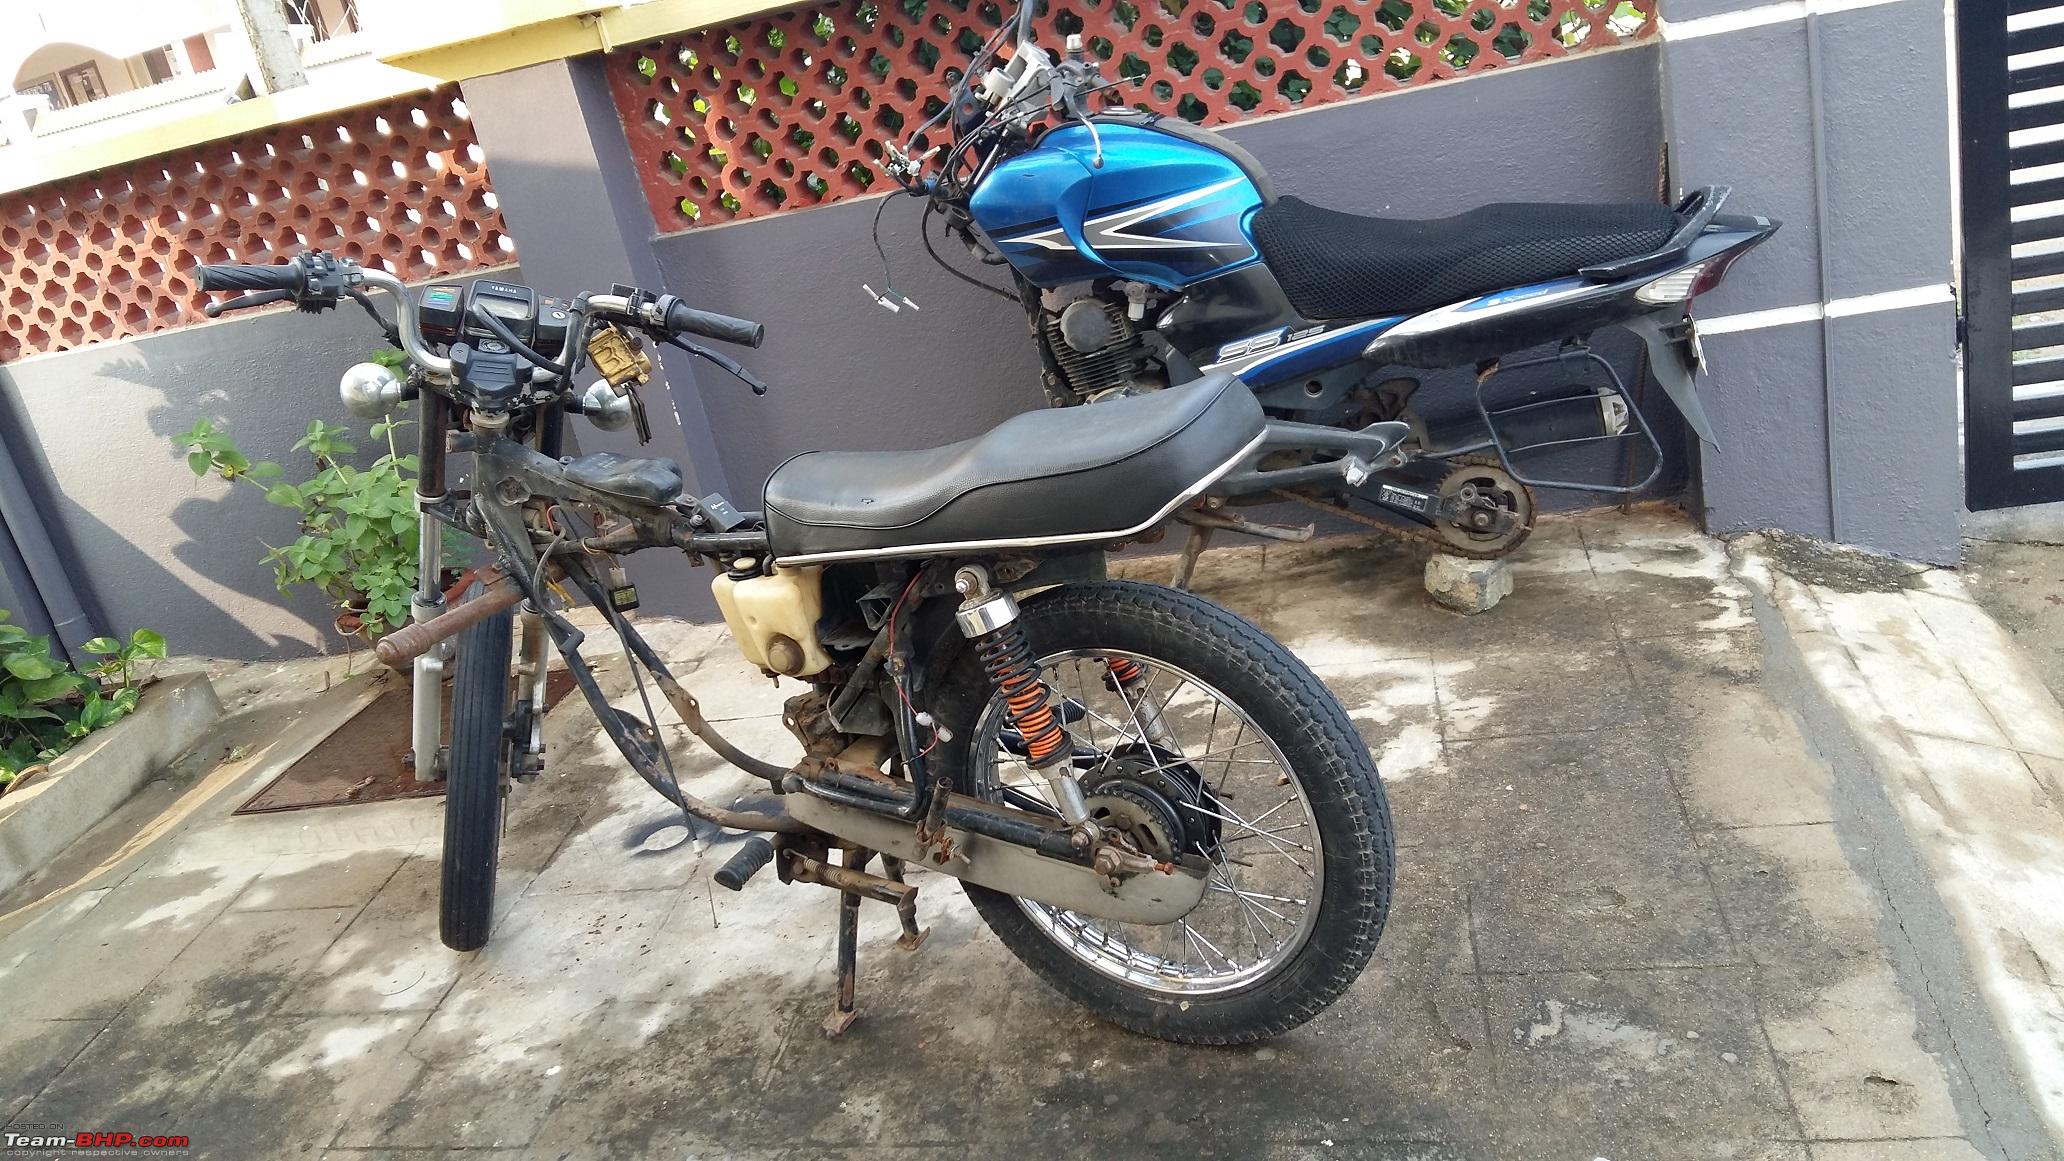 After removing the required parts few items were sold and the left out was scrapped (and recovered more than the purchase price )Last edited by Mr.Boss : 3rd May 2021 at 12:36. |
|
| (23)
Thanks
|
| The following 23 BHPians Thank Mr.Boss for this useful post: | Akshay6988, AmitRavi07, Arun.K, autocrat, chinmaypillay, condor, deepfreak15, DrANTO, drrajasaravanan, Gannu_1, Geo_Ipe, GTO, Ithaca, Jeroen, mazealot, mh09ad5578, RaceHorse, RaghuVis, Shanksta, sleeperwagon, SnS_12, SuhairZain, v12 |
|
3rd May 2021, 14:10
| #7 |
| Distinguished - BHPian | re: Motorcycle Restoration | Beginner's Guide Execution - Contd... 8. Assembly
Better to take an expert help (if required) for engine sub assembly. This saves re-opening the engine case if something goes wrong. Here is the picture of my mechanic getting 'gyan' from his 'guru' during our first restoration. He was kind enough to explain the reason behind certain practices and best practices. 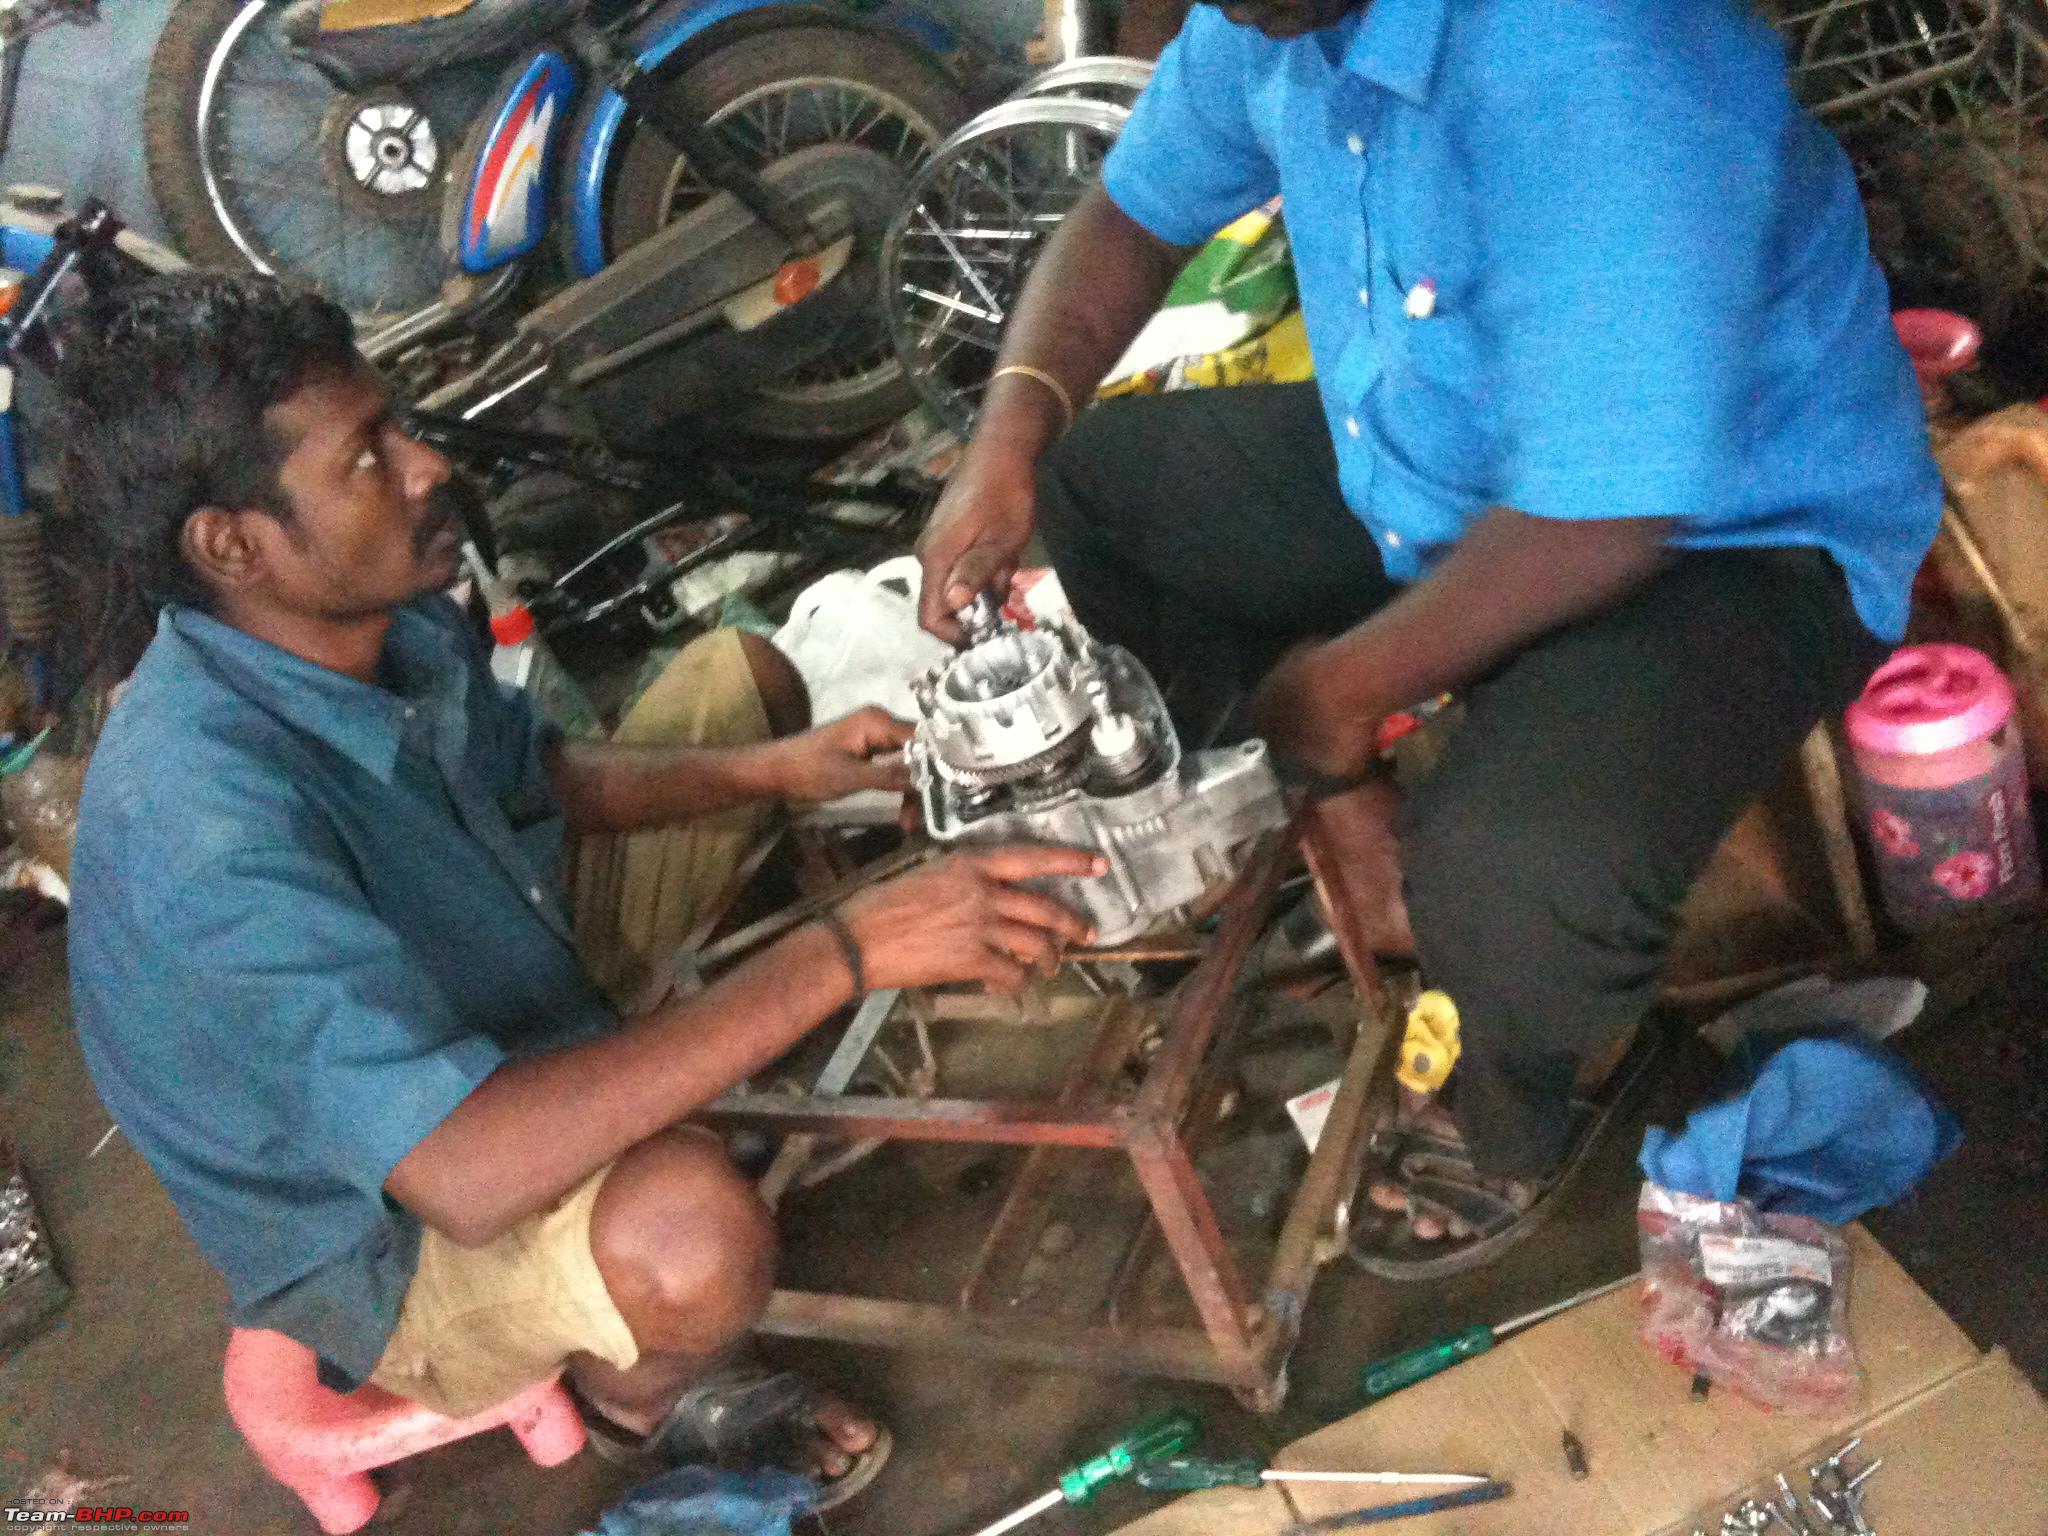 One example of upgrading for better performance without spoiling the OE looks. RX has pathetic headlamp (even going by 2 decade old standards) and this is the only option to retain the classic look and enhancing the light throw 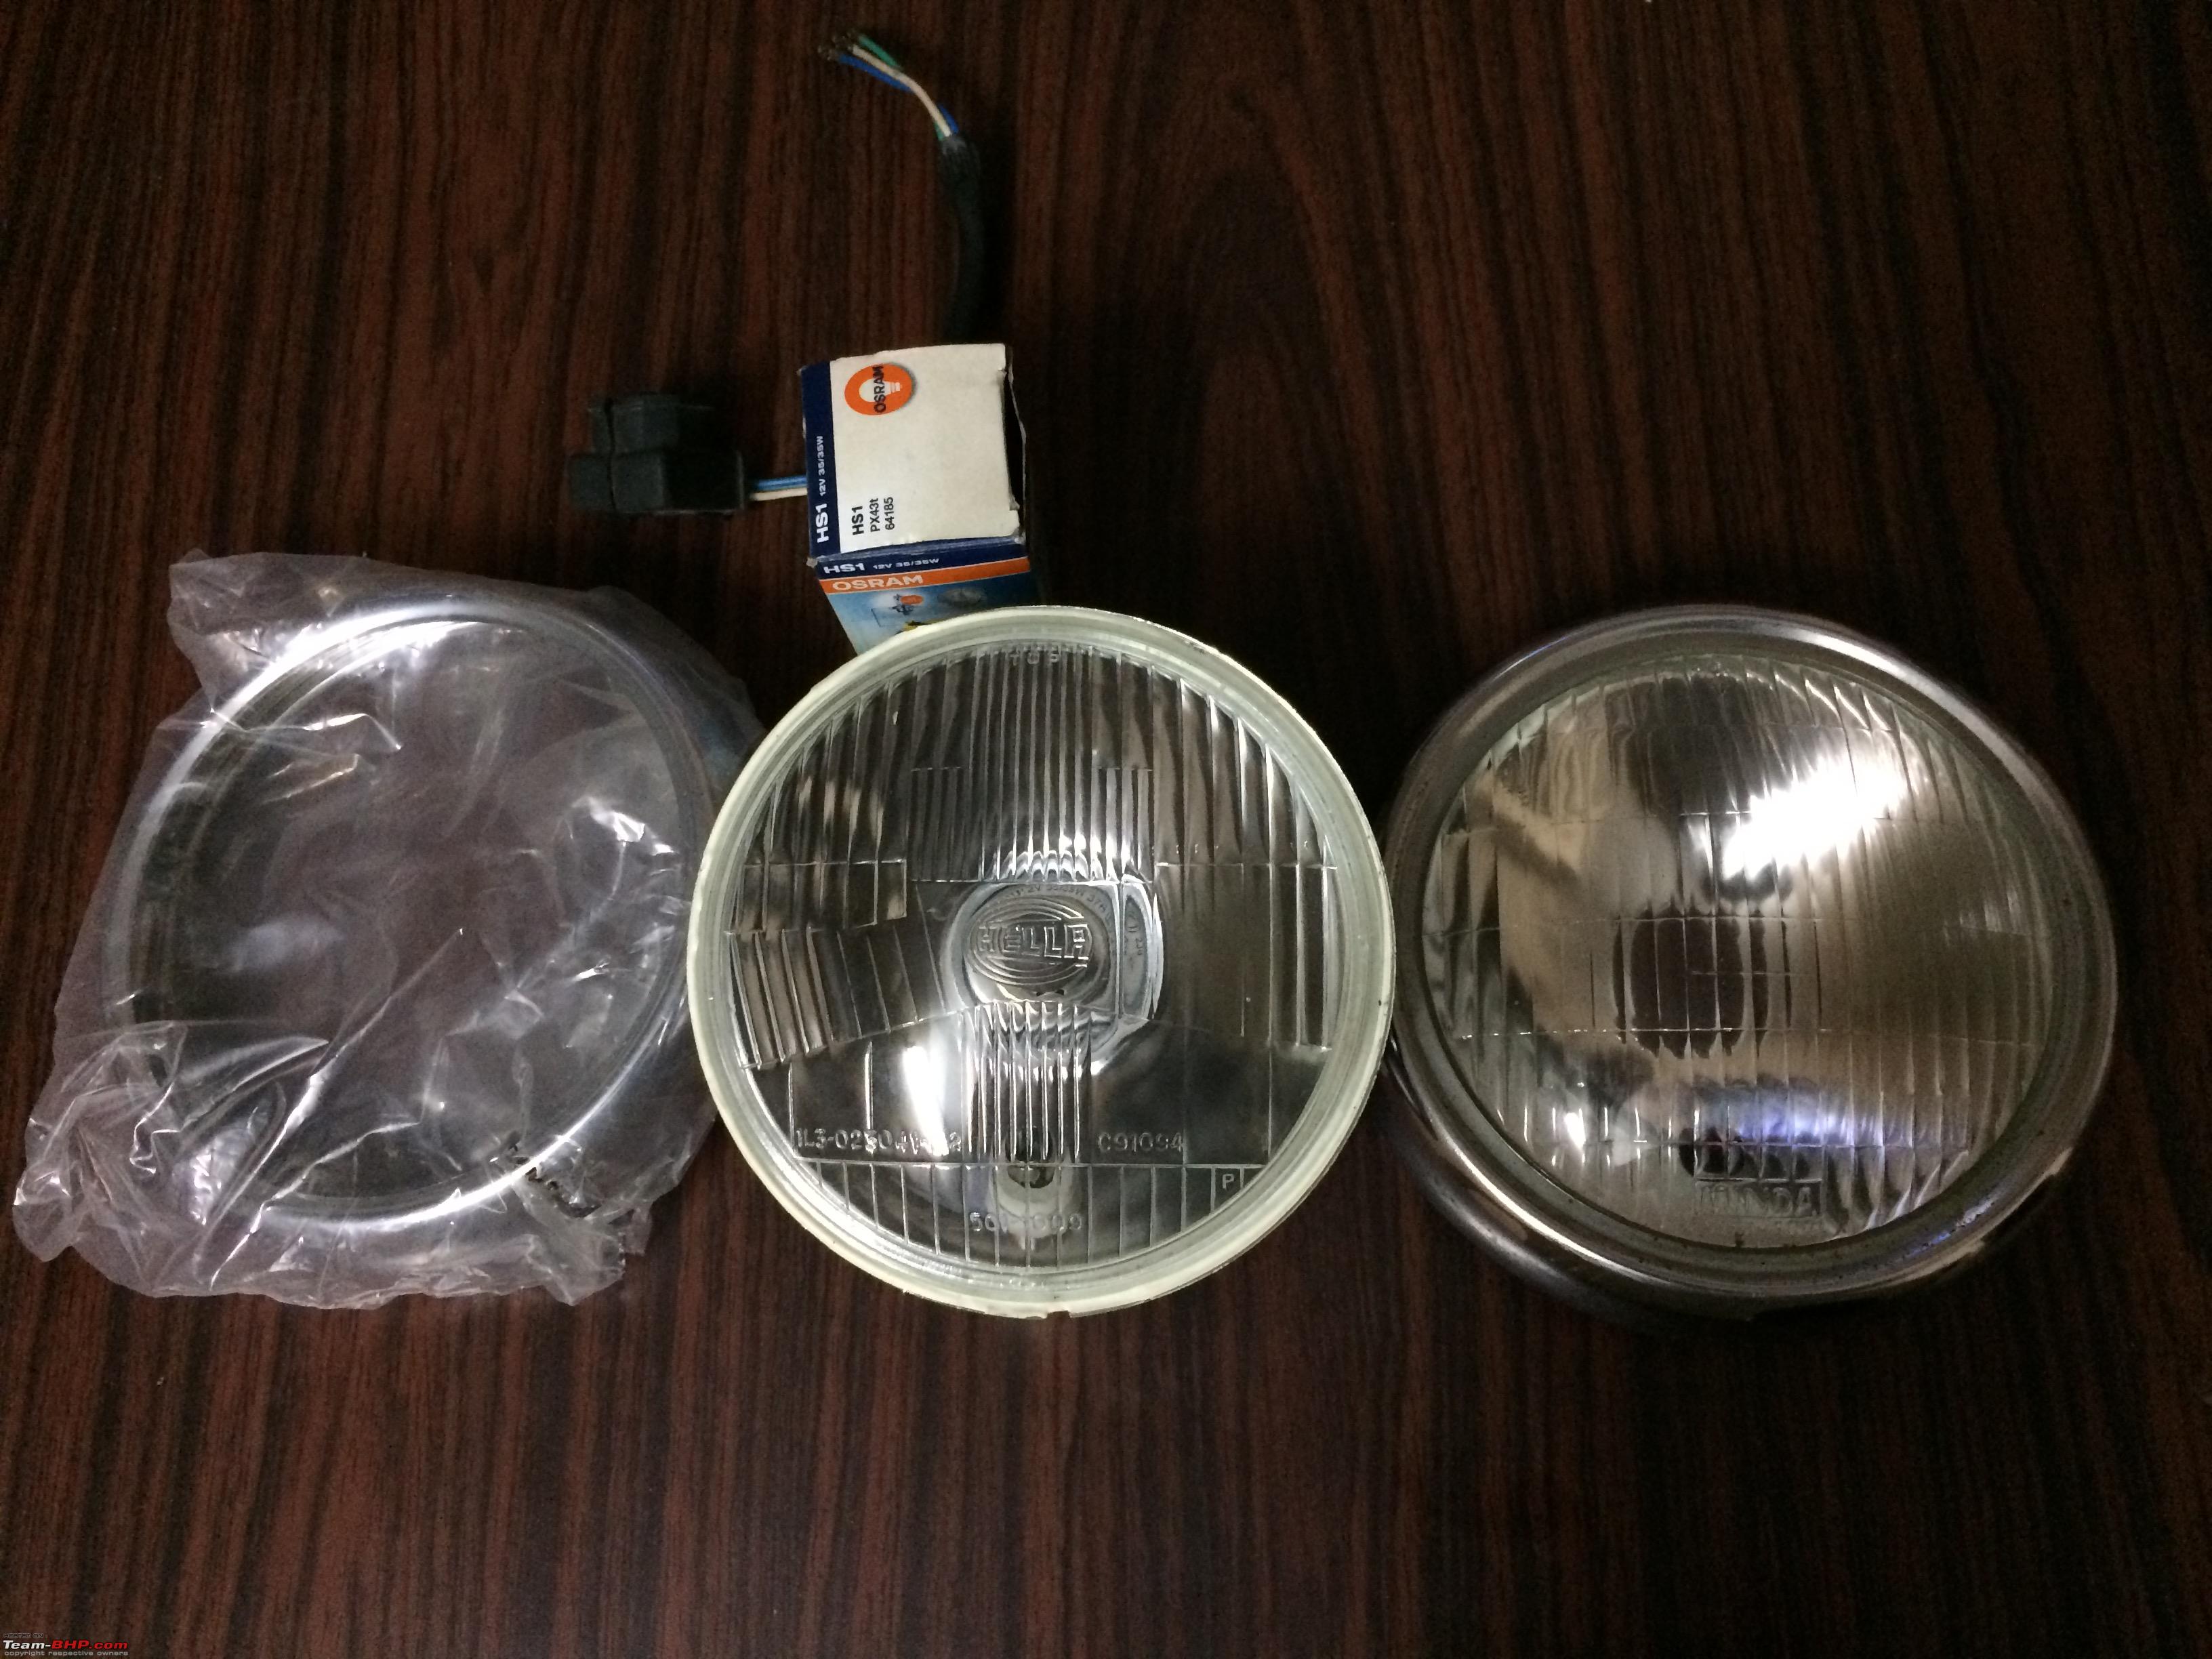 One example of how not the do the assembly. Crank area to be covered with clean cloth or a card board secured with 4 studs to avoid any parts or dirt getting inside 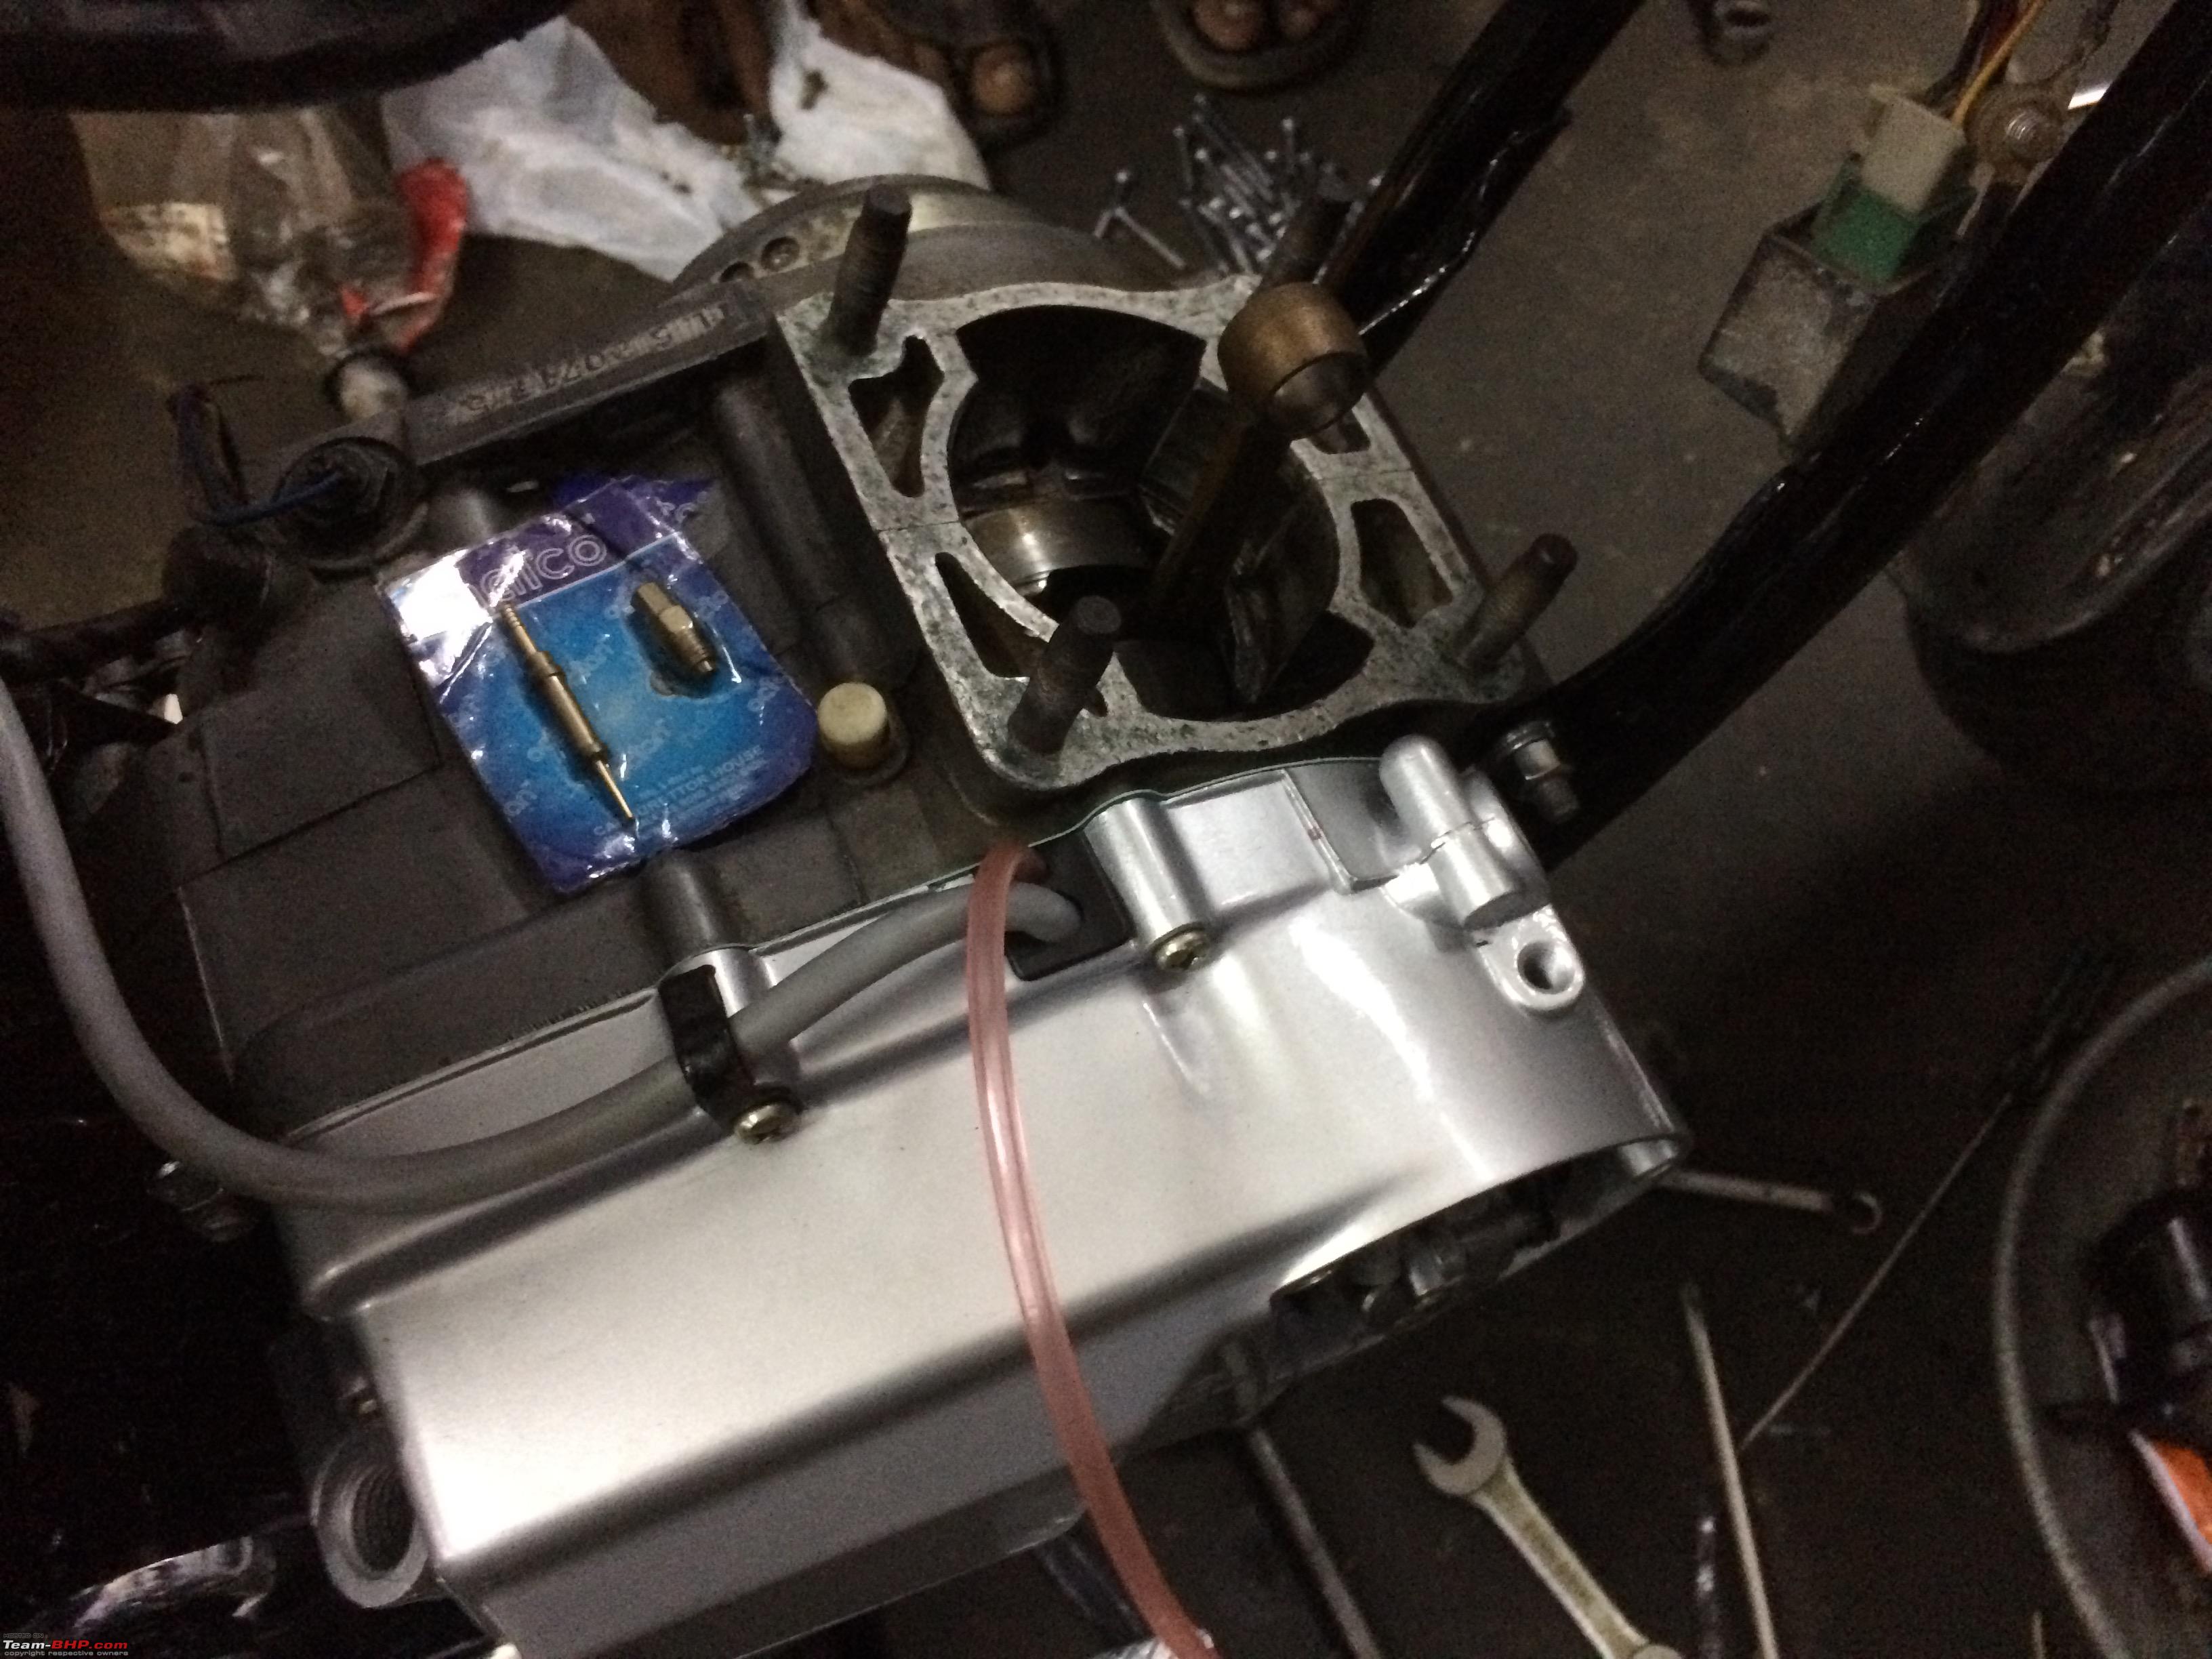 Using wrong tool to open the sprocket nuts damaged the hub  After trying out many combination of shock absorbers (ignoring few expert advise) I understood nothing beats the OE spec. Using a wrong height affects the dynamics and also puts a lot of load on the chain and sprocket (due to change in swing arm articulation path)  Last edited by Mr.Boss : 3rd May 2021 at 14:48. |
|
| (28)
Thanks
|
| The following 28 BHPians Thank Mr.Boss for this useful post: | 2himanshu, Akshay6988, AmitRavi07, Arun.K, autocrat, chinmaypillay, condor, deepfreak15, DrANTO, drrajasaravanan, Fiestaboy, Gannu_1, GTO, InControl, Jeroen, mazealot, mh09ad5578, PM - B, RaghuVis, Shanksta, SnS_12, SuhairZain, v12, varunanb, Venom_rider, viXit, wbd8779, yesyeswe |
|
3rd May 2021, 15:34
| #8 |
| Distinguished - BHPian | re: Motorcycle Restoration | Beginner's Guide Finalizing
With this we are completing the restoration and enjoy riding the machine. Next comes the important episode of securing the parts for future.
Few such cases from Yamaha RX Part name - Old price (2~3 years ago) - New price
Used parts
When I did my first restoration people advised to stock few parts (cylinder kit to be specific) which I ignored and today when I understood the necessity I couldn't find one. Now started getting the used parts and preserving them for future. Today I could make 1 complete RX100/RX135/RXG with the available spares if I could get a frame Thanks for spending your valuable time here. For any updates / corrections / improvements, please feel free to add. |
|
| (36)
Thanks
|
| The following 36 BHPians Thank Mr.Boss for this useful post: | --gKrish--, Akshay6988, AmitRavi07, anra, Arun.K, chinmaypillay, comfortablynumb, condor, deepfreak15, DrANTO, drrajasaravanan, Gannu_1, gauravanekar, Geo_Ipe, GTO, InControl, isandy, Ithaca, Jeroen, mac187, mazealot, mh09ad5578, RaghuVis, Shanksta, sleeperwagon, SnS_12, SuhairZain, Sunny_ST3, surjaonwheelz, Tgo, v12, Venom_rider, vigsom, viXit, warrioraks, yesyeswe |
| The following 26 BHPians Thank Mr.Boss for this useful post: | AmitRavi07, anra, chinmaypillay, comfortablynumb, condor, deepfreak15, drrajasaravanan, Gannu_1, Geo_Ipe, GTO, Ithaca, Jeroen, jithin23, martinantony009, mh09ad5578, Mrs&Mr_Shenu, pachchu77, PM - B, sainyamk95, Shanksta, SnS_12, Tgo, Venom_rider, vigsom, warrioraks, yesyeswe |
|
4th May 2021, 06:15
| #10 |
| Team-BHP Support  | re: Motorcycle Restoration | Beginner's Guide Thread moved out from the Assembly Line. Thanks for sharing! |

| (3)
Thanks
|
| The following 3 BHPians Thank Aditya for this useful post: | GTO, mh09ad5578, Mr.Boss |
|
4th May 2021, 07:16
| #11 | |
| Senior - BHPian Join Date: Apr 2011 Location: Dubai/Bengaluru
Posts: 3,666
Thanked: 11,425 Times
| re: Motorcycle Restoration | Beginner's Guide That Yamaha looks like its just come out of the showroom. Very good restoration indeed. I'm interested in that story. Did you add a disc brake? And from which bike is it sourced from?
Quote:
| |
|
| (2)
Thanks
|

| The following 2 BHPians Thank Sebring for this useful post: | mh09ad5578, Mr.Boss |
| |
|
4th May 2021, 07:49
| #12 |
| Distinguished - BHPian | Re: Motorcycle Restoration | Beginner's Guide Written like a boss ! THANK YOU, Mr. Boss - very nicely put together, with references to other threads. Btw, one question - is 2T getting difficult to procure ? How long can you store it if you get stock like a carton of it ? |
|
| (6)
Thanks
|
| The following 6 BHPians Thank condor for this useful post: | Akshay6988, DriverNo.420, GTO, mh09ad5578, Mr.Boss, SnS_12 |
|
4th May 2021, 08:26
| #13 |
| Team-BHP Support | Re: Motorcycle Restoration | Beginner's Guide Phenomenal thread, Mr. Boss! Thanks for sharing. Going to our homepage today  . . Having restored an old Jeep to excellent condition, I will add the following points that are universal to restoring an old bike or car: • Make sure you really, really love the vehicle needing restoration. It takes a LOT of effort, money & time and you will get a good result only if you are really motivated. I have seen way too many abandoned projects. It should be the kind of vehicle that is really special (whether in terms of character or nostalgia). • Ensure that the vehicle itself is restorable. In the car world, a mechanically-simple Mercedes W124 / W126 is restorable, but an electronically-complex W140 isn't. • You need to have access to an excellent independent garage which understands the vehicle and / or has lots of experience with it. This is perhaps the most important point. It's like choosing the right doctor for your heart bypass surgery. • Whatever your planned budget is, I will bet that the final bill will be 50 - 100% higher. Budget for that. • Whatever your deadline is, I can bet that you will overshoot it by 2X. • Don't cut corners. Go for the best quality parts (either OEM or better than OEM). • Don't cut corners. Go for the best quality labour. My rebuilt Jeep has better reliability than when it came from the factory!! What's more, the factory-built Jeep suffered massive rust in 5 - 6 years. My rebuilt Jeep has lesser rust after 10 years, thanks to best practices such as Wurth coatings etc. • Forget about 100% perfection. What I have realised with large projects (whether restoring a vehicle or renovating your home) is that 80% perfection and a "very good" high quality output take up an acceptable amount of time. But chasing that final 20% perfection (e.g. finishing in areas where you won't even bother to look later in life, exacting panel gaps) take up as much time as the initial 80% of the project. That's why, with very large projects, I am now 100% satisfied with an 8 / 10 result. Primarily because I don't have the time or bandwidth anymore for that final 20% enhancement. Instead of spending 4 additional months chasing perfection, I would rather take my vehicle out on drives & road-trips. |
|
| (22)
Thanks
|
| The following 22 BHPians Thank GTO for this useful post: | Akshay6988, ambarkhan, AmitRavi07, anra, ashphil, chinmaypillay, deepakr82, DriverNo.420, drrajasaravanan, evil_grin, Gannu_1, gauravanekar, InControl, Lone Ranger, mh09ad5578, Mr.Boss, pachchu77, RaghuVis, SnS_12, vaasu, vigsom, warrioraks |
|
4th May 2021, 08:39
| #14 | |||
| Distinguished - BHPian | Re: Motorcycle Restoration | Beginner's Guide Quote:
More details about the bike is Here (Yamaha RX100 restoration - From bits & pieces) Quote:
2T oil as such is not difficult to source. Motul had some supply issue sometimes back (especially in the area where I live) and managed to get this last carton stock from the distributor. Motomix 2T is easy to source then the other synthetic blends from Motul. Most grades of motor oil have shelf life from 3-5 years. Those days my monthly usage was nothing less than 500-800km, and 1 can (500ml) should last for 1 tank fill (close to 500km) roughly translating I should have consumed the entire stock in less than 2 years. But since the running got reduced I'm left with 2 or 3 cans now. Quote:
I wish I get a chance to do a 4 wheeler restoration  Last edited by Mr.Boss : 4th May 2021 at 08:42. | |||
|
| (5)
Thanks
|
| The following 5 BHPians Thank Mr.Boss for this useful post: | chinmaypillay, GTO, InControl, mh09ad5578, SnS_12 |
|
4th May 2021, 10:38
| #15 | ||
| Senior - BHPian | Re: Motorcycle Restoration | Beginner's Guide Fantastic article Mr Boss and thank you for sharing your valuable experience/learning with others. For people doing DIY and especially for the first time it would be better if you make short videos of critical parts being dismantled and store them in marked bags or trays. Reason why I say to make a video is when a bike like even the RX is dismantled completely the amount of small parts around is phenomenal and easy to misplace or get confused with what goes where and the video would be a good reference point. And as always better to do it with some experienced head around. Also never over tighten bolts and be careful of the torque specification of each part. Like you don’t want to damage irreplaceable parts like heads crankcase etc. This is how one should go about tightening the head bolts(cross). Never tighten the bolt to its fullest in one go and instead do a few turns a time and keep checking if all is in order. 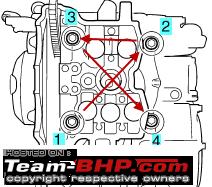 Quote:
I always take out the parts clean and check every few month’s/years. And this is not even the entire stock as they are scattered all around the house along with my scale models  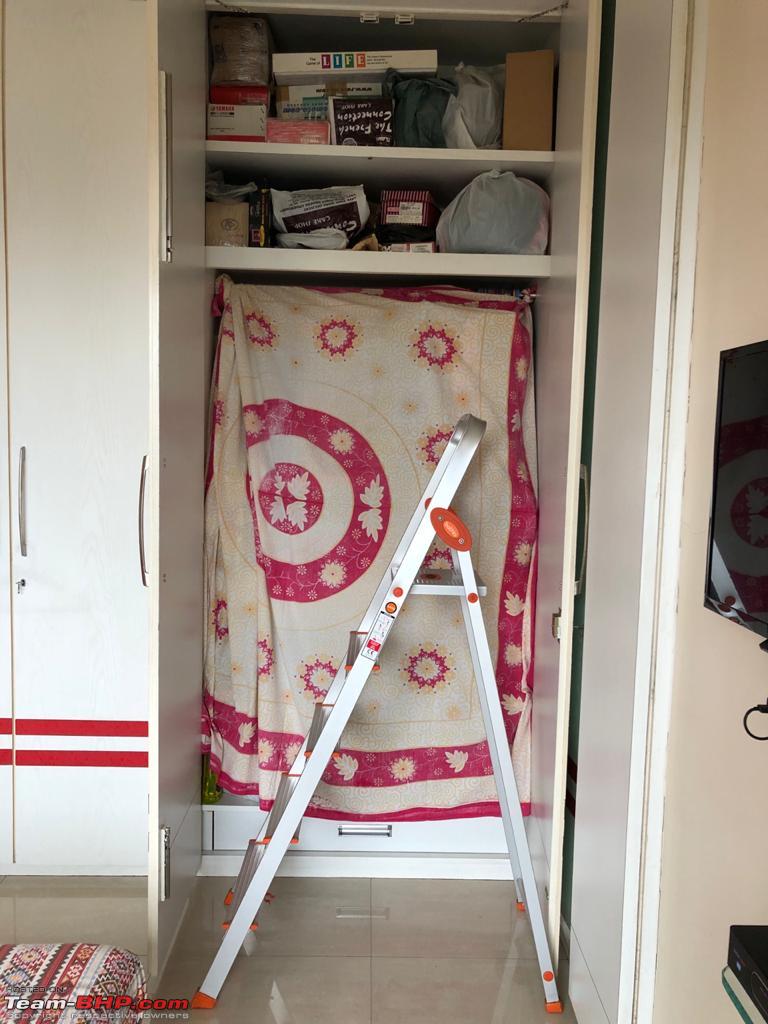 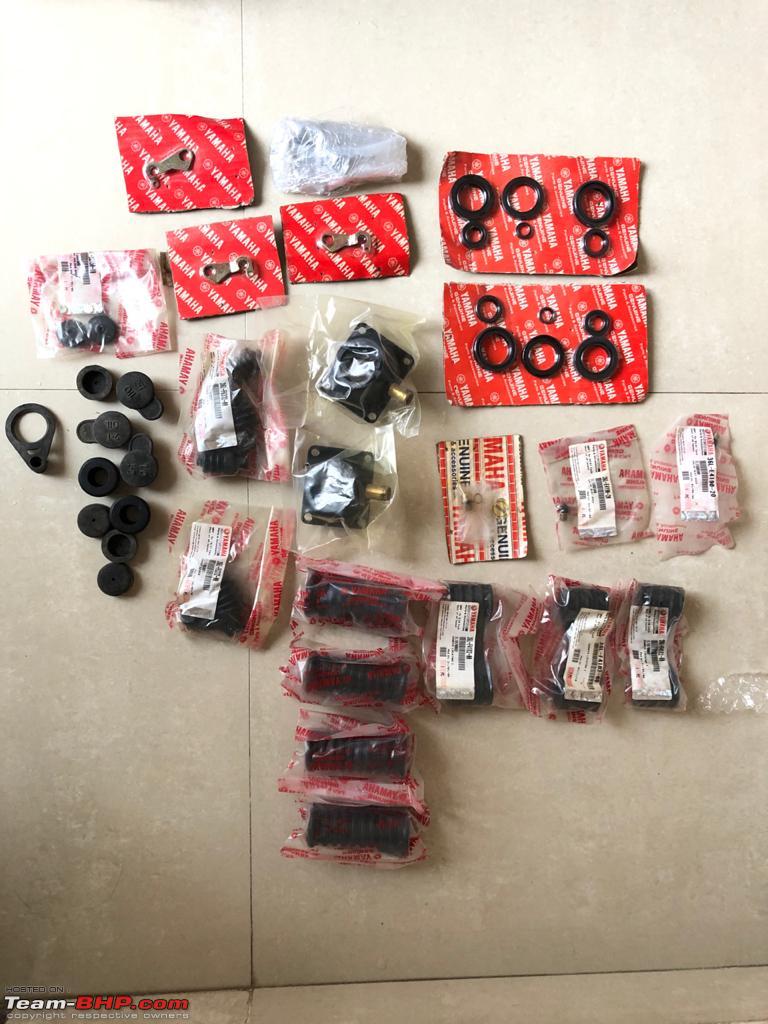 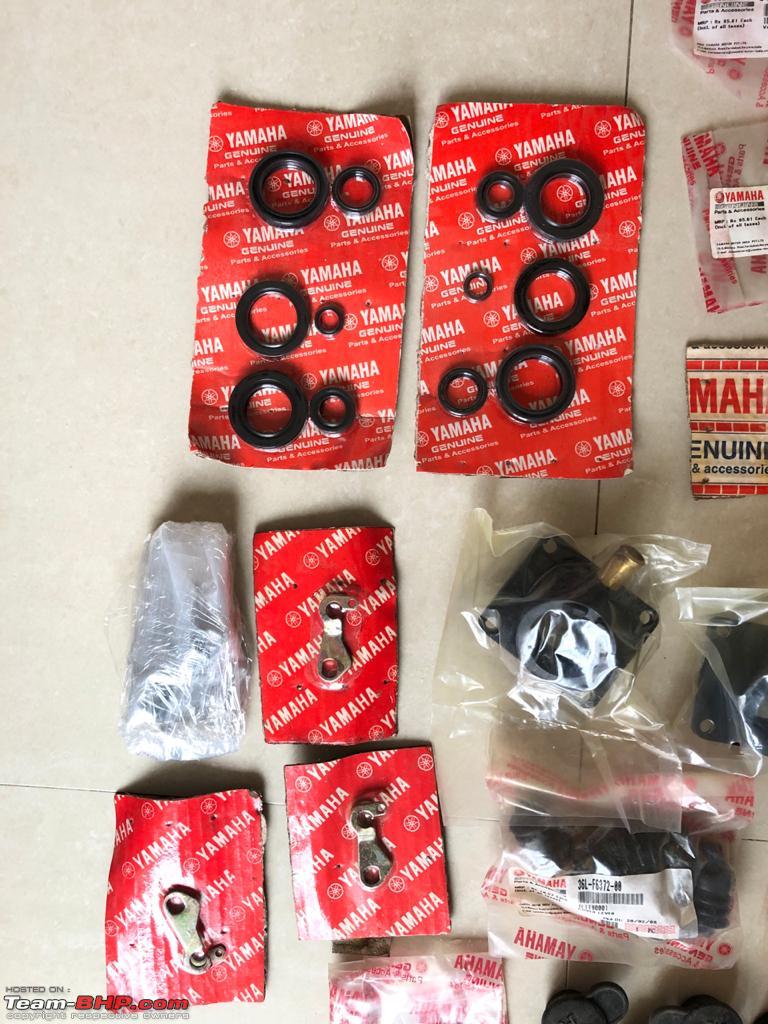   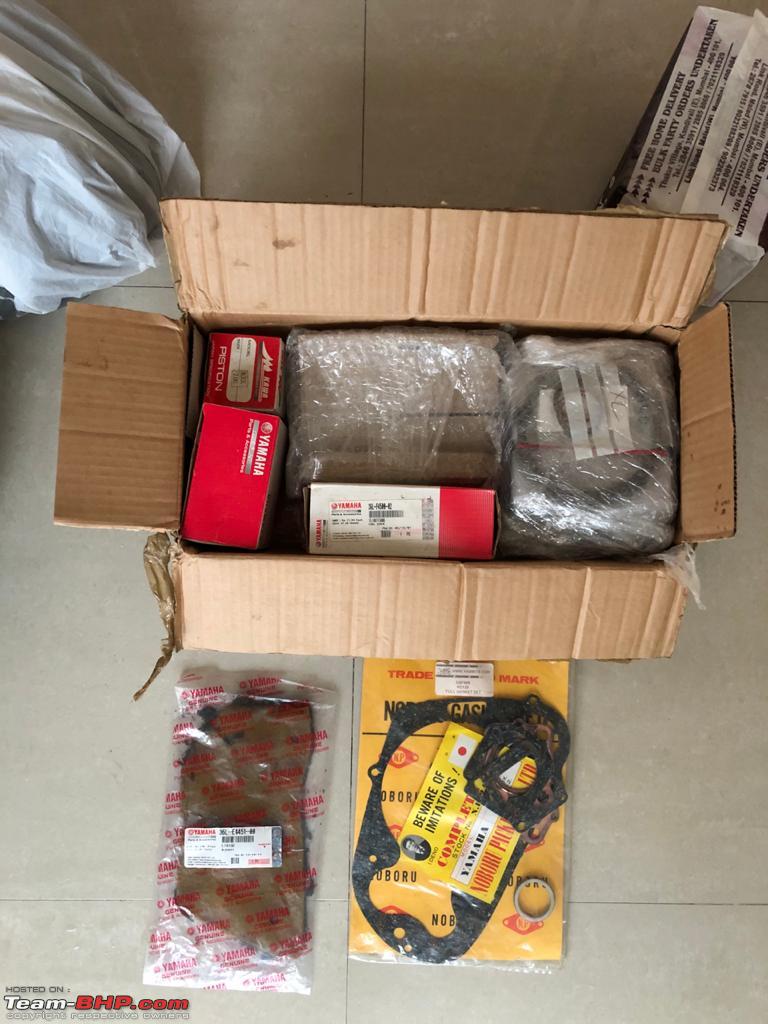  These dual coloured air filters are non existent now and even though it’s worthless now (disintegrated as these don’t have a long shelf life) I have kept it as a memorable. 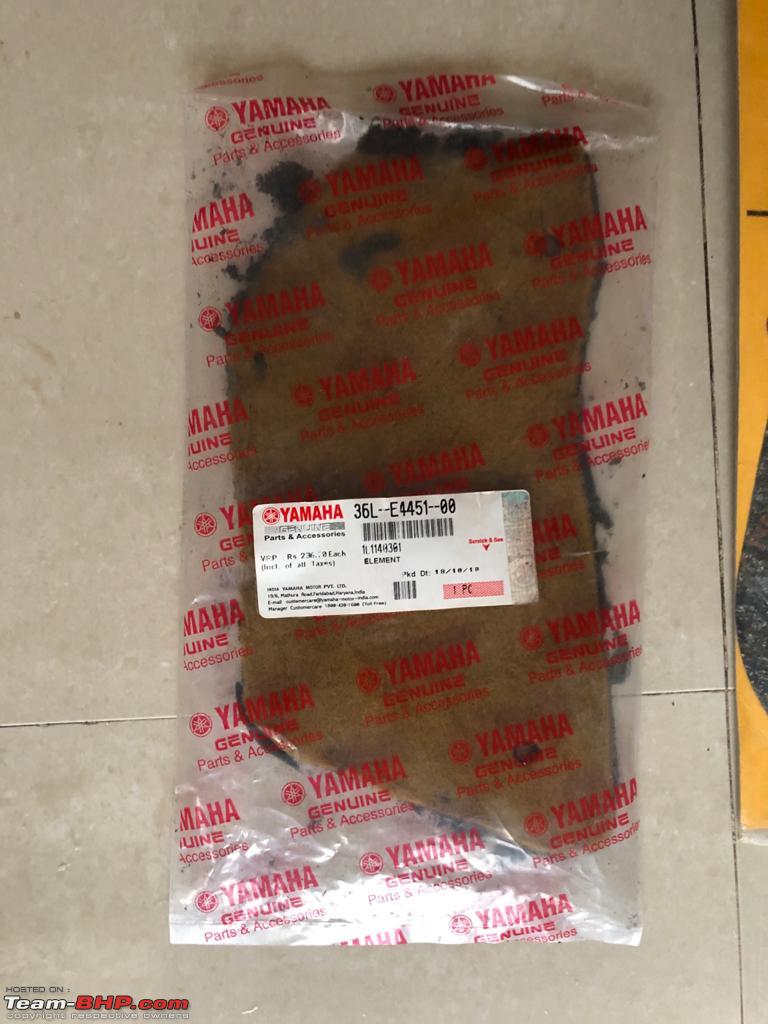 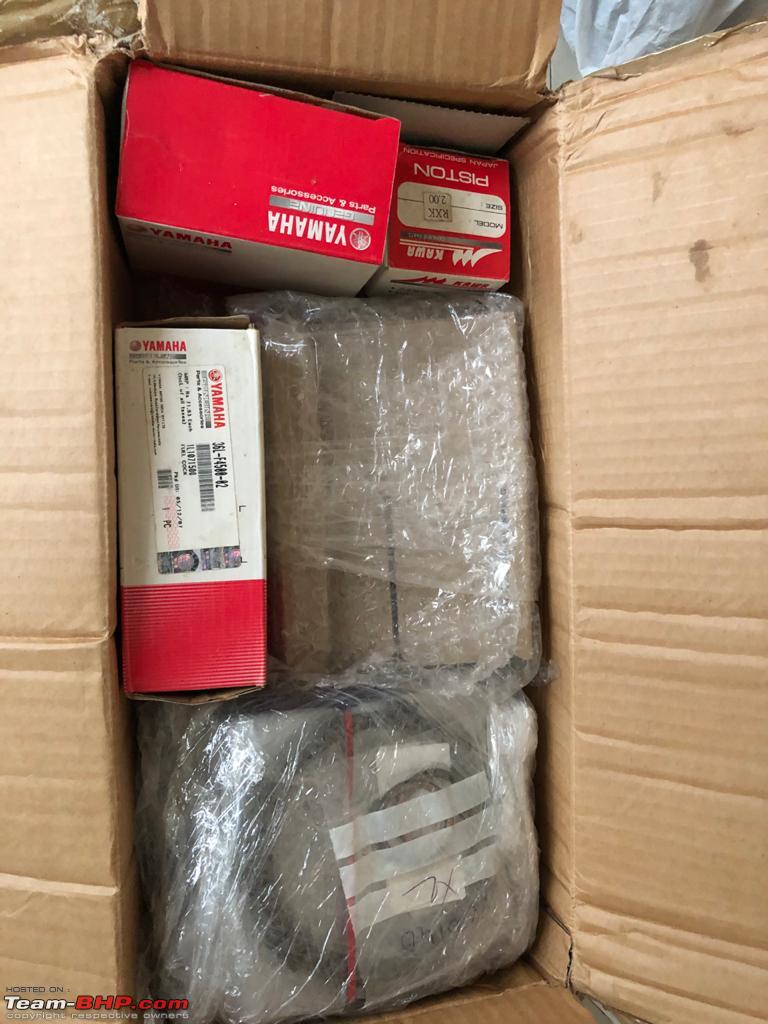   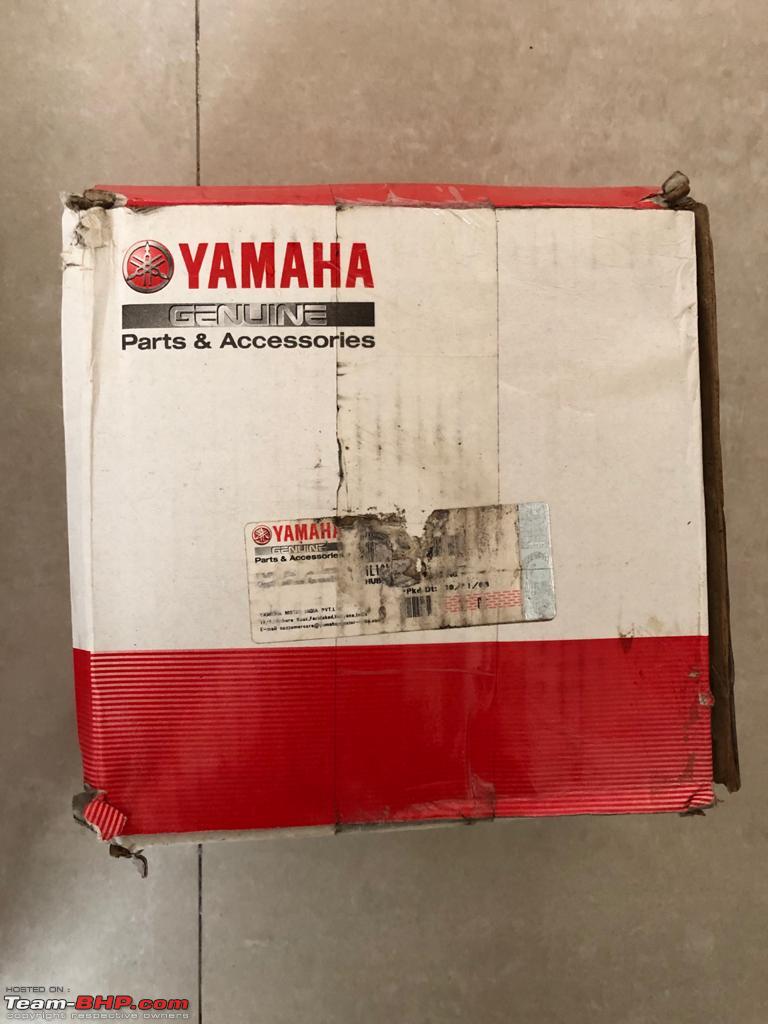 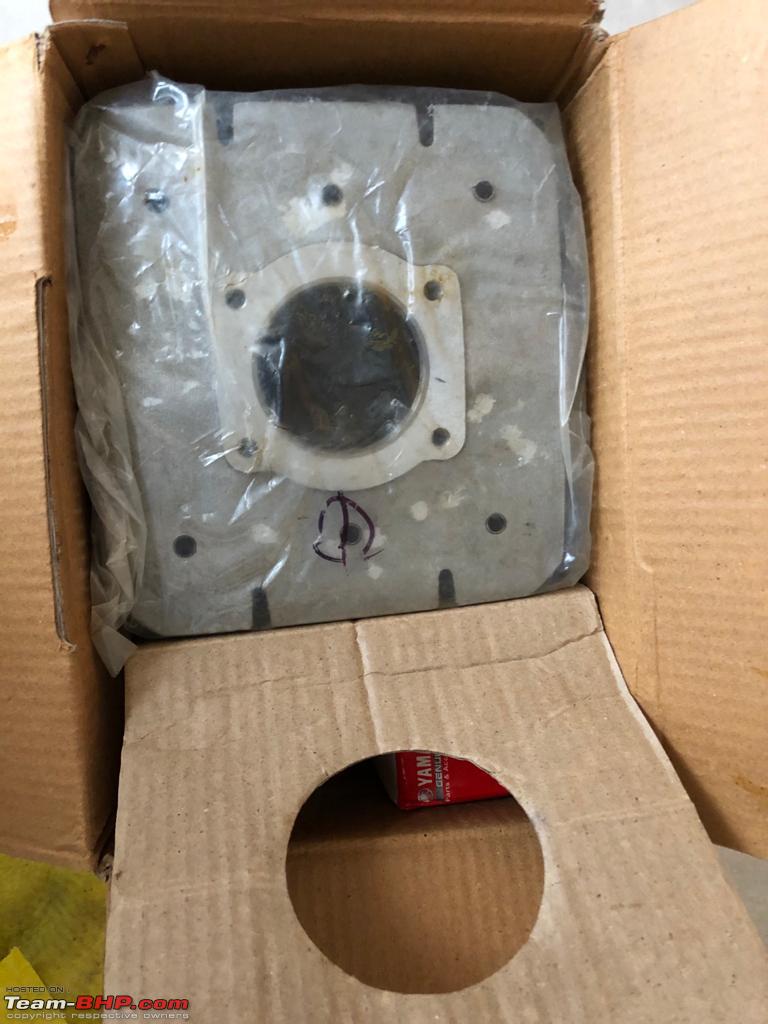  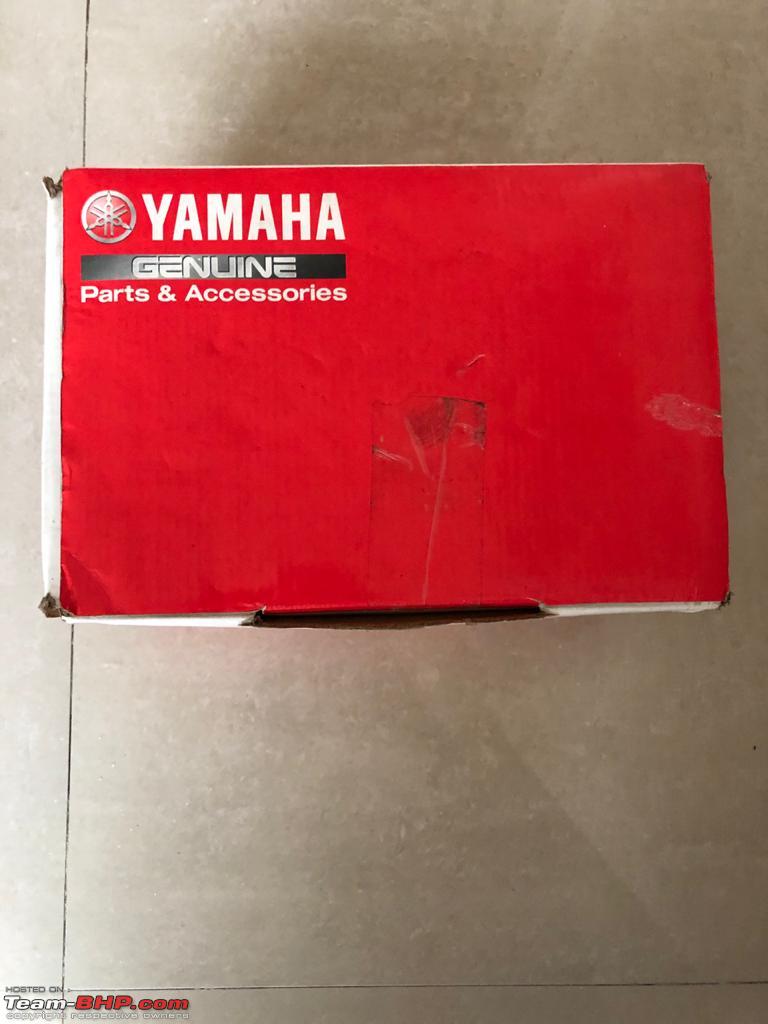  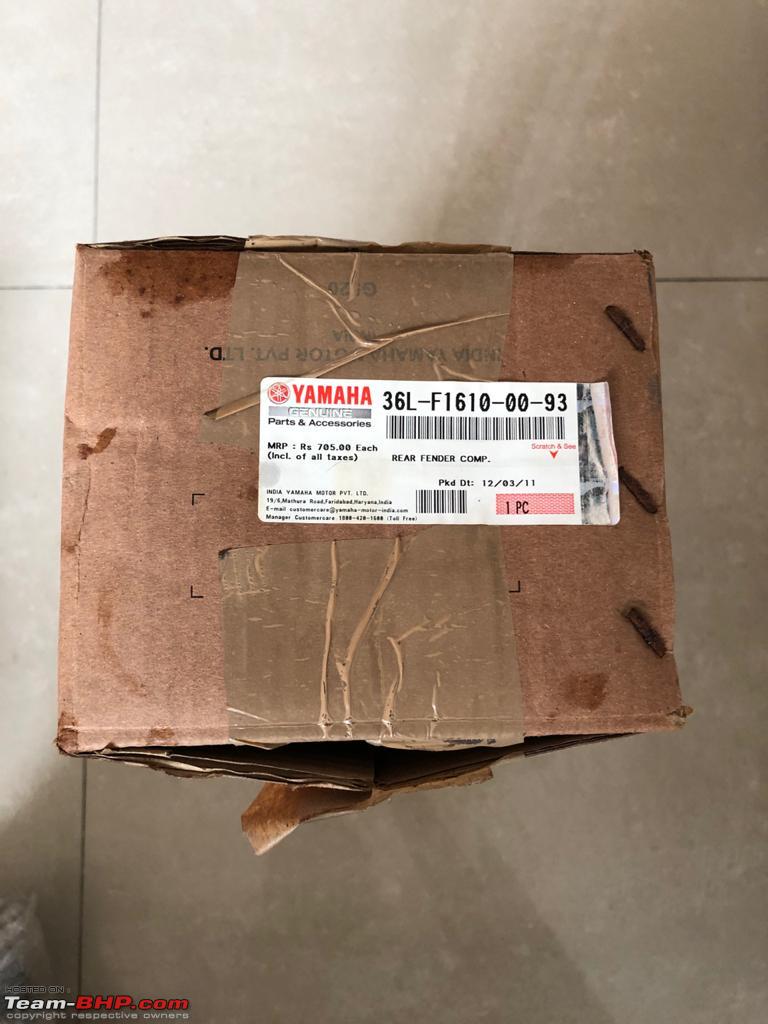  Quote:
I also have some cans of Motul 800 with Ester which are over a decade old and visibly still good. Last edited by SnS_12 : 4th May 2021 at 10:50. | ||
|
| (15)
Thanks
|
| The following 15 BHPians Thank SnS_12 for this useful post: | autocrat, chinmaypillay, condor, gauravanekar, GTO, InControl, mh09ad5578, Mr.Boss, RaceHorse, RaghuVis, Shanksta, surjaonwheelz, vigsom, viXit, yesyeswe |
|