Background
My uncle got himself a 1996 make, Yamaha RXG back in 1999. It traveled with him across the country (he is in the armed forces) and was later passed on to me in 2009 as my first bike

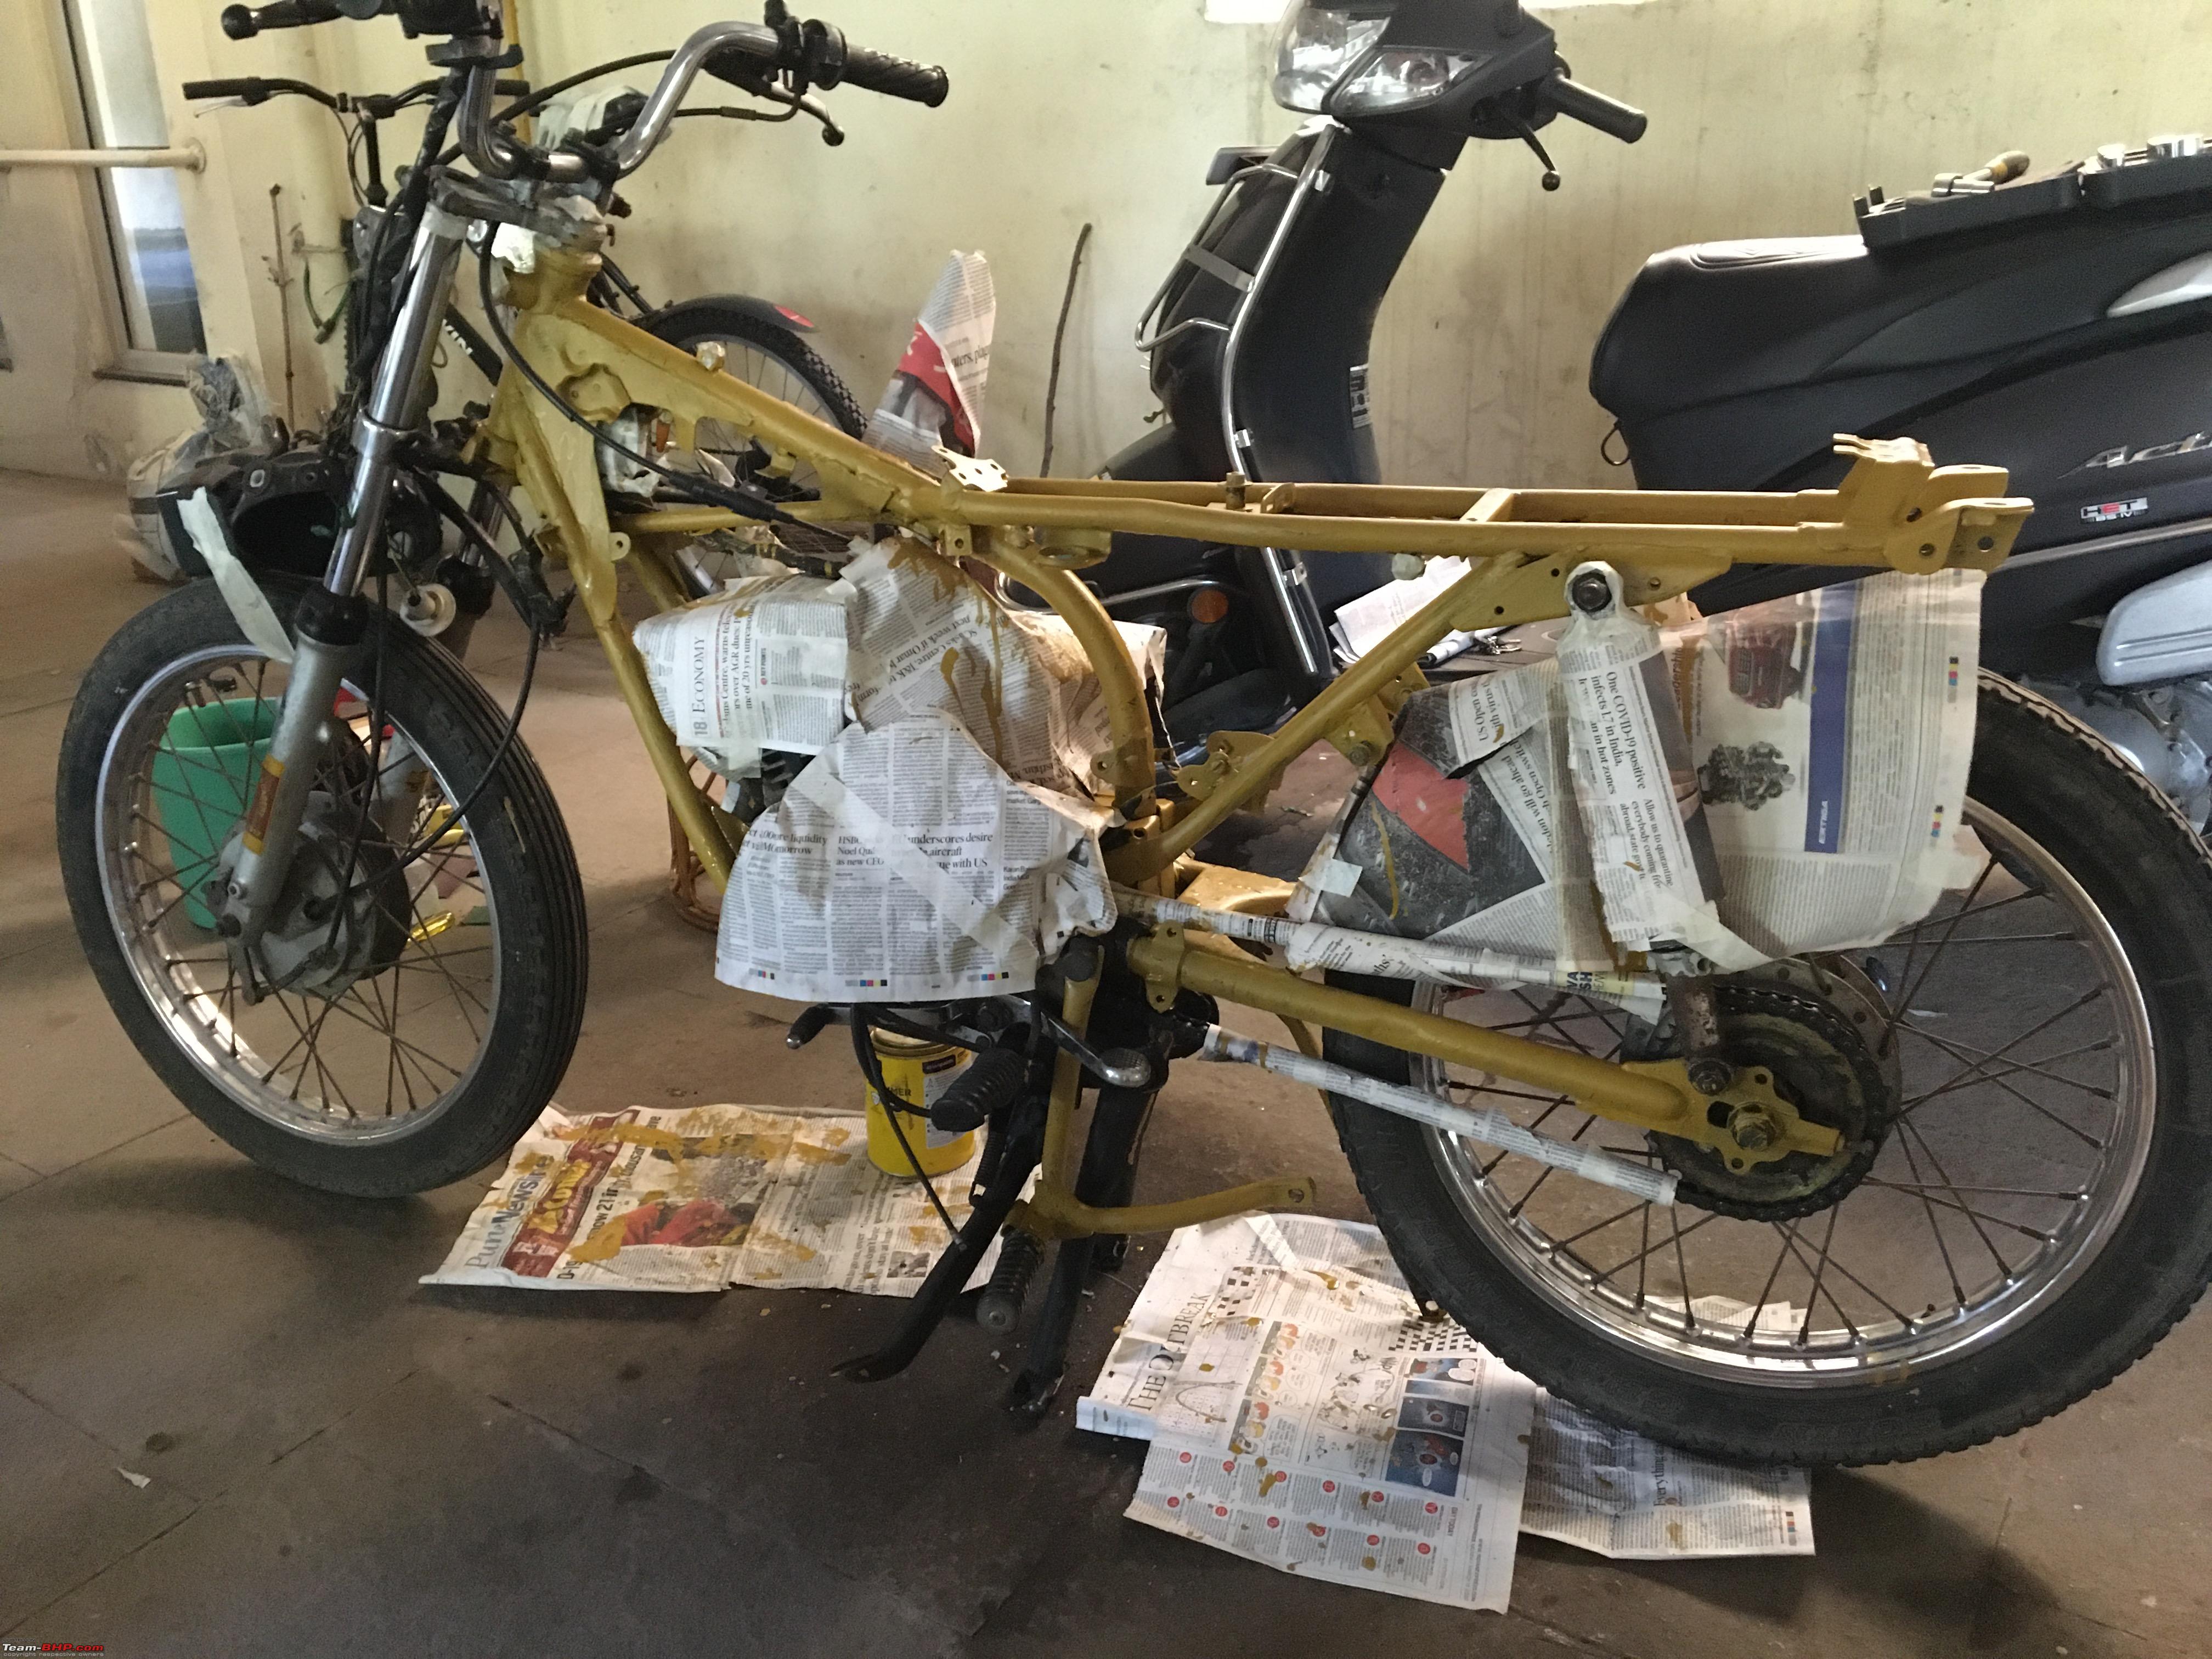
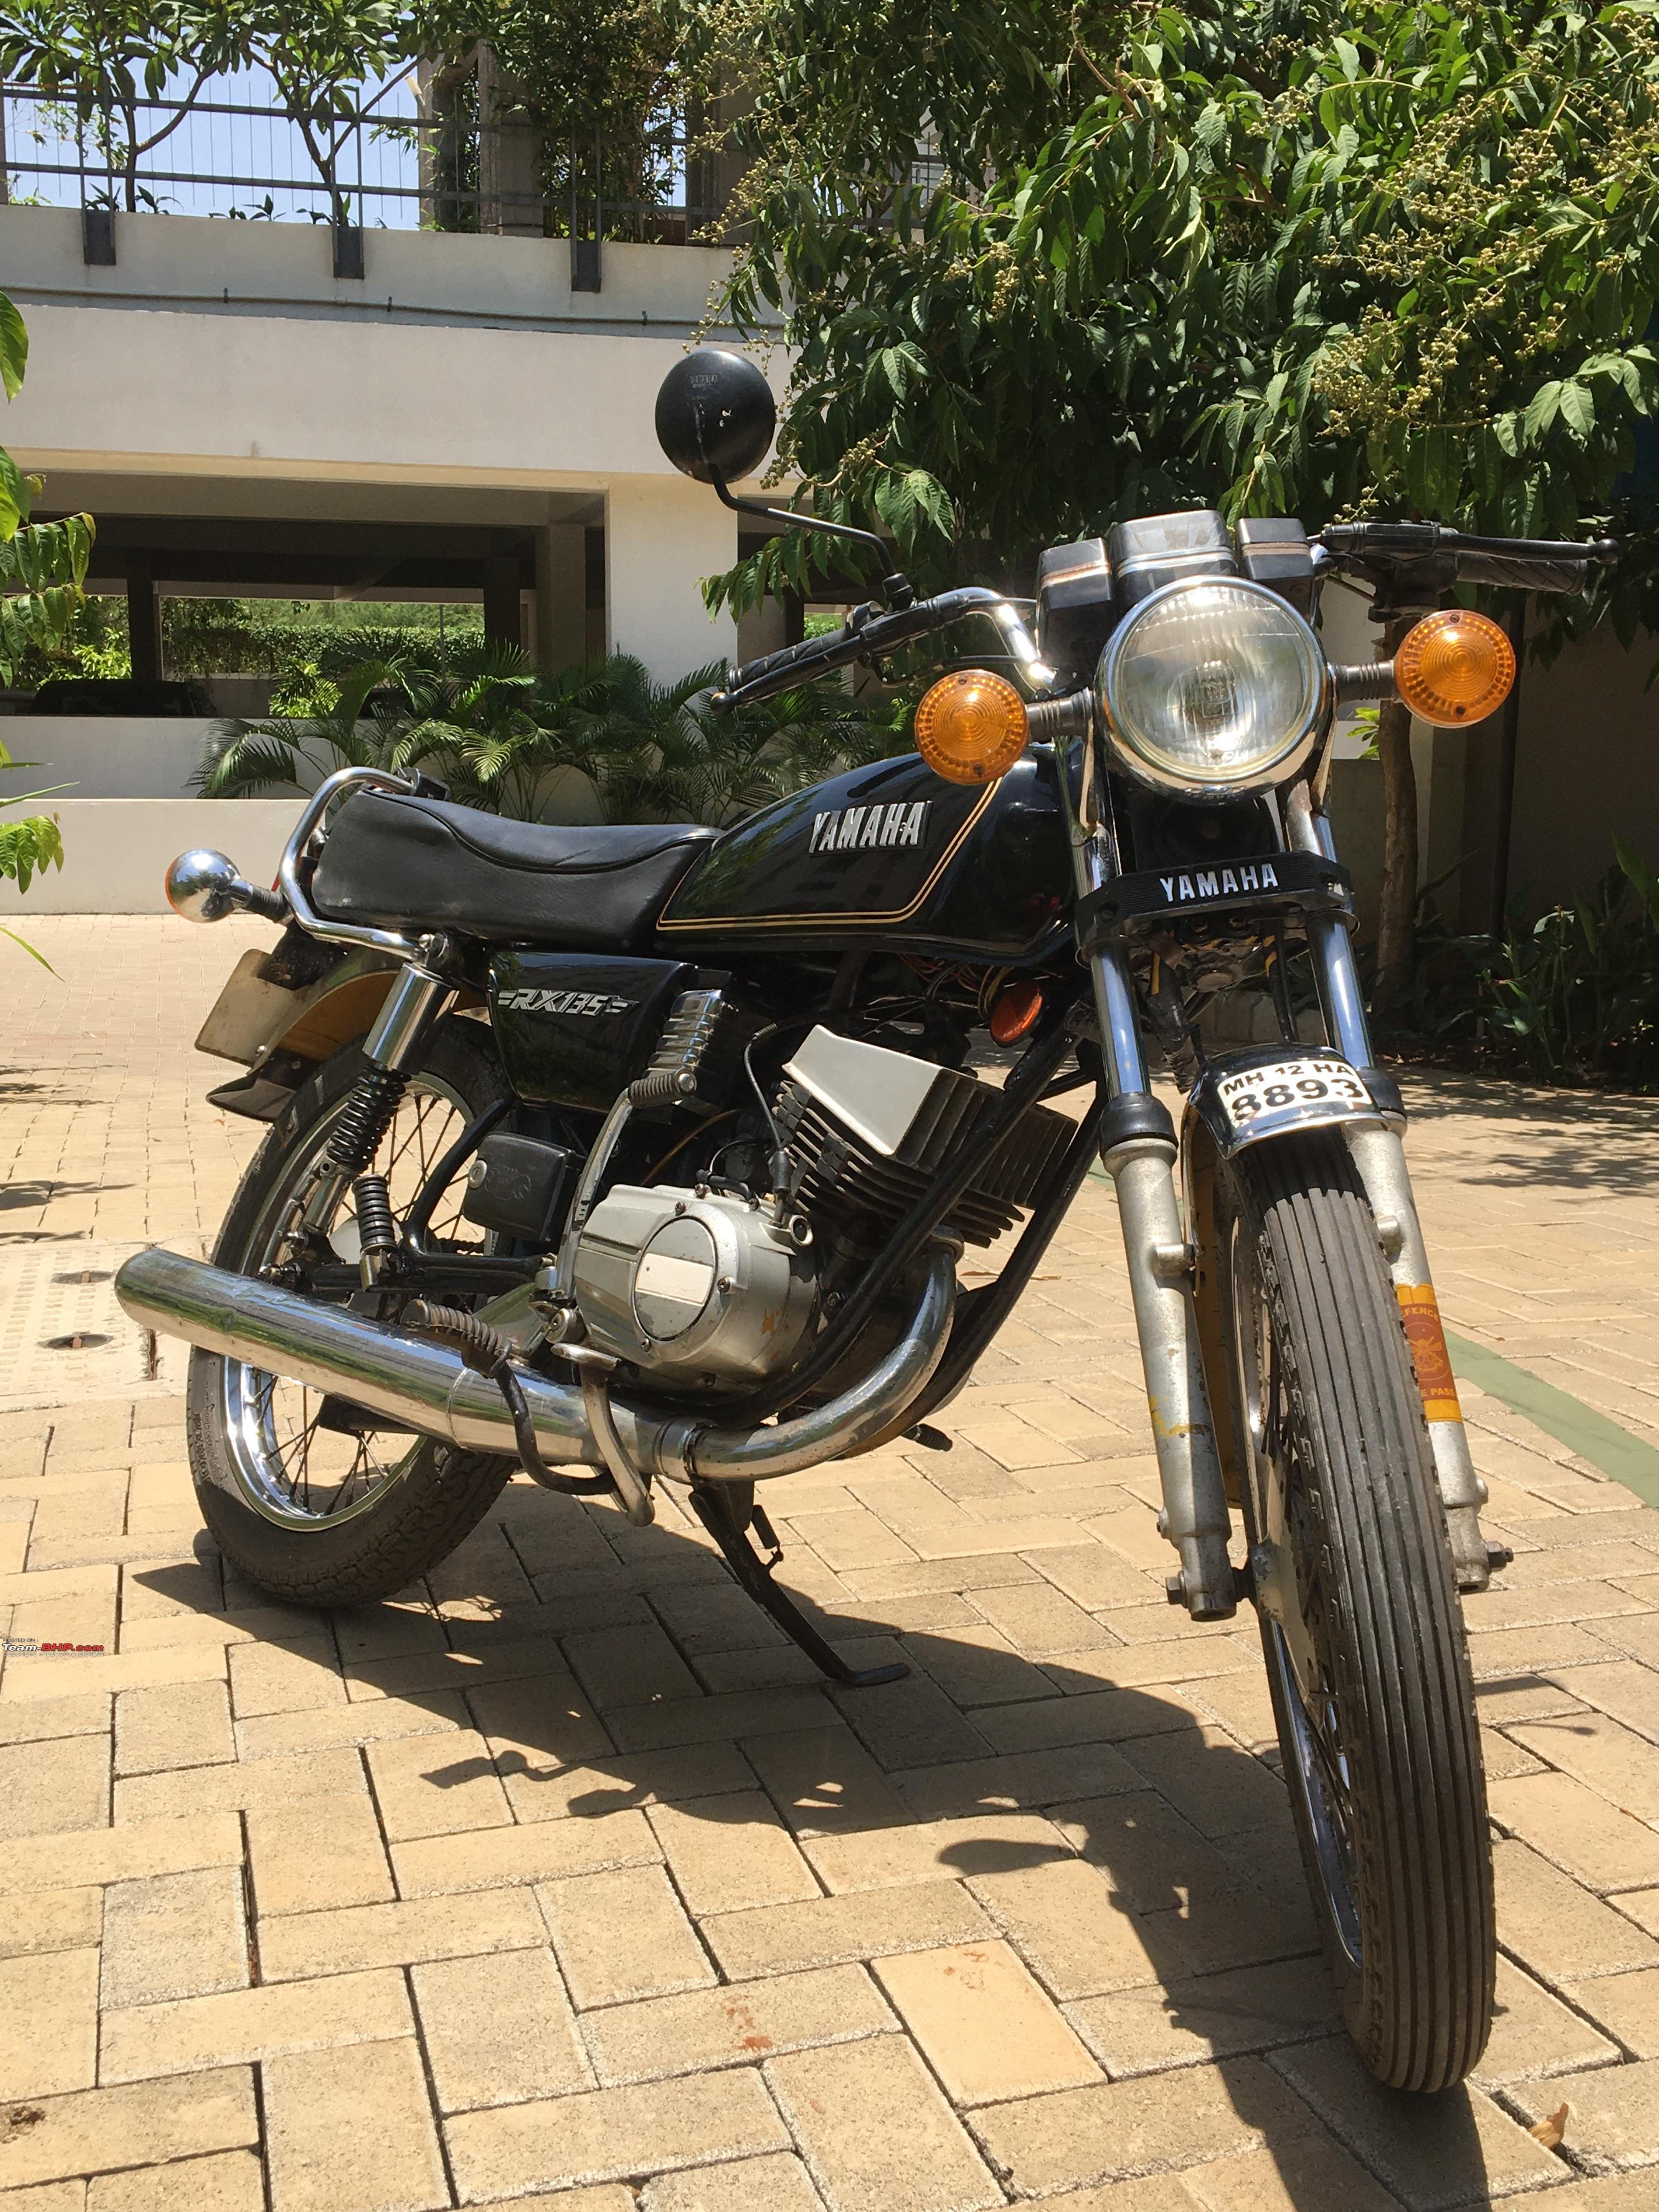
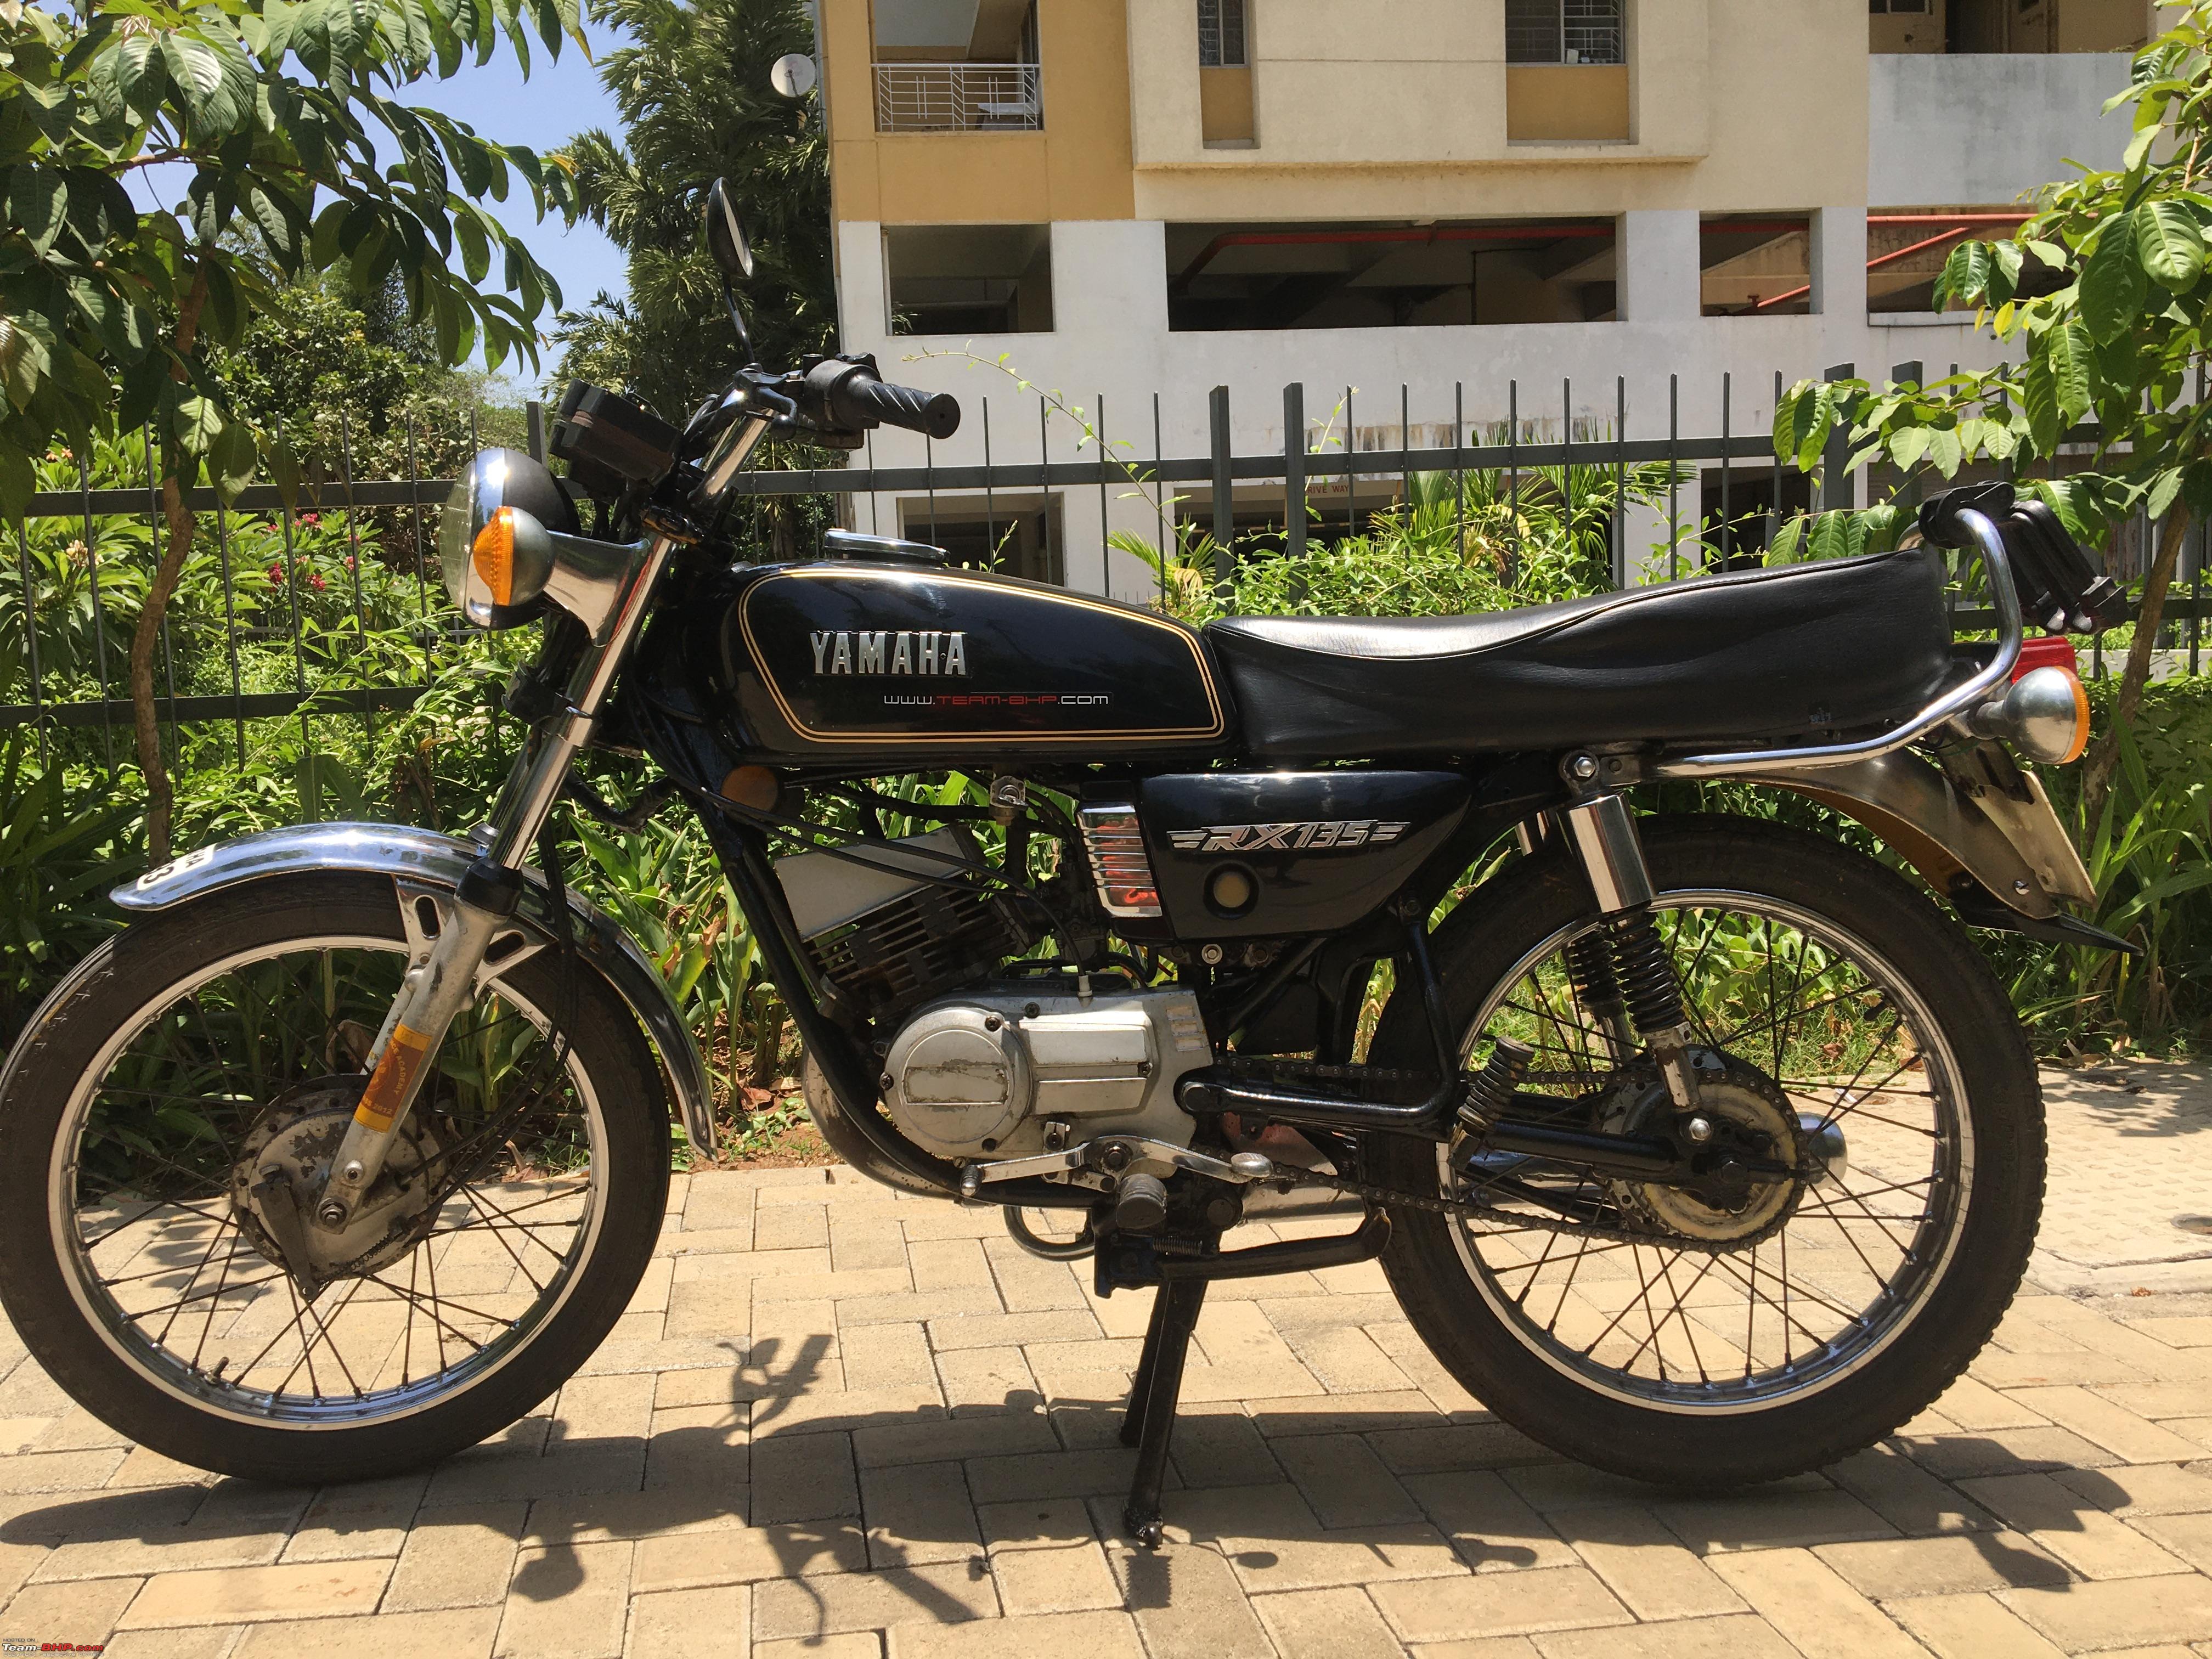
. I was in final year of engineering at that time and vividly remember the change from riding an Activa to riding an RX!
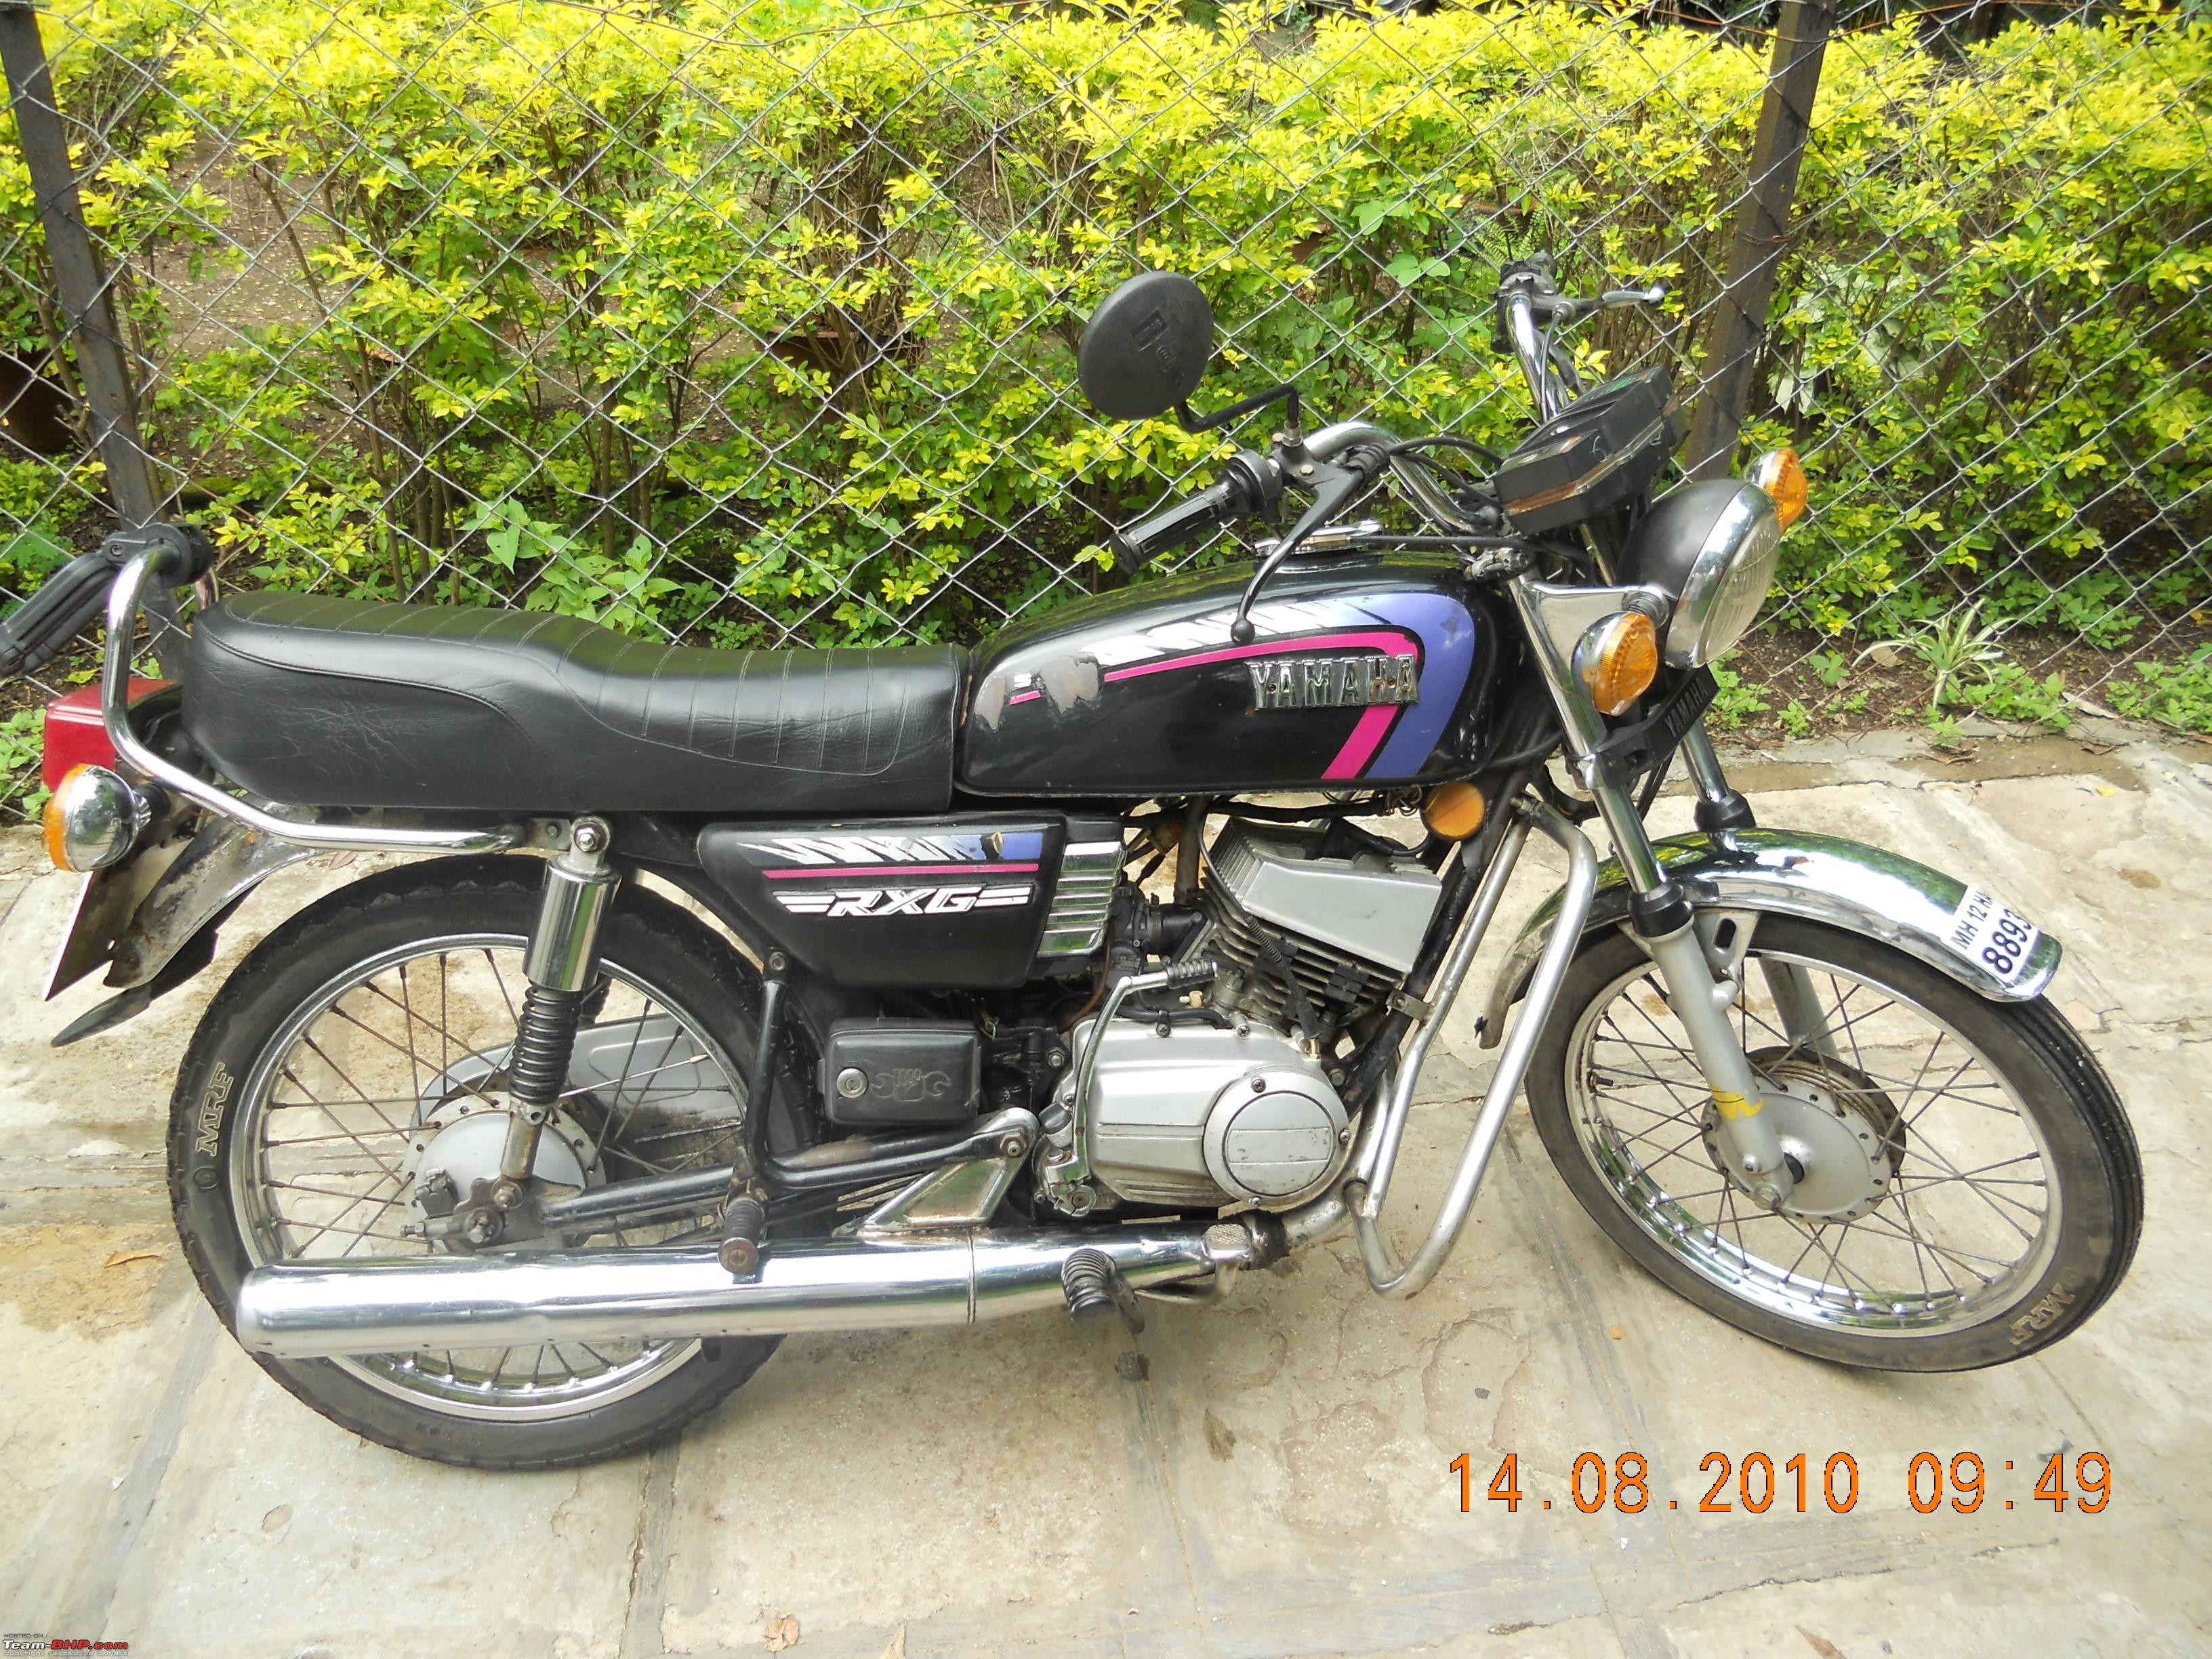
The bike had done close to 34k kms when I got it and it needed some engine work (as told by the first mechanic I took it to) and a routine service. Looking back in hindsight, I'm pretty sure I was swindled big time by this mechanic (first bike, didn't know jack about its maintenance) but he did a decent job with it.
This is how it looked when I got it -
Although the RX served me really well, it came with its fair share of issues: The electricals were pretty bad, it used to leak oil all over the place and it had its fair share of niggles during the early years of ownership. There was never a problem with its performance though - I would love riding it to work and would keep looking for excuses to drop out of my car pool. In 2012 I got myself a Yamaha SZ-R and this replaced the RX and became the daily workhorse. The RX was limited to weekend joyrides and an office commute every once in a while.
Here's a picture of the other Yamaha, the SZ-R, taken on the day of delivery. I had this one for close to 4 years and 33k kms.
Unforeseen start to the restoration
In 2015 I had to move to Mumbai for a year and hence I passed on the RX to my cousin. That turned out to be a mistake since he ran it without 2T oil and seized the piston

So 2016 saw another round of engine work - new piston, cylinder block ( a new one wasn't available, my mechanic found a second hand one which was in a good shape). New clutch and brake levers, new cables, silencer decarb etc. and the bike was back to its former self. I remember how happy I was to hear the sound when I went to pick up the bike.
The bike has been running perfectly fine since then. Age and rust were catching up to the tank and the rear mudguard so I got them replaced. The new mudguard turned out to be worse than the old one, for starters it was much thinner and it started rusting within a year of installation. Side panels too were replaced since their holding brackets were broken. I made the mistake of replacing the lettering along with the side panels - that is how the RXG became the RX 135! I should have retained the RXG lettering since spares for these are not easy to come by.
Lockdown plans
I have been considering a full restoration for quite some time now but the prices that I have been quoted (50k for the complete restoration) have prevented me from taking the plunge. The covid-19 induced lockdown and the accompanying boredom made me take up this project. I planned to strip the bike down to the extent possible, clean and paint the frame, clean and polish the chrome parts and put it all back together.
This is how the bike looked in April before the start of my project.
I had never done anything like this before but I did watch a lot of youtube videos and the job did not seem to be that complicated.
I decided to keep a note of the order in which I removed the parts and also noted down the size of the fasteners. This was done to ensure that I would not mix them up during re-assembly.
Dis-assembly
Getting the fuel transferred out of the tank.
With the tank, side panels and the seat off.
Close up of the resonator.
Removed the shock absorbers (which turned out to be a mistake, more on that later)
Oil tank and chain covers off
Parts transported to the balcony at the end of the session (Excuse the car tyre please)
Notes taken during dis-assembly
Remember how I said that removing the rear shock absorbers was a mistake; In a moment of brilliance, I decided to take the bike off its main stand while holding onto the frame with my right hand. With the shock absorbers removed, there was nothing to prevent the frame from coming crashing down onto the wheel. Unfortunately for me, my fingers happened to be in the way.
This is what it led to -
The finger injury prevented any further dis-assembly so the exhaust, air box and front end remained as it is. I utilized the recovery time to clean the parts that were already dis-assembled.
Cleaning & Polishing
The bathroom sink was put into good use:
The oil tank was covered in years of muck and grime!
This took some effort but the end result was worth it.
Soap water, Autosol polish and lots of elbow grease led to this
Wheels and exhaust were cleaned. Did not put too much effort into the wheels since I plan to get them professionally restored later on.
Gave the stipped down bike a good wash.
Rust on the frame
I decided to leave the front forks untouched. Saw a few videos about how they are to be dis-assembled but couldn't muster up the courage to do it. This was the state in which I decided to proceed with the painting.
Painting
I needed to buy supplies for painting and was stuck due to lockdown # 1. Sometime around end April was when shops were allowed to open and I was able to buy the required things for painting. I did some research and zeroed in on a zinc phosphate based primer from asian paints. The smallest can that I could find was also too much for my requirement hence I decided not to dilute it while applying.
Paint used was gloss black spray paint.
Also found a can of chrome paint, the can itself looked too bling but I decided to give it a try.
Decided to give the primer a trial run.
A very hurriedly done masking job. I was too eager to start with the painting.
Primer coat done. I ended up applying three coats of primer.
The underside of the seat and the mud guards too got a coat of primer.
I did not take any pictures of the actual painting. The spray cans made it very easy to paint and it took less than 15 minutes for a single coat. I applied three coats in total.