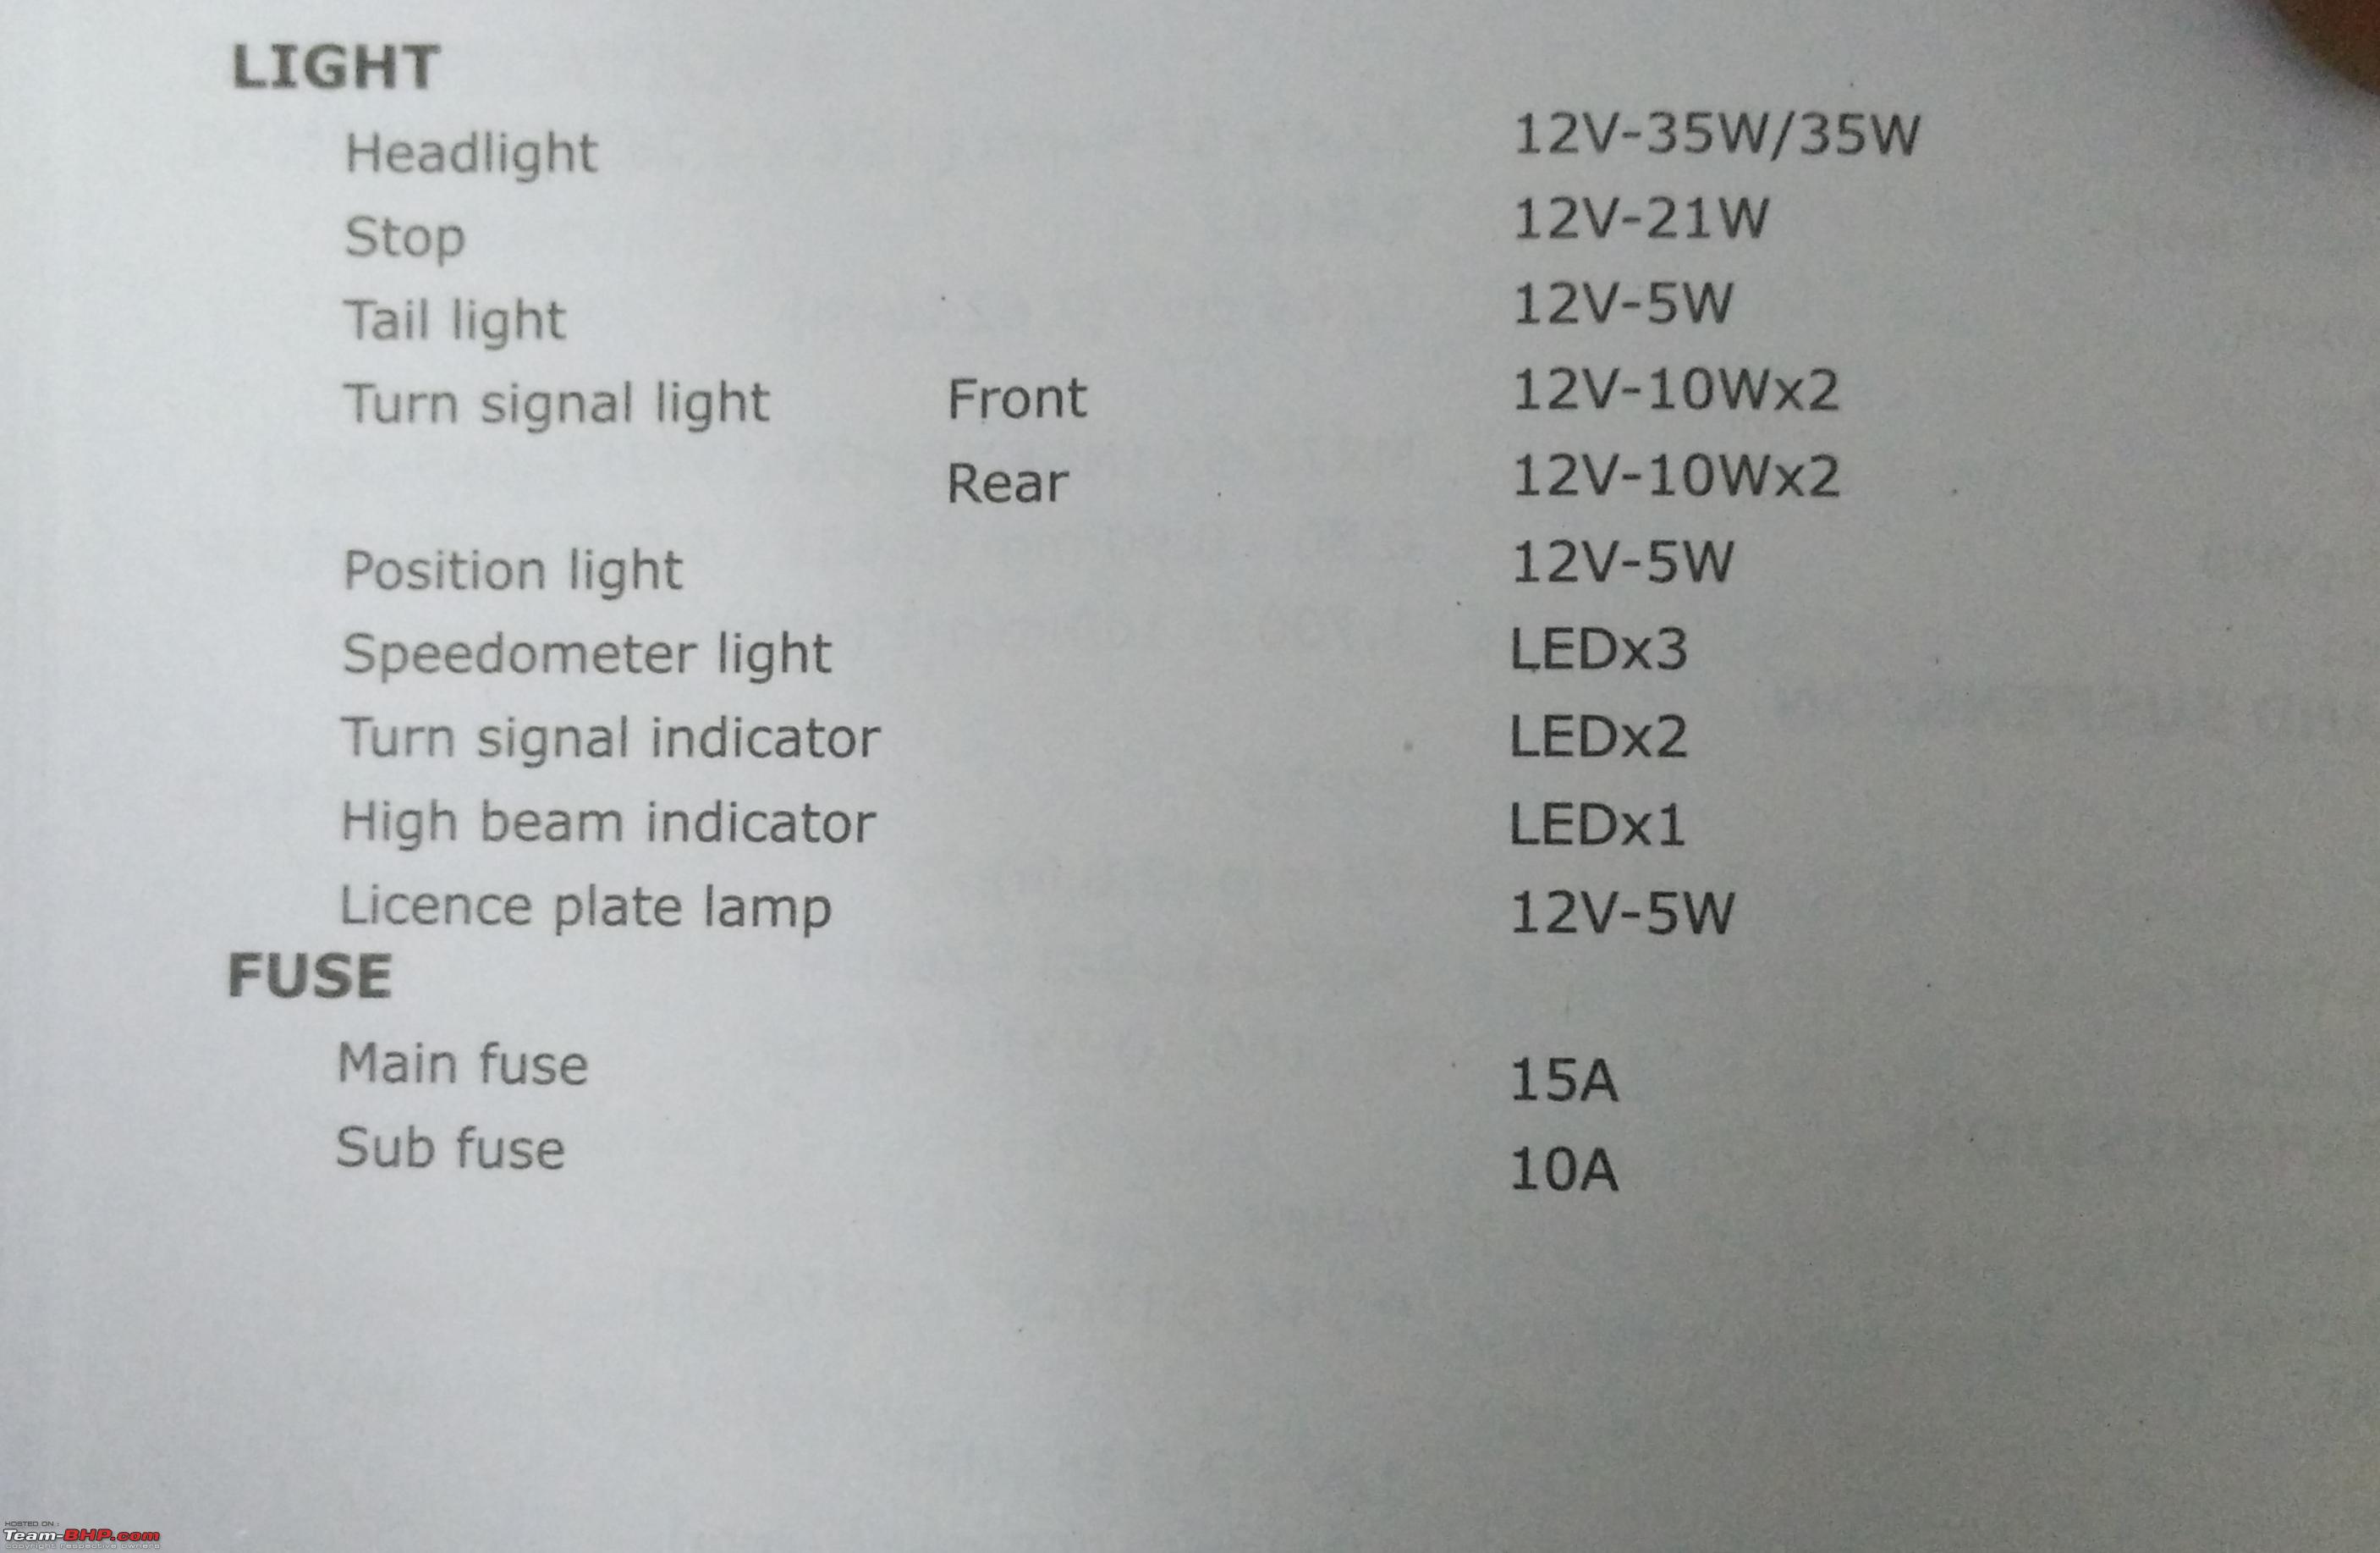
1) Headlight - Swapped the OE Halonix to either Osram Silverstar HS1 35/35W or Philips Rally Moto Halogen HS1 40/40W
After I had got the scooter, I went out at the night to check the light performance and was disappointed due 4 reasons:
- Low power of OE bulbs
- Reflector design fault IMO - It was replaced under warranty solving the issue.
- Adjustment of the light beam with respect to Road
- AC Setup
The OE bulb was Okay but the lights were spread all over the road (read scatter) so visibility was poor especially when in Low Beam. On the other hand the high beam was sharp and pointing upwards towards the trees.
With the scatter at low beam, nearby object at speeds of 30 kmph were hardly visible making me frown and strain my eyes to ride. So I thought of two options:
Option A: Swap to a better brand bulb like Osram or Philips with OE rating.
Option B: Upgrade the rating from 35/35W to 60/55W. It is doable but I am not sure of the electricals can take the load or not and moreover the 60/55W is a H4 P43t base bulb so it needs slight modification to fit in the OE holder of HS1 which is PX43t base. Slight difference between the two but I was not confident to go about this modification on a AC Setup.
So in the end it was
Option A that I went for and got myself a pair of Osram Silverstar HS1 and now also a pair of Philips Rally Moto Halogen (40/40W).
A pair of Osram Silverstar HS1 (35/35W)

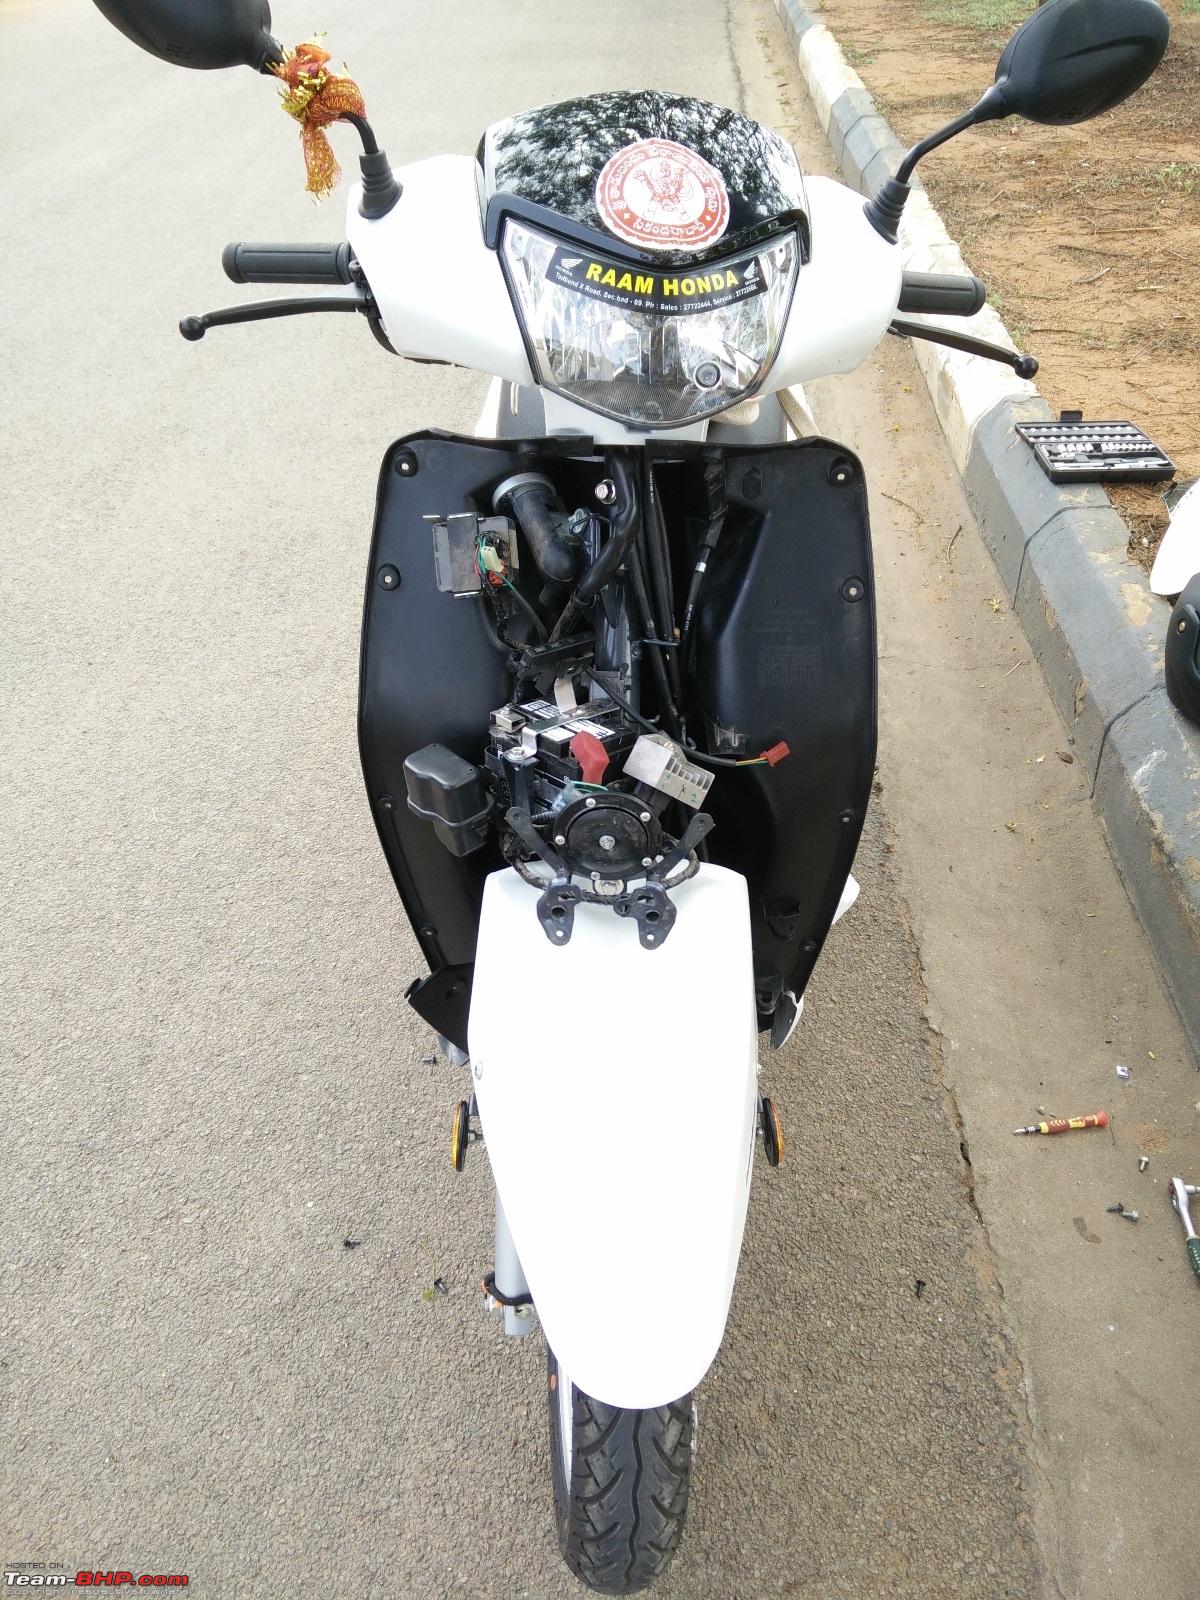
I'll be putting down the process to change the headlight bulb on the Activa 125. To change the bulb there are 3 steps, mainly:
- 1: Headlight cowl removal
- 2: Changing the bulb
- 3: Re-installation of the Headlight cowl
__________________________________________________ _______
1:Headlight Cowl Removal
Not difficult part but i'll say the delicate part of the D.I.Y. Reason being the cowl is too thin and delicate plus any little flexing will be prone to rattling as panel gaps will be created. One needs to be extremely careful when fiddling with the headlight cowl.
Apparatus Required: - 12 x 14 spanner
- Star screwdriver
Tool Kit:
 Procedure: Step - 1:
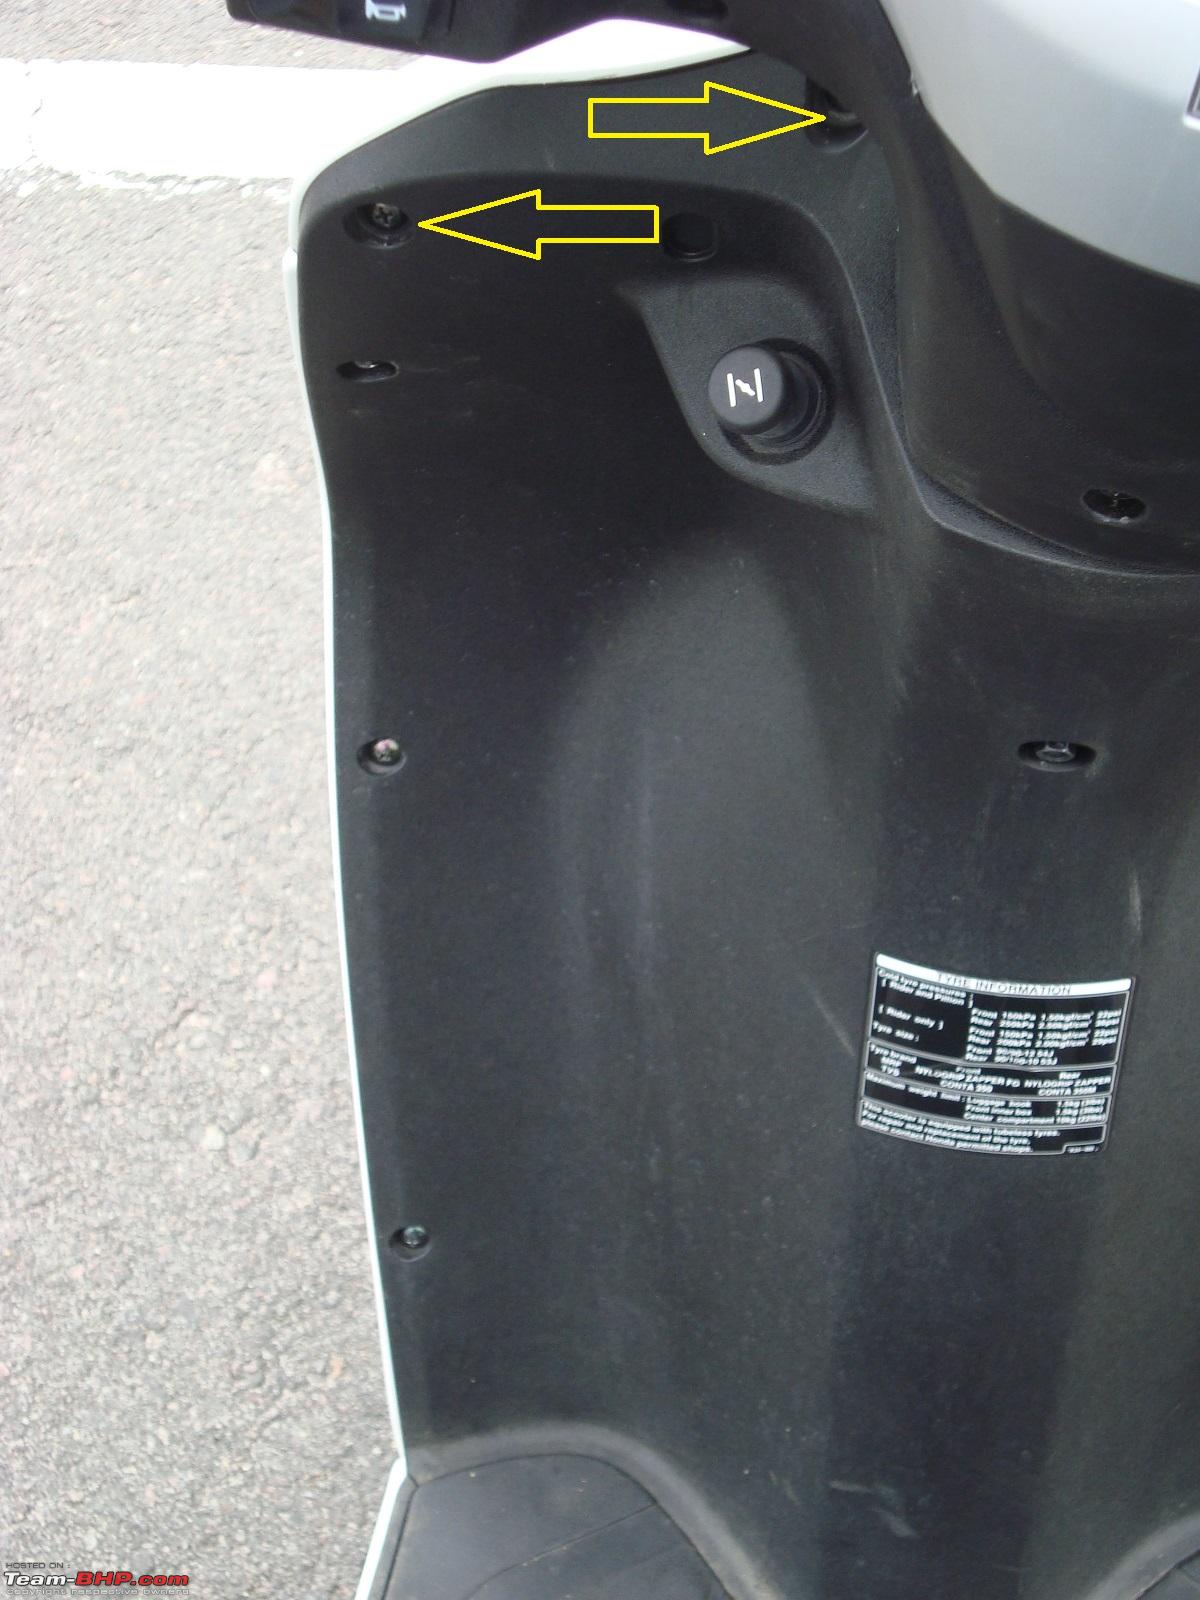
 Open the 4 screws from the instrumentation cluster to free the headlight plastic cowl.
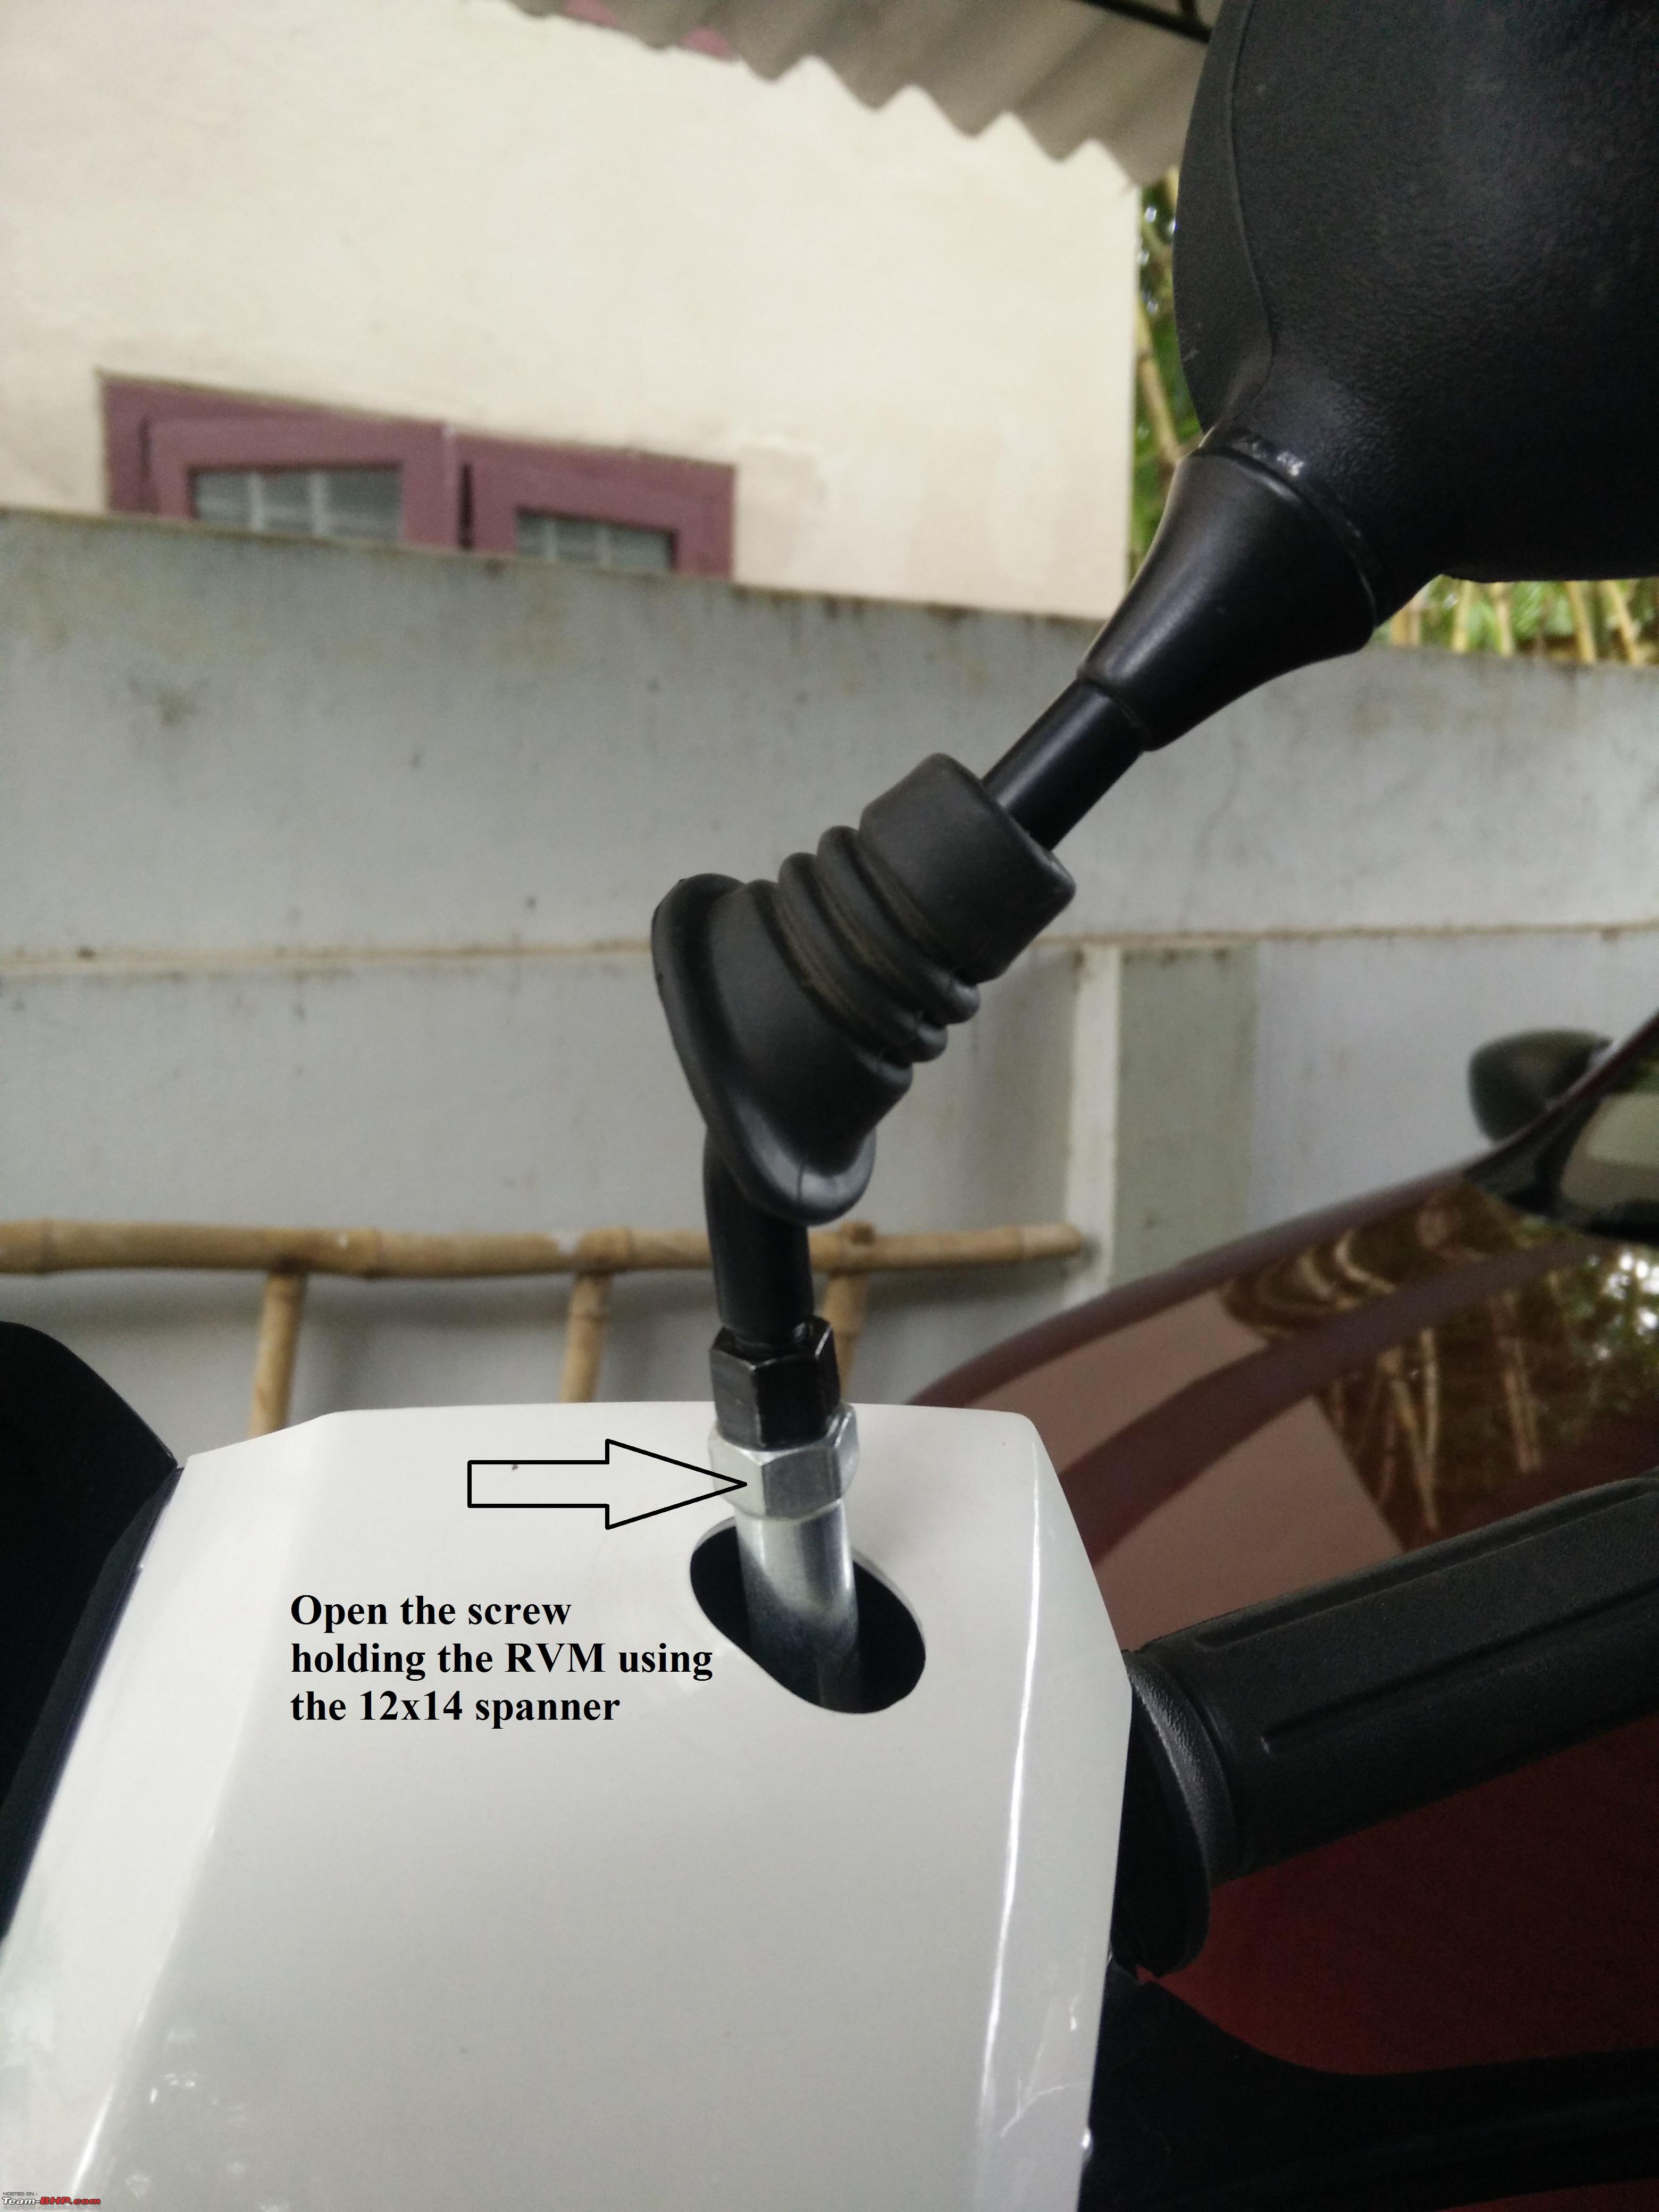
Step - 2: Dismantle the rear view mirrors on both sides as it will be an hindrance later on when removing the cowl from the holder. You'll need the 12 x 14 spanner that is present in the tool kit.
Step - 3 (Optional): Open the Central cowl so that opening the screw Number 5 which is located below the headlight levelling screw can be easily accessed. This is an optional step. I tried using extension bar, testers etc etc but none of them could reach the screw in there because of the low gap between the levelling screw and central cowl.
Step - 4: Once Step - 3 is performed, open the screw number 5 that holds the headlight cowl. This screw is located at the base of the levelling screw.
Step -5: Once all screws have been removed, go in front of the scooter and hold the wheel with your legs and slowly pull the cowl towards you. Don't go too hard here as it is easy to damage the paint of the cowl plus there are high chances of breakage.
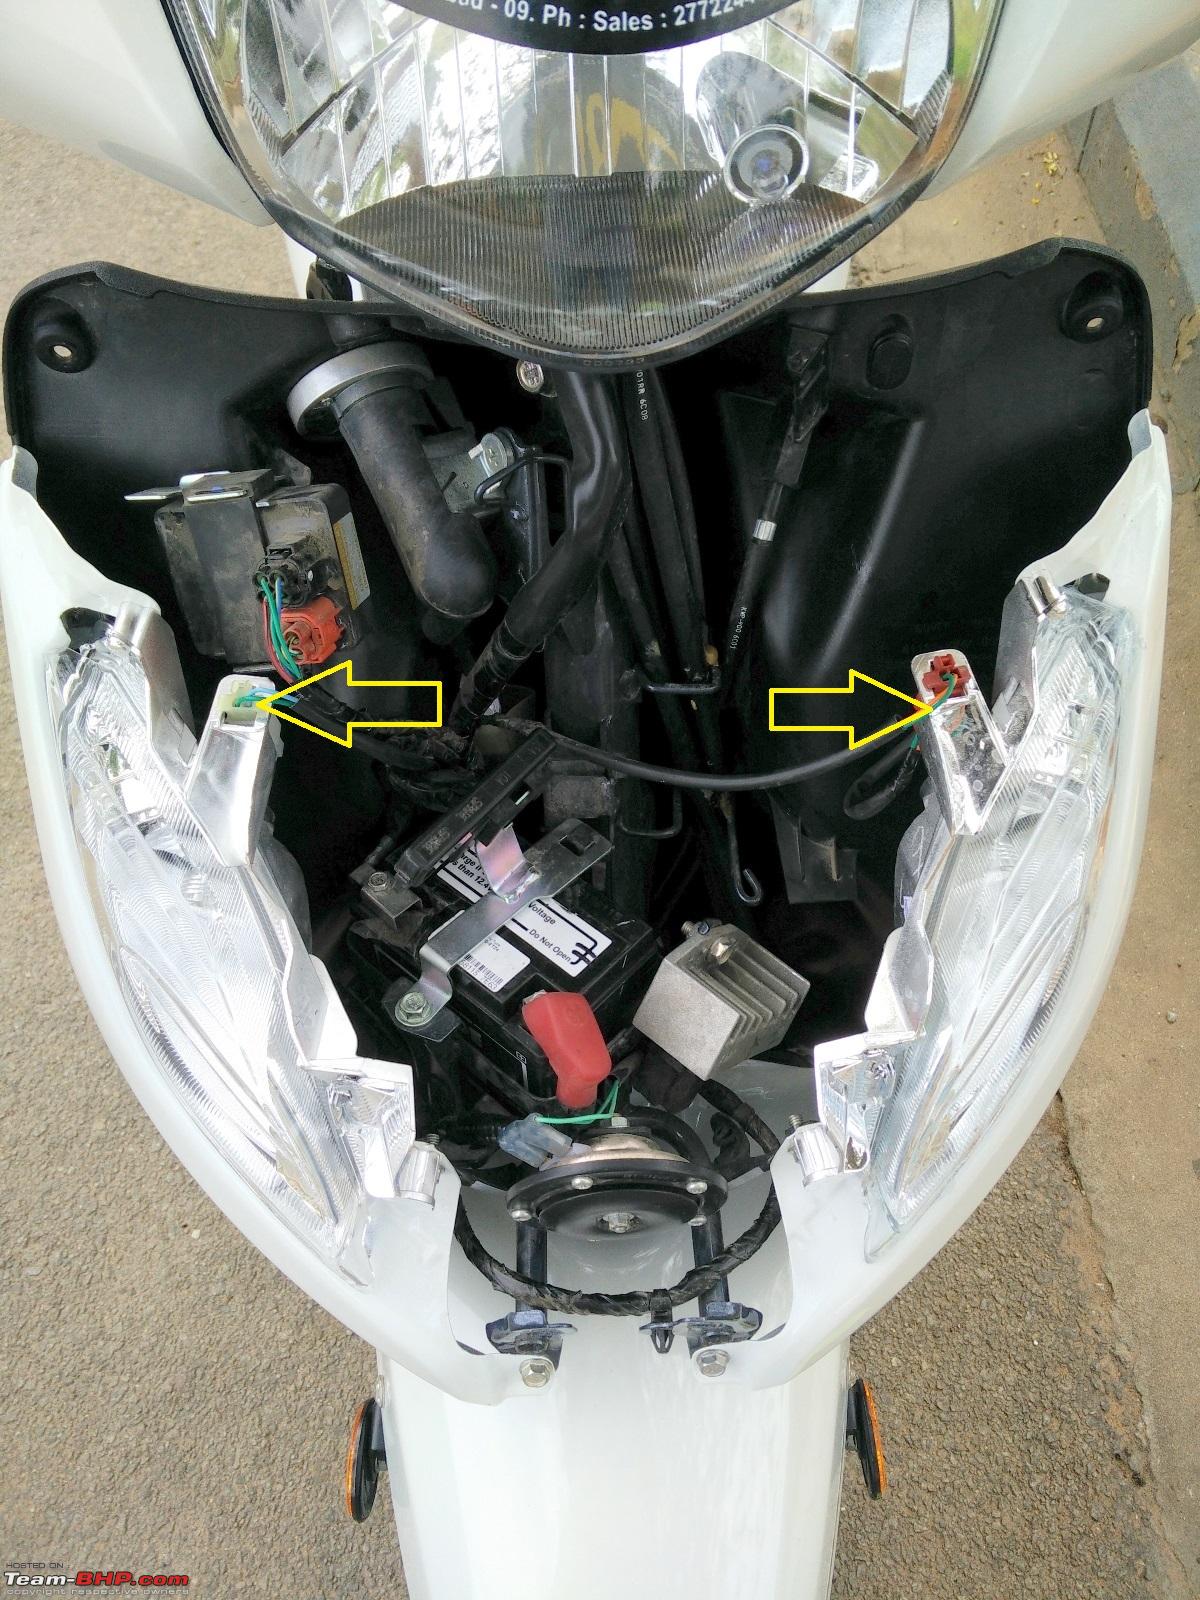
Step - 6: Once the cowl is free from the handlebar, disconnect the two connectors i.e., Headlight bulb & Pilot lamp.
Step - 7: Part of the bulb is over. Now time to change the bulb.
With is solved, I'll add up the pictures so that it is easy to understand the main steps.
Screws holding the headlight cowl  Dismantling of the rear view mirror
  Central cowl that needs to be opened for accessing Screw Number 5.
  Two screws on each side so 4 in total need to be removed to open Central cowl
  Disconnect two connectors (Headlight and Pilot Lamps)
  2: Changing the bulb Step - 1:
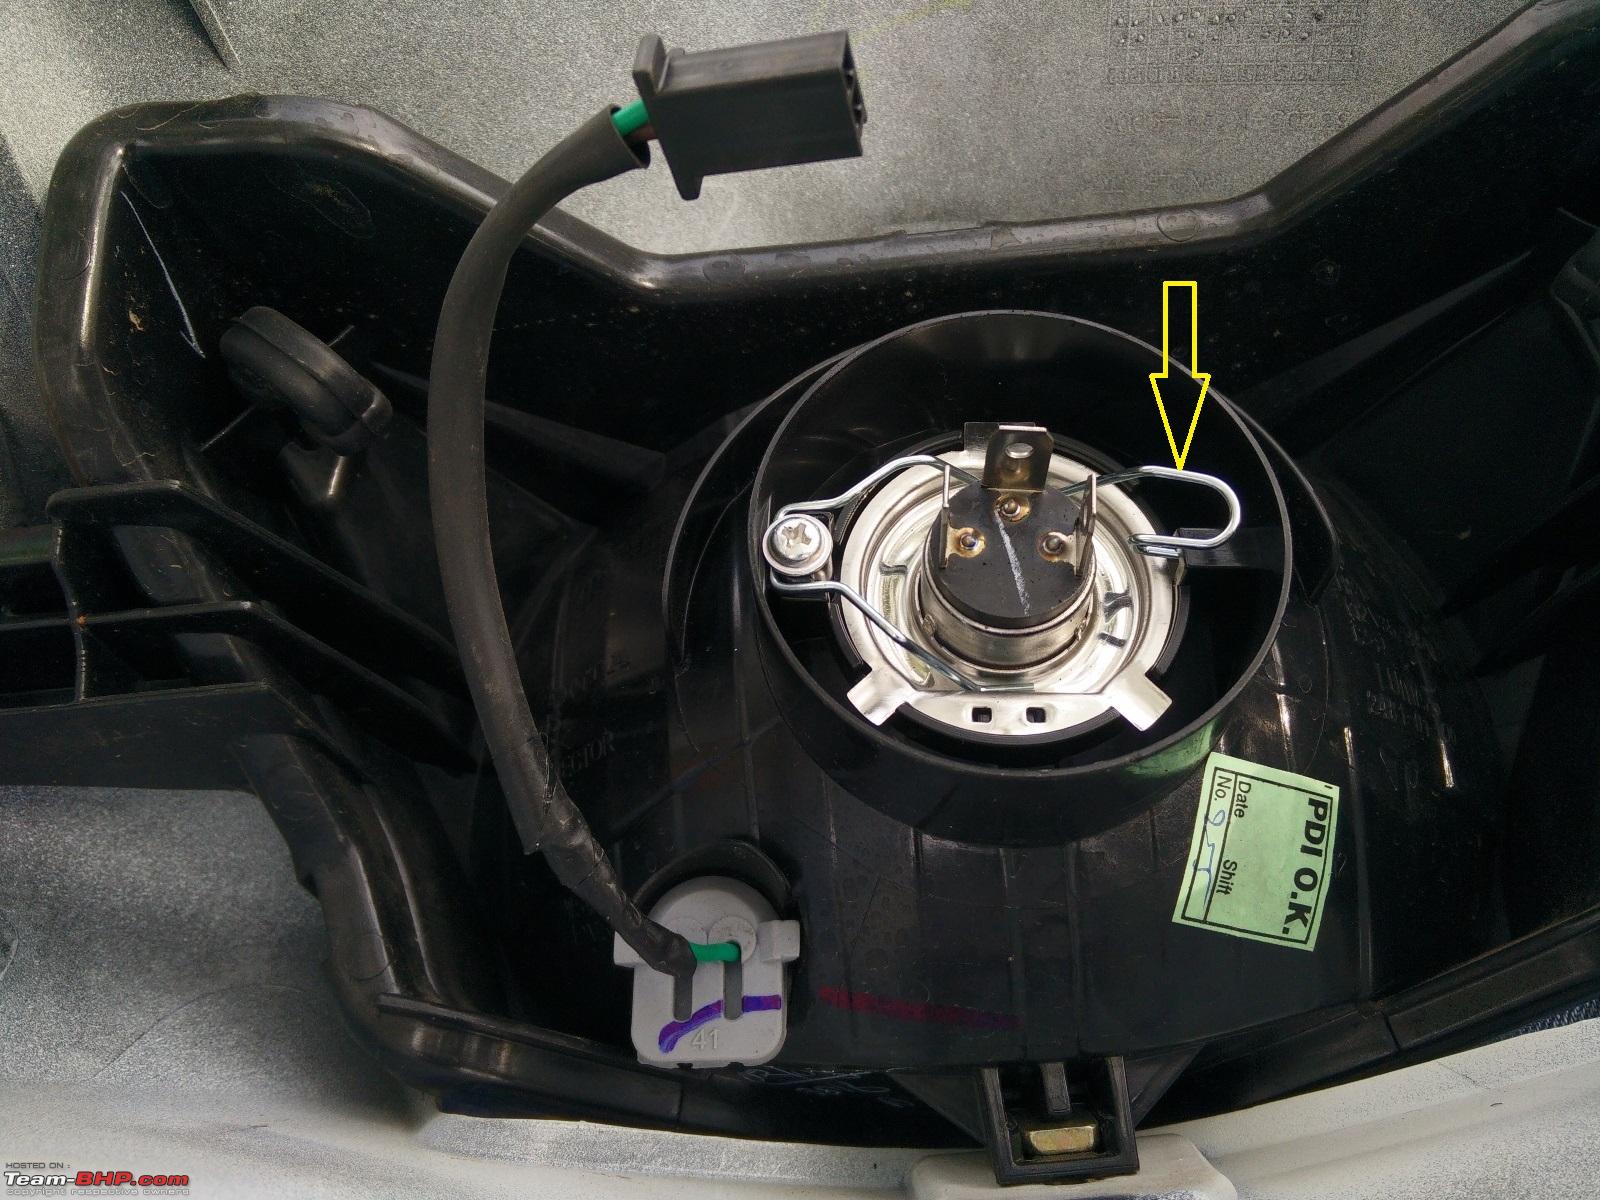
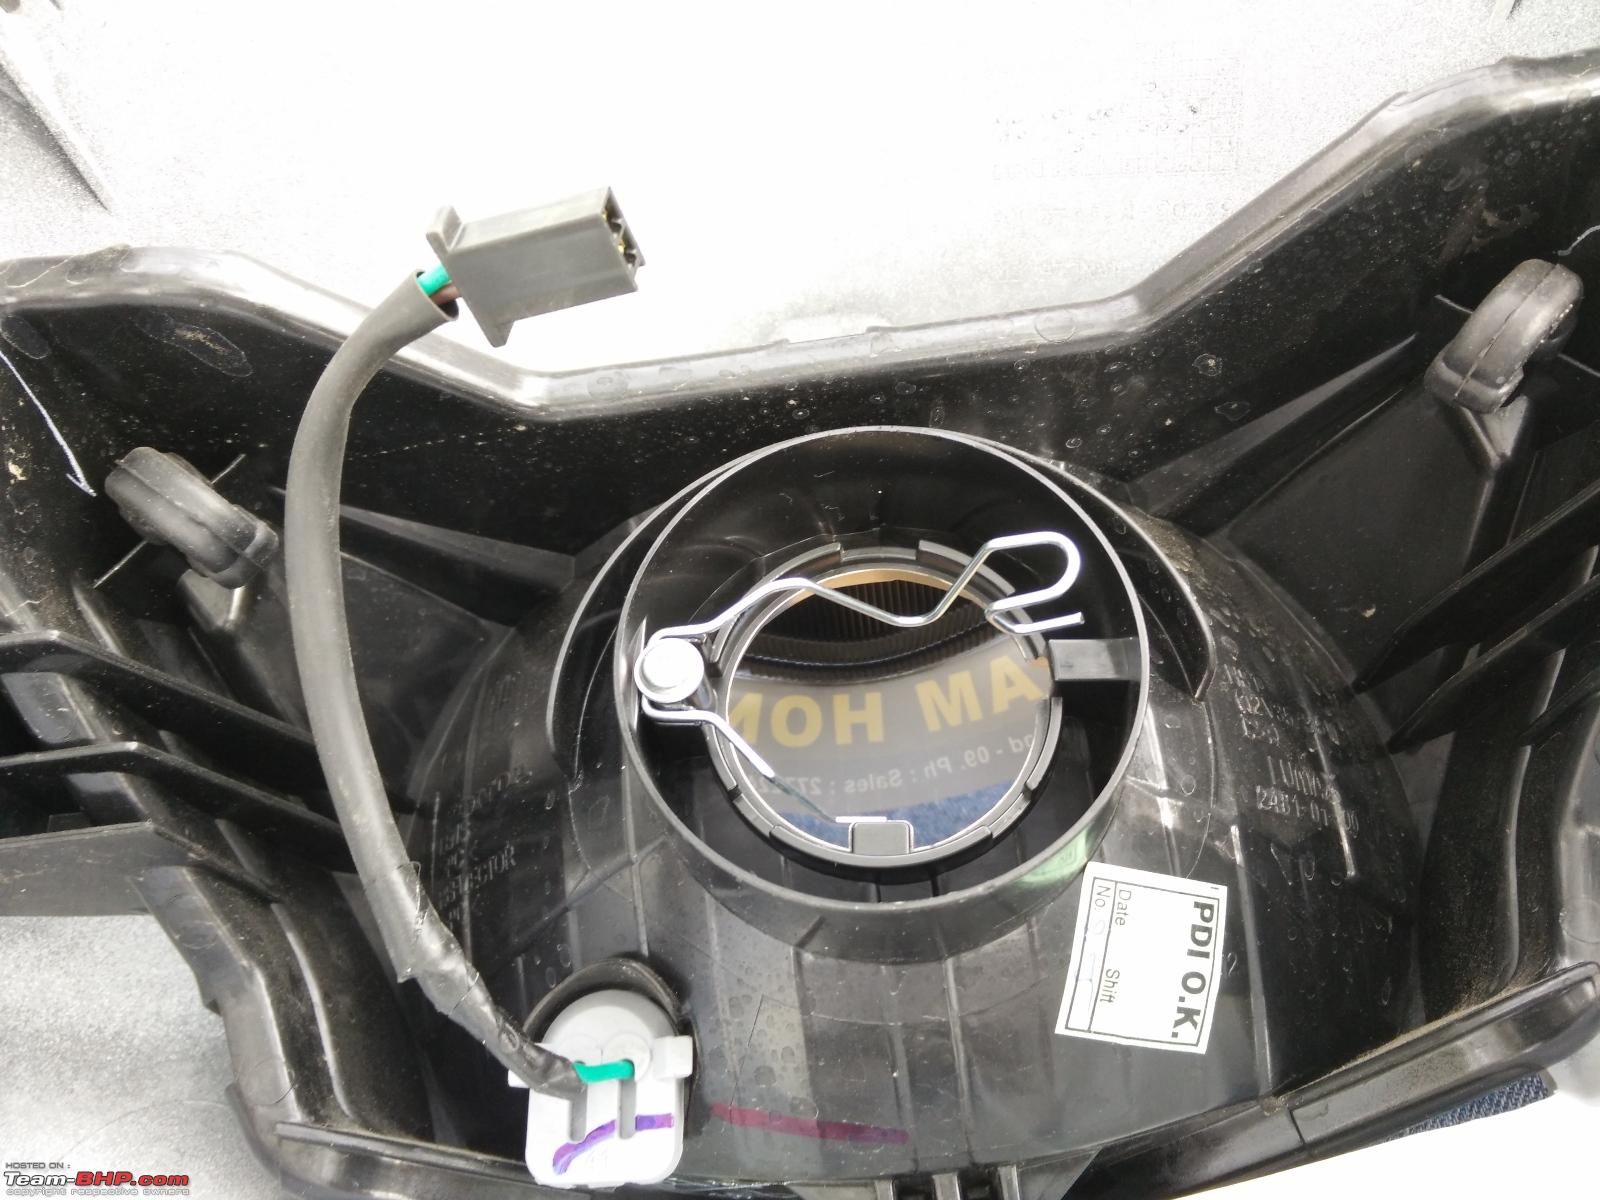
 After the headlight cowl is free, holding the cowl firmly, open the rubber dust cap (Round shaped) that is located on the reflector unit.
Step - 2: After the dust cap is removed, press the on the steel clip that holds the bulb tightly. Just press down on the clip and push it forward to free the bulb from its retainer clip.
Step - 3: Remove the OE bulb and replace it with Osram one.
Step - 4: Follow steps 1 and 2 in reverse order.
Dust cap that needs to opened  Press that clip and push it forward to release the holder clip from the bulb
  Halonix bulb removed
  Halonix vs Osram Silverstar
  Osram's installed
  3: Re-installation of the Headlight cowl Step - 1:
 Follow the steps mention in Headlight cowl removal step in reverse order to refit the cowl.
__________________________________________________ ________
Here are the pictures of the Osram Silverstar. In the Low beam picture, look at that shadow that I was referring to. It is highly irritating to have that when riding around.
Phoenix - Low Beam  Osram - Low Beam
  Phoenix - High Beam
  Osram - High Beam
__________________________________________________ _________
Conclusions: - A major flaw in my eyes, a shadow line when the lights are on Low Beam. It is very irritating since that is the line of vision and Honda is clueless and says it is normal. The issue has magnified with the bulb swap from Phoenix (OEM) to Osram Silverstar. I have sent a mail to Honda, lets see what they have to say about it - UPDATE: Issue solved as mentioned below on 06.07.16 by ASC under warranty.;
- I find the Osram better in light output with a flat beam when in Low Beam whereas the High Beam one was sharp and feels more like an arrow. Even though the power rating for both the bulbs are 35/35W, the Osram feels brighter than Phoenix.;
- Getting a headlight bulb at 140 bucks is cheap IMO.

In the conclusions part, the first point is now addressed as the complaint I raised at the Honda through their website got me the replacement of the reflector unit thus solving the issue. Here is the picture of the low beam post reflector unit change:
New Reflector Unit:  New Low beam pattern
  Before vs After
After the reflector unit change, the headlight is much much better and spread is a lot even throughout the road and the stock Phoenix bulbs itself feels decent enough. Can't wait to swap the OEM for either Philips Rally Moto or Osram Silverstar. Time only will tell which one excels.
Thanks to BHPian Sulivan, I have got a pair of Philips Rally Moto Halogen (40/40W) bulbs with me now. Thanks for couriering it and taking all the pain!
With the Headlight issue solved now, I will post a comparison between the headlight bulbs that I have.
OEM: Phoenix (35/35W);
Upgrade 1: Osram Silverstar (35/35W);
Upgrade 2: Philips Moto Rally Halogen (40/40W).
Philips Rally Moto Halogen (40/40W HS1)  Philips and Osram
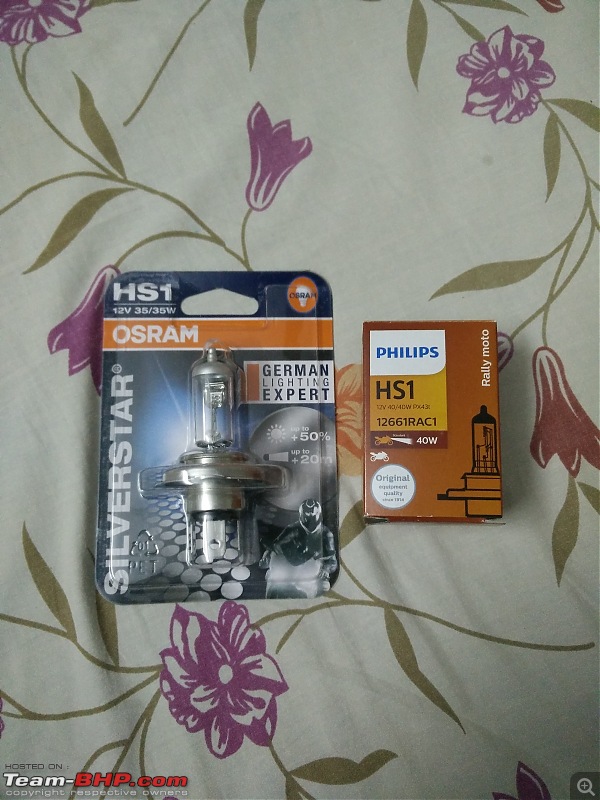


 26th June 2016, 12:04

 (4)
Thanks
(4)
Thanks