Decided to have a go at the stupid headlamps once again and finally did it!! The i10 now runs with 3400 lumens (each

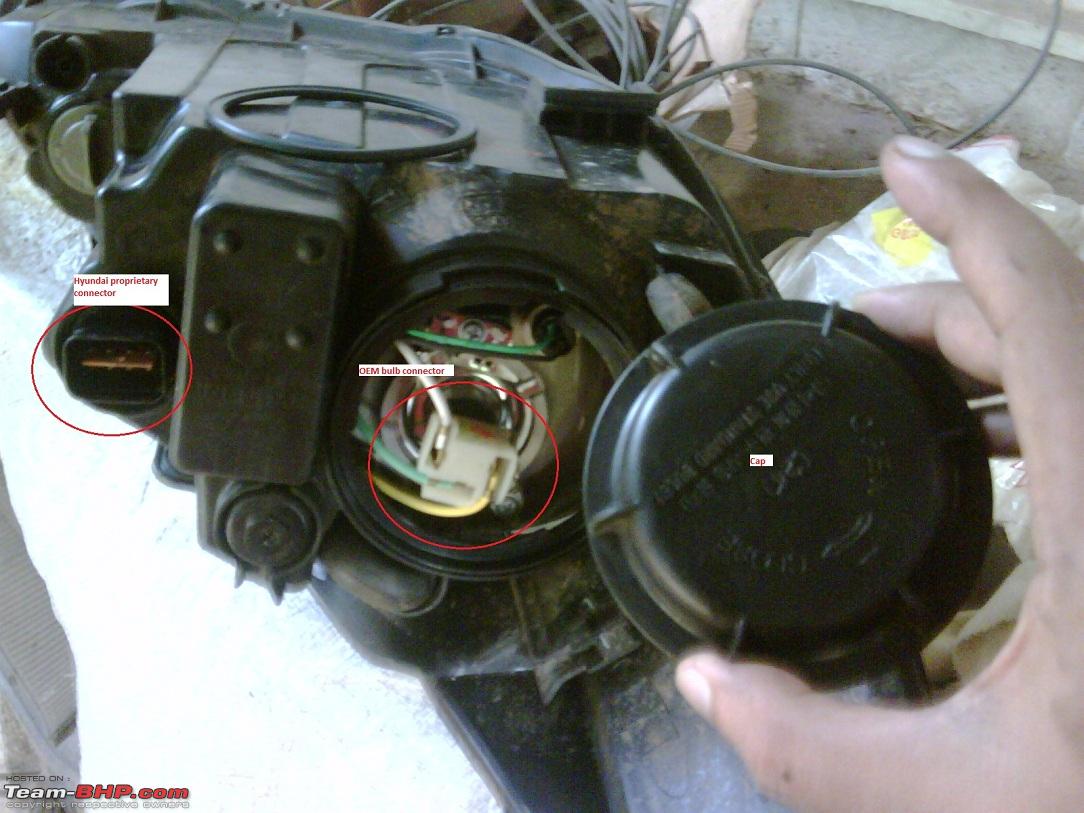
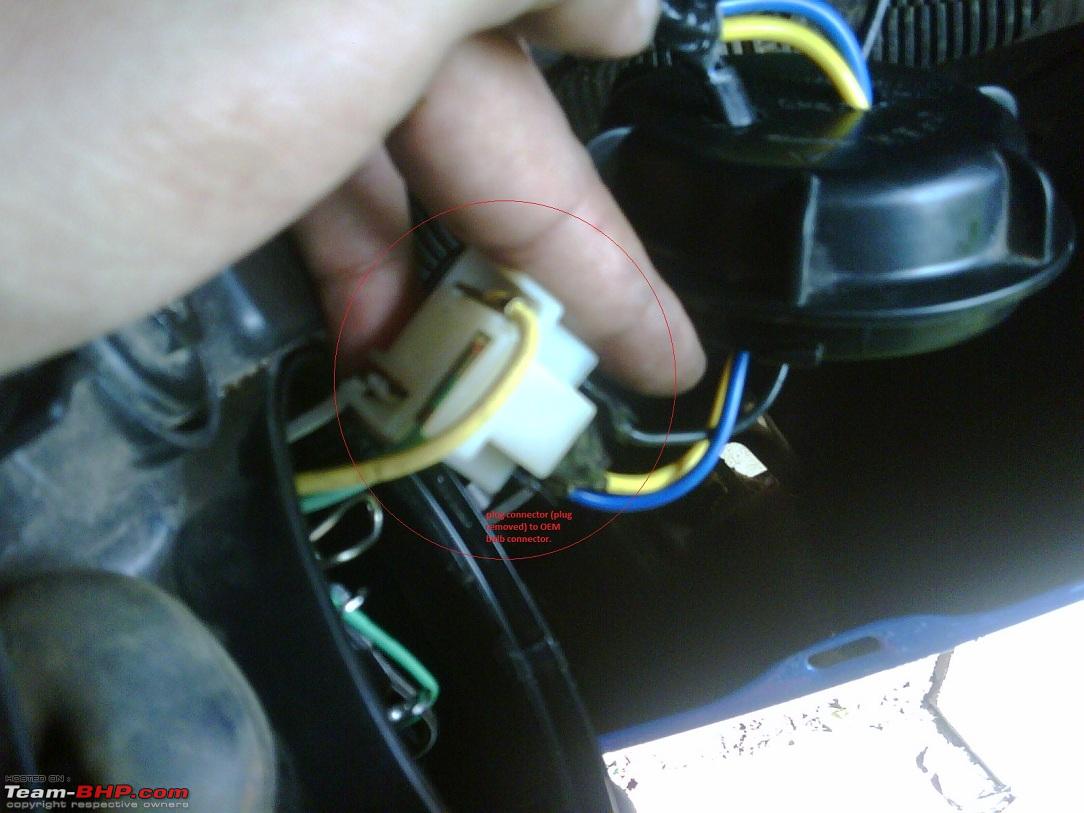
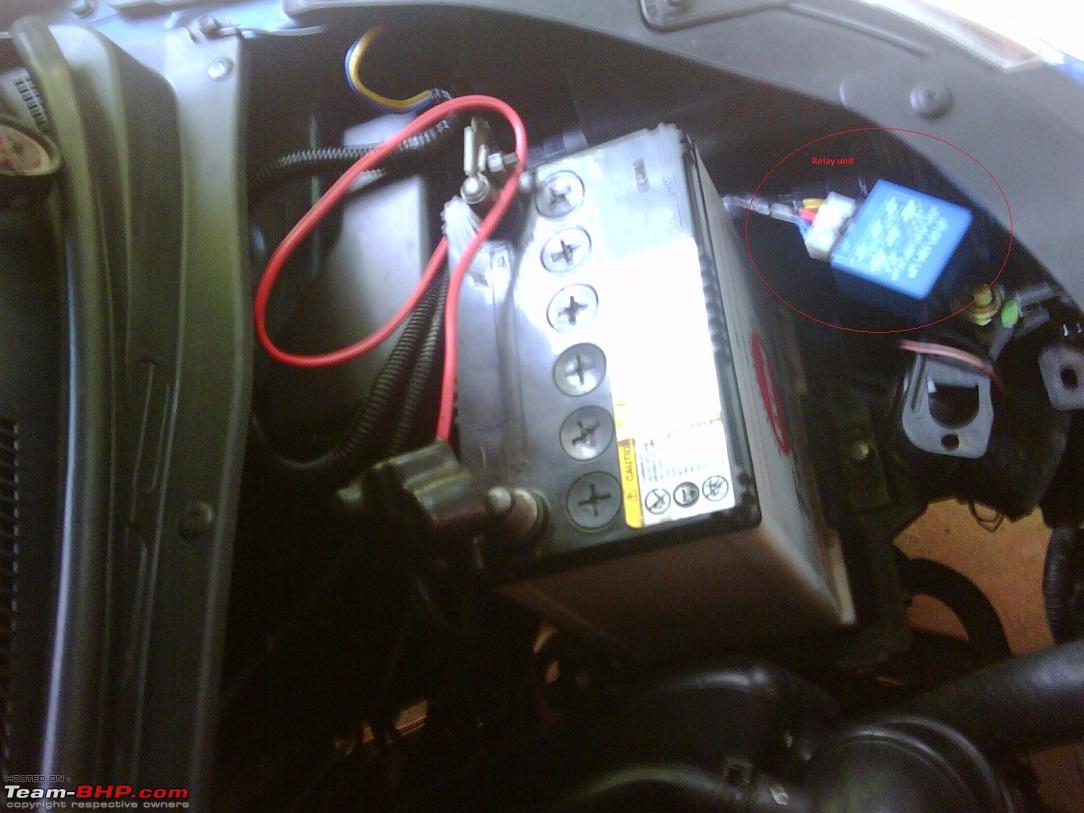
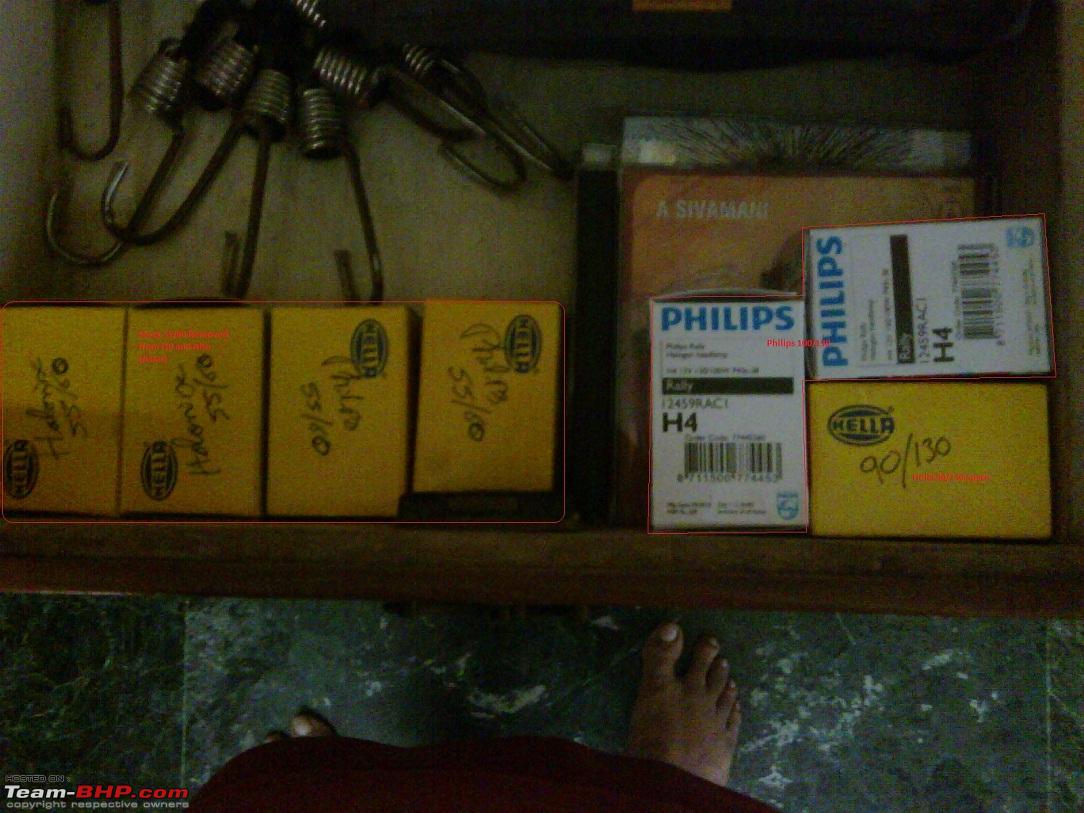
) provided by Hella 90/130 bulbs.
Now you might think why i chose 90/130 instead of the more obvious choice, which is Philips 100/130. The reason is 90W low beam is more than enough for my needs, i would be running on low beam for most of the time and 90W is definitely less damaging than a 100W low beam in the long run, plus i save 20W energy. 130W high beam gives me the lumens when i need it!
Hyundai manual is wrong, it says to remove the headlamps you need to undo two bolts, actually there are three bolts to be undone, one the missing bolt in the manual sits just behind the indicator bulb.
So i undid the three bolts and this time armed with more information from couple of posts at Hyundai Forums, i yanked out the headlamp in a side to side rocking motion. It finally came out after a lot of struggle. So what holds the headlamps is three bolts, clip on the bottom of the lamp and couple of legs on the outer side of the lamp unit.
As i said before the power is provided to the whole headlamp unit by a single connector. There is no separate external connection to the headlamp bulb. But what you have is a short stubby wire that runs inside of the lamp unit and connects to the bulb.
There is a cap behind the headlamp bulb, to keep out mud and dust. Believe me the wheels will splash the back of the lamp unit with nud/water through the gap in the fender apron. So you don't want to leave any holes on that cap! But without making a hole, either on the cap or on the lamp unit itself, there is no what that you can use a ceramic/bakelite holder! So hole should be made. One hole on the right side lamp unit, and two on the left lamp unit. Why two on left? One for the ceramick holder wires to pass through, and one for the stock headlamp connector wire to pass through and mate with the plug from relay kit, i didn't want both high draw wires to run together with the low draw wire. Don't make the hole larger than you need to make the wires to pass through.
To make the ceramic headlamp connector pass through the tiny hole, you need to separate the ceramic part from the clips. There is a tiny tab which locks the clip in place inside the ceramic holder. You need to press that clip and pull out the wire. After you have pulled out all three wires, pass it through the hole in the cap and put it back into the ceramic holder. Now that cap stays on the wire, it won't come off.
Now you change the headlamp bulbs, put in your favourite high wattage blinder, and place it in the headlamp's cavity on the car, but don't push it all the way in!
Now is the time to connect the relay plug to stock headlamp bulb connector. (You need to do what you have done on ceramic holder to separate the wire from plug and pass it through the second hole in the cap and connect it to the oem connector, you need not use the plug, just put it in the correct order). After that you connect the ceramic holder onto the bulb, and fix the cap back onto the headlamp unit. Like this you do the other lamp, but you need to do the relay conector thingy only on the left (car's left) lamp unit. (Why only on the left? Because battery is on that side so you place the relay there, and so you connect the relay plug on that side lamp unit. If the battery is on the right (car's right) you do it there).
There is a balck wire than comes out of the ceramic holder, it goes nowhere, you have to ground it! Now earth both wires from each on a bolt that goes into car body metal. Connect the power wire from the relay to the battery's +ve terminal. Connect the negative terminal back on to the battery. Check for smoke

No smoke is all fine.
IMPORTANT: BEFORE STARTING TO WORK ON ELECTRICALS DISCONNECT ALL LEADS FROM THE NEGATIVE TERMINAL. ELSE RISK A FIRE, BURN, INJURY!!!
Now you turn on the headlamps, check high beam, low beam, indicators etc. If all works fine you may now install the lamp units properly.
If your headlamp beam is ulta ie., high on low and low on high, you need to swap out wires of the relay connector going into the oem connector. Its easy, when you look at a headlamp connector from the back (that is you can see the wires coming out), left is the ground, and top and right are for high and low beams. If your beams are ulta you need to change the top and right wires. Do this at the relay connector instead of doing it on each headlamps.
Now you turn on the headlamps, check high beam, low beam, indicators etc. If all works fine you may now install the lamp units properly.
Installation is easier than pulling it out! You have to align the headlamp clamps with the screw holes and give it a hard push, the lamp will snap back in place! If the lower part of the lamp won't sit in properly you need to again push the lamp out partially and now make the lower part of the lamp sit level with the body line and push it again. Now all will be well!
Put the bolts back on clean up the wiring and you're good to go.
Btw i didn't say anything about sealing the holes in the cap, did i? No i didn't. I did not seal it since i didn't have the right material. But i'm going to get some RTV silicone sealant and do it up. Why RTV silicone, because it is flexible, it is easy to remove if needed, and it can fill into the gaps well. Or you can even use M-Seal, but i won't want to do that since it gets real hard and removing it if needed would be a pita.
Thats it!!
Yes i do have pictures, but not many, will post it later.