Product Review: Pete’s Powerbox for Skoda Octavia 1.9TDi 90bhp Non PD.
Manufacturer: PSI-Motorsport, Belgium
MSRP: Rs.35,000 in Mumbai. / Rs.33,500 in all other States.
Warranty: 2 years
Website: http://www.petes.in/ Manufacturer Claims:
Standard: 88 bhp 202 NM torque
PSI: 108.62 bhp 240 NM torque
- Horsepower and torque increased by 20%
- Better fuel efficiency
- Plug & play
- No changes in original ECU
- No modification to OE parts
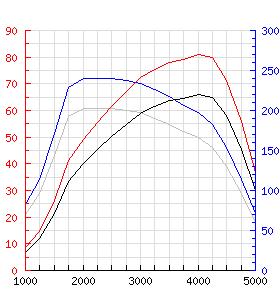 Power figures in KW (1KW=1.34hp)
Pete’s tuning boxes are available for a wide range of turbo diesel cars including the new common rail diesels from Hyundai and Mercedes. Prices for these are a bit more expensive and start from Rs.37,500 (Rs.36,000 outside Mumbai) for the Hyundai and Rs.39,000 (Rs.37,500 outside Mumbai) for the Mercedes 5 cylinder engines.
My Report:
The stock 90bhp TDi engine of the Octavia is a great engine, ideally suited to the Indian road conditions of low speeds and stop/start traffic. It’s torquey nature means you can run a higher gear that you normally would in another car, yet have enough power to overtake without feeling the need to downshift. The excellent fuel economy it gives is the primary reason that allowed Skoda to establish itself as a brand in India.
However, from the enthusiast’s point of view, the low revving diesel could use more power, a wider power band and more torque. If all this can be done without affecting the FE, that would be great! And this is exactly what Pete’s Powerbox claims to provide – more power and torque, but not at the exchange of higher fuel consumption. If this sounds like an oxymoron to you, well, that’s just what we set out to prove by testing it these past few weeks on my 2004 TDi with no modifications except for better tyres.
Installation:
This is the beauty of a piggyback tuning box. Installing it is literally a DIY thing. It takes all of 10 – 20 minutes (depending on where and how you want to fix the box) and is guaranteed to work. No guesswork, no trial and error, no blown engines. Plug it in and you have instant power.
As the photographs below show, installation is a simple procedure.
1. Remove the plastic engine shroud.
2. Unplug the original connector and hook it too the connector supplied with the box.
3. Route the Powerbox wiring to where you want to mount it.
4. Secure all wires and mountings
5. Put the plastic engine shroud back on.
A detailed instruction page is given with the package and it would take the seriously ham fisted to mess up this installation. Further, seeing the “Audi” logo on the connectors puts your mind as ease!
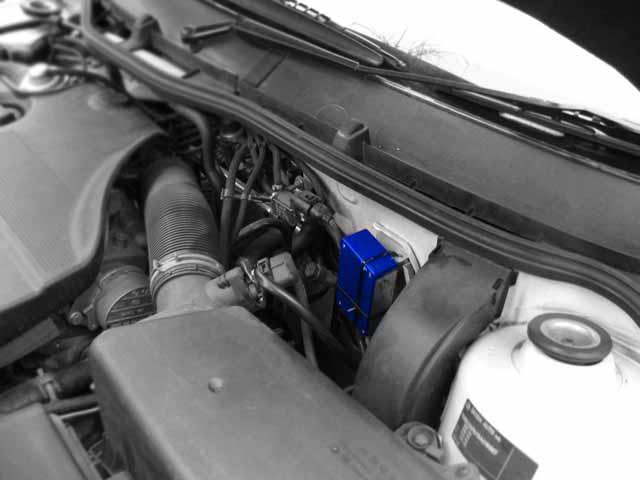
One criticism I have is that the box should have been supplied with a mounting bracket that can be directly fitted to a bracket in the engine bay. Or, the wires should have been long enough to extend into the cabin, where the box can then be neatly kept inside, away from the elements. This would be useful when servicing your car, as even though the manufacturer states that the box is weatherproof, you can’t help but worry about water seeping in or the mechanic “accidentally” knocking it around. Thought on speaking to Peter, I was informed that the best place to install the box would be in the battery shroud, that way it is invisible, relatively cool and sheltered from the elements. This works for the Octavia, but my comments about may hold true for other vehicles.
Performance:
It’s human nature; you are content till you sample something better. And that pretty much summarises the effect on me after fitting the Powerbox. I was satisfied with the power and torque of this simple, non-CRD, engine…till I tried something better!
Moving slowly out of the narrow lane that leads to the main road from 4-season, the garage and official retailer of Pete’s Tuning Box in Mumbai, I briefly mashed the pedal. The simultaneous “WHOOAA” from GTO, Rehaan and myself confirmed that the box was indeed plugged in and working!
The first thing we did was head to Worli Seaface to see the improvements in the 0-96 kmph (0-100mph) timings. We had GTO’s G-tech with us for some accurate measurements, and we had achieved a best time of 13.33 seconds from the stock engine.
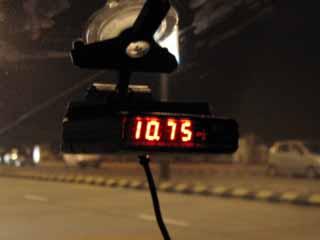
Our first run with the “boxed” car showed a 11.65 second run, and that was with too much wheelspin, as I launched at the same rpm as I had before the box was installed. A few acclimatisation runs later showed timing dropping drastically. The best we got was a 10.75 second run. The reduction in time was further aided by the ability of the engine to continue making power right till it’s 5,000rpm redline, unlike the stock engine which runs out of steam at 4,000rpm (see graph above).
Taking a few variable factors into play, it is still an improvement of 2 seconds over the stock car. 2 seconds to the layman may not sound like much, but everyone reading this post would know that 2 seconds is a lifetime when we talk performance figures.
G-tech tested 0-96 Kmph
Stock: 13.33 sec.
Powerbox: 10.75 sec.
Real World Performance:
Acceleration figures can be misleading at times and don’t always paint a true picture of the car’s real world performance. The Toyota Corolla is a prime example of delivering on paper but not on the streets.
So, how much of a difference does a boxed Skoda make in everyday driving. The simple answer is a lot. The most prominent performance increase you notice is when you first floor the accelerator at 1,800rpm. Whereas the stock car was no slouch in this department, the difference now is simply addictive. Sure, I will get used to it, but for now, I just love giving people rides and look at their faces when I suddenly mash the pedal. Simple pleasures…!!
As you see from the graph, there is a big rise in torque, with the maximum 240NM of torque being produced from only 1,800rpm and staying that way till almost 3,000rpm. That means you can safely drive in third gear in the city and still out-accelerate almost all other cars by simply changing the angle of your right foot.
Out on the expressway, the difference was amplified. Where the stock car runs out of breath at an indicated 180-185kmph, the boxed car gallops past that mark with ease and finally stops at the 200-205 kmph mark. Consider a 10% speedo error, and that would mean the top speed is about 184 kmph. Another notable increase over stock.
Fuel Efficiency
A person spending thirty large ones to improve the performance of his car would not really be concerned with fuel economy. However, in these days of increasing fuel prices, it is always a consideration, and, if you can have more power with little loss in your FE, you have a happy customer!
The writing on Pete’s box claims an improvement in FE. I’m afraid to say that this is the one claim I would have to oppose. However, I’m happy to note that my FE did not drop either, and that alone is enough to bring a smile to my face. Running with the box over a period of a few weeks in city traffic, high-speed runs and acceleration tests, yielded me a combined average of 10.5 kmpl. Remember, that figure is inclusive of 0-96kmpn testing and high-speed runs. With some extended “regular” driving, that figure is sure to rise.
No, I have not done FE runs like the magazines, but then how many customers run their cars in that way? This is a real world, hard driving figure, which I’m sure could be improved upon with driver who has a lighter right foot.
Another benefit of the Pete’s box, and totally unexpected I might add, is the almost complete absence of black smoke from the tailpipe. A stock car under hard acceleration coughs out enough smoke to get the biker behind you mad, but with the box fitted, the smoke levels have dropped drastically. What that means is that the fuel is being effectively consumed to produce power and not wasted.
Conclusion.
Simply put, you cannot find an easier, more reliable and safer way to increase the power of your TDi engined car. Tuning boxes like these have been in use for years overseas, and I’ve yet to come across one instance where any major failure could be attributed to the fitting of these boxes. The fact that you can now buy this over the counter right here in India, with a bill and 2-year warranty is just icing on the cake.
The MRP may seem steep initially, but look at it this way. Which other performance part can you install in 10 minutes, get a guaranteed performance increase of about 20% and without affecting your fuel economy. Plus, when you sell your car, you simply unplug it and take it with you or sell it a get back part of your original purchase price. This sounds like a win-win situation to me, and you don’t get too many of those these days!
Pros:
Easy to install
High quality connectors
Tried, tested & instant results
No loss of FE
Reduction in smoke from the exhaust
Warranty
Cons:
No mounting bracket provided
Wiring not long enough to mount unit in the cabin
Erm...
__________________________________________________ __
Images courtesy Rehaan
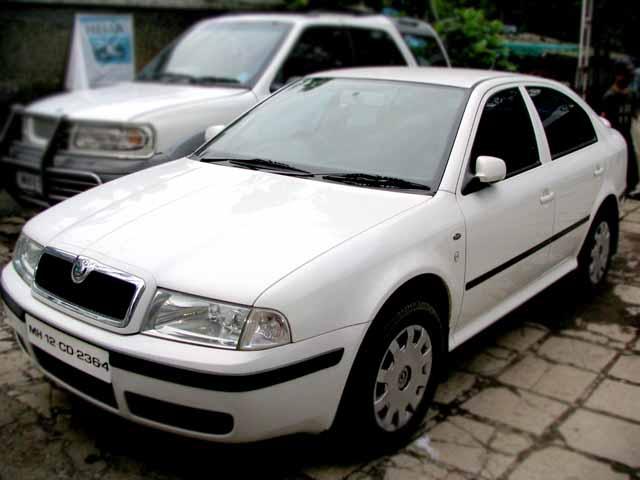
The guinea pig.
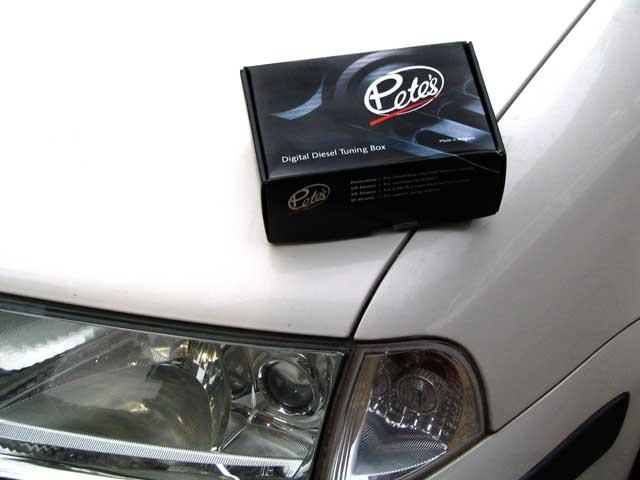
Pete in a box.
Stock 0-96kmph timing
 Installation
Step 1:Remove the plastic engine cover.
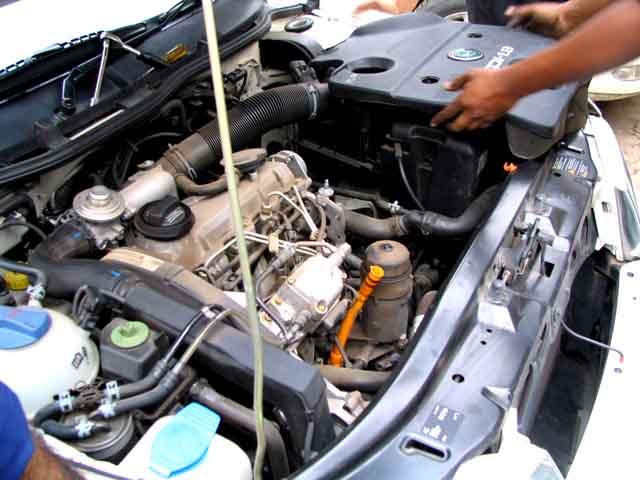
Step 2: Unplug the multi-pin connector which is located on the Injector Pump.
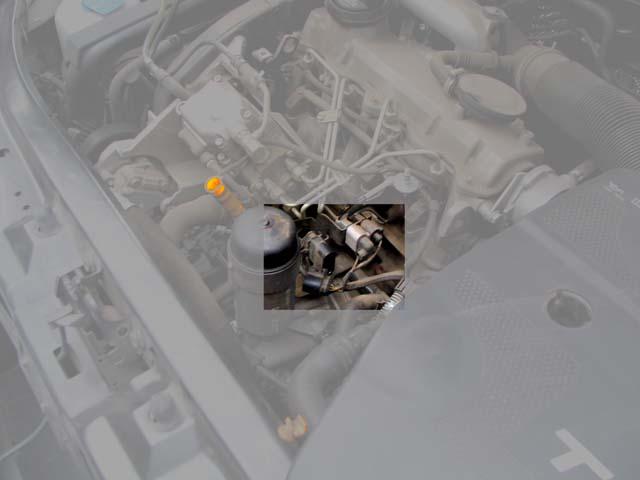
Step 3: Plug the old connector into the Pete's Box connector.
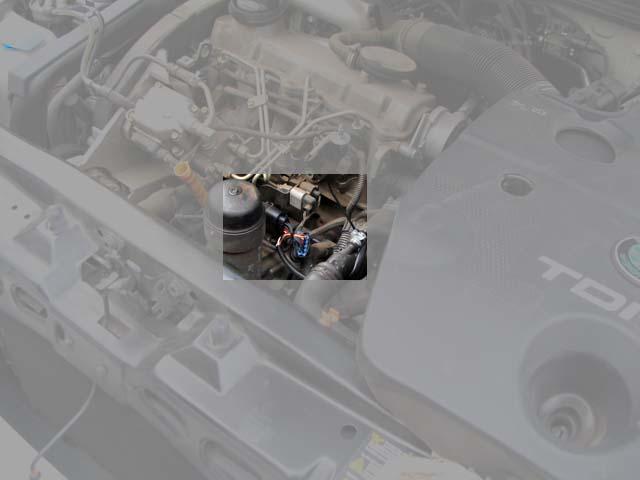
Step 4: Route & Fasten the wiring leading from the connector to the box.
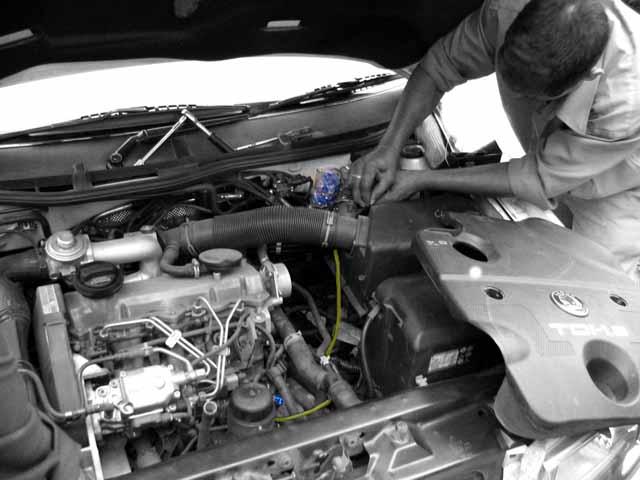
Step 5: Secure the box in it's location.
Time to check the improvements.

Either the car got faster, or the camera got slower!

Quite an improvement on the first try.

And with a little more launch practice....10.75secs!

 (2)
Thanks


 (1)
Thanks

 (1)
Thanks


 .....this time around we better be the first ones to know well in advanced so all of us can save up some cash and have a big smile on our face when we see your products ad in the mags.