| |||||||
| Search Forums |
| Advanced Search |
| Go to Page... |
 |
| Search this Thread |  1,880,373 views |
| | #1171 | ||||||||||||||||||||
| Team-BHP Support  Join Date: Apr 2013 Location: Madras
Posts: 7,335
Thanked: 20,670 Times
| re: VW Polo GT TDI ownership log EDIT: 9 years and 178,000 km later... Thank you for the feedback and comments gentlemen. All of them have been duly noted. Really appreciate it. This is the first time I was fiddling with the front brakes so there was plenty of learning during the process. And I wouldn't say the process is complete since the discs were untouched. Sorry for the late response! There are a few minor scratches though. I intend to give her to the detailer this year. It's been a while since a professional detailer has done the job on the car. Quote:
Quote:
https://www.ebay.com/itm/333972034773 Might be a good idea to try after a few months due to the current covid scene? Post offices are indeed working but I am not sure of international shipments. The downside with eBay is unless you pay with PayPal, no guarantees with the money-back if we don't get the shipment or it doesn't fit the wheels. Quote:
Quote:
Quote:
Quote:
Quote:
Quote:
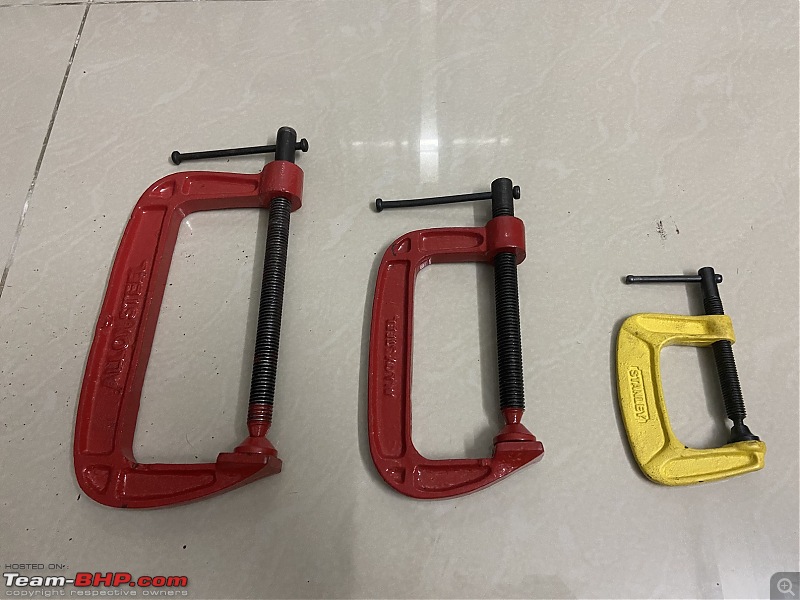 Will do that after a couple of months. There are some scouring marks on the discs which we could feel. Quote:
 That also reminds me to get a large pipe which I can use as a cheater bar to extend the lug wrench. Makes loosening the wheel's lug nuts way easier! Quote:
Quote:
Quote:
Quote:
Quote:
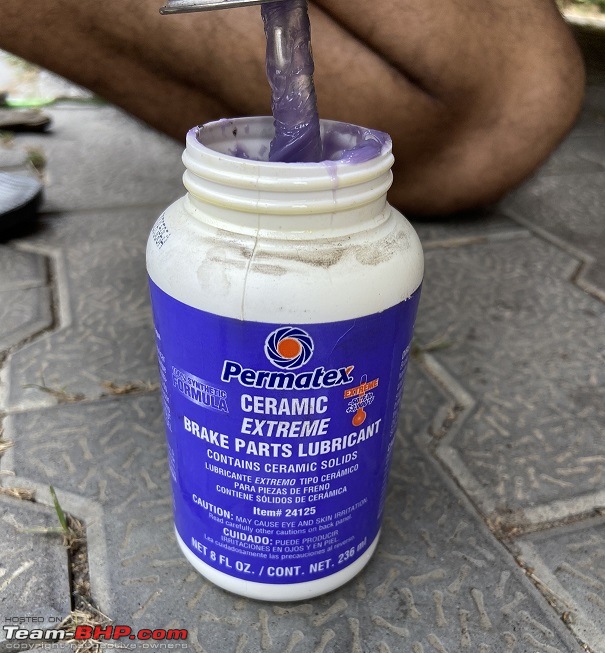 Shall report back with my findings after a few months. Quote:
I'll have the guide pins replaced on both sides when I remove the discs for skimming. Costs about Rs. 850 for one side on Boodmo (link). Quote:
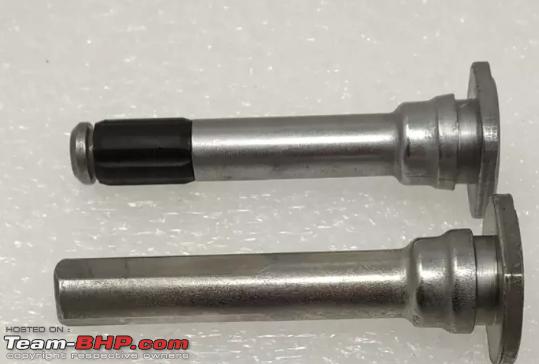 Quote:
Quote:
Quote:
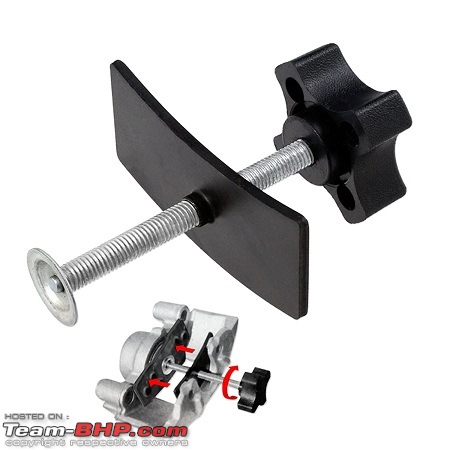 Last edited by Gannu_1 : 9th May 2021 at 21:19. | ||||||||||||||||||||
| |  (7)
Thanks (7)
Thanks
|
| The following 7 BHPians Thank Gannu_1 for this useful post: | hmansari, JoseVijay, paragsachania, Rachit.K.Dogra, shibujp, Thad E Ginathom, The_Outsider! |
| |
| | #1172 | |
| Distinguished - BHPian  Join Date: Jun 2007 Location: Chennai
Posts: 11,431
Thanked: 29,947 Times
| re: VW Polo GT TDI ownership log EDIT: 9 years and 178,000 km later... Quote:
Last couple of repairs have been at Ignite, but before that, I used to go to Mounts Road. They always did a really nice job with paint and denting. Much depends on the lifetime of the car. And that may depend on govt suddenly telling us that our diesel engines are too old, and we can't use them any more. | |
| |  (1)
Thanks (1)
Thanks
|
| The following BHPian Thanks Thad E Ginathom for this useful post: | Gannu_1 |
| | #1173 | ||
| Team-BHP Support  Join Date: Apr 2013 Location: Madras
Posts: 7,335
Thanked: 20,670 Times
| re: VW Polo GT TDI ownership log EDIT: 9 years and 178,000 km later... Hey guys, dropping some updates on the ride. Trust all of you are keeping well during these times and hope the worst is behind us. I managed to dodge the virus thus far due to sheer luck and the usual precautions. I was fortunate enough to receive the first shot of vaccination here at Chennai which may not have been possible if I had spent the last lockdown at Palakkad. Anyways, moving on to the updates in no particular order. Sorting out the High Beam issue:Quote:
Long story short - one fine day, the high beams stopped working and there was no indication of the high beam symbol on the instrument cluster. Removed the xenon headlamp assemblies, plugged the H4 bulbs into the sockets and realised that the co-driver side high beam wasn’t turning on. Both the low beams were working fine and the driver-side high beam was working. After a LOT of troubleshooting, the issue was narrowed down to a disconnect somewhere in the factory wiring harness and with the help of my FNG technician, the issue was resolved. This also led me to retire the xenon headlight assemblies for good having served the last 6+ years faithfully and reverted to a set of new single barrel headlights with 90/100W bulbs and a relay harness. The whole process is described below in detail. 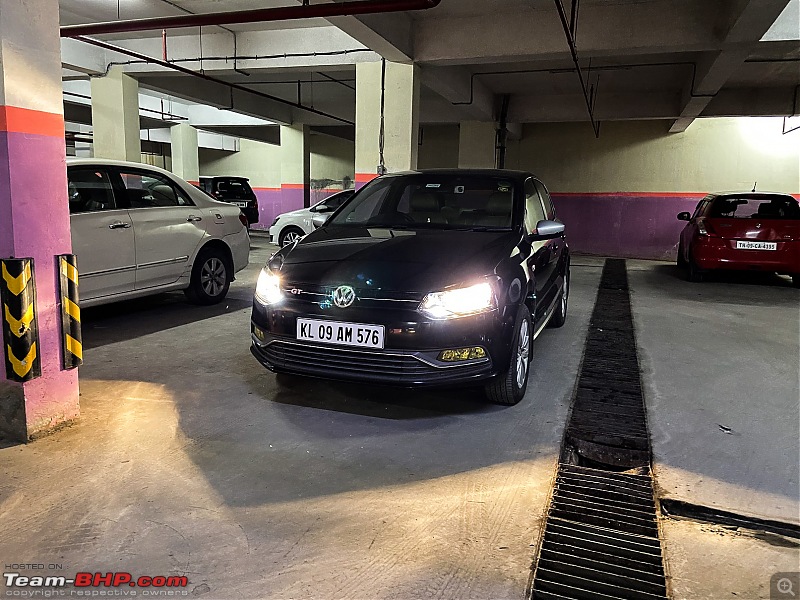 Some of you would know, I had a Morimoto Mini D2S based HID setup retrofitted to the stock single barrel headlights since October ‘14. The entire DIY process has been documented here. The cut-off from the projectors wasn’t the best out there but there was a massive improvement over the stock H4 55/60W bulbs. This setup worked well to this day without any troubles. Before the last lockdown, I was heading to work as usual and when I pulled the LHS stalk for flashing/passing, I noticed the high beam indication symbol on the cluster missing! This had never happened before. I wondered if the SMD LED for the warning symbol soldered to the instrument cluster’s PCB had conked out! While returning home in the evening, I realised the high beams were not working - not while flashing or if they were engaged. Bigger problems! I decided to sort this out over the weekend. Soon enough, the driver side headlight low beam gave up! This was becoming troublesome and embarrassing now. I wouldn’t drive around with just one headlight which looks very odd like a pirate’s eye patch. It wasn’t too dark in the evenings so I would turn off the headlights and drive back home with the fog lamps. With no high beams and with the driver-side headlight out of order completely, my guess was on the Morimoto relay harness now. There were 3 problems now: 1. High beams don’t work. 2. There is no indication of the high beam on the instrument cluster. 3. The driver-side low beam also doesn’t work. At the apartment basement… That weekend, armed with the required tools, I headed to the basement parking lot. Unplugged both the headlight assemblies and swapped them. i.e. the driver side headlight assy. to the co-driver side ballast + socket and vice-versa. Sure enough, the now driver side headlight assy. wouldn’t turn on while the co-driver side headlight works. So defective bulbs were ruled out; probably, ballast was the culprit. The only missing link is the D2S bulb socket or a loose contact somewhere in the circuit. I fiddled with the sockets and it would intermittently work on and off. So the socket or the short harness from the ballast to the D2S socket on the driver-side had a problem. I lugged both the headlight assemblies along with the ballasts and the Morimoto relay harness to my apartment. The whole thing was very exhausting back at the basement with no light or proper ventilation and I was in no mood to fiddle around any further. Lo and behold, TN went into a complete lockdown. Which meant my car was going to be parked in the basement with no headlights for days together and this would draw some unwanted attention from the security staff going on rounds and owners of other cars parked in the vicinity. Never mind. Back to my apartment… The sockets that shipped with the ballasts in the Morimoto kit back in 2014, came with a right-angled D2S igniter/connector perma-wired to the ballast: 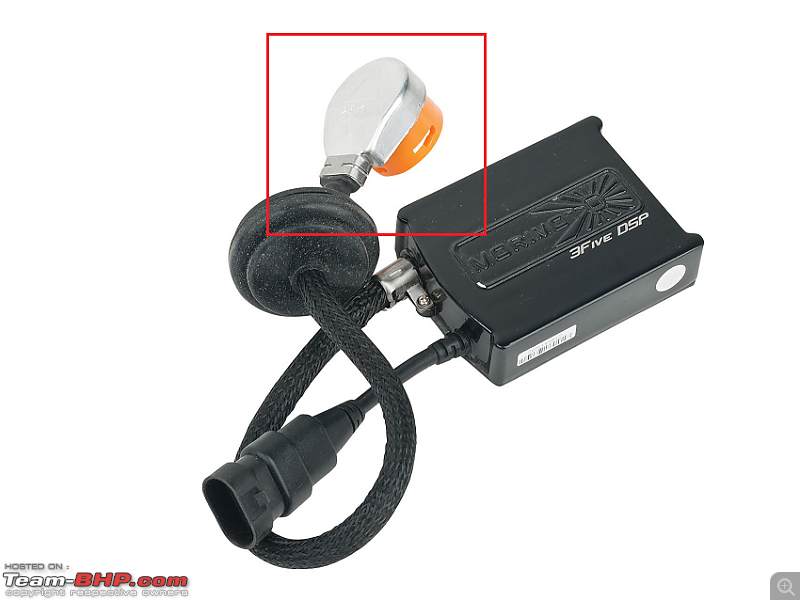 When this is plugged to the bulb in the headlight assy, the cable was taking a sharp bend at the socket and part of the insulation from the cables had worn out exactly at the bend. 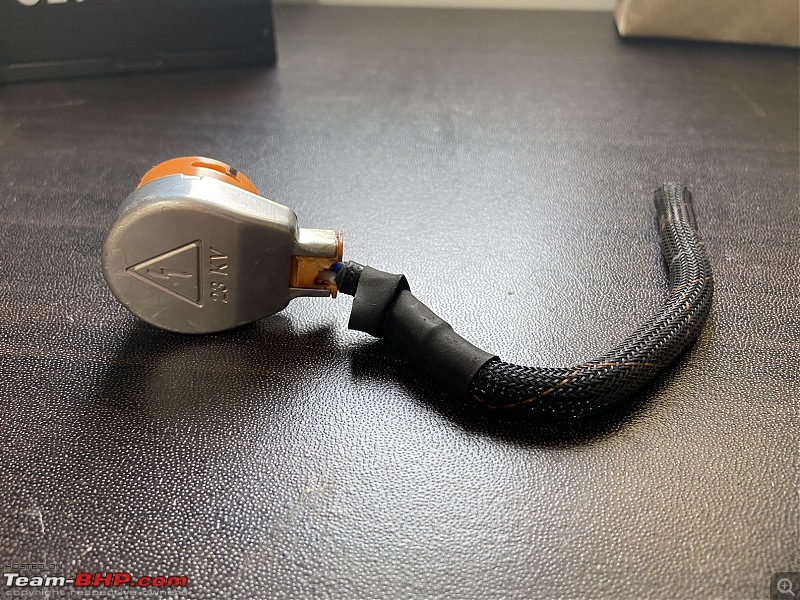 (Image clicked after the cable was cut from the ballast) 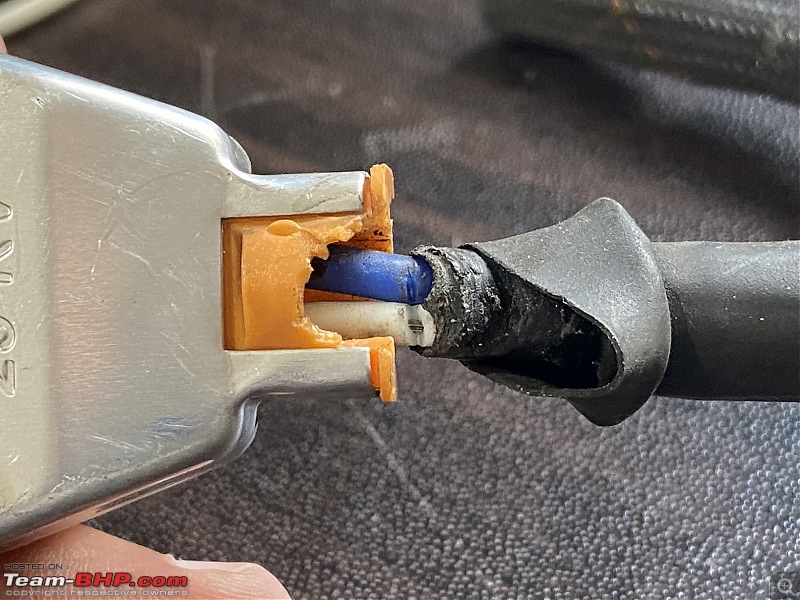 Morimoto never had those straight D2S connectors around that time; they do have them now however. Probably, there was some feedback from existing customers on these right-angled connectors. Because in some headlight assemblies, there is no provision to bend the cable and it has to exit straight from the end. To resolve the sharp bends on the D2S connectors, I had sourced a pair of D2S sockets with straight leads from Aliexpress (the good ol’ days sigh!): 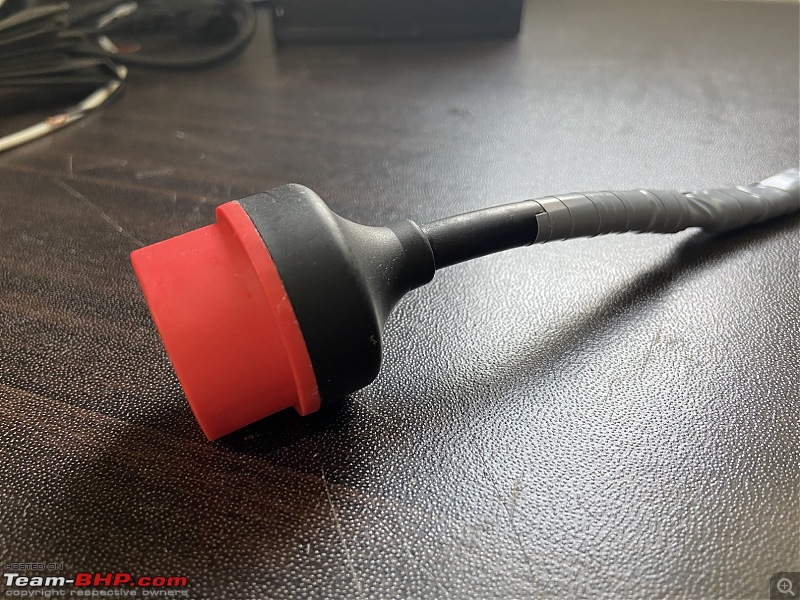 These were purchased way back in Mar ’19:  Check out the differences between the two connectors (Aliexpress one on the left and Morimoto one on the right): 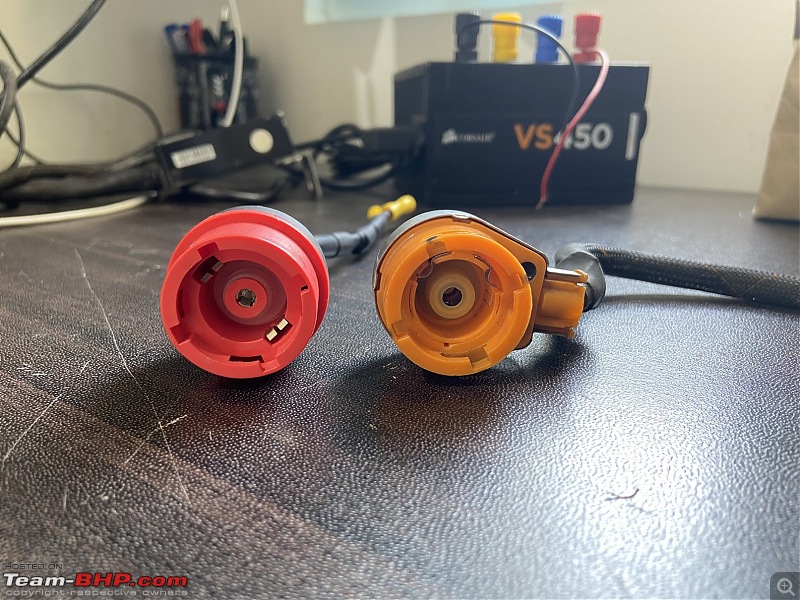 I decided to replace the Morimoto’s connector with the straight connector: 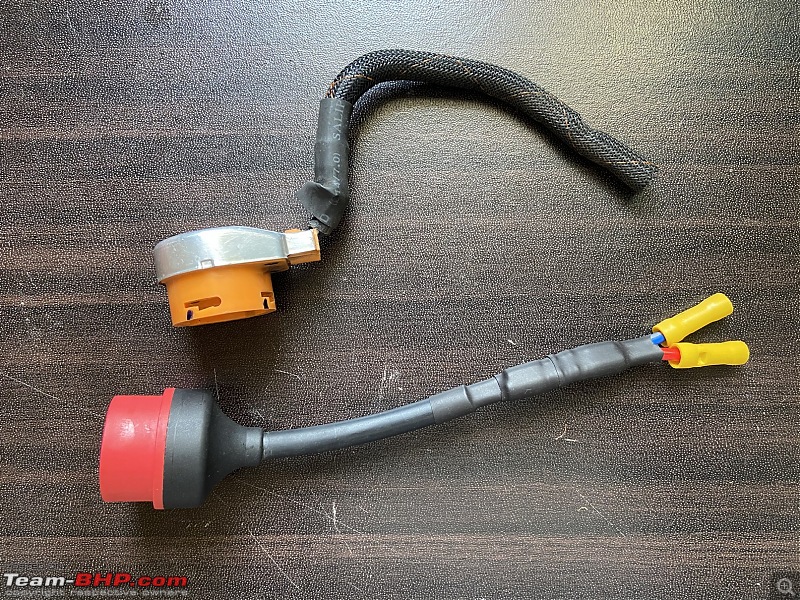 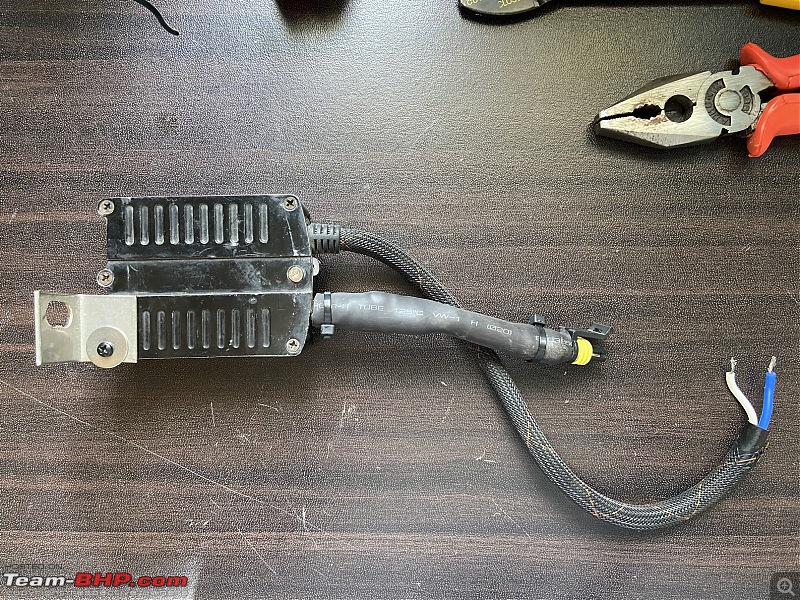 The connector on one headlight assembly was replaced and I threw away the old Morimoto connector to the bin. Big mistake! Why? You’ll find out. I guess life teaches us lessons the hard way sometimes. 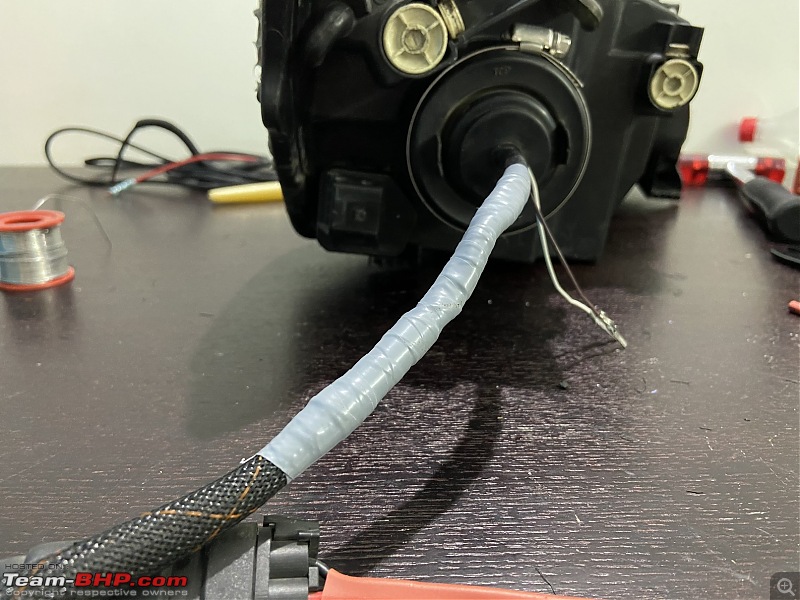 In the meantime, the PVC extension pipe I had installed at the rear of the headlight assy had cracked over time (heat from the engine bay + exposure to natural elements). 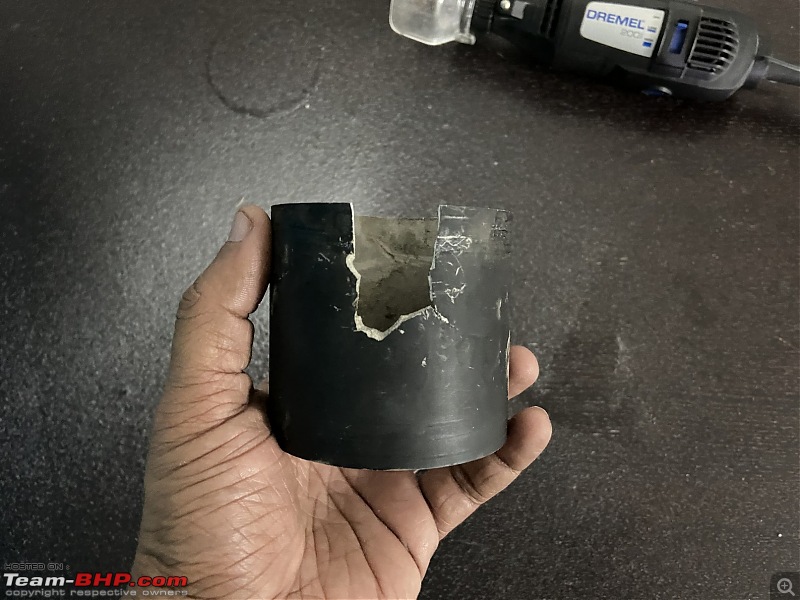 I addressed this issue as well with a new, thicker PVC pipe. Trimmed it to the desired length and I had to grind the innards a bit using the dremel (such a handy tool!): 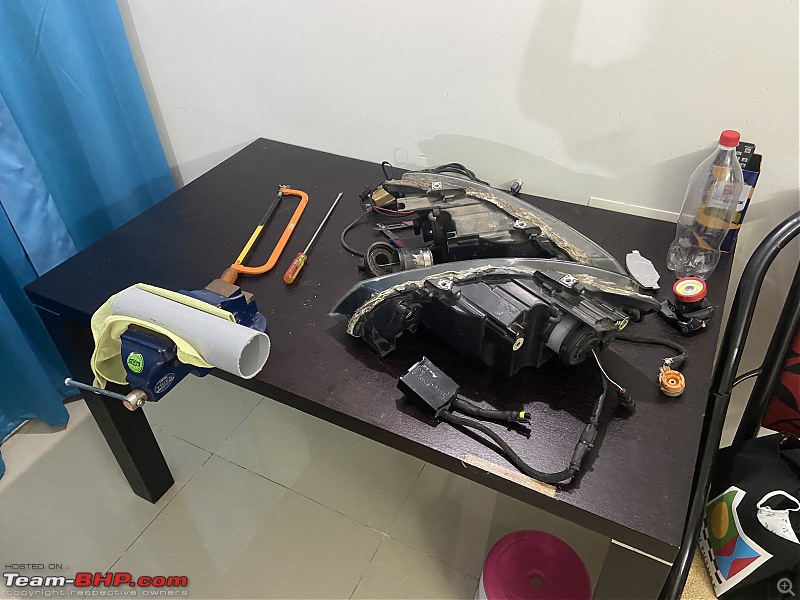 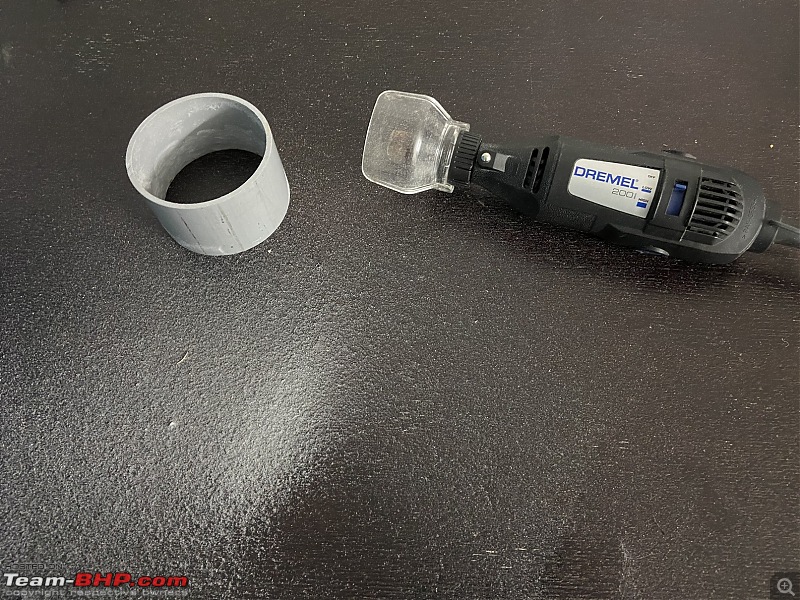 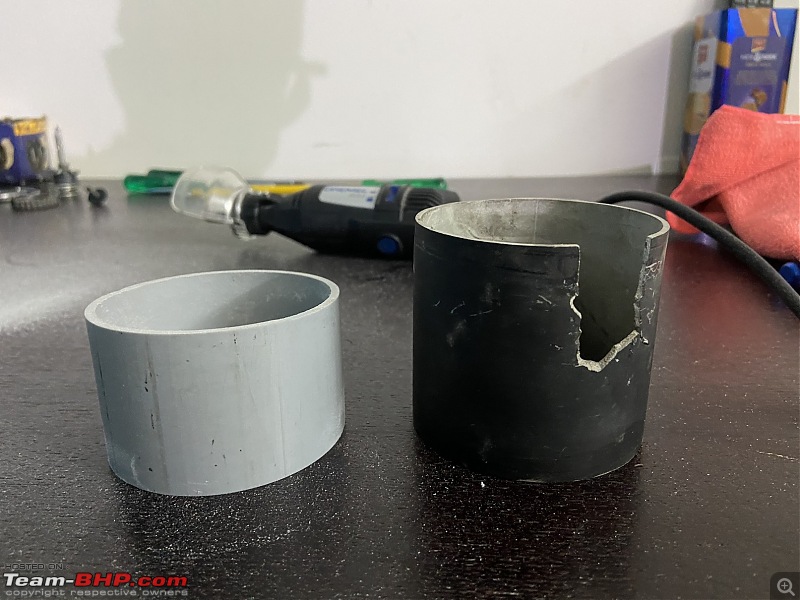 The new pipe was a press-fit at the rear; much better than the previous one: 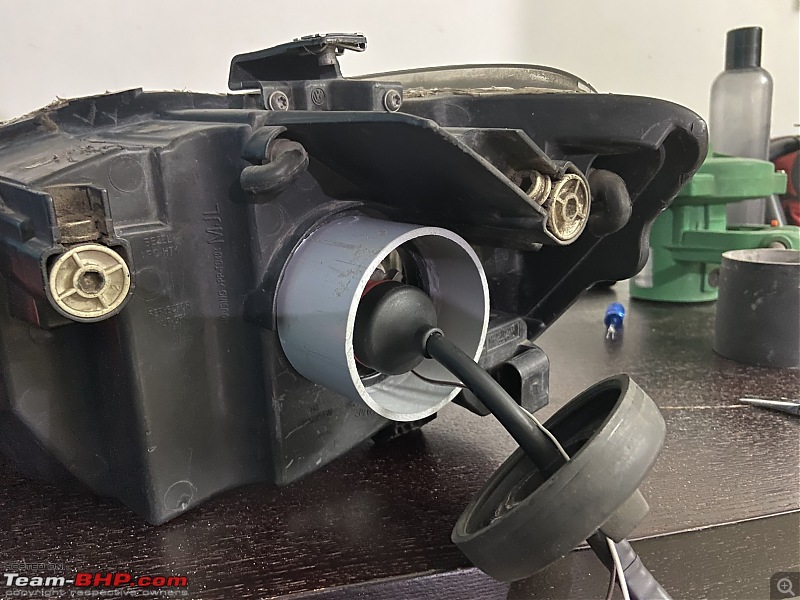 With the rubber cap and a couple of cable ties in series (jugaad, if you may but this was replaced with a jubilee clamp later): 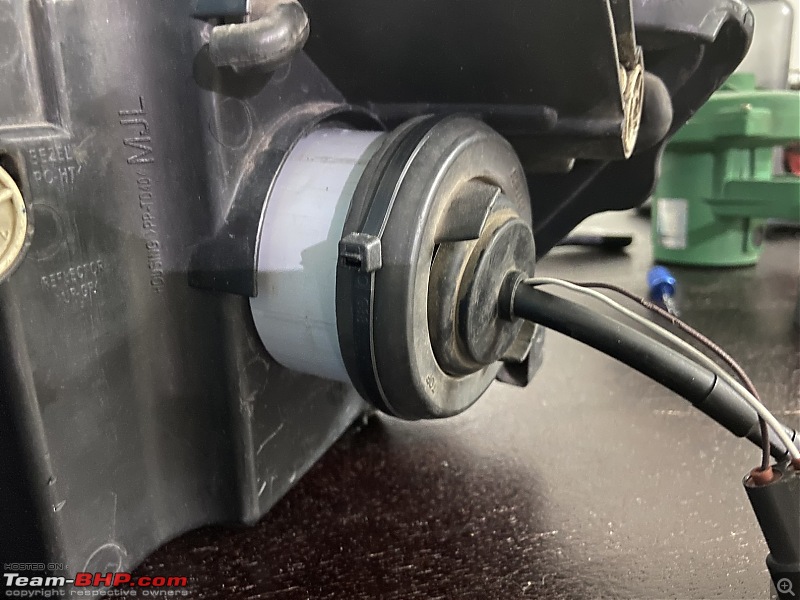 I have a bench power supply made from a computer power supply (SMPS) and it is very handy for testing various devices at my apartment before installing it in the car. You can read more about it on the DIY thread. The ballast needs a +12V supply to power the D2S bulbs. Just as simple as this: 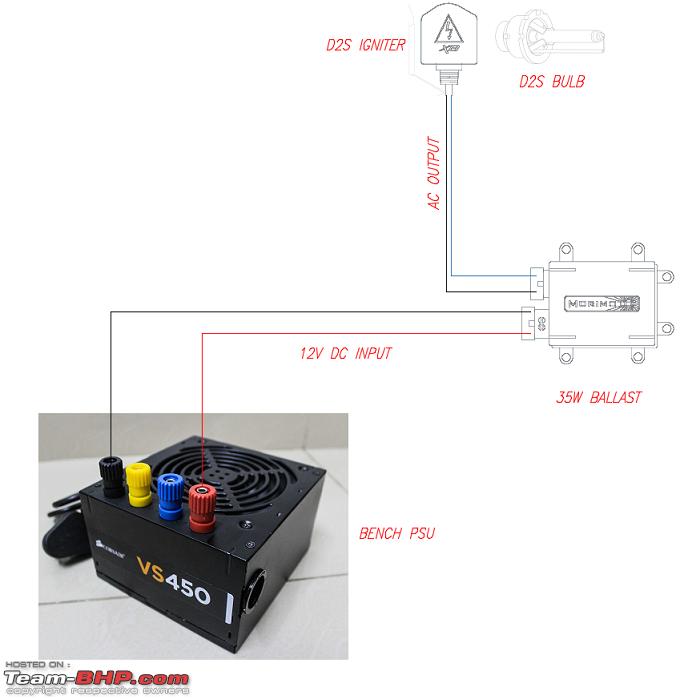 And it powered on nicely! 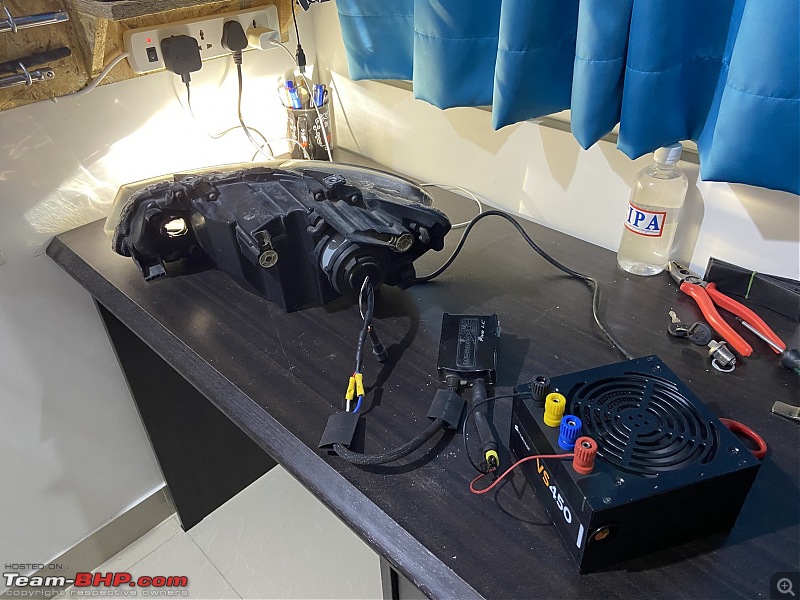 I decide to turn off and on the supply multiple times in quick succession to test if it works (simulating high beam passes/flashing) and it was intermittently working; sometime just the arcing sound with no light output. This is definitely not going to cut it if I were to use it in the car. I did not know what was causing this issue. I read up a lot on the internet and there were varied opinions. Some said not to cut the output AC cable from the ballast to the bulb socket, some said a long output cable would cause this issue, some said if the insulation is exposed or not thick enough, it would cause the AC voltage to leak. I was confused! Instead of using the butt crimp connectors for the ballast’s AC output cables to the igniter, I soldered the two cables together and used two rounds of heatshrink sleeves to insulate the soldered joints. Retested with the bench power supply and the light worked 8 out of 10 times. Randomly, it wouldn’t turn on. I decided to leave this for the time being and concentrated on the co-driver headlight assy. Additionally, I wanted to replace Morimoto’s relay harness and decided to fabricate my own harness for the assembly. The Morimoto harness worked just fine but what’s that saying again? An idle brain is a devil’s workshop? I got these parts from GP Road, Chennai – considered to be the Mecca of all things automotive: - SPST (single pole single throw) relays 12V 40A - 2 nos., - SPST relay sockets with leads - 4 nos. (2 for backup; dirt cheap anyway) - Fuse sockets - 2 nos. - Fuses 12V 30A - 2 nos. - Ground terminal lugs - 5 nos. - 1 sq mm insulated cables of different shades - 2 m each - 1.5 sq mm insulated cables of different shades - 2 m each The next day, I began fabricating the relay harness with plenty of trial and error. It sure was fun. First up, changing the terminals on the relay’s connectors: 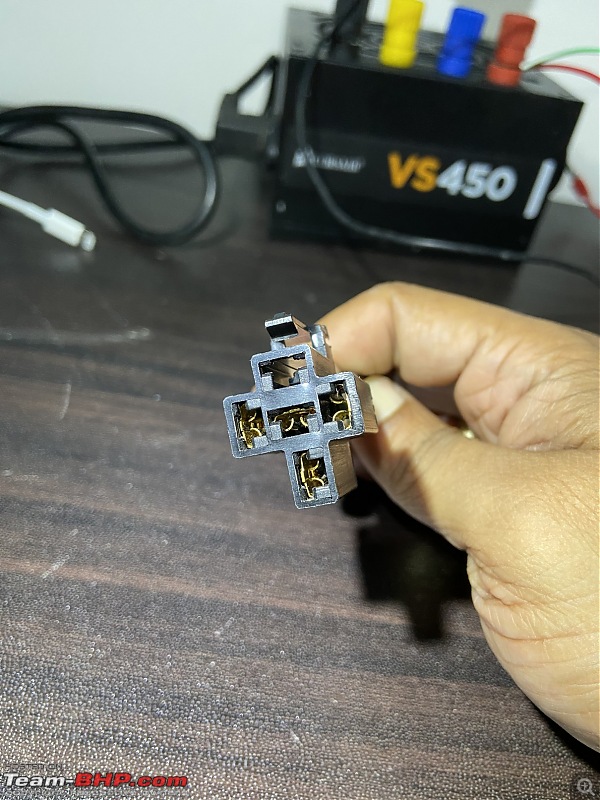 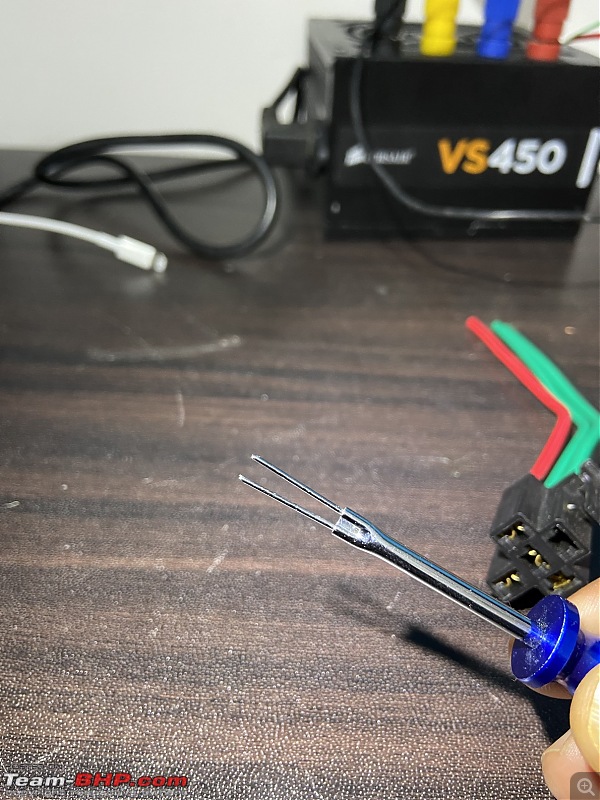 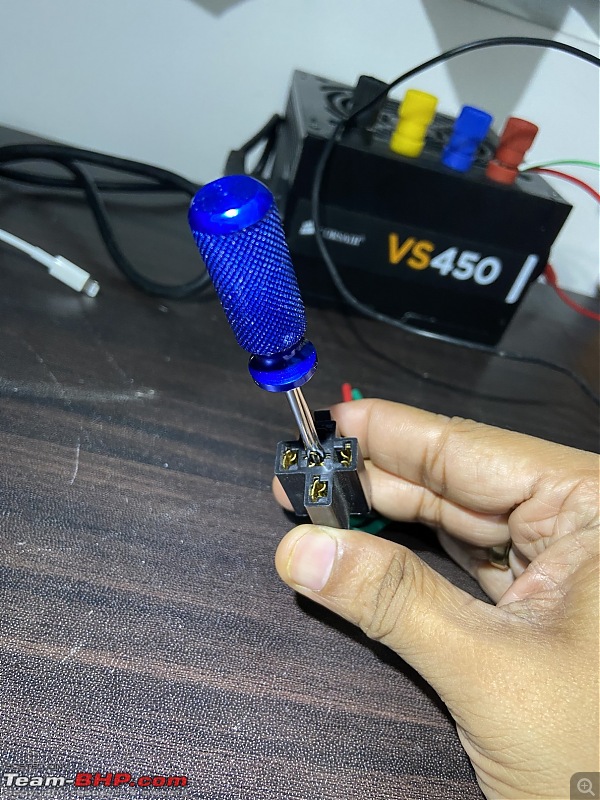 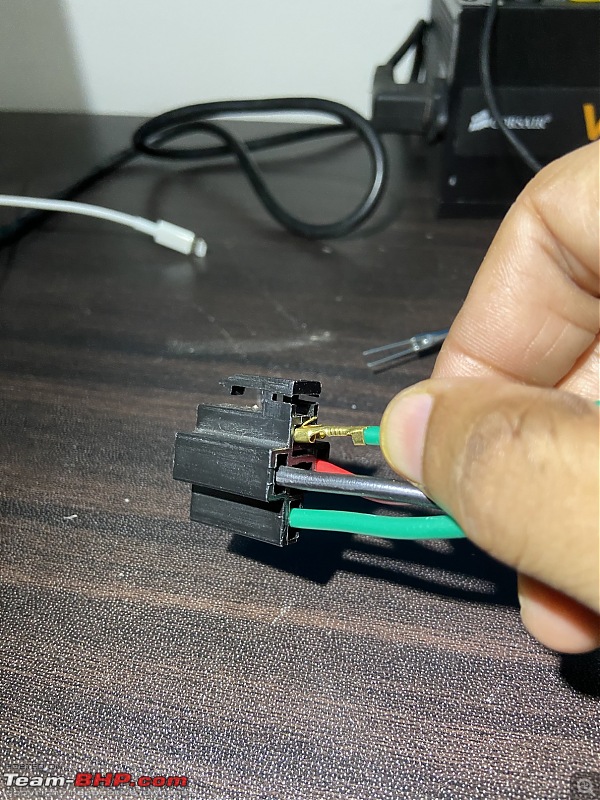 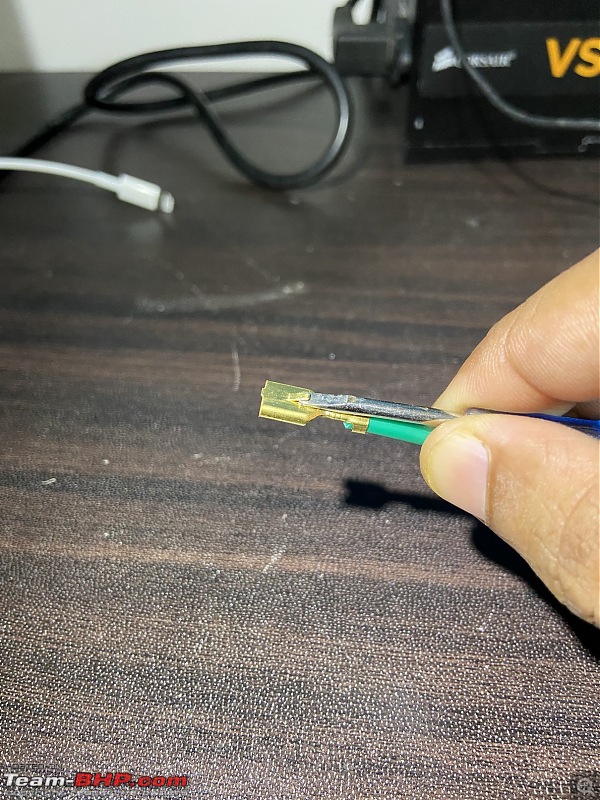 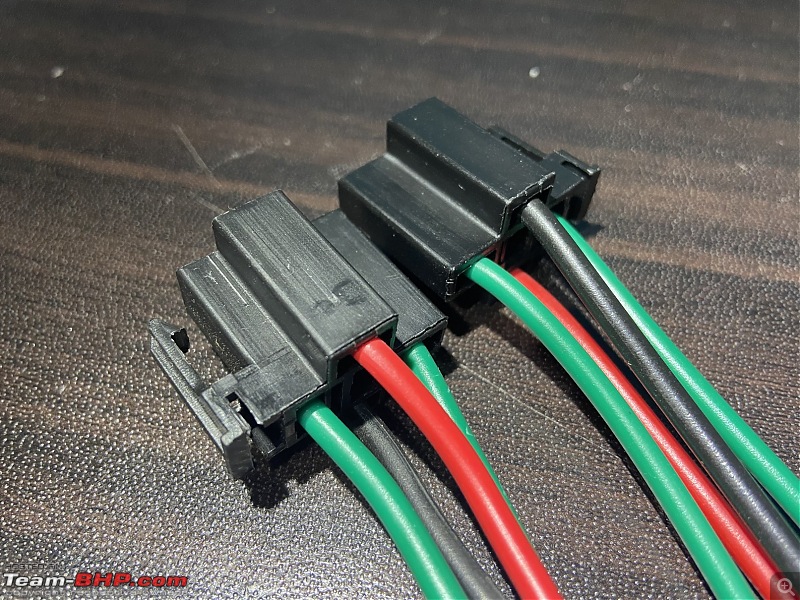 The relays from Maruti’s parts bin: 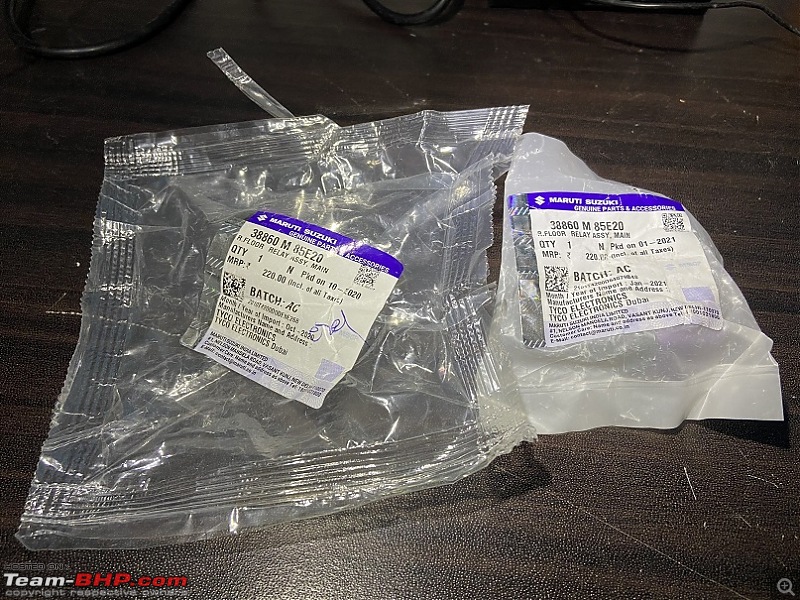 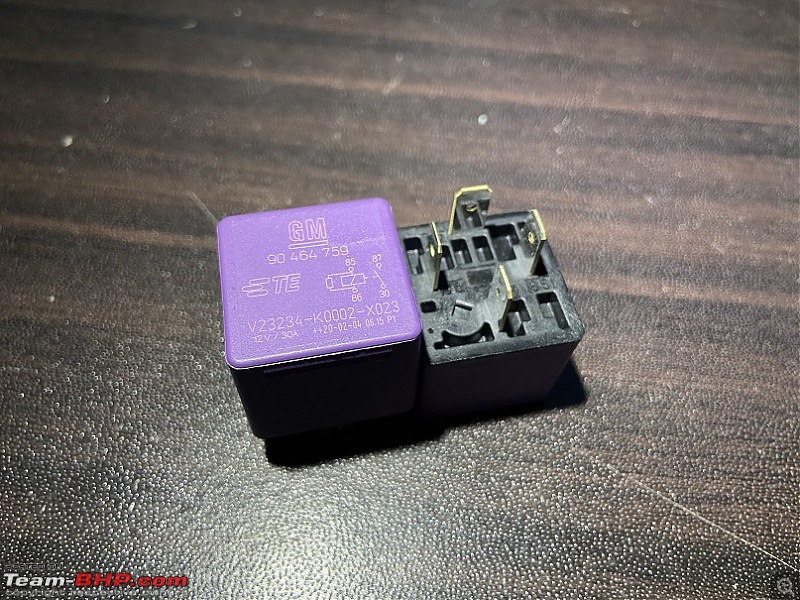 I used a couple of W5W LED bulbs to simulate the D2S bulb’s output and the projector’s solenoid working for the high beam. I searched the internet for a wiring diagram for a bi-xenon based headlamp setup and came across one on lincolnvscadillac forums: 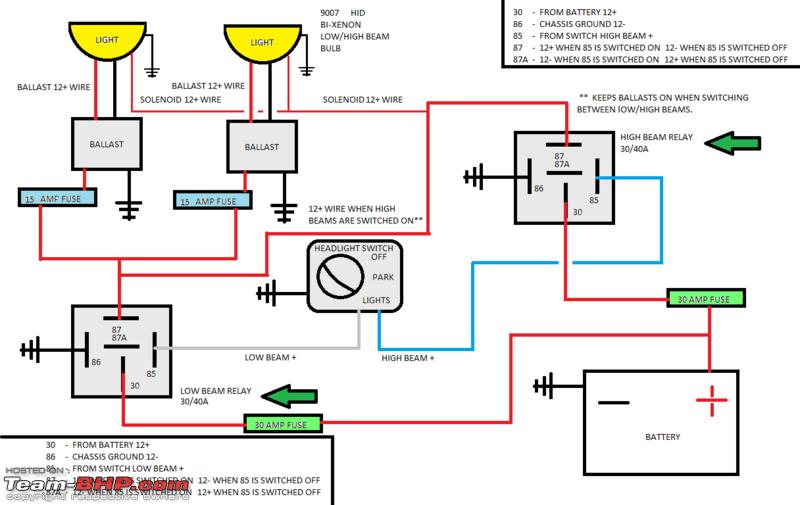 Wired the parts as per this wiring diagram and used my bench power supply to turn the relays on as per low beams and high beams. The LEDs worked indicating the relays are functioning as they should but there was a problem. If the low beam is turned on (i.e. the left relay is turned on), only the HID bulbs should turn on work but as per this wiring diagram, even the right relay would turn on and thereby, the solenoids would receive power. This is wrong and should not work this way. It should be this way: Low beam - only left relay turns on, HID bulbs turns on. High beam - both the relays turn on, HID bulbs + solenoids turn on. I hope this gentleman who shared the wiring diagram on the LVC forum figured this issue out later. That’s when it clicked me, a simple PN diode would do the trick! It would permit current to pass through in only one direction. But what diode should I use here? Searched the internet and landed right on Team-BHP! BHPian graaja had shared this here: Quote:
I modified the wiring diagram this way: 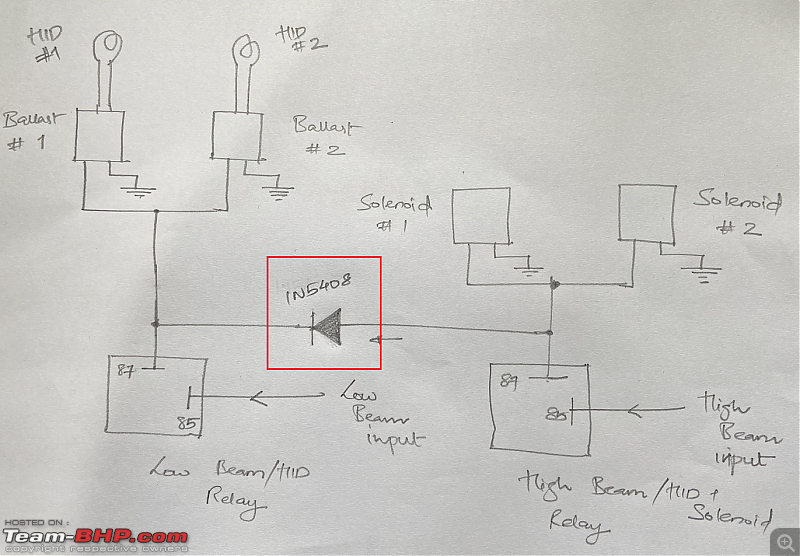 1N540X series it was. The first shot of my covid vaccination was due and it was located at a PHC not far from the electronic components outlet I usually frequent. We couldn't get the vaccination shot that day due to the government putting the 18 - 45 age group on hold but I got hold of the diodes promptly. 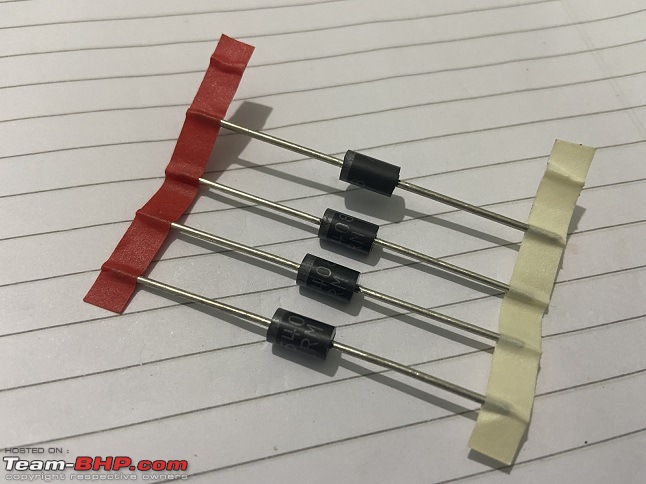 Soldered the diode to the harness and it worked beautifully! 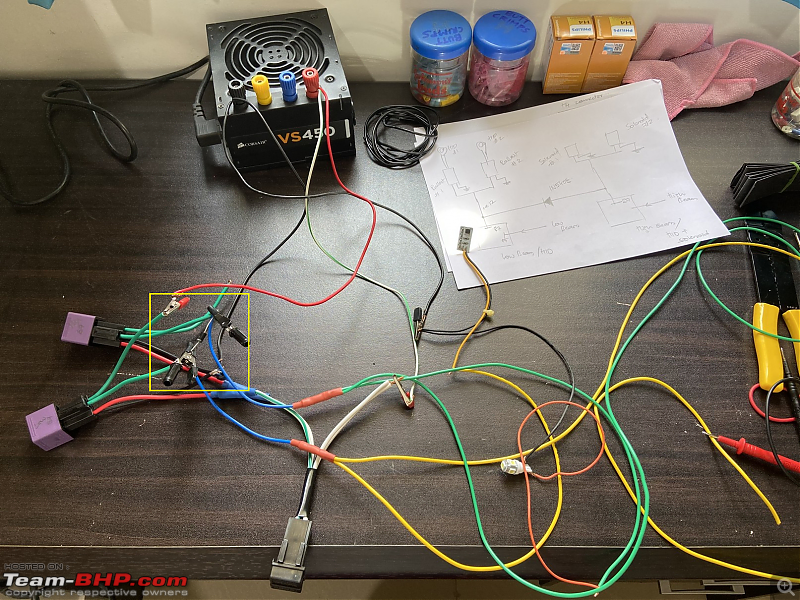 Contd. | ||
| |  (20)
Thanks (20)
Thanks
|
| The following 20 BHPians Thank Gannu_1 for this useful post: | amvj, ashis89, chinmaypillay, CrAzY dRiVeR, digitalnirvana, fluidicjoy, graaja, GTO, ike, iliketurtles, InControl, joethomasv, paragsachania, Researcher, Taha Mir, The_Outsider!, vaasu, vigsom, Voodooblaster, vredesbyrd |
| | #1174 |
| Team-BHP Support  Join Date: Apr 2013 Location: Madras
Posts: 7,335
Thanked: 20,670 Times
| re: VW Polo GT TDI ownership log EDIT: 9 years and 178,000 km later... Completed rest of the wiring with the connectors for the solenoids and ballasts, corrugated protective tubing for the cables, zip-tied the bunch. 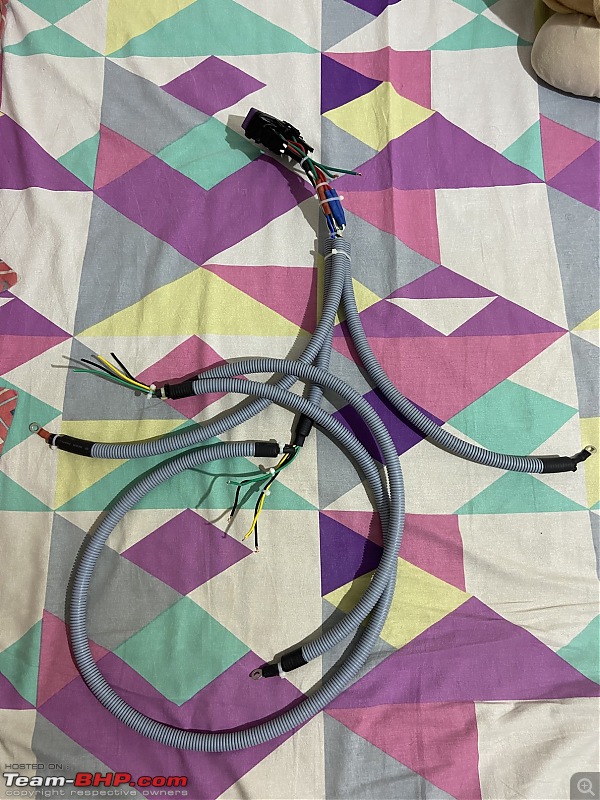 Tested the harness with the actual headlights and that’s when I observed one of the headlights was not turning on occasionally. This was the one with the straight D2S igniter from Aliexpress. And I had thrown away the old Morimoto igniter in the bin which my maid promptly emptied! This turned out to be a big, expensive blunder from my side. I should have preserved the Morimoto D2S igniter! I opened up the Aliexpress straight igniter and it was a shoddy part: 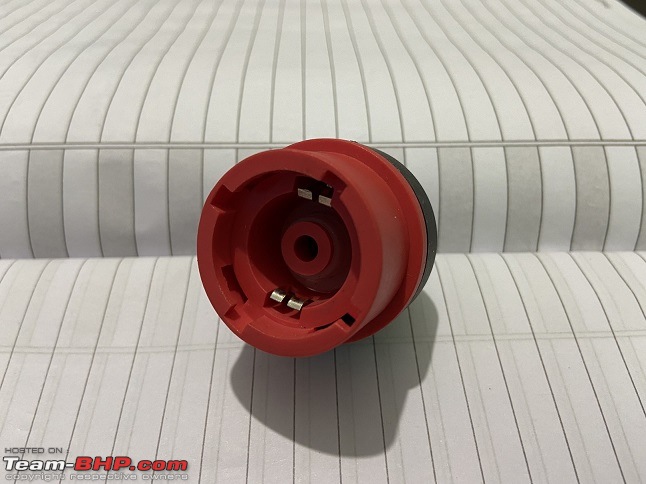 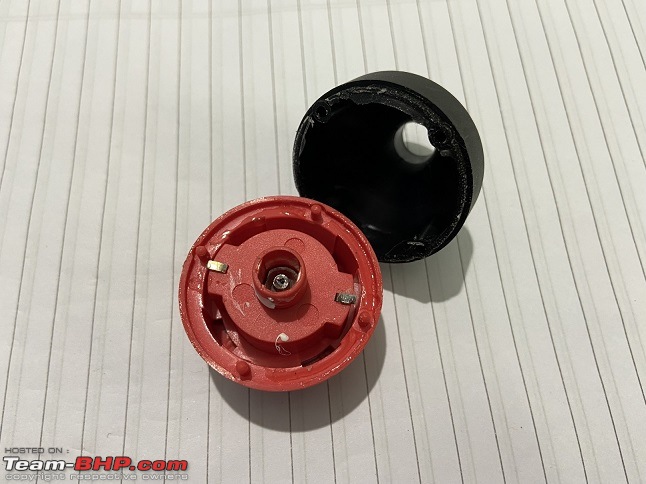 At this point, I was very frustrated! I thought enough is enough, slept on it that night and went ahead with the decision to swap them out with a set of new, stock headlights. The xenon setup had served me faithfully all this while for the last 6+ years with so many night drives I had undertaken from Chennai to Palakkad and back. This was also our first intense DIY that my good friend Moorthy and I did, which lasted close to two weeks. Man, I was definitely going to miss that nice, sharp cut-off with the blue hue and the fun of flicking the high beams like the camera flashes. It used to turn so many heads when the coming-home and leaving-home lights would turn on at the parking. But as they say, all good things must come to an end and thus, I chose to gracefully retire the bi-xenon setup. So what went wrong really? 1. The Morimoto ballast on my setup had the output AC cable permanently connected to the ballast. 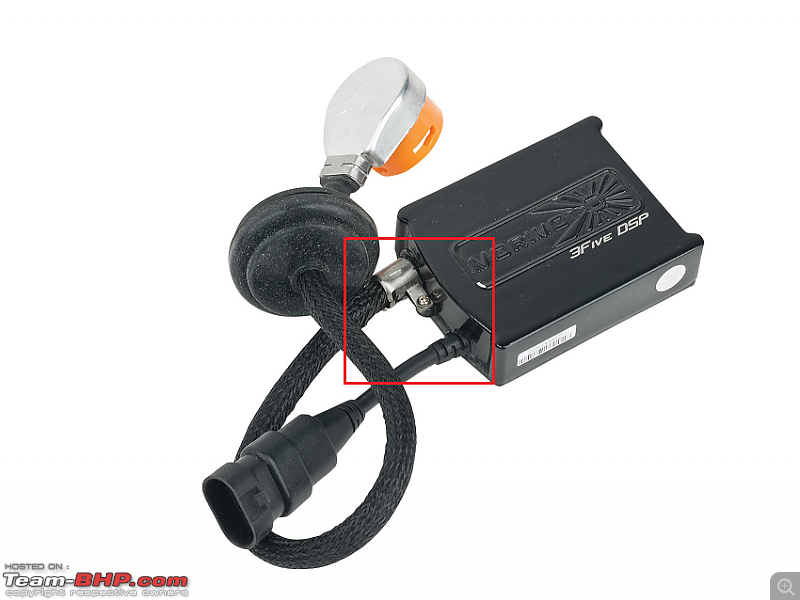 The later units from Morimoto came with removable input and output connectors for the ballast like this: 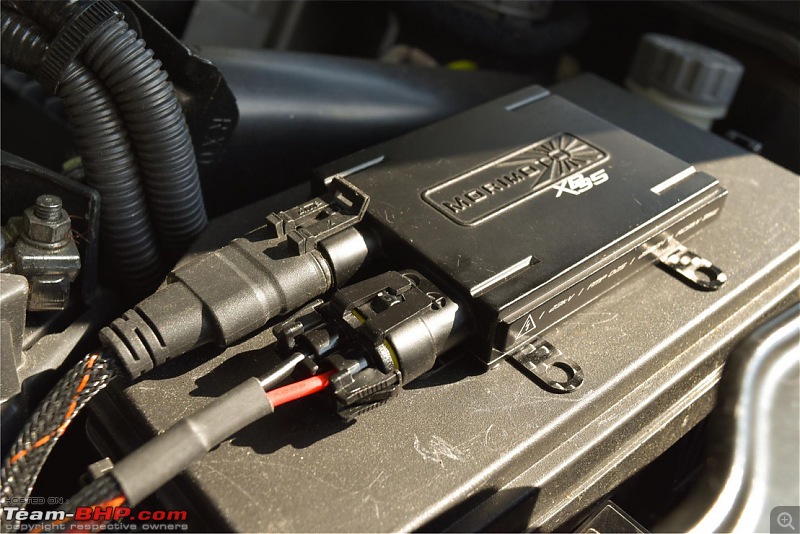 So replacing the bent igniter cable with a straight one wasn’t possible without splicing the AC output cable. 2. The Aliexpress’ straight D2S igniter cable failed to work properly. Guess one can only expect so much from a cheap cable. Is there any way I can reuse the bi-xenon headlight assembly? Yes, with a new ballast unit. I’ll save it for later in case I change my mind. Unlikely but still an option. The headlight assembles were safely packed in the boxes. Never going to part with those and maybe, just maybe, I will fix them up some day. :’) So what next? I had to invest in a new set of headlamps. Having heard not very good reviews of the dual barrel headlights with the H7 bulbs + being twice as expensive as the single barrel headlights, I decided to settle for the cheaper, single barrel headlights with the H4 bulbs and use a set of 90/100W bulbs with a good quality relay harness. I could have modified the DIY harness I had fabricated but chose against it. Ordered a pair of new headlights from Boodmo and they arrived a few days later in a HUGE box, extremely well packed! Set me back by Rs. 8732. 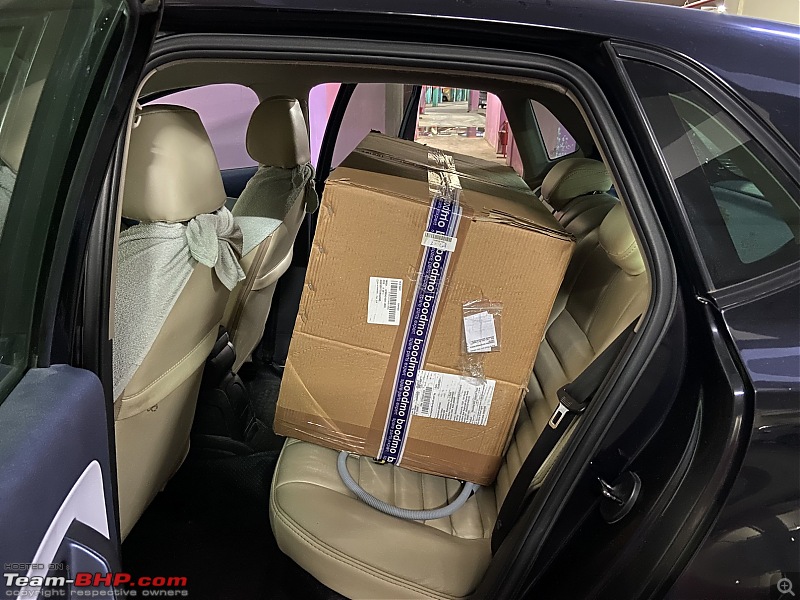 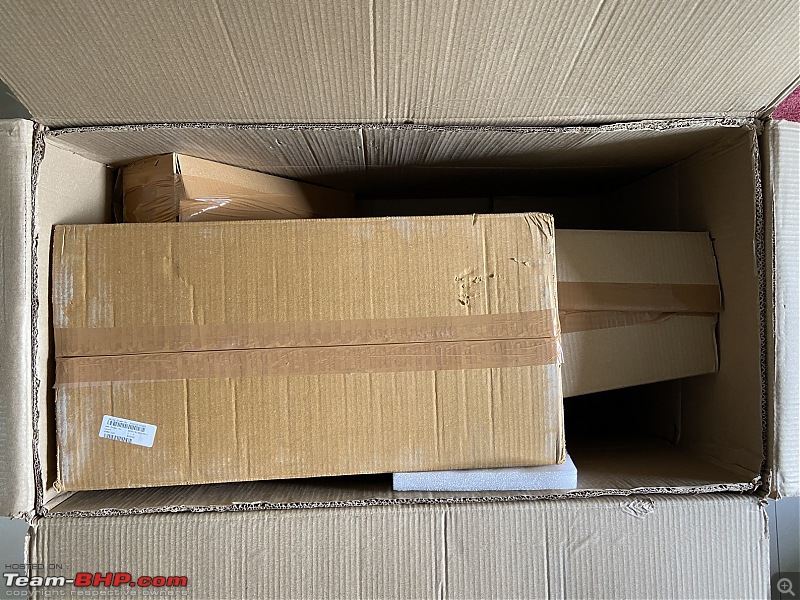 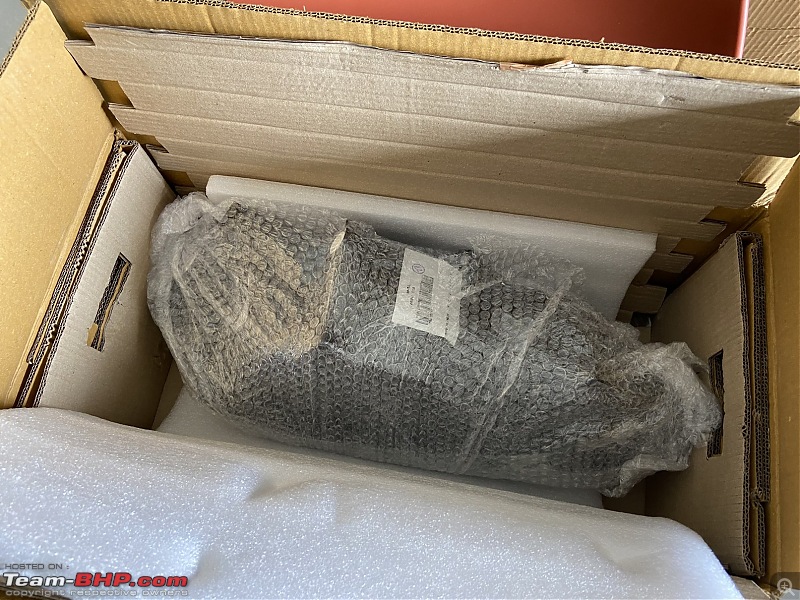 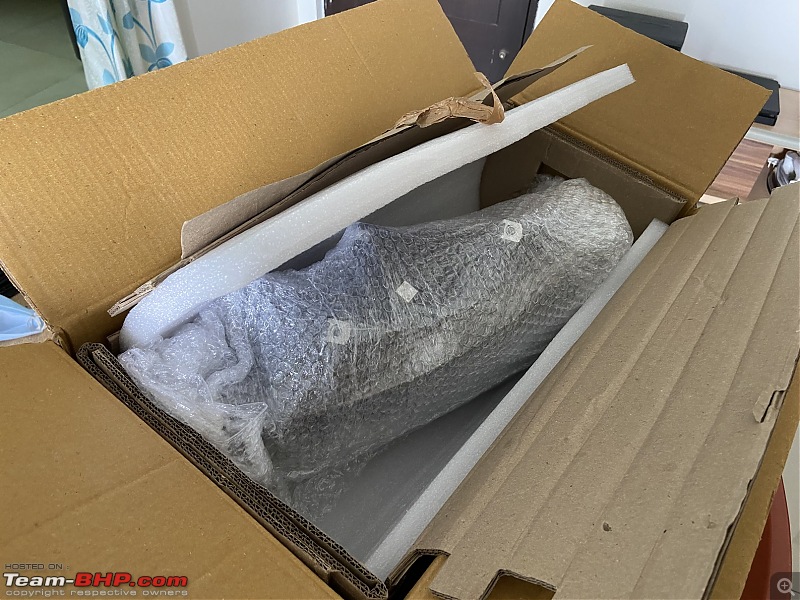 Ordered a cheap pair of Philips 55/60 W bulbs from Amazon for testing and sorting the high beam issue. So the new set of headlights are here. What remained to be sorted was the [/b]high beam issue[/b]. Inserted the bulbs into the stock bulb holders. Turned the rotary switch on for the low beams - both the low beams work properly. 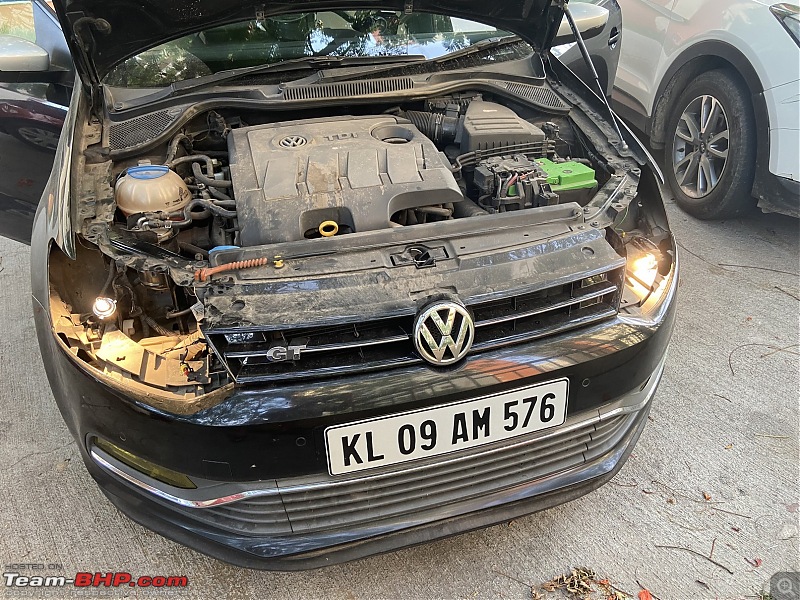 (Please excuse the dirty engine bay; I was in no mood to clean the car without resolving this issue first!) Flicked the stalk for the high beam - only the driver-side high beam turned on. Status quo. 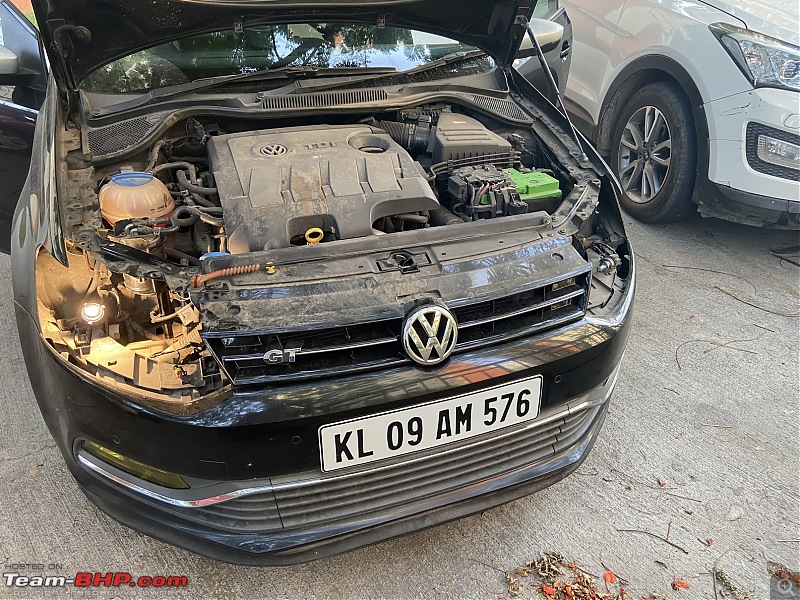 Detailed troubleshooting begins: Step 1 - check the fuses. I used a DMM and checked all the fuses for continuity, secretly praying for one of them to be burnt out. But no, all the fuses were intact. Step 2 - check the relays. The pre-facelift Polo with the single barrel headlight setup has a SPST relay for the low beam but none for the high beam. So this was technically a moot point but to eliminate the issue, I decide to test the relay anyway. This is the relevant relay for the headlights: 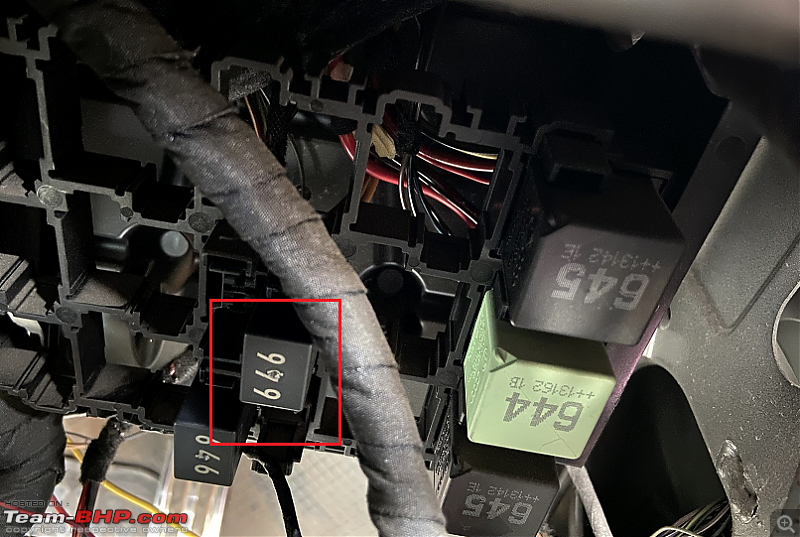 I got home the relay and it was clicking with a +12V supply. I swapped it with the adjacent 646 relay from the relay holder and it was working fine. 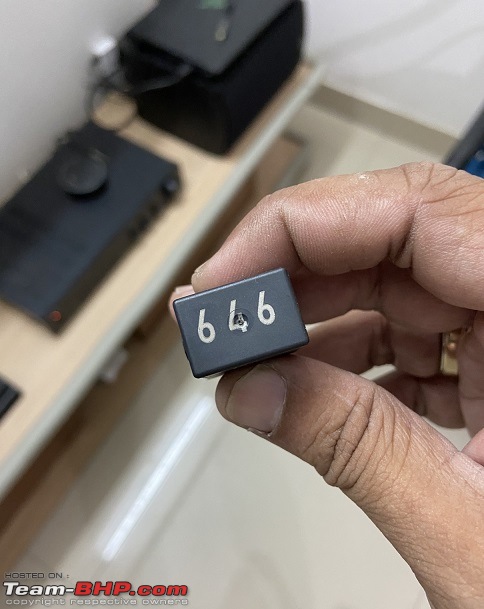  The issue persisted. So a defective relay was also ruled out. Step 3 - check the rotary headlight switch. Less likely for the switch to be the culprit but I had the Chinese auto-headlight module installed and with it, the aftermarket rotary switch with the Auto option. To rule out the issue of the switch, I requested my folks back in Palakkad to courier me the stock rotary switch with the steering column combination switch (the stalk assembly). With great difficulty in the middle of the government-imposed lockdown, I picked up the consignment from the courier’s depot. Swapped the headlight switch and the issue persisted. The switch was ruled out. Step 4 - check the steering column combination switch. This was a possibility as I had read a few instances of the metal contact strips inside the assembly melting the adjacent plastic tab. But in that case, the high beam shouldn’t work at all which wasn’t the case here as the driver side high beam was working fine. Replaced the combination switch with the stock unit and much to my dismay, *sigh* the issue continued. 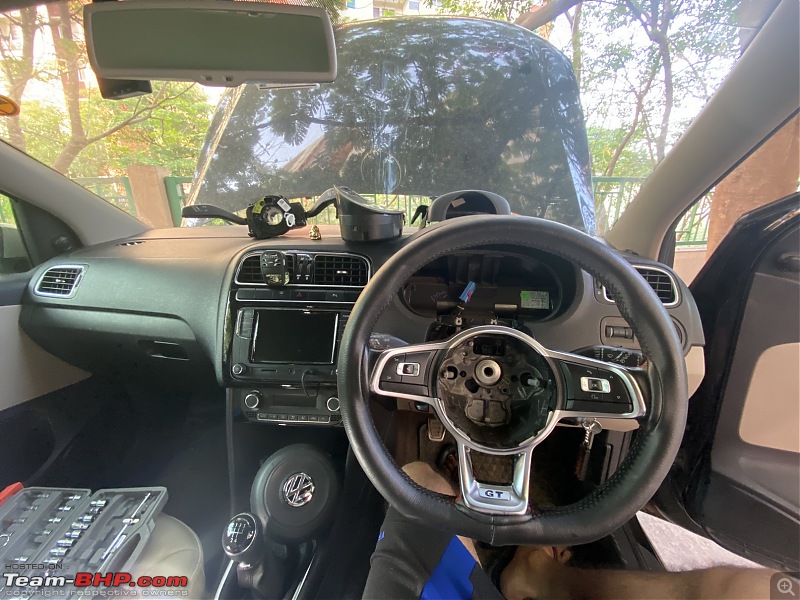 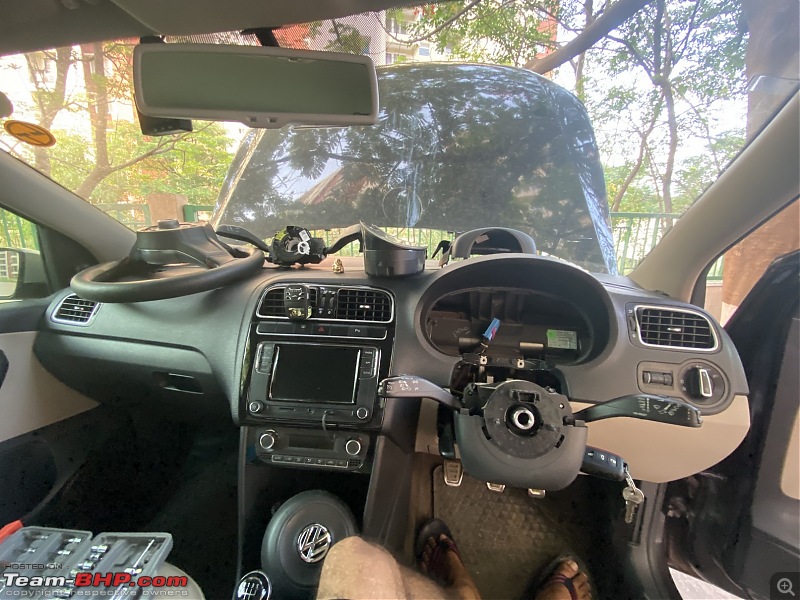 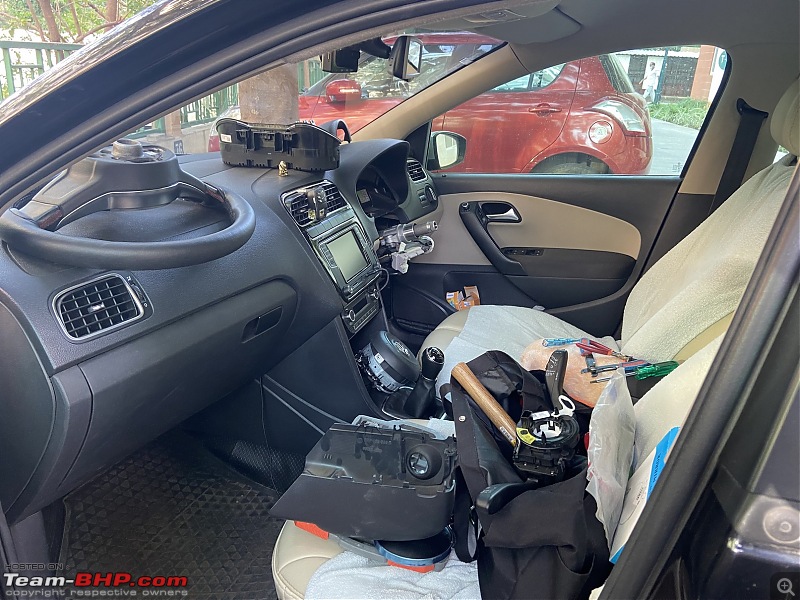 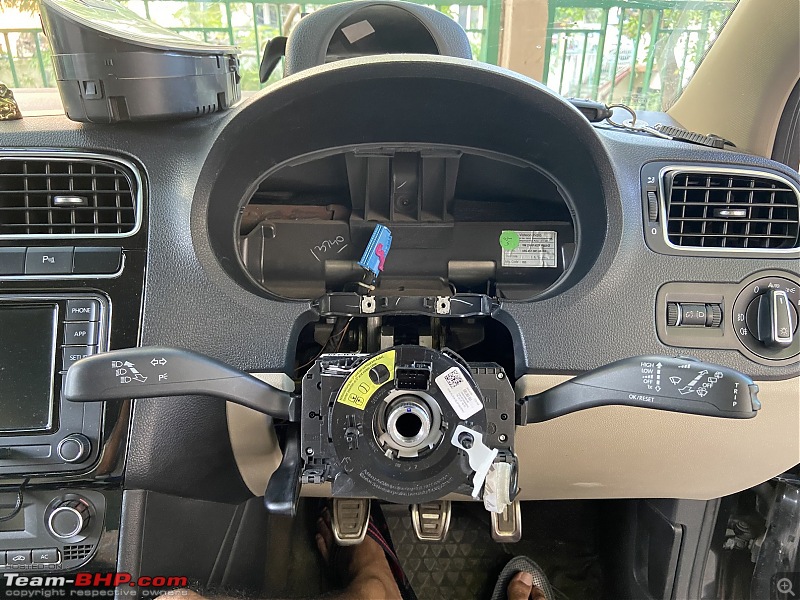 After all the troubleshooting, it finally boiled down to the wiring harness. Voltages from the connectors were inline with what it should be: Low: 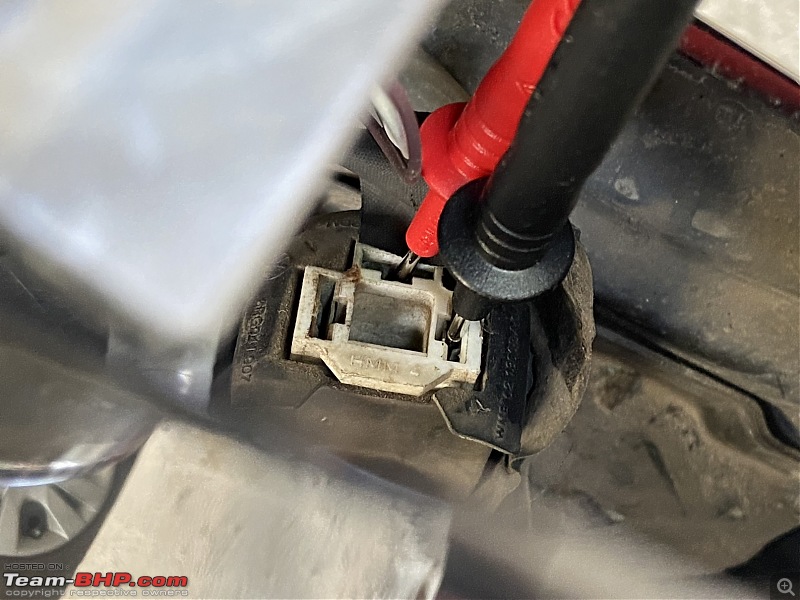 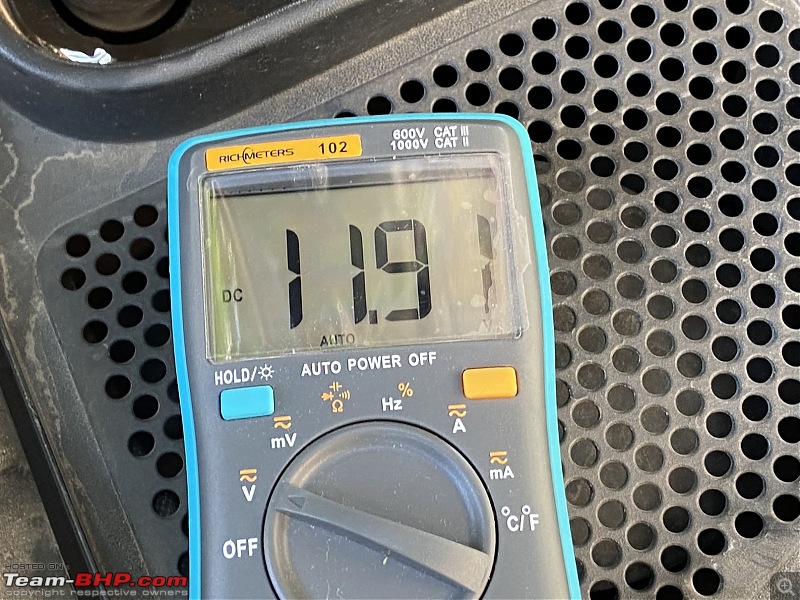 High: 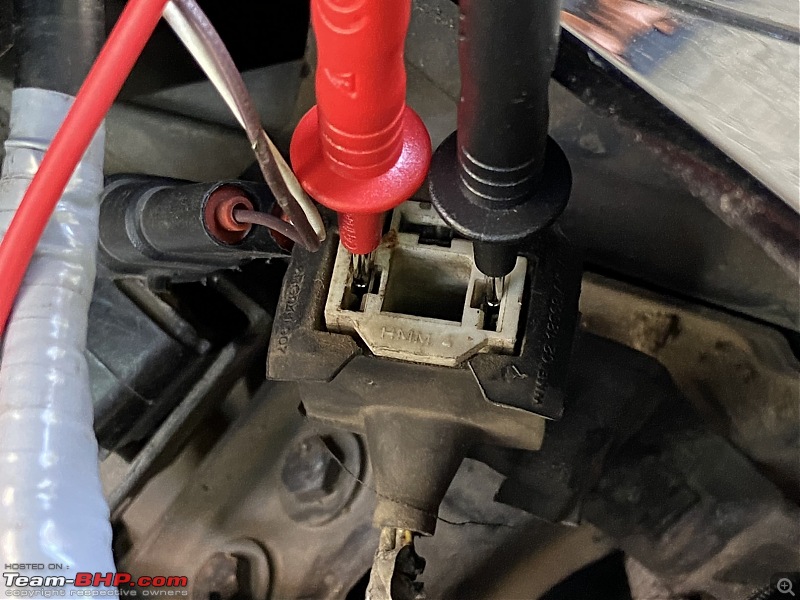 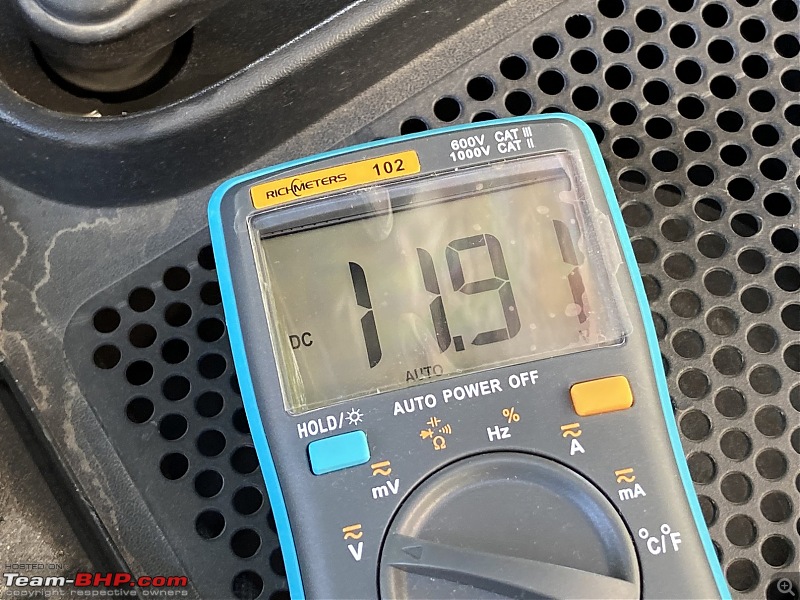 There was nothing else left to be checked. I had no clue where to begin as the whole harness is taped from the factory. Since I had hit the end of the DIY road, I decided to refer to my trusted technician Jayaprakash (JP) from German Tech garage. Gave him a call and explained the entire ordeal. He suggested bringing the car down. To make his work simpler, I installed the new set of headlights with the 55/60 W bulbs before heading there. 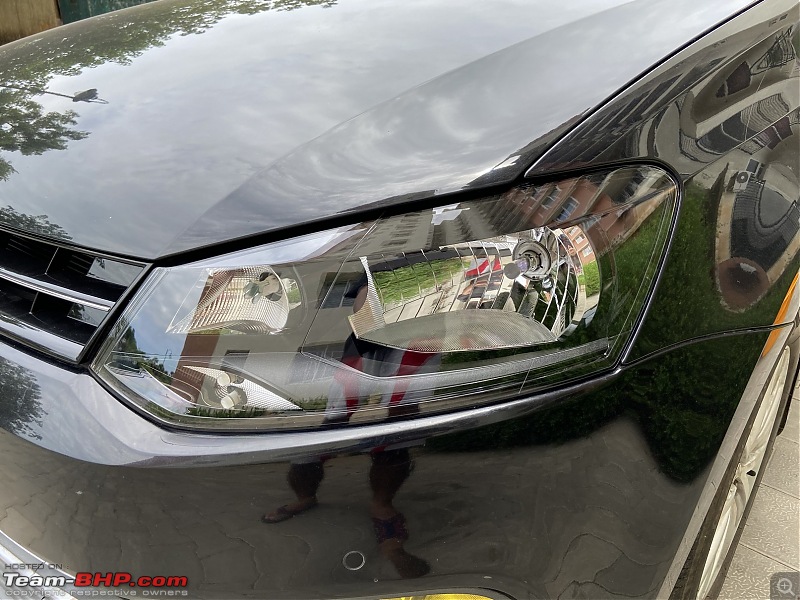 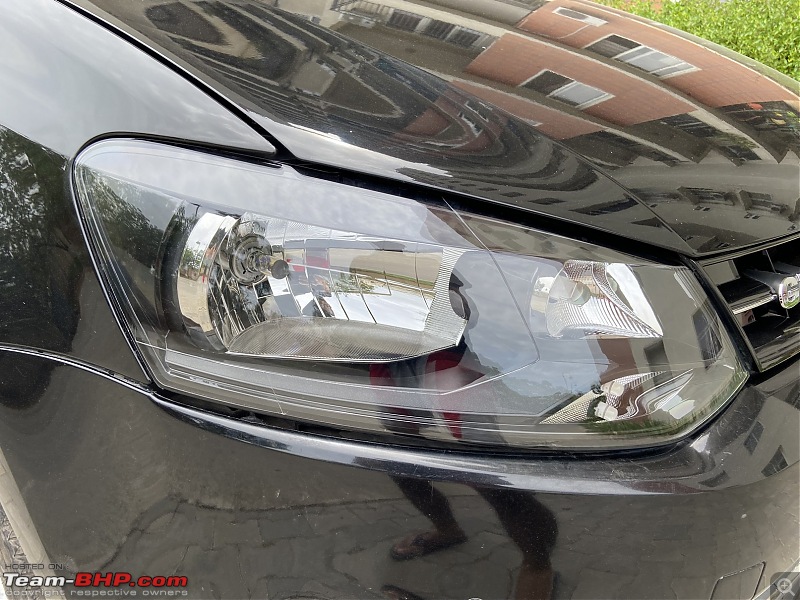 Fortunately, the TN government had also announced some relaxations for the lockdown including resuming automobile garage operations. I got the e-pass ready and dropped the car on a Monday morn. A few minutes later, another person drops by in his White Vento with his father, looks at my car curiously and asks, “You must be Gannu from Team-BHP?” Hell yeah brother! It was BHPian TurboHead! Glad to have met you bud! No such thing like a garage for a mini-meet yeah?  And shortly after, an A6 arrives in a stately style - in a flatbed truck! And shortly after, an A6 arrives in a stately style - in a flatbed truck! The headlight issue was finally ruled out to a pinch in the harness which resulted in the high beam wire to the co-driver headlight to give away. The wires were re-joined and taped properly by JP. It is also worth noting that the high beam indication to the instrument cluster draws signal from the co-driver side high beam. 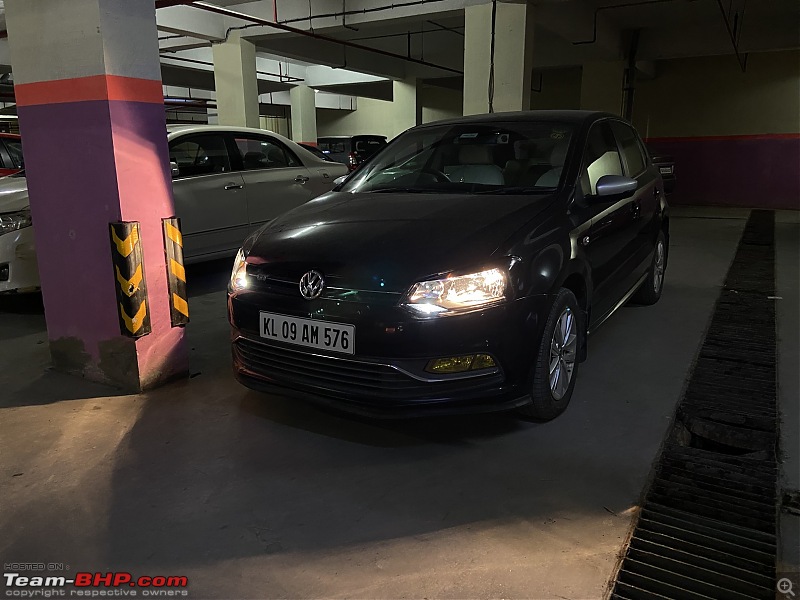 Both the functionalities - high beam and the cluster indication were finally restored. 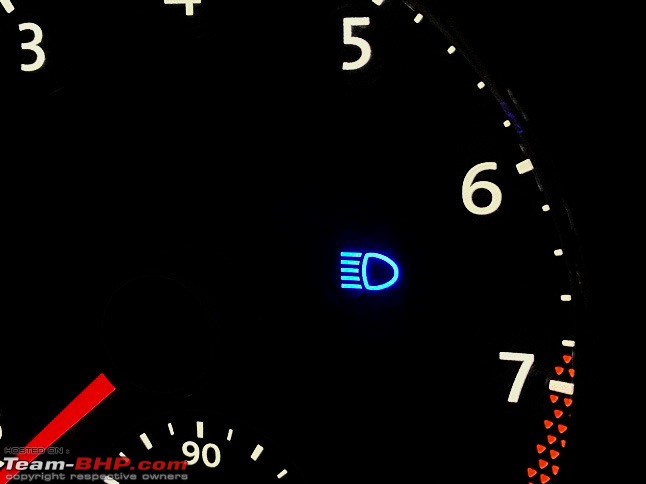 End of an ordeal finally! [Contd.] |
| |  (34)
Thanks (34)
Thanks
|
| The following 34 BHPians Thank Gannu_1 for this useful post: | audioholic, Avikbrio, chinmaypillay, COMMUTER, CrAzY dRiVeR, Dennis, digitalnirvana, DrANTO, ferry911, fluidicjoy, GaryTSI, IcarusMan, ike, iliketurtles, InControl, Jeroen, Leoshashi, matchvan, MoTo_meister, paragsachania, pritanshchandra, pugram, Researcher, romil.shroff, sarav100, Shanksta, Taha Mir, The_Outsider!, vaasu, vigsom, Vik0728, VivekCherian, vredesbyrd, yesyeswe |
| | #1175 |
| Team-BHP Support  Join Date: Apr 2013 Location: Madras
Posts: 7,335
Thanked: 20,670 Times
| re: VW Polo GT TDI ownership log EDIT: 9 years and 178,000 km later... Replacing Steering Rack, Front Strut Bushes and BearingsA one-way trip to home from the garage costs about Rs. 450 - 500 in Uber. Because the car was dropped at my trusted garage, I decided to replace the steering rack, the front strut bushes and the bearings as a part of preventive maintenance. The steering rack was never touched all this while whereas the front strut bushes were replaced with the ECS Tuning ones when the Bilsteins were installed around the 80,000 km mark (link to that post). JP and his team wrapped up all the work done in a day’s time and updates over WhatsApp dropped in promptly. I really appreciate this part. 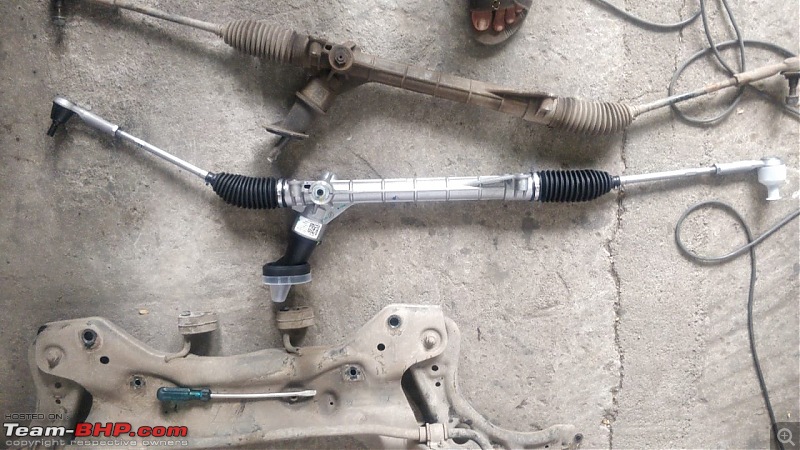 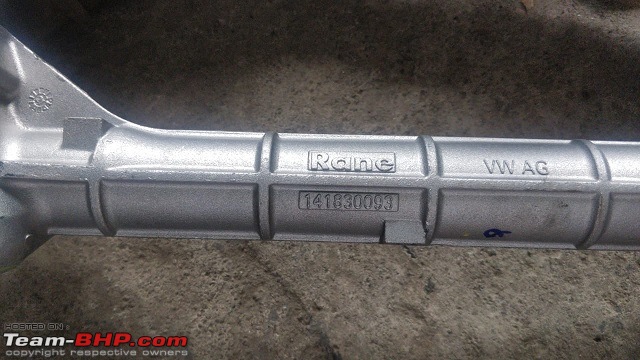 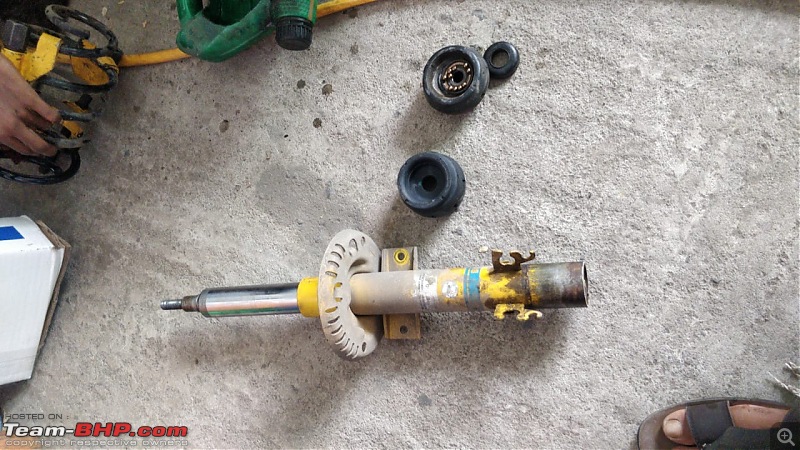 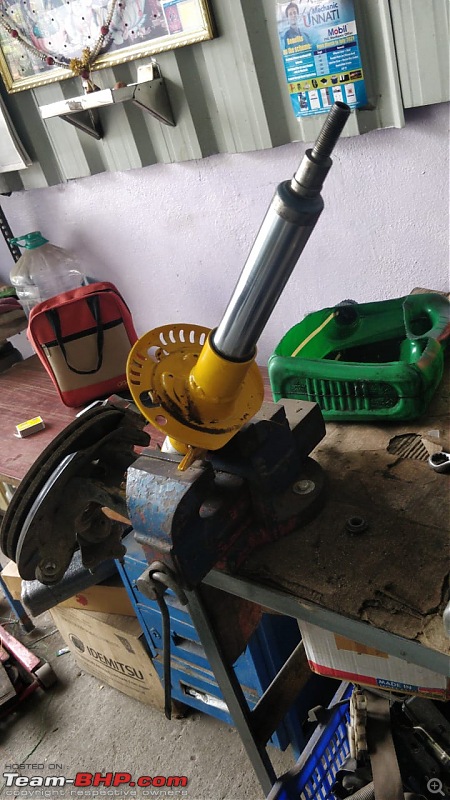 The steering rack is from Rane Madras Ltd and is apparently, one of the OEM supplier for VW and Skoda for the rack. Part number is 141830092, VW part number is 6RF423057P. The whole bill came up to Rs. 20,000 which included the price of the new parts. Adding a relay harness and Philips 90/100W bulbs:Now that a new set of stock single barrel headlamps were installed, I wanted to improve the performance of the lighting. The cheapest way to do this would be to install a good quality relay harness and 90/100W bulbs. 100/130W would be an overkill and there’s a likelihood of the reflectors going bad over time. The usual contenders for the relay harness were Philips and Hella. There was an Indian company which went by the name Thimson based out of Mysore. Their harness had very good reviews on Amazon! I decided to try my luck with this one. The quality of the cables (Finolex grade with varying gauges), ceramic bulb holders, plastic holders for the fuses, corrugated tubing, heatshrink sleeves was very good. Have to see how well the relay holds up over the years. 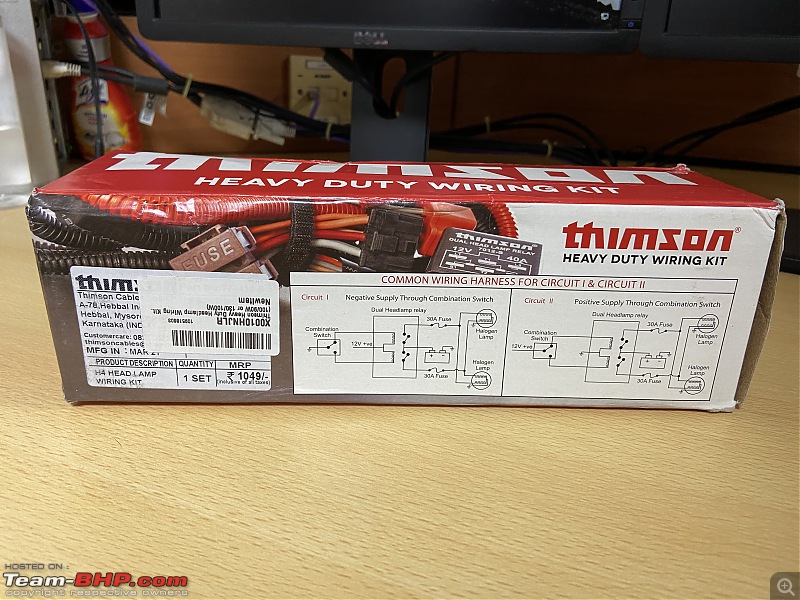 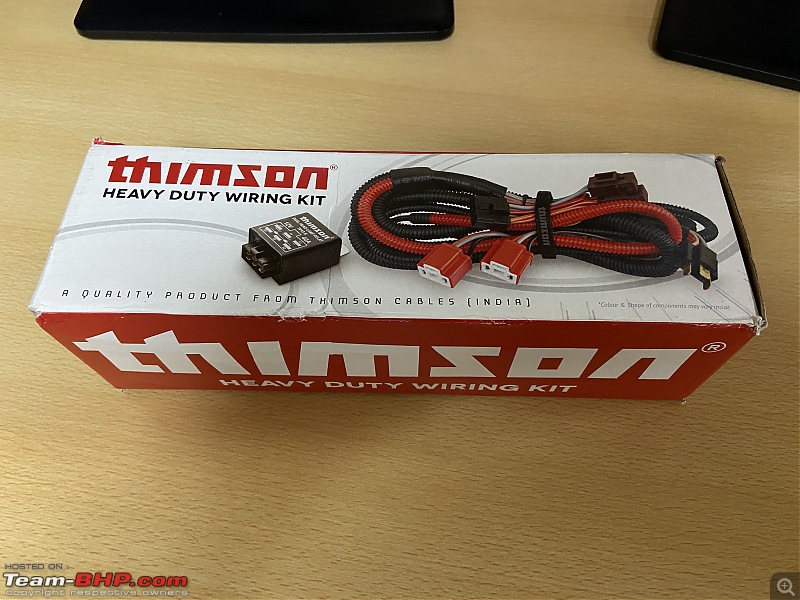 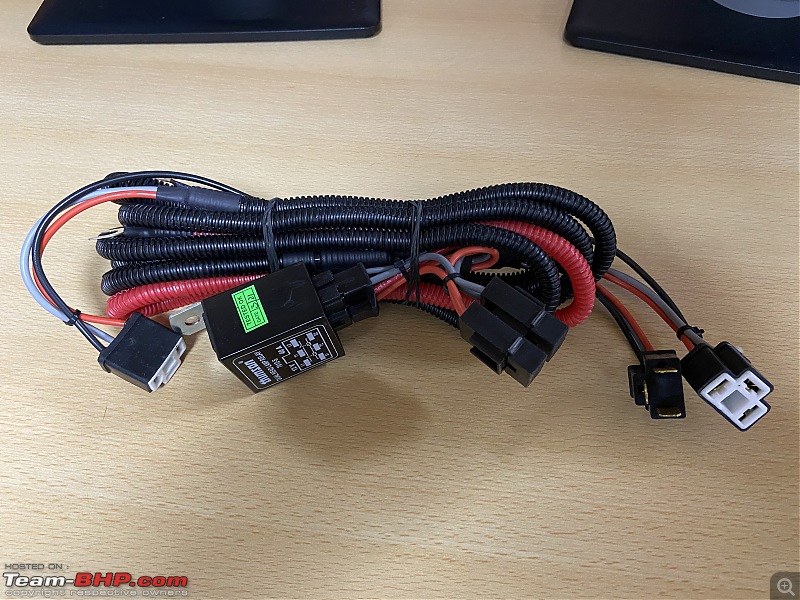 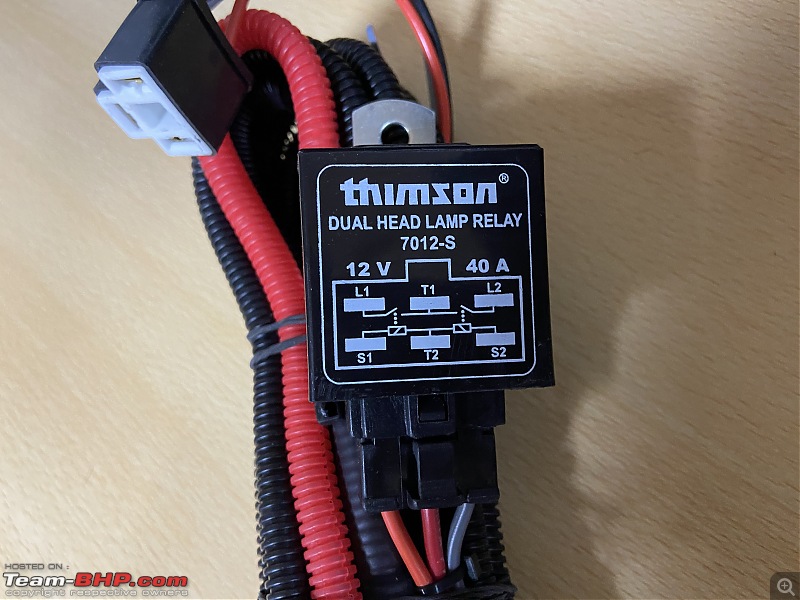 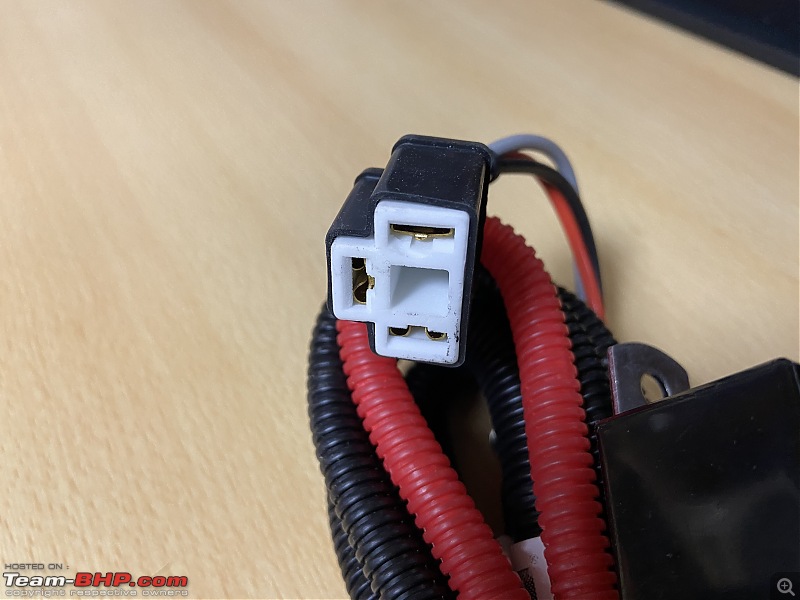 As for bulbs, I picked up a pair of Osram All Season 90/100W bulbs. These seem to have good reviews on Amazon. The HIDs on my previous setup had Osram D2S 35W bulbs and they worked well so that sort of bolstered the faith in Osram once more. Bonus – the bulbs were made in Germany! Come on, don’t we all love car parts made in the Europe? On Amazon, some folks have super high expectations from the product anyway and tend to leave negative reviews. I wasn’t swayed by those anyway and went ahead with the Osram. 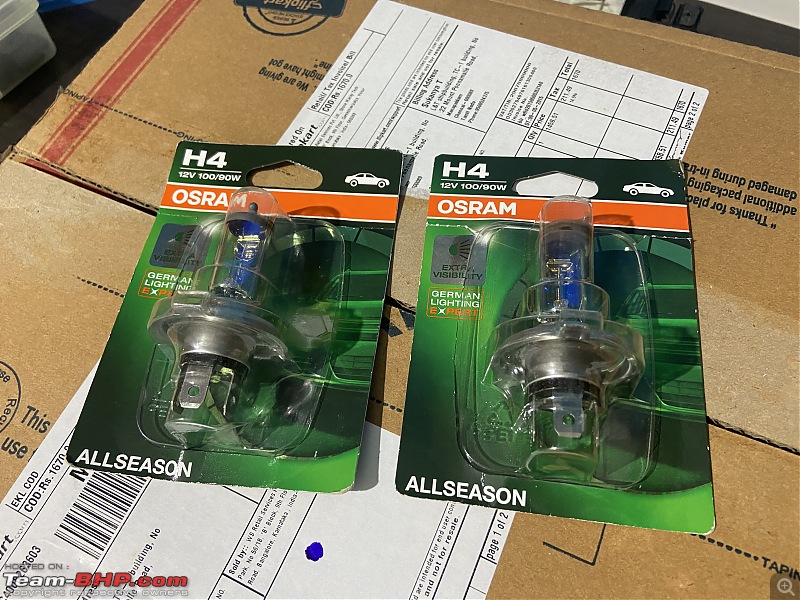 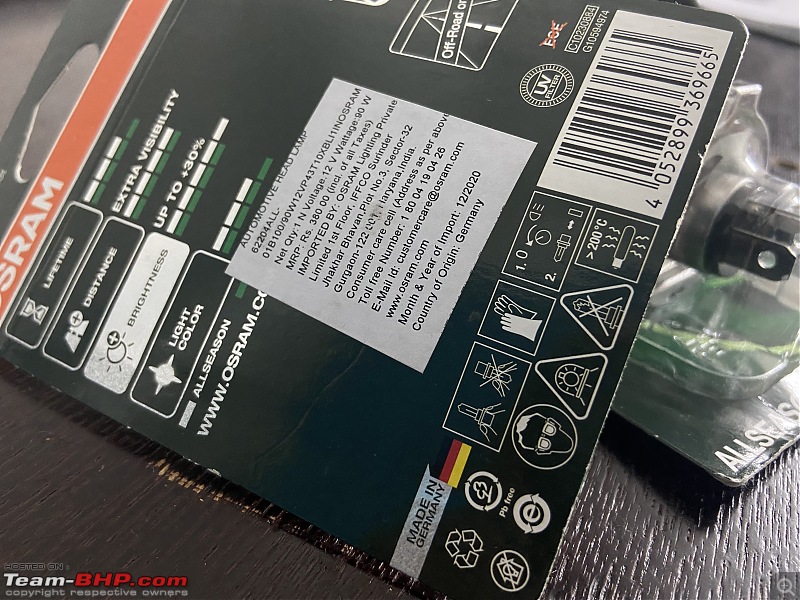 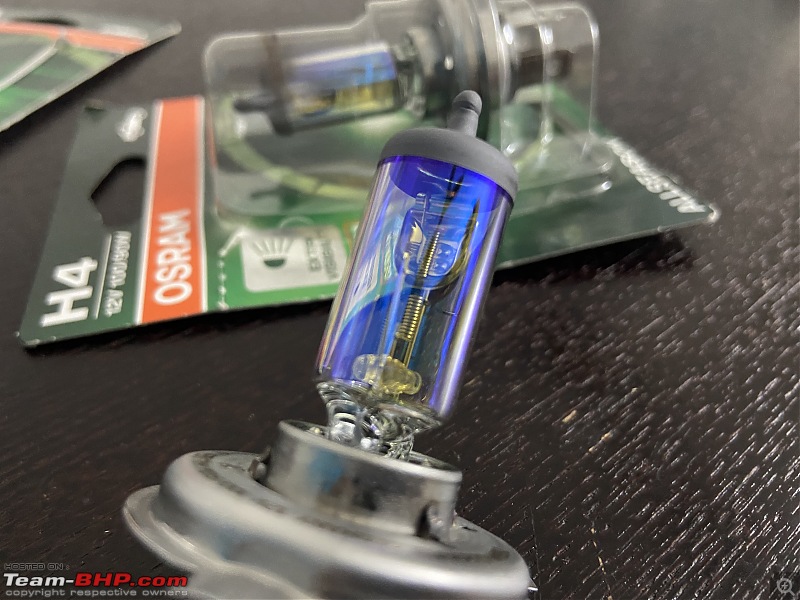 Installed the harness in a jiffy and based on BHPian Parag’s inputs and his experience with the relay harness and higher wattage bulbs, the ground connections were done properly after scrapping the paint. 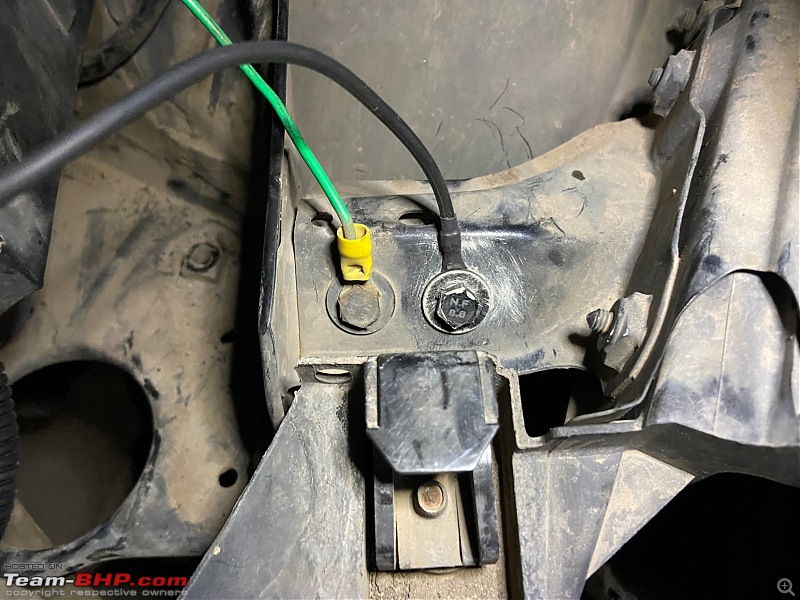 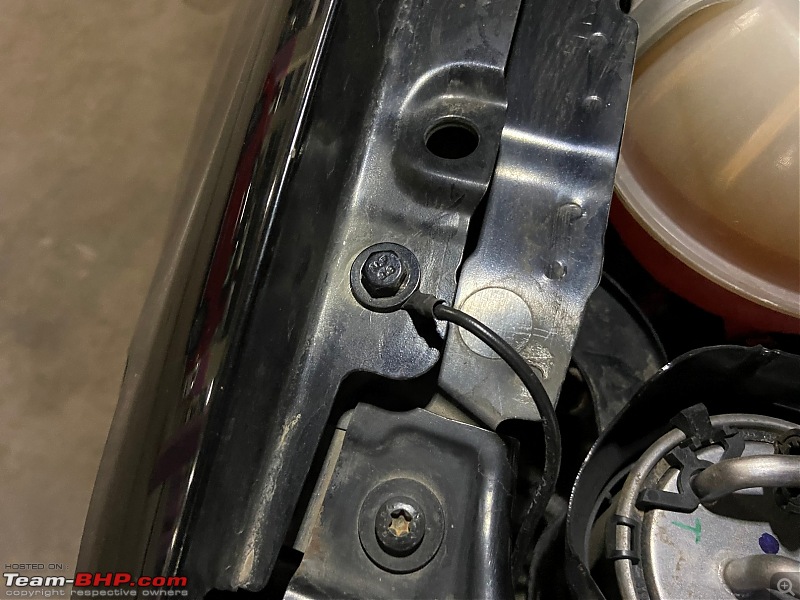 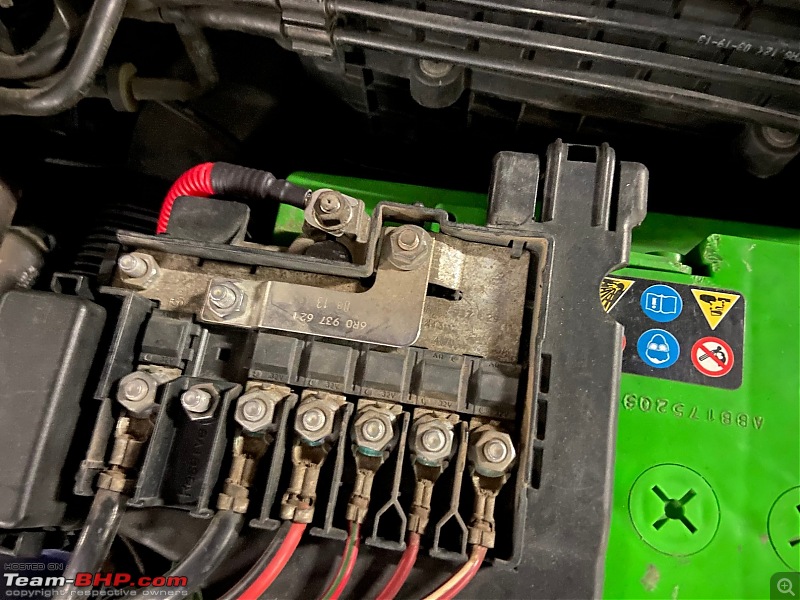 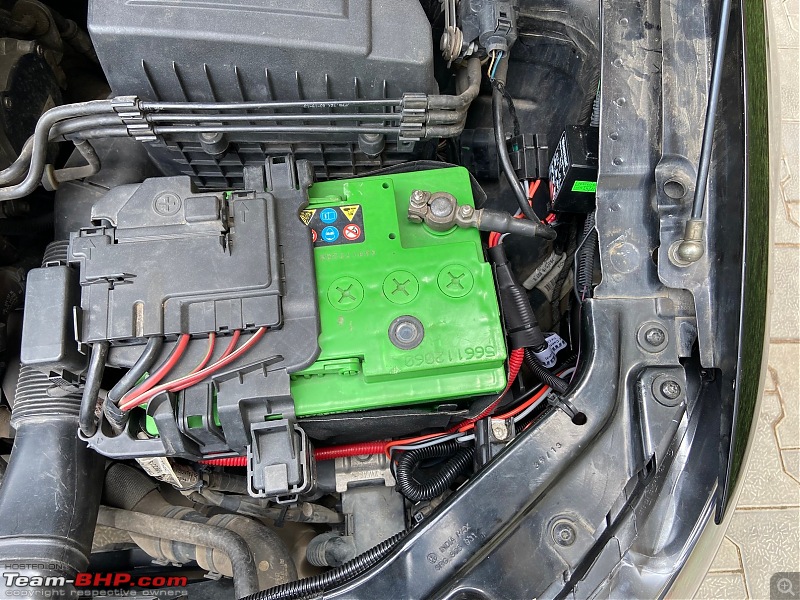 Verdict – there was a definitive improvement in the lighting performance. However, the headlight diffuser/lens was getting heated up! I wonder how long these would hold up over a proper 10-hour Chennai – Palakkad night drive!  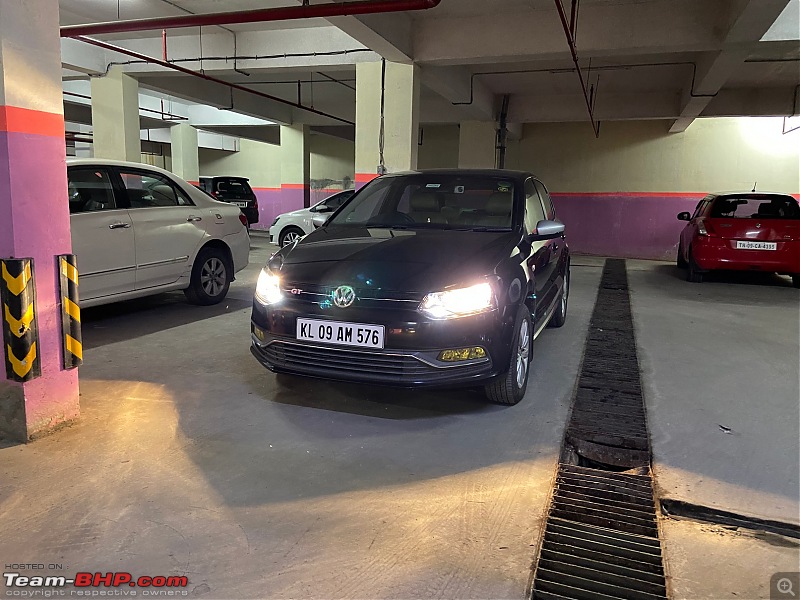 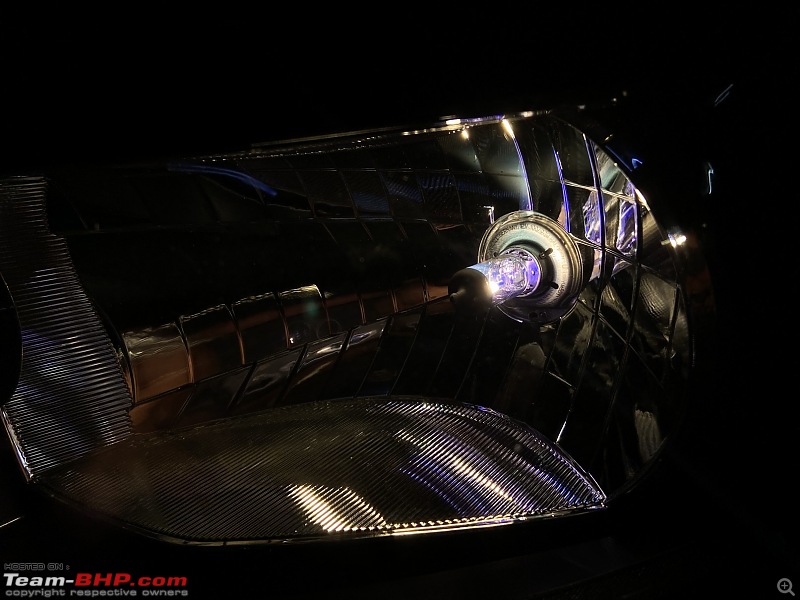 Just for kicks, I also used a cheap light meter to measure the maximum intensity over 2 m, 6 m and 12 m for both the 55/60W and 90/100W bulbs. 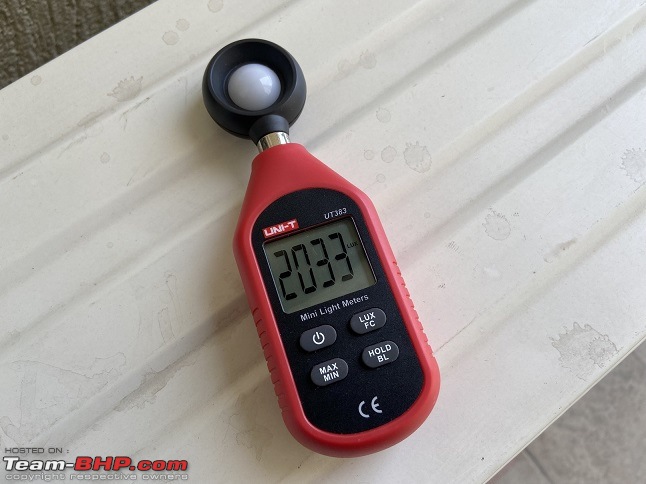 The results from the crude testing at the basement (all other things being constant): 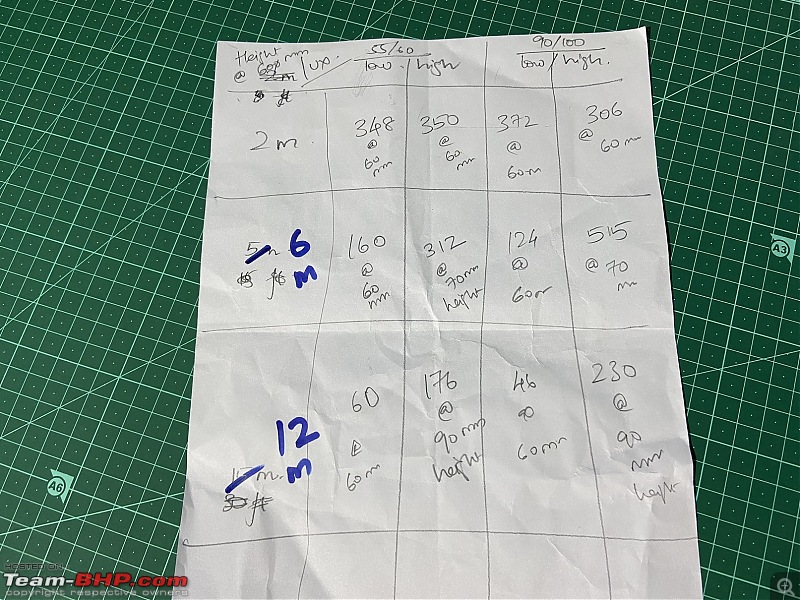 But I miss the white light output of the HIDs and the neat cutoff with the blue hue every time the leaving home lights turn on as I park her and walk. :’) Link for the harness - Amazon (not a referral link) Link for the bulbs - Amazon (not a referral link) Bits and bobs added to my inventory:Some of you may know of my modest collection of tools and consumables. I buy something if it is required for a job, is reasonably priced and may need it in the future as well. Some things are available cheaper at the neighbourhood hardware store compared to Amazon but during these times, nothing really beats the convenience of having them ordered and delivered at home. Scissor jack: VW had bundled this tire jack (not sure if they still do) with the car: 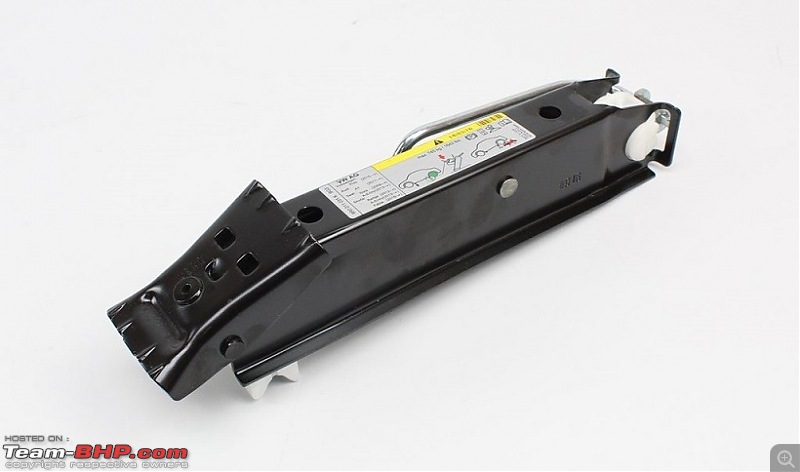 In VW communities and fora, it is also referred to as the widowmaker jack due to the accidents users have faced while jacking up their cars. A classic case of a German, over-engineered product! Ever since I’ve shifted the heavy 3-ton hydraulic jack back to my hometown, I wanted something easier and user-friendly to jack the car for doing the services and odd jobs. I bought this screw jack with the handle from Boodmo which is bundled with many Maruti cars:  Simple, works well and is cheap at Rs. 680. Part number for the jack is 89910M75J00 and for the handle is 09824M00017. Nitrile gloves: I got hold of a box of nitrile gloves (thanks to the BHPian for the tip for suggesting nitrile over latex) for doing brake jobs and such services. Dirt, rust, oil and such gets into the nails and becomes a pain to clean! Got these from Amazon for Rs. 360 for a box of 100 gloves. 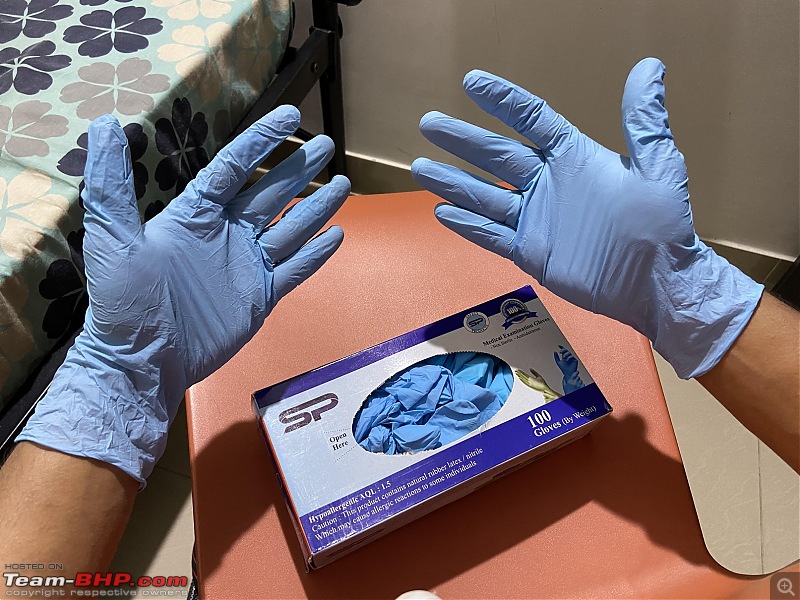 It’s a size larger than I would have liked but this would do for now. Syringe: When I changed the brake pads last time, there’s a step which involves pushing the pistons on both the calipers to fit the new pads. At this point, some brake fluid overflowed from the inlet of the reservoir. Since I have to remove the rotors for skimming, I’ll end up facing the same situation. I sourced this 50 mL syringe (looks scary!) to suck some fluid from the reservoir before attempting the job. Got this from the Apollo247 app for Rs 42, delivered the same day. Wasn’t available at the local pharmacy outlet (1 Re. coin for reference). 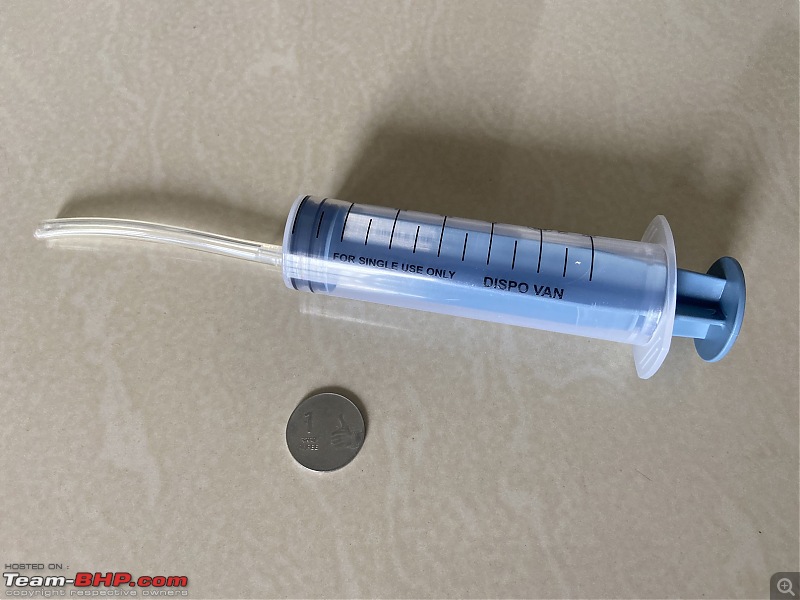 Lug wrench extension pipe: I got myself this GI pipe from a local hardware shop a couple of weeks back - 1 m length, 32 mm outer dia. for Rs. 280. I had to trim the length a bit so it fits perfectly in the boot at the back of the rear seat: 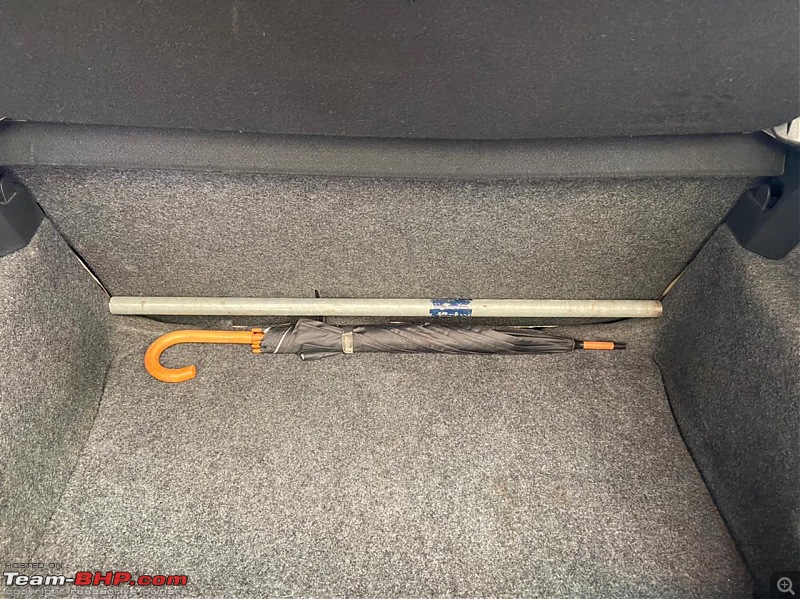 Man, this thing turned out to be a godsend! Last Sunday, I had to change the tubing of the front windshield washing system and had to access the reservoir which is located in front of the driver-side wheel, hidden by the wheel well lining. Had to remove the wheel to access the lining thus. The pipe was immensely helpful and I barely had to put any effort to loosen the bolts which were tightened at the wheel balancing/alignment centre. Usually I would have to stand on the lug wrench that came with the car and push/press a couple of times to loosen the bolts. With this pipe inserted over the lug wrench, I just had to push with the hand with almost no effort. Tightening was easy too although one has to be careful not to strip the threads by over-tightening the bolt/nut as a long pipe exerts a great amount of torque compared to a shorter lug wrench. This lug wrench extension pipe IMO, is a must-have in any car. Barely takes any space in the boot. Just have it secured using some Velcro belt or something. Easily the best 300 Rs I had spent in recent times. Fixing the Broken Fuel Cap Tether:The fuel cap tether broke. 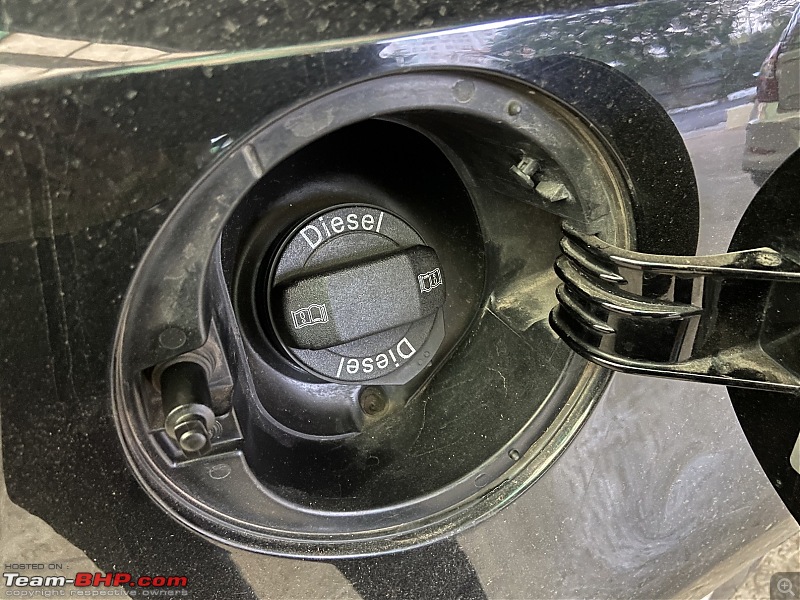 I used a coated metal cable (used for cloth hangers) to replace the broken tether with metal crimps on both sides. Drilled a hole on the rotating part of the cap, routed the cable and crimped it on the loop. Drilled another one on the hinge, routed the cable and crimped it on the loop. 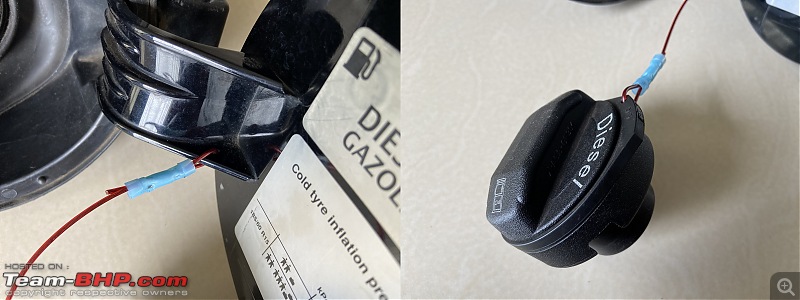 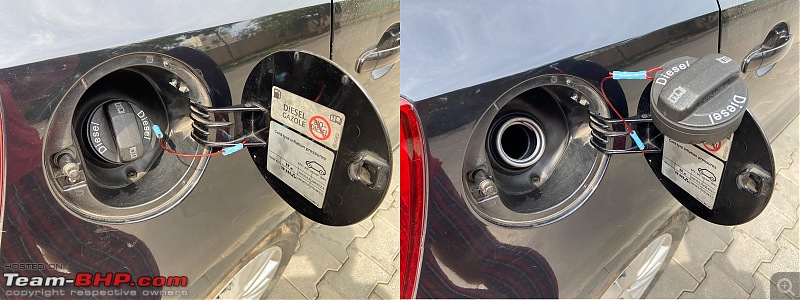 Looks a little crude especially with the bright blue sleeve over the crimps but hey function over form! Last edited by Gannu_1 : 7th July 2021 at 21:13. |
| |  (26)
Thanks (26)
Thanks
|
| The following 26 BHPians Thank Gannu_1 for this useful post: | --gKrish--, amvj, androdev, ashis89, audioholic, chinmaypillay, CrAzY dRiVeR, digitalnirvana, DrANTO, fluidicjoy, gasinveins, guyfrmblr, iliketurtles, InControl, joethomasv, Leoshashi, paragsachania, pugram, Researcher, Taha Mir, The_Outsider!, vaasu, vigsom, Vik0728, VivekCherian, yesyeswe |
| | #1176 |
| Team-BHP Support  Join Date: Apr 2013 Location: Madras
Posts: 7,335
Thanked: 20,670 Times
| re: VW Polo GT TDI ownership log EDIT: 9 years and 178,000 km later... Topping up Engine Oil:If you own a VAG car, you know it is customary to check the engine oil levels from time to time. I measured the engine oil level recently and found it to be on the lower side.  Topped it up with the leftover quantity from the 1 litre bottle of Shell Helix Ultra 5W40. This should do until the next service, which is due this August. Interior Cleaning:There was dust everywhere inside and I had the perfect opportunity to clean the interiors when I was at the garage, using the HP hose of the air compressor. I conveniently overlooked that part! No access to a 230V socket in the apartment complex makes it all the more harder – no way to connect an electric blower or a vacuum cleaner. The manual way it is then - I used some paint brushes, microfiber towels and some hand-wash liquid diluted in water to clean the plastic trims, the sunvisors, seats and some soiled parts of the headliner. Here are some pics: 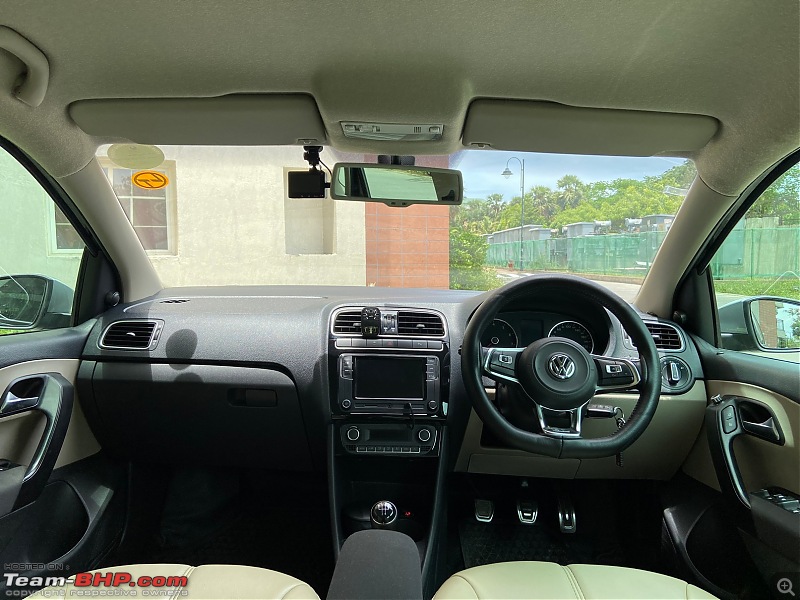 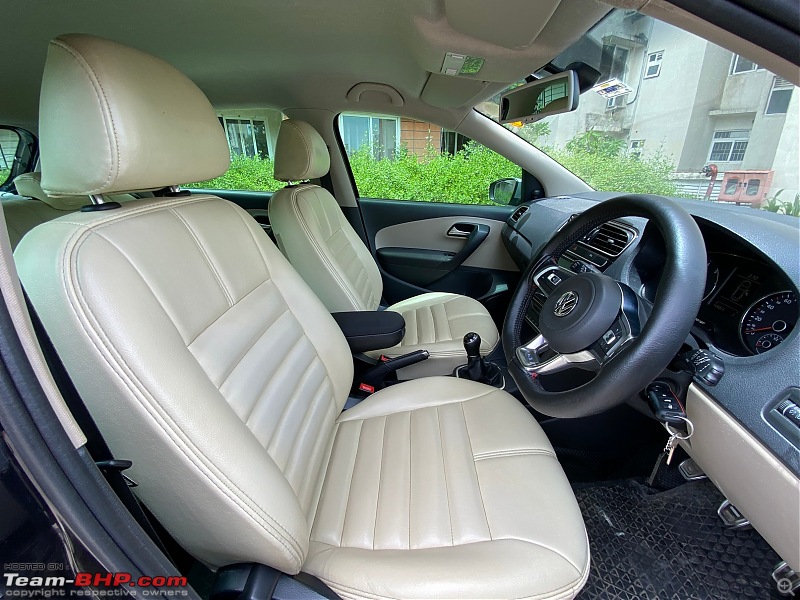 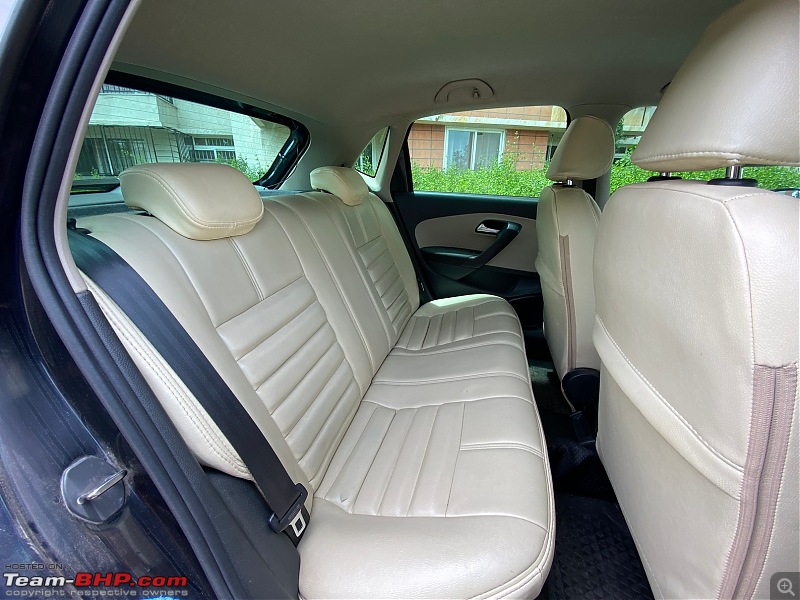 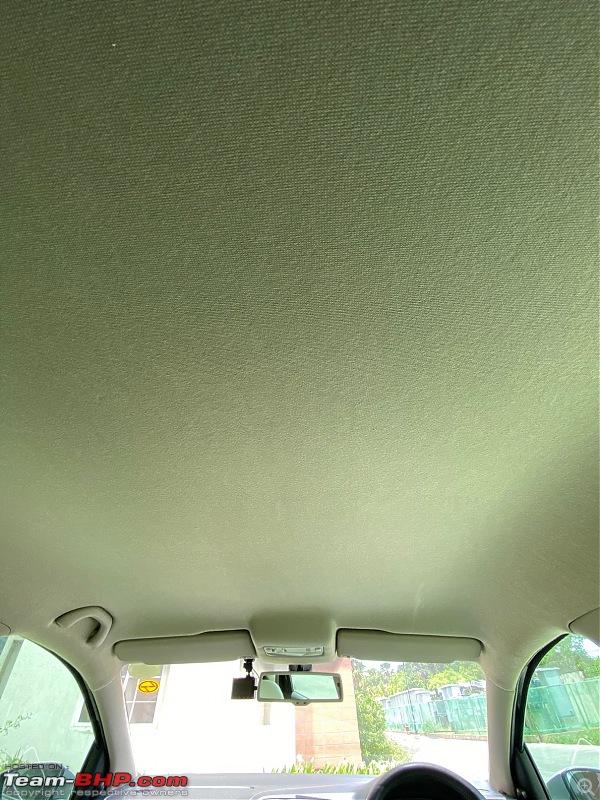 I must admit the quality of the plastic trims are really good on these Germans - they have held up really well over the years (despite removing and installing some of them so many times) although the upholstery has begun showing its age. For instance, part of it has torn away on the rear seat. Guess I’ll redo the complete upholstery at the 10 year mark. Maybe in a shade of tan. Off white has been a pain to maintain but looks swell when it is clean. Replacing the front windshield wash tubing:While using the front windshield wash, some water used to trickle down the bonnet and through the front grill. The spray was also ineffective. Check out these clips: If the car was being driven, the stray water leaked from the bonnet would spray onto the windshield. This was irritating and embarrassing! I would be engaging the wiper continuously on a bright sunny day until all the stray water was cleared. Clearly there was a leak somewhere in the line inside the bonnet. The last lockdown was the perfect time to fix these minor niggles. I removed the nozzles from the bonnet and figured out the leak on the co-driver side elbow which connects the nozzle with the stock corrugated tubing. The elbow has a locking mechanism which holds the nozzle in place – undo the black tab and the nozzle comes off. 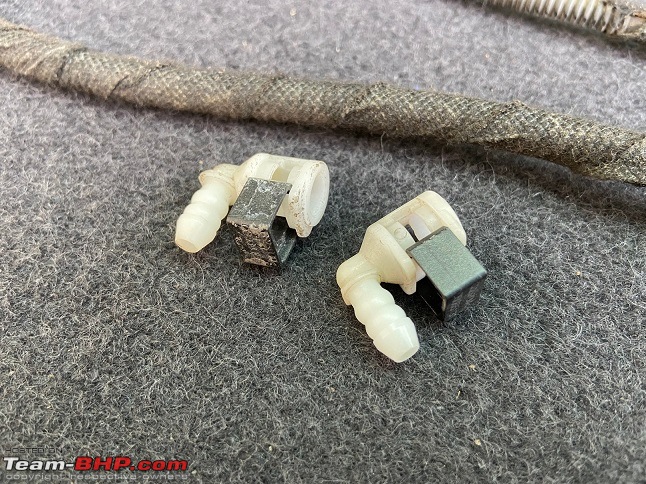 You can see the scales and deposits from the water on the left one. The co-driver side elbow was much cleaner in comparison and there was no leak. To reconfirm the leak, I tested this elbow at home by connecting it to a 1/4" RO tube outlet  and indeed it leaked: and indeed it leaked: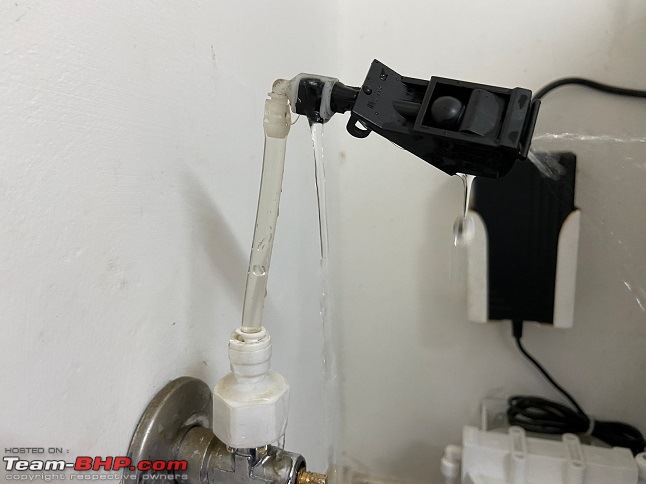 Searched for a replacement elbow from VW’s parts catalog online and it was retailing at Rs 275 per unit (from (Boodmo; no one seems to have ordered this part before as Boodmo shows the snaps of the part on its link if it has been ordered before by a customer) and there were 3 units in this system (one at the pump and one for each nozzle). Part no. 16 in the image below: 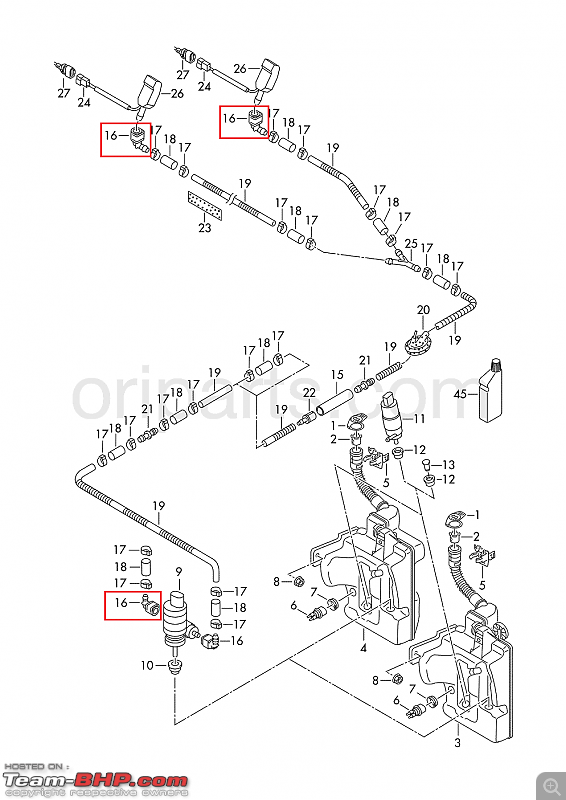 This somehow didn’t make sense as it was prone to leakage later. Plus, the car was close to 8 years old. I decided to replace the entire front windshield wash tubing for good. From the reservoir to the nozzles but with no unwanted parts like these elbows. It did seem like a bit of an over-engineered part to me. The elbow: 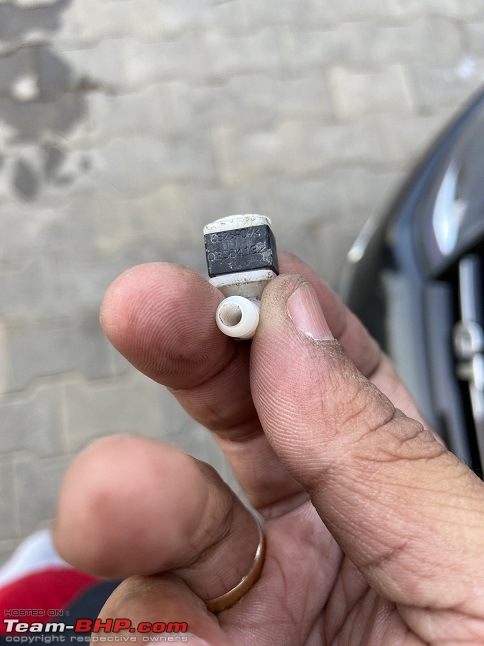 Ordered the replacement tubing from Boodmo but opted for a Toyota branded tubing! What do they say? Toyota = reliability? Can this VW have some Toyota love please?  Although this isn't the first time, a Toyota part is used in the car though. A Toyota check valve (non-return valve) was installed in the same system sometime back (post from the ownership thread; scroll down a bit). Going by the parts catalog, this tubing is used in a lot of Toyota and Lexus vehicles – Corolla, Fortuner, Land Cruisers, Prius, Camry, Highlander, FJ Cruiser etc. Although this isn't the first time, a Toyota part is used in the car though. A Toyota check valve (non-return valve) was installed in the same system sometime back (post from the ownership thread; scroll down a bit). Going by the parts catalog, this tubing is used in a lot of Toyota and Lexus vehicles – Corolla, Fortuner, Land Cruisers, Prius, Camry, Highlander, FJ Cruiser etc.While at it, I also ordered a pair of new nozzles from Boodmo along with a Y connector to split the main outlet tubing. Cheap anyway. I am a big fan of Boodmo now! I spend a lot of time scouring through their parts for sale, get some info on the part costs, zoom into the pics of the random parts, packaging stickers and get info on the country of origin, batch, year of manufacture etc. Some weird pastime if you ask me! The Toyota tubing, 3 ft x 2 nos.: 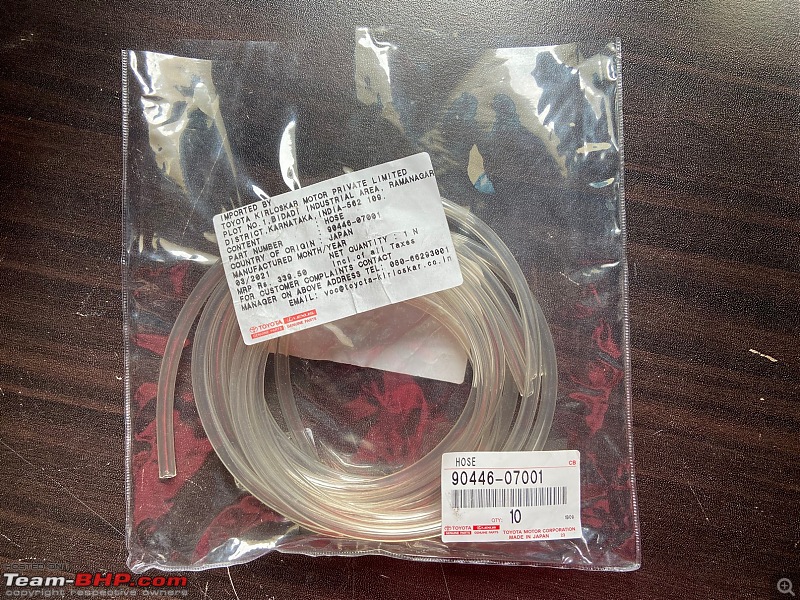 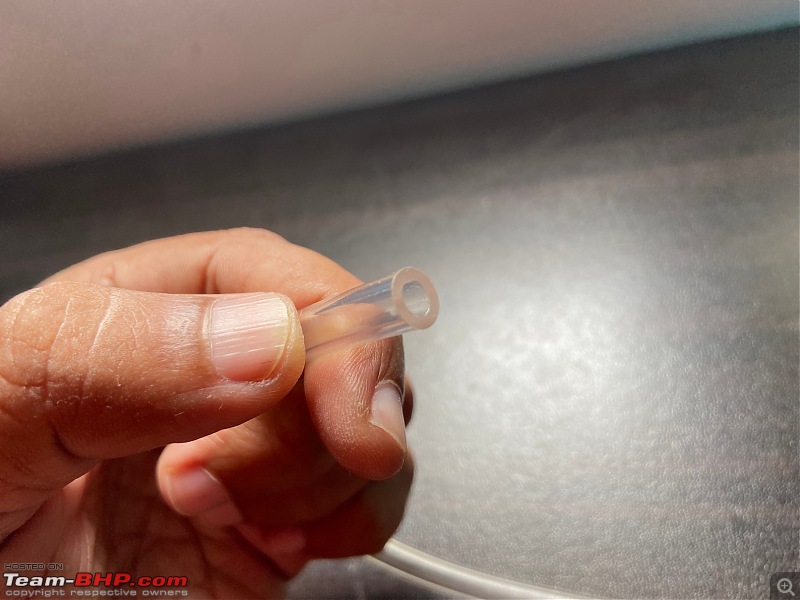 The new nozzles, Y-connector (from Hyundai! Because Maruti had a cheaper part but the cost of shipping was exorbitant!) and a 90-degree elbow (from Aliexpress which was sourced long back for some odd DIY): 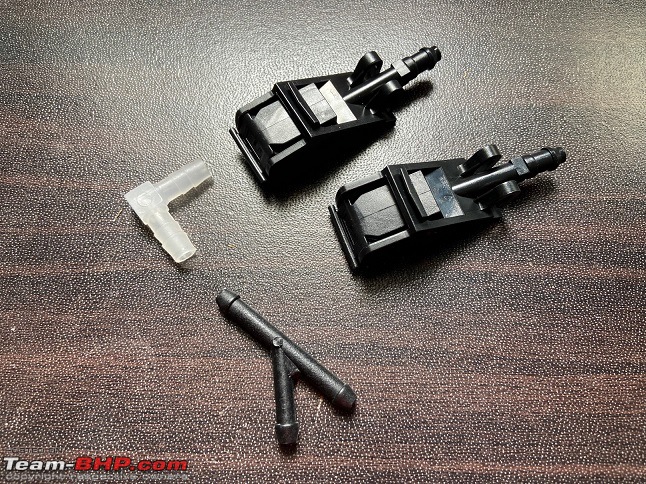 On a Sunday morn, I carried all the required tools in a bag and drove to my usual place in the apartment complex where there’s plenty of light and fresh air. Could notice the usual morning joggers curiously looking at what is happening! Popped up the bonnet, I removed the old nozzles and clipped the old tubing at the bonnet using a plier. Removing the nozzles is easy – just pull the nozzle from the slot in the bonnet and it comes off. Removed the entire stock tubing and salvaged the stock Y-connector: 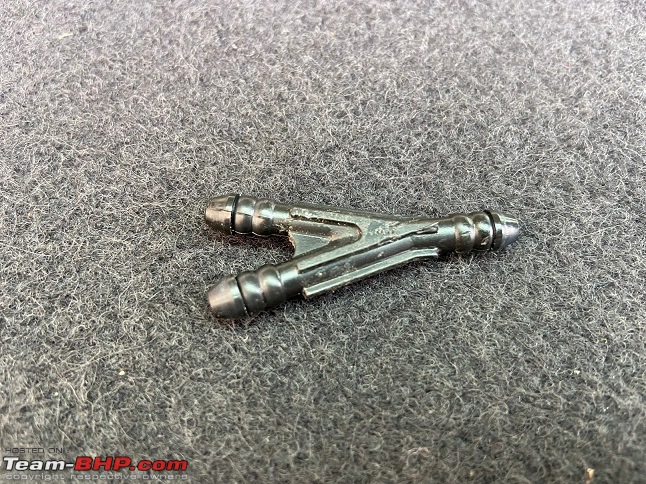 Inserted the tubing at the 3 ends of the Y connector: 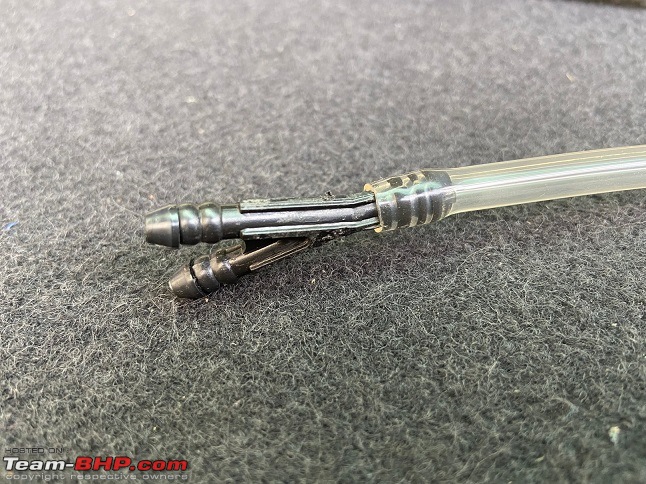 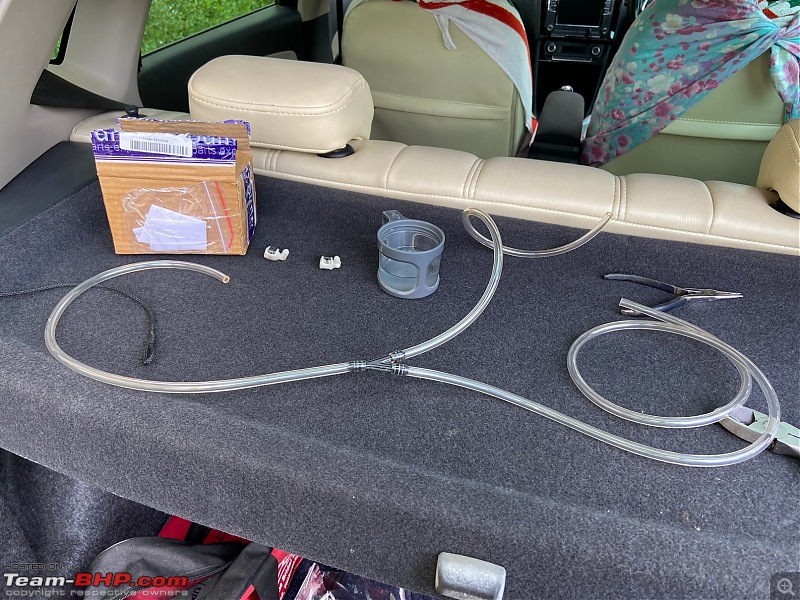 Carried some hot water in a flask which helps to expand the ends of the tubing a bit. Inserting into the connectors becomes easier that way: 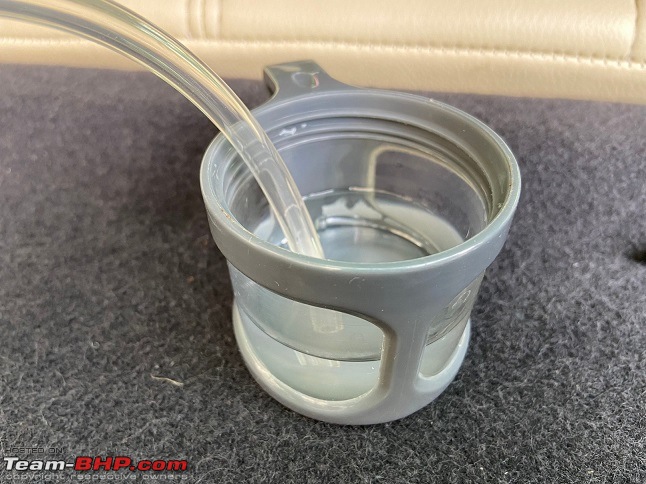 Used my trusty ol’ steel cable (there’s some term like snake cable or something which civil construction folks use for pulling the cables through the conduit pipes) for pulling the tubing from one end of the bonnet to the holes: 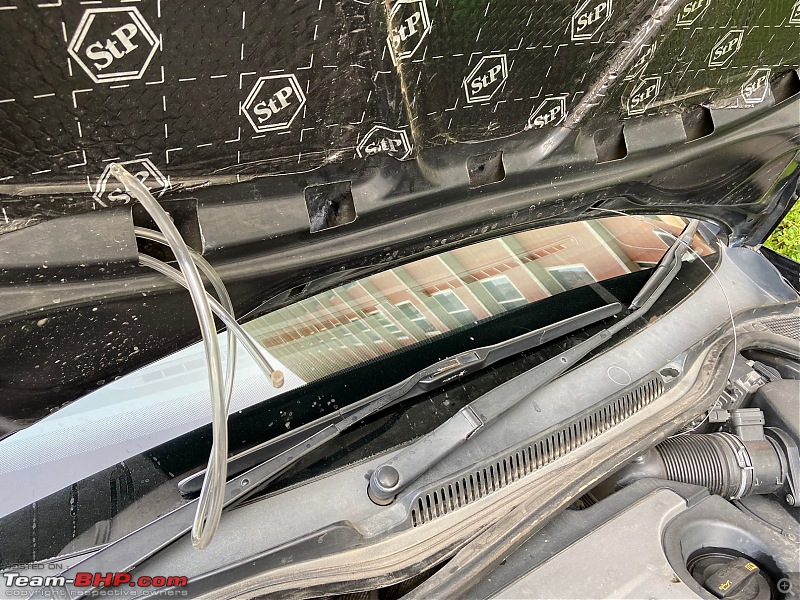 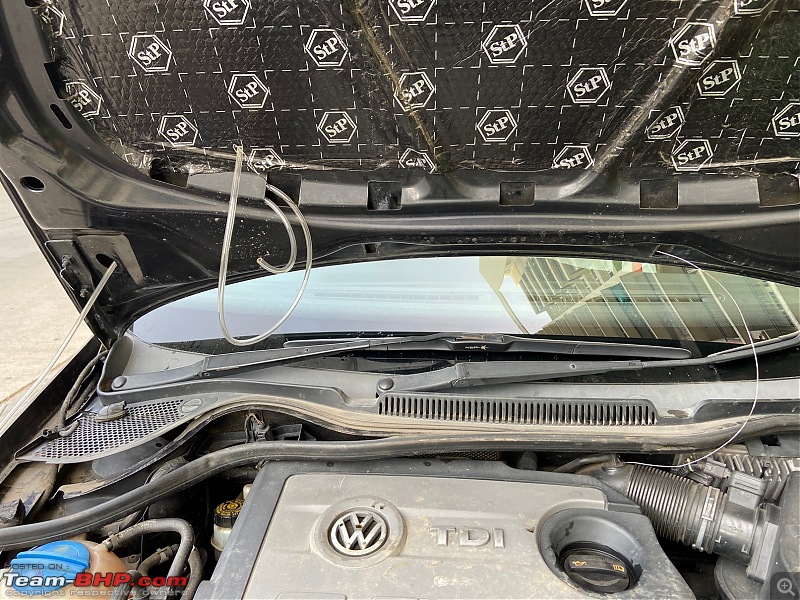 Pulled out one end of the tube through the stock rubber grommet: 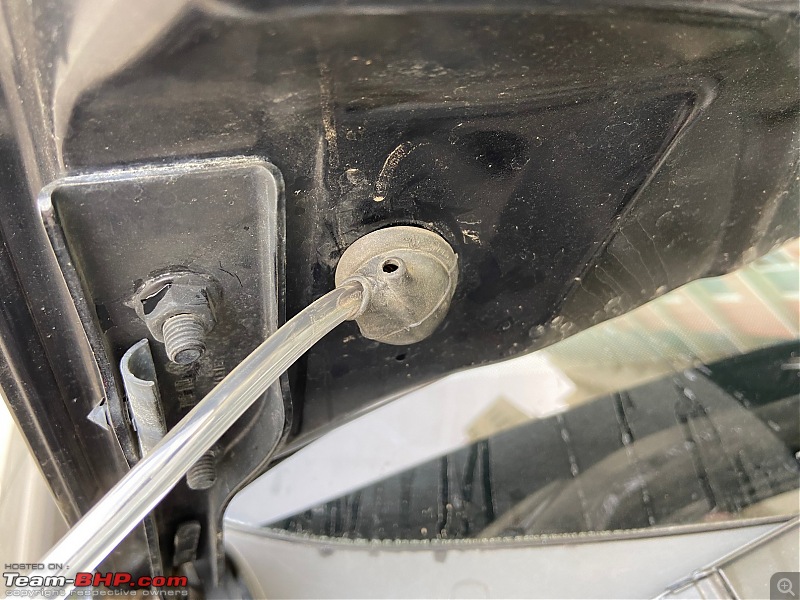 And the other ends of the tubing for both the nozzles:  The stock nozzles and the replacements: 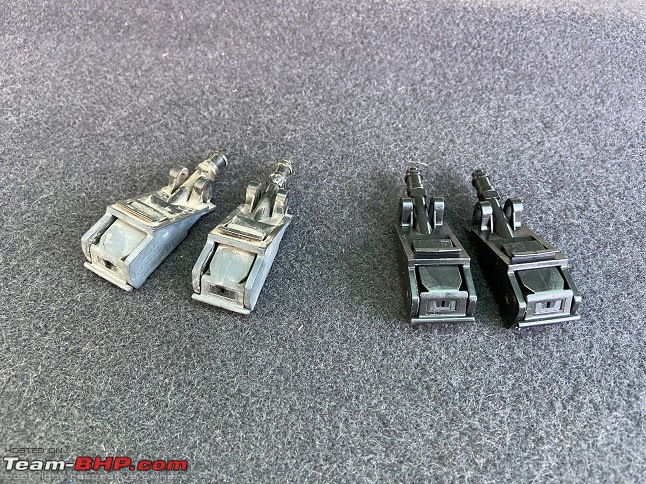 Inserted the tubing into both the nozzles: 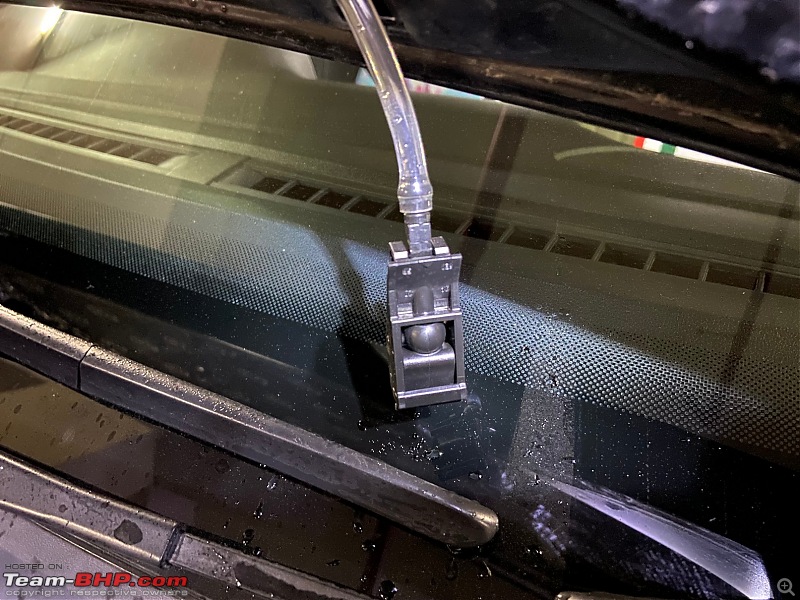 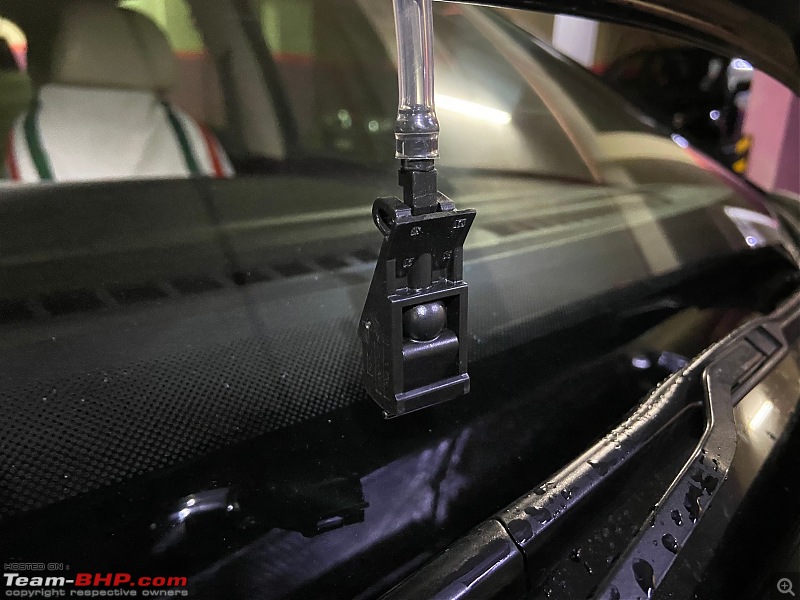 Took a break and that’s the end of Take 1! Take 2 resumes at the basement of the apartment. A little dark in there but the head-mounted torch helped. 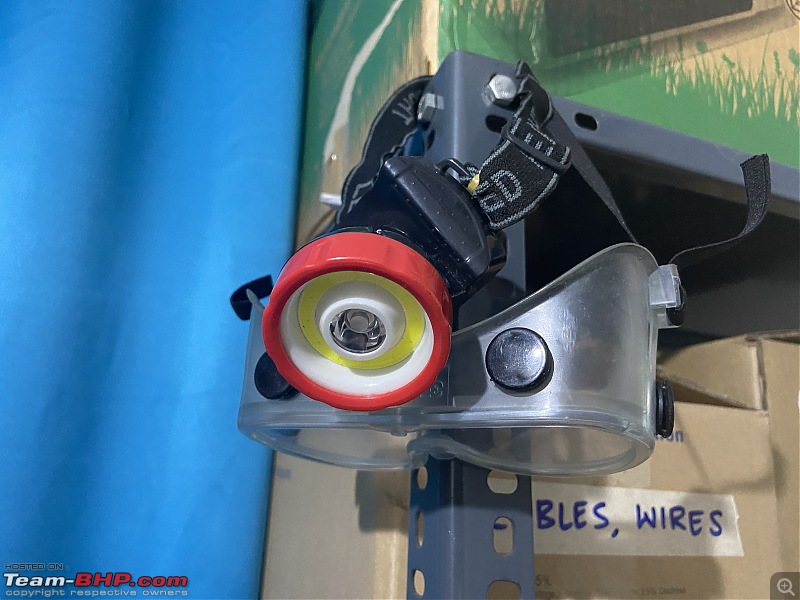 While connecting the tubing to the nozzles, I feared if the tubing would take a sharp bend at the nozzles. This would reduce the flow of the water to the nozzles. Luckily, the bend was a smooth one and there were no sharp bends as evident from the snaps (and the spray action): 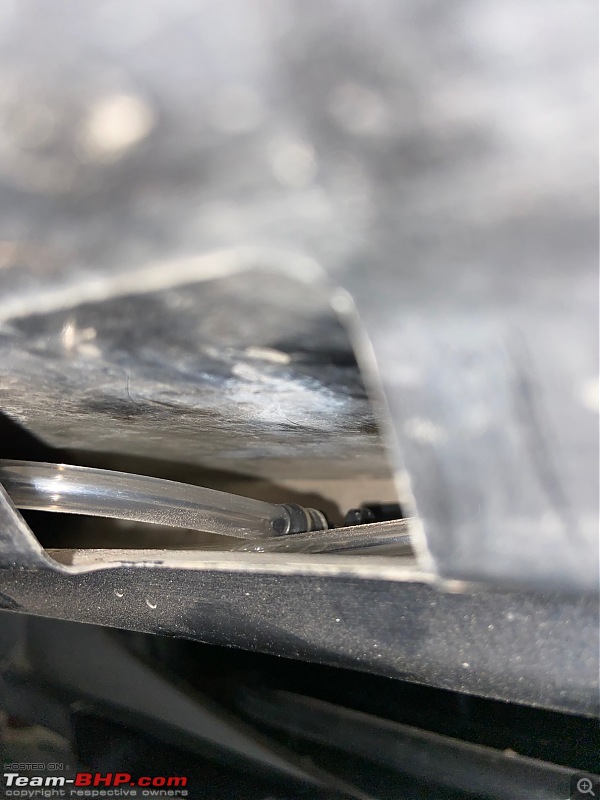 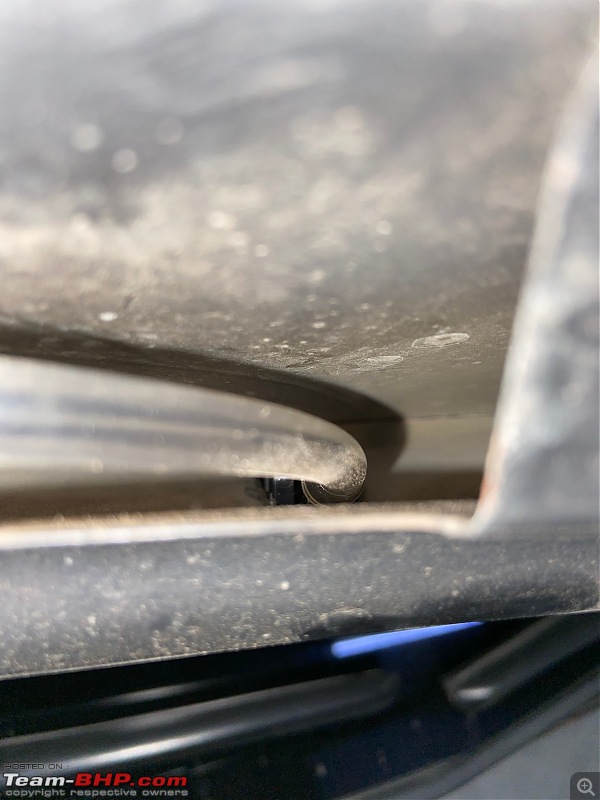 To access the wash fluid reservoir, the driver side wheel has to be removed and part of the wheel-well liner has to be removed. Removing the wheel is a pain! Luckily, the lug wrench extension pipe helped. The stock piping was removed from the pump. It has the same elbow at the end with the lock. Inserted the new tubing into the outlet of the pump, connected the check valve and the other end from the tubing to the check valve: 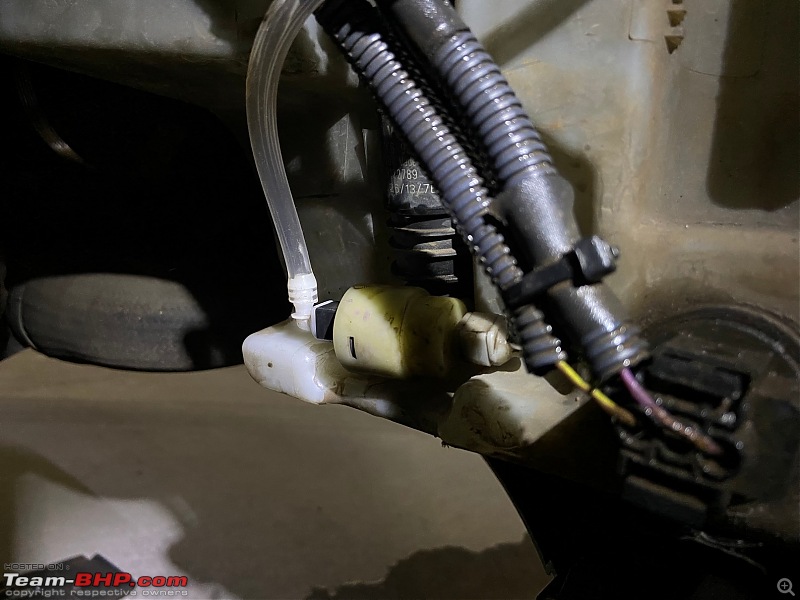 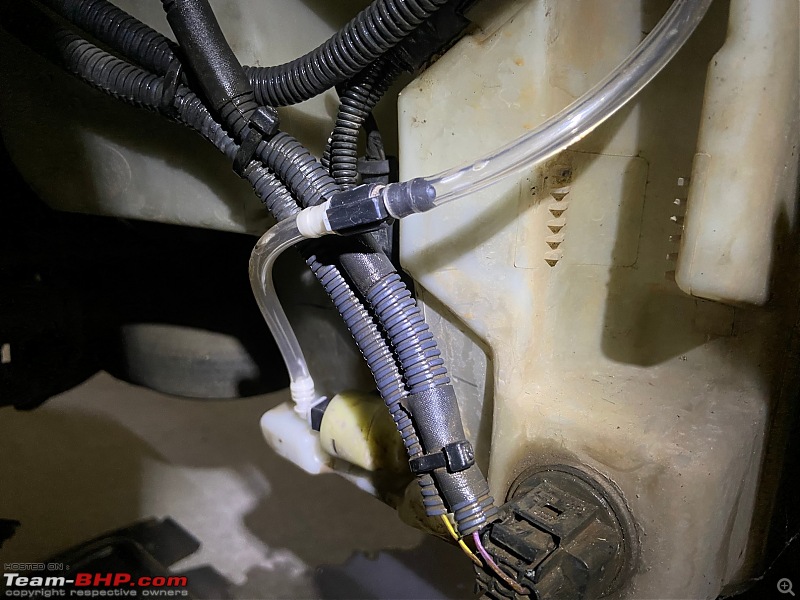 That completes the whole process. Front windshield wash system restoration partly brought to you by Toyota! A VW-Toyota partnership. Check out the results: Part details: 1. Tubing: Part number - 90446-07001 (Toyota) Link - Boodmo Cost - Rs. 750 for 2 units (inc. of shipping) 2. Nozzle: Part number - 6E0 955 985B Link - Boodmo Cost - Rs. 866 for 2 units (inc. of shipping) 3. Y connector: Part number - 98664-33000 (Hyundai) Link - Boodmo Cost - Rs. 78 for 2 units (inc. of shipping) |
| |  (26)
Thanks (26)
Thanks
|
| The following 26 BHPians Thank Gannu_1 for this useful post: | arun_josie, ashis89, audioholic, chinmaypillay, CrAzY dRiVeR, digitalnirvana, DrANTO, fluidicjoy, iliketurtles, InControl, Jeroen, jithin23, Leoshashi, MoTo_meister, paragsachania, PrasannaDhana, pugram, rakesh_r, Researcher, sriharsha_m87, Taha Mir, The_Outsider!, vaasu, Vik0728, vredesbyrd, yesyeswe |
| | #1177 |
| Team-BHP Support  Join Date: Apr 2013 Location: Madras
Posts: 7,335
Thanked: 20,670 Times
| re: VW Polo GT TDI ownership log EDIT: 9 years and 178,000 km later... The Lockdown Night Ritual:During this lockdown, I almost ran into a complete battery discharge issue when the car was left unused for a week to 10 days. She cranked only on the third crank. This was scary as I did not have the jump-start cables with me here! To prevent this from happening again, I used to go for a couple of rounds within the apartment complex late in the night, usually midnights. The circuit measures approx. 1.5 km in length. 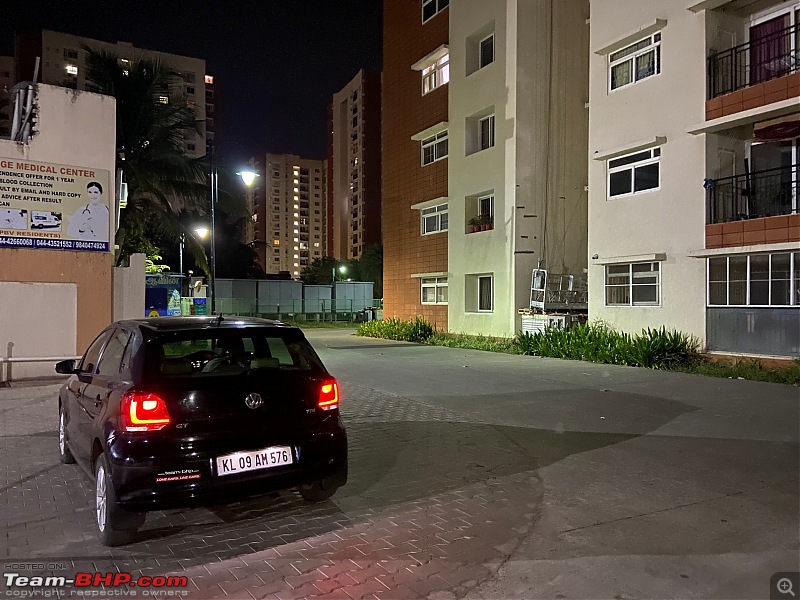 Got hold of the jump-start cables last weekend when I visited my hometown (1 Re. coin for reference): 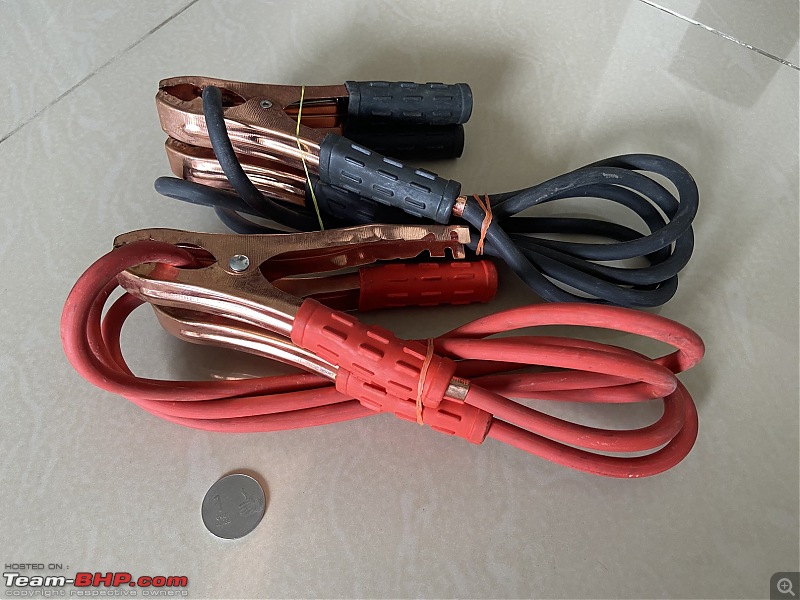 Parting Snaps:Some snaps of the ride clicked from our apartment complex as I wrap these updates: 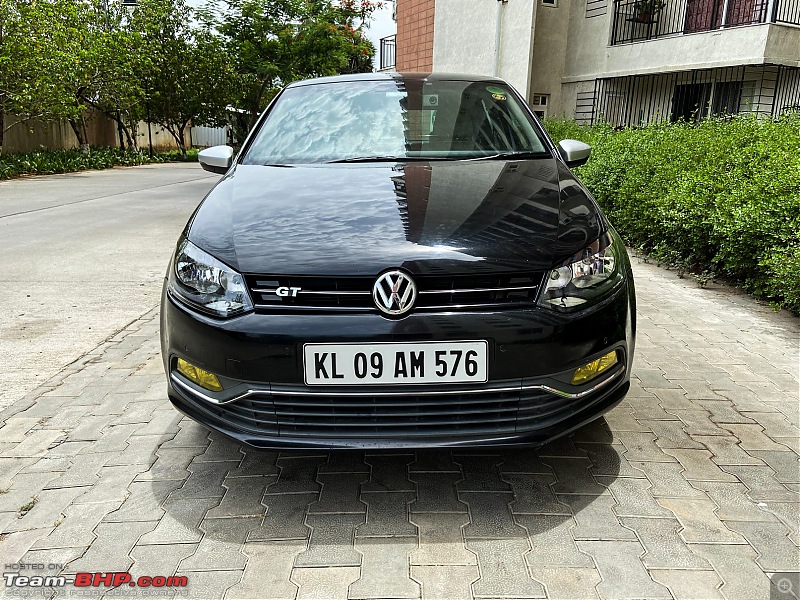 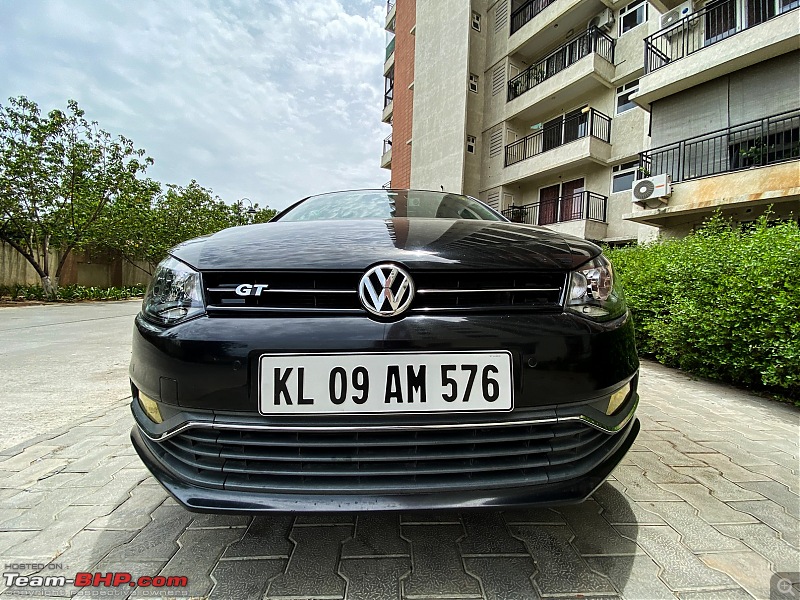 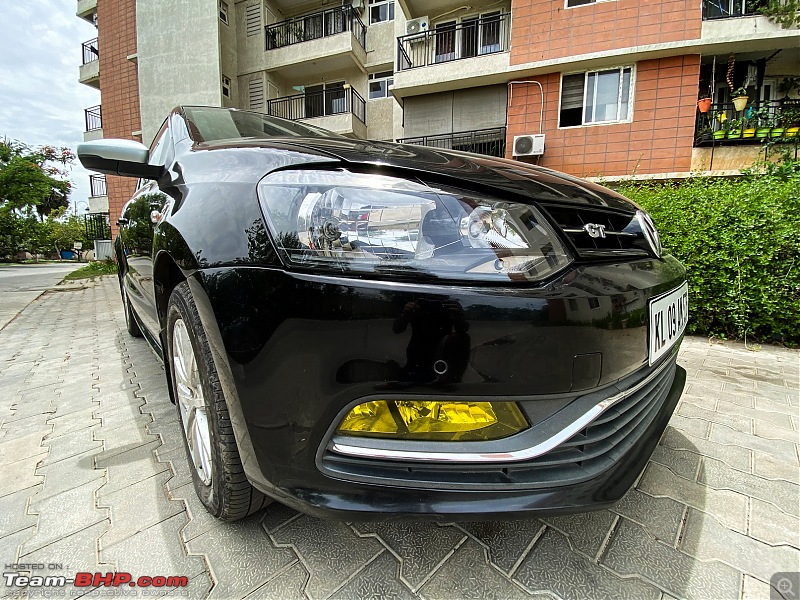 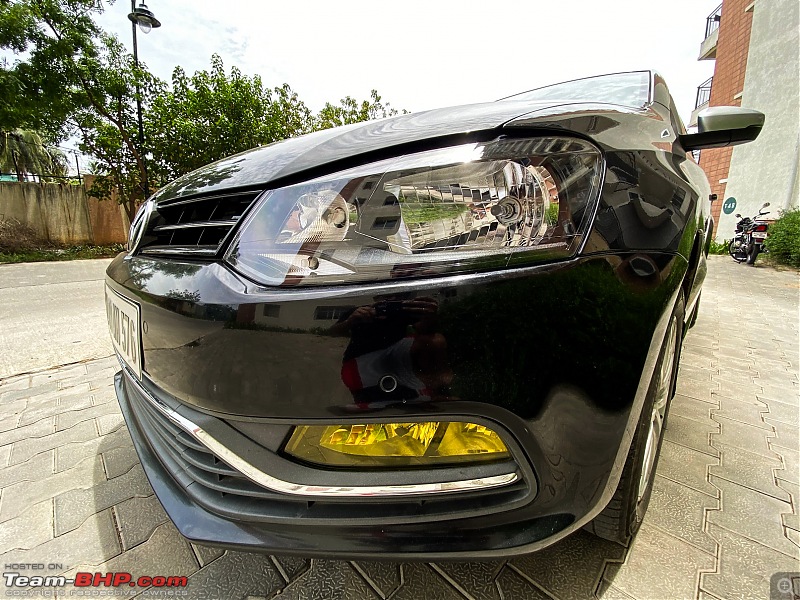 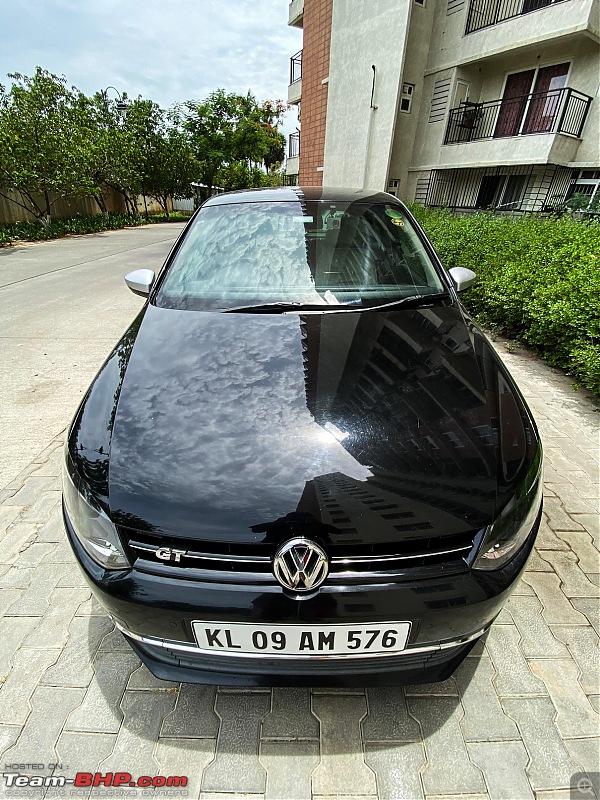 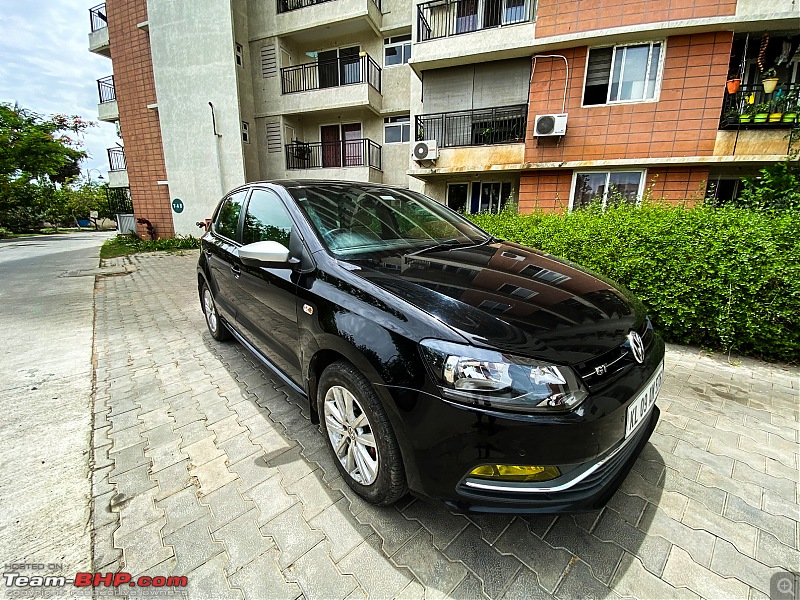 A round of professional detailing is due this year and I intend to drop her at DriveClean sometime during October first week before the 8th anniversary. Before that I have to do some paint touch-ups with the OEM touch up kit at a couple of spots and a round of claying. Before I wrap up the updates, thanks are due to some of them whom I’ve been in touch through WhatsApp and mails for discussing about these issues/updates. In no particular order: Prithviraj Murali - For all the timely help and inputs man! Leoshashi – For the feedback on Maruti’s screwjack, for the Zen’s parts and getting in touch with the spare parts dealer. You truly are a lion! Now I need to get the Zen’s registration renewed and get her transported to Gujarat. ike – For patiently listening to all my rambling! Dude, you really ought to return to Chennai ASAP! I am growing incredibly jealous of you for spending all this time since the lockdown at your hometown. Paragbhai – For all the inputs especially on the relay harness, the lows and highs of the H4 bulbs  , the harness sleeves etc. , the harness sleeves etc.espciclo/Fernando – For guiding me on the fault finding part for the high beam issue, the wiring diagrams and the prompt responses over mails. Unfortunately, the Haynes manual for the Polo 6R doesn’t have the wiring diagrams for the single barrel headlights and neither could I find one at the Elsawin website when I had downloaded the entire contents for the repair of Polo 6R. Jayaprakash/JP – For resolving the high beam issue, the replacement of steering rack and front strut bushes and bearings and, the quick turnaround time after dropping the car at your garage. Pending works:1. Skimming front brake rotors. 2. Fixing the wiring mess at the interior cabin light area (too many consumers tapping +12V from the cabin light and all the wiring going haywire). I like the fact that this car has become a proper study tool over the years - there’s just something or the other to tinker around during the weekends which otherwise I’d spend binging some serial. I have learnt so much and continue to do so every time I fiddle with her. What I really miss at the moment is DRIVING! I terribly miss driving to my hometown, to Yercaud - the hill-station at our backyard where we’ve spent several weekends, to random places on account of colleagues’ engagements, weddings and receptions. Sigh! The current covid scene and the soaring fuel prices have made it really worse for some of us. One can hope the covid scene would die down shortly but I am not sure of the other. Anyways, thanks for reading guys. Stay safe! Last edited by Gannu_1 : 7th July 2021 at 21:24. |
| |  (37)
Thanks (37)
Thanks
|
| The following 37 BHPians Thank Gannu_1 for this useful post: | arun_josie, ashis89, audioholic, BigBrad, catchjyoti, chinmaypillay, CrAzY dRiVeR, deepfreak15, Desmosedici, digitalnirvana, Dr.Naren, fluidicjoy, ike, iliketurtles, InControl, Keynote, Leoshashi, MoTo_meister, PapaBravo, paragsachania, pugram, Raghu M, rakesh_r, Researcher, romil.shroff, satrikon_454, Taha Mir, The_Outsider!, torque18, Turbohead, vaasu, vigsom, Vik0728, vishy76, VivekCherian, viXit, yesyeswe |
| | #1178 |
| BHPian Join Date: Jul 2012 Location: KL-08/Chennai
Posts: 861
Thanked: 1,992 Times
| re: VW Polo GT TDI ownership log EDIT: 9 years and 178,000 km later...
It looks like my luck has run out. A little birdie told me my office might start functioning in September. I'd rather have a colonoscopy than come back to Chennai again. |
| |  (2)
Thanks (2)
Thanks
|
| The following 2 BHPians Thank ike for this useful post: | Researcher, yesyeswe |
| | #1179 | |
| Senior - BHPian Join Date: Apr 2011 Location: Navi Mumbai
Posts: 2,085
Thanked: 2,400 Times
| re: VW Polo GT TDI ownership log EDIT: 9 years and 178,000 km later... Quote:
In my Vento TDI, I have not used for 30 days at a stretch, it still starts with a single crank. Do get it checked. If battery is up for replacement, got for Amaron. | |
| |  (3)
Thanks (3)
Thanks
|
| The following 3 BHPians Thank el lobo 6061 for this useful post: | COMMUTER, Gannu_1, Researcher |
| | #1180 | |
| Distinguished - BHPian  Join Date: Jun 2007 Location: Chennai
Posts: 11,431
Thanked: 29,947 Times
| re: VW Polo GT TDI ownership log EDIT: 9 years and 178,000 km later... Quote:
Took the car out today, 8km. Wasn't quite satisfied with my my parking. Couldn't even turn the engine over! When we came to go home, about three hours later, it would start, and it seemed fine when we got home. But I've learned my lesson about battery-replacement warnings, and not trying to get just a bit more time out of it. | |
| |  (2)
Thanks (2)
Thanks
|
| The following 2 BHPians Thank Thad E Ginathom for this useful post: | Researcher, vigsom |
| | #1181 | |
| BHPian Join Date: Feb 2006 Location: Bangalore
Posts: 900
Thanked: 2,894 Times
| re: VW Polo GT TDI ownership log EDIT: 9 years and 178,000 km later... Quote:
I had used these headlights a lot and given the covid situation and a new place, I had to go for a replacement set of headlights. Just like you, they are packed safely and I hope to revive them soon. I am also considering LED options though. The aliexpress straight connectors are definitely bad, not going to last the time. First of all they are not easy to fix, and secondly they don't connect up to the bulb well. I suspected a loose connection first, but it looks like the poor connections messed up the wiring over a period of time. Just like you, I miss the nice sharp cut off. A lot of people loved the cut off with blue hue. Together with the XP micros (which are still holding up well btw) were damn good for night drives. | |
| |  (4)
Thanks (4)
Thanks
|
| The following 4 BHPians Thank sudeepg for this useful post: | fluidicjoy, Gannu_1, Researcher, vigsom |
| |
| | #1182 | |
| Senior - BHPian | re: VW Polo GT TDI ownership log EDIT: 9 years and 178,000 km later... Quote:
The headlamp heating is going to happen when you use the uprated bulbs. I don't think that it would be a major issue for the plastic lens. Perhaps some dulling in the long term. However I have heard of folks using ceramic holders to counter the heat buildup at the connector. I found it is it was more of an issue if you were constantly on high beam and switching constantly between high and low. Personally I used it on my 800 years ago but it was a disappointing affair resulting in a short due to low quality workmanship. Never went down that path since. Quite a popular upgrade though. One suggestion on my part would be to invest in a torque wrench to help you with the lug nuts in place of the breaker bar. It provides the necessary leverage and you can ensure proper torque while tightening. For loosening you can set the torque higher and get it loosened. I never let the gun be used on for tightening lug nuts at alignment centers I frequent. The final humiliation is me offering to tighten it myself after balancing etc. They can never live that down! Drive on, Shibu. Last edited by shibujp : 9th July 2021 at 11:17. | |
| |  (7)
Thanks (7)
Thanks
|
| The following 7 BHPians Thank shibujp for this useful post: | COMMUTER, digitalnirvana, fluidicjoy, Gannu_1, PapaBravo, The_Outsider!, vigsom |
| | #1183 |
| Senior - BHPian Join Date: Apr 2021 Location: Bangalore
Posts: 1,540
Thanked: 4,177 Times
| re: VW Polo GT TDI ownership log EDIT: 9 years and 178,000 km later... |
| |  (1)
Thanks (1)
Thanks
|
| The following BHPian Thanks sunikkat for this useful post: | Gannu_1 |
| | #1184 |
| Senior - BHPian Join Date: Jul 2015 Location: Chennai
Posts: 1,421
Thanked: 6,097 Times
| re: VW Polo GT TDI ownership log EDIT: 9 years and 178,000 km later... Gannu!It was an absolute pleasure to meet you at the garage. I always wanted to bump into you and check out all the mods you have done. Unfortunately, the pandemic ruined it this time! I was surprised that you changed to the single barrel setup and had come all the way to Perambur for a high beam issue. Didn't realise there was such a huge back story! Interested at the rate you got the single barrel headlamps for. Looking to replace ours shortly. Ours is completely cracked up and yellowed, as you would have seen. We had used 90/100 bulbs with relay for a year after which the relay failed(Finolex/Lucas branded one, the Phillips were out of stuck back then). Currently we're using those high performance 55/60W bulbs from Osram. It's been almost 2 years. Also surprised at the variation of part life in the same type of cars- your steering rack has effectively lasted twice as much as ours while we're still on the stock Gabriel shock absorbers at 1.1 lakh kms. Wishing you many more happy miles with that much loved machine  |
| |  (2)
Thanks (2)
Thanks
|
| The following 2 BHPians Thank Turbohead for this useful post: | Gannu_1, InControl |
| | #1185 | |
| BHPian Join Date: Dec 2019 Location: Chennai
Posts: 125
Thanked: 352 Times
| re: VW Polo GT TDI ownership log EDIT: 9 years and 178,000 km later... Quote: In your 7 years of ownership, have you ever re-painted/wrapped or did any custom work to the paint? As the black still looks really amazing and glossy! If it's still the stock paint, VW's paint quality is exceptionally good and may I please know how do you maintain your cars beauty(external) throughout these years without getting the paint faded/visible scratches/rust etc? Thanks! | |
| |  (1)
Thanks (1)
Thanks
|
| The following BHPian Thanks shravansp24 for this useful post: | Gannu_1 |
 |


