Team-BHP > Technical Stuff > DIY - Do it yourself
Register New Topics New Posts Top Thanked Team-BHP FAQ


Reply
  Search this Thread
7,705 views
Old 5th November 2023, 15:05   #1
BHPian
 
Chhanda Das's Avatar
 
Join Date: Jun 2019
Location: Kolkata
Posts: 380
Thanked: 2,743 Times
DIY : USB Powerbank

My son made a universal serial bus (USB) powerbank with a rated capacity of 17050 mah (milli-ampere hour) at 5 volts (v). The total cost for this came to exactly ₹400.

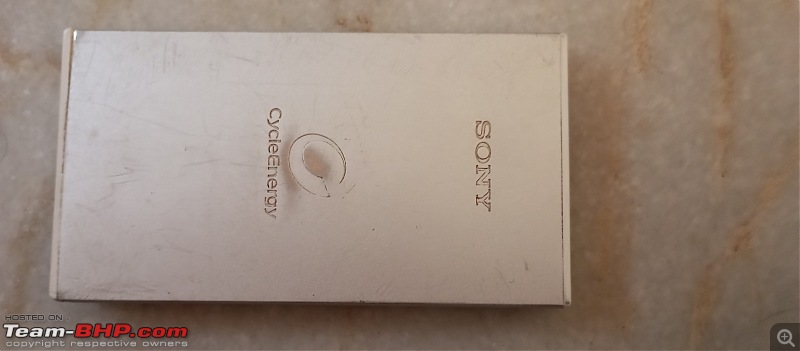
We used to use a Sony 5000 mah powerbank for miscellaneous purposes like as a flashlight while car camping, for recharging phones/cameras, portable speakers, etc. We also use a 20000 mah Xiaomi powerbank but that is solely reserved for running 2 USB fans in an emergency situation while car camping. Recently, we noticed that the aforementioned Sony powerbank (image below) was starting to swell a little after 12 years of stellar performance. Time to get a new one then.

DIY : USB Powerbank-img_20231105_112354.jpg

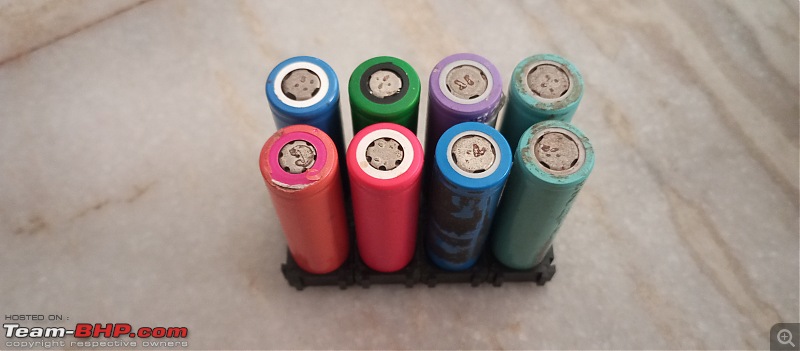
Now it is a mere coincidence that we happened to have quite a few refurbished 18650 model battery cells leftover from our very successful earlier DIY portable power station and DIY lead acid to lithium battery conversion projects. We couldn't use these leftover cells (image below) in those projects simply because we didn't have them in multiples of 3 which is necessary for a 3S (3 cells in series) configuration to make a 12v battery.

DIY : USB Powerbank-img_20231104_124436.jpg

In stark contrast, we only need a single 18650 model cell to make a basic powerbank. Capacity increases can be easily done by adding multiple cells in parallel. We chose a 4(2P) or 4 sets of 2 cells in parallel configuration (image below) to accommodate the powerbank's PCB (printed circuit board) module as compactly as possible. More on that later. The cells were prepared for spot welding by polishing their terminals with some sand paper and then sticking insulating barley/fish paper mats around their positive terminals.

DIY : USB Powerbank-img_20231104_141055.jpg

The spot welding would have to be done in such a way so that all the cells are in parallel. Here is the spot welding in progress as you can see below.

DIY : USB Powerbank-img_20231104_160251.jpg

After the spot welding was completed, some double-sided adhesive tape in multiple layers was stuck to one of the sides of the battery pack and then the PCB module was stuck on the double-sided adhesive tape on the battery pack (image below) while being very careful to match the appropriate polarities of the cells to the suitable sides of the PCB.

DIY : USB Powerbank-img_20231105_102205.jpg

Now there are quite a few different types of powerbank PCB modules available at some very reasonable prices. But my son chose this particular PCB module simply due to its compact form factor and ability to handle fast charging which is very important in/for a car camping scenario. One more factor that influenced his decision was the fact that all the components of the PCB module are on the same side of the PCB's plane. This is very important if you want to stick the PCB module to the battery pack itself allowing the powerbank to be as compact as possible. Additionally, this particular PCB module allows the battery pack to be recharged/discharged by most consumer electronic gadgets with a variety of ports as you can see in the image below.

DIY : USB Powerbank-186505v1a2alithiumbatterydigitaldisplaychargingmodulewithdualusboutputquickchargesupported5.jpg

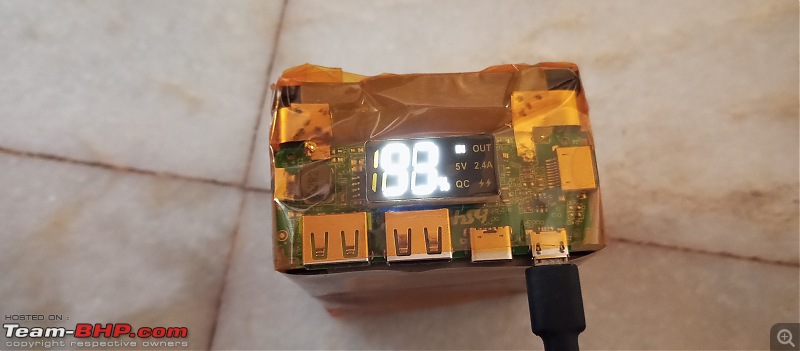
Then the spot welding of the nickel coated steel strips was completed and they were soldered onto the points marked B+ and B- on the PCB with the help of a soldering iron. Here is an image below taken while charging the DIY powerbank for the first time.

DIY : USB Powerbank-img_20231105_110843.jpg

Finally, all exposed nickel strips on the DIY powerbank along with the PCB module itself were covered with Kapton tape for electrical insulation as well as heat insulation to a reasonable extent as you can see below.

DIY : USB Powerbank-img_20231106_093727.jpg

Now this can be covered with a suitable packing material of your choice and voila, it is done.

Frankly speaking, this USB powerbank seemed like a very easy DIY project for my son after the mentally exhausting DIY portable power station project mentioned earlier.

Disclaimer : If you want to replicate this DIY project then please do so solely at your own risk.

I hope you found this interesting and I wish you all happy and safe drives ahead

Last edited by Aditya : 7th November 2023 at 09:52. Reason: As requested
Chhanda Das is offline   (88) Thanks
Old 6th November 2023, 19:27   #2
Team-BHP Support
 
graaja's Avatar
 
Join Date: Nov 2013
Location: Coimbatore
Posts: 3,297
Thanked: 21,183 Times
re: DIY : USB Powerbank

Moving thread from Assembly Line to DIY - Do It Yourself forum. Thank you for sharing.
graaja is online now   (2) Thanks
Old 7th November 2023, 09:26   #3
BHPian
 
Join Date: Jan 2016
Location: Bangalore
Posts: 33
Thanked: 57 Times
Re: DIY : USB Powerbank

Kudos to your son for this project. Our country needs more electrical tinkerers. He should make a YouTube channel with all his projects with a voiceover in regional languages. It will serve as education and will spark curiosity.
nikhilck is offline   (7) Thanks
Reply

Most Viewed


Copyright ©2000 - 2024, Team-BHP.com
Proudly powered by E2E Networks