Team-BHP > Technical Stuff > DIY - Do it yourself
Register New Topics New Posts Top Thanked Team-BHP FAQ


Reply
  Search this Thread
11,407 views
Old 28th September 2023, 16:23   #1
Distinguished - BHPian
 
Reinhard's Avatar
 
Join Date: Nov 2010
Location: Pune
Posts: 4,870
Thanked: 17,795 Times
DIY Install | Adding a Rear Cabin Roof Light in 3 Cars | Ignis, Polo, Nexon

Adding Roof Light To Rear Cabin Area Of Ignis, Polo & Nexon


A few months pass & then there's a DIY itch with the car. Suddenly something starts to feel missing, regardless of whether its really missing or not! Here we go again.
So the title is clear enough I think to set the context. All 3 cars I own are really just small hatchbacks of various lengths. Yet - the makers of all 3 have been very smart in installing the sole cabin-illumination in the front, near the IRVM. Everything in the back should remain a dark secret they said. So far - the Nexon has a detachable LED with USB charging installed on the C pillar within reach of my son from his child-seat (its documented in the Nexon ownership thread). But then - something permanent, without LiIon battery & directly linked to the front lamp / doors - is definitely better. And since anyway its needed in 2 other cars - I decided to install it in the Nexon as well. Cleaner the better. Let there be light!

Warning - if you don't have the cold heart needed to use a cutter and literally chop-away parts of your beloved car - this is where you close the tab & don't read further. Some very cruel blade-work will be needed for this project & you need to have that cold-blood.

As usual, Japanese efficiency and cheap modularity to the rescue. Sourced a WagonR front roof / SCross rear cabin lamp from Boodmo (3Nos) for this purpose. There are good alternatives available - like the cabin light of Tata Punch / Altroz. They are better finished & come with an LED light. But then - they cost 4 times as much .

This is the part that I sourced - Boodmo.com - Suzuki Cabin Roof light
Part Number is - 36210 M 55K00-6GS

As usually is the case - the lamp does have a cheap halogen bulb included - but does not include the connector we need, to attach the wiring. And its a typical non-standard connector thats hard to source online. If you want to source it from Boodmo - the options are roof harnesses of other cars like Swift / Baleno (In my case it was rather costly to procure 3 especially since Boodmo stupidly multiplies shipping charges for every added quantity of the same item in the order). The easiest option is to buy the Swift roof harness. It costs around 205 INR + shipping. Boodmo.com - Swift roof wiring harness.
The use of this harness is just to get the suitable connector and 2 wires of suitable length pre-crimped. Most parts of the harness other than the roof lamp wiring, we'll anyway have to cut away.

I luckily stumbled onto KARDIY once on YouTube and saw that they are stocking the connectors with small 3 wire pig-tail, available for sale via their Whatsapp catalogue. Checked with them & they had it in stock. INR 100+ shipping per unit. Thats really well priced. The gentleman is kind & I liked doing business. Added to contacts for future! We'll use a set of Polycab wires covered in shield to extend the pigtails to the desired power sources.
We'll go one car at a time in the next posts. The steps are pretty much the same -
  1. Make a cut-out in the roof liner while praying that you don't cut it more than needed. You get just 1 shot at getting it right.
  2. Route the wiring harness from it to the front cabin lamp OR desired fuse tap / other power source as per car.
  3. Test that it works, put the lamp into the cut-out firmly, close all opened panels.

For harness preparation, temperature & fireproofing, sound deadening you may also want to have -
  • Good quality copper wires of 3 different colours. These really have to be heat / fire resistant. Remember - they'll run under the roof / inside the pillars. Areas that get extremely hot when car is parked under the Sun. I used 1sq mm Polycab copper wires (that we usually use for household wiring upto 10 Amp).
  • Automotive tape. Amazon.in - Automotive tape
  • Larger LED lights to replace the existing yellow halogen. Amazon.in - LED replacement roof bulb
  • Some sponge / foam pieces - mainly on the inner top side of the lamp, to avoid any fouling/rattling/scratching with the metal roof panel above the fabric roof liner.
  • Double sided tape pieces.
  • Couple of 10 Amp (Check exact rating in your car's user manual's fuse specifications for cabin fuse) blade fuses (of appropriate type - micro/mini/standard) for replacement in case you accidentally blow out the existing fuse while wiring. These are readily available at car/motorcycle spare part shops or on Amazon.in.

So since the project involves cutting away roof liner parts, something that is irreversible (especially painful if you get it wrong), it had to be the Suzuki in the garage that was the guinea pig! Can't imagine messing up something on the Polo/Nexon, would have to be taken to the ER with spasms. We'll be doing a pathfinder installation with the Ignis, learning as we go, & fine tuning the process as we move to the next 2 cars.

Jump To Car -
About the Suzuki Light -

DIY Install | Adding a Rear Cabin Roof Light in 3 Cars | Ignis, Polo, Nexon-all3lights.jpg


DIY Install | Adding a Rear Cabin Roof Light in 3 Cars | Ignis, Polo, Nexon-partnumber.jpg

  1. The part quality really is bad. We won't complain too much about it, because it is also very cheap to purchase one! Can't expect much for this price in today's world.
  2. It comes with a halogen festoon bulb. I have replaced those with LED ones of course, for more and better lighting. Here it is, with a 3M tape that I applied on the back, to stick it safely inside the dome light, to avoid rattles.

    DIY Install | Adding a Rear Cabin Roof Light in 3 Cars | Ignis, Polo, Nexon-festoonbulbled.jpg

  3. It shows the Japanese efficiency + Indian cost-cutting literally everywhere in its build. For example - the rear is totally exposed, with metal contact plates that carry current open to air. If they touch a metal - like roof outer metal sheet (which does touch in the Ignis, but not in Nexon & Polo) - you'll have short contacts and a blown cabin lamp fuse! Marked by blue boxes in this image.

    DIY Install | Adding a Rear Cabin Roof Light in 3 Cars | Ignis, Polo, Nexon-rearviewoflamp.jpg

  4. The only way by which Suzuki has attempted to avoid this short circuit - is a 2 mm tall dimple at 2-3 places on the back of the lamp assembly, which basically creates a small gap with the roof! But then - they are of different heights and if retained, result in the lamp sitting in a rather crooked position! Marked by the red & blue boxes in this image. Note that the one marked by red boxes, is taller, and also has a pointy head. If you retain this - please do not push the lamp too hard into the roof, especially in a Suzuki car. It will create a nice dimple outward on the roof sheet metal, immediately . I had a hard time "undoing" it afterwards.

    DIY Install | Adding a Rear Cabin Roof Light in 3 Cars | Ignis, Polo, Nexon-sideprofile.jpg

  5. Okay, that aside - the functionality is good. Has the usually needed ON & DOOR positions along with OFF. The diffuser is good & spreads light very well all around.
  6. The control switch, is a slider & not a push-button action (like in the one for the Brezza or Altroz/Punch). This I feel is better since its a retrofit in our cars. A push action, would put more strain on our cut-out roof liner edges, which don't have any metal borders for strength.
  7. The results are outstanding & more than worth the effort & money spent. Rear part of the cabin is so conveniently well illuminated, that its really impossible to imagine how we lived without the light earlier! If you have kids / anyone else travelling in your car regularly in the rear seat - this lamp is a very useful addition. Definitely a better investment than them chrome kits!

Last edited by Reinhard : 19th October 2023 at 13:54.
Reinhard is offline   (18) Thanks
Old 28th September 2023, 19:17   #2
Distinguished - BHPian
 
Reinhard's Avatar
 
Join Date: Nov 2010
Location: Pune
Posts: 4,870
Thanked: 17,795 Times
re: DIY Install | Adding a Rear Cabin Roof Light in 3 Cars | Ignis, Polo, Nexon

Suzuki Ignis


So, without further ado, lets get on with the experiment cum learning exercise with the Ignis, hopefully in a step by step manner of documentation.
  1. Open the stock cabin lamp in the front. Use a trim removal spatula to pull it down, from the edge near the mic / control switch. i.e. the edge nearest to us. Its simply held in place by metal bendy plates & will come out easily.

    DIY Install | Adding a Rear Cabin Roof Light in 3 Cars | Ignis, Polo, Nexon-stocklight1.jpg

    DIY Install | Adding a Rear Cabin Roof Light in 3 Cars | Ignis, Polo, Nexon-stocklampremove_1.jpg

  2. Now - one of the connectors is for the onboard mic for phone, and the other is for the roof lamp. I have marked them in the image below. Also marked - are the purposes of the 3 wires in the connector. Disconnect both these, and keep the stock lamp aside for now. Otherwise it keeps hanging by the really thin wires.

    DIY Install | Adding a Rear Cabin Roof Light in 3 Cars | Ignis, Polo, Nexon-stocklampwiring.jpg

  3. Now before doing any actual modifications to the roof-liner / wiring - we will test that the light & wiring harness that we procured, work. Just attach the pigtail to the lamp, and strip open the ends of the pigtail to expose copper strands.
  4. Also marked in the image below - are the purposes of the 3 wires in the new pigtail.

    DIY Install | Adding a Rear Cabin Roof Light in 3 Cars | Ignis, Polo, Nexon-connectorinlamp1.jpg

  5. Just take the lamp to the car and connect the GND to GND, +12V to +12V and Door signal to Door signal - from the new pigtail, to the stock connector.
  6. Now test that the lamp's 3 position switch works as expected in OFF-DOOR-ON positions. Et viola!

    DIY Install | Adding a Rear Cabin Roof Light in 3 Cars | Ignis, Polo, Nexon-testlampwithoutinstallfirst.jpg

  7. Thanks to the negligible space between the liner and the outer roof sheet - I cut-away all 3 plastic protrusions on the backside of the lamp & pasted a cardboard sheet on its back with FeviBond for electric insulation. Apologies, forgot to take a picture of this.
  8. Now that it works as expected - we will proceed to making a cut-out in the roof liner to install the lamp. Its a really simple and yet painful process.
  9. Get in the rear seat of the car. With a tape measure OR with just your visual referencing skills, identify the best central part of the roof to install the lamp. Hold it parallel to the windshield / stock lamp / horizontal metal band inside roof liner if there is one. And now - simply mark the inside border of the lamp's rear, by a pencil on the roof liner. At least I did it this way. You can be more sophisticated and prepare a stencil / template on a blank paper, and use that to mark the edges then on the roof.
  10. Review your marked area as many times as it takes for you to be 100% sure that it is well aligned and not larger than what it should be. A smaller cut-out is fine, as you can still widen it later. If you cut it too large - you are done for. The lamp won't stay secured in it & in the worst case, you are looking at replacing the roof-liner altogether! Look from all the angles, from outside the car, from the boot hatch, from the front seats. Be sure that its well aligned.

    DIY Install | Adding a Rear Cabin Roof Light in 3 Cars | Ignis, Polo, Nexon-roofcutmarking.jpg

  11. Now simply take a pointy-tip paper cutter from your stationary bin & start cutting away along your marking carefully but ruthlessly. The Ignis' (and in general Suzuki's roof liner is pretty mediocre quality. It tries its best to just fall apart! Also note - there is nothing above the liner. Its direct roof sheet metal. So be careful not to damage / deform the metal by applying too much pressure on the cutter / knife.
  12. Once the cut is complete, take the cut-out away, and see how your lamp fits. It took me 3 more attempts to widen the cut-out to perfect size, as I had intentionally marked it smaller by a few mm & had cut on the inner edge of the marking.

    DIY Install | Adding a Rear Cabin Roof Light in 3 Cars | Ignis, Polo, Nexon-roofcutdone.jpg

  13. Now - check how well the lamp fits. Should be good!

    DIY Install | Adding a Rear Cabin Roof Light in 3 Cars | Ignis, Polo, Nexon-checklampfitsincutout.jpg


  14. Now with this - we'll proceed to preparing the harness. Simply estimate / measure the distance between the 2 lamps now. We will prepare a harness of total length which is about 6 inches longer than this distance (for working & error margin).
  15. Solder 3 high quality (I used Polycab 1sqmm copper wires as usual) to the 3 wires from the new pigtail, with proper flux, and good quality solder. Its best to use wires of the same 3 colours as the one you have in the pigtail. I did this on a day when all hardware stores were closed & I used the existing 2 wires at my home. Which meant I have 1 black & 2 red wires in this car. Marked one of the wires with a black tape on the other end, for easy identification afterwards. Cover the solder connections for all 3, using good shrink tubes for safe long term insulation.

    DIY Install | Adding a Rear Cabin Roof Light in 3 Cars | Ignis, Polo, Nexon-solderwires.jpg

  16. Cover the pigtail from connector upto the solder joints with good quality automotive tape (Or the entire length of the new harness, no problem).

    DIY Install | Adding a Rear Cabin Roof Light in 3 Cars | Ignis, Polo, Nexon-withautomotivetape.jpg

  17. Cover the rest of the 3 wire length, with good quality shrink tube cover & shrink it using a heat gun, just keeping an inch or two of the wires exposed on the other end.

    DIY Install | Adding a Rear Cabin Roof Light in 3 Cars | Ignis, Polo, Nexon-withheatshrinkshield.jpg

  18. Now - I used a waste sponge sheet from a t-shirt packing, to cut pieces and wrap them around the harness, for dampening and cushioning. This will keep the harness snugly in place inside the roof liner & will also ensure there are no rattles / vibrations during driving in future. Intentionally kept the central part uncovered, as there is a beam in the Ignis that pushes snugly against the roof liner near the driver's head. In that part - the roof liner and the beam - hold the harness tightly in place, and it doesn't need additional sponge / foam here.

    DIY Install | Adding a Rear Cabin Roof Light in 3 Cars | Ignis, Polo, Nexon-harnessreadywithsponge.jpg


  19. And now we go back to the car. Simply push in the open ends of the new harness into the roof liner from the new cut-out in the rear part of the cabin that we made. Gently keep the roof-liner pulled down to create enough space for the wire to slide in. Keep pushing in, and eventually you'll be able to find it come out around the front roof lamp. Quite an easy step this.

    DIY Install | Adding a Rear Cabin Roof Light in 3 Cars | Ignis, Polo, Nexon-pushharnessinfromnewcutout.jpg


    DIY Install | Adding a Rear Cabin Roof Light in 3 Cars | Ignis, Polo, Nexon-pullharnessoutfromstockcutout.jpg


  20. Now - use a needle / pin-remover tool's pin, to take out 1 connector pin at a time from the stock coupler.

    DIY Install | Adding a Rear Cabin Roof Light in 3 Cars | Ignis, Polo, Nexon-pinremoval.jpg


    DIY Install | Adding a Rear Cabin Roof Light in 3 Cars | Ignis, Polo, Nexon-pinremoval2.jpg

  21. And - connect its appropriate partner from the new harness safely inside the pin using existing gaps/holes. One at a time, complete this connection & push the pin back in place & then pull the next one out. Be very careful in this step. In case you short wrong pins - you'll blow up the cabin-lamp fuse, and the fuse box in the Ignis, is placed in a really inhumane place .

    Here is a photo with 2 pins done & one pending.

    DIY Install | Adding a Rear Cabin Roof Light in 3 Cars | Ignis, Polo, Nexon-connectingpins.jpg

  22. With all 3 pins done, secure the new and stock harnesses together properly with zip ties or automotive tapes for safety and long lasting fitment.
  23. Connect both the front lamp's connectors back into places & test the front as well as rear lamps once for operations in ON and DOOR positions. All working, push both lamps carefully into their places & we are done!
  24. Here are some picture taken at the end of the process, for overall positioning, lighting test & a comparison of BEFORE and AFTER lighting in the rear part of the cabin -


    DIY Install | Adding a Rear Cabin Roof Light in 3 Cars | Ignis, Polo, Nexon-finish1.jpg


    DIY Install | Adding a Rear Cabin Roof Light in 3 Cars | Ignis, Polo, Nexon-finish2.jpg


    DIY Install | Adding a Rear Cabin Roof Light in 3 Cars | Ignis, Polo, Nexon-finish3.jpg


    DIY Install | Adding a Rear Cabin Roof Light in 3 Cars | Ignis, Polo, Nexon-test1.jpg


    BEFORE - (Taken simply by switching off the new lamp)

    DIY Install | Adding a Rear Cabin Roof Light in 3 Cars | Ignis, Polo, Nexon-test3_withoutlight.jpg


    AFTER - (With the new lamp also ON with door position)

    DIY Install | Adding a Rear Cabin Roof Light in 3 Cars | Ignis, Polo, Nexon-test2.jpg

  25. Eventually if you want - you can apply a few drops of FeviQuick / FeviBond / Silicone sealant inside the edges of the cabin lamp, to stick it steady to the roof-liner. I haven't done so yet, and the built-in spring-clips are holding it in place alright.
  26. That's it! The Ignis project is done & we have learned what it takes to do this. On towards the Polo now.

Last edited by Reinhard : 14th October 2023 at 00:31.
Reinhard is offline   (26) Thanks
Old 28th September 2023, 19:19   #3
Distinguished - BHPian
 
Reinhard's Avatar
 
Join Date: Nov 2010
Location: Pune
Posts: 4,870
Thanked: 17,795 Times
Re: DIY - Install Rear Cabin Roof Light in 3 Cars - Ignis, Polo, Nexon

Volkswagen Polo


The process will be pretty much identical in the Polo GT TSI 1.2, at least the one I have from 2014. It's roof lamp connector also has the 3 wires of the same function as the Ignis. Nothing too complicated here. And its an 8 year old car afterall. So lazy as I am - I simply cut the stock connector's wires, added a proper electrical wire connector in between, and reconnected the new wires and old connector back into place. Of course - its always advisable to do a cleaner job, by depinning & re-pinning the stock coupler. I spent 15 minutes trying to take out the existing pins. After that under intense October Sun, it started feeling that I was damaging the wires more by so much abuse. It was better to just cut them clean. You can follow the process mentioned in the post above.

Since we are going to pull the power from the front dome light - the process and concept is pretty much identical to the one we followed with the Ignis. So more pictures than English in this particular post.

  1. Solder the 3 wires of the new pigtail with 3 good quality extensions. This time, I had the brains to buy a 3rd colour and extend the wires with easy identification of the wires on the other end. Cover the solder joints with shrink tubes and shrink them properly.

    DIY Install | Adding a Rear Cabin Roof Light in 3 Cars | Ignis, Polo, Nexon-1.jpg

  2. Tape the 3 wires together at small intervals using Steelgrip/equivalent tape, to keep them in shape and together.

    DIY Install | Adding a Rear Cabin Roof Light in 3 Cars | Ignis, Polo, Nexon-2.jpg

  3. Cover the entire length of the pigtail + extension with high quality shrink shield / automotive tape wrap. I used a combination of both.

    DIY Install | Adding a Rear Cabin Roof Light in 3 Cars | Ignis, Polo, Nexon-3.jpg

    DIY Install | Adding a Rear Cabin Roof Light in 3 Cars | Ignis, Polo, Nexon-4.jpg

    DIY Install | Adding a Rear Cabin Roof Light in 3 Cars | Ignis, Polo, Nexon-7.jpg

  4. Unlike in the Ignis - there is no fiddly beam across the roof in the Polo. So cover the entire length of wire with sponge / foam layer for snug fit & rattle avoidance.

    DIY Install | Adding a Rear Cabin Roof Light in 3 Cars | Ignis, Polo, Nexon-8.jpg

  5. Undo the stock dome lamp in the front of the car. For the GT TSI that I have - its simple. Remove the translucent diffuser cap by prying it out gently. Then there are 2 trox screws holding it together with the roof. Undo them, and the entire roof lamp assembly will come out. Unplug the coupler and keep the lamp aside. I forgot to take a picture of this step. But - this borrowed image from another thread - should be helpful. Its a picture of a more sophisticated 3 bulb lamp from the Jetta. But the mount is 1:1 identical.
    Link to Image - Polo Roof lamp inside screws. (Volkswagen Polo 1.2L GT TSI : Official Review)
  6. I used a simple multimeter on 20V DCs setting to identify the pin purposes in 2 minutes.

    DIY Install | Adding a Rear Cabin Roof Light in 3 Cars | Ignis, Polo, Nexon-9.jpg

  7. Now here are some pictures of the wires & a reference of which pin is for what purpose. We have to integrate our new harness wires with these 3 accordingly. There is a clear mention of pin number 1-2-3 on the coupler. Something so simple, yet avoided by Suzuki as usual.

    DIY Install | Adding a Rear Cabin Roof Light in 3 Cars | Ignis, Polo, Nexon-10.jpg

    DIY Install | Adding a Rear Cabin Roof Light in 3 Cars | Ignis, Polo, Nexon-11.jpg

    DIY Install | Adding a Rear Cabin Roof Light in 3 Cars | Ignis, Polo, Nexon-12.jpg

  8. Here is an image for reference of what each wire from the pigtail will do, and a colour coding reference, so that the upcoming images of connections will make more sense.

    DIY Install | Adding a Rear Cabin Roof Light in 3 Cars | Ignis, Polo, Nexon-2_1.jpg

  9. Now, just insert the 3 wires of the pigtail into this coupler carefully, without creating a short-circuit any strands, and test the new lamp in-place for all 3 functions - OFF-DOOR-ON.

    DIY Install | Adding a Rear Cabin Roof Light in 3 Cars | Ignis, Polo, Nexon-13.jpg

  10. Once confirmed to be working as expected, we'll cut open the roof liner. Like mentioned in the Ignis post - simply use the lamp's back-side outline as a stencil and make pencil marking on the roof. Then cut it smaller than the markings, to leave margin for adjustments. Check how it is, by gently fitting the lamp in place and make necessary adjustments to the cut. You'll see that the roof liner of the Polo is significantly better quality than the Ignis. There is also an extra electrical insulation board between the roof liner and the roof sheet metal. No risk of contacts causing a short-circuit here. German engineering.

    DIY Install | Adding a Rear Cabin Roof Light in 3 Cars | Ignis, Polo, Nexon-15.jpg

    DIY Install | Adding a Rear Cabin Roof Light in 3 Cars | Ignis, Polo, Nexon-16.jpg

    DIY Install | Adding a Rear Cabin Roof Light in 3 Cars | Ignis, Polo, Nexon-17.jpg

  11. Once the lamp fits well - push the new harness from the rear to the front from our newly made cut-out. Gently keep the roof liner pulled down by a cm or two, for the harness to travel easily. It will come out from the front dome light opening, no mistaking it.
  12. Now - Like I mentioned earlier in the post - I simply cut 1 wire at a time from the stock coupler and made a connection with the extra wire using a simple screw type electrical connector. There are many ways of doing it. You can use a bullet-spade type insulated crimp-connector or simply re-pin the stock coupler (best way to do it). If you use a connector like I did - remember to keep at least 2 inches of wire on the stock coupler side, before the cut, so that there is enough length and margin left to spread the wires to the connector screw points. Cut the wire too close to the coupler and you are in trouble.

    DIY Install | Adding a Rear Cabin Roof Light in 3 Cars | Ignis, Polo, Nexon-18.jpg

  13. Once done for all 3 - test the operation of BOTH the lamps for all 3 positions once again, to ensure nothing is malfunctioning.
  14. Cover the newly made connections and any exposed wires with automotive tape, secure the harnesses with zip-ties if needed (especially if your harness is a bit longer than needed).

    DIY Install | Adding a Rear Cabin Roof Light in 3 Cars | Ignis, Polo, Nexon-19.jpg

  15. Reinstall both the lamps securely in place.

    DIY Install | Adding a Rear Cabin Roof Light in 3 Cars | Ignis, Polo, Nexon-20.jpg

    DIY Install | Adding a Rear Cabin Roof Light in 3 Cars | Ignis, Polo, Nexon-21.jpg

  16. I used an LED chip panel festoon light in the rear cabin lamp. Used a small 3M double sided tape to secure it inside the lamp, to avoid rattles.

    DIY Install | Adding a Rear Cabin Roof Light in 3 Cars | Ignis, Polo, Nexon-22.jpg

    DIY Install | Adding a Rear Cabin Roof Light in 3 Cars | Ignis, Polo, Nexon-23.jpg

  17. All done - here are some finished photos & tests. Capping off with a Before and After photo, taken under bright sunlight at around 11AM.

    DIY Install | Adding a Rear Cabin Roof Light in 3 Cars | Ignis, Polo, Nexon-test_1.jpg

    BEFORE - (Taken by switching off the new lamp in rear)

    DIY Install | Adding a Rear Cabin Roof Light in 3 Cars | Ignis, Polo, Nexon-test_before.jpg


    AFTER -

    Just note the difference that it is making even under the Sun. In the dark - its really bright & very useful. On a lighter note - the light spreads out so well, that when the rear doors are opened - this actually works as a fully usable puddle lamp as well! Proper illumination on the ground below .

    DIY Install | Adding a Rear Cabin Roof Light in 3 Cars | Ignis, Polo, Nexon-test_after.jpg


On a side note - I was planning to upgrade the front dome light to the 3 lamp Jetta spec assembly since some time. It costs around 4K INR to purchase right now. Was sitting on the fence for a while. But now with the excellent overall lighting spread in the cabin & the minimal need of specific map lights for the 2 people in the front in my usage pattern - I suspect I won't be going down this upgrade route for now. Less than 300 INR did the job and some for me!

Last edited by Reinhard : 14th October 2023 at 17:47.
Reinhard is offline   (19) Thanks
Old 28th September 2023, 19:20   #4
Distinguished - BHPian
 
Reinhard's Avatar
 
Join Date: Nov 2010
Location: Pune
Posts: 4,870
Thanked: 17,795 Times
Re: DIY - Install Rear Cabin Roof Light in 3 Cars - Ignis, Polo, Nexon

Tata Nexon


The show-stopper. The coup de grace. My precious . Saved for the last. In case of the Nexon - I don't intend to fiddle with the stock dome lamp or its wiring coupler. The car is still in warranty for another year and a half. Also - showing its more modern engineering compared to the cheap Suzuki and decade old Polo PQ, there are easier ways of doing mods in the Nexon. There is a proper electrical coupler in the driver side A pillar of the car, where the signal wires for 12V roof lamp input as well as door-open signal & Ground are easily accessible. What more would you ask for. So my intention is to route the wire from the new roof lamp to the driver side, into the A pillar & make the connections there. It will need about 3 to 4 feet (x3) extra wire compared to the previous 2 cars, but will be much easier to actually make safe connections, without taking out the stock lamp housing etc, keeping its integrity intact in the roof liner.

The Nexon's roof liner - is the best of all the 3. Thick, well knitted, well insulated & well installed. In fact - there is a thick layer of glass-wool (or similar material) across a lot of the roof's area inside the roof-liner as well. The liner is well stuck on the roof as well. The little things that make overall experience better. Its my most favourite of the 3, so cutting the liner of this one, was always going to be quite painful. Nauseating even. But its like a Band-aid as often. Do it quickly and its bearable.

So here we go. Most of the steps you are well aware of by now. So it will be a repeat to some extent.
  1. As in the earlier post - extend the 3 wires of the pigtail by carefully soldering & insulating with good quality copper wires. I have used 1sqmm Polycab. Since I will be routing the wires to the A pillar and not front cabin light, much longer wiring will be needed than the other 3 cars. Approximately 7 ft (x3) wiring will be needed. I took 8ft, to keep margin for error / cuts / rewiring etc. Now I have the remaining wire cut away for making pigtails for something else!

    DIY Install | Adding a Rear Cabin Roof Light in 3 Cars | Ignis, Polo, Nexon-1.jpg

    DIY Install | Adding a Rear Cabin Roof Light in 3 Cars | Ignis, Polo, Nexon-2.jpg

    DIY Install | Adding a Rear Cabin Roof Light in 3 Cars | Ignis, Polo, Nexon-3.jpg
  2. Use automotive tape, heat-shrink tube to completely cover this wiring, joints etc. Will give good protection from wear & tear, short circuits, rats & fire.

    DIY Install | Adding a Rear Cabin Roof Light in 3 Cars | Ignis, Polo, Nexon-4.jpg

  3. I used waste sponge sheets (from shirt-packings!) to make a damping layer around the wiring, just like in the earlier 2 cars. At least for the part of the harness that was to run horizontally under the roof from the light to the door side. In case of the Nexon, it turns out this was pretty much redundant as the roof liner has excellent insulation!

    DIY Install | Adding a Rear Cabin Roof Light in 3 Cars | Ignis, Polo, Nexon-5.jpg

  4. Now in this case of the Nexon (zoom in please) - the wiring is a bit spooked and I didn't realize it earlier. I simply colour coded the extensions as -
    Black - Black
    White - Red
    Green - Green

    But turns out - due to this - now I have extended it as -
    Red = Ground (which ideally is the colour for +12V)
    Black = 12+V (which ideally is the colour for GND)
    Green = Door open signal (which is ok)

    DIY Install | Adding a Rear Cabin Roof Light in 3 Cars | Ignis, Polo, Nexon-6.jpg


    DIY Install | Adding a Rear Cabin Roof Light in 3 Cars | Ignis, Polo, Nexon-7.jpg


    DIY Install | Adding a Rear Cabin Roof Light in 3 Cars | Ignis, Polo, Nexon-8.jpg

  5. With the harness done - we'll now move to the installation in the car. I have had seriously busy weeks at work off late and so - I worked on the car well after 10PM! so please excuse the photos taken in darkness. Here's getting ready for some modifications, with artificial lighting! The one on the left - is my existing C Pillar mounted light with switch. This served me well, but now will find some other use for it.

    DIY Install | Adding a Rear Cabin Roof Light in 3 Cars | Ignis, Polo, Nexon-9.jpg

  6. So - as always - we'll first do a functional test before making any irreversible changes to the car (like cutting away the roof liner etc). So take out the door sill/weather strip/door beading - whatever you call it) on the driver side by carefully pulling it out.

    DIY Install | Adding a Rear Cabin Roof Light in 3 Cars | Ignis, Polo, Nexon-10.jpg

  7. Take out the A pillar plastic trim by gently pulling it out, It has 3 circular bullet clips inside. This will expose the roof harness coupler (thanks Tata for using a proper coupler here) that we'll use for our power source.

    DIY Install | Adding a Rear Cabin Roof Light in 3 Cars | Ignis, Polo, Nexon-11.jpg


    DIY Install | Adding a Rear Cabin Roof Light in 3 Cars | Ignis, Polo, Nexon-12.jpg


    DIY Install | Adding a Rear Cabin Roof Light in 3 Cars | Ignis, Polo, Nexon-13.jpg

  8. The picture below - identifies the wires that we need to use from this coupler. The 12V source & a signal for door open. You can use a de-pinning tool and re-pin on the male / female coupler, whichever is convenient to access. (Or you can go the crude way of stripping a longer length of your new wire and shoving it inside the female coupler pins from the front. Most accessory store folk will do this. I find it rather risky and prone to shorts.

    I did the pin identification simply by using a digital multimeter (DMM).
    Note that if your car has sunroof etc - there will be more wires and more used pins in this coupler. I'd suggest you verify the pins using a DMM before following my steps in that case.

    DIY Install | Adding a Rear Cabin Roof Light in 3 Cars | Ignis, Polo, Nexon-14_wirepinid.jpg

  9. Now - insert your extension wires into the identified pins & connect the ground wire to one of the grounding bolts available in the A pillar. Test all 3 positions of the new lamp switch OFF-DOOR-ON in this position. If things work as expected - we proceed to the next steps. If not - back to the drawing board and no damage done.

    DIY Install | Adding a Rear Cabin Roof Light in 3 Cars | Ignis, Polo, Nexon-15.jpg

  10. Now is what will be the hardest step for many of us. Was for me. Cutting away a good quality piece of your own car ruthlessly! Mark the rear outline of the lamp with a pencil, with at least half a centimeter smaller shape. Keep margin to work with. There is no undo button here. I did a total of 3 attempts to get the final perfect fit cut.


    DIY Install | Adding a Rear Cabin Roof Light in 3 Cars | Ignis, Polo, Nexon-16_roofcut.jpg

  11. Now - take out the door beading on the RH rear door from top right & then push the new wire harness into the roof panel near the horizontal steel member in the roof. I tried pushing it from the newly cut shape towards the door - but the damping materials in the roof really grab on it. Its easier to push it from outside inwards, as the gap near the cross member can be accessed easier. You can access the connector easily from the newly made cut, as long as its near enough to the cross member. Alternatively - you can make a routing tool using a flexible metal rod / cloth hanger and use it to guide the wire.

    DIY Install | Adding a Rear Cabin Roof Light in 3 Cars | Ignis, Polo, Nexon-17.jpg


    DIY Install | Adding a Rear Cabin Roof Light in 3 Cars | Ignis, Polo, Nexon-18.jpg

  12. Now - route the other end of the harness (without any connector attached) - inside the roof liner, along the B pillar, into the roof liner towards the A pillar. Of course, we have already removed the door beading on the front in our previous test step.


    DIY Install | Adding a Rear Cabin Roof Light in 3 Cars | Ignis, Polo, Nexon-19.jpg


    DIY Install | Adding a Rear Cabin Roof Light in 3 Cars | Ignis, Polo, Nexon-20.jpg

  13. Pull it out from the top of the roof liner near the windshield. Here i also have another existing wire of the Auto-dim IRVM. I secured both of them together with new zip ties as part of this project to keep things clean.

    DIY Install | Adding a Rear Cabin Roof Light in 3 Cars | Ignis, Polo, Nexon-21.jpg

  14. Remember - just hang the new light with the connector now. That way - the connector and harness won't accidentally get pulled into the gap and get lost! Also - do NOT fully install the lamp just yet. That will be our last step.

    DIY Install | Adding a Rear Cabin Roof Light in 3 Cars | Ignis, Polo, Nexon-23.jpg


  15. Now - cut and strip the wires to the necessary lengths and connect in the factory coupler as per the pins that we identified earlier. I have done it by de-pinning and re-pinning the male coupler.

    DIY Install | Adding a Rear Cabin Roof Light in 3 Cars | Ignis, Polo, Nexon-24.jpg


  16. Secure the ground wire (ideally with a lug/thimble) into one of the grounding bolts on the pillar. Remember - in this case sadly, its the RED wire, not BLACK.

    DIY Install | Adding a Rear Cabin Roof Light in 3 Cars | Ignis, Polo, Nexon-26.jpg

  17. Test the operations once again for all 3 positions of the switch. Once all confirmed to work OK - safely route & secure all wiring with zip ties, automotive tape & damping tape anywhere as needed.

    DIY Install | Adding a Rear Cabin Roof Light in 3 Cars | Ignis, Polo, Nexon-25.jpg


  18. Put the A pillar back in place, carefully put the front and rear door beadings back into place. Visually check that everything went in exactly as it was earlier. Do one final test of the lamp now. And - finally carefully affix it in the cut we made in the roof panel. Its best that we install it only once, and do not take it out too many times. Afterall its held in place by simple bendy-plates and a soft roof liner material. With constant abuse, the roof liner will eventually deform and stop holding the lamp in place securely.
  19. Here is a BEFORE shot -

    DIY Install | Adding a Rear Cabin Roof Light in 3 Cars | Ignis, Polo, Nexon-28_test_before.jpg


  20. And here are some AFTER shots - Just the 1st photo is enough to justify the project. I cannot imagine how I lived without this illumination for 4 long years!

    DIY Install | Adding a Rear Cabin Roof Light in 3 Cars | Ignis, Polo, Nexon-29_test_after1.jpg


    DIY Install | Adding a Rear Cabin Roof Light in 3 Cars | Ignis, Polo, Nexon-30_fromboot.jpg


    DIY Install | Adding a Rear Cabin Roof Light in 3 Cars | Ignis, Polo, Nexon-32_fromfront.jpg


    DIY Install | Adding a Rear Cabin Roof Light in 3 Cars | Ignis, Polo, Nexon-33_daylight.jpg
  21. In the Nexon, unlike the other 2 cars, I tried a different Festoon LED - Link to product - Amazon.in LED Festoon light 31mm. It fits exactly where the halogen would, and so - gives a symmetric and better diffused light compared to the other large rectangular PCB chip types. I like this one more & eventually will replace the ones in the other 2 cars too with this "bulb".
  22. If your Nexon is one of those "S" or "O" variants with a sunroof - you can still do this - simply make the cut-out further aft of the roof section that bulges for the sunroof mechanism. So somewhere near the seat-back. Rest of the process remains same.
  23. More or less the same process can be followed for the Altroz/Punch also.
  24. Don't worry too much about the positioning, measurements on the roof. I didn't use any measure, referencing tool etc. Just sat on the rear seat, placed the lamp on roof in a general central position, aligned its lines with some references visually, and looked at in from a couple of sides. Then marked it. Nothing too scientific. Its easy.


Well - that's all folks! That's 3 cars with a much better cabin illumination at a really negligible cost. As always - happy to learn from you & do share any insights or suggestions improvements that you might have identified. Happy to help in case anyone wants to try this. Its one of the easiest electrical updates to do in mass market cars.

Cheers!

Last edited by Reinhard : 19th October 2023 at 18:47.
Reinhard is offline   (28) Thanks
Old 19th October 2023, 21:55   #5
Team-BHP Support
 
Join Date: Feb 2004
Location: Mumbai
Posts: 18,422
Thanked: 79,279 Times
re: DIY Install | Adding a Rear Cabin Roof Light in 3 Cars | Ignis, Polo, Nexon

Thread moved out from the Assembly Line. Thanks for sharing!
Aditya is offline   (3) Thanks
Old 20th October 2023, 10:33   #6
BHPian
 
maheshm619's Avatar
 
Join Date: Aug 2020
Location: KL-47 / UP-79
Posts: 197
Thanked: 879 Times
Re: DIY - Install Rear Cabin Roof Light in 3 Cars - Ignis, Polo, Nexon

Quote:
Originally Posted by Reinhard View Post

As always - happy to learn from you & do share any insights or suggestions improvements that you might have identified.
Its a very useful update and shameful from the manufacturers to skip such useful amenities for savings a few hundreds.I had done this in my Ford Freestyle about 3-4 years back and it has lifted the rear cabin ambience many folds.

Name:  Screenshot 20231020 102944.png
Views: 1050
Size:  261.1 KB

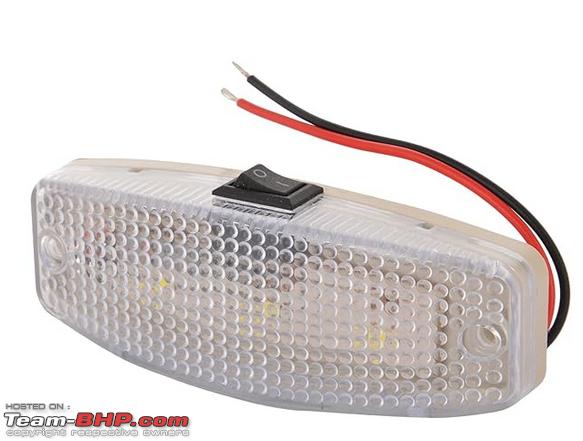
I had used a generic LED roof light which costed about 80 - 90 rs. It can be directly screwed on to the roof liner.Its light-weight and doesn't put any pressure on the liner material.BTW, yours' look better integrated.I made a hole with dia of a pencil and used a cloth hanger to route wires. Still going strong.
maheshm619 is offline   (6) Thanks
Old 20th October 2023, 10:51   #7
BHPian
 
Join Date: Mar 2016
Location: Pune
Posts: 255
Thanked: 596 Times
re: DIY Install | Adding a Rear Cabin Roof Light in 3 Cars | Ignis, Polo, Nexon

That looks like some serious amount of time spent doing this DIY, Kudos to you!!
I'm quite averse to fiddling around with the electronics on my bikes and cars but with such a well documented post I am inclined towards giving it a try.

How long did this take? I'm guessing the time would have been similar on the Polo and Ignis and a bit on the higher side for the nexon.

Thank you for sharing.
jomson13 is offline   (1) Thanks
Old 21st October 2023, 00:44   #8
Senior - BHPian
 
Join Date: Jun 2015
Location: KA01
Posts: 1,304
Thanked: 2,904 Times
Re: DIY Install | Adding a Rear Cabin Roof Light in 3 Cars | Ignis, Polo, Nexon

Phenomenal effort (quite so even for one car!), beautifully articulated and fabulous results. Better interior lighting just lifts the ambience of the car and your cars have gone up a segment or two in this department. Cruel to be kind indeed with the headliners!
GeeTee TSI is offline   (1) Thanks
Old 24th October 2023, 00:29   #9
Distinguished - BHPian
 
Reinhard's Avatar
 
Join Date: Nov 2010
Location: Pune
Posts: 4,870
Thanked: 17,795 Times
Re: DIY Install | Adding a Rear Cabin Roof Light in 3 Cars | Ignis, Polo, Nexon

Quote:
Originally Posted by maheshm619 View Post
Its a very useful update and shameful from the manufacturers to skip such useful amenities for savings a few hundreds.I had done this in my Ford Freestyle about 3-4 years back and it has lifted the rear cabin ambience many folds.Still going strong.
Perfect. It really makes a world of difference and I need to see some Sage in the mountains to know why the car makers don't give this in their cars.
Quote:
Originally Posted by jomson13 View Post
That looks like some serious amount of time spent doing this DIY, Kudos to you!!
I'm quite averse to fiddling around with the electronics on my bikes and cars but with such a well documented post I am inclined towards giving it a try.
How long did this take? I'm guessing the time would have been similar on the Polo and Ignis and a bit on the higher side for the nexon.
Glad you liked the thread. Its not hard - you can go ahead with it. Quite straight forward. And I feel it will be done better as a DIY than the accessory folks who tend to be rather ruthless with cars.
It doesn't take too long. About 3 hours max, including the harness preparation & installation, even at a leisurely pace. I did it in the Nexon in less than 2 hours, including everything. Slowest was the Ignis sadly - as I accidentally ended up blowing a fuse , and the roof liner is of really poor quality and so the cutting had to be extra careful as well as was very fiddly due to the material being too delicate.
Quote:
Originally Posted by GeeTee TSI View Post
Phenomenal effort (quite so even for one car!), beautifully articulated and fabulous results. Better interior lighting just lifts the ambience of the car and your cars have gone up a segment or two in this department. Cruel to be kind indeed with the headliners!
Thanks for the kind words. Glad you liked it. Indeed - the ambience got uplifted well beyond my expectations to be honest. Everyone at home has loved it too. In their opinion - this is the best DIY on utility value I did, which is such a heartbreaking feedback actually .
Reinhard is offline   (1) Thanks
Old 24th October 2023, 01:18   #10
Newbie
 
Join Date: Apr 2023
Location: Coimbatore, TN
Posts: 6
Thanked: 44 Times
Re: DIY - Install Rear Cabin Roof Light in 3 Cars - Ignis, Polo, Nexon

This is very useful. I'm going to try installing it in my alto 800
chandrus03 is offline   (1) Thanks
Old 20th November 2023, 17:22   #11
Newbie
 
Join Date: Nov 2023
Location: Noida
Posts: 2
Thanked: 0 Times
Re: DIY - Install Rear Cabin Roof Light in 3 Cars - Ignis, Polo, Nexon

Quote:
Originally Posted by Reinhard View Post

Volkswagen Polo


The process will be pretty much identical in the Polo GT TSI 1.2, at least the one I have from 2014. It's roof lamp connector also has the 3 wires of the same function as the Ignis. Nothing too complicated here. And its an 8 year old car afterall. So lazy as I am - I simply cut the stock connector's wires, added a proper electrical wire connector in between, and reconnected the new wires and old connector back into place. Of course - its always advisable to do a cleaner job, by depinning & re-pinning the stock coupler. I spent 15 minutes trying to take out the existing pins. After that under intense October Sun, it started feeling that I was damaging the wires more by so much abuse. It was better to just cut them clean. You can follow the process mentioned in the post above.

Since we are going to pull the power from the front dome light - the process and concept is pretty much identical to the one we followed with the Ignis. So more pictures than English in this particular post.

  1. Solder the 3 wires of the new pigtail with 3 good quality extensions. This time, I had the brains to buy a 3rd colour and extend the wires with easy identification of the wires on the other end. Cover the solder joints with shrink tubes and shrink them properly.

    Attachment 2517207

  2. Tape the 3 wires together at small intervals using Steelgrip/equivalent tape, to keep them in shape and together.

    Attachment 2517208

  3. Cover the entire length of the pigtail + extension with high quality shrink shield / automotive tape wrap. I used a combination of both.

    Attachment 2517209

    Attachment 2517210

    Attachment 2517213

  4. Unlike in the Ignis - there is no fiddly beam across the roof in the Polo. So cover the entire length of wire with sponge / foam layer for snug fit & rattle avoidance.

    Attachment 2517214

  5. Undo the stock dome lamp in the front of the car. For the GT TSI that I have - its simple. Remove the translucent diffuser cap by prying it out gently. Then there are 2 trox screws holding it together with the roof. Undo them, and the entire roof lamp assembly will come out. Unplug the coupler and keep the lamp aside. I forgot to take a picture of this step. But - this borrowed image from another thread - should be helpful. Its a picture of a more sophisticated 3 bulb lamp from the Jetta. But the mount is 1:1 identical.
    Link to Image - Polo Roof lamp inside screws. (Volkswagen Polo 1.2L GT TSI : Official Review)
  6. I used a simple multimeter on 20V DCs setting to identify the pin purposes in 2 minutes.

    Attachment 2517215

  7. Now here are some pictures of the wires & a reference of which pin is for what purpose. We have to integrate our new harness wires with these 3 accordingly. There is a clear mention of pin number 1-2-3 on the coupler. Something so simple, yet avoided by Suzuki as usual.

    Attachment 2517216

    Attachment 2517235

    Attachment 2517218

  8. Here is an image for reference of what each wire from the pigtail will do, and a colour coding reference, so that the upcoming images of connections will make more sense.

    Attachment 2517236

  9. Now, just insert the 3 wires of the pigtail into this coupler carefully, without creating a short-circuit any strands, and test the new lamp in-place for all 3 functions - OFF-DOOR-ON.

    Attachment 2517219

  10. Once confirmed to be working as expected, we'll cut open the roof liner. Like mentioned in the Ignis post - simply use the lamp's back-side outline as a stencil and make pencil marking on the roof. Then cut it smaller than the markings, to leave margin for adjustments. Check how it is, by gently fitting the lamp in place and make necessary adjustments to the cut. You'll see that the roof liner of the Polo is significantly better quality than the Ignis. There is also an extra electrical insulation board between the roof liner and the roof sheet metal. No risk of contacts causing a short-circuit here. German engineering.

    Attachment 2517220

    Attachment 2517221

    Attachment 2517222

  11. Once the lamp fits well - push the new harness from the rear to the front from our newly made cut-out. Gently keep the roof liner pulled down by a cm or two, for the harness to travel easily. It will come out from the front dome light opening, no mistaking it.
  12. Now - Like I mentioned earlier in the post - I simply cut 1 wire at a time from the stock coupler and made a connection with the extra wire using a simple screw type electrical connector. There are many ways of doing it. You can use a bullet-spade type insulated crimp-connector or simply re-pin the stock coupler (best way to do it). If you use a connector like I did - remember to keep at least 2 inches of wire on the stock coupler side, before the cut, so that there is enough length and margin left to spread the wires to the connector screw points. Cut the wire too close to the coupler and you are in trouble.

    Attachment 2517223

  13. Once done for all 3 - test the operation of BOTH the lamps for all 3 positions once again, to ensure nothing is malfunctioning.
  14. Cover the newly made connections and any exposed wires with automotive tape, secure the harnesses with zip-ties if needed (especially if your harness is a bit longer than needed).

    Attachment 2517224

  15. Reinstall both the lamps securely in place.

    Attachment 2517225

    Attachment 2517226

  16. I used an LED chip panel festoon light in the rear cabin lamp. Used a small 3M double sided tape to secure it inside the lamp, to avoid rattles.

    Attachment 2517227

    Attachment 2517228

  17. All done - here are some finished photos & tests. Capping off with a Before and After photo, taken under bright sunlight at around 11AM.

    Attachment 2517229

    BEFORE - (Taken by switching off the new lamp in rear)

    Attachment 2517231


    AFTER -

    Just note the difference that it is making even under the Sun. In the dark - its really bright & very useful. On a lighter note - the light spreads out so well, that when the rear doors are opened - this actually works as a fully usable puddle lamp as well! Proper illumination on the ground below .

    Attachment 2517230


On a side note - I was planning to upgrade the front dome light to the 3 lamp Jetta spec assembly since some time. It costs around 4K INR to purchase right now. Was sitting on the fence for a while. But now with the excellent overall lighting spread in the cabin & the minimal need of specific map lights for the 2 people in the front in my usage pattern - I suspect I won't be going down this upgrade route for now. Less than 300 INR did the job and some for me!
Thanks for posting this DIY Reinhard. I got all the tools and materials required last weekend. As the luck is not on my side lately, while attempting to do this mod on my 2013 Polo I have cut my roof liner just below a beam. There is just no room to put the light assembly. There was no way to find if there was a beam just above where I was cutting. Before and after the beam there is the insulation layer mentioned in your post.

I am very distraught right now, I do not know if I have many options. I have tried putting foam sponge as spacers before and after the beam. That kind of works but has created a bulge outwards on the roof liner and doesn't look very appealing.

What other options do I have?
hesoyam_007 is offline  
Old 21st November 2023, 13:01   #12
BHPian
 
Join Date: Jul 2021
Location: Gurgaon
Posts: 51
Thanked: 330 Times
Re: DIY Install | Adding a Rear Cabin Roof Light in 3 Cars | Ignis, Polo, Nexon

Quote:
Originally Posted by Reinhard View Post
I luckily stumbled onto KARDIY once on YouTube and saw that they are stocking the connectors with small 3 wire pig-tail, available for sale via their Whatsapp catalogue. Checked with them & they had it in stock. INR 100+ shipping per unit. Thats really well priced. The gentleman is kind & I liked doing business. Added to contacts for future!
Thanks for the mention Reinhard. Glad to be of help.
Always ready to help DIY community
KarDIY is offline   (1) Thanks
Old 23rd November 2023, 09:49   #13
Distinguished - BHPian
 
Reinhard's Avatar
 
Join Date: Nov 2010
Location: Pune
Posts: 4,870
Thanked: 17,795 Times
Re: DIY - Install Rear Cabin Roof Light in 3 Cars - Ignis, Polo, Nexon

Quote:
Originally Posted by hesoyam_007 View Post
What other options do I have?
Hey hesoyam_007. These are what come to my mind -
  1. if you have an intact single piece of the liner that you cut away, you can put it back into the opening, make a new one and install the lamp there. Then get some sort of a leatherette or similar covering done on the roof liner partially / fully to visually remove the imperfection of the original cut-out. Most folks that do leatherette upholstery work also do the roof liner wrapping.
  2. As a last resort - you can get the roof liner replaced at ASC / good FNG. It is not a big task, some of us on TBHP in fact have removed and reinstalled it the DIY way also. Currently its not available on Boodmo so I can't tell you the price easily, but it shouldn't be over 3 digit.
Reinhard is offline  
Reply

Most Viewed


Copyright ©2000 - 2024, Team-BHP.com
Proudly powered by E2E Networks