Team-BHP > Technical Stuff > DIY - Do it yourself
Register New Topics New Posts Top Thanked Team-BHP FAQ


Reply
  Search this Thread
74,318 views
Old 1st September 2020, 10:03   #1
Distinguished - BHPian
 
Reinhard's Avatar
 
Join Date: Nov 2010
Location: Pune
Posts: 4,873
Thanked: 17,843 Times
DIY: Hard-wire your Dash Cam without expensive hard-wire kit

If you have a car but don't have a dash-cam yet - I strenuously recommend you get one. Its a must have in today's world & benefits heavily outweigh what is already a reasonable price for most units. I have dash-cam installed in both my cars. A 70mai LITE + GPS in the Nexon & a 70mai PRO + GPS in the Alto K10. Both are fantastic devices & personally I find the LITE more than enough for usage in India. The benefits that the PRO version has are not much of use in our conditions and not worth the premium price. I have the PRO version courtesy of a friend who gave his little used unit to me at the same price of a LITE. So far I have been using these with the typical 12V to USB dongle put into the 12V socket in dashboard. It has its own obvious drawbacks -
  1. The wire has to be run to the console/dashboard and the exposed "last mile" part of it looks rather ugly in that area.
  2. The 12V socket remains occupied always taking away the possibility of anything else being used. Especially tricky in cars (like my Nexon) that have a single USB port & 2nd phone in car needs the 12V socket for charging.

The obvious & very popular way to solve this is to hard-wire the dash-cam & that's what we'll be doing too.

What is hard-wiring a Dash-cam?


Hard-wiring is connecting your dash-cam's wiring in a concealed clean fashion to the cabin's fuse box with the appropriate fuse. This way - there are no ugly dangling wires & with the correct fuse connection - there is no battery drain either. (This is important in some cars where the 12V socket is always ON & drains battery even with car locked away if a device is connected to it.) The trick is simply to select a fuse that gets power only when car is in ignition mode & to tap into it.

Almost all dash-cams work with USB spec power. i.e. 5V DC input. The car's standard power supply circuit everywhere is 12V DC. So you can't simply hook up the dash-cam's power into a 12V fuse-tap. What you need is a DC step-down regulator between the car's wiring & the camera's power input. This is basically the circuit that is inside that 12V to USB dongle that comes with the camera.

Hard-wiring without a hard-wiring kit!


(In summary - we'll make our own hard-wiring kit by sourcing the key component of a hard-wiring kit, at a fraction of the price!)

Generally the approach taken is to simply procure the readily available "hard-wiring kit". Unless you procure one from AliExpress or similar avenues at dirt cheap pricing, these cost around INR 800 to 2000 depending on source + installation cost. Not much for most car owners. And then - for a DIY enthusiast what's the fun in simply buying an off-the-shelf item & installing it in 5 minutes? If there is a cheaper+harder way to achieve the same result, we often we pick this way .

All we want to achieve is to get a 5V DC supply from a 12V fuse in the car. So we simply need to find a step down converter. Thanks to online shopping & electronic components shrinking in size on a daily basis, such mass produced items are readily available & rather cheap.

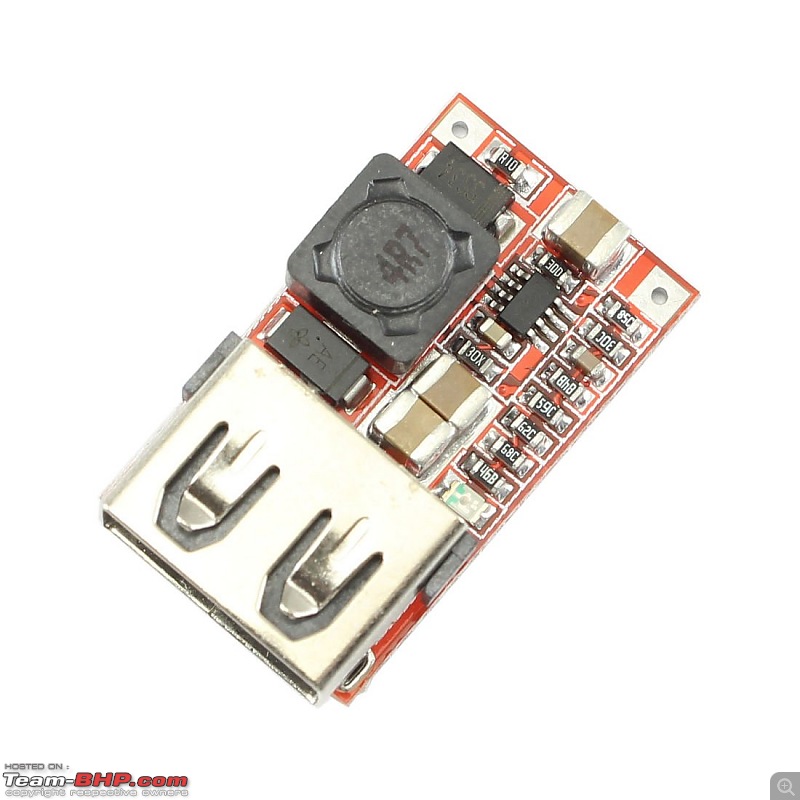
Here's the key item in our project. A simple PCB assembled circuit that can convert a 6V-24V DC input into a steady 5V DC output upto 3 Amp load. Best part is - the output is via a pre-soldered USB socket!

Link : Amazon.in 6-24V DC to 5V DC USB converter

DIY: Hard-wire your Dash Cam without expensive hard-wire kit-usbvoltageconverter.jpg


The seller has even provided the circuit overview & pin details on the product listing. Excellent!

DIY: Hard-wire your Dash Cam without expensive hard-wire kit-pinoutdetails.jpg


Here is a picture for size reference with a Jiofi hotspot.

DIY: Hard-wire your Dash Cam without expensive hard-wire kit-modulesizereference.jpg


I'll be doing this implementation in both the cars. To begin with - I'm using the Alto K10 as the test bed / Guinea pig. Hence the pictures will be from this car. The process is simple & will be identical for most cars. Only the fuse to tap into will change. Let's start with the project now in steps.
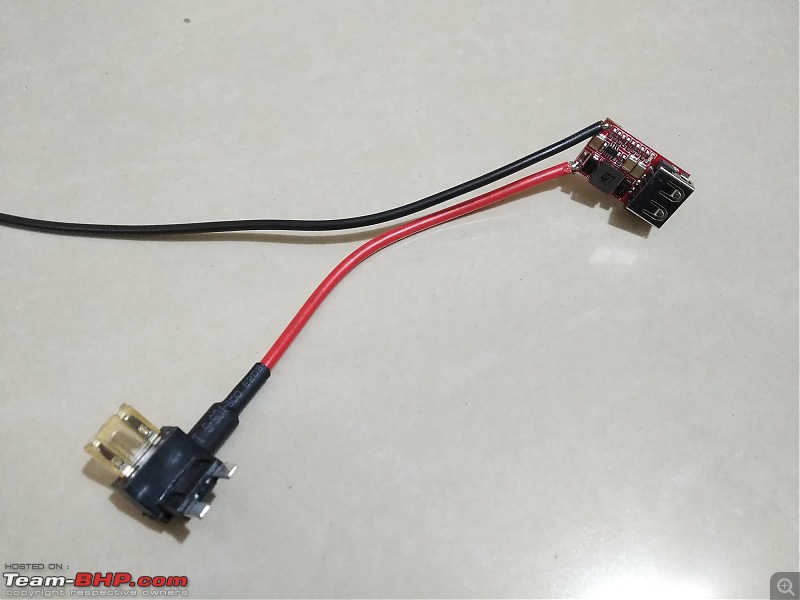
  1. Prepare the USB module by soldering a standalone wire to the -ve terminal & the wire of the fuse tap to the +ve terminal. I simply removed the existing crimp connector of the fuse tap & soldered the wire. If you want modularity, solder a stand-alone wire to the +ve terminal also & then crimp it into the fuse tap.

    DIY: Hard-wire your Dash Cam without expensive hard-wire kit-solderingdone.jpg


  2. I also did a basic insulation of the circuit using simple waste plastic cover (secured by melting & fusing 1 side of it & reinforcing with a zip tag. This will ensure the circuit does not touch any other parts. It is left open from one side for sufficient ventilation & heat dissipation. Now we move to the car & installation.

    DIY: Hard-wire your Dash Cam without expensive hard-wire kit-moduleinsulation.jpg


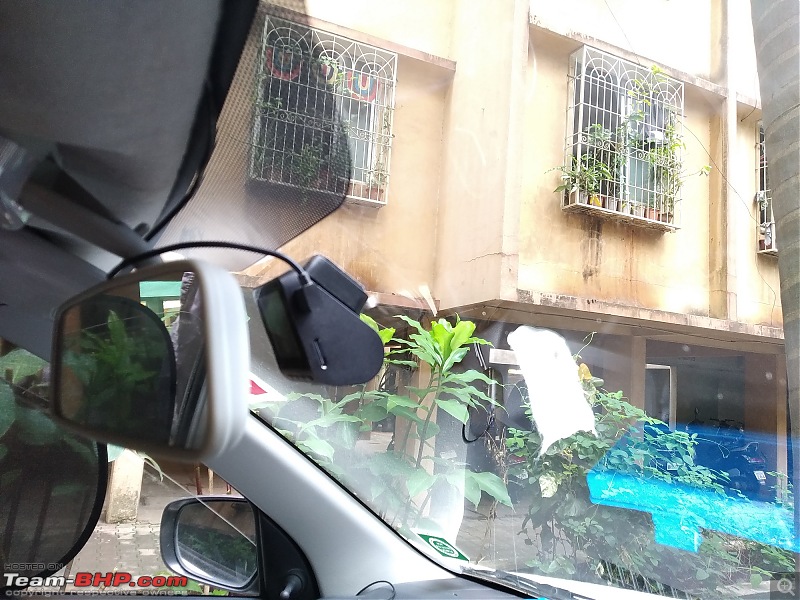
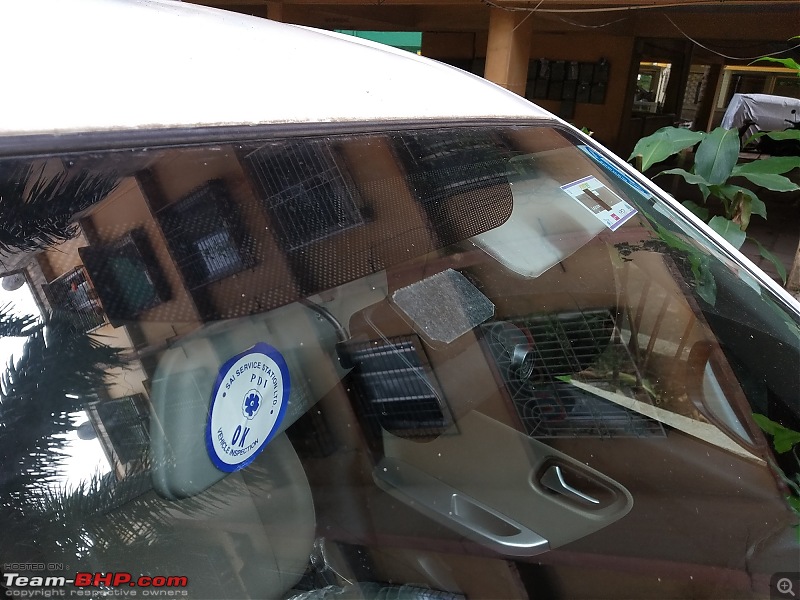
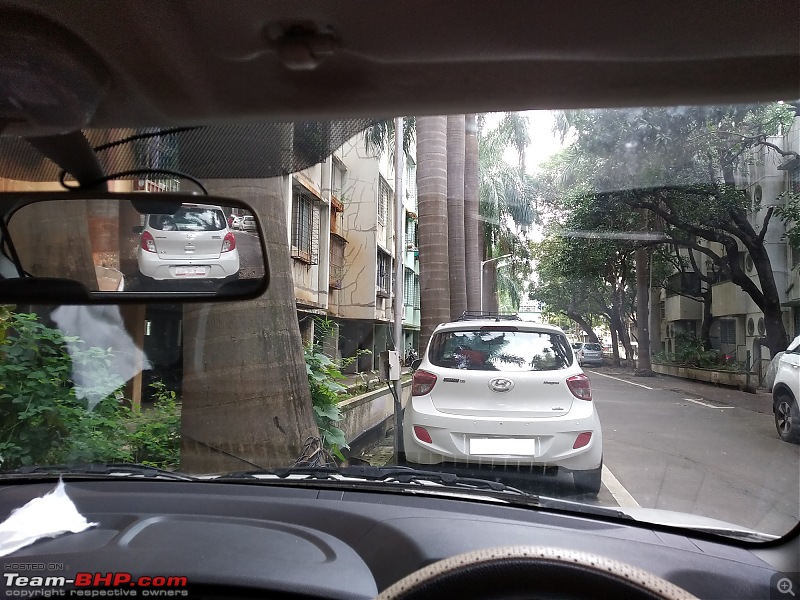
  3. Mount your dashcam at a position on the windshield with minimum obstruction to view of the road. With a 70mai camera, the mounting is simple with double sided tape & behind the IRVM. Completely invisible from driver's view.

    DIY: Hard-wire your Dash Cam without expensive hard-wire kit-camerabehindirvm.jpg

    DIY: Hard-wire your Dash Cam without expensive hard-wire kit-camerabehindirvm_2.jpg

    DIY: Hard-wire your Dash Cam without expensive hard-wire kit-dashcamfromoutside.jpg

    DIY: Hard-wire your Dash Cam without expensive hard-wire kit-invisibledashcam.jpg


  4. Tuck the USB cable into the roof liner simply with fingers. Its easy. Run it towards the RHS A pillar (assuming your cabin fuse box is on this side).
  5. Gently remove the plastic trim on the A pillar. Its a press fit in most cars. In some cars - you may have to first remove the rubber beading of the door edge.
  6. Pass the USB wire's other end with connector through the gap between the dashboard & A Pillar. Generally there will be some existing harness wire. The USB connector will eventually fall down onto the floor in the driver foot-well.
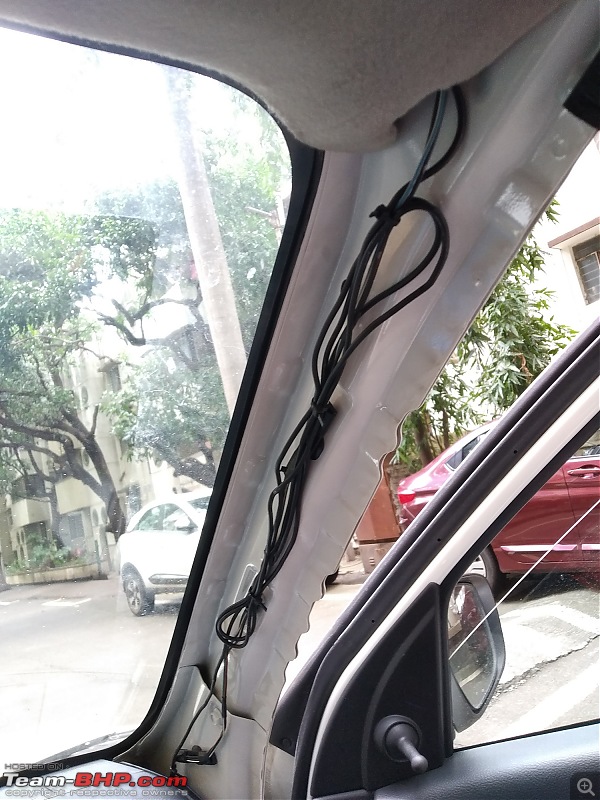
  7. After install is complete, secure the excess USB wire from the camera in a compact form somewhere. I simply zip tagged it safely within the A pillar itself using existing harness mounting points as supports.

    DIY: Hard-wire your Dash Cam without expensive hard-wire kit-apillar_dashcamwiring.jpg


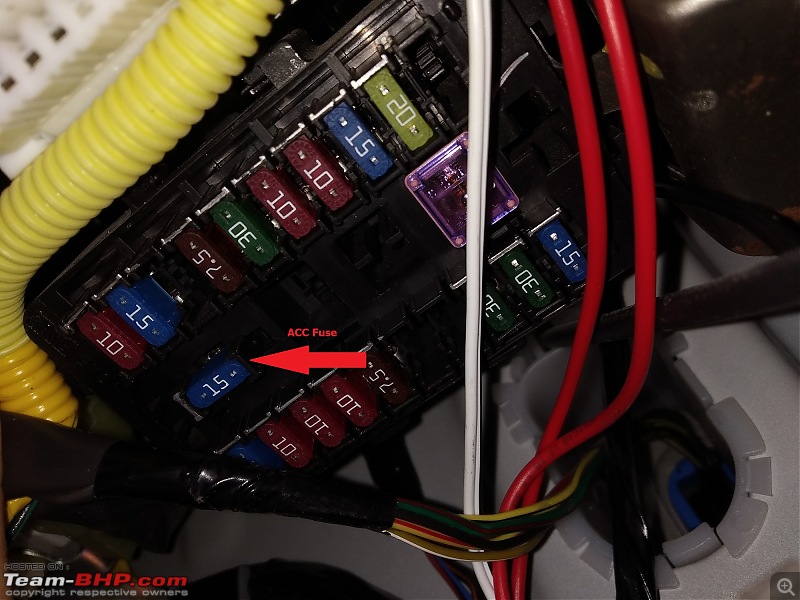
  8. Find the ACC (Accessory) fuse in your cabin fuse-box. You can find it in the car owners' manual. This is the fuse in the Alto K10 for reference -

    DIY: Hard-wire your Dash Cam without expensive hard-wire kit-altok10cabinfuses.jpg


  9. I'm using the ACC fuse since I want the camera to be ON only with car in ignition mode. Don't want it to drain car battery in a 24x7 mode.
  10. If you want to keep the camera ON all the time - find a fuse that is always powered & tap into it. That will work. Rest of the process is same.
  11. Install your fuse tap here. Insert the existing stock fuse into the lower housing of the fuse tap & install a 5 Amp fuse on the top slot of the fuse-tap.

    DIY: Hard-wire your Dash Cam without expensive hard-wire kit-fusetapped.jpg


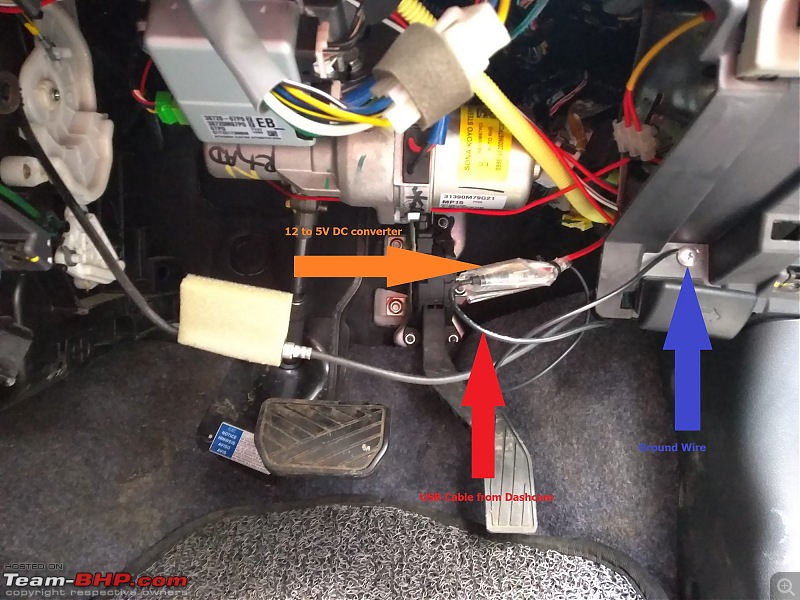
  12. Install the ground wire securely into a body-connected bolt/screw nearby.
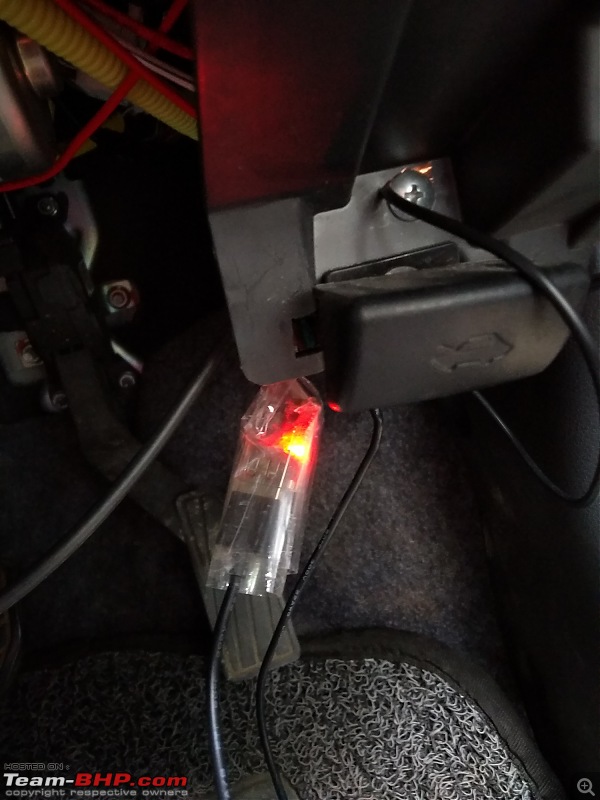
  13. Insert the USB wire of the camera into the USB port of the module & test. The camera should get power when the car is put into IGN/ACC mode & the power should stop once the car is switched off. The module's PCB has a small LED indicator for output power also.

    DIY: Hard-wire your Dash Cam without expensive hard-wire kit-testingbeforeinstall.jpg

    DIY: Hard-wire your Dash Cam without expensive hard-wire kit-understeeringbeforefinish.jpg


  14. Once everything is found to be working - tidy up all the wiring. Remove any excess wiring / properly loop & secure it so that nothing is dangling around.
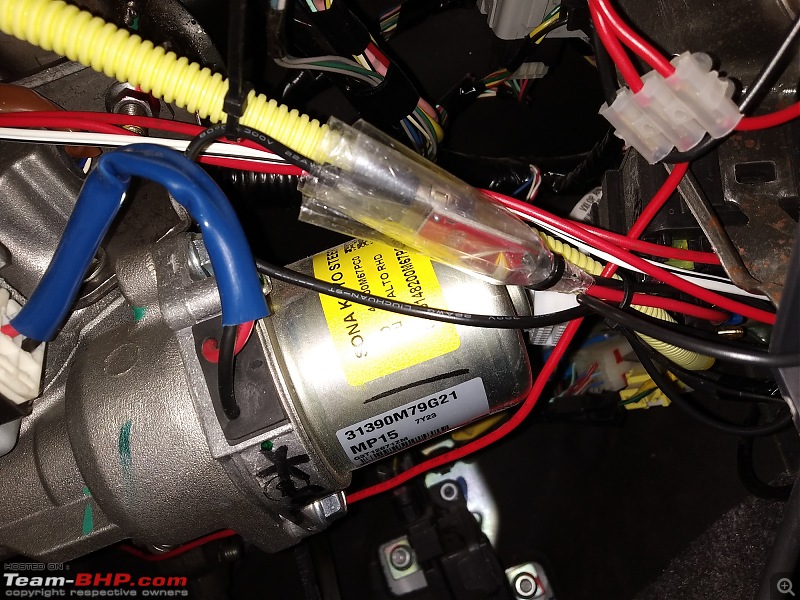
  15. Mount the USB module on an existing harness / surface with sufficient zip ties.

    DIY: Hard-wire your Dash Cam without expensive hard-wire kit-regulatorfinalinstall.jpg


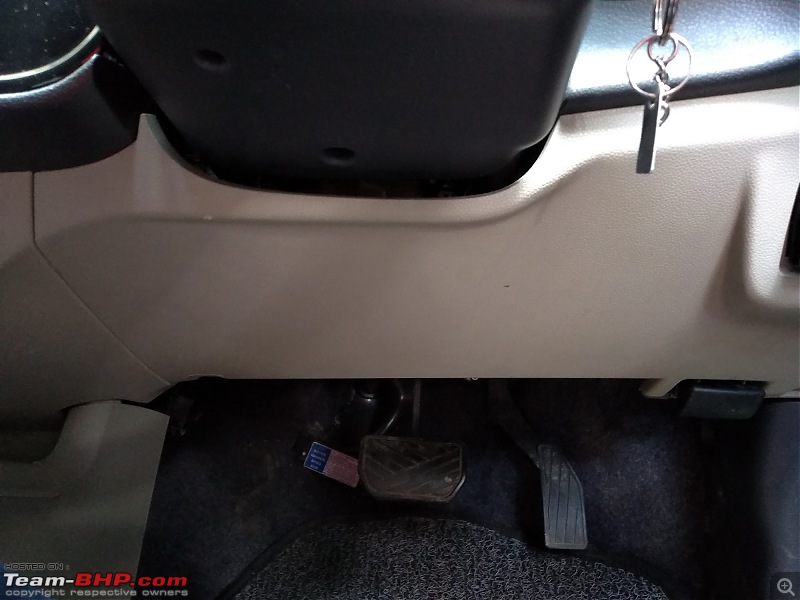
  16. Reinstall all the body panels removed back into place carefully. This is how it looked after finishing the project. And this is how it looked before as well. That's what needs to happen.

    DIY: Hard-wire your Dash Cam without expensive hard-wire kit-finishedapillar.jpg

    DIY: Hard-wire your Dash Cam without expensive hard-wire kit-finishedundersteering.jpg


Conclusions


  • Now we have a nearly invisible dash-cam installed, no unpleasant open wires in the cabin AND a vacant 12V socket in the front cabin for any use any time.
  • I have test driven the car for a 4+ hour journey after installation. Everything worked flawlessly & the module was also completely cool. So I don't see any issue with longevity / heat damage in the long run.
  • Could a readily available hard-wiring kit have worked? Certainly yes. But what's the fun in it! If you are interested in DIYs, every small extra step during installation adds to the fun quotient.

Happy to help should anyone need any tips while implementing it. Good luck.

Last edited by Reinhard : 8th September 2020 at 00:24.
Reinhard is offline   (89) Thanks
Old 8th September 2020, 06:33   #2
Team-BHP Support
 
Join Date: Feb 2004
Location: Mumbai
Posts: 19,344
Thanked: 83,576 Times
re: DIY: Hard-wire your Dash Cam without expensive hard-wire kit

Thread moved out from the Assembly Line. Thanks for sharing!
Aditya is offline   (3) Thanks
Old 8th September 2020, 08:56   #3
BHPian
 
lapis_lazuli's Avatar
 
Join Date: Feb 2012
Location: Noida - NCR
Posts: 791
Thanked: 2,963 Times
Re: DIY: Hard-wire your Dash Cam without expensive hard-wire kit

While this is an extremely informative DIY, being from the semiconductor industry and especially power management side of it, I can only caution you this much: these 12/5V garden variety DCDC converters are industrial grade. For proper hardwiring hardware, it needs to be automotive grade, please look up AECQ100 and AECQ200. In the best case, nothing happens, worst case, it blows a fuse, catastrophic failures aside. It's highly probable that in extremes of temperature, and potential surges in the automotive power bus, your DCDC fails, applying full 13.8V to the cam and well..! You are probably better off, with a good quality charger plugged to the outlet. That has a proper automotive grade regulator inside which is designed for automotive power busses. Once again, great DIY but I have seen far too many apparently "inexplicable" failures in my professional capacity, and I felt it would be prudent to caution you.

Last edited by lapis_lazuli : 8th September 2020 at 08:57.
lapis_lazuli is offline   (53) Thanks
Old 8th September 2020, 09:02   #4
Distinguished - BHPian
 
BoneCollector's Avatar
 
Join Date: Apr 2011
Location: BIHAR
Posts: 3,288
Thanked: 11,140 Times
Re: DIY: Hard-wire your Dash Cam without expensive hard-wire kit

That's a pretty neat DIY.

My Brezza has 2 12V ports in front out of which 1 is permanently occupied by the DashCam and TPMS display. Another one is used for charging the phone as well as other sundry works. This gadget is a good find, especially because it has USB port installed. In case this fails, one can easily revert to using a USB charger port.

But that plastic wrapping may cause it to overheat and fail.

Last edited by BoneCollector : 8th September 2020 at 09:04.
BoneCollector is offline   (1) Thanks
Old 8th September 2020, 09:48   #5
Distinguished - BHPian
 
Reinhard's Avatar
 
Join Date: Nov 2010
Location: Pune
Posts: 4,873
Thanked: 17,843 Times
Re: DIY: Hard-wire your Dash Cam without expensive hard-wire kit

Quote:
Originally Posted by lapis_lazuli View Post
While this is an extremely informative DIY, being from the semiconductor industry and especially power management side of it, I can only caution you this much: these 12/5V garden variety DCDC converters are industrial grade. For proper hardwiring hardware, it needs to be automotive grade, please look up AECQ100 and AECQ200.
Thanks for the word of caution. And glad you liked the implementation apart from the module.

Actually I had an old 12V to USB dongle from previous car that broke (physically) - and it had this same PCB unit installed inside! Silly me, I threw away that dongle a few months ago. That's what gave me the idea now. Also - the buck converter that I have used is in fact on sale specifically as "Automotive Grade" on Amazon.com in the US as well (I checked a bit before ordering).

Finally, it has a 300W TVS / thyristor on the output side which I'm hoping will provide some surge protection for the load connected. So far I have been using the typical cheap 12V to USB dongles off-of Amazon without failures. Of course its economy mass produced electronics and like you said - there are ample causes that can result in malfunction. Even after checking all these things if this happens - perhaps it would be the camera's destiny to have an untimely demise
Quote:
Originally Posted by BoneCollector View Post
That's a pretty neat DIY.
...

But that plastic wrapping may cause it to overheat and fail.
Thanks, glad you liked it. Yes - I envy the twin sockets in the Brezza, Venue etc. One of them can easily power a wireless charging pad too for those who have a compatible phone. Thanks to the practical wide and deep enough storage area right below.

Actually the plastic wrap as I mentioned earlier is completely open and lose from 1 side (which points upwards too). All the folds are lose & there is plenty ventilation. Like I mentioned, I took the car for a non stop 4 hour drive after this & checked the module immediately after returning home. It was at room temperature. So seems to work alright.

Last edited by Reinhard : 8th September 2020 at 10:11. Reason: Punctuation
Reinhard is offline   (3) Thanks
Old 8th September 2020, 10:20   #6
BHPian
 
city2491's Avatar
 
Join Date: Dec 2018
Location: Mumbai
Posts: 123
Thanked: 694 Times
Re: DIY: Hard-wire your Dash Cam without expensive hard-wire kit

Quote:
Originally Posted by lapis_lazuli View Post
For proper hardwiring hardware, it needs to be automotive grade, please look up AECQ100 and AECQ200. In the best case, nothing happens, worst case, it blows a fuse, catastrophic failures aside. It's highly probable that in extremes of temperature, and potential surges in the automotive power bus, your DCDC fails, applying full 13.8V to the cam and well..!
Another way to negate this would be to simply extend the 12V charger socket and join a new 12V socket in parallel. The USB charger comes in the box of the 70mai and a new socket costs 250 bucks. Did it this way in my Honda City.
city2491 is offline   (4) Thanks
Old 8th September 2020, 10:25   #7
Distinguished - BHPian
 
Reinhard's Avatar
 
Join Date: Nov 2010
Location: Pune
Posts: 4,873
Thanked: 17,843 Times
Re: DIY: Hard-wire your Dash Cam without expensive hard-wire kit

Quote:
Originally Posted by city2491 View Post
Another way to negate this would be to simply extend the 12V charger socket and join a new 12V socket in parallel. The USB charger comes in the box of the 70mai and a new socket costs 250 bucks. Did it this way in my Honda City.
There are even 12V socket splitters available that piggy back into the stock socket. 0 wiring required. I had one of these too in the past. I no longer wanted to do this because it still leaves the cabin rather cluttered & does not solve the point about exposed wire of the camera for last 7-8 inches.

Also - in cars like my Alto K10 - the 12V socket is at a stupid location - just under the hand-brake!
Reinhard is offline   (1) Thanks
Old 8th September 2020, 11:02   #8
BHPian
 
Join Date: Dec 2005
Location: bang
Posts: 894
Thanked: 3,223 Times
Re: DIY: Hard-wire your Dash Cam without expensive hard-wire kit

Quote:
Originally Posted by Reinhard View Post
If you have a car but don't have a dash-cam yet....
Quiet a good DIY project. I only suggest that the PCB be securely fastened. Given the suspension quality of a K10 ( a fellow owner myself) and our pot holed roads, there is a chance that the soldered wires just come off. All the best.
srini1785 is offline   (2) Thanks
Old 8th September 2020, 11:04   #9
BHPian
 
city2491's Avatar
 
Join Date: Dec 2018
Location: Mumbai
Posts: 123
Thanked: 694 Times
Re: DIY: Hard-wire your Dash Cam without expensive hard-wire kit

Quote:
Originally Posted by Reinhard View Post
Also - in cars like my Alto K10 - the 12V socket is at a stupid location - just under the hand-brake!
Sorry, my bad. Didn't know the placement of the 12V socket in Alto. In my case there was enough space behind the socket panel to stow away the extra wiring.

Great install nevertheless, always appreciated!
city2491 is offline   (1) Thanks
Old 8th September 2020, 17:34   #10
BHPian
 
Join Date: Mar 2020
Location: Chennai
Posts: 47
Thanked: 107 Times
Re: DIY: Hard-wire your Dash Cam without expensive hard-wire kit

Excellent DIY, the opportunities are endless with these kinds of DIYs. Following your same basic idea and without the buck converter, one should be able to create a cigarette lighter port for the rear seat occupants or boot. For cars that are old or the ones that don't come out of the factory without such an option, this is an fairly DIY or easy ask from a neighborhood garage.

Also, for folks who might not like to tinker with DC DC modules or wiring, there are readily available plug n play modules available on Amazon. Example : https://www.amazon.in/Blueskysea-Uni.../dp/B07H48PCJ5.
asbshyam is offline   (1) Thanks
Old 8th September 2020, 21:58   #11
Senior - BHPian
 
akash_v12's Avatar
 
Join Date: Apr 2020
Location: Pune | Mumbai
Posts: 1,124
Thanked: 2,984 Times
Re: DIY: Hard-wire your Dash Cam without expensive hard-wire kit

Excellent DIY Reinhard! Just the piece of information I needed. Had been thinking of buying a dashcam for the Vento since it's the Highway Express and wanted a clean setup without any dangling wire.

Also, please clarify this if I'm wrong but you tied the excess wires in the A-Pillar with zip-ties right? How safe is this solution? Will there be any electrical issues?
akash_v12 is offline   (1) Thanks
Old 8th September 2020, 23:46   #12
Distinguished - BHPian
 
Reinhard's Avatar
 
Join Date: Nov 2010
Location: Pune
Posts: 4,873
Thanked: 17,843 Times
Re: DIY: Hard-wire your Dash Cam without expensive hard-wire kit

Quote:
Originally Posted by akash_v12 View Post
Also, please clarify this if I'm wrong but you tied the excess wires in the A-Pillar with zip-ties right? How safe is this solution? Will there be any electrical issues?
Thanks akash_v12, happy to know you found it useful. Yes - I have just looped up the excess wire inside the A pillar. That way the original camera wire with USB connectors etc stays intact. In future if I remove / use it with the old school dongle in 12V socket - I can do so.

Yes I have secured it with zip ties. Absolutely nothing to worry about. Secure it using existing mounting supports within the pillar. The only things you should take care of - At the extreme ends - make sure you loop/turn the wire in smooth & lose curves - not tight "V" turns. (You can look at the picture above to know how I have done it.) This way - the wires, shields & copper don't crack/break even after a long duration (years). Cheers!
Reinhard is offline   (3) Thanks
Old 9th September 2020, 16:47   #13
BHPian
 
Tassem's Avatar
 
Join Date: Sep 2009
Location: Bangalore
Posts: 614
Thanked: 1,448 Times
Re: DIY: Hard-wire your Dash Cam without expensive hard-wire kit

Excellent DIY! I hate dangling cables and hardwiring is the best way to get rid of it!

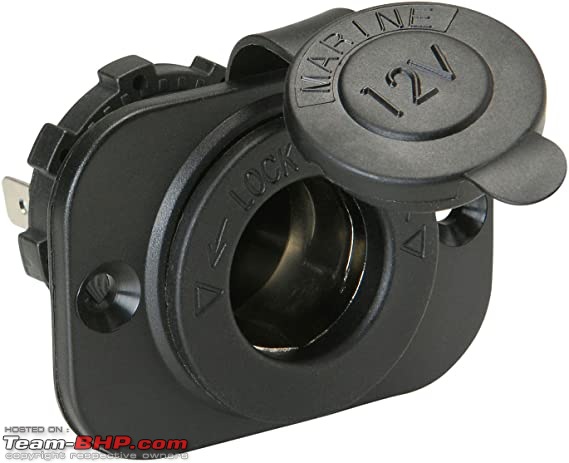
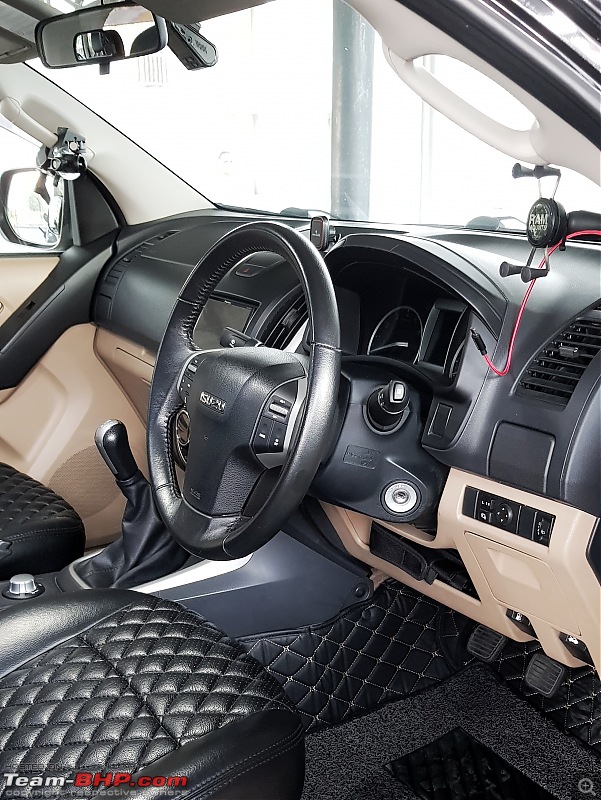
And to that point, I've hardwired all the accessories in my car. However, instead of using the DC converter, I added additional 12V cigarette lighter ports behind the dash.

DIY: Hard-wire your Dash Cam without expensive hard-wire kit-12v-port.jpg

Two of these are direct to battery with their own switch, while 2 are controlled via a relay triggered by the ACC port so that they only come on when the vehicle is on. 4 extra 12V outlets along with two stock ones for a total of 6. One Independent fuse for each. I then added high quality USB chargers to these.

DIY: Hard-wire your Dash Cam without expensive hard-wire kit-screenshot-20200909-4.38.15-pm.jpg

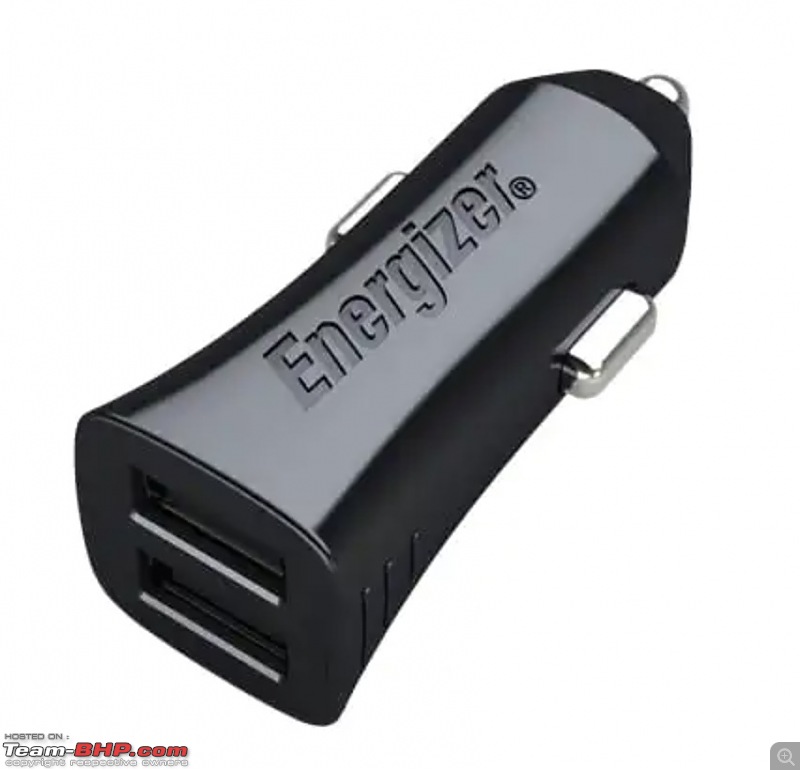
My preferred USB charger is built by energizer and provides 2x2.4A output. Have had these for many years and they perform great. Tons of fakes in the market - something to keep in mind.

One of the chargers is is QC enabled for phones and tablets and one that is 1A for my GPS unit and Dashcam since they don't need the additional power. The cables are all hidden and exit just near where the device is. Helps my OCD a lot!

Here, you can see how the main charger cable for my phone exits right at the holder:

DIY: Hard-wire your Dash Cam without expensive hard-wire kit-20190513_19421901.jpeg

And it wont dangle or get in your way while driving:

DIY: Hard-wire your Dash Cam without expensive hard-wire kit-20190930_17594001.jpeg

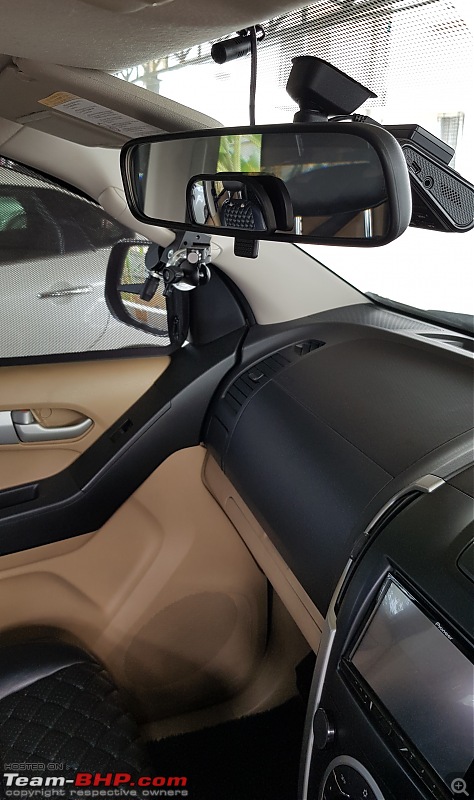
And this is what the cable for the dashcam looks like:

DIY: Hard-wire your Dash Cam without expensive hard-wire kit-20190803_16262001.jpeg

I also have additional ports at the back so that passengers can plug in their phones during long trips without having to fiddle with the one in the front.

I even have the below port inside my glove compartment so that my HDD can be easily connected to my HU without any dangling cables. Also helps the passengers connect and play their music via the 3.5mm jack. PS - The USB on this is for data, not power. I simply do not trust unbranded power supply units that are not specifically designed for automotive use. Just paranoid.

DIY: Hard-wire your Dash Cam without expensive hard-wire kit-screenshot-20200909-4.43.08-pm.jpg

This is what it looks like in the car. The closed port to the left is the AUX inputs.

DIY: Hard-wire your Dash Cam without expensive hard-wire kit-20190712_21290401.jpeg

Best part is, all of this looks so OEM! Have had this setup in the current car for 3 years now with zero issues.

Last edited by Tassem : 9th September 2020 at 17:05.
Tassem is offline   (9) Thanks
Old 9th September 2020, 16:56   #14
Distinguished - BHPian
 
Reinhard's Avatar
 
Join Date: Nov 2010
Location: Pune
Posts: 4,873
Thanked: 17,843 Times
Re: DIY: Hard-wire your Dash Cam without expensive hard-wire kit

Quote:
Originally Posted by Tassem View Post
Two of these are direct to battery with their own switch, while 2 are controlled via a relay triggered by the ACC port so that they only come on when necessary. For a total of 4 extra 12V outlets. Independent fuse for each. I then added high quality USB chargers to these.
This is a fantastic idea. I guess I'll be doing this sooner or later. Clean power from the battery, no excess load on the stock harness through the fuse tap. Thanks for this idea.

Such brilliant ideas really make car-makers look rather silly for not giving basic conveniences like these from factory.
Reinhard is offline   (1) Thanks
Old 9th September 2020, 17:04   #15
BHPian
 
Tassem's Avatar
 
Join Date: Sep 2009
Location: Bangalore
Posts: 614
Thanked: 1,448 Times
Re: DIY: Hard-wire your Dash Cam without expensive hard-wire kit

Quote:
Originally Posted by Reinhard View Post
Such brilliant ideas really make car-makers look rather silly for not giving basic conveniences like these from factory.
I have to add - for some strange reason, my Isuzu has 10 cupholders and two power outputs. Yes, you read that right - TEN cupholders. Who drinks so much!?

I would rather have 4 cupholders and 4 power outputs.
Tassem is offline   (2) Thanks
Reply

Most Viewed


Copyright ©2000 - 2024, Team-BHP.com
Proudly powered by E2E Networks