Short Introduction
During lockdown days, I was contemplating, among other things, which features I missed buying a Tiago XZA+ instead of an Altroz XT. I was not considering the obvious segment differences, but other small things that are visual/practical which create great value additions. Here's a list that I came up with:
- DRLs
- Mood Lighting (aka Footwell Lights)
- Dual Horn
- Boot Unlock with Remote Key
I searched the forums if any of the above was possible without significant investment of time and money. Stumbled upon a4anurag's thread on Footwell light install in his Swift. Ended up doing it as a DIY and the end result gave so much satisfaction considering that all it took was couple of hundred rupees and few hours.
Tools and Materials Used Tools- Soldering Kit
- Small Flat tip Screw driver
- Scissors
Materials- Generic LED Light Strip(1m)
- Wires (Red and Black- 4m each)
- Connector Blocks
- Insulation Tape
- 3M Double Sided Tape
Plan
The footwell lights would be installed in such a way that it works along with the cabin light's door ajar/lock-unlock feature. If the vehicle is unlocked or a door is open, cabin light's would turn on. The cabin light also has the theatre dimming effect. These two functions would be carried over to the footwell lights. The idea was this:
 Procedure Step 1: Removing the Cabin Light
The cabin light was removed by prying it open with a screwdriver on the two slots shown below. Using plastic tools can be a more safe bet but I was careful. Unplugging the 3-pin connector completely removed the light from it's holder. I had to unscrew the cabin light holder to access the roof liner. This was necessary to route the wires from cabin lights to the top of the B-pillar and, in turn, to the A-pillar.

The other side of the Cabin Light module. The picture is self explanatory on the purpose of the wires. In my particular case for the theatre dimming effect/door ajar fuction, the Red(+ve) wire need to be connected to the Door/Green terminal and Black(-ve) wire to the -ve terminal.
 Step 2: Soldering wires to Cabin Light
Connected about 6 inches of wire to the block connector and soldered the other end to the Cabin light as explained in previous step.

 Step 3: Routing wires to Footwell
The cabin light holder was removed and wires routed through the roof liner in between insulation material. You cannot go diagonally, first route the wire to top of B-Pillar and then to the A- Pillar. Remove RH front and rear door beadings for easy access.

Remove the A-Pillar panel by gently pulling on it. Put pressure on each clip at a time to remove the panel. These clips won't break but might dislodge. They are easily reattachable.

Fix the wires on the A-Pillar using insulation tape.

Put the wire through the space where the existing wires pass through to the footwell area.

I again used a connector here so that I can swap the LED light strips later if required. Connected the driver side light strip to the wires that came from top.
 Step 4: Soldering LED light strips to wires
I had cut the light strip for my required length before starting the procedure. There are markings on the strip where you can cut through with your scissors.

Light strips in the Driver side and passenger side had to be connected and needed to be soldered. The light strips I had bought had transparent rubber sheath on top. It was peeled and required portion cut off. Soldered Red(+ve) to the +ve terminal denoted and Black(-ve) to the -ve terminal. Carried out same on the other strip on the passenger side.
 Step 5: Connecting Driver side light to Passenger side
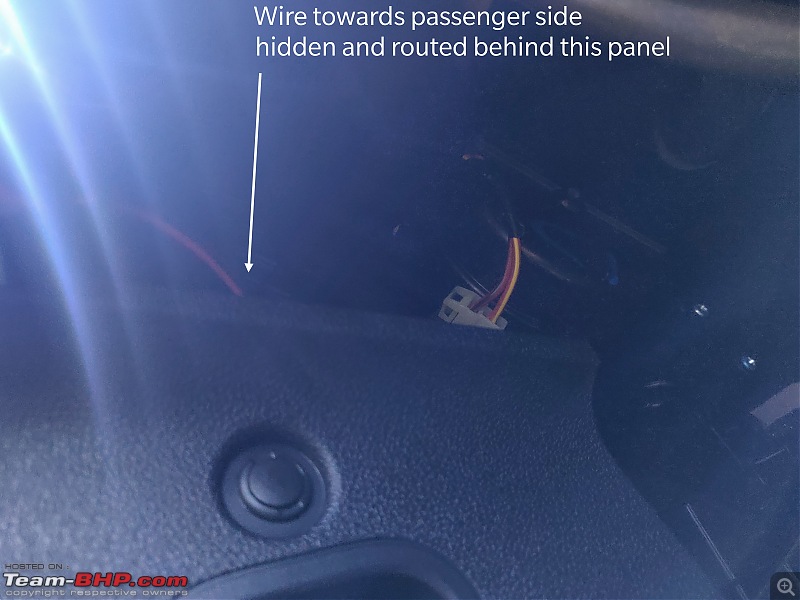
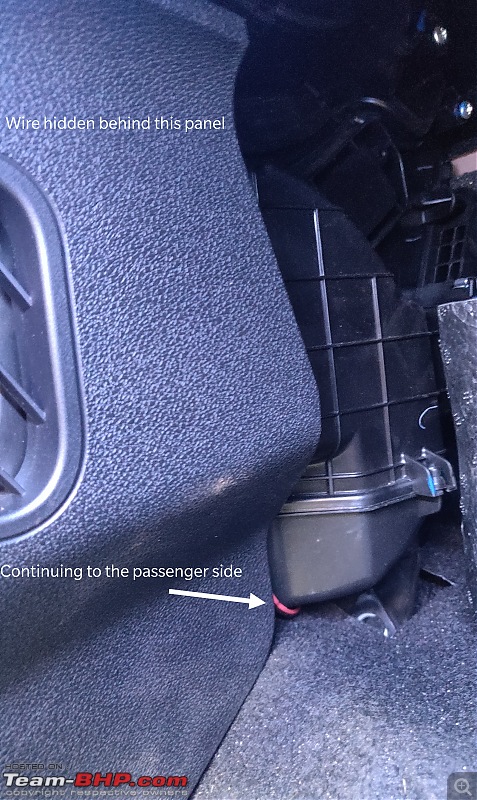
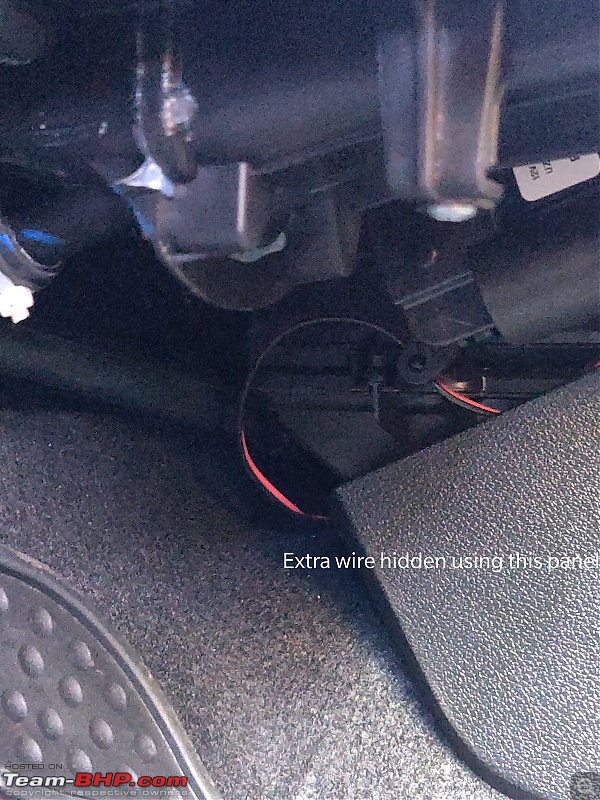
Connections between driver side light and passenger side were hidden using the center console panels on both sides.


There is only a tiny space between the two footwell and routing wire through that was tedious. But because of the lack of space and availability of plastic panels, it was easy to tuck away the extra wiring out of sight.

 Step 6: Fixing LED light strips
The generic light strips came with adhesive but was not sticking to the plastic dashboard panel. Used 3M double side tape I had in stock with me to get the job done. They are good and considering the strips weighing very little, will hold on for a long time.
 End Result
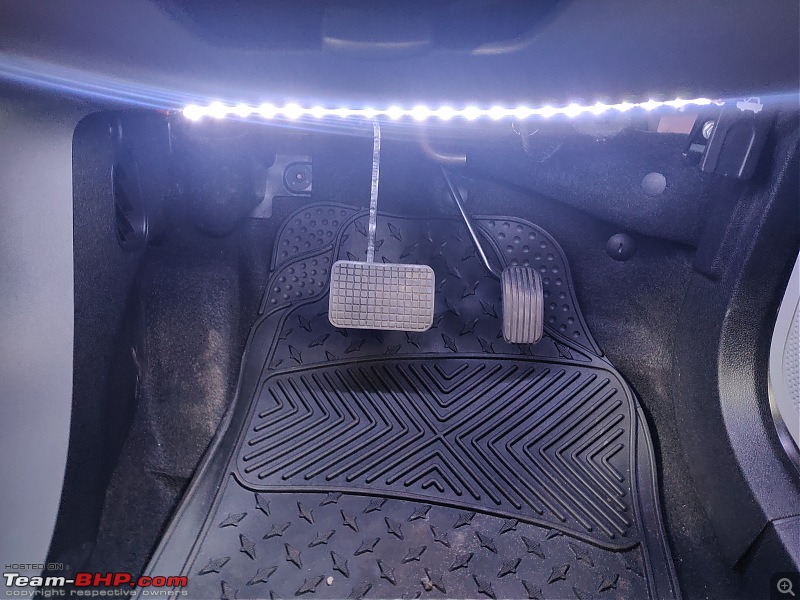
I bought all the items required from the neighborhood electrical shop. Specifically asked for white color LED and when the guy showed me the demo in bright sunlight, it seemed to be white. But after installing, it turned out to be blue. Even though blue was not my expectation, it gives a certain cool ambience when you get into the car
In Daylight: 


 At Night:
The blue tinge of the LEDs and light grey interior syncs so well. It looks even better in person.

 Cost
Cost- Soldering Kit (Including Iron, Solder and Flux)- Rs.150
- LED Light Strip (Generic 5m)- Rs.200
- Wires-Rs.50
- Connectors- Rs.20
- Insulation Tape-Rs.10
Time taken - ~2hrs
 (48)
Thanks

 (2)
Thanks
 (1)
Thanks
 (1)
Thanks
 (1)
Thanks
 (2)
Thanks
 (1)
Thanks

 (3)
Thanks
 (1)
Thanks
 (1)
Thanks
 (1)
Thanks
 (2)
Thanks
 (1)
Thanks
 (3)
Thanks


 . DIYs planned: