My Linea T-Jet came with a pull up screen for the rear windshield. The main purpose was to reduce direct sunlight into the car, especially when there are passengers in the rear seat. I also found it useful to prevent glare from high beam freaks tailgating, during night drives.
However, sometimes, I like to lower the screen, during the day, especially in pleasant weather. Also, the screen does hamper a bit of visibility of the IRVM, during the day time, especially during rains.
Given that the screen was manual, this meant that if I needed to lower or raise it during a drive, I had to pull over stop and do it. Wouldn't it be nice to have a switch on the dashboard with which to raise and lower the screen as required?
Thus the thought of motorizing the screen was born. The manual mechanism is such, that it has a spring loaded cylinder in the parcel tray and two hooks attached to the headliner. So, you pull the screen up and hook it. When you unhook, the spring loaded cylinder winds the screen onto itself and retracts it into the parcel tray. So, my solution needs to be able to hold the screen up and have enough resistance to prevent the screen from winding itself down. Also, given that I have zero knowledge of electronics, wanted a simple enough solution.
So, I researched and then came up with a solution, which involves a geared 12V DC motor, a pulley, a 5 pin electric window switch, some wires and some thread.
Without further ado, will quickly share the details -
Parts used -
Apart from the pictured parts, required length of automotive grade wires will be needed, of course.
My solution was this -
- Tap a fuse from the fuse box under the steering column
- Connect to the 5 pin switch - this helps reverse the direction of the motor revolution
- The motor winds the thread on to the pulley when raising the screen
- The motor rotates in reverse when lowering and the OE spring takes care of winding down the screen
- Draw ground from the OE ground provided in the foot well
- Route wires through the roof liner to the rear
- Attach the pulley to the motor shaft
- Mount the motor in the center of the frame under the parcel tray
- Drill a small hole directly above the pulley in the parcel tray
- Wind some strong thread (I used polyamide thread) around the pulley
- Route the thread through the hole in the parcel tray
- Loop around the hooks in the roof liner
- Secure them to the two spots in the rod that is on top of the OE curtain
Unfortunately I did not take any WIP pictures, but will be happy to answer questions about the install.
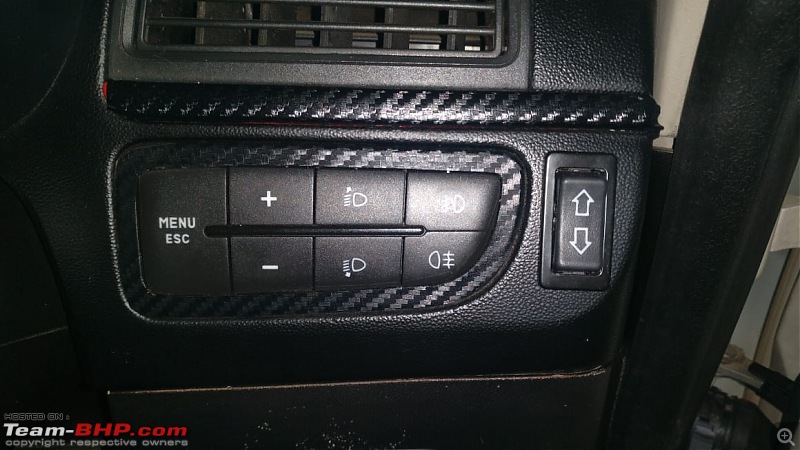
Now, I had to mount the switch somewhere within reach of the driver. This spot next to the OE console looked ideal. So, measured and cut out a rectangle for the switch, and mounted it like this -
Connected and mounted everything as described in the list. The solution isn't the most elegant, but surely does the job. Here is a video of the functionality in action -
It doesn't stop automatically. So, I will have to watch how much I raise and lower. The thread is visible, if you look closely, but I am willing to live with it. My rear bumper is due for replacement. So, the rear camera is mounted on the headliner and the screen touches it and changes the position of the camera, when fully raised. It is just a temporary setback. I will be relocating the reverse camera to the bumper very soon.
Thanks for reading.
 (20)
Thanks

 (5)
Thanks
 (1)
Thanks


