Team-BHP
(
https://www.team-bhp.com/forum/)
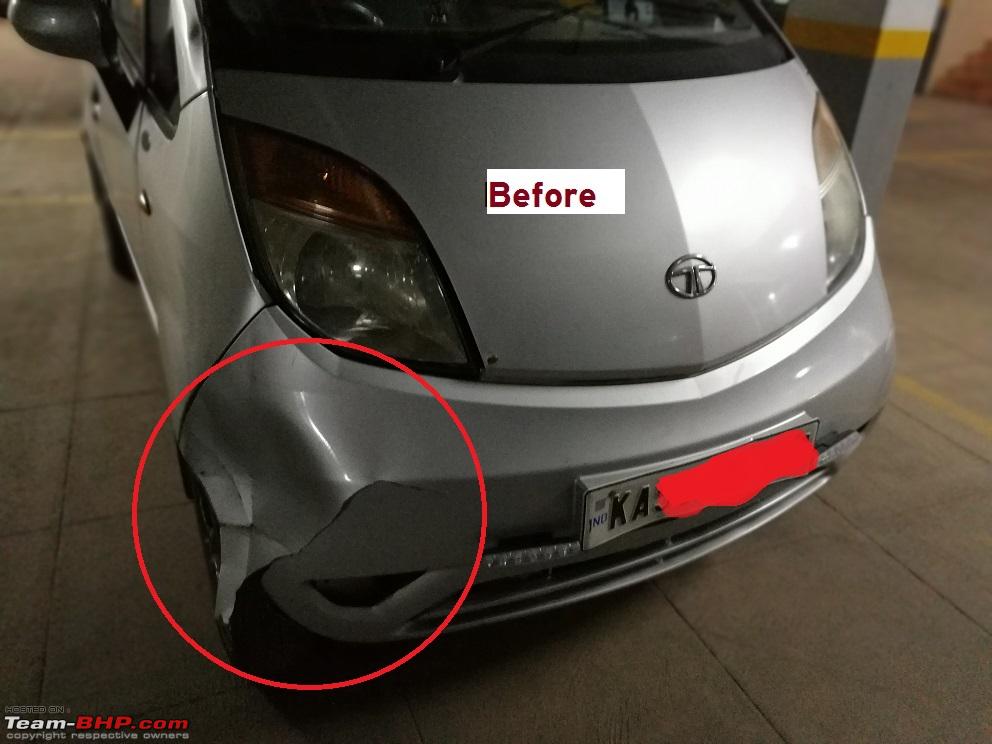
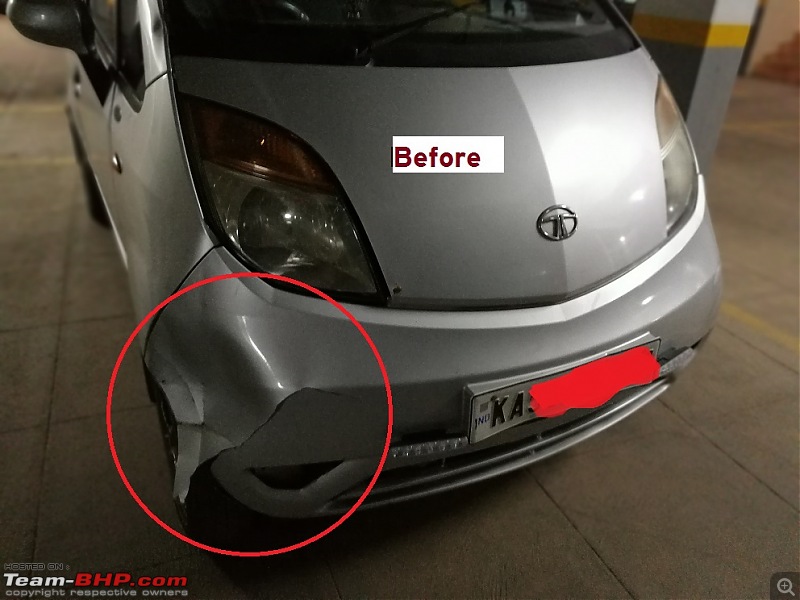
Drifters' stitch is a cheap and effective way of semi-permanently fixing torn bumpers with the use of a drill and zip ties. Legend has it that drifters often use this method to quickly tie up bumpers they tore as against buying new bumpers for hundreds of dollars each time they get it wrong.
The total cost of this job on my Tata nano was Rs.30.
Tools required :
1. Drill machine with 3mm drill bit
2. Zip ties - 2x20mm - 1 pack
3. Philips screwdriver (optional)
4. 10mm spanner/T wrench (optional)
5. Patience and a cold beverage
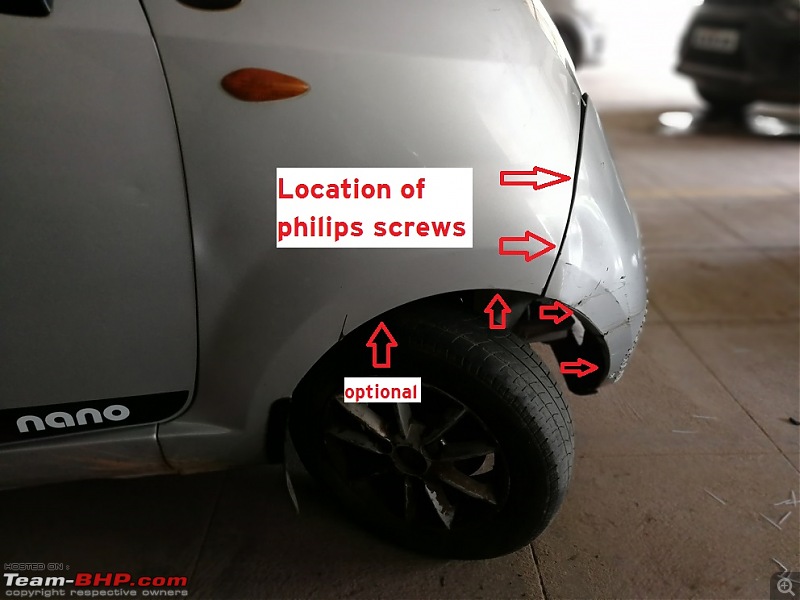
Step 1: (Optional) Take the bumper off the car
This step is optional if the tear is small enough and you have access to a cordless drill or can park your car close to a power source for the duration of repair.
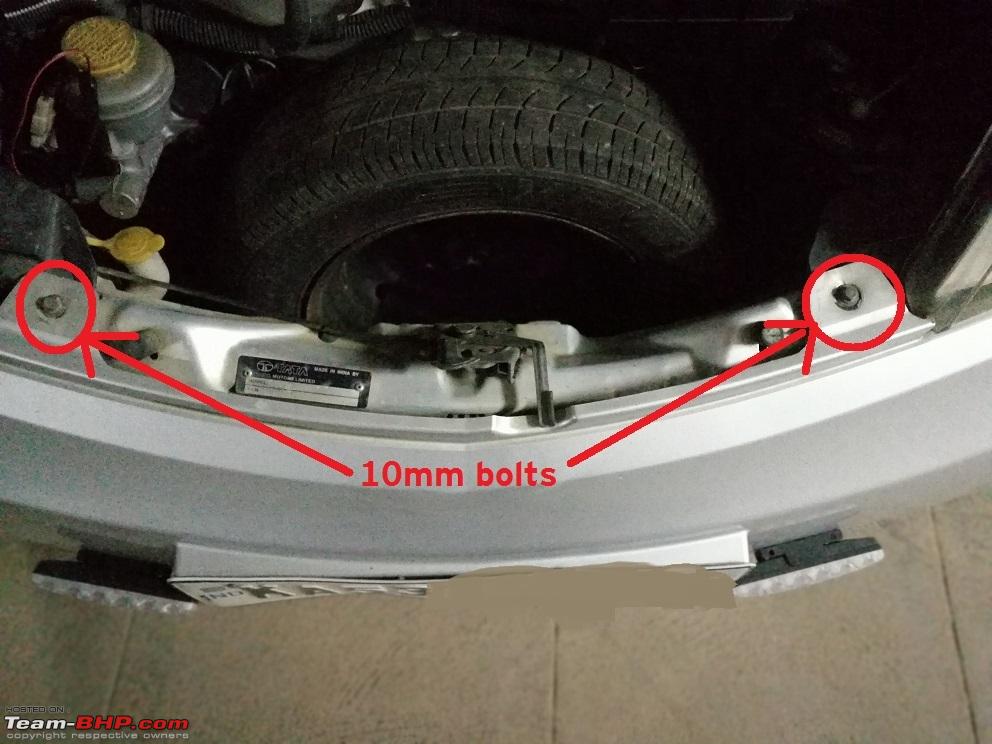
On the nano, the following need to be removed to take the bumper completely off the car
2x 10mm bolts on the top of the bumper
2x 10mm bolts on the underside of the car
4x screws each on either side attaching to the fender - 2 of these are a pain in the wrong place to access, unless you take of the wheels (Ain't nobody got time for that!)
There are also two clips on either side attaching to the fender which will slide off easy-peasy.

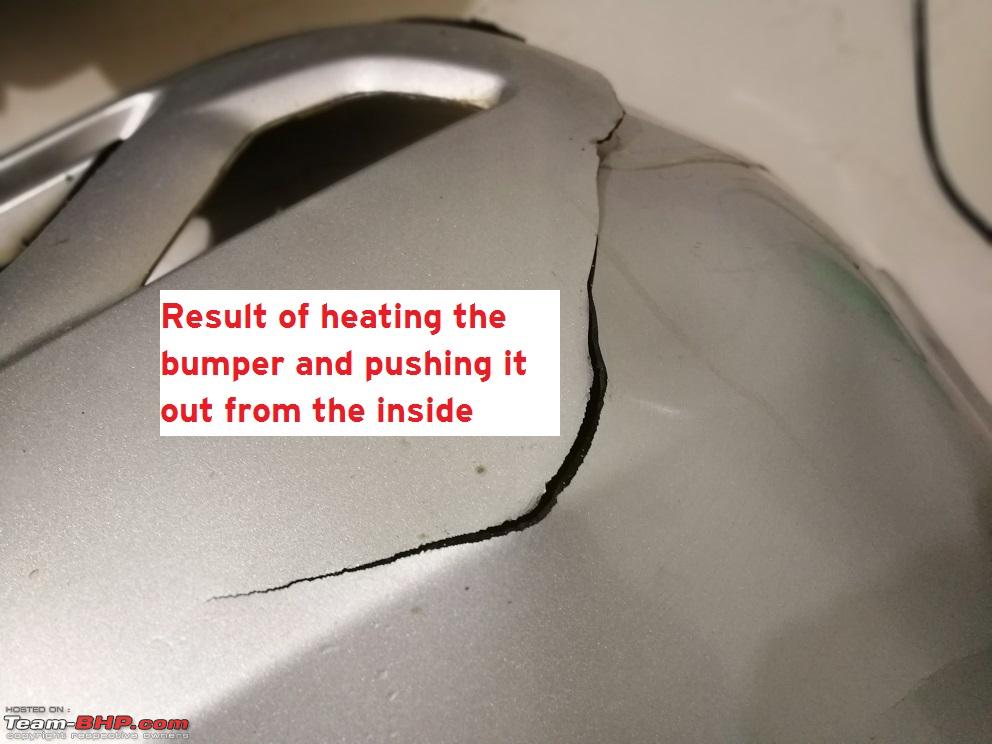
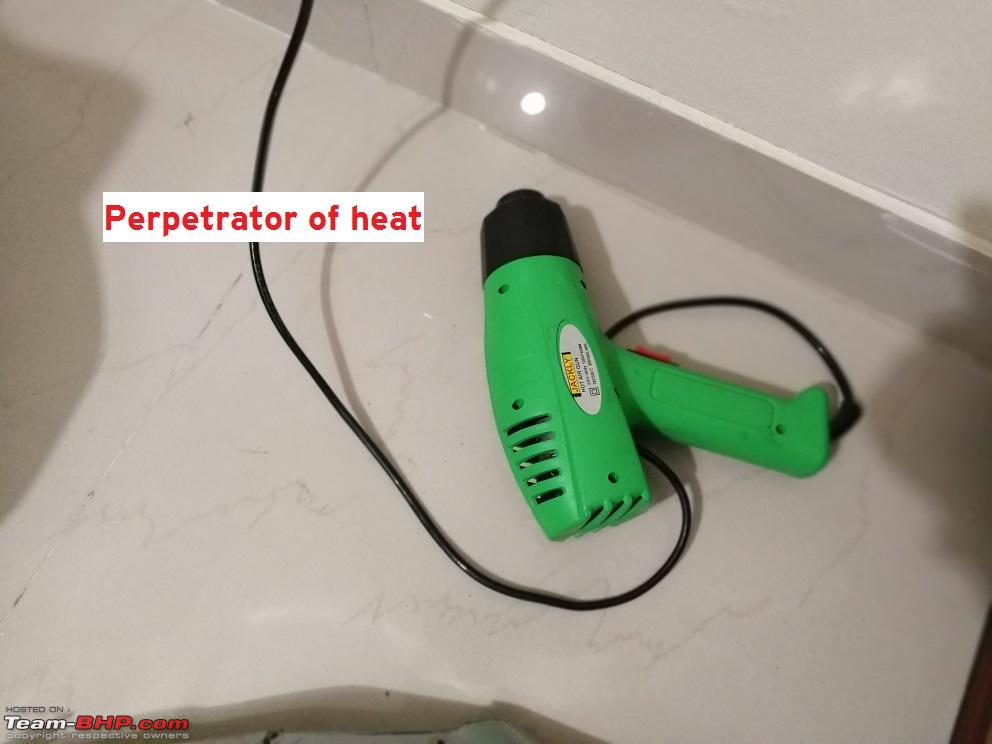
Step 2 : Shape the bumper with heat, if required
Apply moderate heat with a heat gun or hair dryer around the center of the dent to soften plastic. Take care not to heat it too much and ruin what's left of the clearcoat. Push the bumper out with your hands from the inside rather than trying to pull with a plunger or use glue gun tacks etc.. those would be overkill since you have heated the bumper.
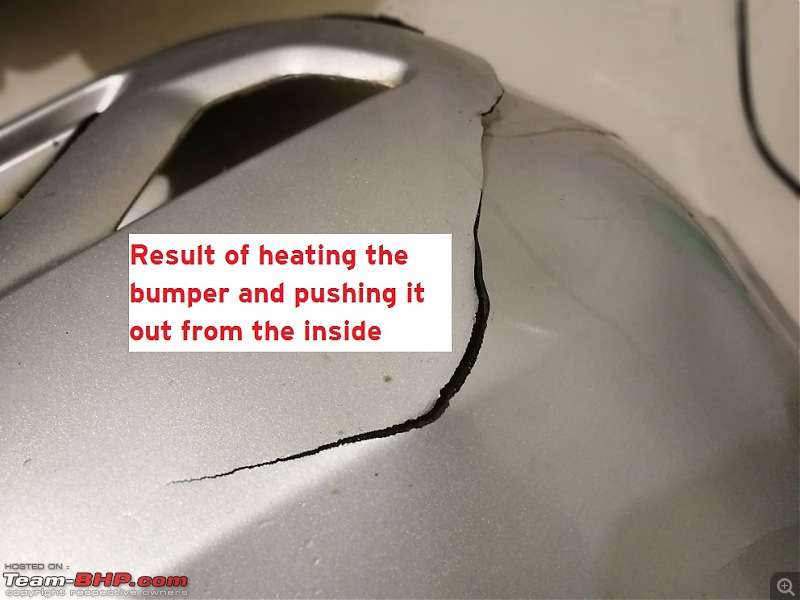

For health and safety reasons, you may choose to wear gloves or use a rag on the hand that is touching this heated plastic. It was a cold evening under the spin of a Crompton Greaves Inc product so I didn't bother.
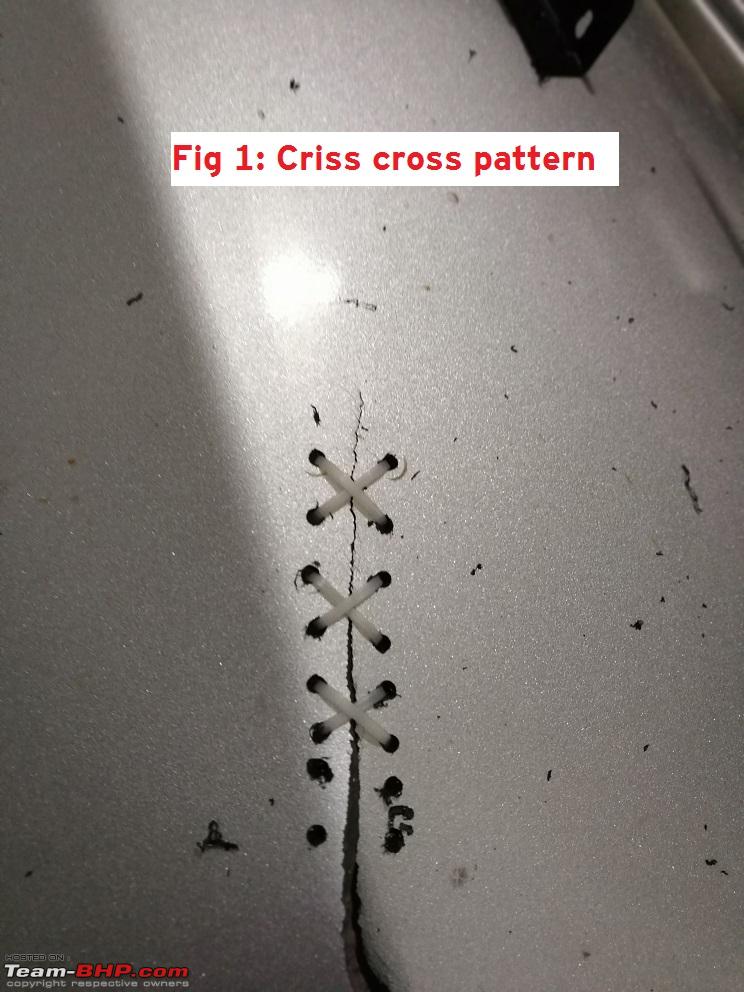
Step 3 : Drill holes
I used 2x20mm zip ties. For this reason, I used a 3mm drill bit to drill holes. There is absolutely no reason to use a larger drill bit or zip ties. Since I didn't have such tiny zip ties, I ran to the nearest electrical store to get a pack of 100 for Rs.30.
While drilling holes, ensure that you drill holes along both sides of the tear and drill from the painted side. The ideal distance between each hole to the next is around 1cm. You may choose to mark the hole path and distance in advance with an OHP marker if you suffer from obsessive compulsive disorder. I chose not to do this because of who I am as a person and my rather imperfect memory around the topic of the location of said marker.
Side note : If you suffer from OCD, you may not want to do this in the first place since the bumper will not be perfect after the job is complete. Alternatively, you may have to tear the bumper on the other side to maintain symmetry. This step may increase the length and complexity of this job. Consider yourself warned.
If you have a long enough tear like I did, it is a good idea to skip to step 4 and back after every 20 holes (5 criss cross patterns).
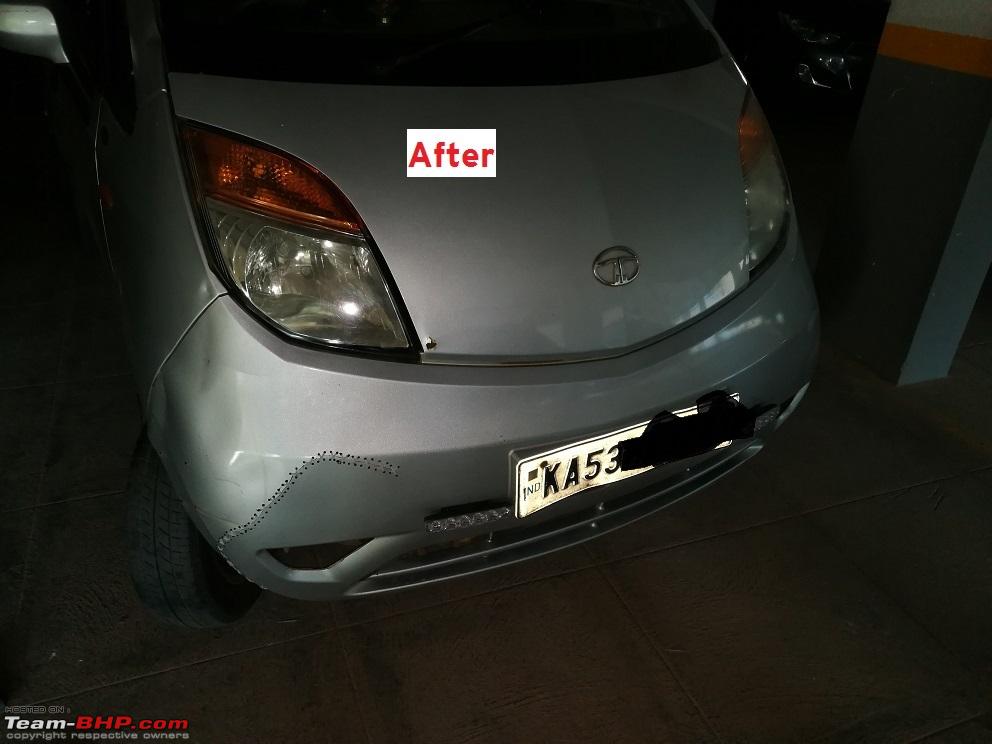
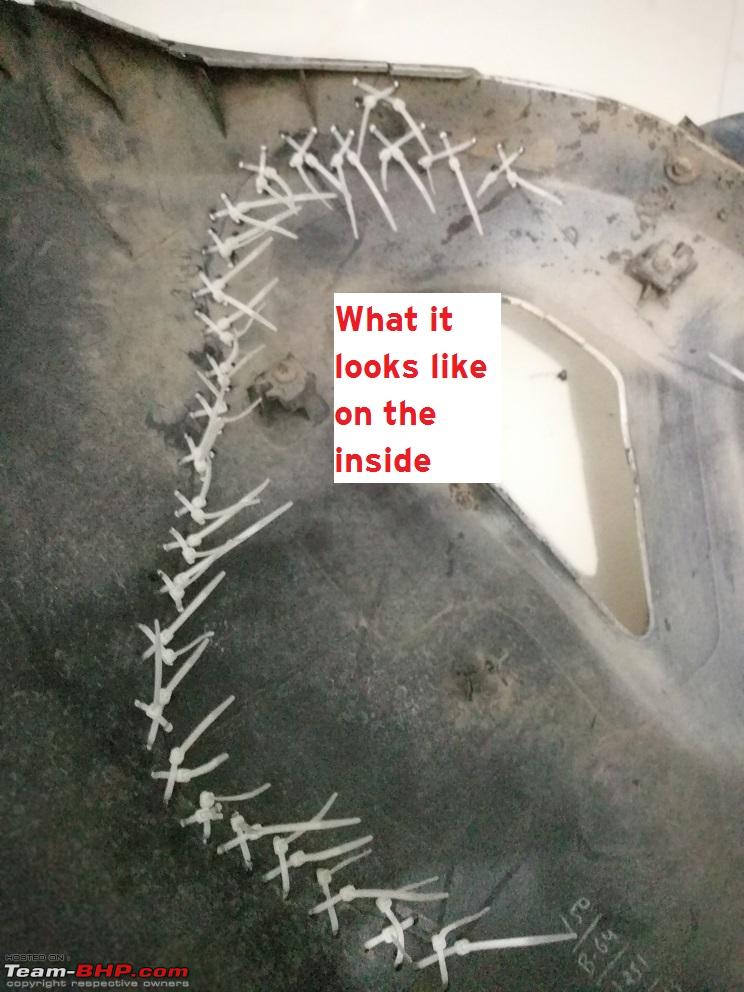
Step 4 : Stitch the bumper
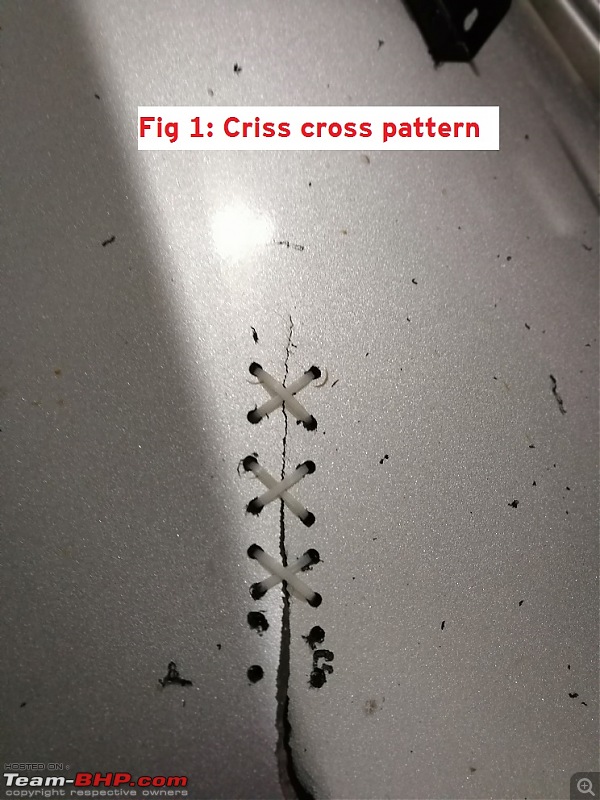
This is a long drawn process but one that is rewarding :). Thread zip ties from the inside and loop them out on the outside. Ensure to keep the smooth side on top of the painted surface while the ridge side, lock top and ridge side on the inside of the bumper. Make sure to follow the same over and under pattern as you chose for the first set of holes. Changing the pattern is unnecessary and may not hold the shape as perfectly.
Once you are done, the inside of the bumper should look something like this.

If you have more than one direction of tear, ensure the zip ties intersect in the same criss cross pattern because I said so.
Caution : Always start from the inside of the tear, never from the outside. If you start from the flared end of the tear, you may not be able to maintain shape of the bumper perfectly, especially if it's a tear longer than 3 inches.
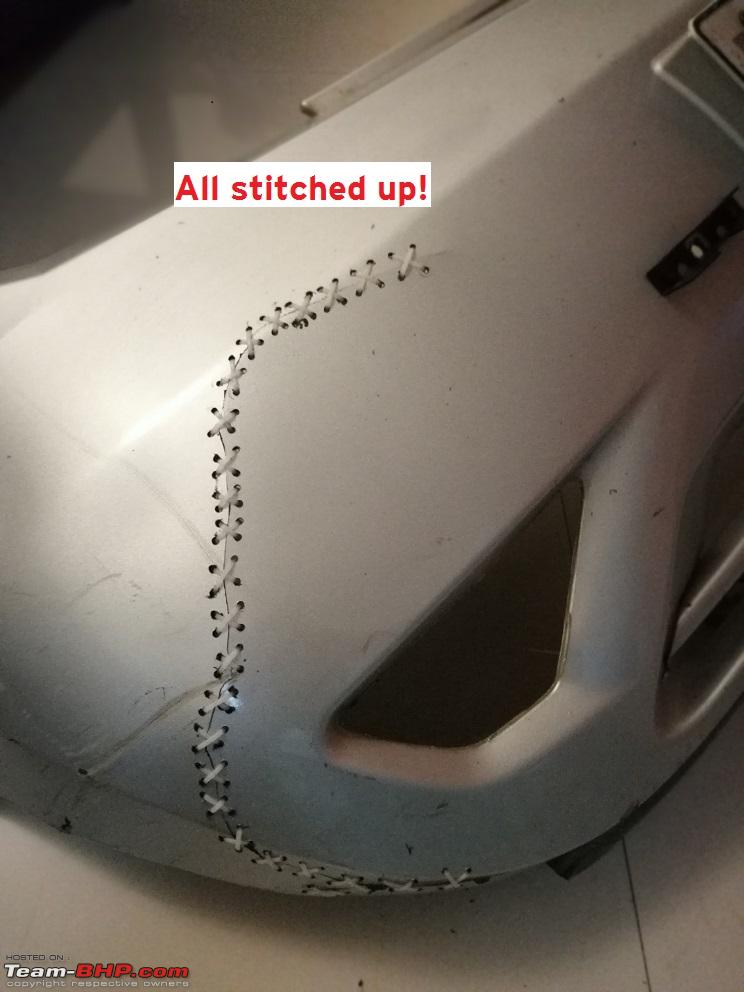
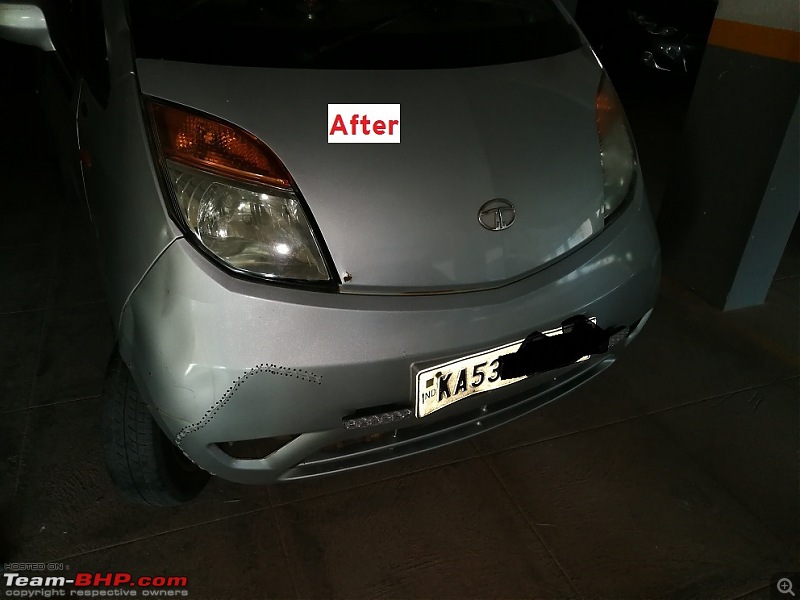
Step 5 : Install the bumper back on the car
Alternate step 5 : Enjoy cold beverage
Step 6 : Store tools safely, out of reach of children, pets and thieves.

Quote:
Originally Posted by AbhiJ
(Post 4410238)
Great Job. Apart from the money saved, It give the car a mean look also, like a scar. :)
Had come across this process on youtube, sharing the video.
|
Ha yes. I'd done it ages ago on my ageing karizma, but I didn't know this thing had a name until I watched this exact video :).
It reminds me of the first accident I was involved in, whilst learning to drive the toycar Santro Xing.
Was taking it of the parking, and some hero, didn't see me coming out, and banged into the Front Right Bumper. The clips came off and RH headlight glass broke.
Had to ask a driver to open the left side clips too, and brought the Front Bumper in my backseat back home. Ahh! the stares from pedestrians I received made me feel no less than a celebrity.
Went to the roadside garage near home, who neatly stitched it using metal wires. Overall cost : Rs. 300 !!
I was literally laughing at the repair costs, cause I was certain that I was screwed and would never be allowed to drive again. stupid:
Quote:
Originally Posted by shankarbn
(Post 4410184)
Drifters' stitch is a cheap and effective way of semi-permanently fixing torn bumpers with the use of a drill and zip ties. Legend has it that drifters often use this method to quickly tie up bumpers they tore as against buying new bumpers for hundreds of dollars each time they get it wrong.
The total cost of this job on my Tata nano was Rs.30.
|
Wow. Not only does it look pleasing on the eye, it lends the car a macho / experienced look thanks to the scar! Its very neat work that you have done.
I have seen this done by a couple of local shops, but they used a continuous wire instead of individual cable ties. The advantage with your method is incase any of them break, the whole thing won't come undone.
My WagonR has a torn rear bumper and I might try this to fix it sometime.
This is such a nifty fix. The fix is so simple and achieves 70% of the part at 1% of the cost compared to a new replacement :) Thanks for sharing this with us. The subtle humor makes the post very engaging to read.
Quote:
Originally Posted by shankarbn
(Post 4410184)
The total cost of this job on my Tata nano was Rs.30
|
That's a neat but not so
neat looking solution. I am a big fan of zip ties and use them everywhere - car, furniture, house, luggage etc. But I always make sure to hide them from plain sight because I feel being discreet is one of their USPs.
That said, thanks for the thread. Will surely act as a stop gap and cost effective remedy for torn bumpers.
Quote:
Originally Posted by sharktale
(Post 4410656)
Went to the roadside garage near home, who neatly stitched it using metal wires. Overall cost : Rs. 300 !!
|
If you meant melting hot wires into the plastic cracks, it's called hot stapling and is the other alternative I briefly considered. But a hot staple costs around $30 as against the same amount in INR I spent and I ditched it. What did you do about the broken headlight though? I've fixed a cracked taillight for Rs.5 in the past ;).
Quote:
Originally Posted by blackwasp
(Post 4410771)
Wow. Not only does it look pleasing on the eye, it lends the car a macho / experienced look thanks to the scar! Its very neat work that you have done.
I have seen this done by a couple of local shops, but they used a continuous wire instead of individual cable ties. The advantage with your method is incase any of them break, the whole thing won't come undone.
My WagonR has a torn rear bumper and I might try this to fix it sometime.
|
I didn't like it at first and it looks a bit better in person, thanks to my limited patience with taking proper pictures while I was busy fixing the bumper. And yes, the advantage of zip ties is the ability to replace one at a time. Do let us know how it goes on the wagonR.
Quote:
Originally Posted by InControl
(Post 4410807)
This is such a nifty fix. The fix is so simple and achieves 70% of the part at 1% of the cost compared to a new replacement :) Thanks for sharing this with us. The subtle humor makes the post very engaging to read.
|
Well, the quote from Tata stealership was Rs.5,500 so we're talking 0.5% or thereabouts. Re the humor: I guess that means I failed while trying to be 'in your face'. hmph. :P
Quote:
Originally Posted by dailydriver
(Post 4410819)
That's a neat but not so neat looking solution.
|
Well, I didn't like the look at first but it is kind of growing on me. Either way, for a saving of 99.5% of the cost to make it perfect on a beater, I can live with it for a while.
Quote:
Originally Posted by shankarbn
(Post 4410184)
Step 3 : Drill holes
I used 2x20mm zip ties. For this reason, I used a 3mm drill bit to drill holes. There is absolutely no reason to use a larger drill bit or zip ties. Since I didn't have such tiny zip ties, I ran to the nearest electrical store to get a pack of 100 for Rs.30. Attachment 1767773
|
Fantastic DIY. It is a
juggad, but it lends so much character to the car. Only one advise is to drill a small hole at the start of the crack. This is to dissipate any odd pressure points and prevent the bumper from tearing further under flex or stress.
This looks cool but I somehow feel that you should have used black zip ties for the additional character. Or you could go with red & black alternates for the extreme character. I am probably going nuts with the possibilities.
Quote:
Originally Posted by bordeaux
(Post 4411128)
This looks cool but I somehow feel that you should have used black zip ties for the additional character. Or you could go with red & black alternates for the extreme character. I am probably going nuts with the possibilities.
|
I'd be agonizing too but I could only find white zip ties at the nearby store - that made it easier for me just to stick to white. However, it would be fun to do this in red. Red would be the right contrast and would match with the special edition stickering on the doors. I'll probably do that if and when I paint the wheels red.
There is another alternative to this option.
Around 10 years ago, I suffered a tear in the bumper of my Indica. I used a solder gun to punch holes in the bumper and single copper electrical wire (single core 2 mm) with PVC coating for the repair.
The end result was a single stitch pattern that was largely invisible, since the tear was on the underside. I further used M-seal to ensure a water tight repair.
Since the copper wire was covered with PVC, it never corroded and the PVC helped provide the flexibility for minor flex.
The M-seal ensured that the backside of the bumper remained clean and debris free.
In my opinion and experience, the wire is strong enough to not break under minor flex and if the holes are far enough from the break (around 7-8 mm) the bumper tear will not open up again.
The point about drilling a hole at the end of the tear is a good one, but if you tie up the bumper stiffly enough, it does not propagate. Plastic (unlike glass) survives such repairs very well if there is no flex left in the repair.
The aesthetics aspect may not be so good as the plastic ties, but stitching with a single piece of wire speeds up the process by a good amount.
You can always go for cross stitch, but given the thickness of the wire as opposed to the ties may leave you with very large holes in the bumper.
Waiting for some member to post pictures of such repairs.
Another option which is even faster and works for small tears, is using the larger stapler. I have two mudguards on my beat which are only hanging on 3-4 staples on each side. The staples are done from the inside and are largely invisible. Once a year, as the staples get loose, I simply pull them out and install new ones. Going strong since last 3 years or so. :)
This one is a cool DIY ! thanks for sharing, we as kids used to 'stitch' plastic mud guards of Splendours and other bikes, but had not seen something of this size and scale.
Just a note, hope the zip ties you used are of good quality. Poor ones tend to harden over a period of time with exposure to heat and weather and then just break off with a gentle twist.
Quote:
Originally Posted by Ravi Parwan
(Post 4411388)
I further used M-seal to ensure a water tight repair. <snip> Going strong since last 3 years or so. :)
|
I did think about m seal but it's not really a concern on my car since the wheel well liner is intact. Also, body filler is a better seal than m-seal in my opinion, no real experience to back it up though.
Quote:
Originally Posted by NiInJa
(Post 4411448)
This one is a cool DIY ! <snip>
Just a note, hope the zip ties you used are of good quality. Poor ones tend to harden over a period of time with exposure to heat and weather and then just break off with a gentle twist.
|
I just assumed there's only sizes and colours. Will watch out. Thanks for the tip!
This method is a standard method for most wayside garages. They even make it invisible. I drove my thar into an electric pole one rainy summer in reverse and the rear bumper tore and the metal bumper underneath flexed. My neighborhood garage chap heated the metal bumperer and stitched the plastic part like its some cloth. I was wondering about the scar marks but he did something. He covered up in putty and sanded and painted it. Invisible. Till now holding good. Work of art. Stitches with metal wires though and not zip ties.
| All times are GMT +5.5. The time now is 22:26. | |