| | #121 |
| Distinguished - BHPian  | Re: My Car Hobby: A lot of fiddling, and some driving too! Jaguar XJR, Mercedes W123 & Alfa Romeo Sp For a period of some 12-14 years I was very active in the Alfa Romeo Spider Register. The Dutch car club for all Alfa Spiders. I was on the board, treasurer, chief editor of our quarterly magazine, member of the touring committee and a member of the technical committee. And a few other duties as well. When we left for the USA in 2009 that was also effectively the end of my direct involvement. That was fine though, time to hand over to some others. We came back to the Netherlands mid 2016. Although the Spider Register still organises events just about every month, for various reasons we donít attend too often. But this weekend was a Spider and Pizza tour. So we enrolled. Our daughter Ellen was staying with us and she got the passenger seat in the Spider in one of our good friends Niek. So a bit of different fiddling today!! The tour started from a Classic Alfa Specialist I know very well, van Neerijnen. This company and the owner features several times in this thread. Also, during my years away from the Netherlands all three of my cars were in storage with this company for some time. Koos, the owner, is a very amicable guy. Bu the is also a real expert when it comes to Alfaís. There is little he doesnít know or hasnít fixed over the years. Always interesting place to visit, because they always have various cars, engines opened up, cut away get boxes etc. These Spider drives are pretty relaxed. You sort of show up, you can register at the club website or via Facebook. If you donít and still show up that is ok as well. This time, as we would end at a pizza place they had asked everybody to register up front and pay of your pizza up front. We had a great turn out: 72 Spiders in all. 95 km drive through a very nice part of the Netherlands. Here we are at Garage Van Neerijnen. It was already quite hot and sunny and people were staying inside as we would be in the blazing sun for hours. The Netherlands is suffering from a heatwave. Temperatures up to 37oC. Very unusual for us.  Always some interesting project ongoing. This here is a Alfa Romeo GT, or rather will be in due course. Various modifications for racing. 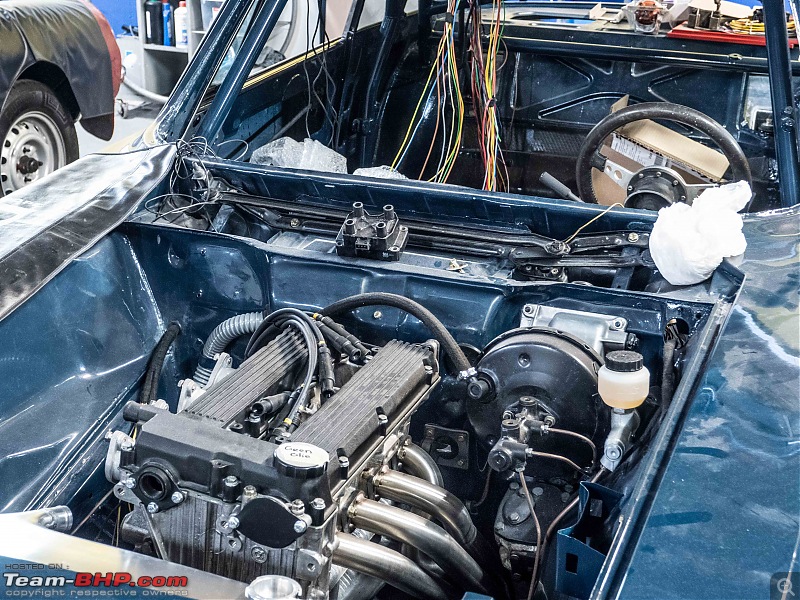 More and more Spiders kept arriving. In the end we had every Spider, from a 2600 touring to a Alfa 4C and every model in between!  Love this one, 2600! This is a very good Spider. I know the owners quite well. They bought it many years ago, joined the Spider Register and immediately enrolled in one of our weekly tours across Europe. On the first day, spanner mate Peter and I got a call from them as they were stranded somewhere along a French motorway on our way to Switzerland or Italy. So Peter and I turned around and found them. We managed to get their Spider going, only for it to break down 10 km further south. We did this a few times. Then we told them we just did not think the Spider was in good enough condition to make it to Switzerland/Italy. They took it in their stride, but it was a big disappointment. The Spider had not been exactly cheap. They drove home straight away and joined us later that night in their regular car. In the end they had the shell out a substantial amount of money to get their Spider properly sorted. Today it is probably one of the nicest and best 2600 in the Netherlands, if not in Europe. A car like this could be worth well over Euro 150.000 this days. They drive it a lot and will easily clock 5000 km/year. These days without any problems  More Spiders arriving   Proud Spider owner!!!  Our daughter Ellen went along with Niek, so most of these images are taken by her   Wherever you find yourself in the Netherlands there will be rivers, dikes and bridges. Perfect for the Spider.  And endless little villages with cool old draw bridges  It took us about three hours of driving for the 95 km. Which is pretty average on these sort of rural drives. We ended up at this Italian quaint restaurant in the middle of nowhere. Spiders parked in a massive field  Here you see the pizza overns and the guys preparing the pizza. It was good food and a very nice relaxed atmosphere. Everybody stayed for several hours. It wasnít until about 1800 hours when we started heading home.  Once at home I took off the so-called fly-swatter. I fitted it specifically for my wife. Without it, the little cockpit of the Spider is very windy, very turbulent. This little thing makes a huge difference. But old school diehard Spideristi believe these things are for wussies only. In a few weeks time, Peter and I are headed for our five day tour in the UK/Isle of Wight/Wales. And I know Peter will never let me forget if I have one of these. So better take it off. Takes all but ten minutes. 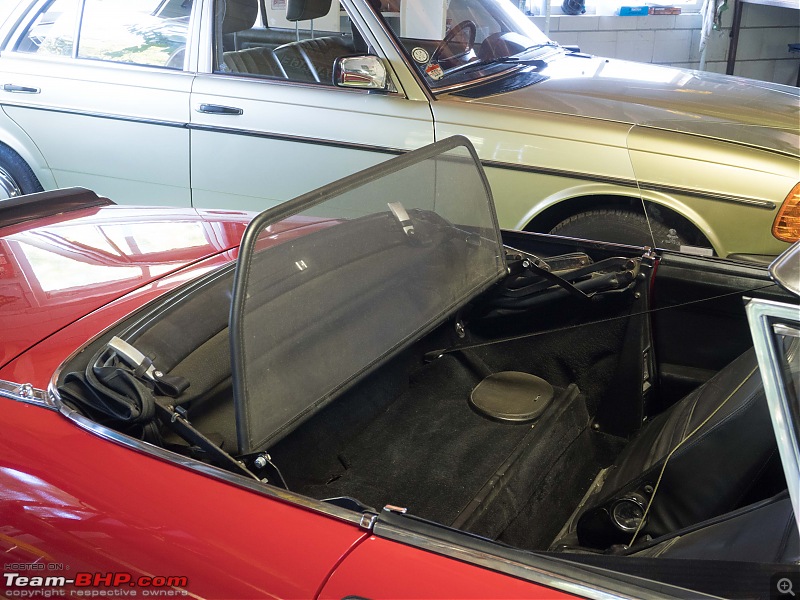 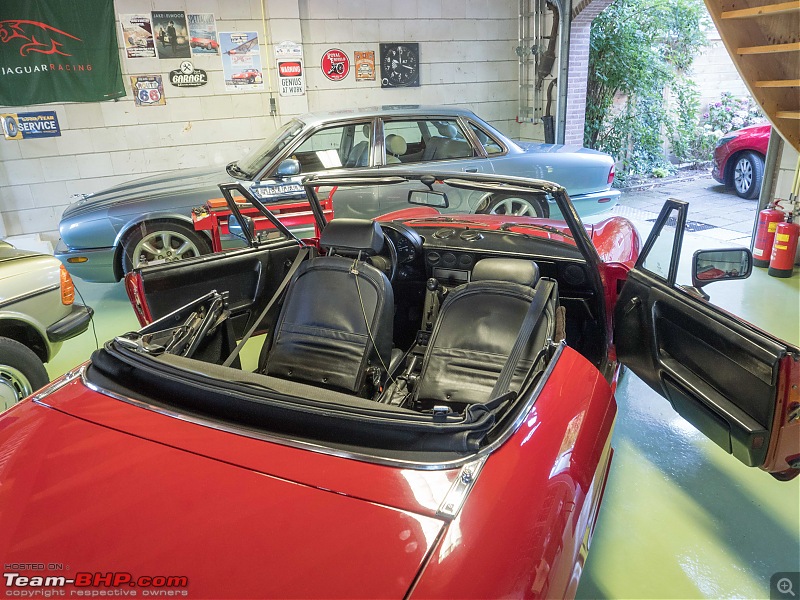 And, would you believe it, the clamp for my window came off again. It was fine for a few days and sometime during the Sunday I found it somewhere in the footwell. Since, i have cleaned, polished, and cleaned and polished both the glass and the metal base several times over again and glued it back on, again. Let us see what happens! 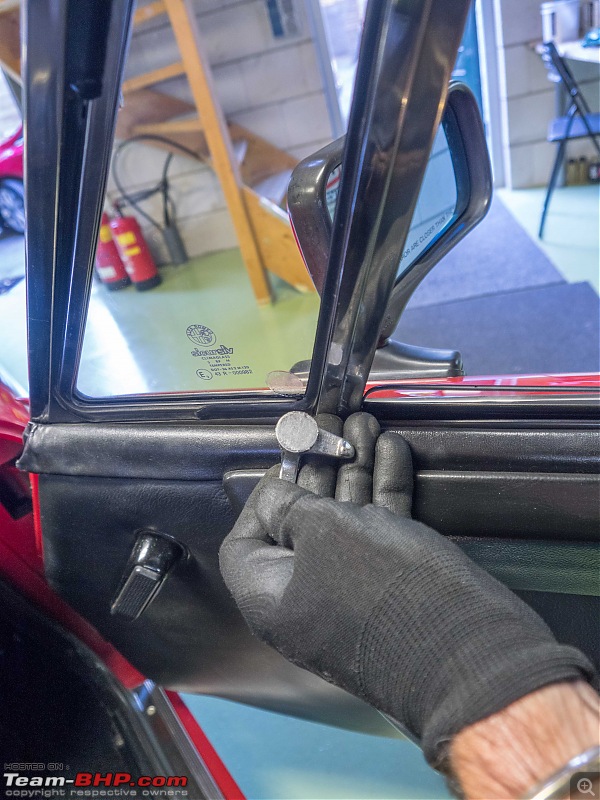 I have also started work on the Mercedes getting ready to change out the timing chain next week with Peter. Stay tuned for more. Jeroen |
| |  (9)
Thanks (9)
Thanks
 |
| The following 9 BHPians Thank Jeroen for this useful post: | Aditya, IcarusMan, Leoshashi, Omkar, R2D2, sandeepmohan, vaasu, Vik0728, VivekCherian |
| |
| | #122 |
| Distinguished - BHPian  | Re: My Car Hobby: A lot of fiddling, and some driving too! Jaguar XJR, Mercedes W123 & Alfa Romeo Sp An update on the Mercedes W123. Mine is a a petrol 2.0L the so called M102 engine. This was the latest development that went into the W123. Generally this engine is considered to be one of the best. It went on into the W124 as well. Slightly modified. It got hydraulically adjusting valves. And importantly, Mercedes replaced the simplex timing chain for a more robust duplex timing chain. Remarkably, nobody knows exactly when to change out a simplex timing chain on a M102 engine. There is nothing written on the interval in the official MB workshop manuals. You can try to measure the wear indirectly. Checking the timing marks on the valve train versus the crankshaft. But the general consensus amongst specialists tend to be every 100.000 km. I don’t know if mine was replaced at 100.000km. My car has done some 175.000 km or there about. So I felt it was high time to change it. When we lived in our last village, one of our neighbours was extremely knowledgable on Alfa’s and Mercedes. He had been the chief mechanic at the local Alfa Romeo dealer in the Hague, then became chief mechanic at Mercedes in the Hague. He got some health problems and the last couple of years he took care of the delivery of new MB cars. Some new owners like a very detailled explanation on every feature/button/setting of their new car. And Aad was extremely good at it. He knew everything and could talk for hours. He often came out and helped me if I was busy working on one of my cars. One night he came round and he had several bags full of parts and documentation. He had been clearing out his loft. He gave me all his old workshop manuals, and a lot of various parts. A few months ago, I learned that, sadly, he passed away. I was thinking of him when reading up on replacing the timing chain. The (German) manual I got from him. He had gotten it from Mercedes during a training in Stuttgart. You can still see some of his notes written across some of the images. These sort of engines, from a design point of view are some forty years old. Mine was produced in 1982. As engines go, this is all pretty basic. Also, the 2.0l version was the smallest engine option on the W123. Which also means that, by and large, everything is very accessible. You put the 6 cylinder 2.8L in and it gets very cramped. This diagram shows the basic lay out of the timing chain arrangement 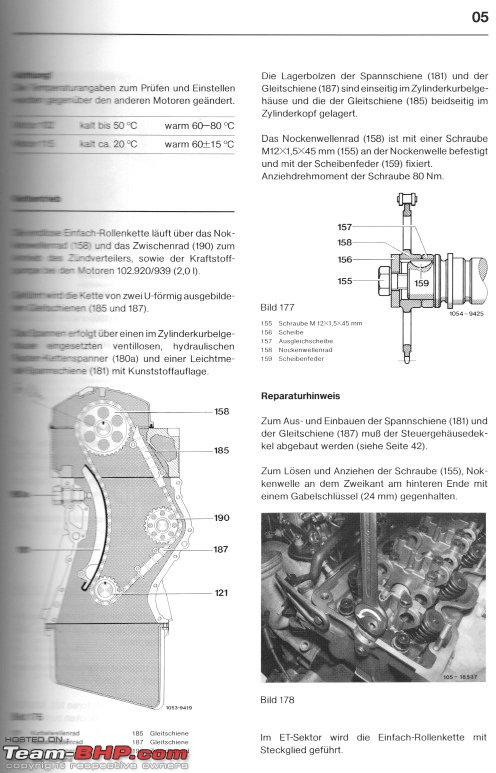 Most experts will tell you to also change out the tensioner at the same time as the chain. 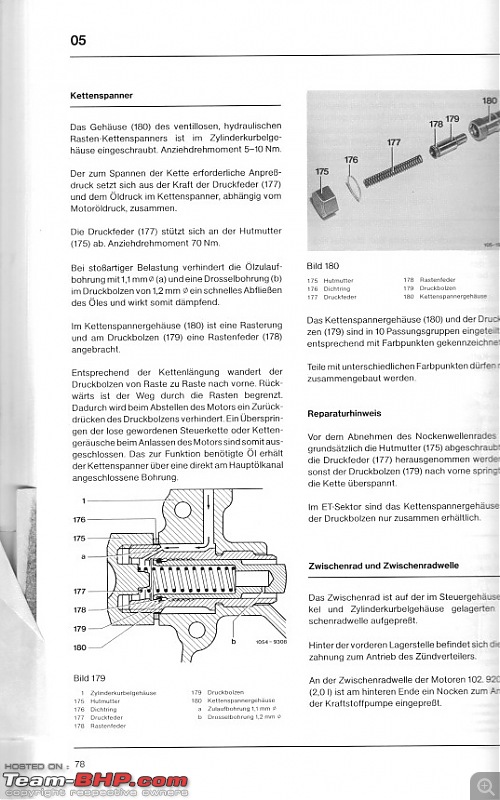 Before we can get to the chain some bits have to come off, obviously. So here goes, this is how it starts. With the hood in its 90o open position. I have put tie-wraps on both hinges to keep it in place! Don’t want it crashing down on me. 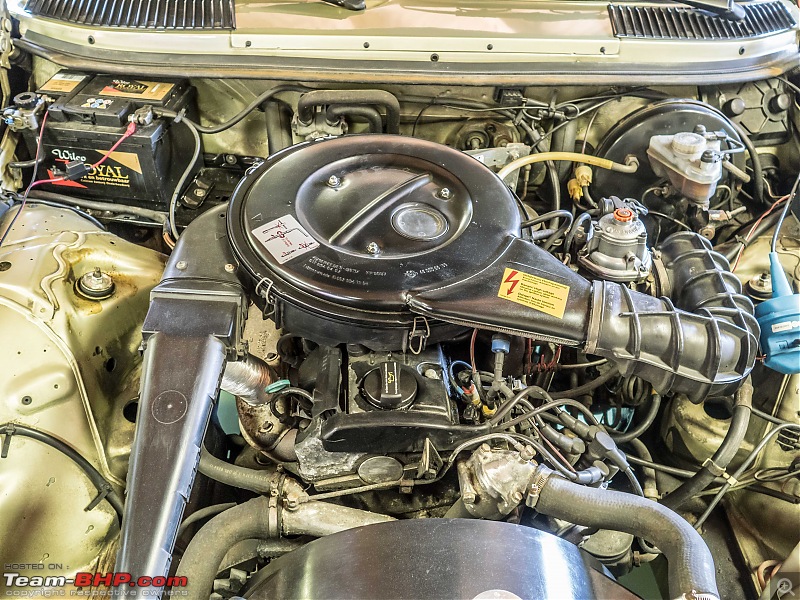 First take off the cover of the air inlet filter. Three nuts and 6 clips. 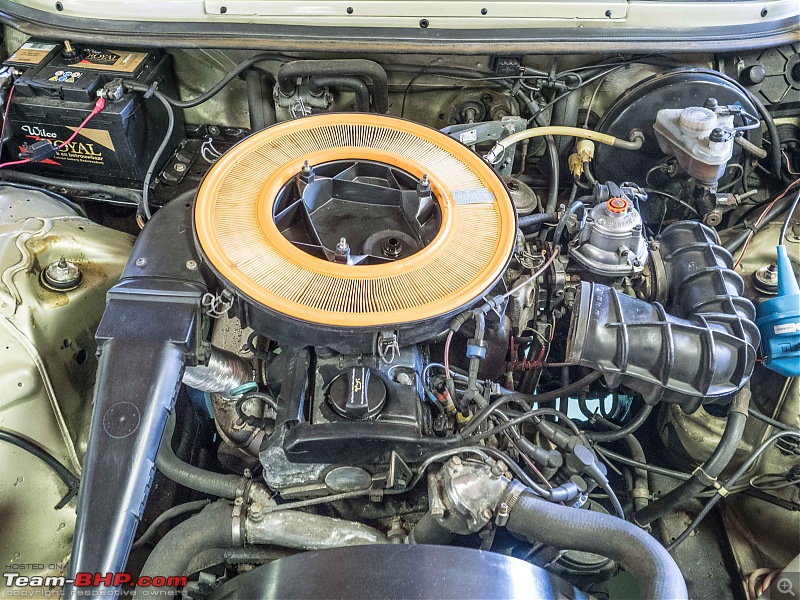 The filter was still pretty clean, I can use that again Take the filter out: 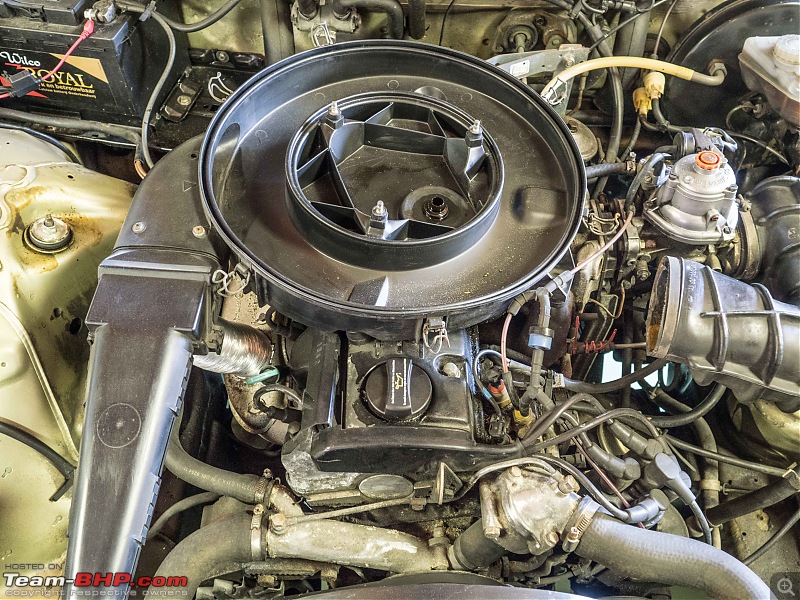 Remove the air inlet body. Couple of nuts and off it comes. Now we have access to the valve cover 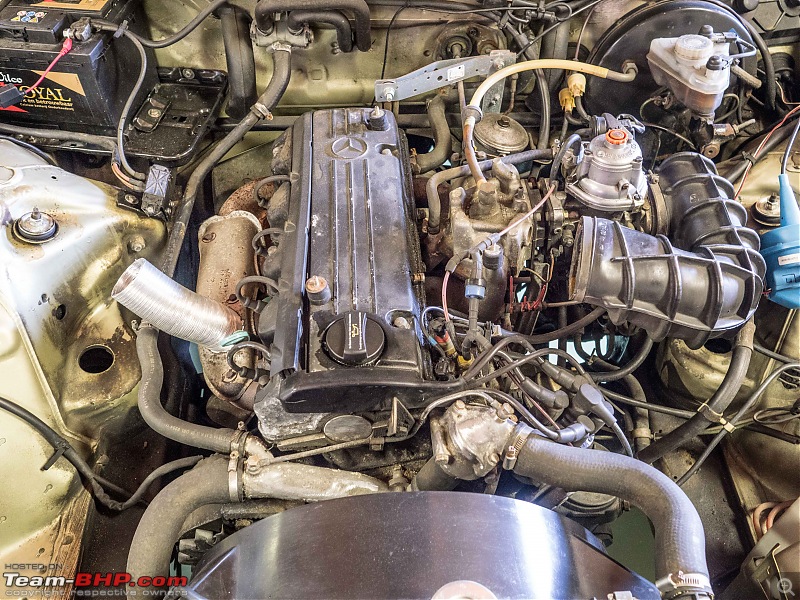 Next the spark plugs come out. The reason is that with them removed it will be much easier to turn the engine. I make it a habit to always label the spark plug cables. You think that based on length you will put them back correctly and usually that works out ok. But once I worked on my Jeep Cherokee (6 cylinder) and I managed to swap two cables by accidents. The engine still started, but was running rough. I had been doing a whole bunch of different jobs, so at first I did not suspect the cables. Took me a while to figure it out. Since then, I label all cables, no matter how simple and straight forward the arrangement might look. 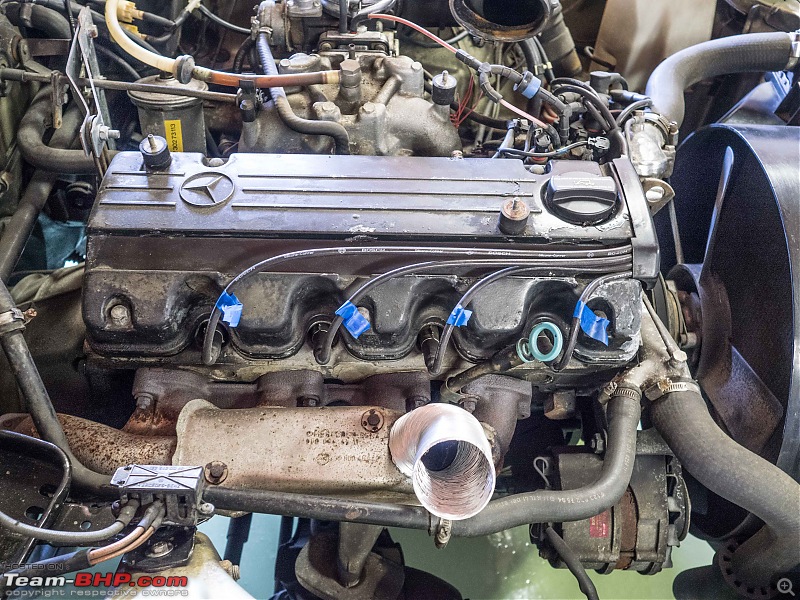 The spark plugs on this engine sit pretty deep. So first I blow some air around it to clean out these spark plug recess holes. Next, you need to have the correct spark plug tool. 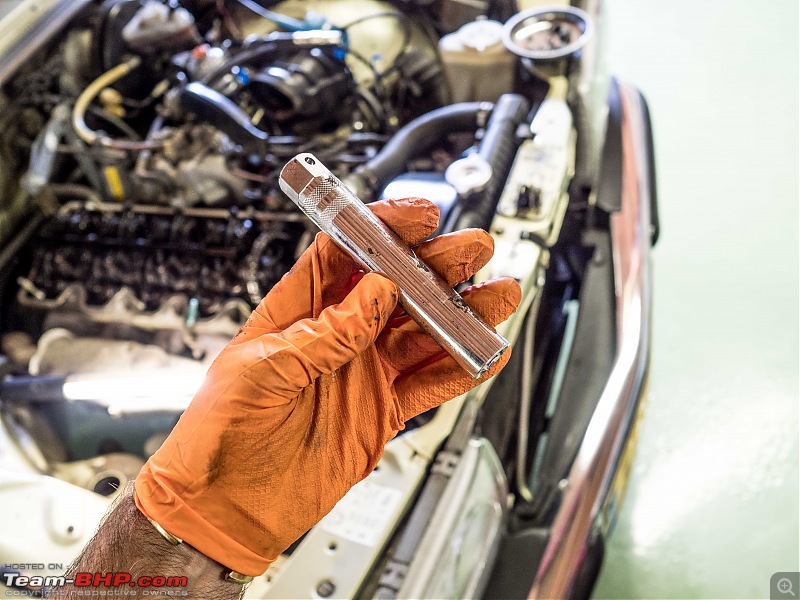 All the plugs removed and all cables are out of the way 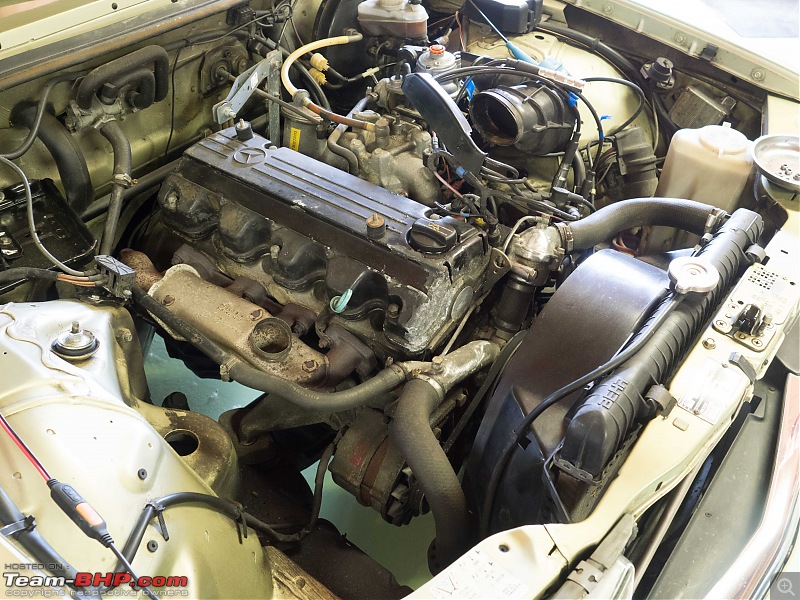 Here you have a view of how deep these spark plugs sit: 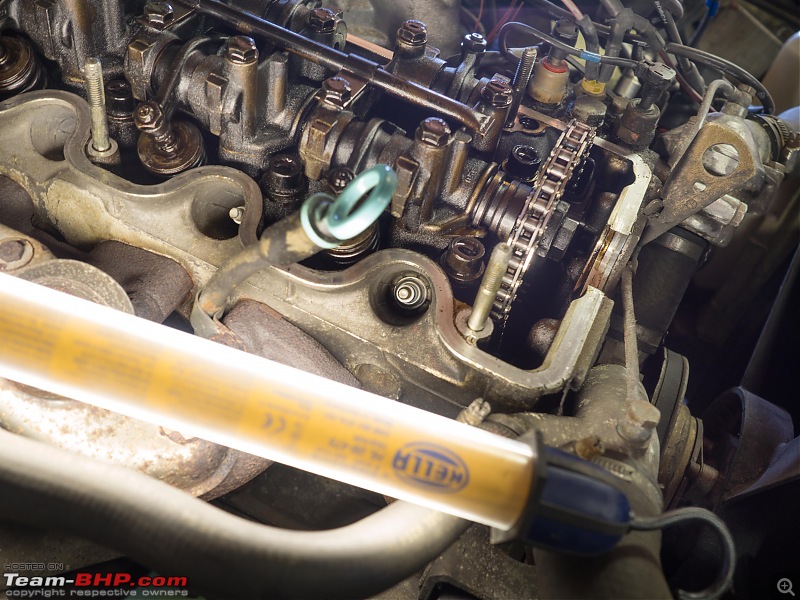 Valve cover removed. Just 5 nuts. It came off real easy. Sometimes these covers really stick. In which case you might have to tap them very gently with a mallet. 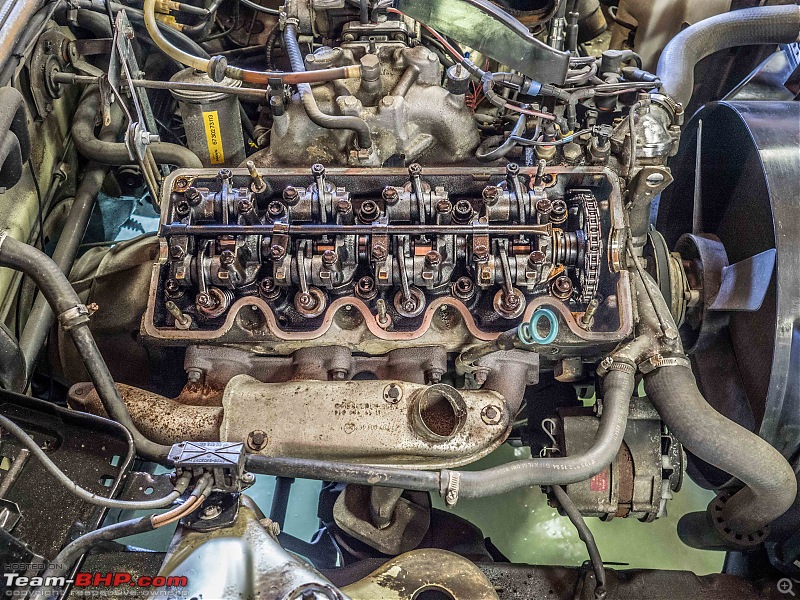 Inside of the valve cover. A bit mucky, they usually are. 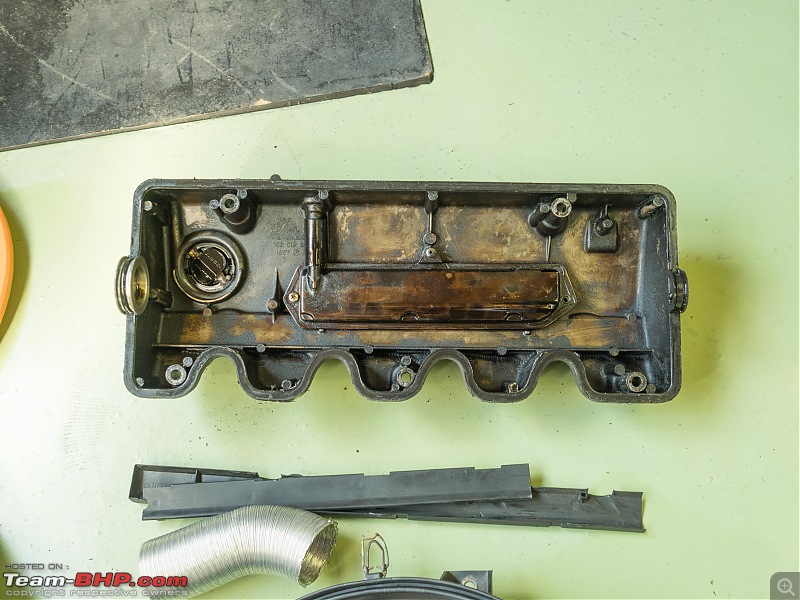 I checked the plugs. They looked fine, these are iridium plugs by the looks of it. Even so, just checked the gap to make sure. Special little tool for that! 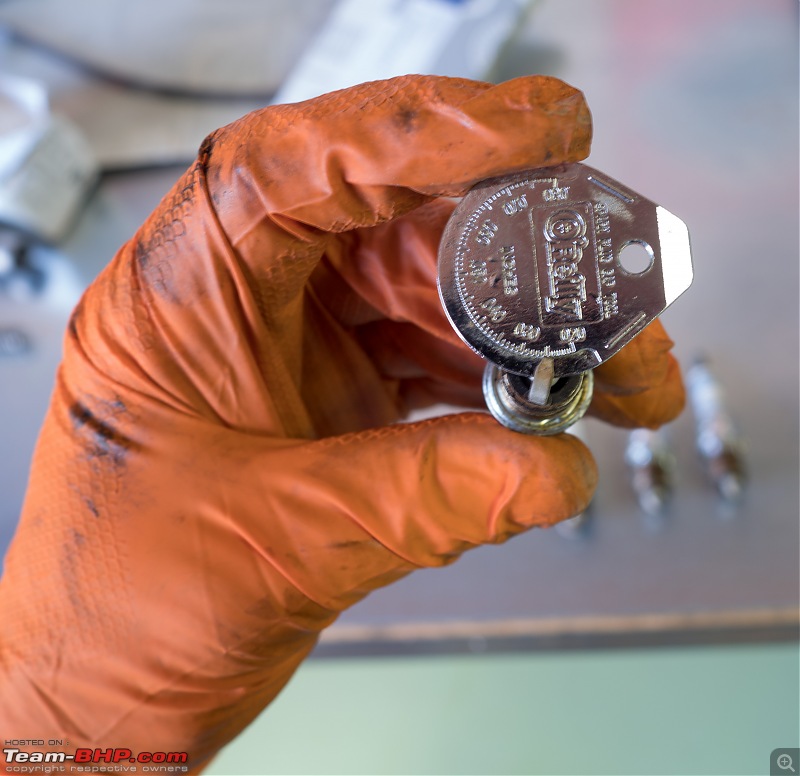 To get the tensioner out the alternator needs to be loosened up. Now, take it from me, on most cars that can be quite a bear of a job. Typically these bolts are very very tight. I always spray some of this special WD40 on it. This is not the regular WD40, but this one specifically penetrates and loosens up rusty old bolts and nuts. It works really well, much better than the general WD40. 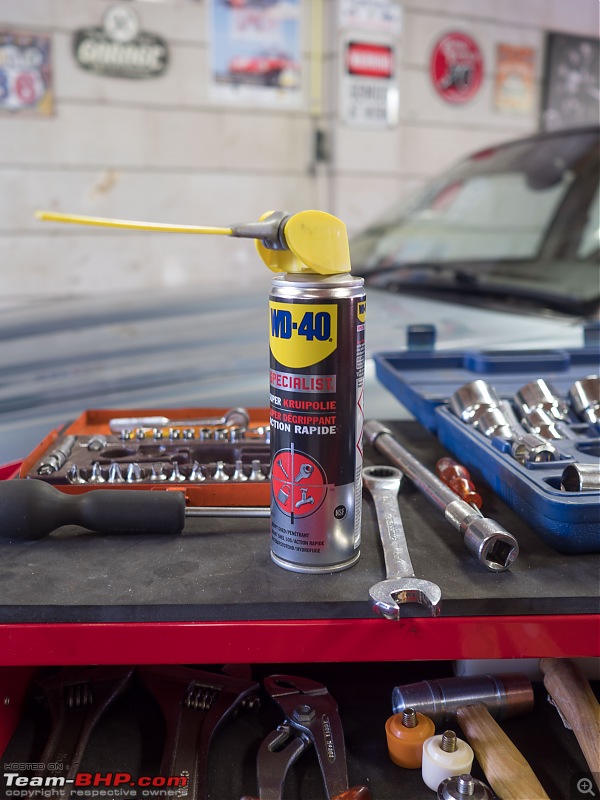 Most alternators have a very similar set up. There is usually one bolt on which it swivels and one bolt that moves across a support and you use to tighten the V-belt. This latter bolt on the mercedes is very clever. It comes with teeth that interlock with teeth on the support. So by turning this bolt you actually move it forward/backward tensioning/slacking the V-belt tension. Very simple, very clever. 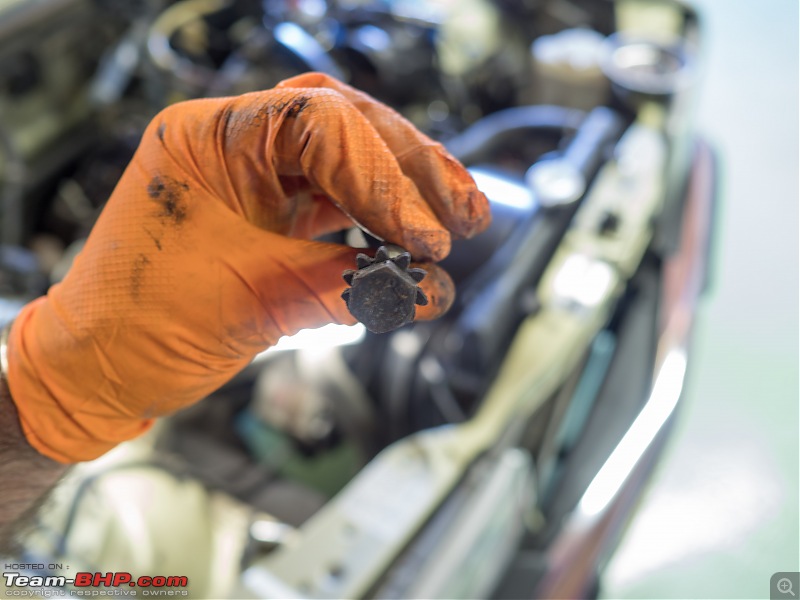 Even with my special penetration spray it took a lot of muscle and a large ratchet to get the bolts undone. 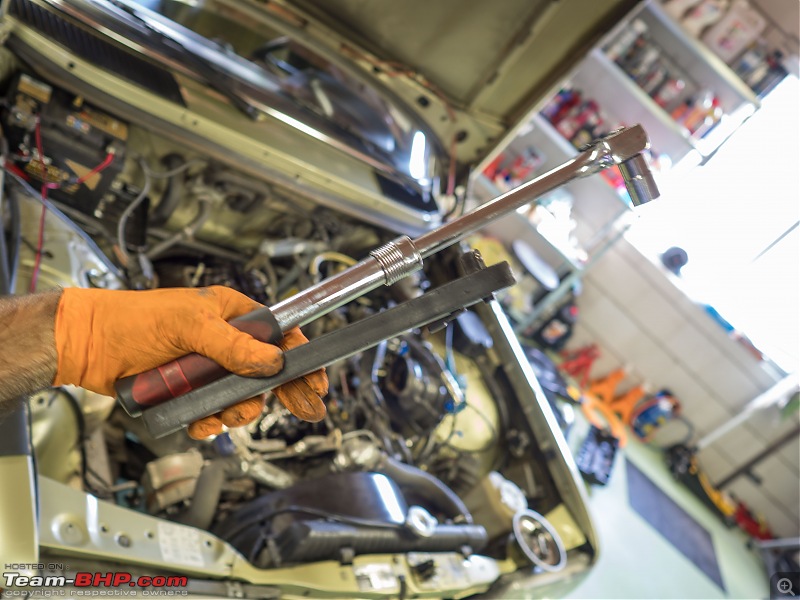 Here you see the alternator swung out of the way. The very large nut, just underneath the light is the retainer nut of the tensioner. 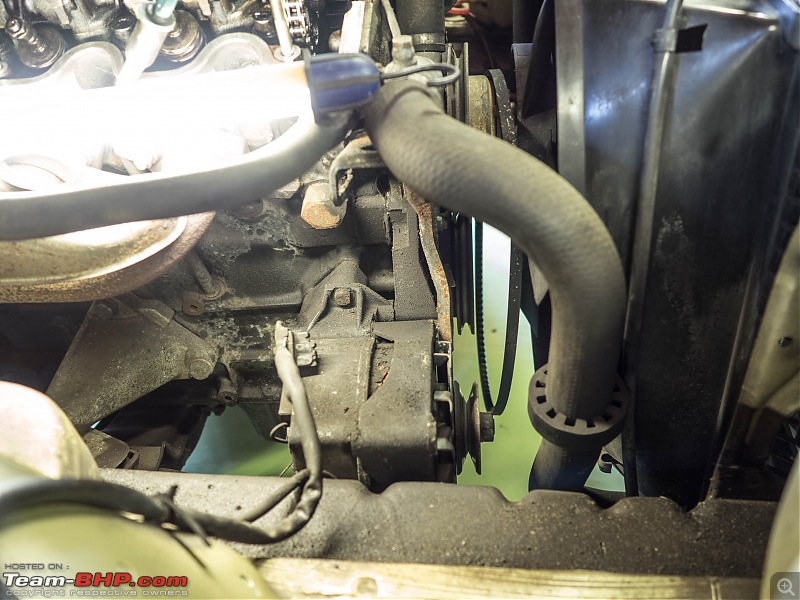 The retainer nut of the tensioner came off without too much problems too. But then I hit a snag. In order to get the actual tensioner out of the engine you need a Allen key size 17. I have up to size 13 and one size 19, but not 17mm. Quick bicycle ride to my local car part store. They did not have it either, but ordered it and it will arrive later this week. As I had the valve cover off, I decided to check the valve clearance. 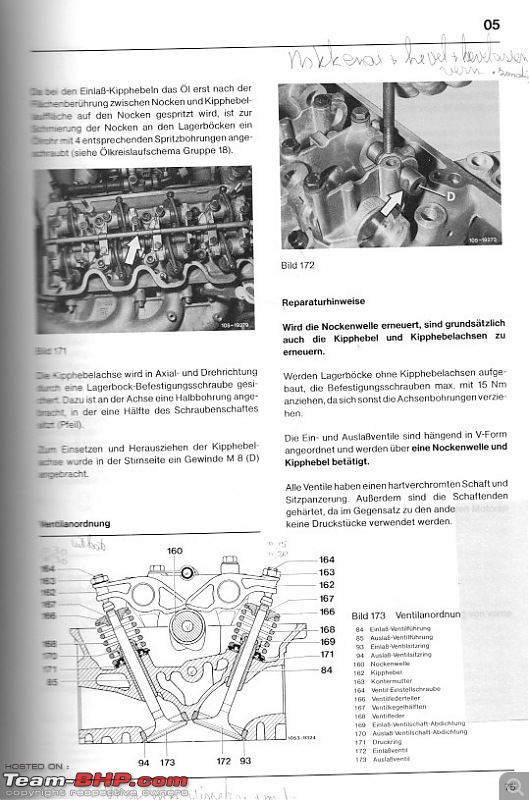 On this engine you can do that whilst the engine is still warm. They provide valve gap measurements for both cold and warm engines. Warm is anything above 50o. Again, this really shows how well the Mercedes engineers thought this through. When a car comes into the workshop for a service it’s engine might take several hours to cool down. Irrespective, here you can adjust the valves immediately or at the end of the day. You just use the appropriate measurements. Adjusting valves on this engine is as basic as it gets. You check with a feeler gauge the gap. As explained earlier, with the plugs out, the engine turns really easy. you need to make sure that the valve you are checking is fully closed. Check the gap with the feeler gauge. It should just fit. Adding 0.05mm should make it stick. It is a very simple arrangements, a locking nut and a simple adjustment bolt. All you need is a ring spanner and a screw driver that fits really well into the adjustment bolt. 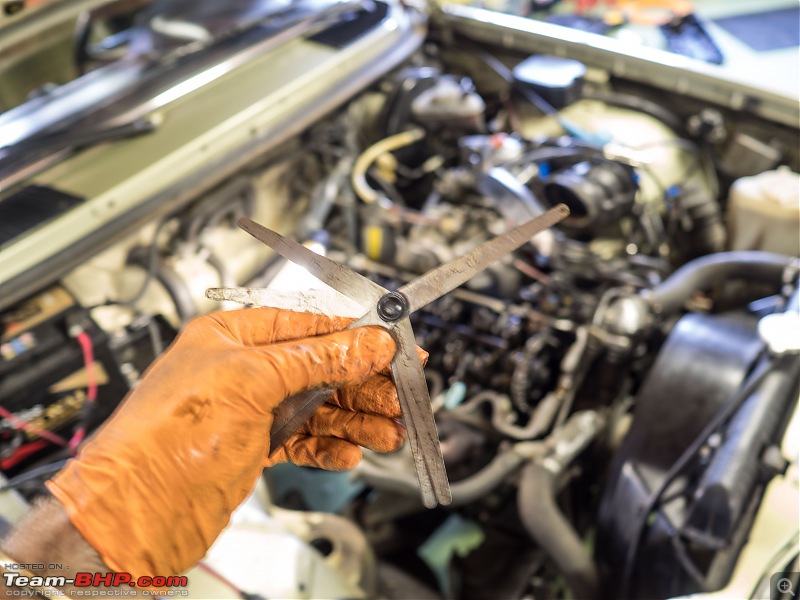 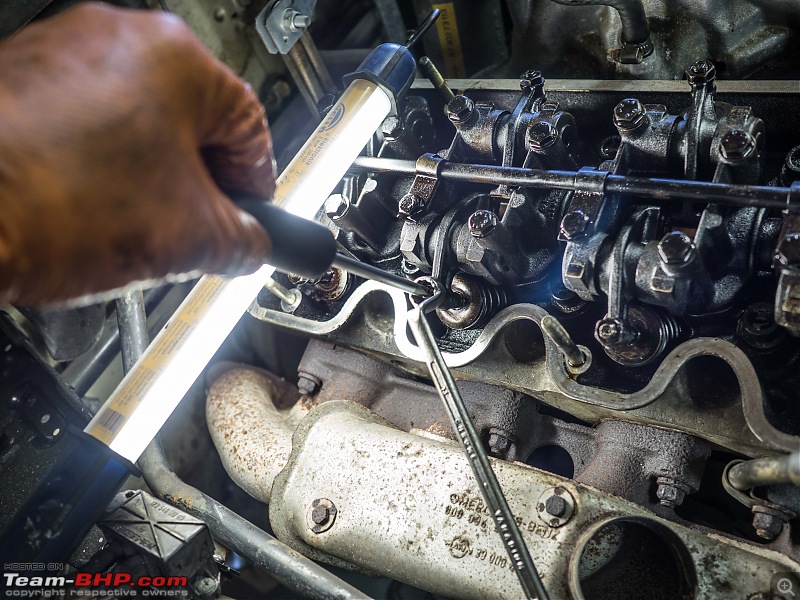 I only had to adjust one inlet and one outlet valve, off by 0.05mm. I did mention a problem with one of the adjustment bolts earlier. Last time I check the valve clearance the number 4 inlet valve had a problem. It was really a bit loose and the adjustment bolt was stuck. I was actually prepared to take the rocker arm out. But with my fancy Wd40 spray, a bit of patience and a large plier I managed to get it loosened up again. So, all valves are fine. I will get my tensioner Allen key in a few days. Next week spanner mater Peter is giving me a hand with changing out the chain. It is a two man, four hands job. Jeroen Last edited by Jeroen : 7th August 2018 at 12:56. |
| |  (6)
Thanks (6)
Thanks
 |
| The following 6 BHPians Thank Jeroen for this useful post: | Aditya, cheetahrd, Leoshashi, Omkar, R2D2, vaasu |
| | #123 |
| Distinguished - BHPian  | Re: My Car Hobby: A lot of fiddling, and some driving too! Jaguar XJR, Mercedes W123 & Alfa Romeo Sp Yesterday the little dent in the Spider driver's door got fixed. I picked the Spider up after work and drove it home. Spend some time getting it all clean and waxed for the big drive to the UK and Wales at the end of the month. I might have a go at one more little simple job. The door card on the driver door is very wonky. I really need to replace it, but it could wait I guess till I come back from the UK. Would you believe the clamp on the window fell off again. So I tried another glue, fingers crossed. Tonight on the way home I will pick up my new size 17mm Allen Key so I can take the chain tensioner out of the engine of the Mercedes. I cleaned all the parts, so everything is ready to change out the chain next week. First thing now is my three day weekend at the Nurnburg Ring in Germany. I have been there many times before. When I just got my Spider, the Alfa Romeo Spider Register used to visit every year and we used to camp out. Lots of fun. I'm going for three days this time. I'm leaving Thursday late afternoon after work and will drive to a small village nearby the ring where I have booked a little hotel. The main reason for going this year is that I want to produce a so called panel of 15 photographs for the Royal Photography Society as part of my next assignment. I know for a fact if you just shoot cars, nobody will like it. So I am going to try and capture the atmosphere, the people interacting with one another, talking, driving, enjoying old cars. I'll be taking the Jaguar. It is about 270 km, mostly motorways and even some unrestriced speed parts on the German Autobahn. This thread I put up a few years ago: http://www.team-bhp.com/forum/intl-m...g-germany.html We have been suffering from a heatwave the last couple of weeks here in the Netherlands. But last night it started to rain and more rain is expected for tomorrow. I do not mind a bit of a shower when I am at the ring. Makes for interesting images, but I do hope to have plenty of dry spells too! Last edited by ajmat : 9th August 2018 at 15:01. |
| |  (3)
Thanks (3)
Thanks
 |
| The following 3 BHPians Thank Jeroen for this useful post: | Aditya, Leoshashi, R2D2 |
| | #124 |
| Distinguished - BHPian  | Re: My Car Hobby: A lot of fiddling, and some driving too! Jaguar XJR, Mercedes W123 & Alfa Romeo Sp Today on the way home I picked up my special 17 mm Allen key. Fits perfectly and I have already loosened up the tensioner. I will take it out completely when we start on the chain. 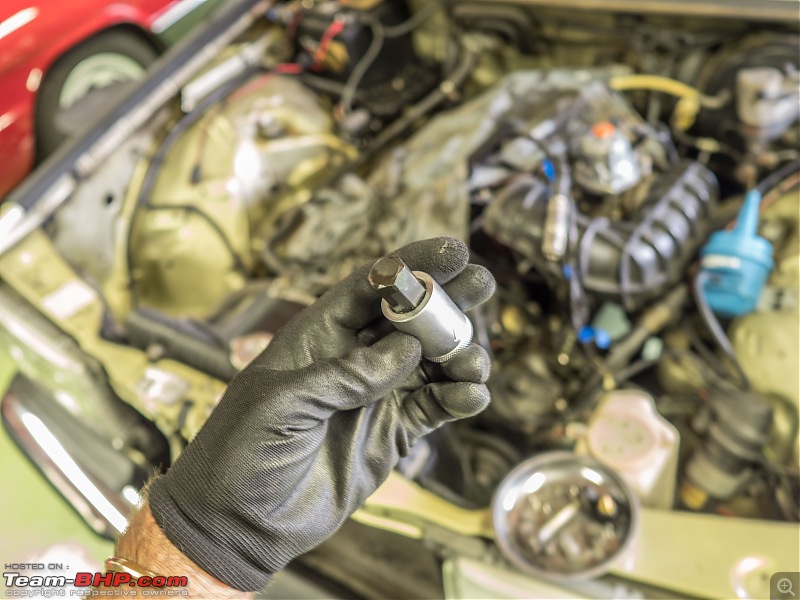 I was also cleaning some more parts of the Mercedes. I was checking the spark plug cables and found one of them badly corroded inside the connector. To the extend that the plug wonít stay put. So I need to find a new part of maybe change out the whole cable. These are four individual length spark plug cable. I hope I can get the correct one. 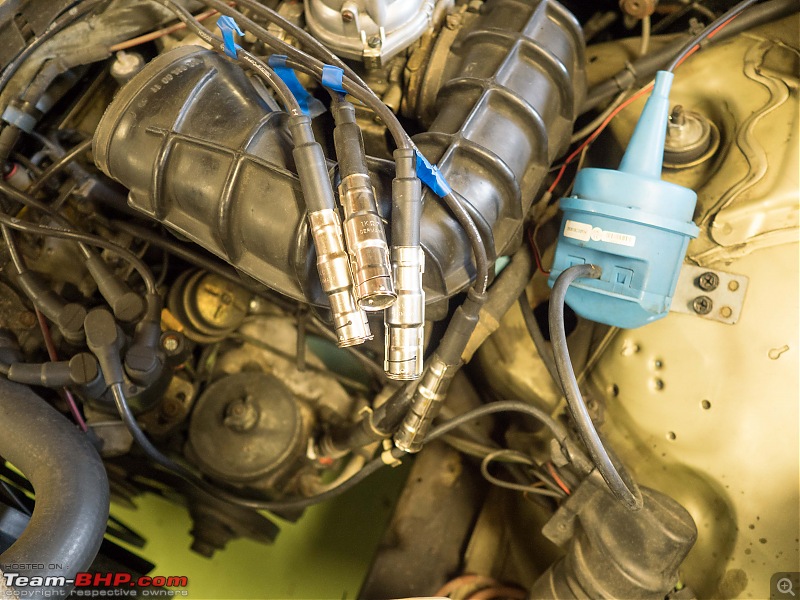 On the Alfa Spider, well, the little clamp is still attached to the window. So let us see again, (3rd or 4th time) if it holds! 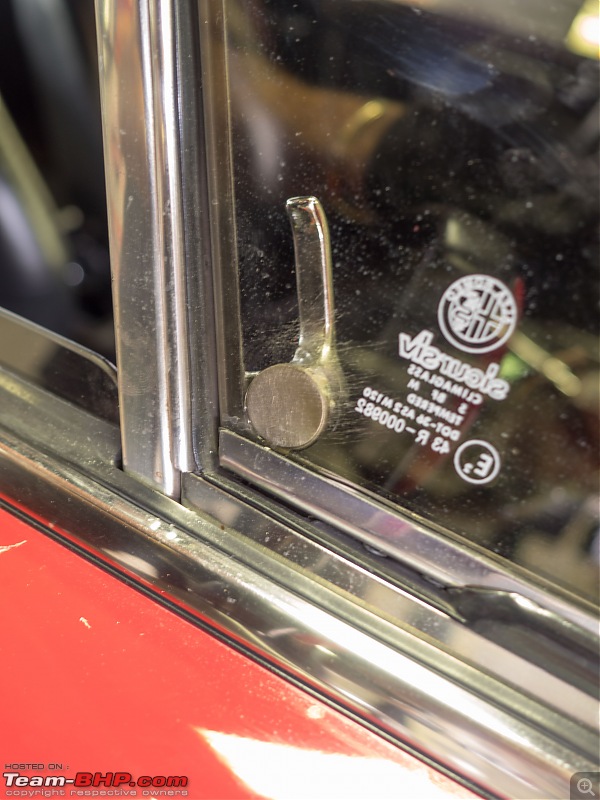 I also had a go at the doorcard on the drivers door. I remembered vaguely I had some parts stored somewhere. I checked last night and I had various clips, so off comes the panel. This is how it looks: 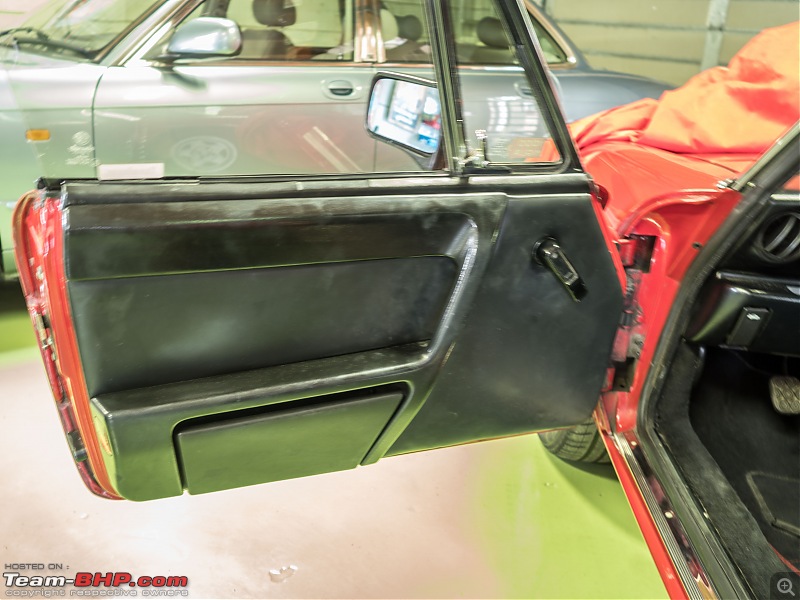 But here you can see, that when pulling the door, which is with the armrest, which is attached to the doorcard, the door cards is coming off. 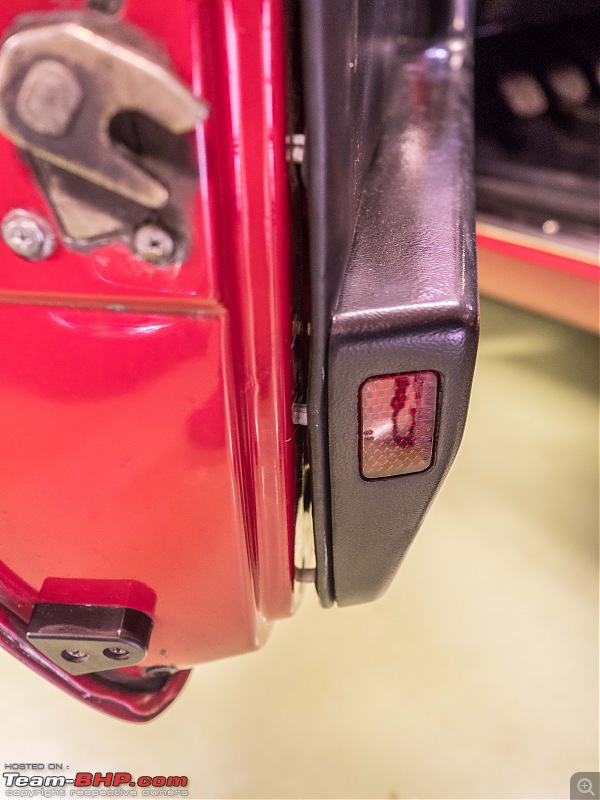 Time to break out one of my special nifty tools!! Very handy to remove these sort of panels: 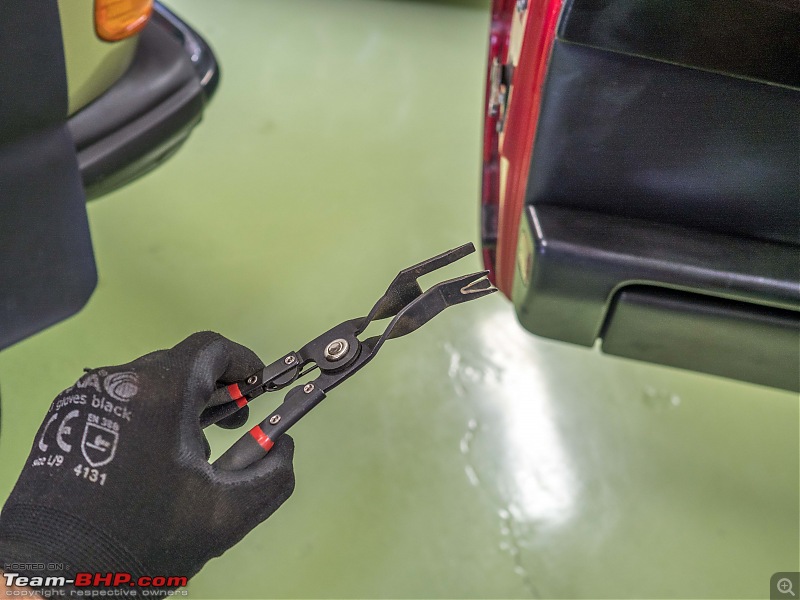 Here you see the back of the door card en plastic bags full of new or partly new bits. 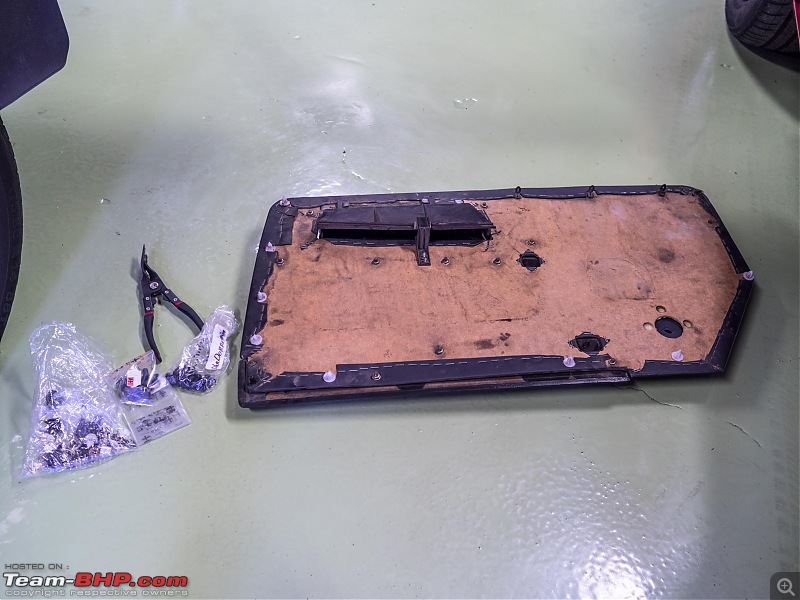 There are three different kinds of clips Alfa uses on this doorcard. Managed to replace various that had worn down. Here you see one particular type. You screw it into a whole in the door card. 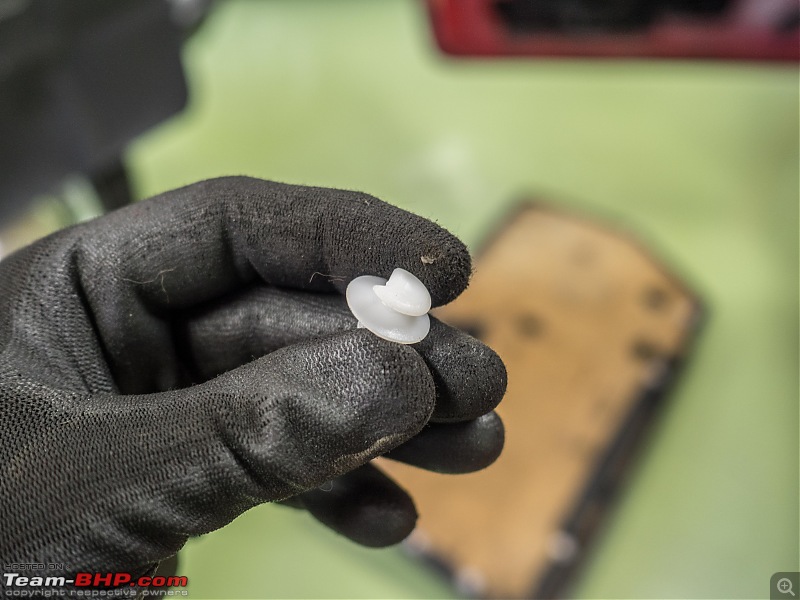 Aftter about an hour of fiddling and messing about, things look much improved: 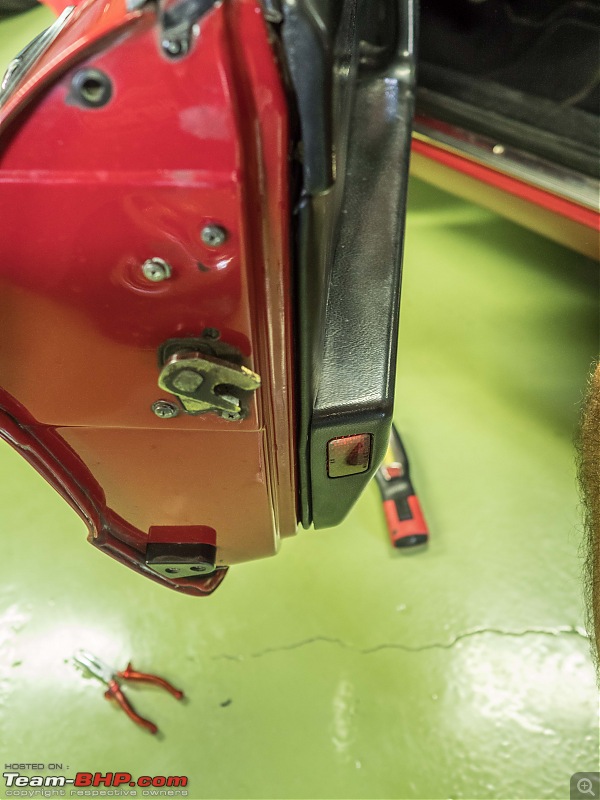 A new job on the Spider has announced itself. Earlier I noticed that the passenger door was getting very stiff. In order to grease/lubricate the hinges you have to take the whole door with the hinges off the car. Not a small job and it is really difficult getting everything back in place and properly aligned. So I was dreading to have to do this. But you canít wait to long. If the hinges become to dry they will wear and that means replacing them, which is a whole lot more tricky work. Anyway, tonight I was inspecting the hinges again, trying to see if I could get a bit of oil on them without anything taken apart. So I was moving the door back and forth to get a better view. All of sudden something snapped and the door moved freely. What snapped was the door catch. Only marginally less dreaded to have to replace that. The problem is you have to go inside the door. Which means taking out the window electric winding mechanism. This is a system of pulley and wires. If you mess it up, if the wire jumps of the pulley or worse, of the main central drum, you are in for it. Anyway, for now not a problem. This is most likely a job for this winter. Whatever, I need to order a new door catch. Jeroen |
| |  (5)
Thanks (5)
Thanks
 |
| The following 5 BHPians Thank Jeroen for this useful post: | Aditya, IcarusMan, Leoshashi, R2D2, vaasu |
| | #125 |
| Senior - BHPian Join Date: Jul 2009 Location: Calcutta
Posts: 4,668
Thanked: 6,227 Times
| Re: My Car Hobby: A lot of fiddling, and some driving too! Jaguar XJR, Mercedes W123 & Alfa Romeo Sp Could you post a picture of the Alfa door striker plate pls. Regards Sutripta |
| |  ()
Thanks ()
Thanks
 |
| | #126 |
| Distinguished - BHPian  | Sure, but it will have to wait for a few days. I have just arrived in a little village in Germany near the Nurburgring. Tomorrow the Classic grand prix starts and I will be here till Sunday evening. I drove the Jaguar, went fine until I actually pulled in the parking lot of my hotel. It went in restricted performance mode and showed it had an electrical fault. Bit of fiddling with fuses, relay, the battery and my little code reader and all seems well again. But I am not happy with it. Because it is very likely to happen again. One thing this happening in a parking lot, but you don't want this sort of nonsense on the Autobahn. Anyway, I will post a few images on Monday. Any particular reason you are interested in this particular part? Jeroen |
| |  ()
Thanks ()
Thanks
 |
| | #127 |
| Senior - BHPian Join Date: Jul 2009 Location: Calcutta
Posts: 4,668
Thanked: 6,227 Times
| Re: My Car Hobby: A lot of fiddling, and some driving too! Jaguar XJR, Mercedes W123 & Alfa Romeo Sp |
| |  ()
Thanks ()
Thanks
 |
| | #128 |
| Distinguished - BHPian  | |
| |  ()
Thanks ()
Thanks
 |
| | #129 |
| Senior - BHPian Join Date: Jul 2009 Location: Calcutta
Posts: 4,668
Thanked: 6,227 Times
| Re: My Car Hobby: A lot of fiddling, and some driving too! Jaguar XJR, Mercedes W123 & Alfa Romeo Sp |
| |  ()
Thanks ()
Thanks
 |
| | #130 |
| Distinguished - BHPian  | Re: My Car Hobby: A lot of fiddling, and some driving too! Jaguar XJR, Mercedes W123 & Alfa Romeo Sp
Special request: Here is the actual striker plate on a Spider: 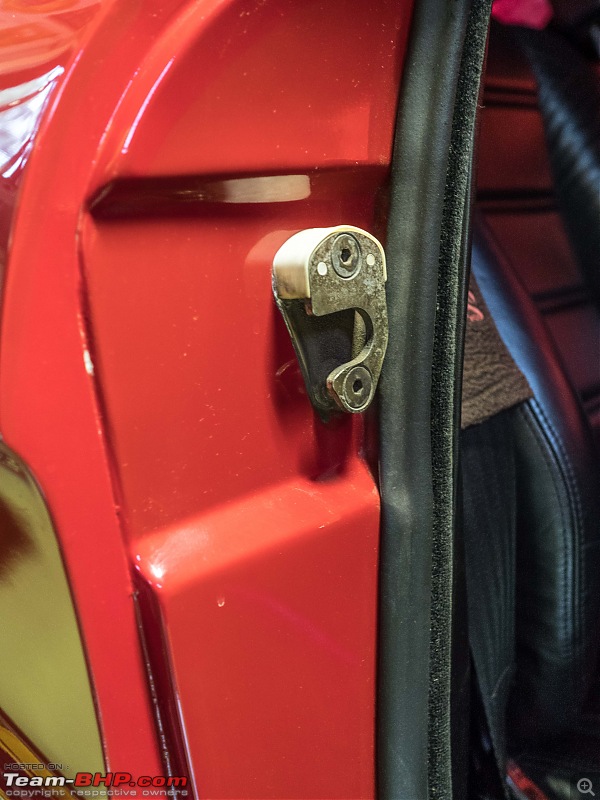 On the doors of a Spider you have also what is known as a door wedge plate: 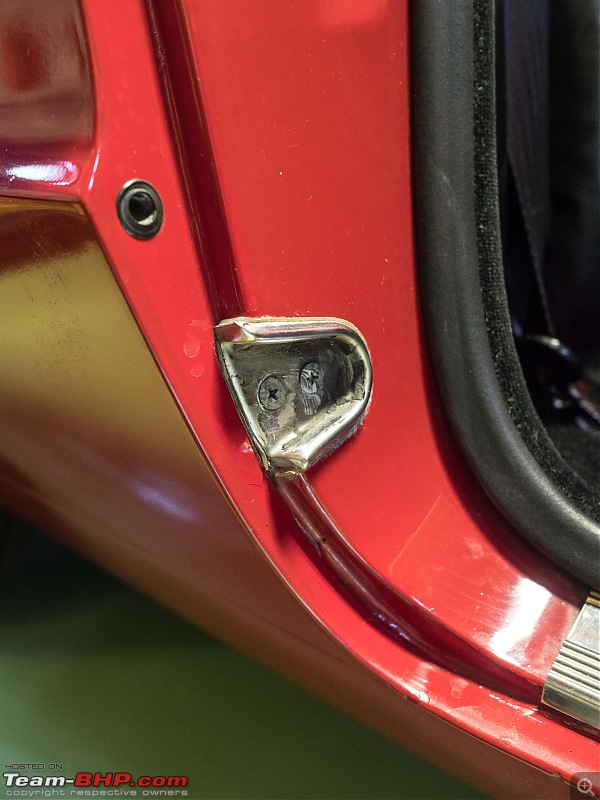 These cars have quite a bit of flex in their chassis, so the doors do need a bit of extra help to stay put. This is what the door looks like: 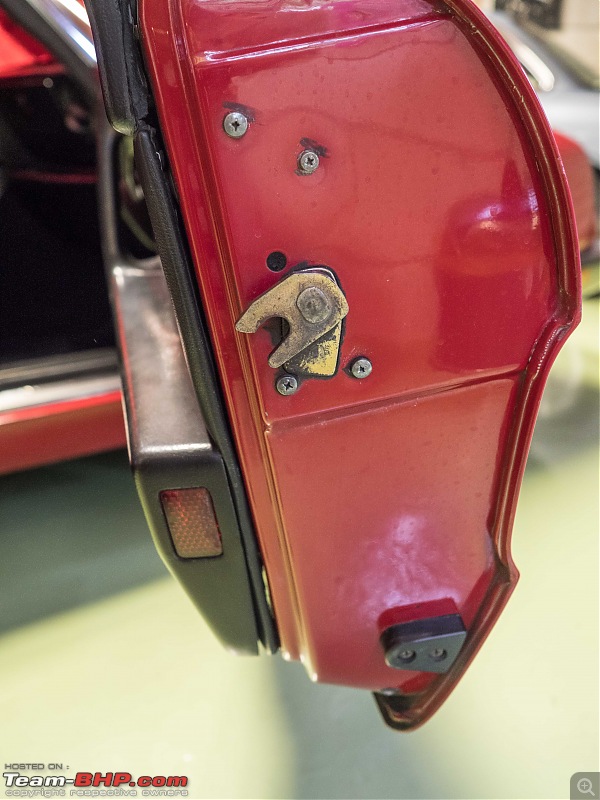 Finally, overnight de door latch part arrived. So now I need to figure out how to get at it inside the door. 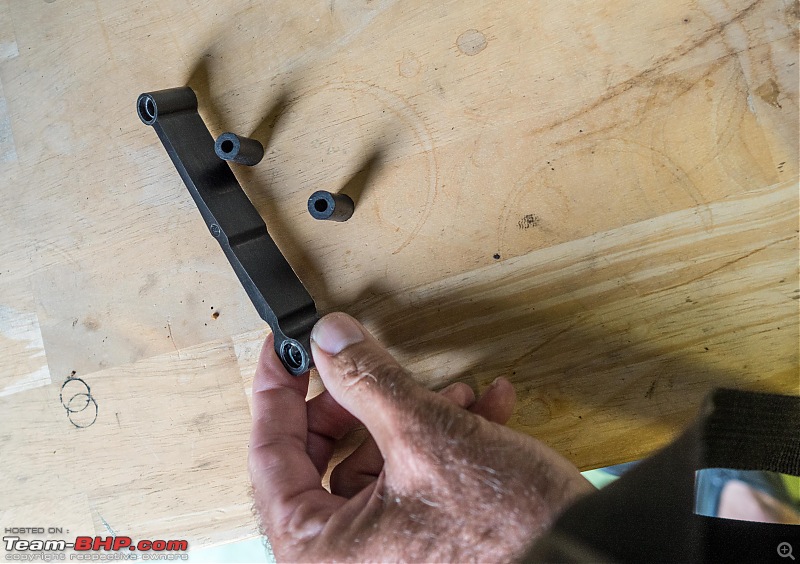 Jeroen |
| |  (4)
Thanks (4)
Thanks
 |
| The following 4 BHPians Thank Jeroen for this useful post: | Aditya, blackwasp, Jaggu, R2D2 |
| | #131 |
| Senior - BHPian Join Date: Jul 2009 Location: Calcutta
Posts: 4,668
Thanked: 6,227 Times
| Re: My Car Hobby: A lot of fiddling, and some driving too! Jaguar XJR, Mercedes W123 & Alfa Romeo Sp ^^^ Thanks. In the original picture of the latch it seemed as if there was almost no gap between the latch and the door sheetmetal. Regards Sutripta |
| |  ()
Thanks ()
Thanks
 |
| |
| | #132 | |
| Distinguished - BHPian  | Re: My Car Hobby: A lot of fiddling, and some driving too! Jaguar XJR, Mercedes W123 & Alfa Romeo Sp Quote:
Jeroen Last edited by Jaggu : 14th August 2018 at 13:14. Reason: Fixing Quotes. | |
| |  ()
Thanks ()
Thanks
 |
| | #133 |
| Distinguished - BHPian  | Re: My Car Hobby: A lot of fiddling, and some driving too! Jaguar XJR, Mercedes W123 & Alfa Romeo Sp Earlier I showed all the preparations on the W123 to replace the timing chain. Earlier this week, my good friend and spanner mate Peter joined me to give me a hand. Replacing the chain is a real two man / four hand job. So here we are ready to get going. Fire extinguisher at the ready just in case as well be grinding off the rivets on the old chain. 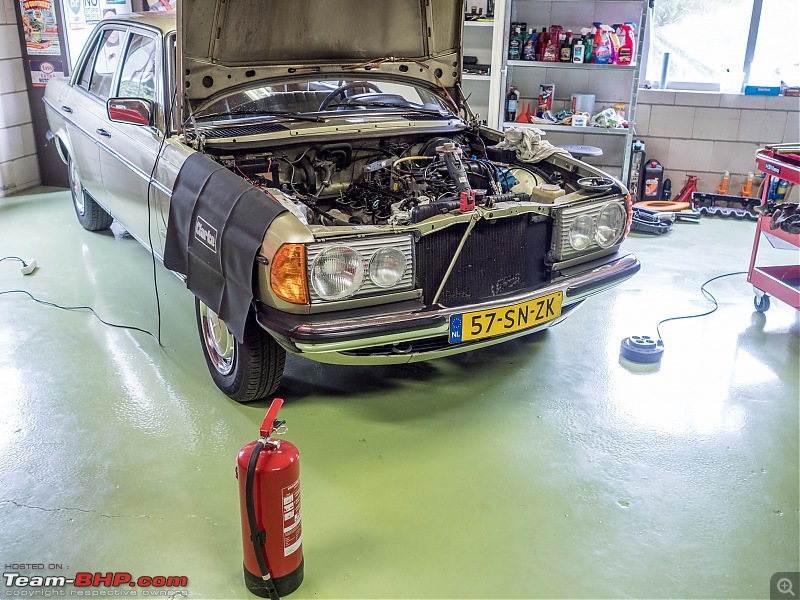 Before you start always double check the internal timing of the engine. So you know where the markings are on the cam and crankshaft. Remove the chain tensioner. Step 1: Lots of stuff wrapped around the sprocket and the chain. Whatever happens, nothing should fall in between as it will end up in to bottom of engine. Might get stuck somewhere along the chain guides, sprockets etc. Not good! So better safe than sorry. Here you can see the chain is fixed with two tie-wraps to the sprocket wheel. We have already ground down the two rivets on the old chain. 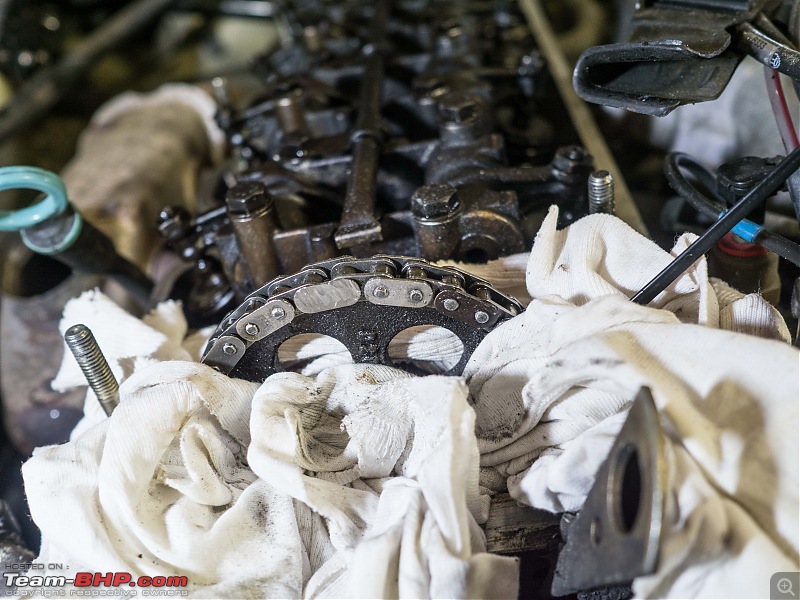 Step 2: Pop of the link: Bit of a fiddle but a large screwdriver and some twisting should pop it off, if the heads of the old rivets are properly ground down. 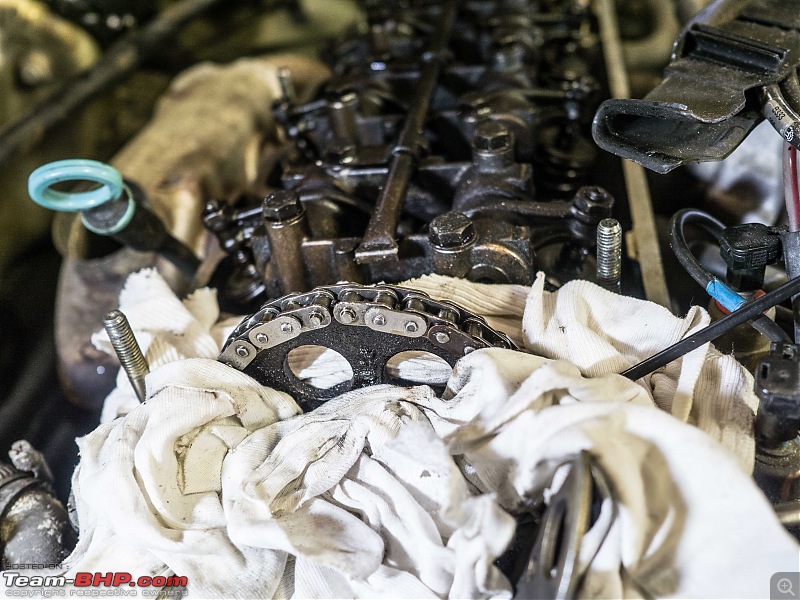 Step 3: Attach the new chain to the old chain. I am using the new interlink provided with the new chain. It sits quite snuggly and you donít need to rivet it, it will hold fine for this purpose. I was cranking the engine slowly with a socket wrench on the crankshaft pulley into the normal rotation direction. Effectively you pull the new chain in slowly. Peter is guiding the new chain, keeping tension on both parts. The important part is that the new chain doesnít jump a tooth. 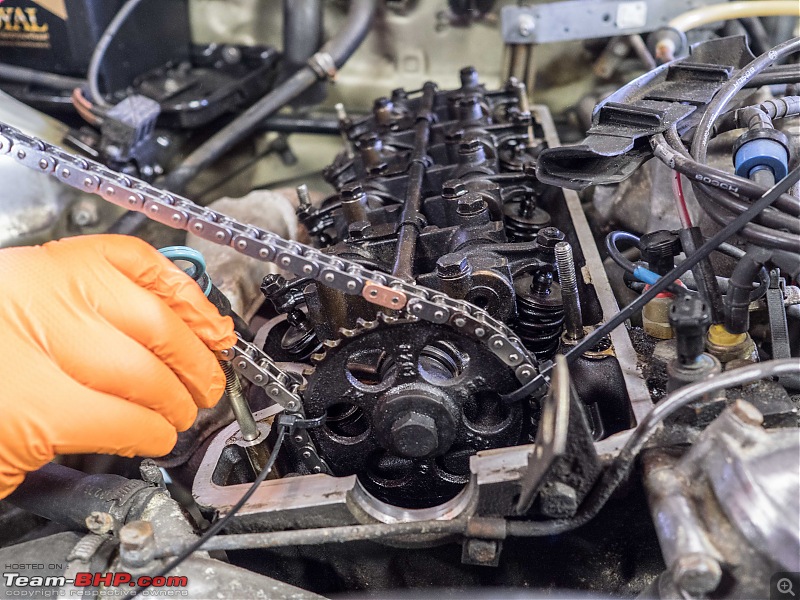 Step 4: Here we are, the new chain is coming out on the other side and can be attached permanently. 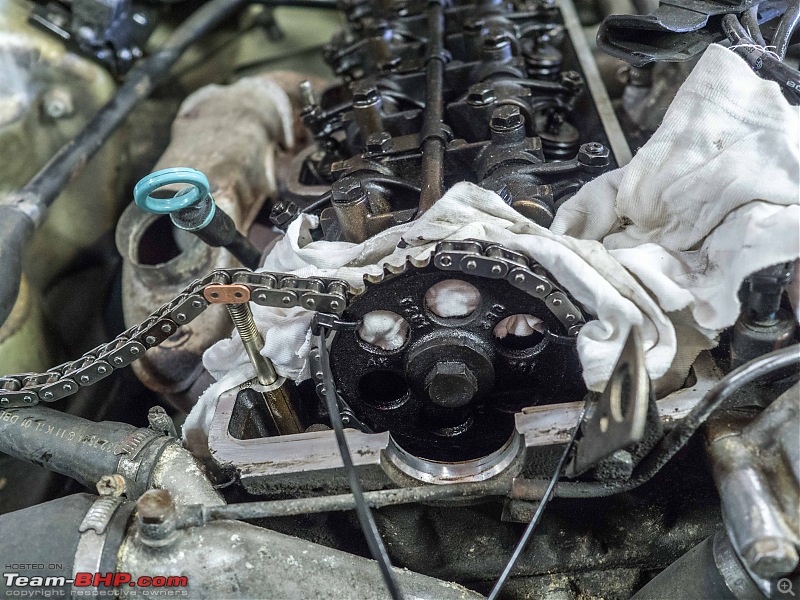 Step 5: Here we are the nice new chain carefully riveted in place. Ideally you would use a proper chain punch for this. I donít have one that fits this chain. Most people, even MB technician just rivet them down with two hammers. One large hammer behind the link, with a smaller hammer gently tap it in place. 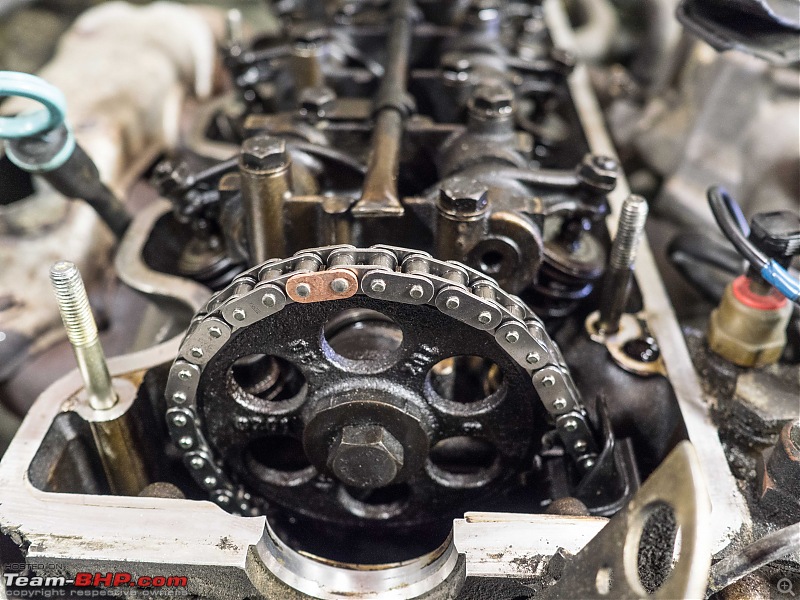 Once you have the new chain in place, put the new tensioner in and rotate it at least two full turns so the engine will have completed one complete cycle in opening/closing valves versus pistons coming up and down. If anything has gone wrong, your engine might get stuck here by a piston hitting a valve. We also double checking the internal timing again. All looked good!! That is all there is. At least so we thought. We put the rest of the bits back on the engine. Final checks and then we started the engine. The good news, it started straight away, runs ok but the bad news, there is a very distinguished rattle. Listen to this: My beautiful petrol engine sound like a beat up old diesel start up on a wintery morning. We have been checking the inlet and outlet valves again, checked the ignition timing, the plug leads (remember I had them numbered). Double checked all the timing marks again. But so far we havent found anything yet. It does sound like a valve problem. I am not sure if we messed up the internal timing (i.e. had the new chain jump a tooth) it would sound like this. Usually engines donít run very well, or at all. On this engine, one sprocket tooth is 18 degrees, that is quite a bit to be out of sync. When we took the valve cover of again, I did notice that I did not see as much oil around the valves and the cam shaft as I was expecting. The dashboard gauge shows full oil pressure. But I am wondering. So tonight I am going to put some oil on the cam shaft, cam lobes, valve stems etc. Start the engine and see if at least initially makes less of a racket. I might have to resort to checking the internal timing more precisely by measuring the valve movements against the crankshaft position. I donít have the measuring equipment for that. But I could probably borrow or I will order on line. Just in case, I have also ordered three more chain links, just in case we do need to reset the timing chain on the sprocket because somehow it has jumped a tooth. Very strange. to be continued. The joy of car DIY.  Jeroen |
| |  (6)
Thanks (6)
Thanks
 |
| The following 6 BHPians Thank Jeroen for this useful post: | blackwasp, Gannu_1, Leoshashi, R2D2, sukiwa, vaasu |
| | #134 |
| Distinguished - BHPian  | Re: My Car Hobby: A lot of fiddling, and some driving too! Jaguar XJR, Mercedes W123 & Alfa Romeo Sp Tonight I had another go at the W123 and why it is making such a racket after the timing chain replacement. Took the inlet filter, valve cover off, so I had good access to the valve and camshaft and removed the spark plugs, so I could turn the engine easy. First thing I did was to check if the valve train was getting oil. Easy enough. With everything out of way of the rockers and the cam shaft I had my wife turn on the ignition key. So basically the starter then cranks the engine, without it firing (spark plugs are out) and I can observe if, how and where oil comes out on the valve cams. And sure enough that was fine. Double checked the ignition again. In the past I have muddled up the spark plug cables and once the distributor had worked itself loose so had turn almost 20 degrees which made for some interesting engine noises too. None of that. So finally I decided to check the internal timing once again. Now remember, Peter and I had done that multiple times already. Peter checks it, then I check it, then we check it once more together. Given the criticality of this item we (thought) we did a very thorough job. Even so, it looks we got it wrong. Tonight I once more cleaned the markings of the crankshaft pulley and the cam shaft. Slowly started rotating the engine with my socket wrench on the crank shaft pulley. Carefully monitoring the cam shaft. It has a little notch and when that notch is at 90o horizontal lining up with the bearing case the cam shaft is in the position for the first piston being in the top dead centre of the compression cycle of the first cylinder. 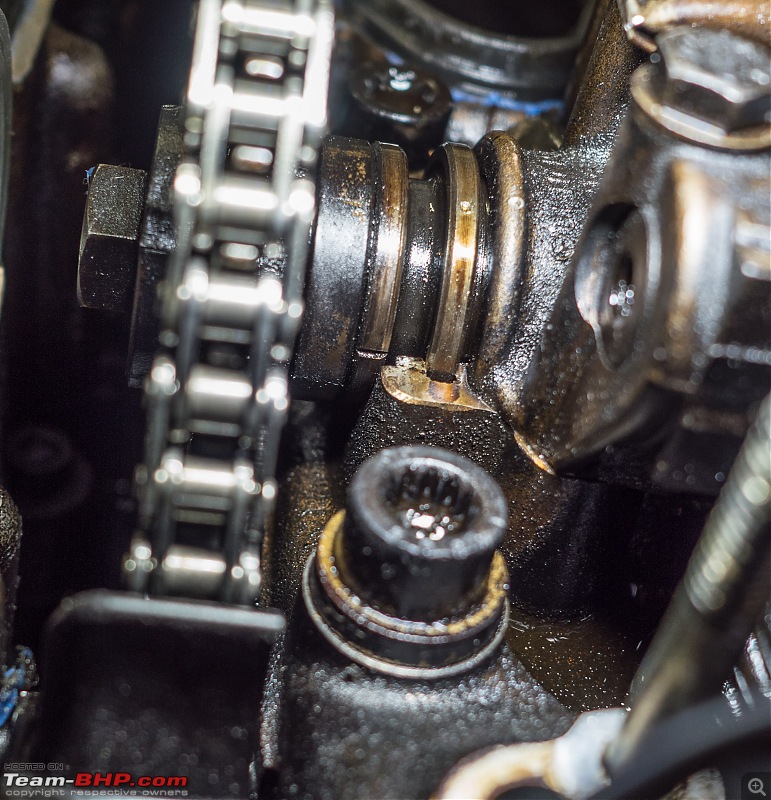 Which means the crank shaft marking should be at 0o according to various MB manuals I have. With the camshaft in position I checked the crankshaft. The problem became clear immediately. The crankshaft is almost at 20o past top dead centre! According to my MB manual one tooth equals 18o. (there must be 20 teeth). So it looks like somehow the chain jumped one tooth!!!  What I donít understand and also find very frustrating is we checked this many times before we riveted the chain. We knew how critical this was. So we checked, we double checked, we triple checked. Still we managed to screw up. It just shows how unreliable eye witness accounts can be. I would have taken an oath swearing the internal timing was ok. Anyway, a relative simple fix. Grind down the rivets, move the chain, or rather the camshaft one tooth, rivet the chain back again. The chain link and rivets are already ordered. In fact I ordered three sets, just in case we get in wrong again! Neither Peter or I have much time the coming weeks to fix this, so we have targeted Tuesday the 28th. Fingers crossed. Jeroen |
| |  (6)
Thanks (6)
Thanks
 |
| The following 6 BHPians Thank Jeroen for this useful post: | blackwasp, Leoshashi, R2D2, sukiwa, vaasu, vb-saan |
| | #135 |
| Distinguished - BHPian  Join Date: Oct 2008 Location: Pune
Posts: 3,242
Thanked: 5,798 Times
| Re: My Car Hobby: A lot of fiddling, and some driving too! Jaguar XJR, Mercedes W123 & Alfa Romeo Sp Very interesting. Thanks for sharing Jeroen. I replaced my 16.5 year old Fiat Palio 1.6L engine's timing belt last Saturday. The engine oil (Shell HX7 10W-40 semi synthetic) and filter were changed plus the car got a coolant and brake fluid flush. For the timing belt I had to take the help of a Fiat specialist as I do not have the workshop manual and I'd rather not take chances with misaligned valve timings. The process was not intricate as with the chain in your Mercedes engine. In this you align the marks on the crankshaft pulley and both camshafts with preset markings on the block, loosen the belt tensioner, slip off the old part and install the new one. Then you align the tensioner with another mark on the block. The belt requires replacements every 60K kms. The same person helped me with the brake and coolant service. I need to get a whole new set of brake parts for this car including pads, caliper pins, caliper kit (rubber parts) and rotors that are now grooved and IMO best replaced instead of being resurfaced. Last edited by R2D2 : 16th August 2018 at 00:36. Reason: added oil details |
| |  (2)
Thanks (2)
Thanks
 |
| The following 2 BHPians Thank R2D2 for this useful post: | blackwasp, Leoshashi |
 |


