| |||||||
| Search Forums |
| Advanced Search |
| Go to Page... |
 |
| Search this Thread |  1,107,057 views |
| | #61 |
| Distinguished - BHPian  | Re: My Car Hobby: A lot of fiddling, and some driving too! Jaguar XJR, Mercedes W123 & Alfa Romeo Sp As I said earlier, the Jaguar did really well during our recent trip to the UK. However, on Sunday night I was moving my cars around and I noticed a very pecular whinning noise. As far as I can tell it is coming from the front of the engine. There are two large belts and pully system. One drives the supercharger and I replaced the belt and the tensioner about 30.000 kilomters ago and they are supposed to last 100K. The other belts drives all the other auxiliaries, waterpump, dynamo, AC. I got out my stethoscope to listen to the bearing noises. The ony one I can get at easily are the waterpump and the supercharger. They both sound ok. I can not get my stetoscope in between all those moving belts and pulleys further down. So the next step is to take the front belt off and start the engine. If the whinning is still there, its back to the super charger drive belt and pullies. If the whinning has stopped it will be something in the auxiliaries. My money is on the dynamo. As far as I know it is still the original one and my car has done almost 280K km. So something is going to give, bearing wise. I hope to replace the Mercedes exhaust this weekend. Its a long weekend for us in Europe, Easter weekend, which means Monday is an official holiday for us. For some this Friday, good Friday is an holiday as well. In the Netherlands that is mostly civil servants, banks and schools, but not the commercial sector. Jeroen |
| |  (2)
Thanks (2)
Thanks
|
| The following 2 BHPians Thank Jeroen for this useful post: | R2D2, SS-Traveller |
| |
| | #62 |
| Distinguished - BHPian  | Re: My Car Hobby: A lot of fiddling, and some driving too! Jaguar XJR, Mercedes W123 & Alfa Romeo Sp Managed to do a bit of photoshopping, so jumping about a week back in time. Last Friday my good friend and spanner mate Peter flew over to the NEC in Birmingham, UK to attend the Classic Car & Restoration show, see https://www.necrestorationshow.com We had been here for the first time last year and really enjoyed it. Very different classic car show as it is all about working, fixing and restoring old and classic cars. And all the clubs and vendors give demonstrations. We spend quite a bit of time at the Jaguar Club. As luck would have it they were giving life demonstrations on how to replace wheel bearings on the XJR and the XK8. In essence they procedure is almost identical. Except on the XJR (i.e. my Jag) you need to ensure you load up the spring with a special tool before attempting to remove anything.  Obviously, these demo rigs were properly prepared. Even so, it took him about an hour to get if off, replace and re install everything. 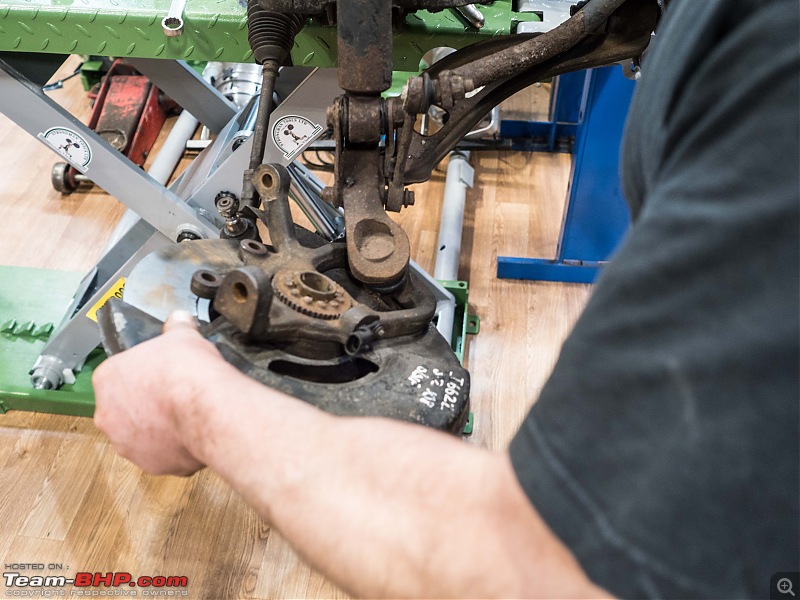 This sort of job on say my Spider is very easy, no special tools required. But on the Jaguar you need several special tools, to hold the spring, to undo the locking nut, to hold the whole assembly in place, and you need a press with the appropiate pressing plates  It was a very interesting and enjoyable day. The next day was a technical meeting of the Alfa Romeo Spider Club. Peter is at hand to do formal appraisal for insurance purposes. It was at the same workshop as last year and you can find those photographs earlier on in the thread. Just a few to give you an impression; 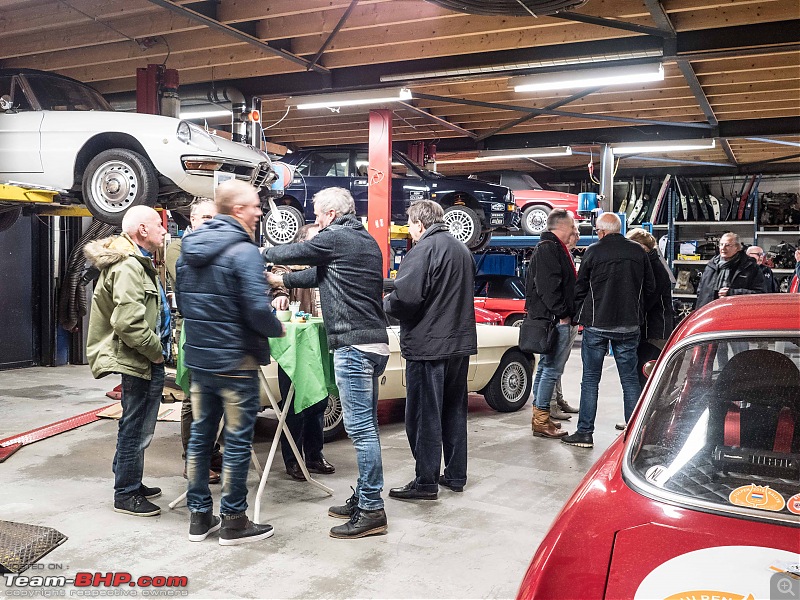 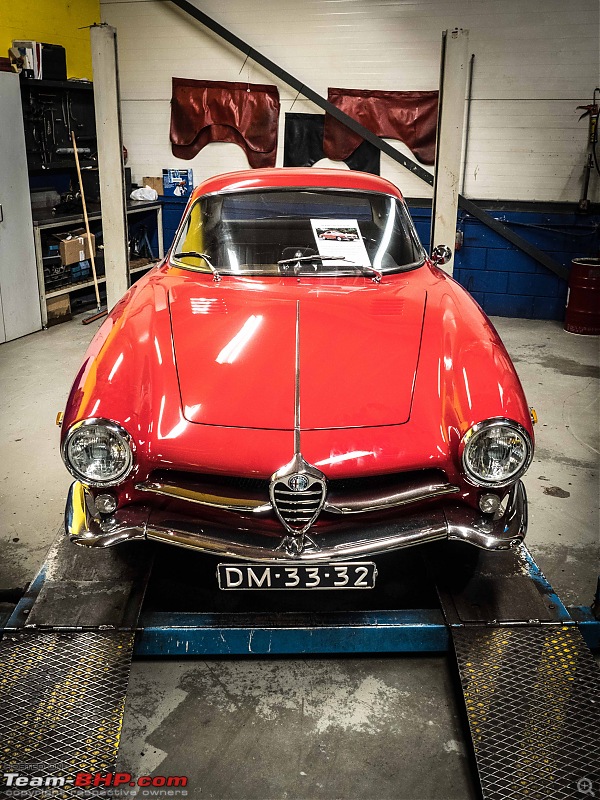 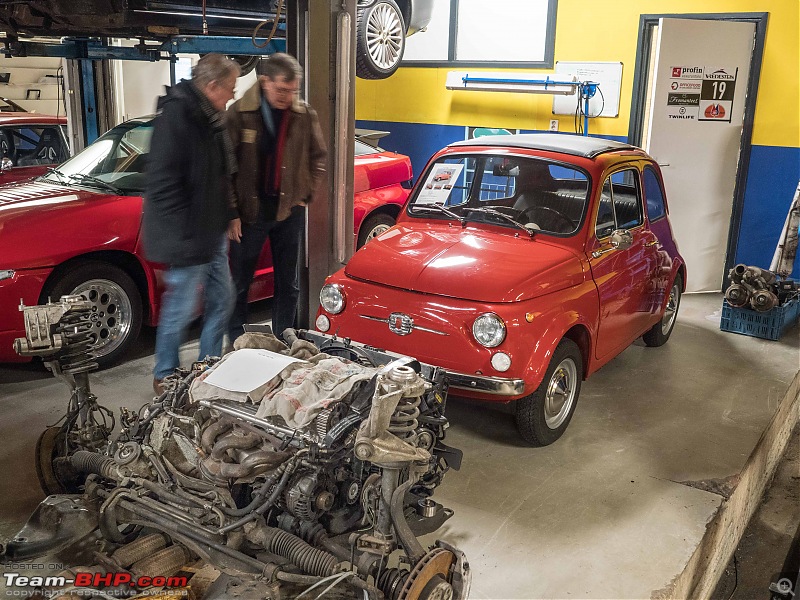 I do like these meetings. It is great seeing all the members, some of whom I have known for more than twenty years and have become good friends. So we chat, look at each other cars, comment on Peterís appraisals, drink huge quantities of free coffee and tea and eat cake. On Sunday I decided it was time to give the Jaguar a proper wash. Usually I clean my cars in front of the house/garage. But as I had just done this huge trip to the UK on snowy roads with a lot of salt and grit, I decided I had better run it through our local car wash. I like to go very early as there will not be a queue. Well, I wasnít early enough because both car washes were taken by the local cops cleaning their vans!  So I had a little chat with the cops. Found out one of them lives just around the corner from us! Before you drive into the actual car wash itself, there is a holding place where you can also use a high pressure washer on your car. I always use it before it allows me to spray off most grime and dirt. Really get deep into the wheel arches. I also put special wheel cleaning stuff on the rims. So the car is already quite clean and soaped up when it goes into the car wash. This particular car wash puts quite a bit of soap on your car.  It does the usual car wash, it has special brushes and high pressure nozzles to clean the rims. And, very importantly it also sprays high pressure water underneath the chassis as well. It sprays was and rinses with demineralised water and then blow dries the car so you donít get any white spots, streaks etc.  Next stop are the hoovers. These are pretty good, there is also a special contraption you can bang your doormats against. Shammy down the car and ready to go. A car wash costs between Euro 6 -12,50 depending on the program you choose. The high pressure washer and the hoover give you 6 minutes for respectively Euro 0,50 and 1,00.  Drove back home and got the Spider out for the very first time this year. It was quite dirty as I had not even cleaned it when we moved it from our old place to our new home. So it has been sitting here for three months collecting dust. Cleaned it and took it for a very nice first test drive.  All in all, three days of fiddling and buying busy with cars and or car related stuff. Weekends donít come much better!! Jeroen |
| |  (8)
Thanks (8)
Thanks
|
| The following 8 BHPians Thank Jeroen for this useful post: | Leoshashi, paragsachania, R2D2, sanjayrozario, SS-Traveller, vaasu, vb-saan, VivekCherian |
| | #63 |
| Distinguished - BHPian  | Re: My Car Hobby: A lot of fiddling, and some driving too! Jaguar XJR, Mercedes W123 & Alfa Romeo Sp Yesterday was good Friday. Here in Europe it varies considerably per country whether that is an official holiday. Even within countries it varies. Here in the Netherlands the civil servants, schools and banks are off. Everybody else (e.g. me) still needs to work. But for instance in Sweden it is an official holiday for everybody. These days I have a so called ďGlobal JobĒ. Which means that wherever I am I still need to interact a lot every single day with my collegueas in Sweden. But it also meant I could knock off early as there was nobody to talk too and all my other stuff was just about done. So by 1600 hours I decided to get going on the exhaust for the W123. The usual drill to get the car ready. In gear, brakes, blocks of wood behind the wheels, jack, jack stands etc.  Remember I had already managed to loosen up the bolts on the flanges on the interconnection between the front and the middle damper. My concern was primarily getting the four nuts on the flange at the exhaust manifold. These are not bolts, but studs on the flange attached to the manifold side. I had been warned they tend to get stuck and can easily snap. I was lucky, with a normal size 14 socket attached to two extenders I managed to get all four nuts off, with my pneumatic ratchet in under two minutes. A few more minutes on a supporting bracket and the whole front damper came out!. Here you see the old and the new side by side. When installing new parts such as these it is good practice to really check them side by side. Make sure the dimensions are identical, check flanges for size etc. Also, you can see the mounting bracket still attached to the old damper. I undid the bracket from the chassis as that was quicker.  I must admit I am not that impressed by the quality of my Euro 100 new damper. It weights 0,5 kg less, but in particularly the welds arenít all that well done. Here two images comparing the old and new inlet side. Might be a bit difficult to see but the original Mercedes one has nice rounded off sided. The new one has a pretty rough weld, not smoothened down.  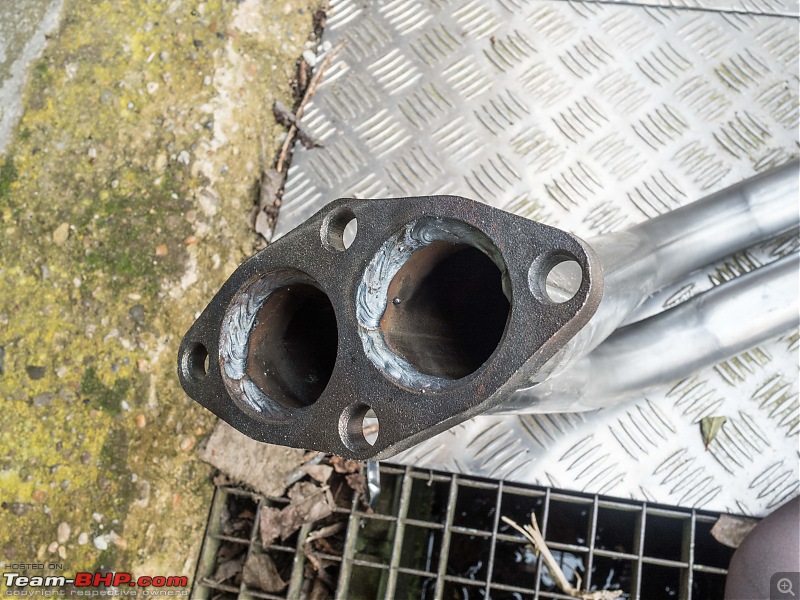 But too late to start complaining now, also there is a 300% difference in price and that is likely to show somewhere. With the old bit off, a last view to the problem:  Replacing exhaust yourself is actually something I donít particular enjoy. You really need the car on a lift. With my Mercedes the exhaust comes in three separate parts so that makes it a bit easier without a lift. But the main problem with exhaust is they rarely fit well straight out of the box so to speak. So usually it will involve heating and bending the various pipes and so. I donít have the equipment for that. Anyway, this is how the remaining part of the exhaust looked after the front bit came out. It just sort of pivoted on one of the mounting points, without touching anything. So we are good to proceed.  So time to start cleaning and preparing everything to go back on. That means I get to play with my new pneumatic drill. Here you see it with one of these fancy new abrasive bits attached. These days beyond the usual steel drill all sort of fancy new bits and pieces come to market. Iím a sucker for any new piece of tooling so I buy them all and give them a try. Make sure you check the RPM rating though. These pneumatic drills run at considerable higher RPMs than your typical electrical drill. This abrasive bit is rated at 15.500 RPM which is plenty even for my pneumatic tool 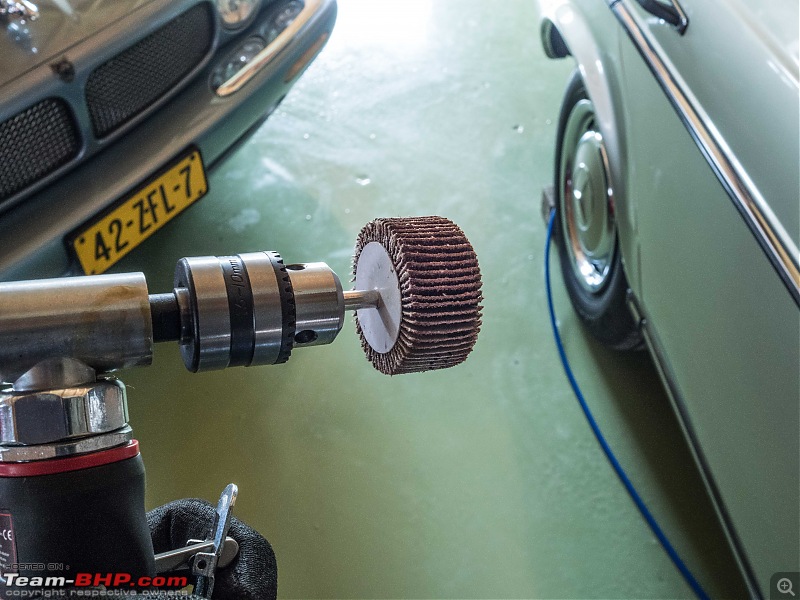 Also, when working with these kind of drill wear proper safety goggles! And gloves!  A bit difficult to see, but all the rust has come off on the connection on the middle damper underneath the car.  I also took off the bracket from the old damper and sure enough here was something that broke. The clip holding the pipes to the brackets broke on one side Luckily enough I have a good auto parts store five minutes away. I quickly drove over and showed him my broken bit. I thought these exhaust clips were pretty standard. But the guy told me he stocks several hundred different ones. But his computer keeps track of all and by drilling down into Mercedes, W123, 200, M102 engine he found it and would you believe it he had one in stock! 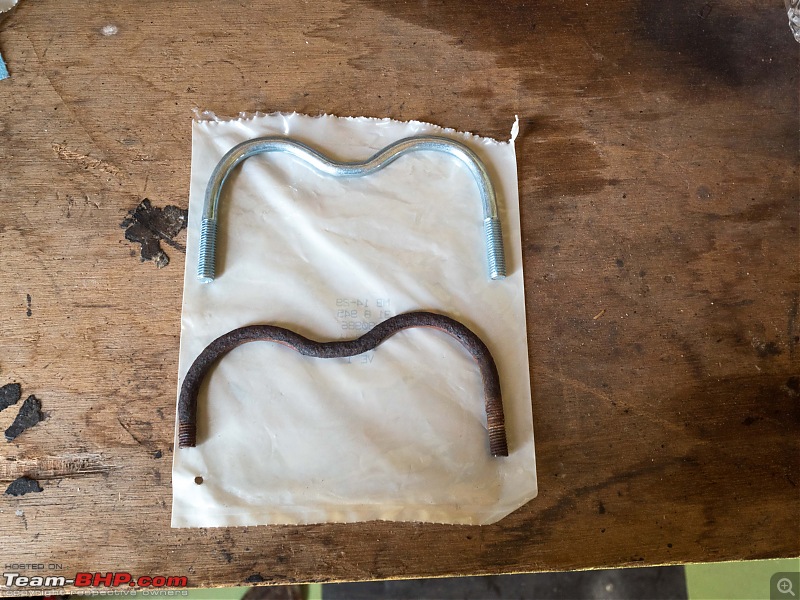 The actual mounting bracket itself was badly rusted as well:  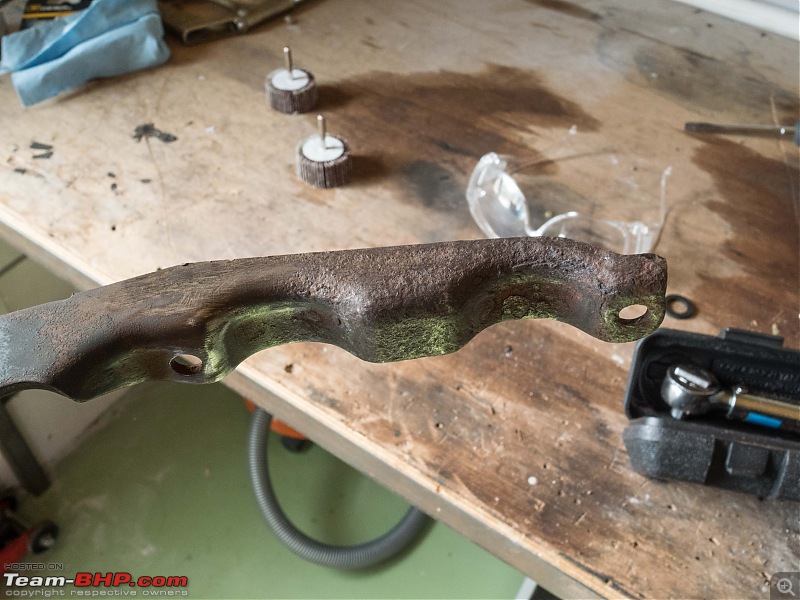 So some quick work with my pneumatic drill and some quick touch up with three layers of Hammerite spray on paint. 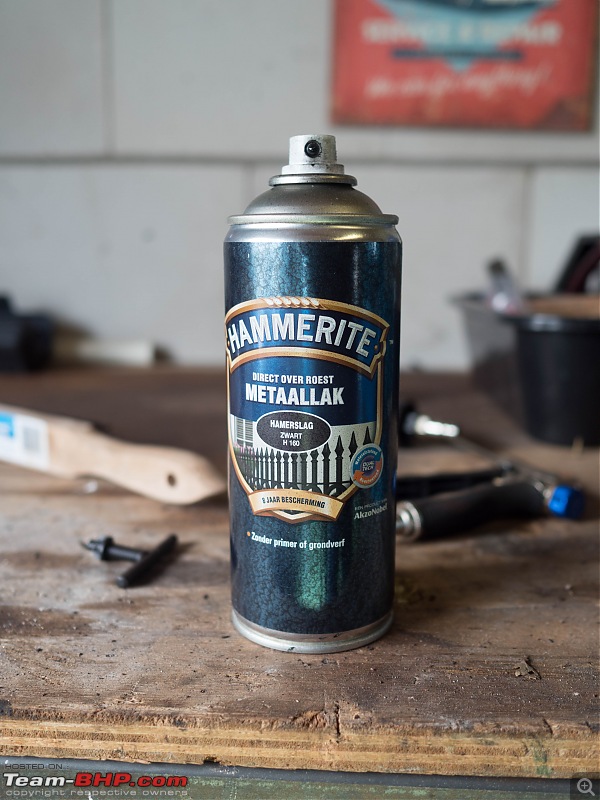 Iím pretty pleased with the result. It doesnít need to be perfect, but it does need to protect the part from rusting again. This hammerite stuff is pretty good. You can use it without a primer. It is quick drying. Three layers will go on within 15 minutes of each other. Leave it for another 30 minutes and you can re-install the part.  I cleaned all the nuts and bolts, put copper past on them. These are the other parts I needed for the installation of the new damper. A new exhaust manifold gasket, a new steel gasket for the flange connection between front and middle damper and special exhaust mounting paste. The exhaust mounting paste is to ensure a gas leak free connection. You apply it very liberally to all gaskets both side. It will quickly harden/set, but it will remain fairly flexible so it wonít crack. 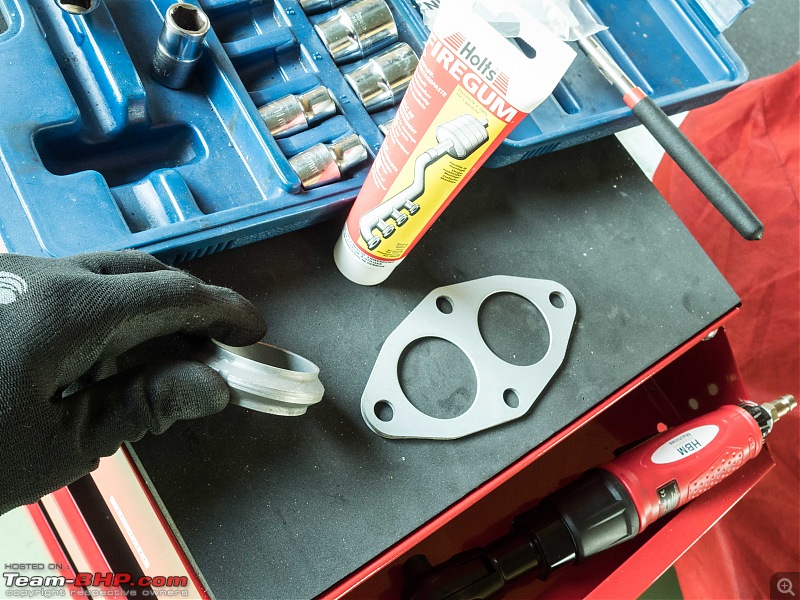 Always check old against new gasket just to make sure they are identical in size, shape, diameters of holes etc.   With liberally applied paste the exhaust flange just sticks to the underside of the exhaust manifold flange which is pointing downwards. Just popped it on, across the four studs and it sticks/stays in place by the paste. Now comes the fun part, to get the new damper in place, by myself, with two tennis elbows, lying on my back, on a cold concrete floor, underneath the car. The trick is to think it through and have everything you possibly might need whilst underneath within arms reach. So I put all the parts, tools, bolt, nuts in strategically chosen spots underneath the car. Also, I needed something to prop up the damper to hold it in place whilst I put the nuts and bolts back on. To this effect an old storage box and various bit of styrofoam package material came in handy. I keep a wide range of styrofoam bits just for this purpose. With everything ready I crawled underneath the car. Lifted up the damper, got the front flange to quickly slide over the four studs in the exhaust manifold flange, held it up with my left arm. With my right arm I trapped the the storage box and styrofoam packing material and wedged those underneath the damper. Perfect. Everything stayed in place, so I could put the four nuts back onto the studs.  Last bit was to line up the middle damper to the front damper. I put one of my smaller jacks underneath it. So I could move it up and down and left and right. Slotted the steel gasket covered in exhaust paste in, put the two bolts and nuts on  The bracket went back on without too much trouble too. Had to adjusted a tiny bit to make it fit properly to the new damper. Double checked everything to make sure everything was tight. The exhaust was lining up well, not touching anything, not putting strain on anything. Took the car for half an hour test drive and crawled back under to double check. All is well, no more leaking exhaust gasses. Job done!! What is left is to clean and put all my tools away, sweep the floor of my garage. In all it took me about 2,5 hours. A quick fitter would probably do it in 30-45 minutes, but then again he would have the car on a lift which makes life considerably easier on these exhaust jobs. Even so, I always like fiddling with my cars. No matter whether it is a small or big job, it always give me tremendous satisfaction doing these jobs myself. Next, the Jaguar with its whining bearing somewhere deep down in the engine. Jeroen |
| |  (11)
Thanks (11)
Thanks
|
| The following 11 BHPians Thank Jeroen for this useful post: | Leoshashi, Nissan1180, paragsachania, R2D2, sanjayrozario, shibujp, SS-Traveller, tharian, vaasu, vb-saan, VivekCherian |
| | #64 |
| Distinguished - BHPian  | Re: My Car Hobby: A lot of fiddling, and some driving too! Jaguar XJR, Mercedes W123 & Alfa Romeo Sp Making some progress with diagnosing the whining noise on the Jaguar. Initially I thought it was from one of the drive belt systems. For no other reason I noticed it when I got out of my car to open the garage door and the engine was still running at the time. Prior to fixing the exhaust on the W123 I had to move the Jaguar and I noticed the same noise, when just putting the ignition on, so prior to cranking the engine! Listen to this: So the noise is already present before the engine starts, which means it must be something electrical driven and there are only a few bits that start turning when putting the ignition on, fuel pumps and in this particular case the Supercharger Coolant Pump. Sure enough it is this pump that is making the noise. I have worked on the pump before, see earlier on in this thread. Just replaced a couple of worn grommets on the mounting plate. So a clear and precise diagnosis. Now for the bad news; a new Supercharger Coolant Pump costs a whopping Euro 450,--. I have owned several cars that costed considerably less. But then for something like this I am also reluctant to go with some aftermarket part. It can cause a lot of harm if it doesnít work well. A new Supercharger would cost considerable more. So I took to the various Jaguar forums and sure enough very quickly I got the same reply on two different Forums; go for a Bosch pump. The Bosch pump should be considerable cheaper and runs at a higher flow (14% or so I am told) which isnít a bad thing either. I got some diagrams and all the parts numbers. Interestingly, this pump is used on some Mercedes as well, so I have Bosch and Mercedes part numbers. It should fit with no problems on the hoses. The only modification required is the mounting bracket and the wiring. Both appear to be fairly straightforward to modify. So the search for parts is on. Tomorrow all three kids and their partners are coming over for a traditional Easter brunch. In many western Countries the Monday after Easter is also a holiday, so it is a nice long weekend. My son Luc will be driving his VW Golf Mk IV. He has some electronic problems so we will be hooking up his car to my fancy OBD scanner and see what gives. Also, spanner mate Peter and I booked our yearly Europe drive in our Spiders. Peter and I visited many years ago the Beaulieu International Autojumble. https://www.beaulieu.co.uk/events/in...al-autojumble/ Must have been some 12-15 years ago. I went back last year by myself as I happened to be in the UK on business. Peter could not make it. See http://www.team-bhp.com/forum/intern...aulieu-uk.html This year the two of us will visit it again, driving our respective Alfa Romeo Spider. The itinerary will be as follows Thursday 30th August we meet at the Stenaline terminal in Hook of Holland at around 20.00. That night we sail across to Harwich Friday 31st August we will hit the Essex country roads by 07.00am. We will be driving largely cross country on rural roads towards Southampton where we board the ferry to the isle of Wight. Our last few hours driving will be exploring the isle of Wight. Next morning, Saturday 1st of September we will leave early to get to the Autojumble before they open. We will spend the whole day wandering around and in the late afternoon we will depart for another 1-1.5 hour drive heading towards Wales. Monday and Tuesday we will be touring Wales all day. Tuesday 4th September we need to head back to Harwich. Our ferry will leave at 2300, so we have all day to explore Wales some more and a relaxing drive back to Harwich. Wednesday morning 5th of September we will disembark at Hook of Holland at 0800. I have just booked the ferry crossing for the two of us and our Spiders. Peter is in charge of finding B&Bs for the first two nights. All other nights we will just look for a B&B wherever we are. We want to prebook our first night as it is on the isle of Wight, also we need to check what time we can leave the island the next morning. We donít want to leave it too late. The Autojumble gets very busy and we want to have our Spiders parked and be on the venue before all the roads are clogged up. At the end of the day we donít want to have to drive too far. So again, we prebook a B&B nearby. Looking forward to it! Jeroen |
| |  (8)
Thanks (8)
Thanks
|
| The following 8 BHPians Thank Jeroen for this useful post: | Leoshashi, Nissan1180, paragsachania, Prathiiik, R2D2, sanjayrozario, vaasu, VivekCherian |
| | #65 |
| Distinguished - BHPian  | Just came across this very short but interesting video on the Jaguar V8. If you ever wondered what the inside of a supercharger looks like, have a look! |
| |  (3)
Thanks (3)
Thanks
|
| The following 3 BHPians Thank Jeroen for this useful post: | R2D2, sanjayrozario, vishy76 |
| | #66 |
| Distinguished - BHPian  | Our kids and partners came over for a nice Easter lunch. My son Luc's VW Golf GTI was having some problems. Did a full OBD system scan over lunch. Looks like we will have a few things to sort next weekend!  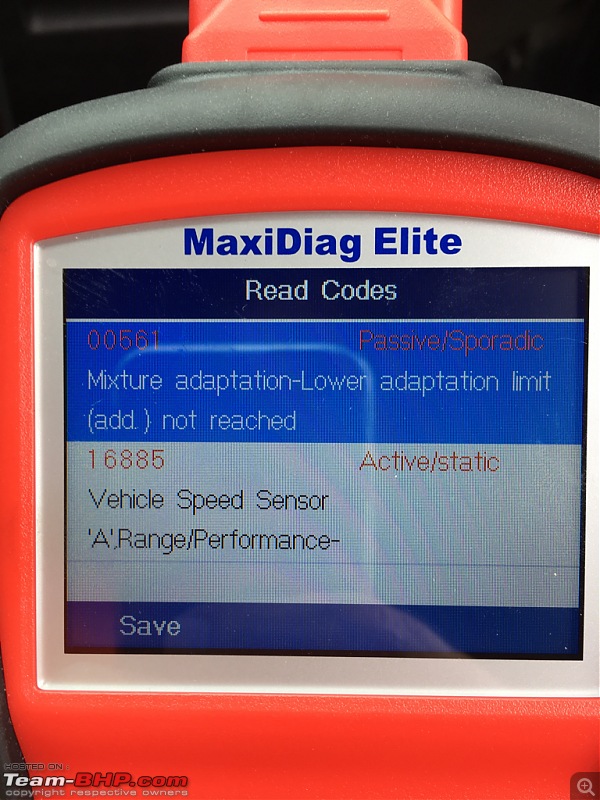 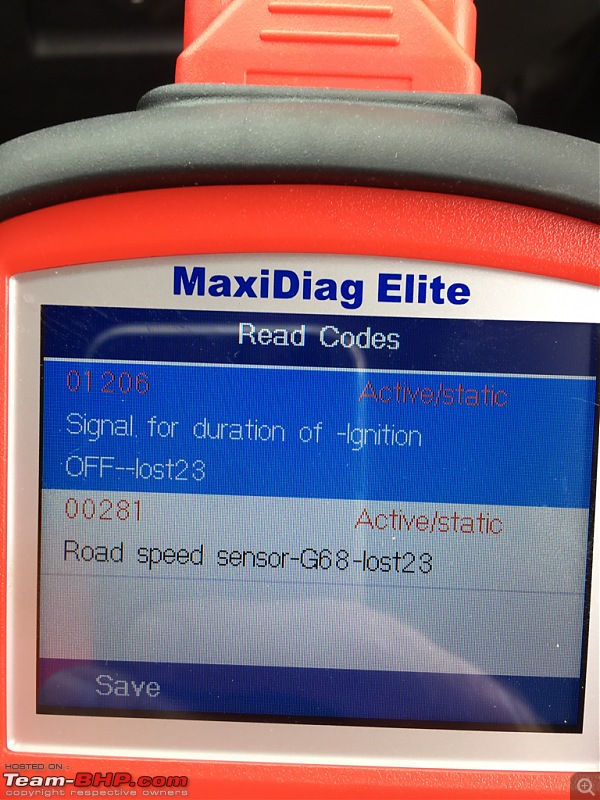   Jeroen |
| |  (9)
Thanks (9)
Thanks
|
| The following 9 BHPians Thank Jeroen for this useful post: | Akib Khan, Leoshashi, paragsachania, Prathiiik, R2D2, sanjayrozario, the_real_slager, vaasu, vb-saan |
| | #67 |
| Distinguished - BHPian  | Re: My Car Hobby: A lot of fiddling, and some driving too! Jaguar XJR, Mercedes W123 & Alfa Romeo Sp I have ordered the new supercharger coolant pump for the Jaguar. Found several Dutch webshop that offered this Bosch pump at a very reasonable price. Just over Euro 100, which is less than 25% over what Jaguar or SNGBarrett would charge for an original Jaguar pump. And the Bosch pump is supposed to be better, or at least it provides a 14% higher capacity. Also ordered a couple of small Mercedes parts to modify the electrical connection. The pump is already on its way by courier, the MB parts need to come from Germany to my local MB dealer, but I should have them within the next two days as well. I have been doing a bit more research online and going through the workshop manual. It should be fairly straight forward. Couple of things I still need. To purge the cooling system you need to undo a large purge valve which requires an Allen key size 19mm!! I certainly donít have that large a size. Luckily Peter has.  To minimise the loss of coolant the official procedure is just to clamp the coolant hoses with special hose clamps. I have one or two, but I doubt they will fit. Checked with Peter, but he doesnít have them either, so I might find two of these to fit these hoses. 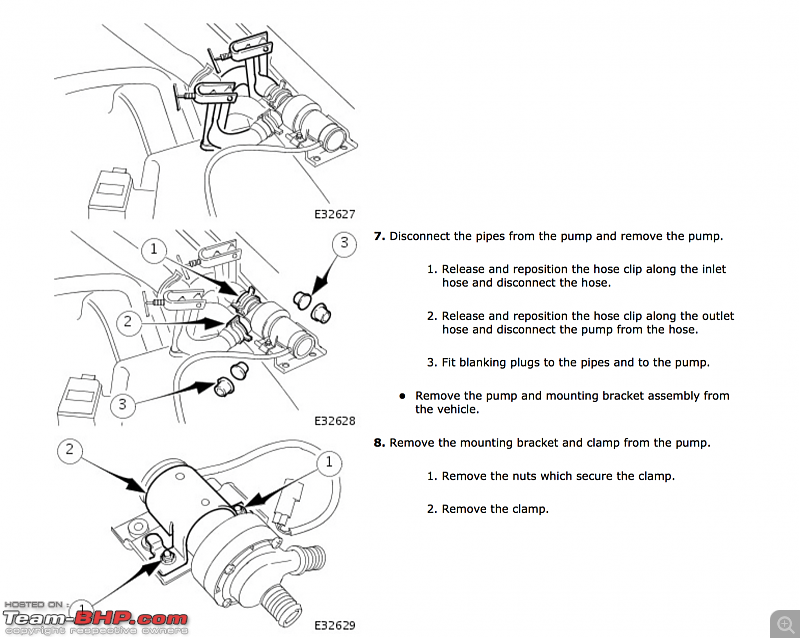 I have also been digging into all these error codes we found on my sonís Golf GTI. Iím beginning to get some idea on how we will start. Still need to do more research. Practical problem, just like us, Luc has just moved house as well. HIs workshop manuals are still in some boxes. I told him he needs to find them, because we are definitely going to need them!! Luc is coming the Saturday and we will see how far we get with his Golf. Depending how things go I might tackle the Jaguar as well or do that some other time. More to come. Jeroen |
| |  (5)
Thanks (5)
Thanks
|
| The following 5 BHPians Thank Jeroen for this useful post: | Akib Khan, Leoshashi, paragsachania, sanjayrozario, vb-saan |
| | #68 |
| Distinguished - BHPian  | The New Bosch Super Charger Coolant pump arrived today by DHL. Yesterday I picked up the connectors from the Local MB dealer. Still need to get the right tools. However, first things first. Tomorrow we start digging into Luc's Golf first!  |
| |  (3)
Thanks (3)
Thanks
|
| The following 3 BHPians Thank Jeroen for this useful post: | Leoshashi, paragsachania, R2D2 |
| | #69 |
| Distinguished - BHPian  | Re: My Car Hobby: A lot of fiddling, and some driving too! Jaguar XJR, Mercedes W123 & Alfa Romeo Sp So this morning I started work on the Jaguar. My son Luc was coming with his Golf, but I decided I would at least do some of the prep work on my Jaguar. I had already printed out the three main instructions: 1) Removal of the fan and fan shroud 2) Removal and installation of the pump 3) Purging of the system If I can I will always try and work according to the official procedure. Or at least I want to understand what I might be by passing. 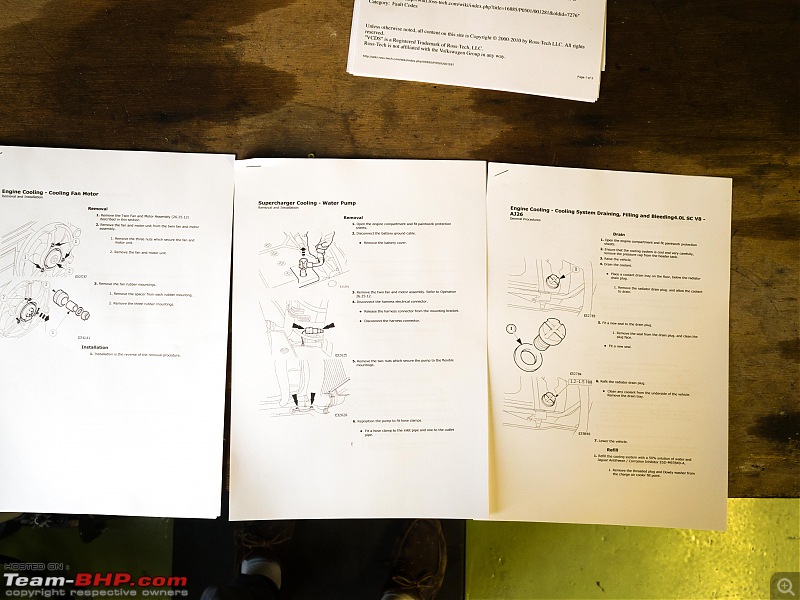 in accordance with the procedure first disconnect the battery. Which is very easy on my car as I have one these special devices fitted:    The official procedure said to first remove the two electric fans and then remove the shroud. It all needs to come out as you simply canít get at the coolant pump otherwise. Itís somewhere under that pulley.  After carefully checking I decided to leave the fans in place and remove the shroud cover in one go with both fan still in place. Just undo two bolts, two connectors, cut a few tie wraps that are holding the wiring in place and Bobís your uncle!  Room to work at last! 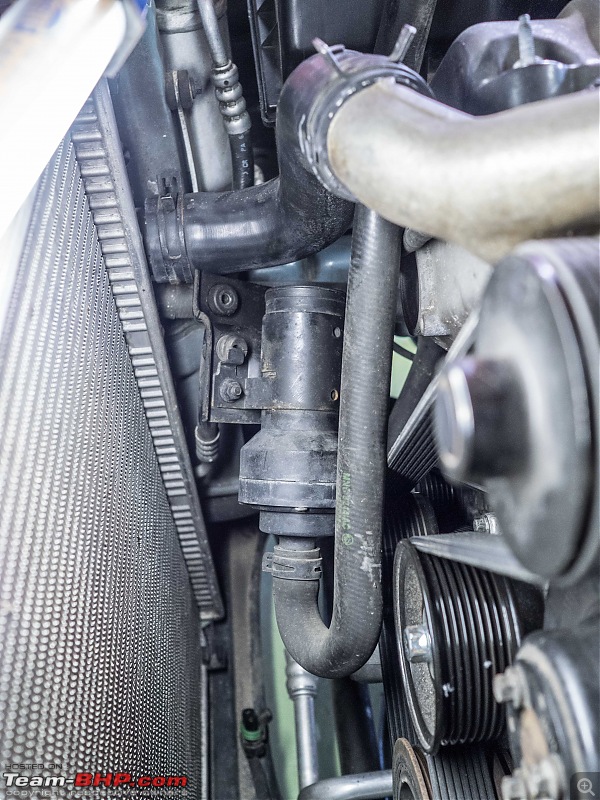 So I can now get at the pump, but that will have to wait. Luc arrived and soon we were busy with his car.  We did not get very far. There was also a problem with his head lights as we noted before. We took the bulb to one of local car parts stores. They told us these Xenon lights were not available anymore as they were illegal. So we could try and upgrade to new Xenon lights. The Xenon lights were an aftermarket upgrade done by Mike the previous owners. So I had a good look at all the wiring. Luckily all the original wiring was still intact. So we just cut away all the Xenon wiring, ballasts and what have you, bought two cheap regular H7 lights and at least the lights are working properly. Luc also complained of the car shaking and jerking under load. So I took it for a test drive and it is not good news, one or probably both the homokenatic couplings are done for. Big job!! We fixed a few other small things, cleaned his car and polished out some scratches. So we will have to revisit all the problems in due course. I still need to order some tools for my Jaguar, found the 19mm Allen key, but not the hose clamps. So they need to be ordered. To be continued Jeroen |
| |  (8)
Thanks (8)
Thanks
|
| The following 8 BHPians Thank Jeroen for this useful post: | Leoshashi, paragsachania, Prathiiik, R2D2, sanjayrozario, SS-Traveller, vaasu, vb-saan |
| | #70 |
| Distinguished - BHPian  | Today the last few tools arrived. So now I have a 19mm Allen key socket and four special hose clamps. The clamps will be used on the inlet and outlet hose to the pump in order to squeeze down the hose so as not loose too much cooling liquid. Still need to get some cooling liquid too. Also shown the new pump and the connector pieces. Ready to be installed  Jeroen |
| |  (4)
Thanks (4)
Thanks
|
| The following 4 BHPians Thank Jeroen for this useful post: | ajmat, dailydriver, Leoshashi, R2D2 |
| | #71 |
| Distinguished - BHPian  | Passed by my local auto part shop today so I picked up two litres of coolant liquid. This is the G12+ stuff. I hope my trick with the hose clamping works. The Jaguar takes a total of 10-12 litre of coolant and I really don't want to drain and refill it. Especially as it has been flushed and refreshed last year. Also bought some copper slip. This is the smallest package. Told the guy it will last three lifetimes easily!  Last edited by Jeroen : 11th April 2018 at 20:36. |
| |  (4)
Thanks (4)
Thanks
|
| The following 4 BHPians Thank Jeroen for this useful post: | dailydriver, Nissan1180, R2D2, sanjayrozario |
| |
| | #72 |
| Distinguished - BHPian  | Re: My Car Hobby: A lot of fiddling, and some driving too! Jaguar XJR, Mercedes W123 & Alfa Romeo Sp I participated in a nice tour last Sunday organised by a local classic car club. I just happened to notice an add in the local newspaper where they announced their tour. Called them and they were happy for me to come along. The starting point was only 3km from my home, a nice restaurant on the dike of the river Waal. Nice location. These tours always start with coffee and cake! So I met and spoke to a lot of new people. After a nice drive of about 80km we came to the finish. Again a restaurant/cafe on a different river. It was quite busy at the parking lot. So the club had a couple of people marshalling everybody into empty spots. i backed my car into a spot, looking at my rear and at the marshaller. I thought everything was clear, but it wasnít. There was a concrete pole right behind me, I could not see it as it was too low and the marshaller did not spot it either. So long story short, I backed into it.   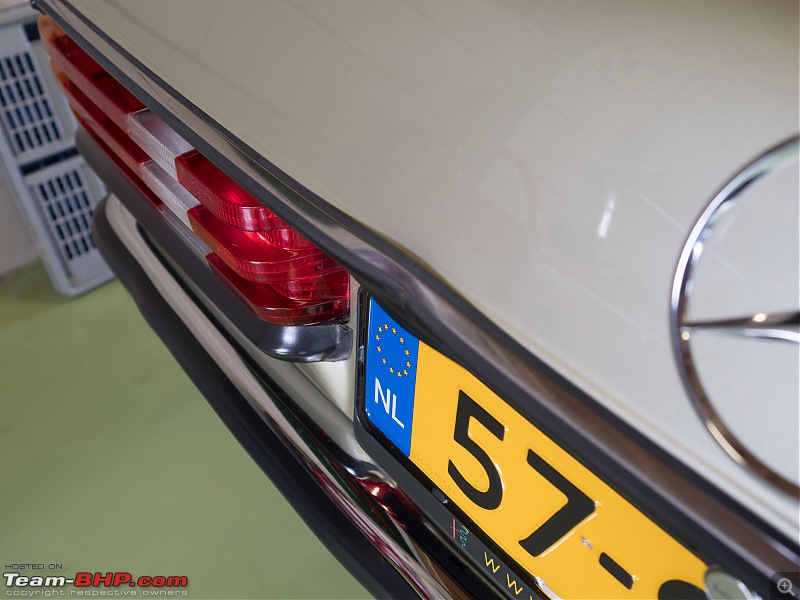 Damaged the bumper and a chrome/rubber strip on the boot lid. Very, very, very annoying. If I had paid more attention I should have noticed it. But unfortunately these things happen. Yesterday evening I had a go at the chrome/rubberstrip on the boot lid. It comes off very easily, just six small bolts. I managed to sort of straighten it out and it doesnít look to obvious any more. Problem is the rubbers is somewhat damaged and it doesnít sit completely flush with the lid anymore. So it will trap water and that is a bad thing on these Mercedes, they rust like anything. So I will have to find a new one, which is likely to be a challenge and expensive. We will see. I will have to remove the bumper to see what I can do with it. to be continued!  Jeroen |
| |  (6)
Thanks (6)
Thanks
|
| The following 6 BHPians Thank Jeroen for this useful post: | Leoshashi, R2D2, sanjayrozario, shibujp, vb-saan, VivekCherian |
| | #73 |
| Distinguished - BHPian  | Re: My Car Hobby: A lot of fiddling, and some driving too! Jaguar XJR, Mercedes W123 & Alfa Romeo Sp Last night after work I did some work on the Jaguar. Iím working from home often these days. So after work means: Within 1 minute after I shut down my work laptop I walk downstairs and out to my garage! As I showed before I had already taken the radiotor and shroud off and had essentially managed to undo the Supercharger Coolant pump from the chassis. It was hanging by itís two hoses. Even with the radiotor and shroud out of the way I decided to also remove the air inlet filter. Just undo the clips, two bolts connecting the inlet pipe to the throttle body and the whole thing comes off. The one part that was difficult to get at was the wire/powersupply to the pump. According to my drawings it should have a simple connector. But I could not find it. So with the help of my digital camera I followed the wire underneath a chassis part where the connector was hidden. Quite fiddly to undo. Working blind, but aided with my little digital camera helped. With the electrical connection now undone I could really pull the pump out of the bowels of the engine compartment.  Next step is to clamp off the hoses and I bought specials clamps for this purpose, see earlier posts. Just to make sure, I also bought a broomstick and sawed off two pieces. So I had two wooden plugs to push into the hoses as well. 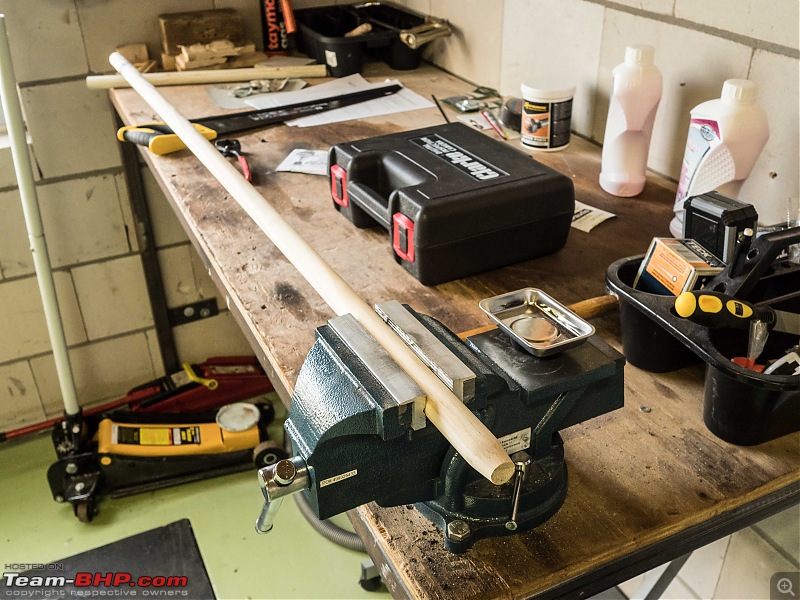 Here we are clamped and plugged! Hardly a drop of coolant spilled. I had my big flat oil/liguid container underneath the car. I think it was less then 100-200 ml.  Getting hoses off can be quite tricky. Over time they tend to ďattachĒ themselves and you might damage them trying to pry them off. This little tool comes in very handy. You just stick it in between the hose and the pipe and move it around the circumference as best as you can. Works a treat!  Here we are the old and the new pump together on my workbench. Always compare as best as you can the old parts with the new parts. The old pump is still attached to itís mounting plate.  The new pump is larger in diameter so the bracket holding it in place required a bit of modification. Out comes my new electrical saw!  I have shown before all the boxes I collect/buy with endless different kinds of rings, washers, bolts, nuts, springs etc. These come in handy when doing these sort of jobs, because you are going to need some new parts. 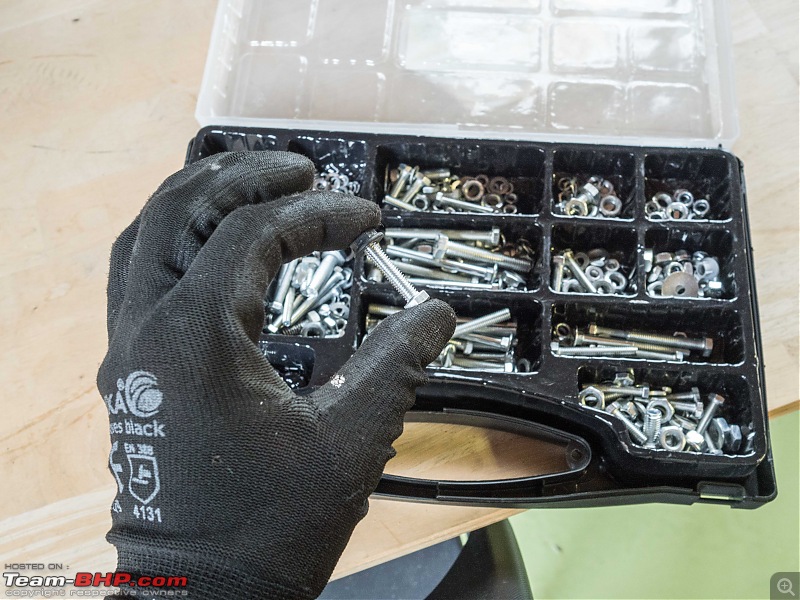 I kept the old bracket and modified itís mounting point on one side. Very simple, but adequate. The red stuff is locktite to ensure the bolts donít work loose.  Next was the electrical connection. These are, obviously, DC powered pumps, so you need to make sure you get the + and - right. First thing open up the old pump:  Very straightforward, but always measure continuity with a multimeter to make sure you know which pin on the connector is connected to which wire! And make a little diagram. With only two wires, you think you will remember, but you might not. Having a coolant pump turning the wrong way is not good!  So I took my soldering gun and undid the wires. On one of the Jaguar forums I had received the exact parts numbers for the connector. Funnily enough these were Mercedes parts. So making sure I get the right connector hooked up to the right pin in the new connector. Very fiddly job, took me well over an hour!  I just remembered when we visited the Classic Car and Restoration Show in Birmingham a few weeks ago I bought some new gloves of Mike (Wheeler Dealers). He is always there in person, chatting with everybody, allowing endless selfies with whole families and do various talks on stage. Also, he plugs some of his products:  I tried them during the rest of the evening. Not quite sure yet. I like my other black pair I showed earlier. I donít think these orange ones are much better to my other box of blue gloves. Still, they do a good job of keeping your hands clean. Once you get used to working with gloves it is very convenient. Itís not so much I mind getting my hands dirty as these days I sometimes get allergy reaction from oil. So better safe then sorry.  I have said it before, but Iím always amazed how even relatively simple jobs, still require so many of my tools to come out!  Ready to put the pump back in. There is very little room between all the different components. The coolant hoses run very close to the pulleys and V-belts. So I had to make sure I got the hoses on correctly, so they did not bend unduly or rubbing against anything.  In the end I managed to get everything lined up nicely. I was bolting the chassis plate with the pump back onto the car. Unfortunately, I managed to bugger one of the grommets holding the plate to the car. I had replaced these some time ago, see earlier post. So I have to get a new one, before I can finish this job. As I type this I have already placed the order and Iím picking them up later this afternoon. found some aftermarkets ones at Barrat SNG for Euro 0,37 each. Jaguar parts donít come much cheaper than that! To be continued Jeroen |
| |  (5)
Thanks (5)
Thanks
|
| The following 5 BHPians Thank Jeroen for this useful post: | Leoshashi, R2D2, samaspire, sanjayrozario, vaasu |
| | #74 |
| Distinguished - BHPian  Join Date: Oct 2008 Location: Pune
Posts: 3,255
Thanked: 5,836 Times
| Re: My Car Hobby: A lot of fiddling, and some driving too! Jaguar XJR, Mercedes W123 & Alfa Romeo Sp This thread is a treat as usual.  @Jeroen, one question, I noticed you used Red Loctite (271) which makes the fasteners very hard to take off again. They need to be heated up with a blow torch to get the adhesive to melt and let go. @Jeroen, one question, I noticed you used Red Loctite (271) which makes the fasteners very hard to take off again. They need to be heated up with a blow torch to get the adhesive to melt and let go. Loctite threadlocker differences I would have used blue Loctite. Is there a reason you used the 'permanent' red variety? Reason I ask is I use the blue variety at different spots in household repairs, most recently my front door's lock mechanism and will probably be using it for the DIY rotor/disc and pad replacement (on the caliper carrier and pin bolts) planned in the next week or so. Toyota does not recommend using thread locker but just sufficient torque for which I have my trusty torque wrenches. |
| |  ()
Thanks ()
Thanks
|
| | #75 | |
| Distinguished - BHPian  | Re: My Car Hobby: A lot of fiddling, and some driving too! Jaguar XJR, Mercedes W123 & Alfa Romeo Sp Quote:
 But I have never found it needed heating to undo. Especially on these relatively small bolts and nuts. Also, I donít dip the whole bolt in. I apply it after I have tightened the bolt/nut. In all honesty, the original nuts were not locked by Jaguar as far as I could tell. itís just me being a bit extra cautious. This new pump is larger, higher capacity, the bracket is modified and maybe not as tight as the original. This whole pump assembly is mounted with two bolts through two grommets on the base plate. No idea what Jaguar was thinking when they designed this. It is just hanging there, swinging about, on the inside of the wheel arch. Using torque wrenches is always the preferred option. But again, on these small bolts and nuts, applying a drop of Loctite seems to do the trick for me just as well I just picked up the new grommets, so I hope to finish this job tonight or at least this week. Jeroen Last edited by Jeroen : 18th April 2018 at 19:52. | |
| |  (1)
Thanks (1)
Thanks
|
| The following BHPian Thanks Jeroen for this useful post: | R2D2 |
 |


