| |||||||
 |
| Search this Thread |  1,041,489 views |
| | #166 |
| Distinguished - BHPian  | Re: My Car Hobby: A lot of fiddling, and some driving too! Jaguar XJR, Mercedes W123 & Alfa Romeo Sp Very exited. We got tickets to go to next yearís Goodwood Revival. https://www.goodwood.com/flagship-ev...dwood-revival/ A good friend of ours lives near the circuit and she has a GRRC fellowship. So she can get tickets early. We are going with another couple, very good friends of ours from the Alfa Spider club. Both our ladies are very much into period dress making. So they are already planning on what outfit the four of us will have. I told them I need to know in a hurry as I might have to get ourselves a proper period car. Between the four of us we owe 6 classic cars, of which three Alfa Spider. But none of them are any older then mid 70ís and that is really to new for Goodwood! We will only attend on the Friday. I just booked us a nice little cottage the day before, on the edge of Brighton. So Thursday we will do Brighton, Friday Goodwood and Friday evening we drive over to Bath. On Saturday/Sunday our ladies are attending the various Jane Austen events, also in period dress. Any hotel, B&B in a 50 miles radius around Goodwood is already sold out for that whole weekend! It is going to be a logistical nightmare. My wife will be travelling through Europe on a two week period dress making tour. We will need to fly or train her into London from Paris on the Thursday. I will have to be there with a car to pick her up. Our friends Bianca and Alex have no idea yet what their work schedule will be like. My daughter and the daughter of UK friends of ours want to attend the Jane Austen event as well. Just as they did this year. The problem with these historic events is luggage. We went to the Jane Austin event this September with daughter and friends daughter. The four of us we needed two cars just to carry the luggage, dresses, seamstress stuff and an endless amount of huge hat-boxes. The boxes alone filled my wifeís. These period dress events are like the F-1. Huge numbers of stuff, parts, tools are required. Endless lastminute sewing, pressing, ironing and God knows what else went on before my three ladies set of for the big parade in Bath:     So 10 months to go and counting. Lots of things to decide and arrange. We will probably end up making it into a week of touring the UK with at least two or three classic cars. Looking forward to it! Jeroen PS: Period Dress makers are quite impressed by modern cars too:  |
| |  (3)
Thanks (3)
Thanks
 |
| The following 3 BHPians Thank Jeroen for this useful post: | giri1.8, Karthik Chandra, R2D2 |
| |
| | #167 |
| Distinguished - BHPian  | Re: My Car Hobby: A lot of fiddling, and some driving too! Jaguar XJR, Mercedes W123 & Alfa Romeo Sp Back to the Jaguar. I was checking the service maintenance schedules and my own service notes over the years. Appears that it is high time to change out the spark plugs and the two drive belts. When still in the USA I installed Iridium spark plugs. They should last up to 90.000 km. And it was getting close that number, Could not get Iridium any more, but I could still get the original ones as per the Jaguar manual, NGK Laser Platinum. Got the belts too, but that turned out a whole different story. I order most of my Jaguar parts from SNG Barratt. A trusted name for Jaguar owners. https://www.sngbarratt.com/us/#!/Eng...Parts/Families They have a branch in the Netherlands, not to far from my office. So with all the parts on my work bench I set out one evengin last week. 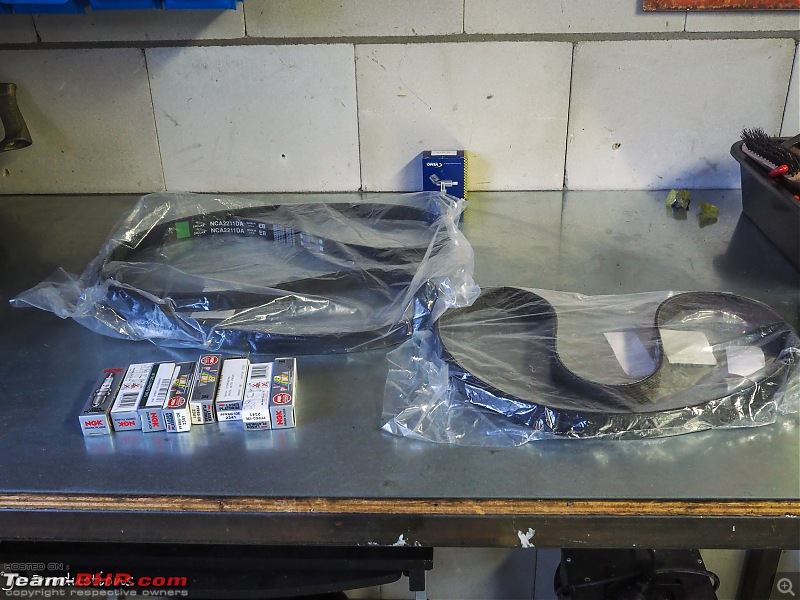 Make sure the car is ready, tools ready. Not too many tools required for this little job. 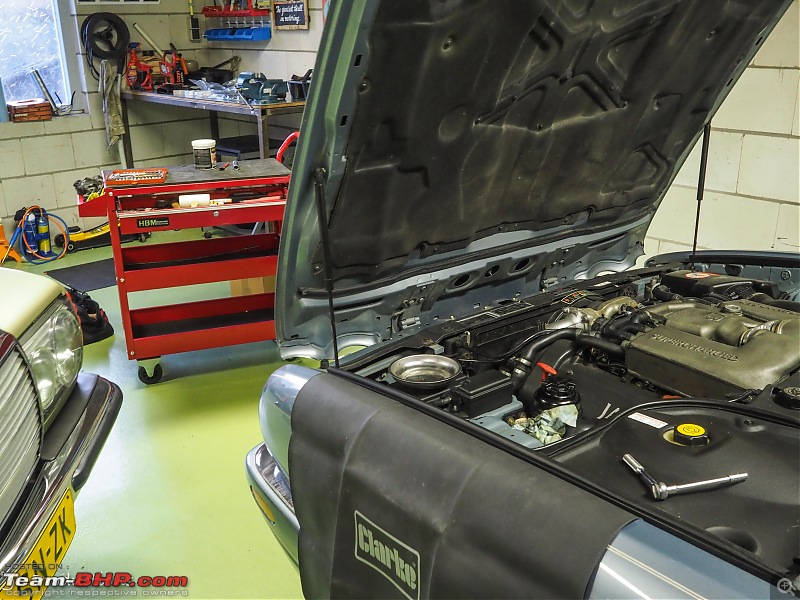 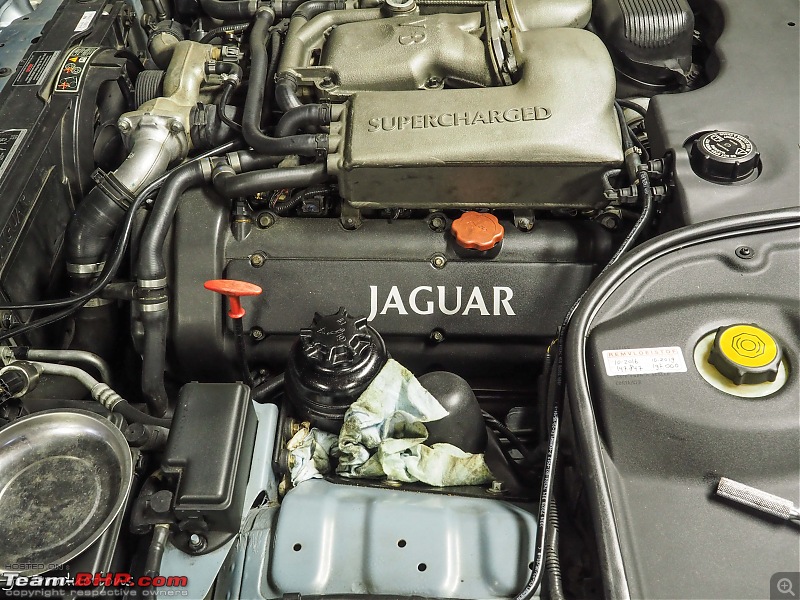 First thing I did was to check the gap on the new spark plugs. Checking and adjusting the electrode gap on a spark plugs used to be standard procedure. However, these days it is not so straight forward anymore. NGK does not recommend it for certain plugs: https://www.ngk.com.au/technical_inf...ap-adjustment/ It gets more confusing as other NGK wegsites are less specific. Anyway I just thought and check with my little spark plug measuring tool. 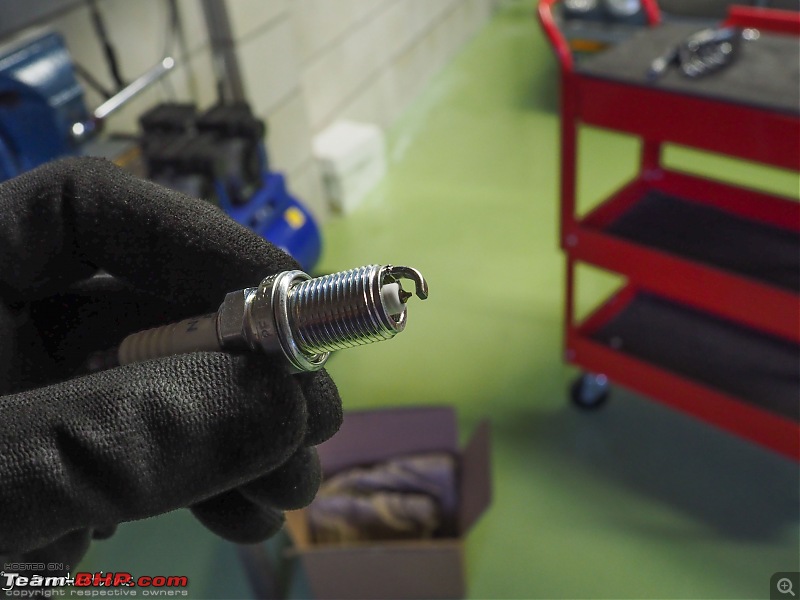 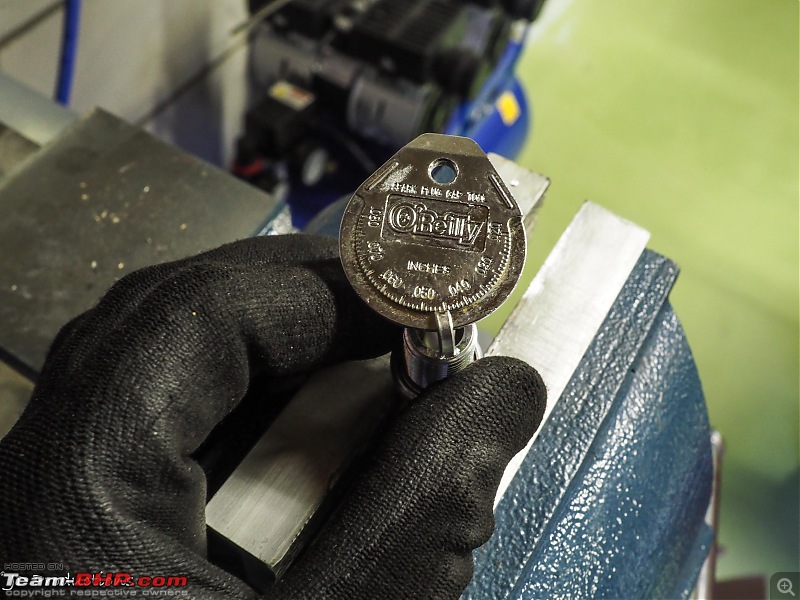 According to the Jaguar manual on the supercharged engine the gap needs to be between 1.1-1.2 mm (or 0.047 - 0.051 inch). As you can see my new NGK plugs are spot on! Still, it is quite a large gap! Usually it is around 0.8mm. But this is what Jaguar specifies. Here I have already removed the little panel you can see in an earlier photograph. We are looking at the four coils on the left (driver) bank of the V8. 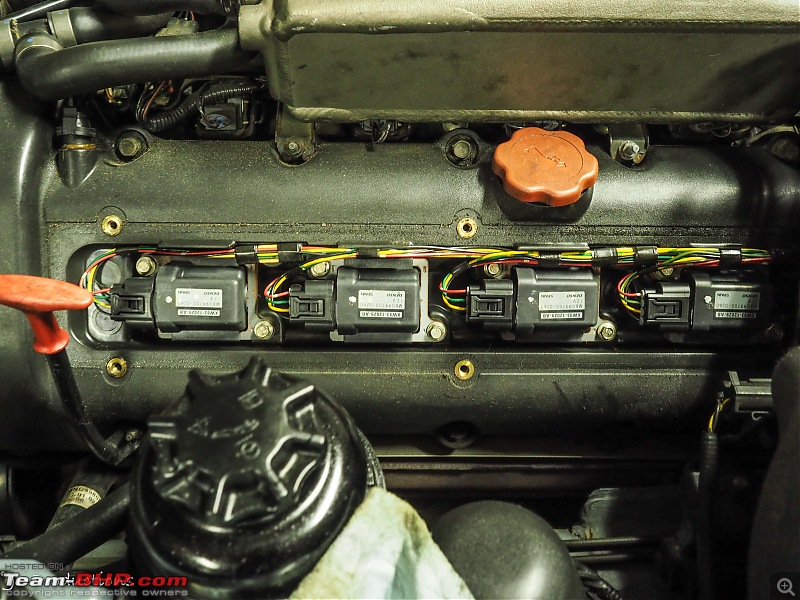 Gently pry off the connectors. Here is the thing; when working on all cars be very careful with electrical connectors. They tend to brake easily. When working on older / classic cars be even more careful and tender. Anything plastic tends to snap more easily as it gets older! 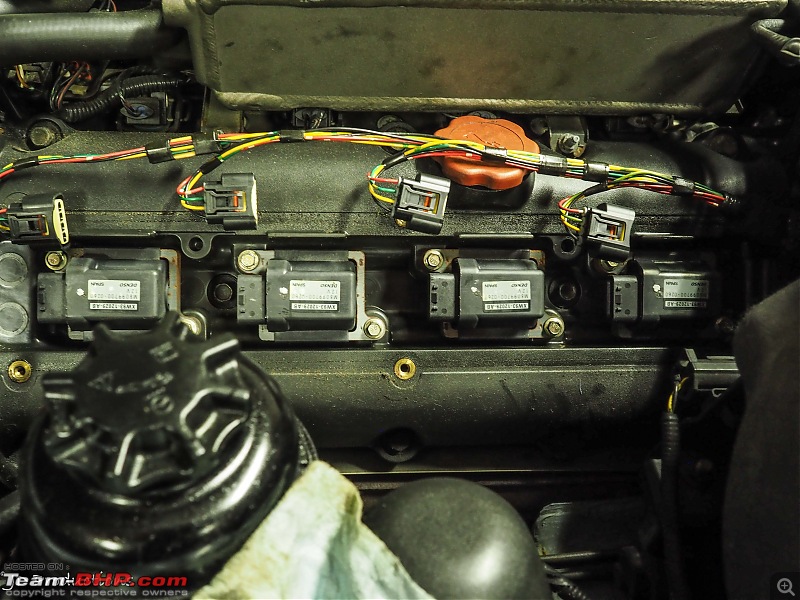 The coils are kept in place with two little bolts, undo them and you can just pull the coil out 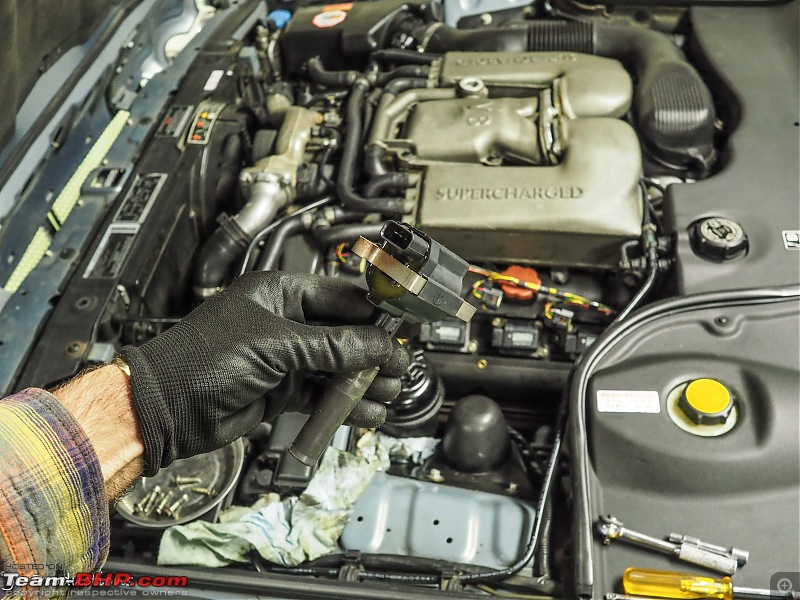 Check the coil for visible damage/wear and very importantly signs of oil! Which would indicate a leaking seal. I came across one of them that had a little oil on it. I decided not to worry. Because it means taking of the rocker cover and replacing all seal. Not a hugely complex job, but it is expensive as the gasket set is around Euro 250. Check visually with the coil removed for debris, oil etc: 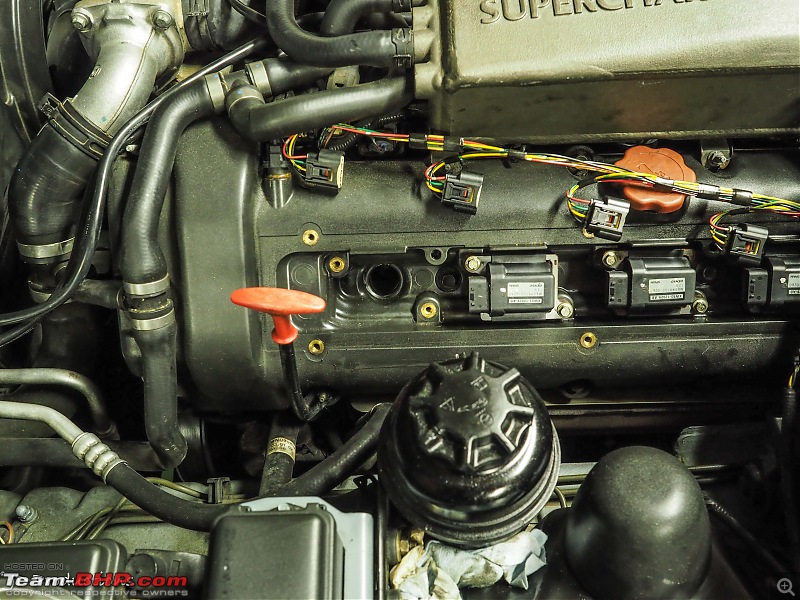 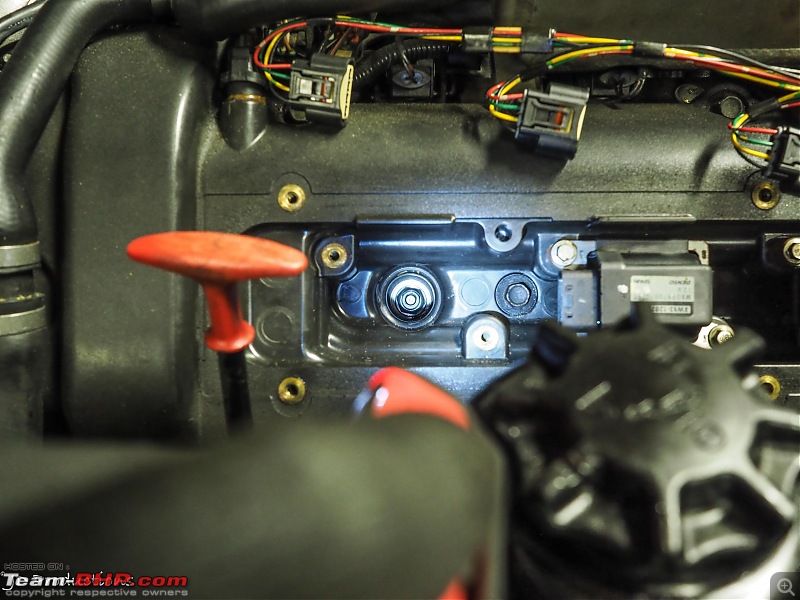 Use a proper spark plug removal tool. All plugs came out, but some were quite stuck and I had to use quite a bit of force getting them out 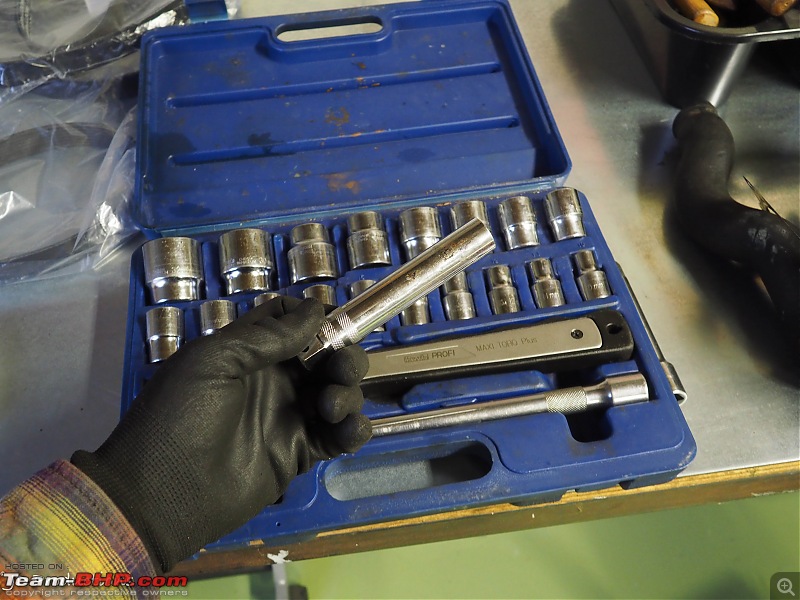 I always change out the plugs one by one. Making sure I keep the coil together with their original cylinder. I don’t know if that is really required, I don’t think so on the car, but it can’t hurt either. Before inserting the new plugs make sure you coat the thread with an appropiate anti-seize paste. Make sure not to get any paste not he electrode. 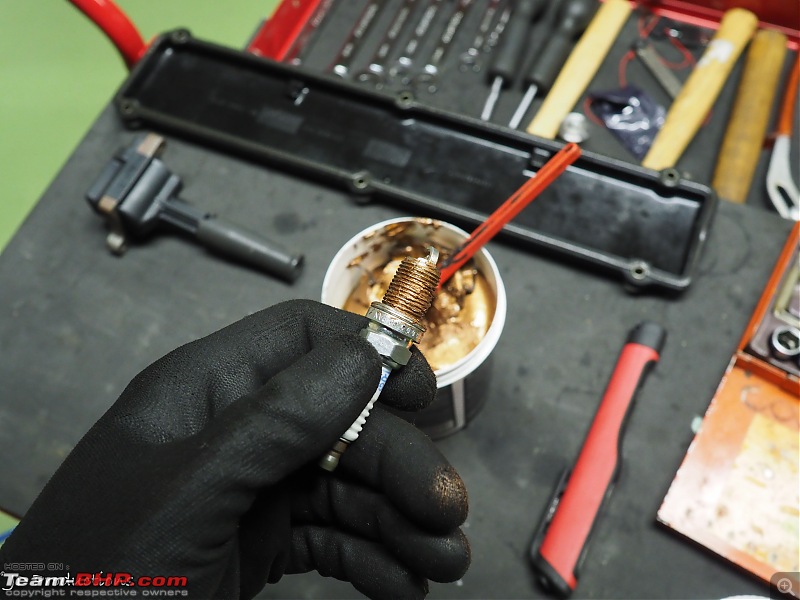 Before inserting the new plug, make sure everything inside the engine head is properly clean and dry. I blow a lot of air into it and poke around with a long screw driver to scrape off any dirt. Insert the plug. You really ought to be able to hand tighten the new plug most of the way. If not, better pull it out and fix the thread. Always be cautious, ruining the thread in the cilinder head can be fixed, but is a major headache job. Better safe than sorry is the way forward here. Finally, use a proper torque wrench to properly fasten the plug. 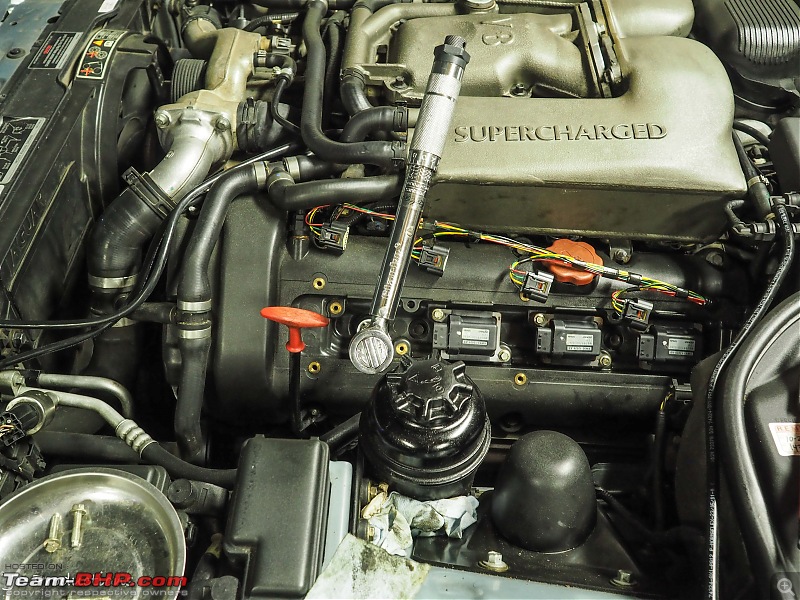 The most rear plugs is a bit of a pain to get at. I have some very handy tools that will help getting too these sort of difficult areas. 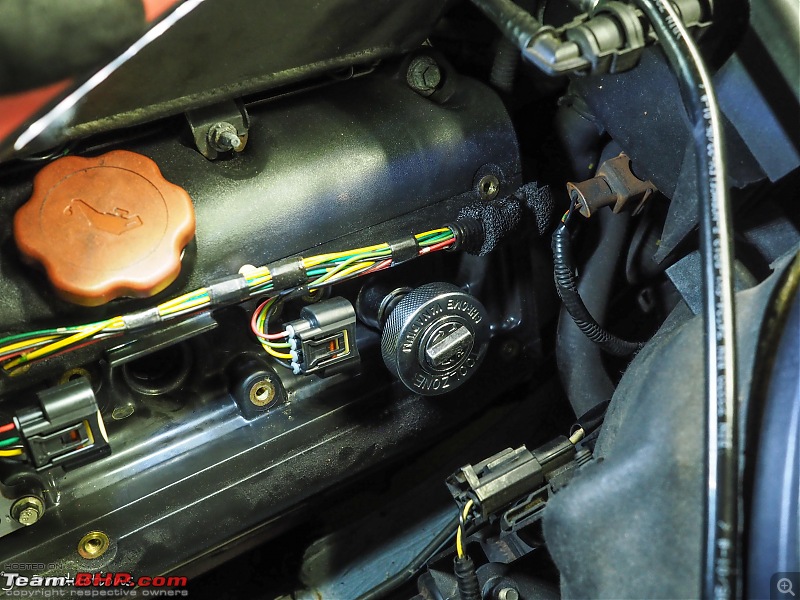 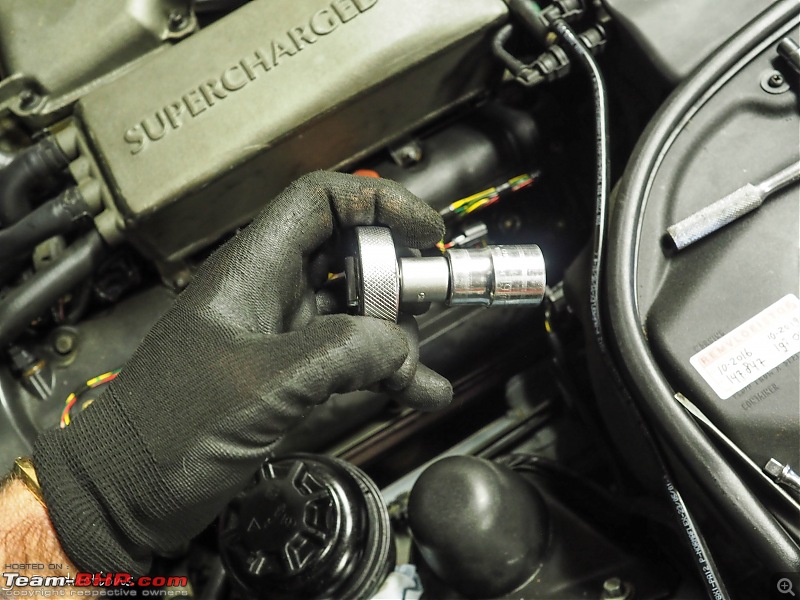 Next the right bank (passenger side). Similar, but you have to remove the inlet pipe with a few bits. 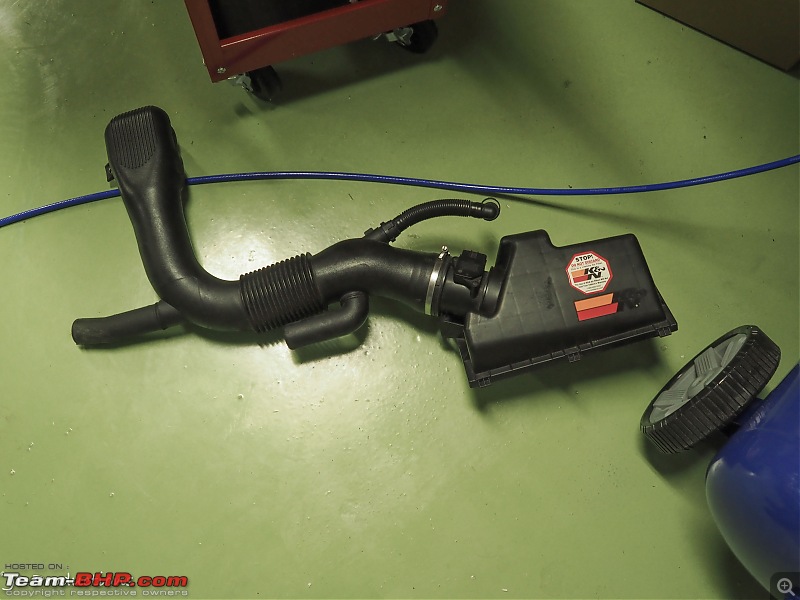 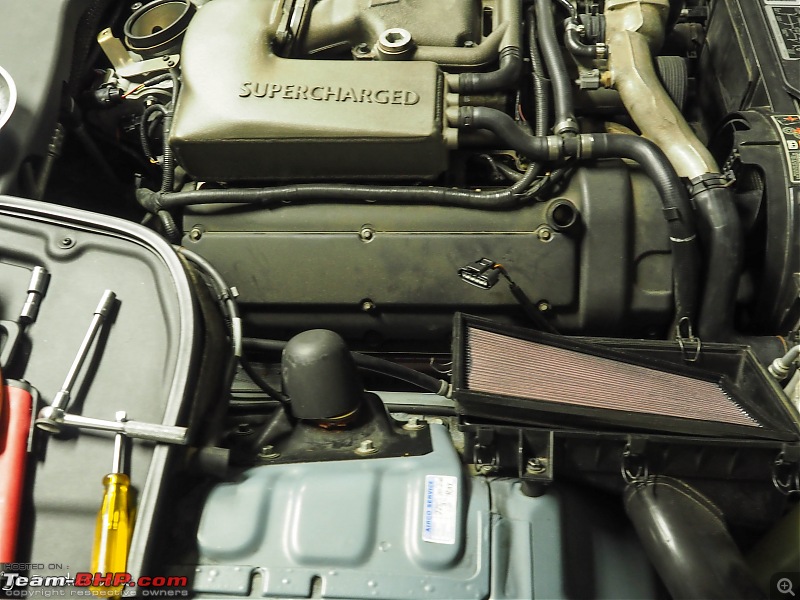 Otherwise identical. I left the inlet pipe off and I also took out the shroud with the two fans in 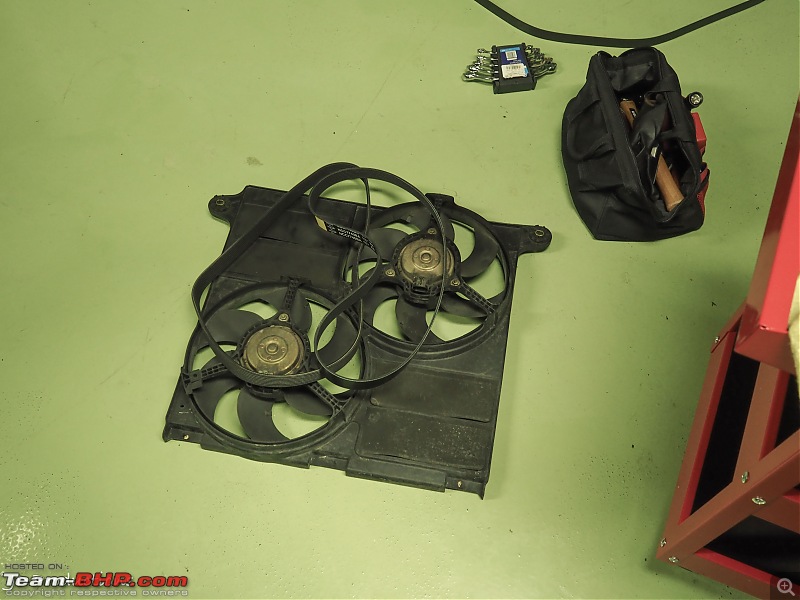 The Jaguar manual tells you it should be possible to replace the belts without removing anything. But either the manual is wrong or I am stupid because there is simply no way you can get at the belts and pulleys without removing some stuff. These supercharged engines have two belts. One belt for the supercharger and one so called (Jaguar name) accessory belt which drives the dynamo, waterpump and such. In order to get at the latter you have to remove the super charger belt. Both have a tensioner pulley with wear indicators. The Jaguar manual stipulates changing the Super charger belt every 30.000km and the accessory belt every 60.000 km. I checked the wear indicator and both still had a bit to go, but again better safe than sorry. We call it preventive maintenance after all! The procedure on both belts is similar. You insert a ratchet tool or similar in the tensioner and pull it so the belts gets some slack. Pop off the old belt, pop on the new and Bob’s your uncle as they say. The accessory belt is very long with many, many pulleys, so always a bit of a puzzle to get it back onto the right pulleys. 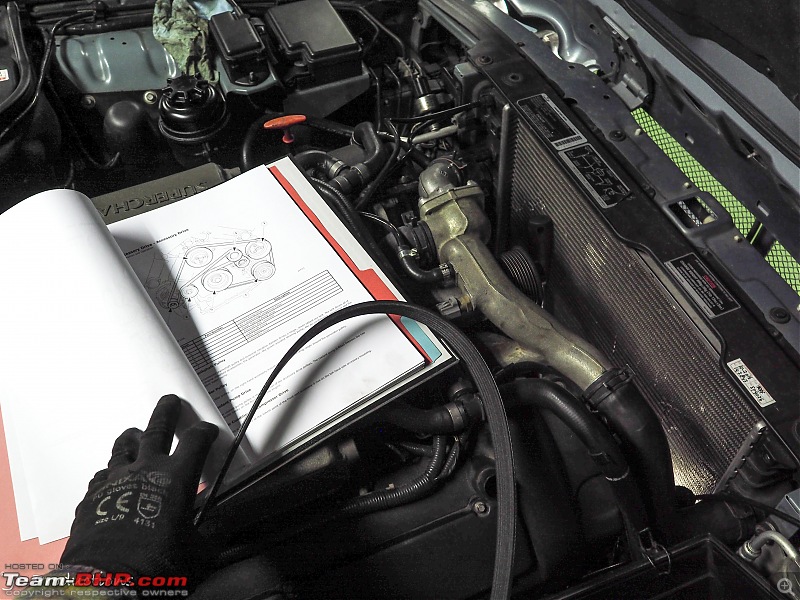 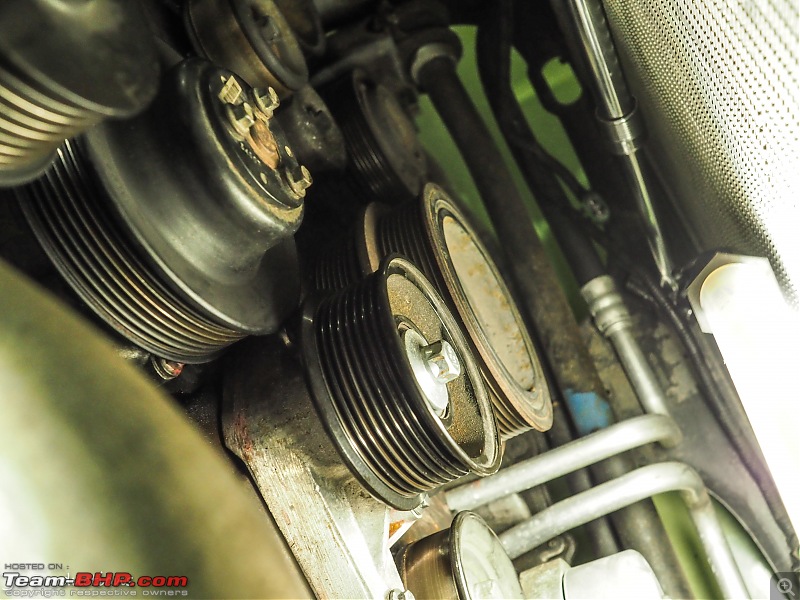 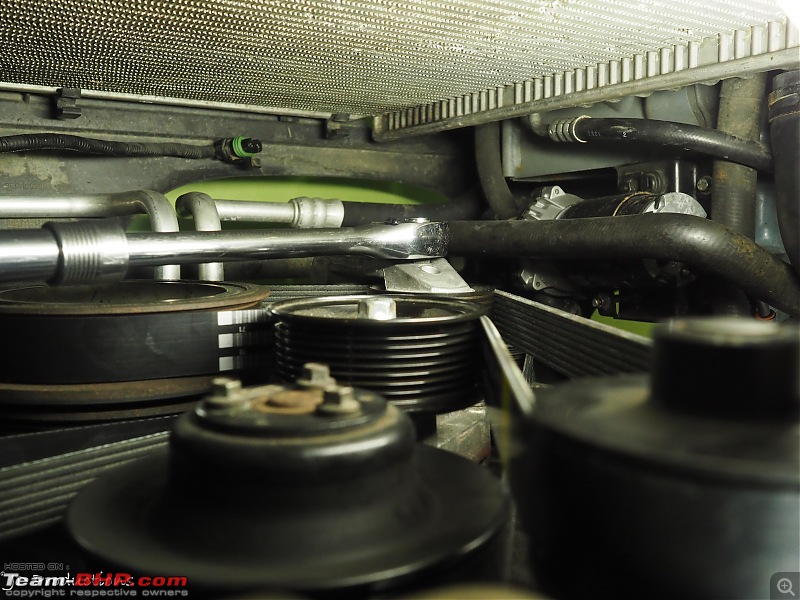 However, I found out SNG Barratt had provided me with the wrong super charger belt. Jaguar at some point in time modified the idler pulley on the super charger belt system. They went from a smooth pulley to a ribbed pulley. Which also means you had to have a double sided ribbed belt. The one i was given was not a double sided ribbed belt. The new and the old: 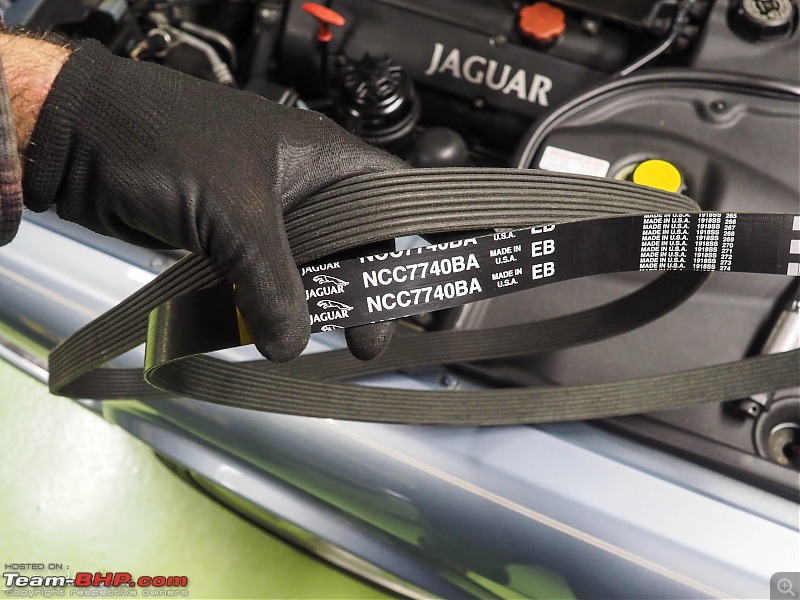 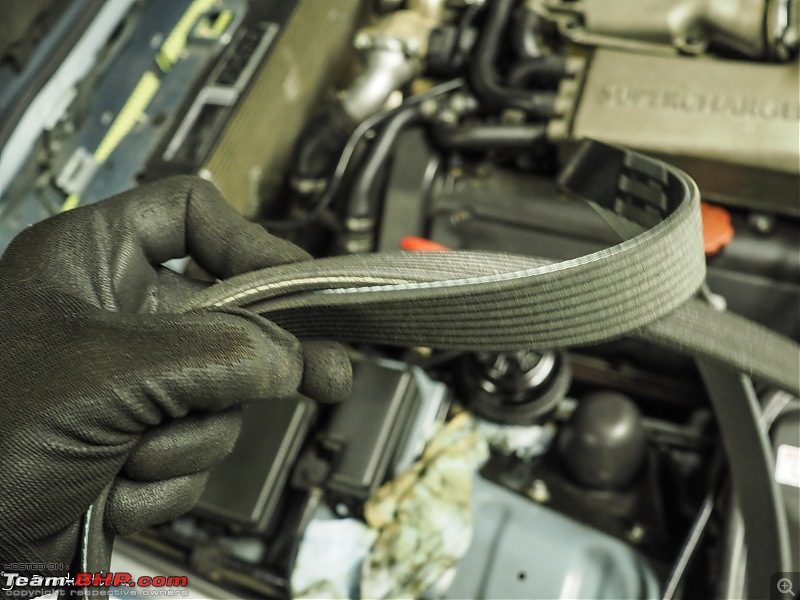 The old one: 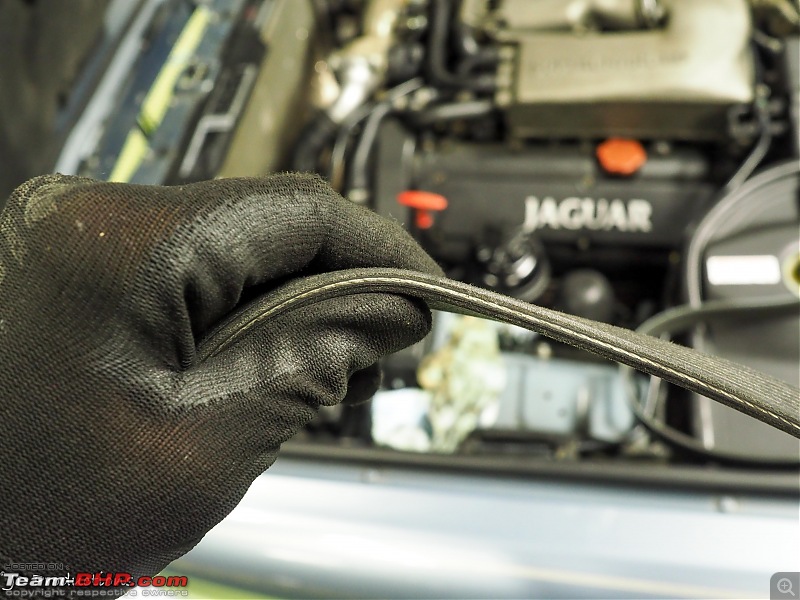 Called SNG and there was some confusion, but they managed to find me the correct belt. So I drove over there, exchanged the belts. Came home, put the new belt on, only to find out it was really a bit too long. With it fitted the wear indicator shows it is already passed it’s completely worn marker. More calls to SNG, but they are still trying to figure out what is going on. With the help of one of my Jaguar forums I managed to figure out what happened. Looks like SNG gave me a belt from the later XJR (X350). It is slightly longer. Today I am attending a technical workshop at my favourite indecent Jaguar repair shop. https://gg-autoservice.nl I have already spoken to the owner, Raymond. He knew immediately what the problem was and he has put the correct belt for me aside, ready for me to pick up. Looking forward to today! Off for a 145 km blast in the Jaguar to the Jaguar Workshop! to be continued. Jeroen Last edited by Jeroen : 17th November 2018 at 12:34. |
| |  (8)
Thanks (8)
Thanks
 |
| The following 8 BHPians Thank Jeroen for this useful post: | AdiSolEn, giri1.8, Jaggu, jeeva, Leoshashi, R2D2, vaasu, VivekCherian |
| | #168 |
| Distinguished - BHPian  | Re: My Car Hobby: A lot of fiddling, and some driving too! Jaguar XJR, Mercedes W123 & Alfa Romeo Sp I attended a hugely interesting full day workshop at G&G last Saturday. Write up and images to follow. I also talked to the owner Raymond about my problems with the supercharger belt. He gave me a new belt. Same number as the one SNG provided me with the second time around. But when I compared them, Raymond belts appeared a bit tighter. According to him and Jaguar the X350 4.2l V8 and my X308 4.0 V8 do use the same belt. Raymond suggested I would just take the belt home and fit it. If it’s ok he will send me the invoice, if not ok I can just return the belt to him. It’s nice to know guys who just trust you and hand stuff out and await for your feedback and or payment afterwards. Much appreciated! So I took the belt home and put it on. It definitely fits a bit more snug than the SNG belt. When I check the wear indicator it sits almost on the same position as the old belt (which was worn down). I really can’t tell whether that is a huge problem. Tensioner seems tight enough. And still has plenty of room to tighten further. So for now I will leave Raymond’s belt on. But I have done some more research and found some knowledgeable people on one of the Jaguar forums. They claim that the belts for the X350 and X308 are different. The X308 belt is almost 18 mm shorter. So maybe Jaguar has started to use one and the same belt. But I have found a guy in the UK, that was advertising on Ebay, with the correct X308 belt. So I have ordered it. It will take a few weeks to get here. No problem. I also redid the alignment steering wheel vv steering box on the W123. I already did it once, after I had re-installed the steering box after it’s overhaul. The second time I must have turned it the wrong way, as it was even more off centre than before. As they say third time lucky. Just to help luck a bit I re-did the full official Mercedes procedure on how to centre the steering box with my special little tool as shown earlier. Then I positioned the steering wheel in the exact middle and attached the two together again. I am taking it out for a short test drive this afternoon. Fingers Crossed. I am actually taking it for it’s bi-annual MOT this afternoon. I am not expecting anything, but I am a bit apprehensive. First time the W123 is going to the MOT with a regular MOT outfit, rather than a specialised oldtimer/classic garage. Let us see what happens! 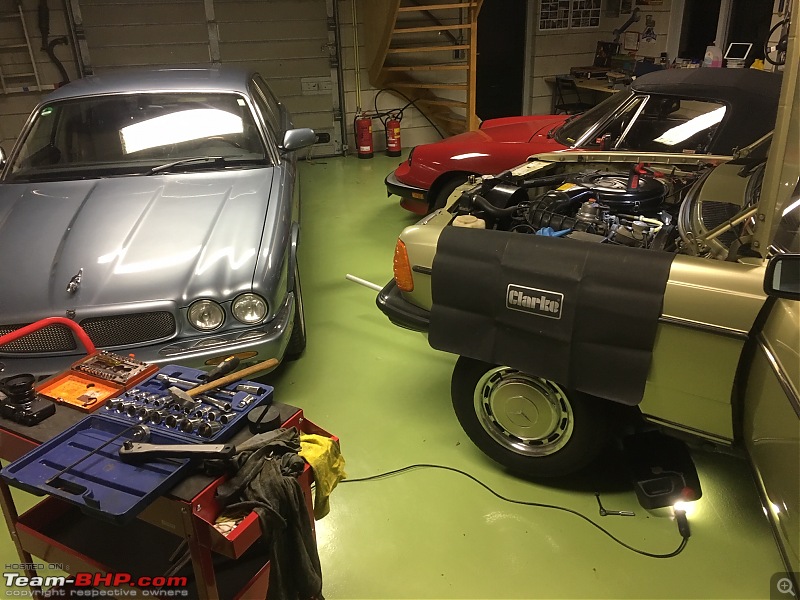 It is getting quite chilly here in the Netherlands. Difficult to see on this image, but I have a special electric air heater blasting away. (The black box between the red tool cart and the workbench. Pretty effective. It really takes the chill out of the air! Probabably costs a bundle in electricity. But I had solar panels installed recently too! 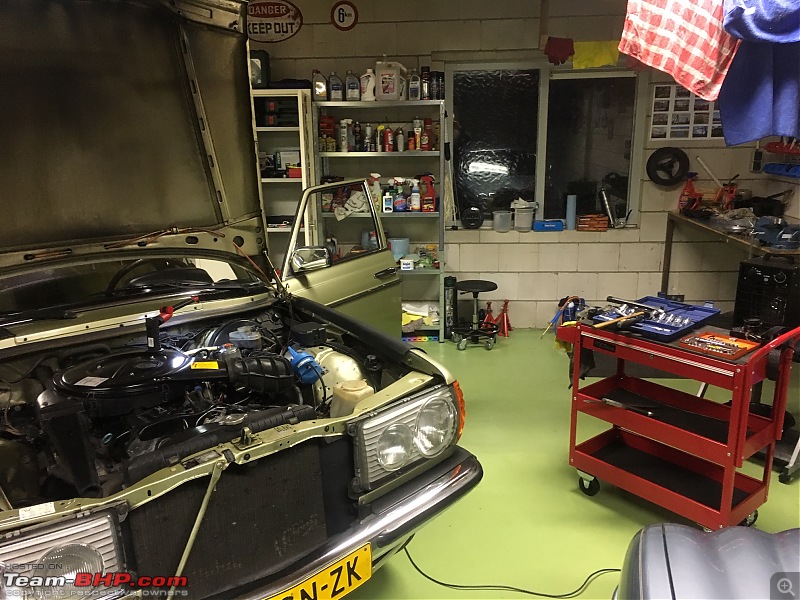 Last edited by Jeroen : 21st November 2018 at 16:39. |
| |  (6)
Thanks (6)
Thanks
 |
| The following 6 BHPians Thank Jeroen for this useful post: | Jaggu, R2D2, sai_ace, SS-Traveller, vaasu, vb-saan |
| | #169 |
| Distinguished - BHPian  | Re: My Car Hobby: A lot of fiddling, and some driving too! Jaguar XJR, Mercedes W123 & Alfa Romeo Sp Last Saturday I went to the open day at G&G. I wrote about them before: https://www.team-bhp.com/forum/diy-d...ml#post4180547 Last year Raymond showed us how he overhauls automatic transmissions. This time he had several different kind of jobs lined up. More or less in random order a couple of the more note worthy ones. As you are probably aware, emission control is a huge thing with ever more stringent legislation falling in place in many countries. In some countries during your car’s annual MOT emission reading are already collected and stored. With more stringent control, it is not just good enough to have a car that complied with emission regulation when it was build, but also maintaining it during it’s life time to get the lowest emission possible. A UK based company Forte (virtually next door to Jaguar in Coventry) has build a new machine that allows you to clean the air intake, injectors, turbo and (part of the catalytic convertor. Till date, that is typically done by “throwing” some liquids into the fuel, sometime the air intake. These guys have taken it to a new level and have re-invented the various fluids and a very new way of introducing it into the car’ engine. Here you see Raymond holding a nozzle. That is inserted into the air intake hose, after the MAF has been removed. 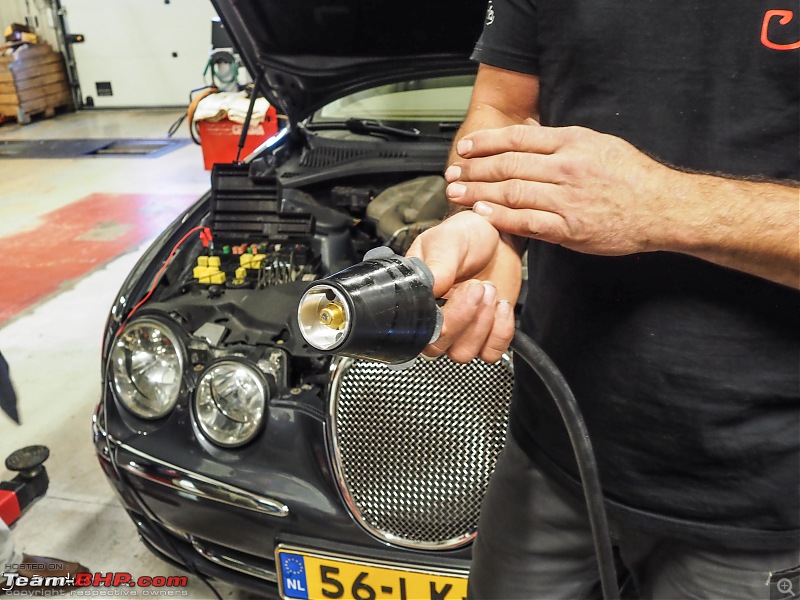 This is the machine: 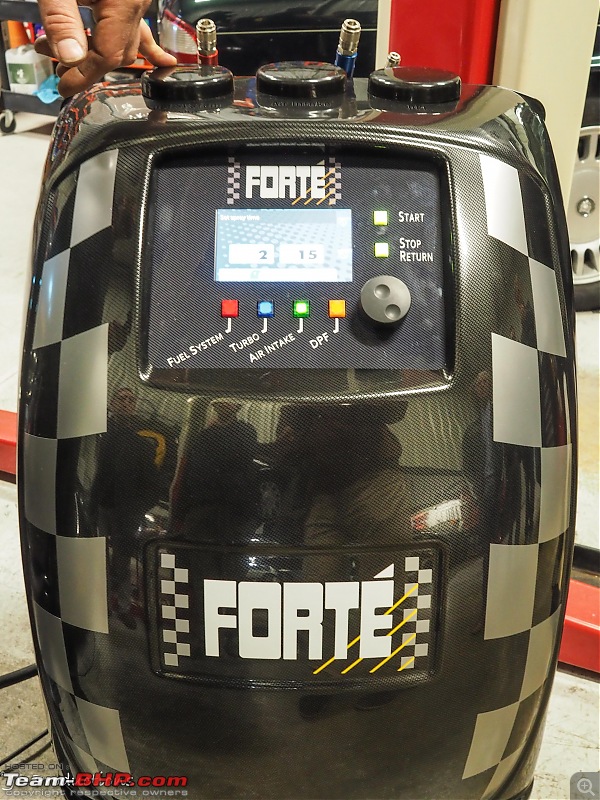 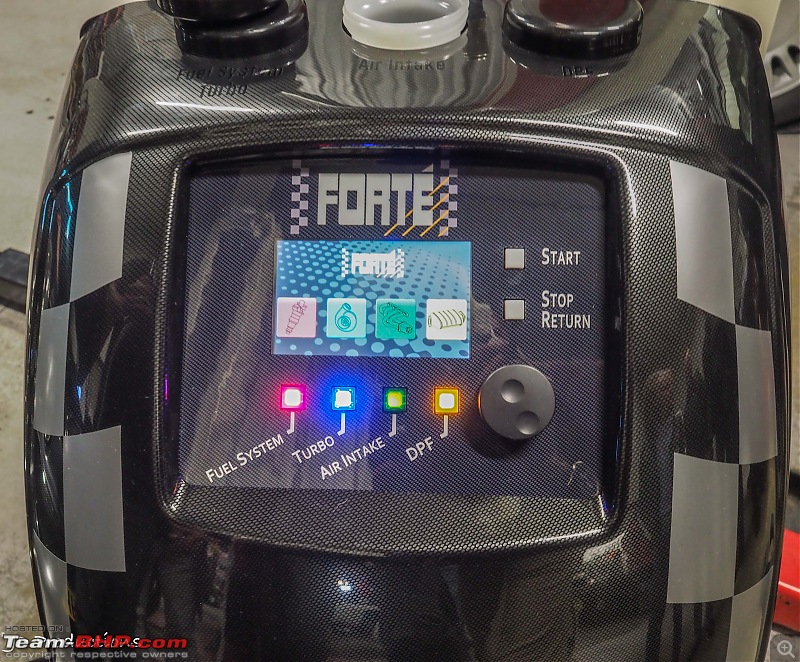 With the engine running this machine introduces various liquids into the air intake hose. 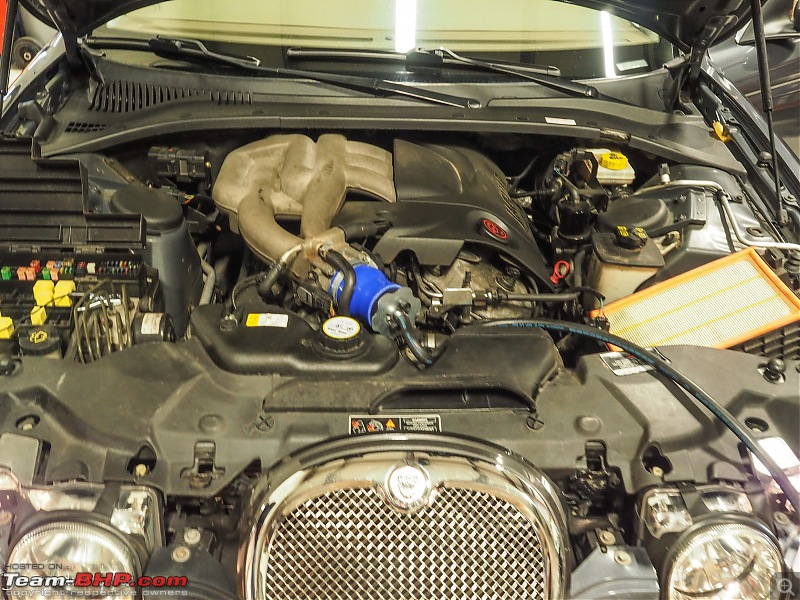 Here you see Raymond and one of his staff, checking how clean it has become. You will have to take my word for it, compared to what it was, the throttle body looked immaculate! 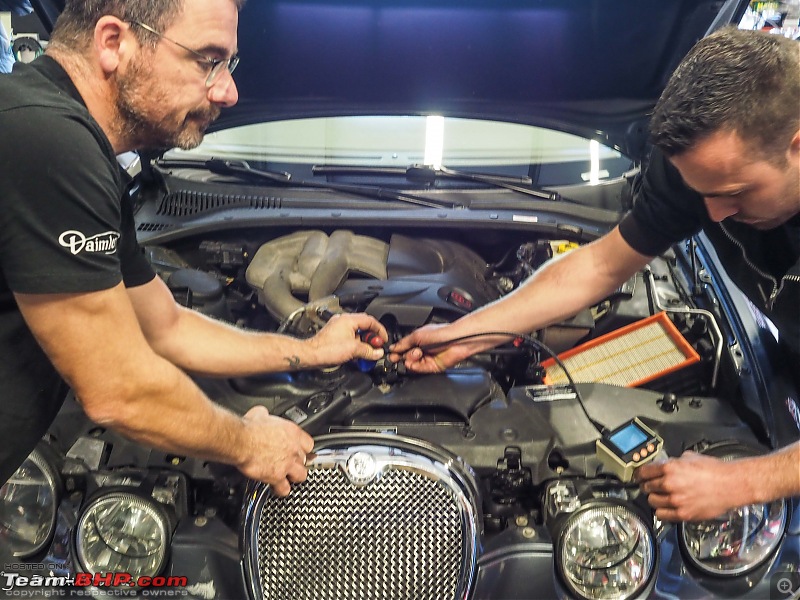 Raymond used an exhaust gas analyser to check the before and after reading. This is a Jaguar that had run well over 300.000km. The & Vol CO was initially at close to 3%. This is at the end of it’s cycle. Legal limit is 0.5. So very impressive. 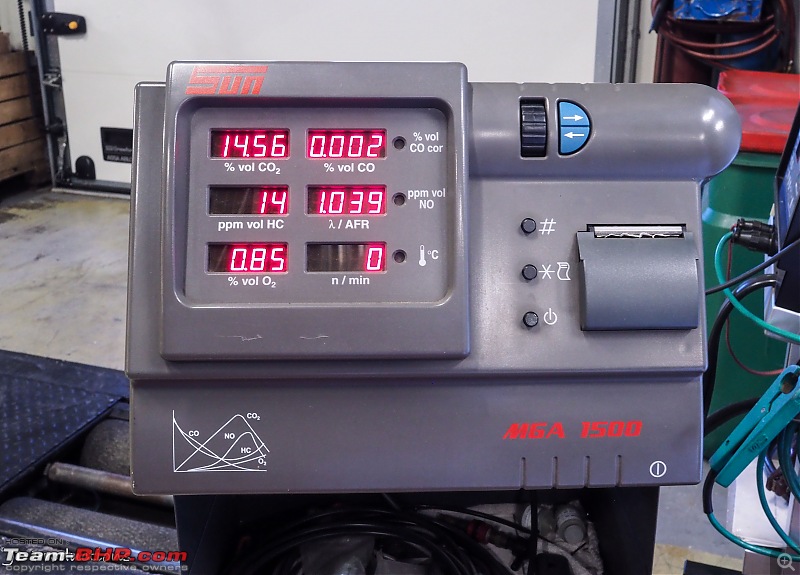 To clean the injectors and turbo the machine is hooked up to the fuel line. This is the very first of it’s kind in the Netherlands. Raymond had managed to persuade the manufacturer, Forte, to bring one over for this work shop specifically. It came along with a product specialist. The idea behind these very advanced engine cleaning methods is that, soon this will become mandatory for all cars. So a big, yet to be explored market. This machine ensure that firstly the appropiate liquid are applied softly to the various carbon build ups. It needs to get a chance to soak. You also don’t want large chunks of Carbon breaking loose and entering into your engine either. So this machine times different cycle times for soaking, removing, at different RPM etc. Raymond is always at the foreground of new innovative technology, tools and such. What you find in his workshop is rare to find even with mainstream Dealers. With a new machine like this he will do a lot of experimenting before he starts offering it as a service. I asked how this machine would work on our Supercharged Cars. I thought it could be a bit of a problem. There is an intercooler, so the air and the injected fluids are warmed up, compressed by the supercharger and then cooled down again. Raymond confirmed that he still needed to figure it out. His wife Joke has an XJR and he is going to experiment on her car. He aims to give the car several of these treatments and then remove and cut open the intercooler. He had already a spare intercooler at the ready! I am telling you, this guy is something else. By the time he starts offering this as a service, there will no other person on the planet as knowledgeable as our Raymond! Cooperation between Forte and Jaguar goes back a long time. They have done quite a bit of joint research in the past. At some point in time, certain Jaguars were suffering from sticky valve. The two of them produced a dedicated “cleaning machine”: Obviously, Raymond has one of those too: 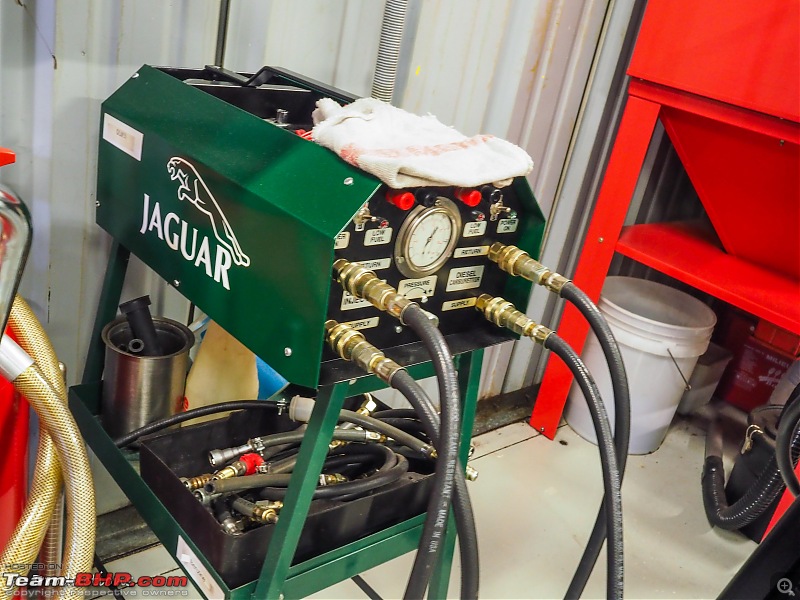 There was also a continuos demonstration of fixing the remote controls for our Jaguars. I.e. Fobs. This gentleman opens them up, cleans them, takes out the minute switches and solders new ones back in. I had a little chat with him. He told me that the switches is really the only thing that wears down (other than the battery). But he also told me some people try to increase the range of their FOB key. They insert two smaller batteries, double the voltage. Apparently, it is likely to work, but not for very long. And you can throw your FOB key away afterwards. Not quite sure how much, but these original Jaguar FOB keys are hugely expensive. 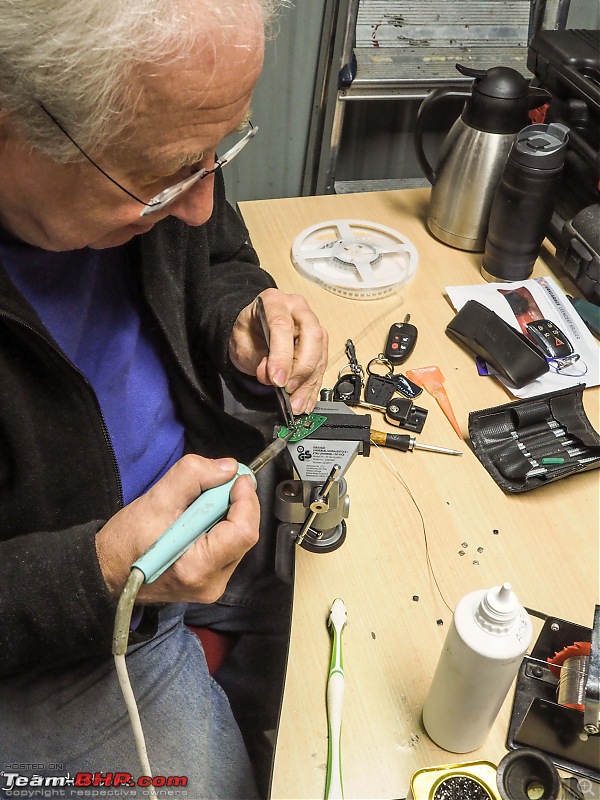 This is one of the micro switches: 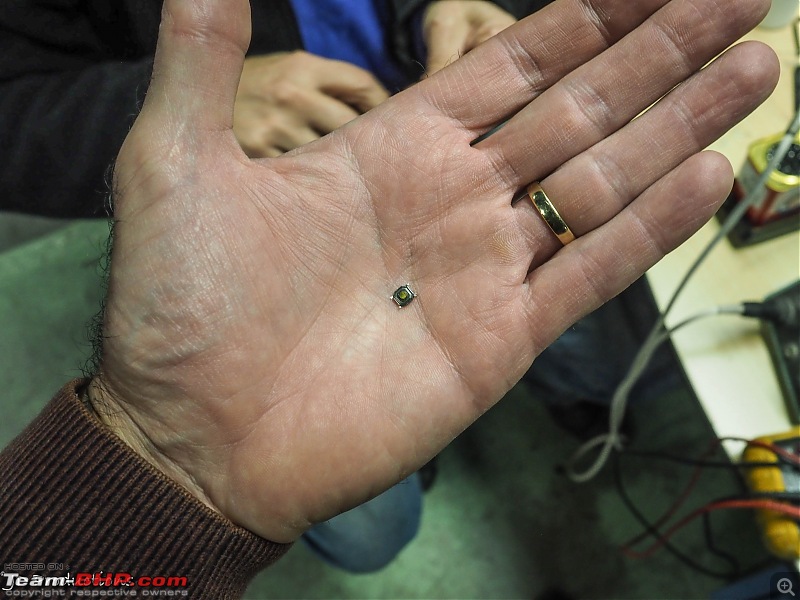 They come on a roll, 250 pieces like this: 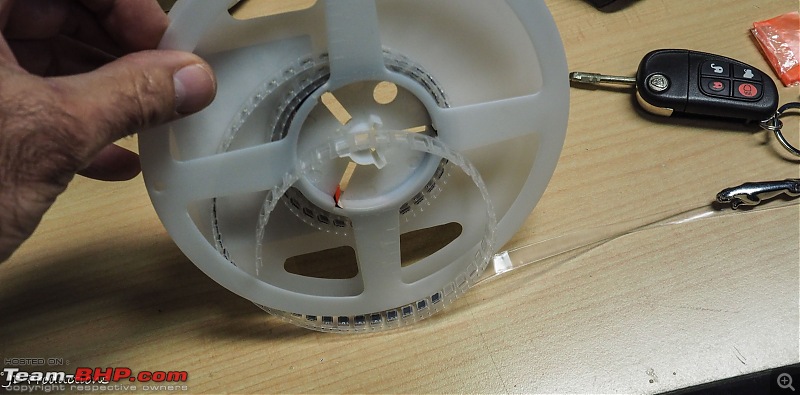 Here an overview of G&G absolutely immaculate workshop. The Jaguar on the lift is used to demonstrate transmission flushes. One of the machines that it used sits in front of it: 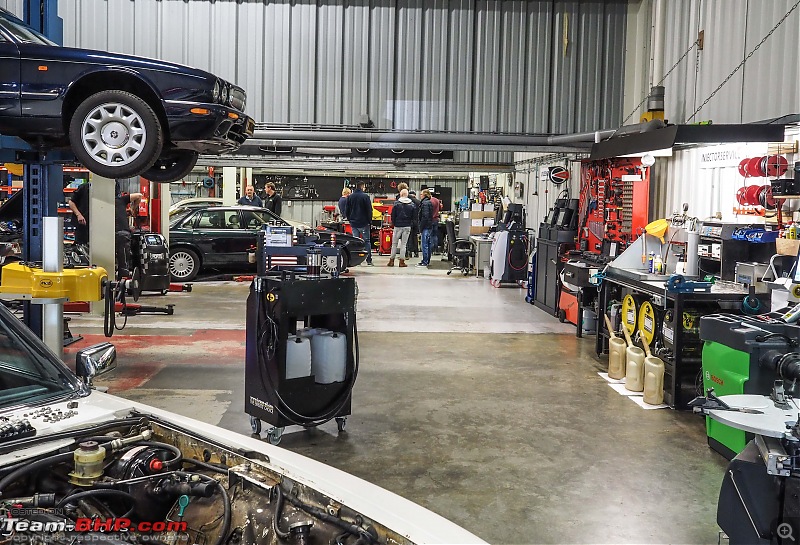 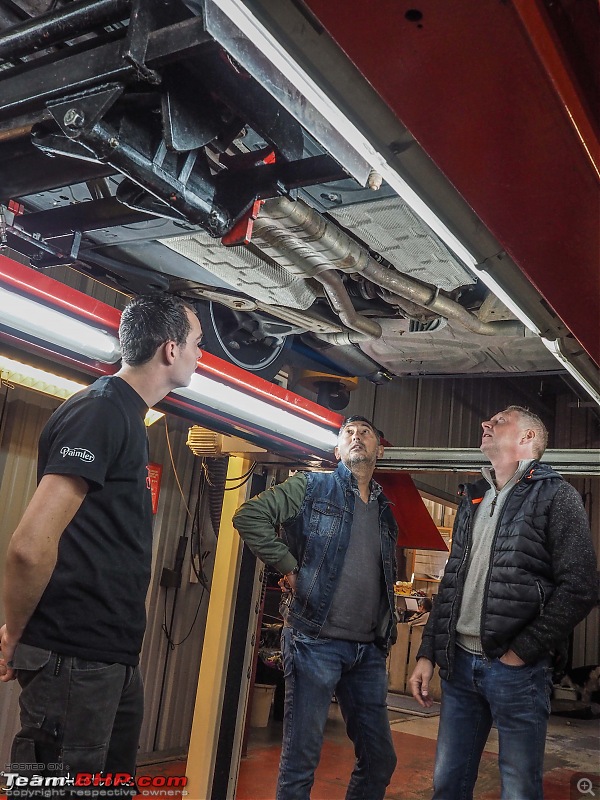 Somebody that stores his parts, tools, consumables etc like this, is likely to be a very precise and thorough mechanic too! 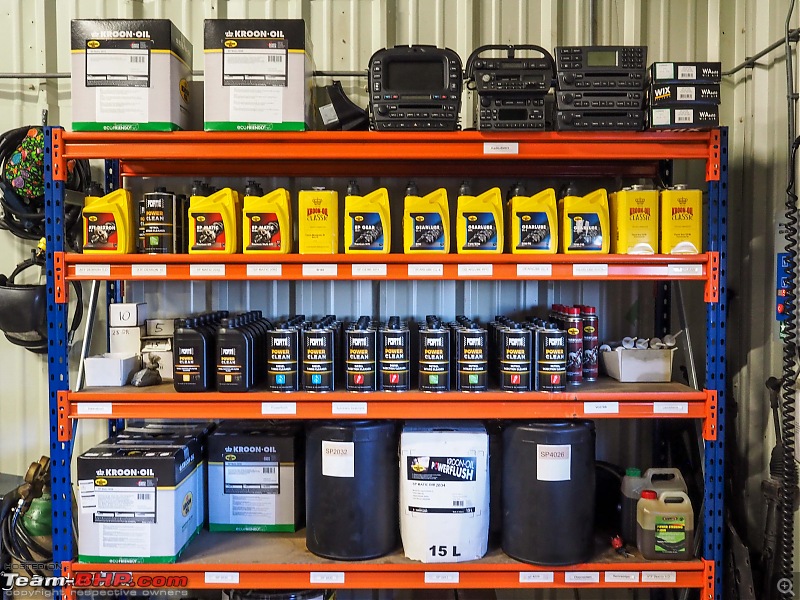 One of Raymonds mechanic was working on a XJS. This car has a big V12 and they have quite a bit of a temper. Very complex engine. So they had been taking it apart and were rebuilding it during the day. 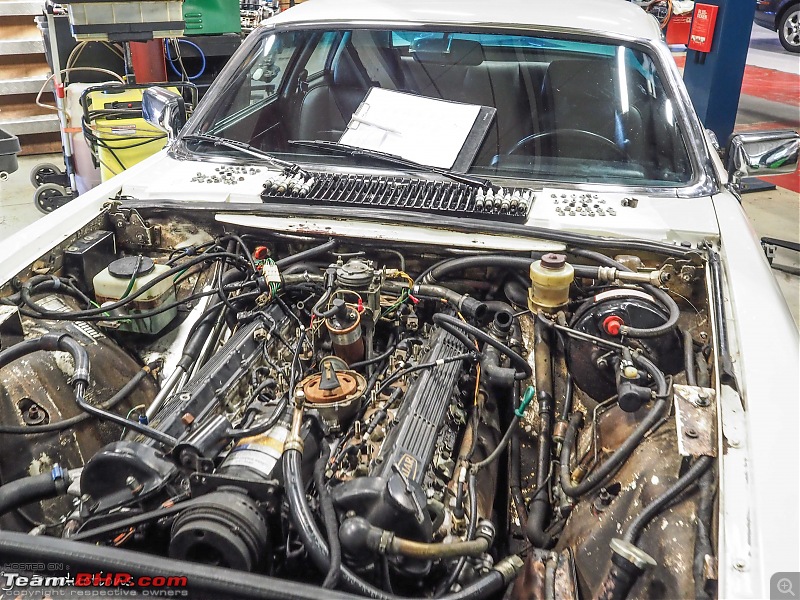 Here the engine from above at 10.00 AM: 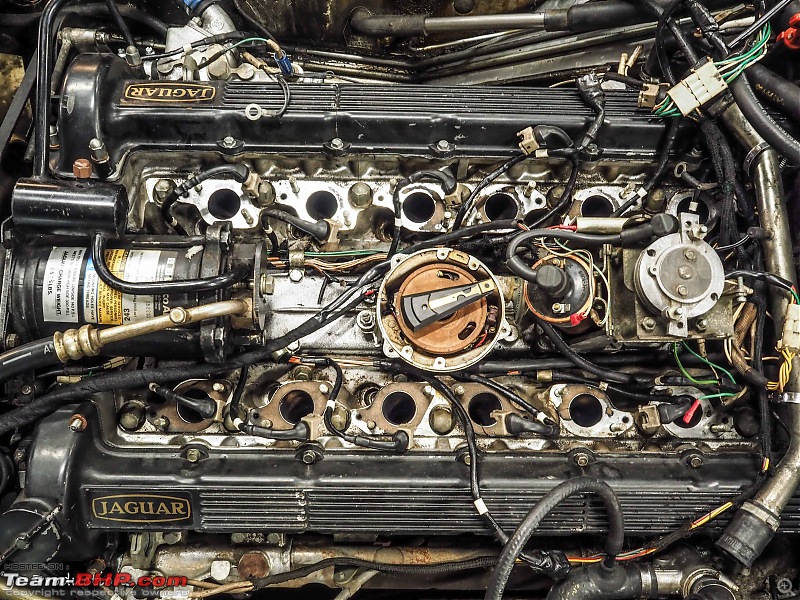 Here the same engine at around 16.00 AM. That is the thing with a V12. There is 12 of everything! 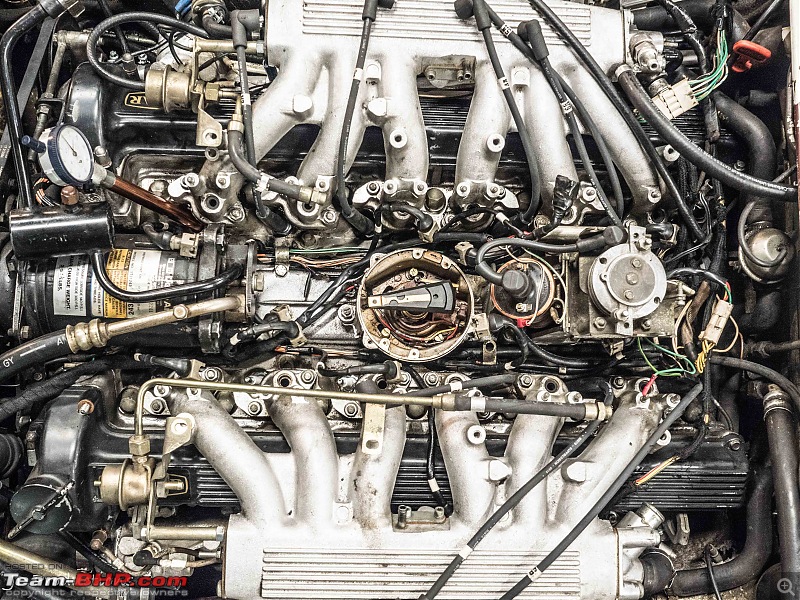 Several cars were washed, cleaned, clayed, polished to within an inch of their life. These car detailing guru’s are just unbelievable. It’s is a science in its own right. With lots of special tools, liquids, all sorts of stuff and tonnes of experience. 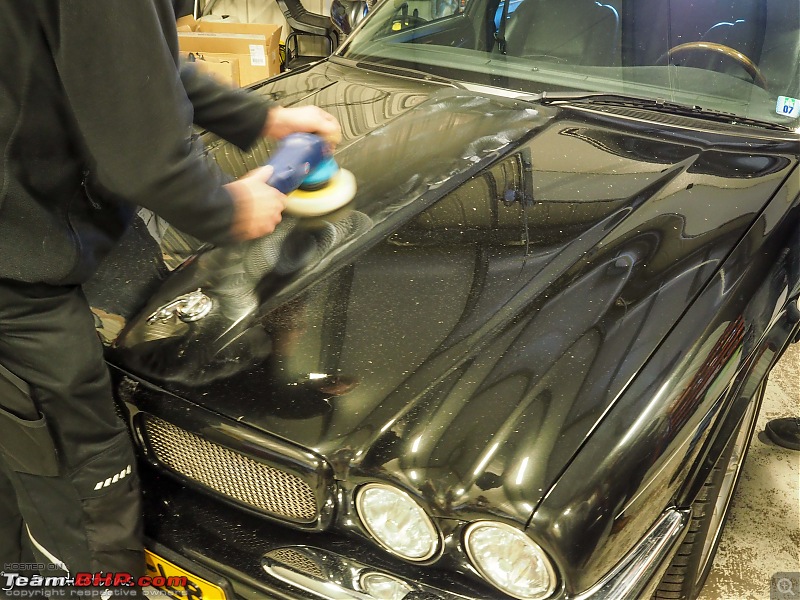 We also got a demonstration on how injectors are tested. Here you see Raymond’s test bed. They test four injectors in parallel. On the most left one they have taken the canister away. And you can actually see that there is a problem with this particular injector. Problems with injectors are nearly always, either a leaking injector, or it doesn’t spray/inject properly (as this particular one) 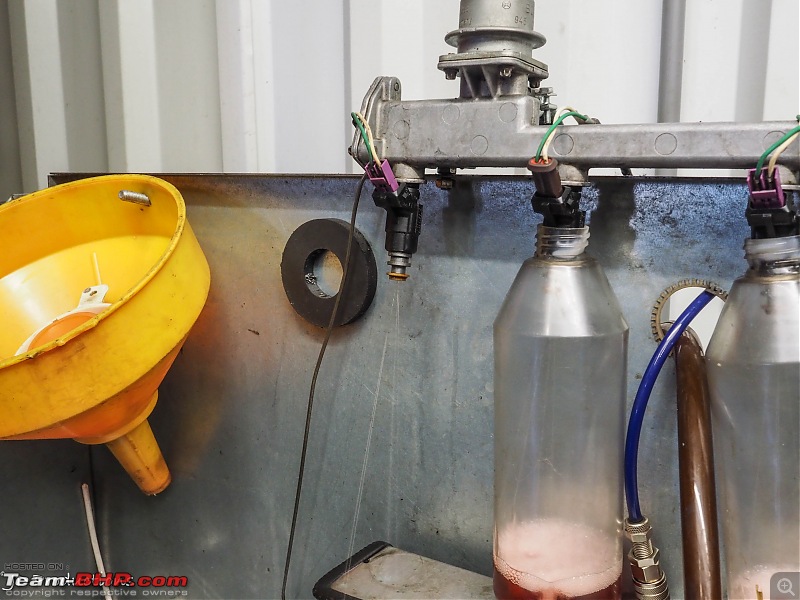 Last edited by Jeroen : 22nd November 2018 at 16:54. |
| |  (9)
Thanks (9)
Thanks
 |
| The following 9 BHPians Thank Jeroen for this useful post: | giri1.8, Jaggu, ksameer1234, Leoshashi, Miyata, NPV, R2D2, vaasu, VivekCherian |
| | #170 |
| Distinguished - BHPian  | Re: My Car Hobby: A lot of fiddling, and some driving too! Jaguar XJR, Mercedes W123 & Alfa Romeo Sp The next demonstration I watched with interest was the “on car disc alignment”. I had heard about it, but I had never seen it done. Obviously, Raymond has the tools and the staff that know how to do it. Problems with wonky rotors/discs are usually solved by either simply replacing them, or by putting them on a lathe and skimming of a small layer until the disc spins perfect again without a wobble. In rare cases, that might not solve the problem. The only solution to fix it, is to hone the disc whilst still on the car’s hub. Here a few images that shows how it is done:  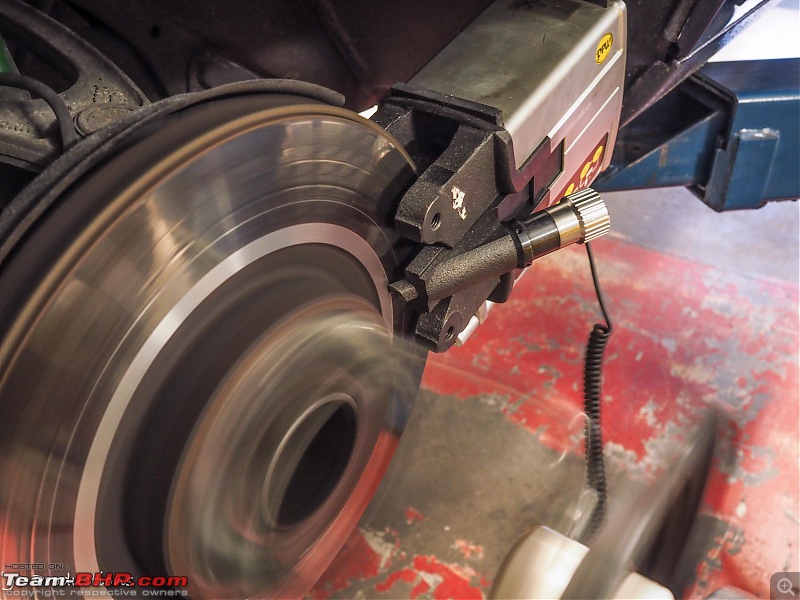 There is a cutter/chissel on both sides of the disc. This is what it looks like. 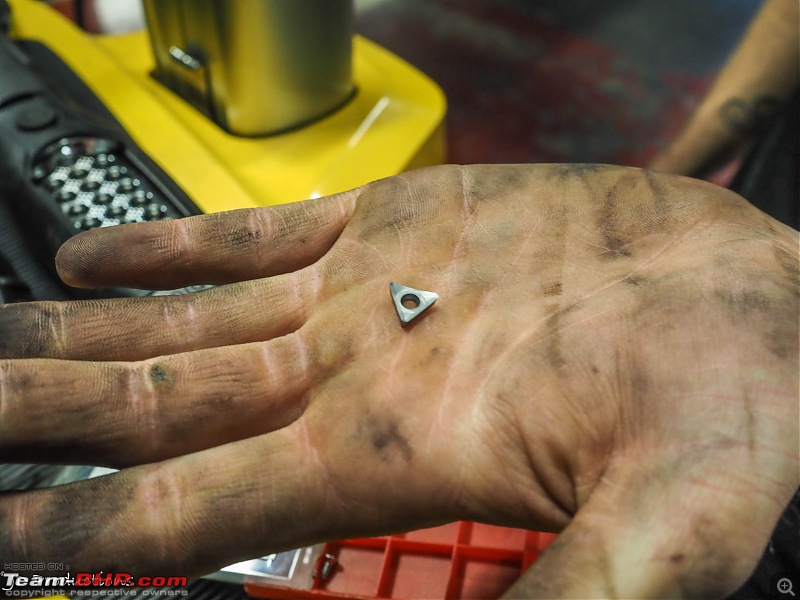 The typical set up is to work from the inside to to the outside taking 0,1 mm off. If that is not sufficient keep taking 0,1 mm off until the disc runs true. (Or stop of course if the get to the minimum disc thickness. The chisels are moved automatically from inside to the outside. Depends a bit on the size of the disc of course, but give or take 30 minutes. Once set up the mechanics leave it to run unsupervised. Look closely and you can see them inside the tool: 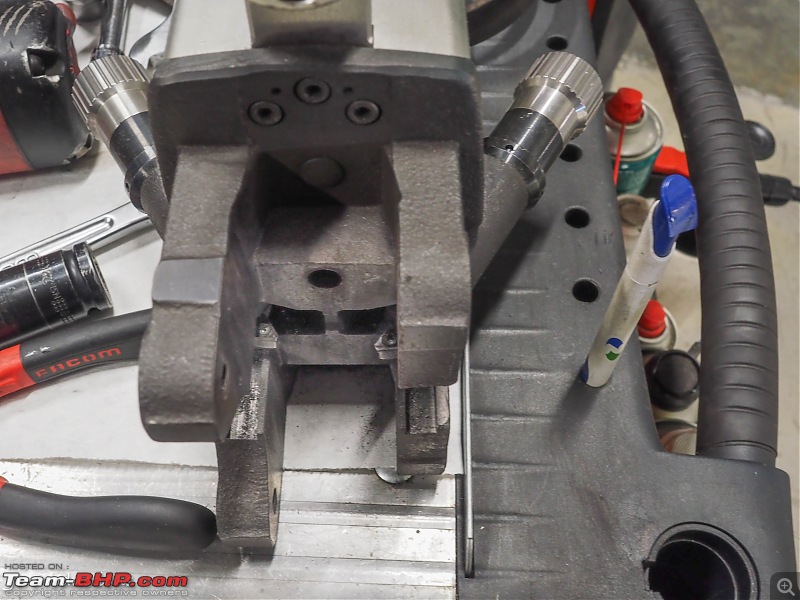 A special attachment is bolted onto the wheel hub/disc. That is driven by an external electric motor: 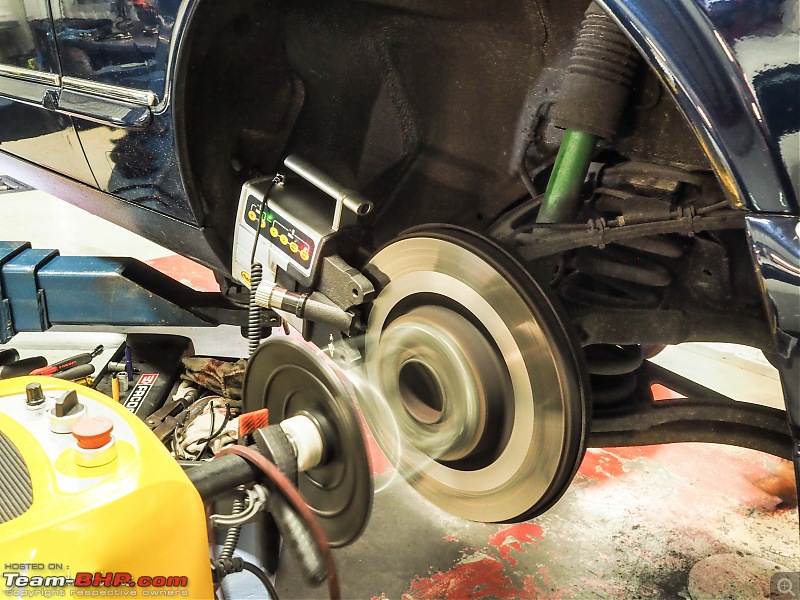 End result looks impressive. New brake pads are always fitted after this repair. 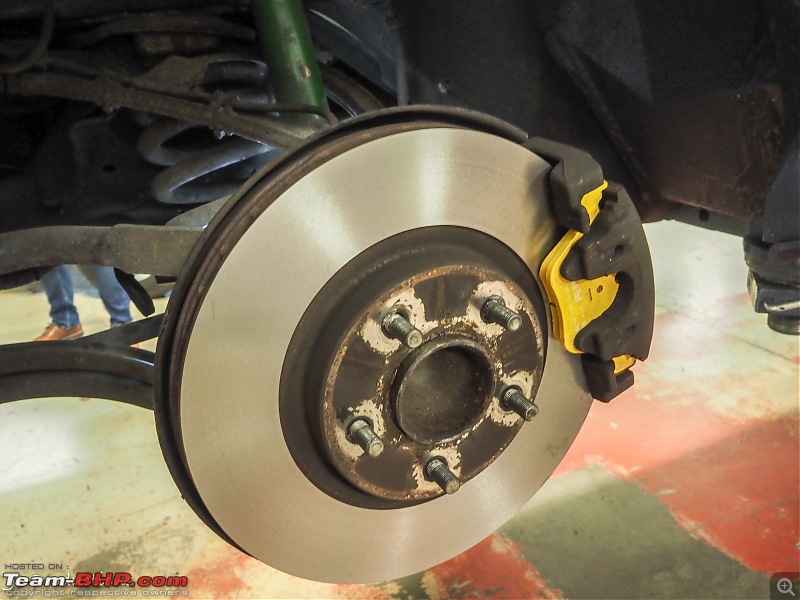 Lunch was provided for as well. Hamburgers! 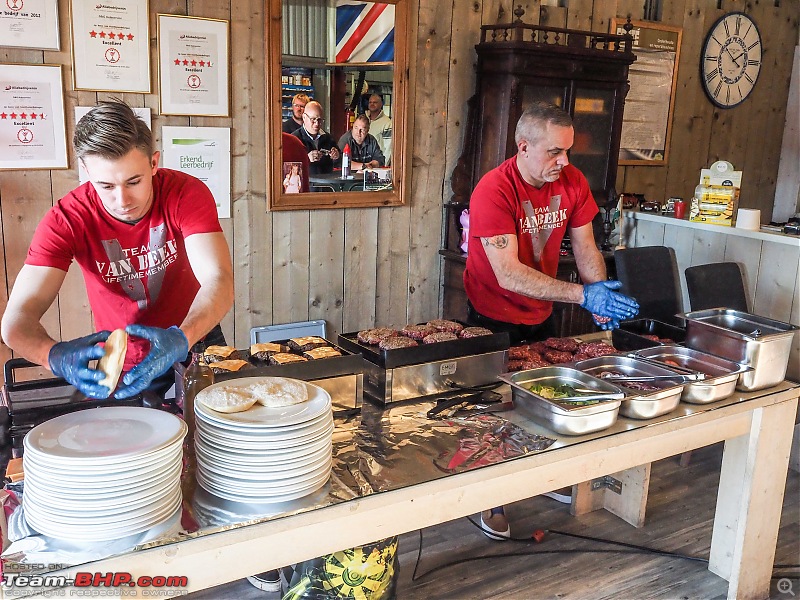 Raymond did another auto-transmission overhaul. This time a simpler box than last time. He took it apart, overhauled it and put it back together in about 3.5 hours or thereabouts. For more details I refer back to the original post, where you can find an almost step by step guide on how Raymond takes these boxes apart. 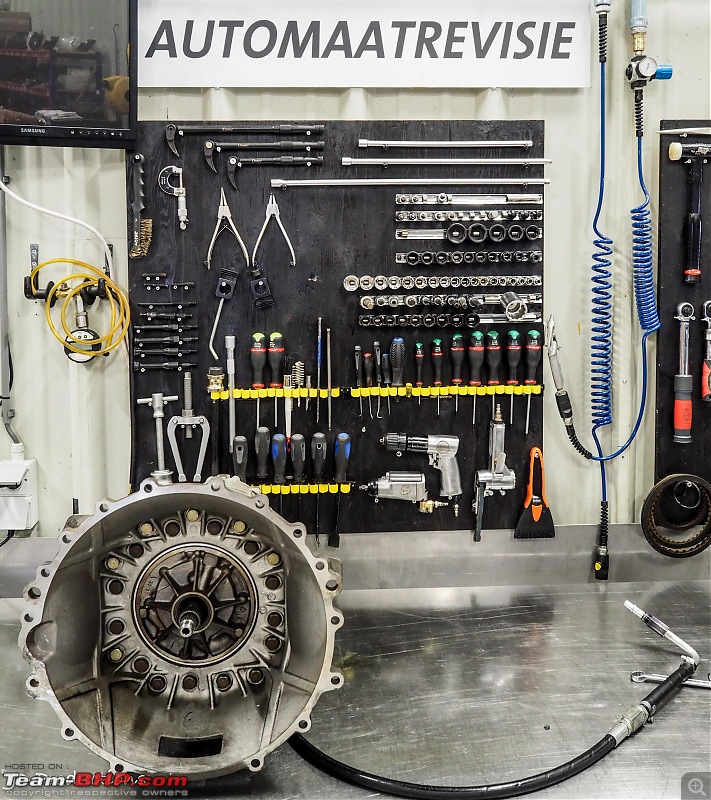 Lots of auto (fluid) clutches, all ready and waiting to be installed: 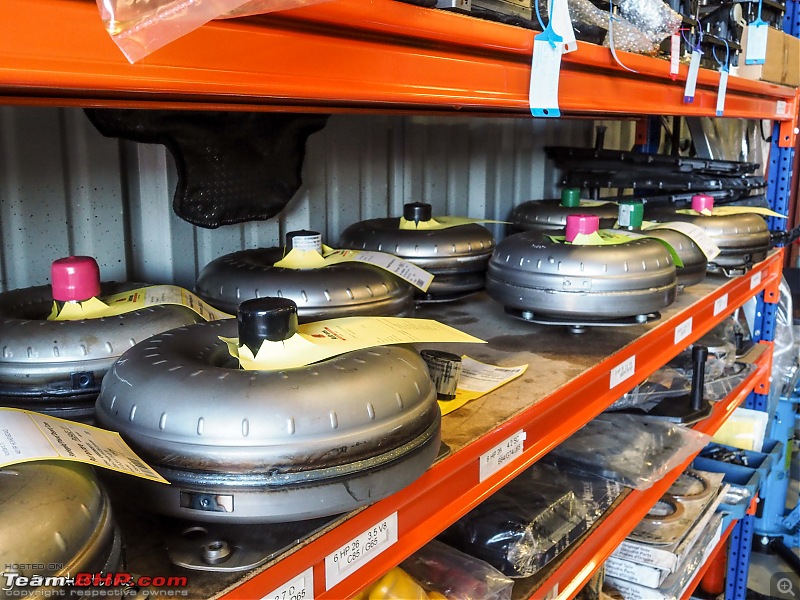 I have taken a few images of some very specific things on this particular box. The owner had complained it did not shift properly. What I find interesting is the way Raymond approaches the overhaul. It is almost like a forensic expert, analysing what the customer has told him and whilst he is taking the various bits apart adding facts to the story to prove what the real problem is. Raymond at his specially designed and equipped Transmission overhaul work station: 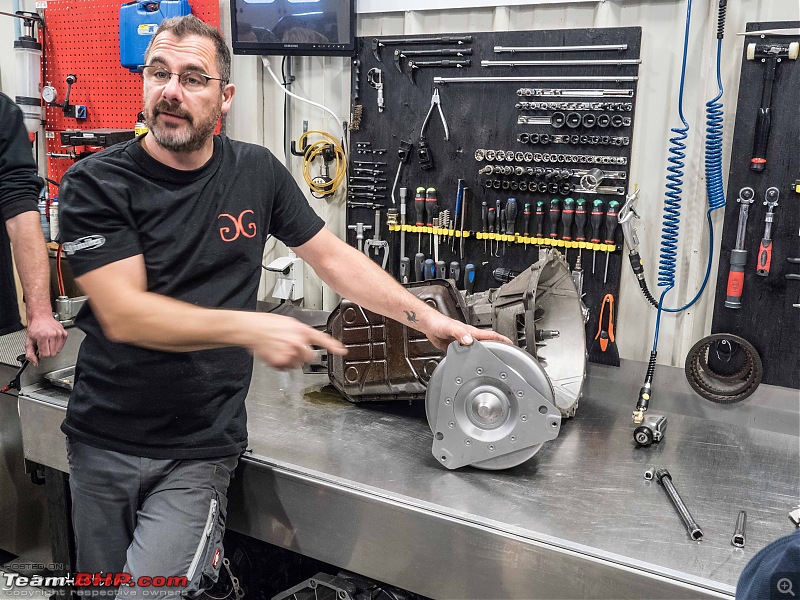 This time he also had a model of the fluid clutch that had been opened up. Very interesting to see the inner parts and hear how it actually all works; 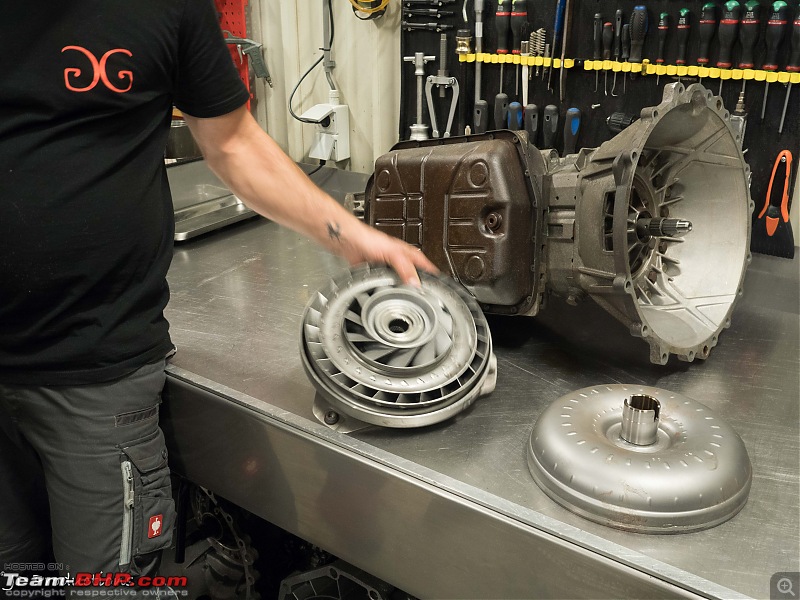 So if you take the sump of an auto box and you find this much metal on the little magnets (there are in fact four) you know something is amiss! 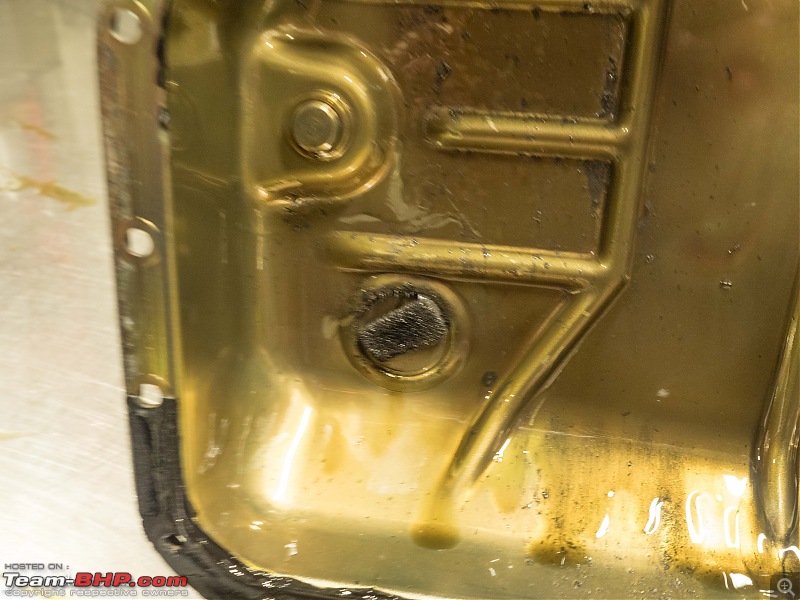 Also, very quickly Raymond spotted some Molykote residue. Which suggest someone has been trying to fix a problem by adding Molykote. When stuff in a box is broken, Molykote won’t fix a thing: 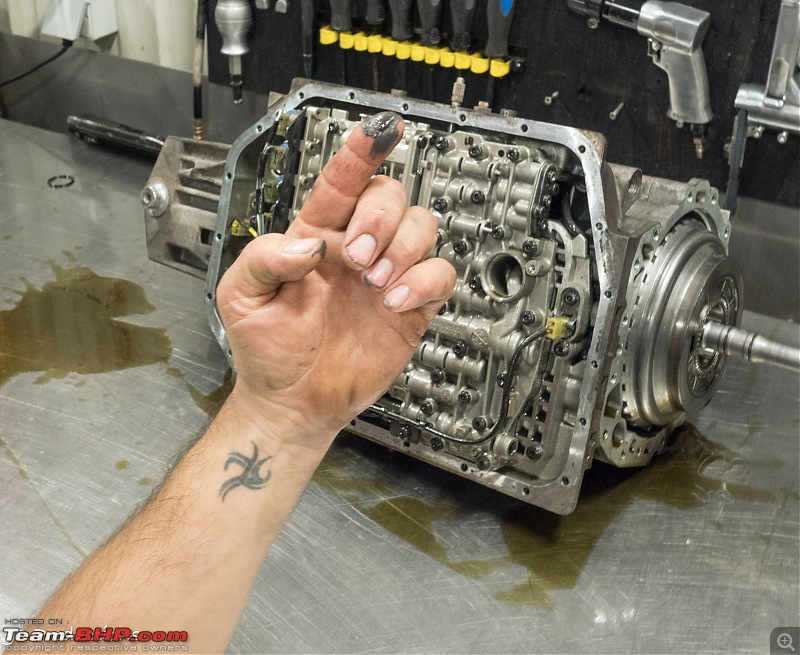 The brain and the little wire is actually the temperature sensor. On our Jaguars it might give a high temperature alarm. Nothing else happens, it is just an alarm. 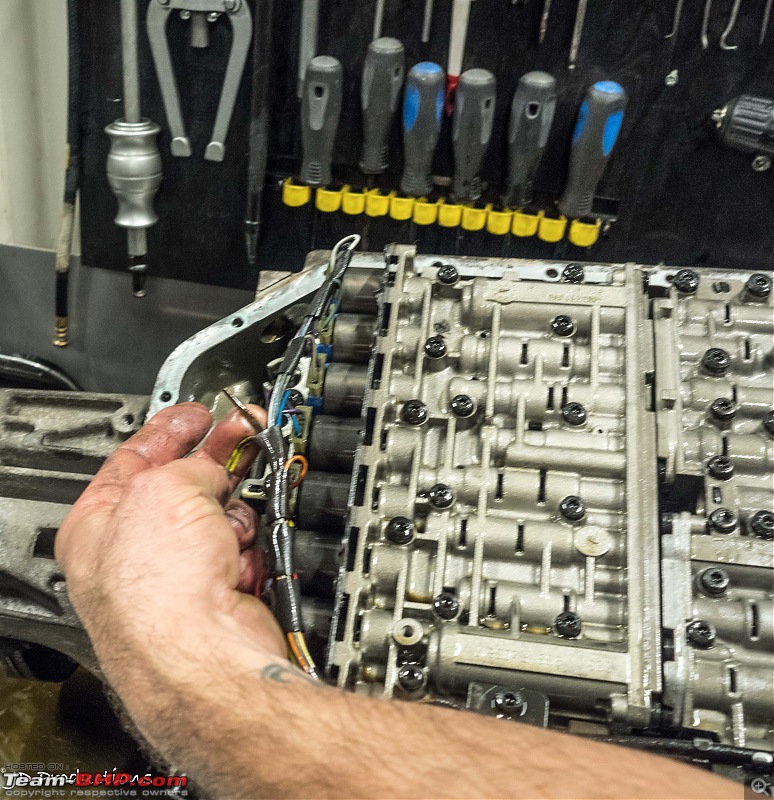 This was the first evidence of some major problem. A torn/damaged A-drum. Completelely torn! 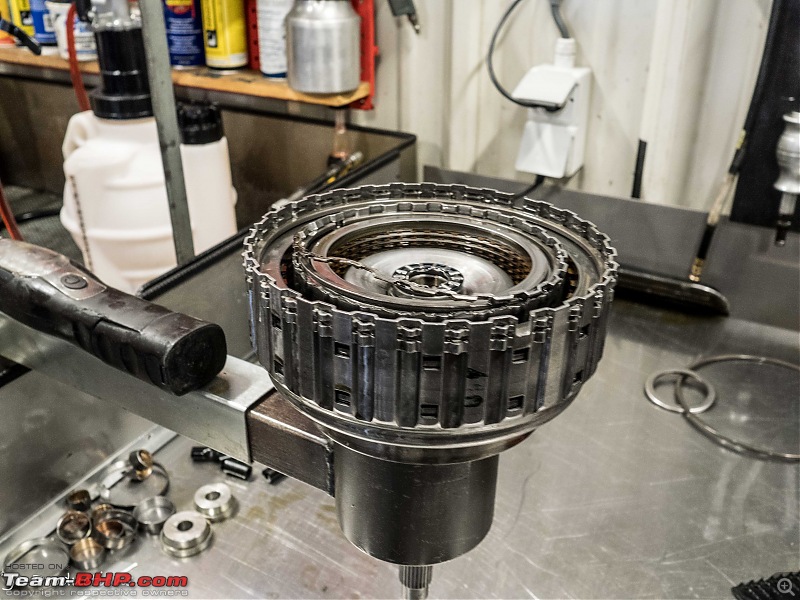 And the next problem. A broken O-ring on one of the pistons:  At the very end of the day we spend another hour or so talking about the Jaguar XJR engine management system. I had Raymond point out where some of the various sensors are located. Some are obvious, some are not and are tucked away. The workshop manuals are not always clear either. Case in point: see my earlier post regarding my son Lucas Golf GTI. It took us many hours, various manuals and all of the Internetforum to try and figure out where VW had hidden the speed sensor! All in all, a very enjoyable and hugely interesting day. Just another way of what I would like to call fiddling with my cars. Meeting experts such as Raymond and of course many of his customers are guys like me. With similar cars and interests. The Jaguar drove flawlessly all the way back and forth. The next day I drove over to Germany to attend the Retro Classic show at Cologne. The show was a bit of a disappointment. However, I did enjoy walking around Cologne and visiting the art museum. Also, the drive back and forth was very enjoyable. Of course, in my Jaguar. Here I am doing a very relaxed, very legal 155 km/h (GPS true speed) on the German Autobahn. Car on cruise, JJ. Cale on the radio. Life doesn’t get much better! 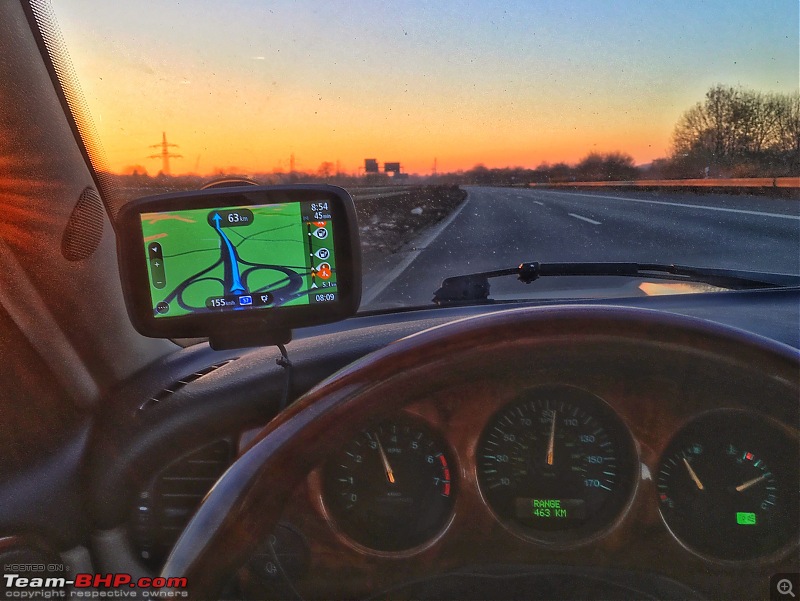 Last edited by Jeroen : 22nd November 2018 at 17:36. |
| |  (11)
Thanks (11)
Thanks
 |
| The following 11 BHPians Thank Jeroen for this useful post: | Jaggu, jeeva, Leoshashi, Miyata, Motard_Blr, NPV, R2D2, sai_ace, Sutripta, vaasu, VivekCherian |
| | #171 | |
| Senior - BHPian Join Date: Jul 2009 Location: Calcutta
Posts: 4,668
Thanked: 6,227 Times
| Re: My Car Hobby: A lot of fiddling, and some driving too! Jaguar XJR, Mercedes W123 & Alfa Romeo Sp Quote:
So turning/ facing as on a lathe, not honing. Wonder why it would be advertised as a honing machine. Regards Sutripta | |
| |  (1)
Thanks (1)
Thanks
 |
| The following BHPian Thanks Sutripta for this useful post: | NPV |
| | #172 | |
| Distinguished - BHPian  | Quote:
My bad. I know a lathe, but I wasn't quite sure about the verb. In Dutch we call a lathe a "turning machine". I had not realised it is the same in English. Where the object (i.e. the disc) rotates or the machine, it is still the same principle obviously, turning/facing. Jeroen Last edited by ajmat : 24th November 2018 at 09:47. Reason: typo | |
| |  ()
Thanks ()
Thanks
 |
| | #173 |
| Distinguished - BHPian  | Re: My Car Hobby: A lot of fiddling, and some driving too! Jaguar XJR, Mercedes W123 & Alfa Romeo Sp Earlier this week I could see it coming. Looked like Friday was going to be a cold, but nice sunny day. So I managed to free up my calendar and take the day off to go for a nice long drive in my Spider. Very likely the last drive of the year. As I explained before, both the Spider and the W123 are under a Road tax transition regime for Classic Cars. They only become fully exempt after they become fourth years of age. That is still a few years to go on both. Under this transition regime I only need to pay one quarter of the annual road tax. One quarter is still Euro 125 per car. But it has to be off the public road from 1st of December until end of February. So a gorgeous drive across endless rural little roads, dikes. Very little traffic around. A few coffeeshops along the way. Perfect day. In all some 6 hours of driving. Two small problems. Early on I could hear the same fluttering noise as before. Stopped along a dike and tightened a few more of the nuts on the exhaust manifold. Noise gone, Here you see the Spider on the “Waalwijk”. The Waal is one of the busiest rivers in Europe. Endless barges going up and down it. 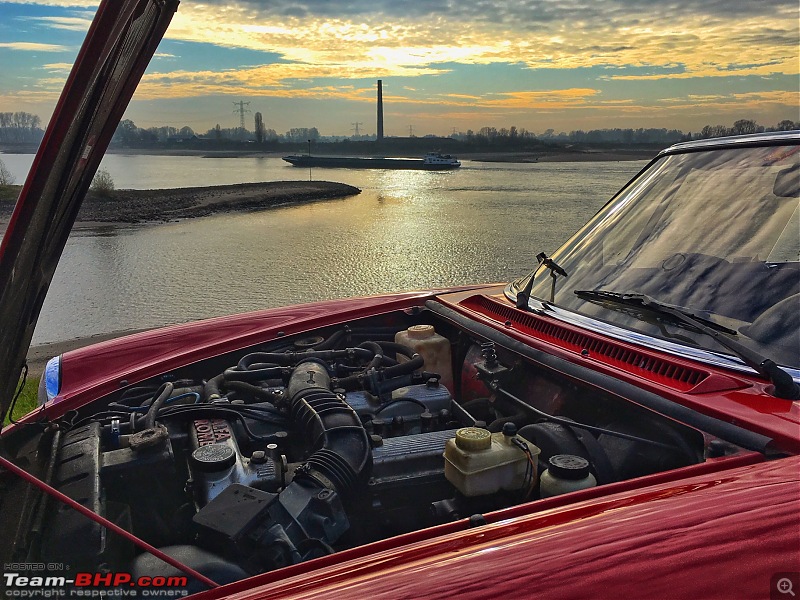 The second problem might turn out to be a bit more complicated. I started noticing that at high RPM, around 4300 RPM, the engine started to splutter a bit, with a noticeable change in exhaust noise as well. It would still accelerate, but with a noticeable dip first and change in noise. Just before returning home I went to a DIY car wash. Hosed all the mud of the car. There was less than 1/4 tank of petrol left, so I thought it might be a problem with the fuel. I always fill up the tank before any car goes into long term storage to avoid condensation problem. I put BP 98 in it. Most petrols have an increasing amount of Ethanol in it. The new Europea kind has up to 10% and the Spider won’t take it. So there are a few 98 left on the market that are pure undulated fuels. So I filled up and took the Spider onto the motorway. At speeds of around 120/130 km/h it was definitely struggling (high wind resistance in combination with the earlier problem?!) So I have something to trouble shoot in the months to come. One problem, can’t take it for a test drive. I have no idea what this could be. I will probably start by checking the spark plugs and the ignition. This Spider has variable inlet timing, but I am pretty sure that comes in at around 3300-3500 rpm. Need to check. Maybe it is something with the O2 sensor. Remember I had to fix the wiring earlier on. Also, those things do not last forever. Worst case, it could be burned valve or so. I already spoke to spanner mate Peter. He has two Spiders. The green Coda Tronca that is often featured in the various trips we undertake and I have written about. But he also has a white identical series 3 to mine. His had some problems as well and he is having the engine overhauled. Piston rings seized and a burned valve. I hope my Spider doesn’t need anything major like that. Jeroen |
| |  (2)
Thanks (2)
Thanks
 |
| The following 2 BHPians Thank Jeroen for this useful post: | aravind.anand, R2D2 |
| | #174 |
| Distinguished - BHPian  | Re: My Car Hobby: A lot of fiddling, and some driving too! Jaguar XJR, Mercedes W123 & Alfa Romeo Sp A rainy Saturday. This afternoon we are going to see the Queen movie but till then I got to play with my cars. I had a first go at the Spider to check if I could find anything pertaining to the splutters I experience yesterday. First things, I took out the spark plugs. In order to get at plug number 2 you have to remove the MAF with air intake as it goes right across it. Which also meant I got very good access to the V-belt I had replaced earlier. Checked and it was very loose. So I had to tighten it again. Noticed that one of the bolt/nuts had come loose, so a new bolt from one of my many boxes. 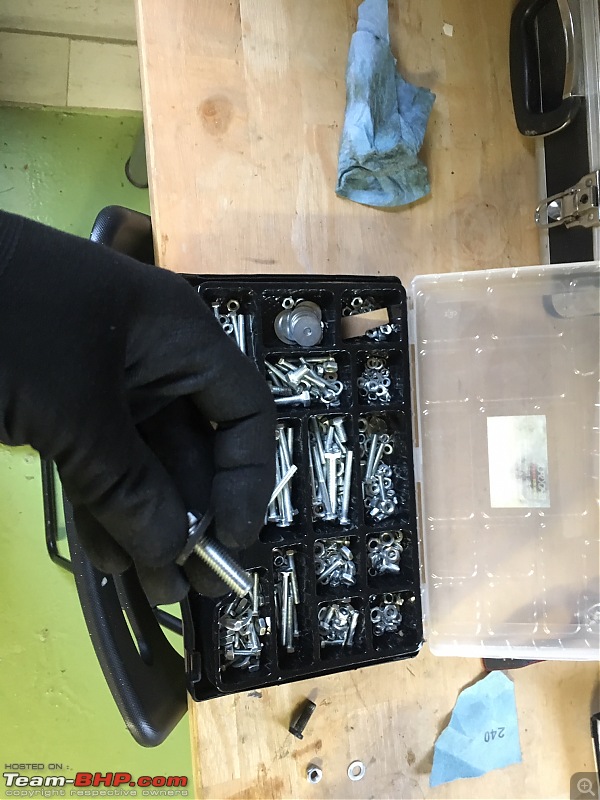 I wonder if the belt has been slipping? I had not noticed the red dynamo light. But then again, that light is difficult to see for me as it is sort of hidden behind the rim of the steering wheel. Anyway, all tightened again. Spark plugs looked fine 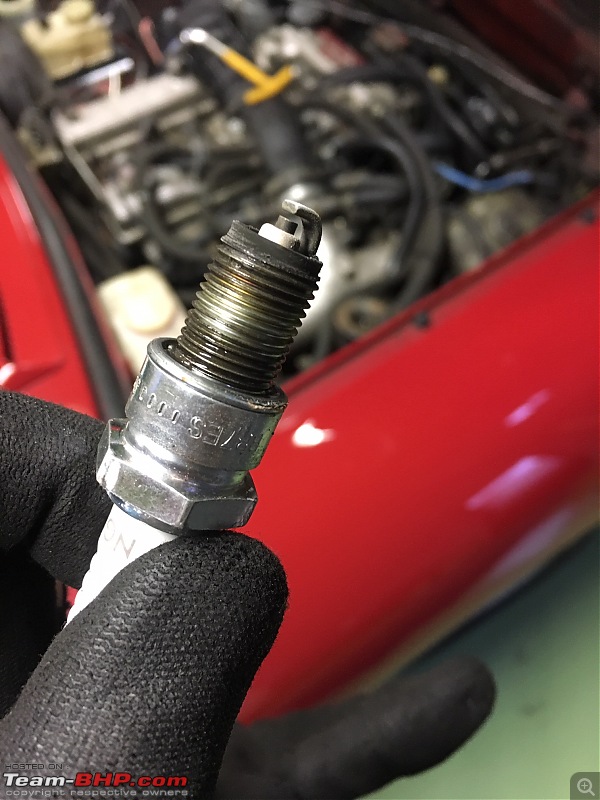 Next, I decided to inspect the distributor cap. In order to get it you have to lift out the expansion tank of the cooling system. 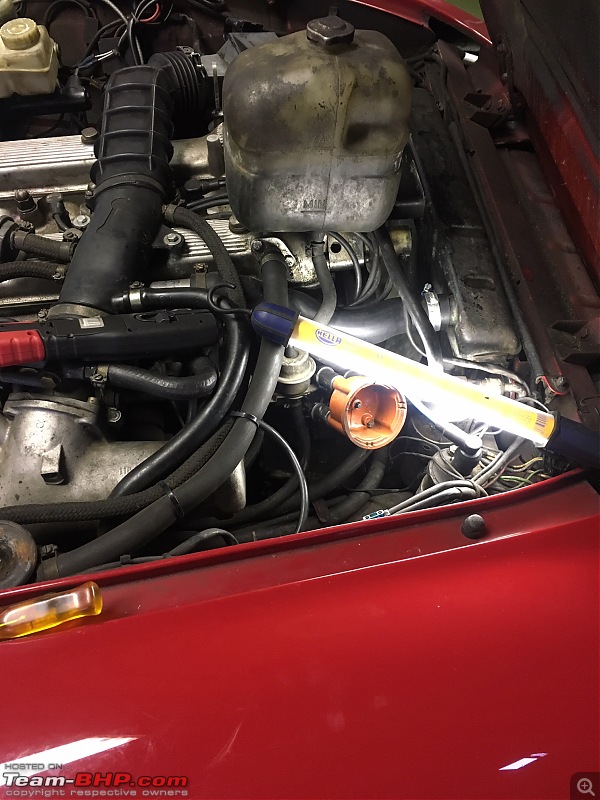 Noticed a few drops of cooling liquid under the coupling of the expansion tank. Their was definitely quite a bit of scorching on the four contacts. But what was more alarming was the state of the spark plug leads connectors into the distributor cap. I pulled them all, and 2 out of 4 were badly corroded. When I pushed them back they hardly fitted anymore. To loose. 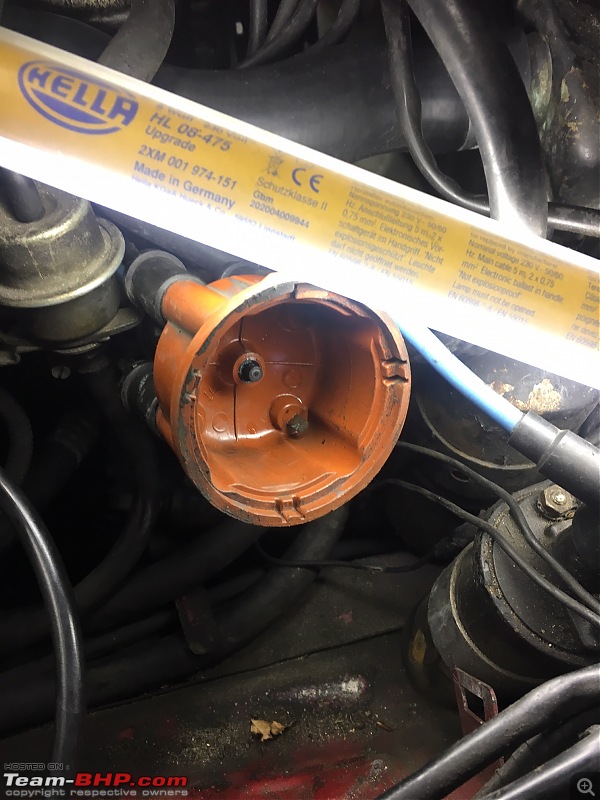 So I will be ordering replacements for all on Monday. I also cleaned the connectors of the Lambda sensor. One was pretty corroded. I just wanted to do a quick check if any of this had helped. So I cleaned and bolted everything together, started the Spider and it ran awful. That was until i realised I had forgotten to push the electrical connector back onto the MAF sensor! Duhh! Took it for a spin, but still the same problem. So waiting for parts. I will be off to Dubai. I will be back on Friday morning. Last day of the year I can drive my Spider! I did a thorough clean, wax, polish, vacuum of the W123 and Spider and put them in their pyjamas for the winter. 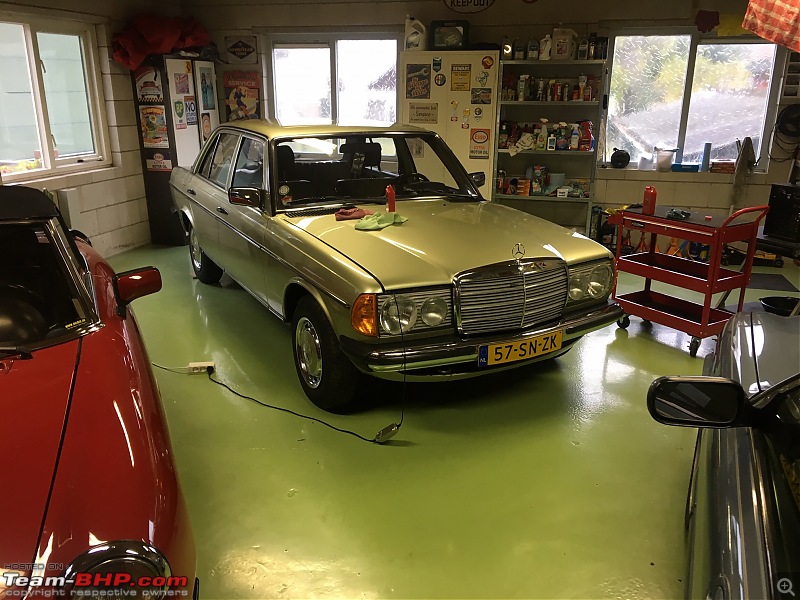 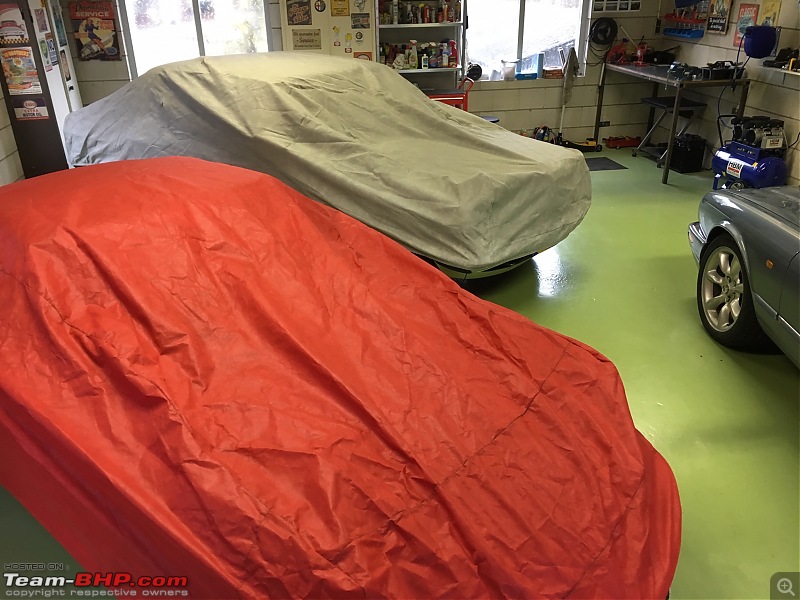 The only job still doing on the W123 is to flush the brake fluid. Letís see what happens with the Spider when I replace the distributor cap and plugs leads. Jeroen |
| |  (4)
Thanks (4)
Thanks
 |
| The following 4 BHPians Thank Jeroen for this useful post: | R2D2, vaasu, VivekCherian, wbd8779 |
| | #175 |
| Distinguished - BHPian  | Re: My Car Hobby: A lot of fiddling, and some driving too! Jaguar XJR, Mercedes W123 & Alfa Romeo Sp Time to brush up on my understanding of the Bosch L-Tronic system. Bosch used to publish these little “technical Courses” in various languages. I have both the L-tronic and Moronic ones. Both these systems are often used on cars from the 80s. By and large I have always found them extremely reliable. Touch wood, never had any major problems yet. But with my current “spluttering engine” at high RPM time to dig in. 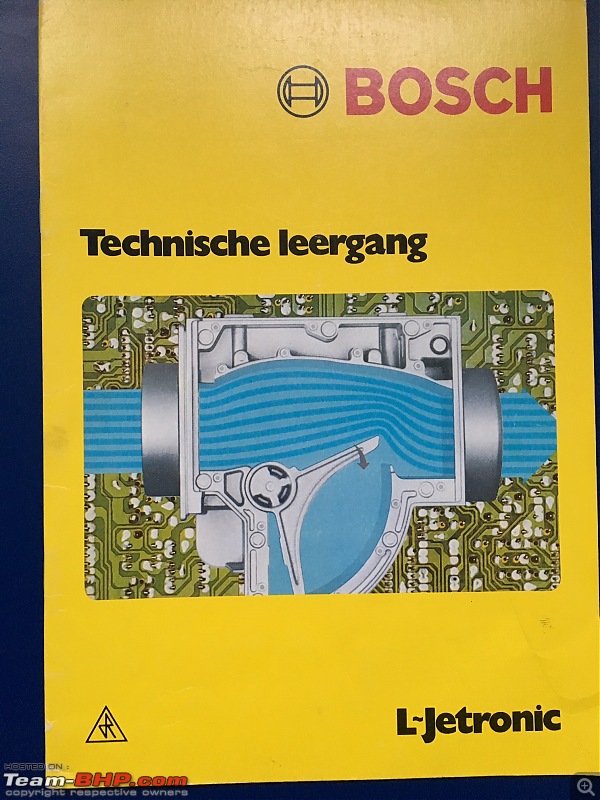 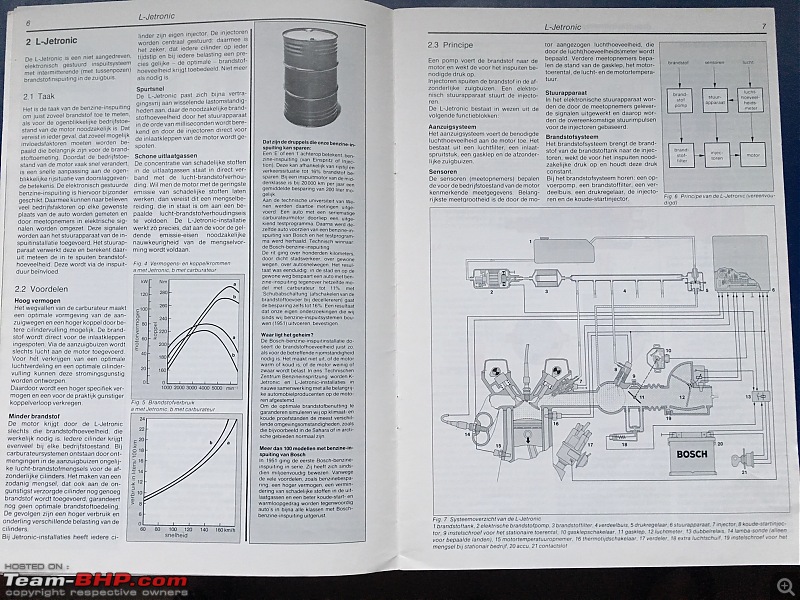 As I said earlier, the distributor cap and the spark leads will be replaced. Just because it has been a really long time since I replaced them and they looked really crappy. But I have a feeling that will not solve the problem. The problem with these early electronic is there are no test facilities or anything like an OBD. So it is all old school hard core trouble shooting. When you have to resort to old school trouble shooting it comes down to experience, logical understanding and system understanding and a bit of luck. Also, practicalities are important. Eg. what can I quickly test/verify without to much hassle? I don’t have much experience at all trouble shooting this, as I rarely encountered problems in my car or in any of the Dutch Alfa Romeo spider Register events that I supported as part of the technical committee. It was usually the carburettor cars that had issues. So here goes: Symptoms: spluttering at high RPM, high load. Starts around 42-4300RPM every gear. Gets more pronounced and starts occurring at lower RPM on the motorway. (i.e. high speeds / higher wind resistance) What we know is OK; - Air filter is clean (replaced it recently and I double checked it yesterday as it had to come off) - spark plugs seem fine, correctly gapped, burning clean - Electrical supply (dynamo) and battery are, apparently, in good condition. What else can cause this: - Poor fuel supply. I replaced the fuel filter only a few months ago. The Spider has two fuel pumps. One in the tank and one underneath the car. The latter one usually starts making a loud whining noise before it breaks down. I have an old spare I think I can swap. I will need to check the supply voltage to both pumps. The manual stipulates the fuel pressure at various RPMs. But then I need to find the correct T-mount and a manometer. That will also allow me to verify the fuel pressure regulator though. - Problems with the variable valve timing unit. I have checked the manual. A real PITA to have to replace as the cam shaft needs to come out. But testing the hydraulic working is fairly straightforward. Idle the engine, apply 12V to the terminals, if the engines stalls or starts to splutter the hydraulic actuating mechanism is ok. Easy to do. I need to check how I can verify the electrical signal though. - Injectors Possible but a long shot. So I am not going to bother yet - Extra air / starting valve. These Bosch system all have solenoid valves that add air and or fuel for cold starting operation and during . Maybe one is leaking or so. The most typical symptom of a problem in this area is that the engine hunts a bit when idling. Mine does not. There is also a bi-metal operated valve that reduces the air as the engine temperature increases. It acts as a bypass on the throttle valve. I have no idea if you can test it at all. - Wonky Lambda sensor. My Spider came equipped with a Catalytic convertor. My car was initially exported from the factory in Italy to the USA and in many states in the 80s, certainly in California, catalytic convertors were mandatory. Although at the time more and more cars were fitted with catalytic convertors in Europe as well, mine doesn’t need one verse. So when I bought the Spider, I took it off very early on and also replace one of the other dampness. The nett results is 4-5 additional horsepowers, better pick up at low RPM. But most importantly the engine (exhaust) sounds so much better. Initially, we had removed the Lambda sensor as well. But that resulted in way to much and to loud back fires when lifting the throttle. Also, fuel efficiency was appealing. So we re-installed the sensor and that is where it always has been. So this is most likely the original factory fitted sensor. Not bad, 32 years. But of course, at some point in time it is going to give. There are a few tests you can try to get some sort of sense if the sensor is still ok. But it might be quicker to hook up an exhaust tester that will be much more precise. There are probably quite a few other e.g. loose electrical connections. Something I will need to check thoroughly. Can be very time consuming. MAF can be faulty, but it runs fine at lower RPM/loading. This is the type with essential a little flapper valve that gets displaces by the air being sucked into the engine. The little flapper valve is connected to a potentiometer. If that has any wear I would expect it to be at lower RPMS as that is where 80% of its movement is likely to be. The injectors are as old as the car and have never been replaced. Water/air temperature sensors, but again I would think that would give problems along the whole RPM range If all fails, I have a spare ECU and a spare injection computers (The Spider has two computers already!). Swapping them is easy. So, plenty to check and verify in the next three months. Jeroen Last edited by Jeroen : 25th November 2018 at 14:37. |
| |  (3)
Thanks (3)
Thanks
 |
| The following 3 BHPians Thank Jeroen for this useful post: | R2D2, vaasu, wbd8779 |
| | #176 |
| Distinguished - BHPian  | Re: My Car Hobby: A lot of fiddling, and some driving too! Jaguar XJR, Mercedes W123 & Alfa Romeo Sp Last Saturday the parts for the Spider arrived. Took five days for the parts to arrive. Which is very unusual. Usually they arrive the day after ordering. Apparently, due to Black Friday the various postal services had enormous backlogs. Anyway, today after work I decided to spend a bit of time fiddling with the Spider. One new set of cables and a new distributor cap. 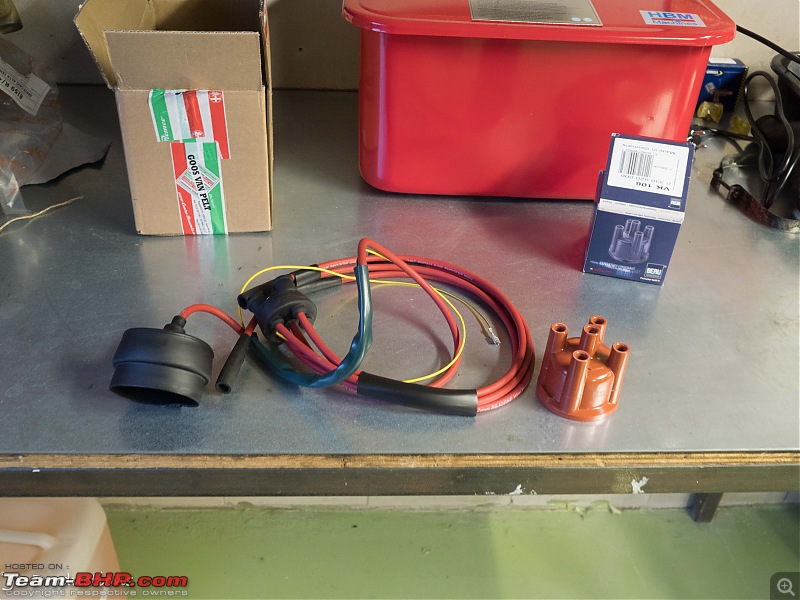 Spider made ready for some spannering 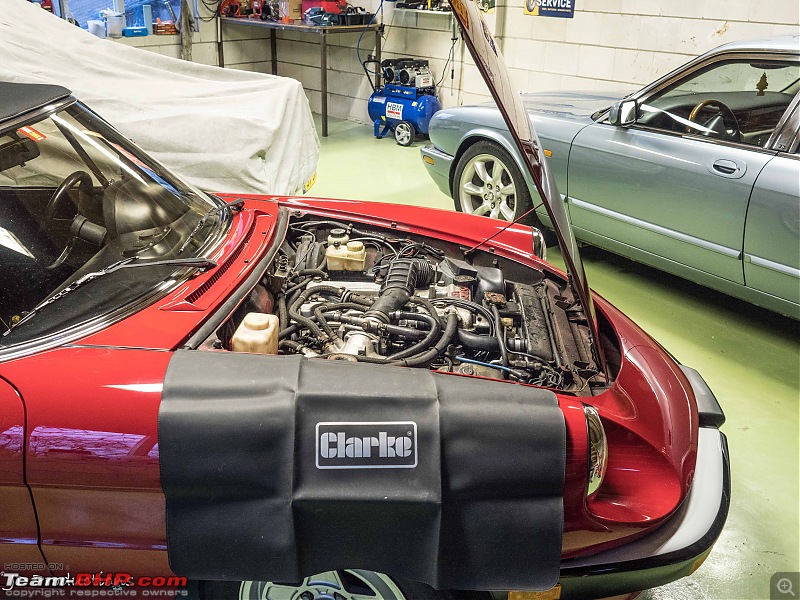 Itís getting cold here, only 10oC, so I am running my little electric heater. Takes of the chill in the air 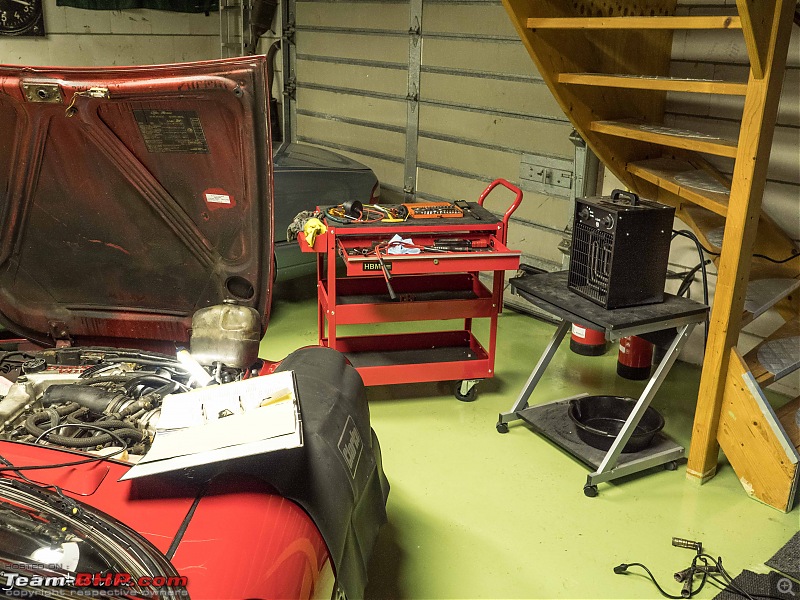 Ripped out all the old spark plug leads 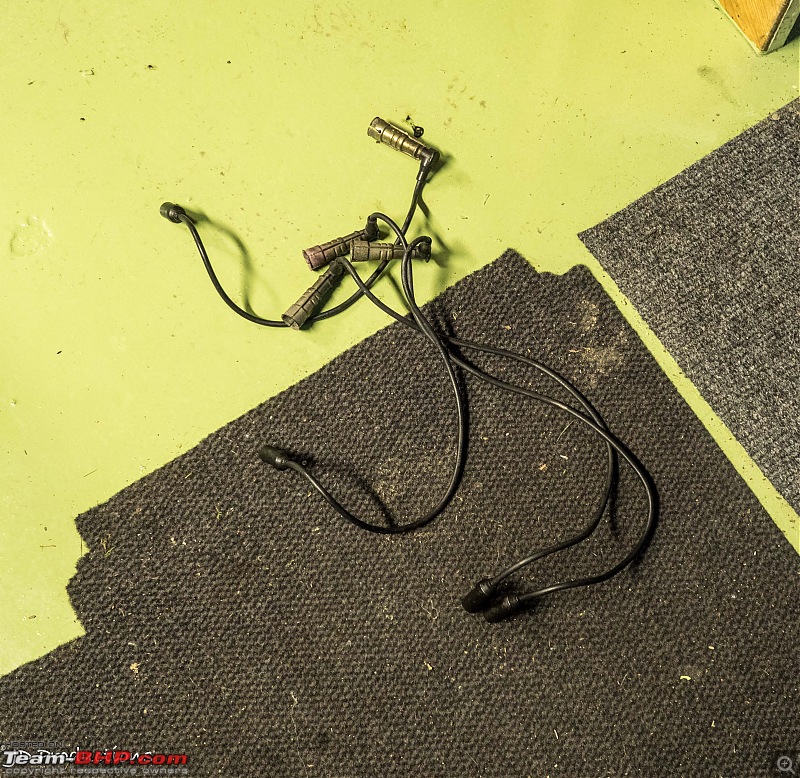 Here one more detail on why I am replacing them. The contacts are badly corroded. I think this happened due to the cooling liquid hose leaking a tiny bit. It drips more or less straight on the distributor. 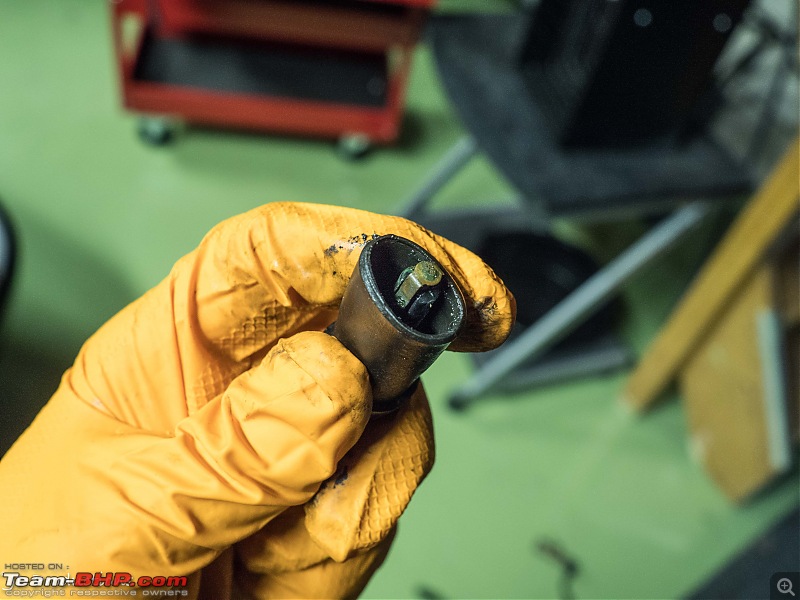 Whilst I took away the inlet hose and inlet filter and MAF I also noticed one hose clamp was loose. The hose still felts reasonably tight. But the problems I am experiencing can definitely come from false air (leaks). Easily tightened. 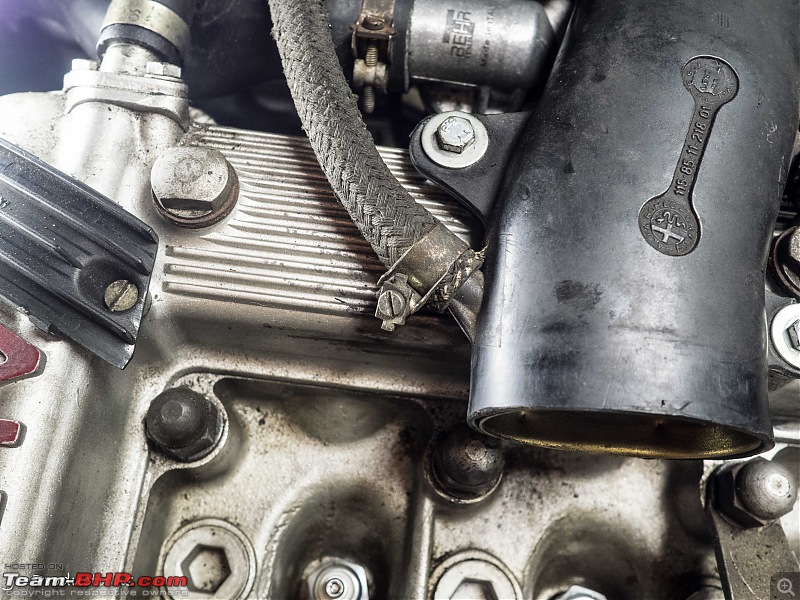 Whilst probing around, gently pulling all cables, hoses, I suddenly noticed this loose connector on one of the fuel injectors. 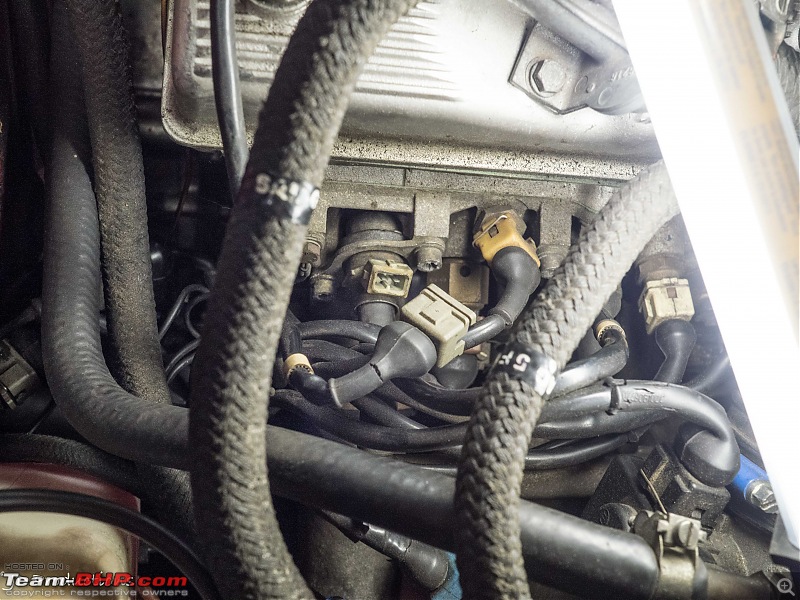 Difficult to see, but the connector is actually broken, part is missing and also the little spring is gone. Here you see, sort of how it is supposed to look like. 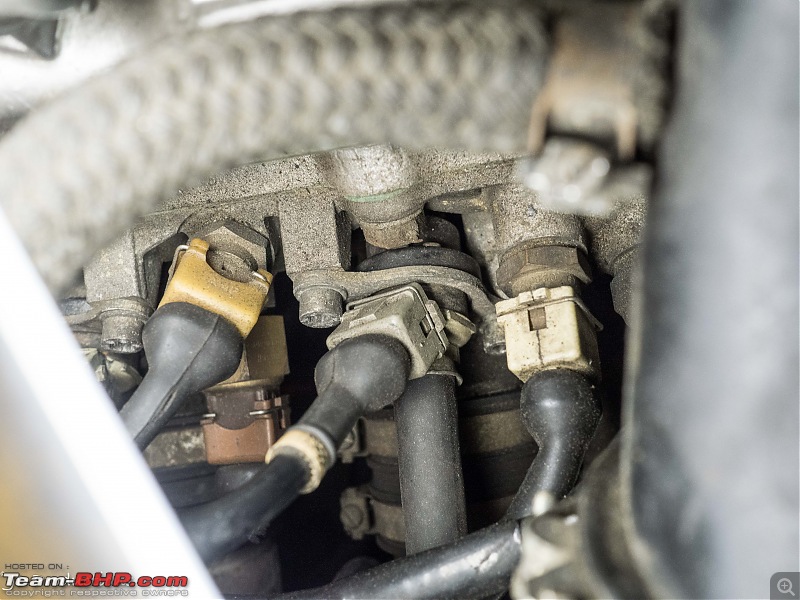 This could well be the cause of my problems! Now I have to try and find a new spring or replace the whole connector. I need to check how that is done. Anyway, I proceeded to at least replace the parts, that I did have. Here, my usual checking of the old and the new parts. 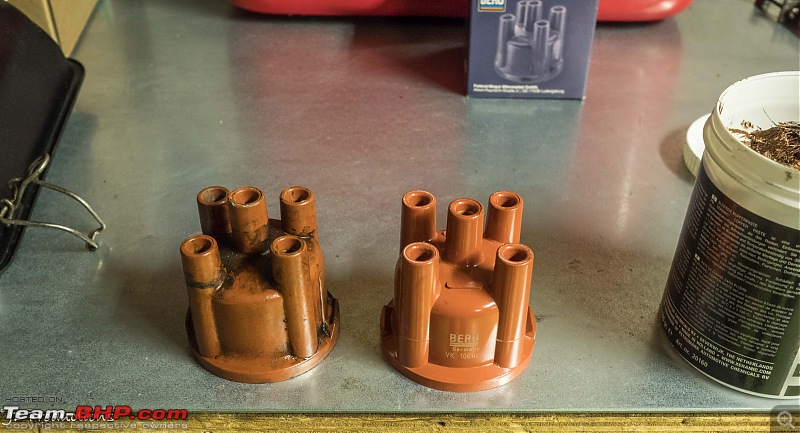 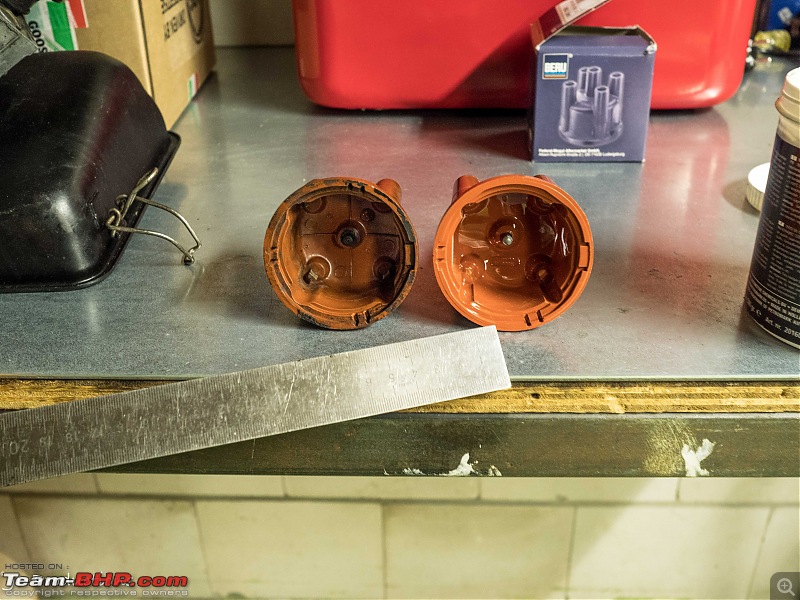 They are slightly different on the outside. More importantly, I measured the inside distances to the contacts and they are identical, so it should be a good fit. Not so sure about the new hight tension coil cable. The new one I got is easily twice as long as the old one! 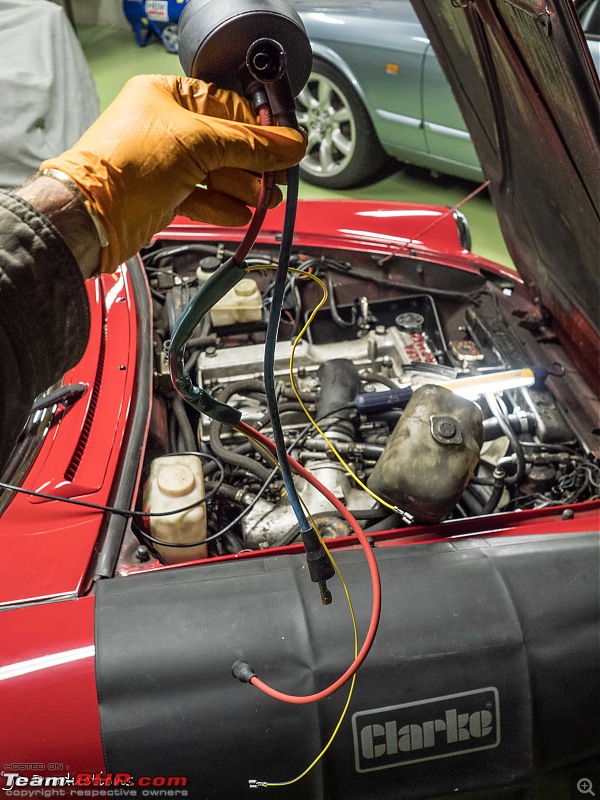 I did install the new distributor cap and the new spark plug cables. Always make sure you know exactly which cable goes where on the distributor cap. always make a little diagram so you get it right! I am not happy with these new cable. Yes, they look very cool, being red and all. But they do not fit well on my car. 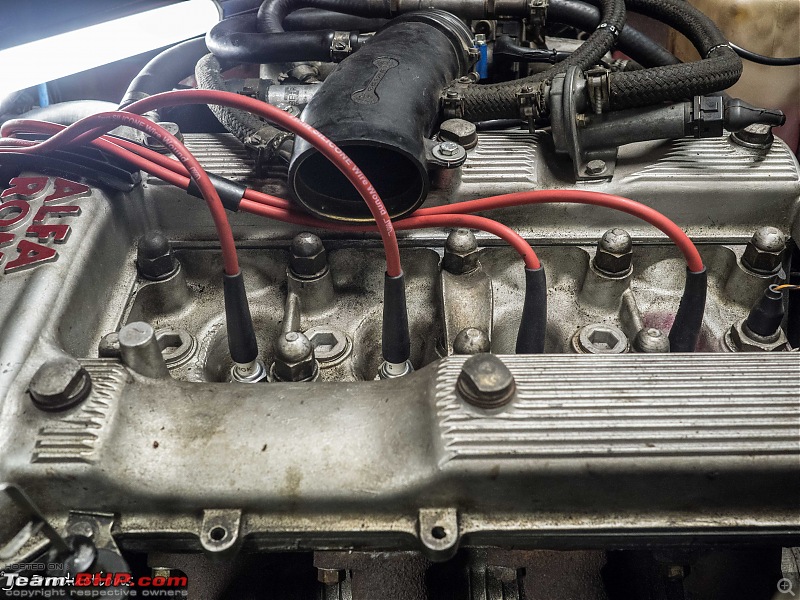 With the inlet air hose in place the number 2 spark plug cable gets squashed. Also, the cables leave a large loop that will rub against the hood. 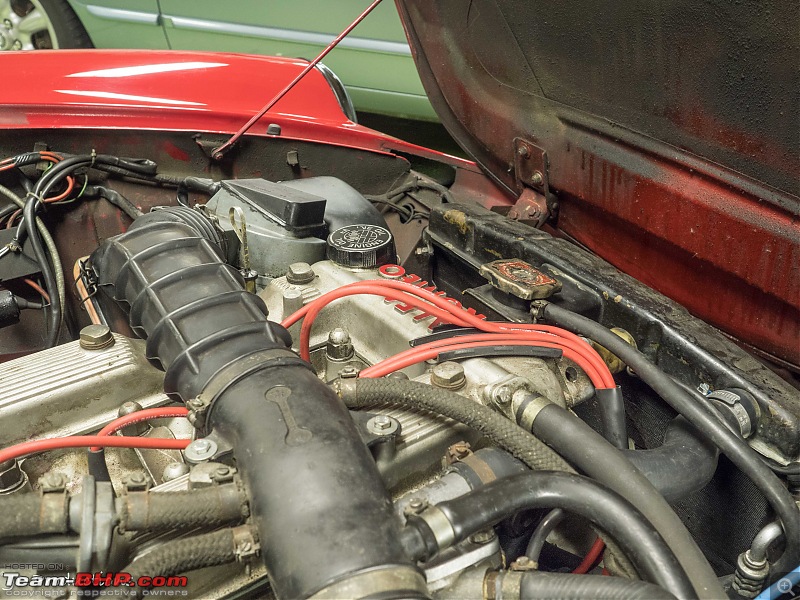 The problem is that the old cable had these rectangular connectors, instead of the straight ones. 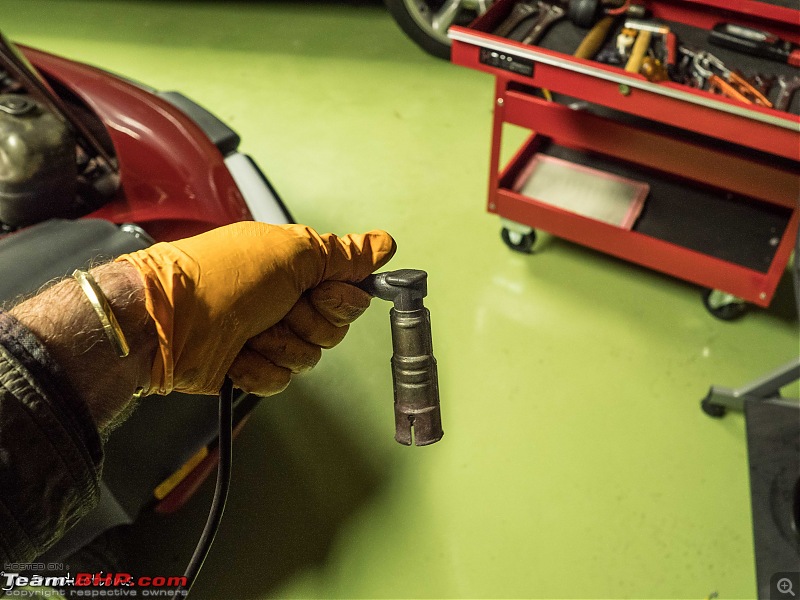 I am sort of pleased by having discovered the broken injector connector. But I am annoyed with myself that I tried to install this new cable set. It just doesnít fit properly. So back to the drawing board. Hopefully I can find the correct cables tomorrow. I will have to make some calls, check a few website. I will be travelling to the UK for the remainder of the week. So I wonít get around to finishing this for some time. It does not matter much to be honest. As I explained before. Both the Mercedes W123 and the Alfa Romeo Spider have to be of the public road from 1st of December till the 1st of March 2019. So I can not even take them for a test drive! No hurry fixing the cars. Jeroen |
| |  (4)
Thanks (4)
Thanks
 |
| The following 4 BHPians Thank Jeroen for this useful post: | R2D2, vaasu, vb-saan, VivekCherian |
| |
| | #177 |
| Distinguished - BHPian  | Re: My Car Hobby: A lot of fiddling, and some driving too! Jaguar XJR, Mercedes W123 & Alfa Romeo Sp First thing this morning, a quick call to my Alfa part guy who supplied the cables. He checked and says he can get the correct ones. I told him I had already used them and cut away the rubber boot that I donít use. He told me not to worry, he is going to exchange them anyway. Also, he is trying to find one of the little springs for the connector on the injector. They are not sold separately, even the connector is not sold separately. I would need to order a complete harness for all the injectors. But this guy also buys up old Spider that have been totalled, just for spare parts. So I hope he can find something that will allow me to fix that connector again More to come! Jeroen |
| |  (2)
Thanks (2)
Thanks
 |
| The following 2 BHPians Thank Jeroen for this useful post: | R2D2, vaasu |
| | #178 |
| Distinguished - BHPian  | Re: My Car Hobby: A lot of fiddling, and some driving too! Jaguar XJR, Mercedes W123 & Alfa Romeo Sp Filthy weather today. Very windy and very rainy. So a good time to spend my Sunday doing a couple of jobs. I have been abroad on business last week. But as I was away several parcels with goodies arrived. 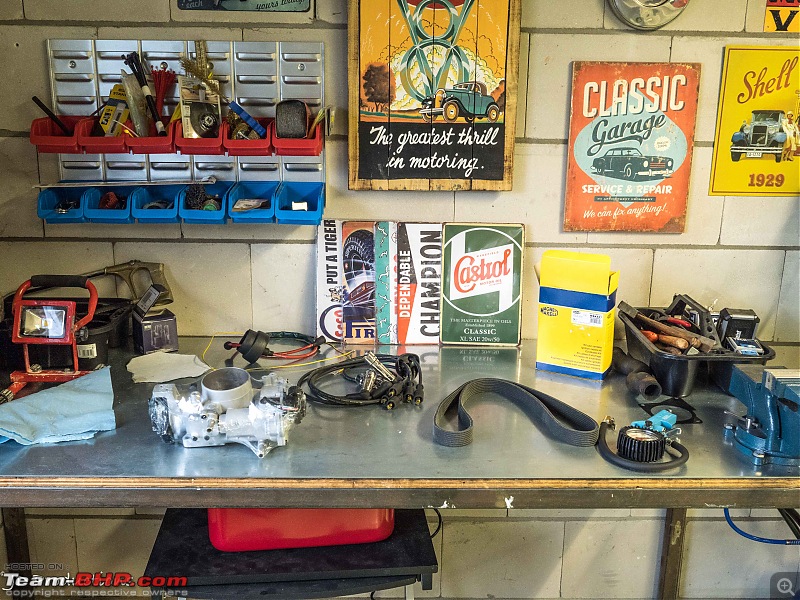 My throttle body for the Jaguar has returned from the USA. All overhauled and as good as new. Very happy that I now have one good spare one in stock. Still need to call customs, because I believe they have overcharged me on the duty. But at least I have got it back. 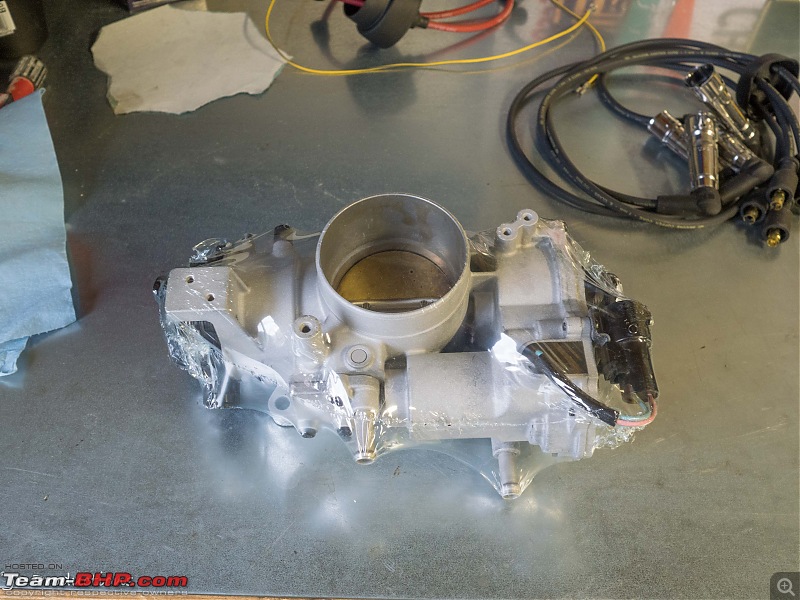 Got a new set of spark plug and coil cables to replace the incorrect one! 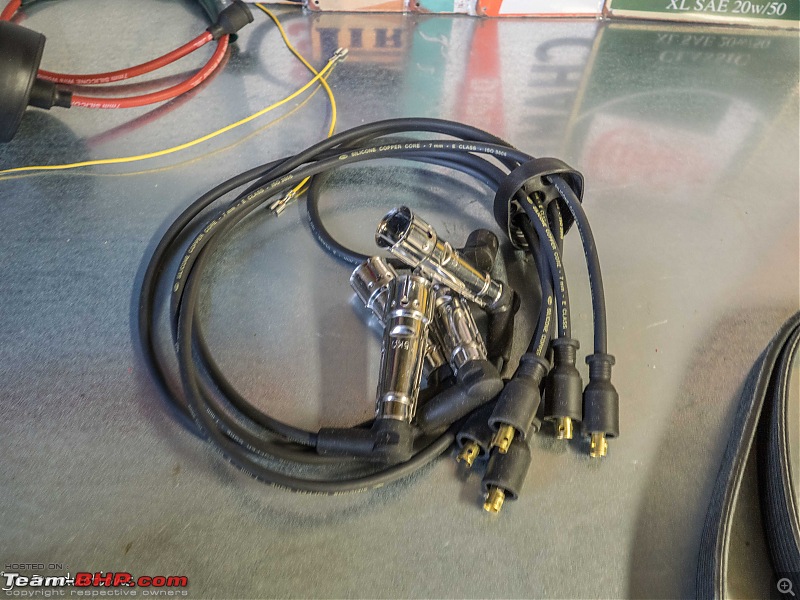 Finally, the supposedly correct Turbo charger belt arrived. 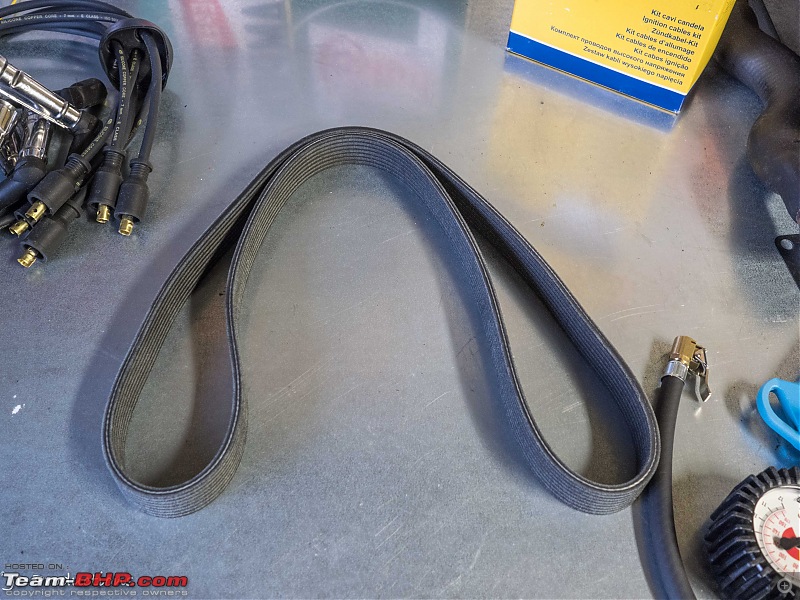 First things first. The belt of the Supercharger of the Jaguar. This is the third or fourth one, so I am getting really good at replacing these things 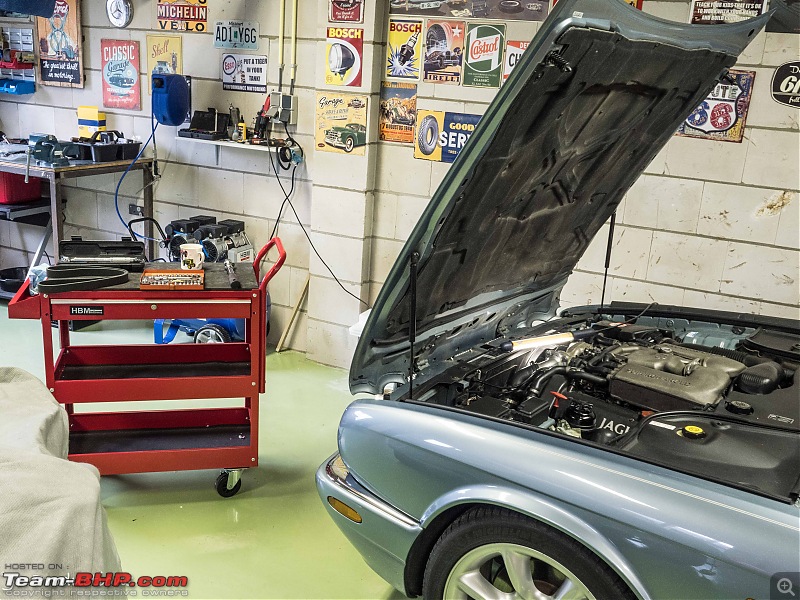 It is a simple job. But even simple jobs, sometime take more time. I cracked this retaining clip last time and it cracked again. So I had to use some superglue to fix it. There are three of these clips that hold the bottom of the fan shroud in place. I will order some new ones, next time 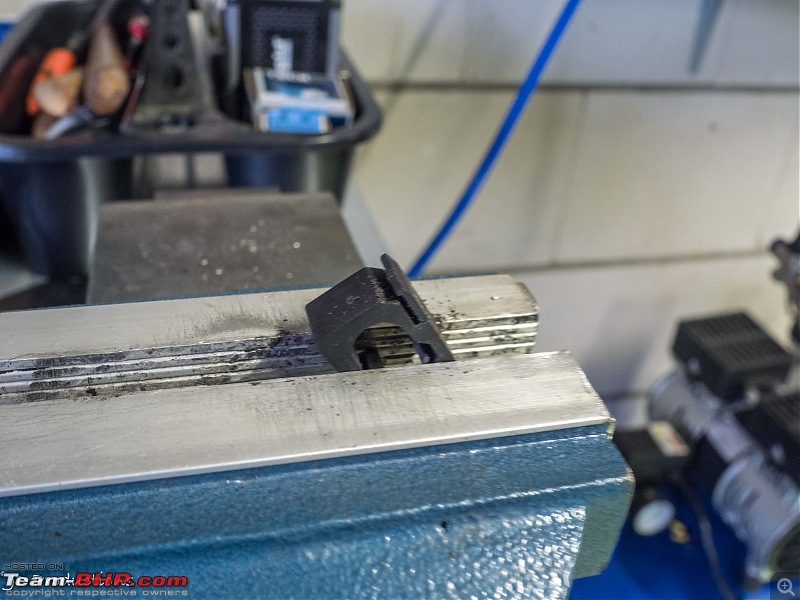 I am very happy with the new belt. At long last a perfect fit. The tensioner is now showing, correctly, a new belt is fitted. Hurray for the internet for helping out: https://www.jaguarforums.com/forum/x...-belts-210695/ I bought a little white board that I hung over my desk. I am getting terrible at remembering stuff. If I write it down, it tends to help. Working down my list. 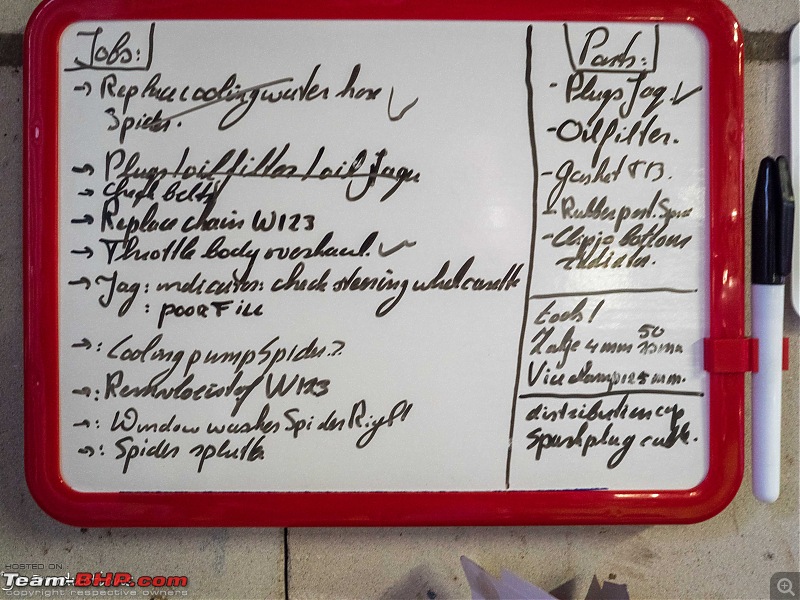 The new set of cables certainly looked more like the old ones. I did like the red colour on the incorrect set though. Swapping them out, making sure you get the correct cable on the correct connector of the distributor cap. Always, check, double check, triple check! (Even then, I once managed to get it wrong on my Jeep Cherokee. In my defence, six cables are easily mixed up) 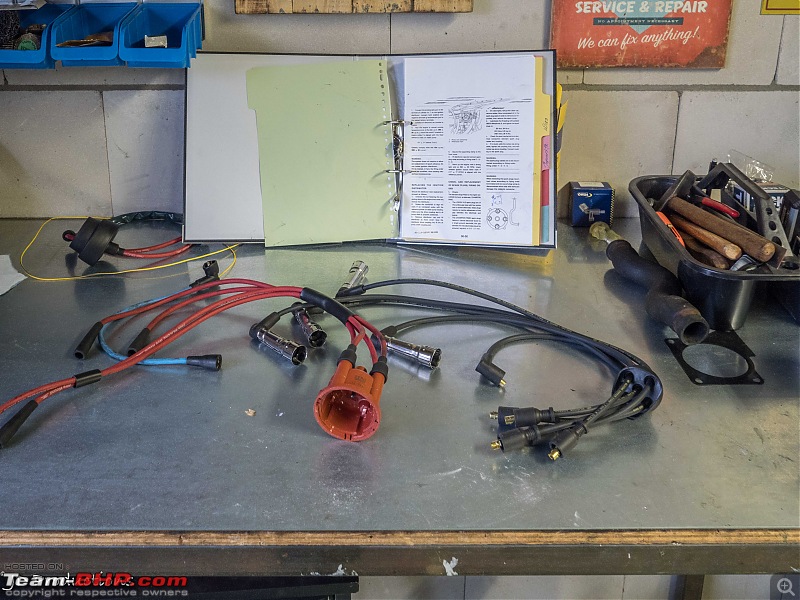 I just checked the old one and the new ones. And although they are the similar 90 degree connector type the new ones appear to be slightly taller. 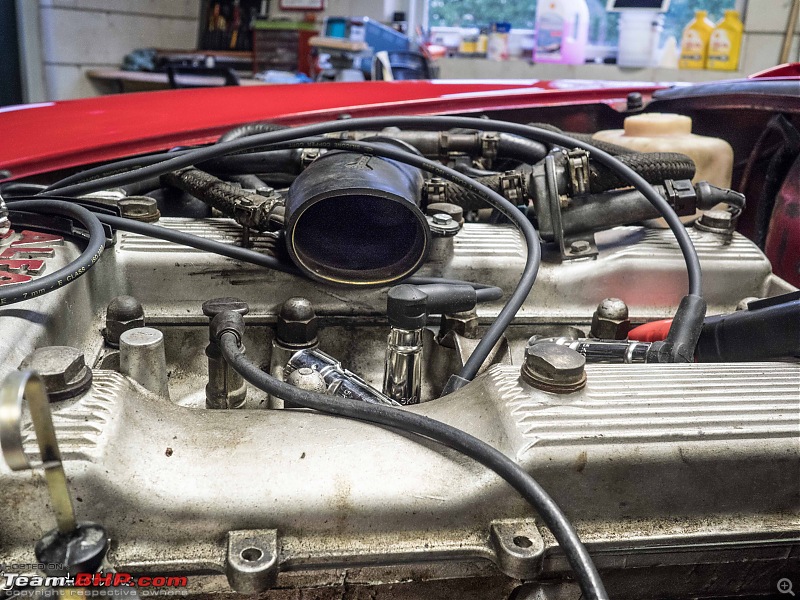 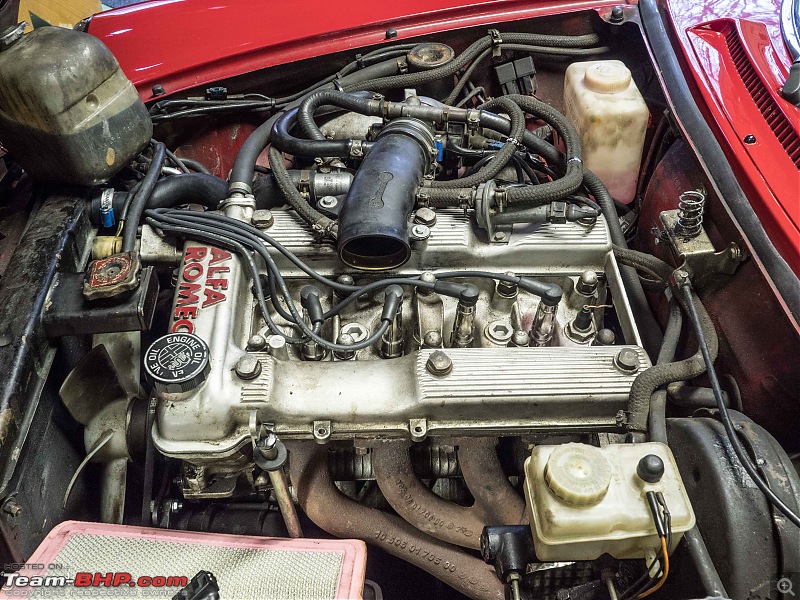 In the end it did not make any difference. The air inlet hose still went neatly over it. 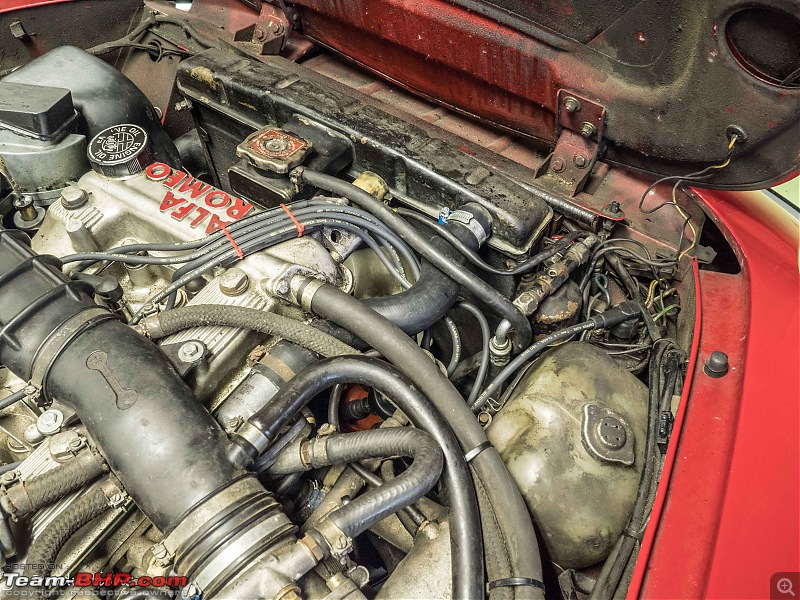 All done. As I mentioned before I can not take the Spider out for a test run, until 1st of March. I still need to fix the connector on the injector too. More little jobs to come!! Jeroen |
| |  (3)
Thanks (3)
Thanks
 |
| The following 3 BHPians Thank Jeroen for this useful post: | R2D2, vaasu, VivekCherian |
| | #179 |
| Distinguished - BHPian  | Re: My Car Hobby: A lot of fiddling, and some driving too! Jaguar XJR, Mercedes W123 & Alfa Romeo Sp Forgot something from a week or two ago. I took the W123 for itís bi-annual MOT or APK as it is called her. Passed with flying colours. Here you see it on the lift at the MOT station. 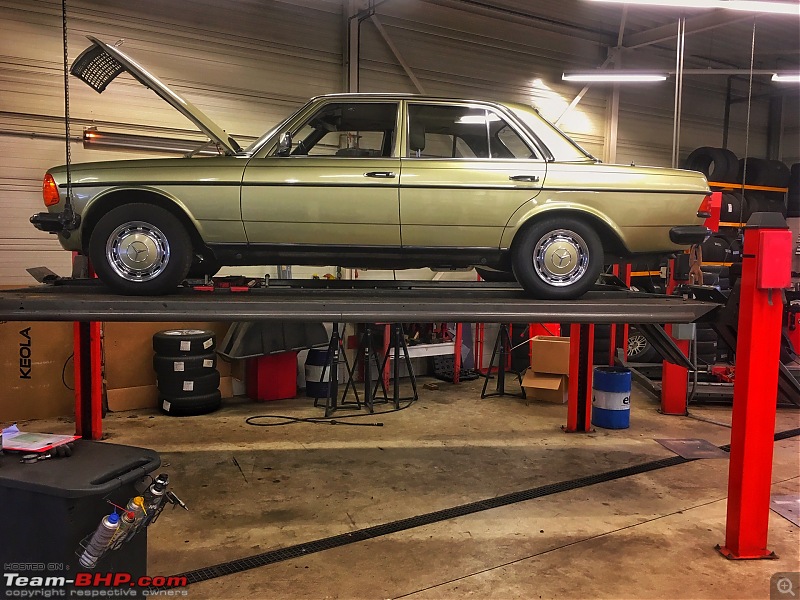 They also check the tyre pressure and I noticed all four tyres were about 0,4 bar lower than I thought. I had put them on the correct pressure about a week earlier. These guys use calibrated manometers and at my request he even got another one. Same thing. Which leaves my manometer highly suspect. Back home I did a few more checks and sure enough, my nice manometer is about 0,4 bar off! I bought it about 11 months ago at my favourite toolshop HBM, where I buy a lot of my tools. You can not call them. You can mail them, or show up in their shop. So I mailed them and they replied within a few hours. Very sorry to hear and they offered to credit my account as they had ran out of stock. When I checked their website there was a different one, made by Hazet, a pretty decent brand. So I asked them if I could have one of those. Same price, they boxed it up and send it away with no packing charges. I could keep the old one too. Arrived last week as well. Excellent service. Thatís how all (web) shops should deal with proper warranty claims. So now I have a brand new one, see how long it last 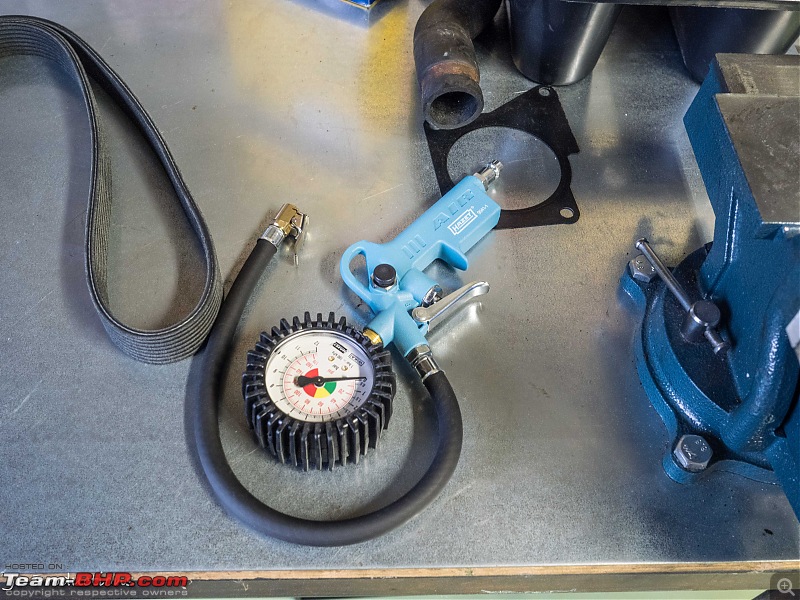 |
| |  (3)
Thanks (3)
Thanks
 |
| The following 3 BHPians Thank Jeroen for this useful post: | dailydriver, R2D2, vaasu |
| | #180 |
| Distinguished - BHPian  | Re: My Car Hobby: A lot of fiddling, and some driving too! Jaguar XJR, Mercedes W123 & Alfa Romeo Sp This Sunday morning we woke up to the first real snow of the year. Just a few centimeters, but still very pretty.   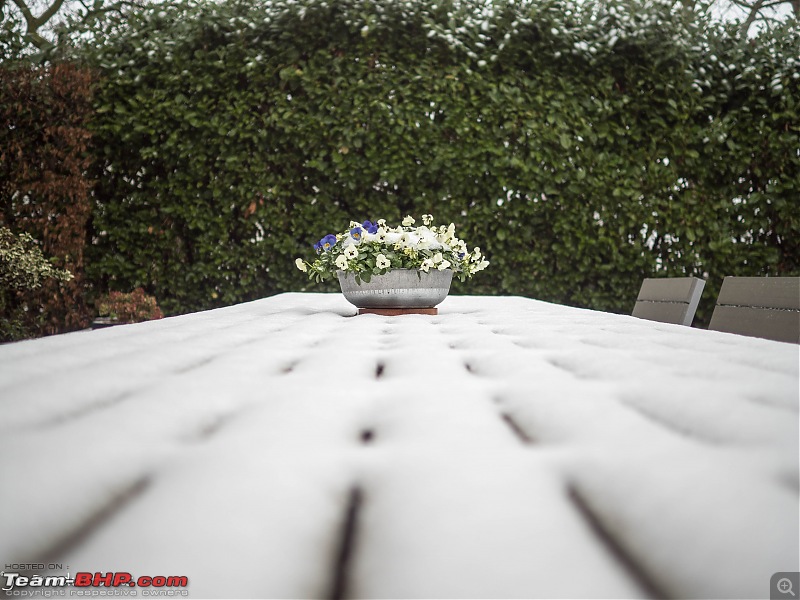 I had a lot of things to do, but I wanted to have a go at fixing the broken connector of the Spider’s fuel injector before I did anything else The connector and various other parts arrived earlier this week: 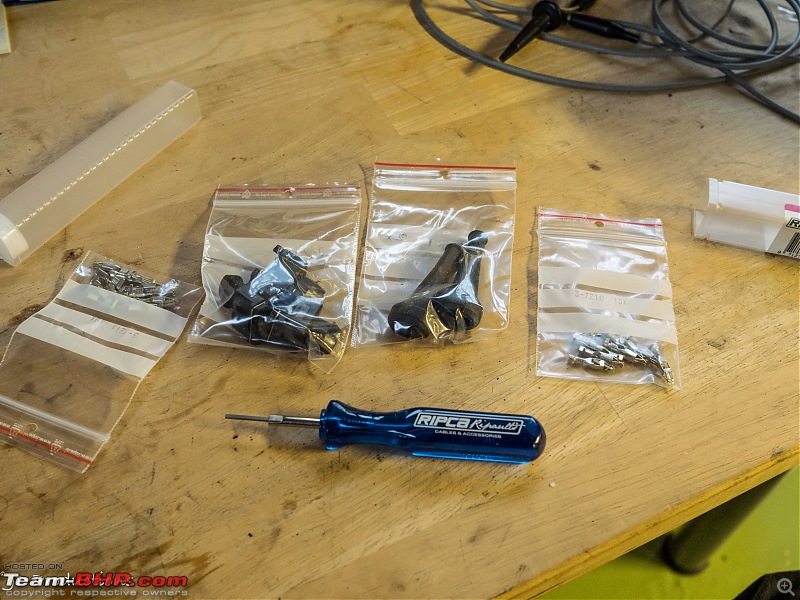 Here another good look at the broken connector 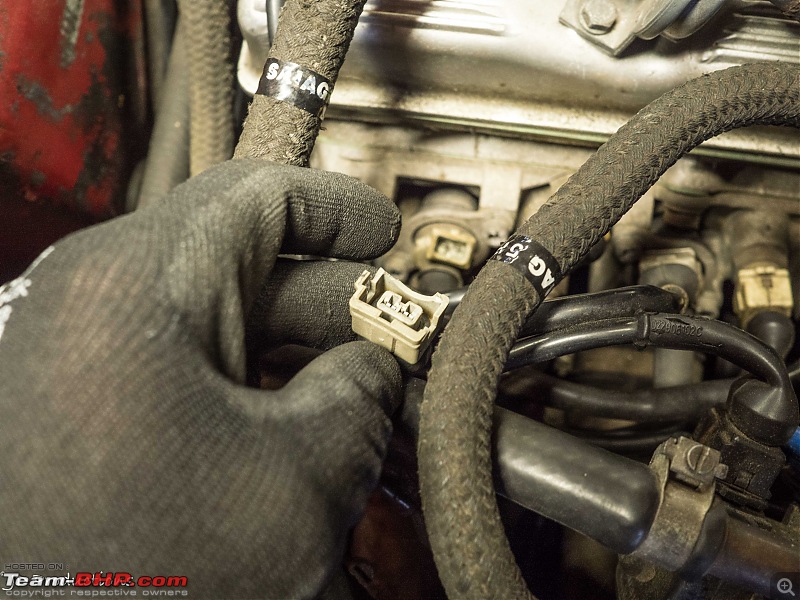 The new one, with new pins. Look closely. You will see on the top pin a little clip sticking out. That clip ensure that the pin is fixed inside the plastic connector. The little tool needs to be inserted correctly in the slot in the connector and then depresses the little clip, which allows you to pull out the pin with the wire. In theory you can also use a small screw driver. But you might end up bending the little clip. So I also got myself the little special tool. 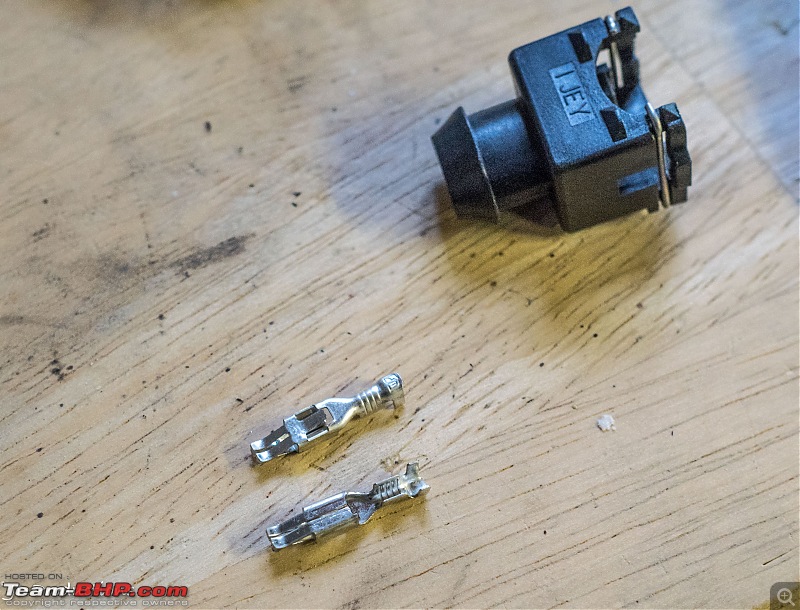 Here you can see I have cut away the rubber boot that fits around the cable and the connector. 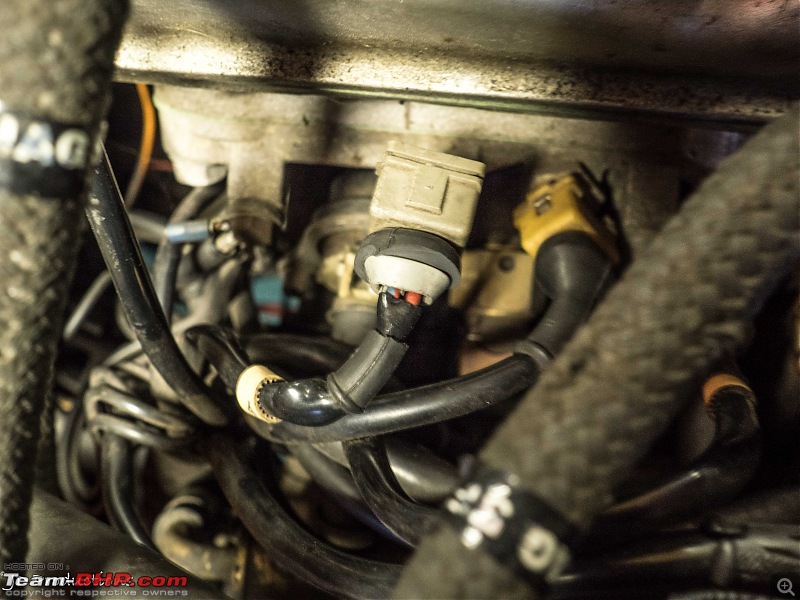 As the cable is quite short, I wanted to try and get the old pins out of the connector, rather than just cut it all off. Which would have meant loosing a few centimeters of cable. Used my special little tool to get the connector pins out of the plastic body. 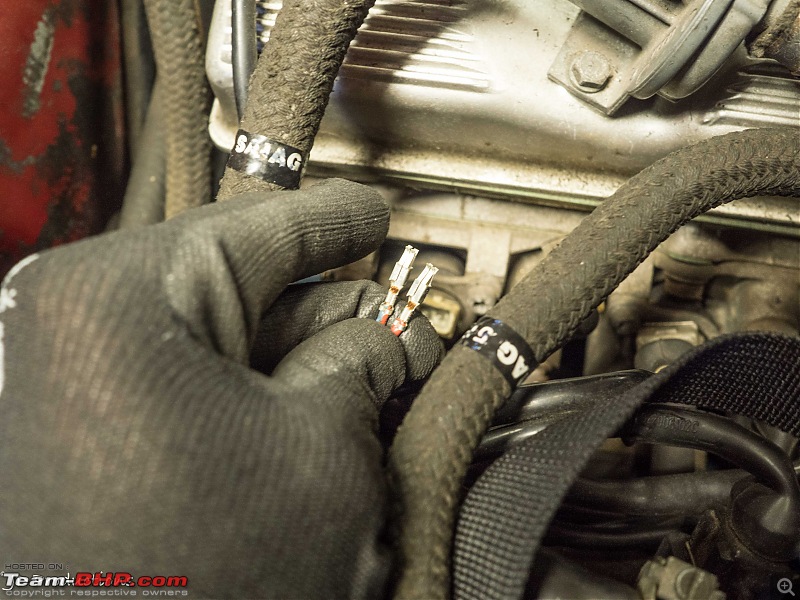 Here you see the old broken connector and the new one, side by side. In the background the special little tool that allows you to push the connector pins out. 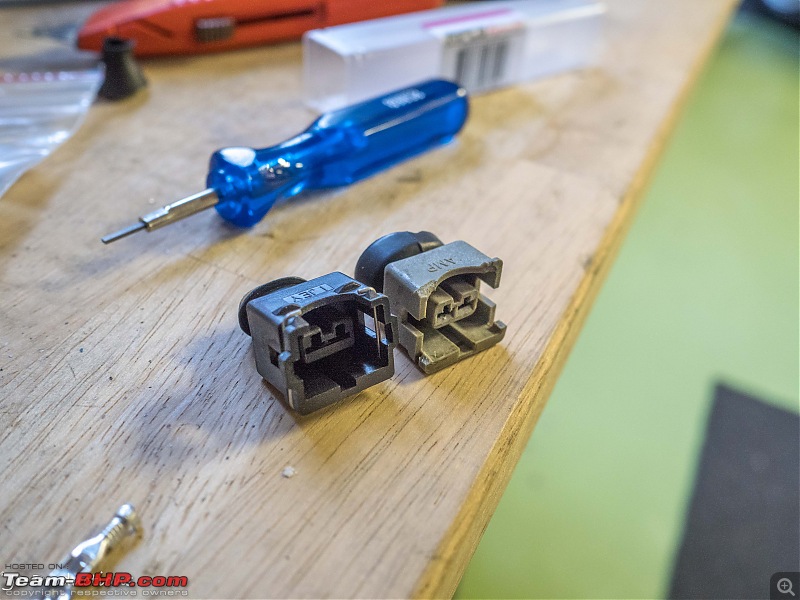 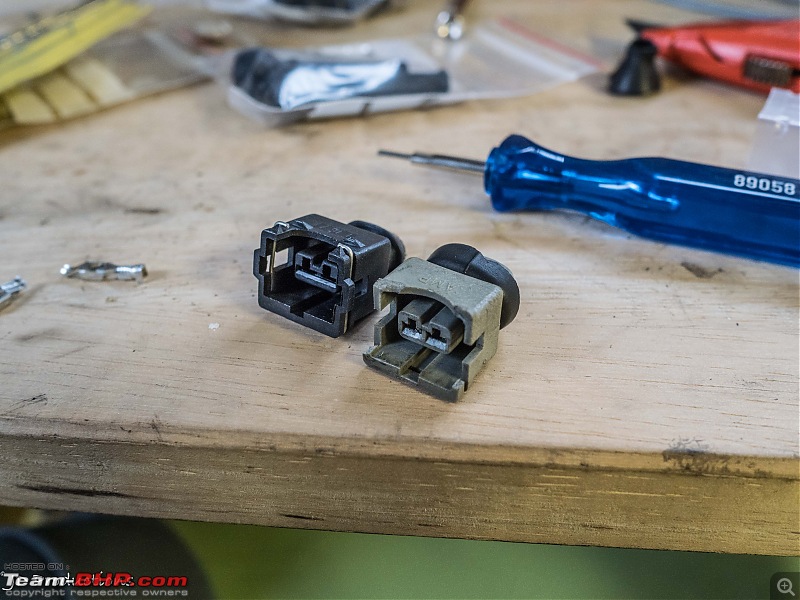 Here you can see the wire with the two old connector pins, but completely stripped from the rubber boot. 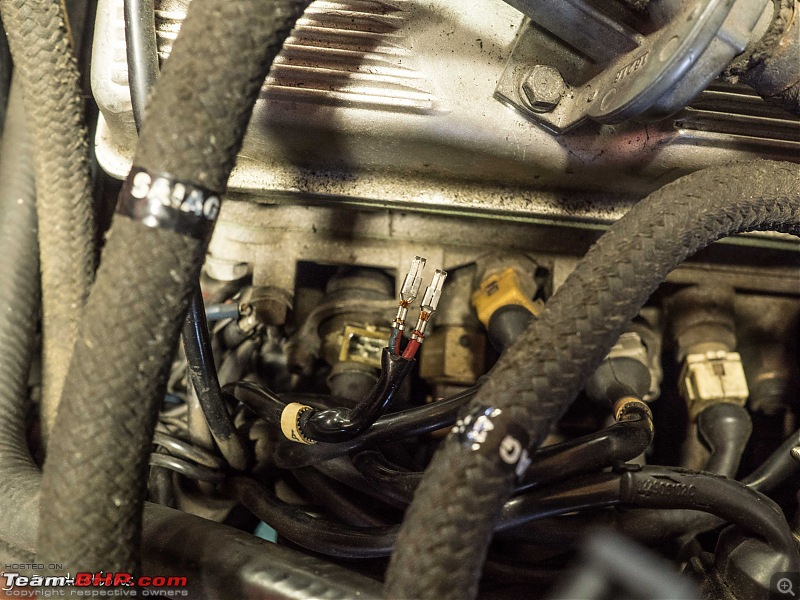 This is what happens to old wiring. In this case it is just the main insulation around the actual wires. But over time it becomes brittle and it just tears/breaks up. (sorry, image is a bit out of focus) 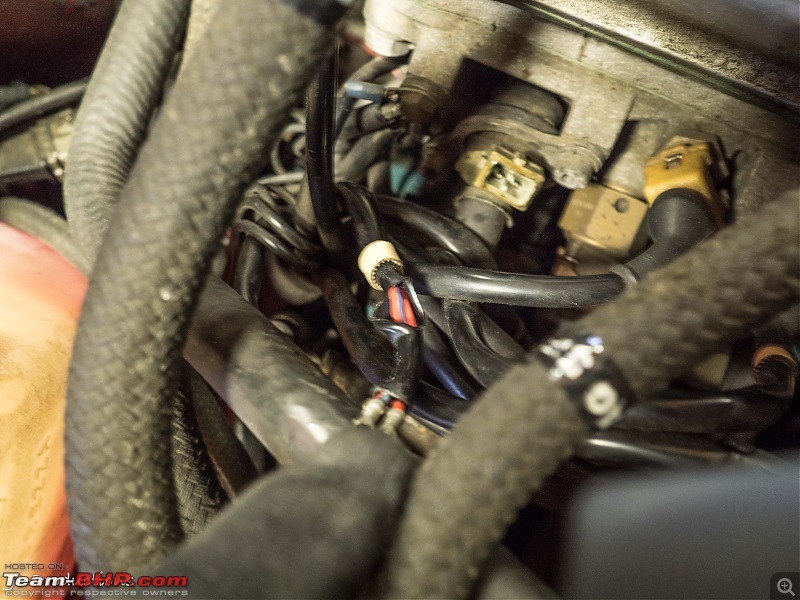 I could have just put electrical insulation tape around it. But I prefer to make these sort of repairs properly so I put a piece of crimp/shrink hose around it. 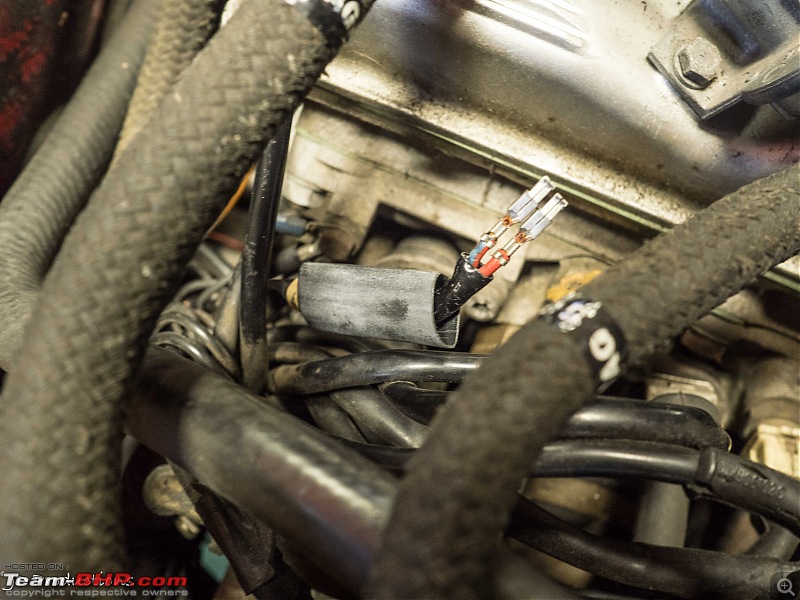 Just apply heat and it will shrink to roughly half the diameter, which makes for a nice and tidy package. 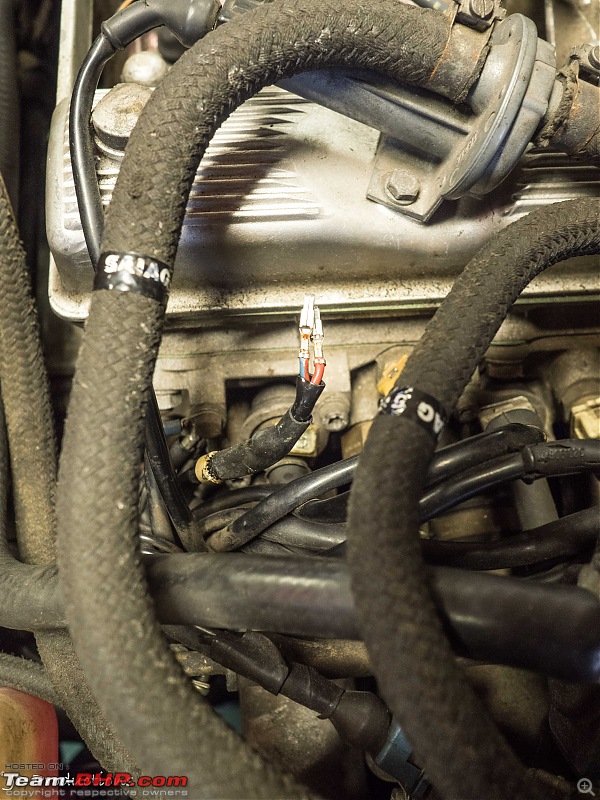 Next I put a new rubber boot on. I peeled it back, so I can put the pins into the plastic connector. 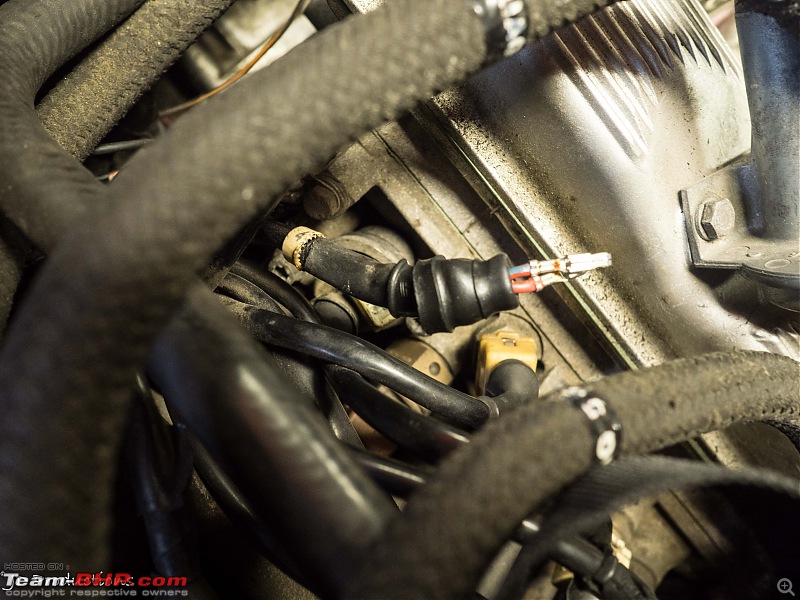 Only when I had put them in, I noticed one did not fit properly. Noticed it was slightly bend. So I will have to replace it after all. Not a big job, but I ran out of time. So I will finish this little job later this week most likely. I am very pleased with these new connectors, pins, boots and my little tool. Very useful web shop I found. I found it through one of the Alfa Romeo Facebook technical groups. I posted an image of my broken connector. Within half an hour somebody posted a link to this amazing website. All in Dutch, but the images speak for themselves. Just about any electrical car connector known to man! https://www.rdae.nl As I showed in some of my earlier posts, the Jaguar has the odd broken/wonky connector too. So I will be checking them and see if they have the appropiate parts to repair those too. Jeroen Last edited by Jeroen : 17th December 2018 at 01:13. |
| |  (3)
Thanks (3)
Thanks
 |
| The following 3 BHPians Thank Jeroen for this useful post: | R2D2, vaasu, vb-saan |
 |


