Now, before we proceed, a small disclaimer:
DISCLAIMER: You are following this guide at your own risk. Neither team-bhp nor I are responsible for any damages that may occur. You must be comfortable with dismantling/disassembling and reassembling large portions of your center console. This procedure was performed on a 2011 Indian-spec Polo 1.6 (Mk5) 5-speed manual. I do not know if the install procedure is the same for automatics and for Mk5 Polos outside of India. I also do not know if the install procedure is the same for the Indian-spec Polo Mk5 facelift (2015+).
Ok, now with that out of the way, let us begin! Please read through the entire guide first before you start the install!
Pull up this piece under the handbrake by grabbing the tab and lifting up. You should not need any tools for this.

Behind the handbrake, carefully pry up this piece by using your opening tool.

A view of the handbrake area with both plastic covers off.

Very carefully pry up the gear shift cover (gaiter). Using your opening tool of choice, pry up at the arrow and slowly work your way around the cover to lift it up. If you have an automatic, you're on your own at this step.


Remove these two screws in front of the gear shift lever with the Torx screwdriver. Remember to store all of the screws safely! Your glove box may have a small compartment that will serve as a safe place. Again, if you have an automatic, the number of screws may be different.

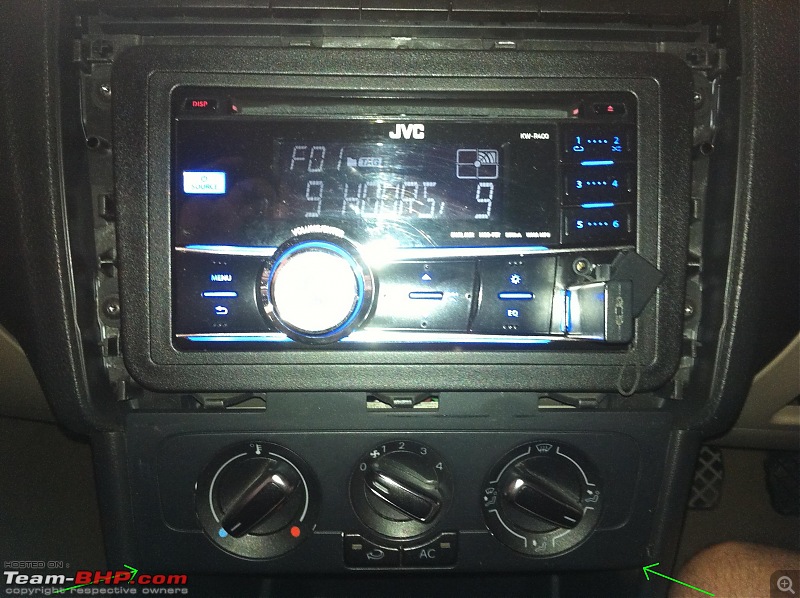
Using the opening tool, pry open the trim around the stereo at the points indicated by the arrows. You can then slowly release the trim from the center console by working your way around it.

Similarly, remove the trim around the AC control unit by starting at the bottom. Pry at the points shown by the arrows and slowly release the trim. Even if you have climate control, the procedure should be similar.

Taking off the trim around the AC control unit.

Remove the two screws that are now revealed. I do not know how many screws there are in case you have a climate control unit.

Now this part is a little tricky. You will be removing a large plastic piece of trim from your center console. Behind the gear shift lever, you need to press down on these two large plastic tabs.

While pressing down on the tabs, you need to grab the trim around the cup holders at the indicated points and slide it straight back.

Make sure not to lose these metal bits near the tabs after sliding back the trim. These hold your screws in place.

You can completely remove this trim piece and set it aside. Four more screws will now be revealed for removal.
In front of the cup holders, remove the two screws that have now been exposed.

Also remove the two screws to the right and left of the cup holders. Here is a pic of the screw on the right. Similarly, there is a screw on the left (no pic).

At the beginning, we removed a plastic cover behind the handbrake. There is a single screw there that now needs to be removed.

You can now lift the entire piece of trim that stretches from here to the front.

Slide the base of the armrest under the trim and into position.

There are four holes on this base that line up with four screw holes that were factory drilled into the floor of the car. Using a ratchet set you should be able to screw down the base with the four #20 Torx screws that are supplied with the armrest. This is where I used the hybrid tool that I fashioned out of 2 separate tool kits. Attached a Torx bit to the ratchet.

There is a large bolt pointing up on the base of the armrest. This bolt is offset from the center. Make sure the smaller offset is towards the rear of the car as shown.

Drop the trim back down and put back the lone screw.

First put this small plastic piece of trim in place. This is supplied with the armrest. I forgot about it and installed the armrest first but was luckily able to slide it in.

You can now set the armrest down on the armrest base. It should easily click into place.

Screw down this nut using the ratchet set. It kind of grinds while turning so you might want to lubricate the nut and bolt with WD-40.

You can now attach the cup holder part to the back of the armrest as shown. First touch the top part of the cup holder to the armrest and pivot it down to close. You will hear a click when it gets attached.


Believe it or not, this was the most frustrating part of the entire install! It took forever to put in this small screw. Having a strong magnetic Philips screwdriver will help. Open the cup holder to reveal a small hole to put in the screw.

 (6)
Thanks
 (8)
Thanks
 (33)
Thanks

 (2)
Thanks
 (2)
Thanks
 (1)
Thanks

 (1)
Thanks


