Team-BHP > Technical Stuff > DIY - Do it yourself


Reply
  Search this Thread
23,769 views
Old 9th April 2013, 22:38   #1
Senior - BHPian
 
Join Date: Sep 2006
Location: zxc
Posts: 3,395
Thanked: 727 Times
DIY! Hella 700FF Installation

Hello fellow Petrol Heads,
Had been very busy as usual doing usual stuff to make livelihood. Service of the car after a 2700kms journey last month was in cards. As i check every bits and pieces after a long journey, even if the scheduled maintainance is months away.
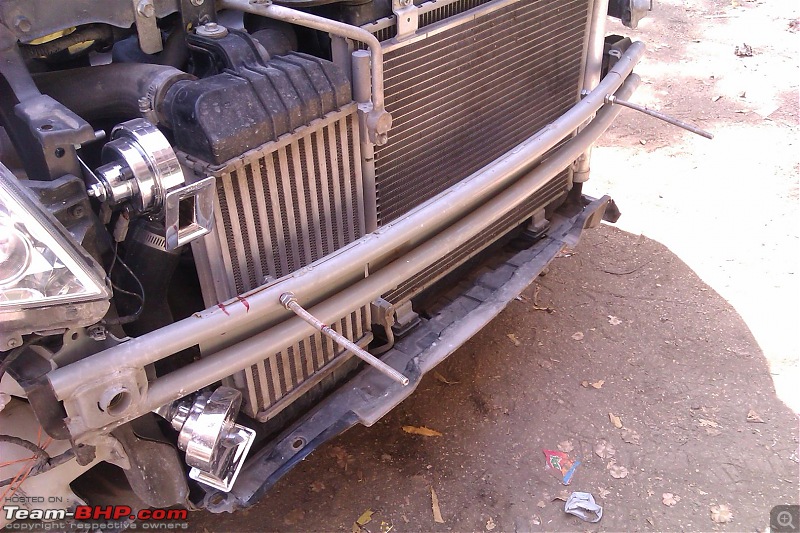
Bought Hella 700FF from a dealer friend last year but didn't had time to install. So what the hell! it will take another extra 1.5 hour! right.

The Patient a.k.a Bakra

My daily commuter Ritz Vdi.

The Job-
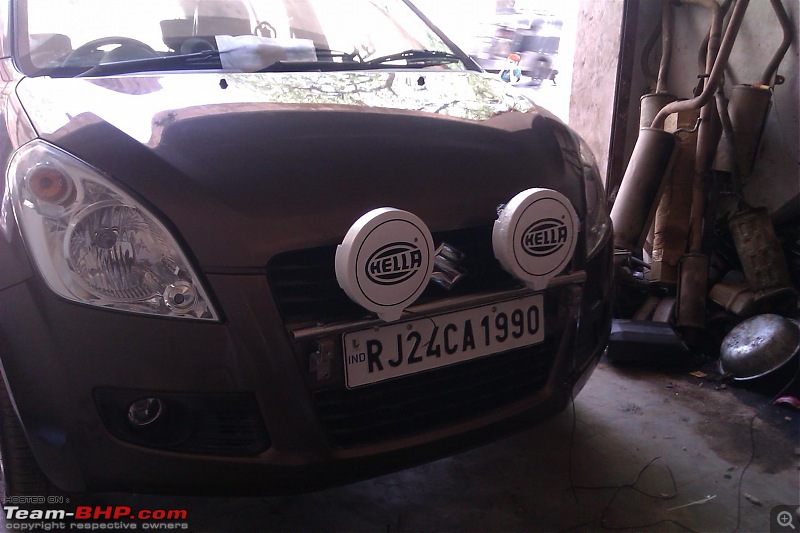
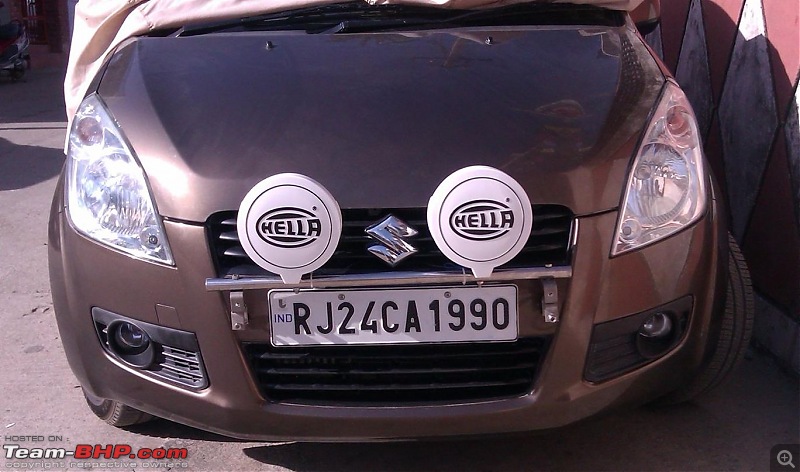
Hella 700FF aux lights install on Ritz.

Synopsis
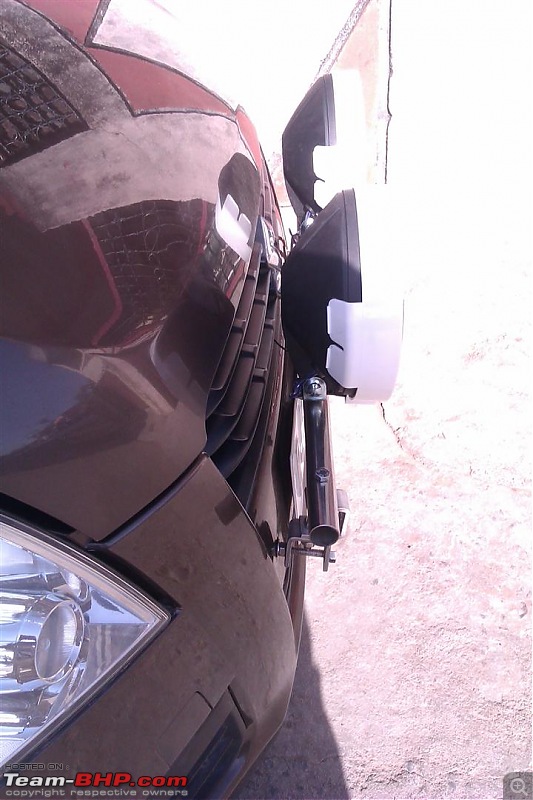
In my opinion Aux lights are the necessity of the hills where I live. Even my old 800 had a pair. Like all modern car designed today Ritz also has sloping front bumper. There is simply no platform to mount the Lights. And thanks to cost cutting, bumper is made using very flimsy material. So mounting on the chassis is a must to ensure its rigidness.

Hella 700FF was sent by a dear friend who is a Hella dealer in Ahmedabad among other things. The light was in the store for the past 8 months or so catching dust, I simply had no time to do it.

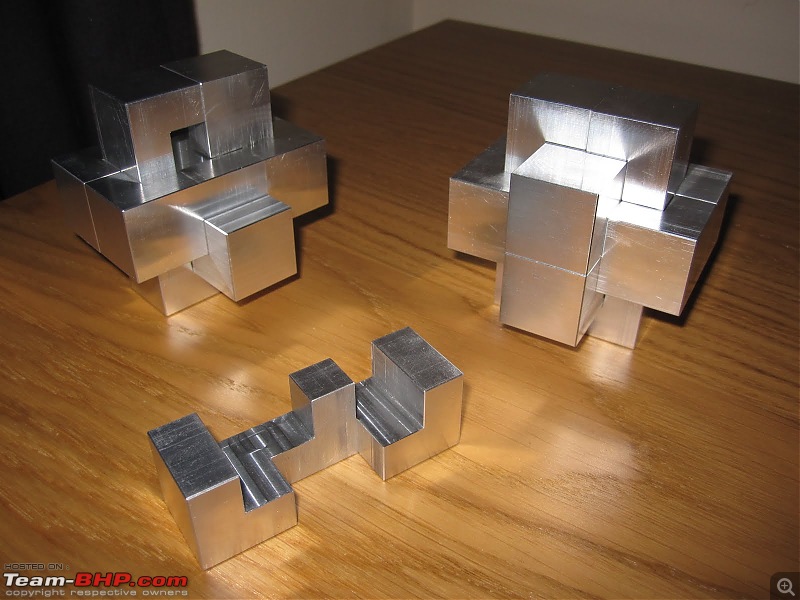
My real challenge was to make hole on the exact spot on the bumper, where the screw protrude. Also I am not happy with the L vertical clamp. I needed 3x1x1 inch aluminum block but just could not find it in the market, as you'll know we live in a gaon. Ideas was to work on the aluminum block on lathe and make desired shape. Next time i will update on this.

Hella pack comes with everything, lights, wiring harness, relay and switches, So installation was a breeze.


Tools and Essentials
1. Open and box spanner 12, 13
2. A good (Taparia) Flat head Screw driver with proper grip
3. A good (Taparia) Philip head Screw driver with proper grip
4. Soldering Iron, To make hole on the Bumper
5. Pliers and Wire cutter.
6. Insulation tape
7. Sharp Paper Cutting Blade
8. Wire Crimper
9. Plastic Cable ties, very cheap but handy.
10. 2.5 Feet Steel Pipe, 1 inch thick. (Rs.80.)
11. Steel Clamps, These are from my work we used these to clamp Fibre Optic cable.
12. 8inch long Screw with heads knocked off.
14. Couple of No.12 and 13 steel bolts.
15. Measuring tape
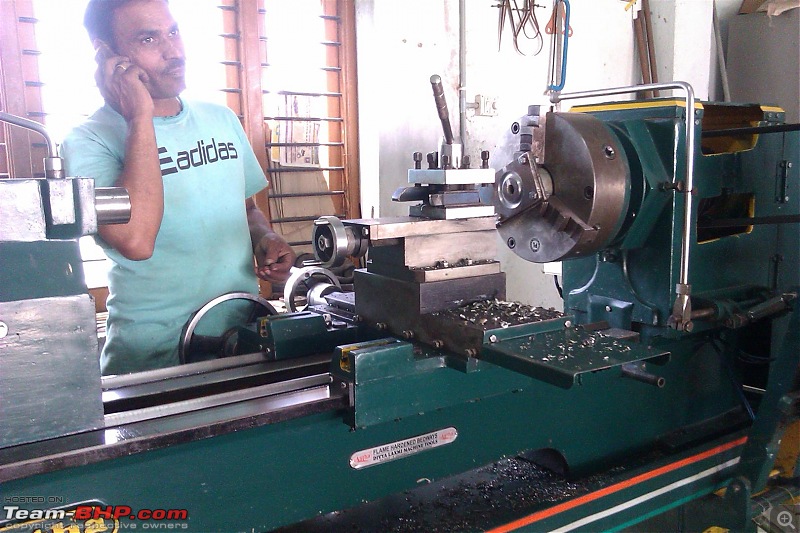
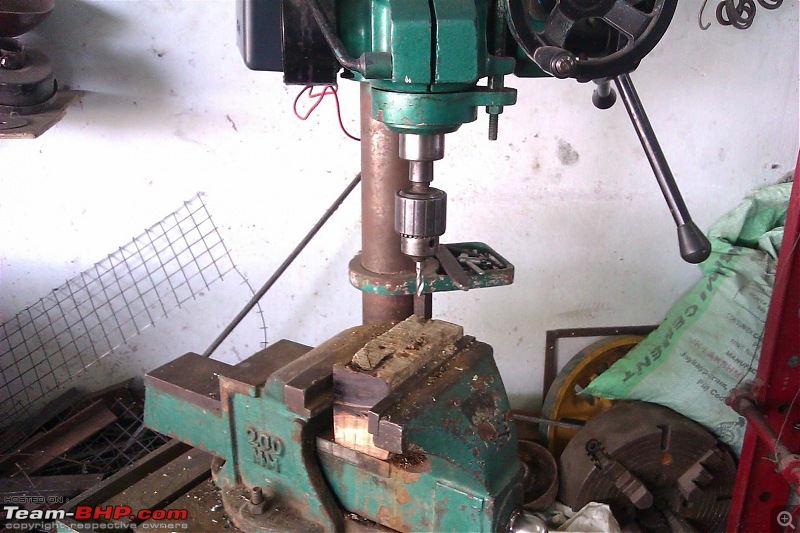
16. Table Drill and lathe machine I used a friend's friend place near his service center.


Images

Enjoy!! and comments are welcome, also suggestions too.

PS: Sorry couldn't take too may images of the install this time, as it was too damn hot and had to check too many things on the car.


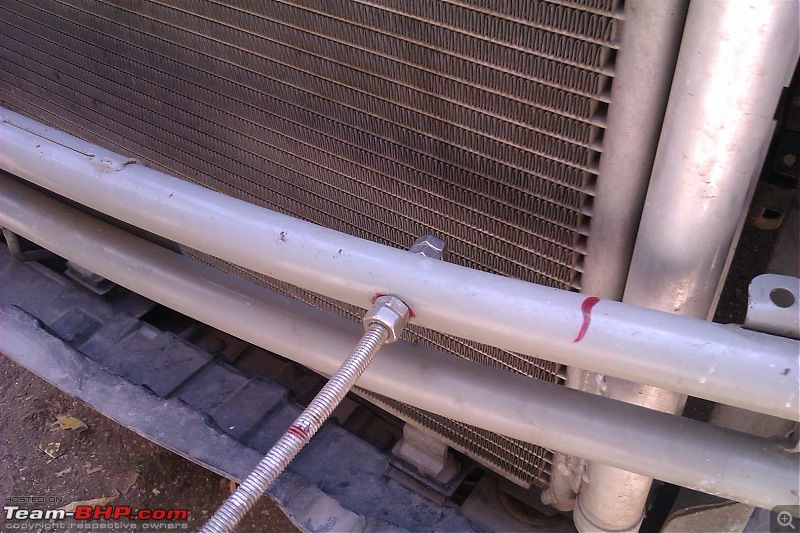
Knocked off screw on the Cross Member.
DIY! Hella 700FF Installation-1-screw-cross-member.jpg

DIY! Hella 700FF Installation-2-screw-cross-member.jpg

Final Install!!

My mechanic friend asked why install a steel rod instead of just mounting on the screw that was bolted on chassis. Well i am a computer guy with Physics degree. Principle is simple, and same way as strut braces work.
DIY! Hella 700FF Installation-final-install-1.jpg

DIY! Hella 700FF Installation-final-install-2.jpg

DIY! Hella 700FF Installation-final-install-3.jpg

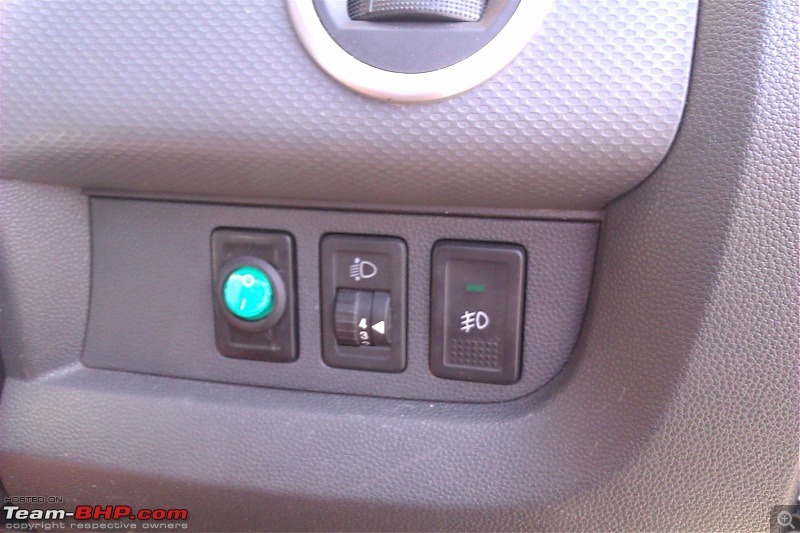
Switch for the Aux Lights
DIY! Hella 700FF Installation-switch.jpg

Lathe Guy
DIY! Hella 700FF Installation-lathe-machine-guy.jpg

Table Drill, This is a must to drill through steel
DIY! Hella 700FF Installation-table-drill.jpg

This is what i needed, just could not find, Help to locate it is welcome. Will pay for everything if some good souls here buys and ships it to me.
DIY! Hella 700FF Installation-aluminium-burrs.jpg

Thanks for taking time to read.
SirAlec is offline   (14) Thanks
Old 10th April 2013, 03:49   #2
Team-BHP Support
 
CrAzY dRiVeR's Avatar
 
Join Date: Jun 2006
Location: Bangalore / TVM
Posts: 17,600
Thanked: 75,949 Times
re: DIY! Hella 700FF Installation

Really nice effort as a DIY!

But IMHO - its spoiling the looks of the car. The rod and the brackets on either side of the number plate looks out of place on an otherwise curvy car. Would have suited those Indicab's, but no - not a brown Ritz.
CrAzY dRiVeR is offline   (1) Thanks
Old 10th April 2013, 07:39   #3
Distinguished - BHPian
 
condor's Avatar
 
Join Date: Jun 2006
Location: Speed-brkr City
Posts: 16,128
Thanked: 16,551 Times
re: DIY! Hella 700FF Installation

Neatly set up, @Sir Alec.

For all my DIY's I try to avoid cutting anything - especially the visible areas. While you have done cuttinf of the bumper, it is still very neat. I Liked the way you have set up the switch. I need to mount 2 switches in my Sumo, but am not finding a place (the switch bank is already full, with OE stuff). Same with the Ikon - not able to find a place to mount the switch for the aux lamps.

Last edited by condor : 10th April 2013 at 07:40.
condor is online now  
Old 10th April 2013, 09:15   #4
Senior - BHPian
 
Join Date: Jan 2012
Location: Bengaluru
Posts: 1,118
Thanked: 3,071 Times
re: DIY! Hella 700FF Installation

Quote:
Originally Posted by SirAlec View Post

This is what i needed, just could not find, Help to locate it is welcome. Will pay for everything if some good souls here buys and ships it to me.
Attachment 1071584
Hello SirAlec,
If you can provide me the dimensions of the block, I can get this made and shipped for you.
unk9ja is offline  
Old 10th April 2013, 09:16   #5
Senior - BHPian
 
starter's Avatar
 
Join Date: Jan 2009
Location: Bangalore
Posts: 1,136
Thanked: 926 Times
re: DIY! Hella 700FF Installation

Neat DIY SirAlec. Thanks for sharing.
But, won't those 8" screws puncture your radiator on the slightest of impacts?
Or is it just the pictures and there is sufficient gap between the two?
Cheers,
Deepak
starter is online now   (1) Thanks
Old 10th April 2013, 09:51   #6
Distinguished - BHPian
 
condor's Avatar
 
Join Date: Jun 2006
Location: Speed-brkr City
Posts: 16,128
Thanked: 16,551 Times
re: DIY! Hella 700FF Installation

Quote:
Originally Posted by starter View Post
Neat DIY SirAlec. Thanks for sharing.
But, won't those 8" screws puncture your radiator on the slightest of impacts?
Deepak, isnt the rear end of the rod fixed into the cross member in front of the radiator ?
condor is online now  
Old 10th April 2013, 10:20   #7
Distinguished - BHPian
 
sagarpadaki's Avatar
 
Join Date: May 2010
Location: Bengaluru
Posts: 4,359
Thanked: 6,477 Times
re: DIY! Hella 700FF Installation

SirAlec, i did not under stand the usage of the aluminium blocks. Can you please explain how and where it will be placed and used?
sagarpadaki is offline   (1) Thanks
Old 10th April 2013, 11:19   #8
Senior - BHPian
 
starter's Avatar
 
Join Date: Jan 2009
Location: Bangalore
Posts: 1,136
Thanked: 926 Times
re: DIY! Hella 700FF Installation

Quote:
Originally Posted by condor View Post
Deepak, isnt the rear end of the rod fixed into the cross member in front of the radiator ?
Thanks Parvath. I din't notice it earlier
@Alec: You can forget my earlier question.
Cheers,
Deepak
starter is online now  
Old 10th April 2013, 11:47   #9
Senior - BHPian
 
rakesh_r's Avatar
 
Join Date: Nov 2009
Location: MH14/MH02/KL09
Posts: 2,036
Thanked: 3,275 Times
re: DIY! Hella 700FF Installation

Excellent stuff sir alecI was looking to get it done on my swift myself.One question,is there a way where i can instead of mounting on the bumper,install an L clamp from the cross memeber to the lower grill in front of the intercooler?I know it brings the lights below the headlamp level,but is it possible?
rakesh_r is offline  
Old 10th April 2013, 15:44   #10
Senior - BHPian
 
Join Date: Sep 2006
Location: zxc
Posts: 3,395
Thanked: 727 Times
Re: DIY! Hella 700FF Installation

Quote:
Originally Posted by CrAzY dRiVeR View Post
Really nice effort as a DIY!

But IMHO - its spoiling the looks of the car. The rod and the brackets on either side of the number plate looks out of place on an otherwise curvy car. Would have suited those Indicab's, but no - not a brown Ritz.
Its a kinda subjective Bro! But Yeah! As i mentioned earlier I too did not like the use of steel clamp. I had no choice as what i needed was not available.


Quote:
Originally Posted by unk9ja View Post
Hello SirAlec,
If you can provide me the dimensions of the block, I can get this made and shipped for you.
Just raw block is fine, i can do the rest on lathe myself. It Should be solid block 1 feet long x 1.5 inch thick x 1.5 inch breadth. And yeah Thanks for the kind gesture.

Quote:
Originally Posted by starter View Post
Neat DIY SirAlec. Thanks for sharing.
But, won't those 8" screws puncture your radiator on the slightest of impacts?
Or is it just the pictures and there is sufficient gap between the two?
Cheers,
Deepak
There is sufficient gap but I have fixed it in a quirky way by using a U clamp. I could not take the picture of that. ALso the cross member is very flimsy. I doubt it will save radiator or inter cooler in case of impact. So next time I have time i will reinforce the cross member with steel rods.

Quote:
Originally Posted by sagarpadaki View Post
SirAlec, i did not under stand the usage of the aluminium blocks. Can you please explain how and where it will be placed and used?
To use aluminum instead of four steel clamps that hold the cross steel pipe.

Quote:
Originally Posted by rakesh_r View Post
Excellent stuff sir alecI was looking to get it done on my swift myself.One question,is there a way where i can instead of mounting on the bumper,install an L clamp from the cross memeber to the lower grill in front of the intercooler?I know it brings the lights below the headlamp level,but is it possible?
You cannot mount it on bumper as its very flimsy.

Thanks everybody for the kind inputs!
SirAlec is offline  
Old 10th April 2013, 16:24   #11
Senior - BHPian
 
rakesh_r's Avatar
 
Join Date: Nov 2009
Location: MH14/MH02/KL09
Posts: 2,036
Thanked: 3,275 Times
Re: DIY! Hella 700FF Installation

Quote:
Originally Posted by SirAlec View Post
You cannot mount it on bumper as its very flimsy.

Thanks everybody for the kind inputs!
Yes i agree the bumpers are flimsy,what i had in my mind was something like below,a rough sketch made in illustrator
Attached Thumbnails
DIY! Hella 700FF Installation-700ff.jpg  

rakesh_r is offline   (1) Thanks
Old 11th April 2013, 11:17   #12
Senior - BHPian
 
Join Date: Jan 2012
Location: Bengaluru
Posts: 1,118
Thanked: 3,071 Times
Re: DIY! Hella 700FF Installation

[quote=SirAlec;3091115]
Just raw block is fine, i can do the rest on lathe myself. It Should be solid block 1 feet long x 1.5 inch thick x 1.5 inch breadth. And yeah Thanks for the kind gesture.

Sir Alec,
The supplier is on holiday till this weekend for Ugadi. I will enquire about your requirement on Monday and let you know.
unk9ja is offline   (1) Thanks
Old 11th April 2013, 15:32   #13
BHPian
 
samarth.bhatia's Avatar
 
Join Date: May 2010
Location: Sydney
Posts: 450
Thanked: 450 Times
Re: DIY! Hella 700FF Installation

Quote:
Originally Posted by SirAlec View Post
In my opinion Aux lights are the necessity of the hills where I live. Even my old 800 had a pair. Like all modern car designed today Ritz also has sloping front bumper. There is simply no platform to mount the Lights. And thanks to cost cutting, bumper is made using very flimsy material. So mounting on the chassis is a must to ensure its rigidness.

make hole on the exact spot on the bumper, where the screw protrude.
Hi SirAlec,

I can relate well to your situation on this not being an easy task.

I have installed Hella 500 Black Magics on my Chevy Beat.
I chose to use L-shaped metal angles, bolted on the cross member (not welded as the welds can break when there are mechanical shocks), cut out from bumper, and then the Hellas bracketed & mounted on them. This ensures minimal vibrations getting transferred to the light body.

Do you face any vibrations on the 700s?
And would you say the long protruding bolts are strong enough to handle the weight of the lights during shocks?

All in all, a neat install there! Congrats.

You can view my install here: Hella 500 Black magic on Chevy Beat

Cheers,
Sam
samarth.bhatia is offline  
Old 11th April 2013, 15:46   #14
Senior - BHPian
 
Join Date: Sep 2006
Location: zxc
Posts: 3,395
Thanked: 727 Times
Re: DIY! Hella 700FF Installation

Quote:
Originally Posted by samarth.bhatia View Post
Hi SirAlec,

I can relate well to your situation on this not being an easy task.

I have installed Hella 500 Black Magics on my Chevy Beat.
I chose to use L-shaped metal angles, bolted on the cross member (not welded as the welds can break when there are mechanical shocks), cut out from bumper, and then the Hellas bracketed & mounted on them. This ensures minimal vibrations getting transferred to the light body.

Do you face any vibrations on the 700s?
And would you say the long protruding bolts are strong enough to handle the weight of the lights during shocks?

All in all, a neat install there! Congrats.

You can view my install here: Hella 500 Black magic on Chevy Beat

Cheers,
Sam
thats a very beautifully kept car you have there.
those are not normal bolts, those are pure steel bolts and very strong ones we use to clamp thick cables and its rust proof. to ensure the rigidness i used that 1 inch steel pipe.
SirAlec is offline  
Old 12th April 2013, 10:33   #15
Newbie
 
Join Date: Feb 2009
Location: New Delhi
Posts: 24
Thanked: 23 Times
Re: DIY! Hella 700FF Installation

Quote:
Originally Posted by starter View Post
Neat DIY SirAlec. Thanks for sharing.
But, won't those 8" screws puncture your radiator on the slightest of impacts?
Or is it just the pictures and there is sufficient gap between the two?
Cheers,
Deepak
In absolute agreement, That is the AC Condensor and it is very fragile, there has to be a minimum gap of 1" between the bolt heads and the condensor, its an expensive proposition to replace a blown one
Anil
getanilkhanna is offline  
Reply

Most Viewed
Thread Tools Search this Thread
Search this Thread:

Advanced Search

Copyright ©2000 - 2024, Team-BHP.com
Proudly powered by E2E Networks