Team-BHP
(
https://www.team-bhp.com/forum/)
Quote:
Originally Posted by GTO
(Post 2413468)
Tell you what : Once you have completed submitting your DIY guidelines, drop me a PM with a link to all the instructional posts. I'll have an index created in the opening post for easy reference.
|
That would be nice.. Thanks!
Quote:
Originally Posted by mayankk
(Post 2413437)
|
Hey Mayankk, I have sourced the actuator motor for just 250 Rs. Also, I have the switch that is there in the above post, cost me just Rs10 :). But if you observe it, you can see that, the yellow switch will look really out of place in the cabin of an ikon. That's why, im looking for cheaper alternatives of OE boot release switch.
Is there a similar DYI for Verna Diesel cars? really impressive and well detailed thread.
This is an awesome thread and will be very useful for people.
For Baleno's headlight replacement it's not needed to remove the HL assembly as you can access the bulb by removing the rubber cover, wire connector and then the locking pin.
BTW, for brake-fluid replacement/bleeding, won't we need two person?
DIY: How to tackle AC Diverter Valve Issue in a Ford IKON (All models).
One out of
very few, but the most irritant manufacturing defects of an IKON is, the AC Divertor valve. I bet, that 90% of the IKON owners must have faced a bust AC Divertor valve.
The Symptom of a bust AC Diverter valve is: hot (warm) air coming through the vents, even when AC is set to the cold position. Initially, one might think the AC is not working, but with time, the air and the problem starts to heat up, you will literally have to travel without AC.
The Diverter valve costs about ~2k (don't remember correctly). Well, most of us would not find it that expensive, and would replace it. Buuutttttt!!.. what if the part fails again?... and again?... and again??.. :Frustrati.
This DIY will show you a 50 Rupee alternative to fix your AC back to blow that soothing cold air, but with a downside that you will have to live with only that, and no warm air. I chose to spend 50 bucks and live with only cold air, instead of repeatedly spending ~2000 bucks, and having to make freequent trips to A.S.S.
================================================
Not exactly a pictorial guide as I will have to unplug all the plumbing and re-do it once again, but, the pictures should give you a pretty neat idea.
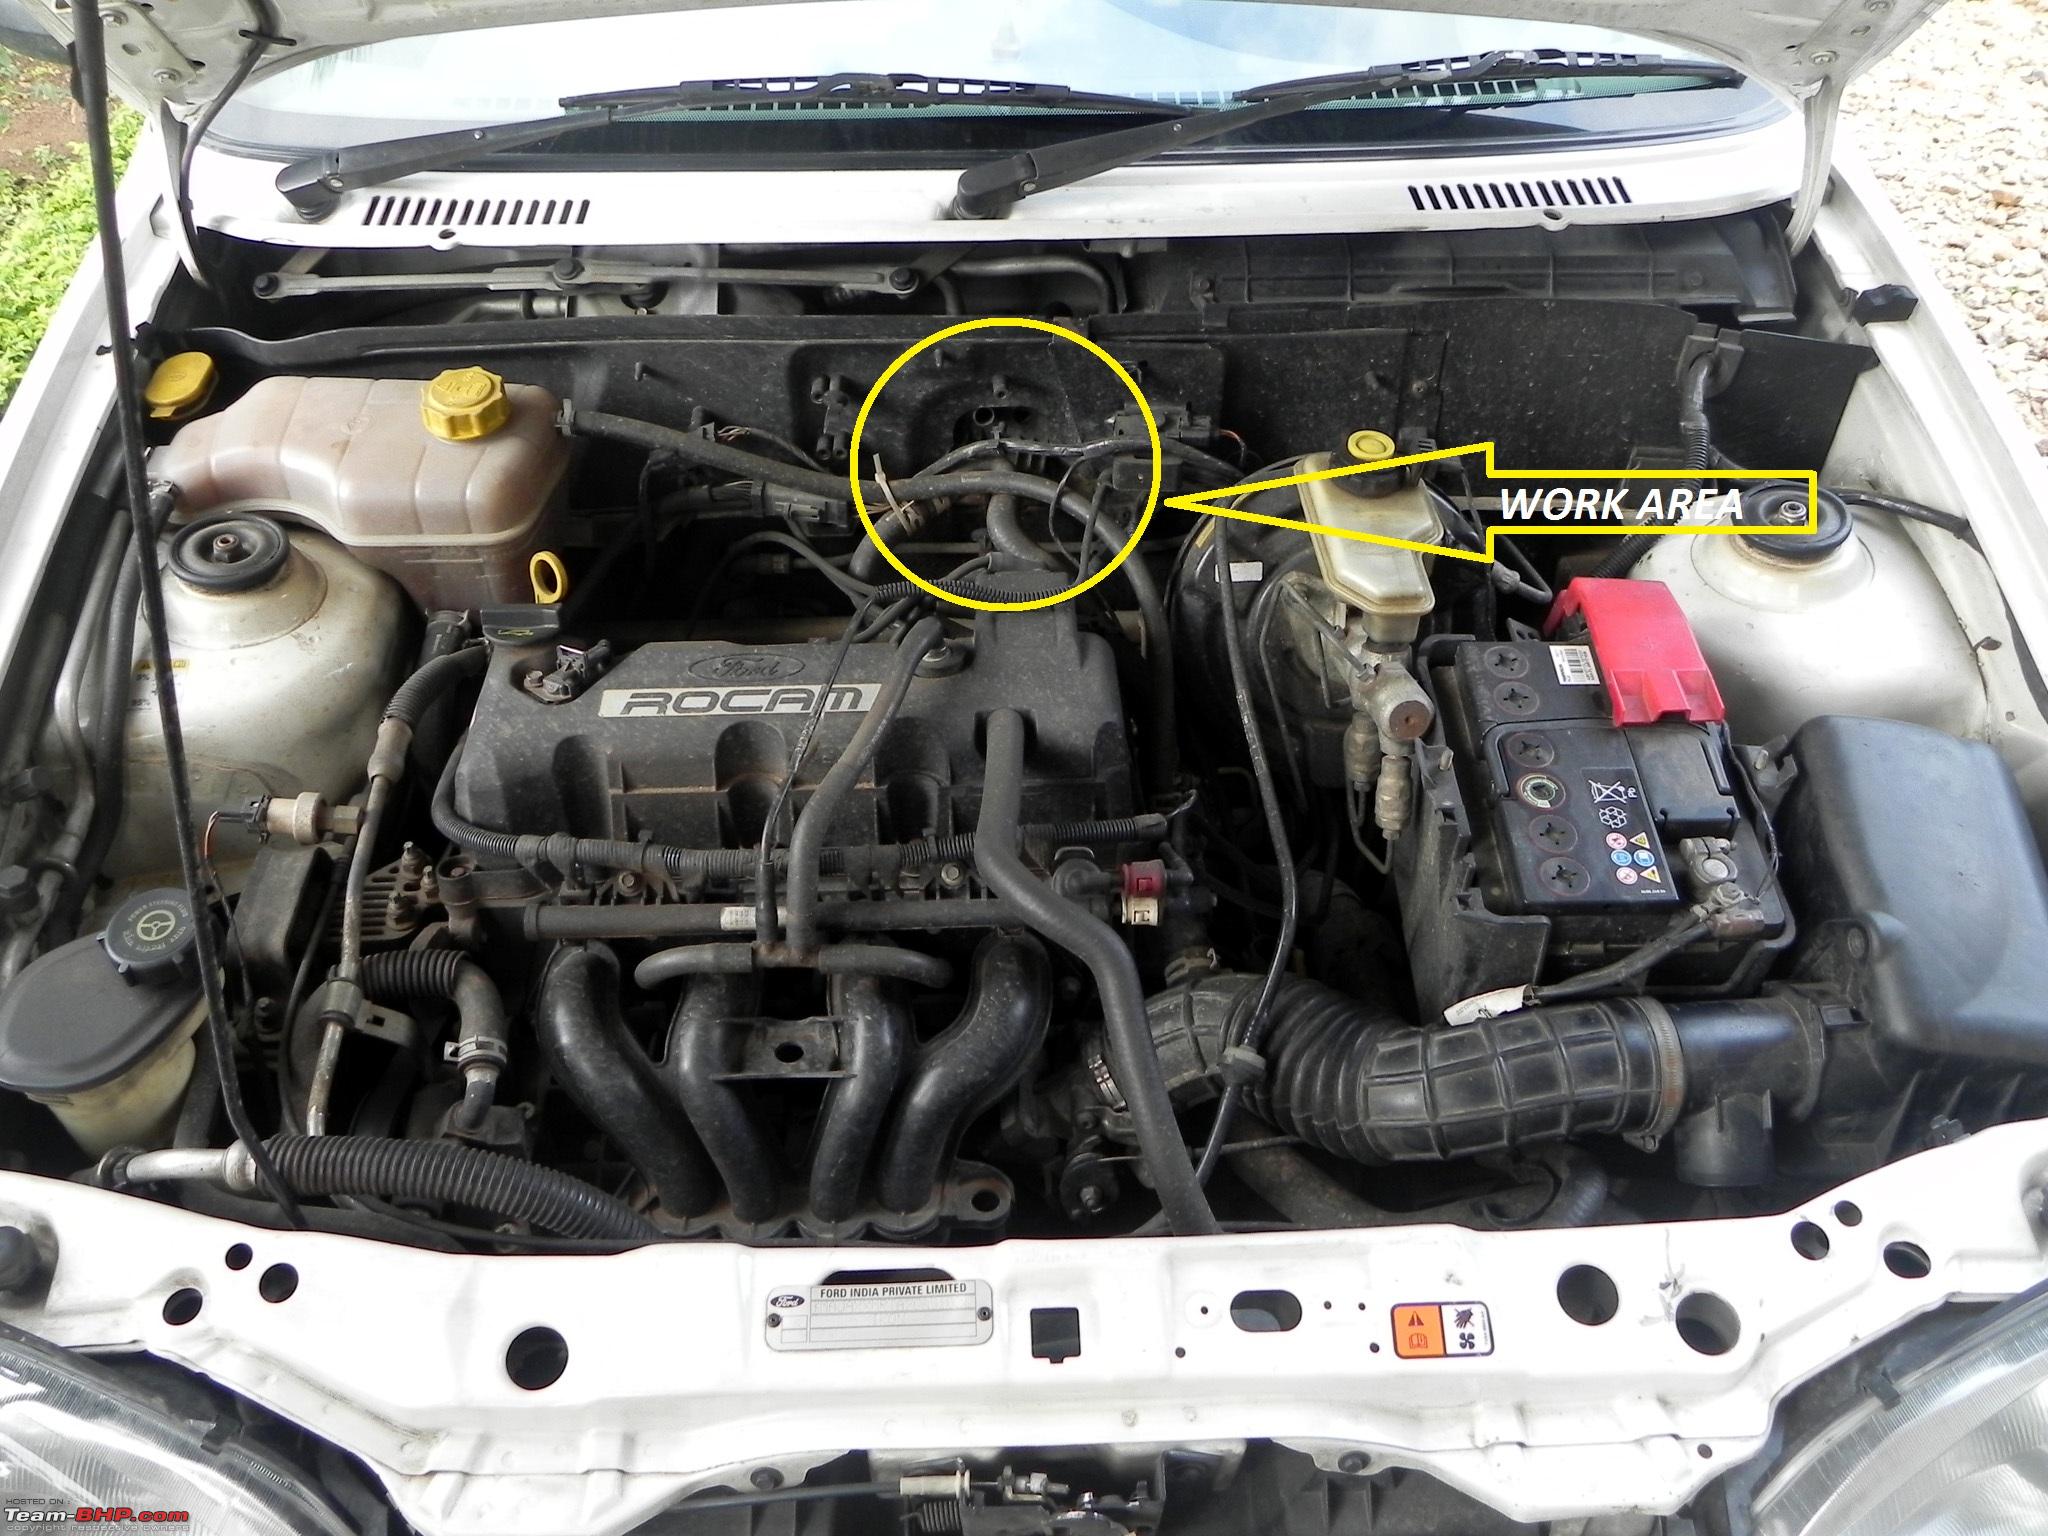
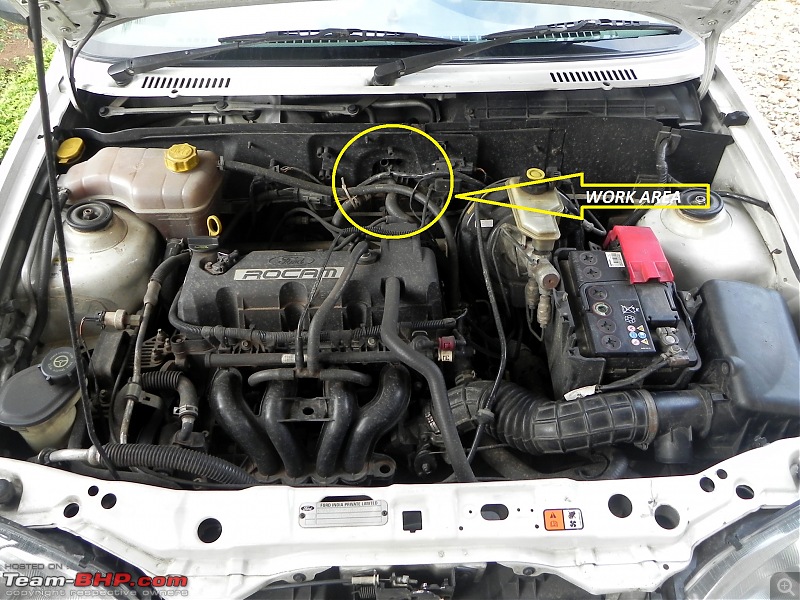
The temperature to heat up the air in the cabin is obtained from the engine coolant. And hence, a pipe carrying the hot engine coolant will be coming into the cabin. It is shown in the figure.
In a car whose diverter valve is working fine, the original plumbing will be: The orange (coolant in) pipe plugged into the orange slot, and the blue (coolant out) pipe plugged into the blue slot.
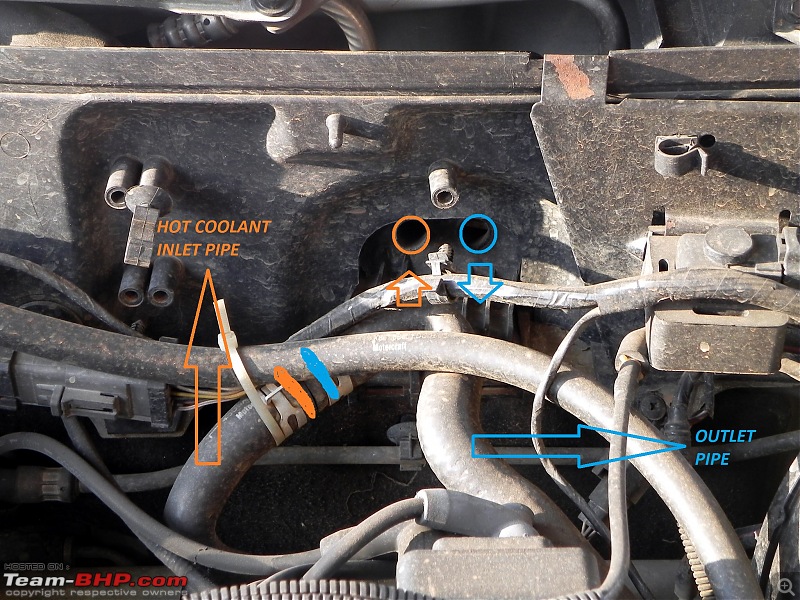
If a diverter valve is shot, all what you have to do is, unplug the the above mentioned pipes from their slots, and connect them together. You will need a 2 inch long connecter metal pipe. And then clamp it tightly - you are good to go!
 P.S: Please try this DIY only when the engine(coolant) is cold.
Quote:
Originally Posted by dhanushs
(Post 2414145)
The Diverter valve costs about ~2k (don't remember correctly).
|
I believe the price of the value is close to 1k now. Thankfully I never had to face this issue. However a great DIY.
Quote:
Originally Posted by sajands
(Post 2413648)
Is there a similar DYI for Verna Diesel cars? really impressive and well detailed thread.
|
Lets add any DIY of any car on this thread. As GTO has promised, he will index it later.
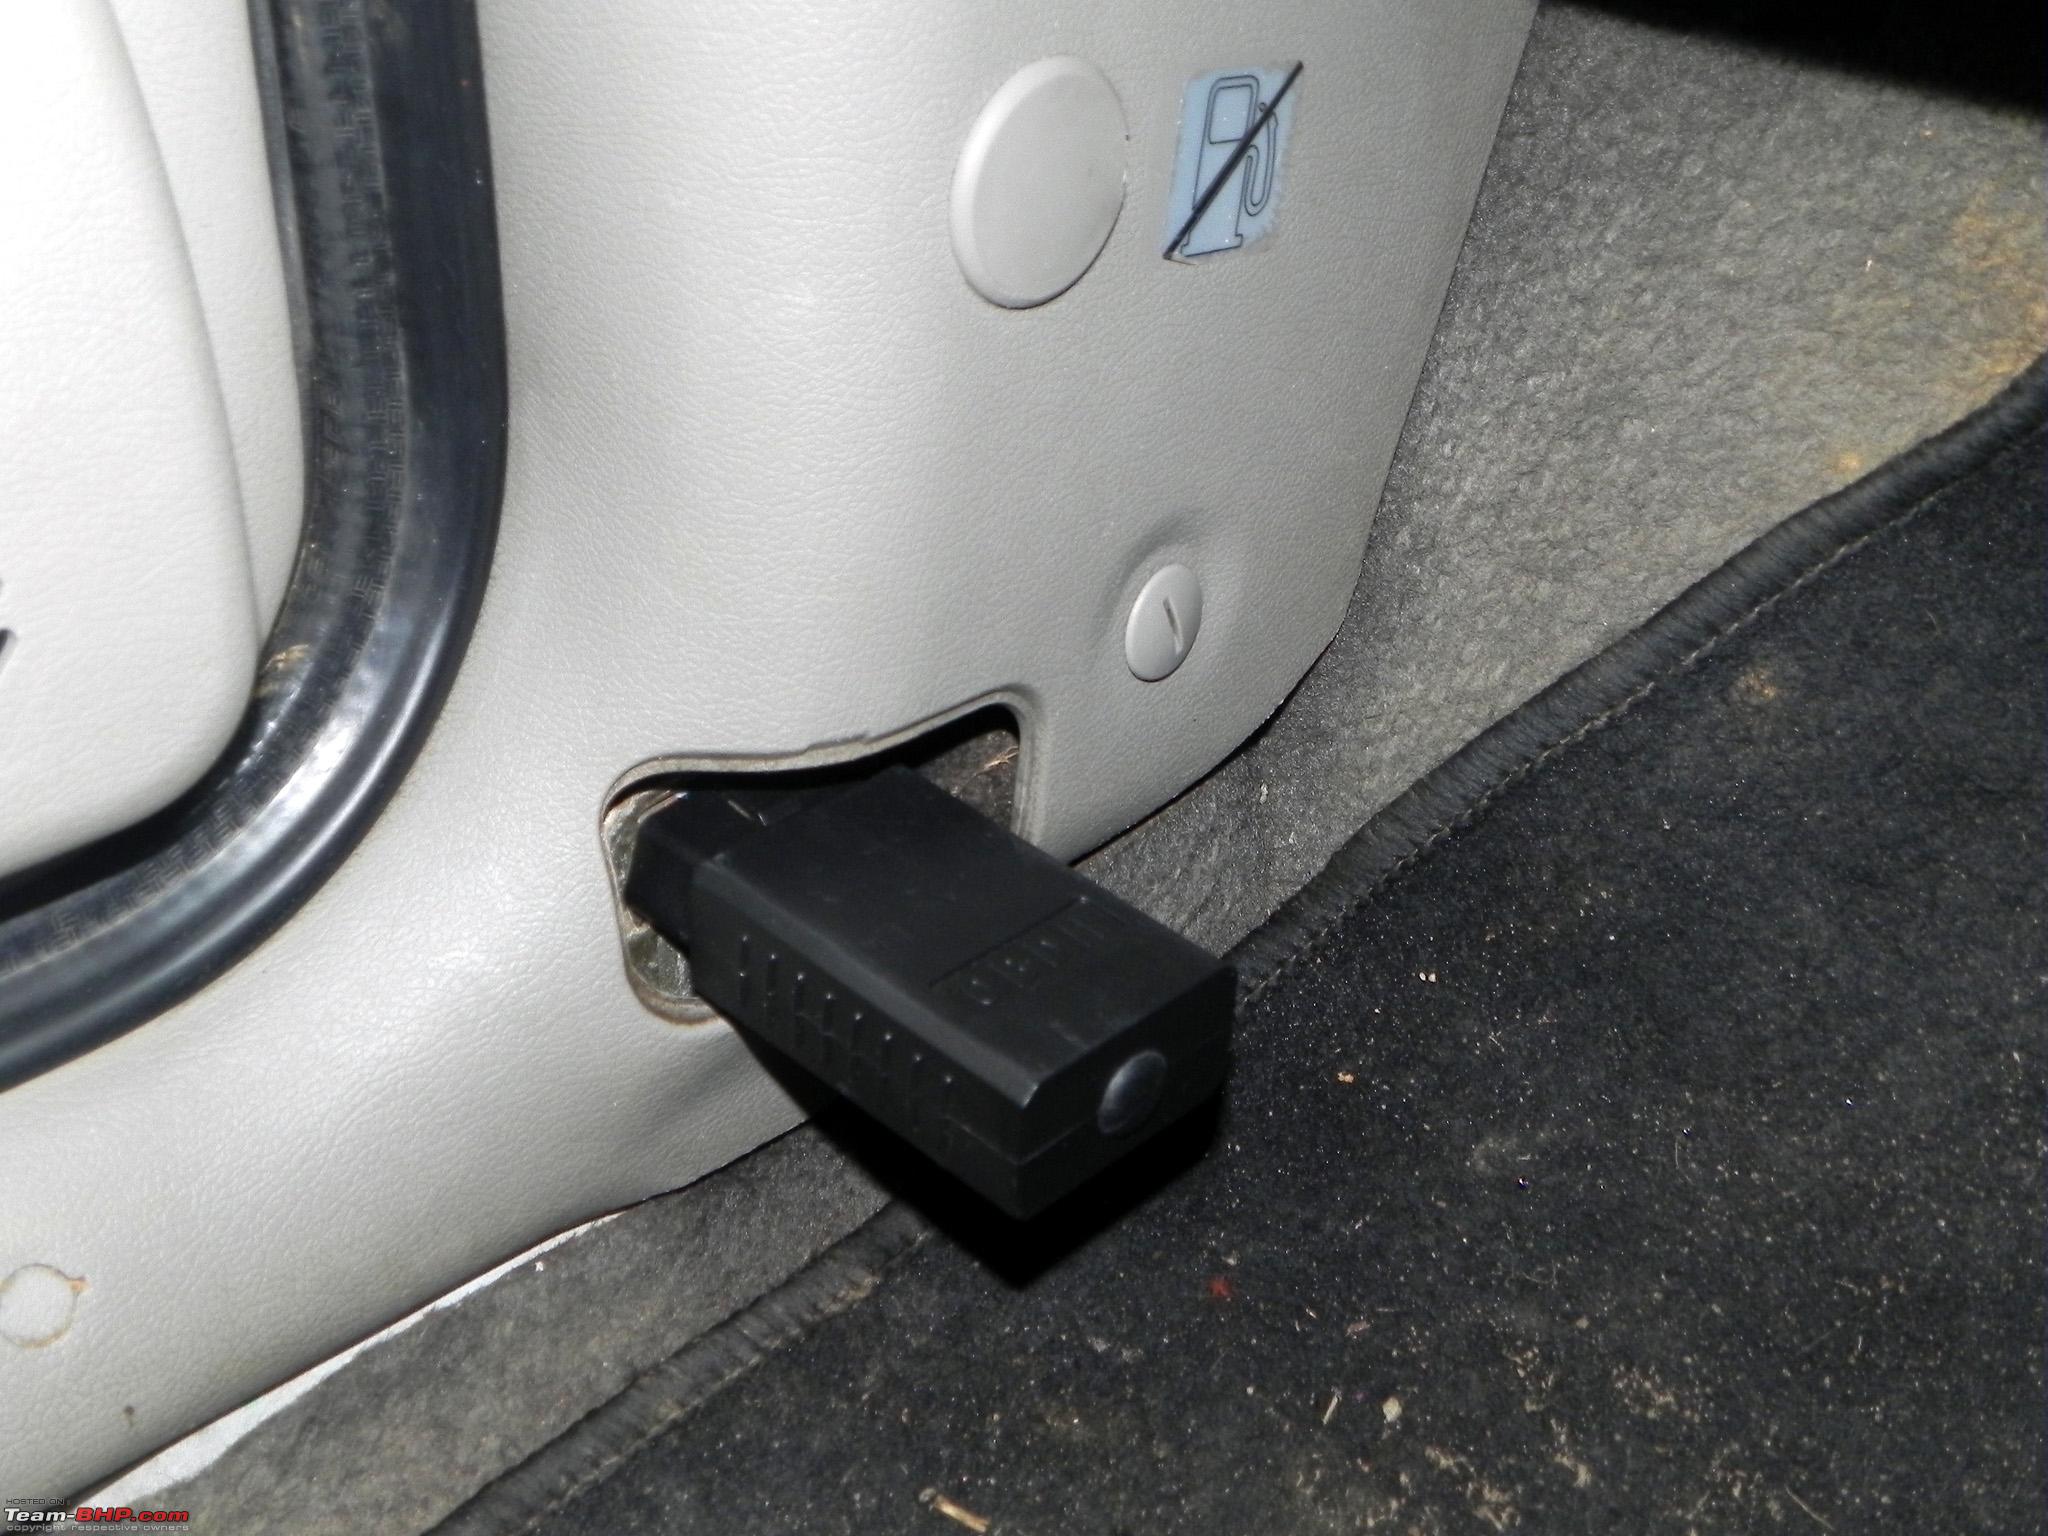
I'm attaching the locations of the OBD Port, Fuel Cut off Switch, and the Fuse box.
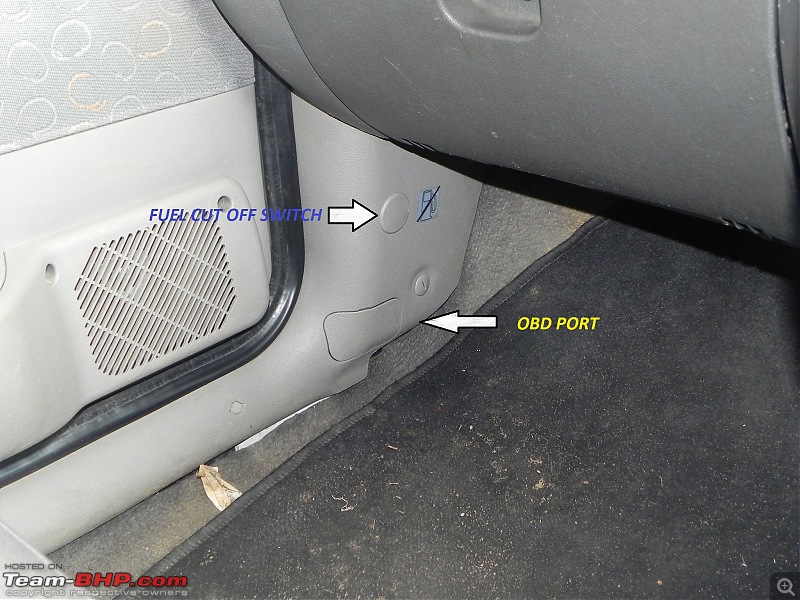 OBD Port:
 Can be used along with an OBD Reader to access information about various sensors in the ECU and error codes. Know more
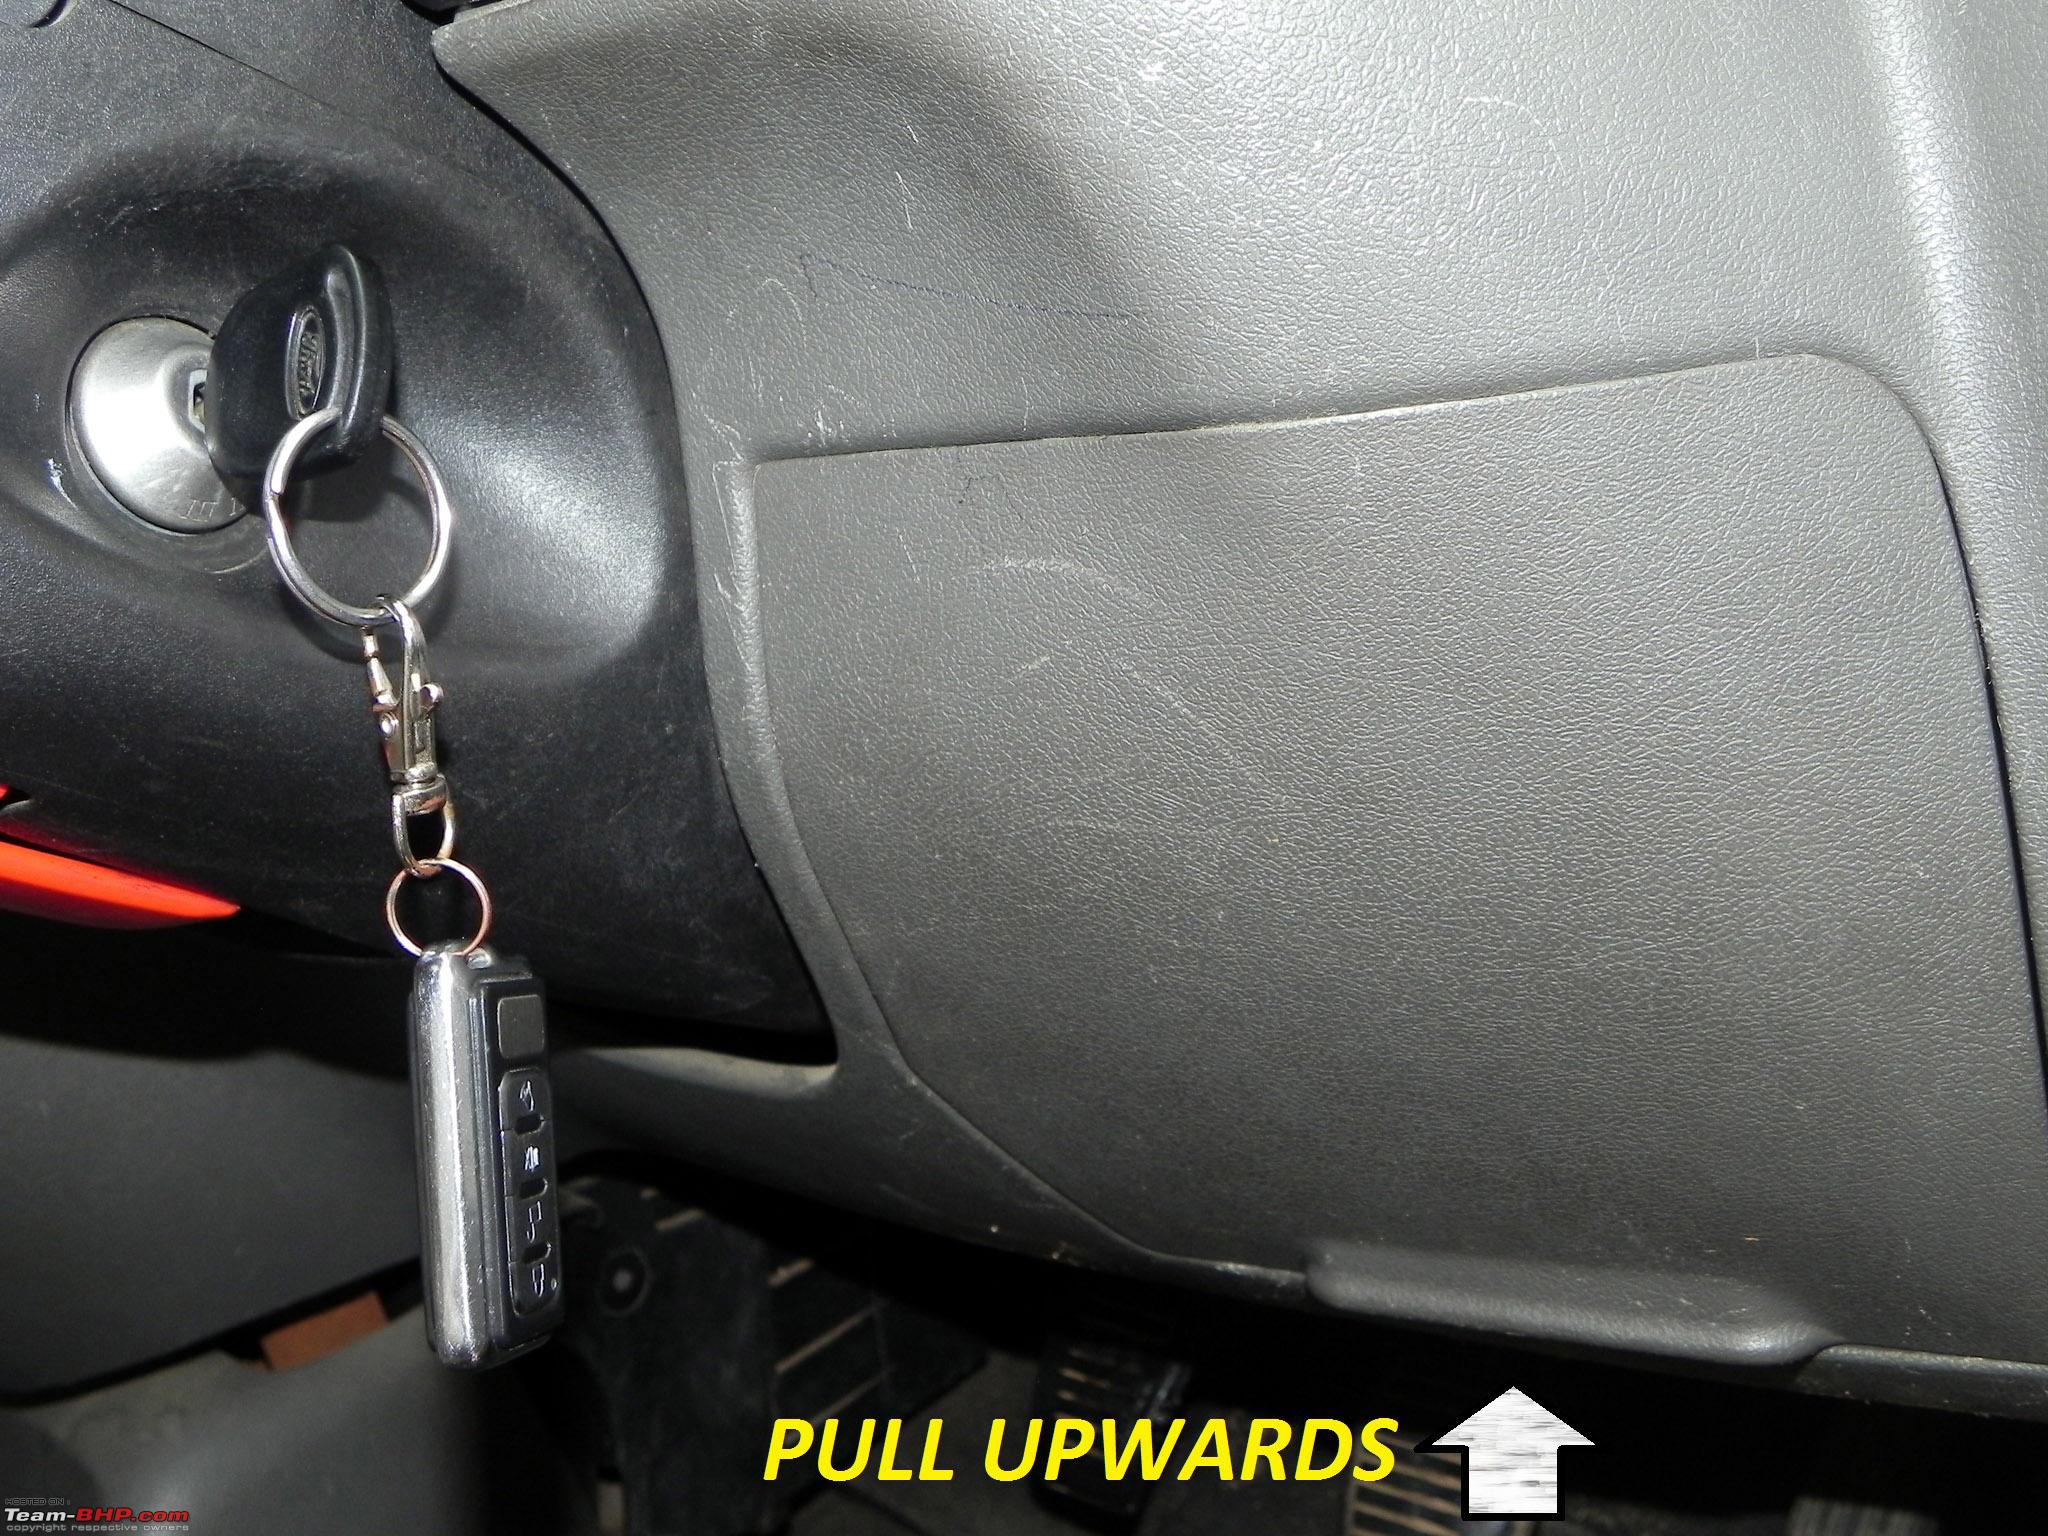
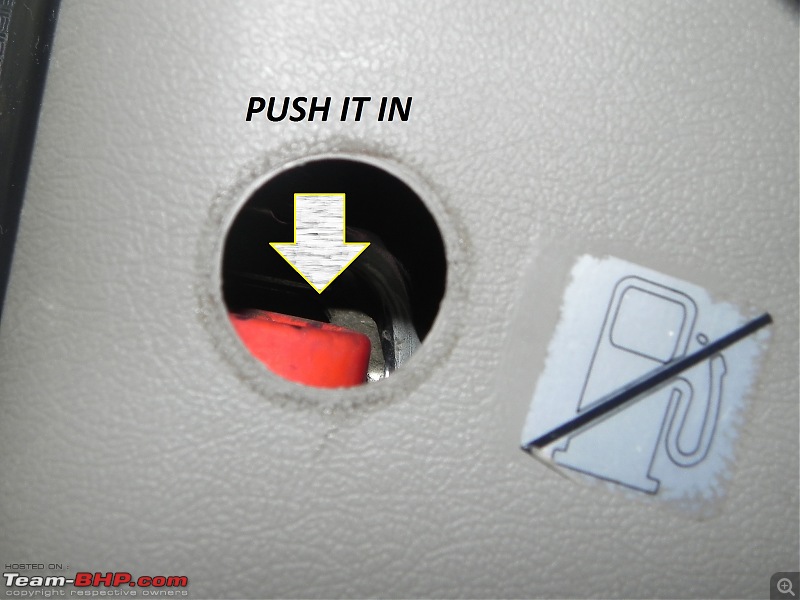
HERE 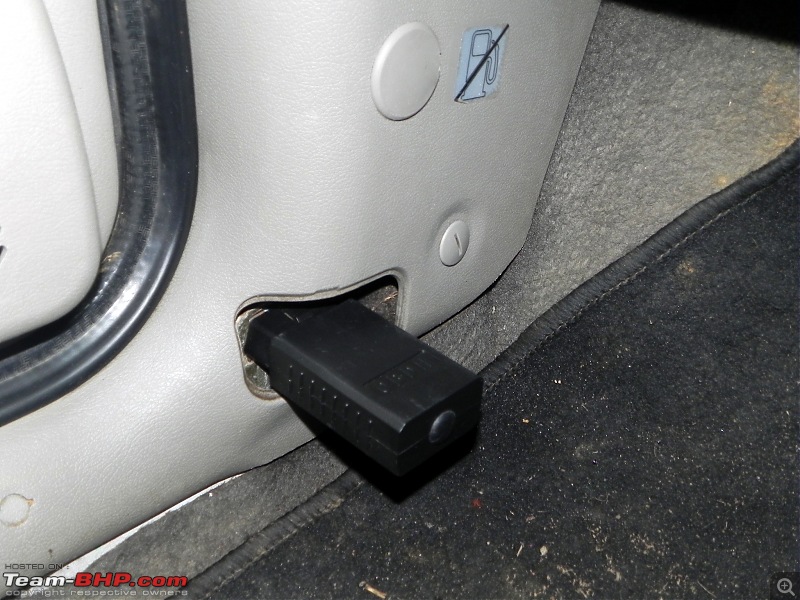 Fuel Cut Off Switch:
 I'm yet to use this, but I'm told that, in the unfortunate event of an accident, this switch pops out and cuts off fuel to the engine, to prevent fires (if there is any fuel line leakage). So, if at all by any chance this switch pops out, make sure you have no fuel leakage. I'm yet to understand the working principle behind it. Perhaps fellow bhp'ns can shed some light.
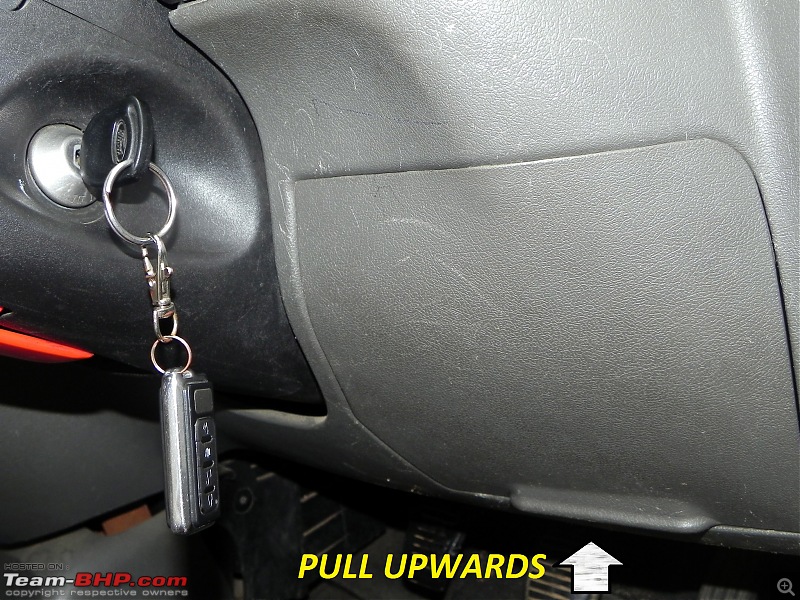
Fuse box: Need I say more?. The 1st place to look at, if something is not working. :D
 Coming Soon: Air Filter and Fuel Filter Change :D
Quote:
Originally Posted by dot
(Post 2414196)
I believe the price of the value is close to 1k now. Thankfully I never had to face this issue. However a great DIY.
|
It costed me Rs 1450/- in Pune. But while enquiring I came across rates rangine from 1450 up till 3.5K for this device. And I did this DIY replacement in my dad's car just a day before my marriage, as I was the only free guy while everyone else was busy running around for my marriage the next morning.lol:
Quite an informative thread Dhanush!:) This thread is going to be a sort of reference material especially for the Ikon. Rated 5 stars.
Is there any specific method to check the ignition coil? Dad's Ikon had this missing cropping up every now and then. Luckily, the issue vanished after I changed the plug wire set.
Quote:
Originally Posted by jeeva
(Post 2414783)
Is there any specific method to check the ignition coil?
|
Yep!. You need to check each of the spark plugs if they are firing correctly. If ignition coil is shot, then firing will be erratic . If possible i'll try to cover that too. Thanks for the tip Jeevan!
Quote:
Originally Posted by jeeva
(Post 2414783)
Dad's Ikon had this missing cropping up every now and then. Luckily, the issue vanished after I changed the plug wire set.
|
Its good that you replaced it asap. Actually, a tip for ignition coil longevity is: Keep your spark plugs and HT cables in prime condition. Its usually a bad spark plug/cable problem that evolves into an ignition coil issue.
Especially IKON's (Another defamed part)
Dear dhanushs,
Great information in this thread. Is it possible to procure (purchase/borrow or other means) a workshop manual for maruti dzire or swift. I checked up with Haynes, but they don't have it stock. Is there any other source?
How do you go about tinkering with the car? Do you follow any specific manual?
Thanks and regards
Saji
DIY: How to clean/replace Air Filter Car: Ford Ikon Flair
Symptoms which lead to change/clean Air Filter: Airfilter cleaning/replacement is one of the basic things one can do to make the engine breath better. Cars running in dusty environments, might need a filter change or cleaning much before the recommended service interval.
Basically a clogged air filter means, the engine is not breathing as it should be, and it will result in reduced power output, as well as a reduced FE. In extreme cases, it causes idling and revving problems.
By this DIY, we intend to let the engine breath easy, and consequently, maintain optimum performance and Fuel Efficiency of the engine. You owe your beauty clean breath, eh? :D
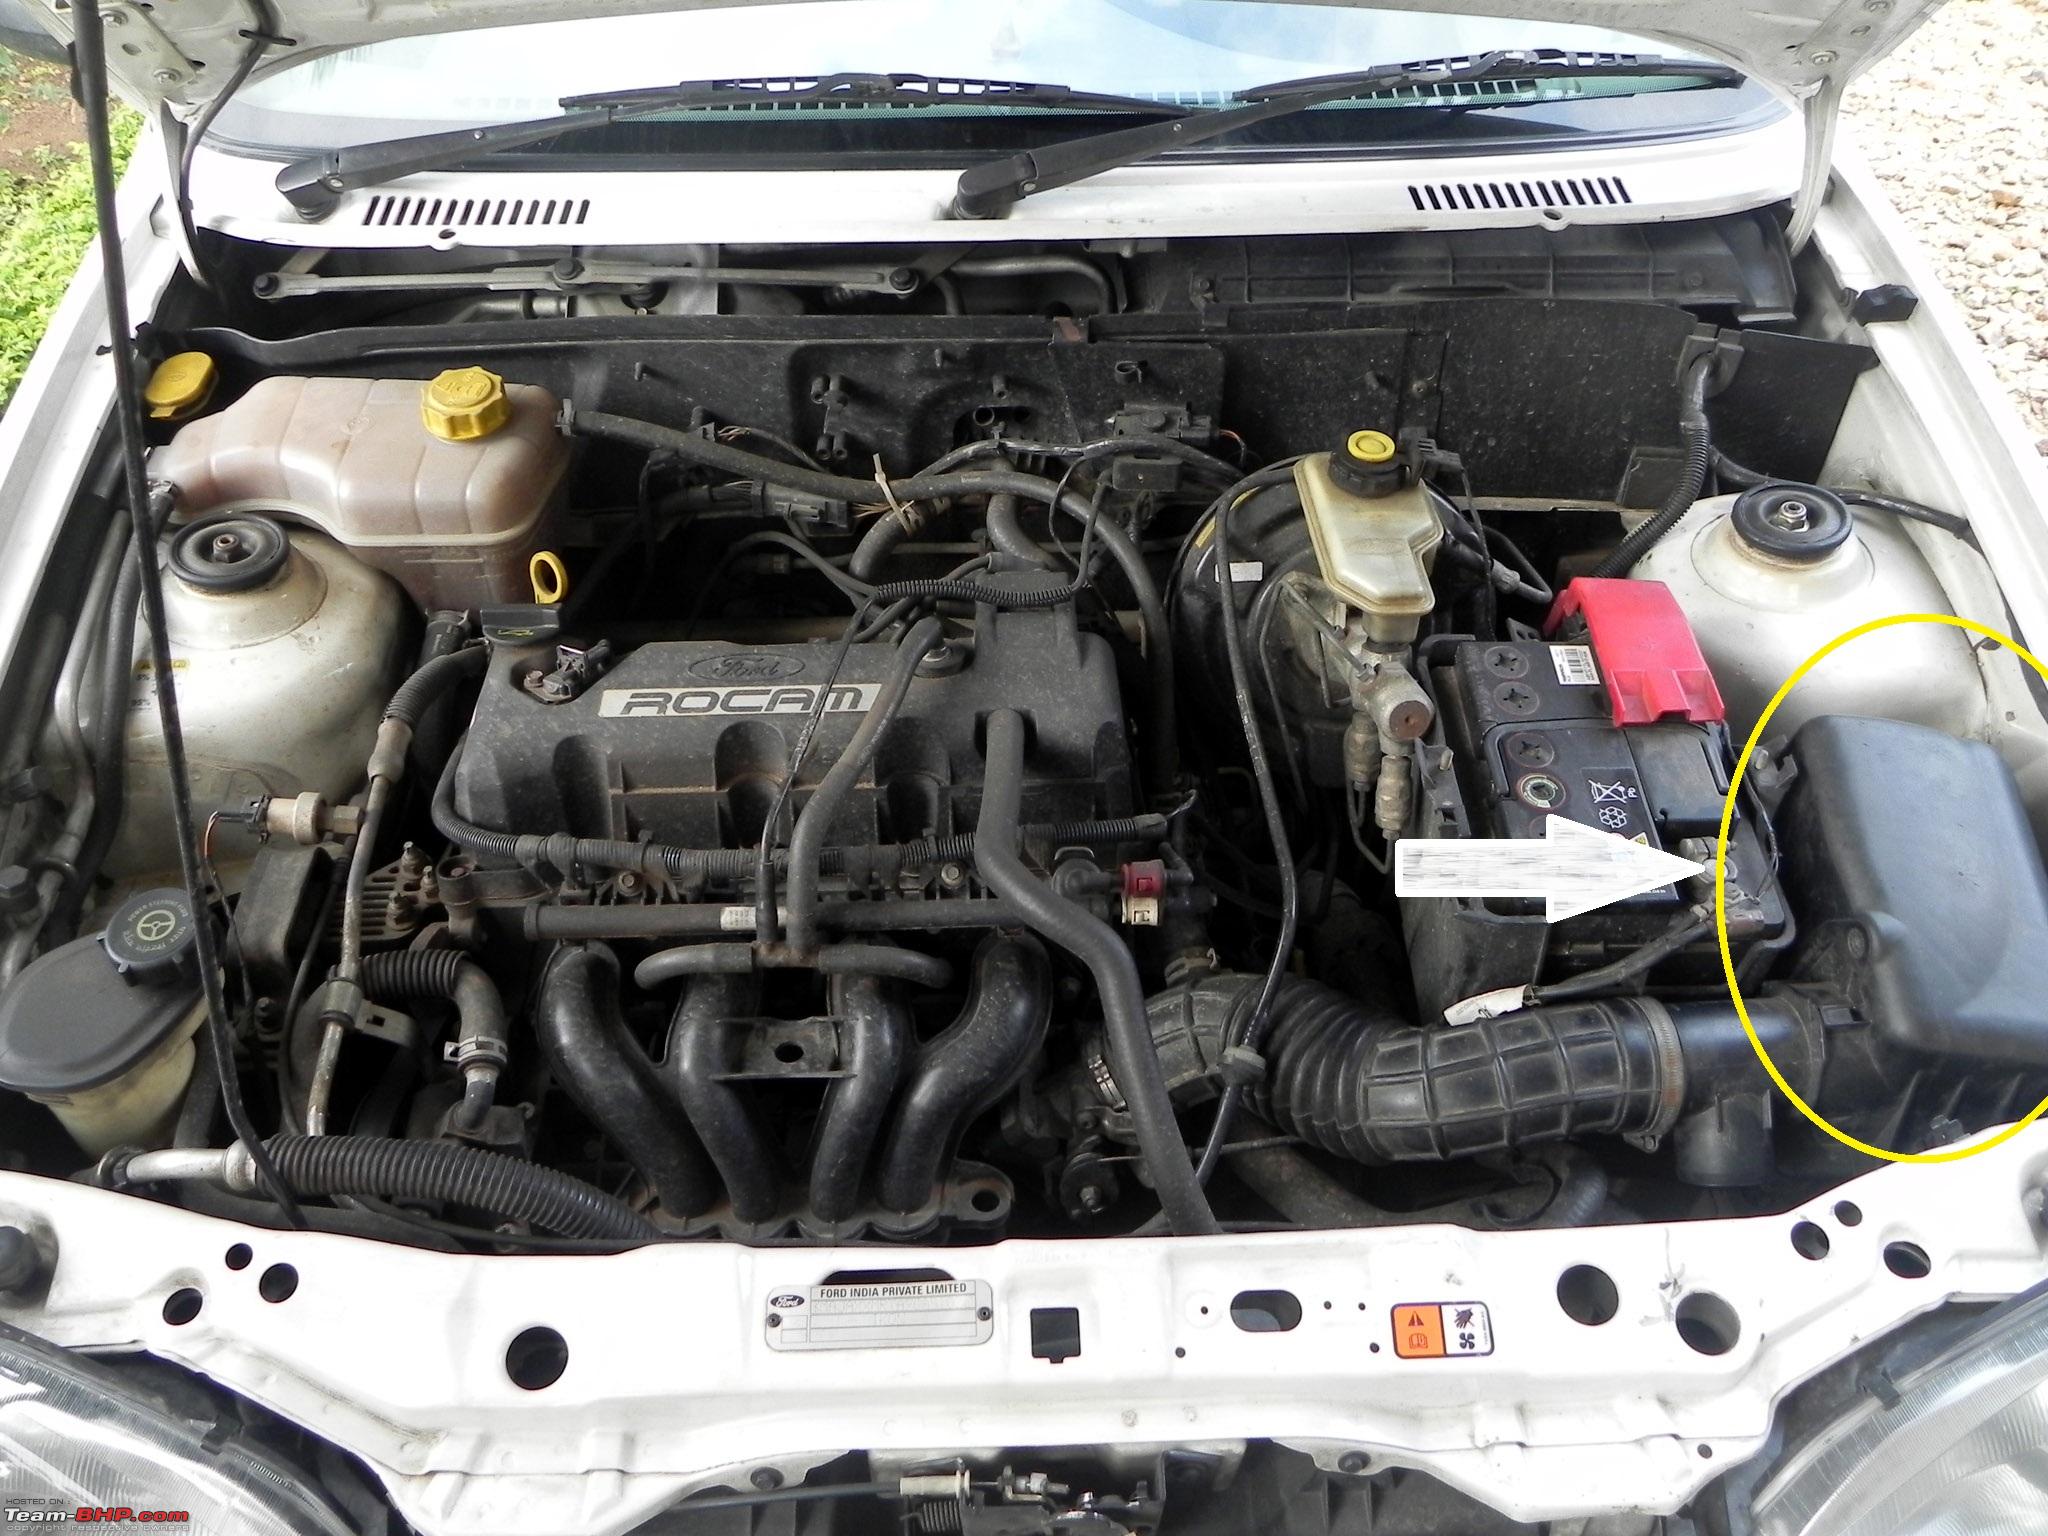
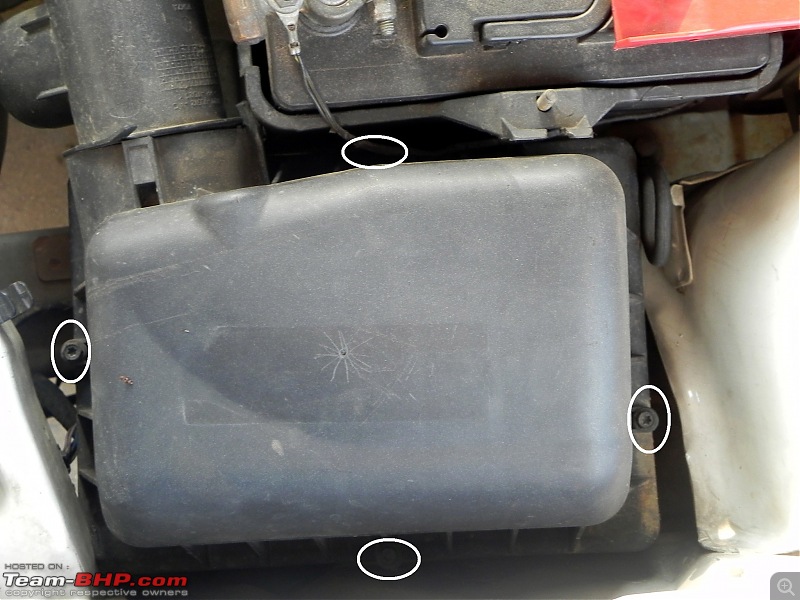
Location of the Filter in the engine bay: 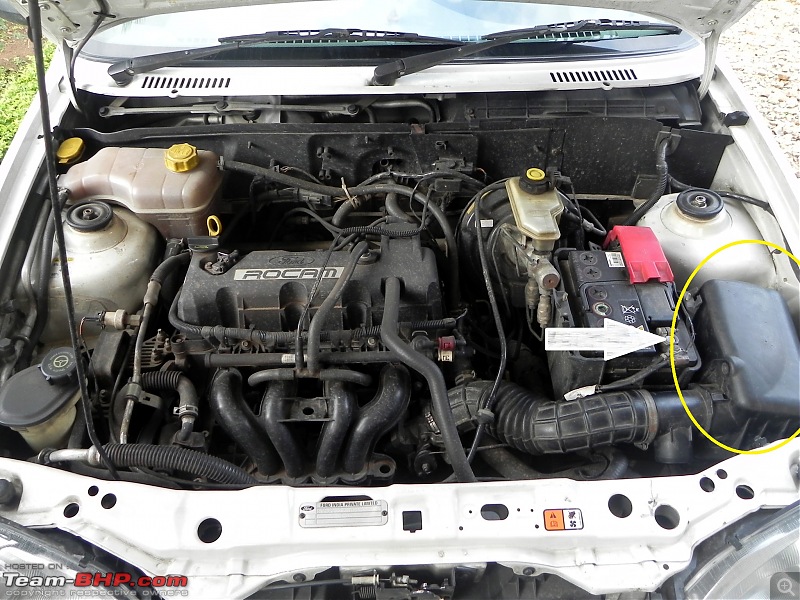 Step 1:
 Remove Screws. As shown in the figure, remove the four screws that hold the filter box in place. As the location of the screws are a bit tricky, a magnetic screw driver might have a slight edge.
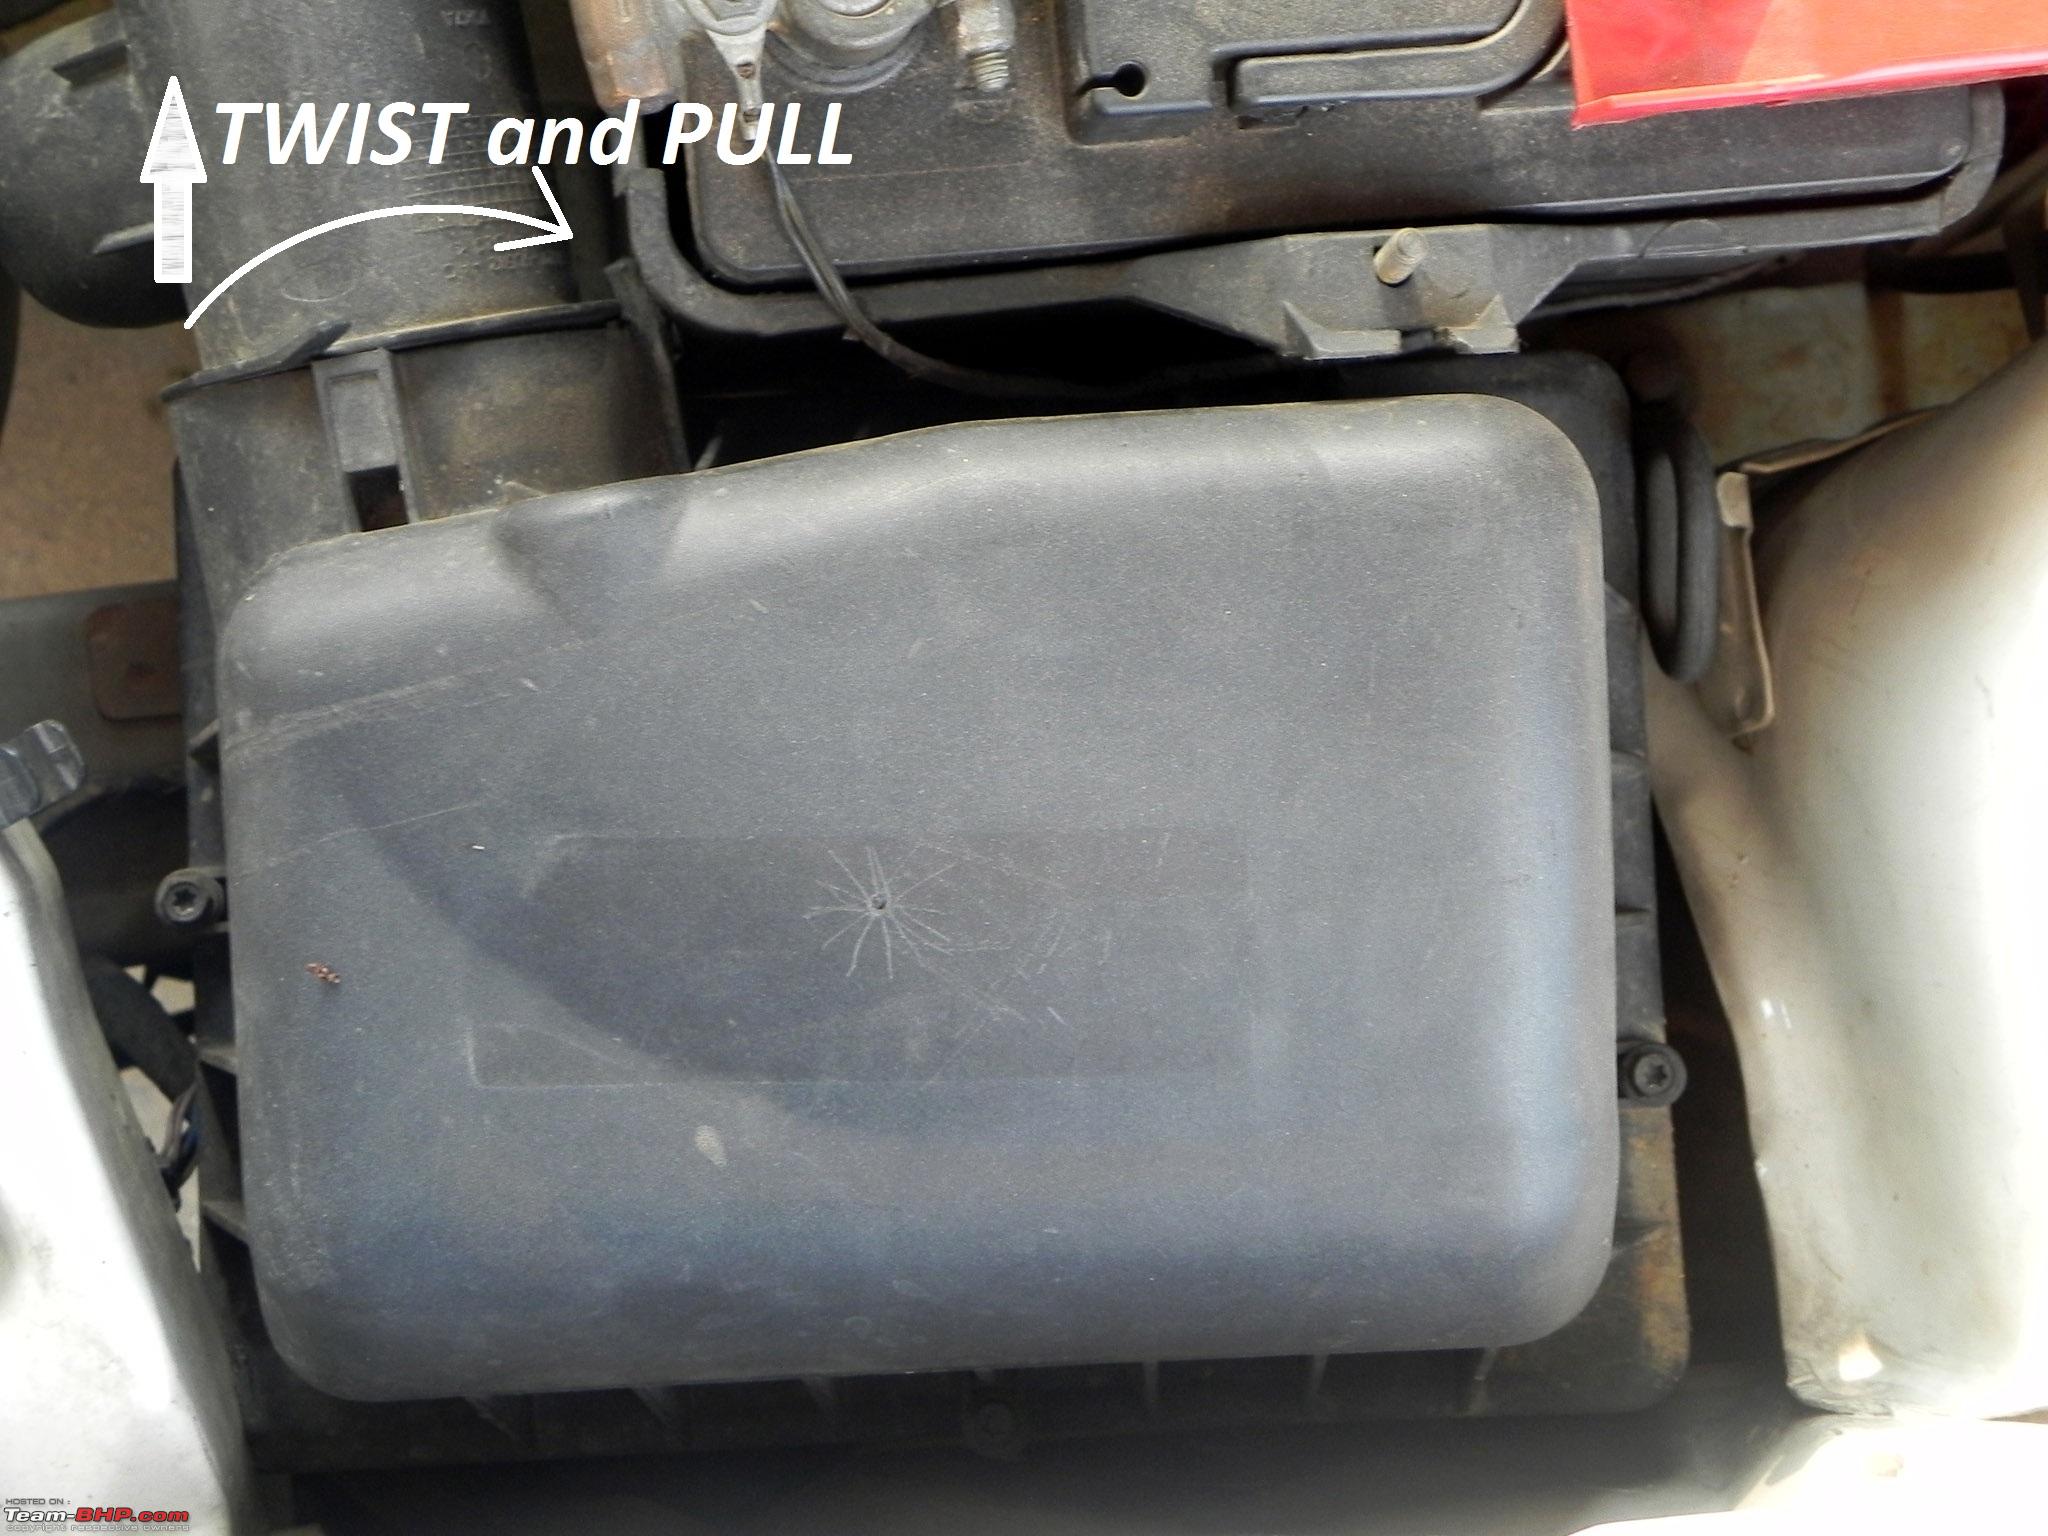
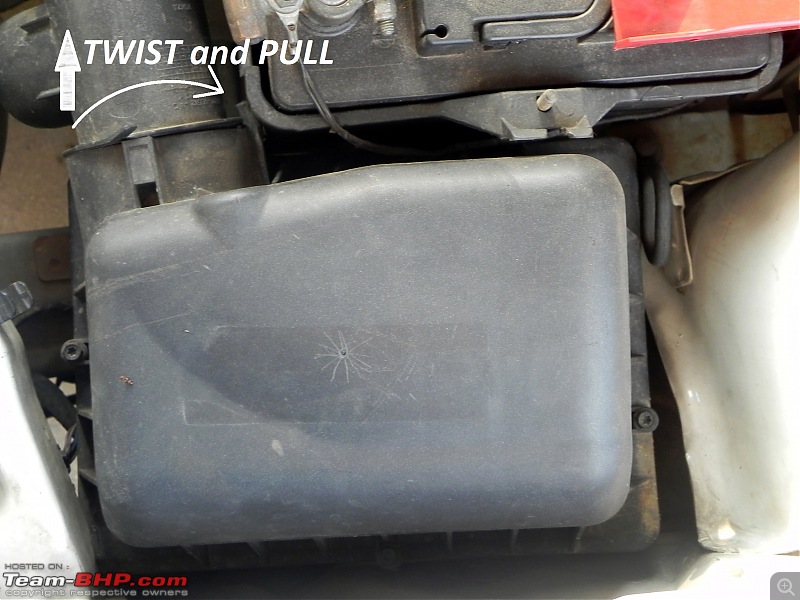
 Step 2:
 Remove the Plumbing. As shown in the figure, you will have to remove the plumbing for easily removing the filter box. You just have to twist it in the direction shown and pull it. Might be a bit tricky for the 1st time, but pretty simple.
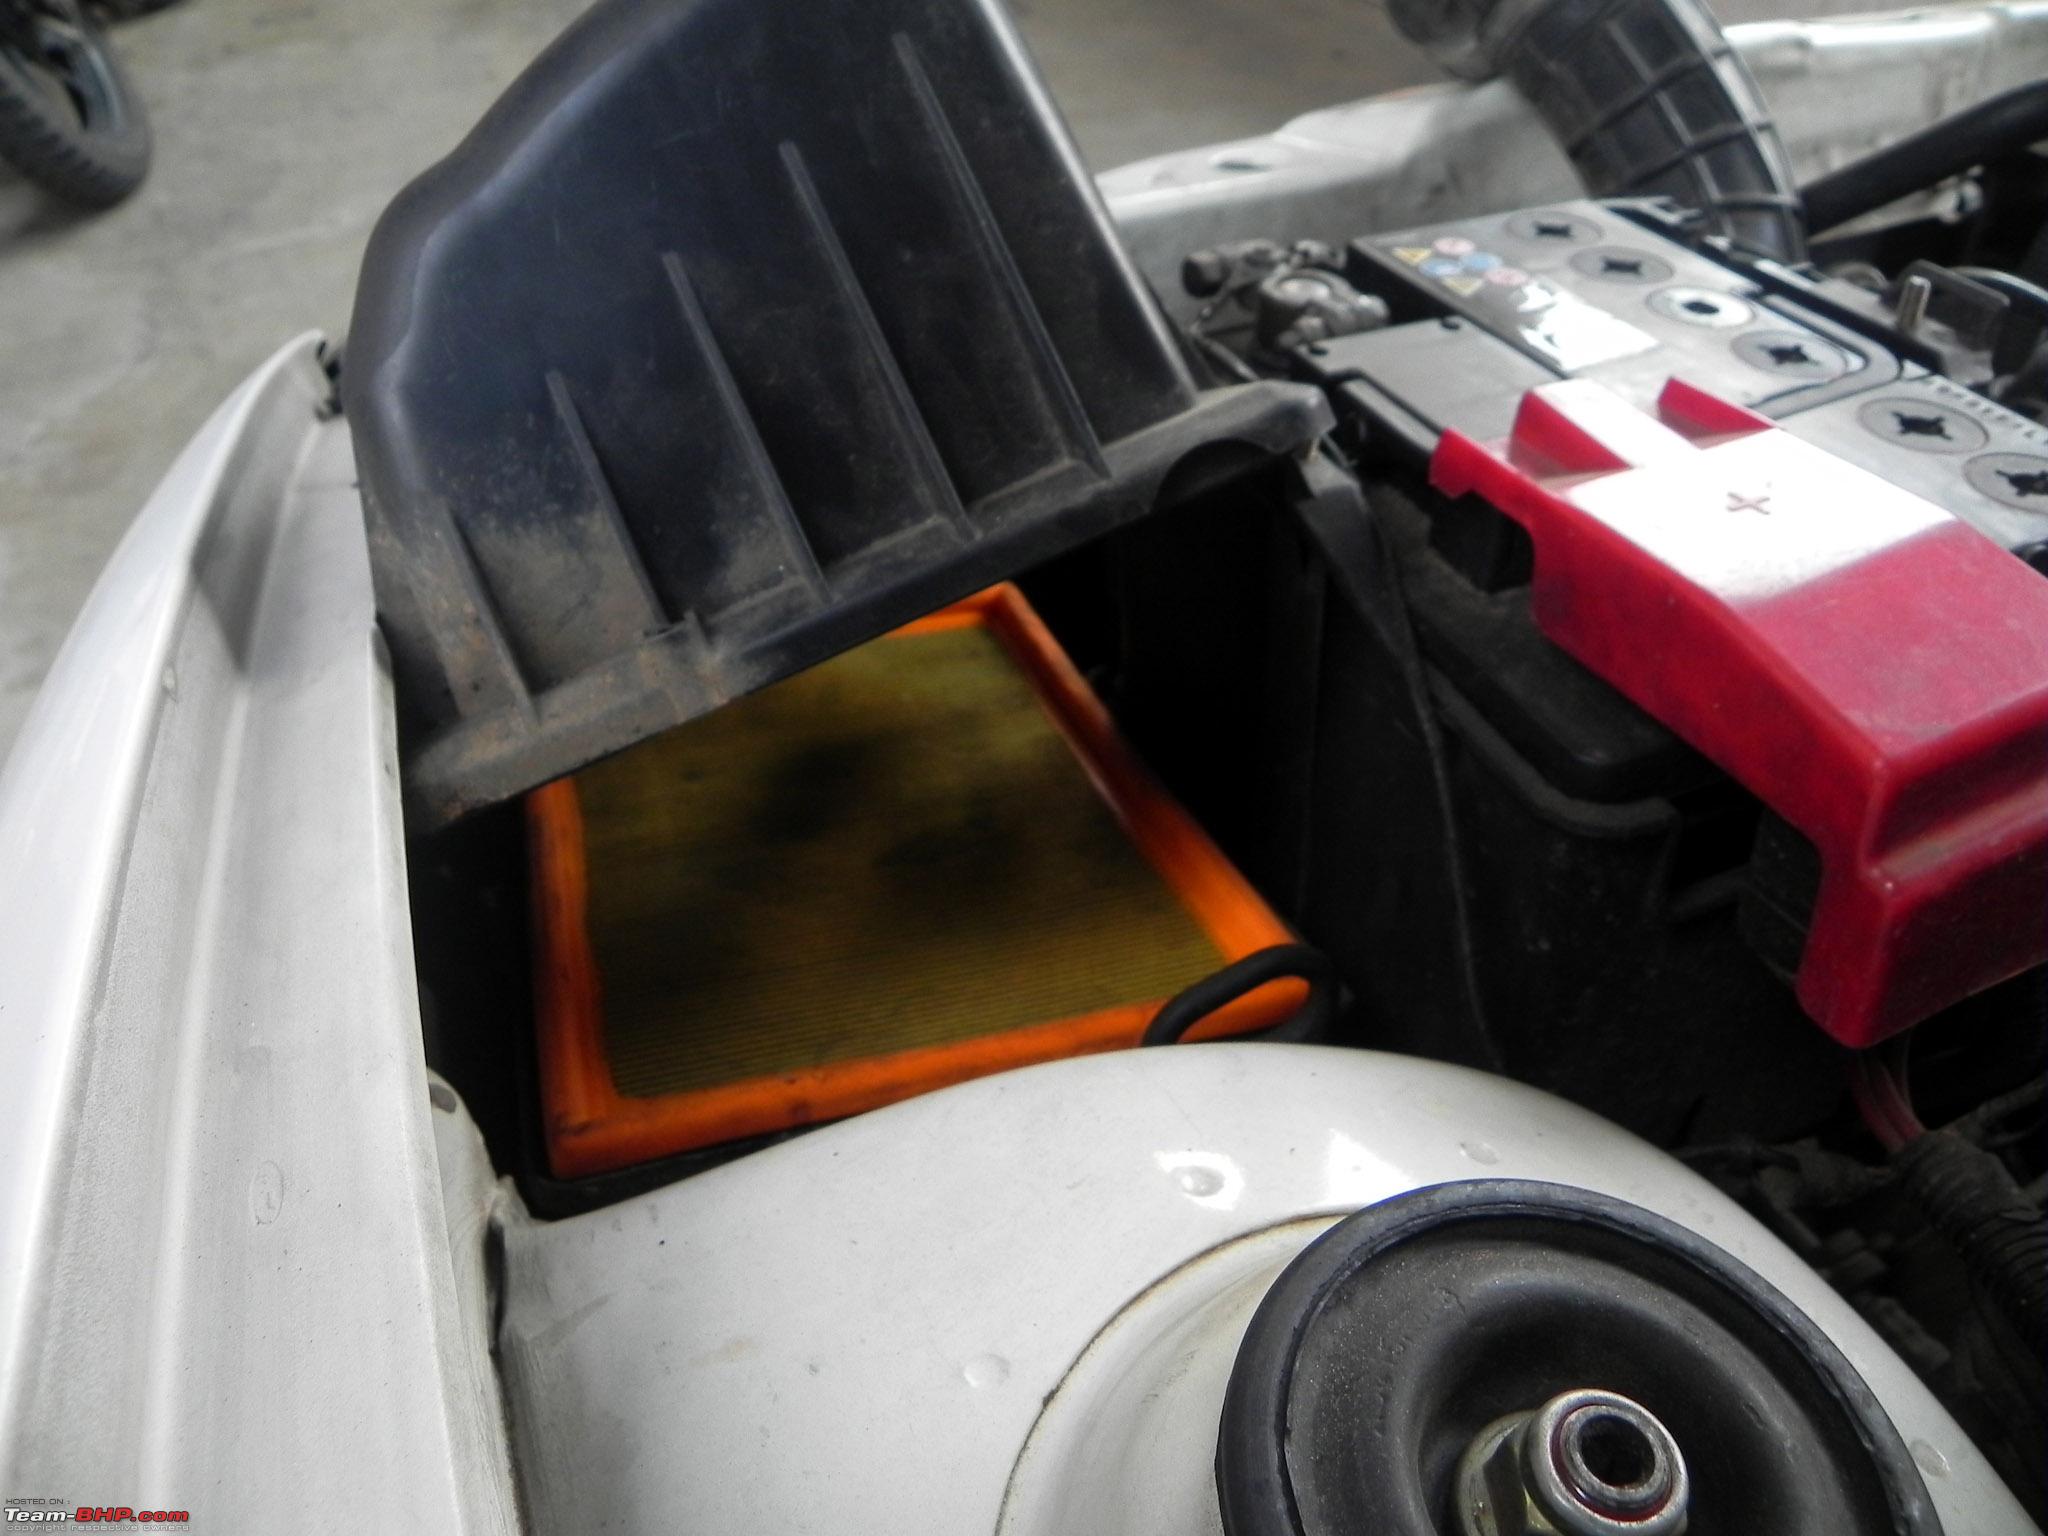
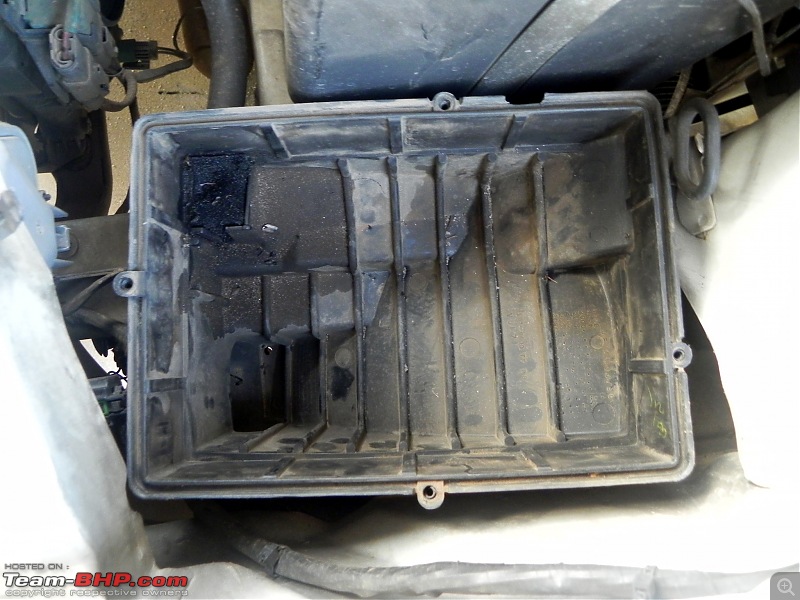
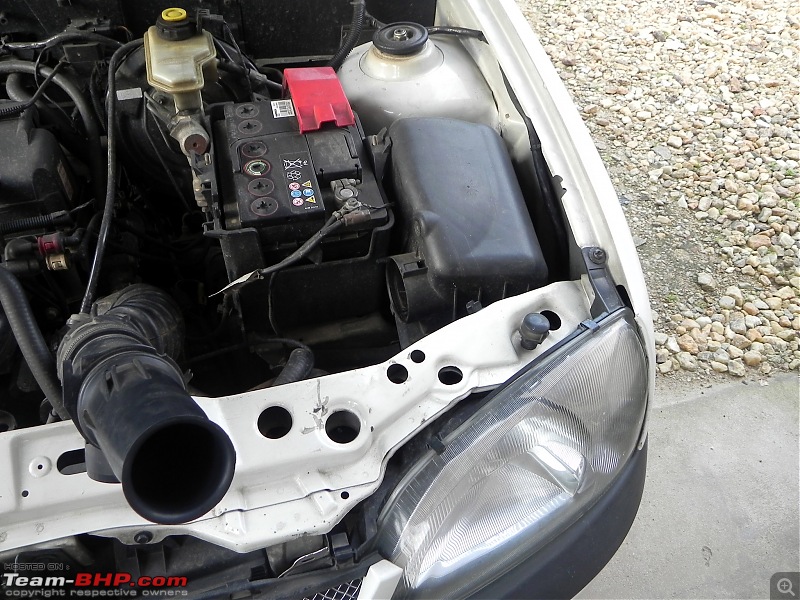 Step 3:
 Removing the box. After which, the Filter box can be removed. Well, getting the filter box out from its seating might need a bit of patience, and is a bit tricky for the first timers. But again, as I say, is pretty simple.
 Step 4:
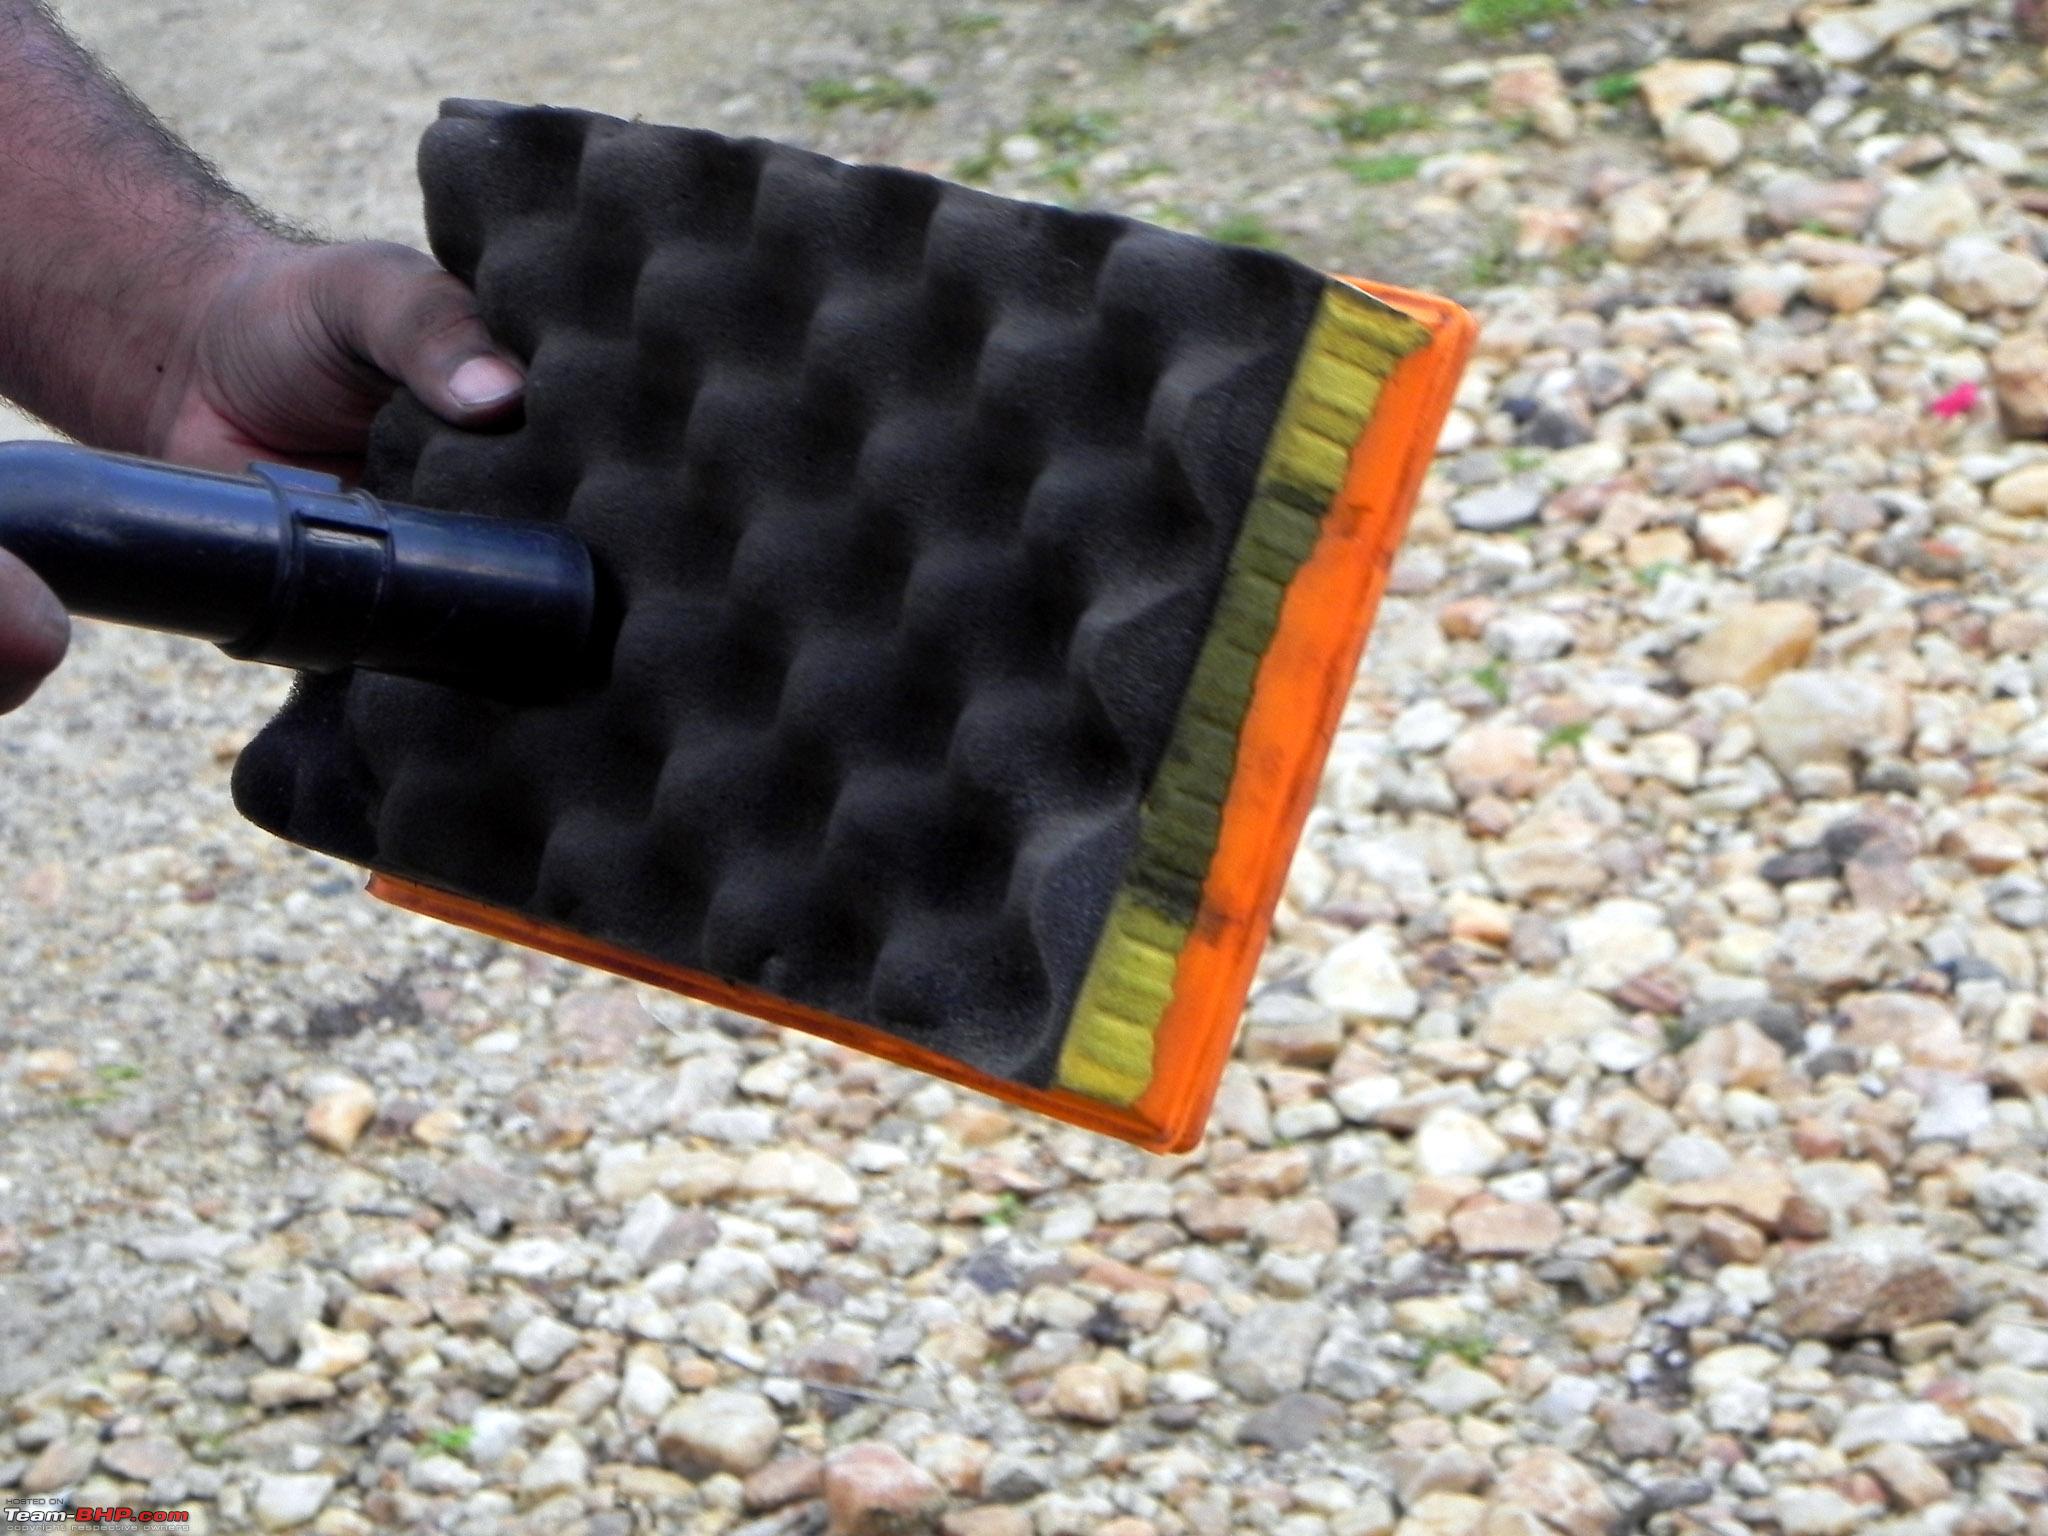
 Removing the filter. After removing the box, the filter can be just taken out of its seating. Nothing holding it back.
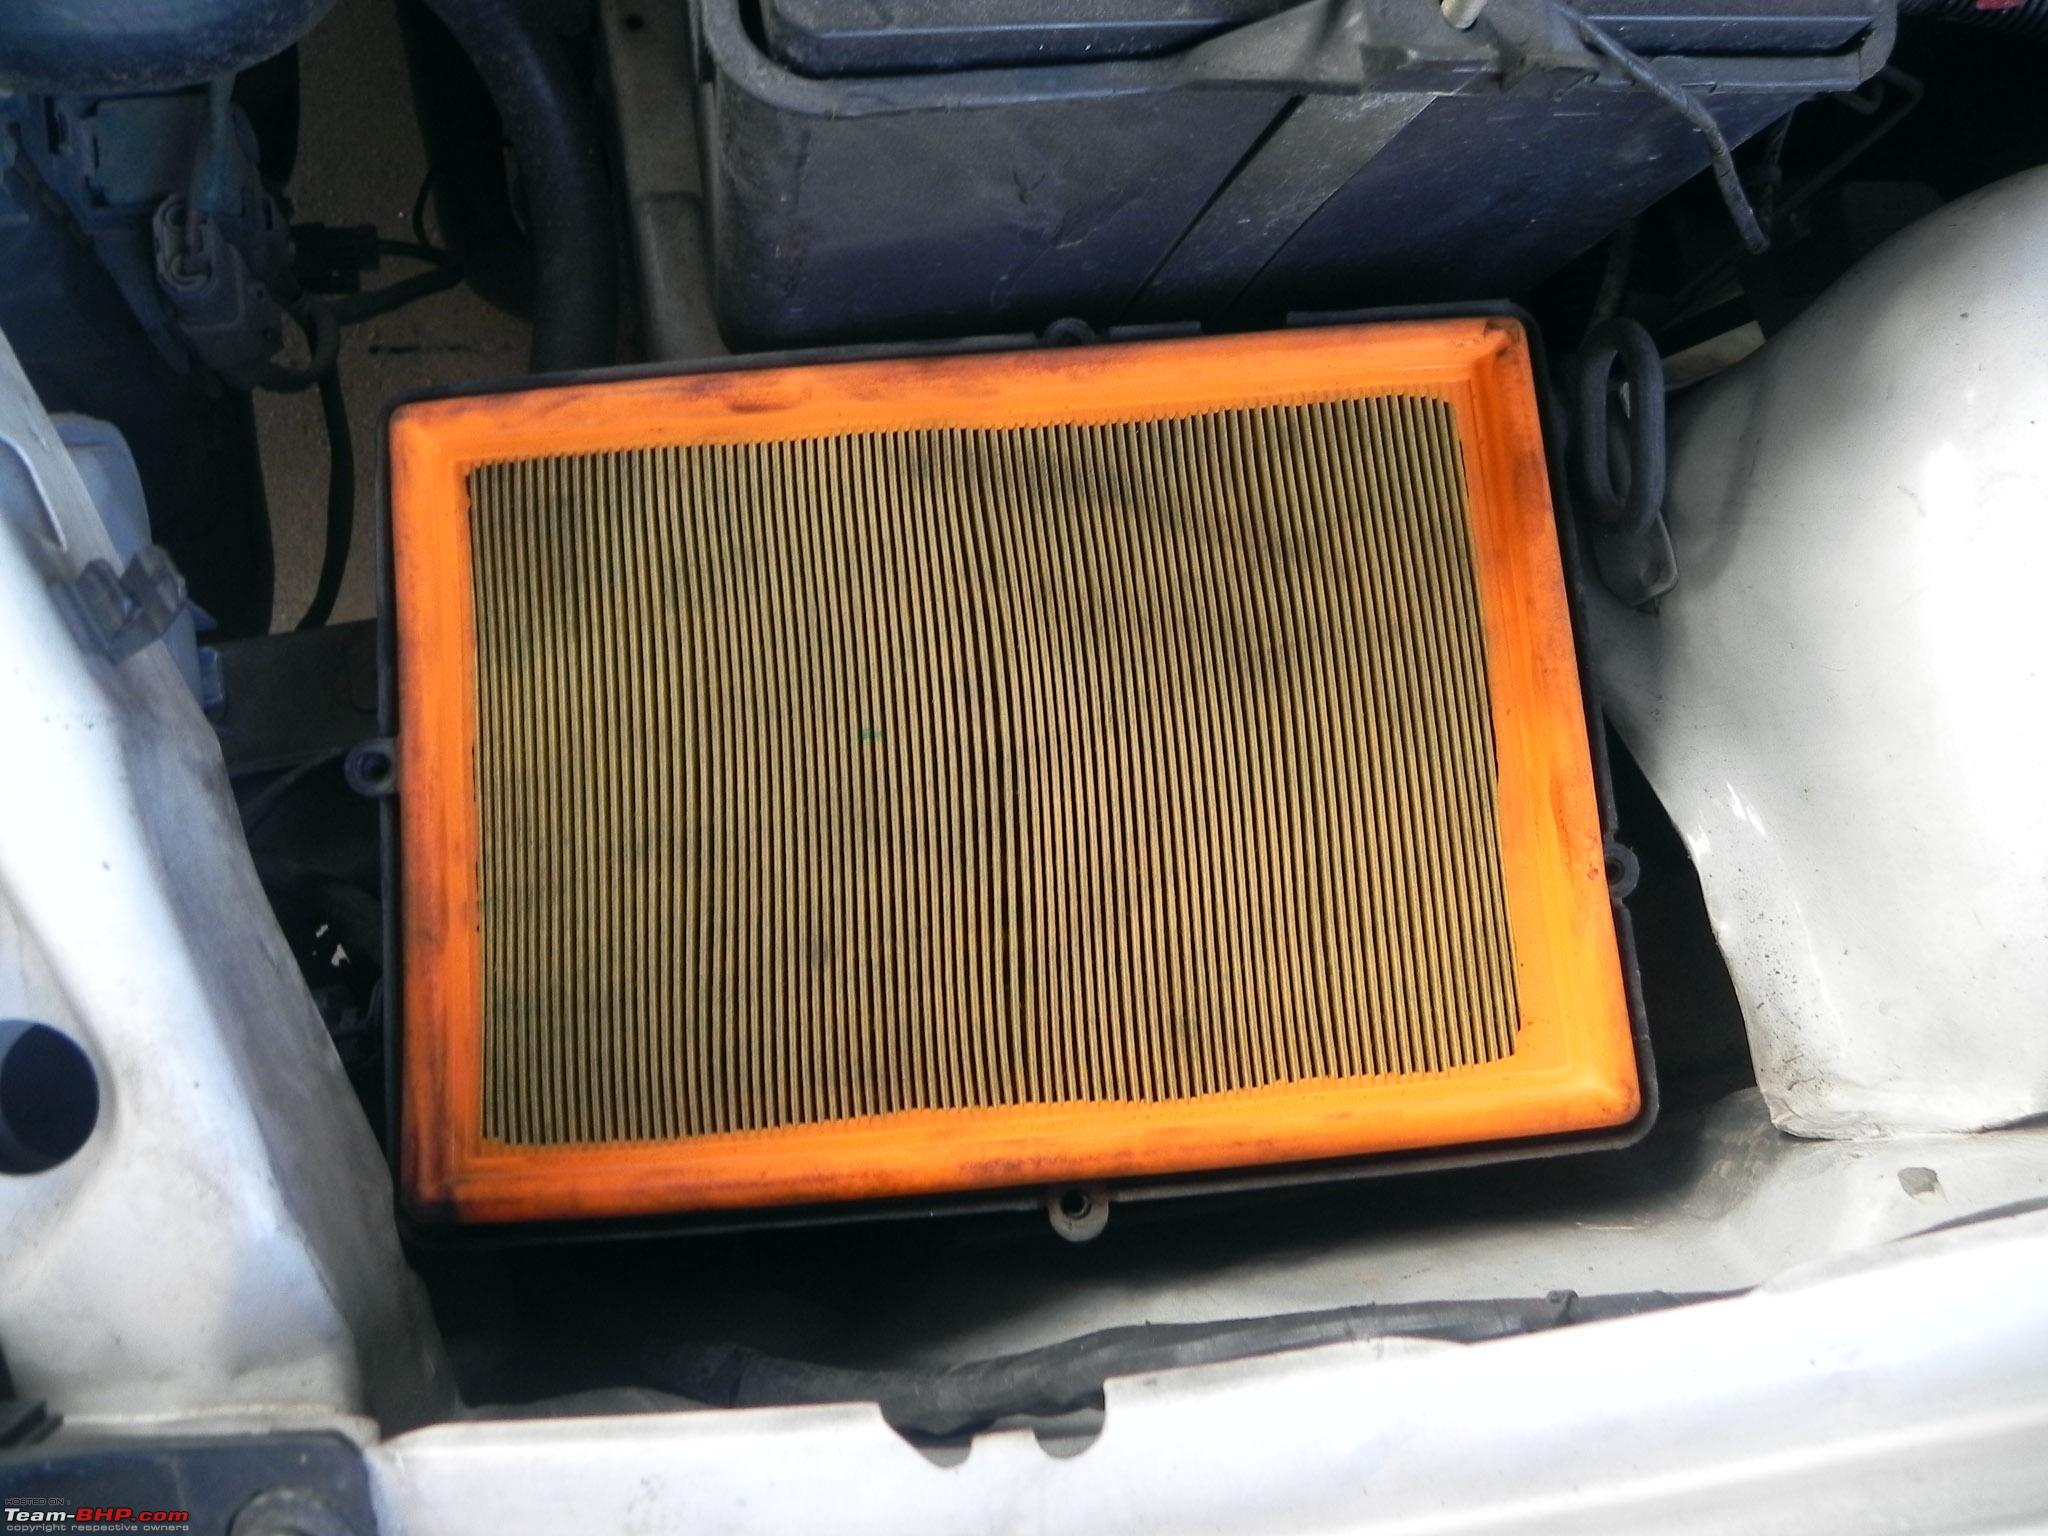
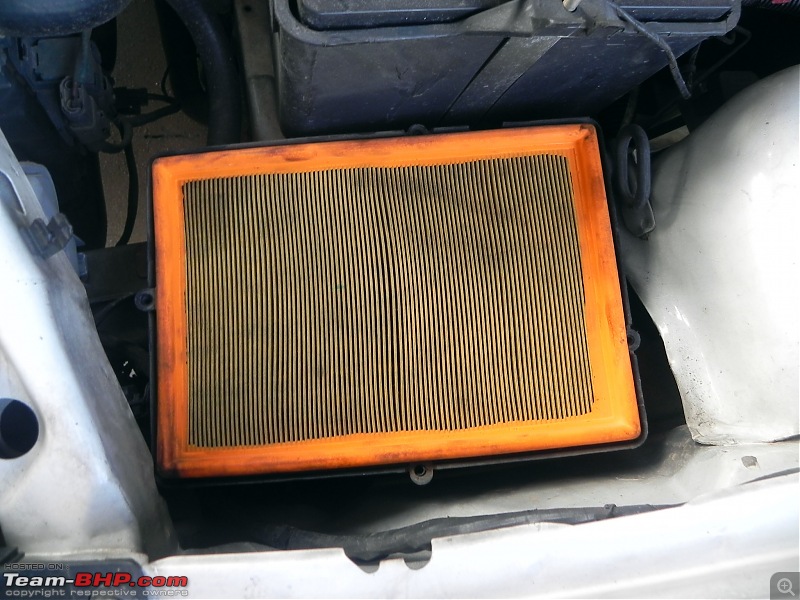 Air Filter Element
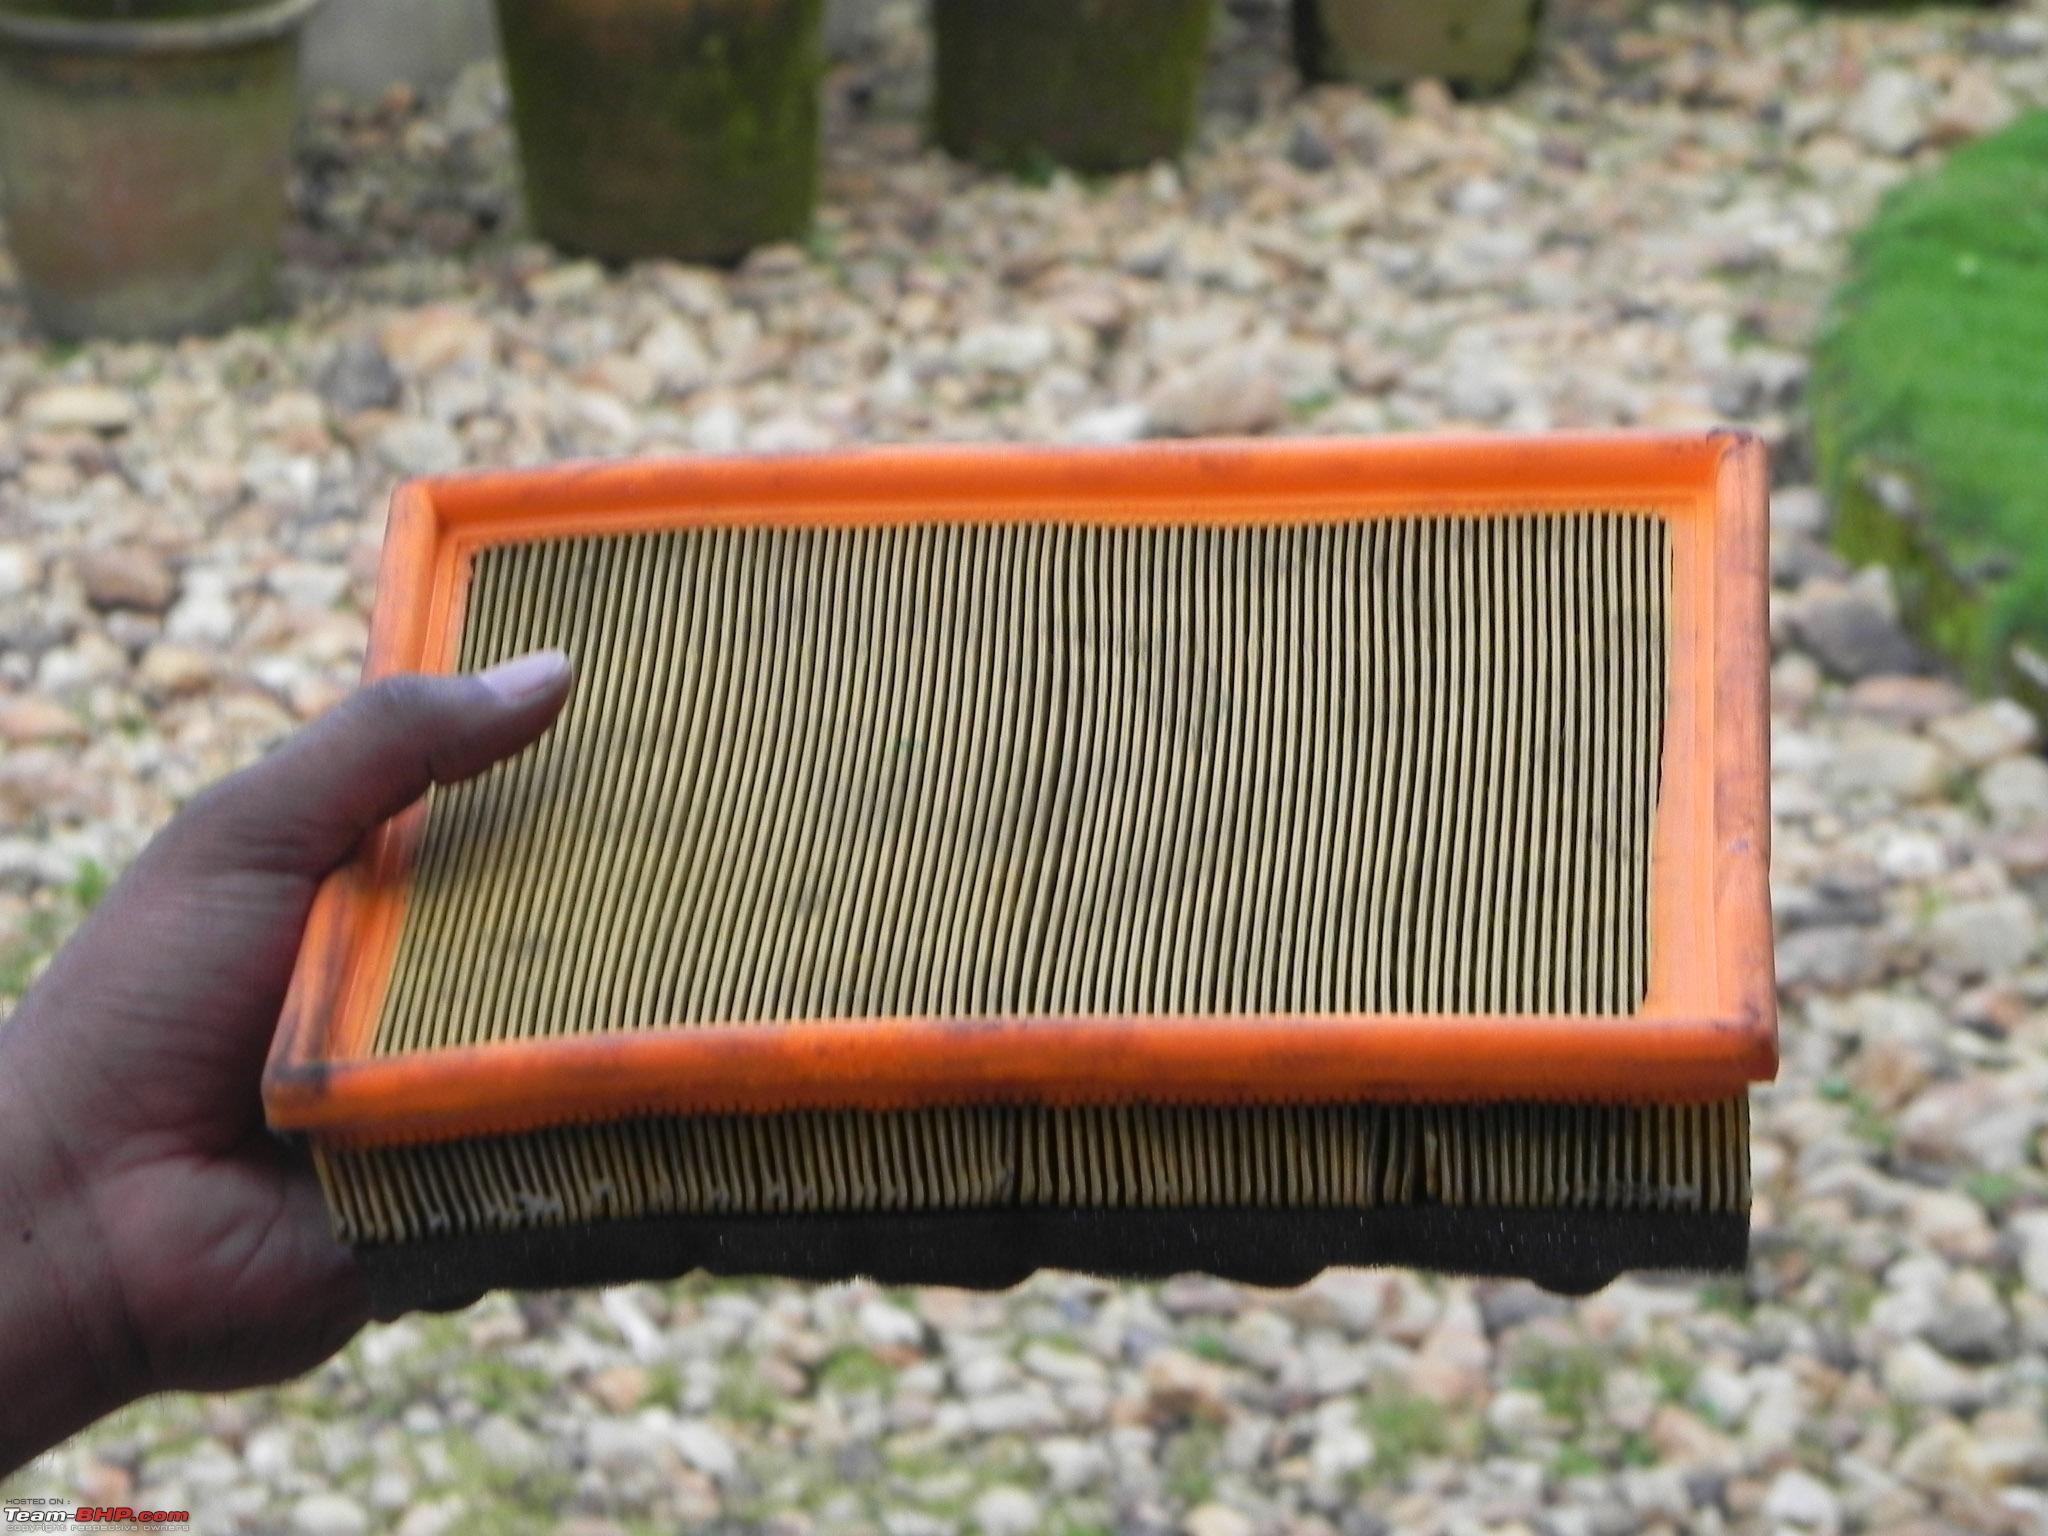
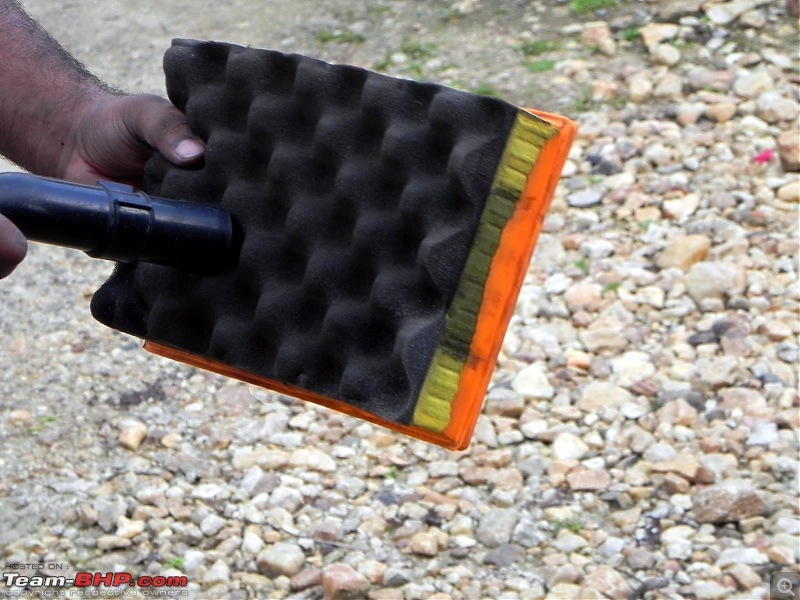
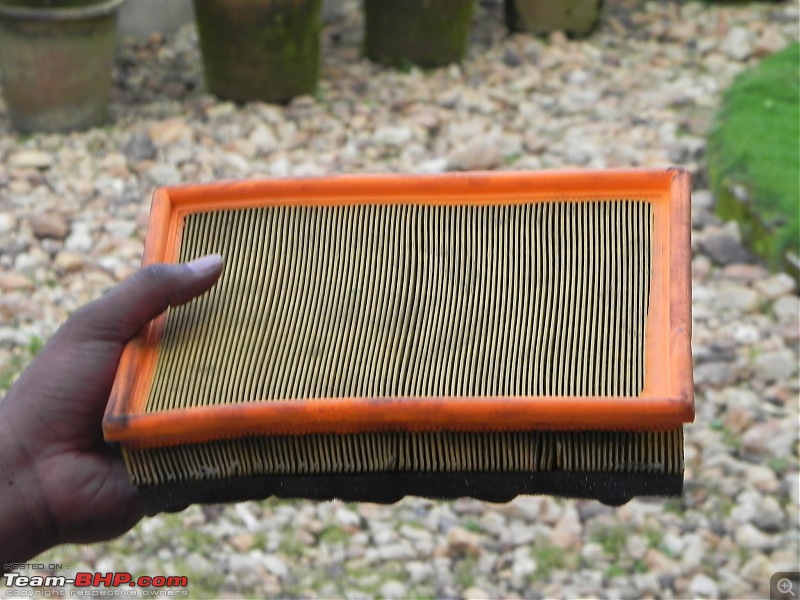 Step 5:
 Clean or Replace Filter. If a replacement filter is not available/feasible, then you can clean the existing filter with compressed air. Again, if compressed air is not accessible (can be accessed in almost all service stations) , then a home vacuum cleaner will do for time being. Suck, blow, or do whatever you can to remove dust from it.
 Step 6:
 Replace the Filter.
 Step 7:
 Replace the box. Now, just like taking out the box out of its seating, this also can be a bit tricky. However, with some patience, you can
seat it right. After which, screw it in. As I mentioned before, this is where a magnetic screw driver might have an edge. Though normal one will also do. I used a normal one.
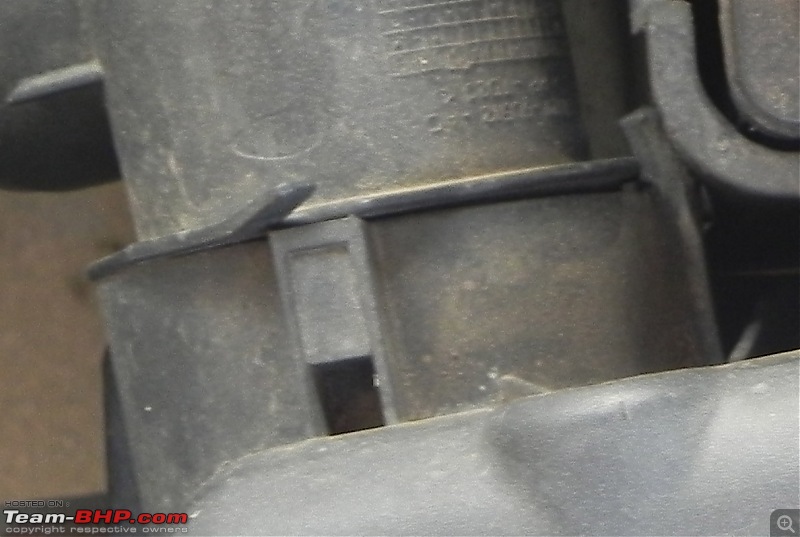
Step 8:***IMPORTANT*** . Now, replace the plumbing back, which is the reverse of Step 2. However, the IMPORTANT thing one should consider is that, while replacing you might get a false feeling that it has fit properly, but, PLEASE ensure that it goes all the way in, just like when you pulled it out. Or else, you will be sucking in outside(impure air) into your engine at high rpms, which is a VERY BAD thing.
This is how, it should fit in.
One of the TBHP members @anilsanil put this video for a Figo on the youtube - I guess this thread is the perfect place.
http://www.youtube.com/watch?v=TBVdF_odrDQ
Dhanush - do you have something equivalent for Ikon?
Quote:
Originally Posted by vina
(Post 2416548)
Dhanush - do you have something equivalent for Ikon?
|
Vina, the Ikon is old school, and doesn't have a digital ODO. So, cannot try out these tricks.
However, IIRC, the in the Civic, we can try out some pretty cool features. ie, make the center console show speed/rpm (don't remember) et al.. Will try to refresh it, and post.
:)
@Dhanush, the newer Ikons do have a Digital ODO. At least the TDCi's do (late 2008 onwards)
Super neat!
First thing I did a week ago was clean the air filter to a squeaky clean whitish-grey.
Thanks much for this, DIYs are a big help. :thumbs up
| All times are GMT +5.5. The time now is 04:15. | |