hi guys,
here are a few pics of the install. my cameras battery conked off in the evening and we were too engrossed and tired to put it on charging. lol.
sacry sculls has already posted about how the install went, ill post the finer point of the install(if there are any, ofcourse) with the pics or otherwise as i upload the pics.
i haven't done any install work leaving aside my cars. so this is my first.
Here are the pics
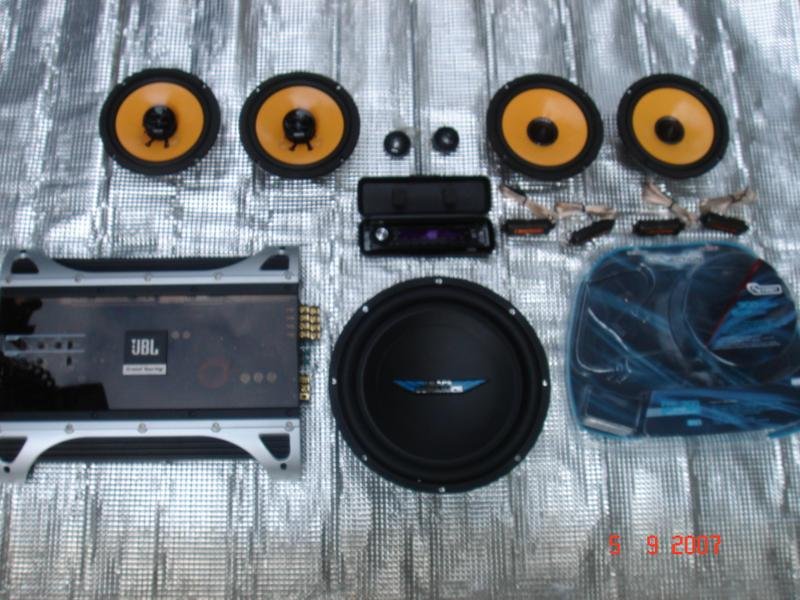
Stuff going in(the wires were taken out of the packing were being installed so thats why the empty container.)
[url=http://imageshack.us]

[/
URL]
The Subwoofer. An ID10 dual 2 ohms.
[url=http://imageshack.us]

[/
URL]
The 2-way co-axials. Hertz Energy Ecx 165.
[url=http://imageshack.us]

[/UR
L]
The 2-way component speakers. Hertz Energy ESK165.
[url=http://imageshack.us]

[/
URL]
The Head Unit. Kenwood with USB.
[url=http://imageshack.us]

[/
URL]
The Amplifier. A JBL 75.4
[url=http://imageshack.us]

[/
URL]
Door panels and lots of other panels stripped and a little damping done.
[url=http://imageshack.us]

[/
URL]
Damping Underway.
[url=http://imageshack.us]

[/
URL]
More damping
[url=http://imageshack.us]

[/
URL]
Centre console stripped, wiring done.
[url=http://imageshack.us]

[/
URL]
Damping on all doors done.
[url=http://imageshack.us]

[/
URL]
Space Rings installed.
[url=http://imageshack.us]

[/U
RL]
Thats me, test fitting the rear co-axials
[url=http://imageshack.us]

[/
URL]
Done
[url=http://imageshack.us]

[/
URL]
Mr. Scary Sculls A.K.A. Rajat Installing the power cable and fuse block.
[url=http://imageshack.us]

[/
URL]
Me again, Inspecting and finishing the damping and having a little laugh. had to check it because i could see loose edges.
[url=http://imageshack.us]

[/
URL]
Me again, smoking and the damping on door inspected, co-ax installed, ready to fix the panels.

Me terminating subs wire with ss. Note: cigarette on that black railing thingy. i smoke too much.

Me again wiring the sub in series.

Me and Gill mounting the sub in the enclosure. This was the most difficult part because of the screw driver. it wasn't of proper size or had wared out. i would have had a heart attack if any thing happened to that beautiful sub. Note: the cigarrete on the black thingy above my lower arm. I need to quit, thats too much.

So these are the pics from my camera, a sont T-7 so please forgive me for the quality as it is a point and shoot cam.
The install wasn't easy at all. we had to do alot of thinking. there were some errors like the spacers were installed with the screws that were just below the drivers so had to counter sink (or what ever you call it) the screws so that the drivers fit perfectly flat. and this took quite some time as we had to rectify all of them.
The other persons heping us were least helpful. they were increasing the work rather than helping us. it was really frustrating.
The Sq was amazing. i have never seen better integration of the sub with the front stage. MIND BLOWING. the music was crystal clear with perfect highs and mids and lows as well.
right now, because of only 2 preouts on the HU, there was no fader control for the speakers. the fronts are on the amp, rear fills on the HU and the sub Bridged on the amp getting some 280w.
Got to go,
rest of the details later sorry.
cheers
clip


 ) of dieting.


 [/
[/ [/
[/ [/UR
[/UR [/
[/ [/
[/ [/
[/ [/
[/ [/
[/ [/
[/ [/
[/ [/
[/ [/U
[/U [/
[/ [/
[/ [/
[/ [/
[/


