OEM to Aftermarket Stereo: RETAINING ALL FACTORY FEATURES - DO-IT-YOURSELF (DIY)
Introduction
My Verna has just completed 4 years (with around 1.52L kms on the ODO), she’s old but she is still in an excellent condition and munches miles effortlessly. With no imminent plans of a replacement around the corner, techwise, it was starting to feel old.
Since I plan to keep her for another couple of years, I realised newer cars bring newer tech, it just isn’t possible to keep buying cars every year for the new tech they offer. I have been giving my baby little upgrades every year.
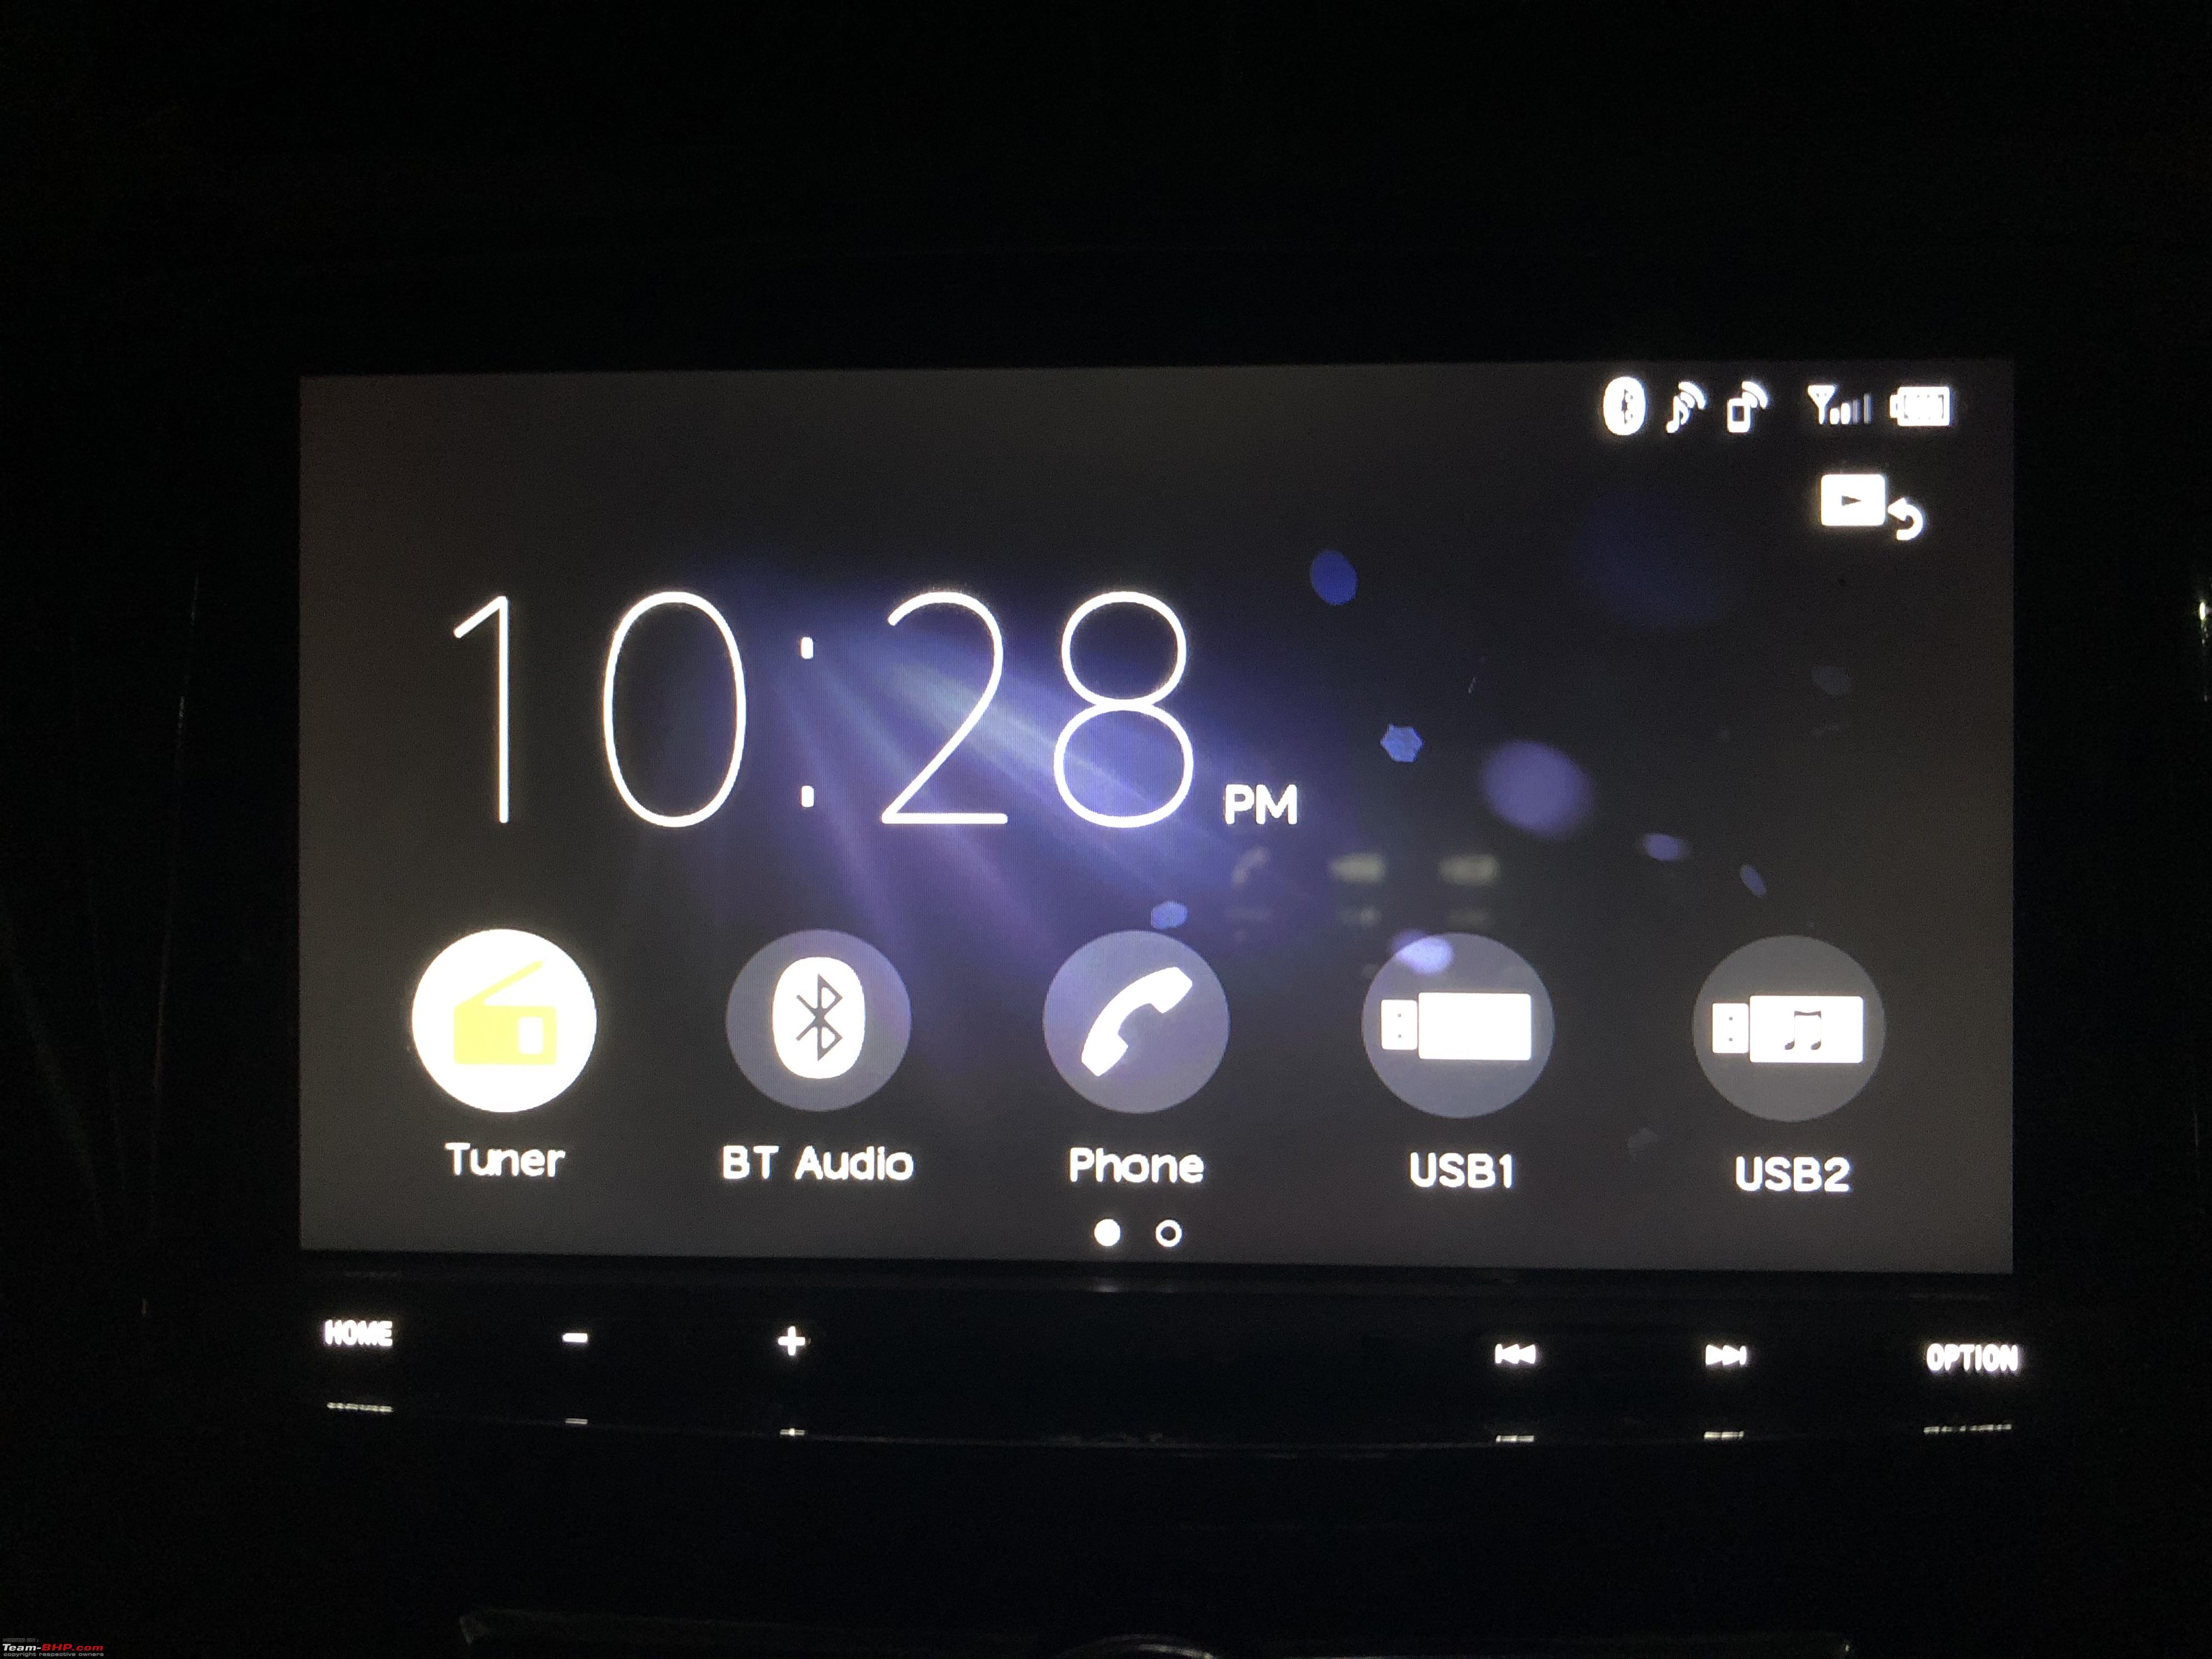
This year's upgrade I thought to myself, let's keep it up with the times, hence the decision to get an audio headunit upgrade. My main requirements (going with the recent trend of car audio) :-
- 7 inch screen (there is no place for a bigger screen)
- Responsive touchscreen and good display visible in sunlight.
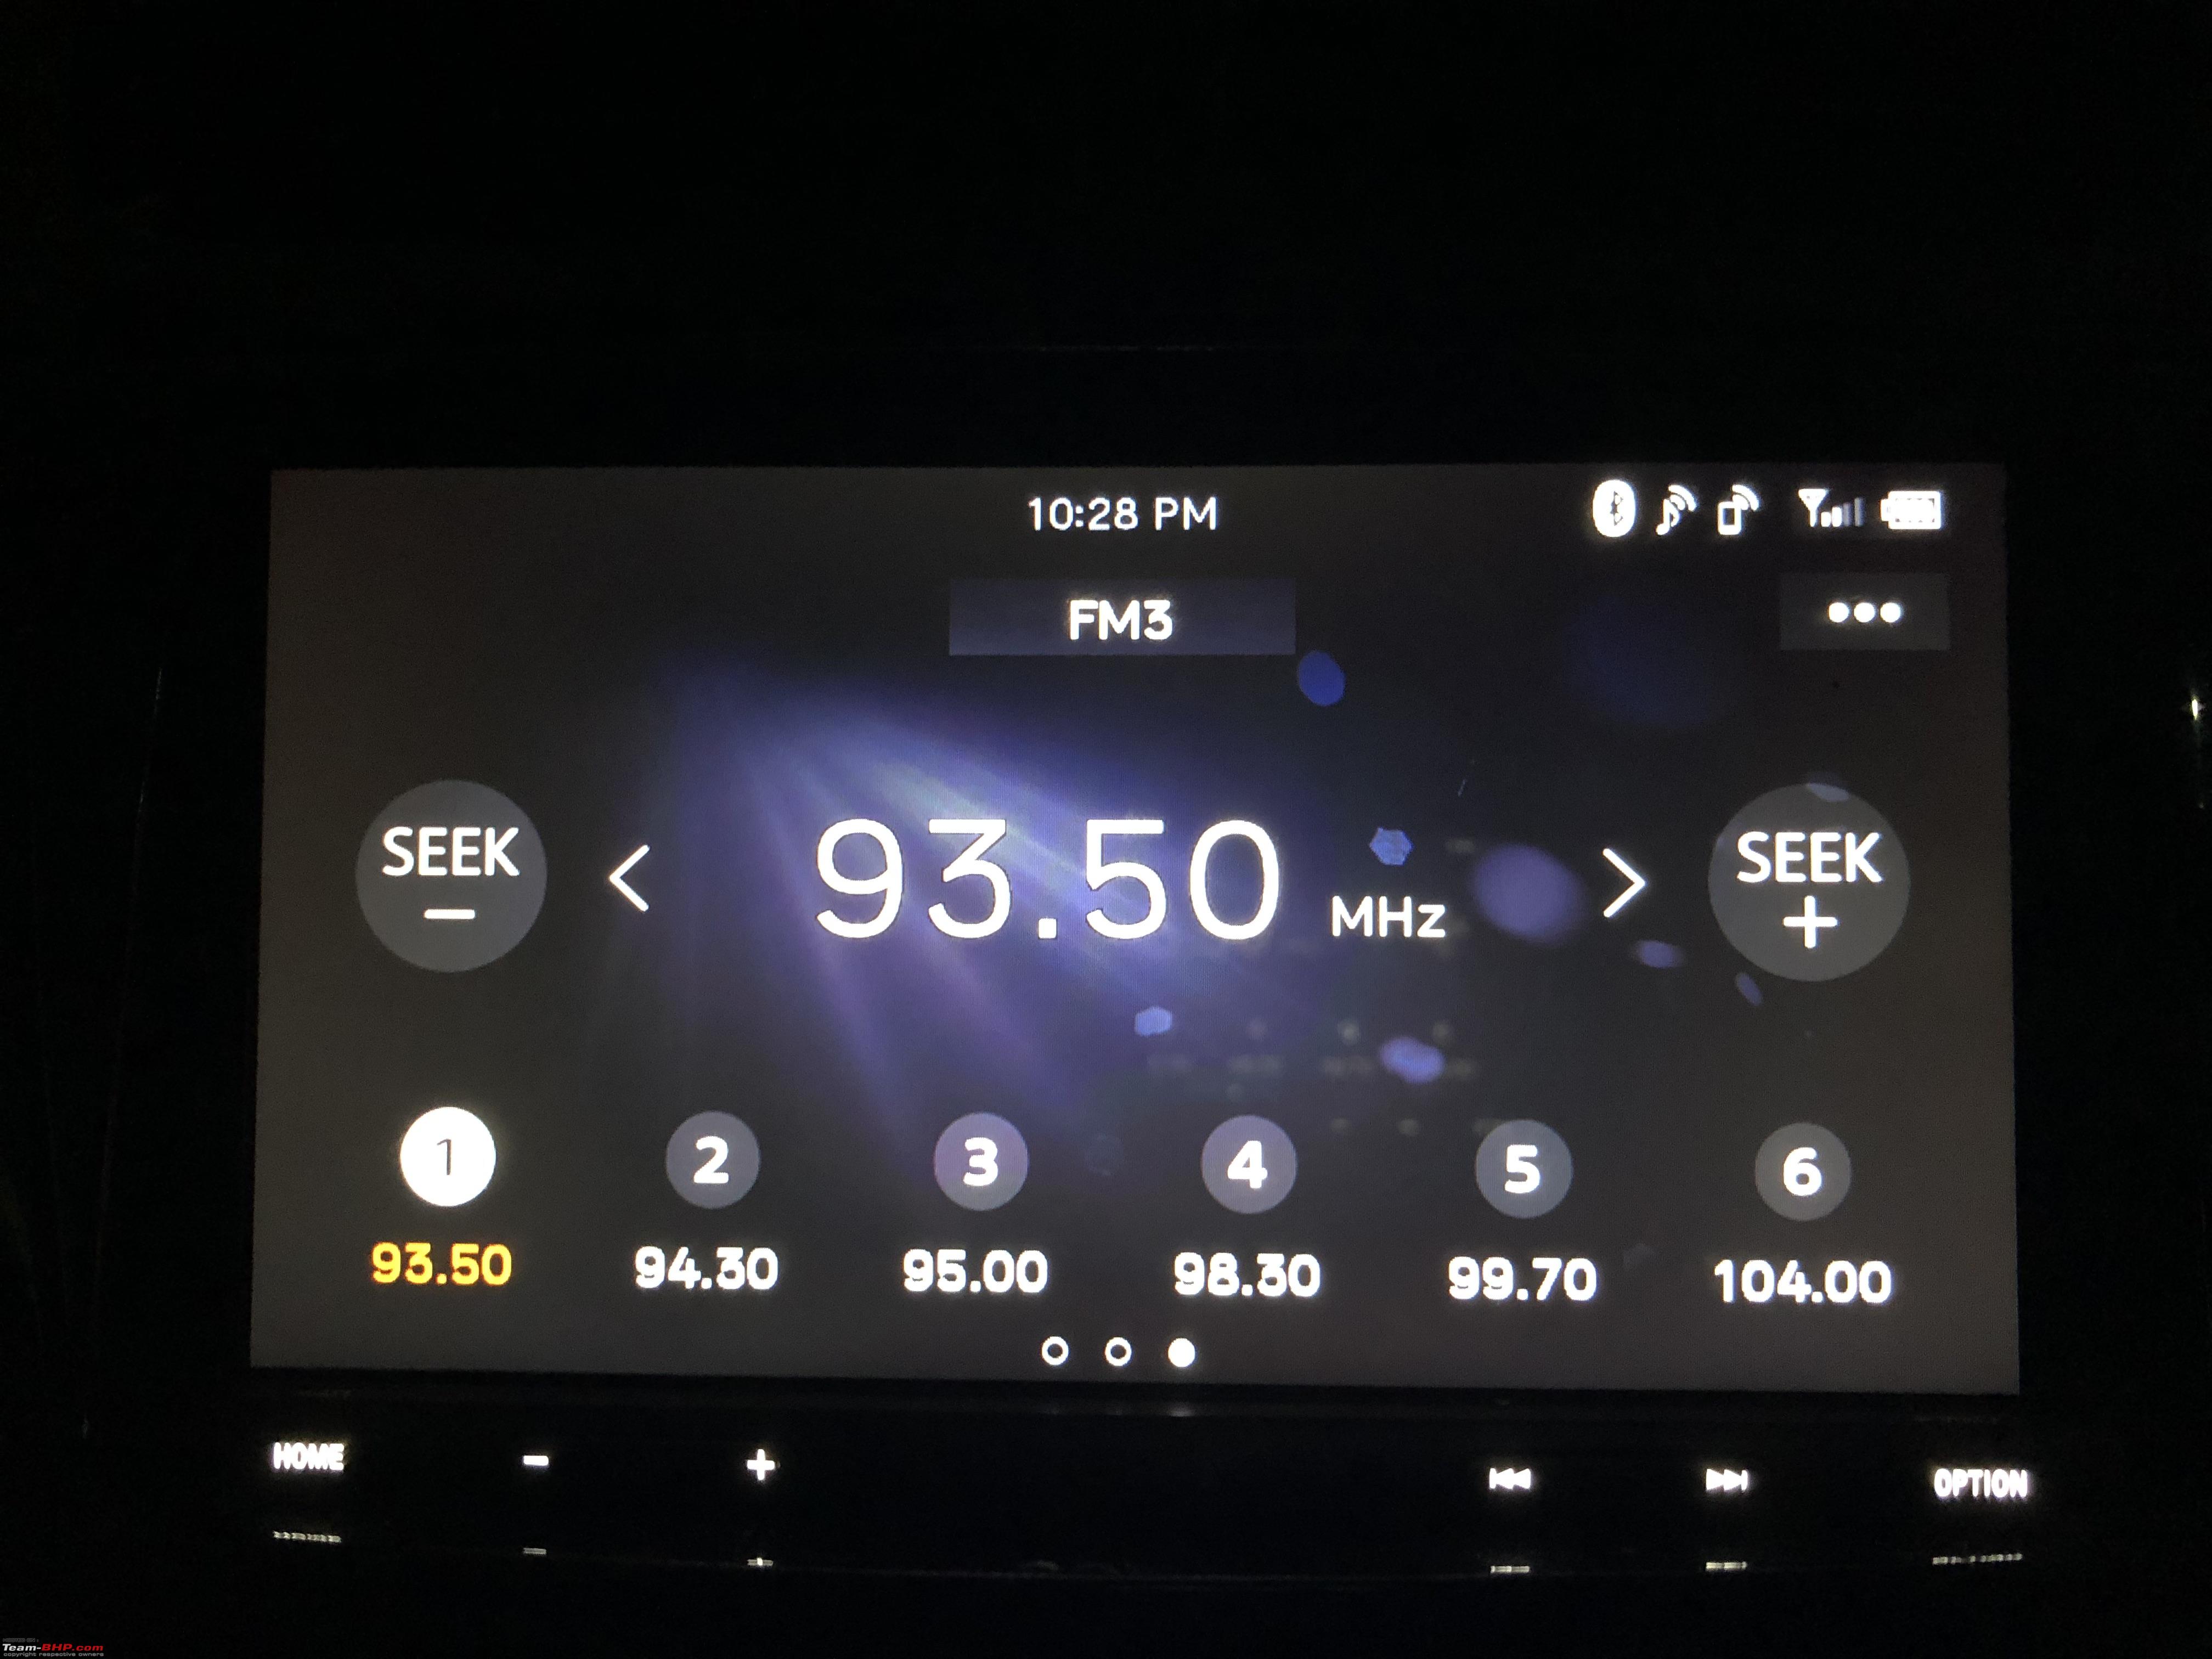
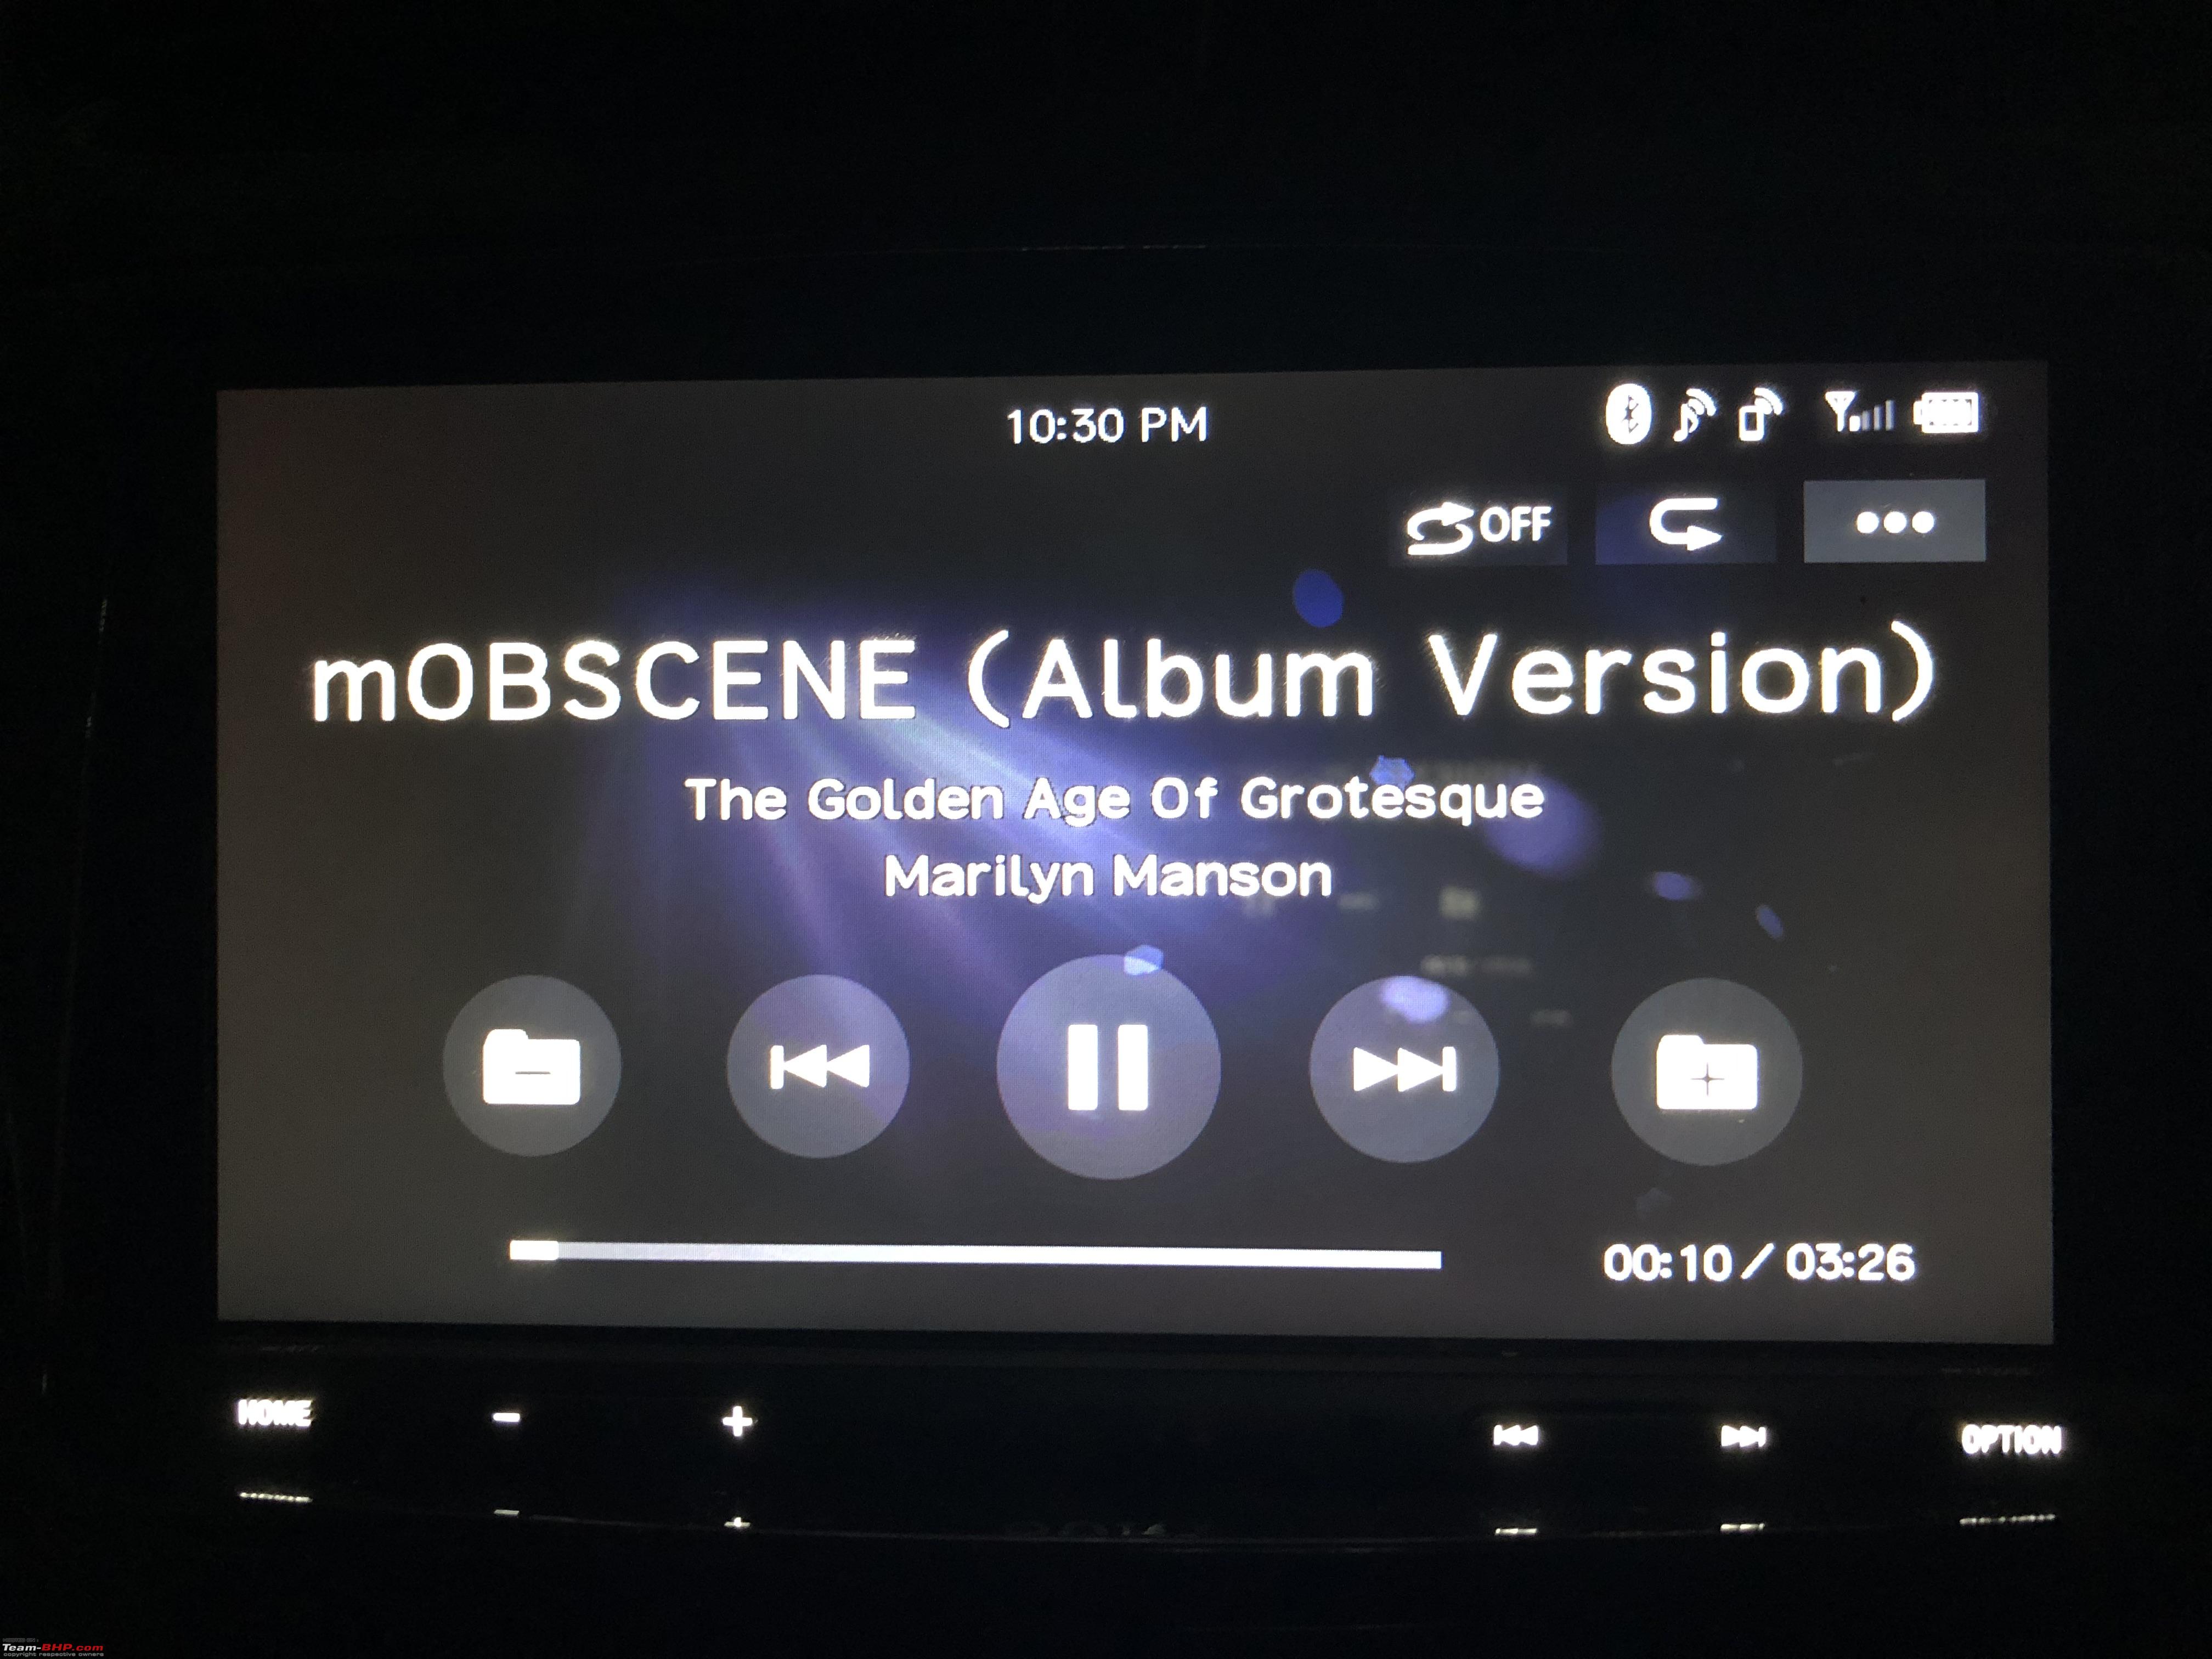
- USB Music
- Apple Carplay (nobody at home uses Android phones, so I’m ok if that’s missing)
- Reverse Feed (my car comes with a factory backup camera, so I need the HU to display the video)
- Steering controls integration
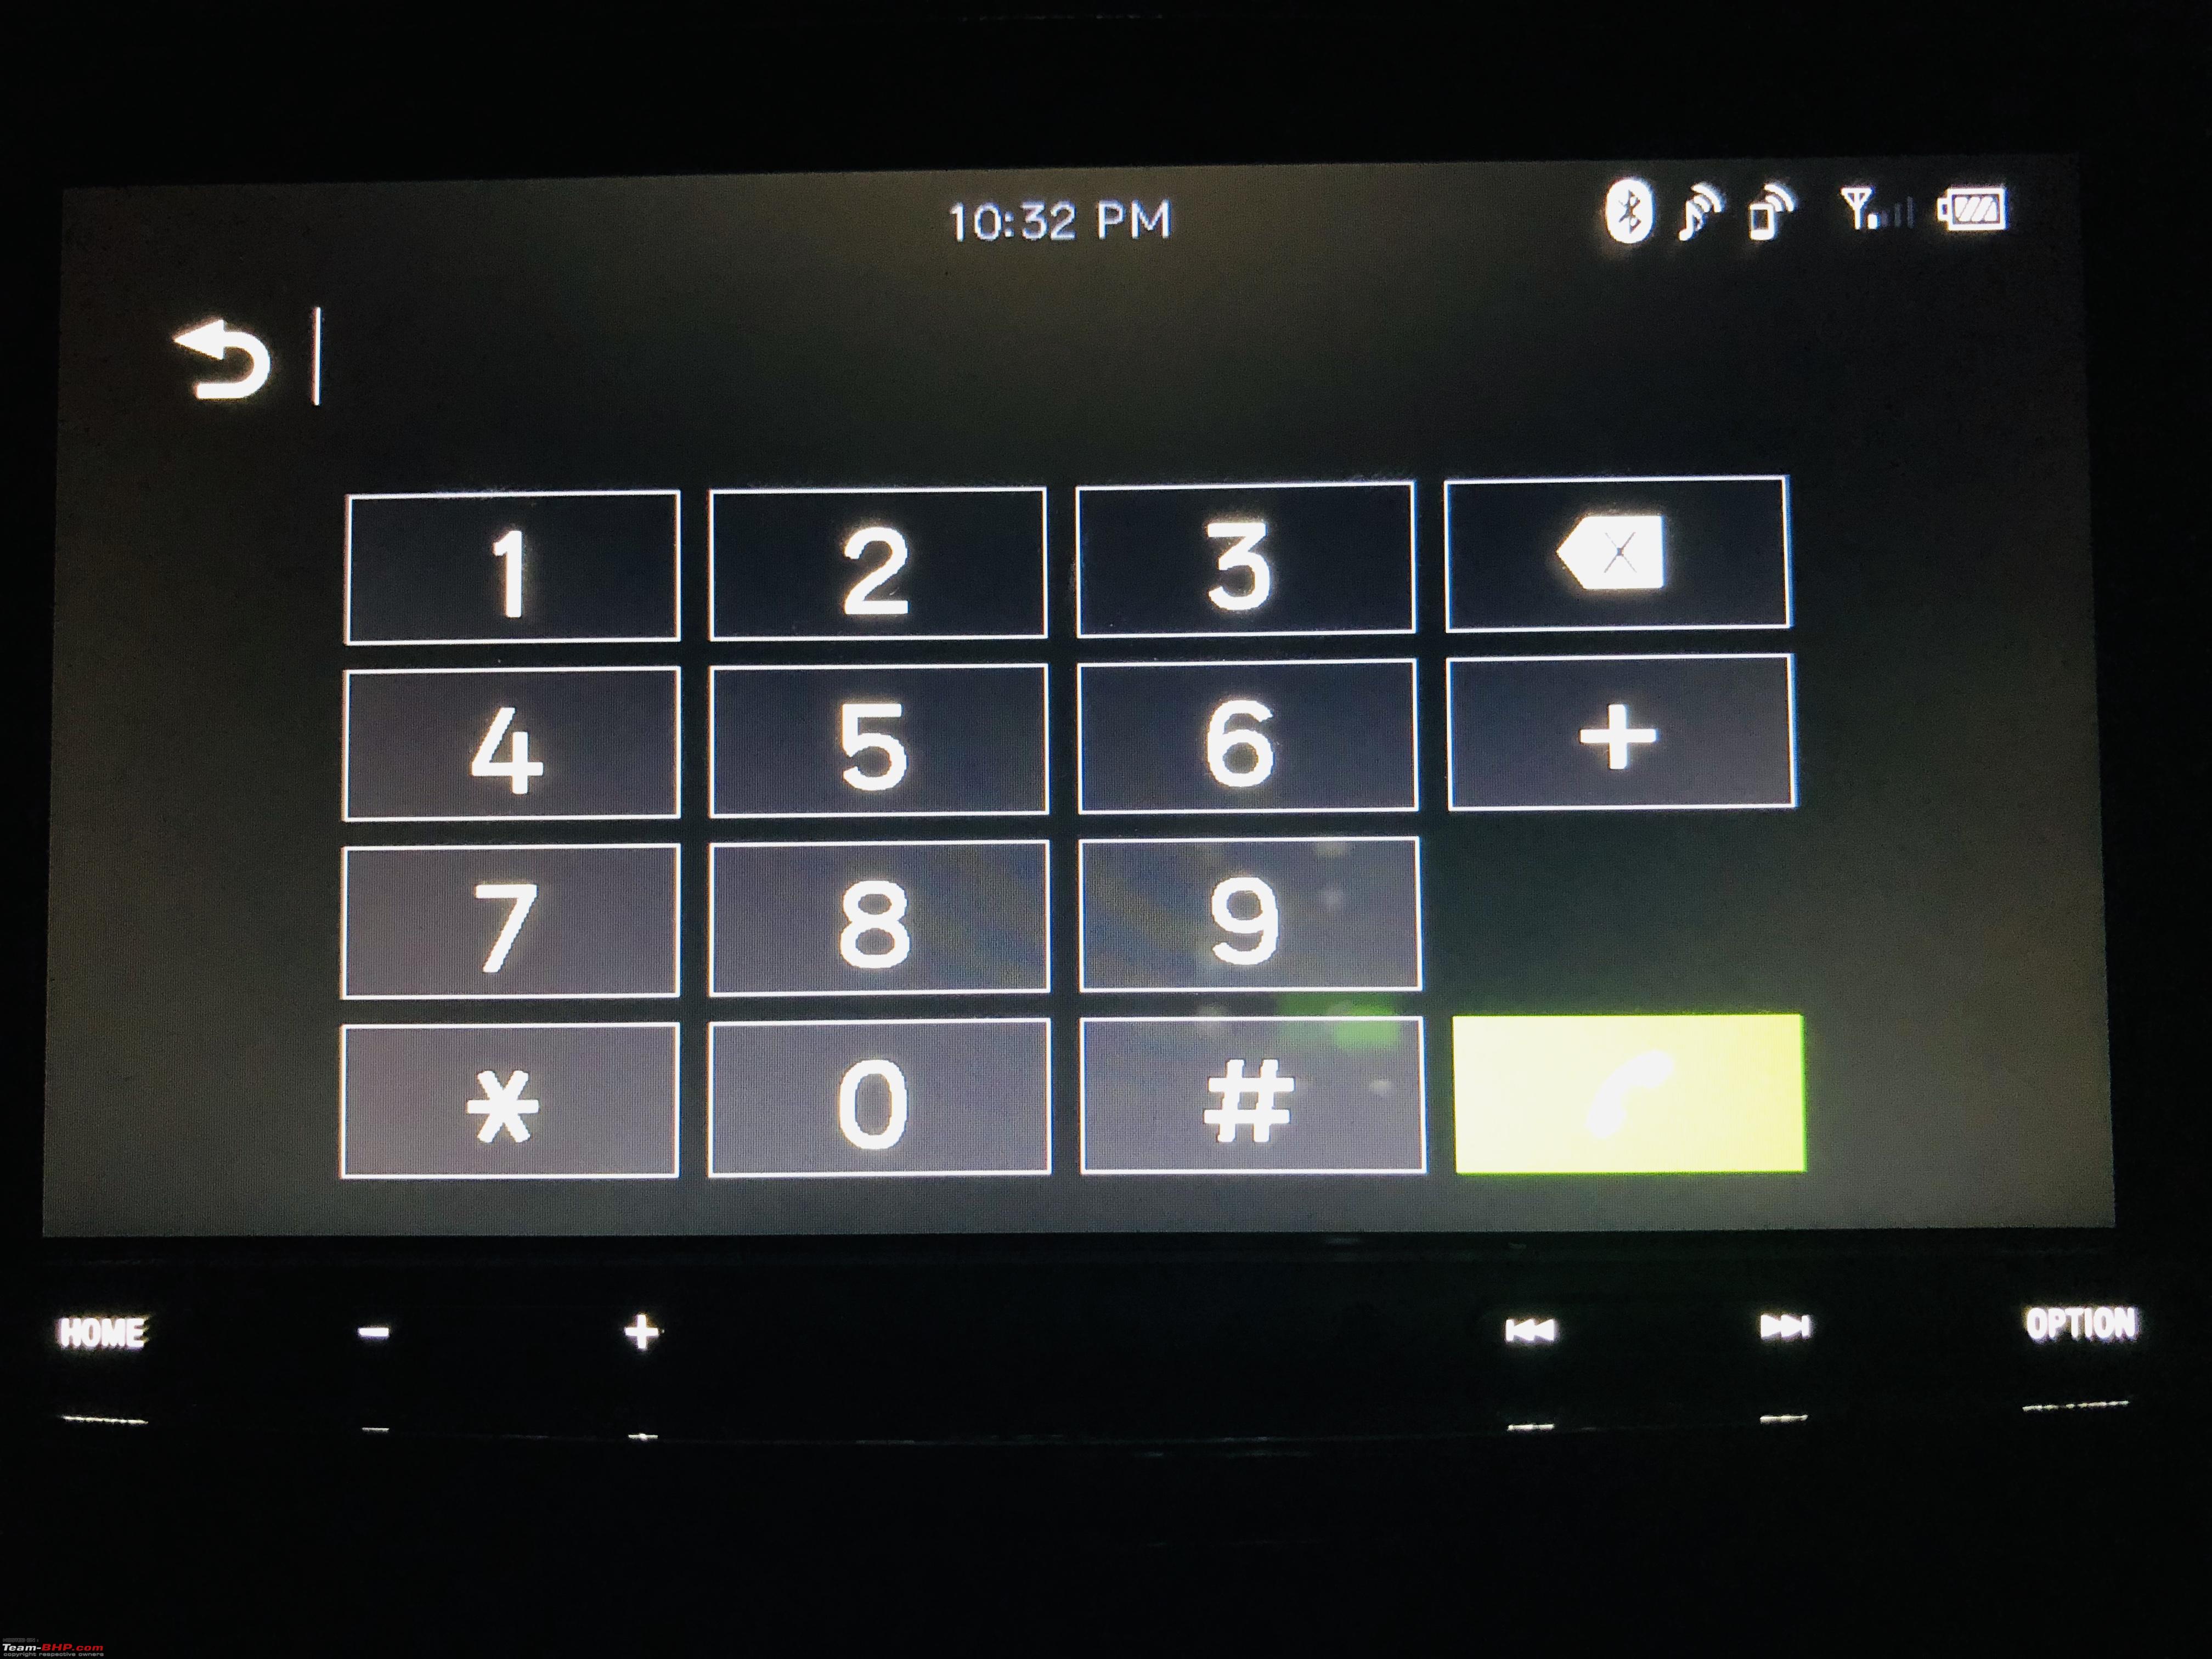
- Superb sound quality for calls and music over bluetooth.
- Retain factory USB Port (never used AUX, so I’m ok if that’s missing)
- Clean and neat interface.
RESEARCH & PARTS PROCURING
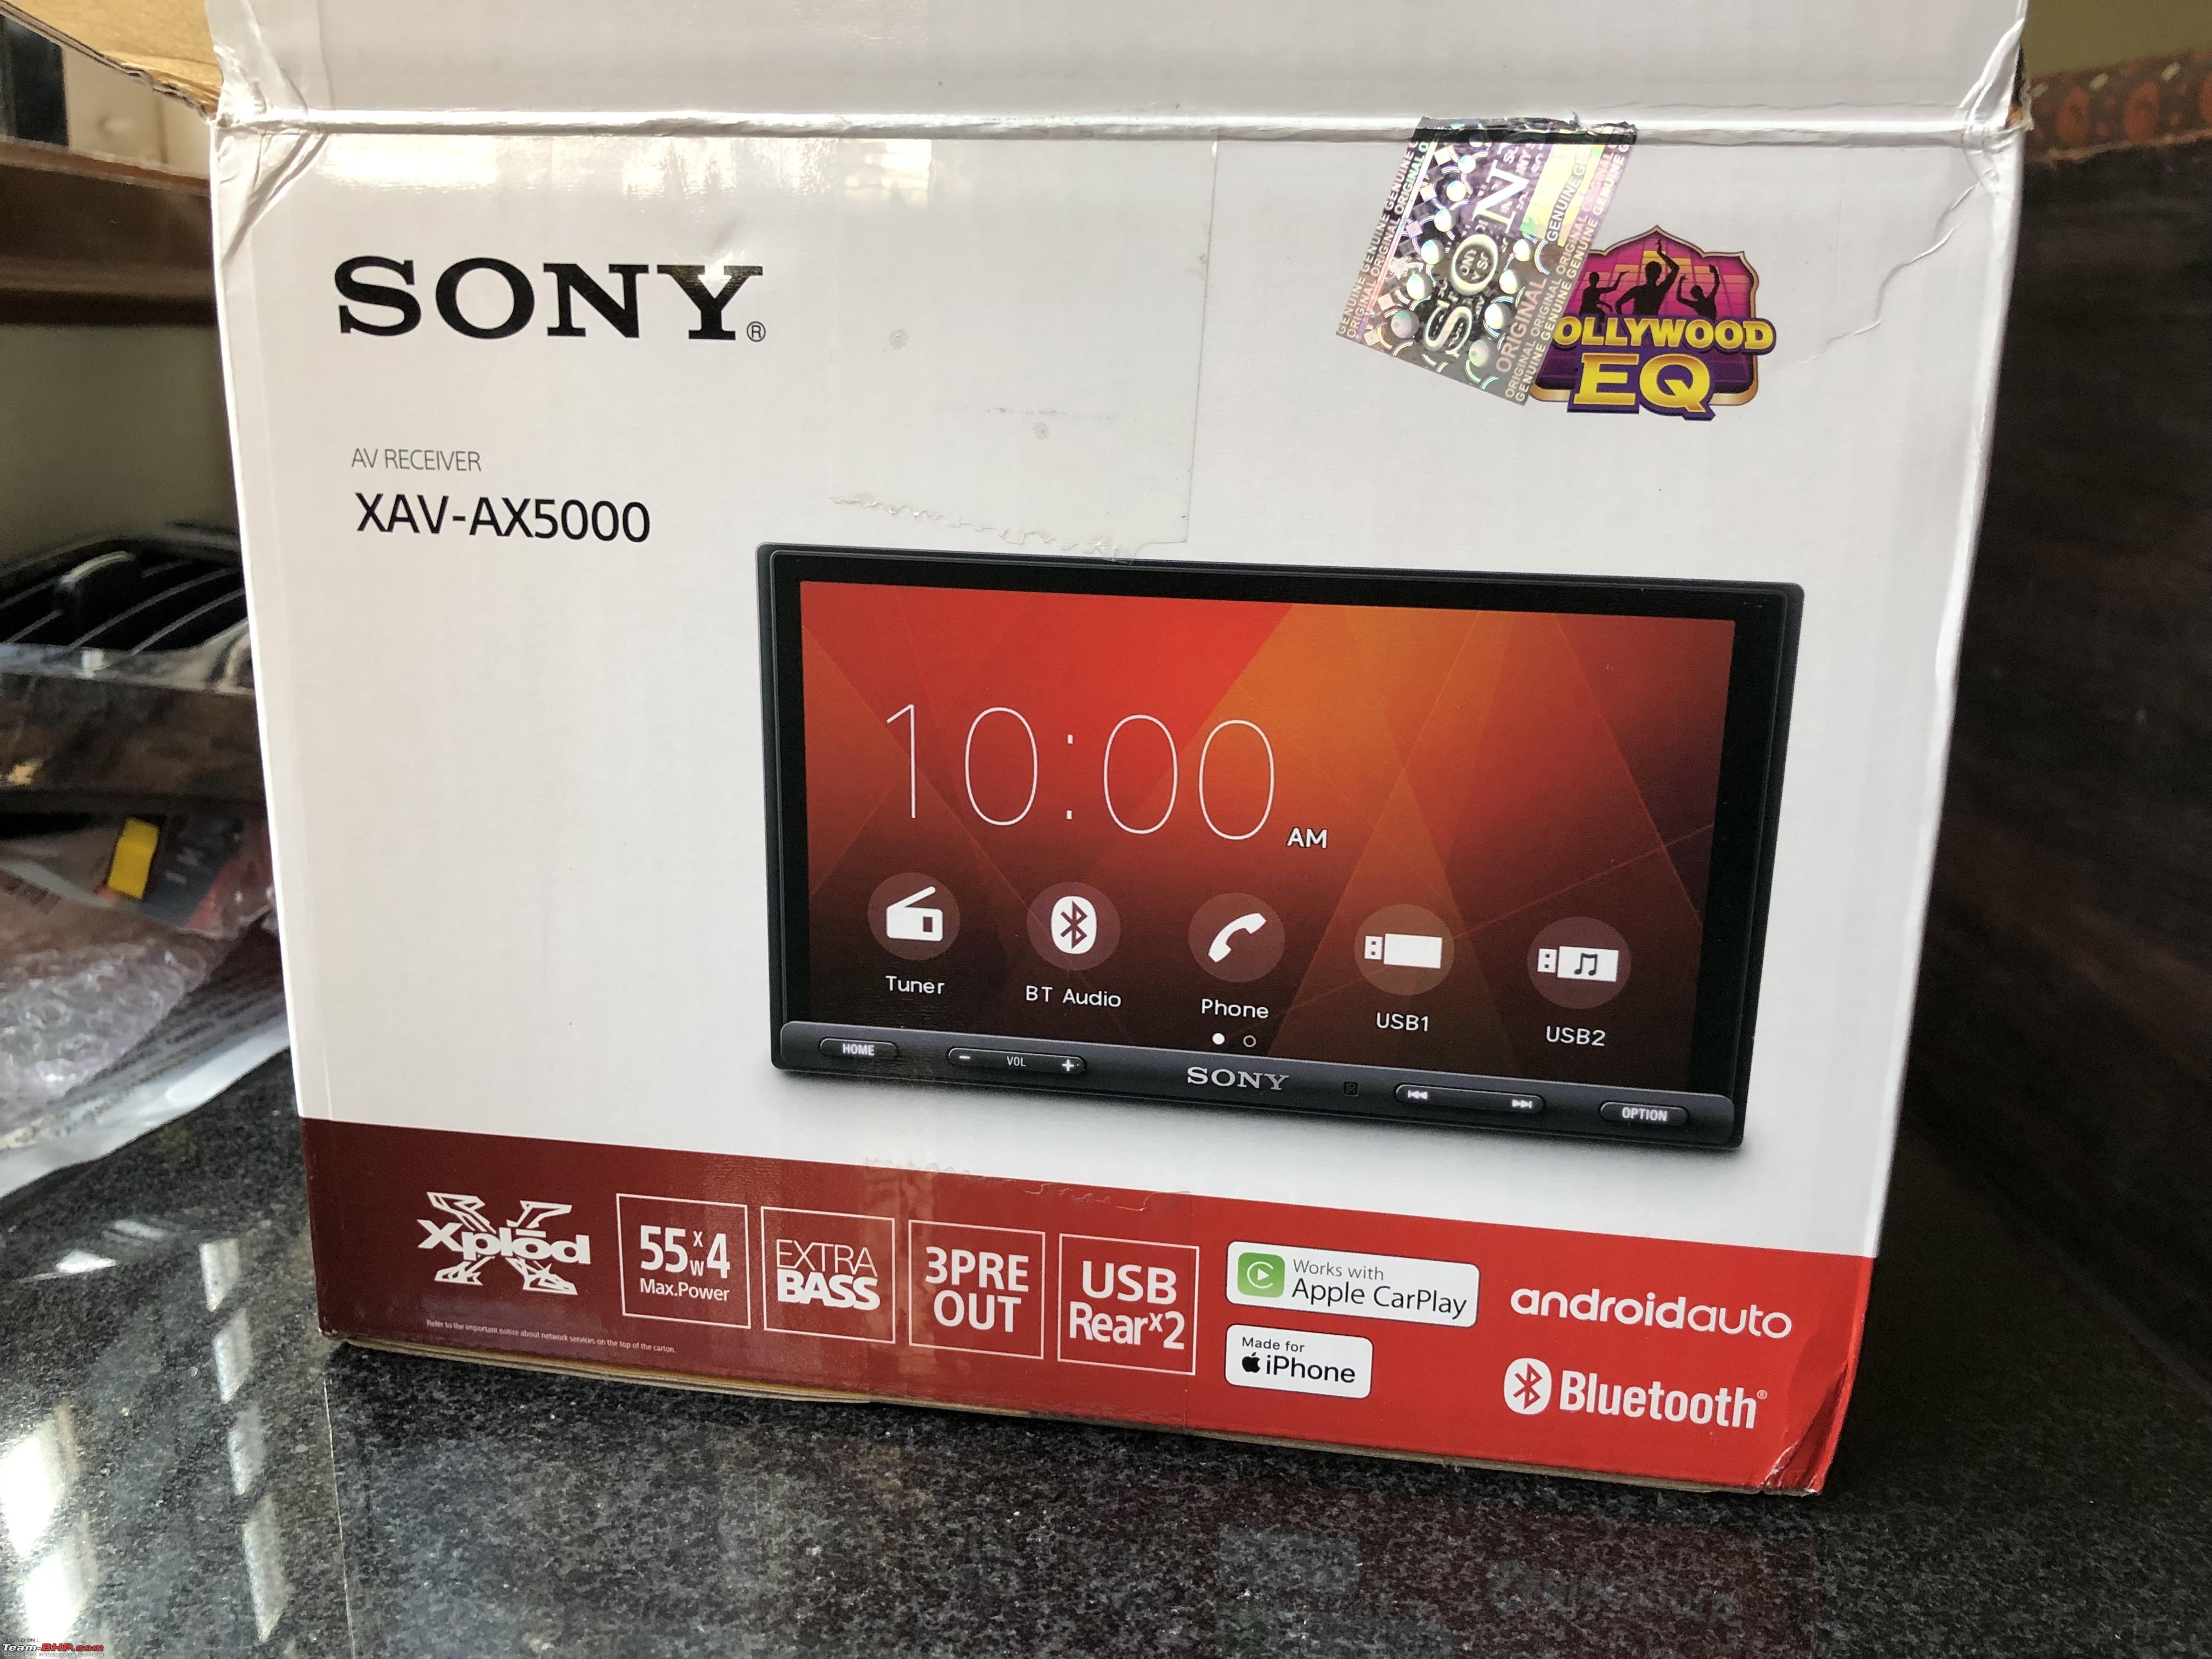
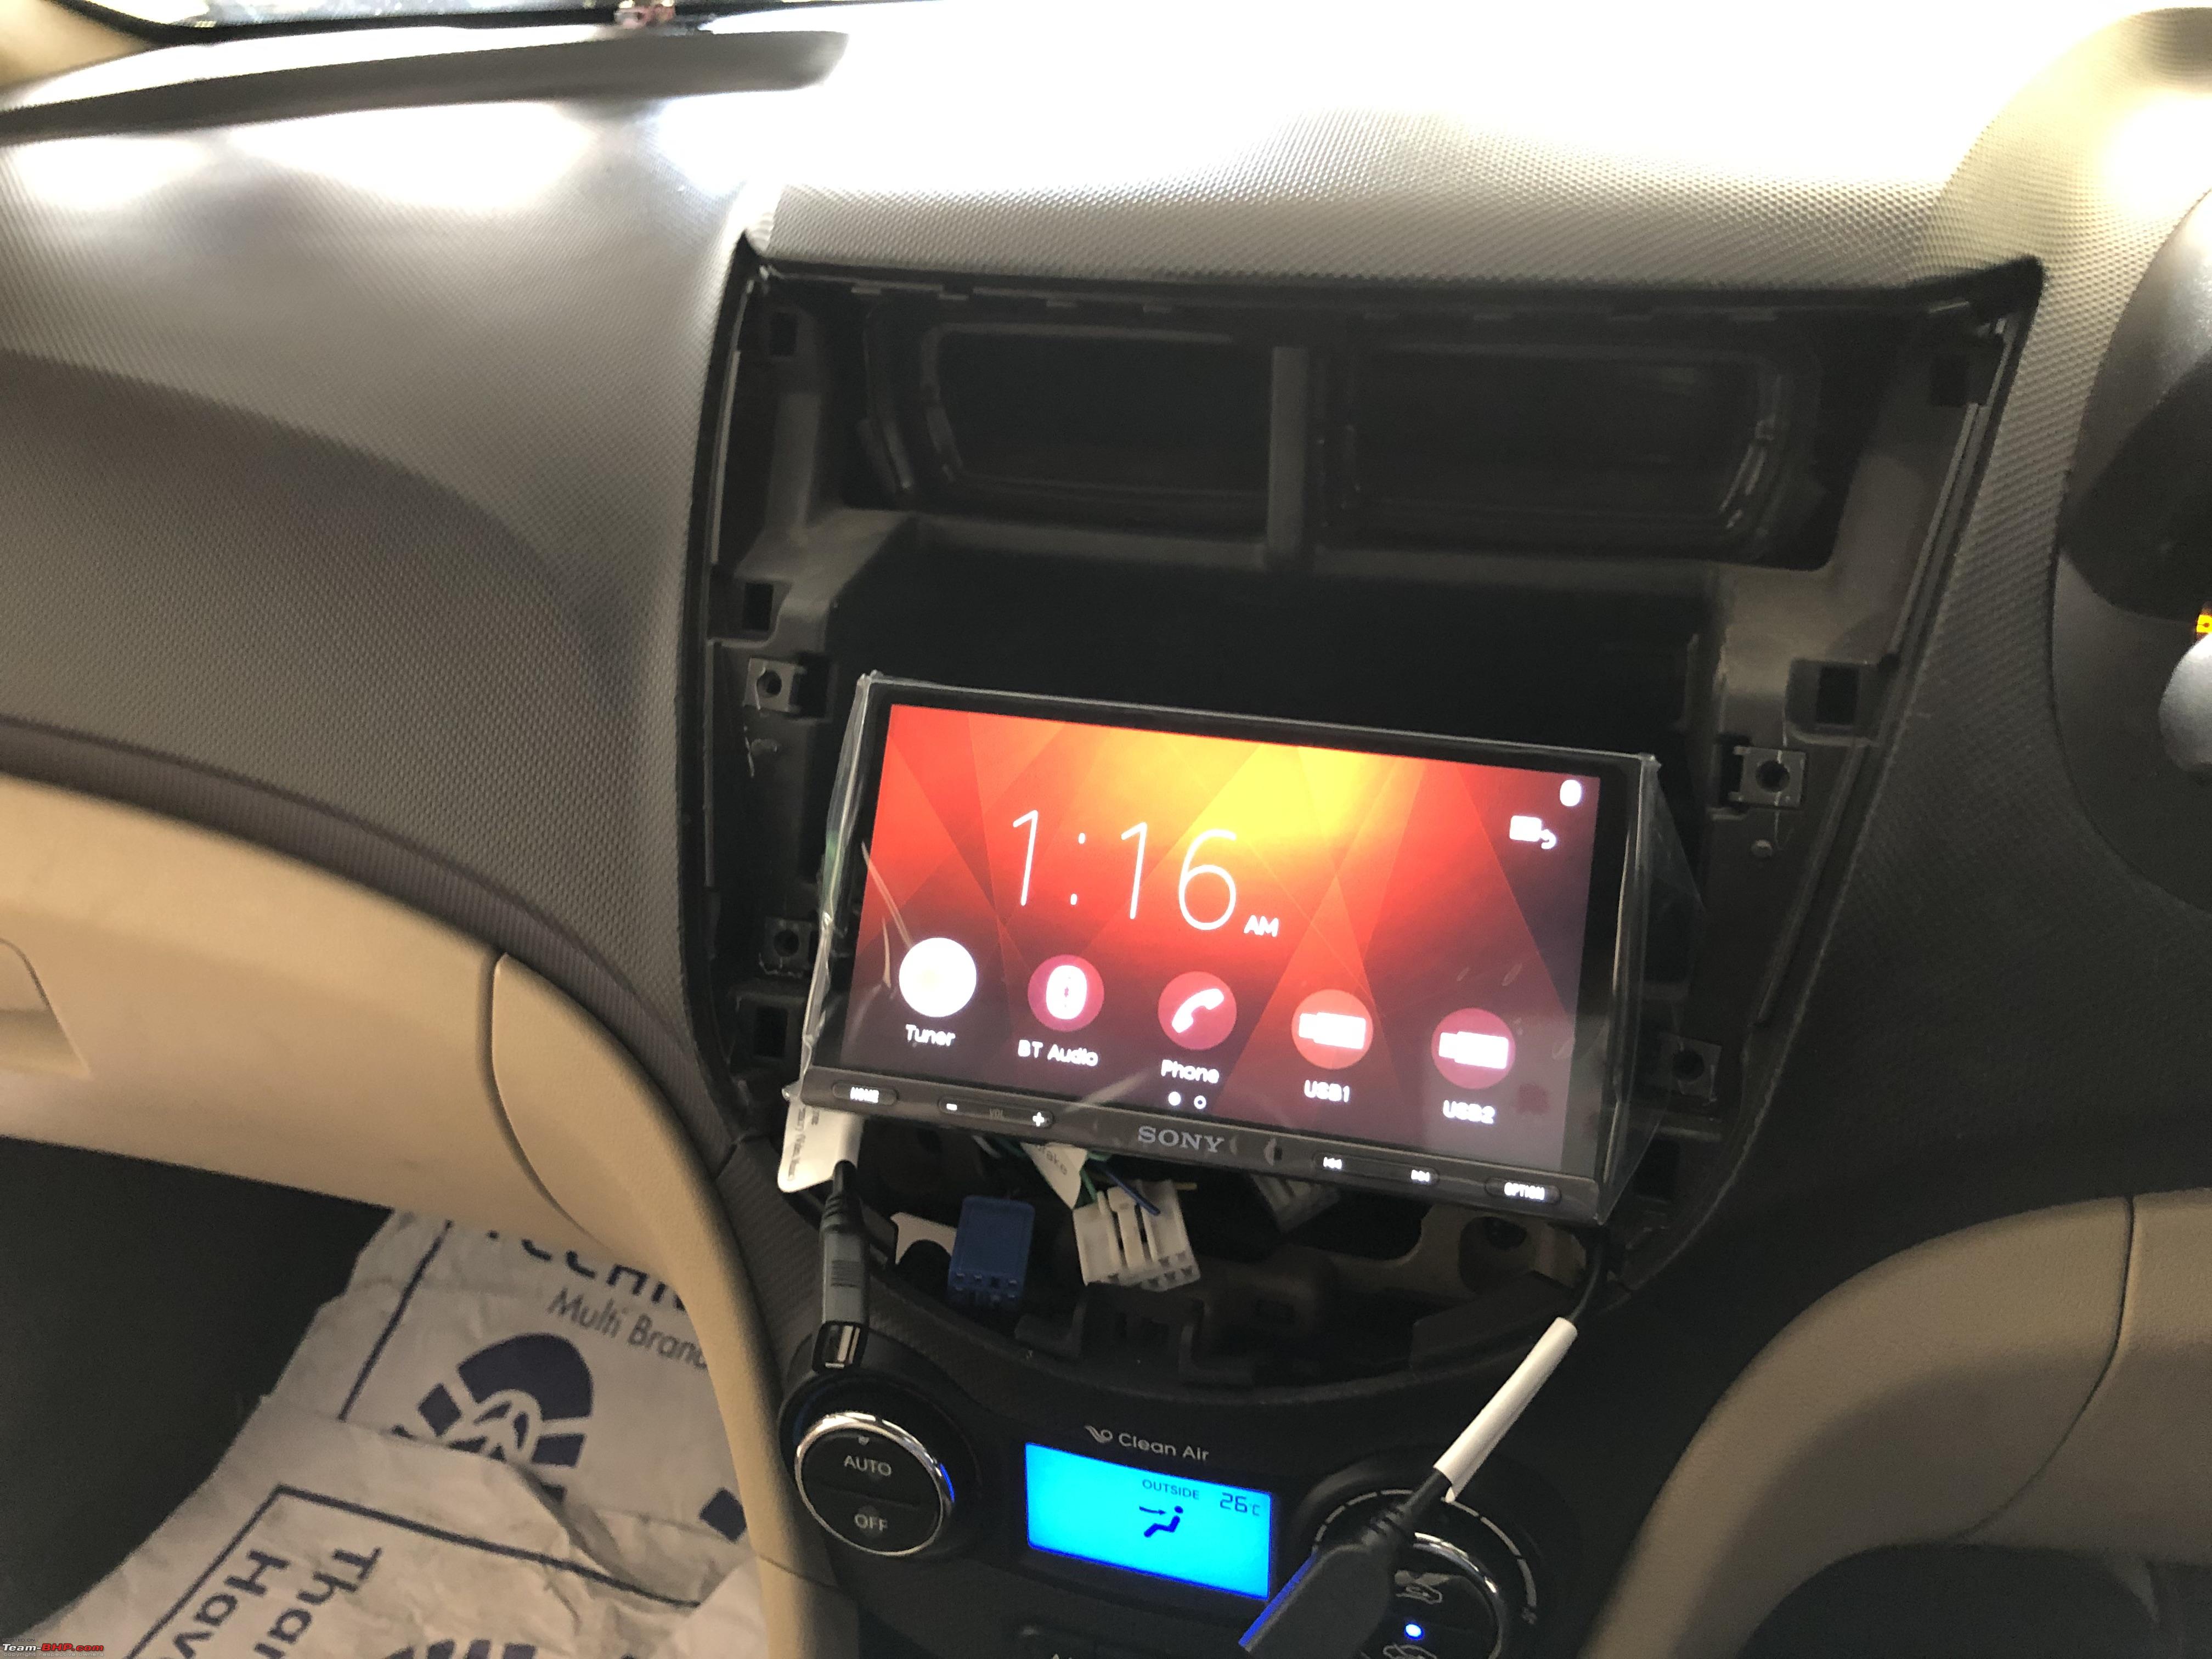
After a lot of research, I figured out that the Sony XAV-AX5000 fits my requirements the most. But putting in an aftermarket HU into cars these days isn't as simple as it used to be. You need dash fascia kits specific to your car, wire harnesses (so you don’t splice factory wires), special adapters to make steering wheel controls and your OEM Bluetooth mic to work and reverse camera integration.
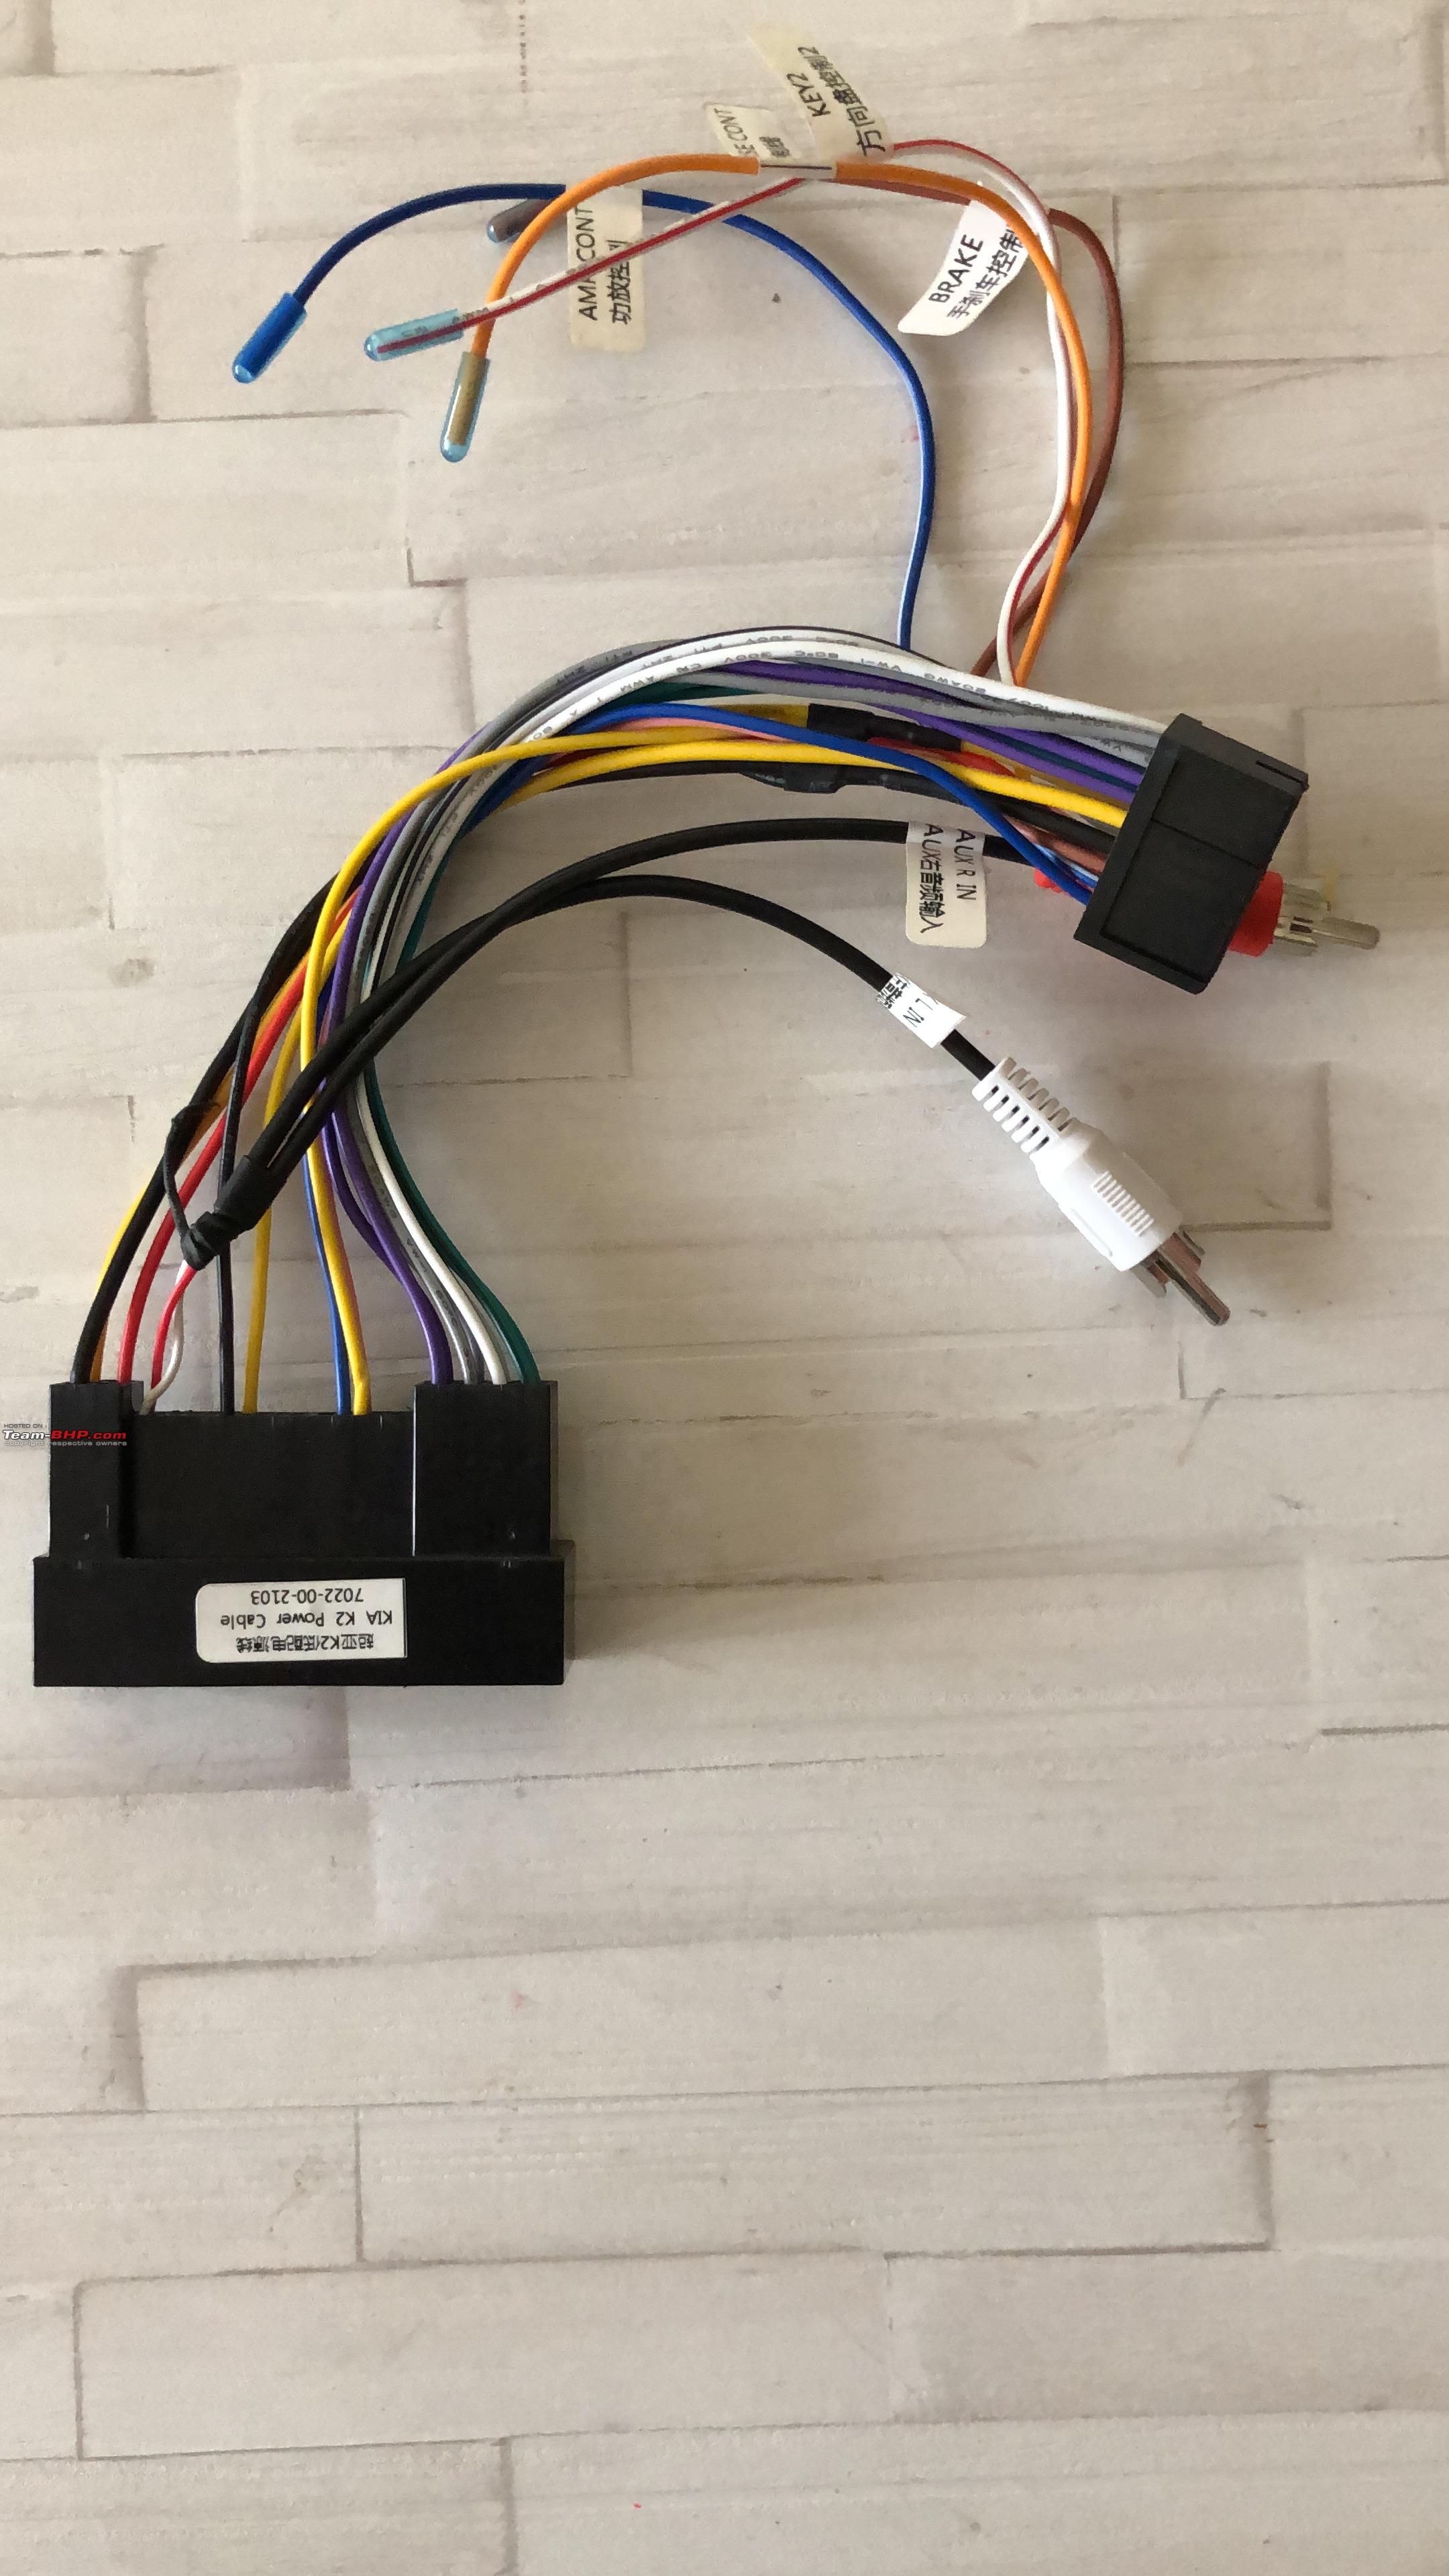
Now the fact is most of the cars use their own proprietory connectors for the various aspects of car audio. Finding the wiring diagrams and the appropriate wire harness adapters required a lot of research. But being a global car, availability of these were fantastic. I bought everything off AliExpress and the wiring diagrams from HyundaiForums.com.
PARTS NEEDED
-
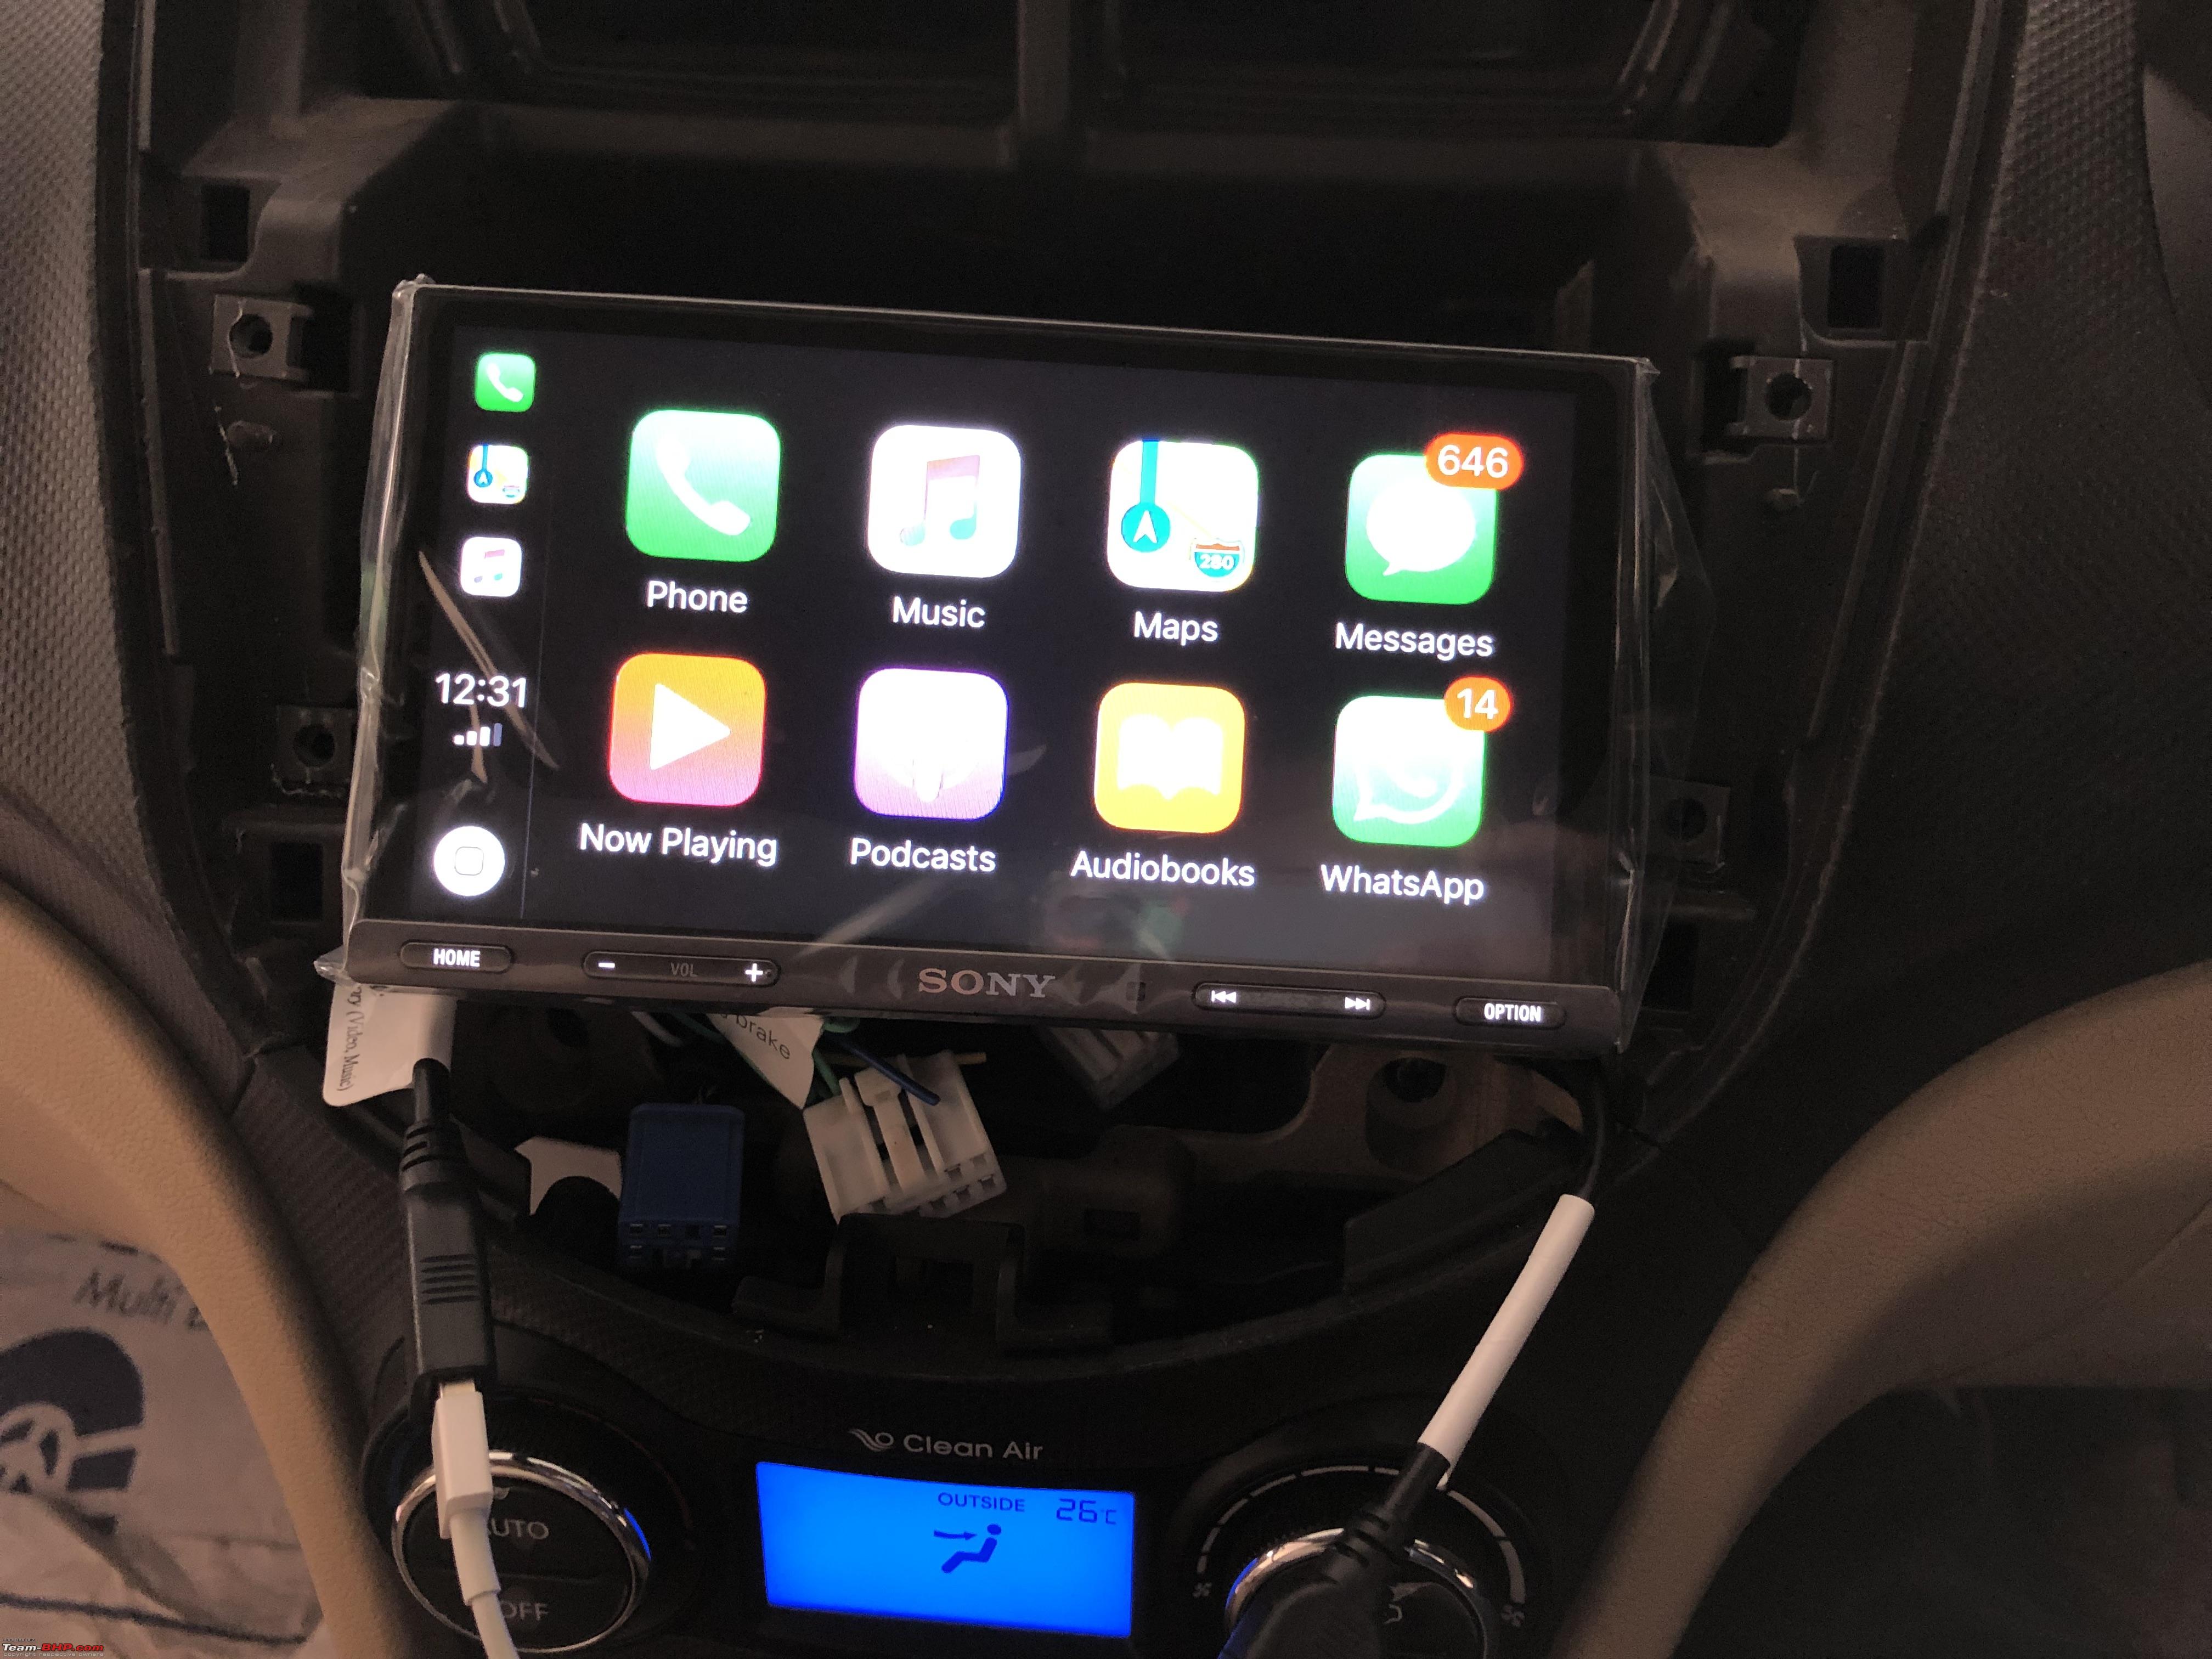
Audio HeadUnit (Sony XAV-AX5000) 
-
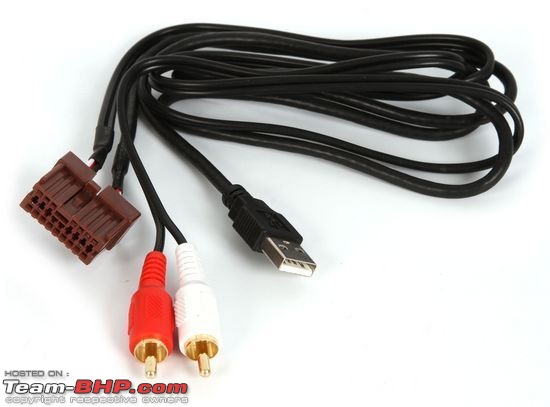
Hyundai Audio Wire Harness (18p + 24p). This will work for most modern Hyundai/Kia cars (2011 & up)

-
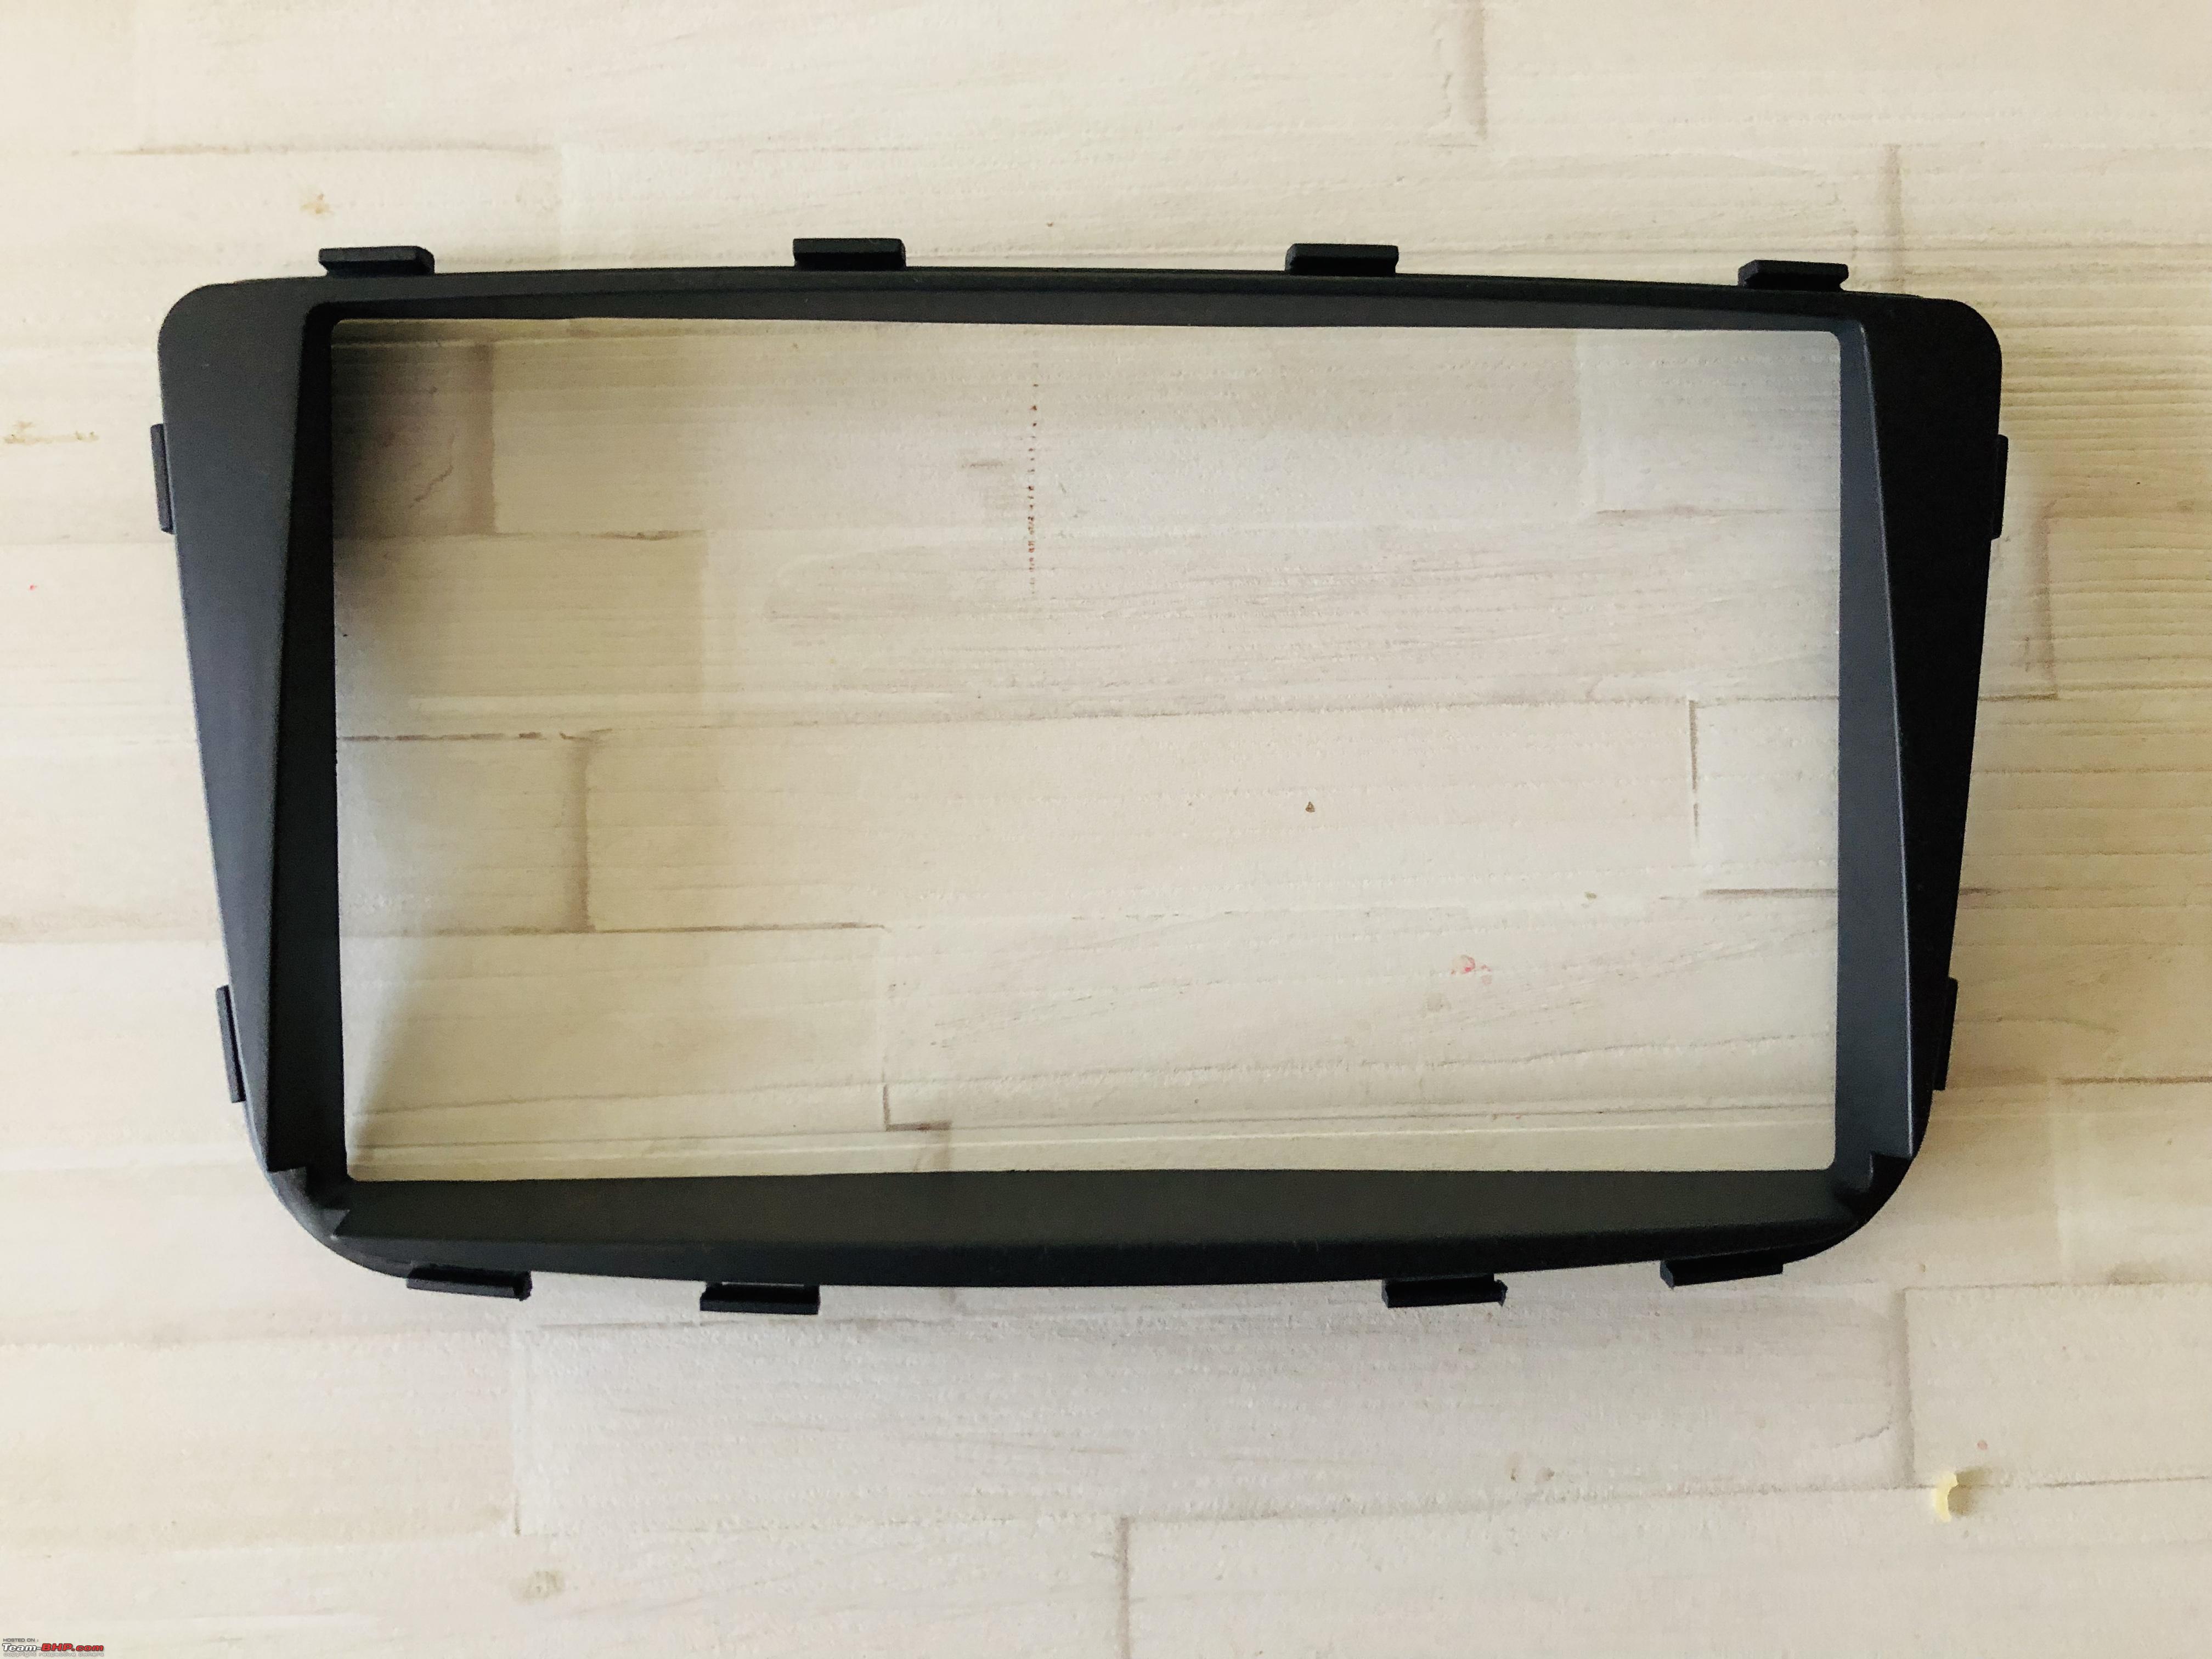
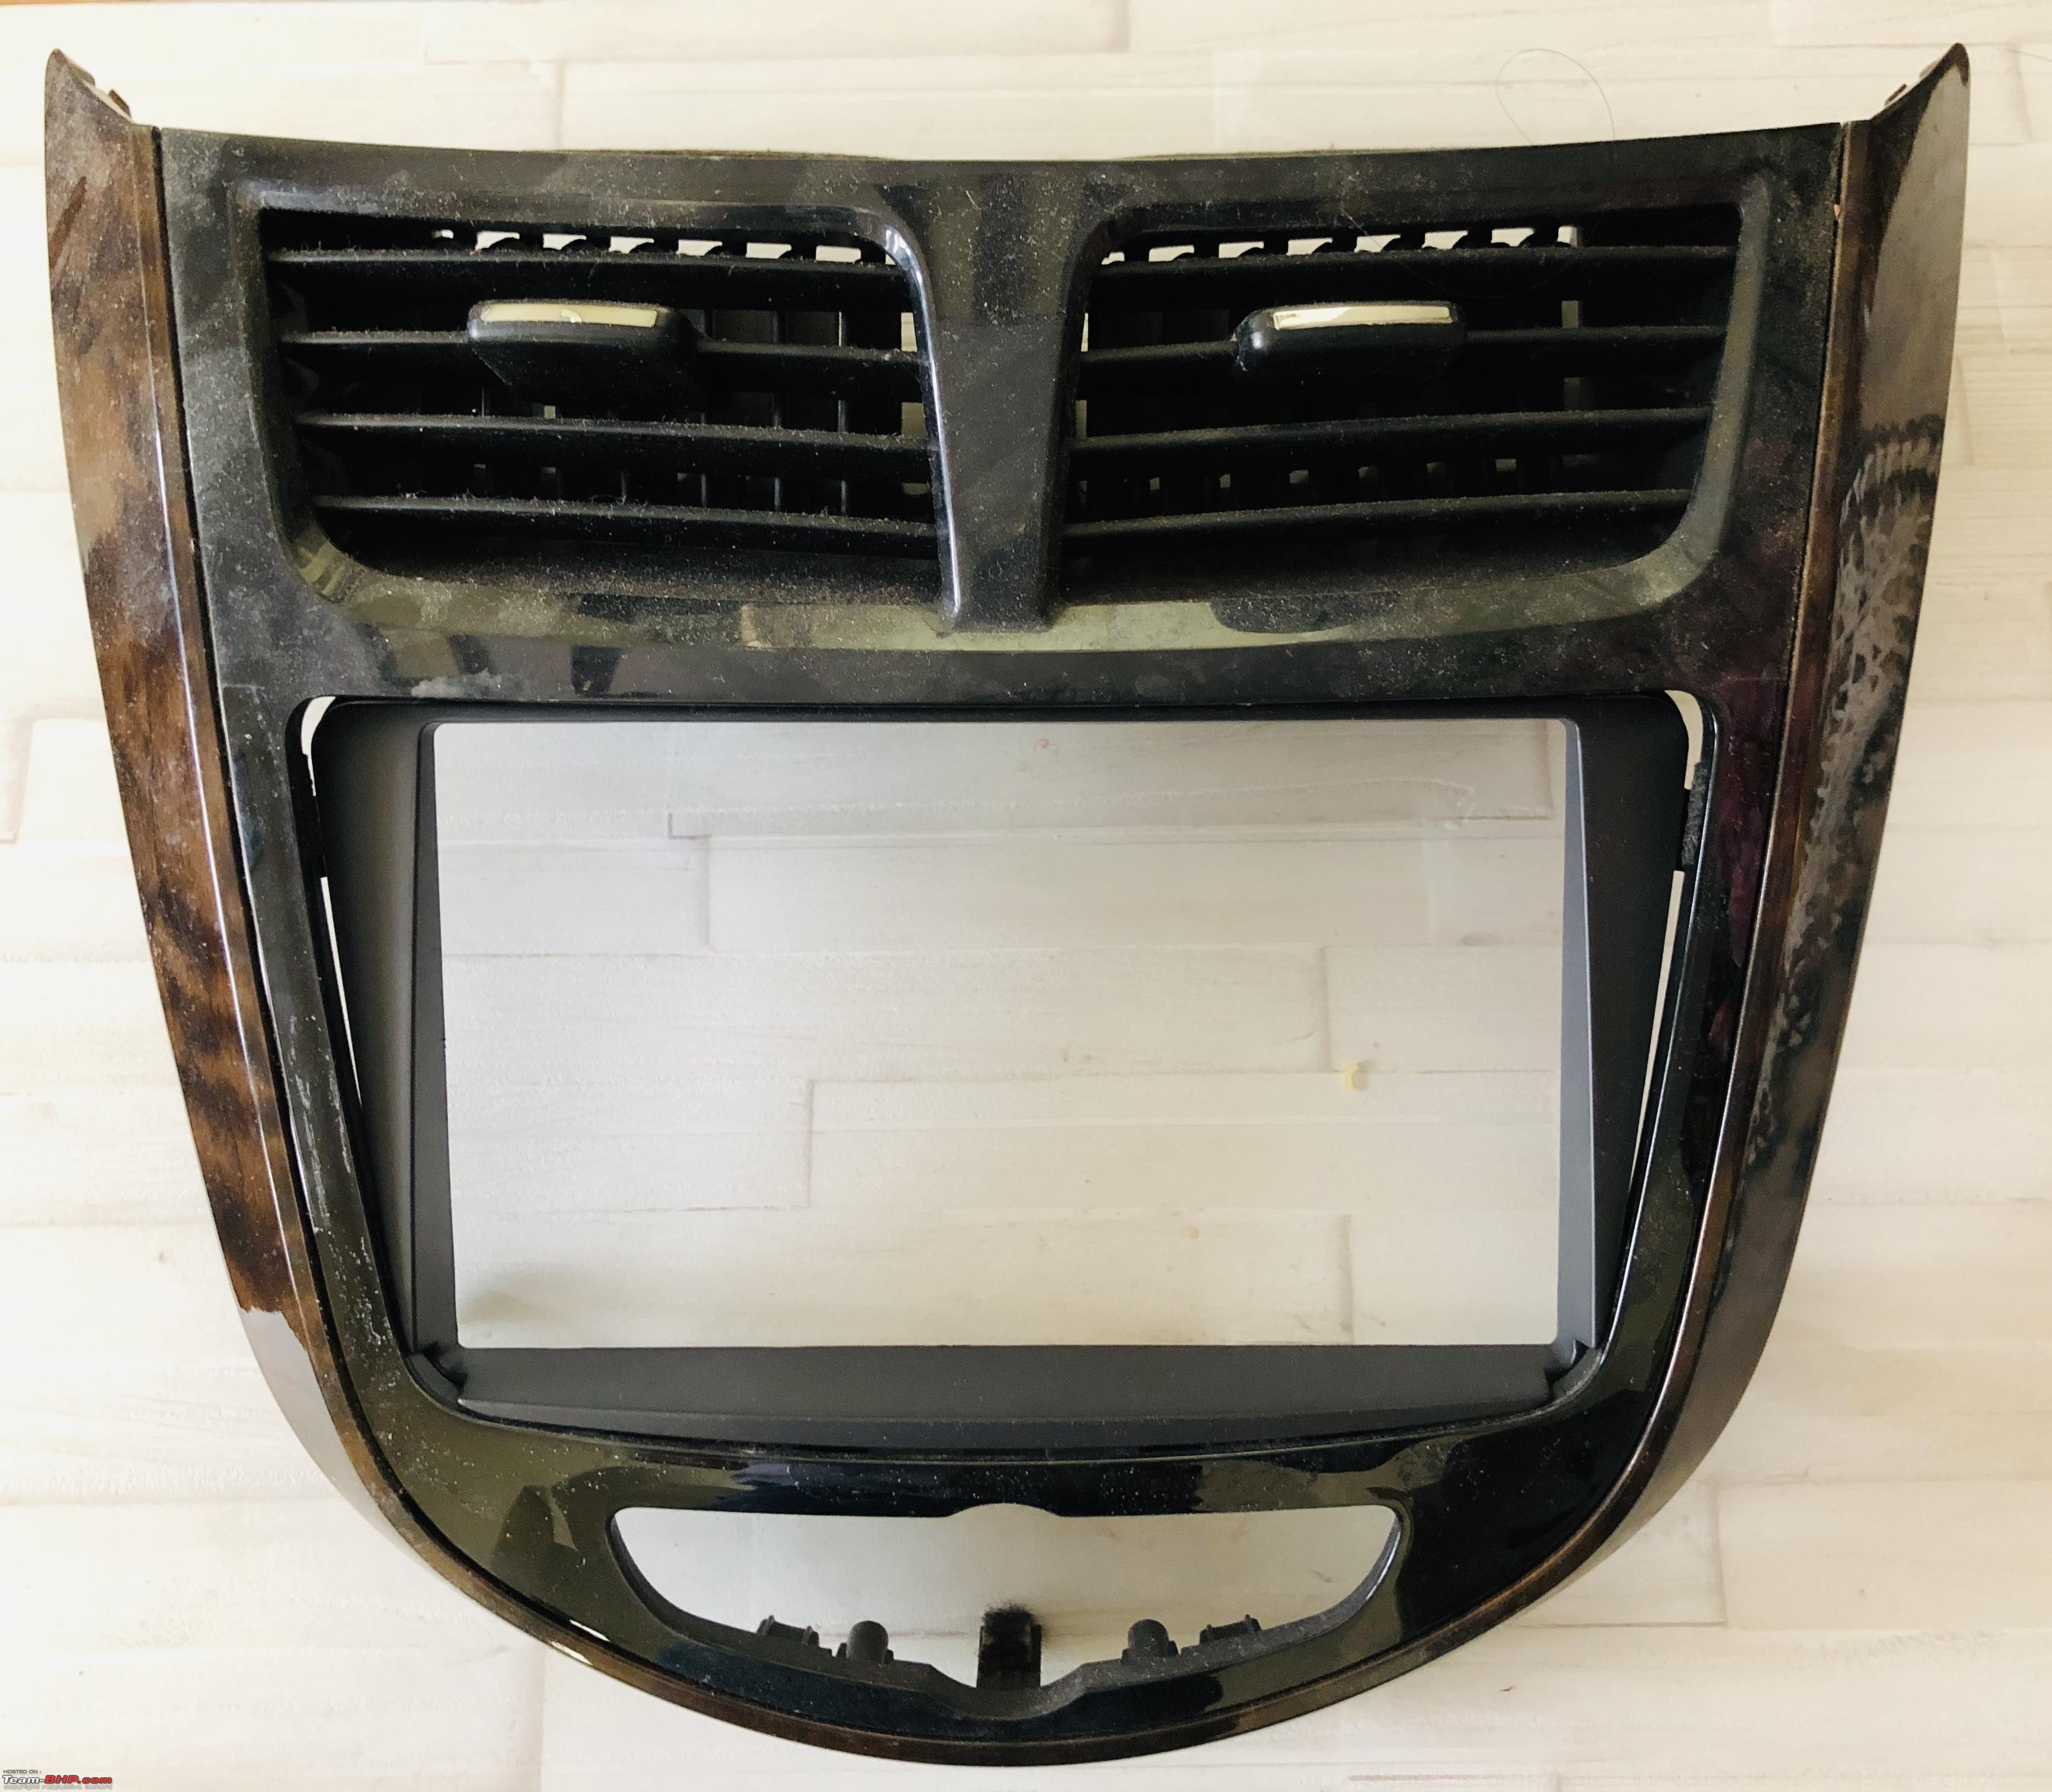
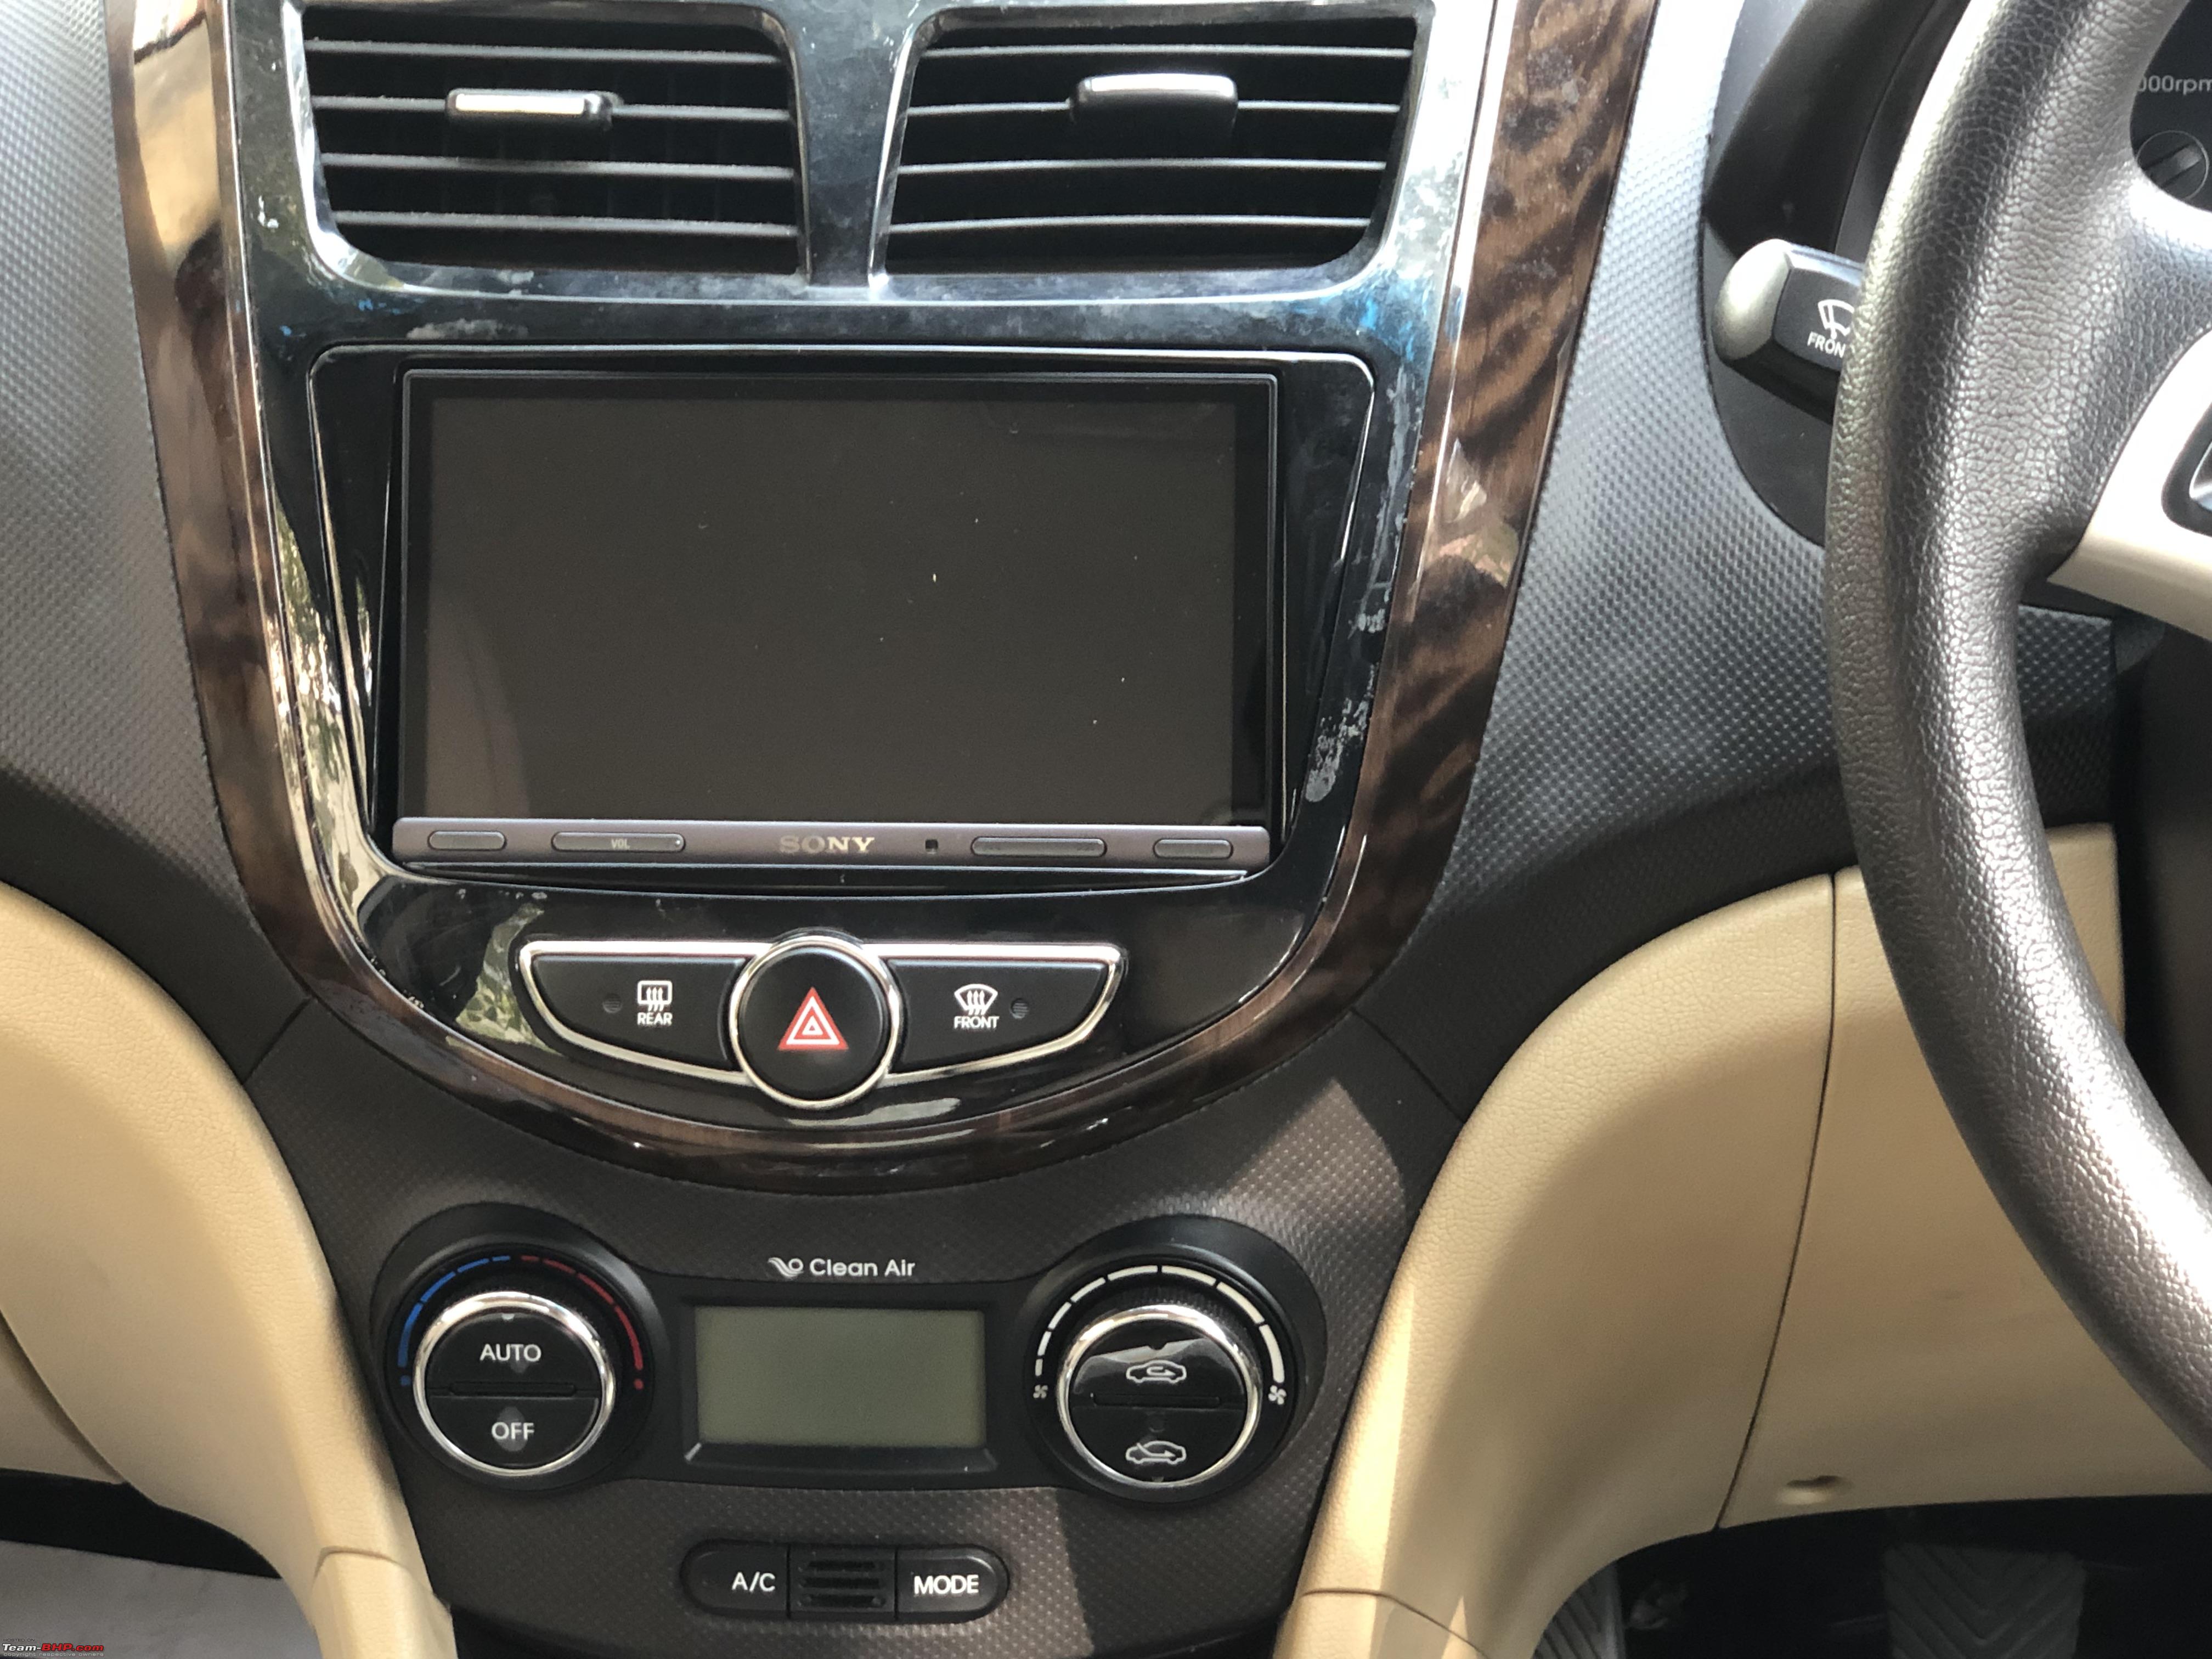
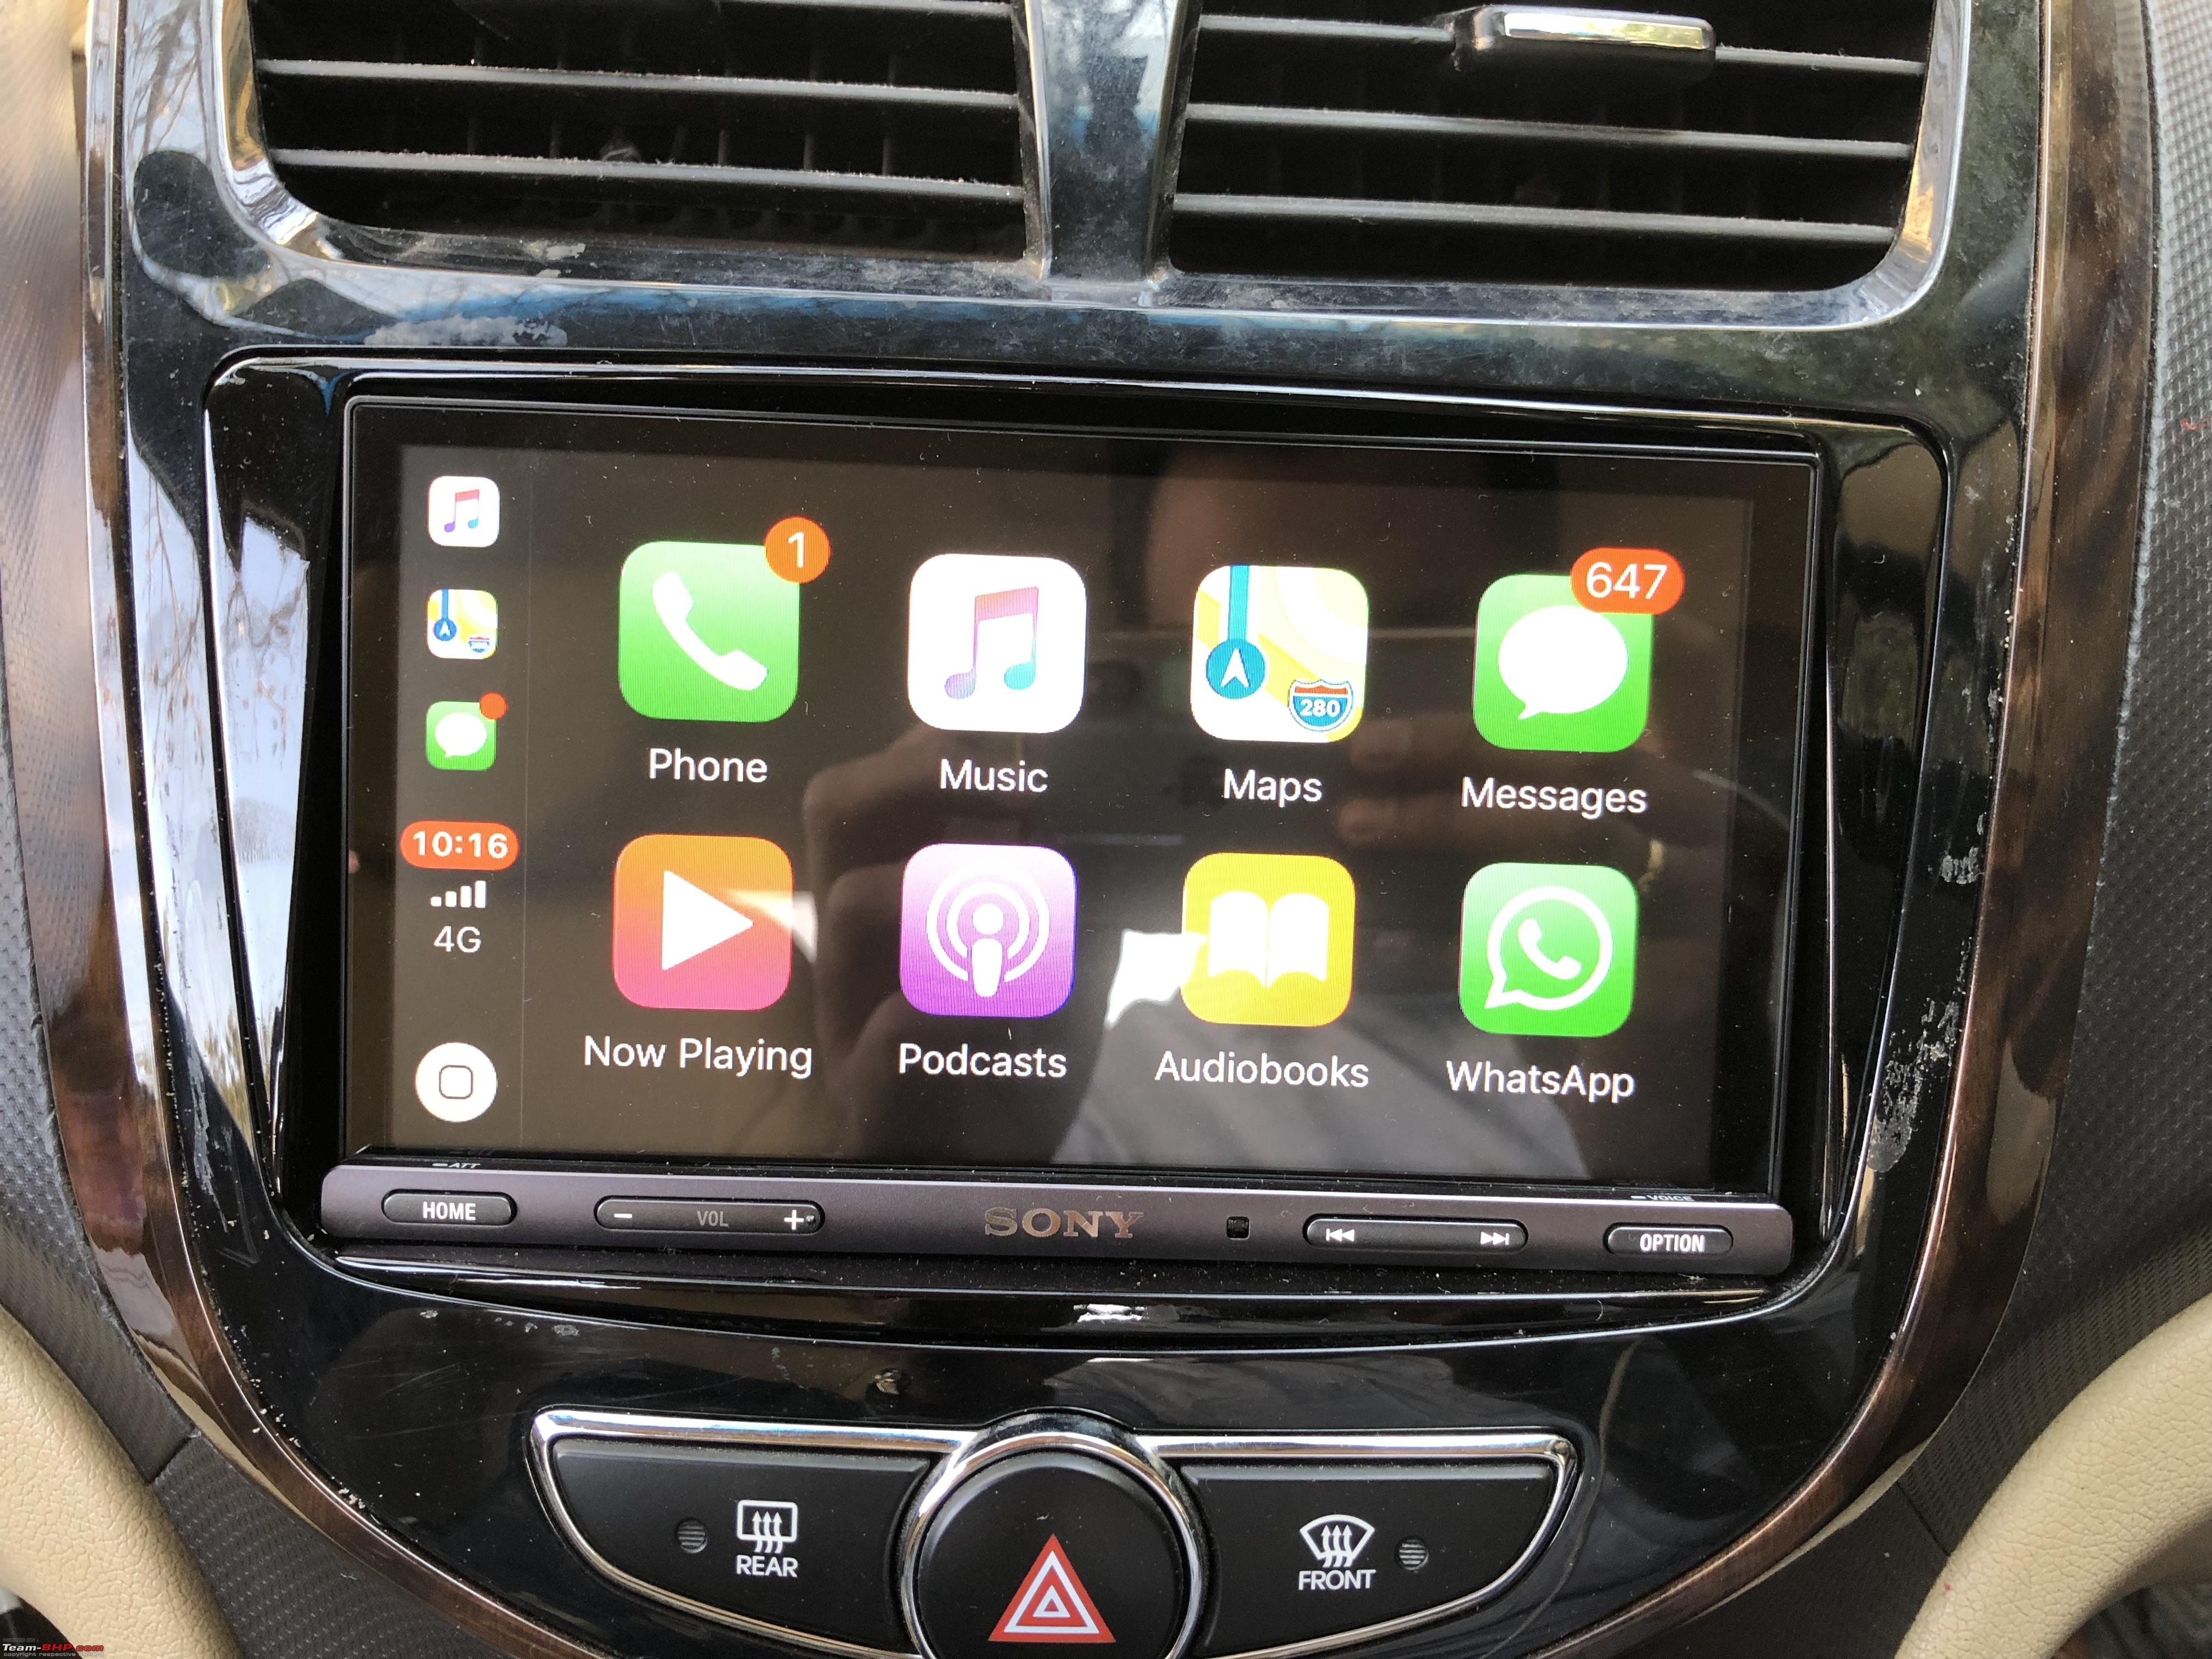
Dash Kit/Fascia Plate You get full dash kits online even in India, but they are all imported and since India is the only country where the Verna’s dash has that wood finish, I wasn’t ready to lose that. So I searched some more on Aliexpress and bumped into the following item. Fits like a glove while retaining the wood finish look of the OEM.


-
Video Cable (RCA) to connect the backup camera to the Sony HU. The default Hyundai Camera harness that you can see on aliexpress will not work. The Verna has the Camera integrated into the Electrochromic IRVM and a completely different wiring setup. (more on that later).

-
Hyundai AUX/USB Retention harness. This did not work. Had to find an other way. (Mentioned below). The connection kept dropping and Android Auto/Apple CarPlay does not work with this harness.
-
ABRO Gloss Black Spray Paint. Now this fascia plate came in a matt-black finish whereas the Verna’s OEM Fascia had a gloss black finish. So I got a can of ABRO Gloss Black Paint and spray-painted it to match the OEM Finish.

-
Old AUX/Microphone Cables. (to Retain the Bluetooth mic)
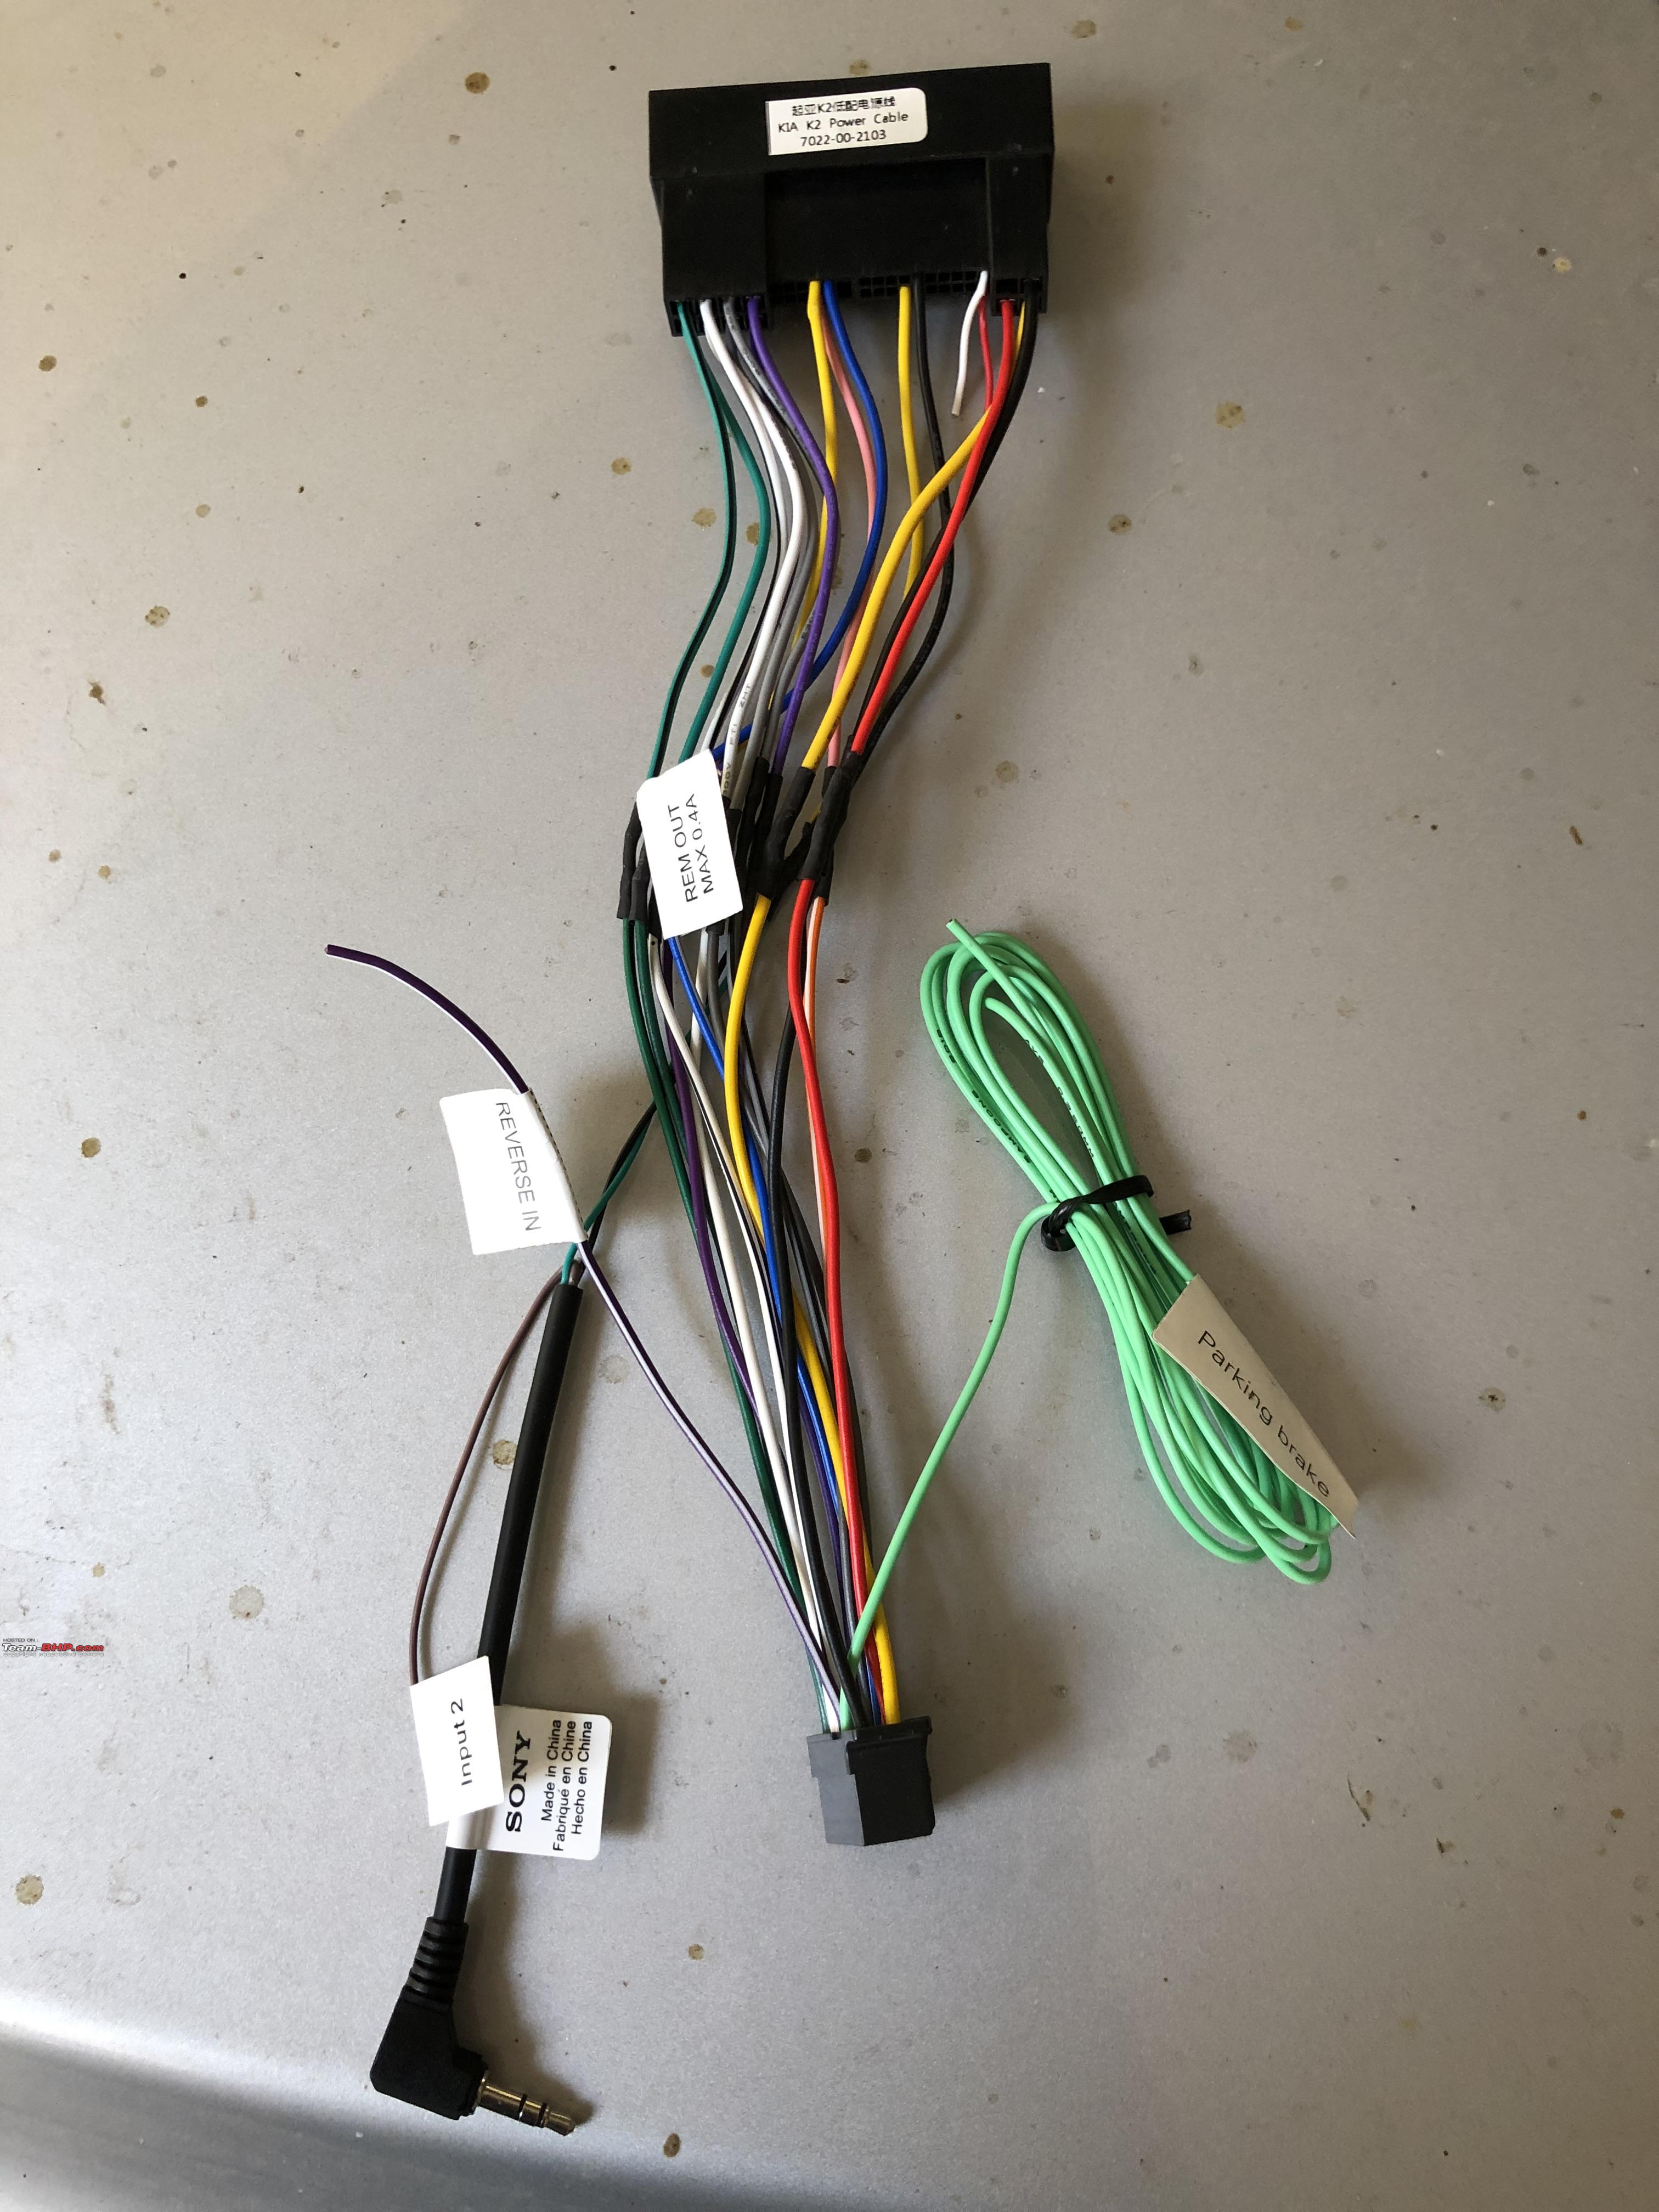
 WIRING
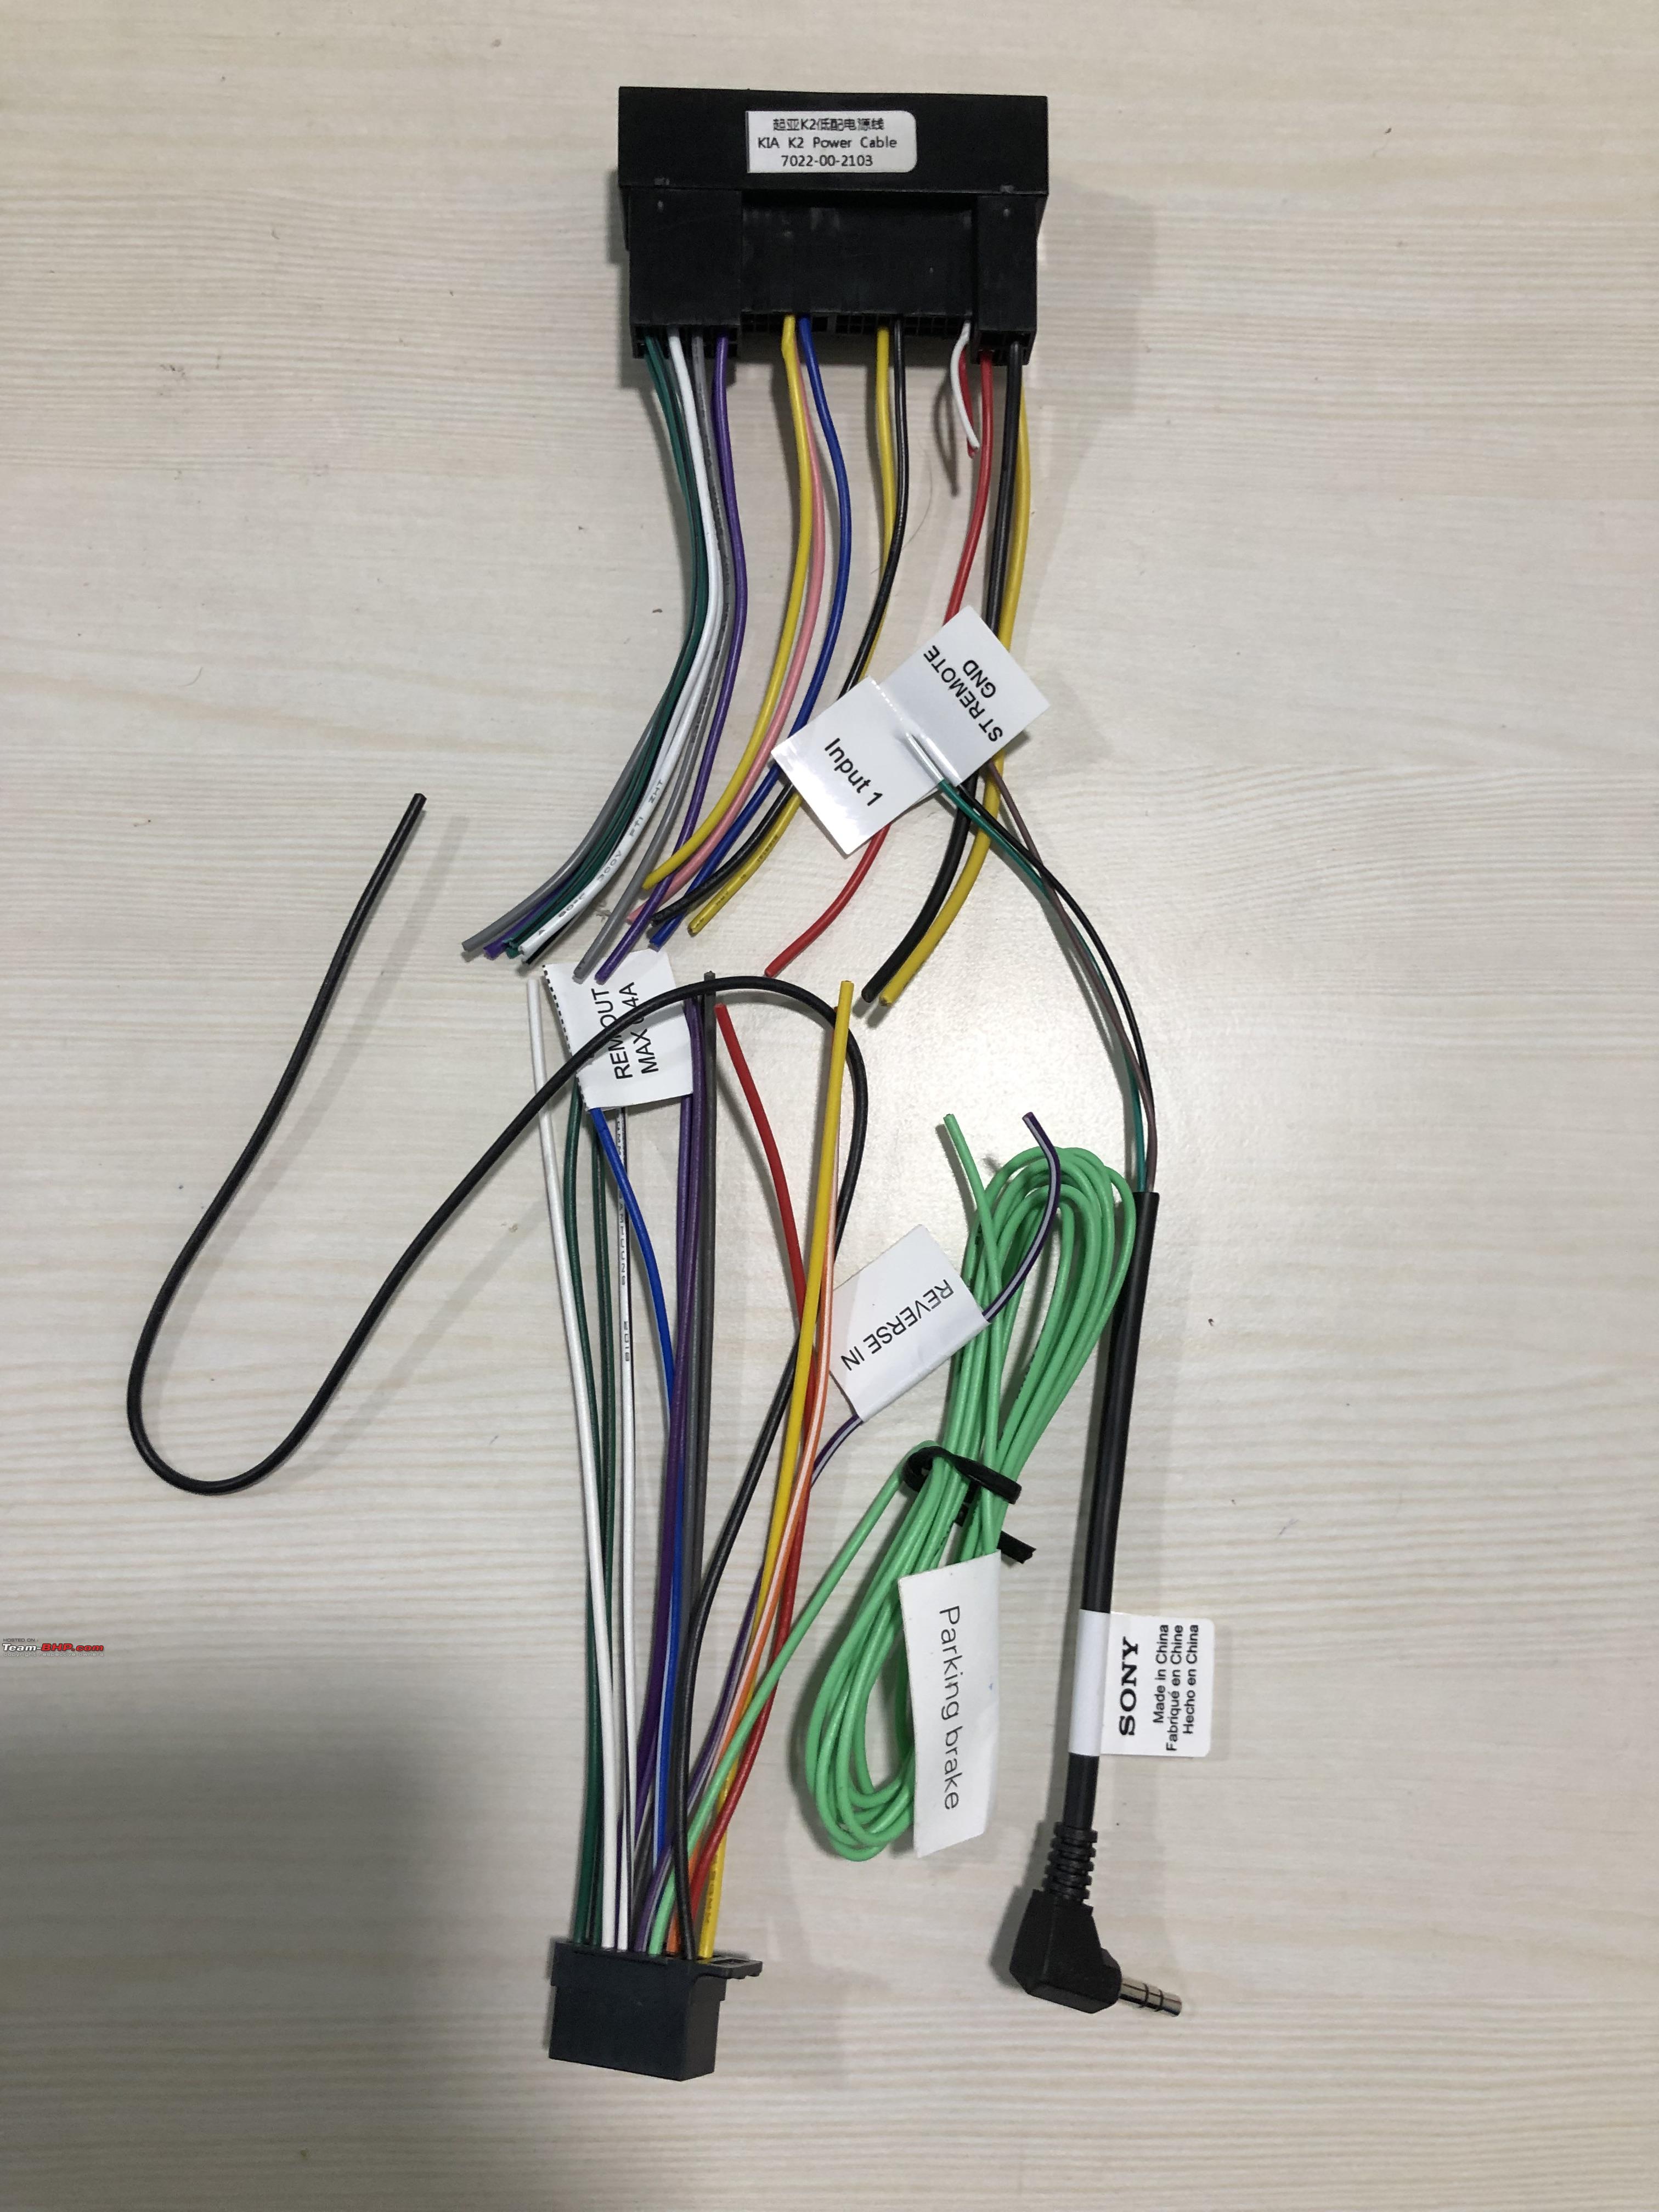
First and foremost, after studying the hyundai wiring diagrams, this all that we need. Eliminate all the wires thats not needed. The rest of it is simply matching the colours. The wiring harness (sourced from AliExpress) has a couple of RCA outputs and unnecessary wires. Following the wiring diagrams, we need to eliminate the unnecessary wires. Since this headunit does not have an AUX-IN, the RCA inputs are not necessary. Also, since this car does not have a built-in amplifier, we don't need the "Remote-In" wires as well. All that we need is the following:
 MAKING THE CUSTOM WIRE HARNESS
Now unlike most car accessories shop guys in India, I was not willing to splice factory wires for anything. So I thought I’d make a custom wire harness that fits into the factory harness on one-end and the Aftermarket headunit on the other end. This way, its completely reversible, I can go back to the stock unit incase I need to for whatever reason. Since the aliexpress harness had colour coded wires, all we need to do is solder them onto the sony's proprietory wiring harness which is as easy as colour matching.
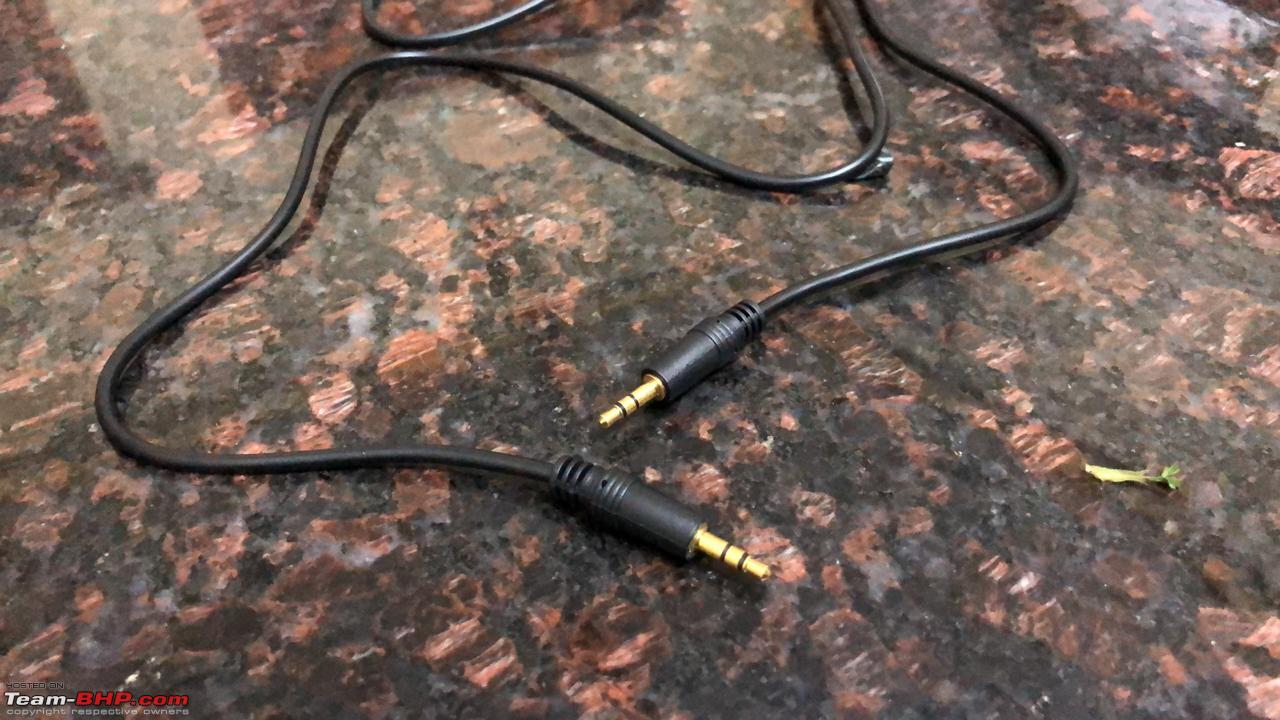
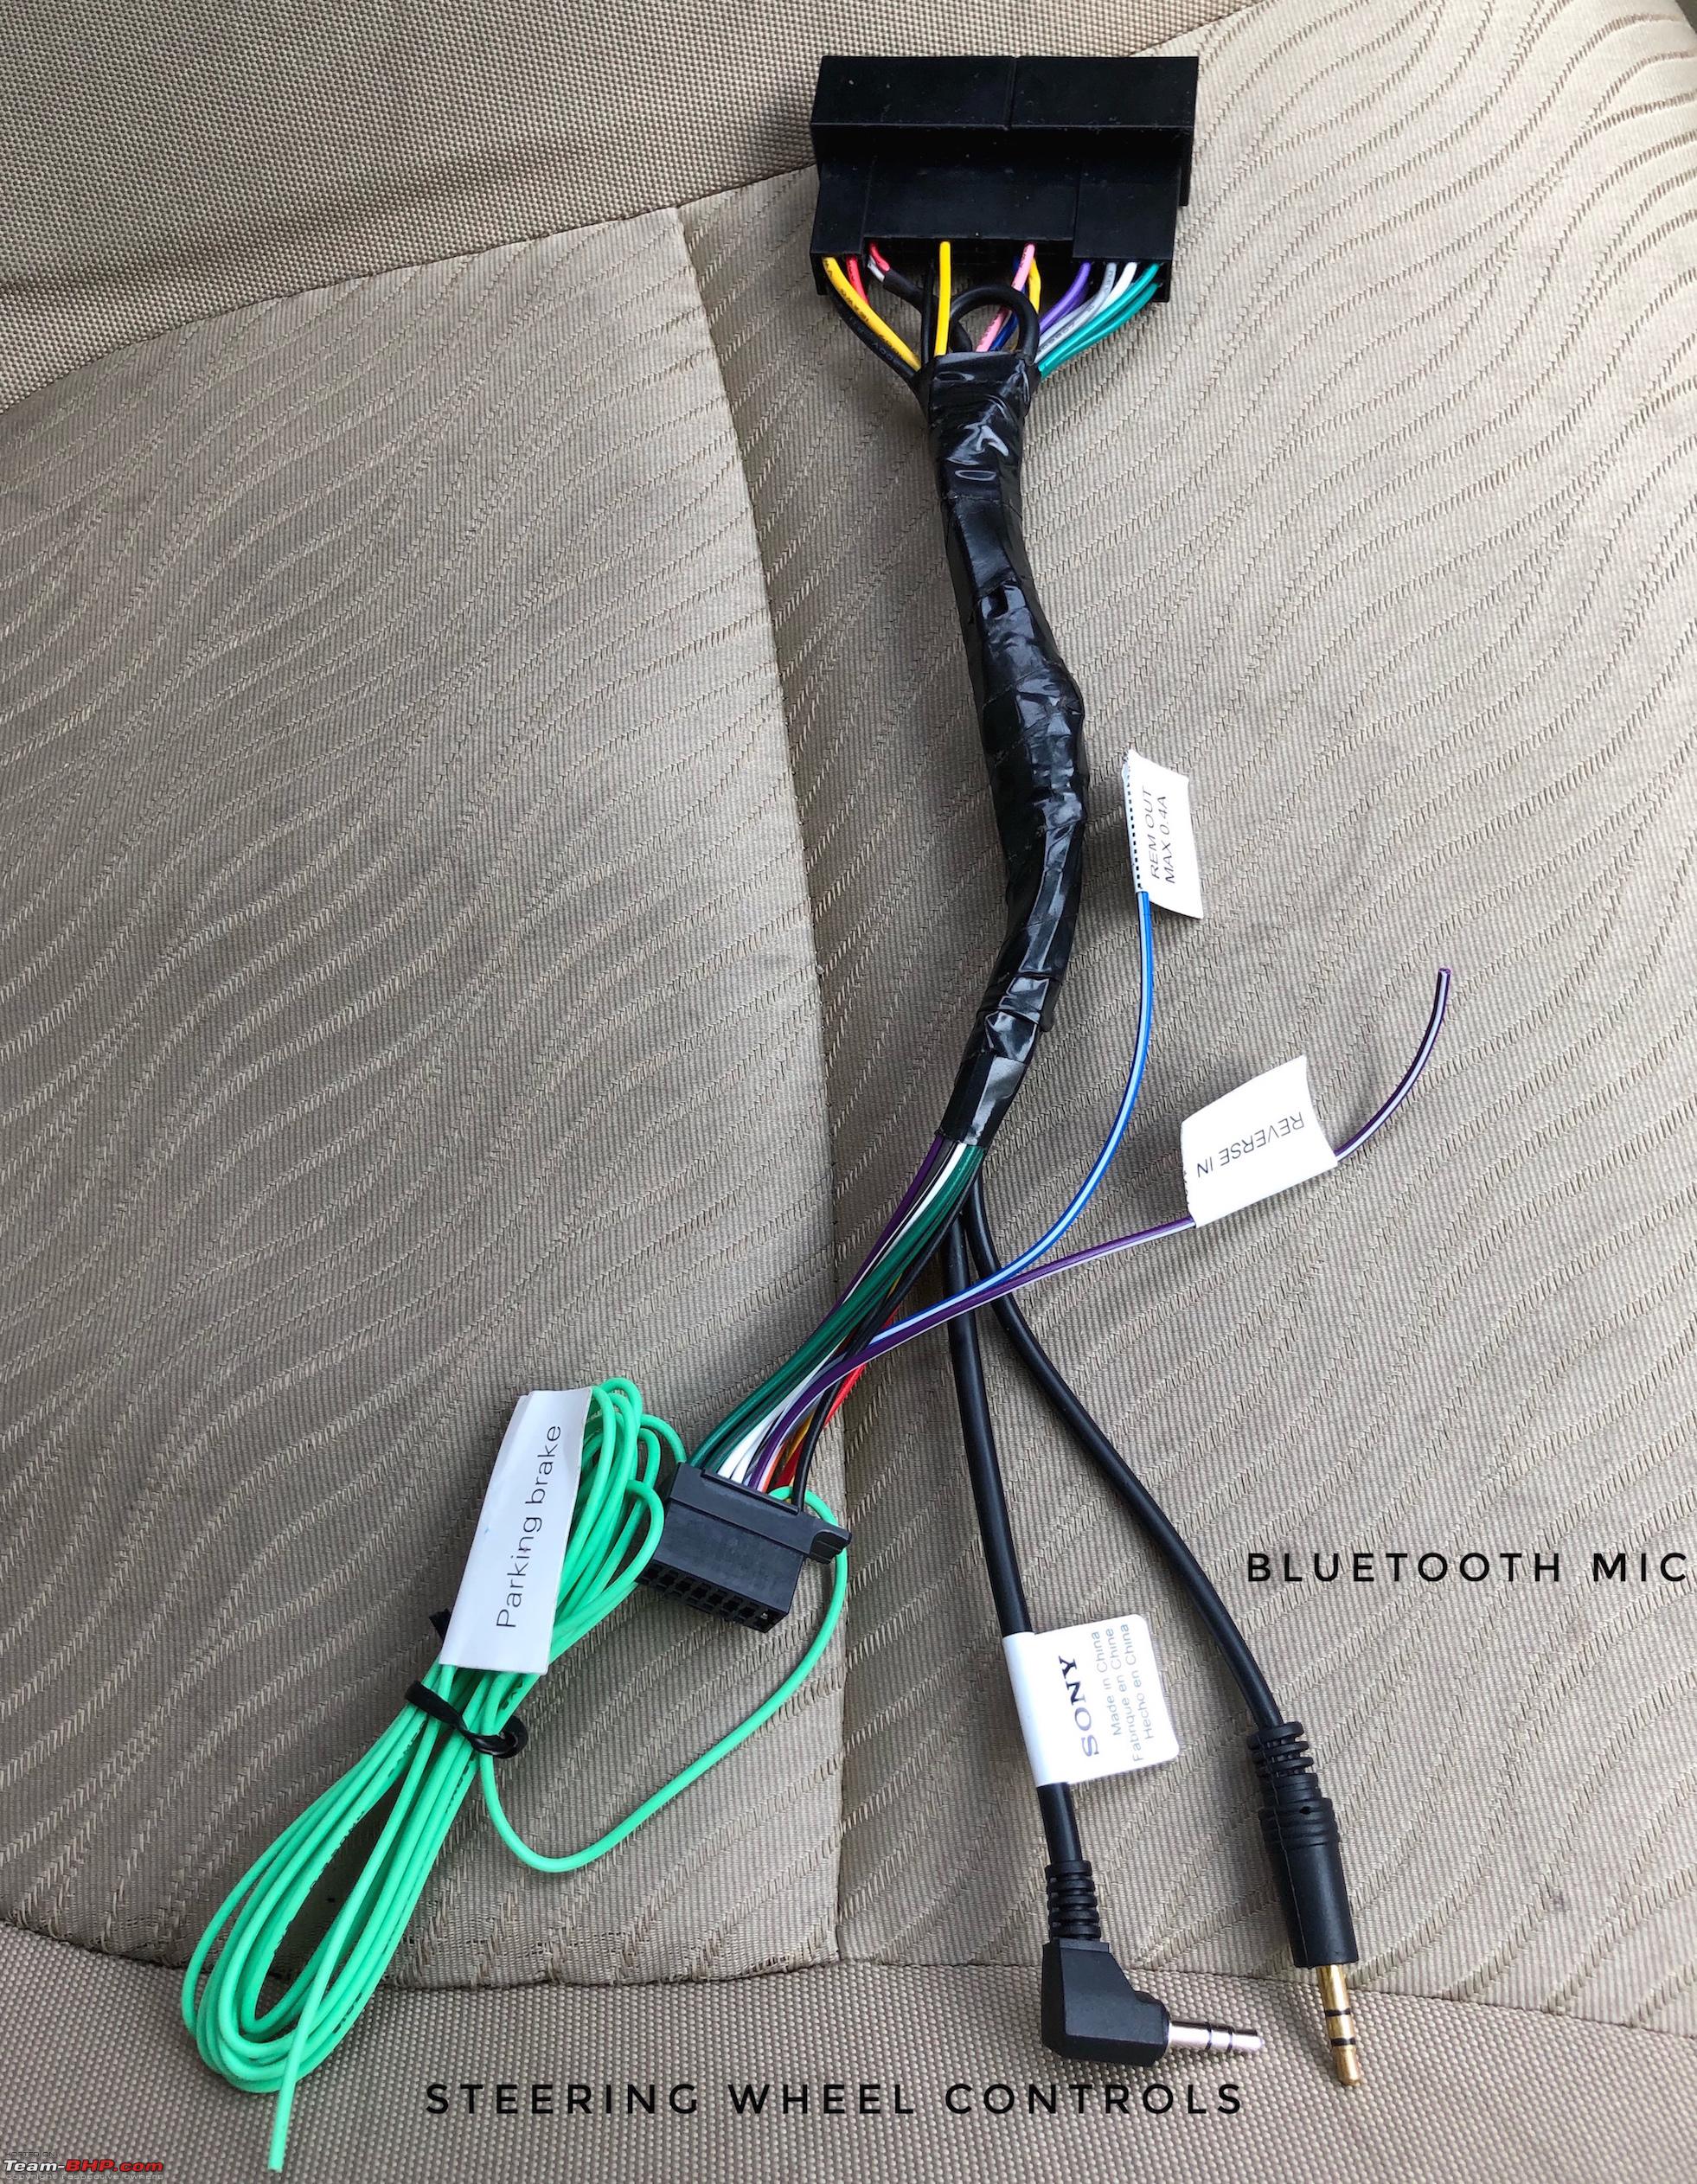
 BlueTooth Mic
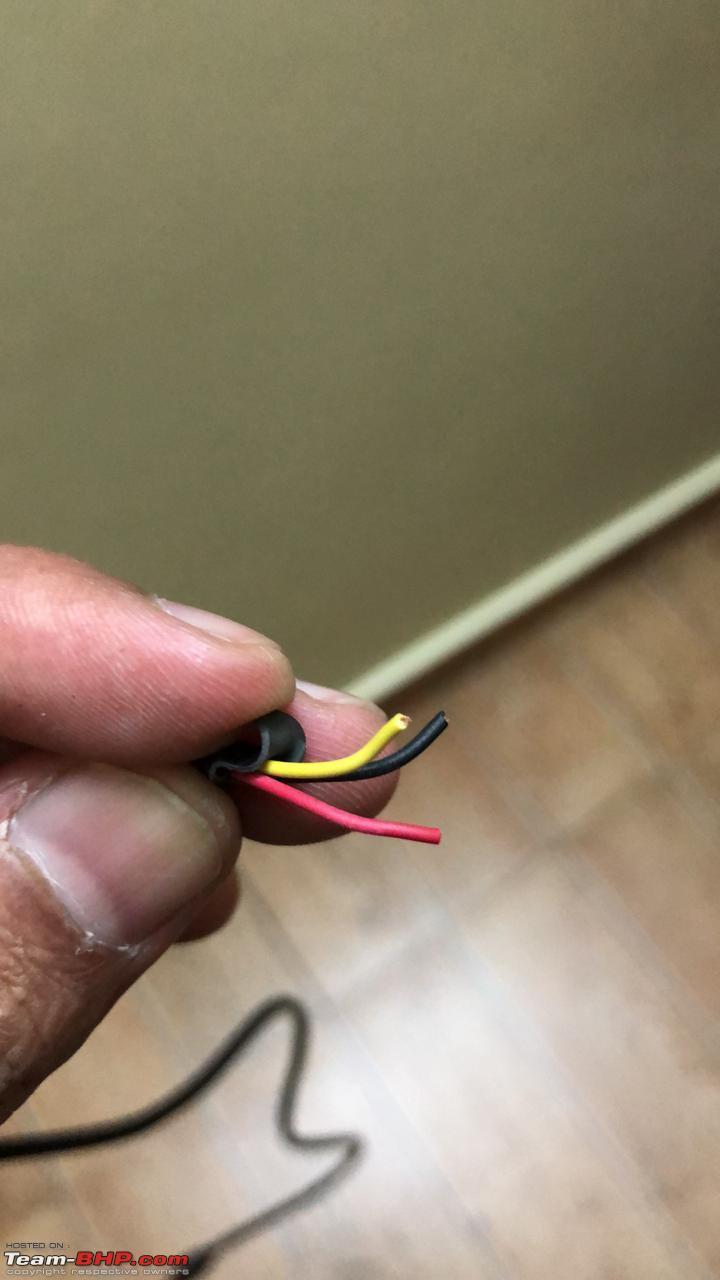
The sony headunit came with a bluetooth mic in the box. This mic needs to be fitted near the A-pillar on the driver’s side. This kinda ruined the OEM look that I was aiming for. Now the only way to get the factory bluetooth mic working with this aftermarket heading was to figure out which pins control this function in the factory harness. The wiring diagrams mentioned the pins needed and all I did was to hack up an old microphone/aux cable, use a multimeter to figure out which is GND and which is +ve and voila we have the wiring for the bluetooth mic ready and integrated into the harness.
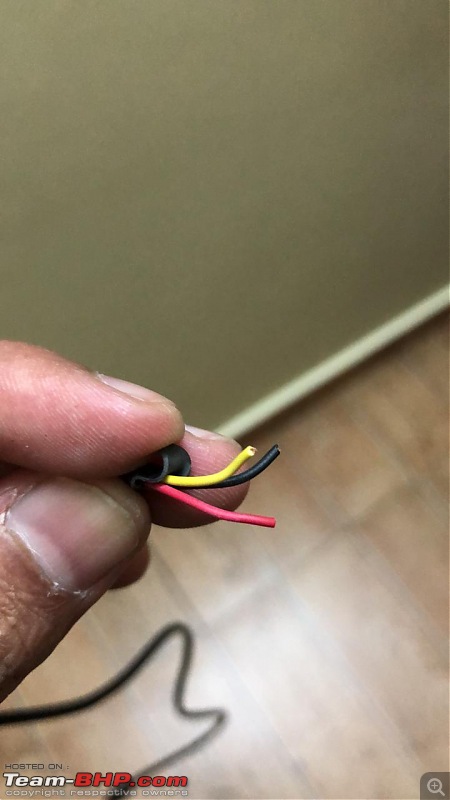
Using a multimeter, I could figure out that the Black wire is the ground and the Red & Yellow wires are positive wires.
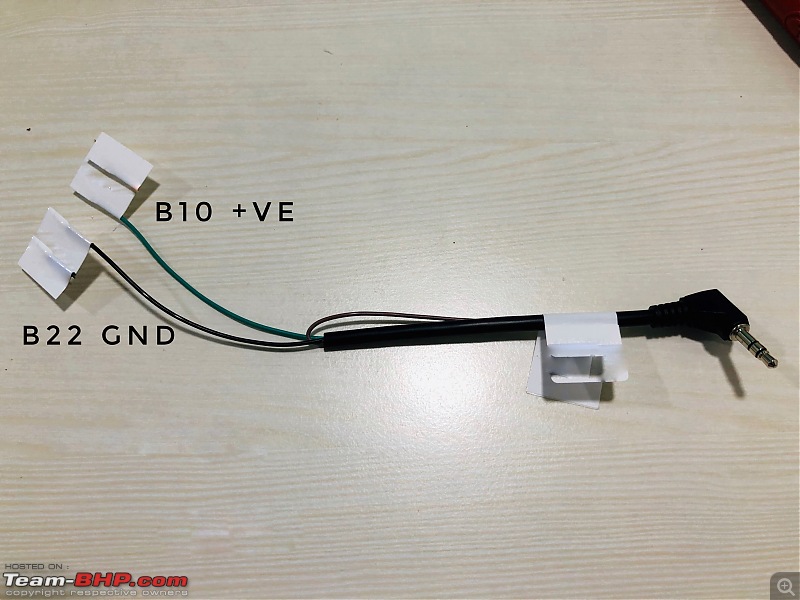
Final wire with the pins they are supposed to go into
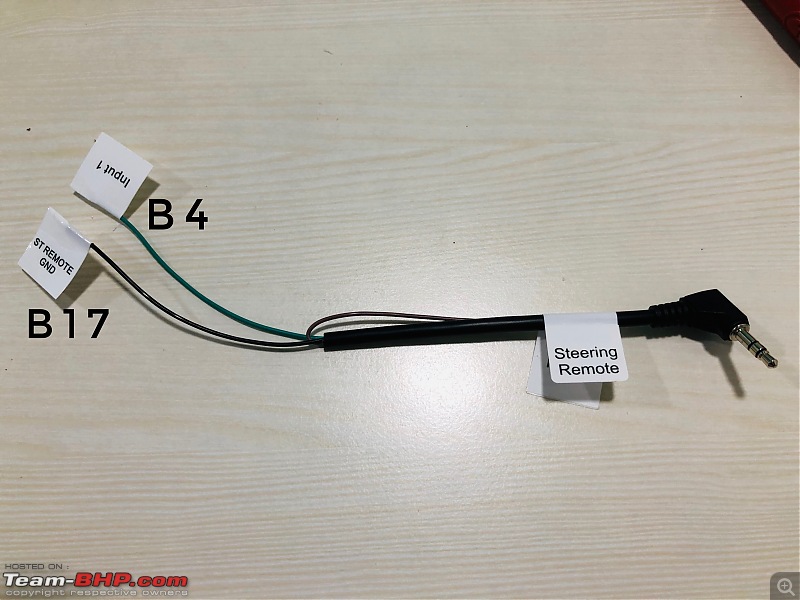
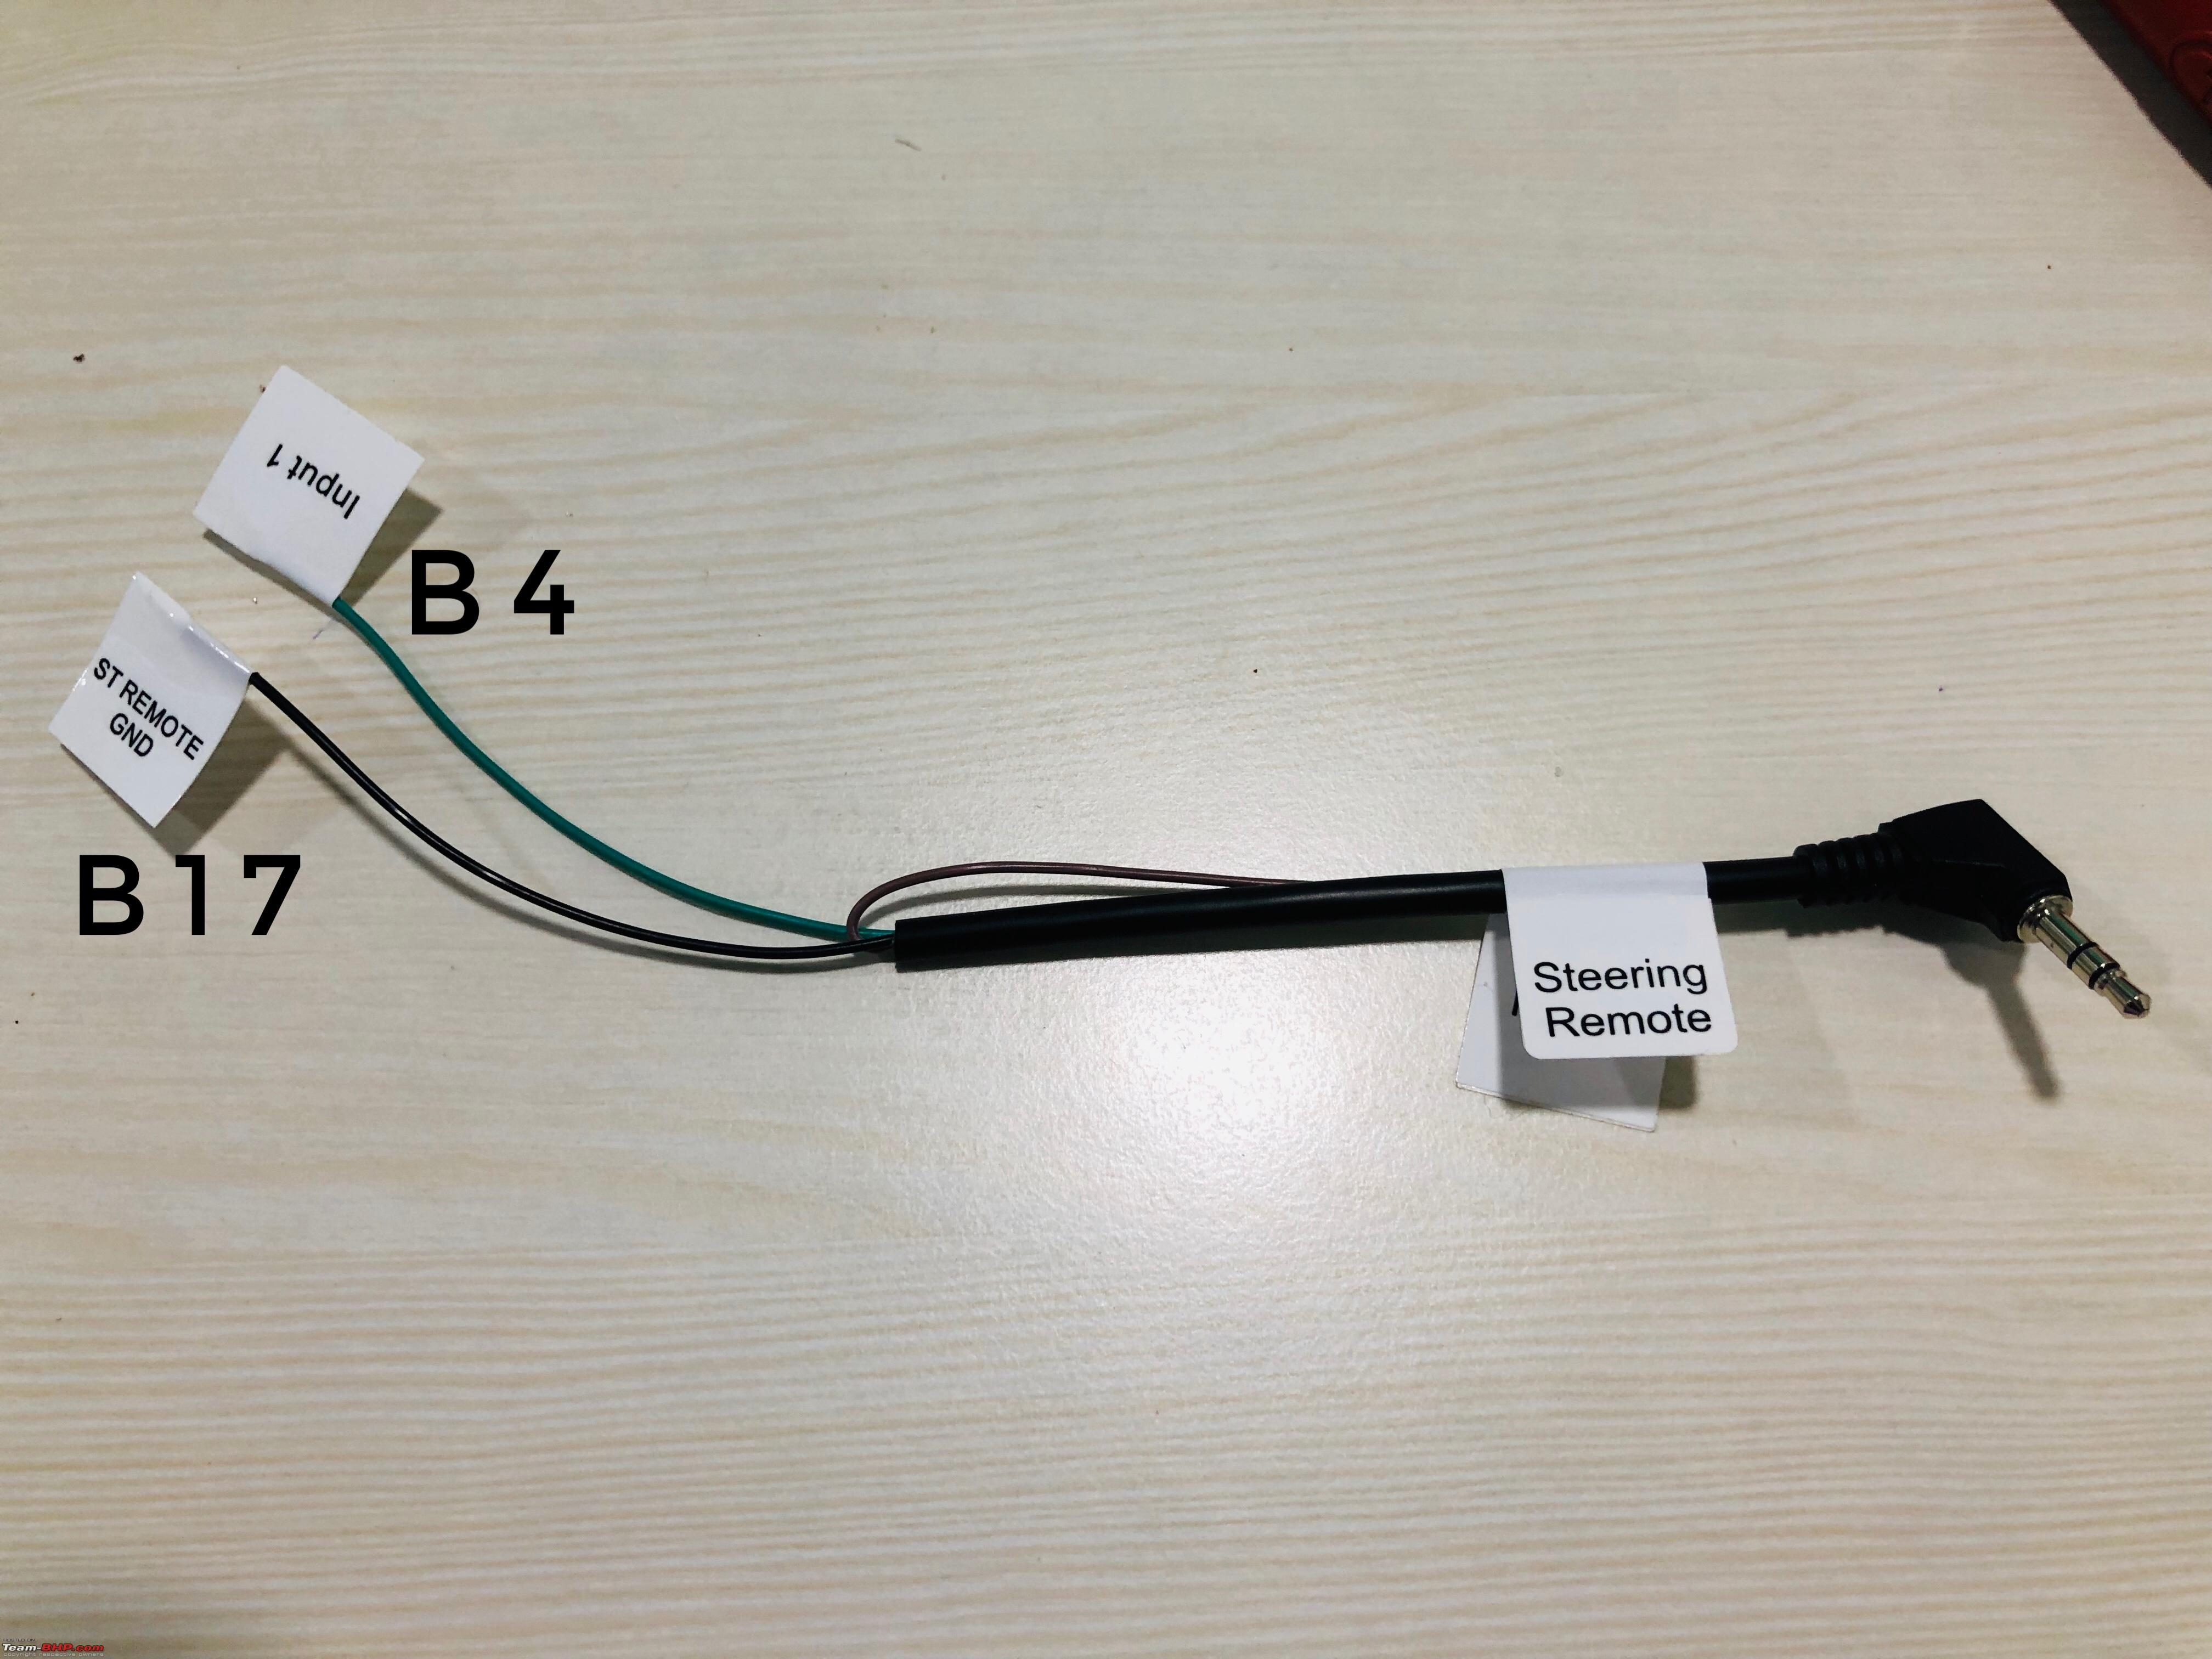
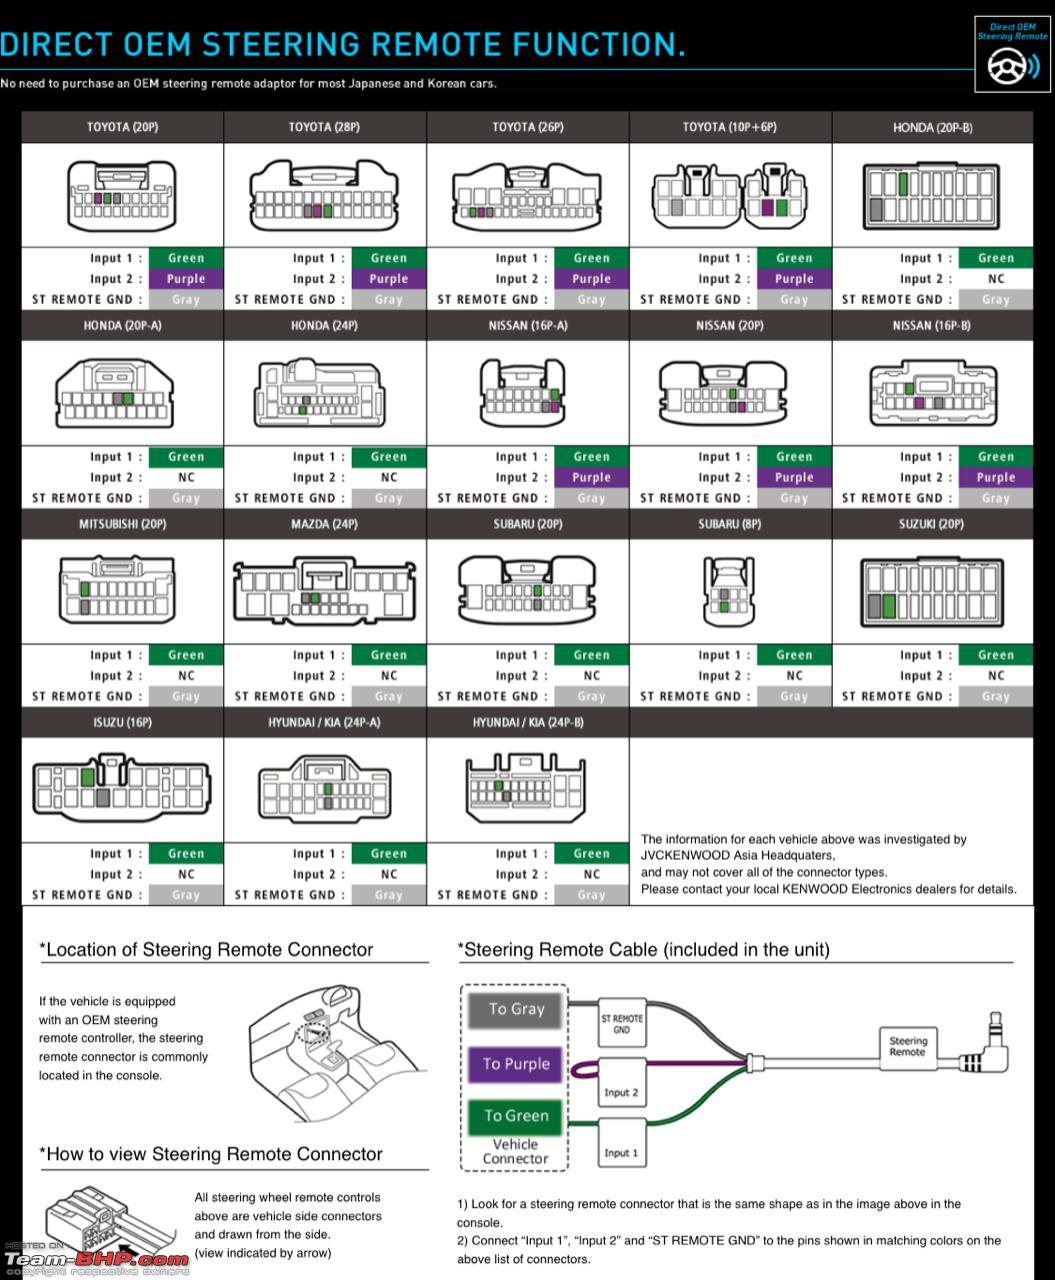
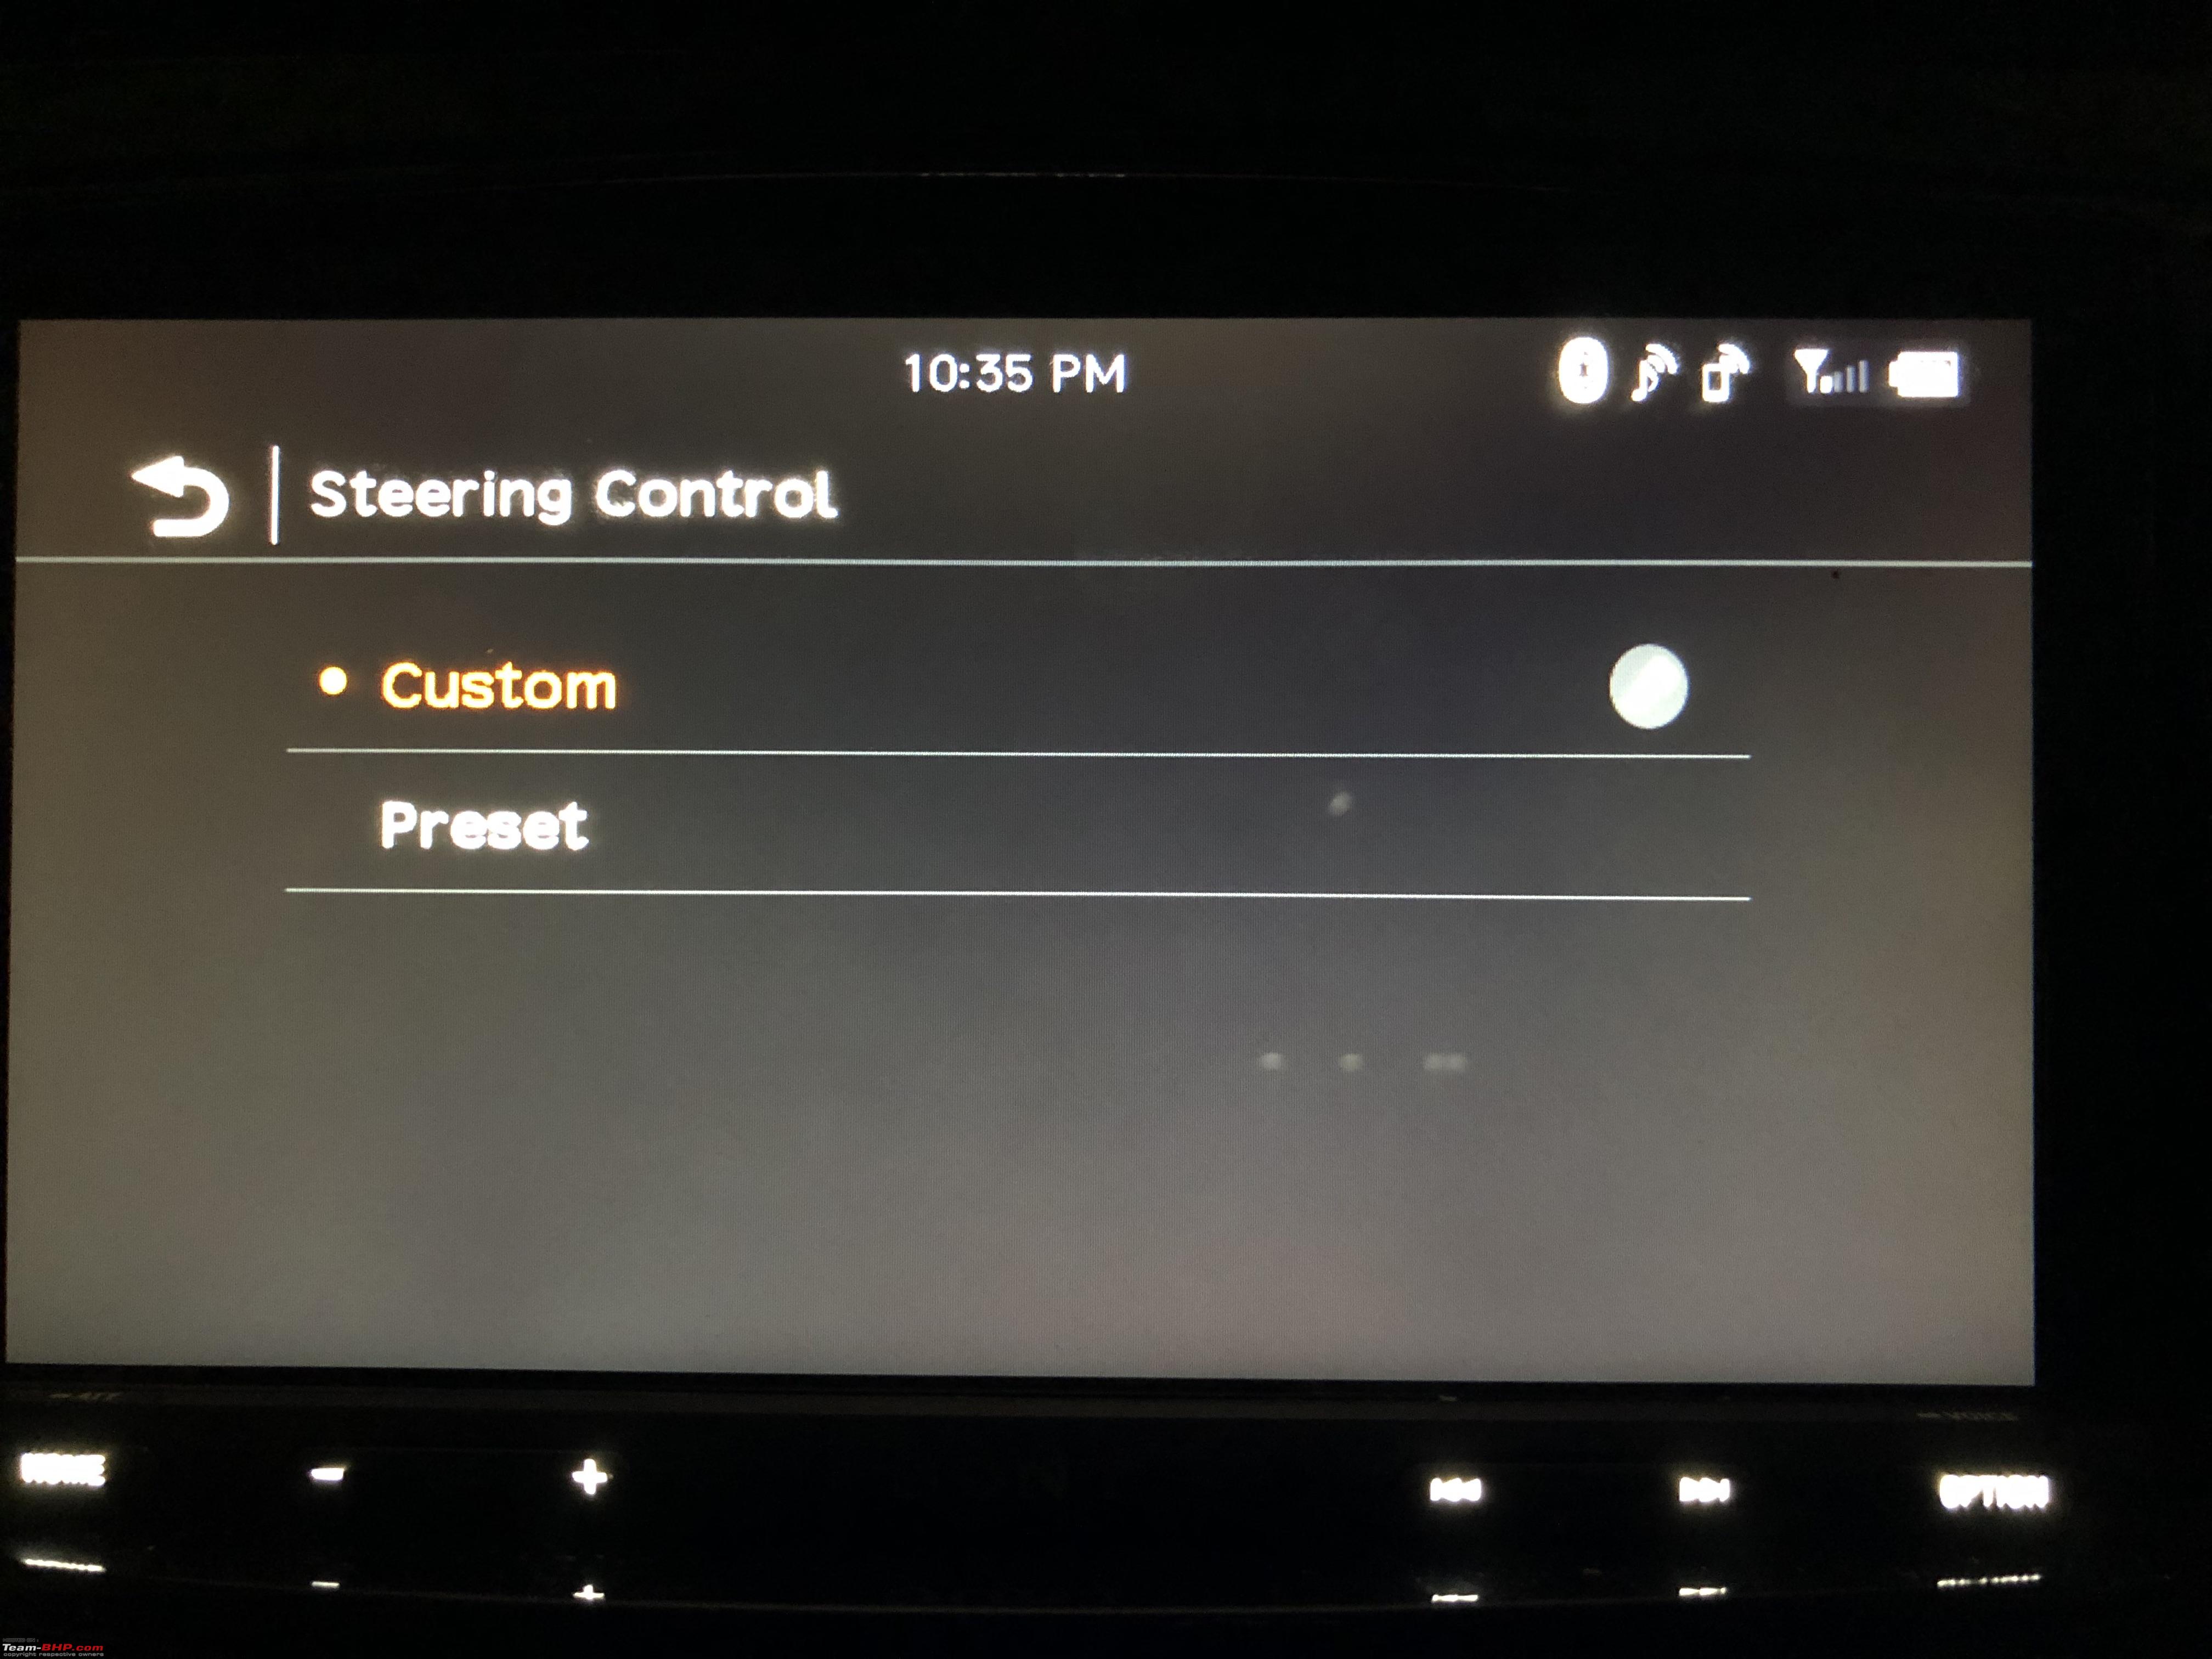
Steering Wheel Controls
What good is music system if it cannot help you retain steering wheel controls. The Sony Headunit came with its own steering wheel controls adapter and the website mentioned how to wire up the whole thing. Also a point to note is that Japanese and Korean cars do not need any other adapters to get the steering wheel controls to work. Once connected and powered on, the unit lets you assign functions to the buttons. Impressive.
Sony's Steering Wheel Controls (SWC) Adapter supplied in the box.
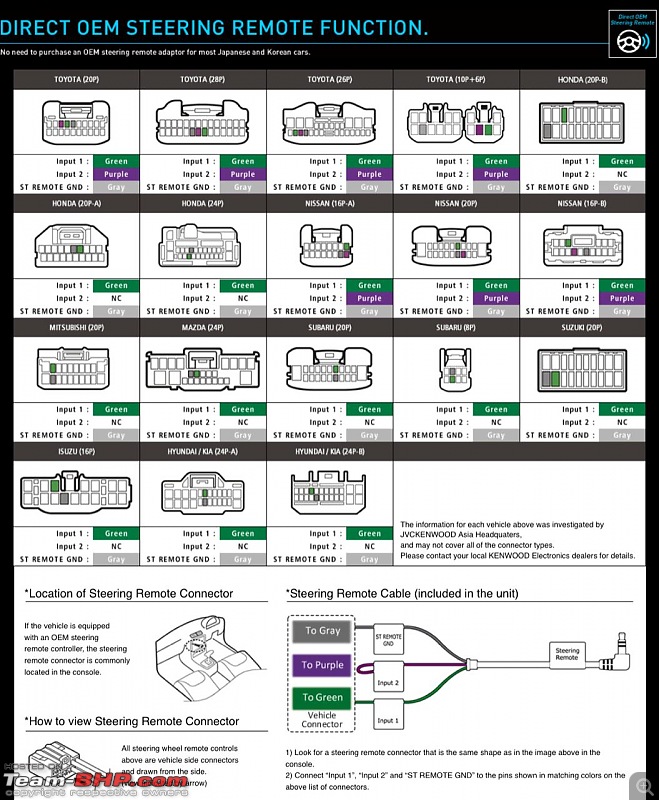
Picture showing how to wire up the SWC in different cars.
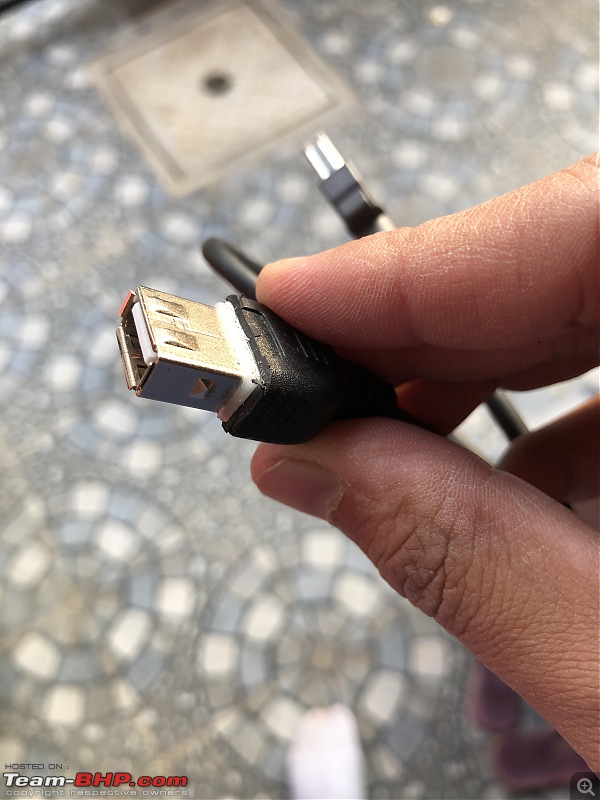
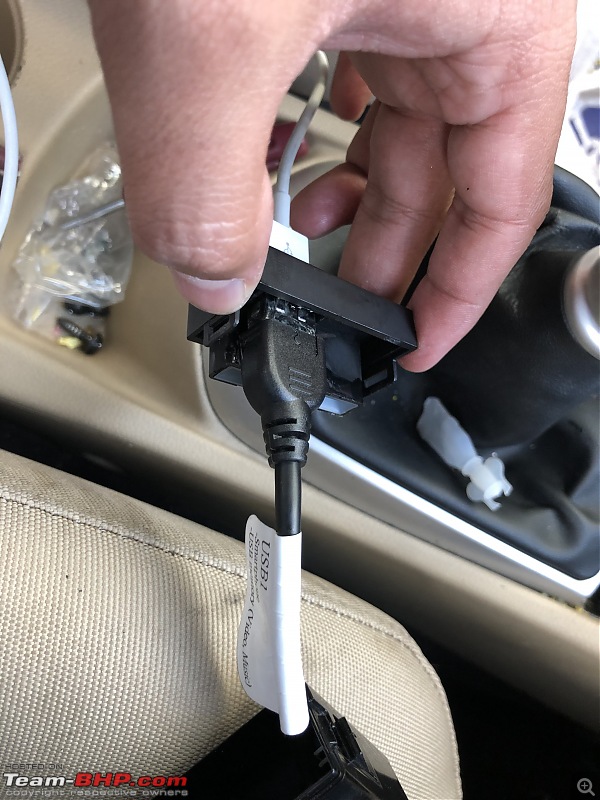
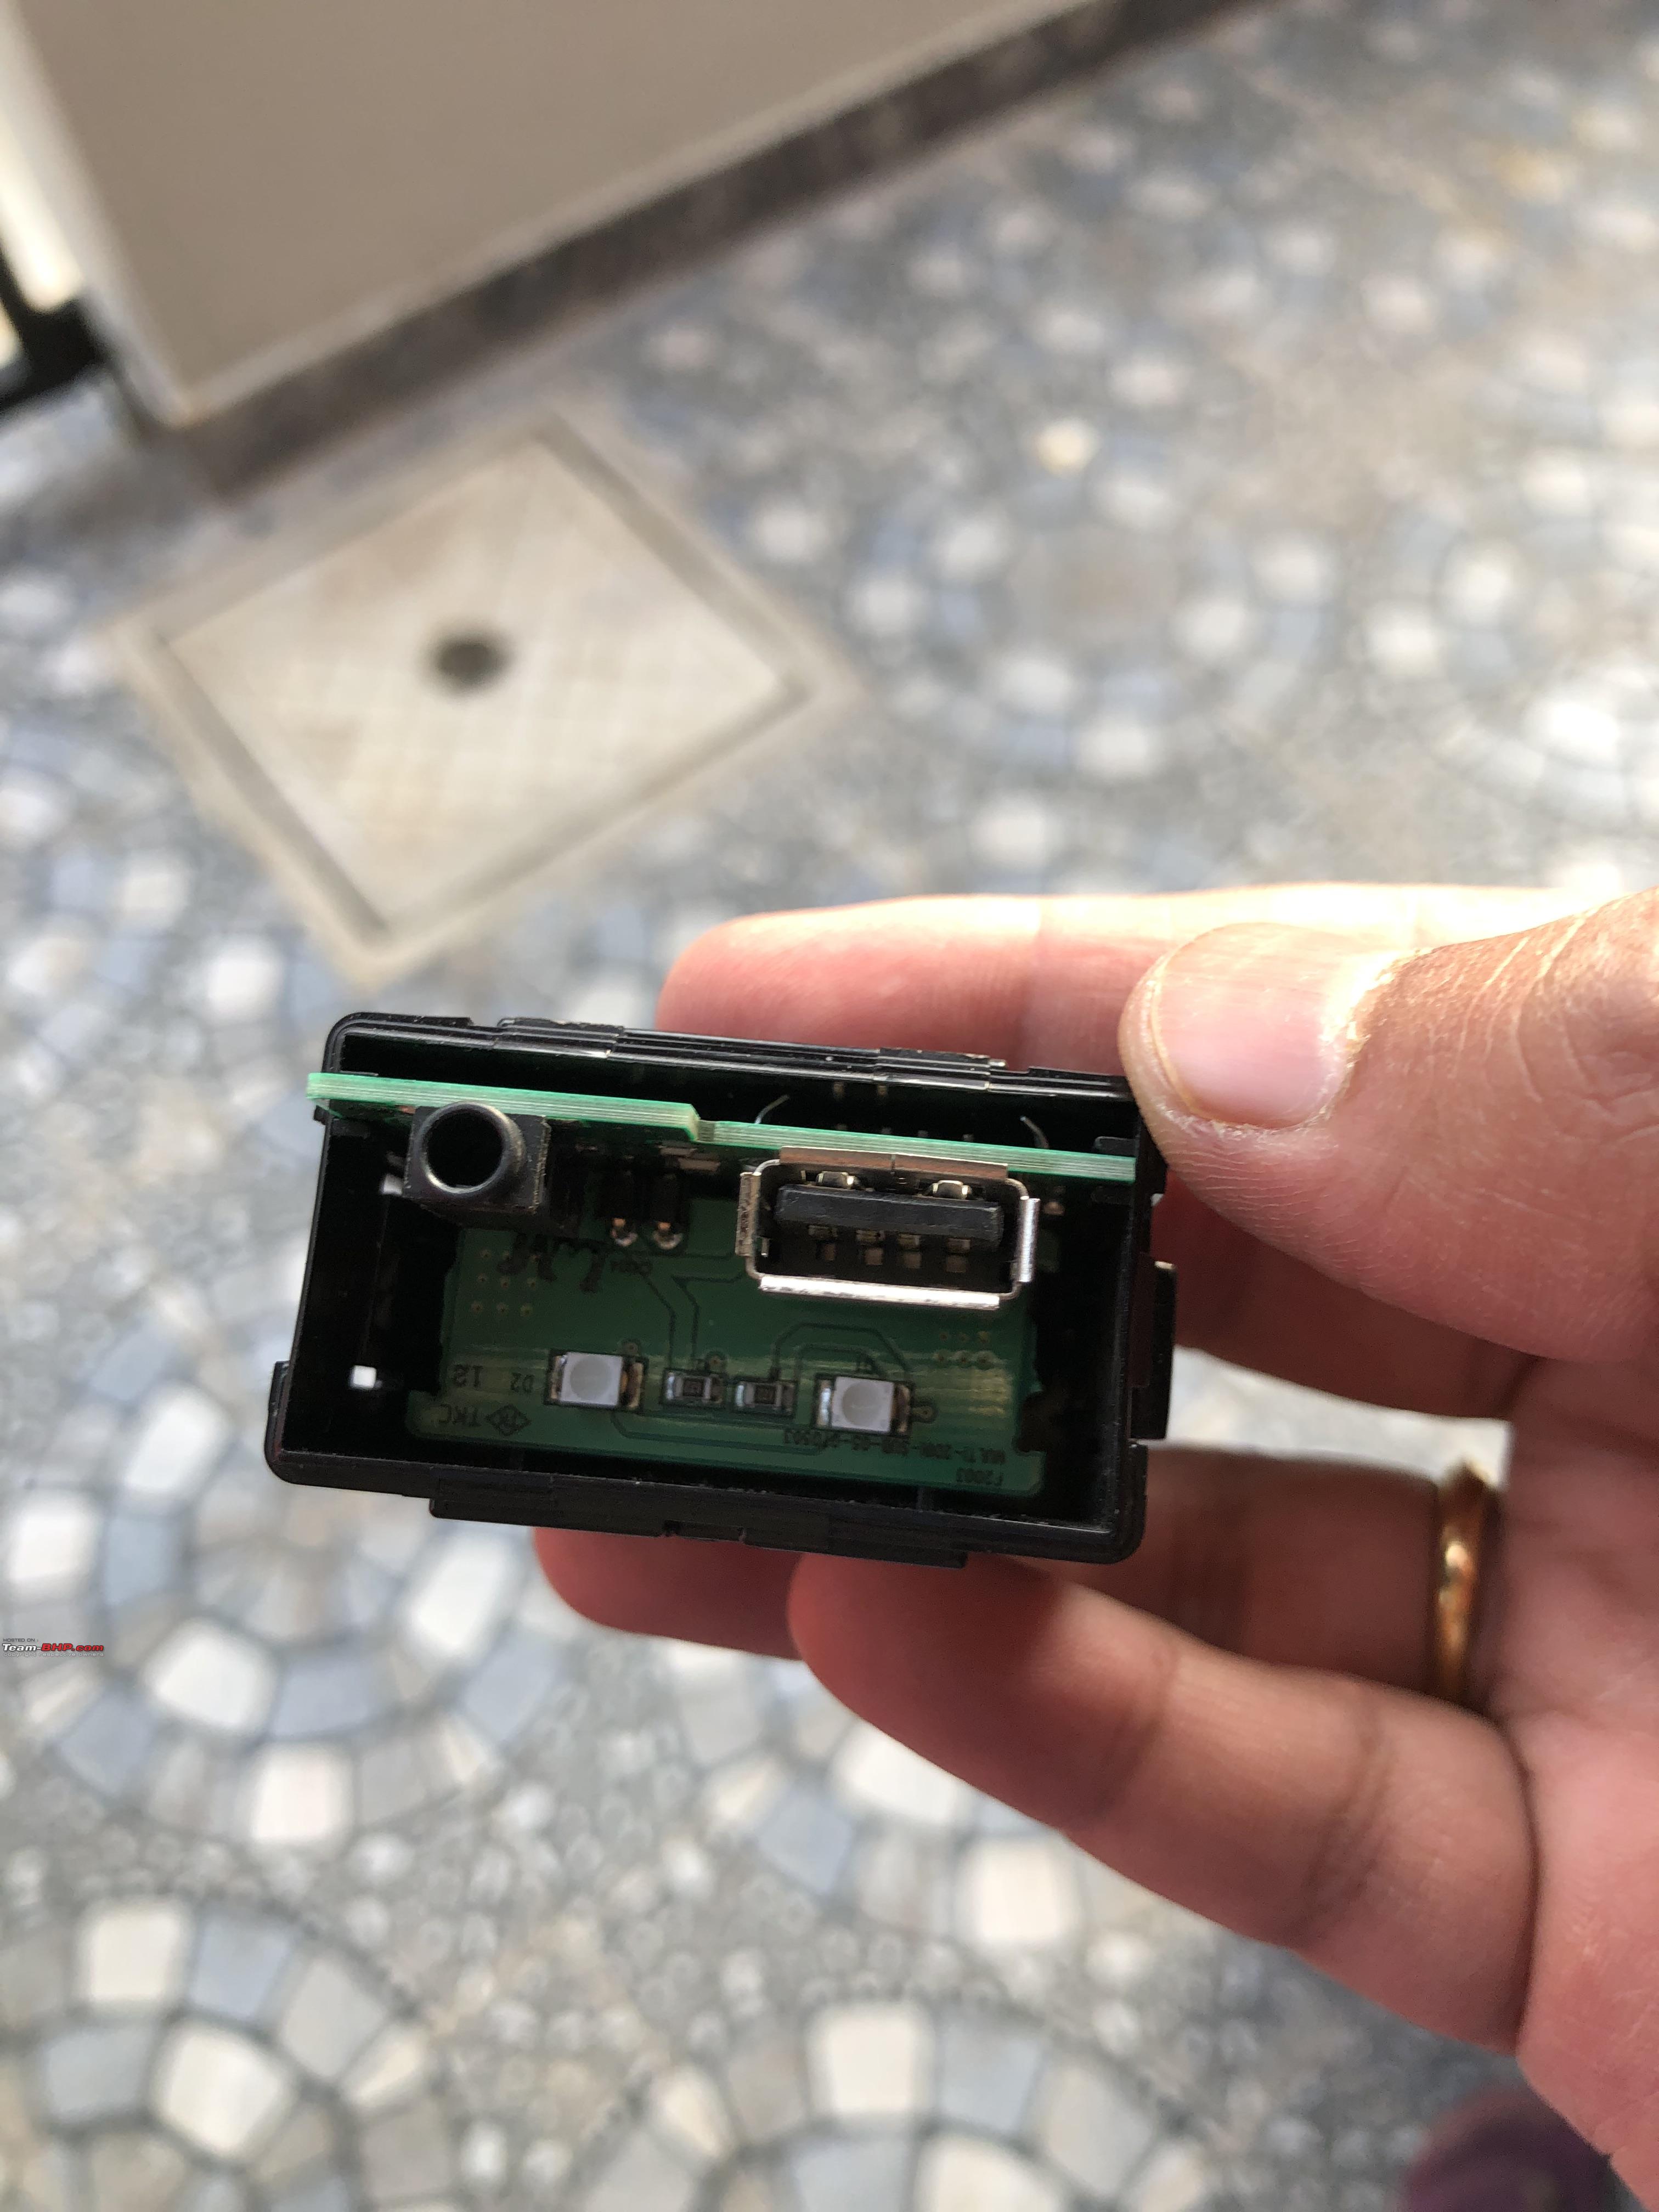
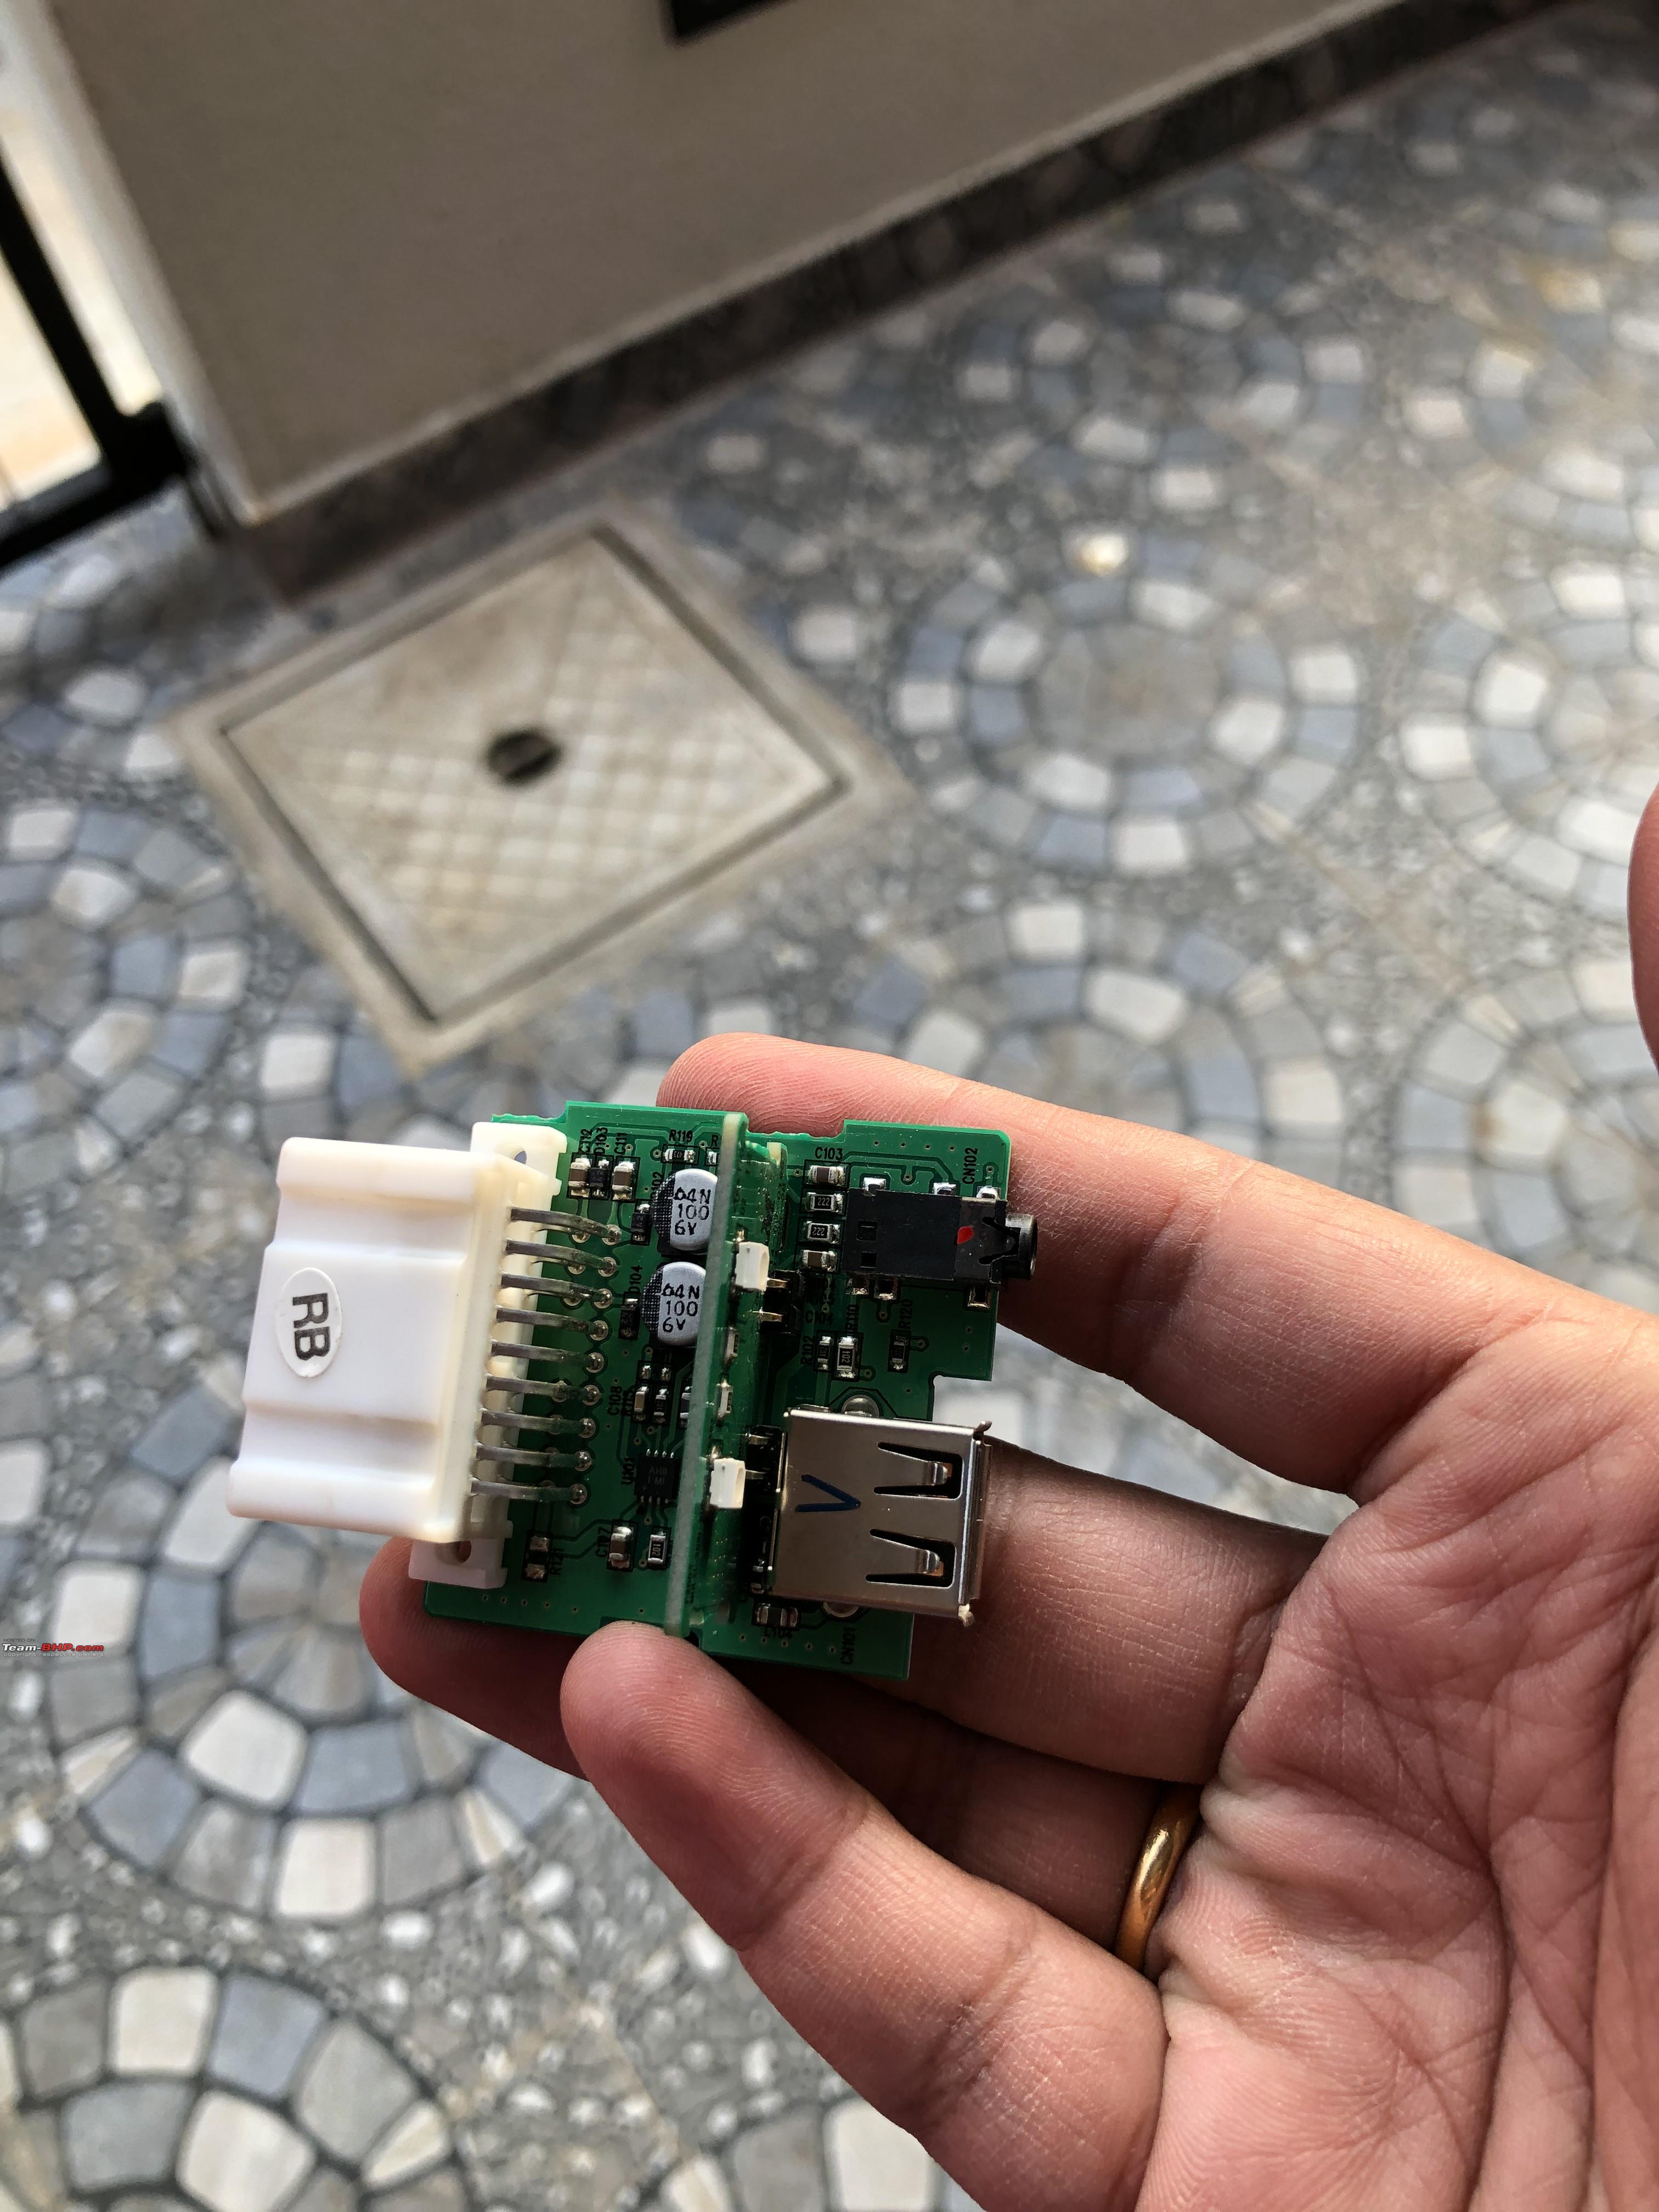
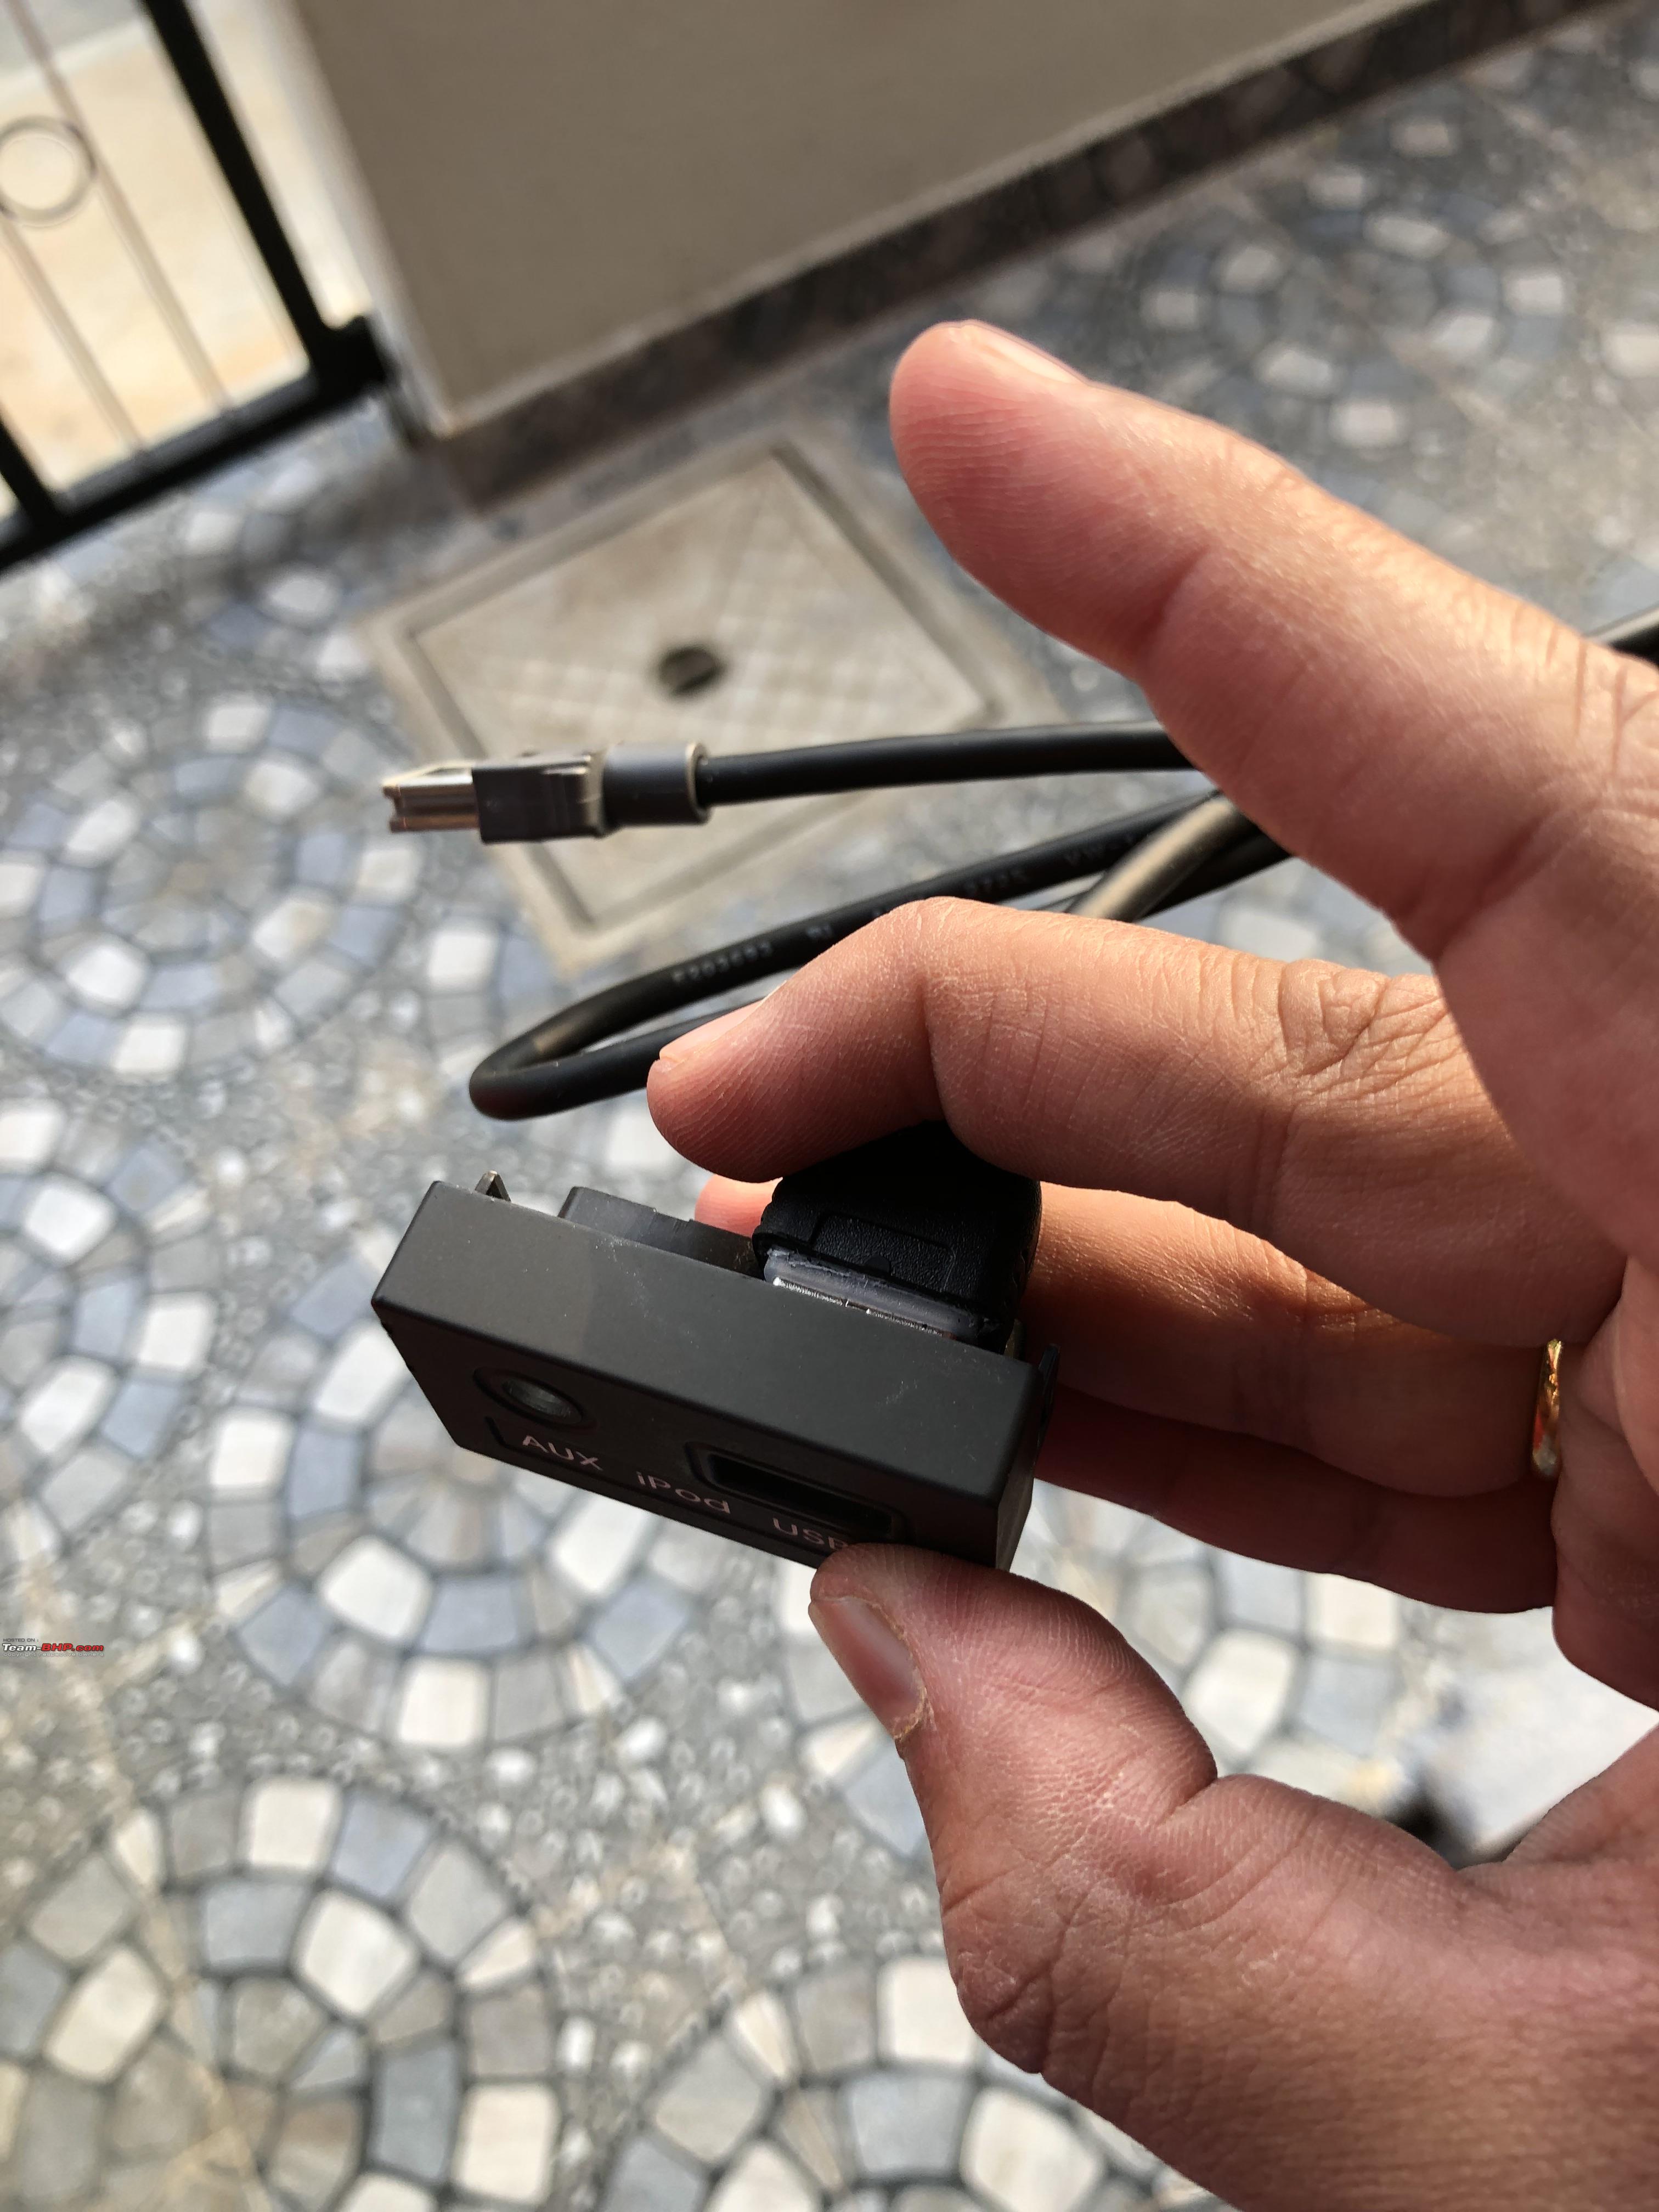
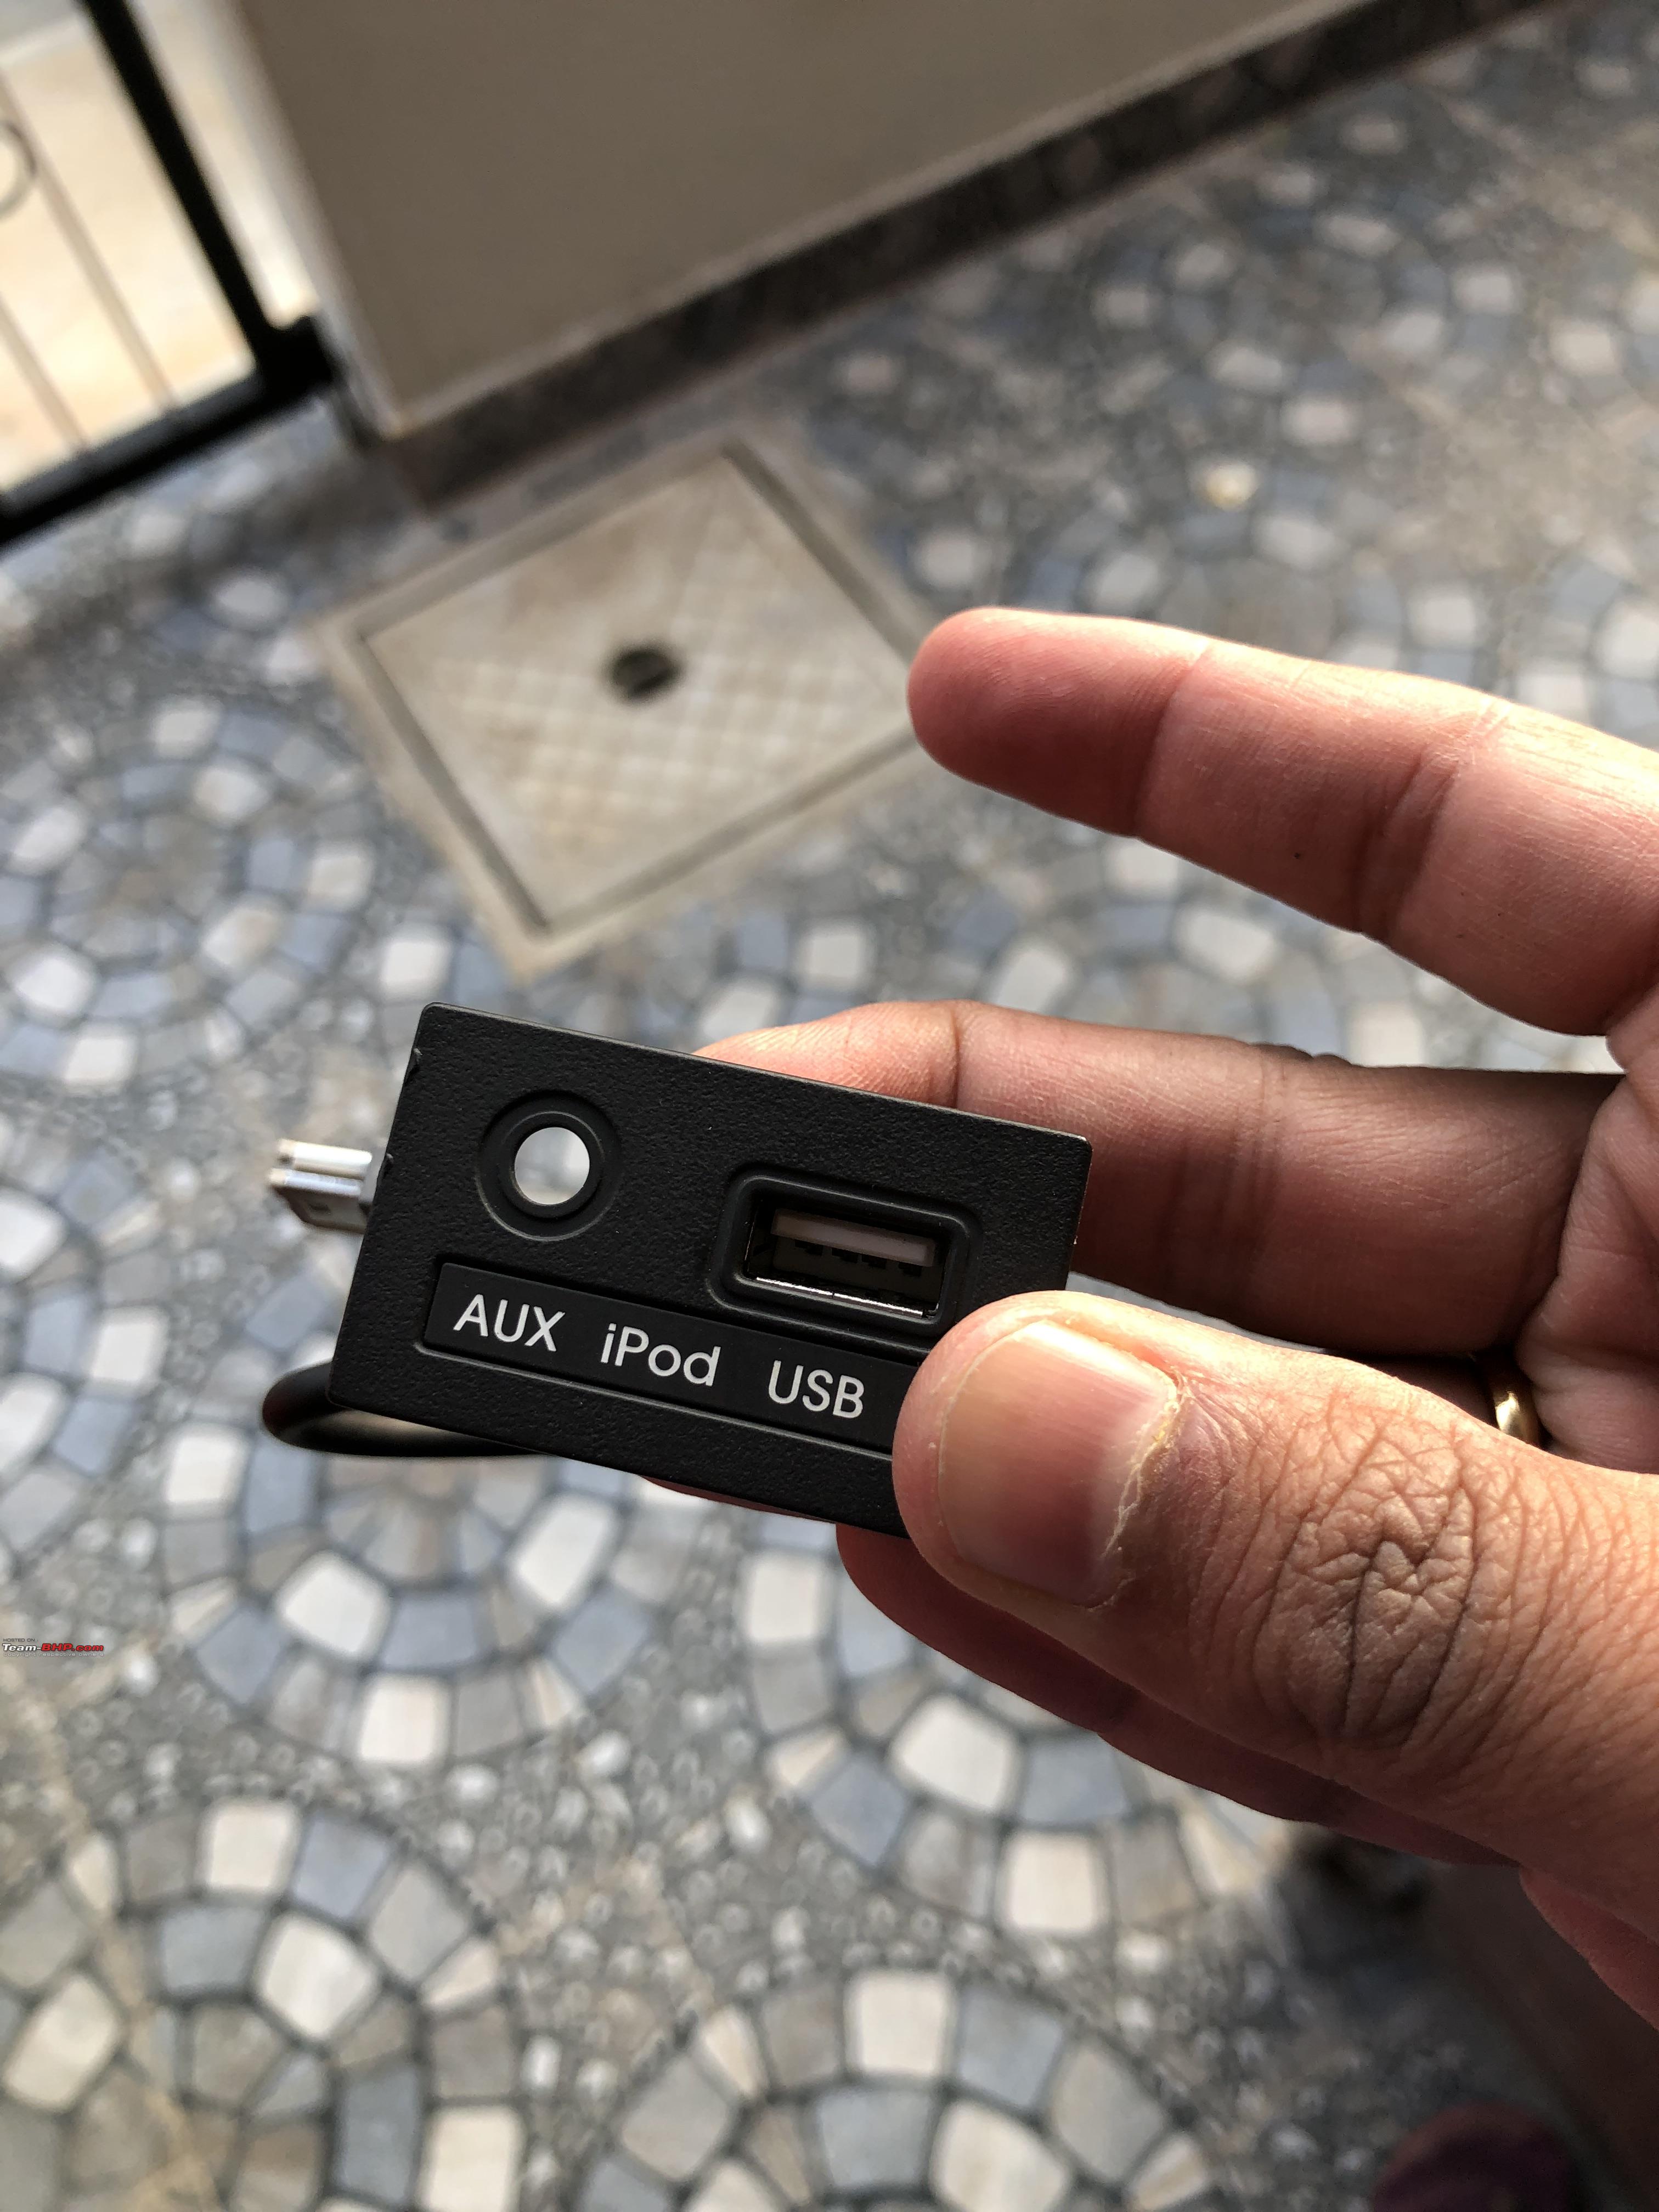
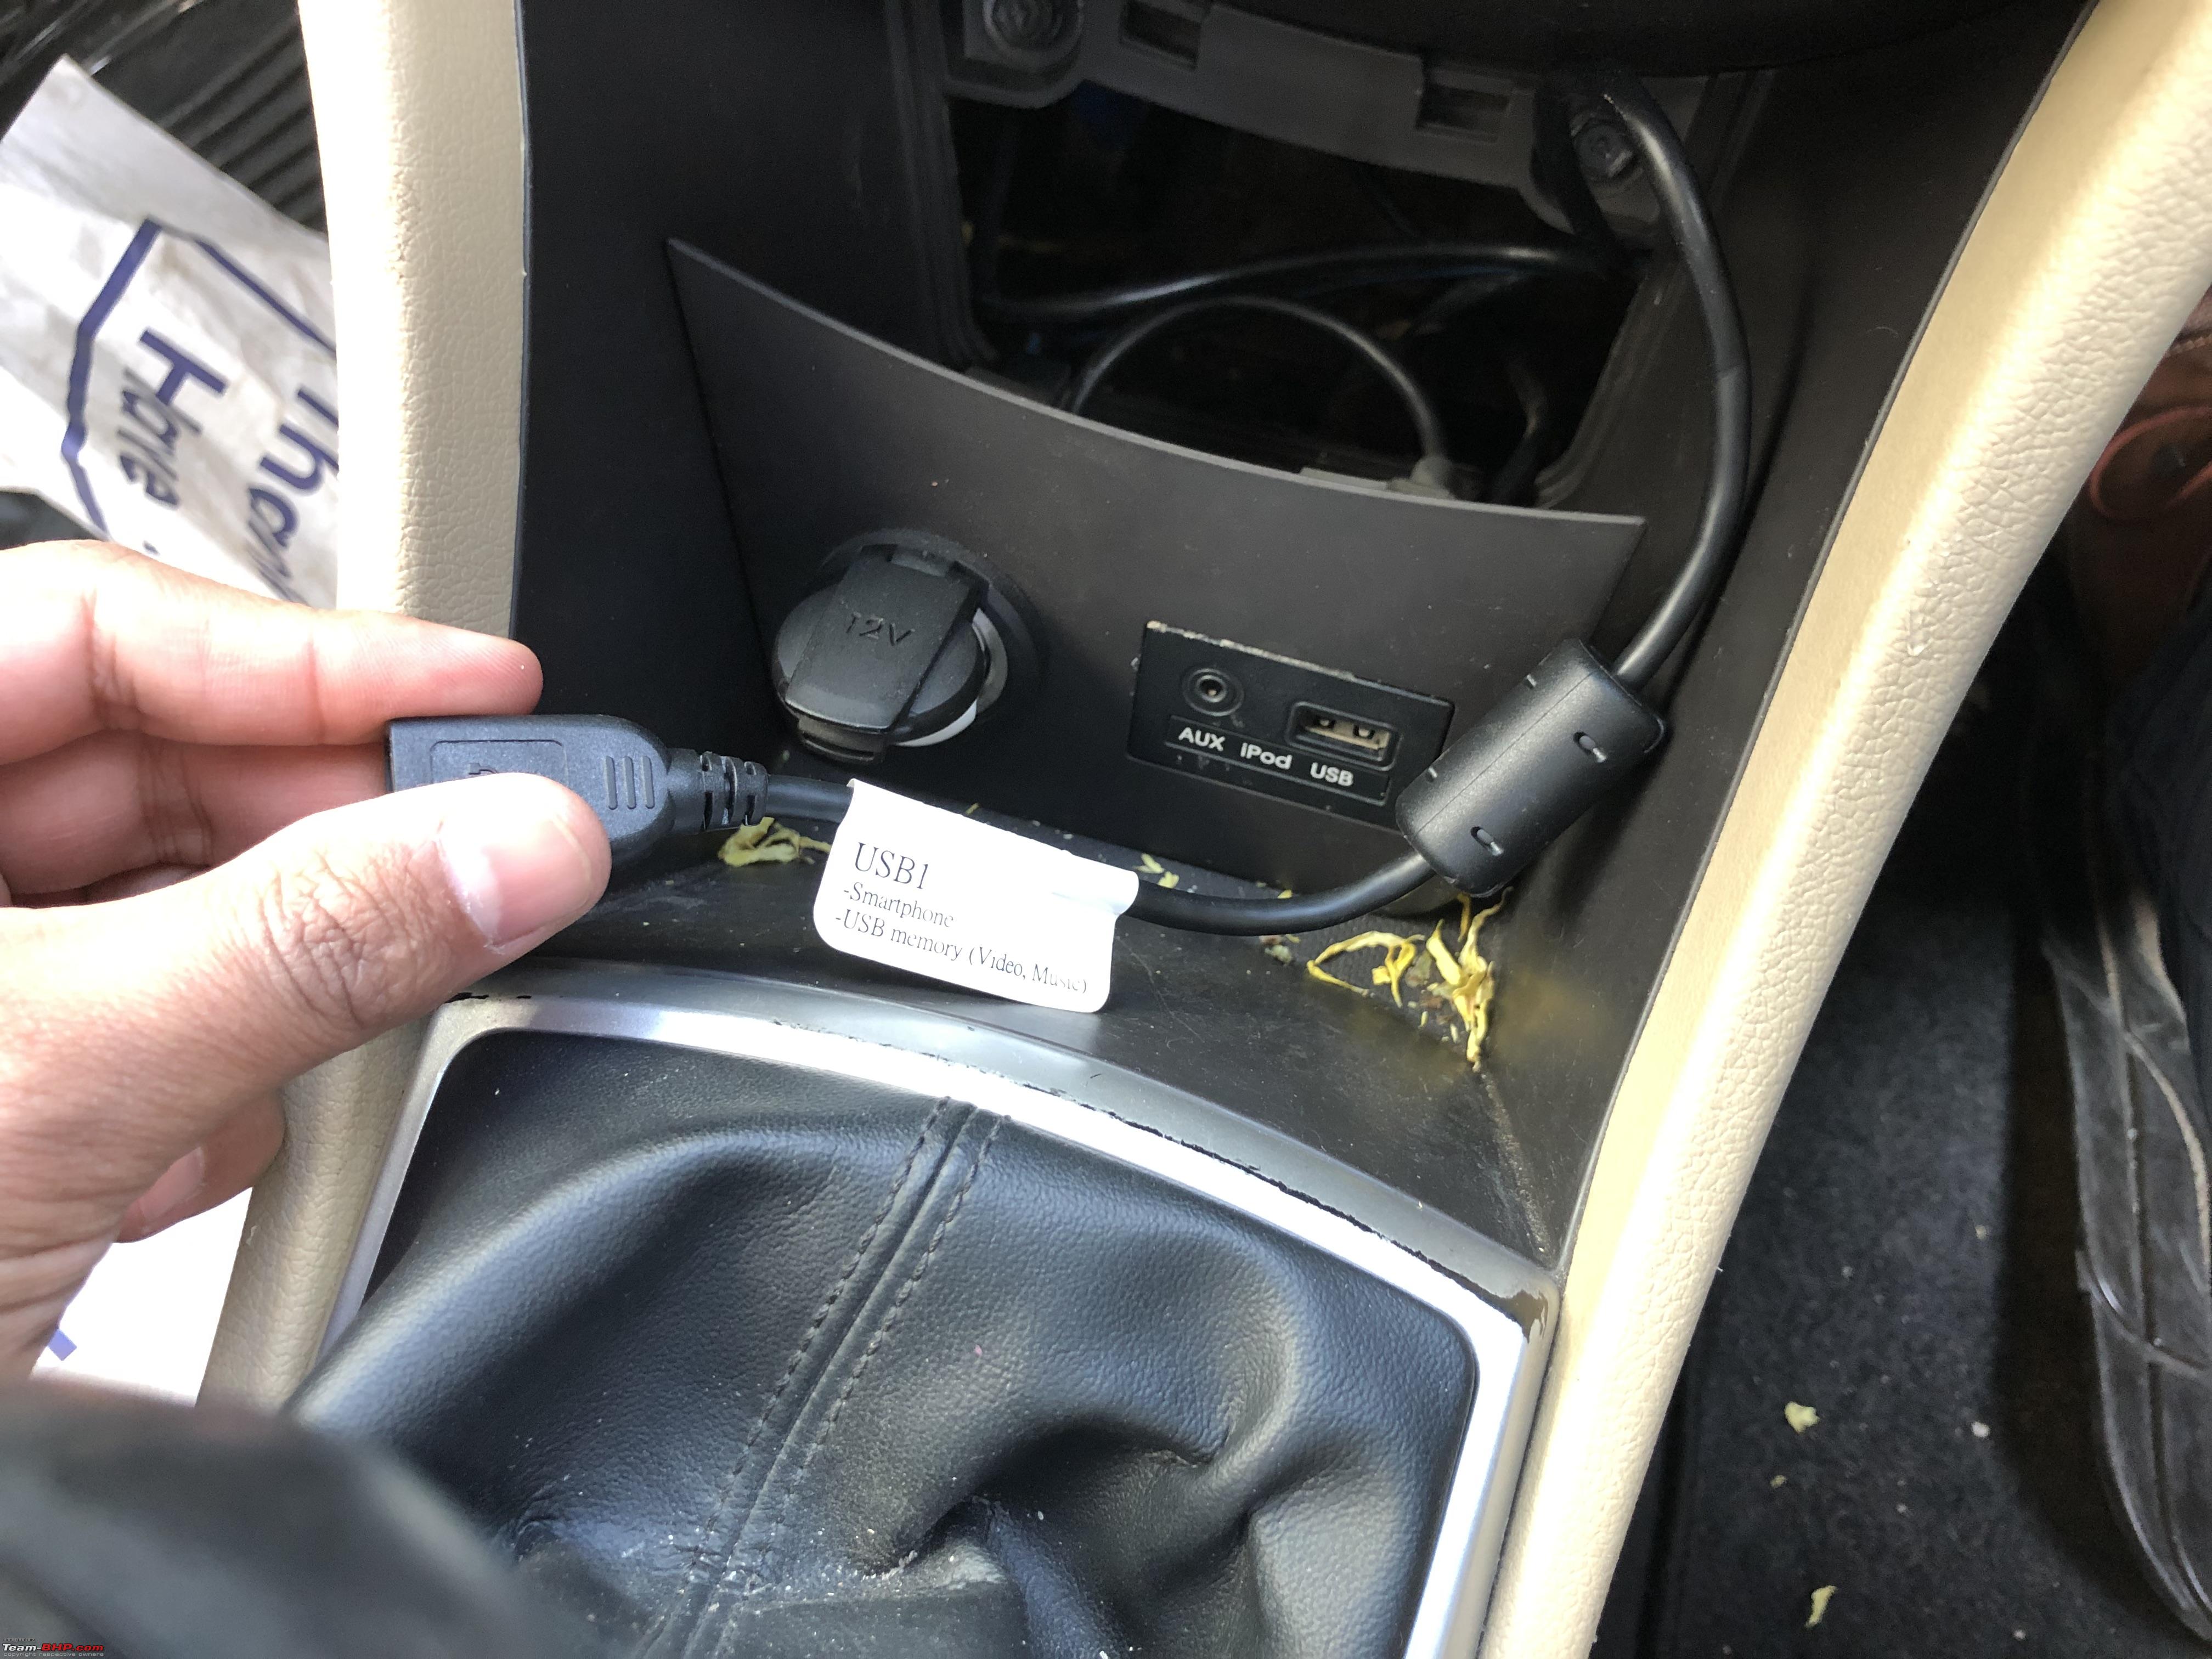
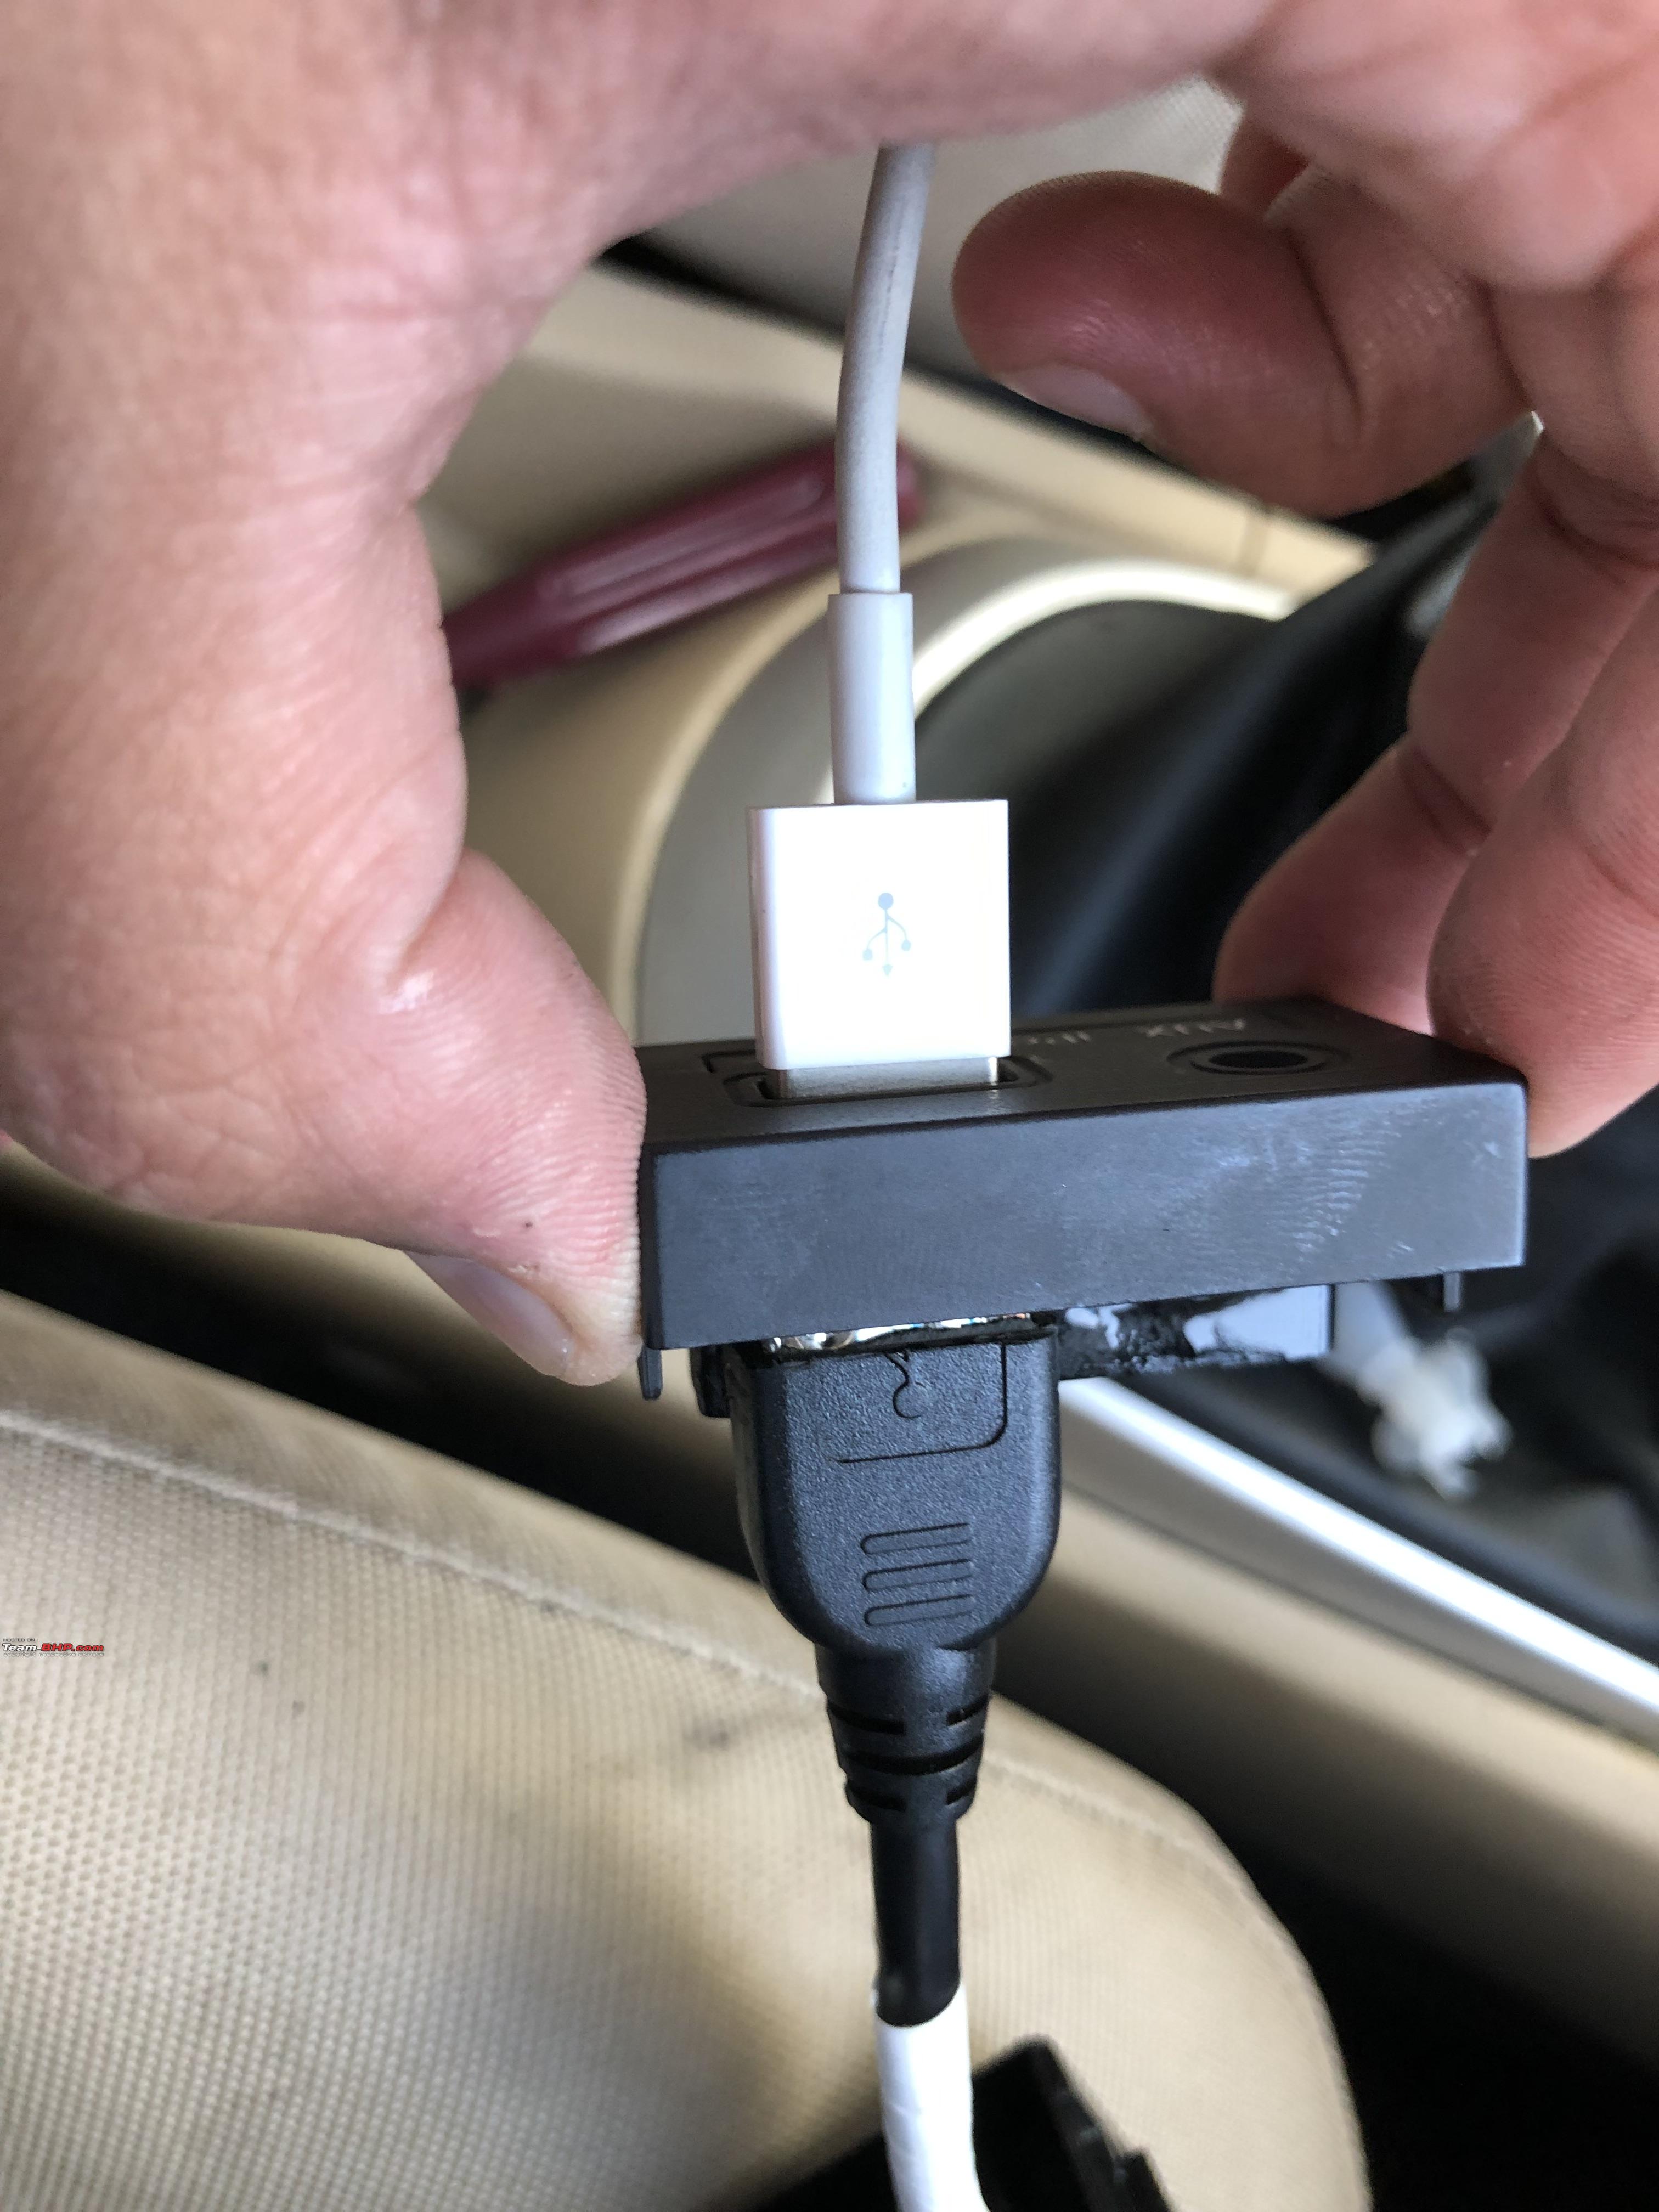
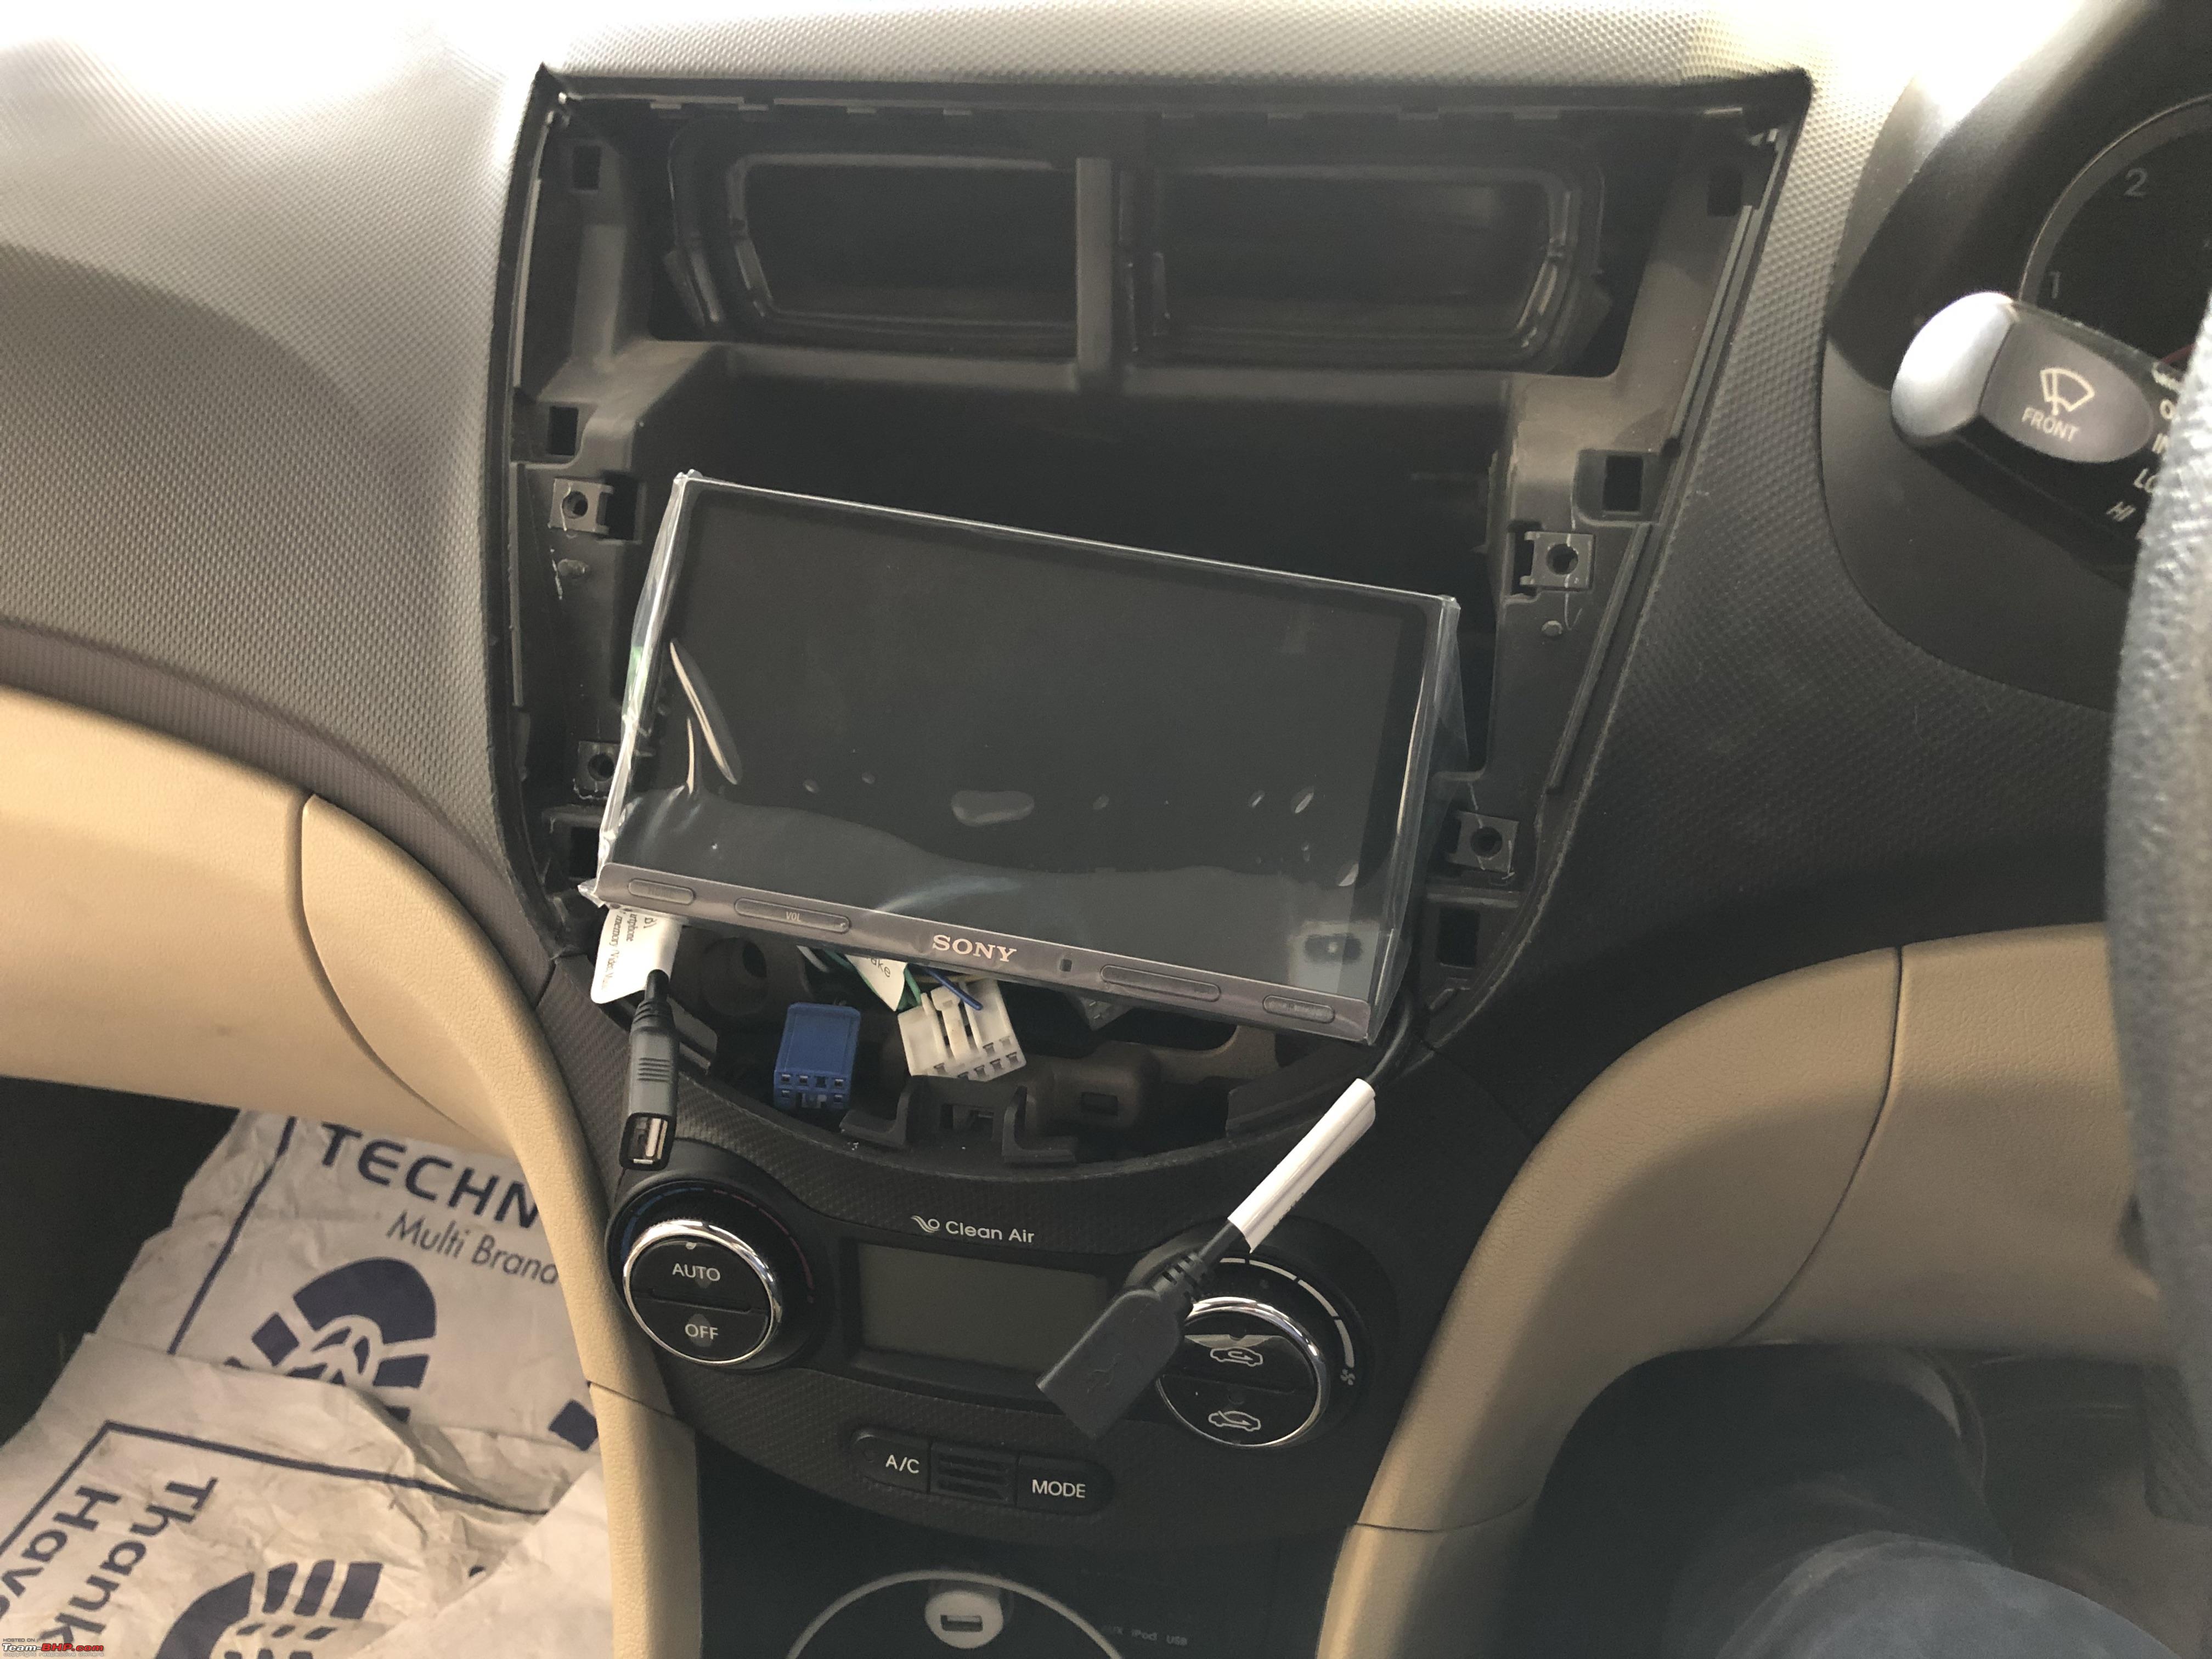
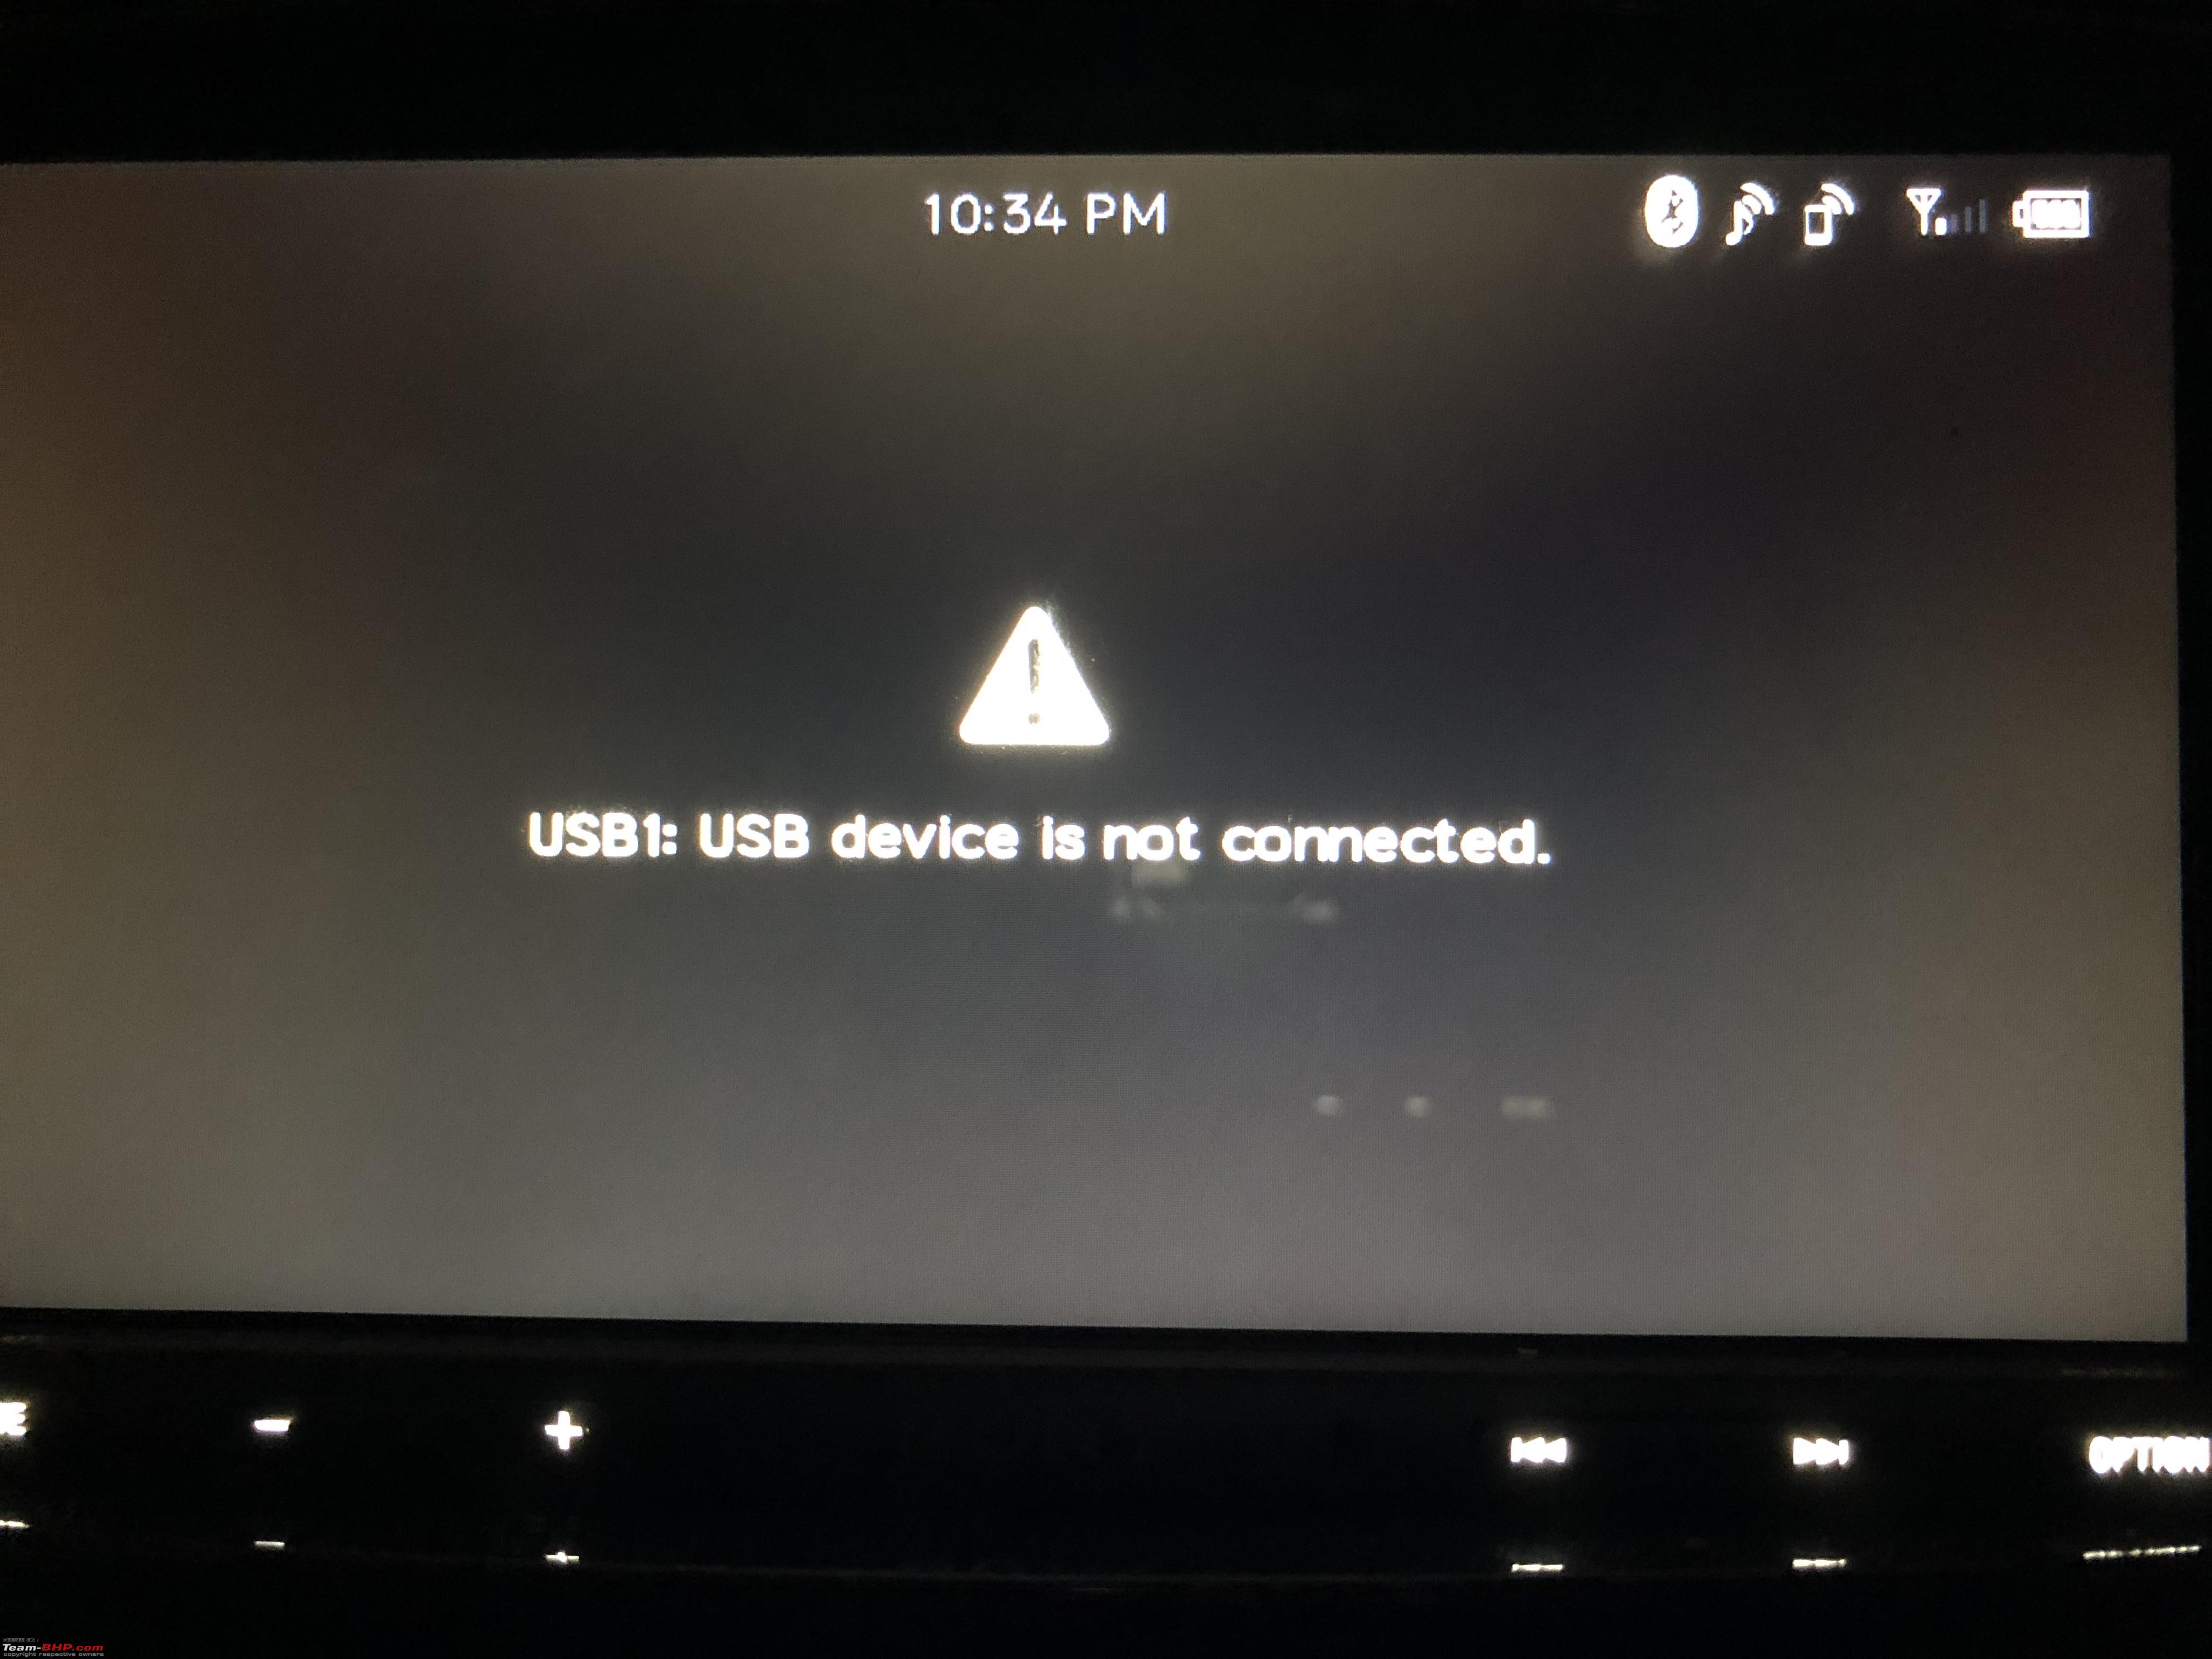
Factory USB/AUX.
The Sony Headunit doesn’t take an AUX-in. Also I haven’t used the AUX port in ages. The Hyundai USB/AUX port uses a proprietary connector which makes connecting to an aftermarket headunit a pain. But, again there are harnesses made exclusively to retain the Factory port when using an aftermarket stereo. This is made by Metra and is available on Amazon India.
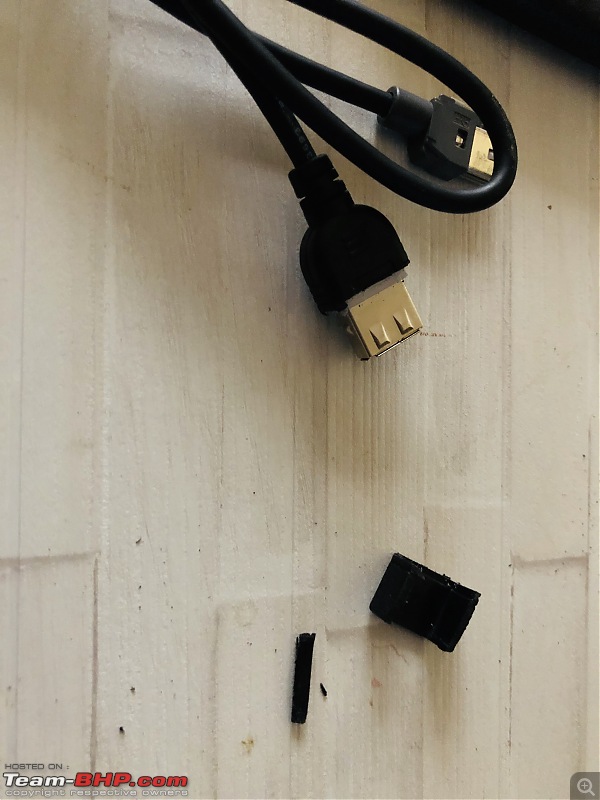
Now, before you think this is easy, you need to know that this harness did have a lot of issues. There were frequent disconnections, failed to detect my ipod, USB drives were unable to play songs, phones don't charge and the biggest issue, Apple CarPlay and Android Auto donot work. Now, either the port doesn't provide enough power or there is a resistor built-in to it to prevent it from connecting anything more than a pendrive. Nonetheless, I had to come up with an alternative.
I follow these guys and bumped into their video explaining how to retain factory USB/AUX port on a Hyundai/Kia and it worked.
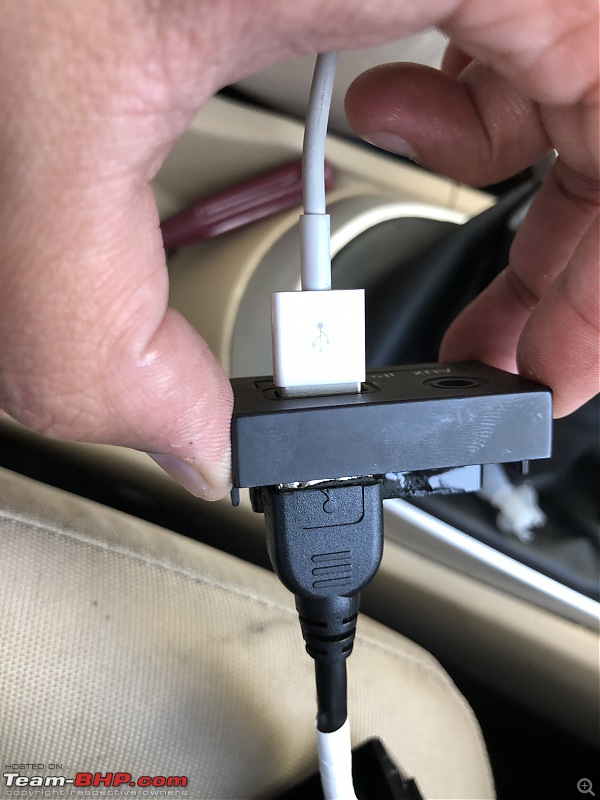
Here's how I got to retain the factory USB/AUX Port


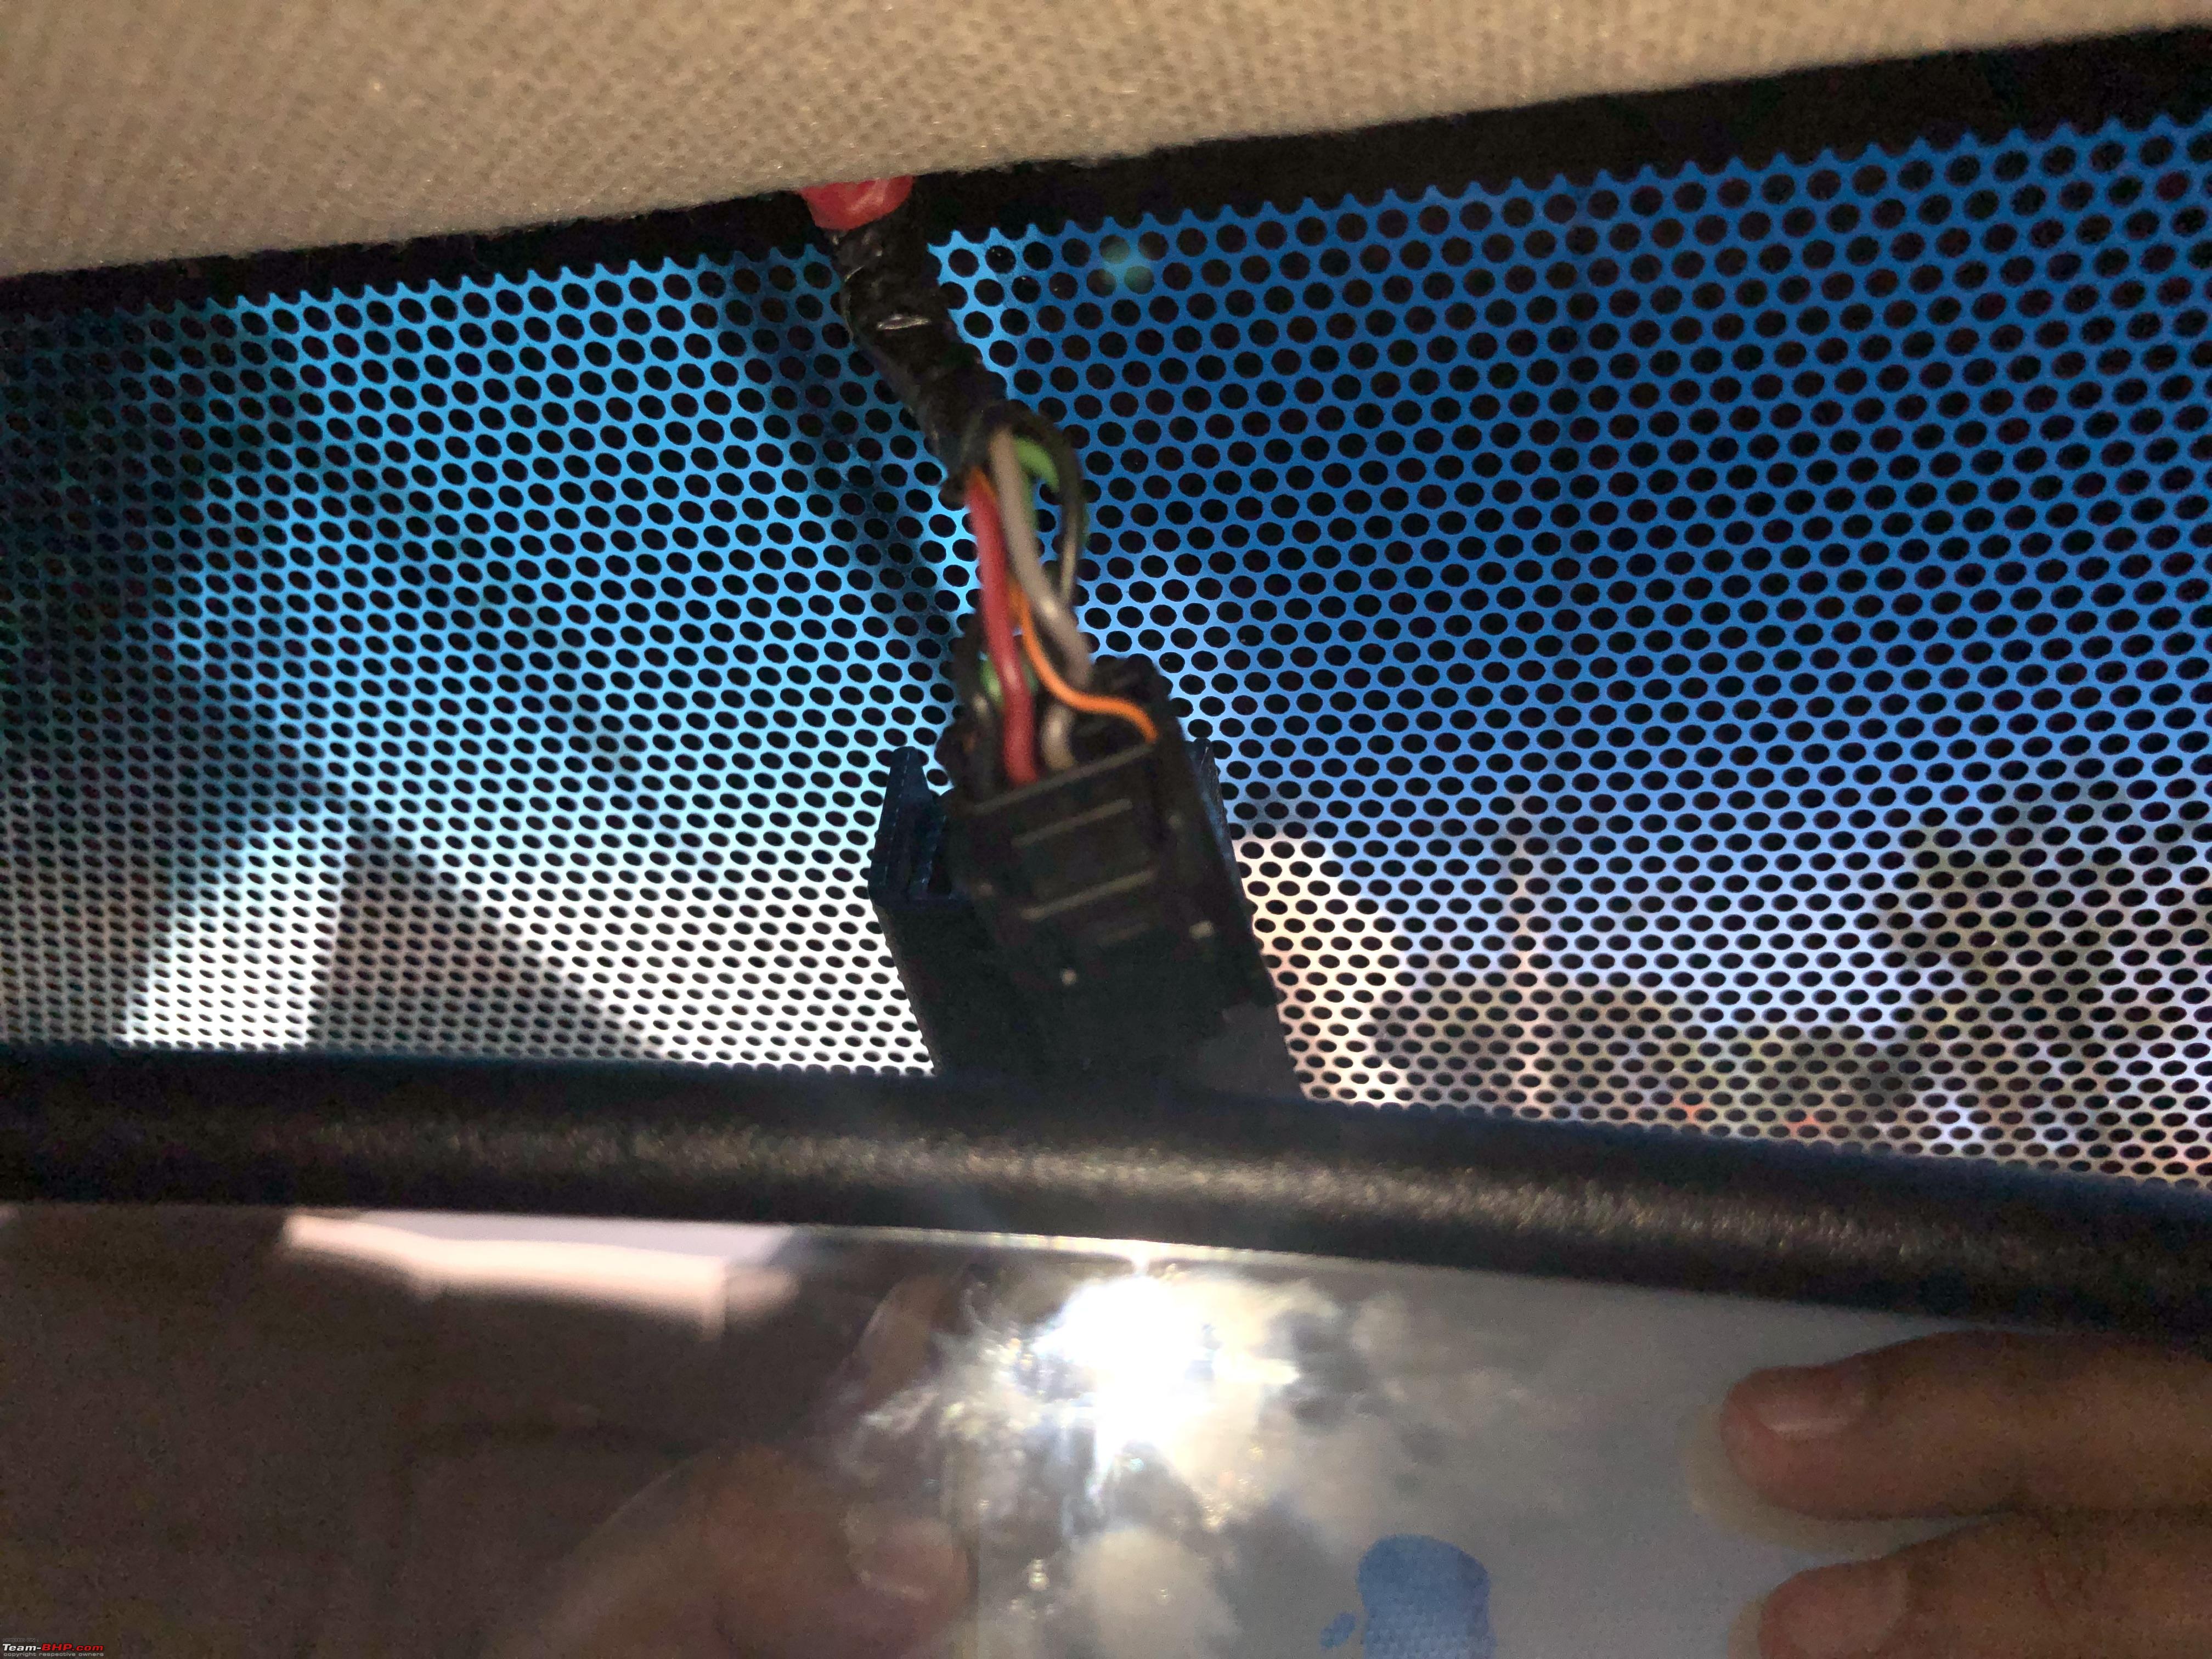
 Factory BackUp Camera
Integrating the factory backup Camera is a bit of a pain because
- Unlike the newer Hyundai's, the backup camera is integrated into the IRVM
- There is no harness available online for Hyundai/Kia backup cameras integrated into the IRVM
- Aftermarket headunits use a Video Cable (RCA input) and OEM Camera's use a proprietory connection.
First we need the wiring diagram of the Electrochromic Rear View Mirror.

3 points to note
- Pin 4 (Video GND)
- Pin 5 (VideoOut Signal)
- Pin 9 (Backup Lamp Signal)
We need to cut out the female end of the RCA Video Cable. Inside are two cables a positive cable and a sheath that acts as the Ground.
Positive cable of RCA = Pin 5
GND cable of RCA = Pin 4
Reverse Cable (for Sony Stereo) = Pin 9
This will tell the headunit to switch over to the reverse camera feed. These wires will go via the glovebox into the A pillar and spliced into the factory harness using T-taps.
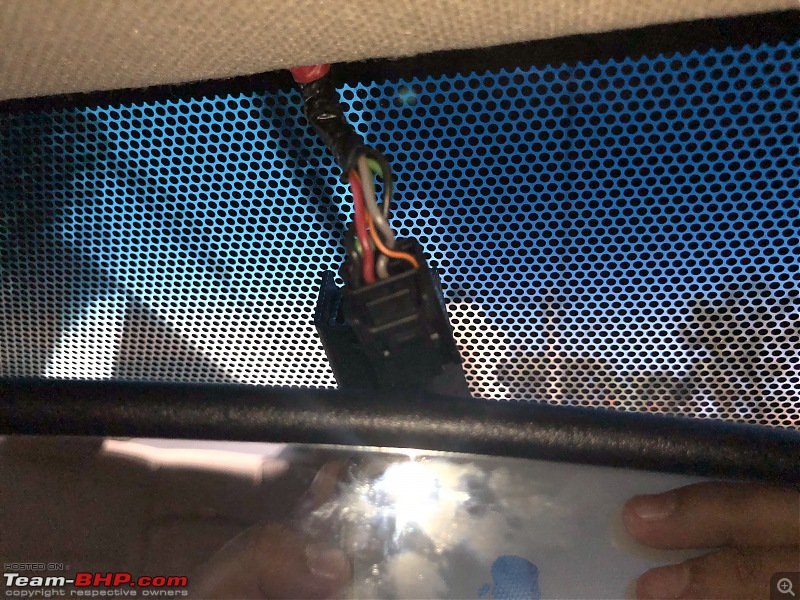
The wires in the IRVM
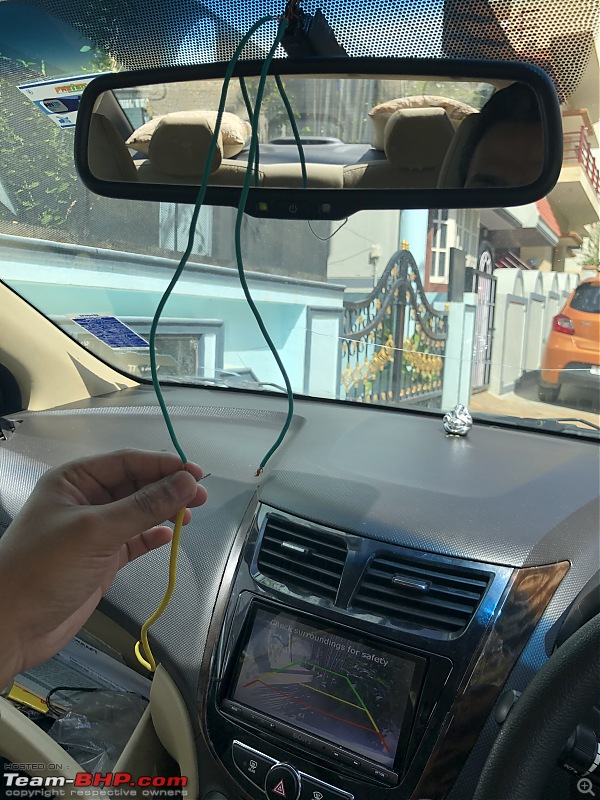
Testing the backup camera.
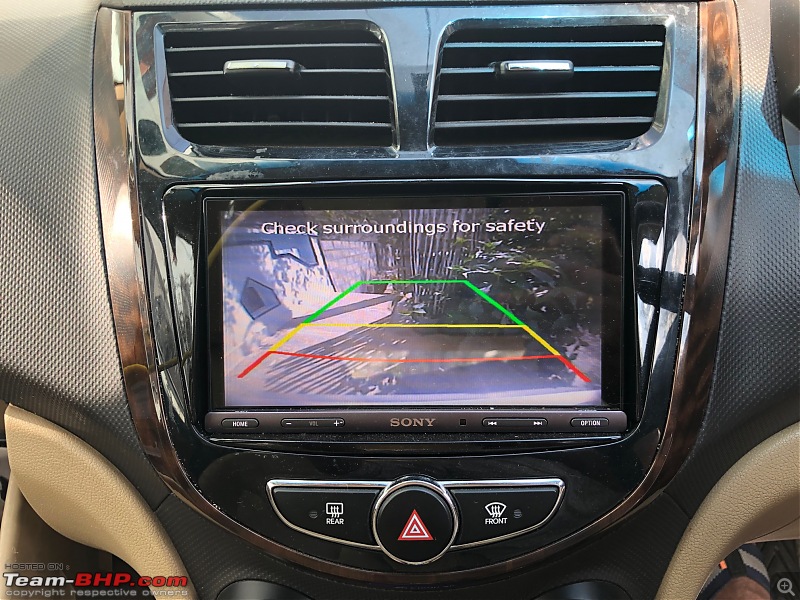
Success.


 13th February 2019, 20:12

 (20)
Thanks
(20)
Thanks


 Had no option but to go aftermarket.


