Continuing from my last post on my ownership thread, I managed to play around with the unit (make: Desay SV) and got a couple of things done:
1. Changed the theme to all red.

Tip: To take a screenshot of the HU display, long press the
MEDIA button. The image will get saved as a 24-bit .bmp file on the memory card.
There used to be these yellow lines on most windows; contrasting for sure but I like an all-red display which gels well with the red backlighting at night. To get this theme, the stock .png overlay files on the system have to be replaced with the ones with the red theme. And to copy these files from the SD card to the system’s memory, we need to use an application called
Total Commander.
So those who're interested, here's what you need to do:
- Get an SD card with a capacity of 16 GB or less. The update will not work with 32 GB cards (confirmed so don’t bother). Format it using the FAT32 file system.
- Download the compressed folder from Dropbox (link; that's from my personal Dropbox folder - perfectly safe) and unrar the contents to the SD card.
The contents of the SD card should look like this:
- Turn on the HU, insert the SD card into the slot and long press the SETUP button to bring up the service mode.

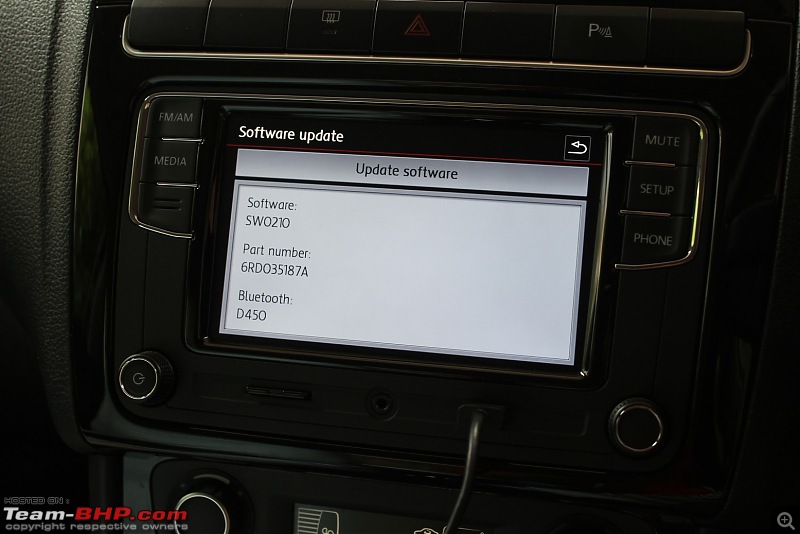
- Click on Software update/versions, click on Update software:
- Click on Update Navi if this option shows up else click on FM/AM button to bring up the desktop.
You’ll notice the taskbar with the Start button on the lower left corner.
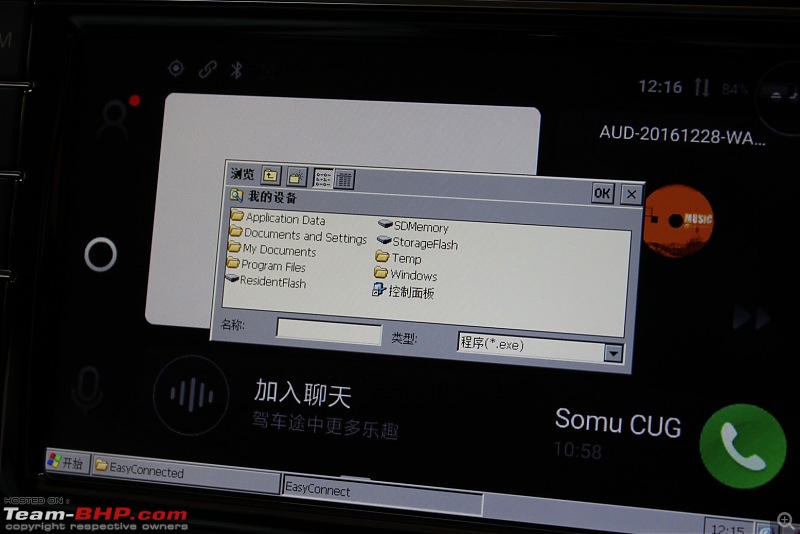
- Double click on My Device (the icon below Recycle bin):

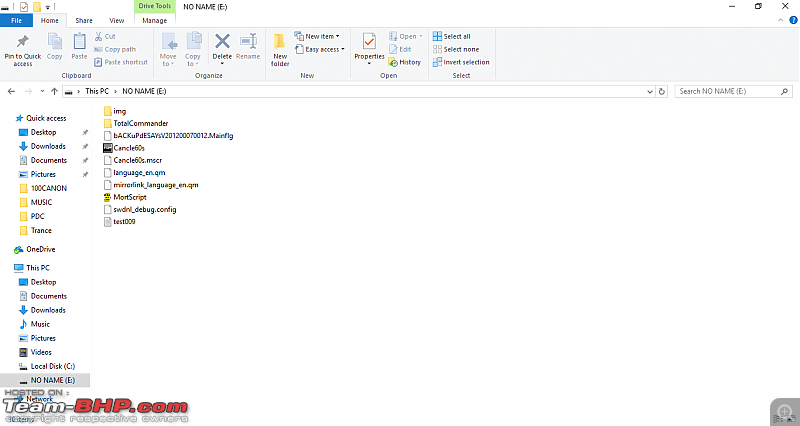
- Browse to SDMemory\TotalCommander folder:
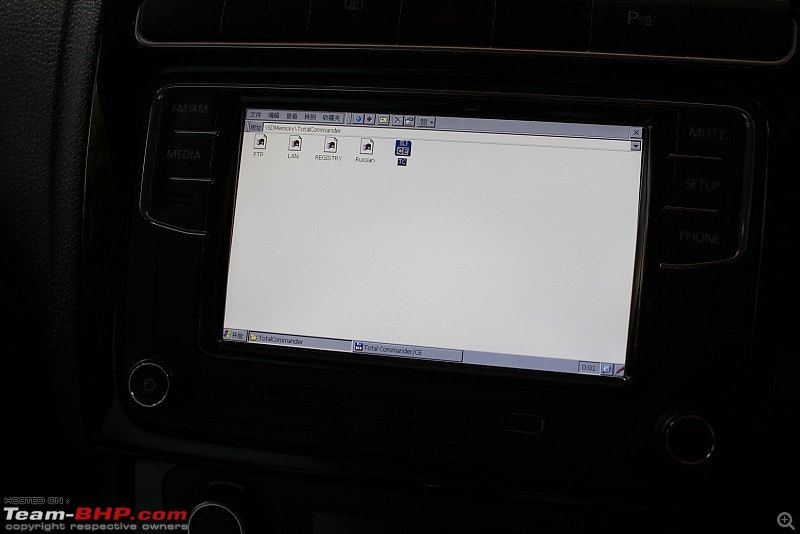
- Double click on TC icon (the floppy disk icon) to bring up Total Commander app:
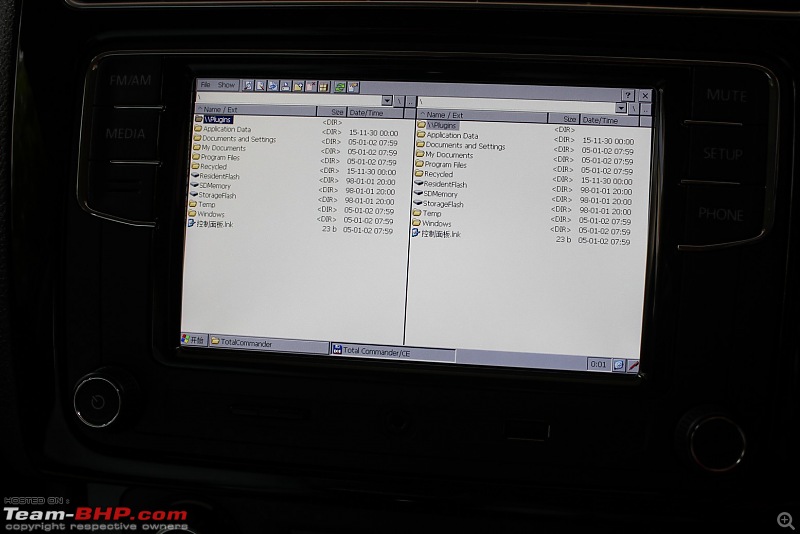
The window on the left is the source folder and the one on the right is the destination folder.
- On the left window, browse to the SDMemory folder. And on the right window, browse to ResidentFlash\navigation\app\res\. The resulting windows should look like this:

Tip: Carefully browse to the folders by using the tip of the finger. If you have a stylus which can be used on capacitive touch displays, nothing like it!
- Long press the img folder on the left window to bring up the right click command:

Click on Copy/Move:
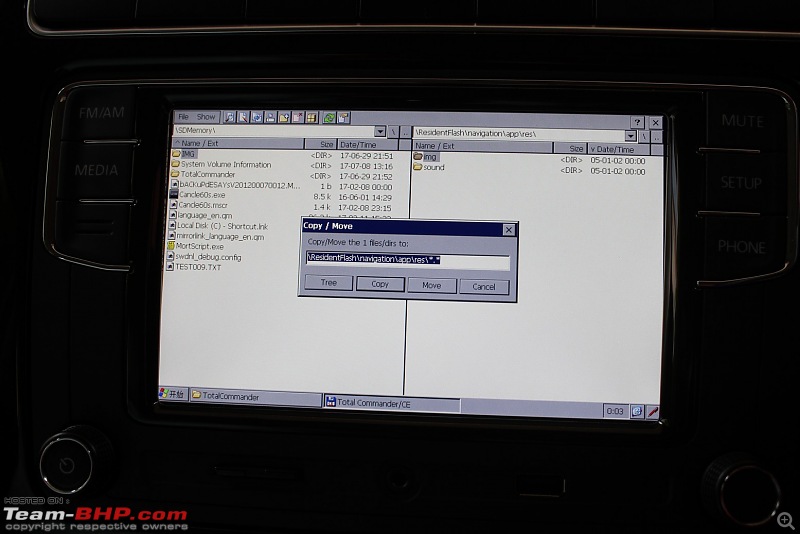
Click on Copy. It will prompt for a Target file exists, overwrite window:
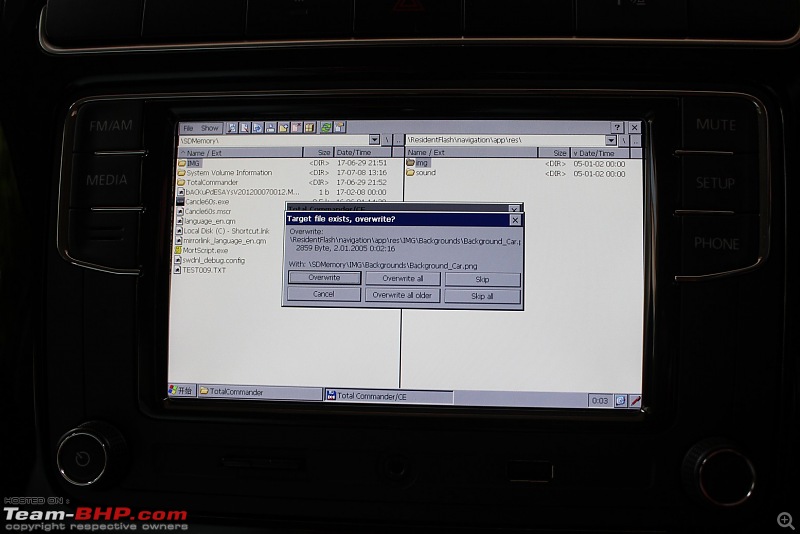
Click on Overwrite all:
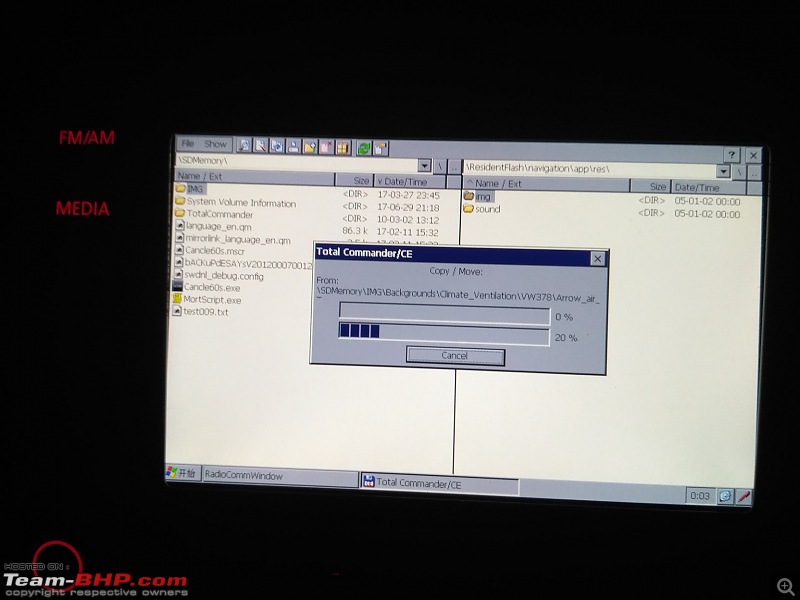
Wait for a minute for the files (there are some 5590 files in 882 folders) to be copied and overwritten to the HU’s onboard memory. Once it’s done, long press the power button to restart the system. The stock theme would now have been changed.
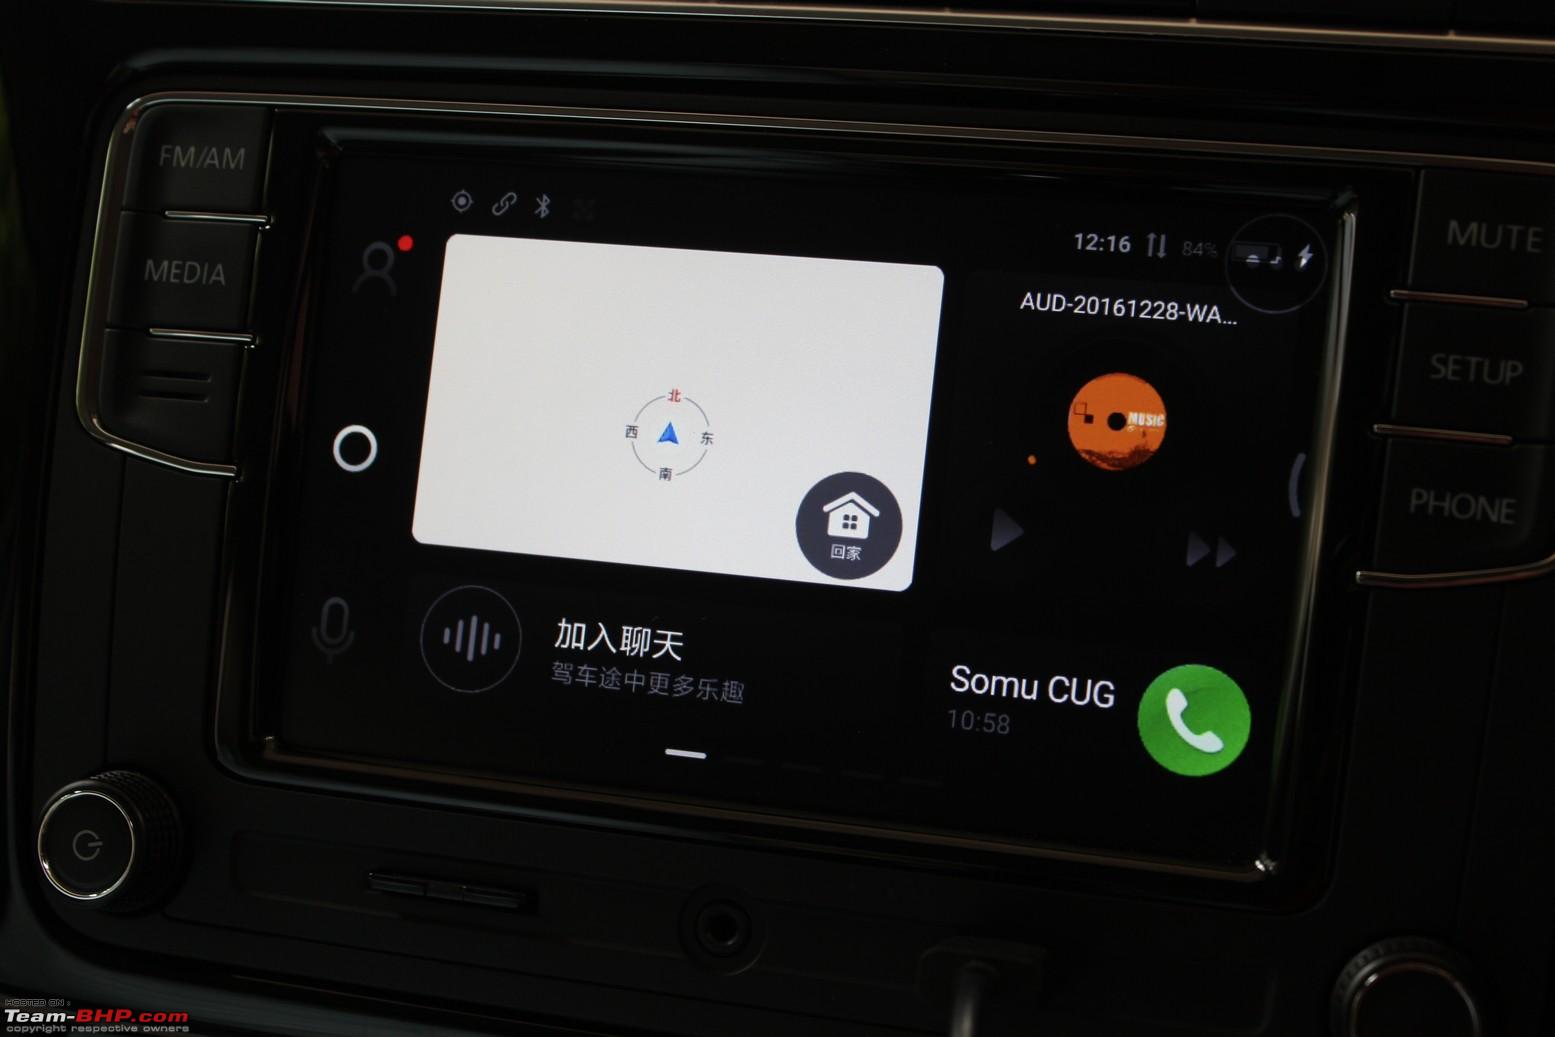
2. Got the smartphone display mirrored on the HU using a device which is incompatible with the Mirrorlink standard:


But there are a few caveats as well which I have explained towards the end of the post.
I have a Redmi 3S Prime Android smartphone which is not Mirrorlink compatible. The Mirrorlink consortium supports only a selected few devices from HTC, Samsung and Sony (
link). And there’s no workaround even if the device is rooted. While browsing through the Russian blogs, I came across a link wherein the user had posted a video showing how his smartphone display was mirrored to the HU’s display. But I couldn't understand what he spoke in the video nor the Google translated version of the link (RU>EN) and I had to do some fiddling around to get it right. I’ve mentioned the steps below.
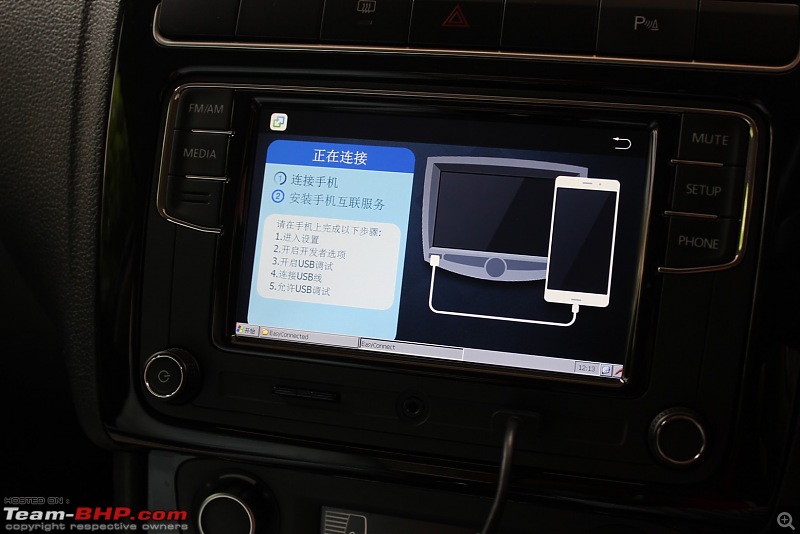
There are 3 basic steps involved in the process:
a. The HU’s stock firmware has to be flashed in order to enable access to the desktop.
b. An app called
EasyConnected has to be installed on the HU and the Android phone.
c. The phone has to be connected to the HU using the USB cable.
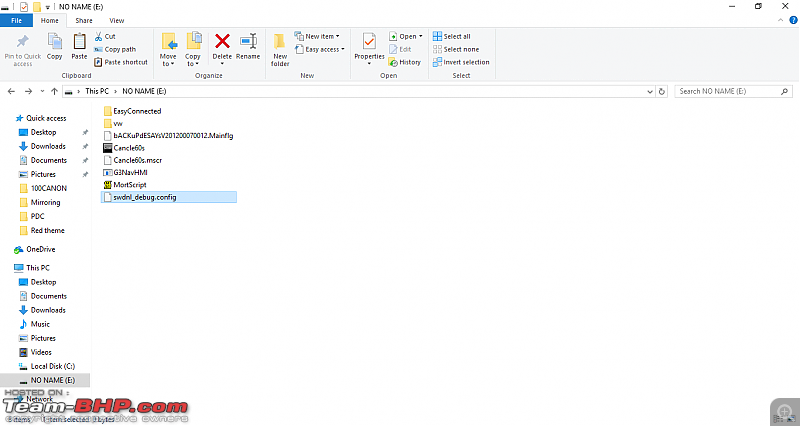
Steps: - Format a 16 GB SD card using the FAT32 file system and copy the contents from the folder in this Dropbox link (https://goo.gl/17jmGW). The SD card folder should look like this:
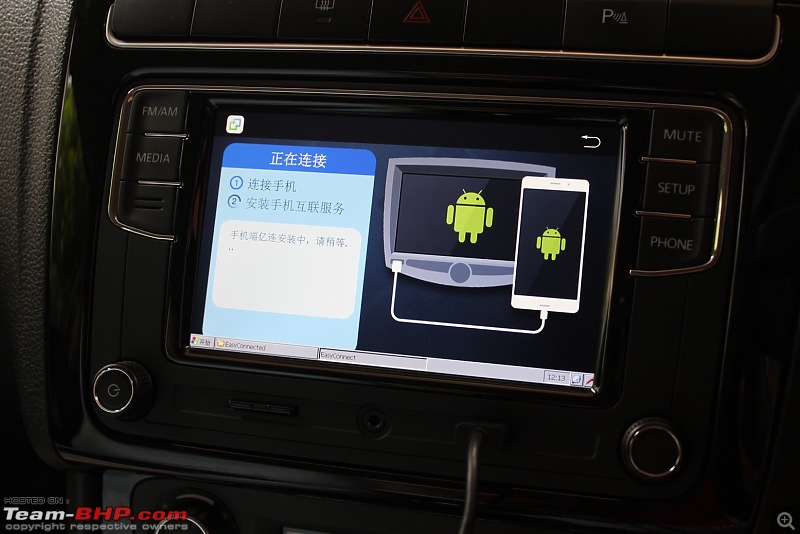
- Transfer the 2 apk files to the smartphone and install them. After installation, the app EasyConnected would appear on the home screen. Unfortunately, this app is completely in Chinese language but it doesn’t matter as the sole intention of installing the app is to enable mirroring. We aren’t using the app anyway.
- Enable USB debugging mode on the phone under Developer options in Settings.
- Turn on the HU, insert the SD card into the slot and long press the SETUP button to bring up the service mode.
- Click on Software update/versions, click on Update software:
- The firmware update would take a few seconds and the system would then ask for a reboot after the countdown timer in the dialog box stops at 1. Long press the power button to restart the system.
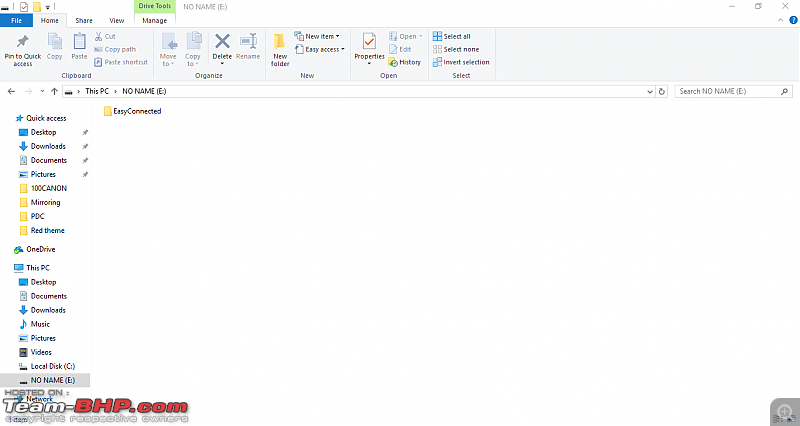
- Delete all the folders in the SD card except the EasyConnected folder. The folder should now look like this:
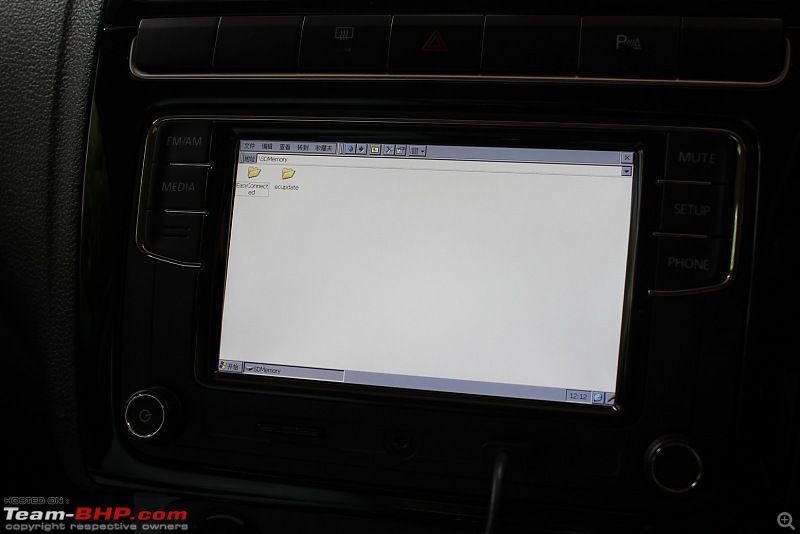
- Insert the SD card into the HU, long press the SETUP button to bring up the service mode and then press the FM/AM button to bring up the desktop:
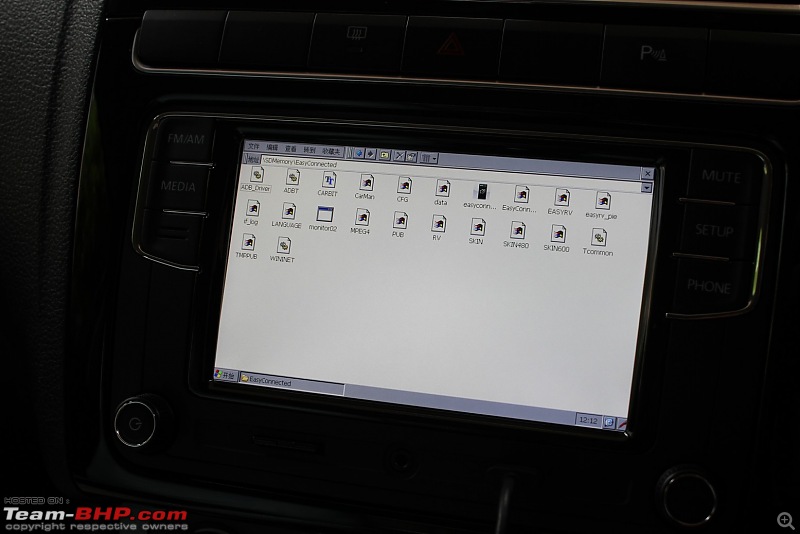
- Double click on My Device, browse to SDMemory\EasyConnected folder, double click on EasyConnected icon to bring up the application:
- Connect the smartphone using the USB cable to the HU and open the EasyConnected app on the smartphone. The HU would then establish the connection between the two devices and will mirror the display.
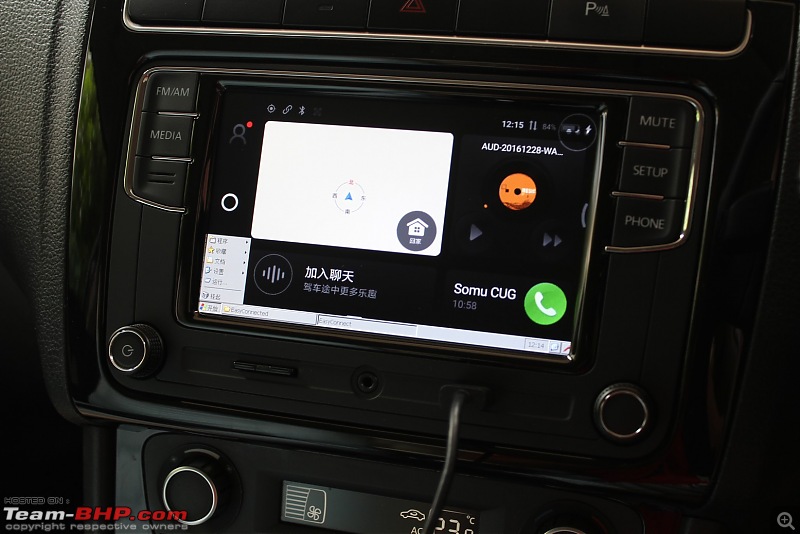
- You'll notice the mirrored display on the HU with the taskbar at the bottom:
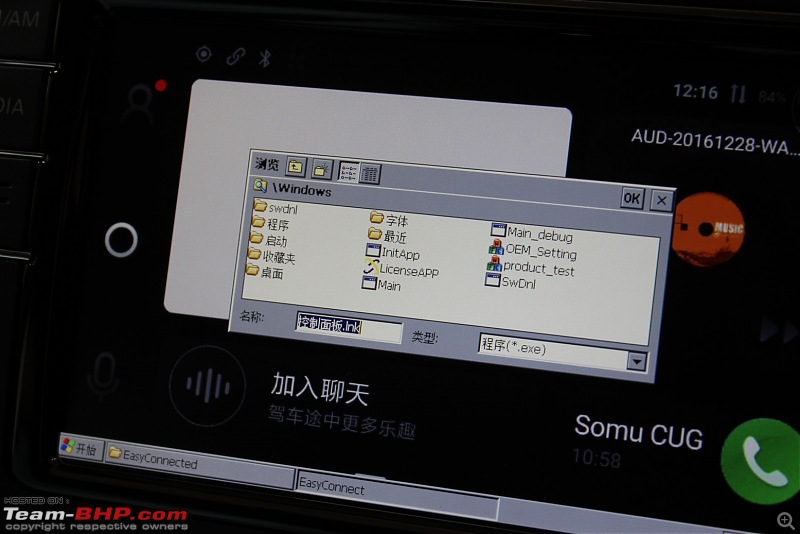
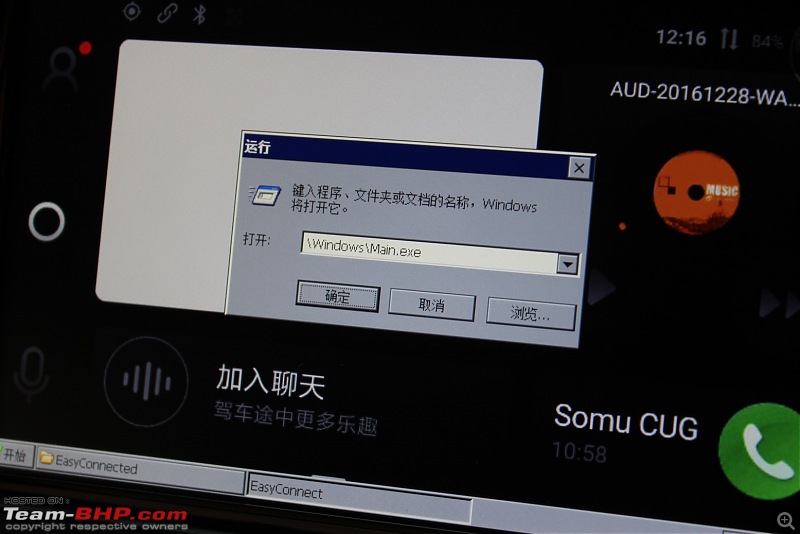
- To expand the window and to get rid of the taskbar, click on the Start button, click on Run:
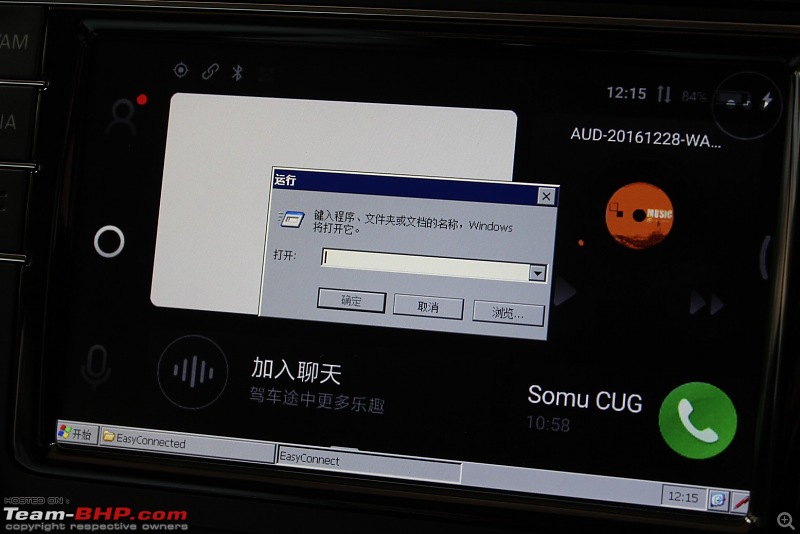
- Click on Windows:
- Click on Main.exe:
- Click on OK:
- The window would expand and the taskbar would hide itself:
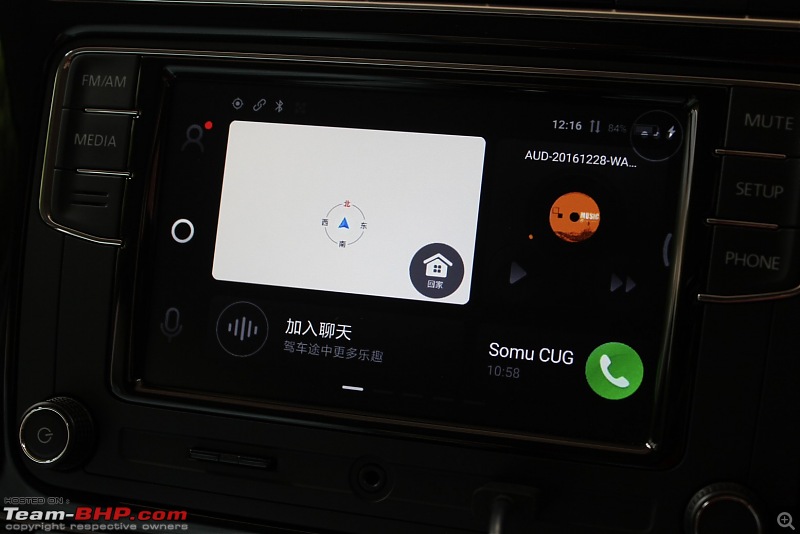
Touching the quick access menu on the top-right corner gives this menu:

From L to R, they mean:
Return, Menu, Home, Brightness, Setup and Exit. Google VR translate FTW!

Here’s a video demonstrating the process and the mirroring feature:
Like I said before, there are a few downsides to this method:
1. The smartphone display does not go into standby while mirroring. The brightness of the phone dims to zero after the link is established but the display is still on. In Mirrorlink however, the smartphone display automatically goes into standby and displays this message when prompted:

2. Only the display is routed to the HU and not audio through the USB cable. As a result, one needs to connect the 3.5mm TRS cable from the smartphone to the aux. jack of the HU if audio input from the smartphone is required.. That’s one extra cable in addition to the USB cable.
3. When the display is mirrored, one cannot answer the calls using the steering wheel button. To answer the call, one must press the button on the HU display. However, the volume and mute buttons work without issues.
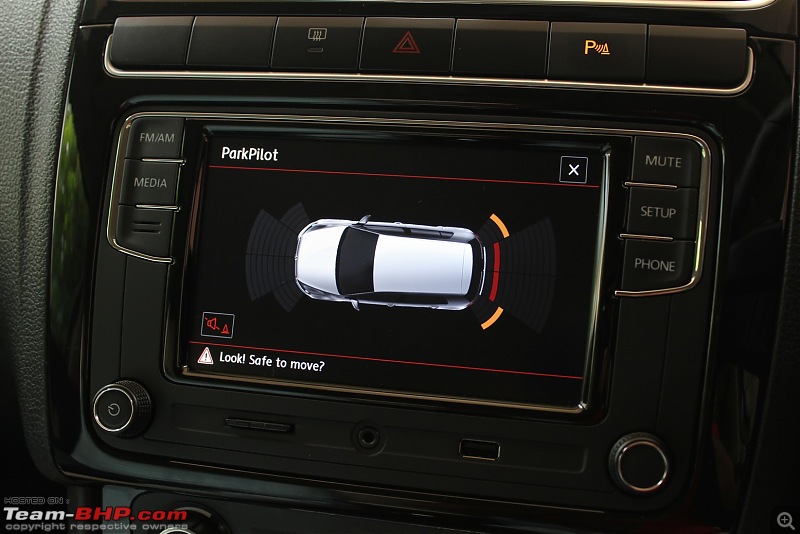
4. The OPS display will not indicate the ParkPilot display on the HU.
5. The smartphone gets heated up gradually and more so when a GPS app is used.
However, the good thing is, it is cheap and it works with any Android device. Especially without the need for the smartphone to be mounted on the windshield which is one less distraction.
Hope this helps! Let me know if you run into issues.
PS: Many thanks to our Russian counterparts. Took me a while to decipher what these folks did but in the end, I felt it was worth it.


 13th June 2017, 09:52

 (3)
Thanks
(3)
Thanks