Note from Support: New thread created from (Volkswagen Vento TDi Comfortline)Volkswagen Vento TDi Comfortline
Disclaimer : This is not as easy a plug and play as the pollen filter
DIY. Any gap in the filter / seating means you may screw up your engine. I was in
two minds on whether to disconnect the battery before disconnecting the sensor. For a new car, if the DIY is done before the first service, the original alignment of the inspection marks of the screws with the filter box gets lost, which is a give away that the filter box has been opened at least once. My steps need not necessarily be the exact way the filter box should be actually removed.
Thanks to
this post, an air filter cleaning DIY of the Polo TDi over the vwfansclub.com, I set out to try my hands on the same for my Vento TDi.
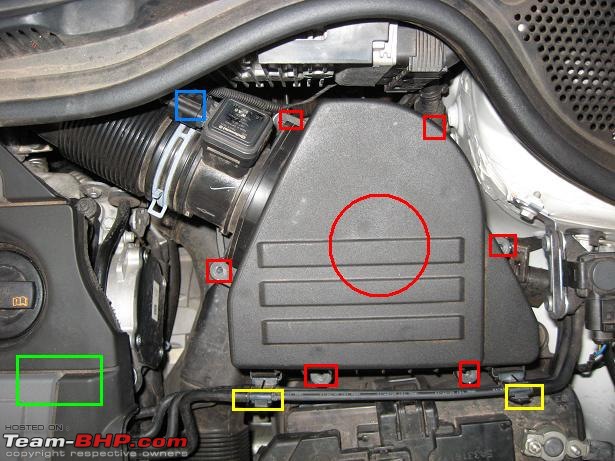
The box marked in red is the air filter box. Remove the six screws marked in red. A T20 precision screwdriver matches the screw head but there is one tricky corner with less space and my screw driver was short in length. So I had to improvise a jugaad. A long slender ordinary screwdriver should also do the trick, but exercise patience in not to slip the screwdriver and damage the screw head.
The one marked in blue is the MAF sensor connector which I removed without disconnecting the battery.
The yellow marked pipes (fuel?) also need to be disengaged from their holder one by one on both sides.
One thing I forgot was to remove the engine top cover, marked in green. That should have given me more space to pull out the filter element.
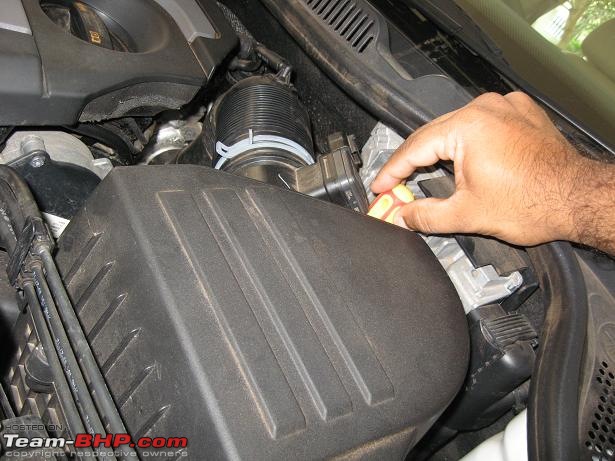
My screw driver is a bit short and was tricky to unscrew. So I improvised with some thick metal wire around the top.
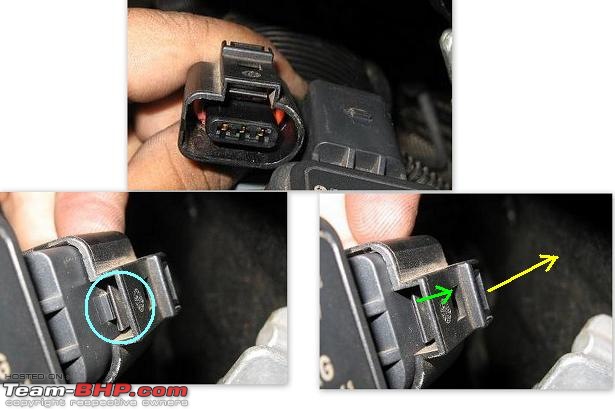
For removing the MAF sensor connector, pull BACK (away from the sensor) and DOWN on the top latch, marked in yellow. It will pull UP the portion marked in green and release the lock, as marked in blue. No slowly pull the connector all the way back to disengage it from the sensor.
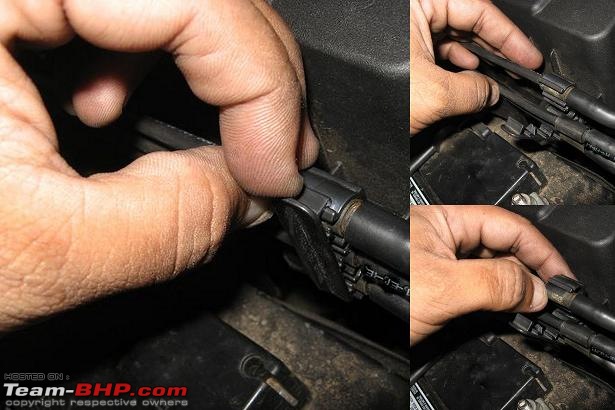
Pull back the clips and pull out the 3 pipes one by one carefully, on both sides.
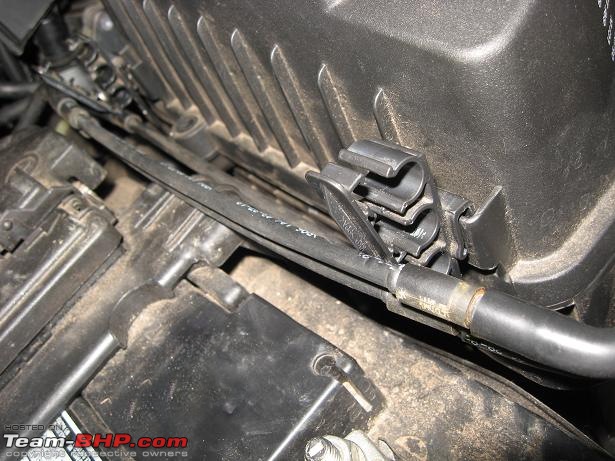
Let the lines sag outside the clips. The clip is attached to the filter box and will go up when we pull up the filter box covering.
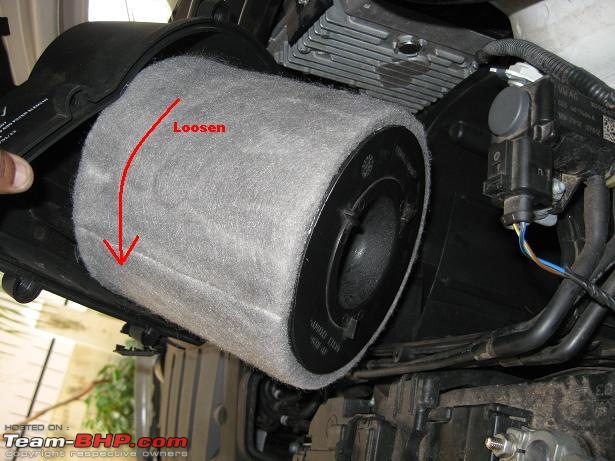
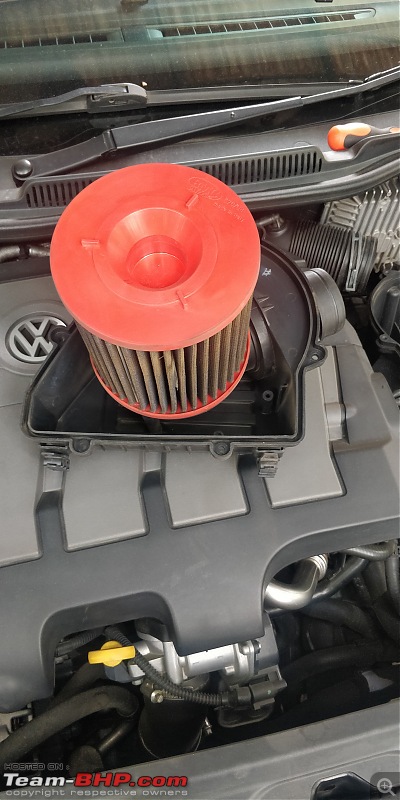
After unscrewing all the screws, now pull up the filter box top cover. you can see the filter woolen(?) element. Unlock the filter woolen element by turning it anti-clockwise a quarter of a turn and then pulling it apart from the top cover.
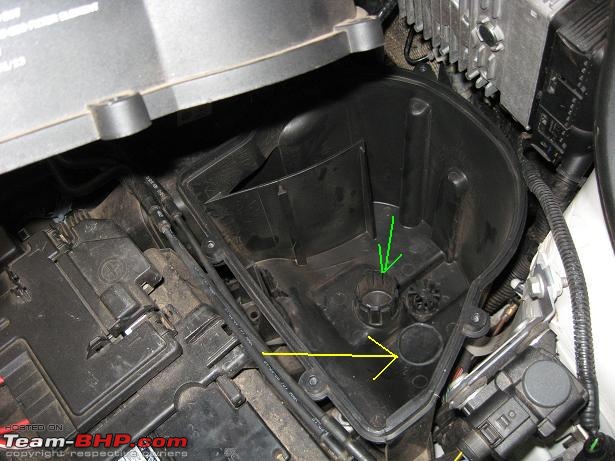
A rubber ring (marked yellow) may either stick on to the bottom of the filter element or fall down while removing it. Be careful in not loosing it in the process of removing the filter element. When fitting back, the rubber ring goes back on the cylindrical thing marked in green.
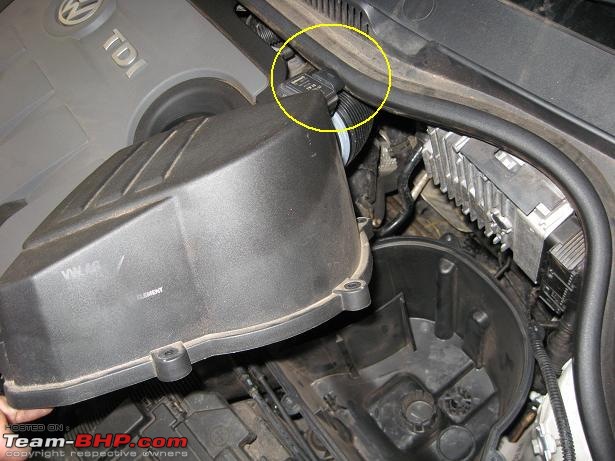
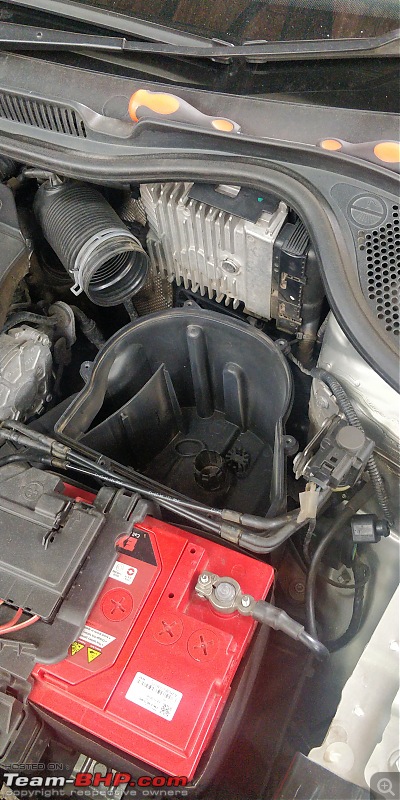
If I had remembered to remove the engine top cover, I could have got a bit more space, marked yellow.
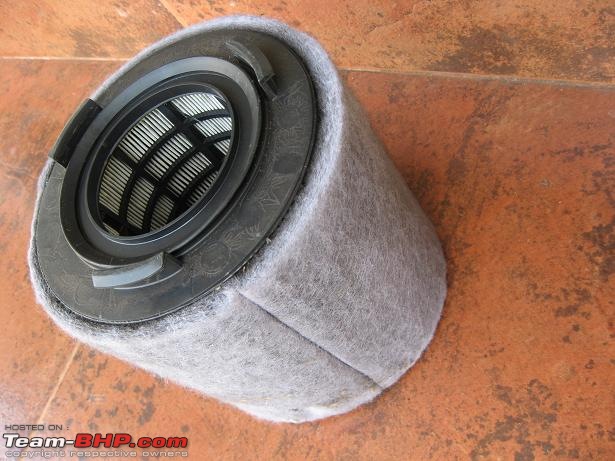
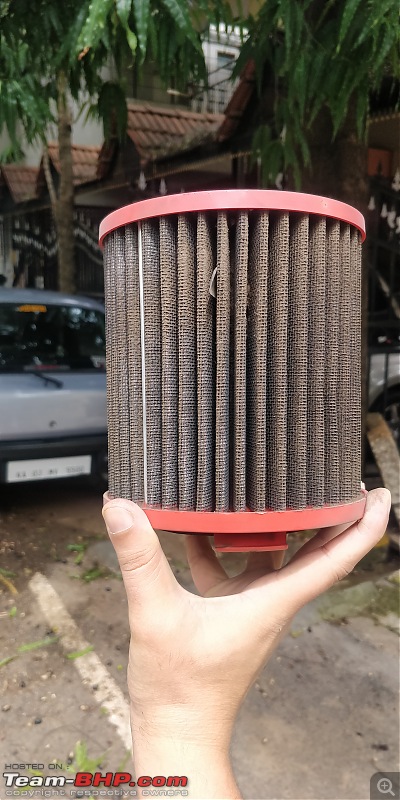
This is how your filter element looks. See the three clamps on the top, this locks on to the bottom of the filter box top cover.
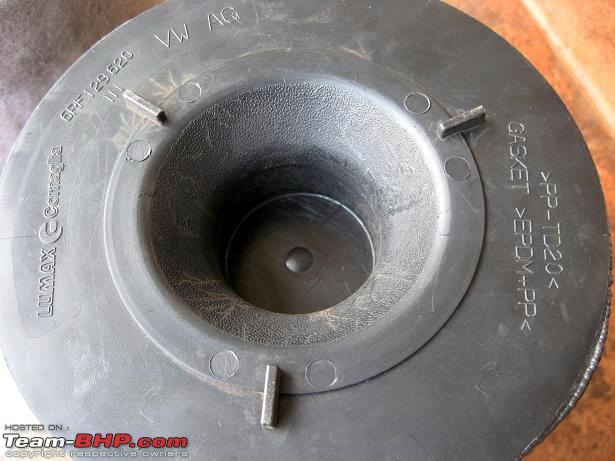
Bottom view. Make Lumax. VW Part no 6RF 129 620.
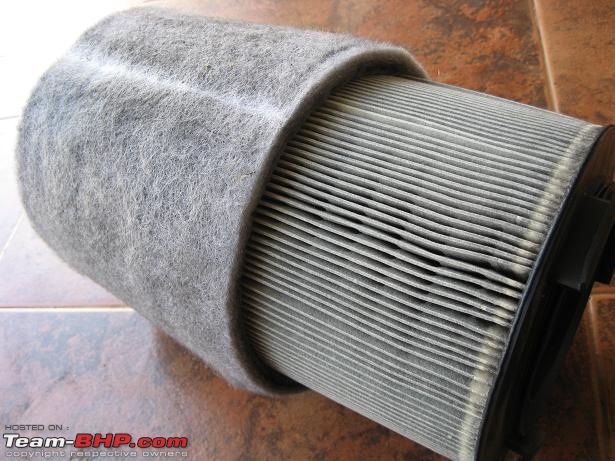
I slowly removed the woolen filter bit by bit, from the core.
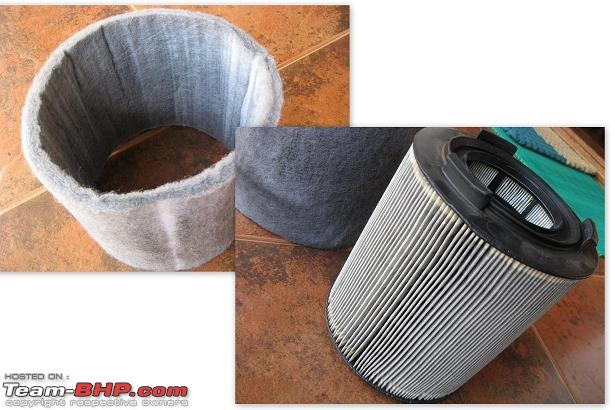
The woolen element and the paper core, separated.
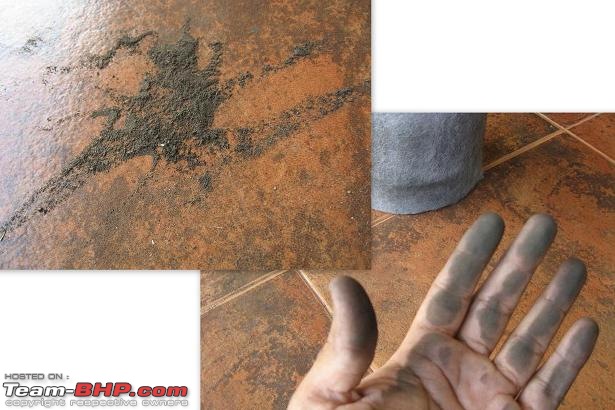
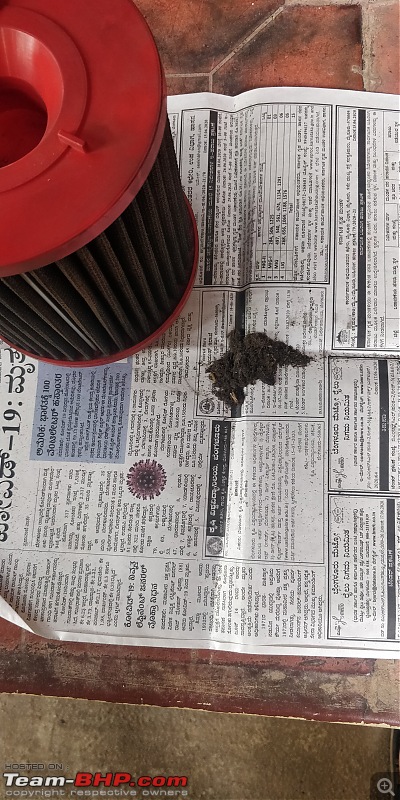
Dirt from a 4.5k run filter.
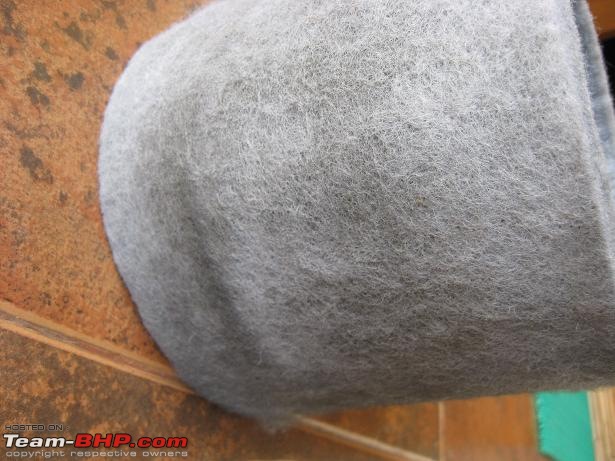
Look at the difference at the bottom part. This is after hitting the bottom of the woolen filter on the floor. I vacuumed it. Care not to take out much of the wool while vacuuming. Didn't go for a water wash; may be it will shrink and get difficult to put back.
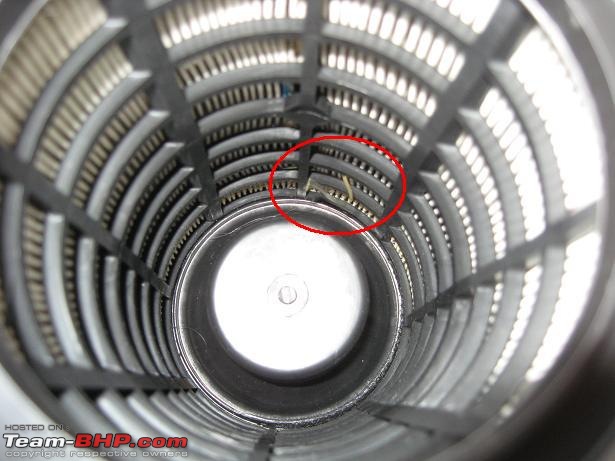
Inside the core, observed some left over hardened glue from production, like an extruded wire.
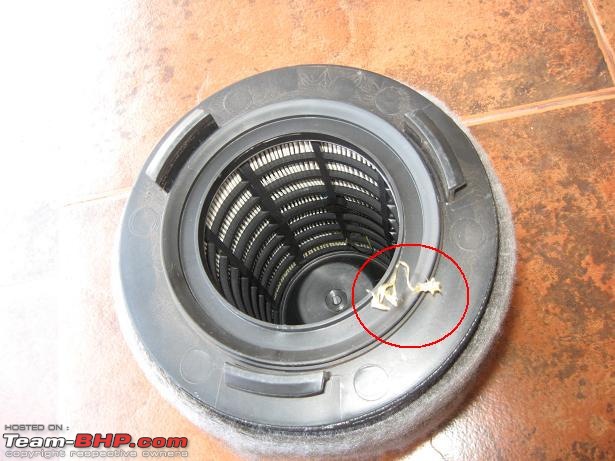
Plucked out some of it. Wonder whether this would ever get loose and go inside the engine!
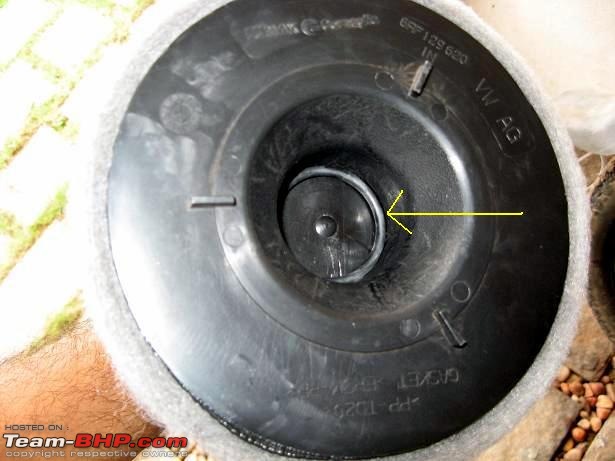
After cleaning, patiently pull back the woolen element back on to the core. Remember to put back the rubber ring (marked yellow) at the back of the filter and hold a hand below it till you fix the whole filter in position.
To put the filter element back, align the three clamps carefully and turn clockwise to lock the filter element on to the filter box top cover. Make sure it clicks in (seated properly).
Shut the top cover (remember about the rubber ring here; if you are pulling the element back a second time due to wrong alignment, make sure the rubber ring is seated properly) and align it properly. Screw back all the screws and attach the pipes back carefully and lock it. Click back the sensor connector.
For the first run after the DIY, I felt a wee bit of smoothness of the engine. don't know if it is just a placebo as there was not much dirt accumulated in the first place.
 (28)
Thanks
 (1)
Thanks
 (1)
Thanks
 (1)
Thanks
 (1)
Thanks
 (3)
Thanks
 (5)
Thanks
 (1)
Thanks


